I’ve been getting some questions from concerned readers: “Where have we been???” They’re assuming we’ve been eaten by the half-finished kitchen. Well…. I’ve been sketching kitchen projects and my adorable Rainman has been fishing. It’s my fault that I approved the purchase of a small boat fixer upper (in addition to the larger boat we already have) and that all equates to FISHING and NOT WORKING INSIDE ON MY KITCHEN. But the Dewalt miter saw on the front porch makes it LOOK like we’re working, so that’s cool. “Sips wine.” (Supply links at the end of the post!)
*This post may contain affiliate links. Please see full disclosure at the end of the post.
Anyway, that’s not preventing me from forging ahead and obsessively planning every detail, and occasionally threatening to hire a carpenter if he doesn’t get his rumpus back in the house and start throwing some kitchen together. It’s getting to the point where I may ACTUALLY consider a carpenter… or start wielding tools at opportune moments so he will catch me and feel compelled to intervene. So… the current project (that I have ordered materials for and am just WAITING FOR SOMEONE TO INSTALL): A shelf nook for the range surround.
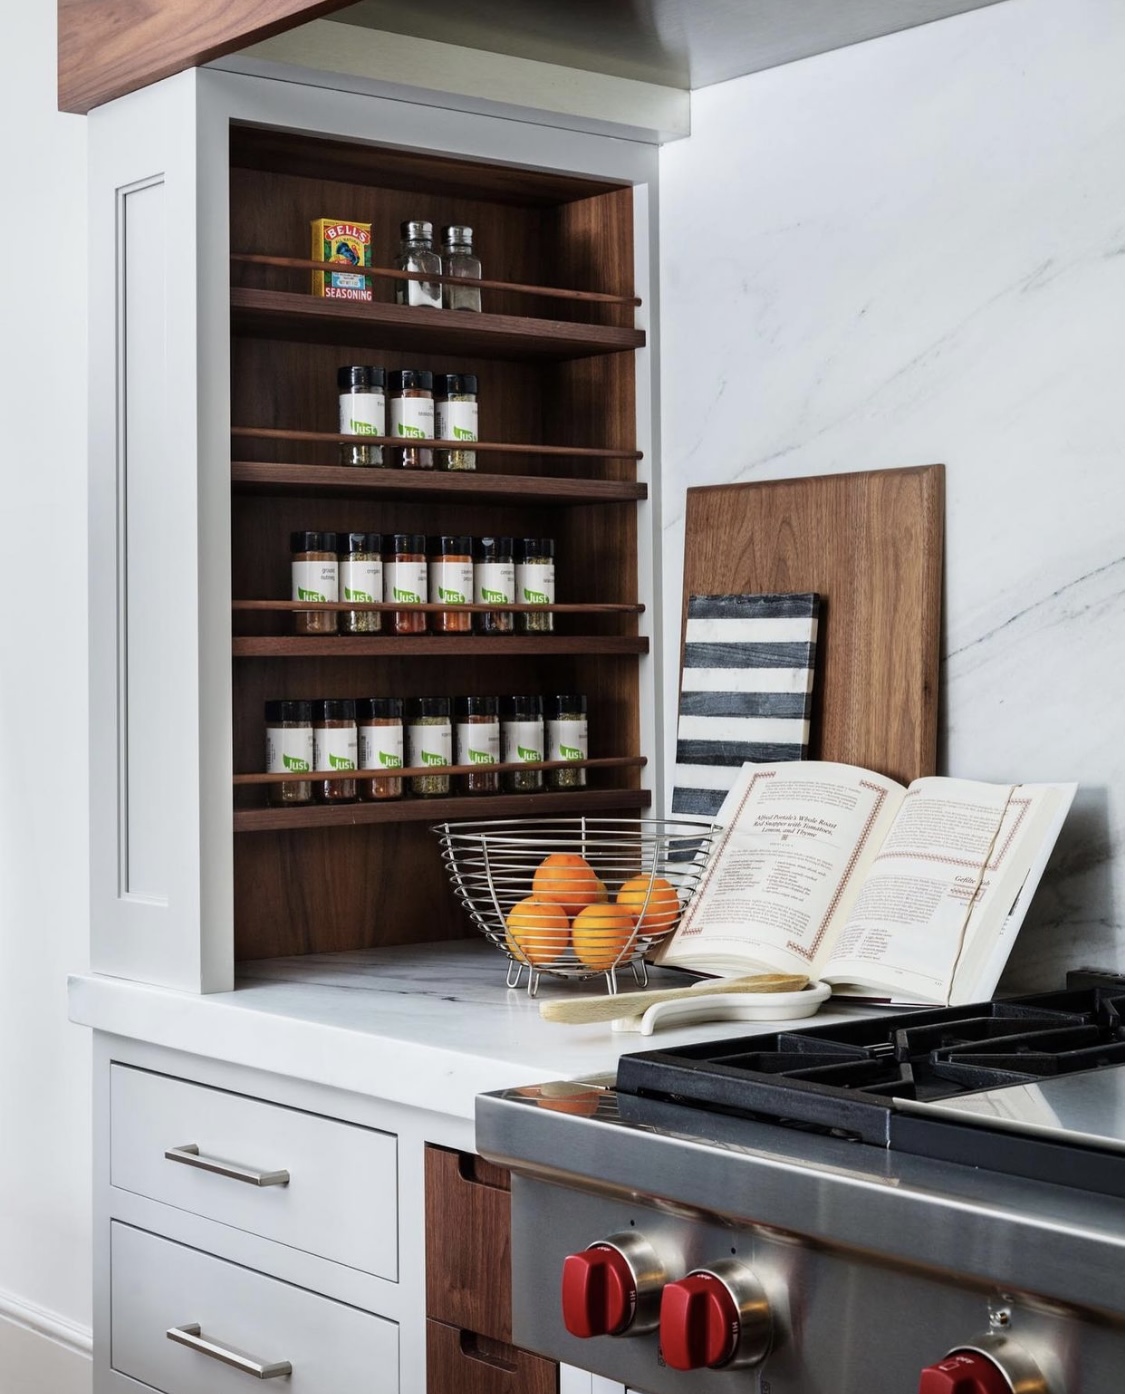
A shelf nook? Yes, it’s absolutely a thing. Think: incredible use of wall space for storing daily use items like olive oils and favorite spices within EASY REACH of your cooking space. We are in the middle beginning of a kitchen renovation and the focal point of the room is a large hood with a surround that encapsulates the entire space (range, hood, and cabinetry). Having looked at ALL of the kitchens on Pinterest and Instagram, I feel well informed and confident that I have planned all of the details well.
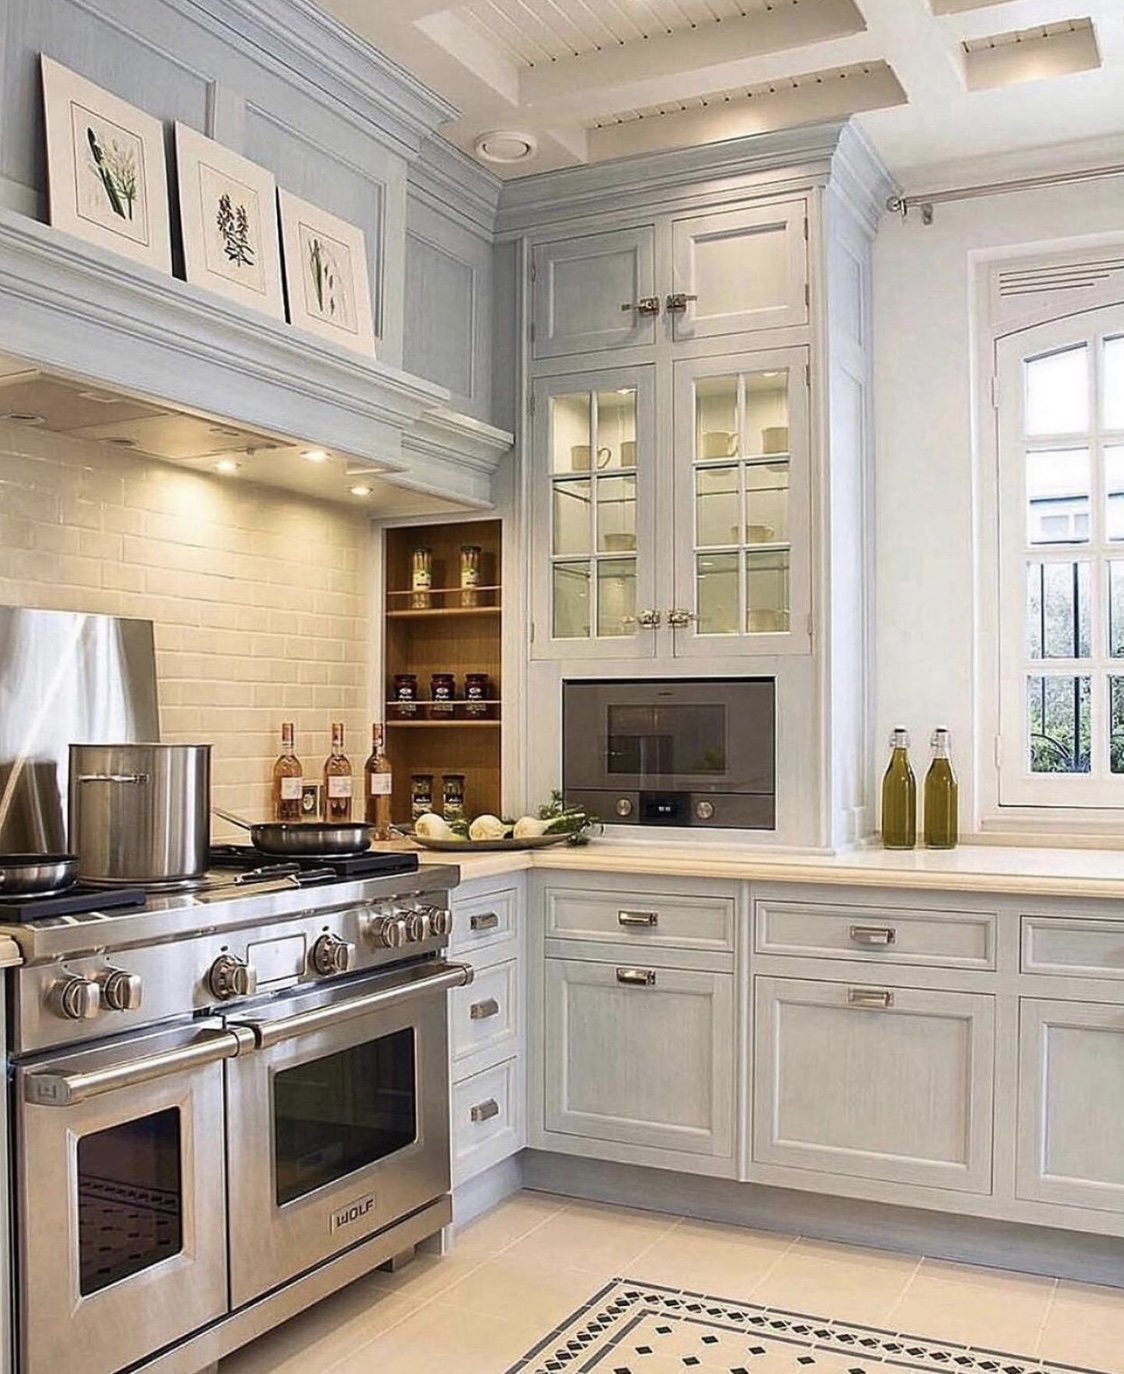
Not sure what I’m talking about? Here are two EXCELLENT representations of my idea by professional designers (and let me give a SHOUT OUT to these ladies/gents, because the amount of nit-noid planning that goes into designing these spaces is really next-level):
Gorgeous walnut shelving inside the hood surround by @studiodearborn on Instagram.
Gorgeous wooden shelving inside the hood surround by @christopherpeacock on Instagram.
Are you IN??? Yeah, me too! Imagine wasting all of that space when you could have usable, adorable shelves (and trust me, you need the storage)!
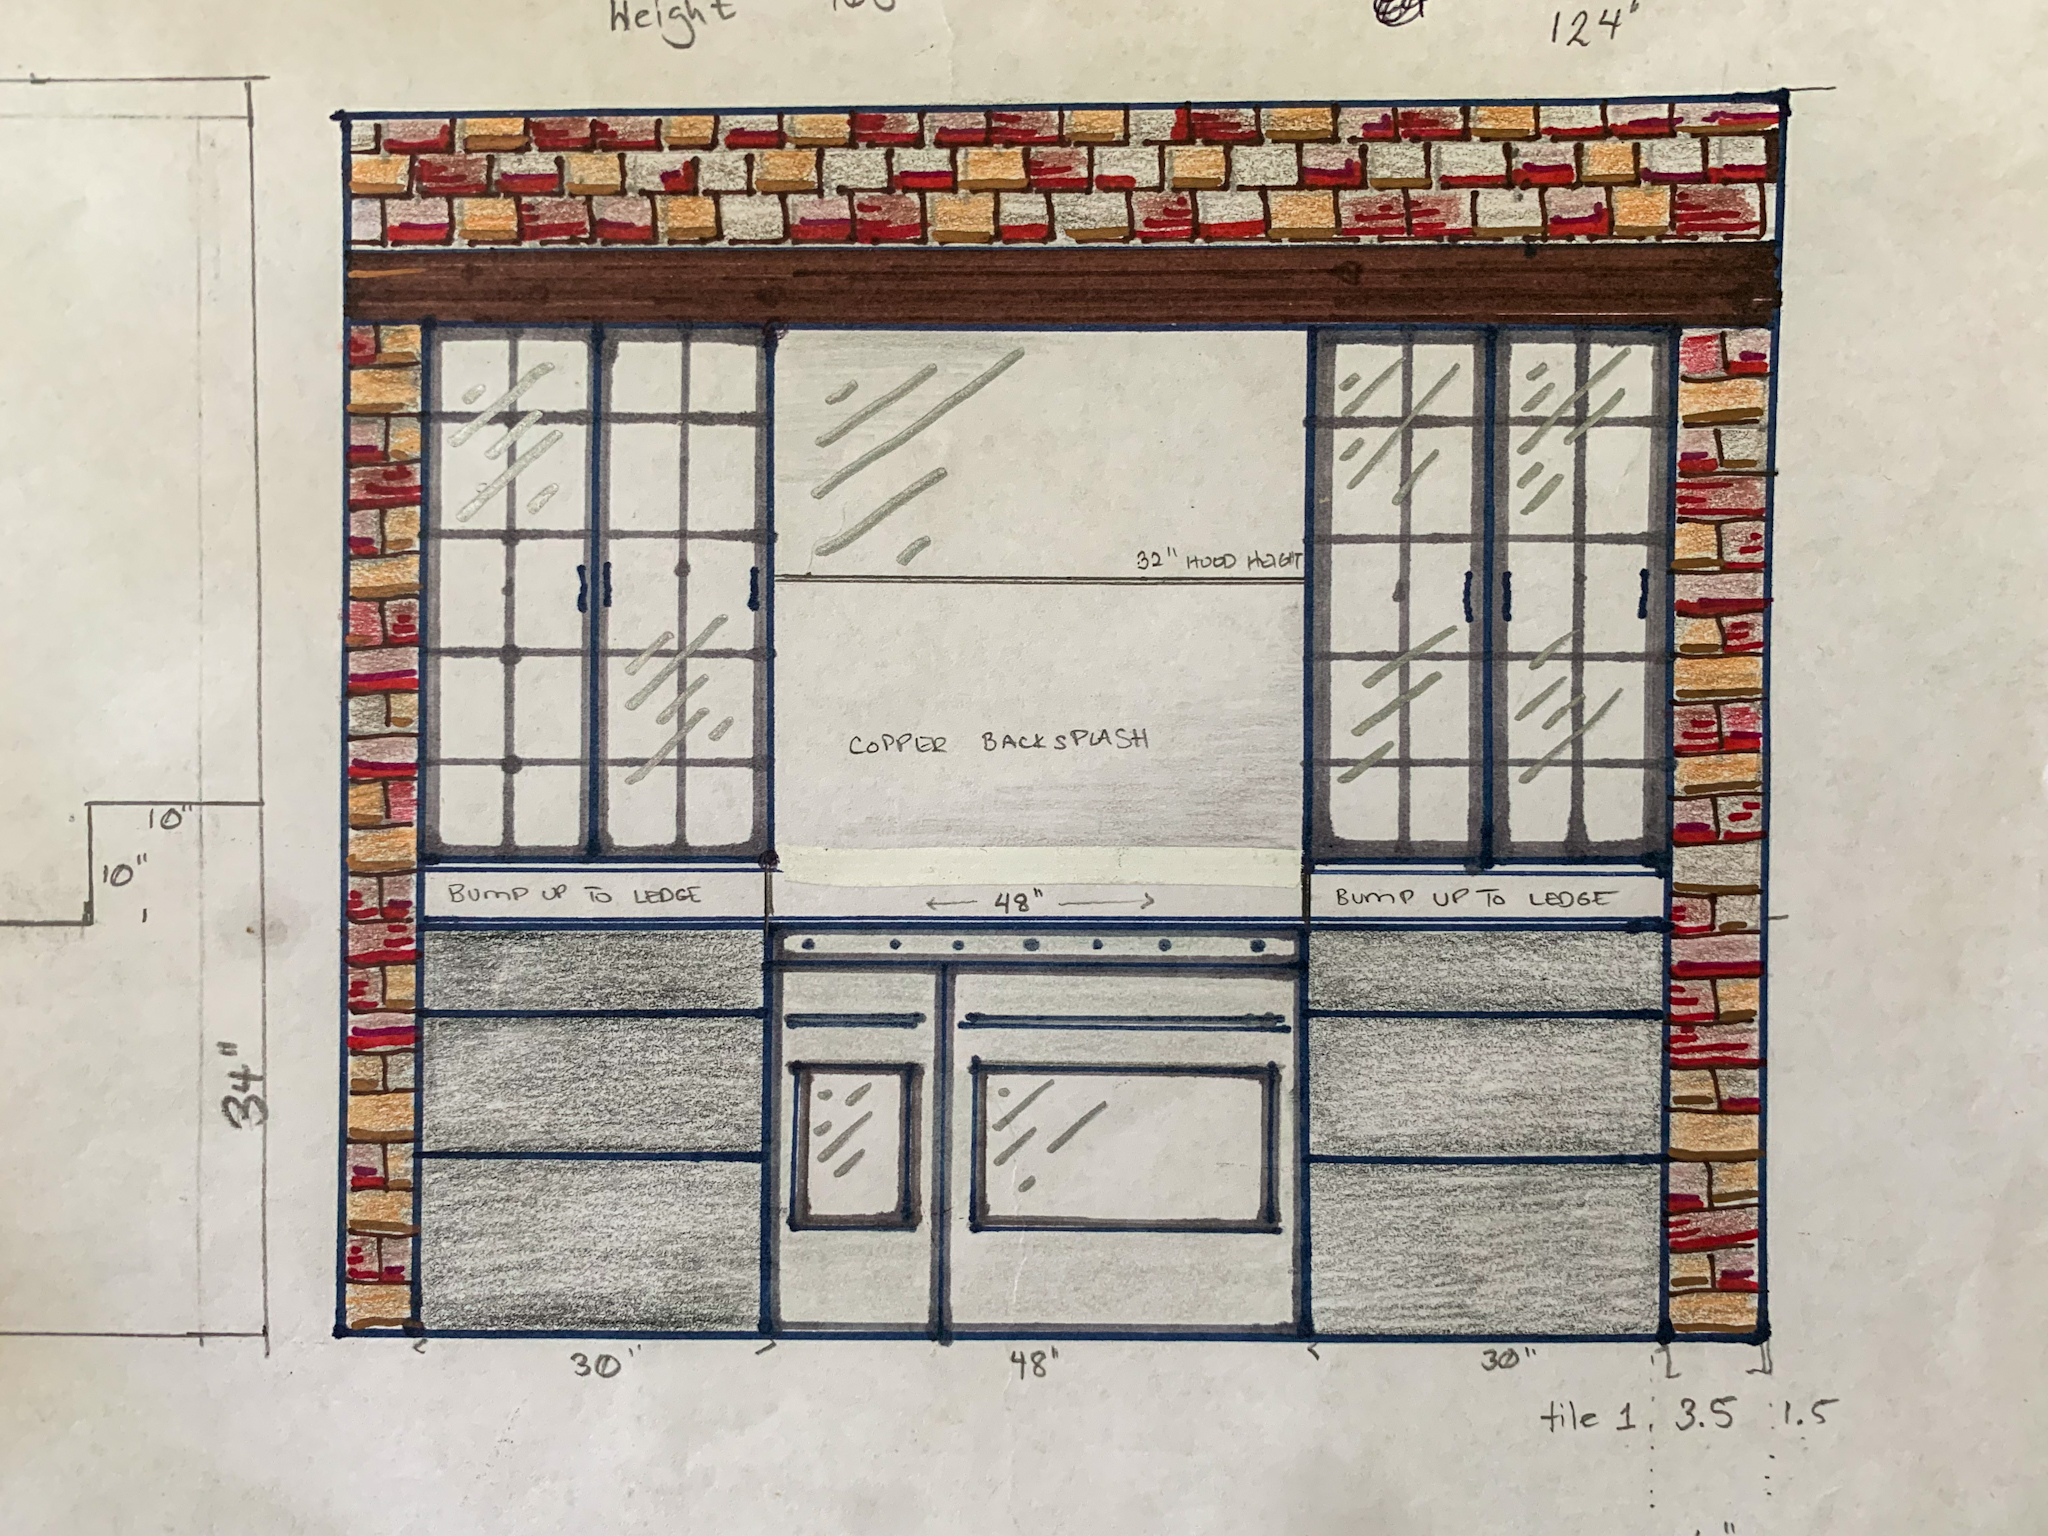
So, here’s my sketch of the front of our range wall:
The Oil and Spice Shelf Nook Inside Your Range Hood Surround You Didn’t Know You Needed But You Absolutely Have To Have
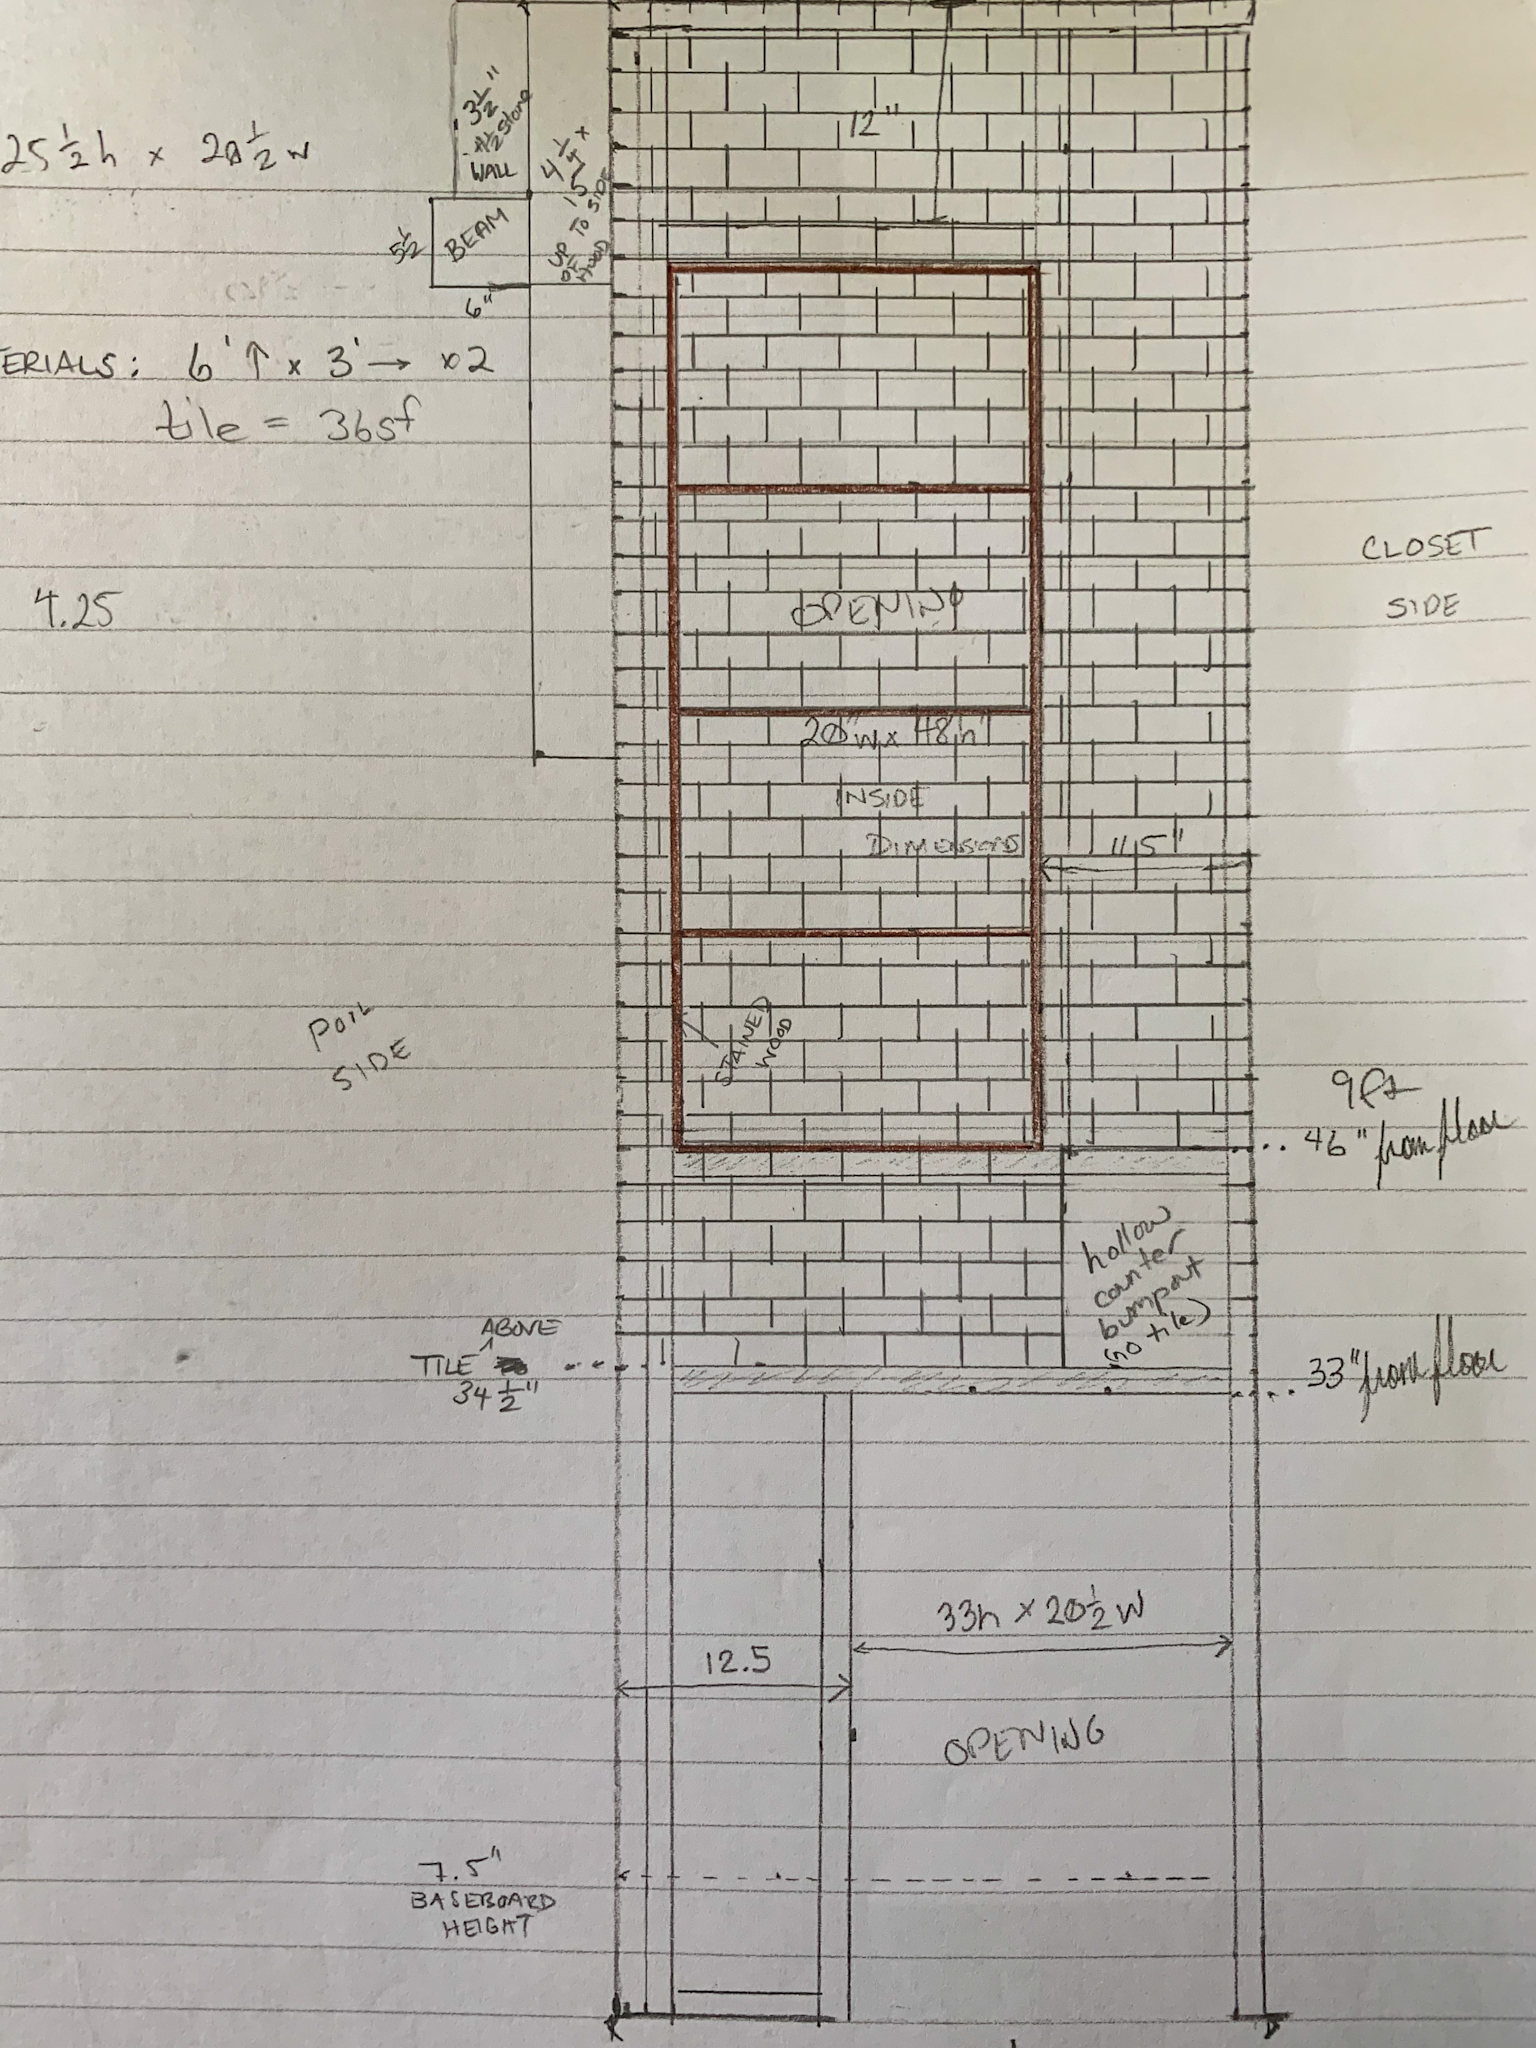
And here is the sketch of the inside of the right-hand wall:
The Oil and Spice Shelf Nook Inside Your Range Hood Surround You Didn’t Know You Needed But You Absolutely Have To Have
No fancy design software here! It’s so much easier for me to visualize when I sketch.
One of the most important design elements of this space was functionality: an excellent space to cook where all of the cook’s tools are within easy reach. It’s also important that the space be very easy to clean and hardy. Everything near the stove is a solid surface and non-scorch-able (including the metal upper cabinets). I allowed myself a little leniency with the shelf materials because they are 33 inches from the side of the range and the back of the shelves are still tiled. I briefly considered a shelf OVER the stove (it looks so pretty with the copper pots hanging there) but remembered that I don’t want to clean grease spatter off utensils, pots, and spices every time I cook.
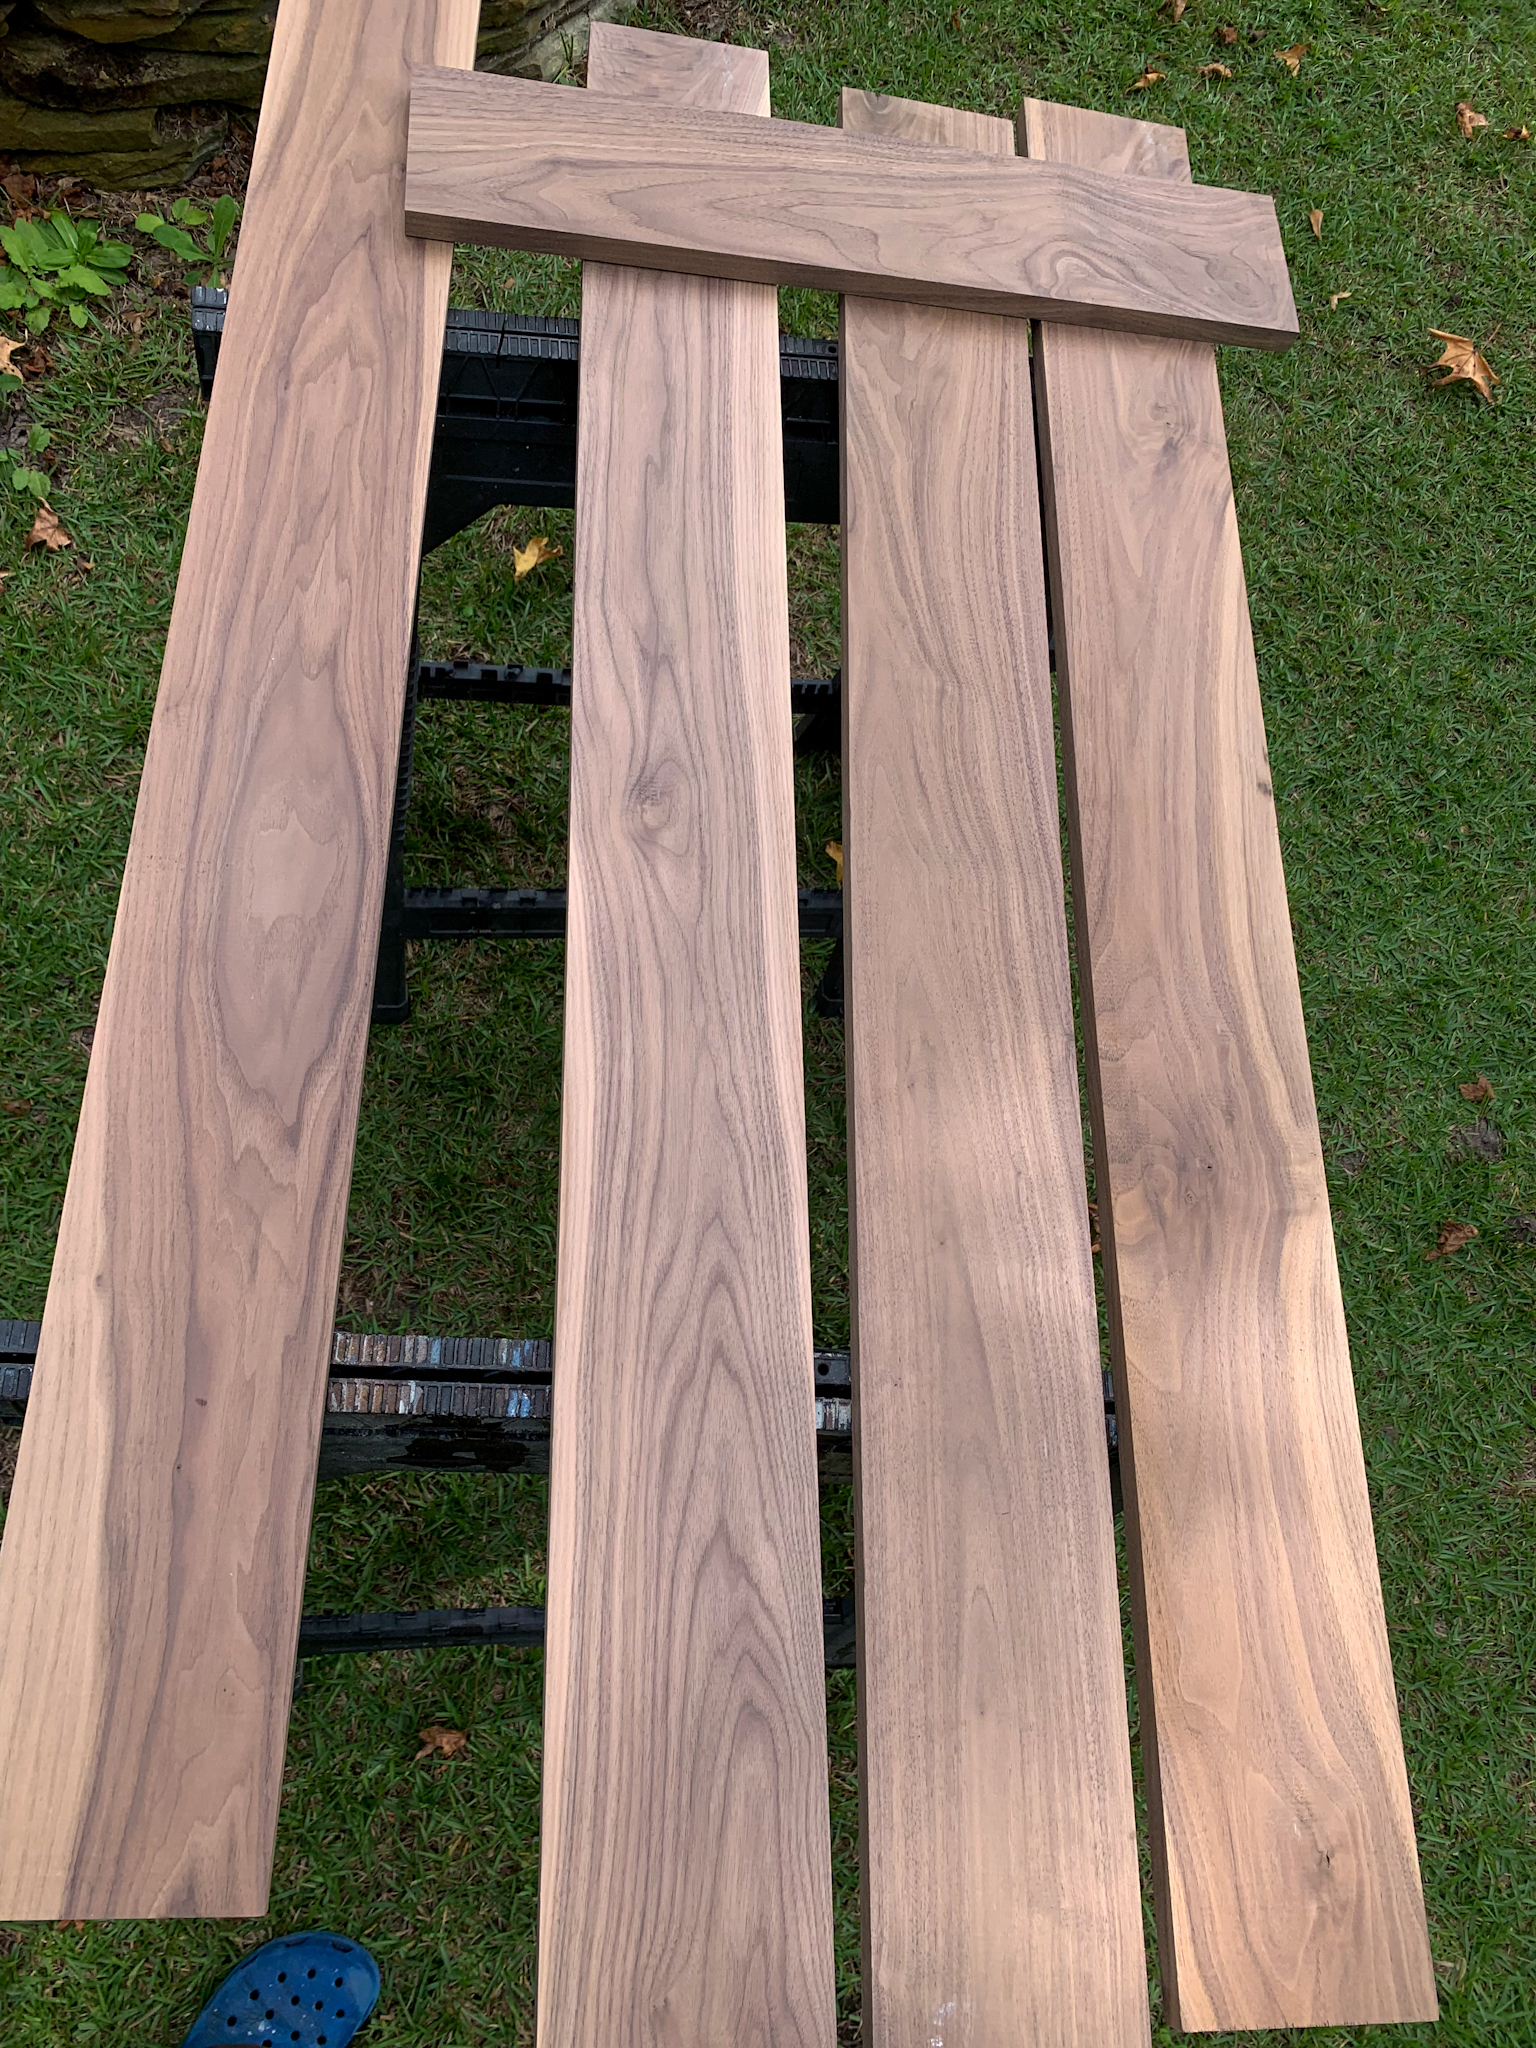
Anyhoo, after I actually threatened my husband with bodily harm for the lack of progress on the kitchen (i.e. fishing/casting on the boat instead of doing interior construction), this is the next project we came to in the build. One of the challenges was that walnut is really hard to find (read: expensive) right now, but since it wasn’t a lot square footage wise, I thought it would be fairly affordable. It was not. Not, to say that little detail changed my mind: I still got my walnut shelves. Just know that the species of wood you choose very much impacts the final cost.
I also wanted some pretty gallery rails to prevent oil bottles from being knocked off and smashing into tiny pieces. Those were also not cheap, but they were necessary both from an aesthetic and functional standpoint. I had already purchased the Carrara marble subway tile for the interior range walls, and I have broken out the relative cost below.
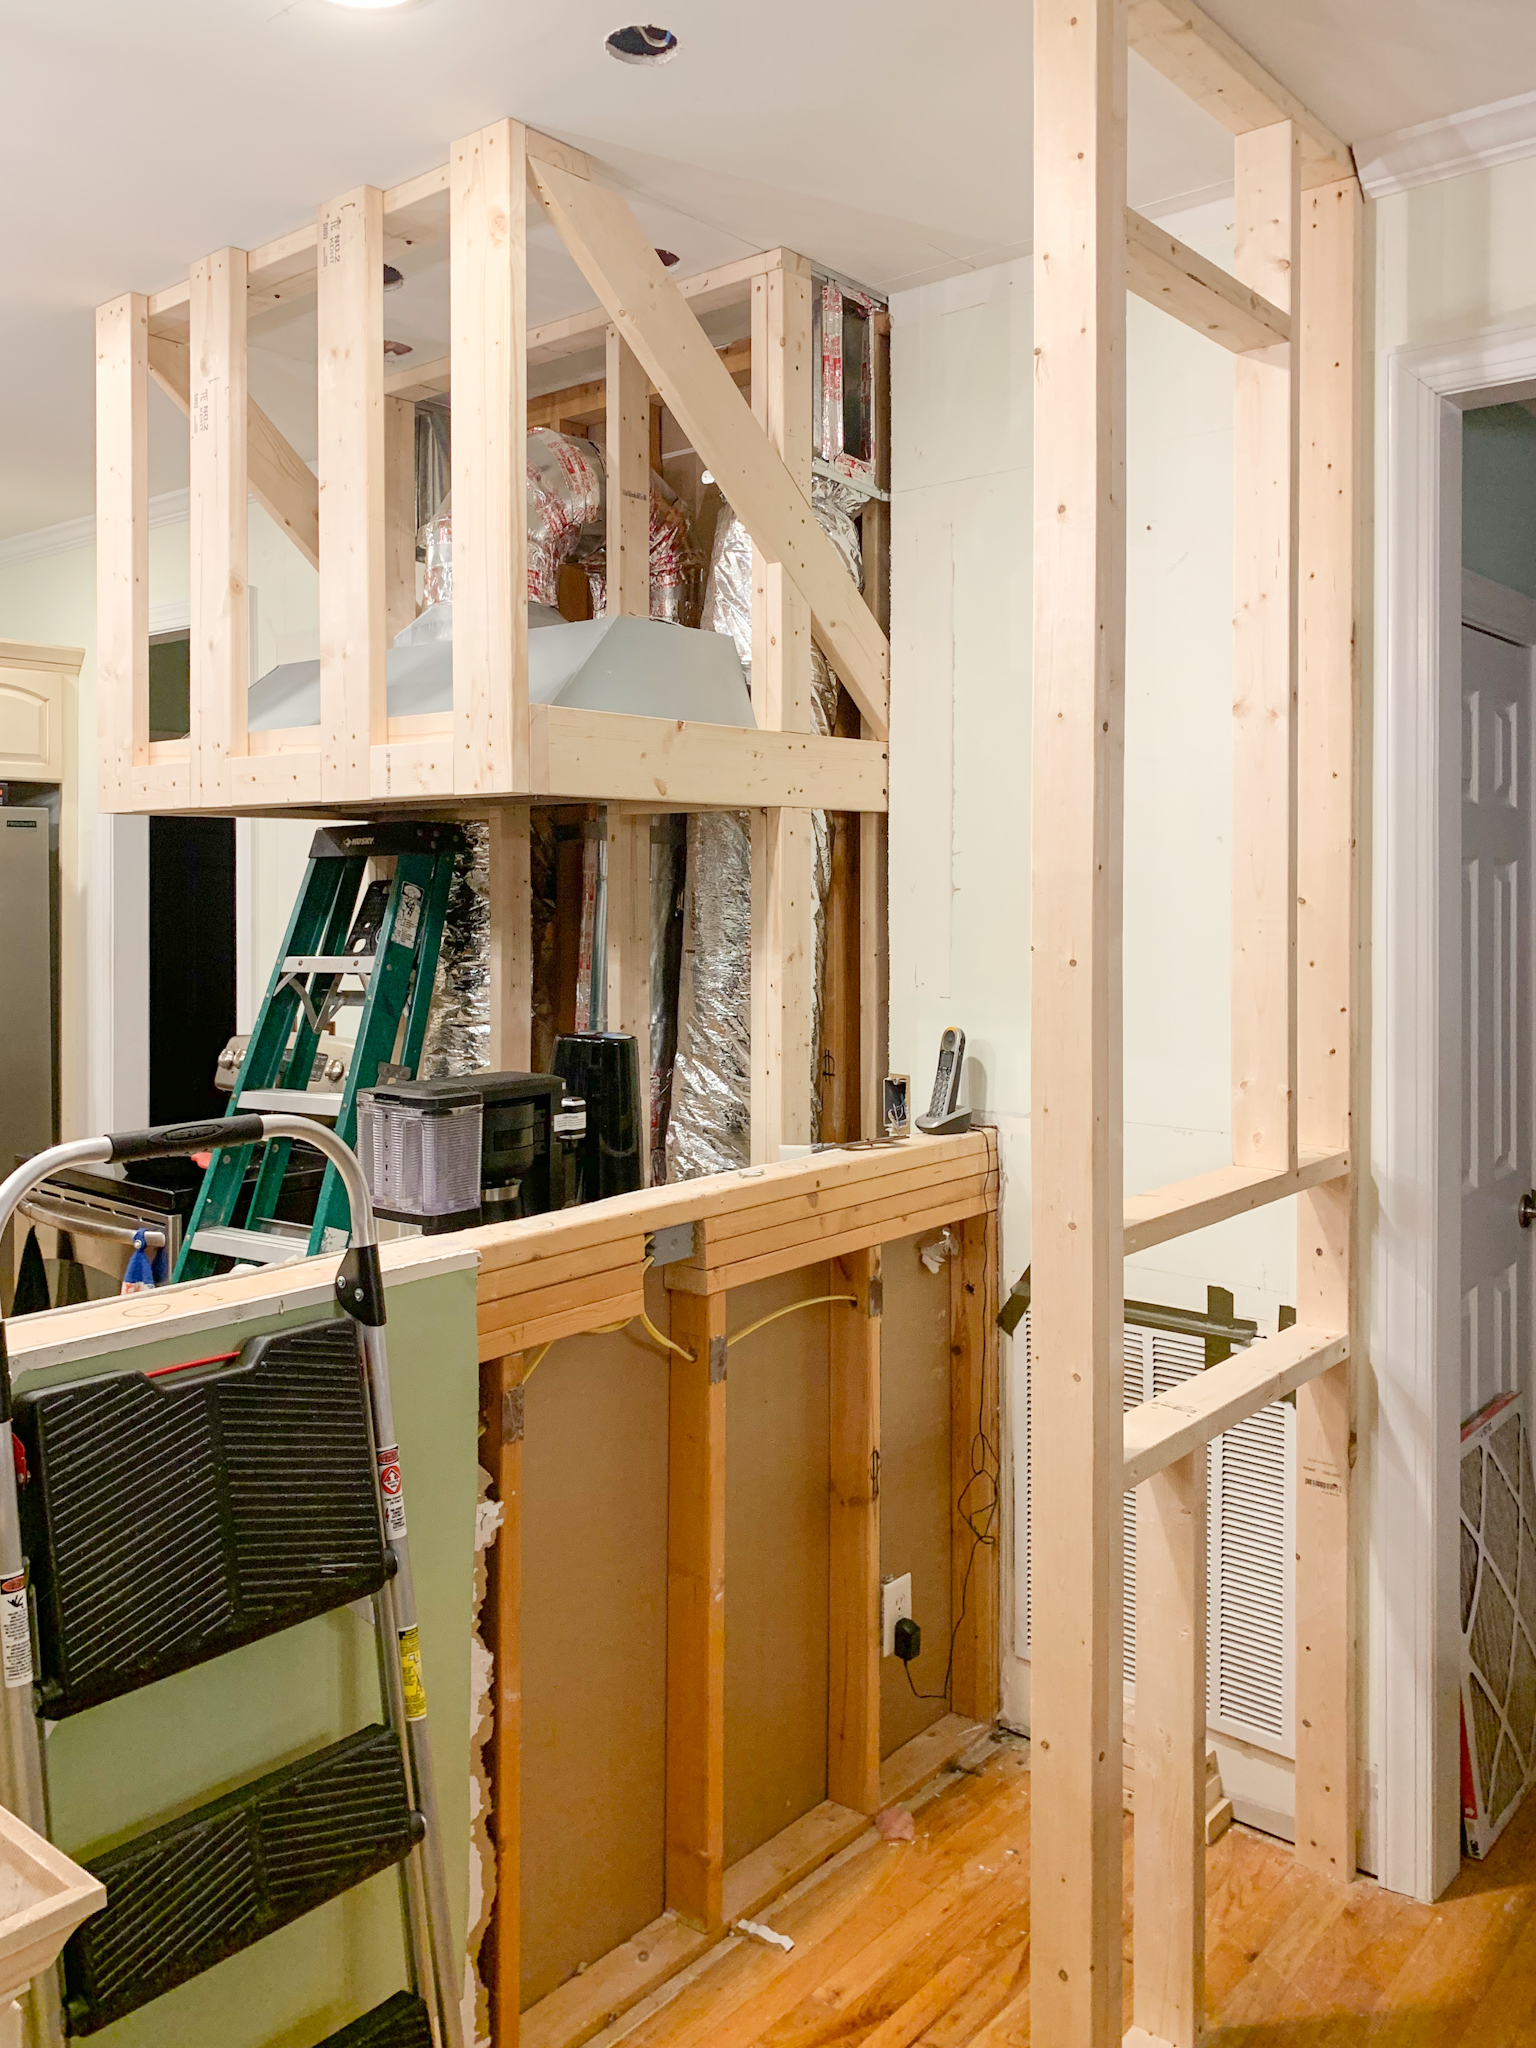
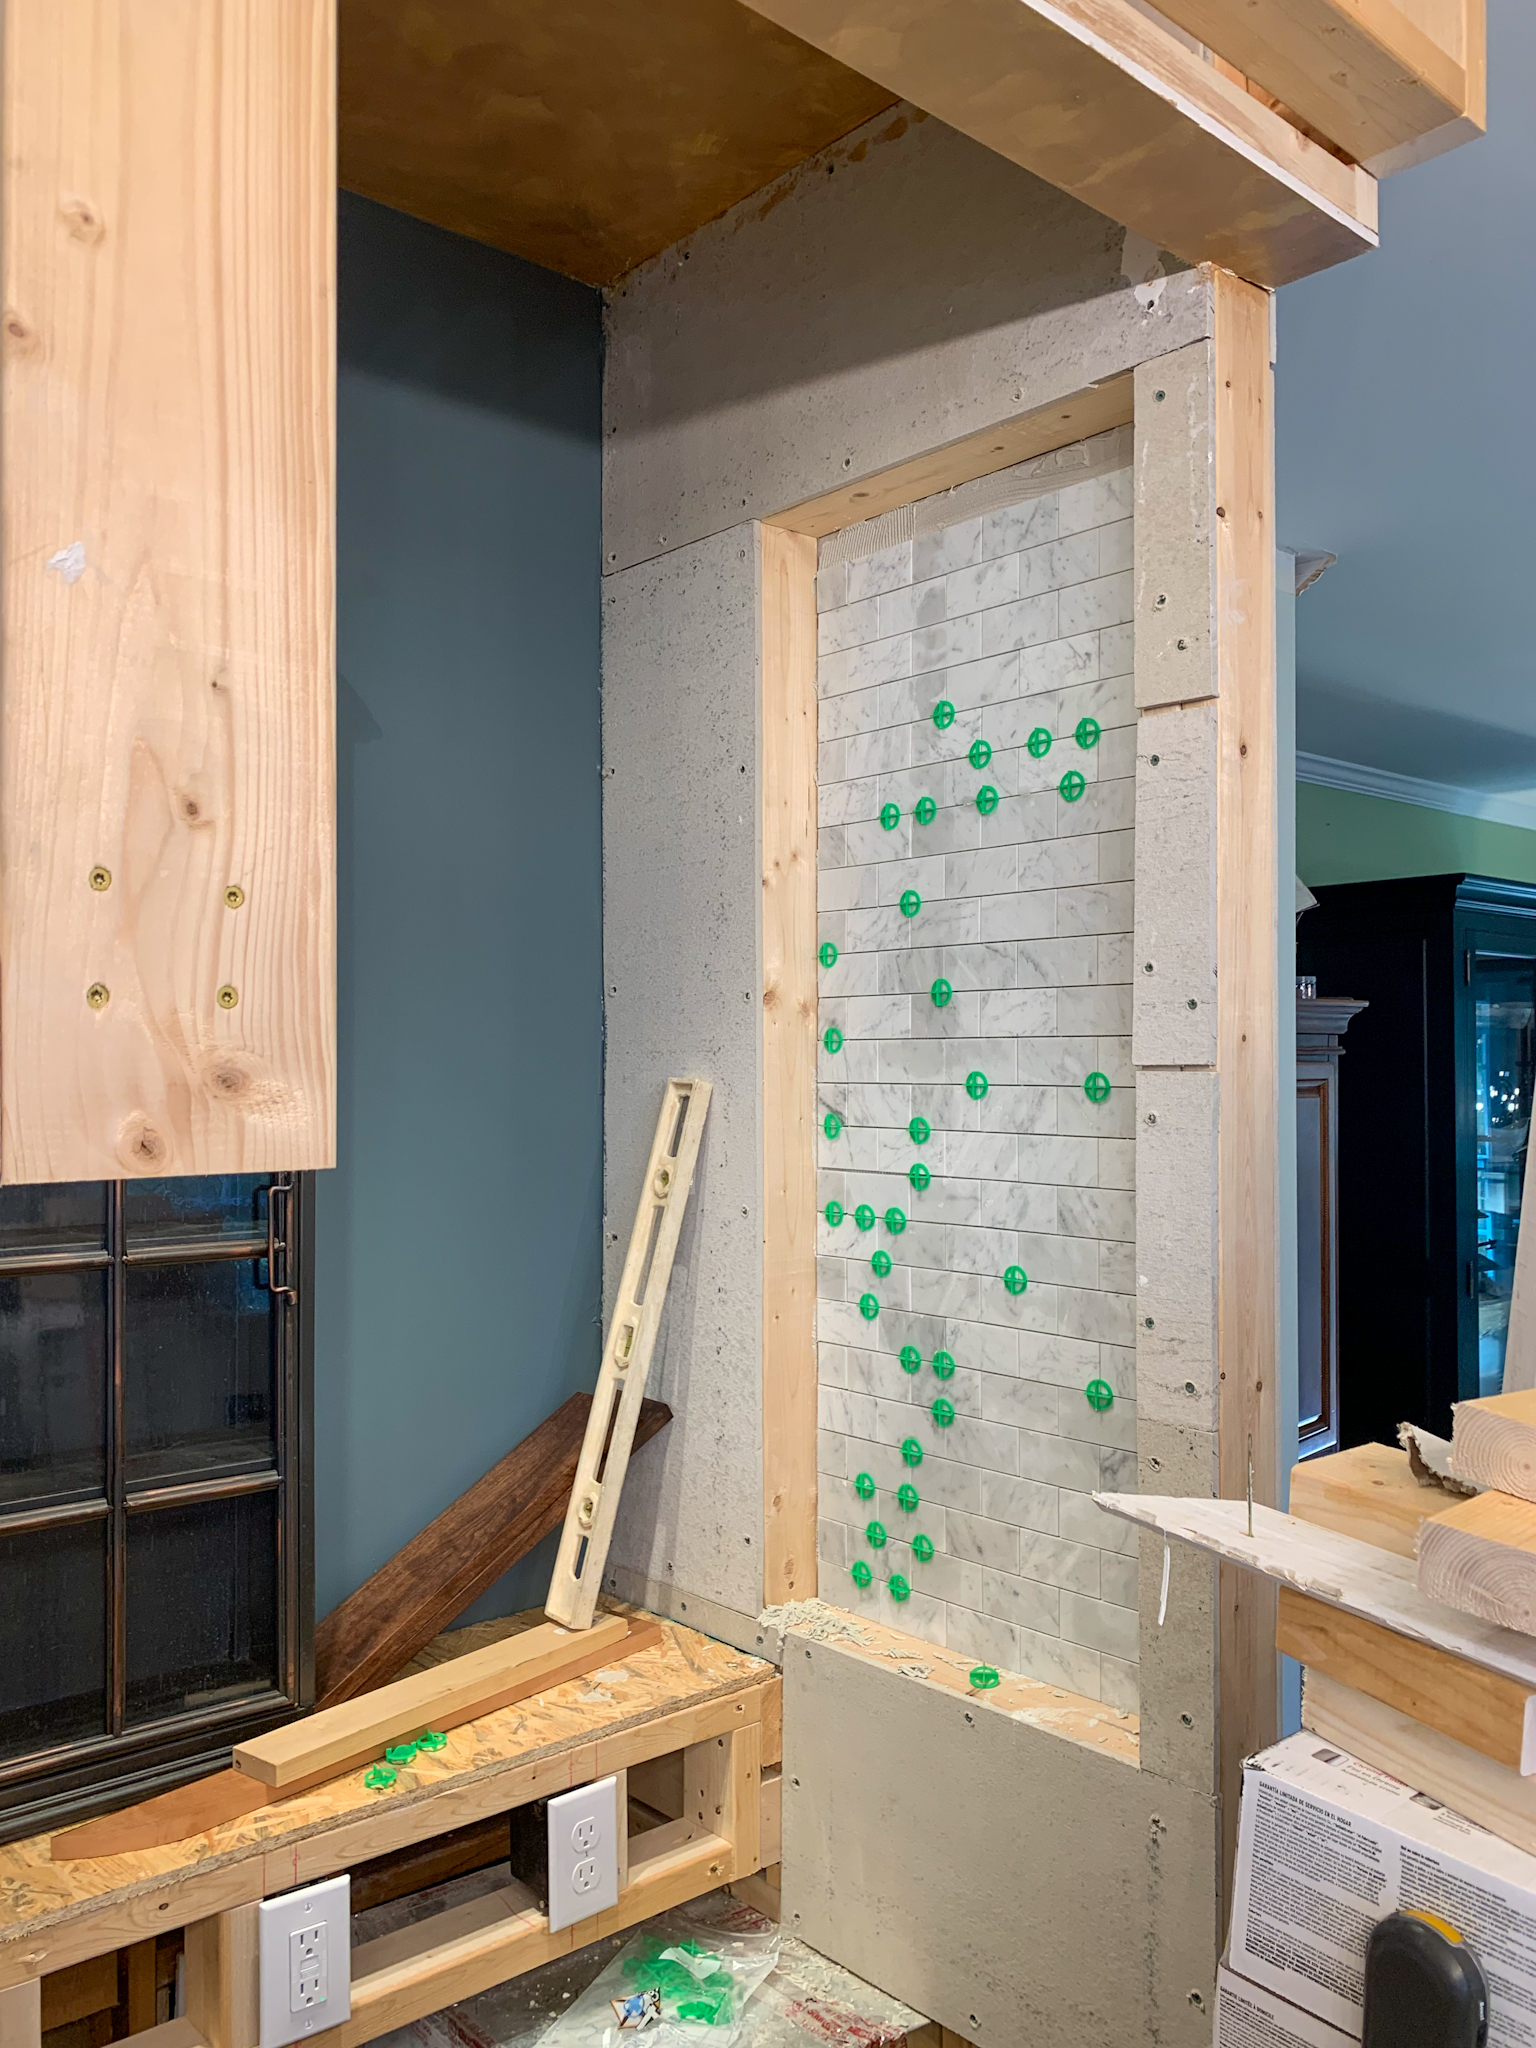
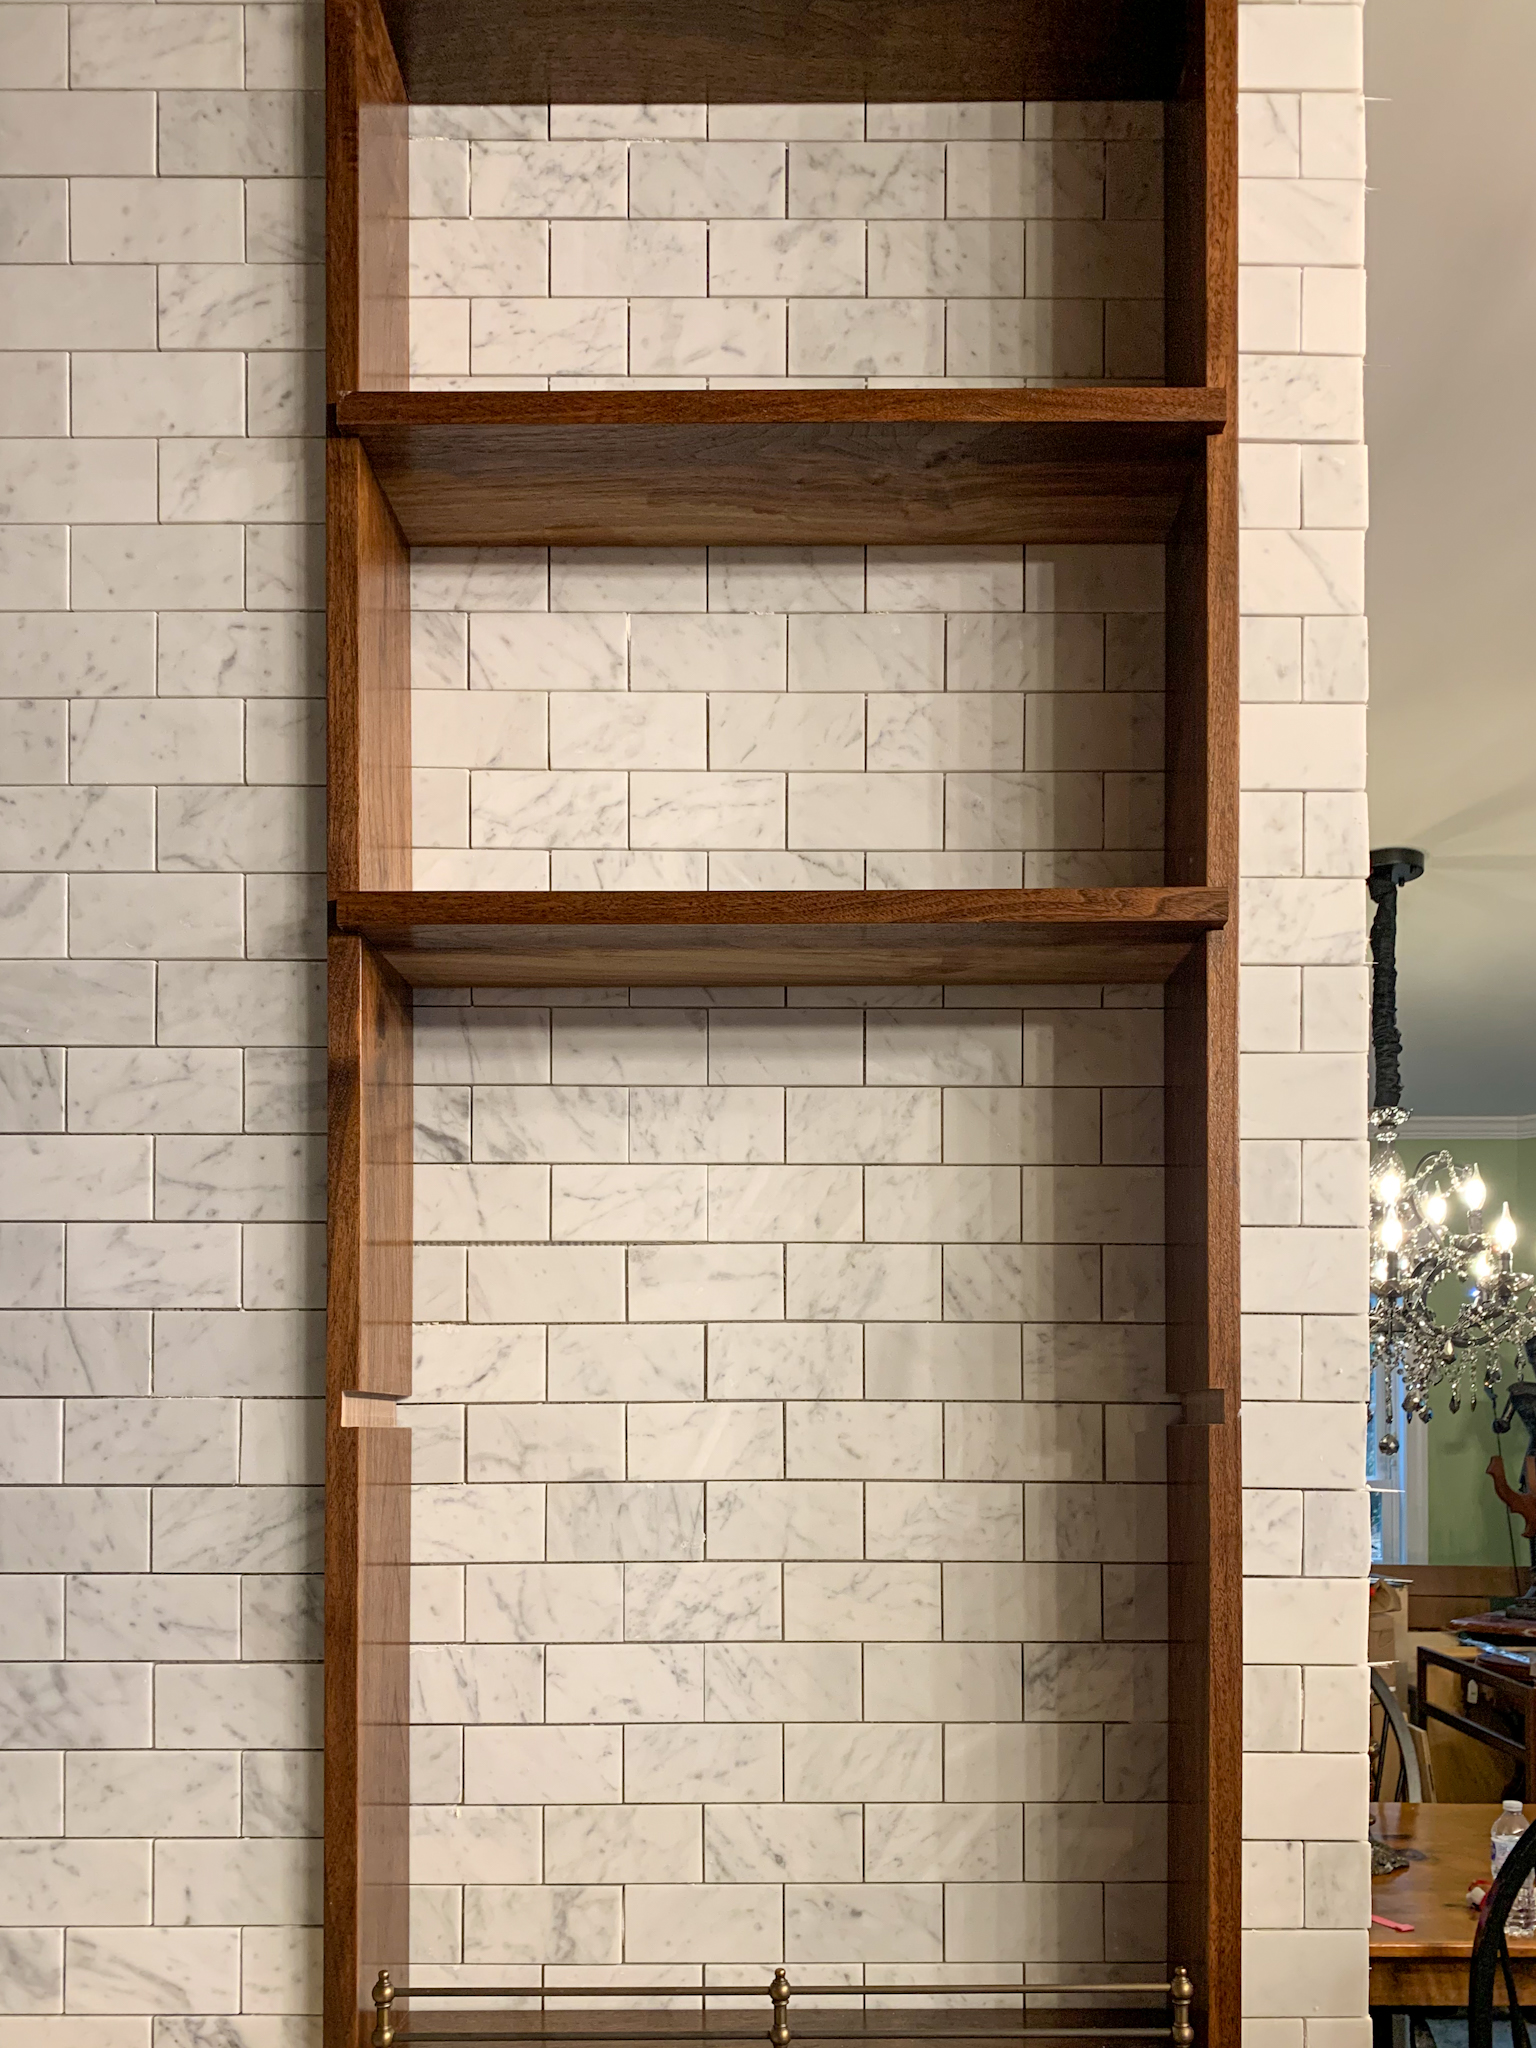
Step one was framing the wall with the size I wanted and thinking about all the 3D things that could affect the functionality of the design.
Since we are doing one wall at a time… it is more difficult. I want to have a functional kitchen for as long as possible through the renovation, so there was an old peninsula with electrical and plumbing in the way on one side.
The Oil and Spice Shelf Nook Inside Your Range Hood Surround You Didn’t Know You Needed But You Absolutely Have To Have
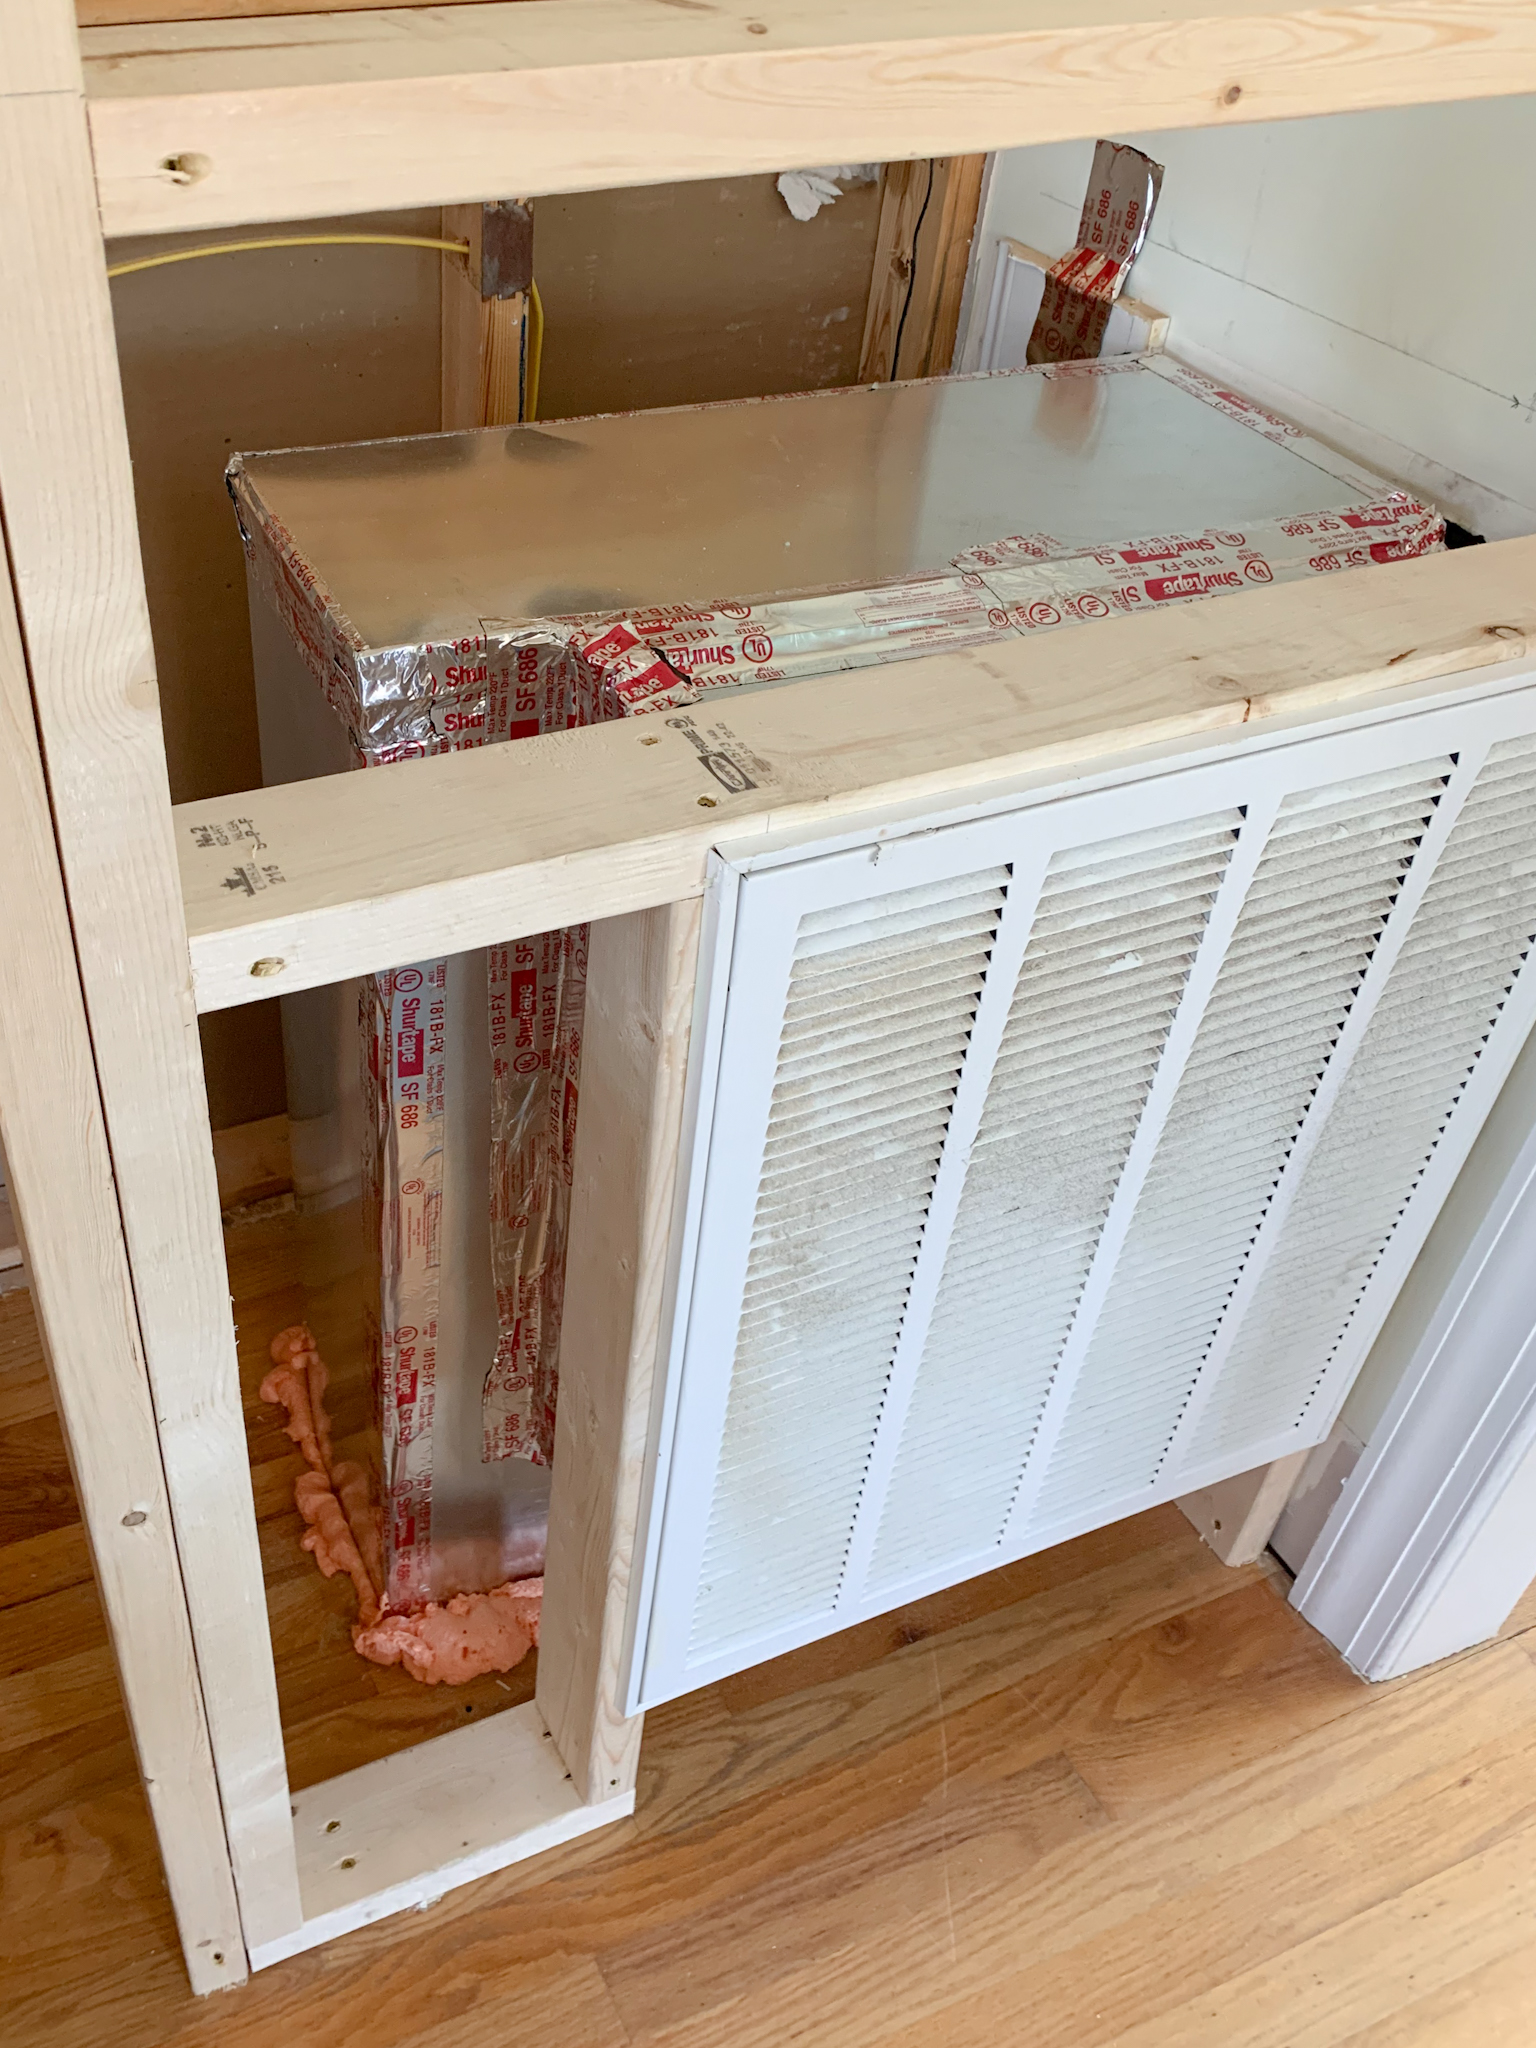
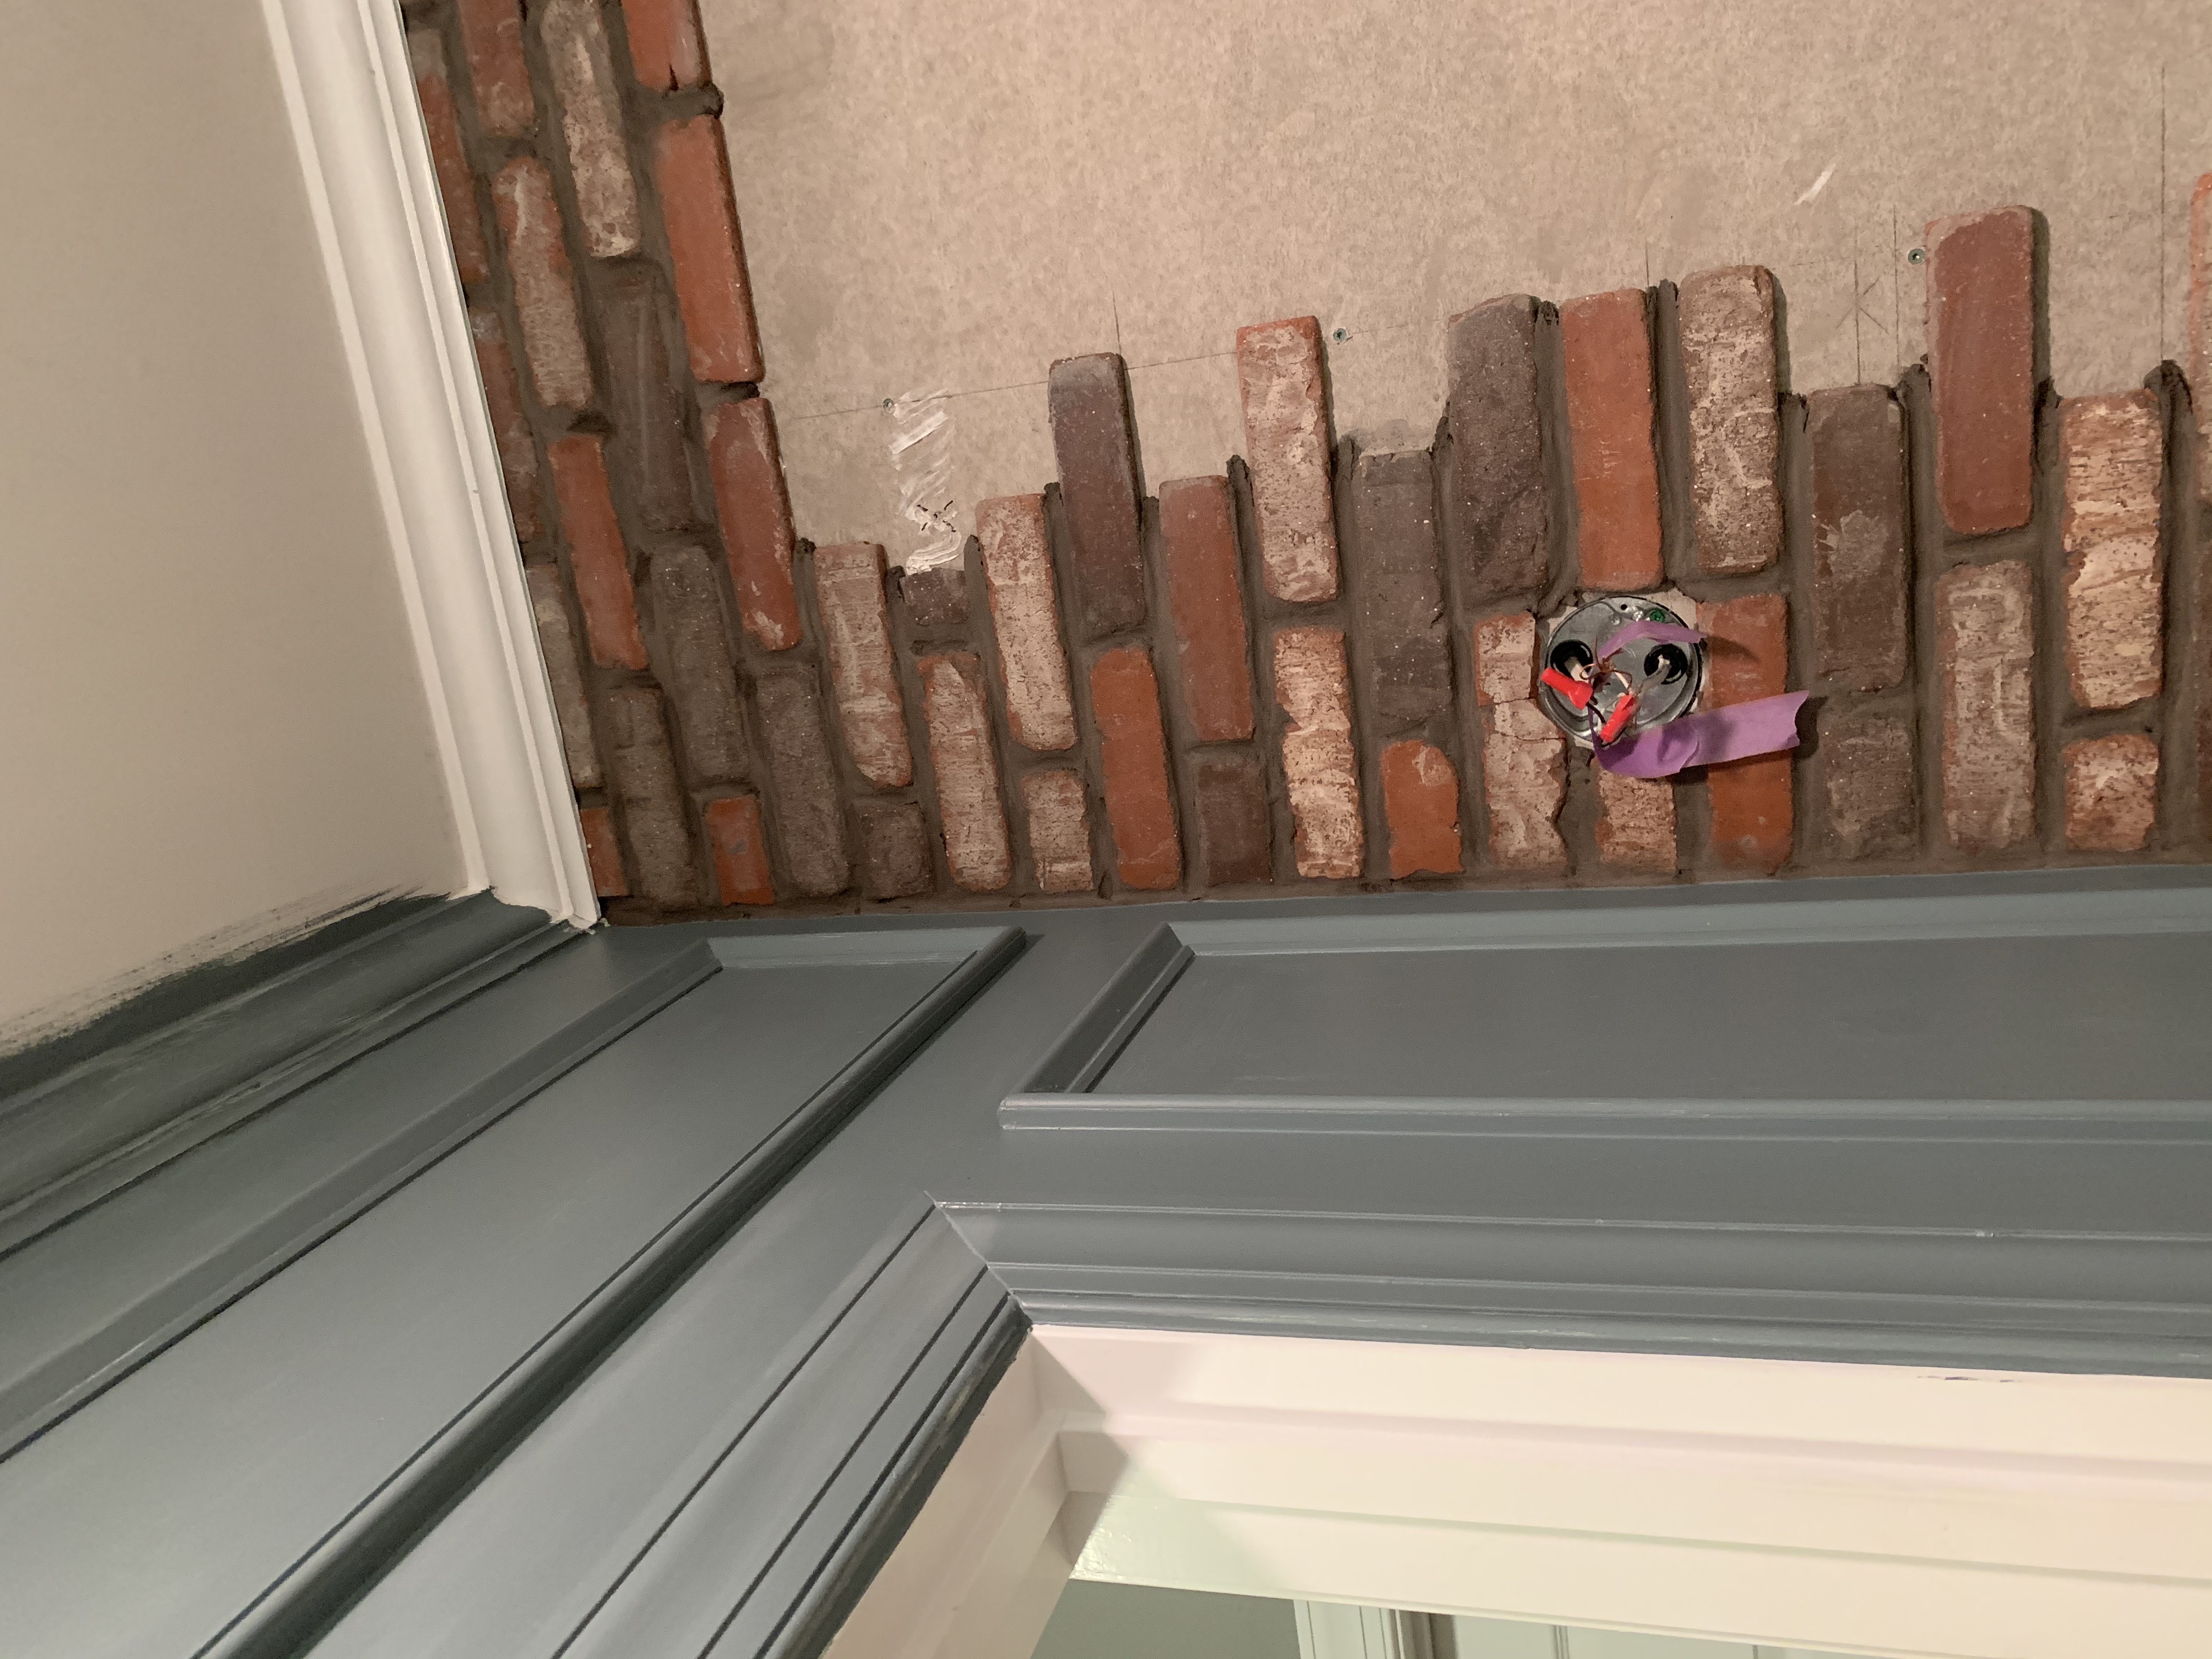
And then, of course, this little design treasure that I was feeling borderline homicidal about. Don’t worry, I fixed the look, but I’m still pretty torqued the HVAC crew couldn’t reroute the intake anywhere else. The worst part is it robbed me of half of my cabinet space on one side of the stove. NOT COOL. (It currently has a really pretty cover on it, and I ordered a false front for the cabinet so it will be invisible to anyone who doesn’t know).
The Oil and Spice Shelf Nook Inside Your Range Hood Surround You Didn’t Know You Needed But You Absolutely Have To Have
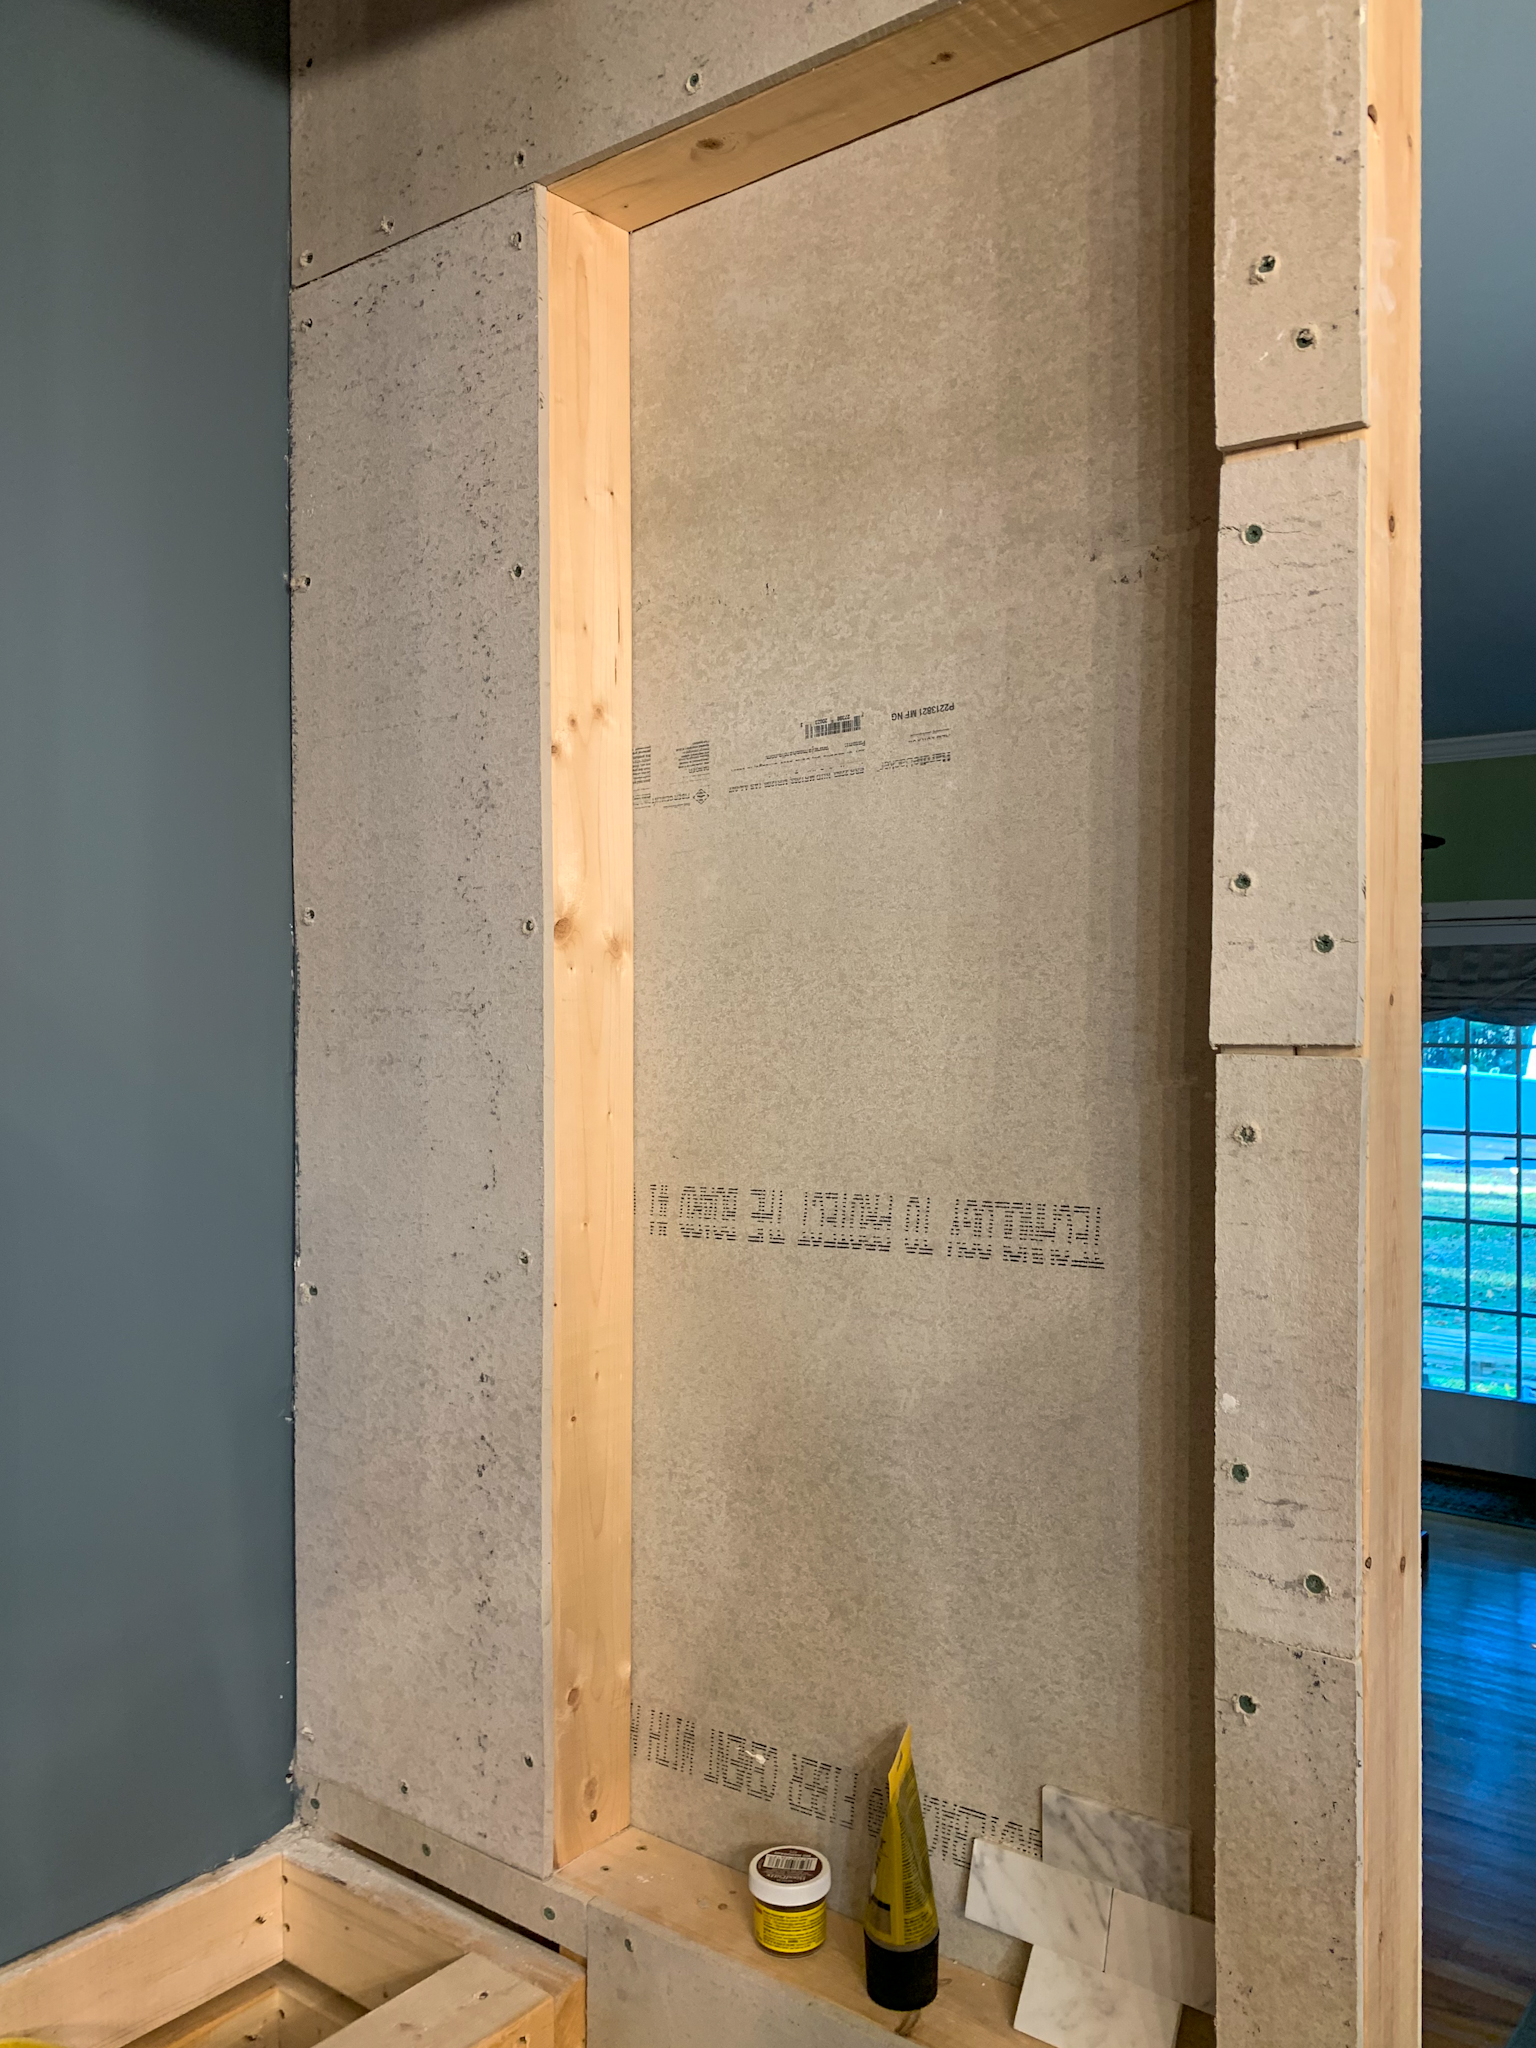
Step one: Install cement board for all tiled areas.
The Oil and Spice Shelf Nook Inside Your Range Hood Surround You Didn’t Know You Needed But You Absolutely Have To Have
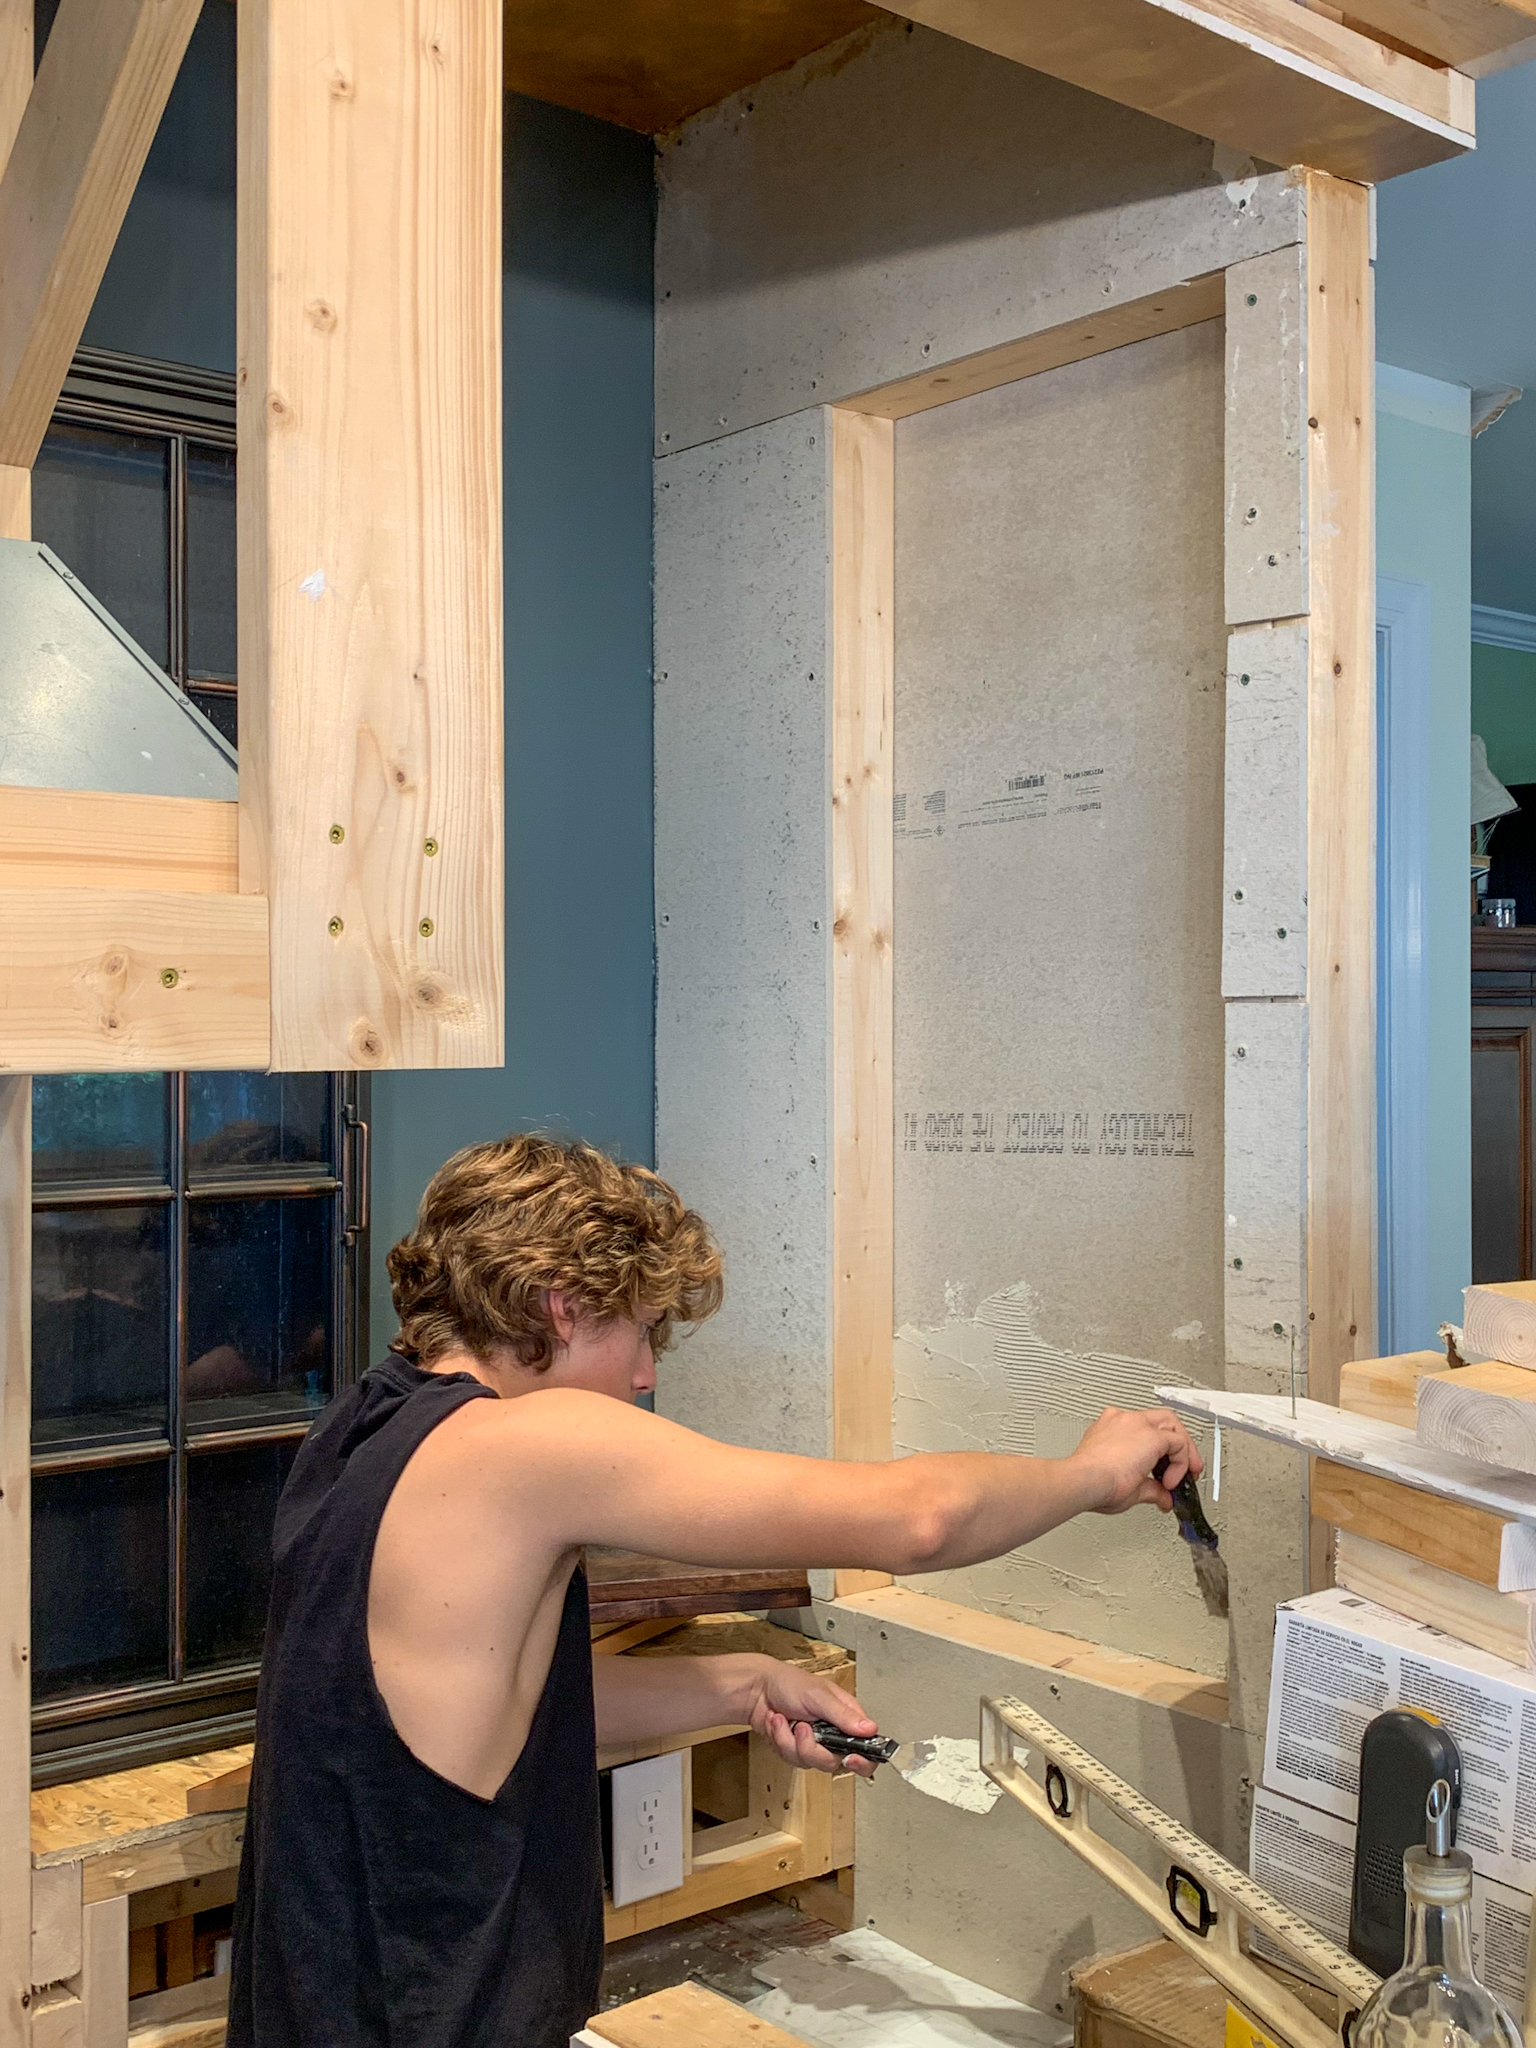
Step 2: Mortar.
The Oil and Spice Shelf Nook Inside Your Range Hood Surround You Didn’t Know You Needed But You Absolutely Have To Have
Step 3: Tile.
The Oil and Spice Shelf Nook Inside Your Range Hood Surround You Didn’t Know You Needed But You Absolutely Have To Have
Step 4: Prefinish the walnut shelves prior to installation. I highly recommend lots of lacquer to prevent warping/staining from spills or drips.
The Oil and Spice Shelf Nook Inside Your Range Hood Surround You Didn’t Know You Needed But You Absolutely Have To Have
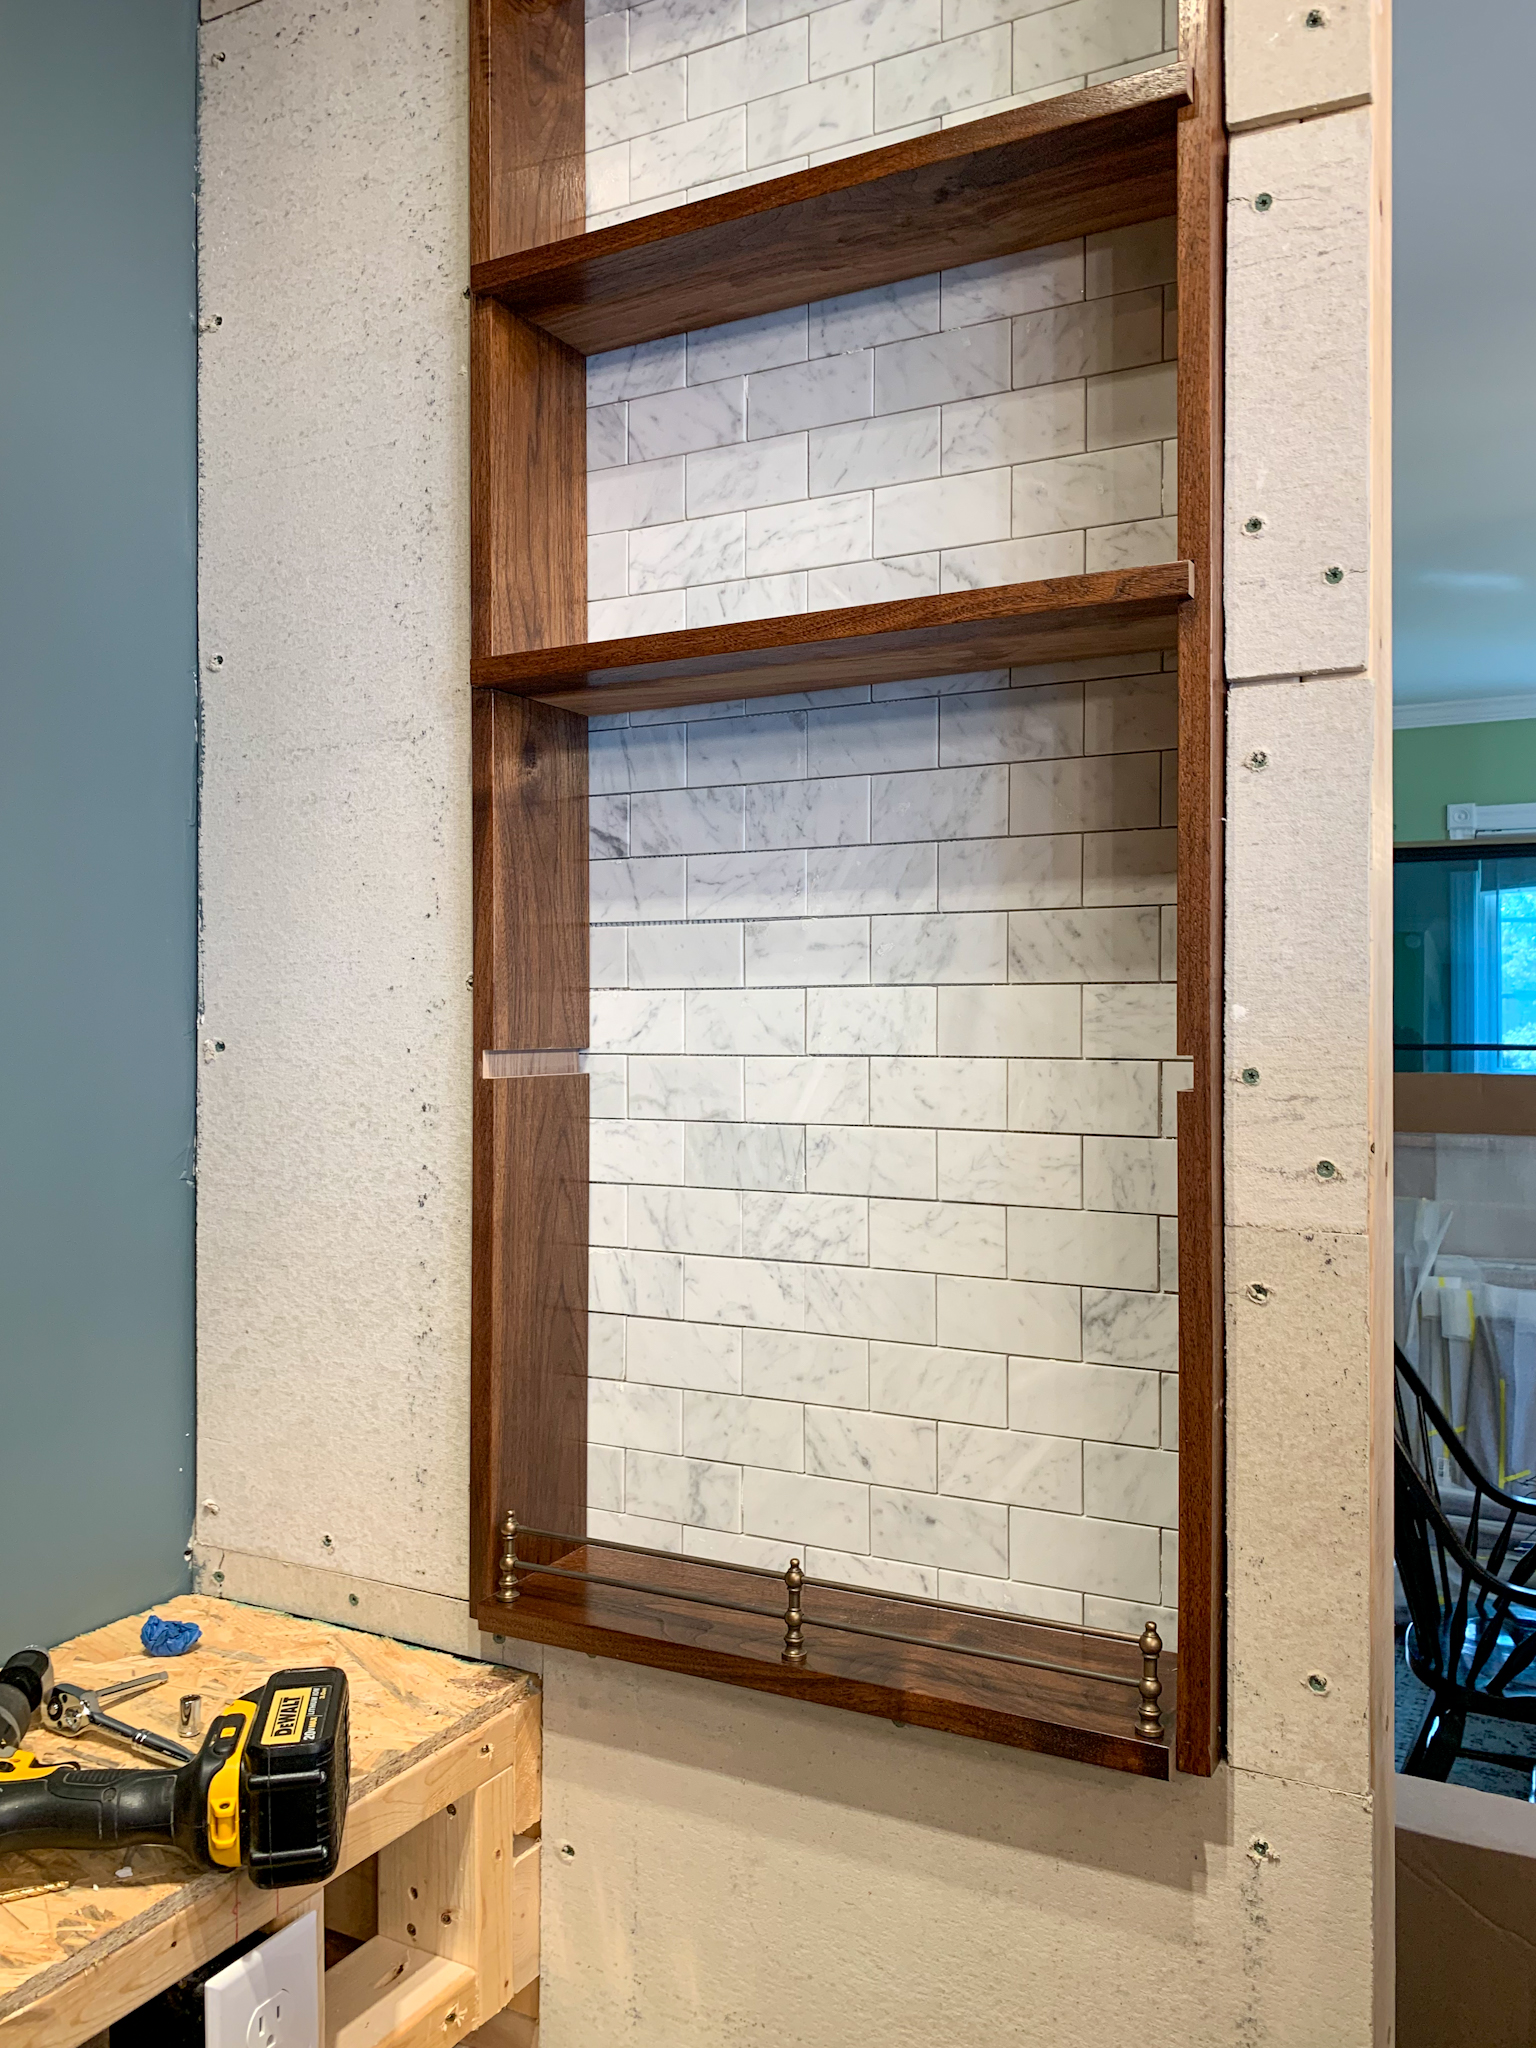
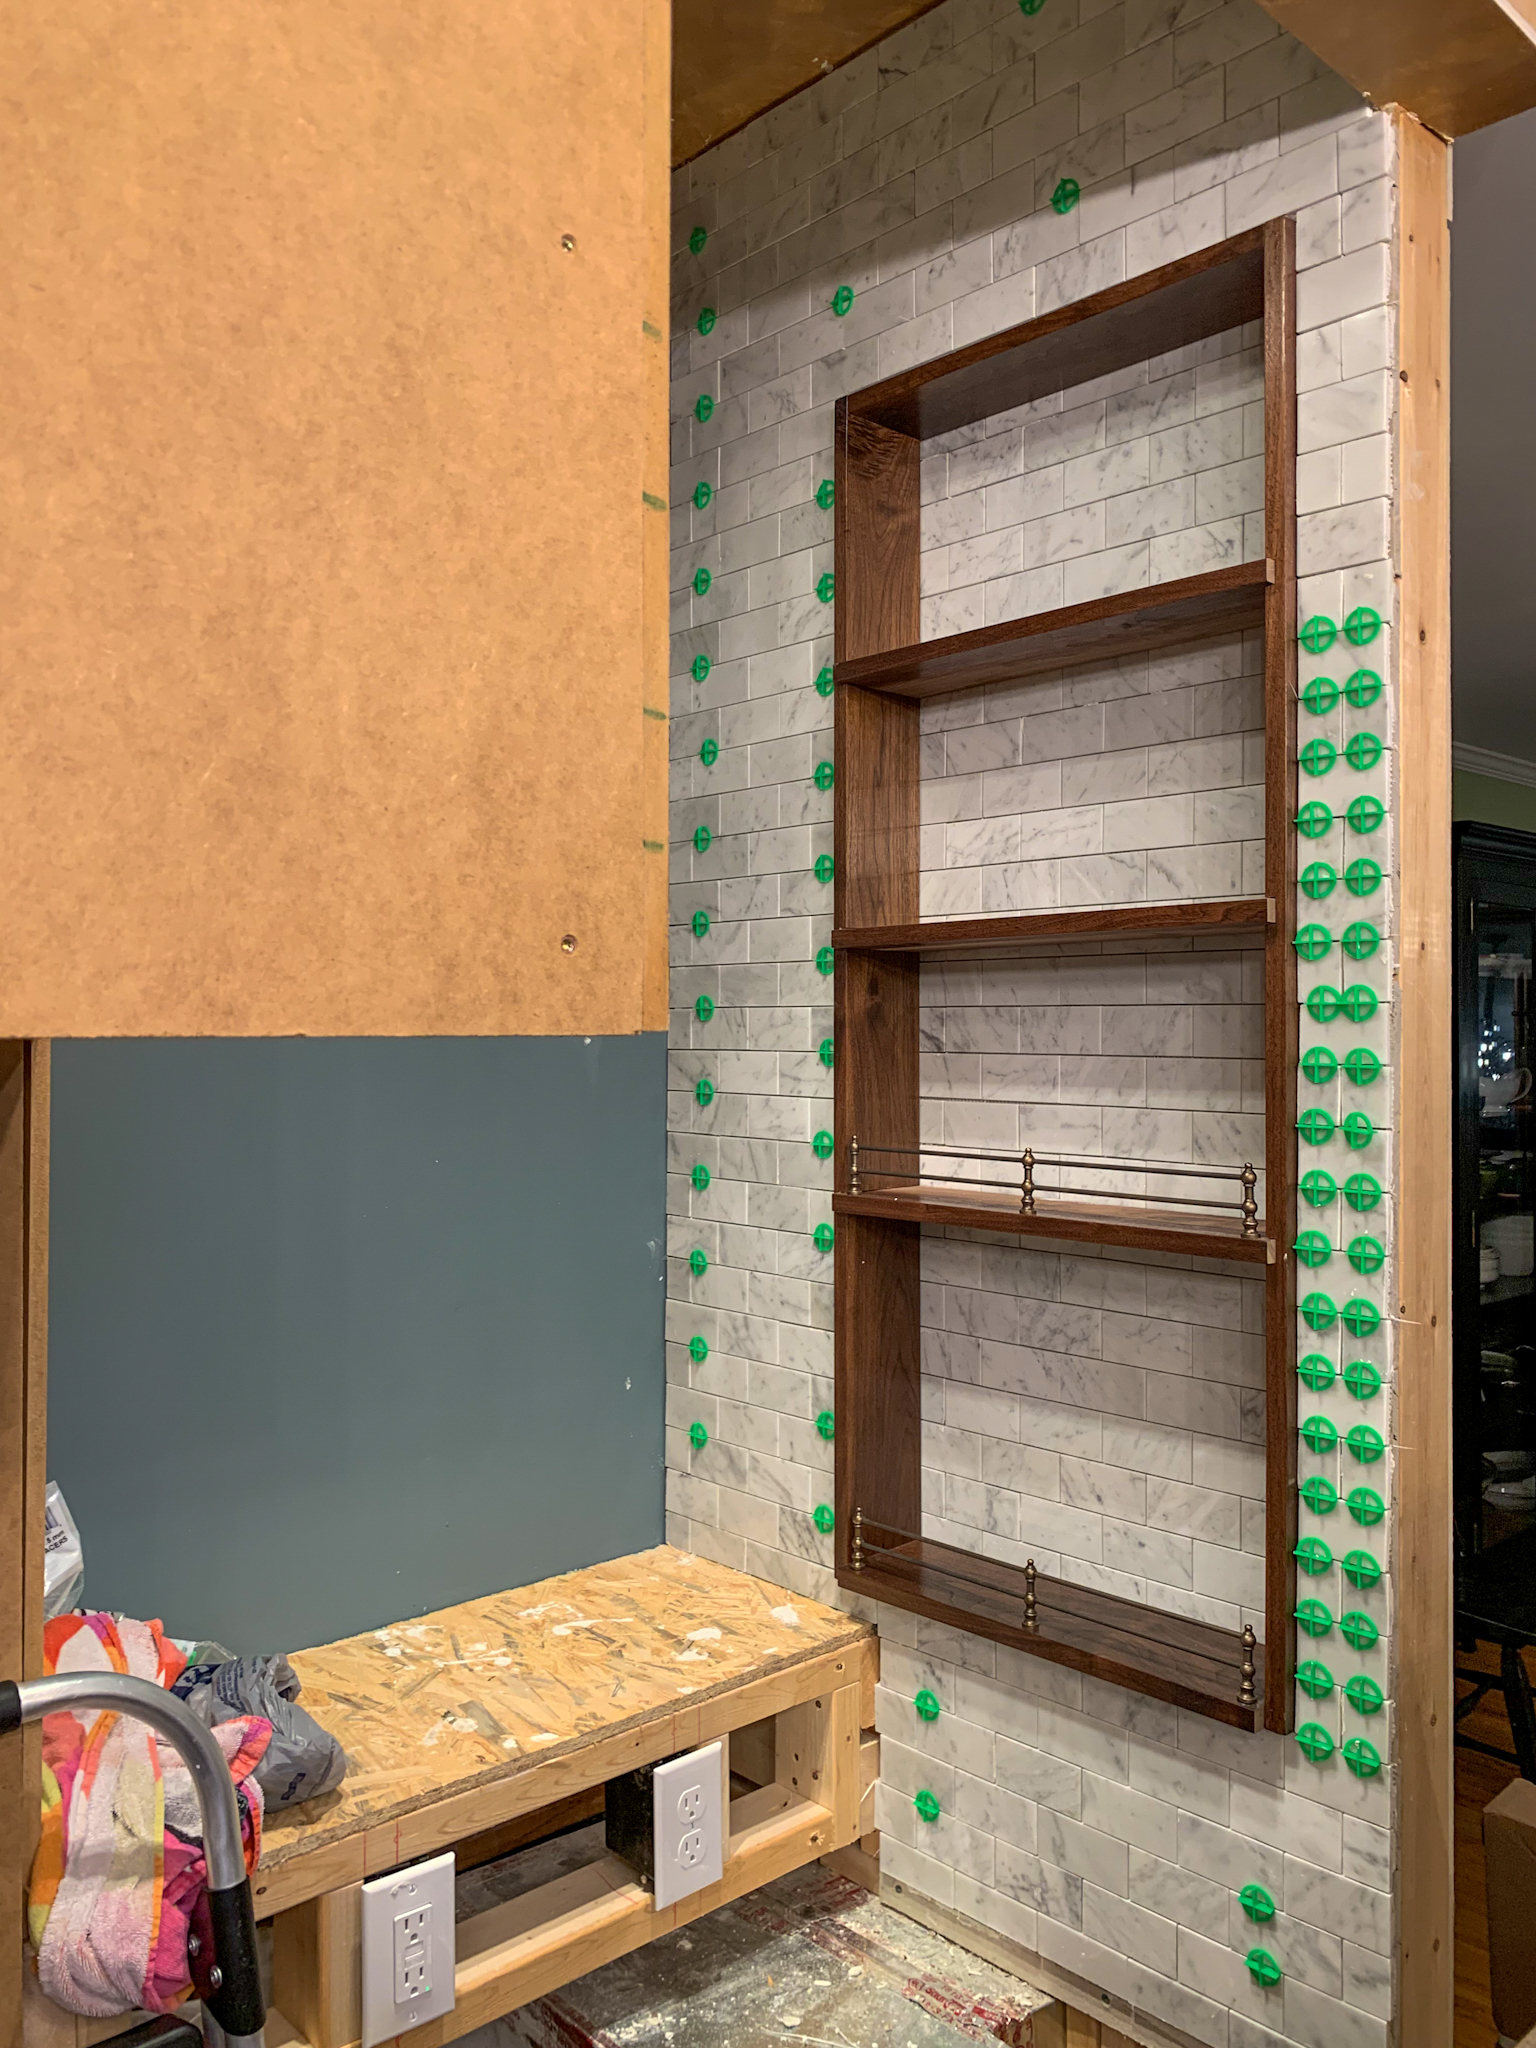
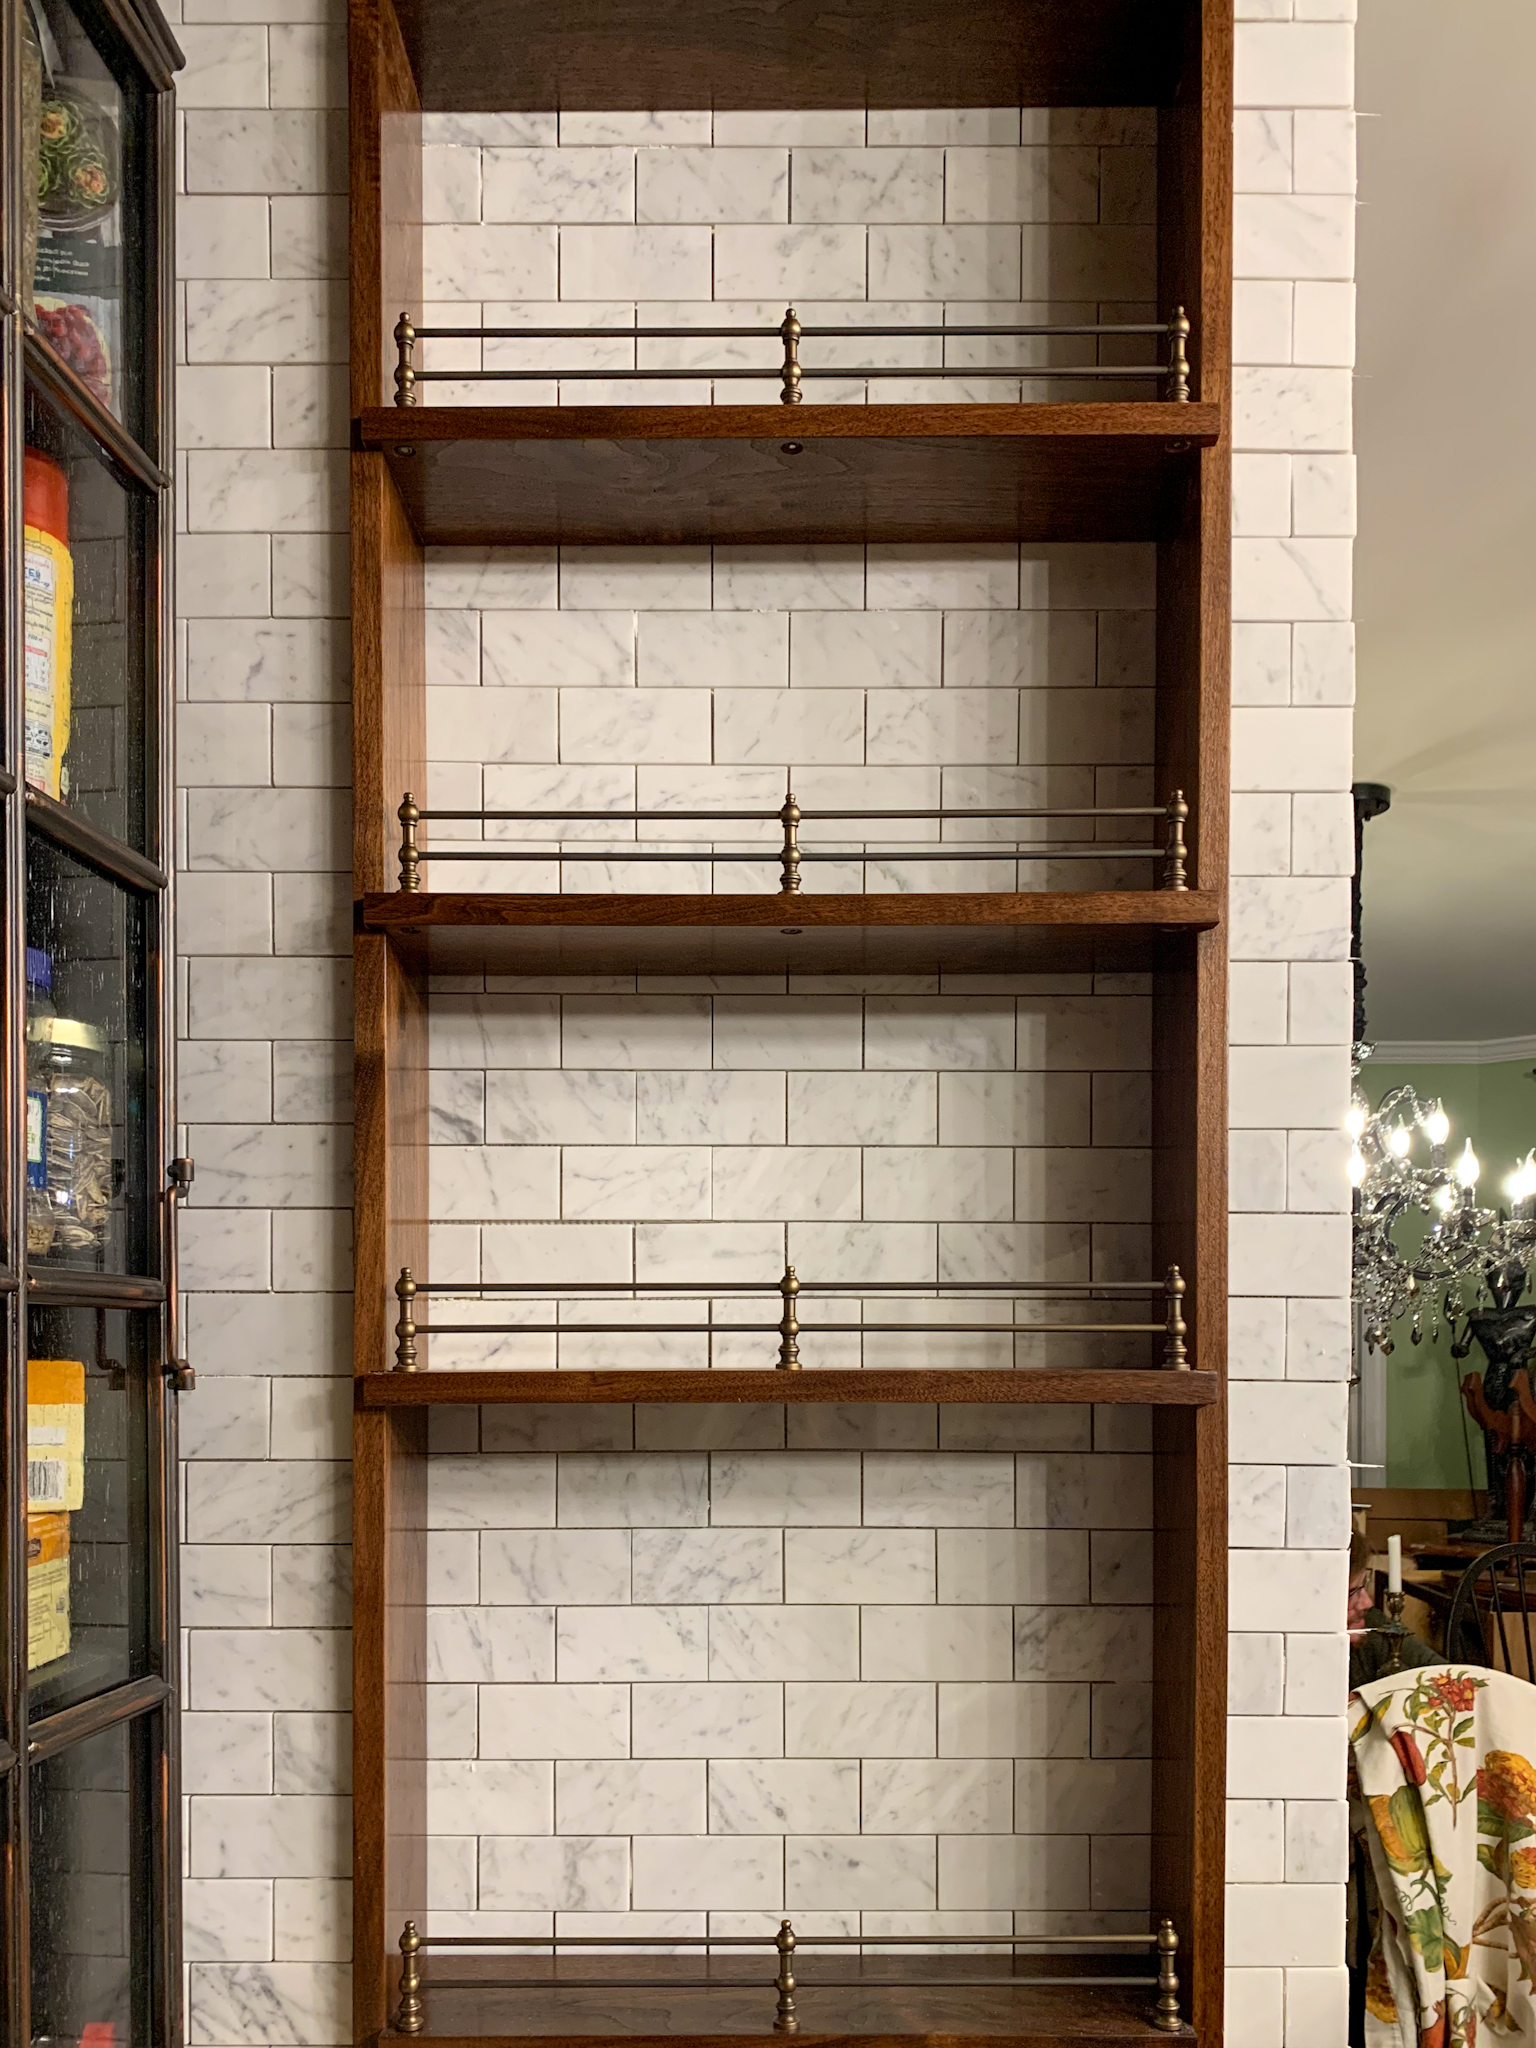
Step 5: Install wooden shelf surround (if you’re using gallery rails, I highly recommend attaching them to the shelves prior to installation). I recommend leaving the shelves unattached until you have completed the grouting process (it’s much easier to grout without the shelves in).
The Oil and Spice Shelf Nook Inside Your Range Hood Surround You Didn’t Know You Needed But You Absolutely Have To Have
The Oil and Spice Shelf Nook Inside Your Range Hood Surround You Didn’t Know You Needed But You Absolutely Have To Have
The Oil and Spice Shelf Nook Inside Your Range Hood Surround You Didn’t Know You Needed But You Absolutely Need To Have
The Oil and Spice Shelf Nook Inside Your Range Hood Surround You Didn’t Know You Needed But You Absolutely Need To Have
Step 7: Grout and caulk (don’t skip the caulk, it prevents fluids from getting behind the shelves and warping them).
The Oil and Spice Shelf Nook Inside Your Range Hood Surround You Didn’t Know You Needed But You Absolutely Must Have: Carrara Marble backed walnut shelves with antique brass gallery rails in the kitchen
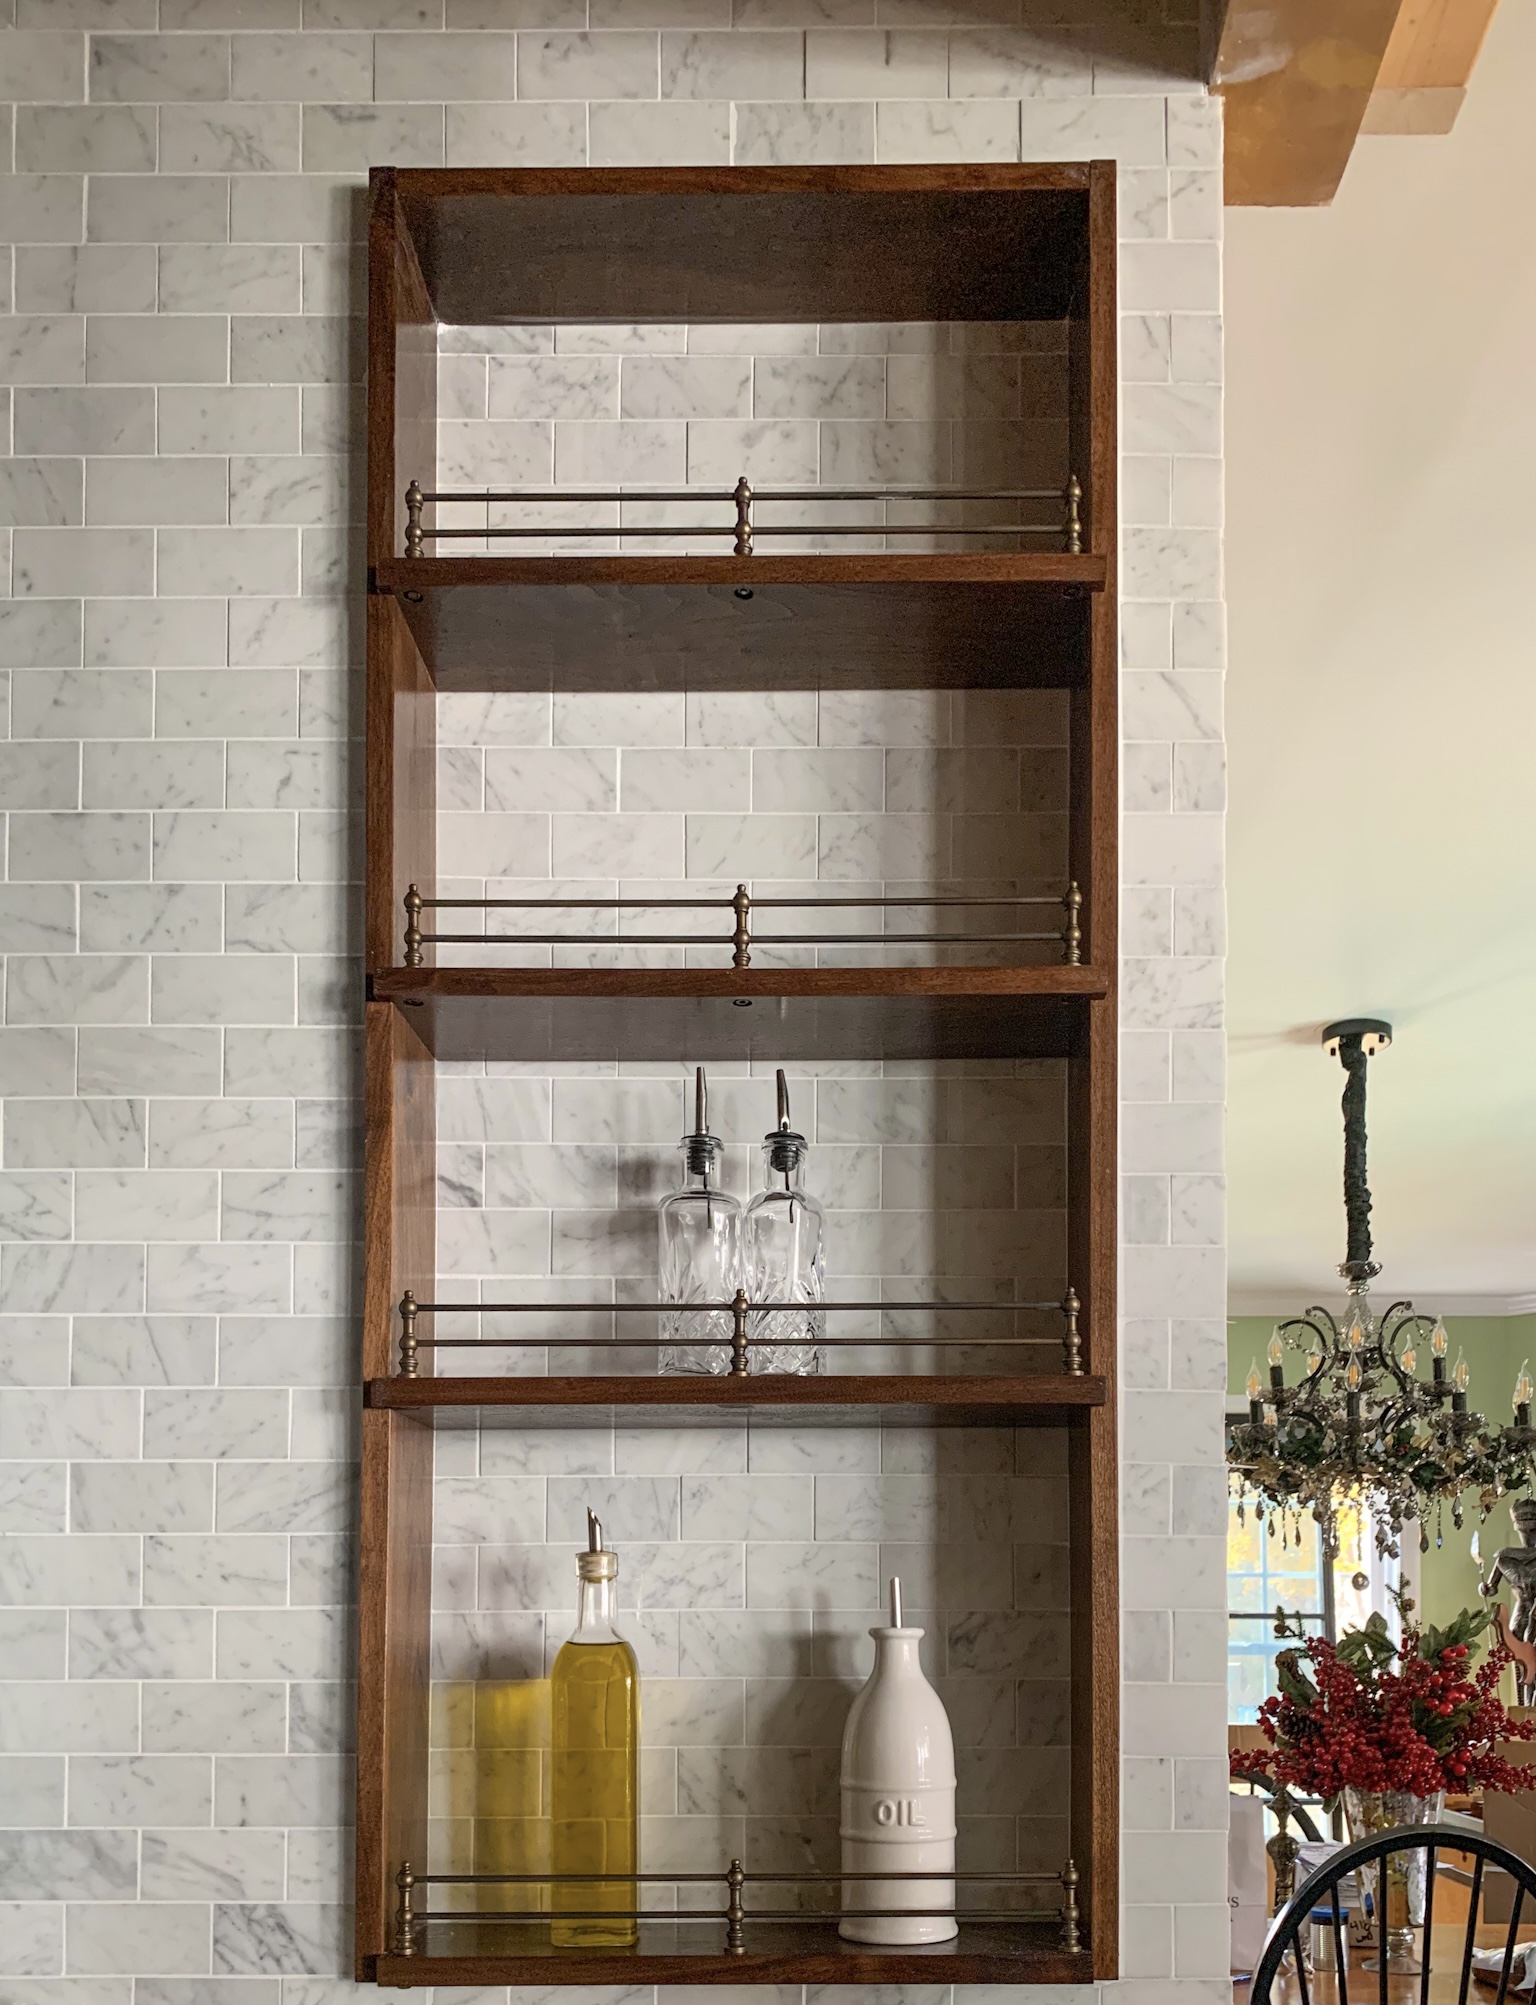
Step 8: Style: Like everything else in the kitchen, this shelf should be both beautiful and functional. Keep your favorite oils, vinegars, Worcestershire sauce, etc. within reach.
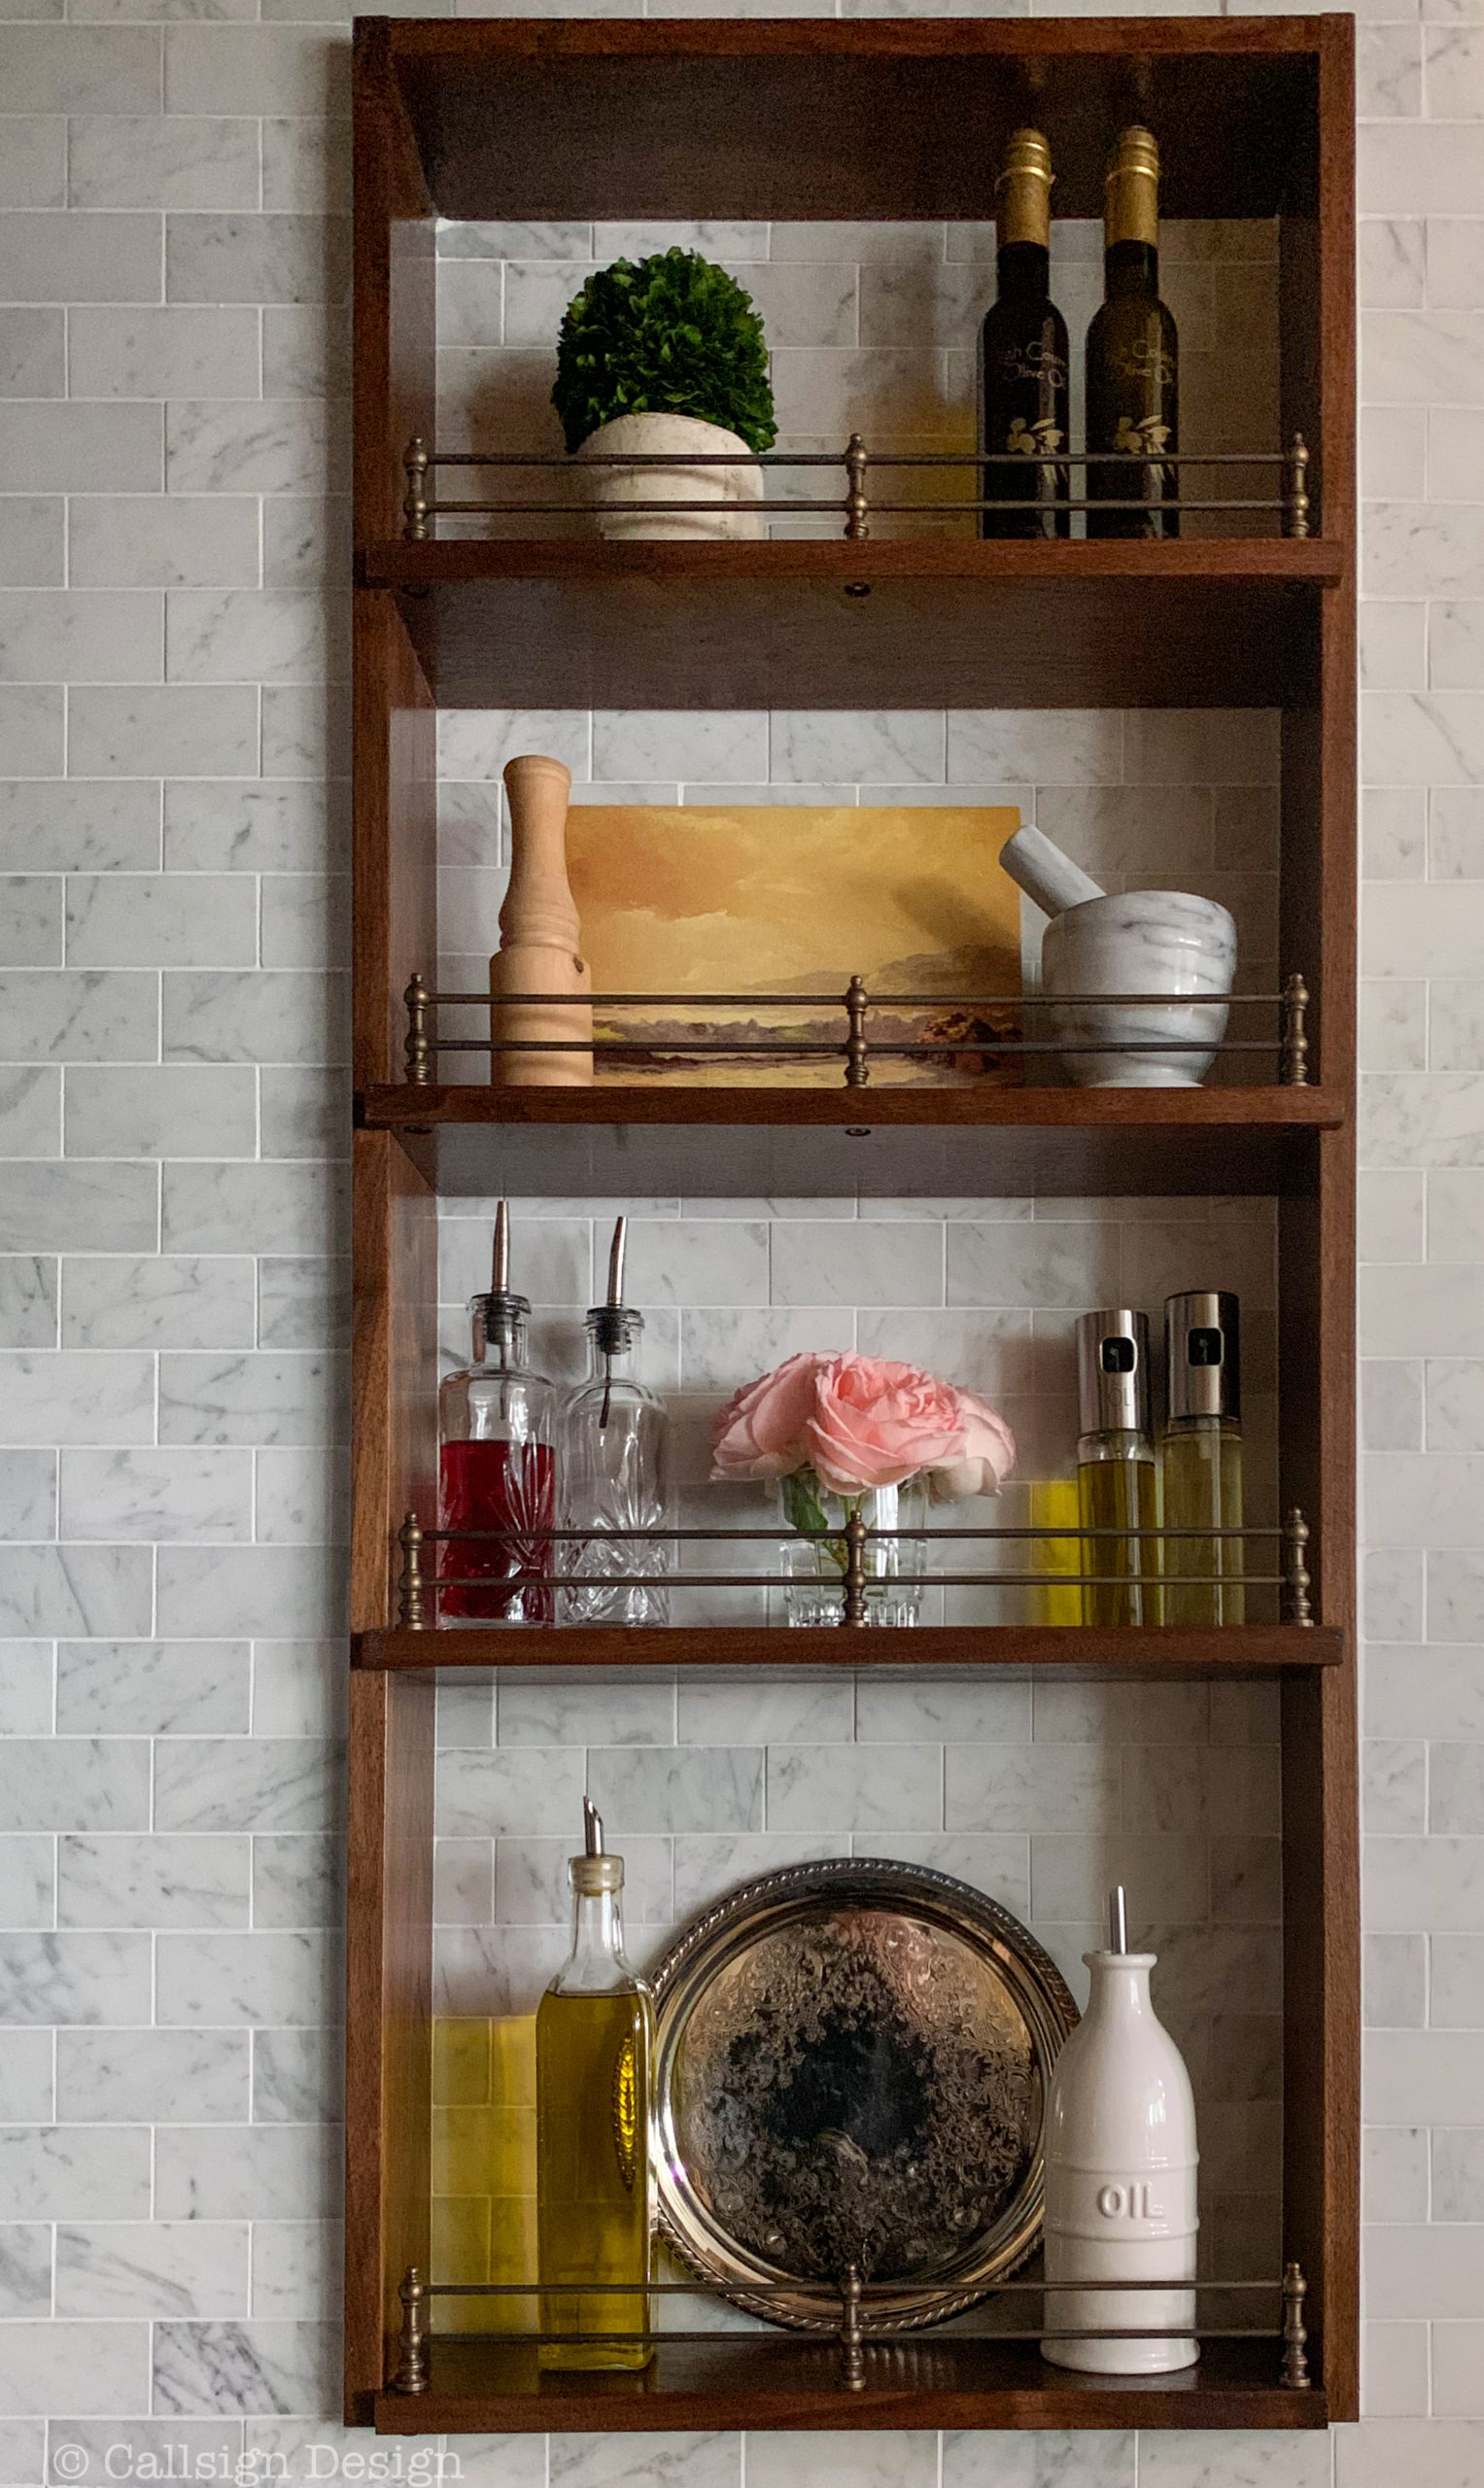
The Oil and Spice Shelf Nook Inside Your Range Hood Surround You Didn’t Know You Needed But You Absolutely Must Have: Styled shelfie all ready to go with a small preserved boxwood, oils from High Country Olive Oil, a Carrara marble mortar and pestle, a vintage landscape oil painting, oil carafes/dispensers, and a tiny votive of roses from our last bloom of the season
I don’t know if I mentioned this… but I LOVE my shelves!
Carrara marble subway tiles behind shelves: Stone Center Online: About $100
Supplies for installing tile and shelves (mortar, grout, nails, stain, and lacquer): About $100
Total: $650.13
If you’re planning your dream kitchen, I highly recommend these!
*Legal stuff:
I am honest about my experiences with different products and write because I enjoy it. I do however, have the opportunity to earn money for my writing, also.
Slavetodiy.com is a participant in the Amazon Services LLC Associates Program, LTK, and other affiliate programs: affiliate advertising programs designed to provide a means for sites to earn advertising fees by advertising and linking to amazon.com and other sites. These programs offer a small commission on products sold through their affiliate links. Each of your purchases via our affiliation links supports our cause at no additional cost to you.
If a blogger links to a product (with a special code for affiliates embedded in the link), and a reader places an item in their “shopping cart” through that link within 24 hours of clicking the link, the blogger gets a small percentage of the sale. These links are not “pay per click.” If you click on the product link and stay around and purchase something else, however, I will get a commission on that sale.
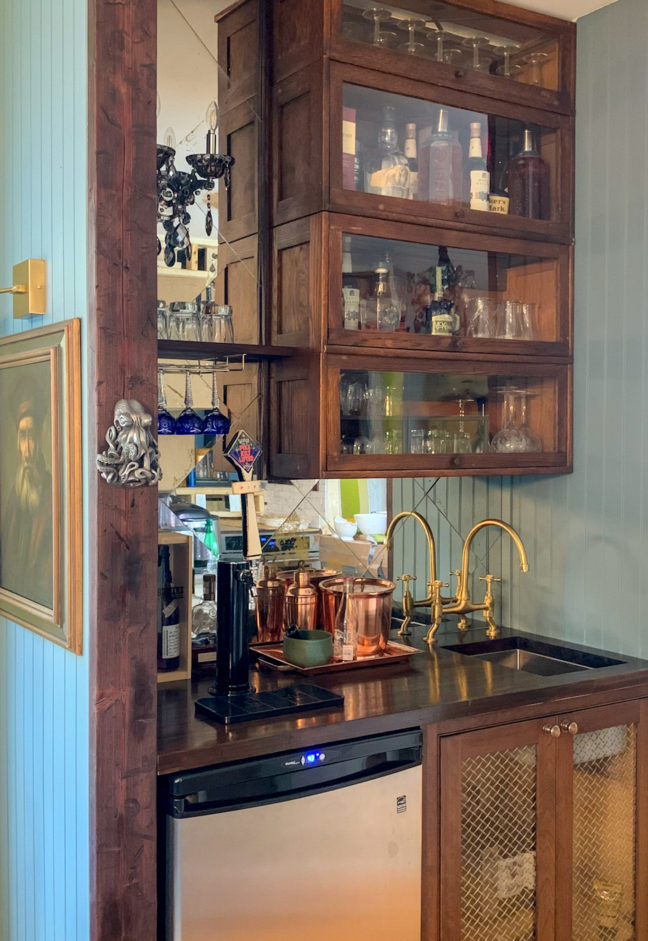
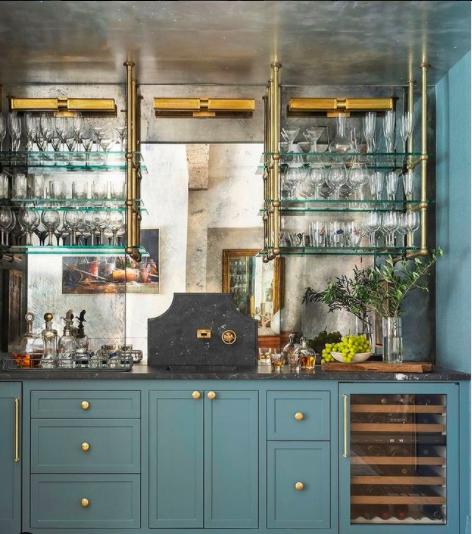
I’ve been dreaming of an antique mirrored backsplash since I first saw it on a simple home bar. The mirrored tiles are everything from one solid sheet, to tiles with beveled edges, to larger flat tiles. When I started researching where to buy the tiles for our own home bar backsplash (because of course I just HAD to have one) I was mortified. Those suckers are expensive. There are some sellers on ETSY selling these for $60 a square foot… which is well out of any budget I’m willing to spend on a backsplash. But look how beautiful they are!
*This post may contain affiliate links. Please see full disclosure at the end of the post.
Home bar by @chandosinteriors on Instagram
Home bar by @meredithmcbrearty and @eleanor_roper_interiors_style
So, what did we do? We DIYed it (of course). And it came out JUST as dreamy as those designer looks.
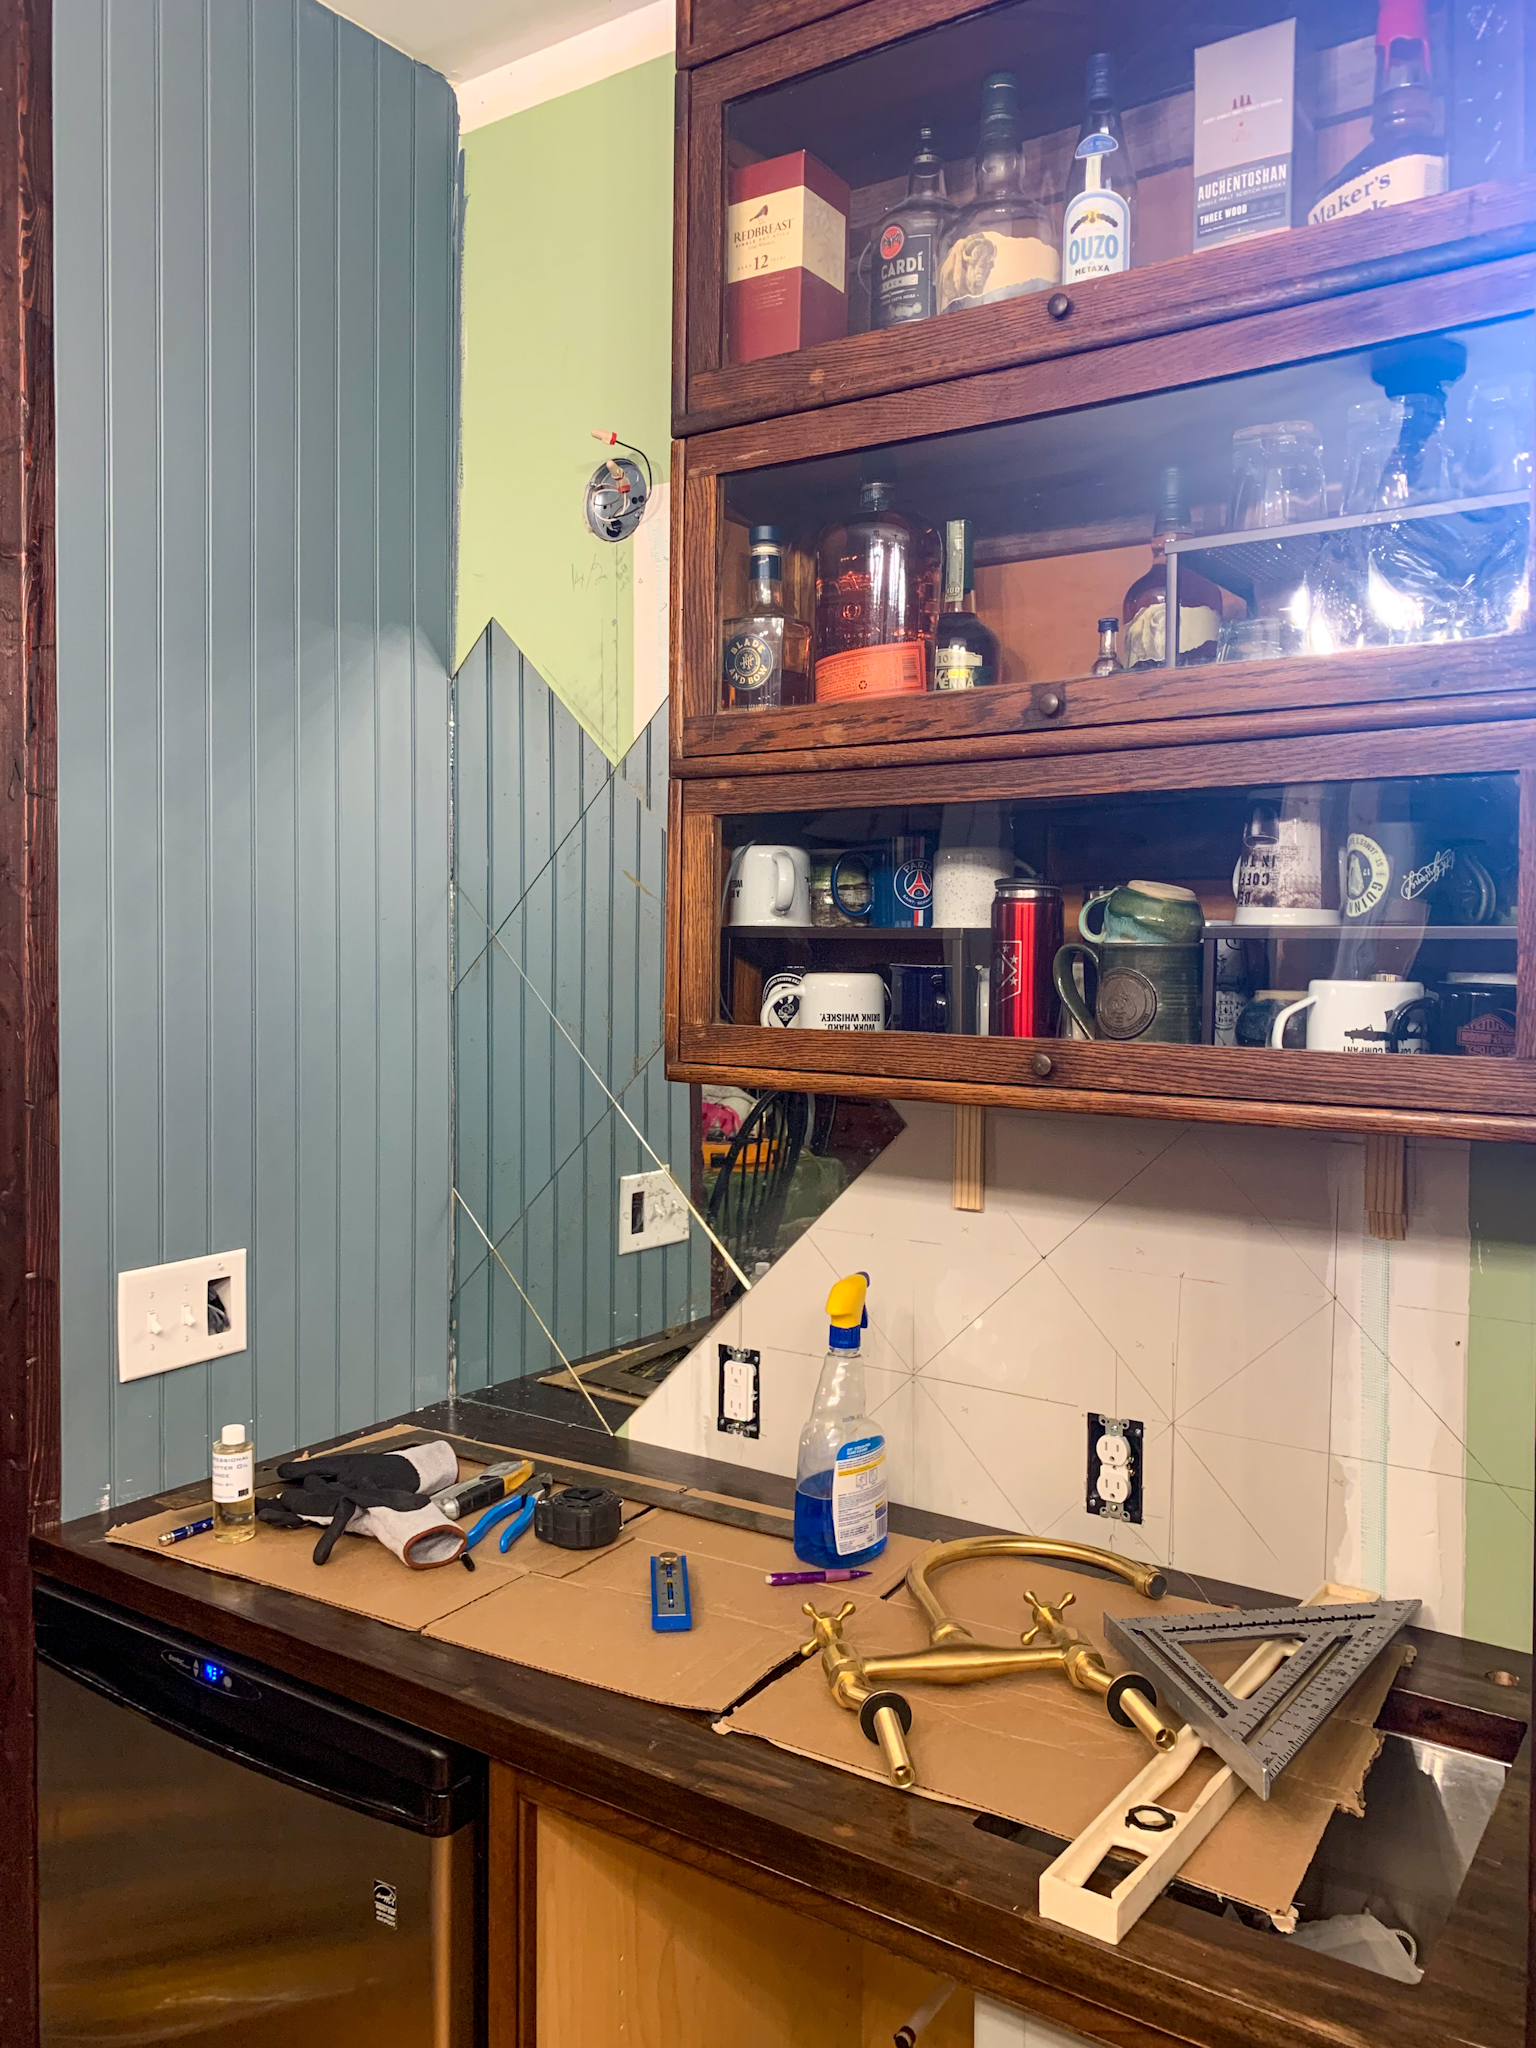
Before I start the tutorial, please know that this process is quite labor intensive and makes a huge mess. I recommend doing this with a buddy, a spouse, or a helper (my body was screaming at me for two days after the paint-stripping process because I had underestimated the amount of up and down and crouching). But, what do you get out of it? An awesome, one of a kind backsplash!
I did quite a bit of research and looked at a LOT of pictures before I got out the plastic dropcloth and laid out the mirrors. I encourage you to look at the finished photos of ours and adjust your plan accordingly. I wanted a lighter antiqued look with a glow… but if you want more antiquing, or a different color underneath, it will still look great!
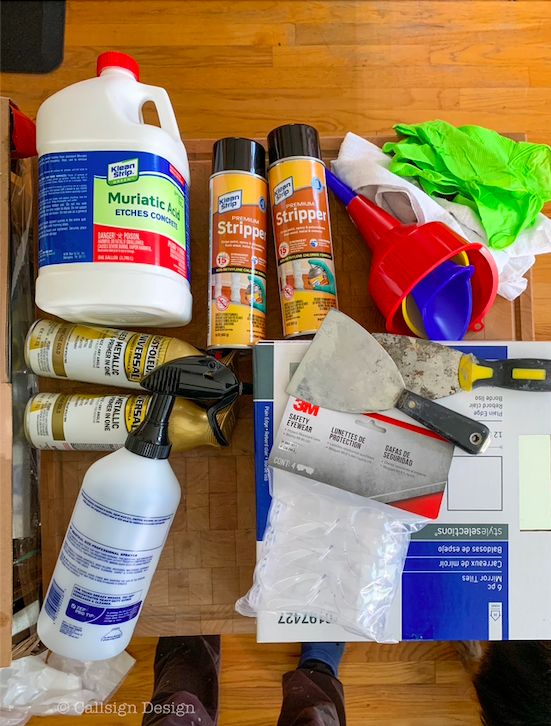
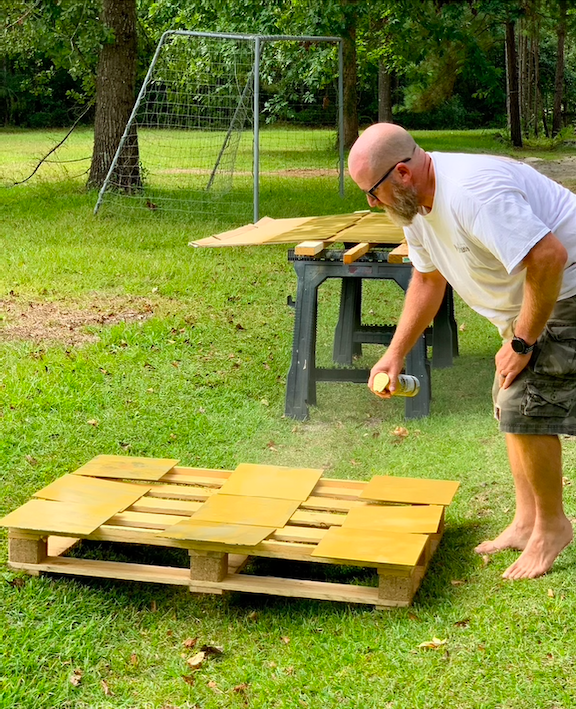
So, this is what our materials looked like before we began, but I can tell you up front that we made at least one MAJOR adjustment. Unless you’re doing a VERY small project, the stripper shown is not going to do the trick. I ended up using a bucket of stripper we had previously used on an antique mirror someone had painted, and slopping that on really did the trick (a full materials list is at the end of the post).
What you’ll need: two plastic drop cloths, muriatic acid, stripper, disposable gloves, eye protection, funnels, gold or gray spray paint, a spray bottle, 12×12″ mirror panels (you can cut these down later if you’d like smaller tiles), and a good putty or mudding knife. I apologize for some of the progress photos being missing: once I got into the middle of the stripping process I couldn’t stop and I had goop and acid on my gloves.
Supplies you’ll need to antique mirrors
1 Put down your plastic sheet somewhere you can work and where you can get messy (we did this project on a deck we’ll be tearing out later).
2. Lay out your tiles so you can walk between them.
3. Put on your gloves and eye protection and slather the back of each tile (there is a thick layer of paint) with a good coat of stripper. To clarify, every step of this process, the “front” or glass face is down… you are only manipulating the backside finish.
Pro tip: Mirrored tiles are made up of three layers: Glass, silver reflective material, and a thick painted backing that protects the silver. This step removes the painted backing. It will lift EASILY when it is ready: don’t scrape at the mirrors or it will scratch through all of the layers and be visible later (ask me how I know).
How To Get That Antique Mirror Backsplash For a Fraction of the Price and Install it Like a Pro
4. When the backing is lifted (set it aside next to the tiles on the plastic drop cloth), spray off the back of each tile with water.
5. Move the tiles to a safe place, face down, where the front glass will not get scratched (we moved them to a smooth concrete slab and had individual paper towels down to protect the glass surface of each tile.
6. Put some dawn dishsoap on the back of each tile, wipe it down thoroughly (keep the hose running next to you here) rinse and dry it (it helps to have two people working on this step, one cleaning one drying). What you should have left at this point is just the silver backing. If there is leftover paint, that’s okay, it’s not going to show through, that area just will not be antiqued.
7. The next step it is VERY CRITICAL you are wearing protective eyewear, gloves, and clothing as you’ll be dealing with muriatic acid. Carefully use the funnel to pour muriatic acid into the spray bottle (I would use a NEW spray bottle to ensure you’re not mixing any other chemicals with the acid).
8. Gather up your used drop cloth (that should be very wet and filled with used goop) and put a new plastic dropcloth down so you don’t have any chemical reactions with the acid step. Lay your mirrored tiles glass side down again, spaced out.
9. This is sort of the fun part: now you’re antiquing! If you want heavy pieces of the silver gone you can spray it on more liberally. Mist the acid around the edges of the panels for a natural antiqued look, spraying some tiles more heavily and some less. Then you just let the acid do it’s work. Keep some clean rags on hand to blot excess acid in case you spray too much. You’ll be able to see when the acid is finished doing it’s work: you’ll be able to see through the clear glass to what’s beneath.
10. Get your hose out and spray off the panels to clear the acid.
11. Move the panels back to your washing and drying area and repeat the process of washing and drying (don’t forget to protect the face of the glass!). Your panels are now ready for paint!
How To Get That Antique Mirror Backsplash For a Fraction of the Price and Install it Like a Pro
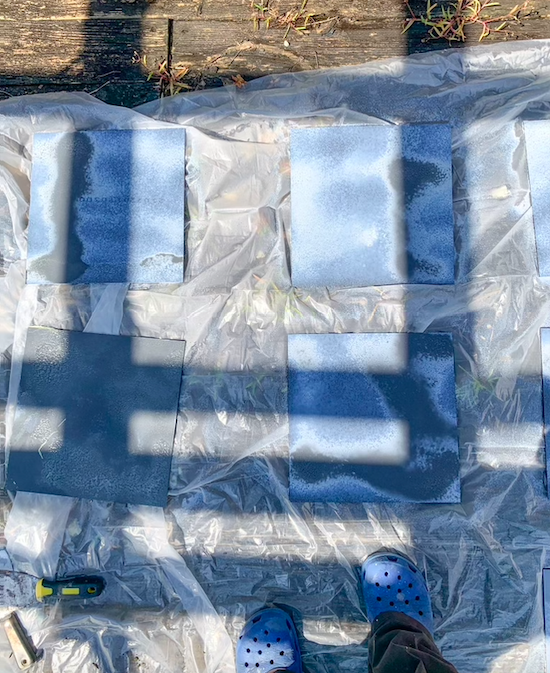
12. We chose an antiqued gold spray paint instead of gray to give our panels a lighter, gilded feel, but gray works also if you’re into a moodier look.
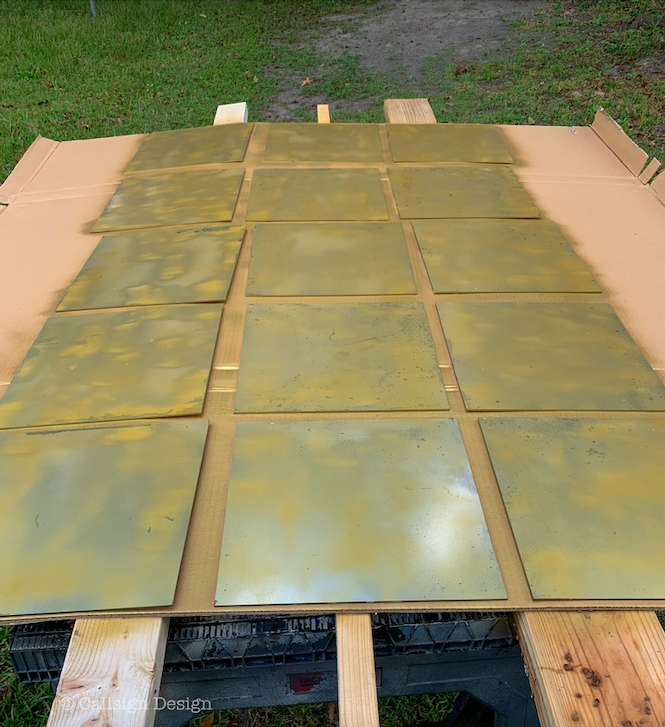
13. Lay out the panels in a place where you’ll have plenty of time to let them dry, glass side down. Rainman did two good layers of gold spraypaint with the panels laid out on cardboard, allowing the layers to dry inbetween.
14. When they are completely dry, you can store them stacked with cardboard between the panels to prevent scratching.
How To Get That Antique Mirror Backsplash For a Fraction of the Price and Install it Like a Pro
In the photo above, you can see the dark spots through the first layer of paint: those are the spots the acid etched into the panels, and where you will see through to the paint.
Now to the really fun part: cutting glass/mirrors isn’t difficult, but I recommend planning ahead for getting around outlets, light fixtures, or plumbing fixtures. There are one million tutorials on Youtube on how to cut glass or mirrors… so I recommend you look those up (the glass cutting tools I linked below are all that we needed to do cuts).
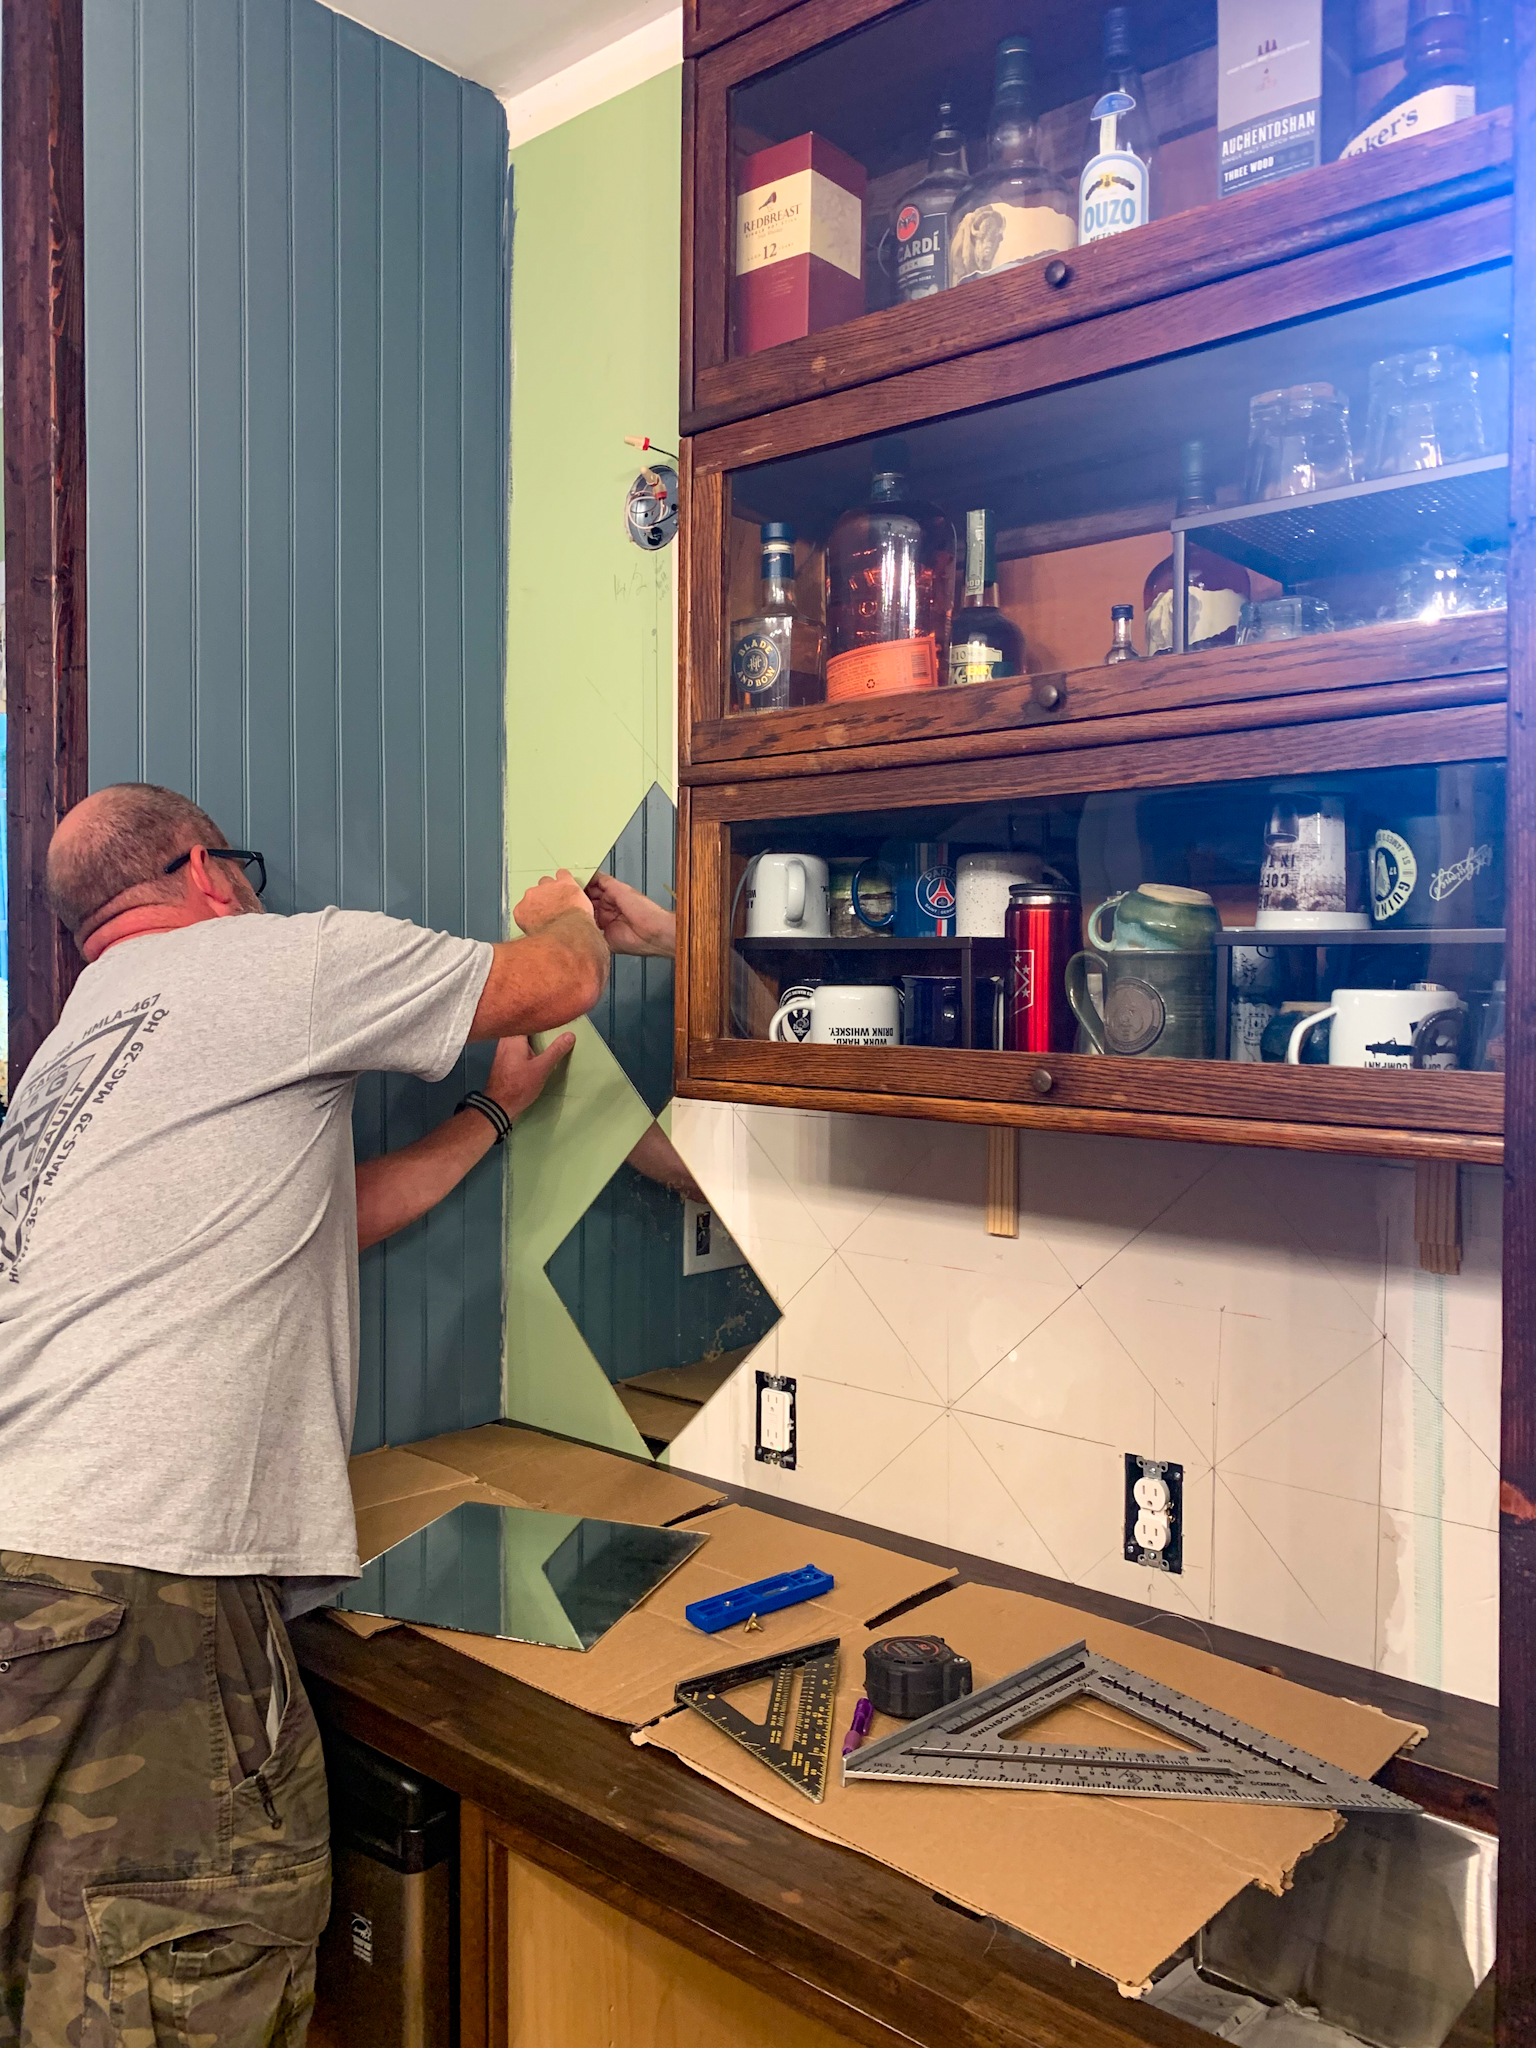
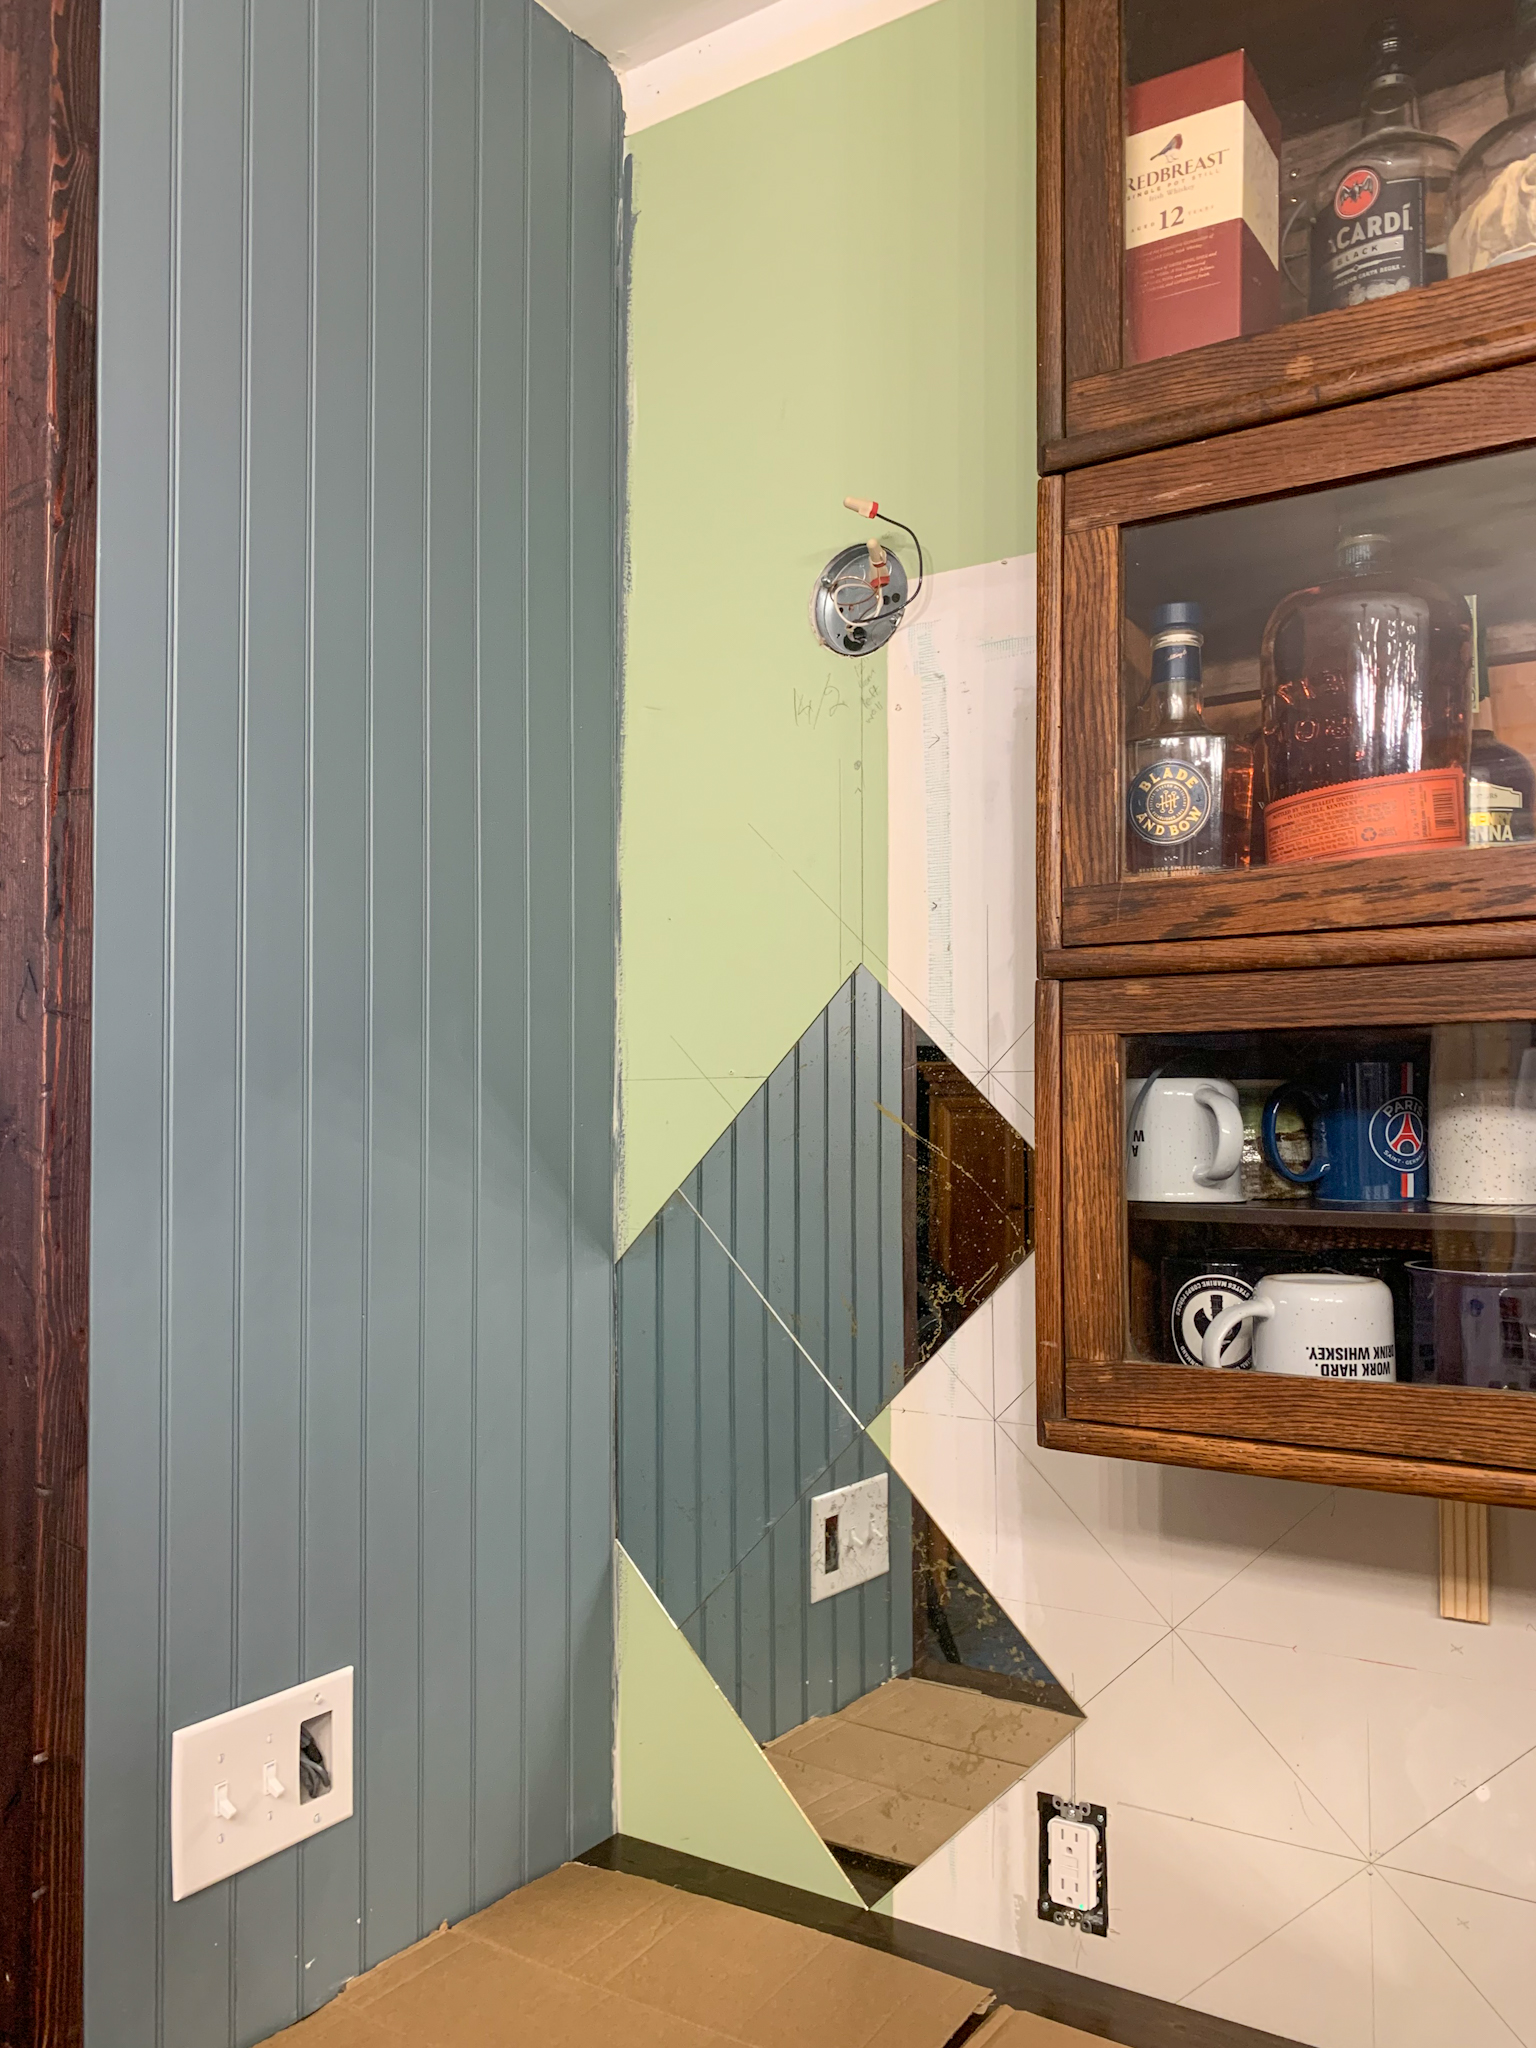
15. I recommend drawing out the tiles on the wall to make sure your cuts will be do-able. I also recommend doing test cuts on scrap before you start cutting your antiqued tiles (these tiles are only $3.50 apiece so don’t forget to grab some extra at the store). If you have cut outs to do for outlets or light fixtures, getting these on an edge or a corner is CRUCIAL. Otherwise, you will end up with cuts that show (we only had a couple and it still looks great, but if we did it again I would plan around that).
Pro tip: Make sure your wall is flat. If you have bumps, imperfections, or mounds the tiles will not lie flat.
16. Put mirror mastic on the back of the mirror as directed. If you start at the bottom, the mirrors hold each other up until the mastic dries.
How To Get That Antique Mirror Backsplash For a Fraction of the Price and Install it Like a Pro
How To Get That Antique Mirror Backsplash For a Fraction of the Price and Install it Like a Pro
How To Get That Antique Mirror Backsplash For a Fraction of the Price and Install it Like a Pro
How To Get That Antique Mirror Backsplash For a Fraction of the Price and Install it Like a Pro
How To Get That Antique Mirror Backsplash For a Fraction of the Price and Install it Like a Pro
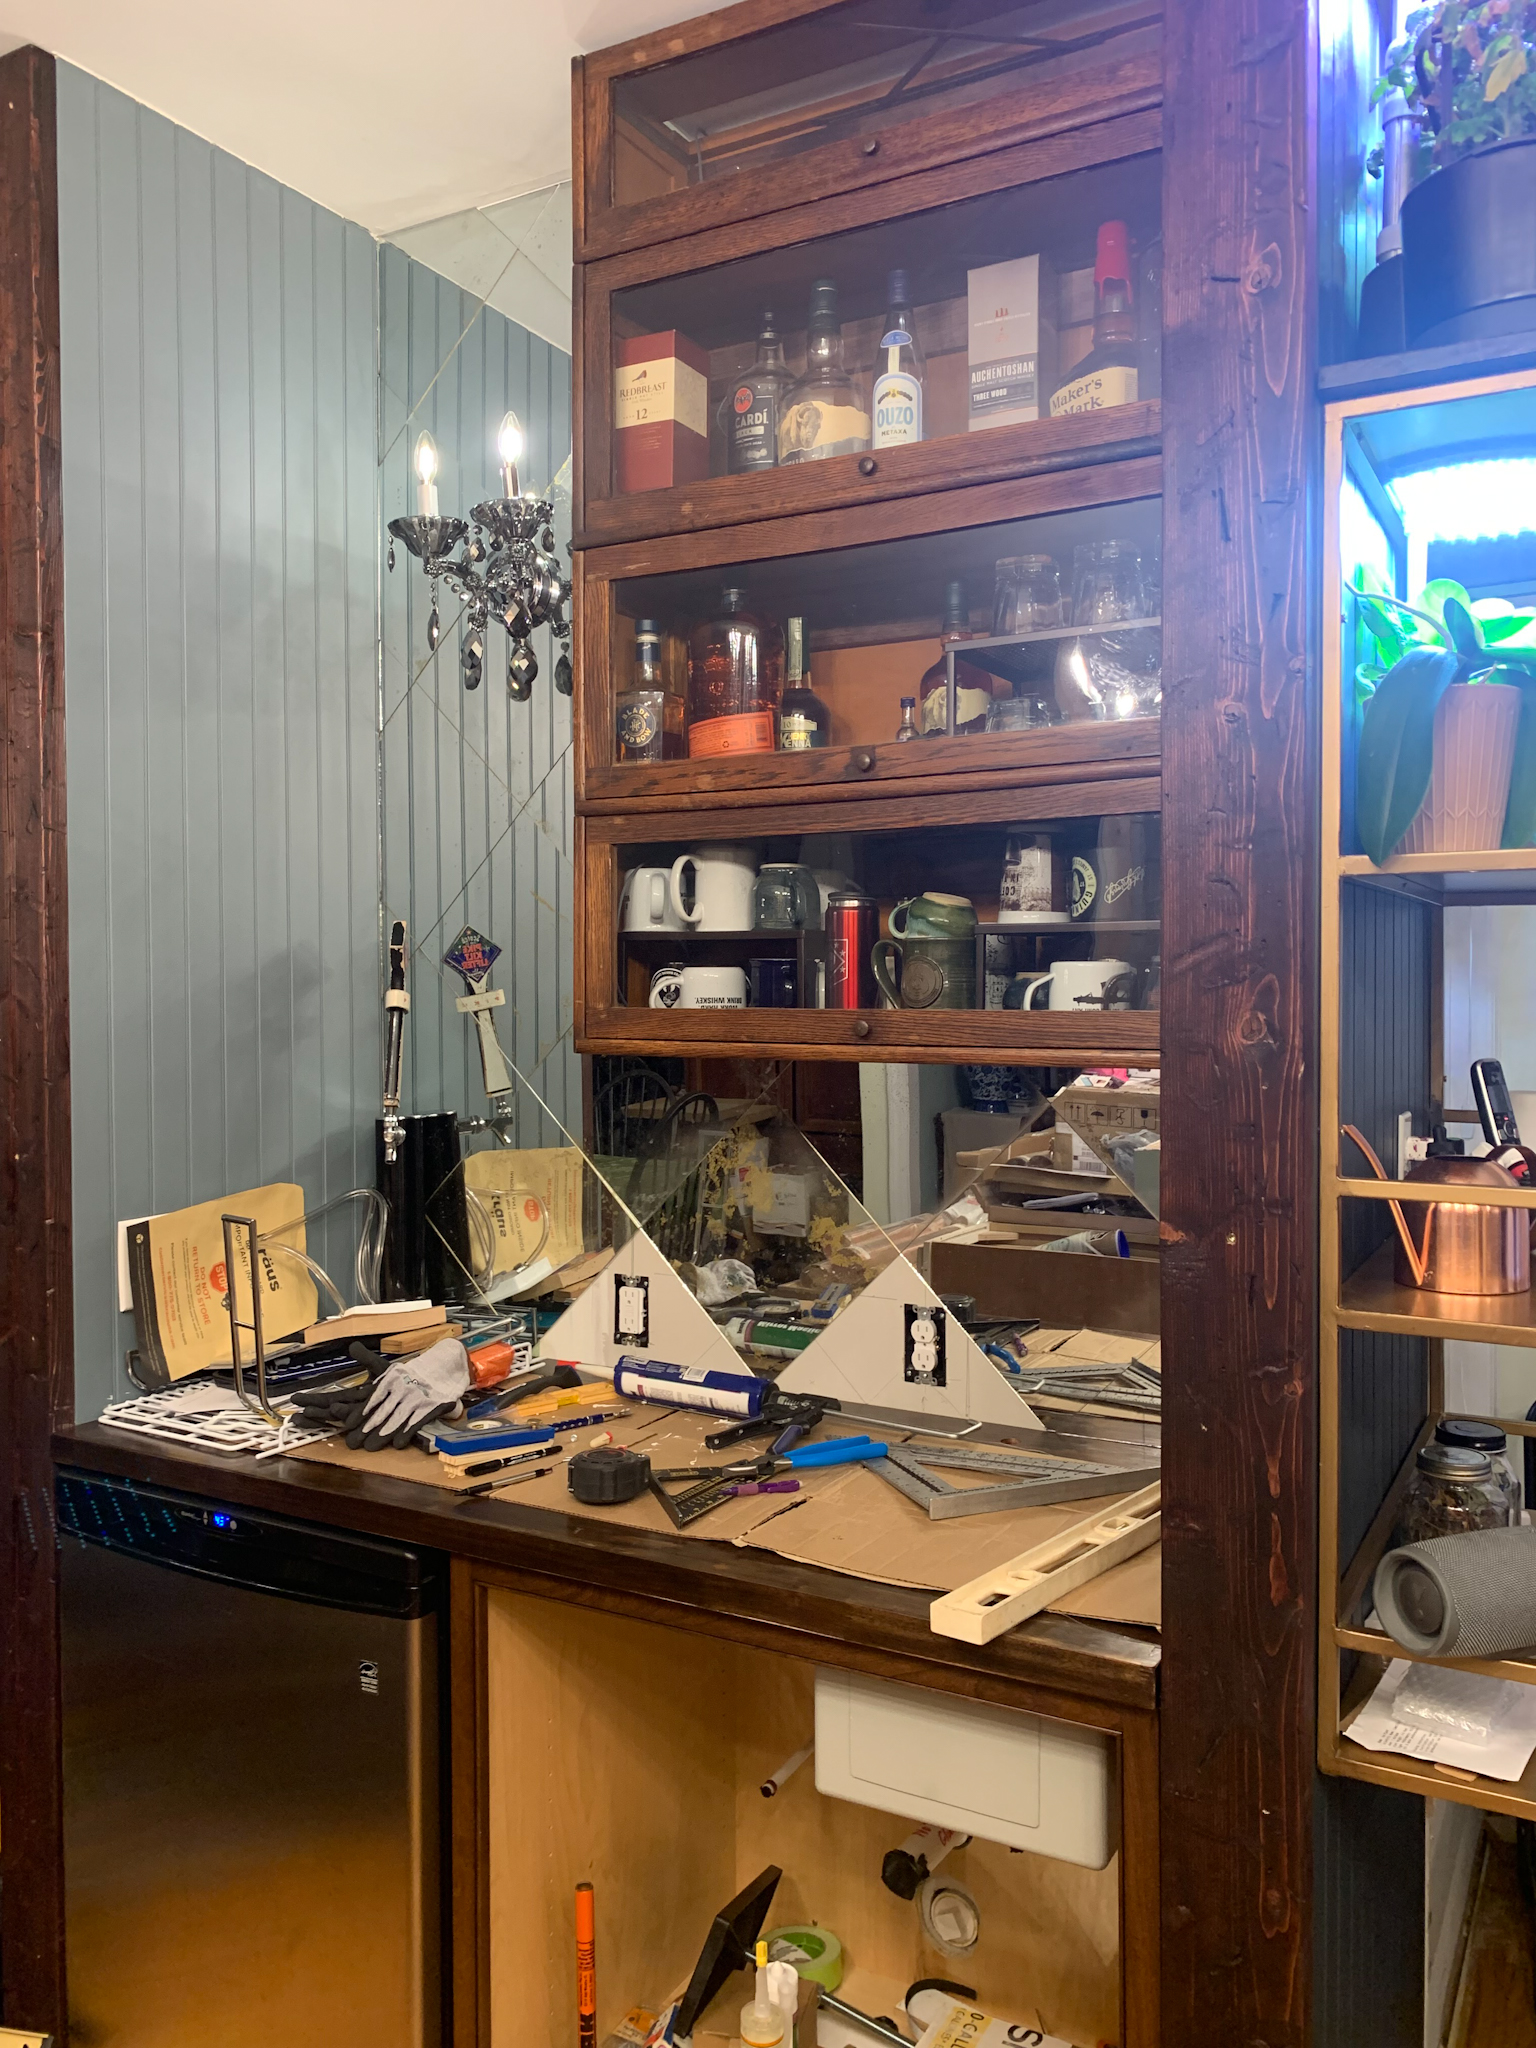
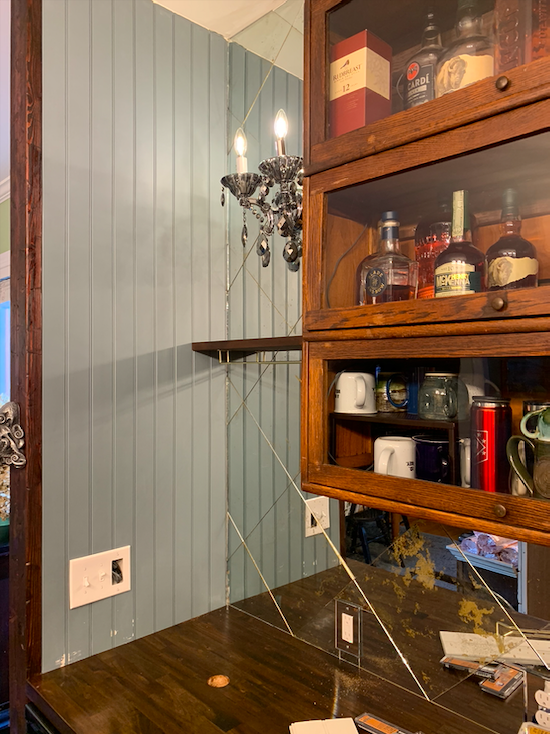
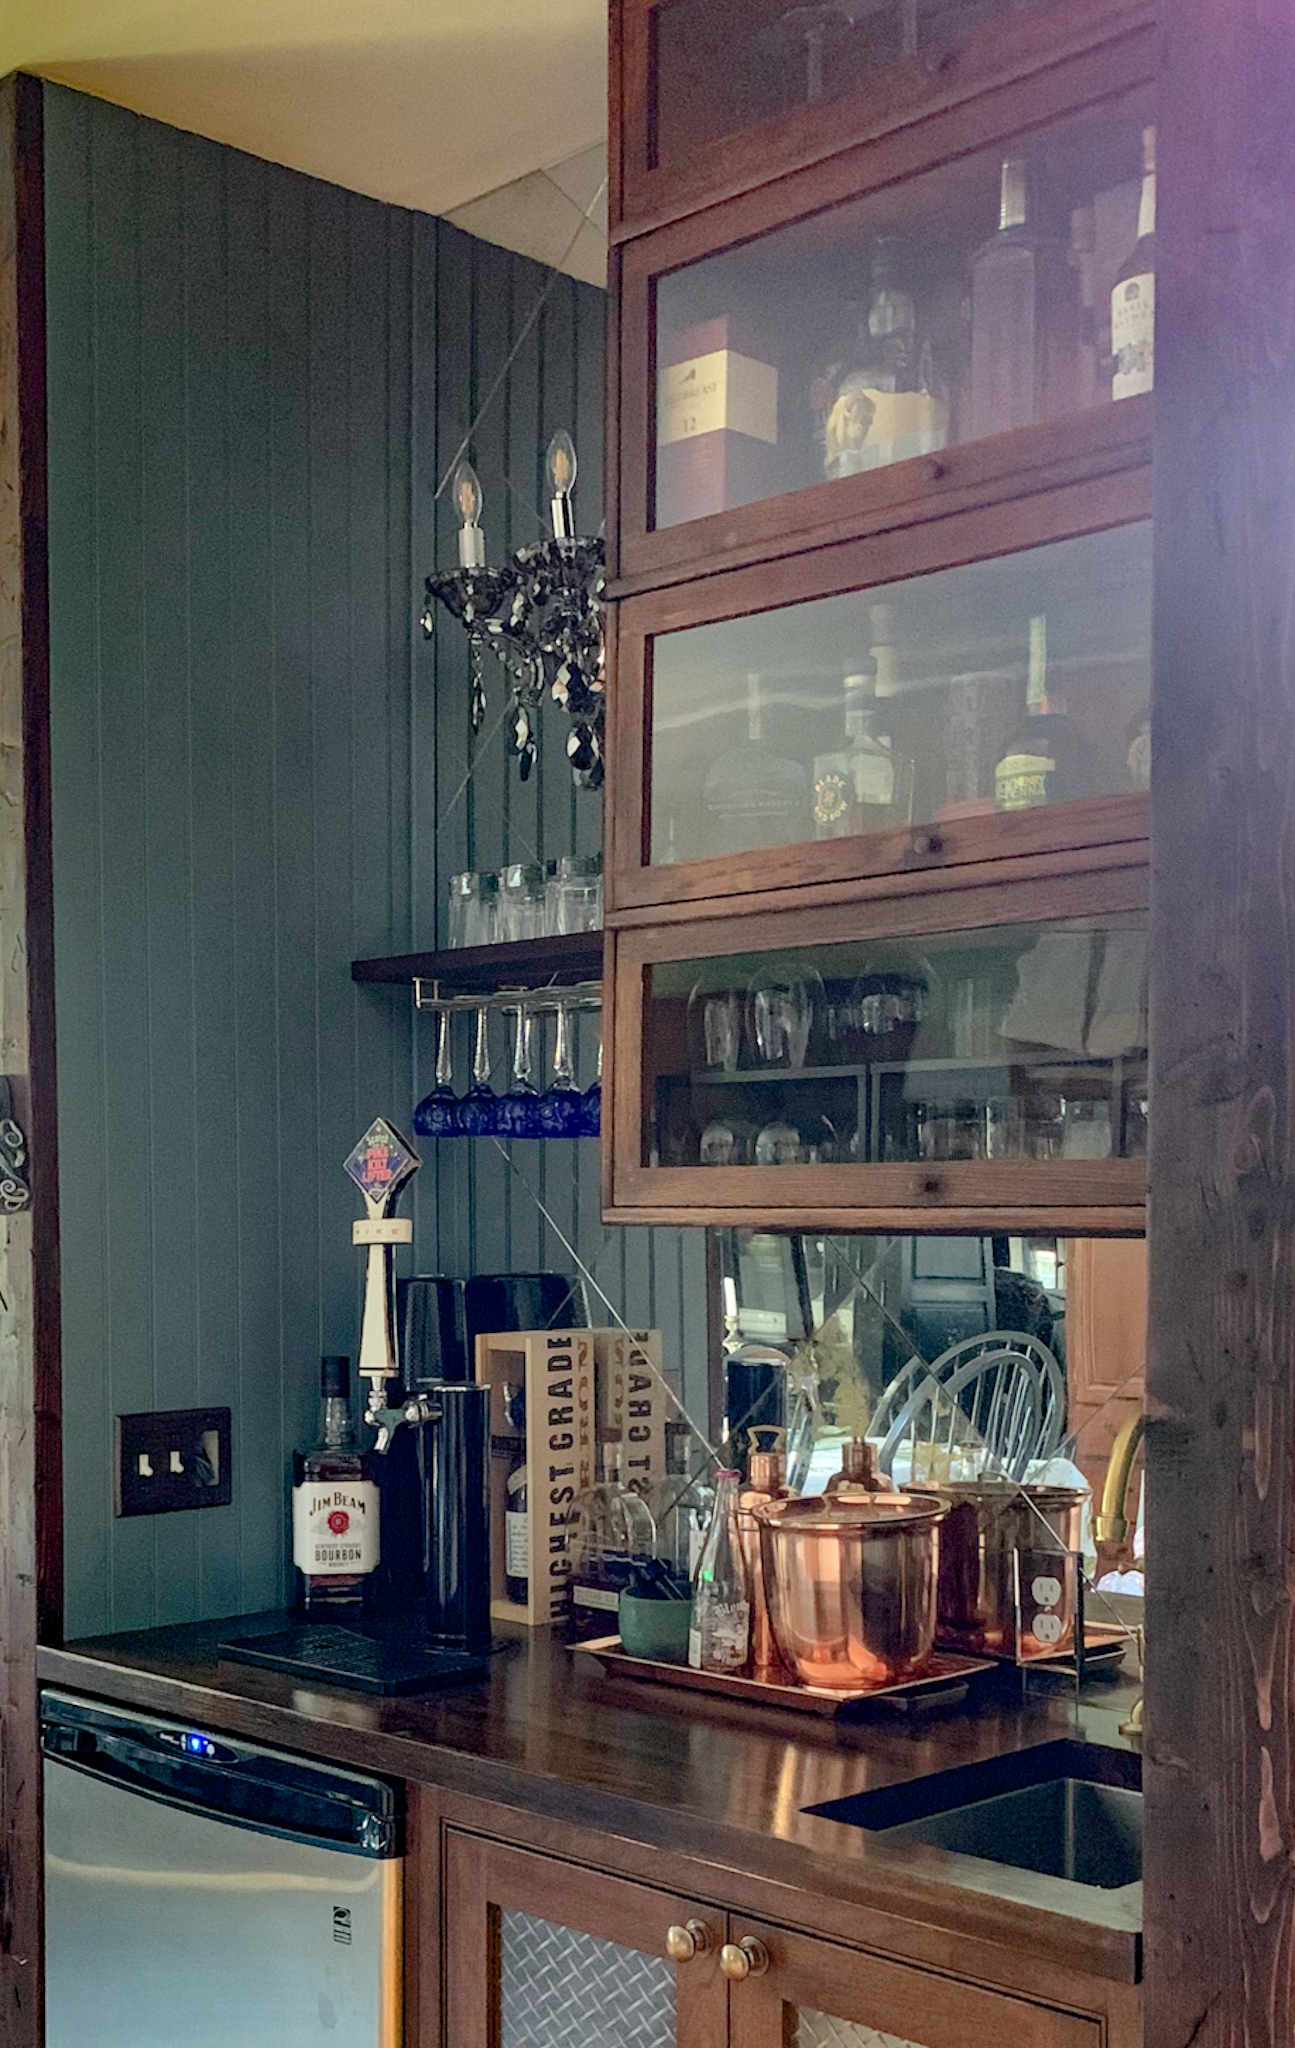
Want to see the finished product??? We’re pretty proud of how this bar came out, and the antique mirrored backsplash is a big part of it. You’ll have to forgive the reflection in the mirror showing our unfinished kitchen… but, you get the idea! Cheers!
How To Get That Antique Mirror Backsplash For a Fraction of the Price and Install it Like a Pro
How To Get That Antique Mirror Backsplash For a Fraction of the Price and Install it Like a Pro
*Legal stuff:
I am honest about my experiences with different products and write because I enjoy it. I do however, have the opportunity to earn money for my writing, also.
Slavetodiy.com is a participant in the Amazon Services LLC Associates Program, LTK, and other affiliate programs: affiliate advertising programs designed to provide a means for sites to earn advertising fees by advertising and linking to amazon.com and other sites. These programs offer a small commission on products sold through their affiliate links. Each of your purchases via our affiliation links supports our cause at no additional cost to you.
If a blogger links to a product (with a special code for affiliates embedded in the link), and a reader places an item in their “shopping cart” through that link within 24 hours of clicking the link, the blogger gets a small percentage of the sale. These links are not “pay per click.” If you click on the product link and stay around and purchase something else, however, I will get a commission on that sale.
One of the biggest challenges living in a new, or newer, home is making the house feel like it’s been there forever: lived in, loved, cozy, warm. I know. I’ve been there. I am also CURRENTLY there… We’ve been trying to accomplish this task room by room here. It’s slow going (because Rainman has to go to work… which is super frustrating and also QUITE INCONVENIENT WHEN WE NEED TO BE RENOVATING OUR HOUSE) but we did finally get to our downstairs bathroom remodel.
The neighbor had the audacity to remark to my husband that he thought our downstairs bathroom was fine and that time would be better spent fishing. I haven’t egged his house yet, but I’m considering it. Do people still TP houses or is that frowned upon? Asking for a friend.
And the bathroom?
It. Is. Awesome.
*This post may contain affiliate links. Please see full disclosure at the end of the post.
As usual, the budget did not allow for me to hire a bathroom contractor (bathroom remodeling near me is SUPER EXPENSIVE- but, isn’t everything?). Apparently, every tradesman in my area has a ton of work and they can charge whatever they want to show up and work on your house (and that’s a BIG IF you can get them to show up).
Of course, it’s not like Rainman would hire out something he is “perfectly capable of doing himself” even if they can do it in under a decade, unlike us.
But… I feel like we got this amazing project done well under the average cost to remodel a bathroom because we did it ourselves (other than the plumber, who I begged Rainman to hire and ended up saving us probably about a week in work time) and I LOVE that we saved the money.
As most of you know: kitchen and bathroom renovations are the most expensive rooms in the house to remodel, but we managed to do this pretty reasonably, because I’ve been working on this for A WHILE. I’ve been sourcing pieces, researching,… cough cough… and buying stuff for this bathroom for about two years (and the guest room that was temporarily storing all of the construction stuff has finally breathed a sigh of relief and been emptied out again).
Long story short: how did we do?
This. Is. My. Favorite. Room. We’ve. Ever. Done.
Seriously. I am absolutely, 100% in LOVE… and have captured EXACTLY my design style. It doesn’t have a name.
It’s just me.
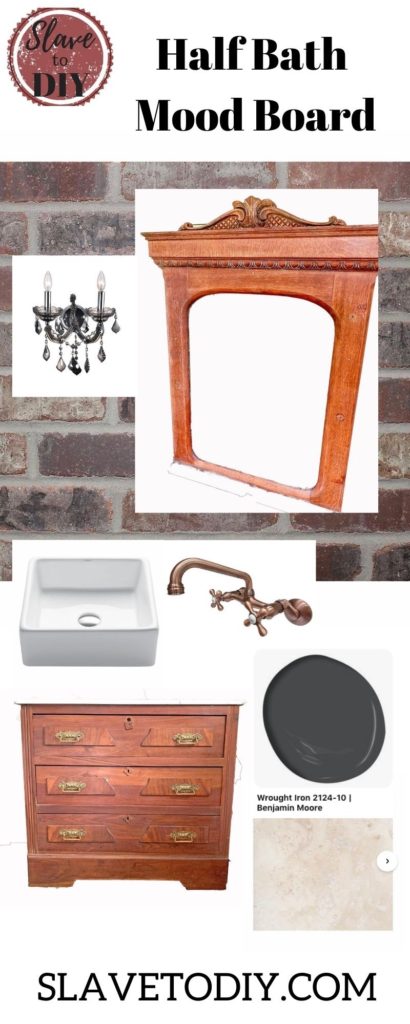
Without further ADIEU, here is the mood board we started with:
How To Create A Historic Bathroom In A New Home
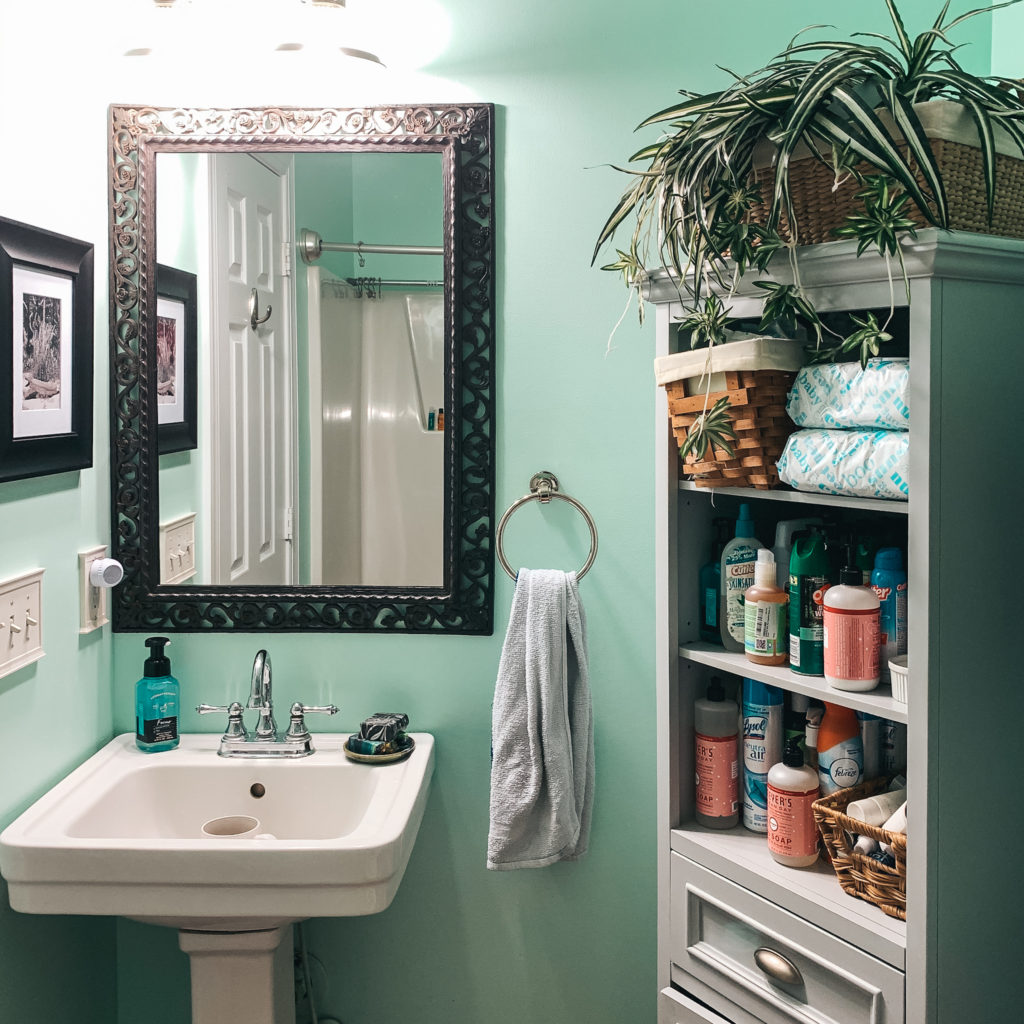
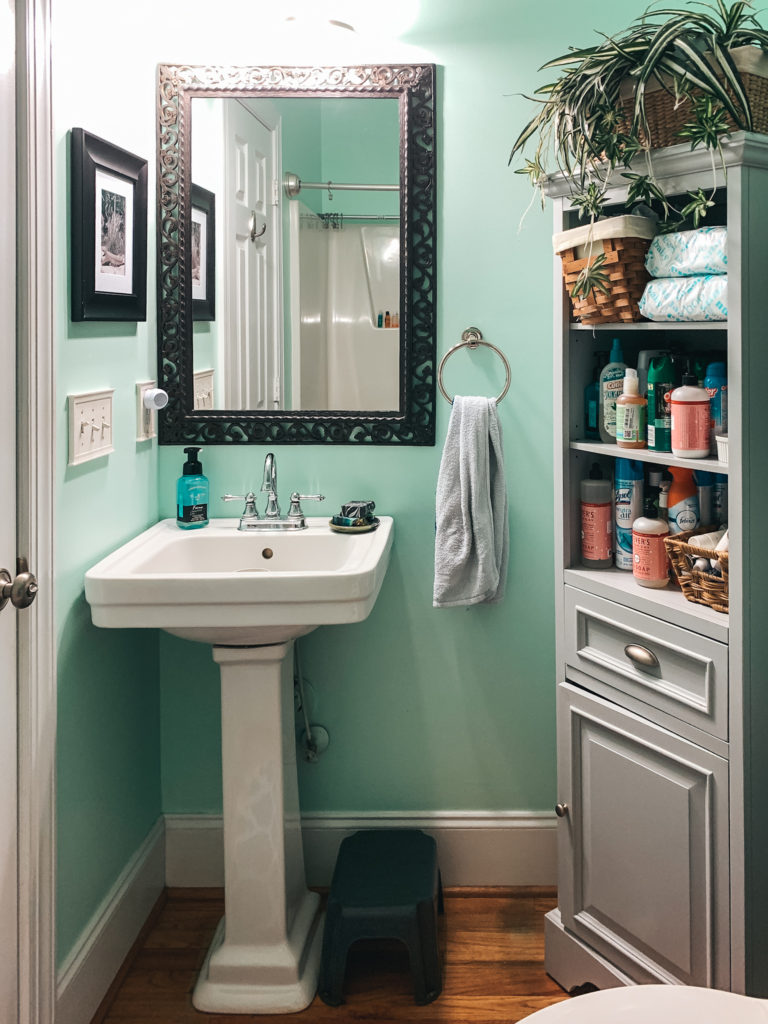
And the bathroom I was trying to take from boring and forgettable, to awesome…
I’m actually really lucky, because at no point did my darling Rainman suggest any silly things like, “this room is perfectly okay as is.” Or any other such nonsense. I believe he has truly embraced his fate in being married to someone who can’t just- for the LOVE OF GOD- leave well enough alone. I honestly don’t know why he puts up with me.
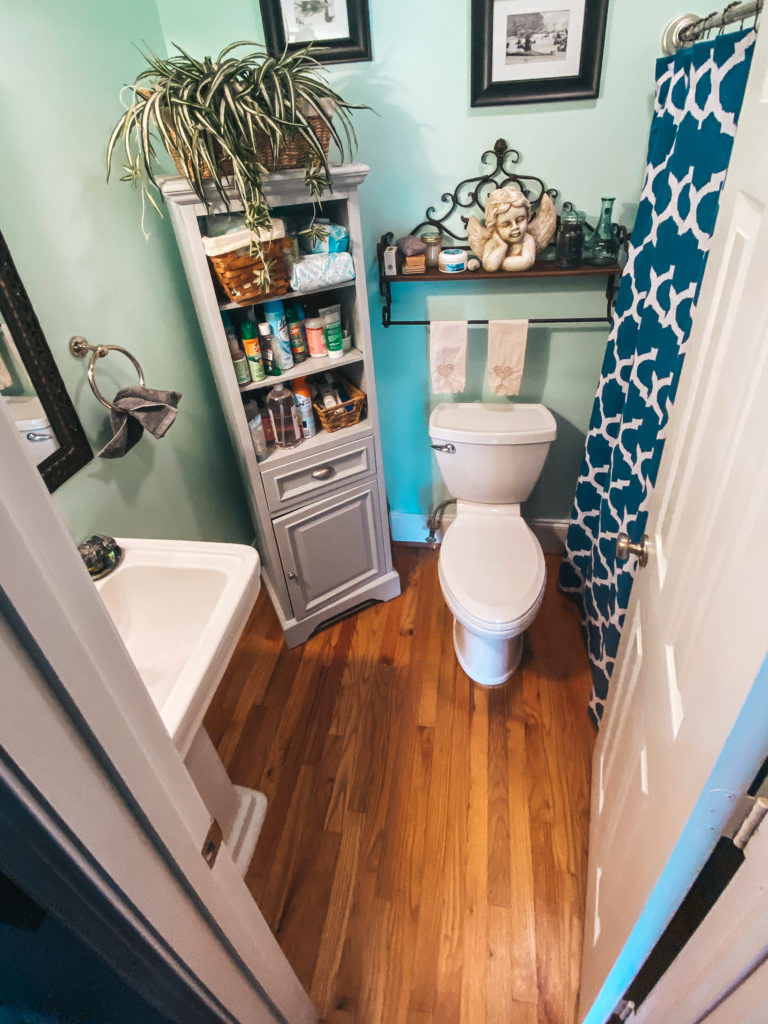
BEFORE (also see “Zzzzzzzzz” in the dictionary):
How To Create A Historic Bathroom In A New Home
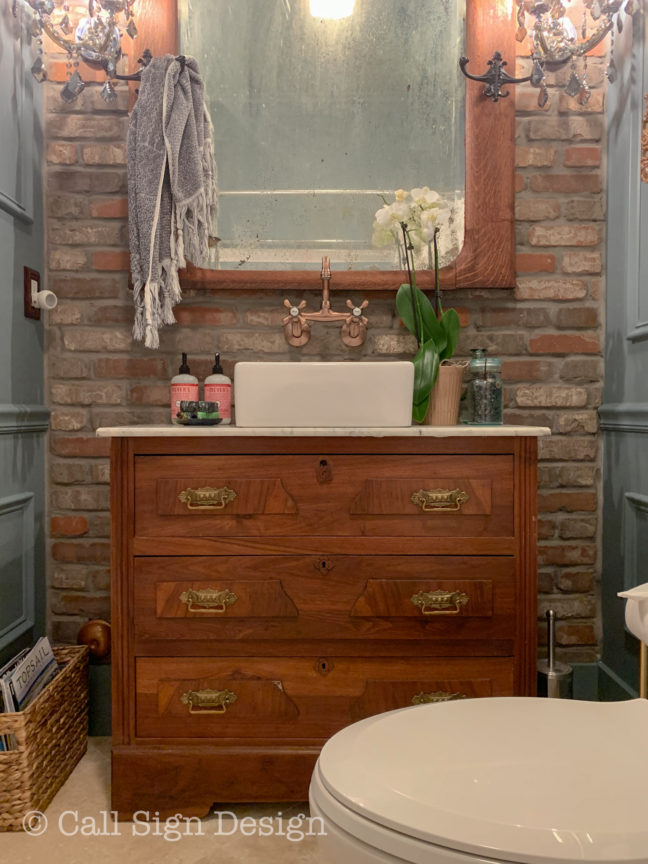
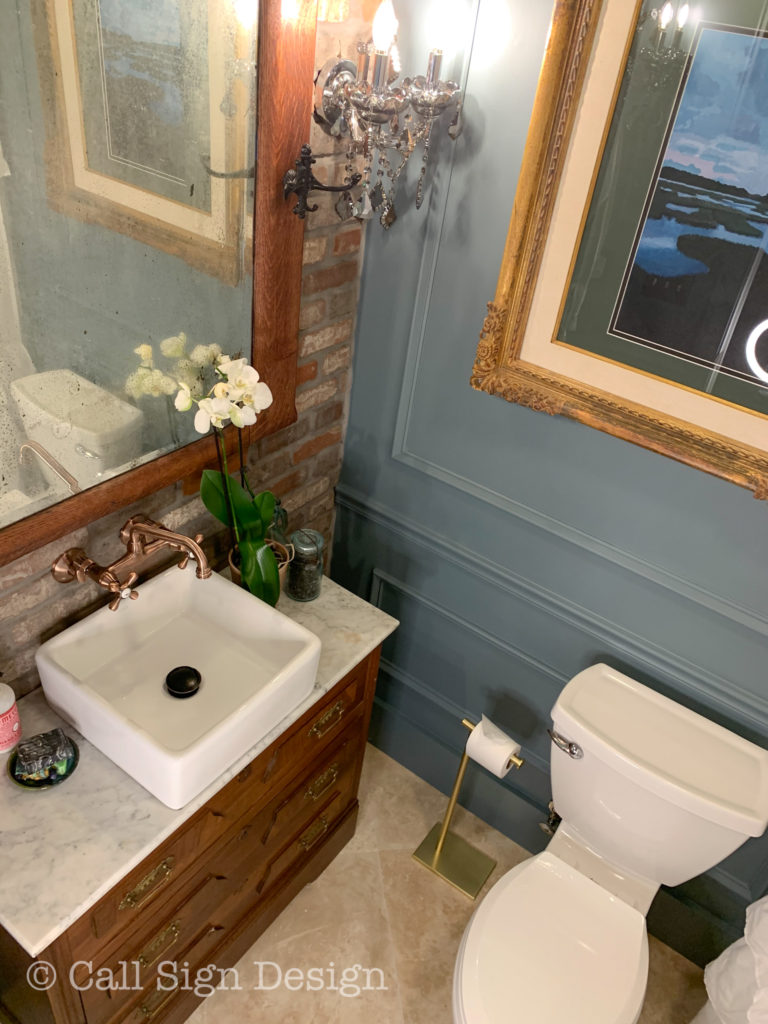
AFTER (and the clouds parted…):
How To Create A Historic Bathroom In A New Home
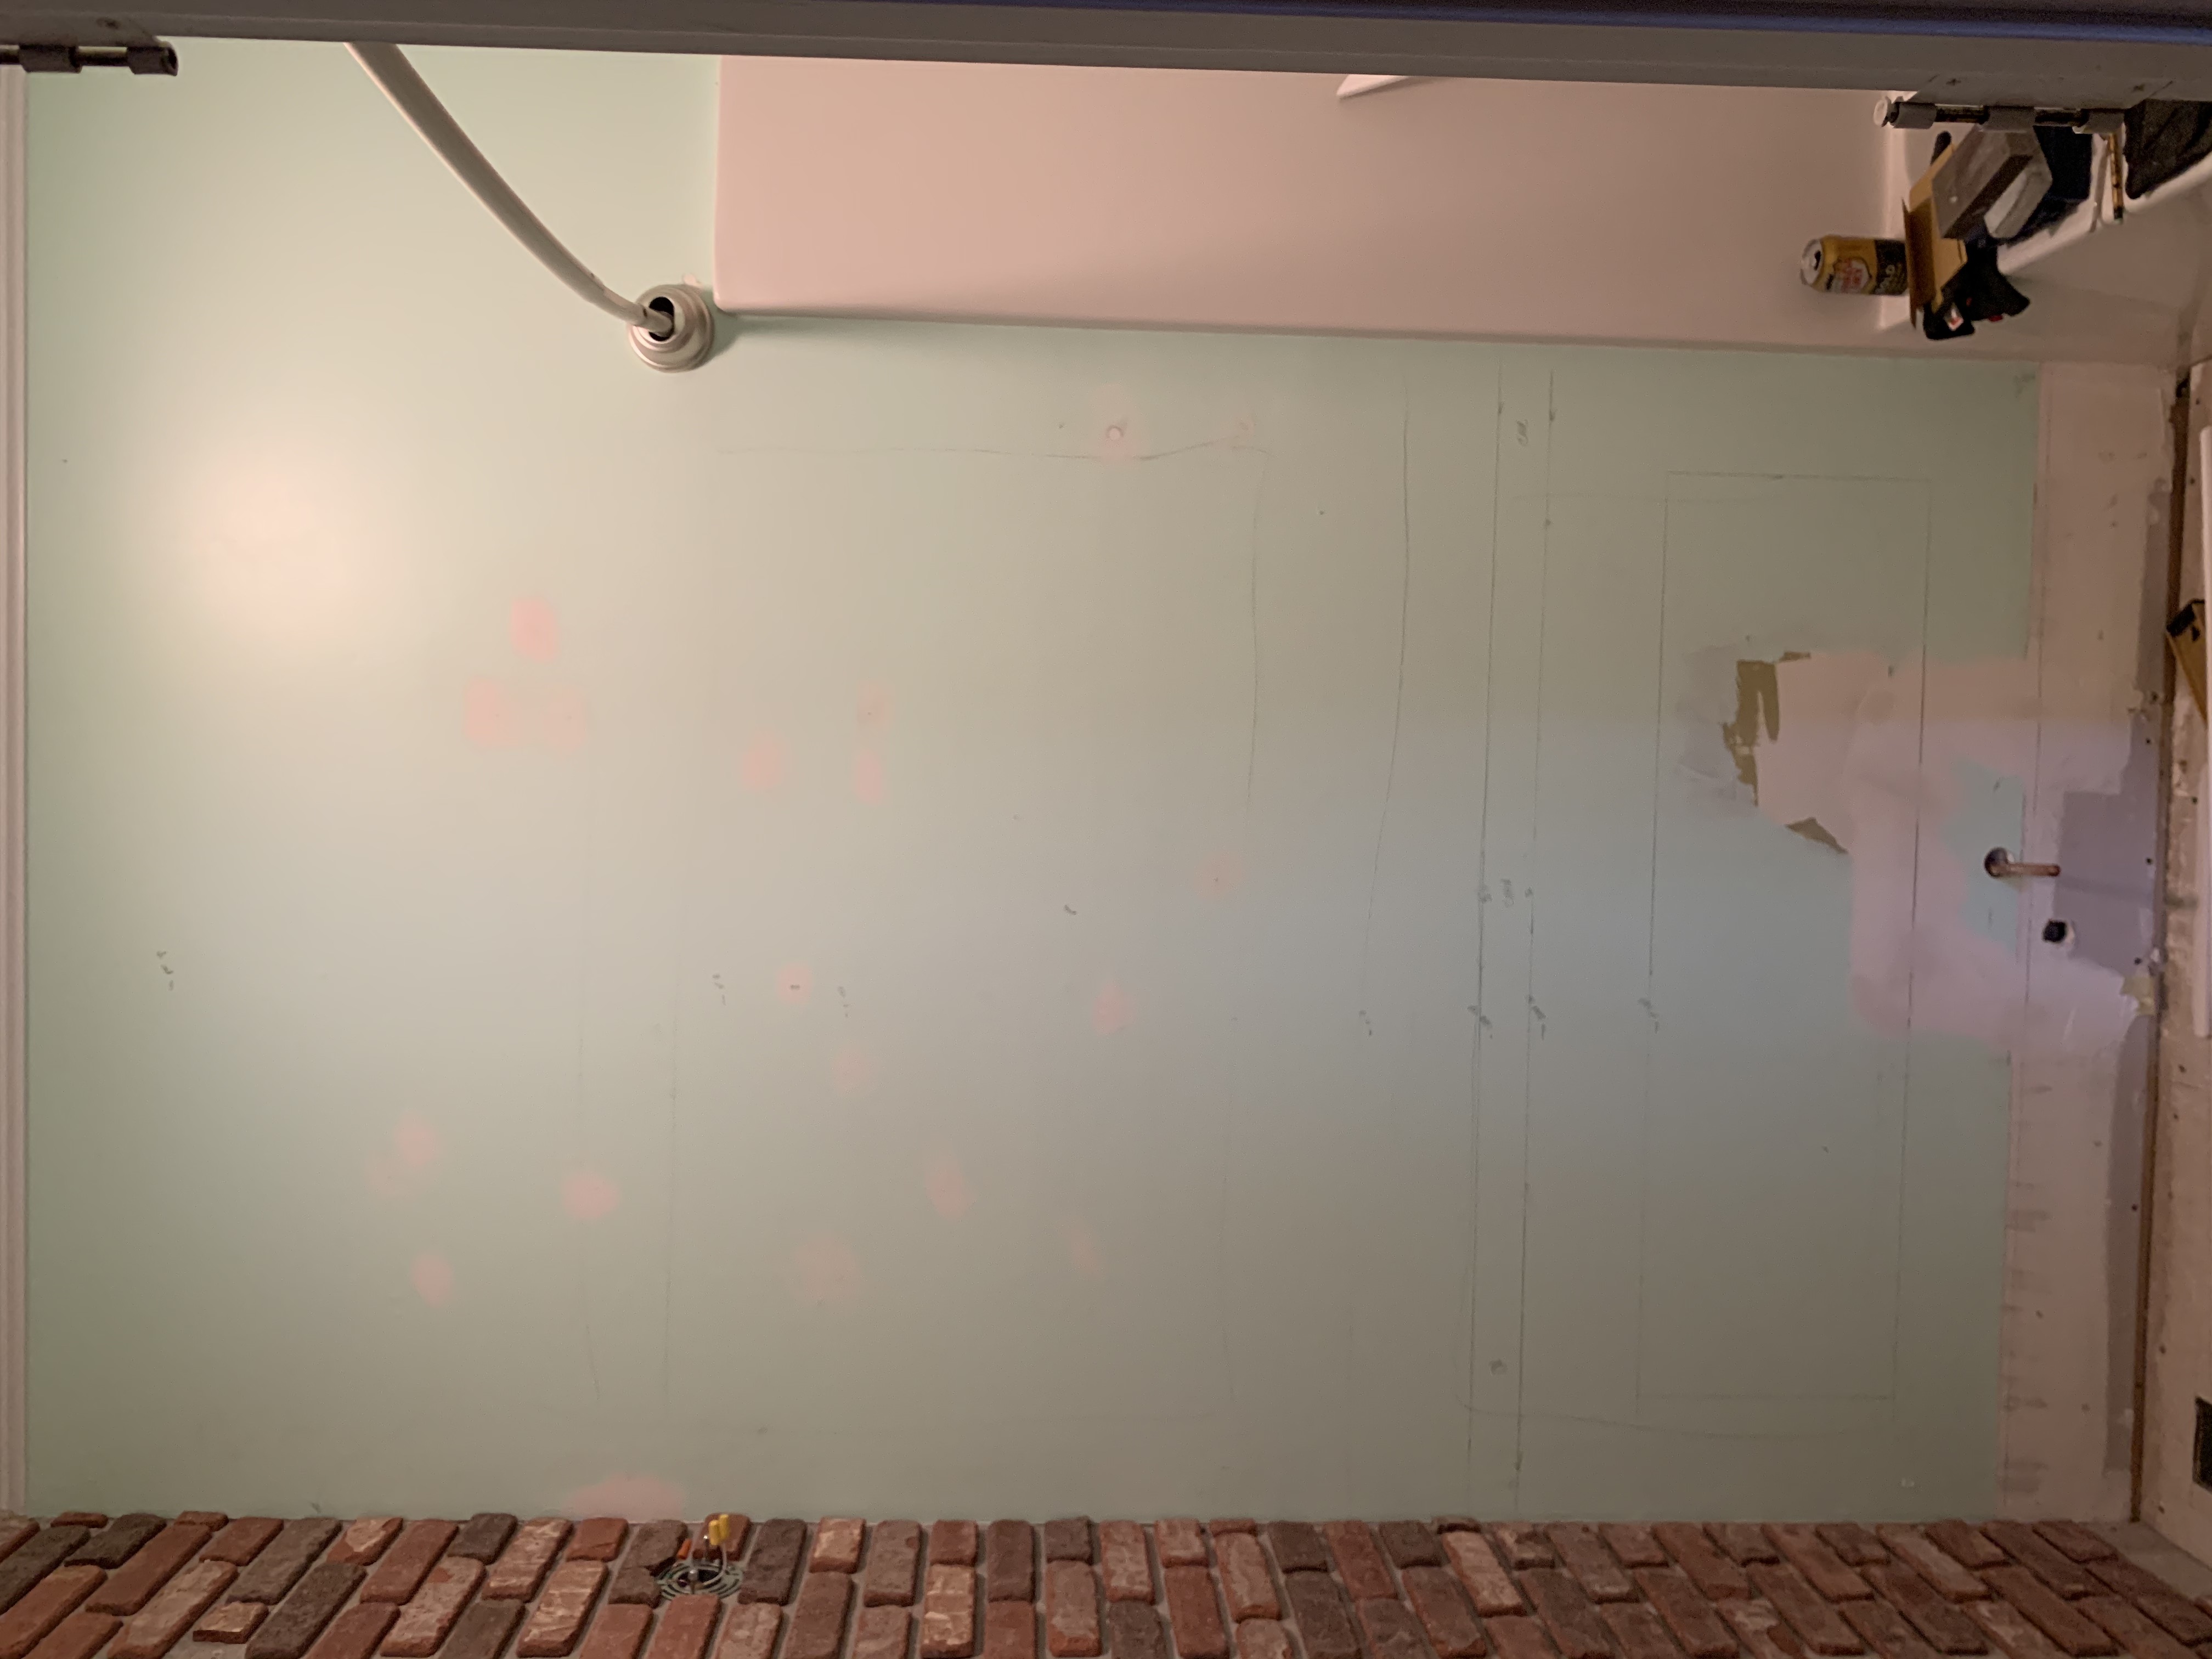
BEFORE:
How To Create A Historic Bathroom In A New Home
AFTER:
How To Create A Historic Bathroom In A New Home
BEFORE:
How To Create A Historic Bathroom In A New Home
AFTER:
How To Create A Historic Bathroom In A New Home
BEFORE:
How To Create A Historic Bathroom In A New Home
AFTER:
How To Create A Historic Bathroom In A New Home
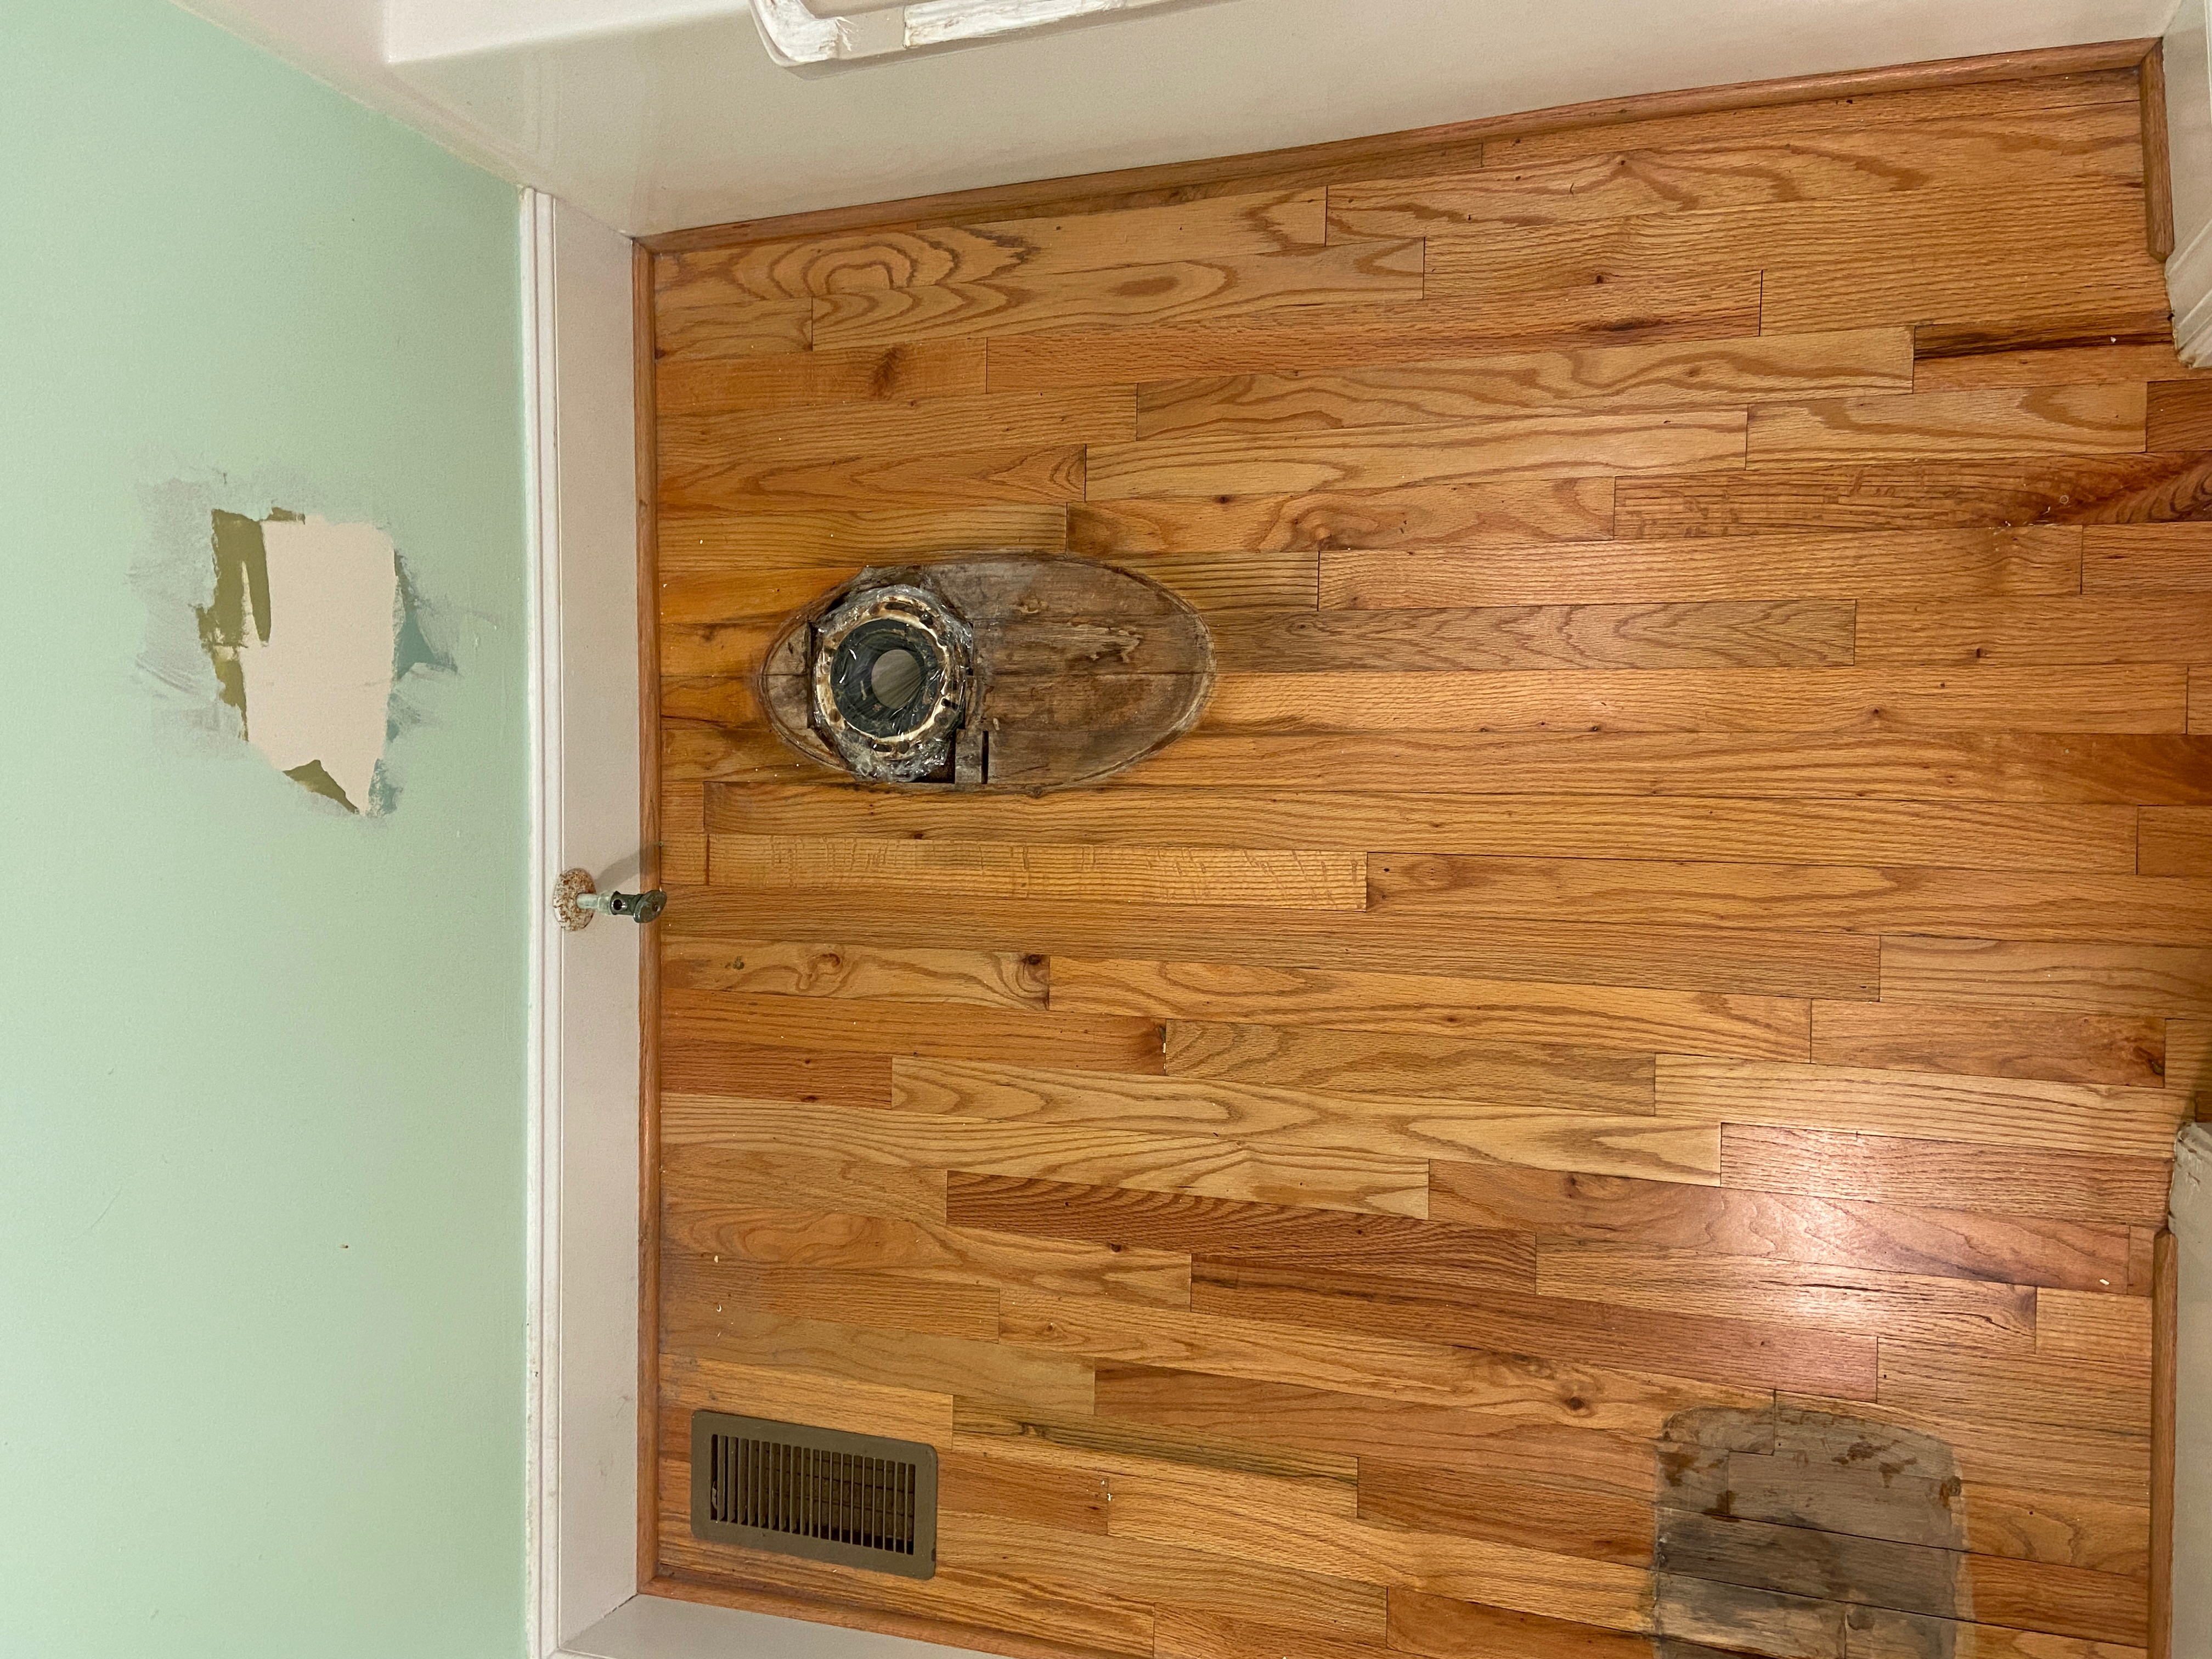
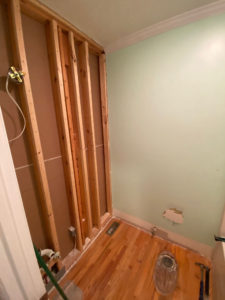
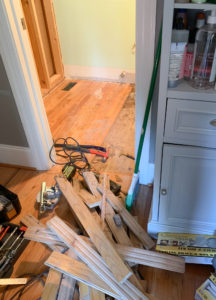
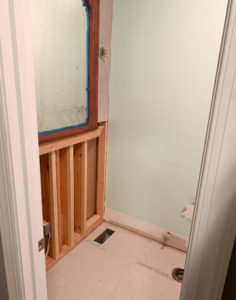
Here are some fun construction photos:
Don’t be discouraged by our two-week timeframe… we had to self-isolate for two weeks because we had a possible COVID exposure… so I very smoothly suggested that a lockdown would be an EXCELLENT opportunity to renovate the bathroom (for which we just happened to have all of the supplies)… This cut our normal construction time from about ten years per project to finished in about two weeks.
I think renovations are a lot like having babies: you only do it again because you forget how painful and messy it is. But, you keep doing it because the end result is AMAZING (even if the process involves pain, bleeding, and occasional screaming). I’m trying to remind myself of that because the ENTIRE downstairs is in a state of construction mess.
Also, the six year old has done 5000 drawings watching Youtube videos. She loves it when we’re distracted. Insert mom guilt.
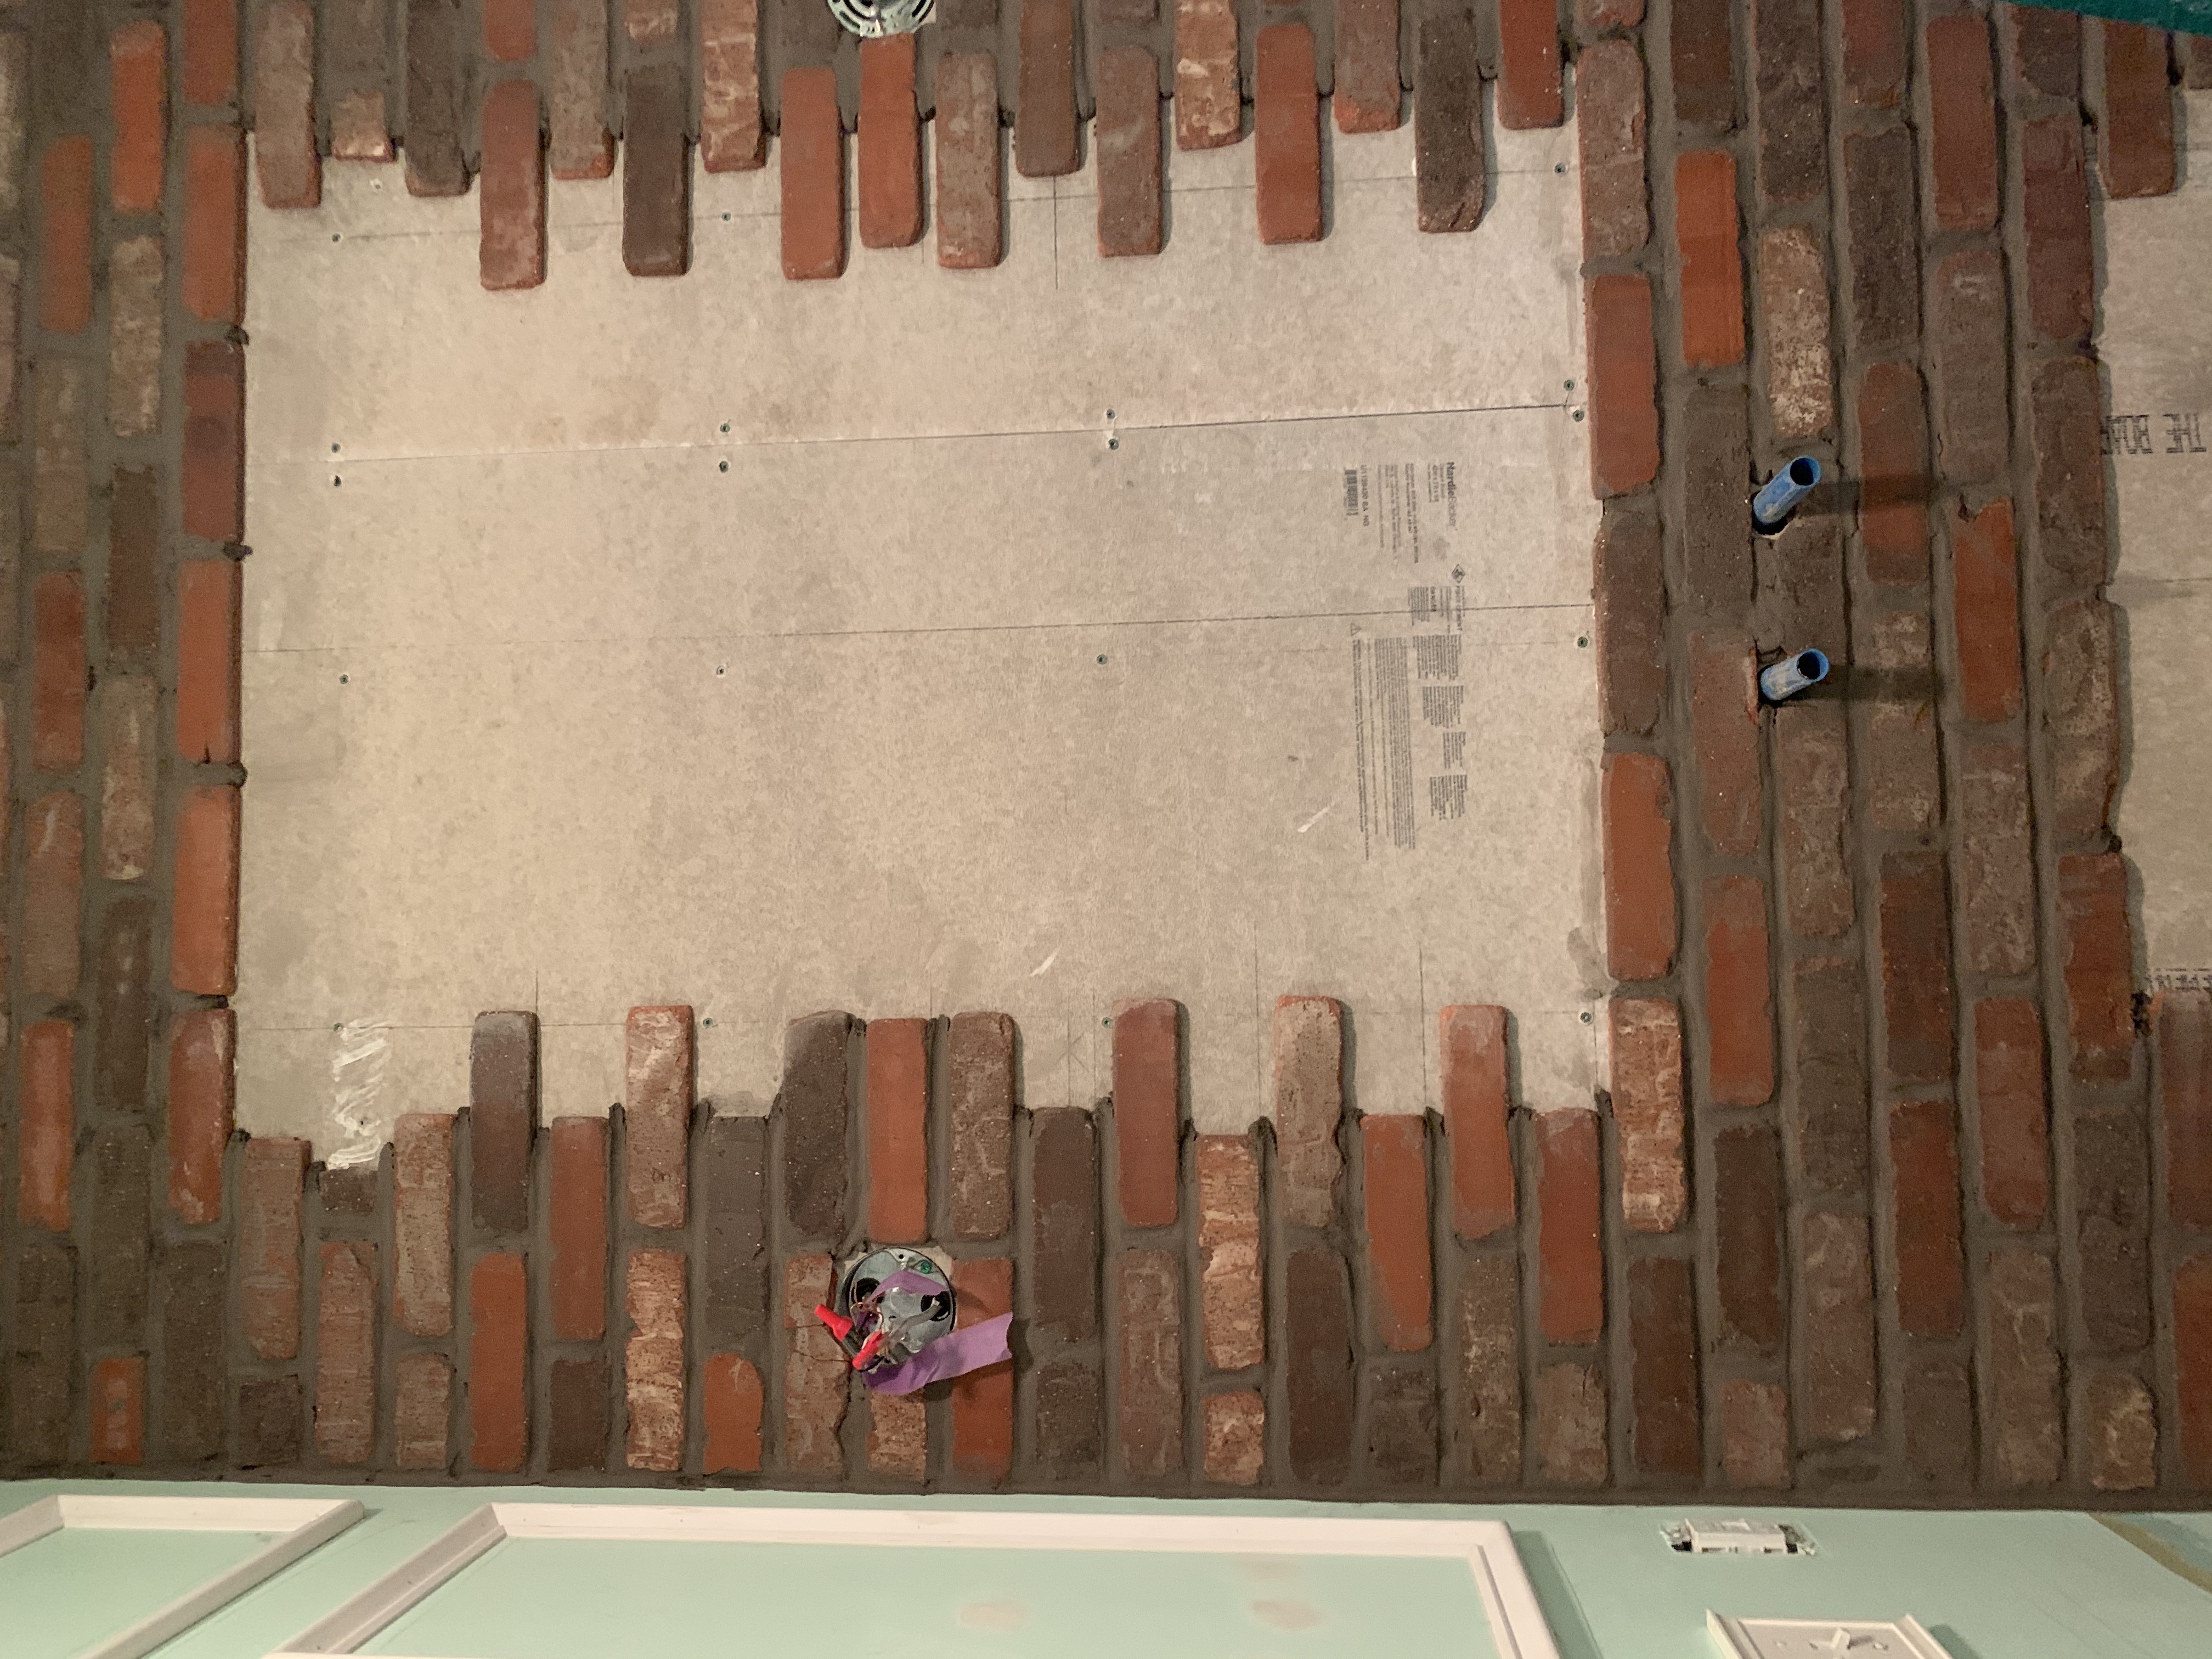
For those of you who have ever renovated a bathroom, you already noticed the water damage (NEVER, EVER PUT A WOOD FLOOR IN A BATHROOM). And you were already thinking, “I wonder if they have any extra plywood on hand for that subfloor because I bet it has rot.” And you’d be right.
You noticed the color is different than the mood board? Yes, I changed my paint plan at the last minute (like THAT’S never happened before). I decided to go with Benjamin Moore’s Smoke Stack Gray. I think it’s going to have the cozy feel I want anyway, because the room is very small and I’m painting EVERYTHING the same color (ceiling, walls, and trim).
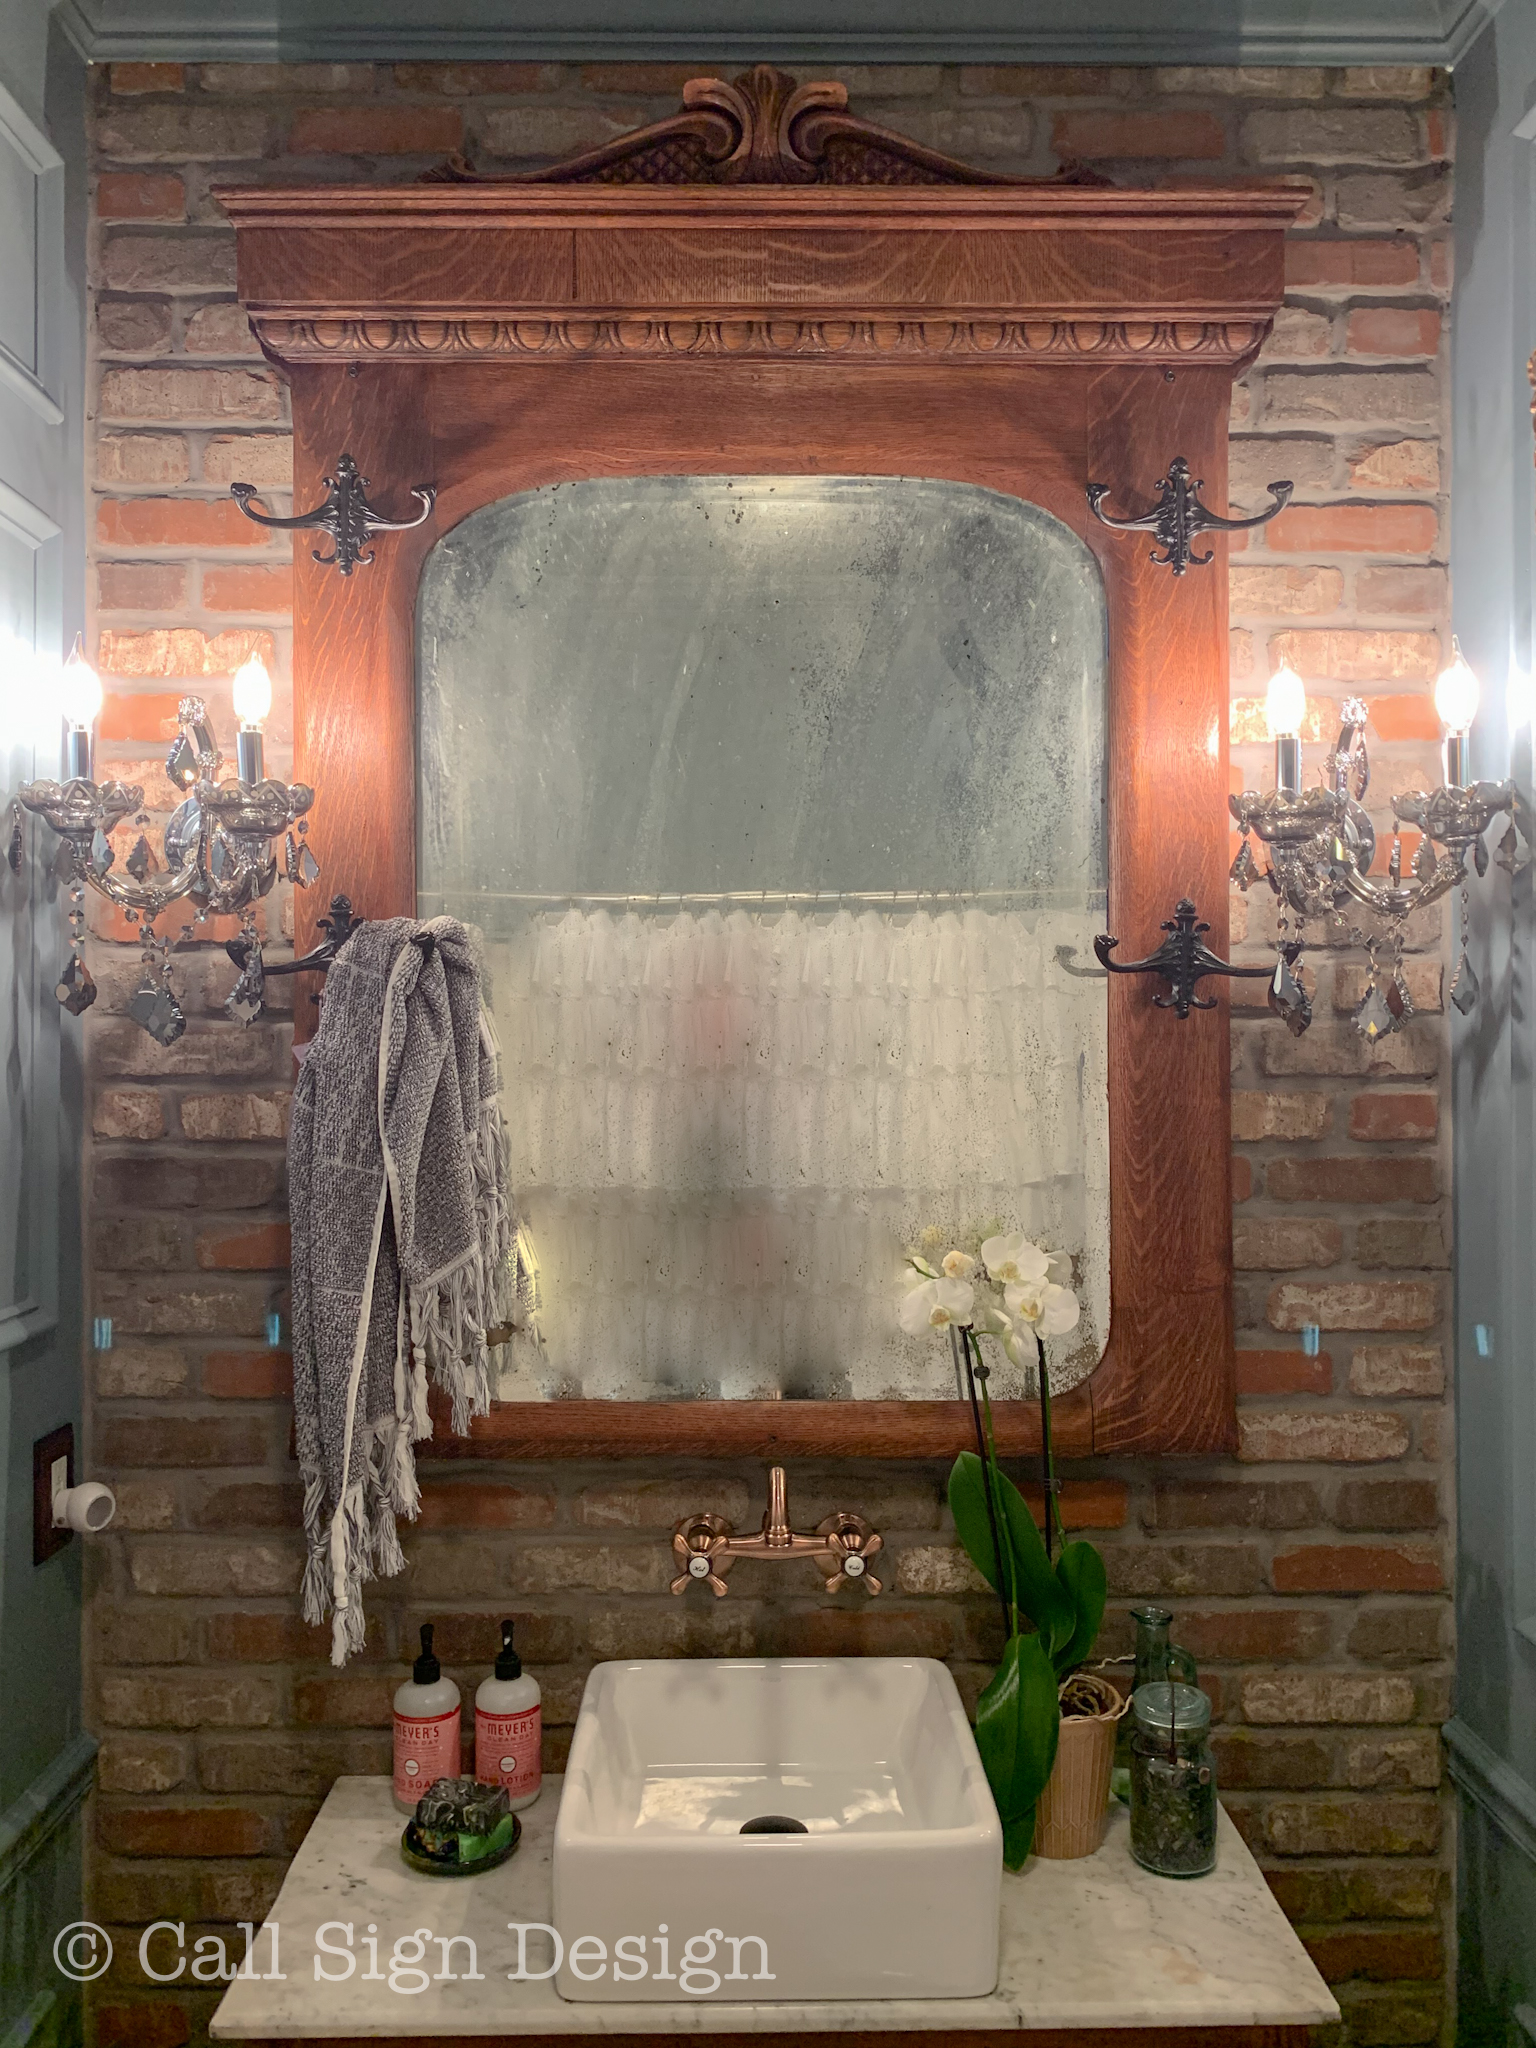
But, here’s for the really fun part: FINISHED!!!
How To Create A Historic Bathroom In A New Home
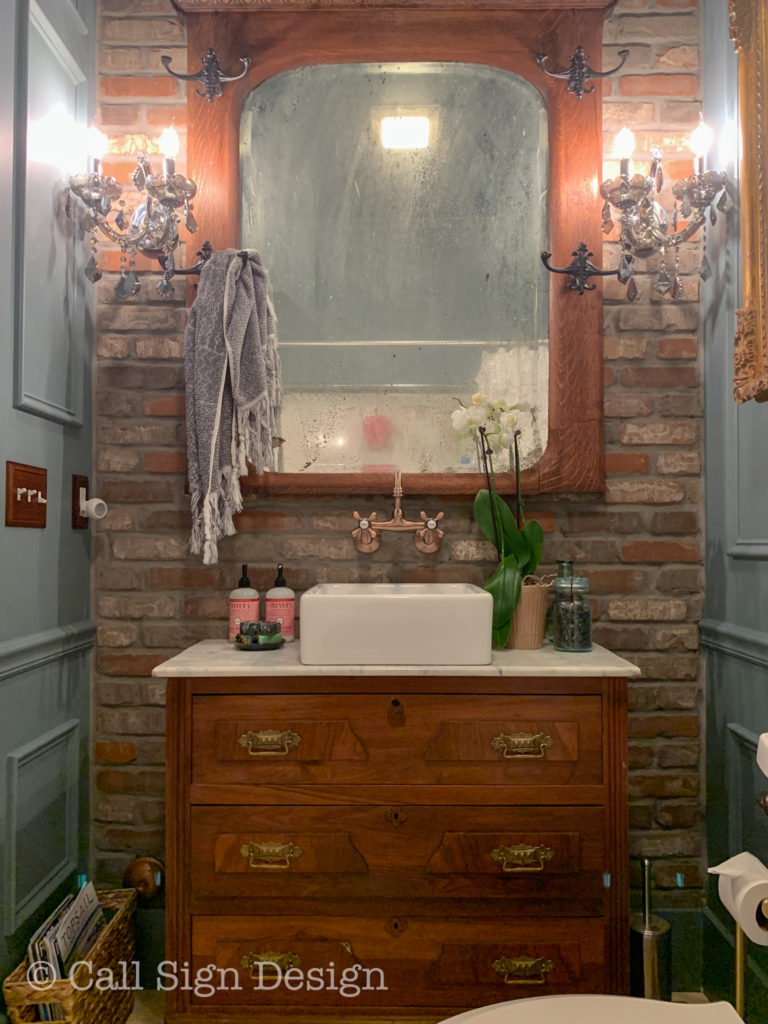
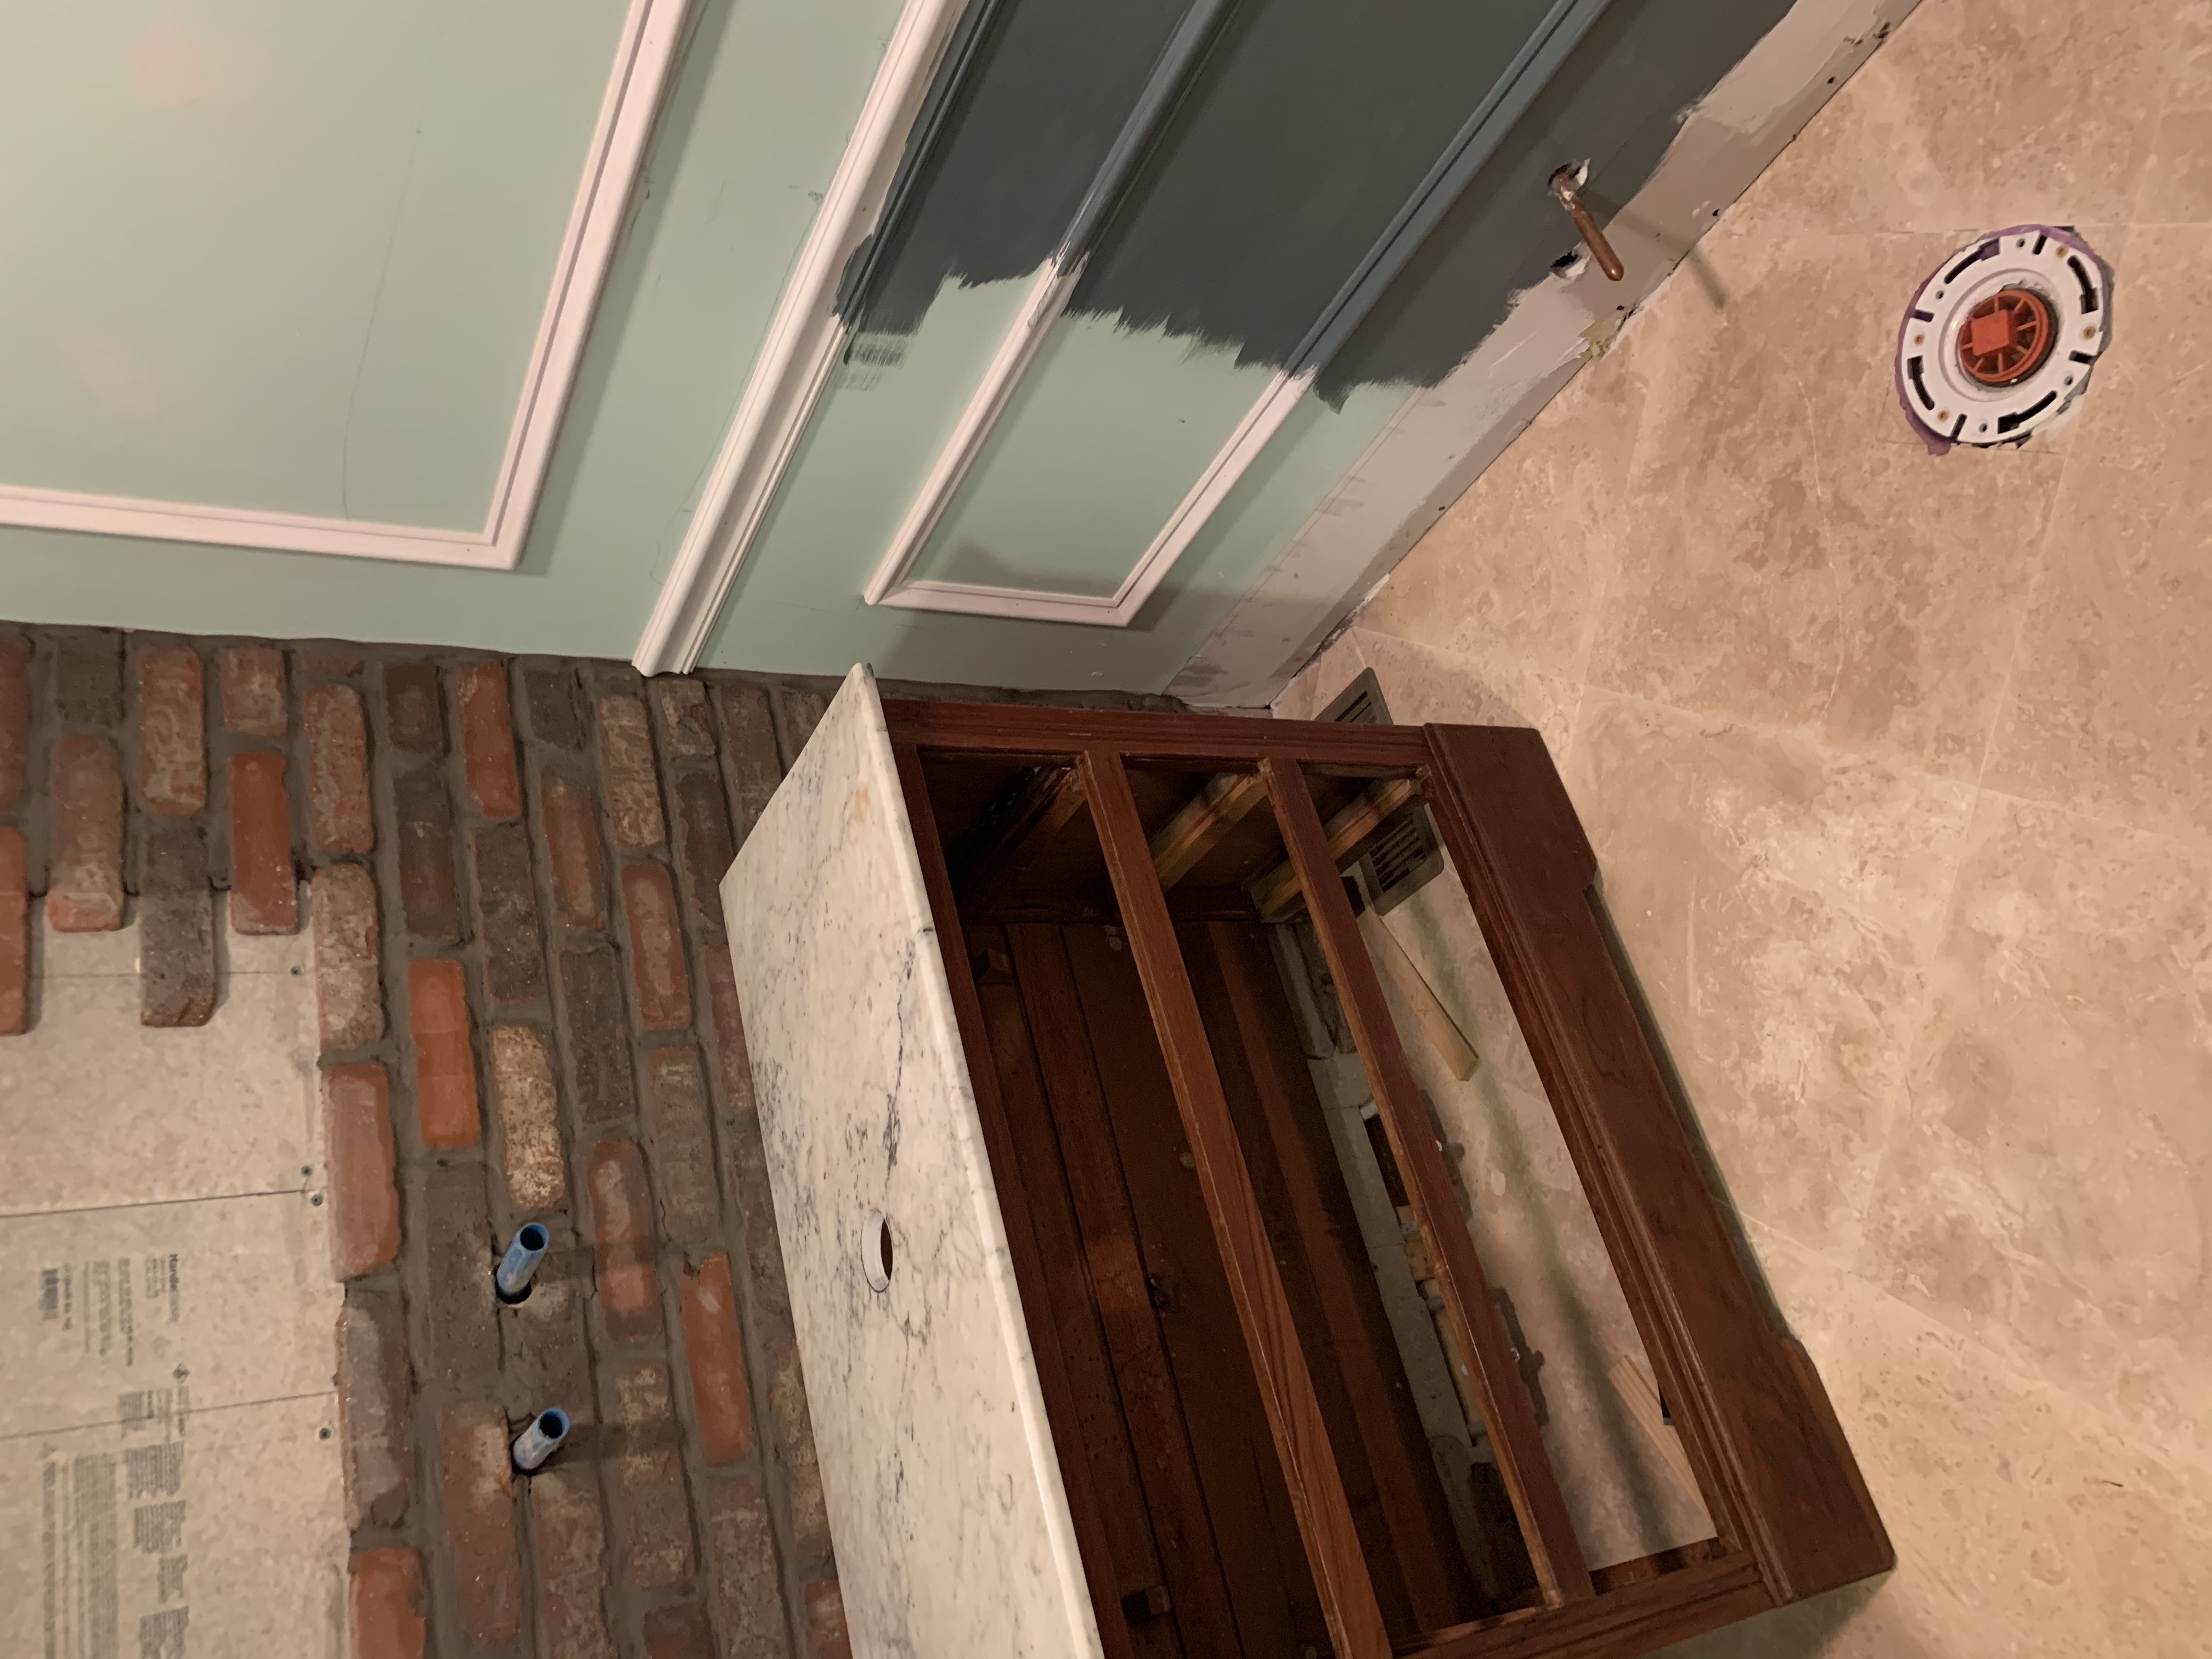
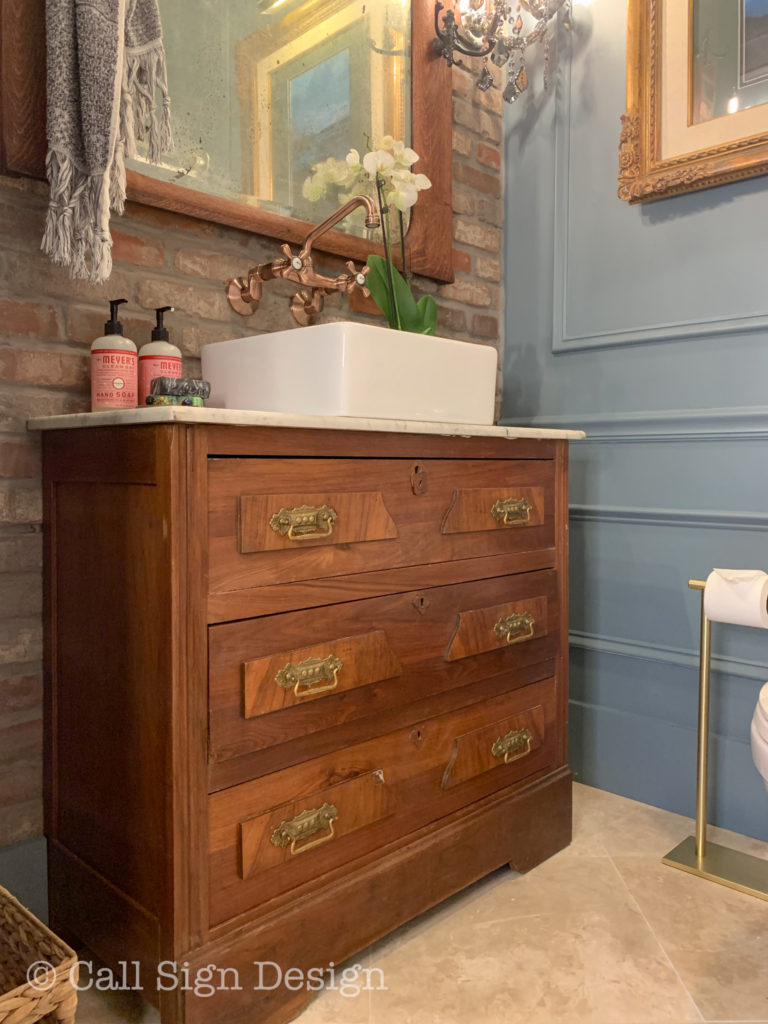
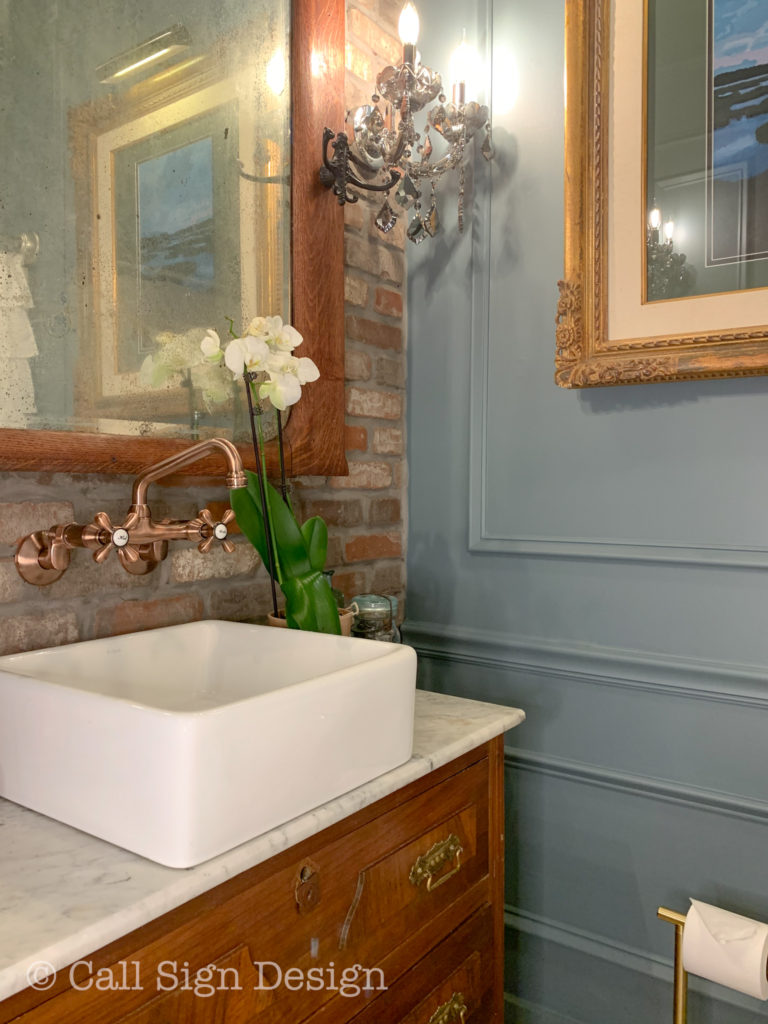
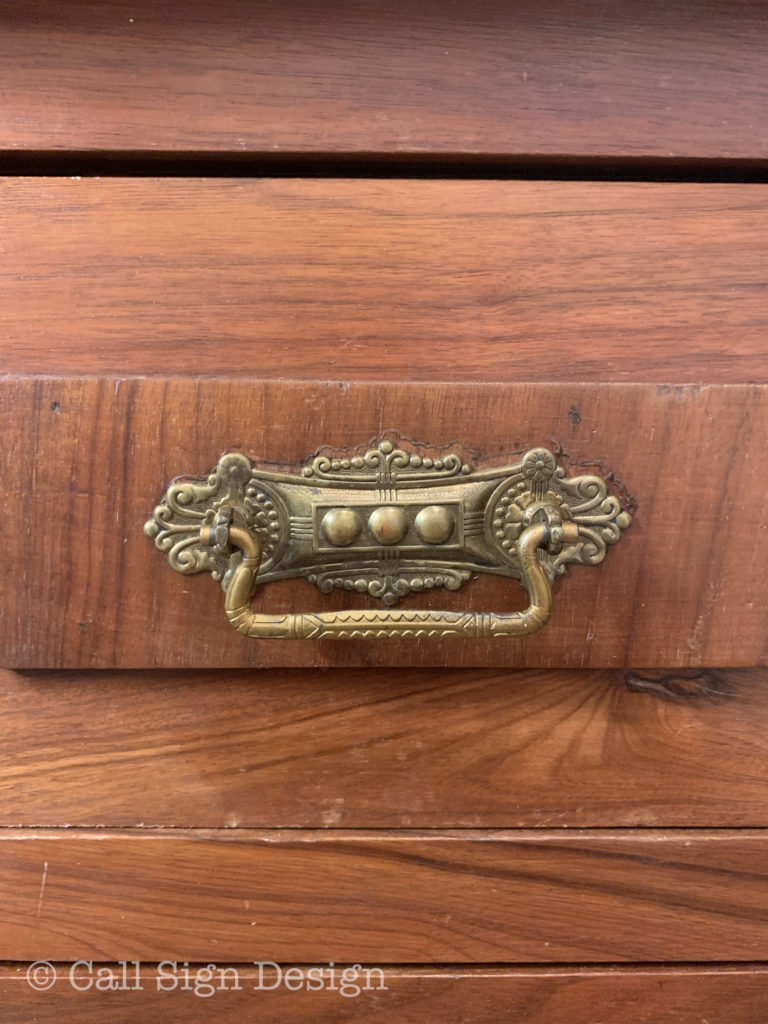
One of the best ways to save money on your sink vanity is to do an antique dresser vanity conversion. Vanities are super pricey, even the junky ones. So, why not build a beautiful custom one that’s not only WAY cheaper, but also way more awesome in every way?
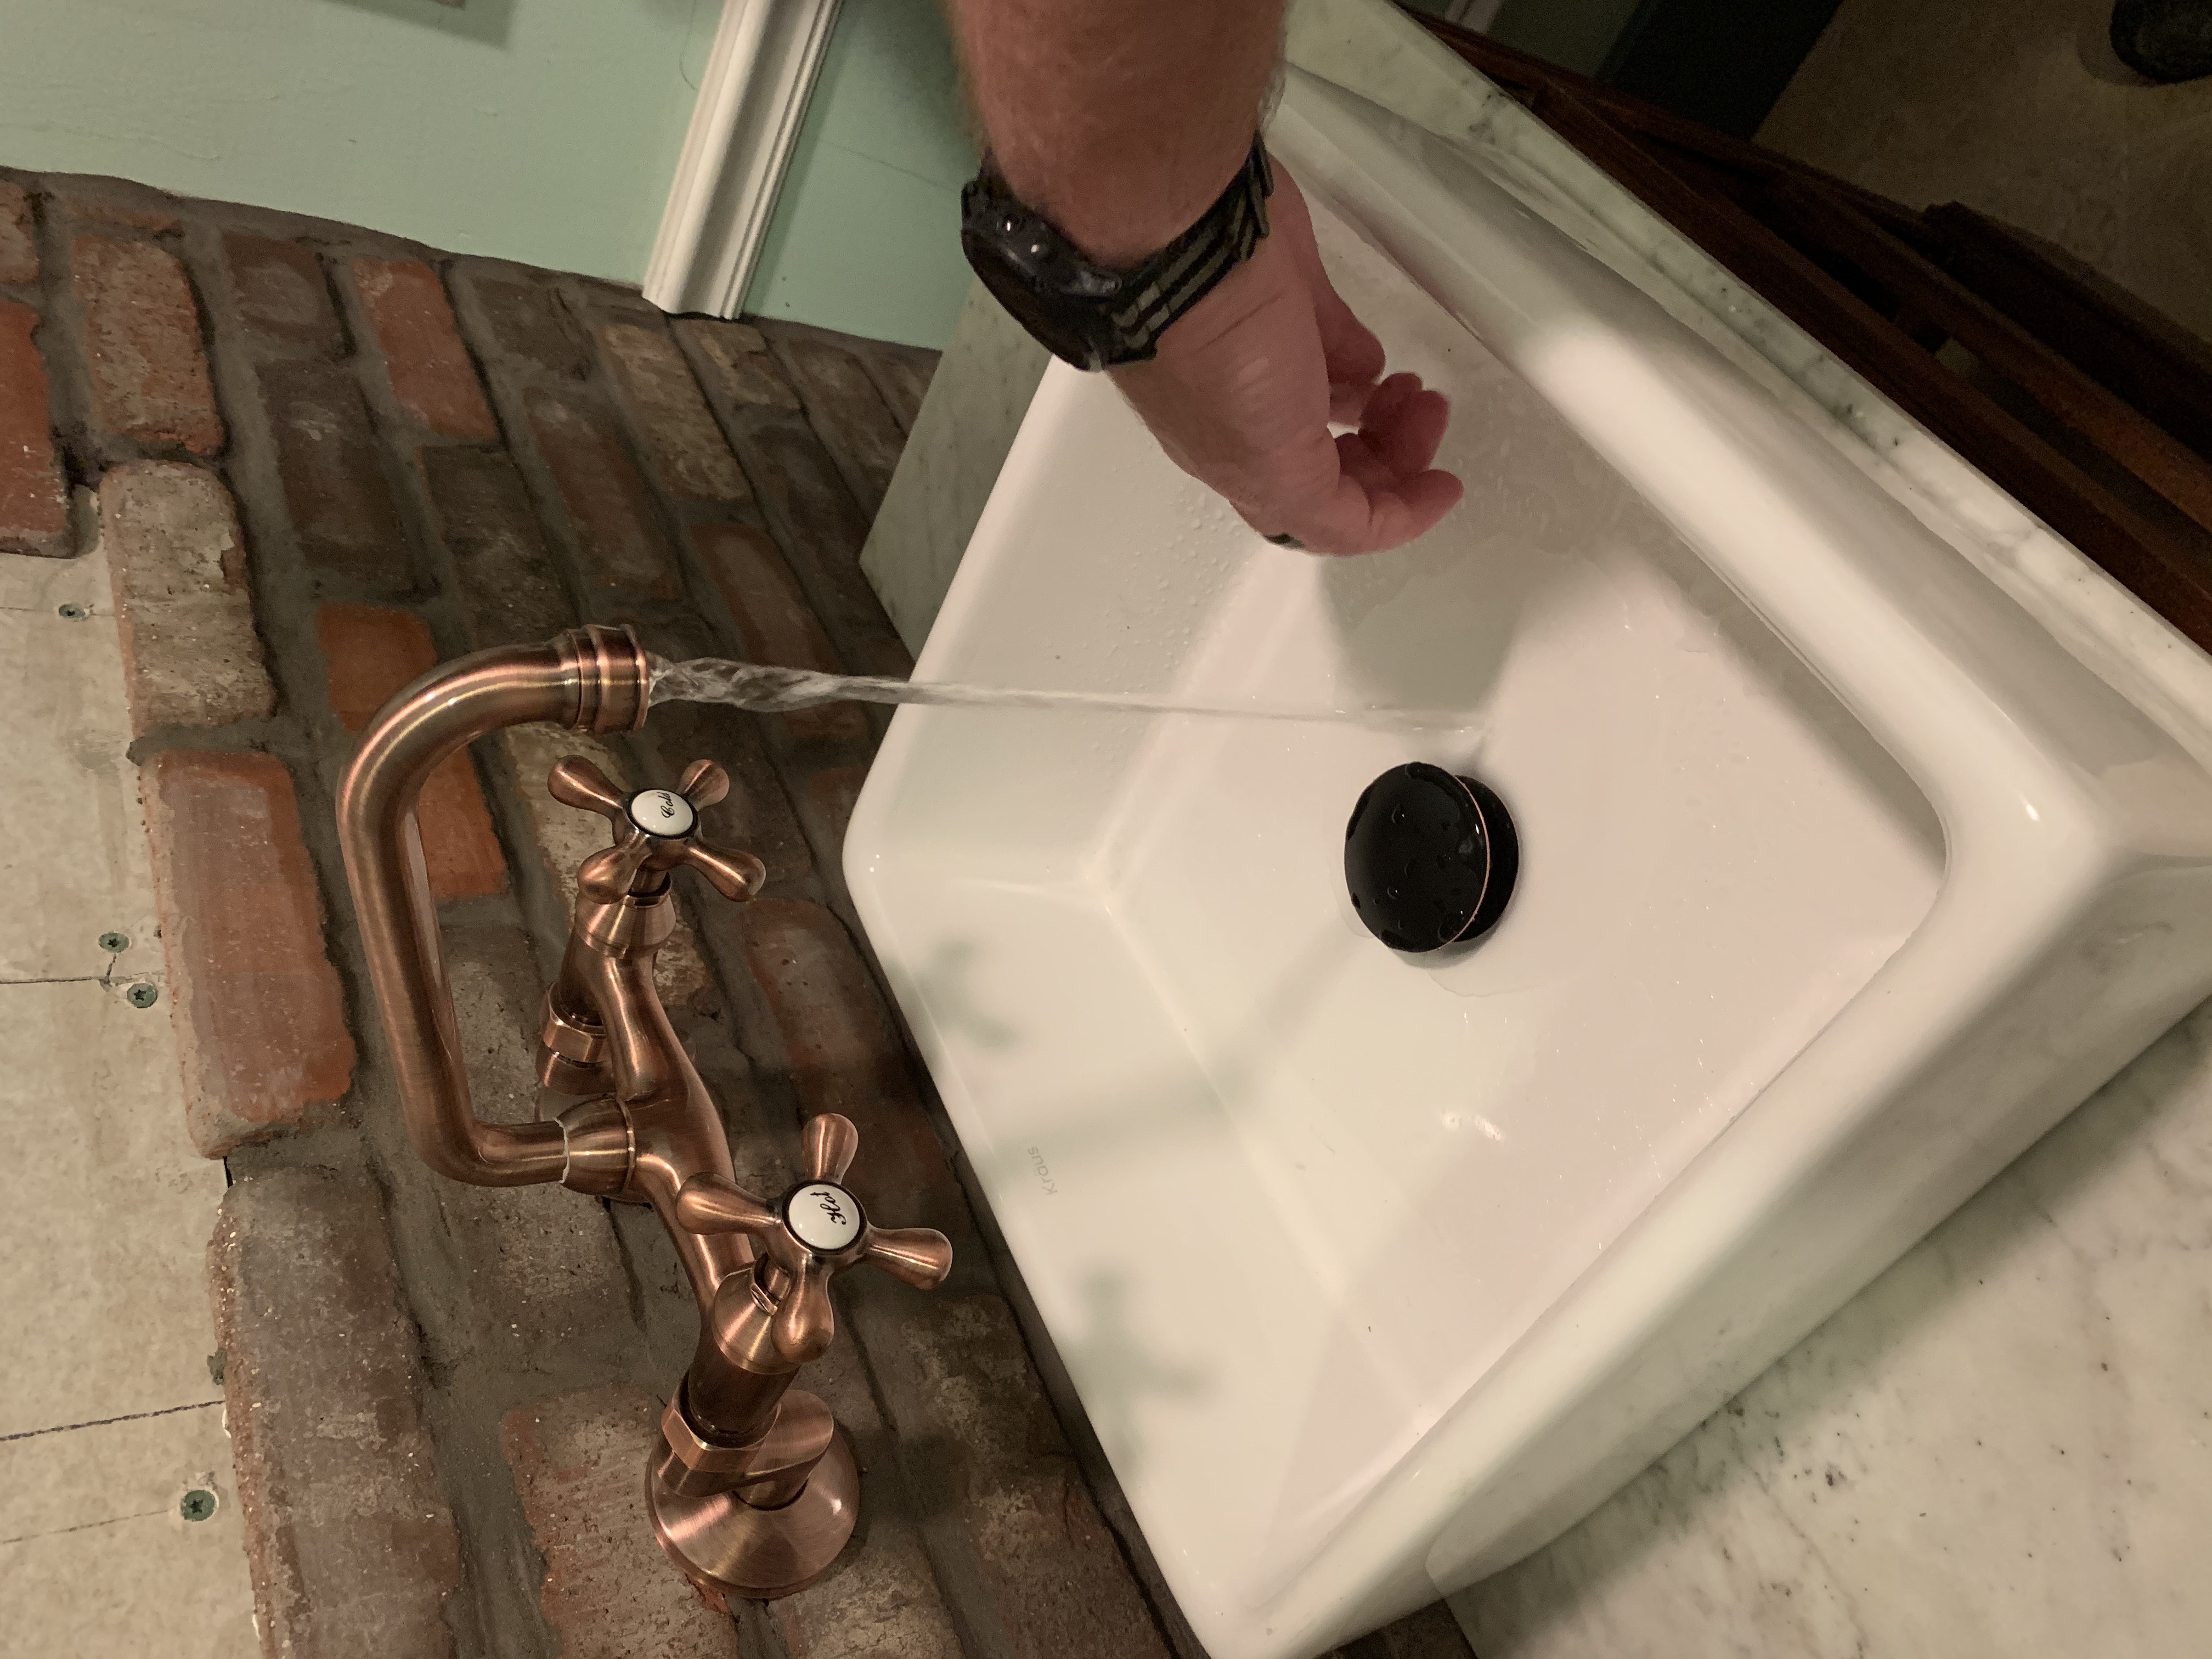
You can look for an antique dresser made into a bathroom vanity for sale (lots of people sell these on Craigslist), or you can just find the dresser and customize it with a smashingly fancy white porcelain vessel sink basin and any fixture you want.
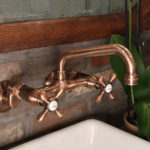
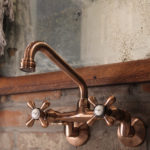
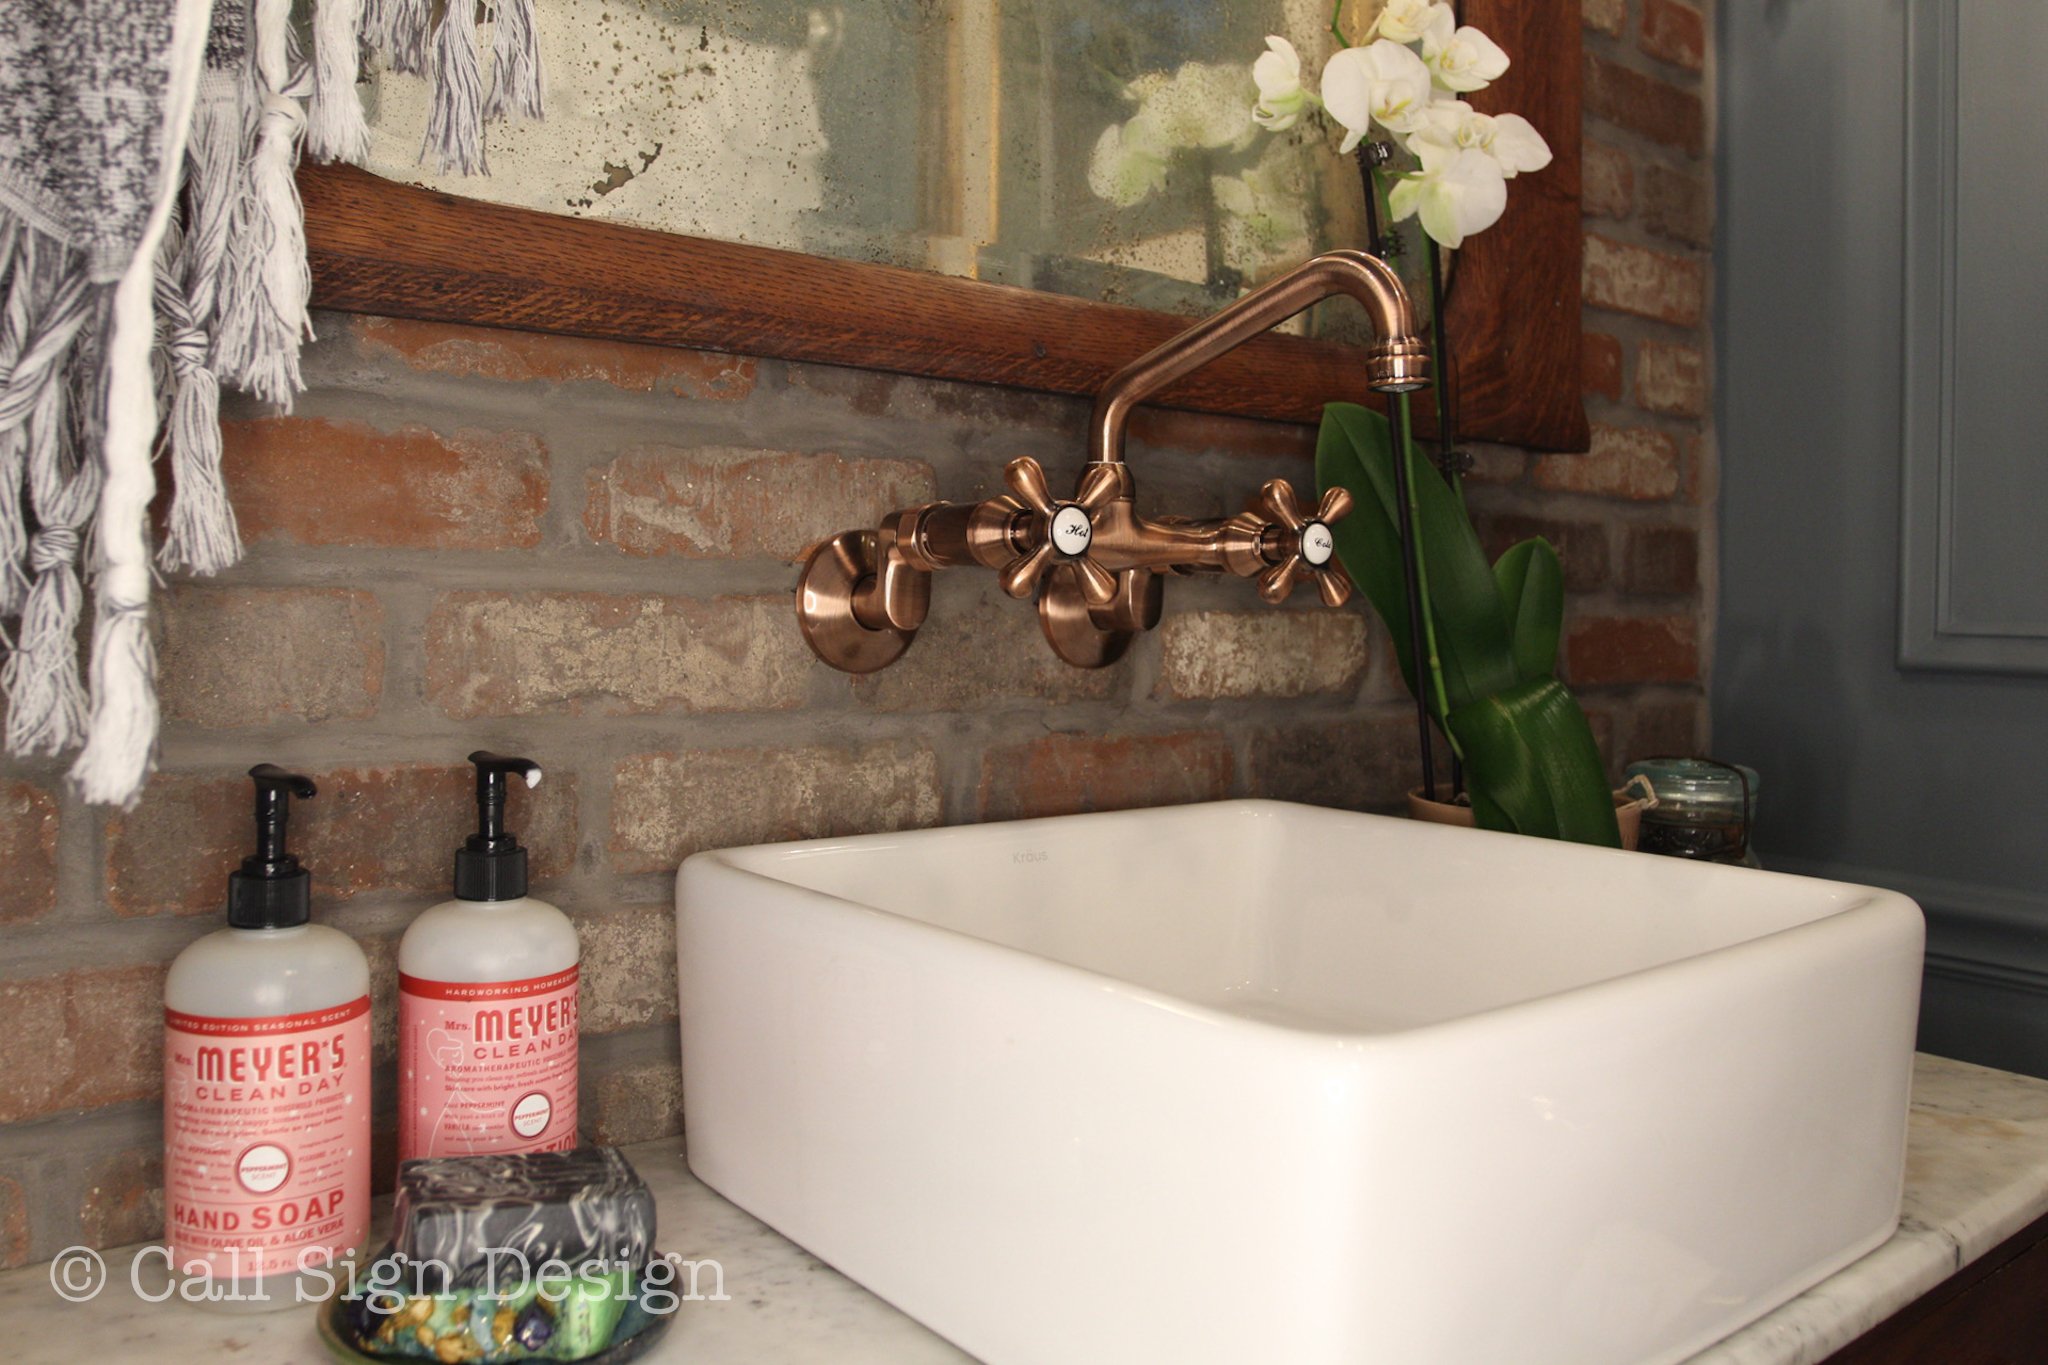
I was the most surprised by this incredible faucet: I had no idea it could be that cost effective and be so beautiful. Check out some close ups.
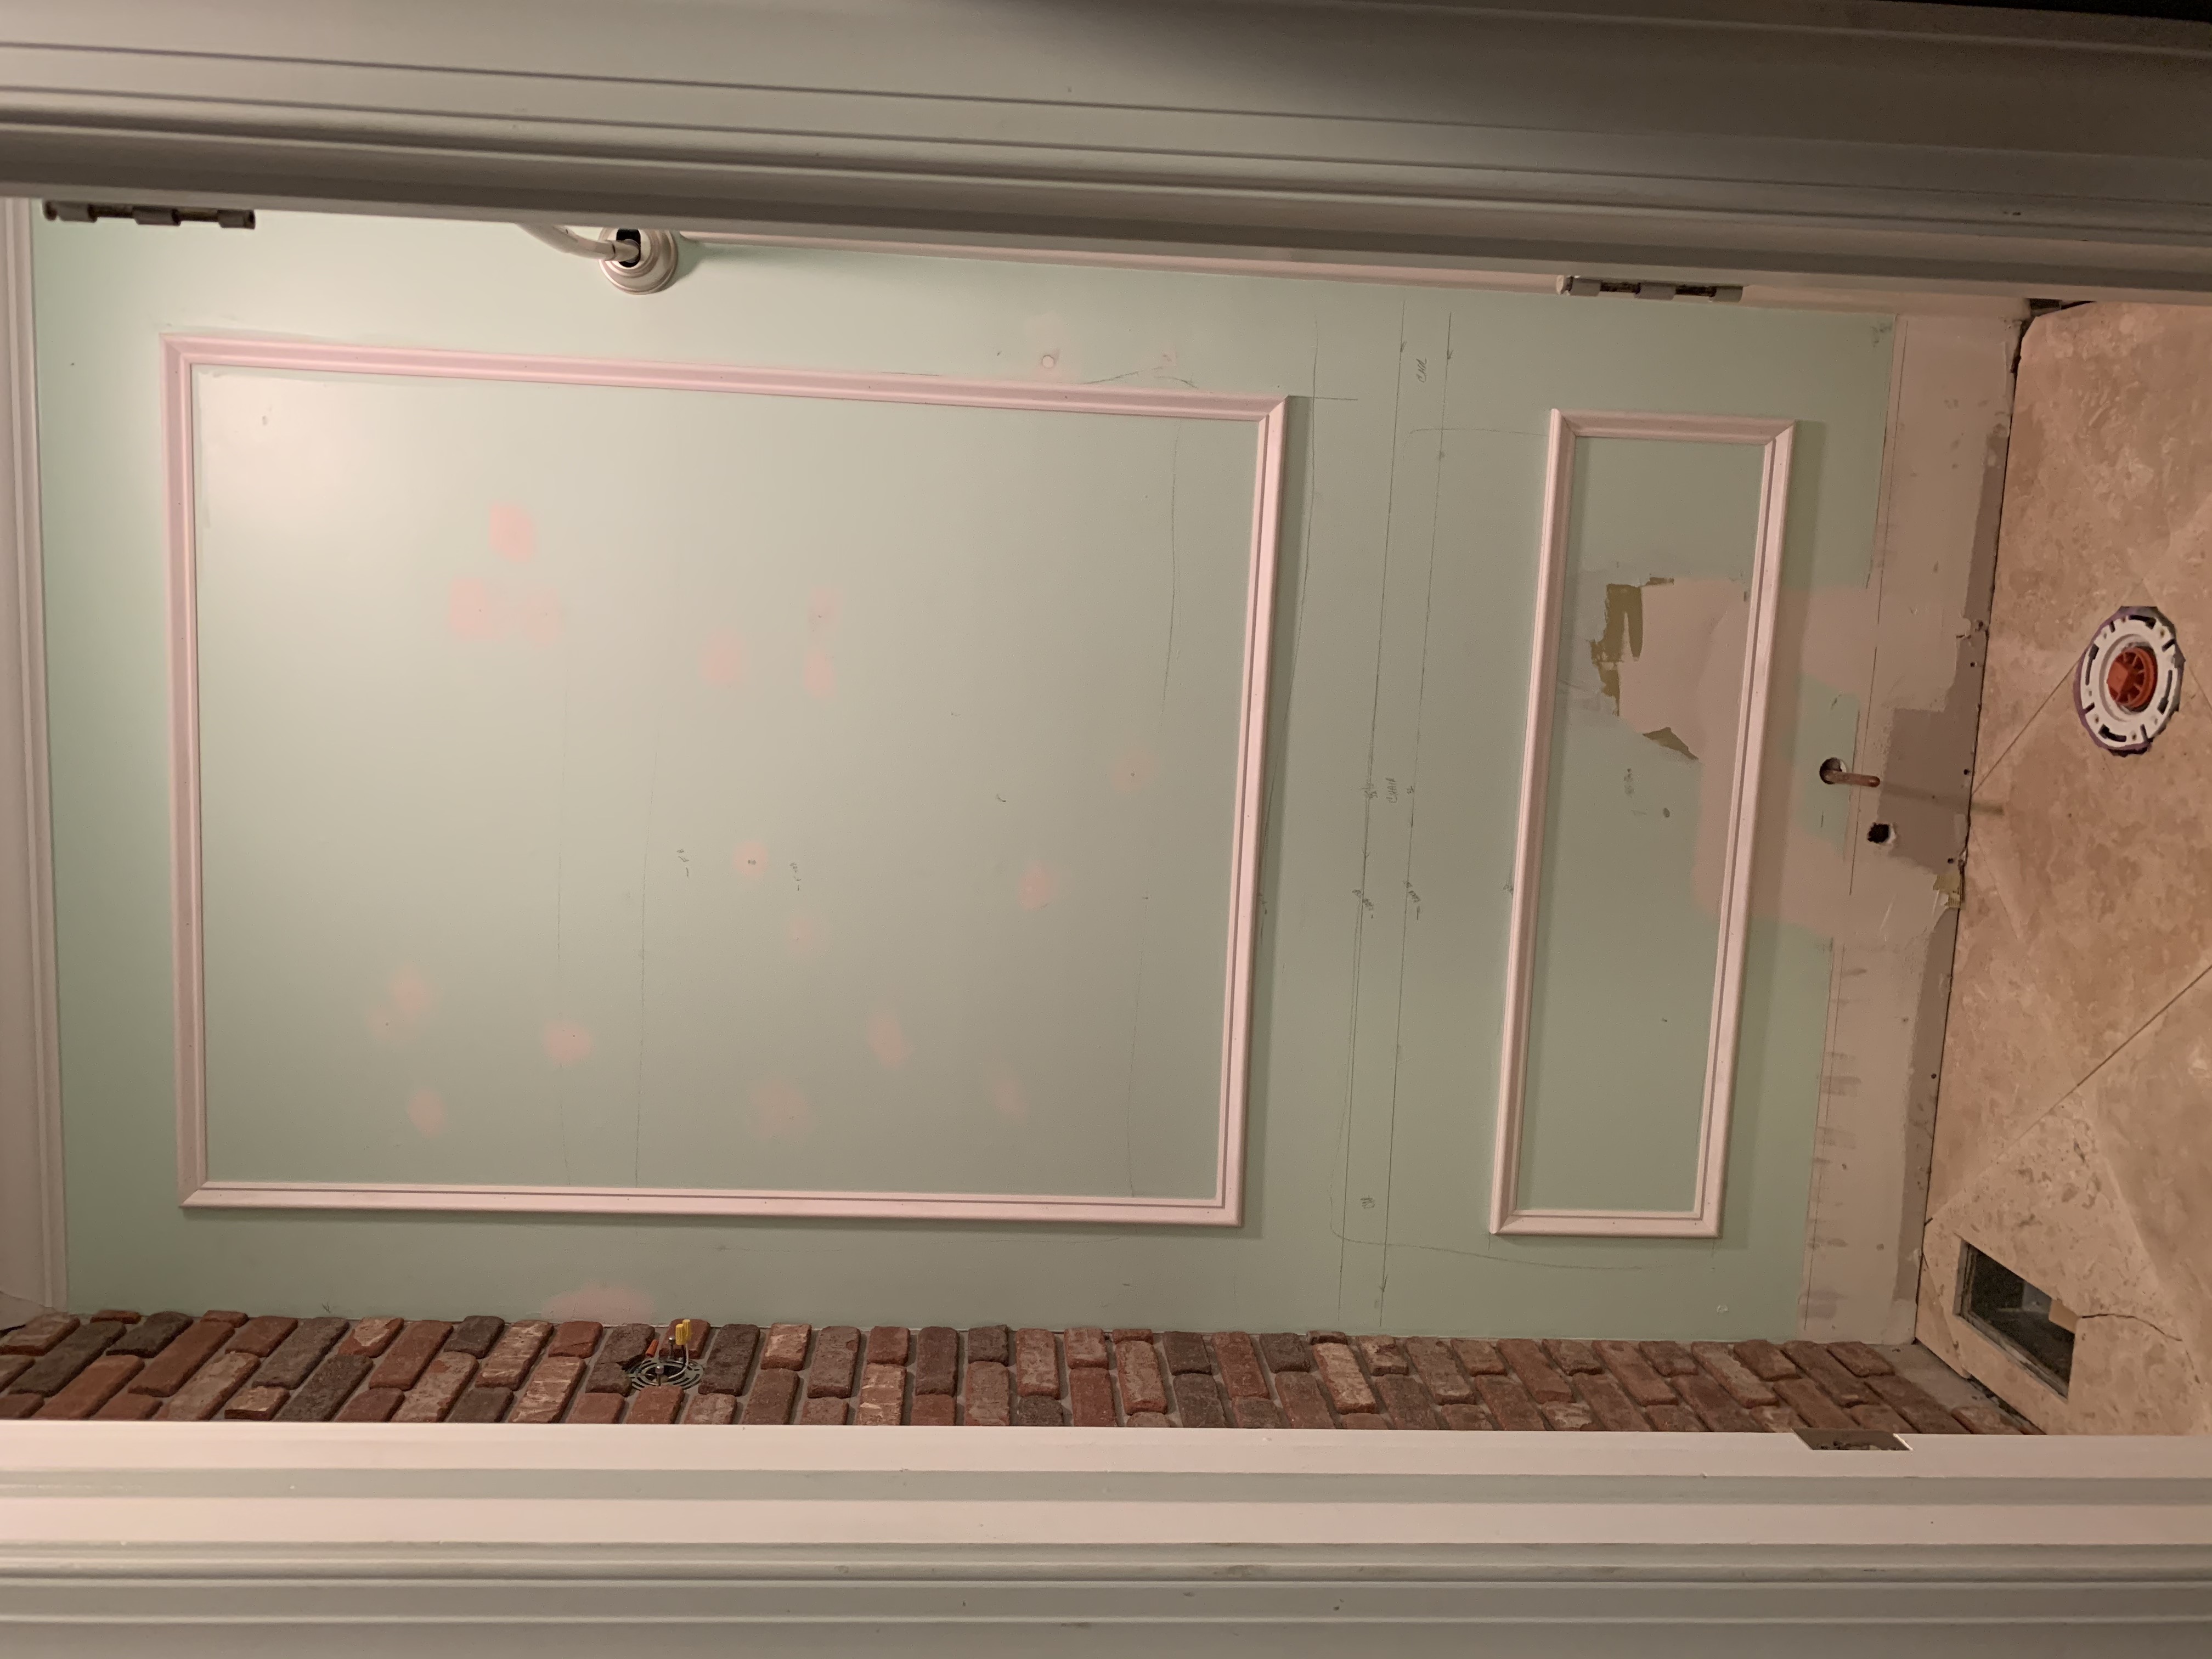
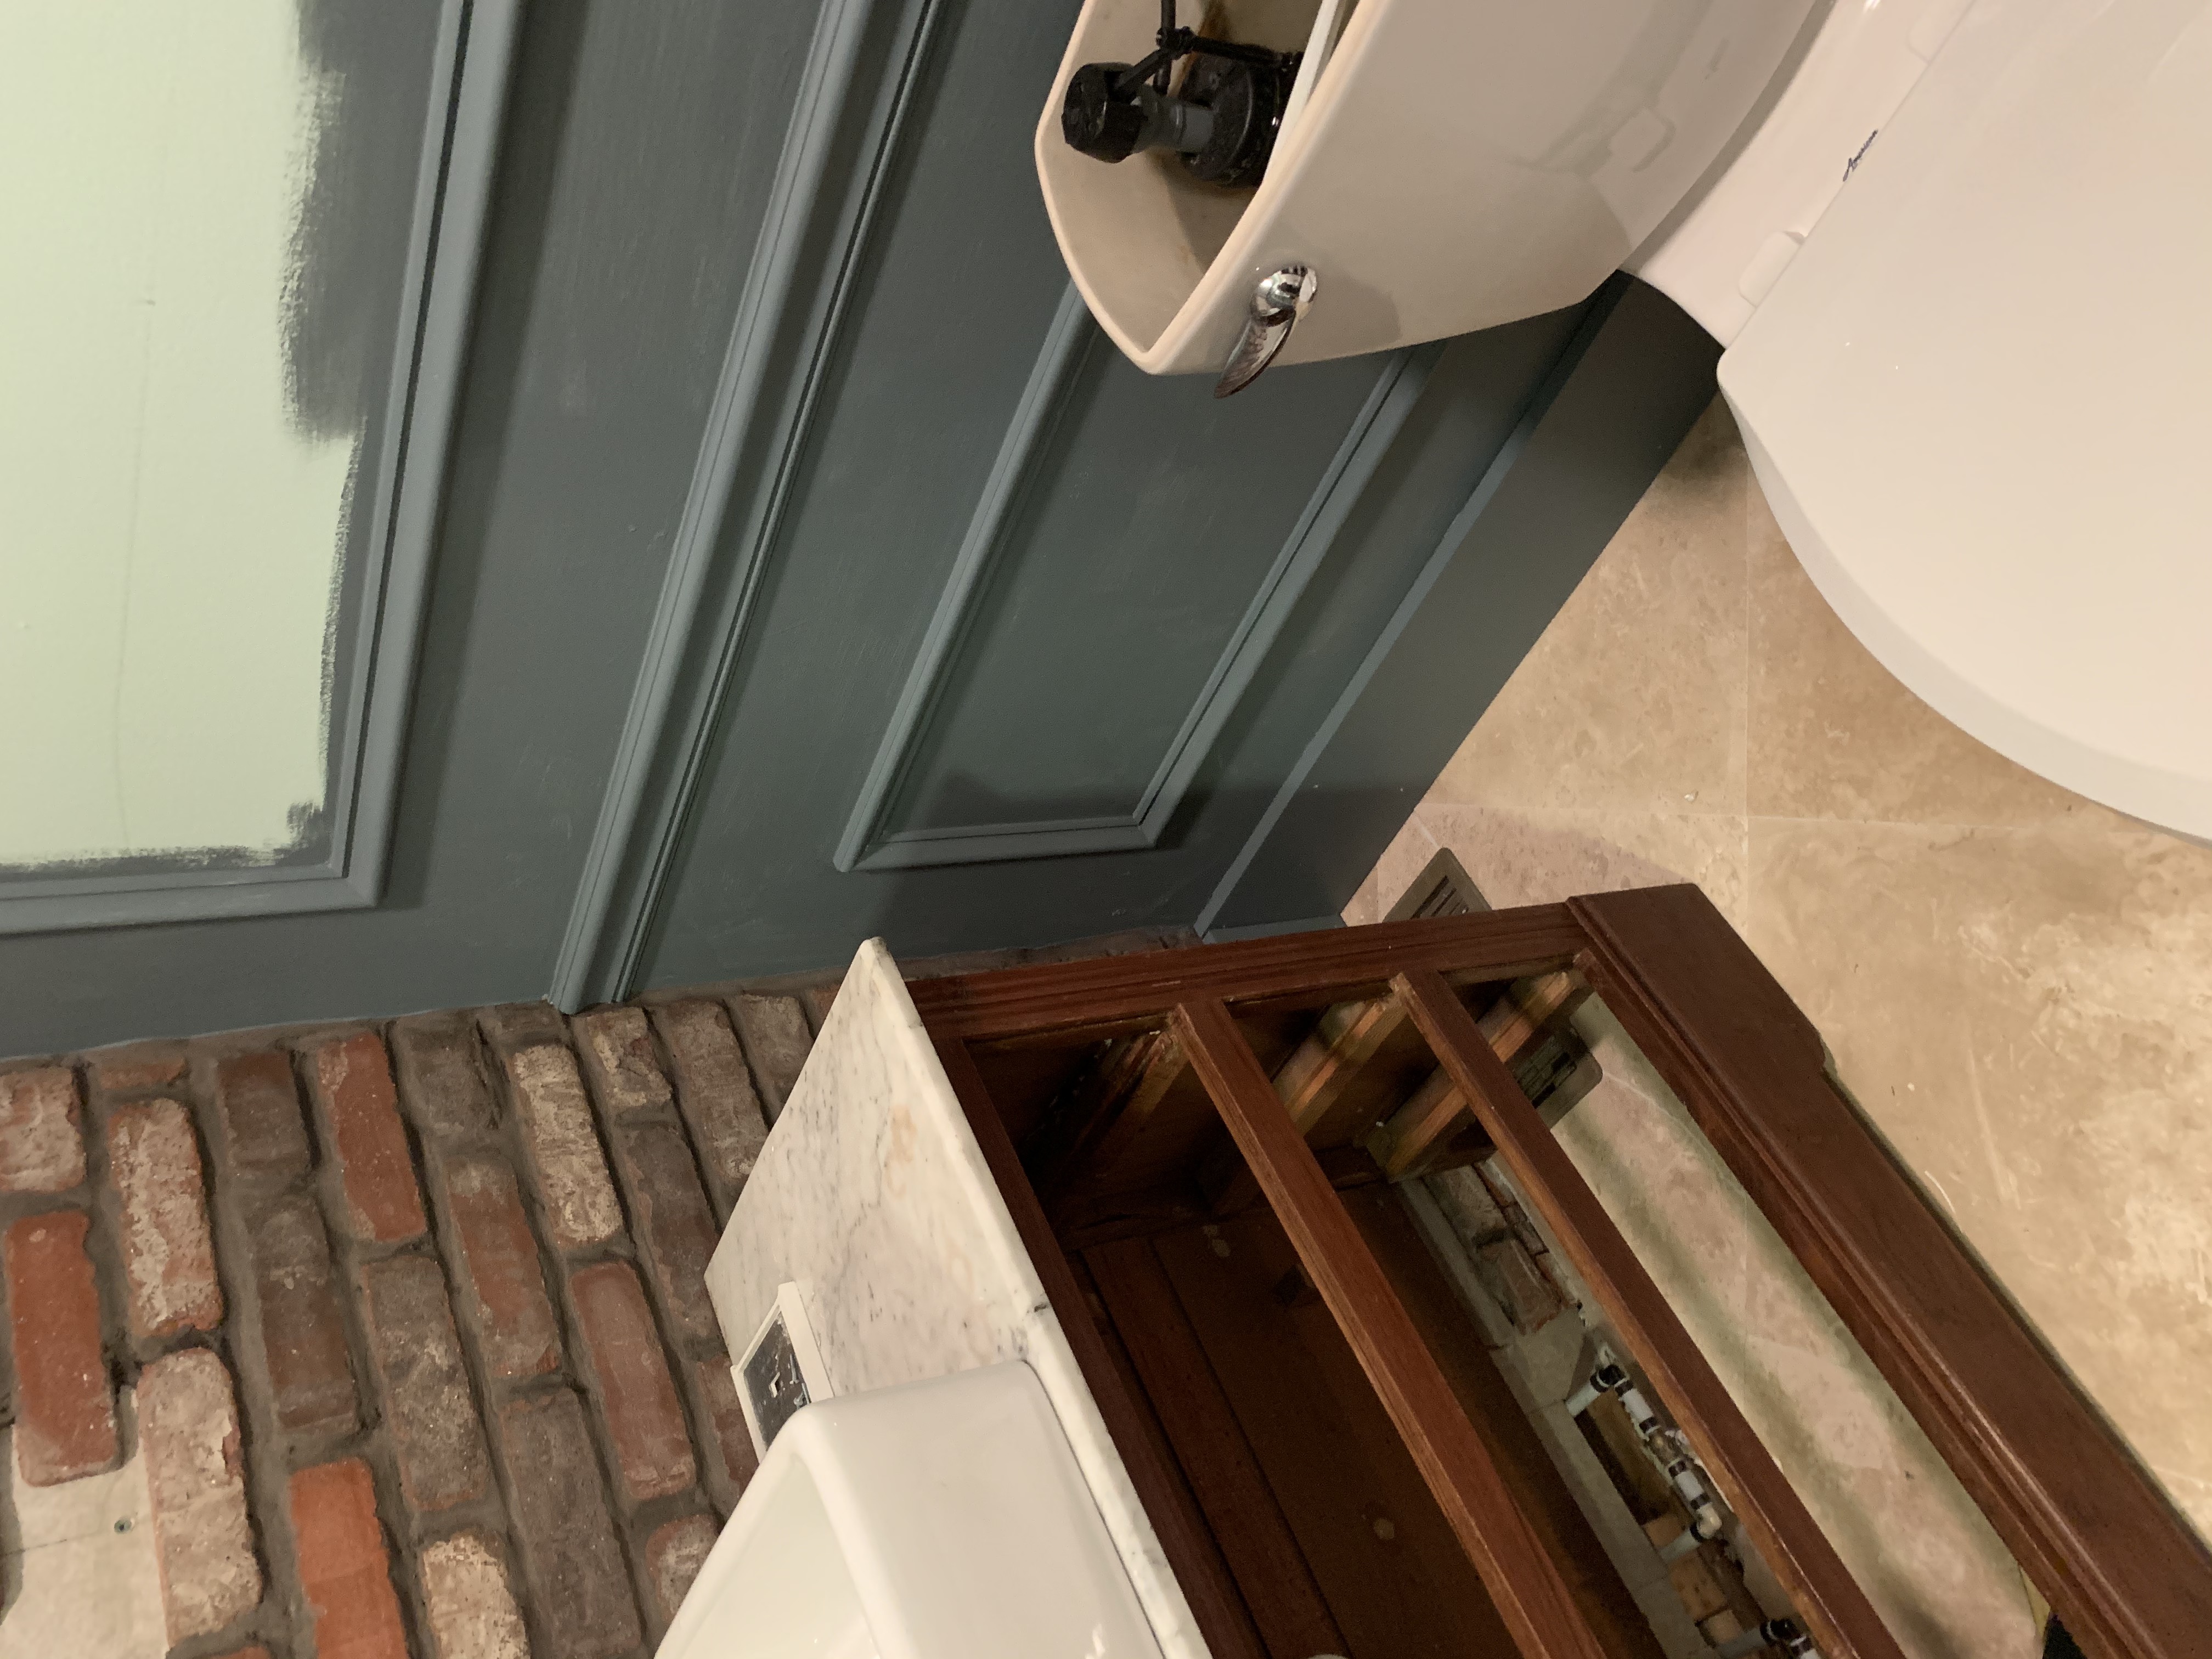
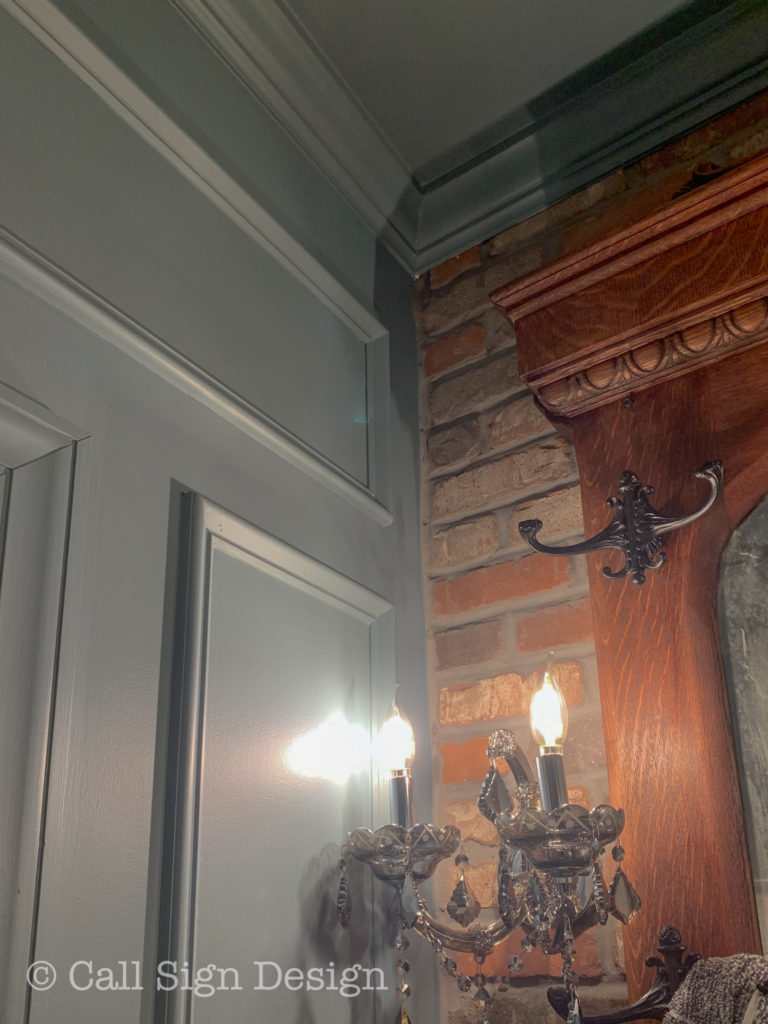
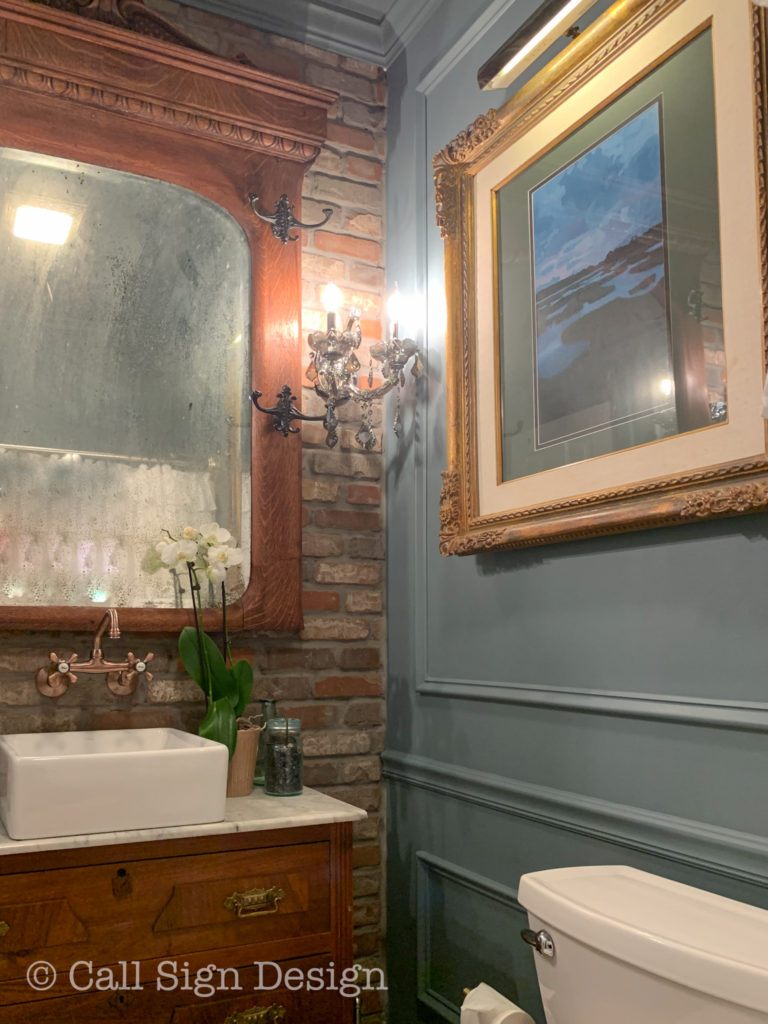
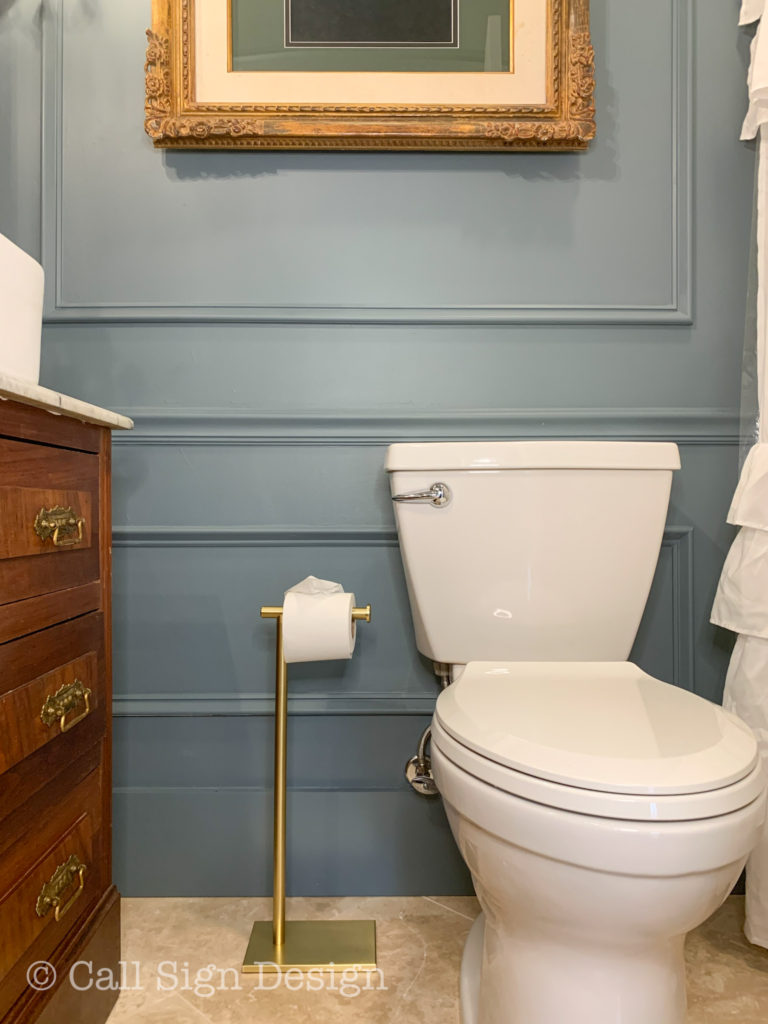
One of the easiest ways to add depth to walls (and get rid of that horrid new house feel) is to add moldings. I wanted this already small room to feel cozy, but not claustrophobic. By painting everything one color, it feels bigger and taller. We added picture frame moldings, chair rail, and put in new baseboards. We were able to reuse the crown molding.
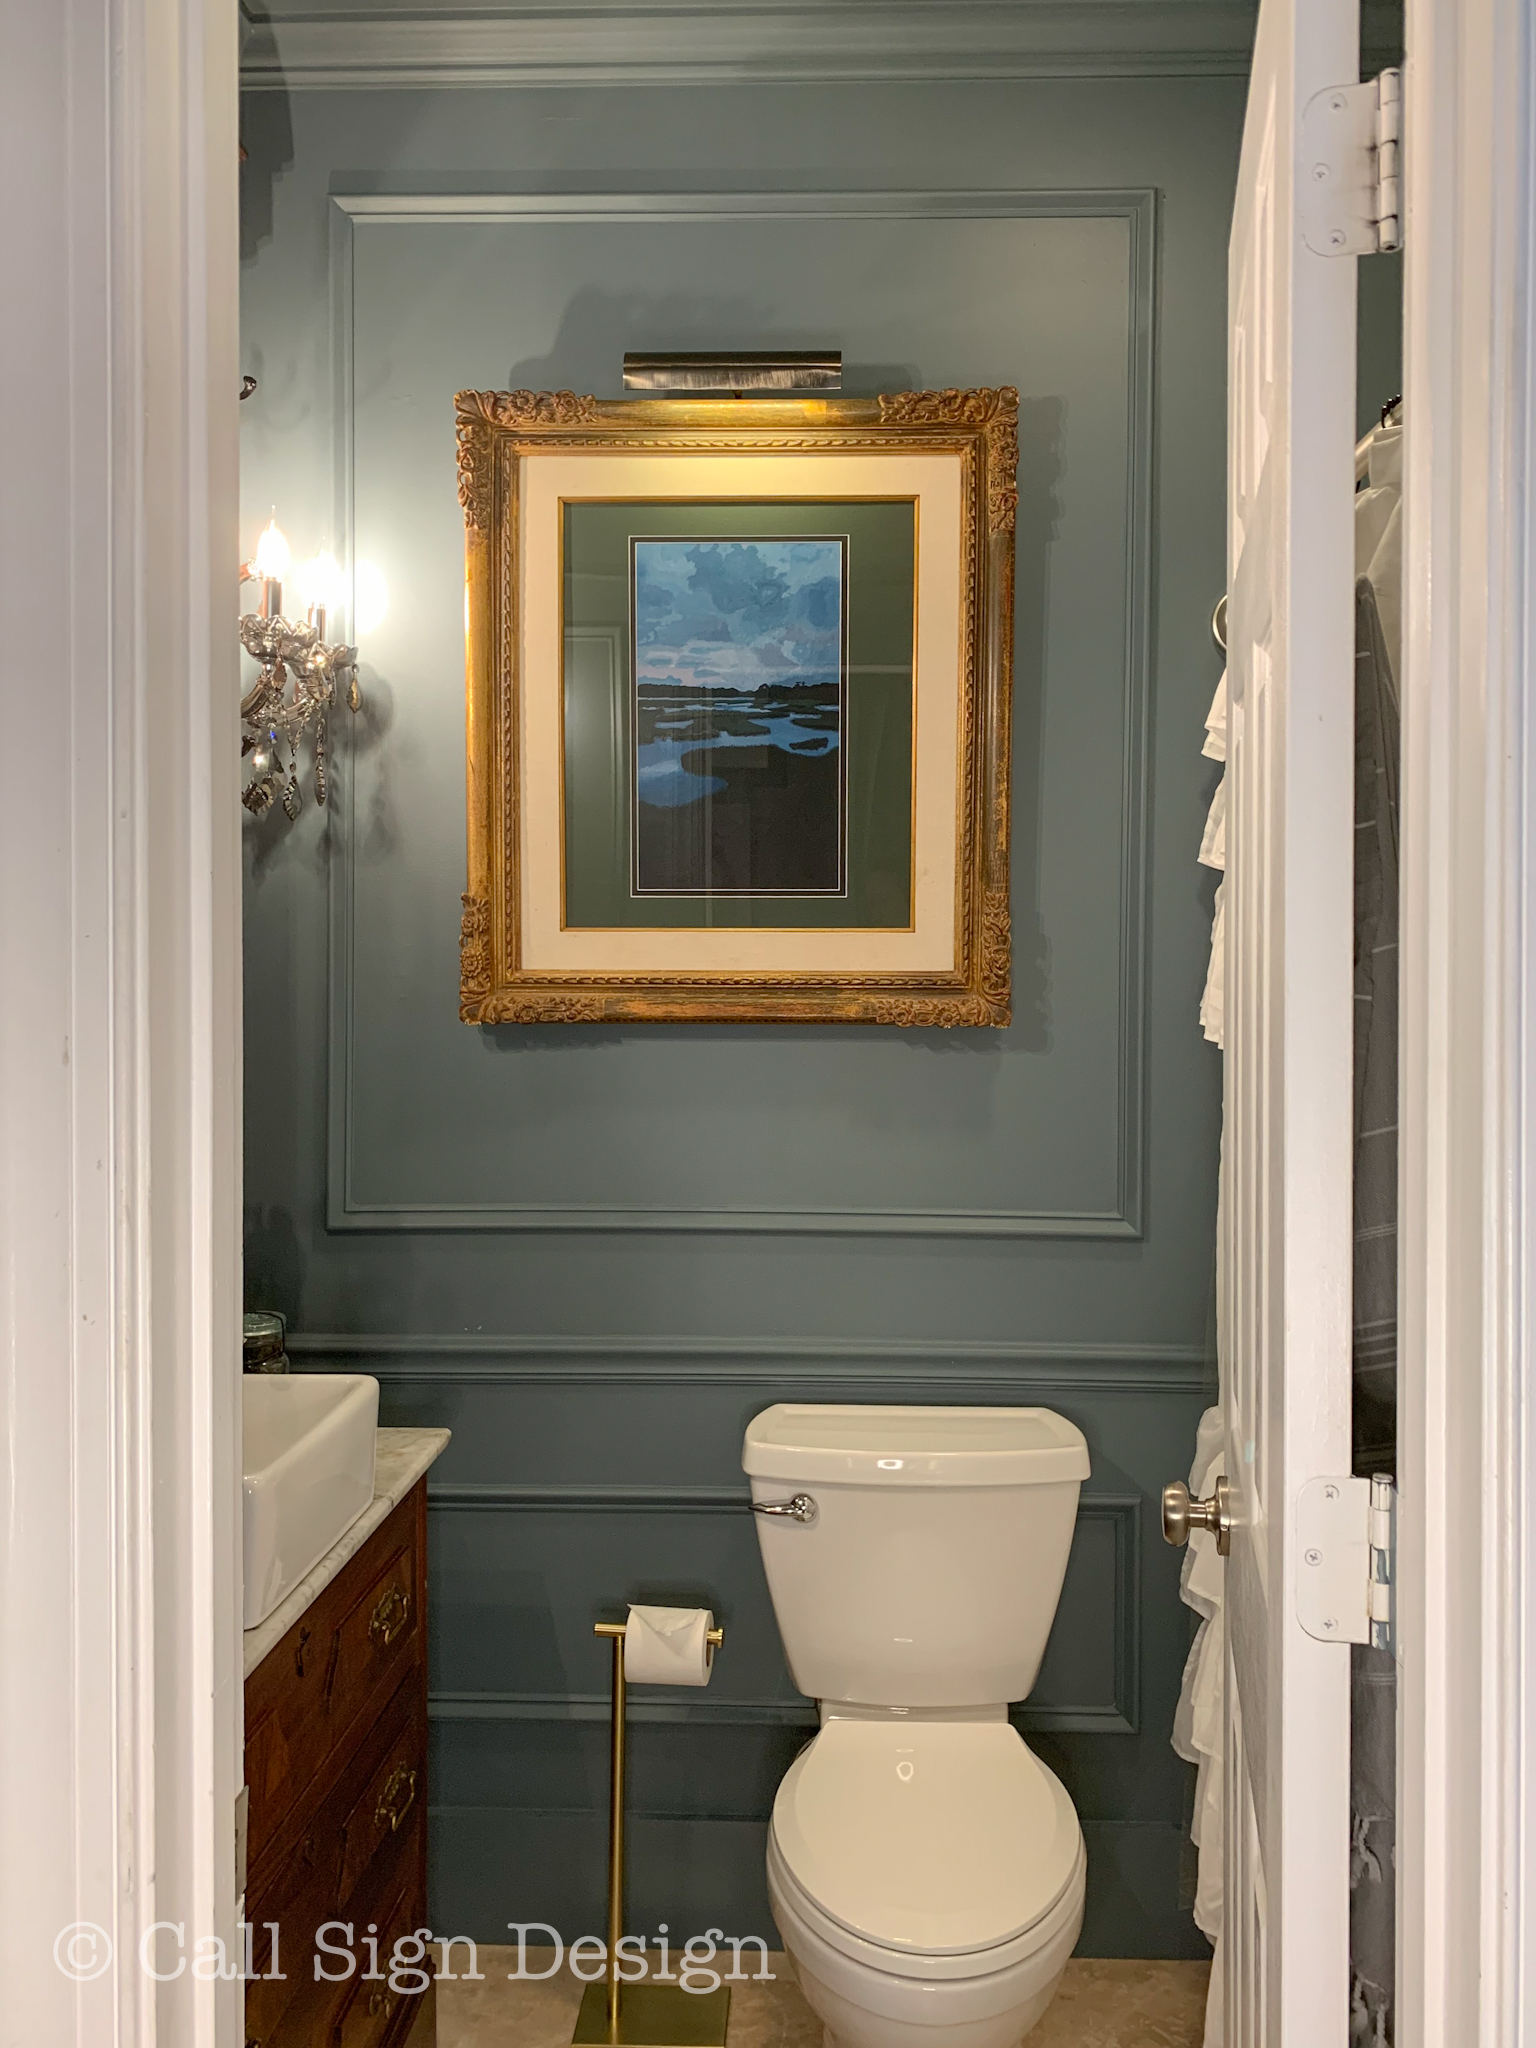
The Easy Way To DIY Breathtaking Landscape and Scenery Paintings
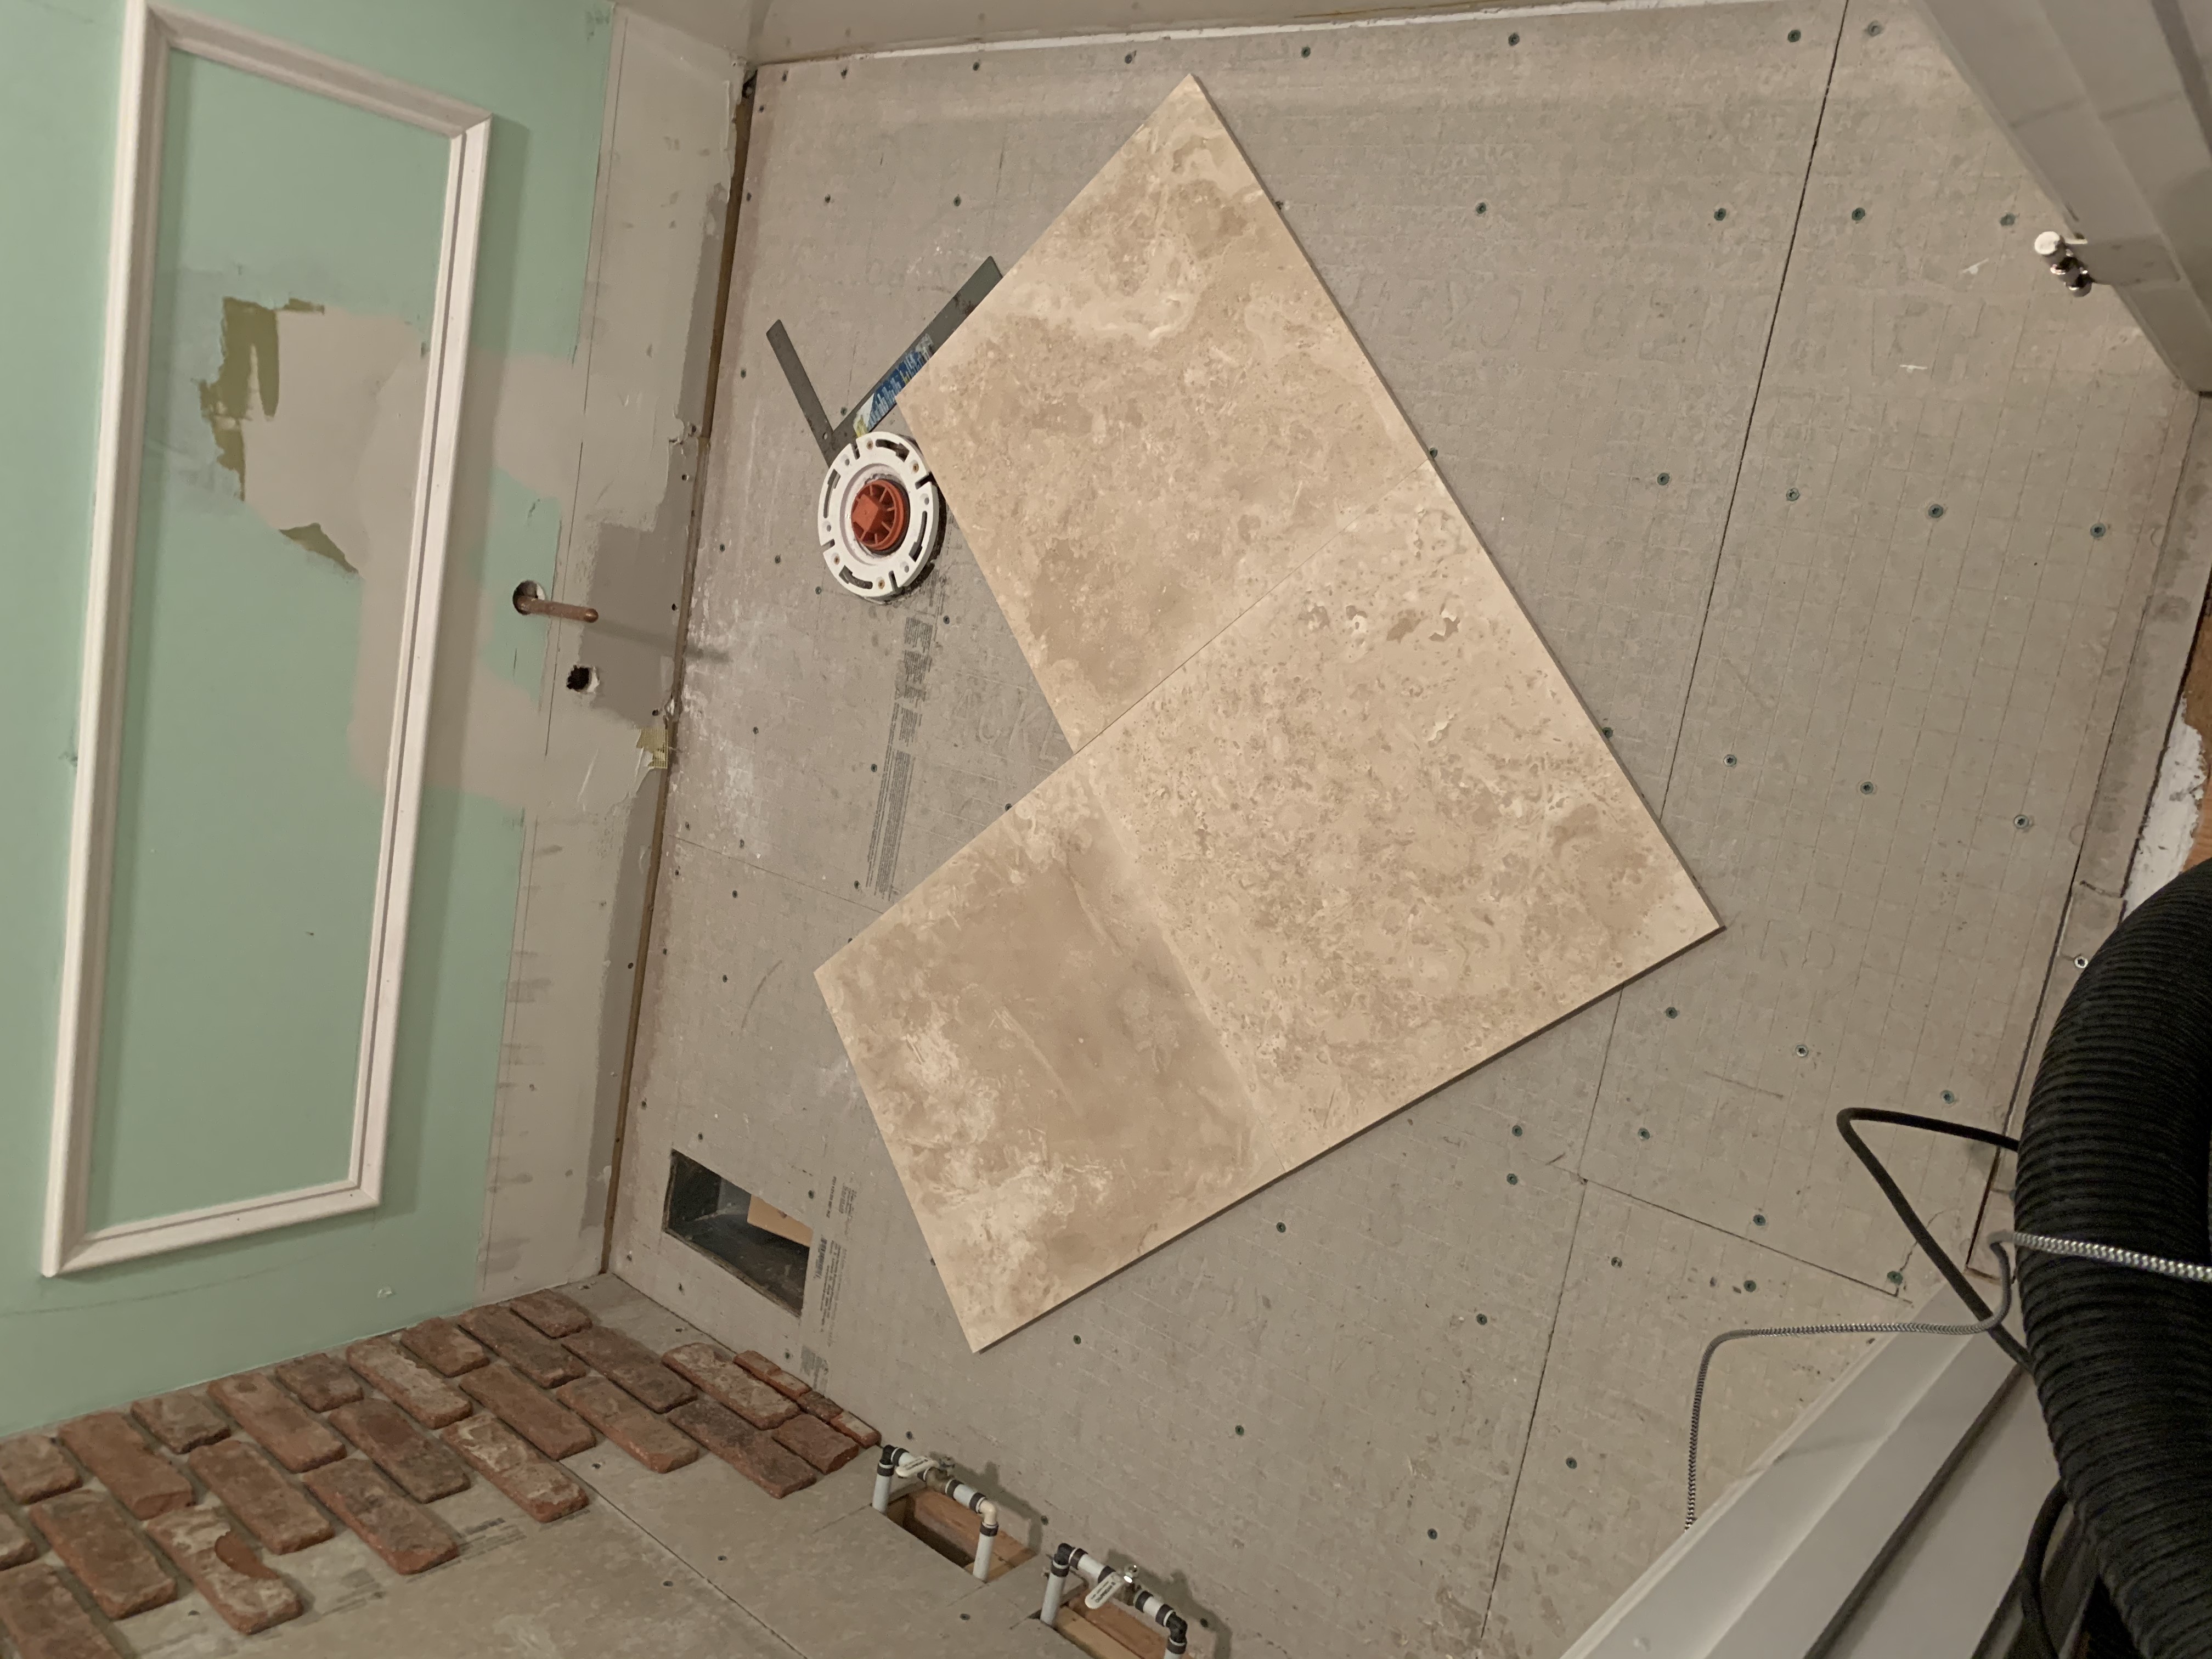
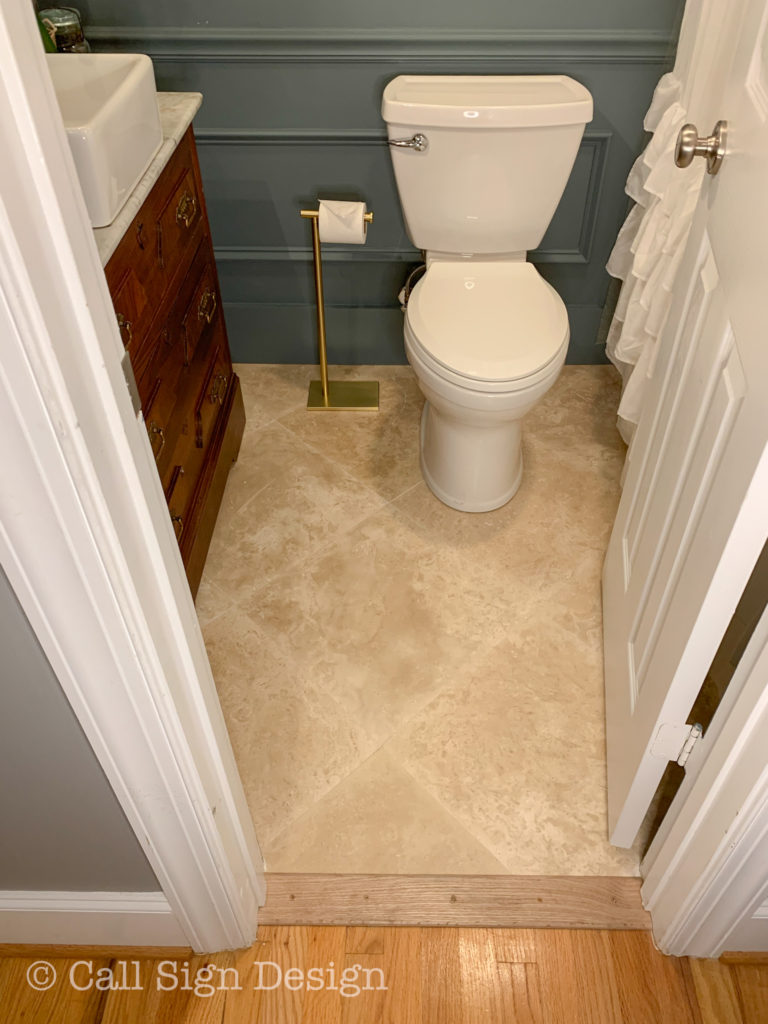
We pulled out the hardwood (why why why would you ever put wood in a bathroom???) and traded it for this gorgeous Travertine Field Tile in Ivory Honed (18″X18″). It is breathtaking but EXTREMELY finicky to install. We cracked two tiles during installation. The end result: SO WORTH IT. Travertine tile (limestone floor tile) is timeless and I made sure to pick one without the peachy/pink hues that I hate.
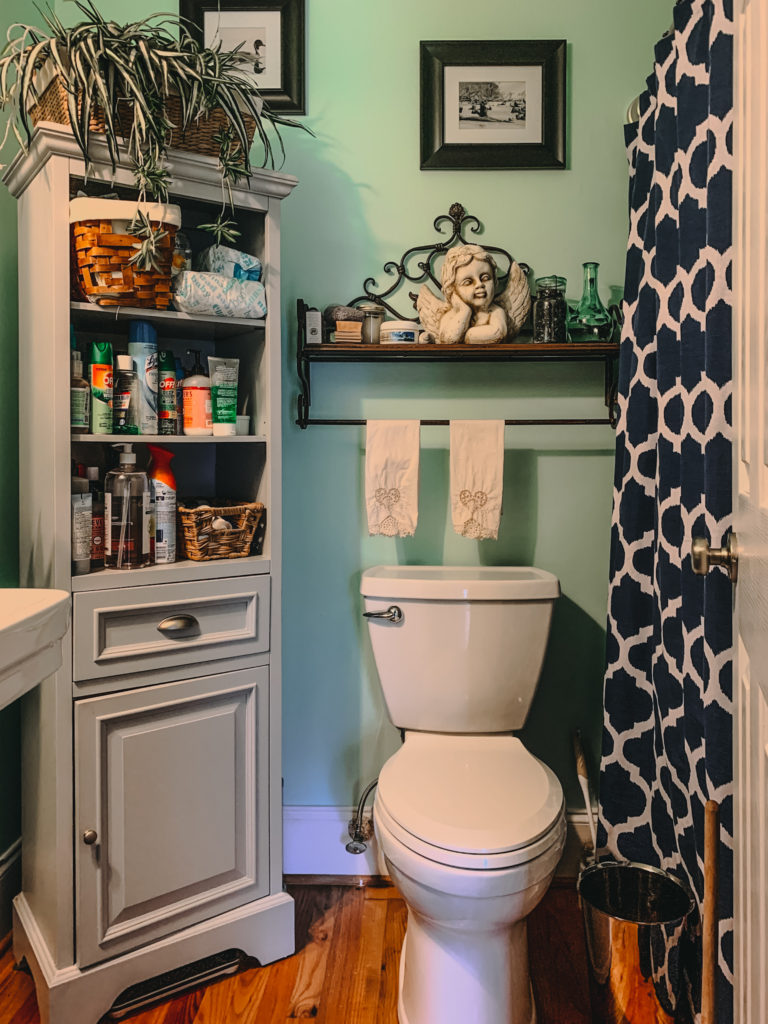
The commode we already had (we have upgraded every toilet in our last two houses to the American Standard Champion 4, because it is the UNCLOGGABLE toilet). It’s also very attractive, so win win. This just required a removal to put down the floors and a reinstall afterward.
How To Create A Historic Bathroom In A New Home
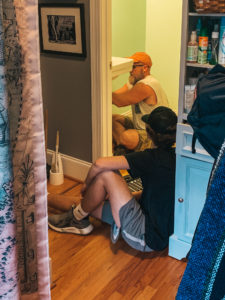
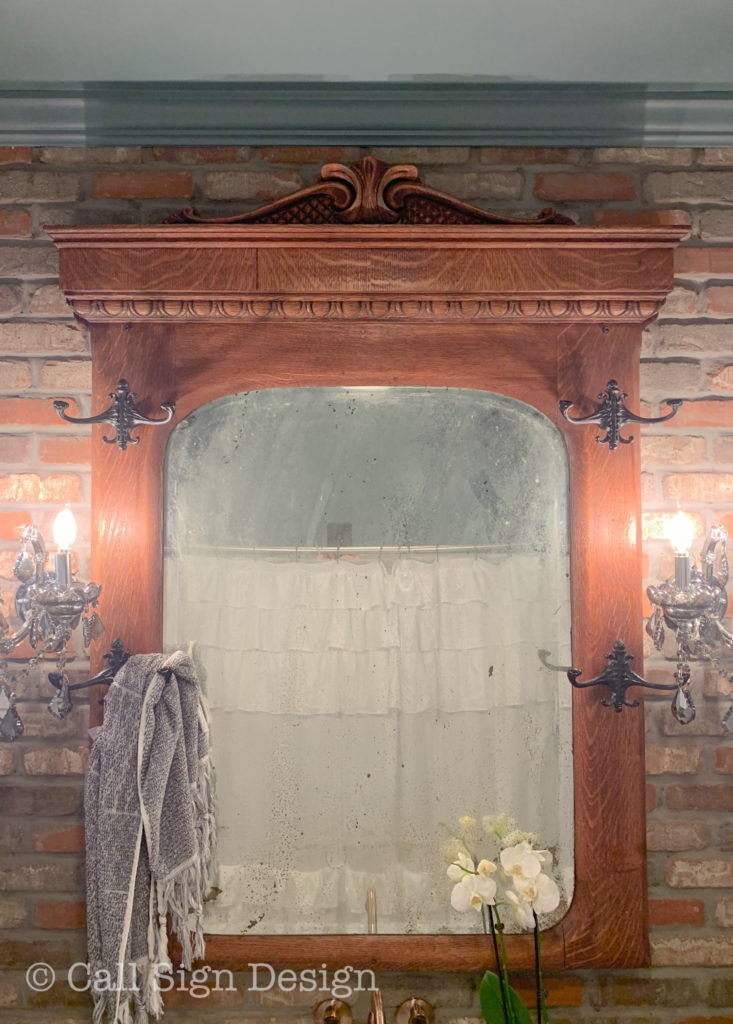
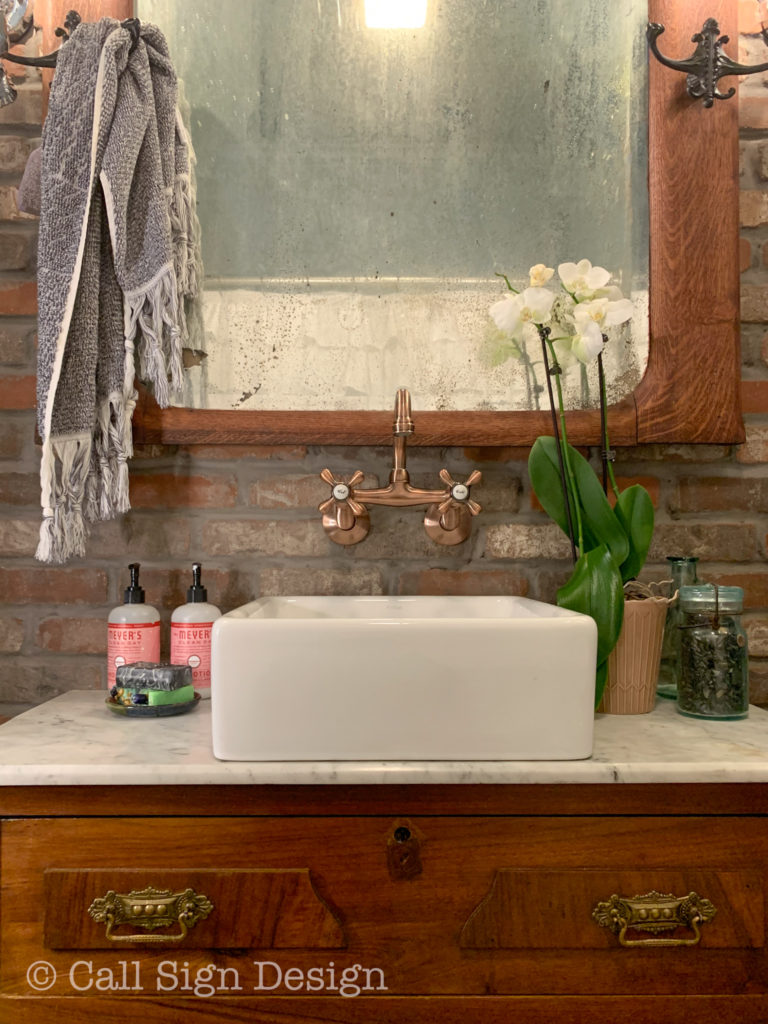
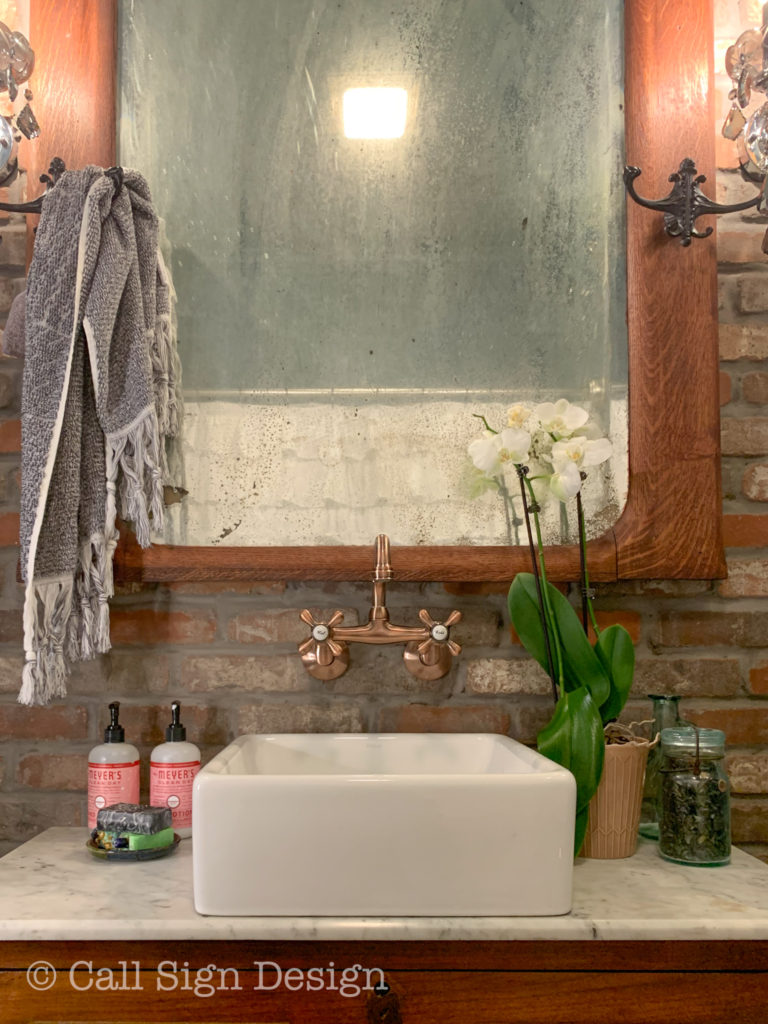
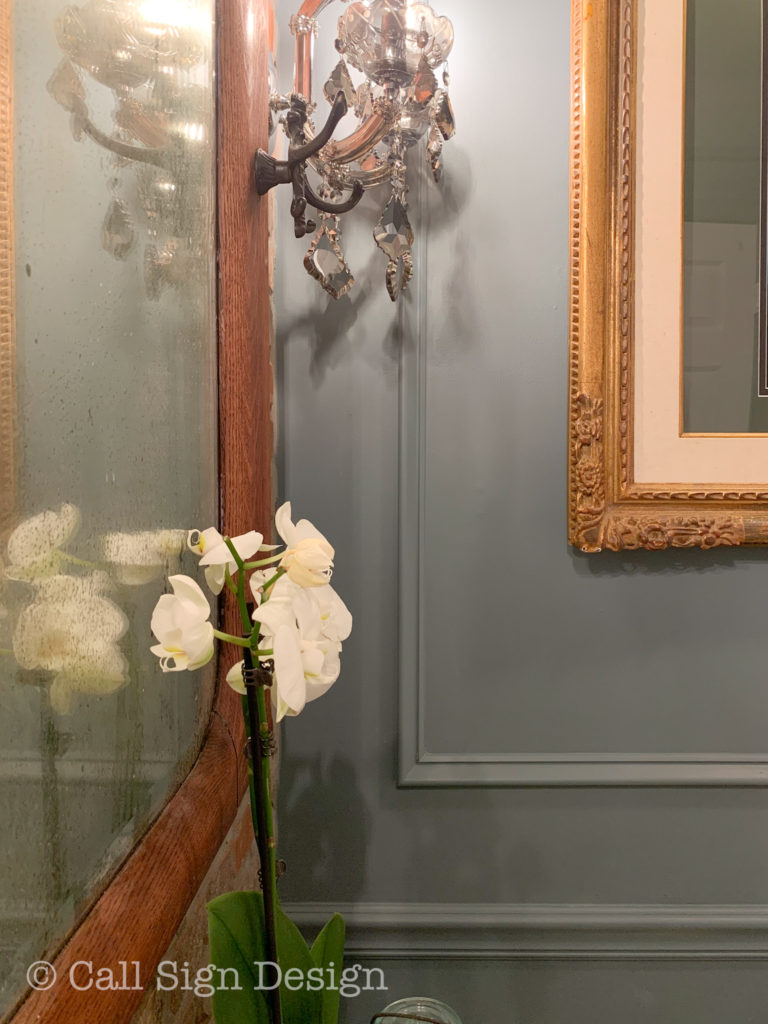
In this shot you can see the antique Hall Tree I found on Craigslist for (I think) around $100. It was painted in a robin’s egg blue, and it was no small task getting all the paint off, but I used this paint and varnish remover, and that helped tremendously. I absolutely ADORE how it turned out (and that I can use the hooks for towels).
One little problem, though. It is ENORMOUS.
Remember Mr. “That Bathroom Doesn’t Need to Renovated” from next door? Well, as penance I asked him and his son to come over to help hang it. This involved he, his son, and my husband squeezed into this tiny bathroom, holding it up, and trying to line the bolts up with the holes we had dry fitted.
I was balancing on the toilet lid behind them, waiting with the drill to drive home the bolts as soon as someone signaled they had a bolt lined up.
So, Rainman says, “I think it’s in.” And, without hesitation, I leapt into action… RAKAKAKAK… and drove that bolt home…
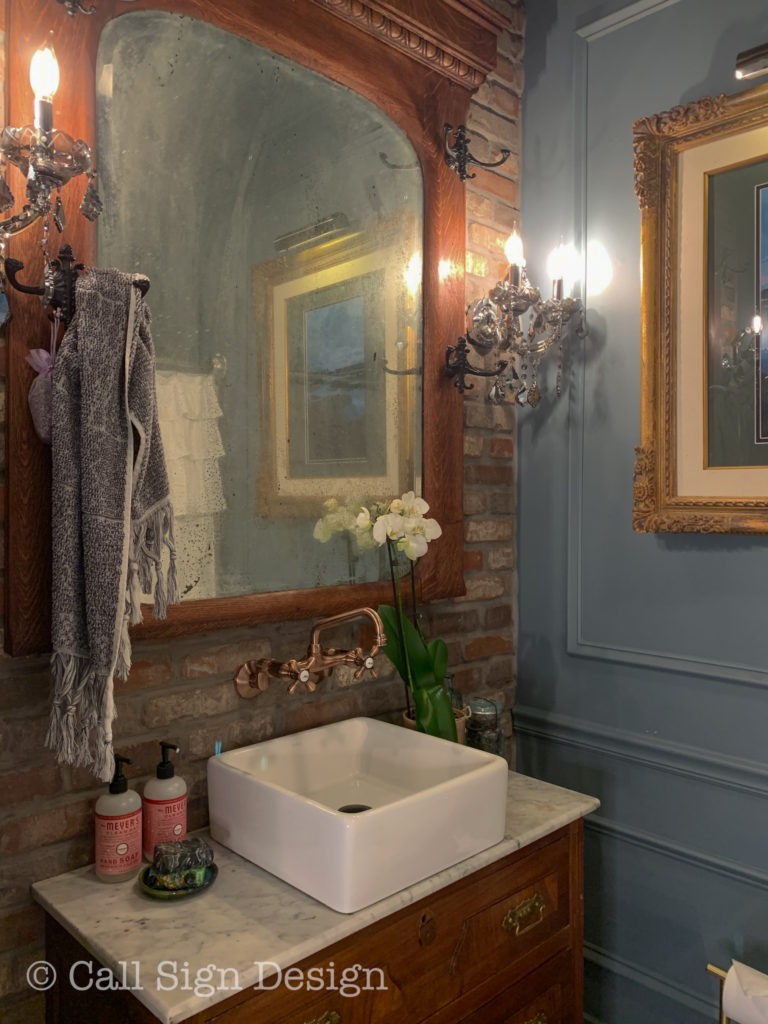
Smashing Rainman’s finger between the mirror and the brick.
We might have to work on our communication.
But, I’m betting the neighbor probably won’t mess with me after that. I feel like the head of an organized crime family. Be afraid, be very afraid.
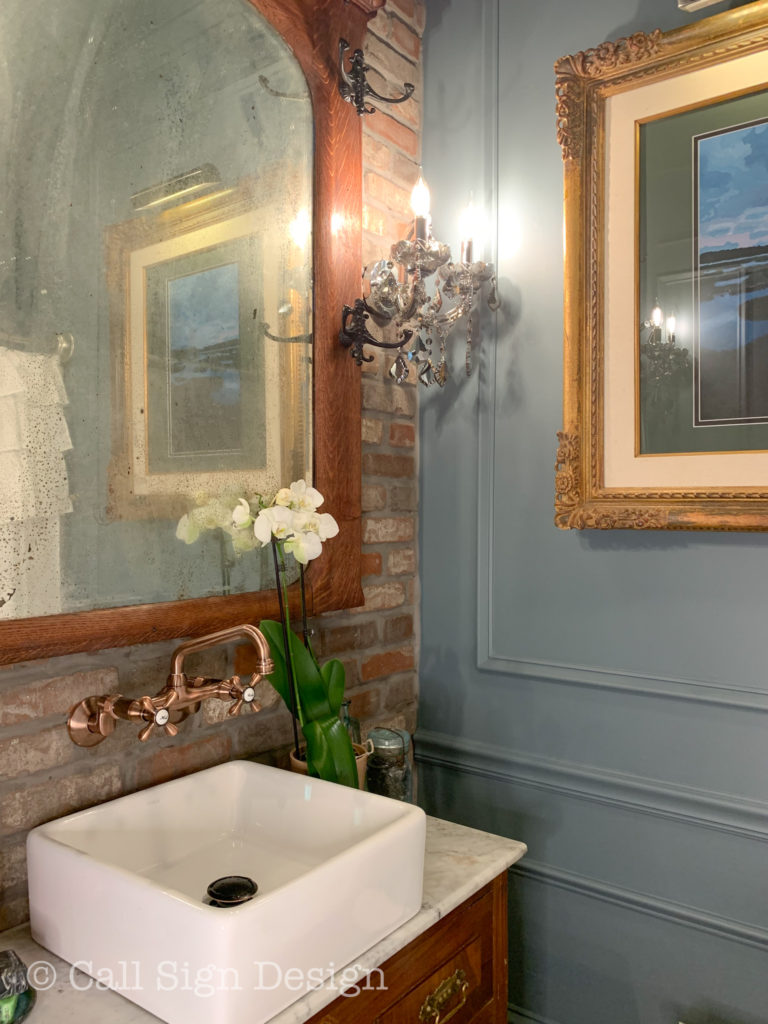
Then there’s my son, who is apparently NOT afraid of me. He thought I needed to replace the mirror part for one less “antiqued” (which he brought up no less than thirty-seven times prior to installation). Pffffft. What he doesn’t know yet, because he’s an amateur is that this is the perfect party mirror: everyone looks lovely in it. He’s just not old enough to appreciate the beauty of an imperfect mirror.
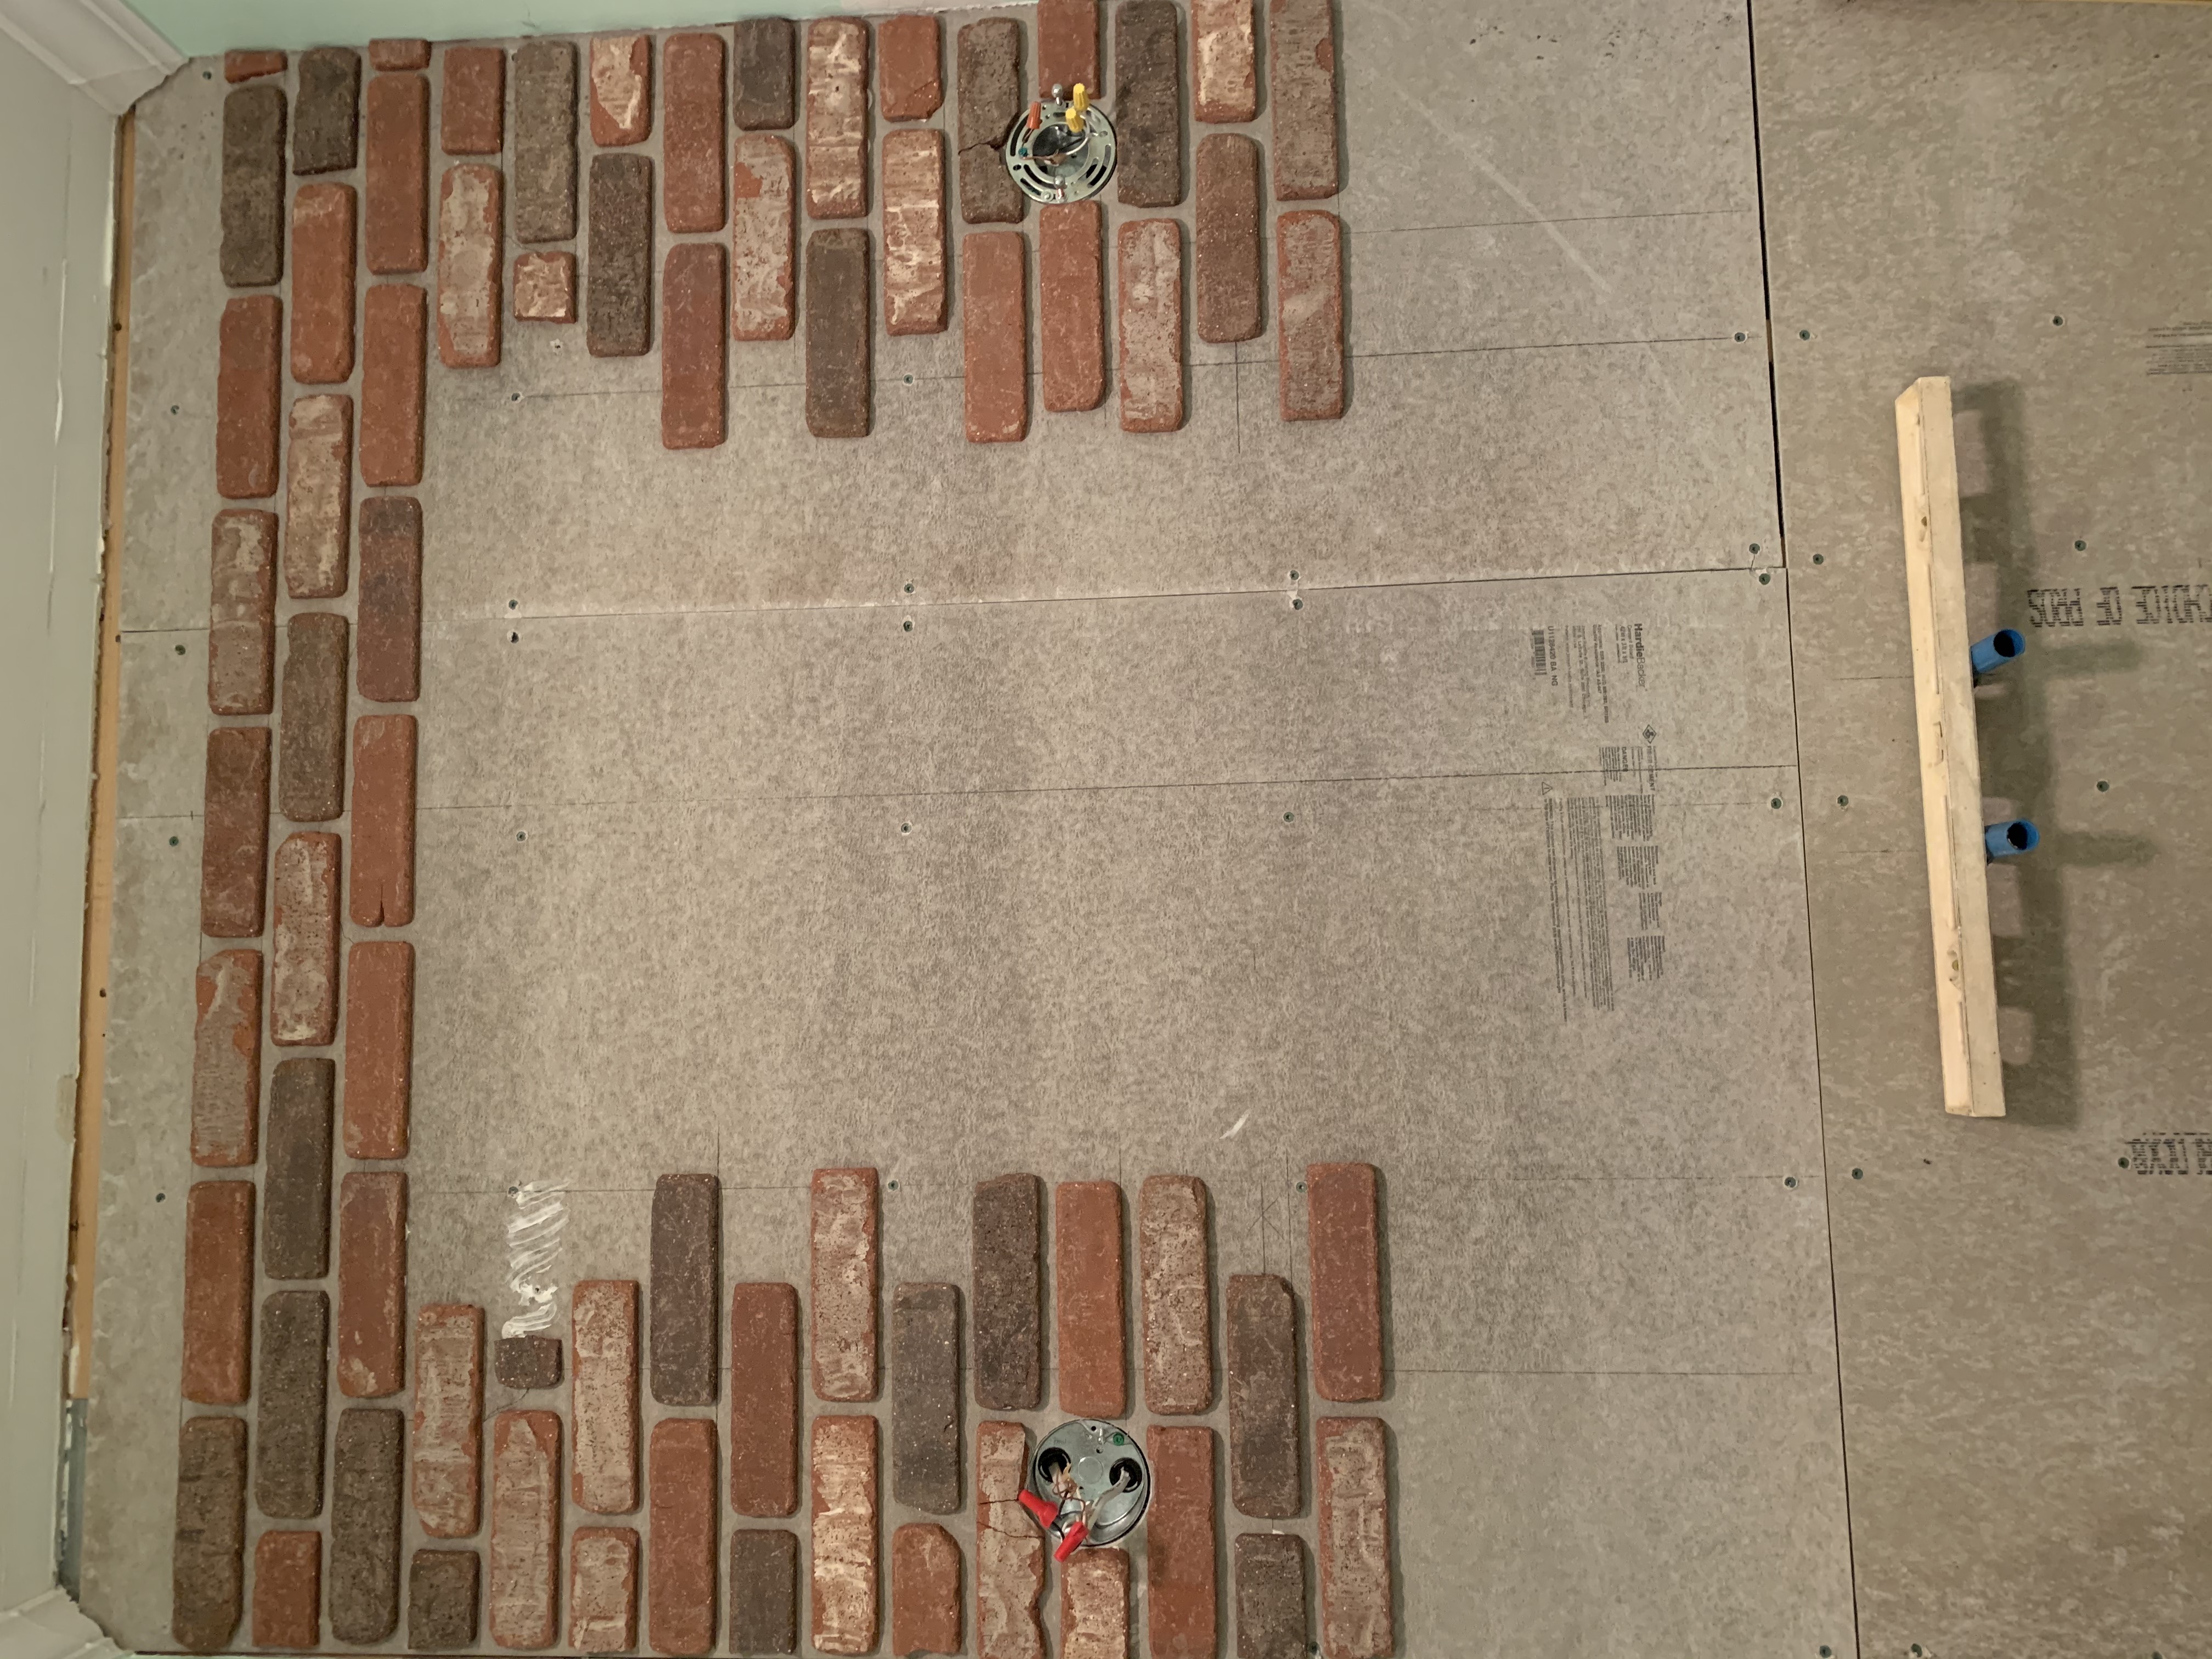
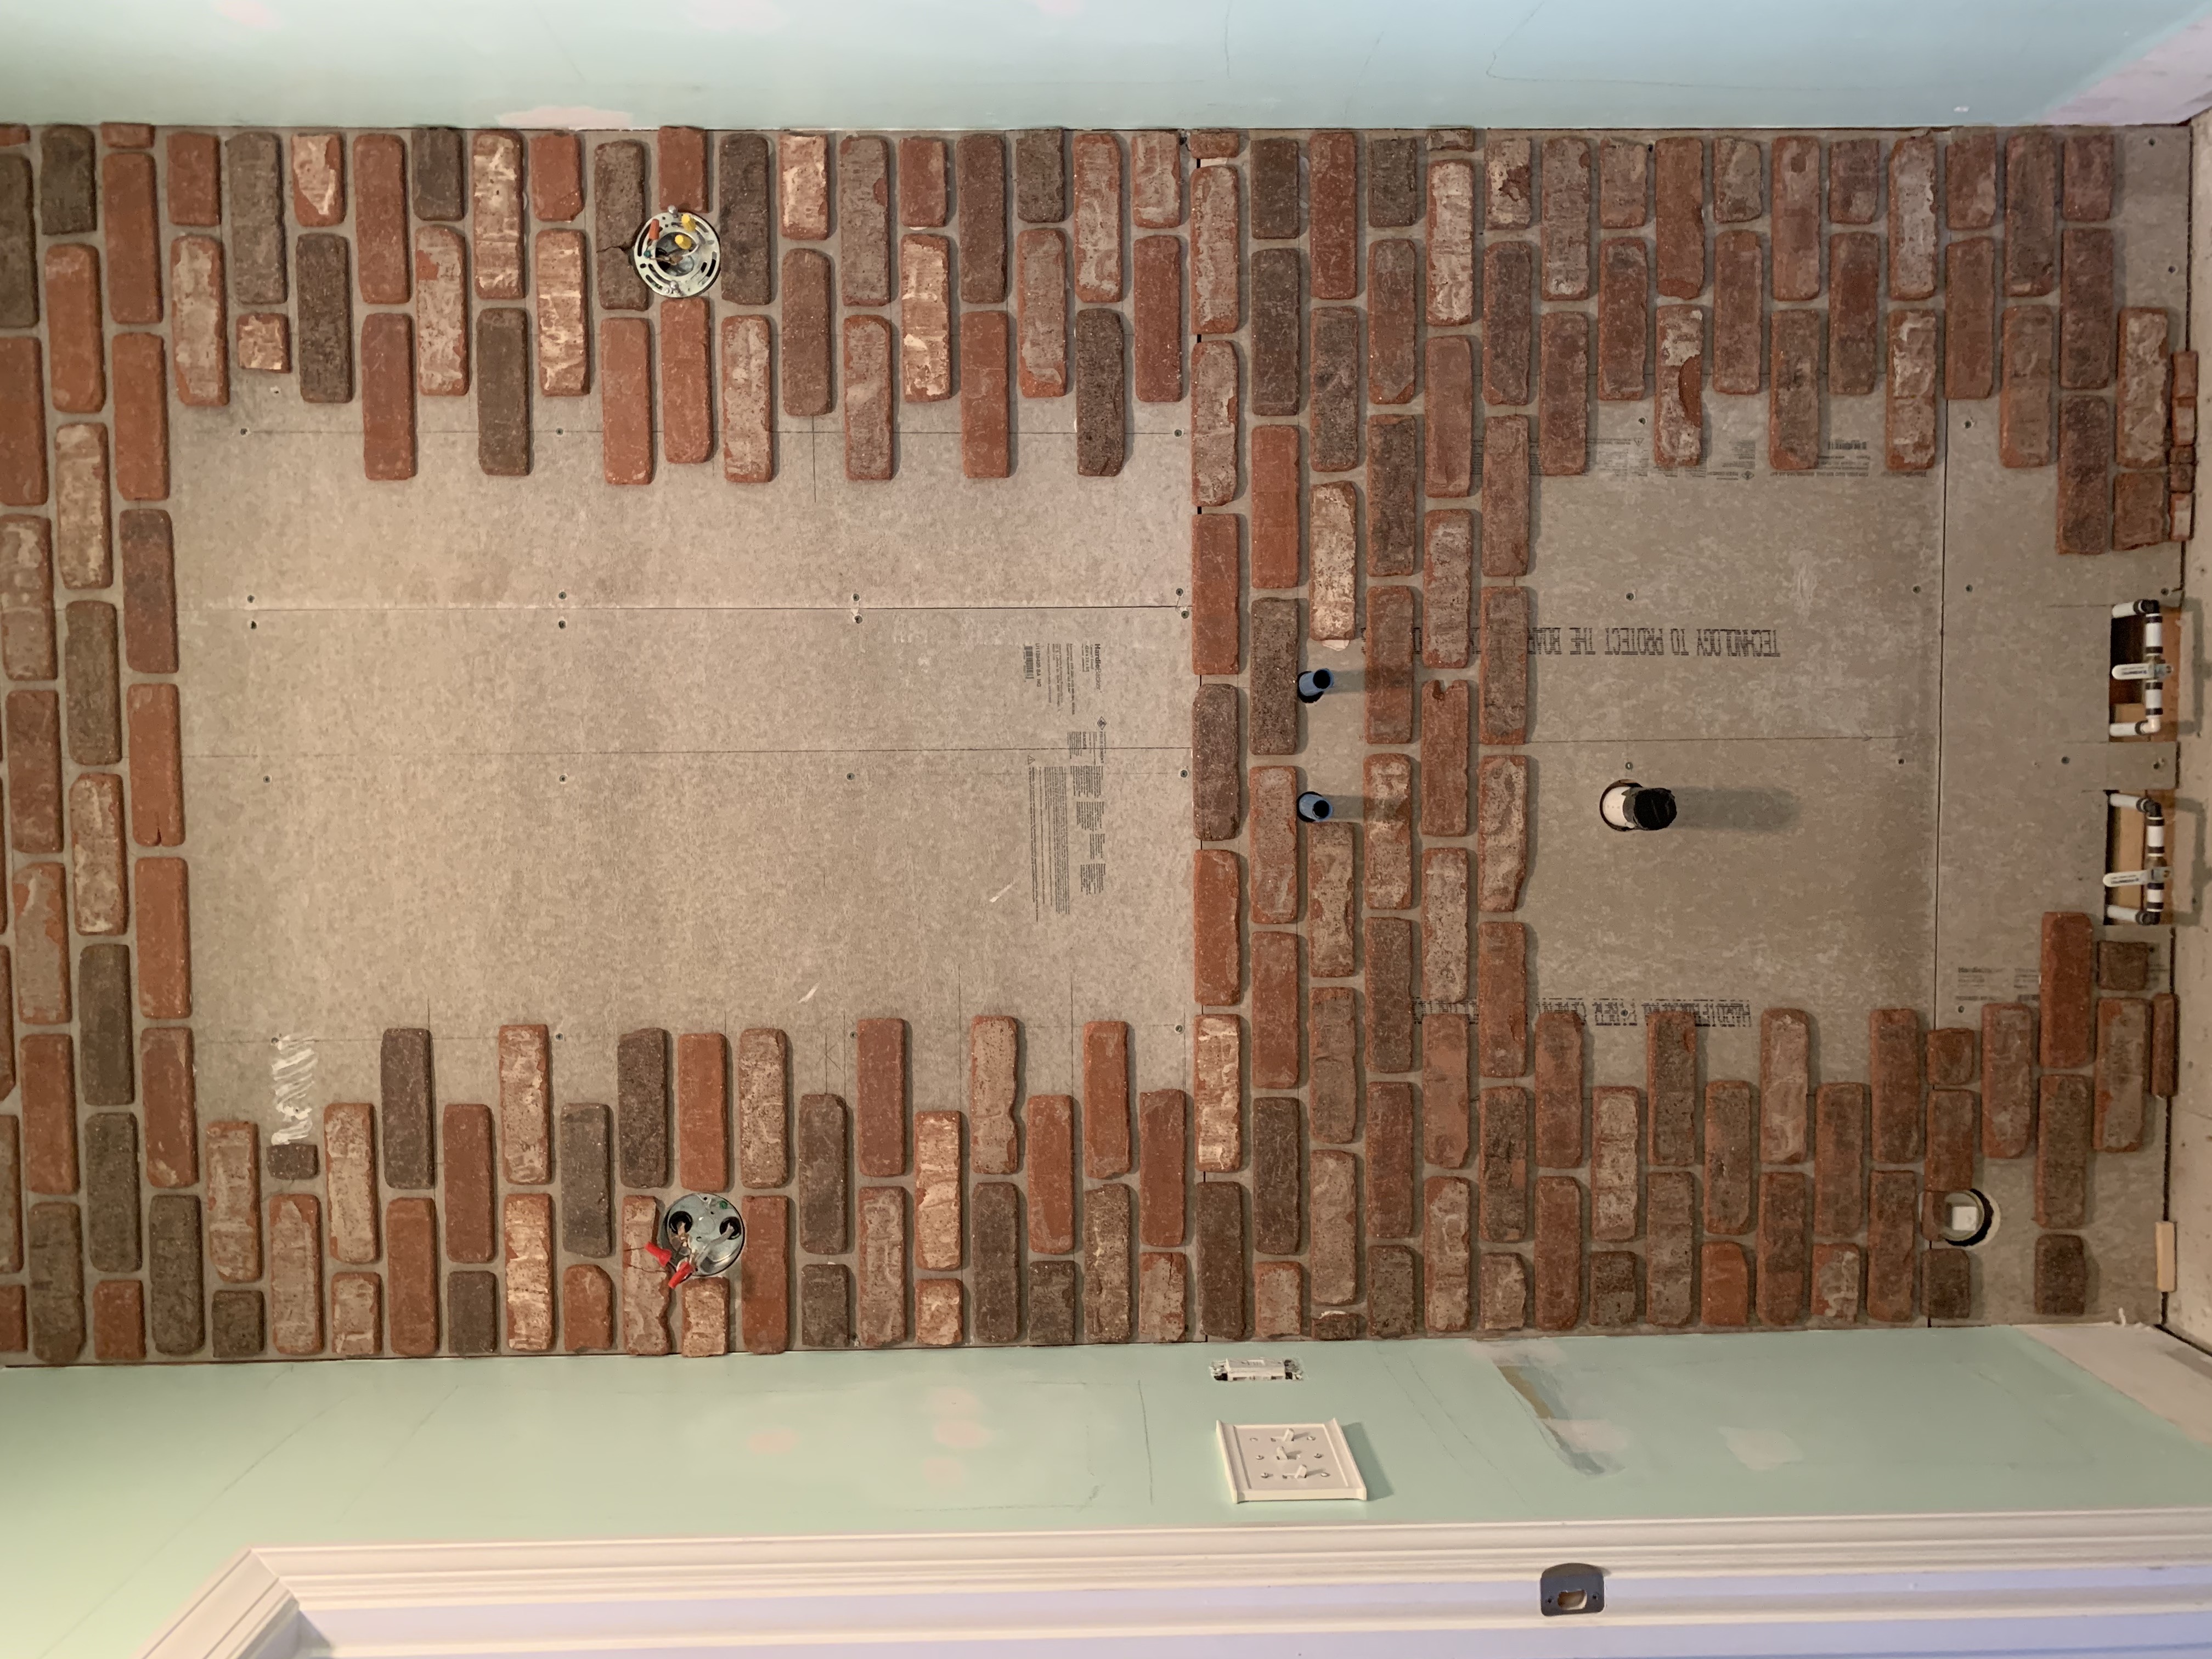
How To Create A Historic Bathroom In A New Home
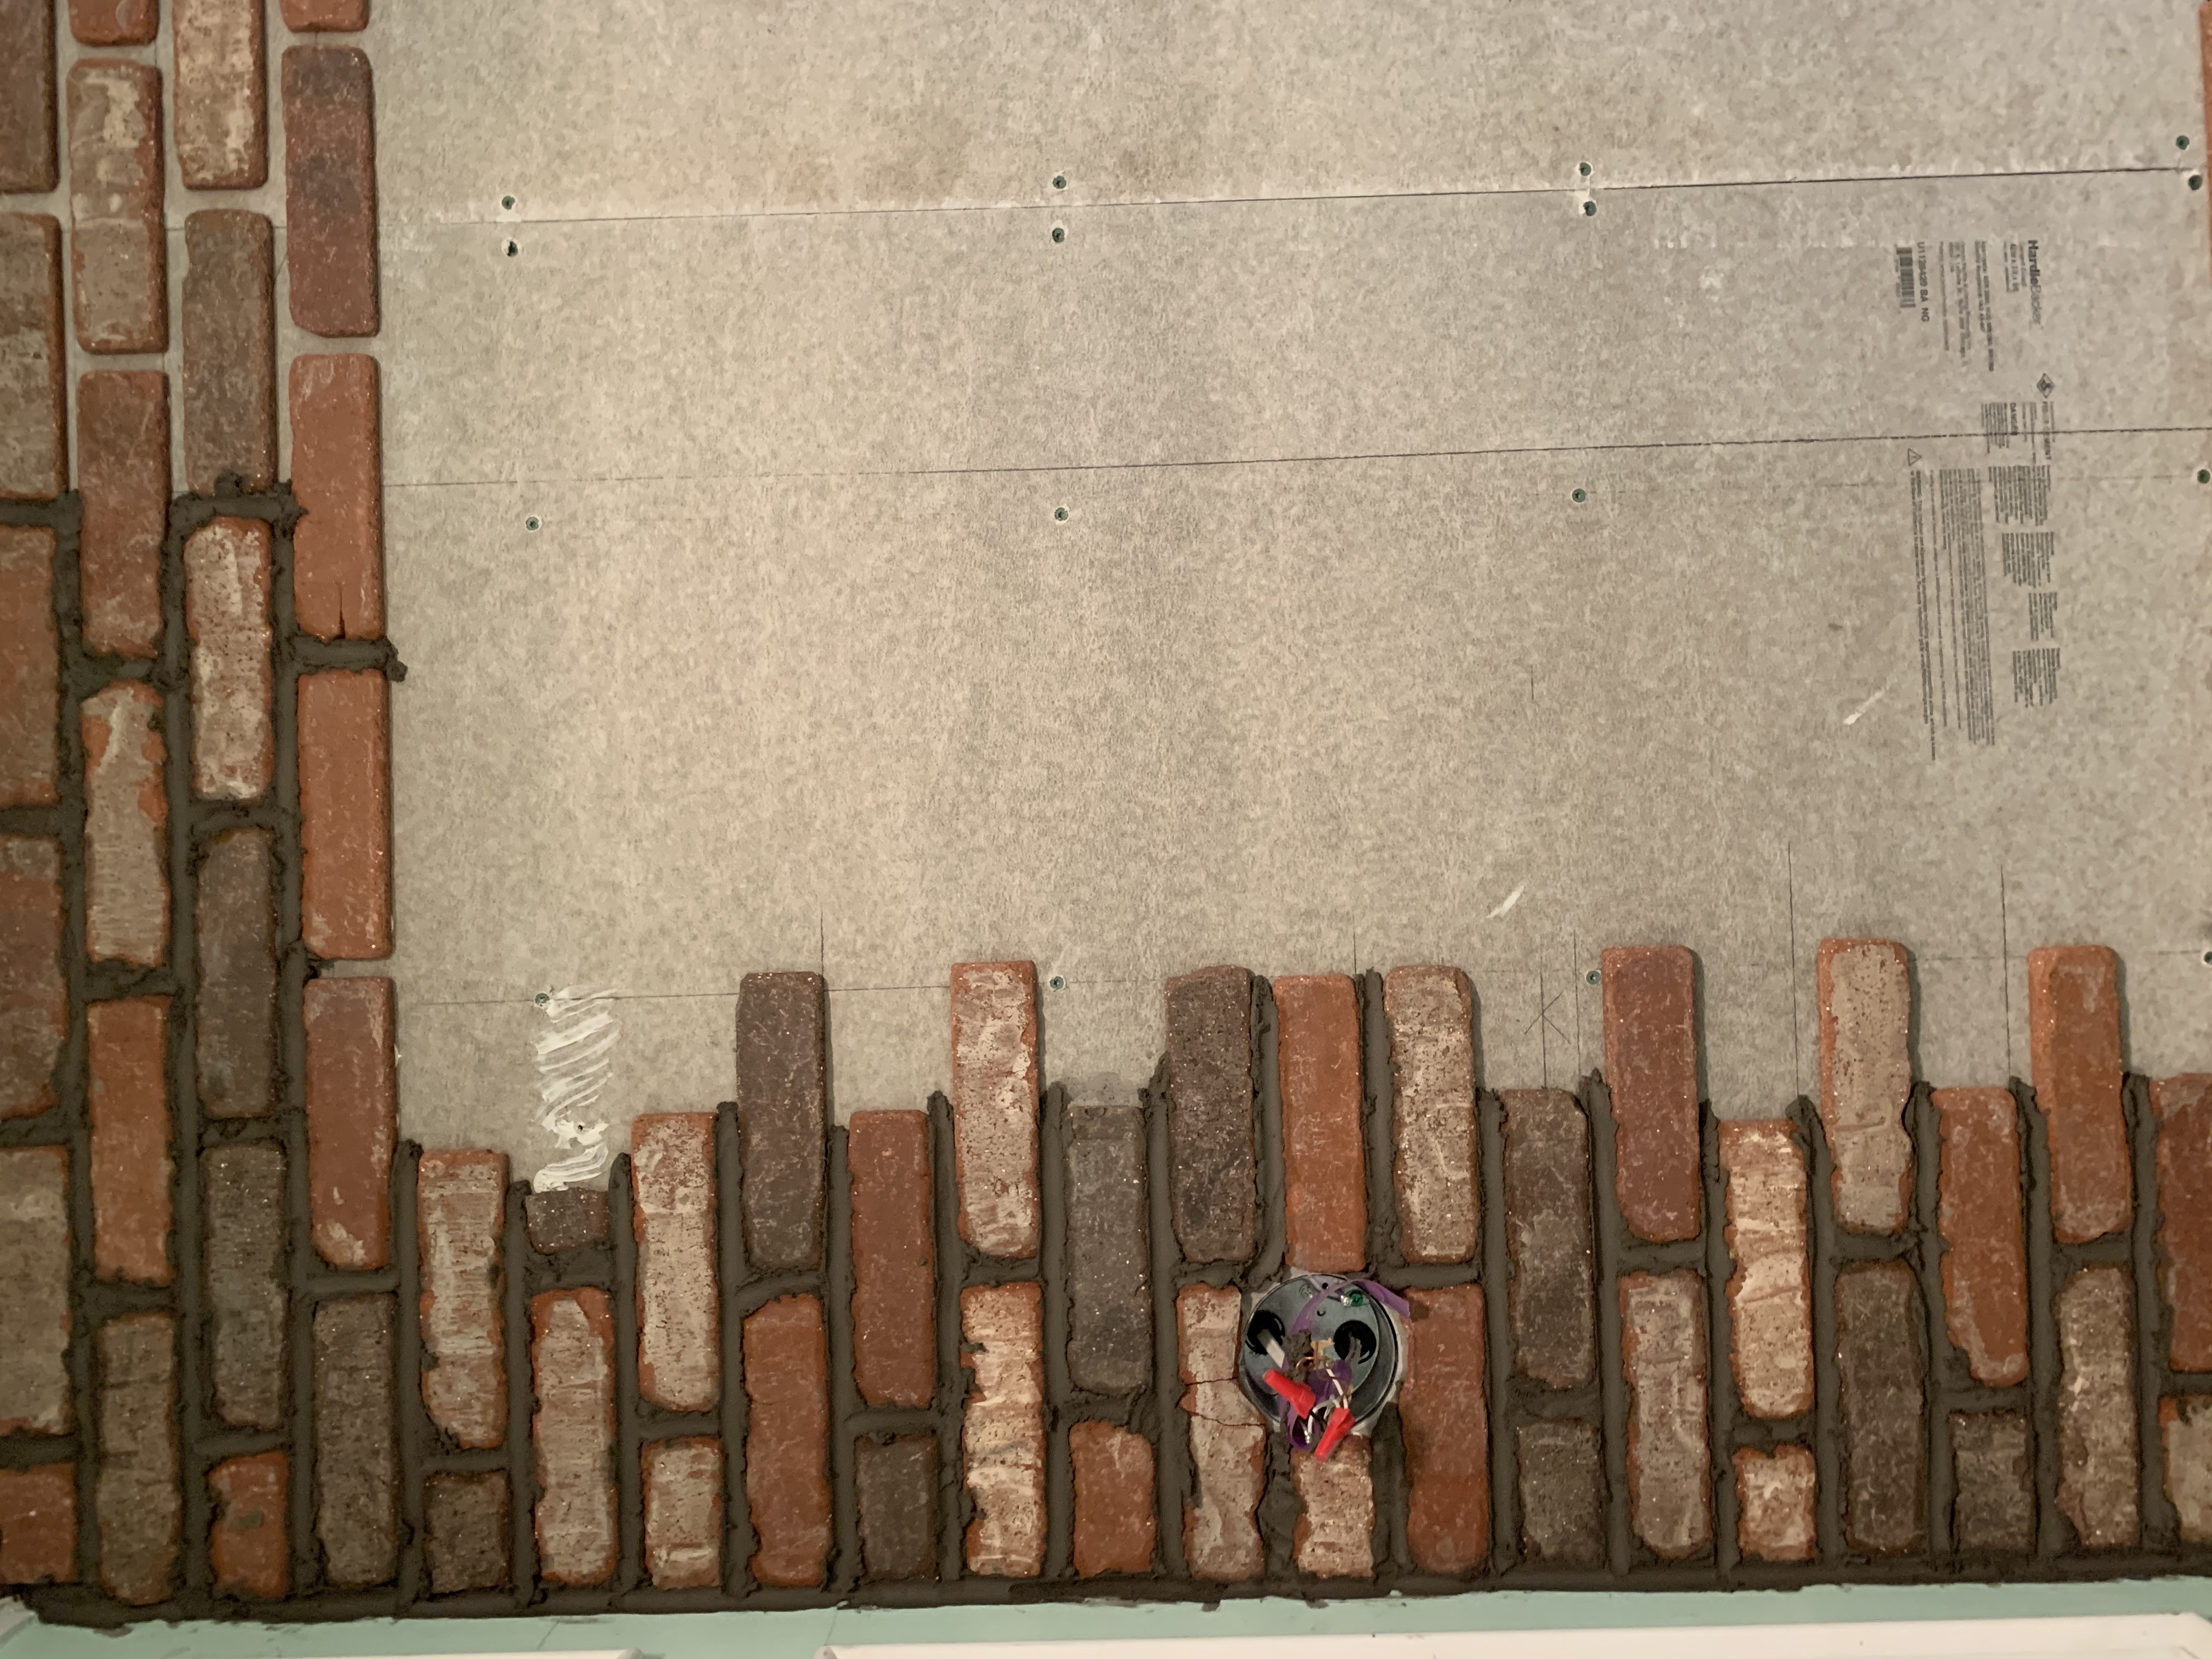
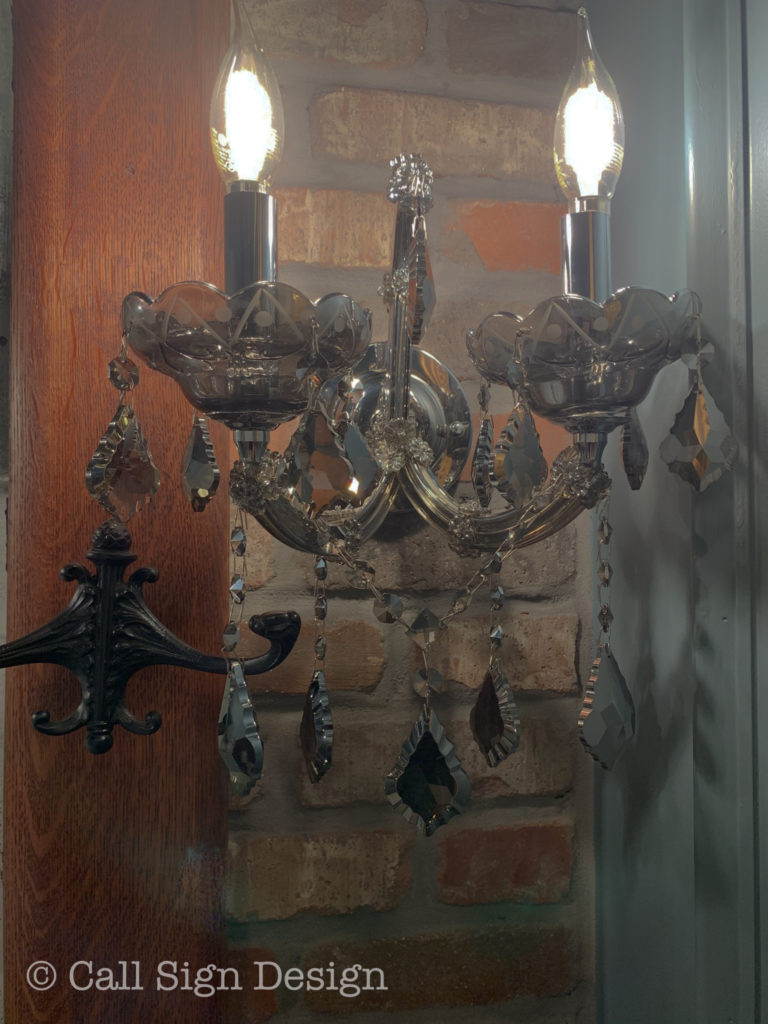
How about those awesome Veneer Bricks from Old Mill? This is the third time we’ve used these (the Castle Gate color) and they are absolutely FANTASTIC. They are 100% authentic brick, just thinner and easier to install. We went with a medium gray grout this time to achieve the antique look we were going for and I’m absolutely over the moon with how it turned out!
Watch for our installation tutorial coming soon!
How To Create A Historic Bathroom In A New Home
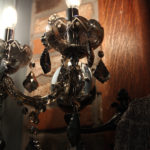
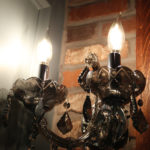
So, by now you’ve noticed those Dreamy 2 Light Sconces With Smoke Crystals. Yes, I’ll be buying more when they are in stock again. They match our RH Rococo Chandeliers (in smoke) perfectly, but with a much smaller price tag.
How To Create A Historic Bathroom In A New Home
And more pictures of my “Smithsonian bath,” (as my sweet sister dubbed it).
How To Create A Historic Bathroom In A New Home
How To Create A Historic Bathroom In A New Home
How To Create A Historic Bathroom In A New Home
How To Create A Historic Bathroom In A New Home
How To Create A Historic Bathroom In A New Home
How To Create A Historic Bathroom In A New Home
How To Create A Historic Bathroom In A New Home
How To Create A Historic Bathroom In A New Home
How To Create A Historic Bathroom In A New Home
How To Create A Historic Bathroom In A New Home
How To Create A Historic Bathroom In A New Home
Here is the complete source list for our bathroom reno (and staging items):
Can you see doing something like this in your bathroom?
Check out more fantastic projects and design inspiration on the blog!
Cheers!
*Legal stuff:
I am honest about my experiences with different products and write because I enjoy it. I do however, have the opportunity to earn money for my writing, also.
Slavetodiy.com is a participant in the Amazon Services LLC Associates Program, LTK, and other affiliate programs: affiliate advertising programs designed to provide a means for sites to earn advertising fees by advertising and linking to amazon.com and other sites. These programs offer a small commission on products sold through their affiliate links. Each of your purchases via our affiliation links supports our cause at no additional cost to you.
If a blogger links to a product (with a special code for affiliates embedded in the link), and a reader places an item in their “shopping cart” through that link within 24 hours of clicking the link, the blogger gets a small percentage of the sale. These links are not “pay per click.” If you click on the product link and stay around and purchase something else, however, I will get a commission on that sale.
I have been hunting for antique oil and acrylic landscape paintings for about the last five years. These have always been notoriously hard to come by anyway, but since they’ve become wildly popular in the last year or two, my situation has not improved. The price for these antiques has gone way, way up and I certainly can’t afford the collection I really want. Modern landscape artists are seeing huge gains in the price of their artwork as oil and acrylic landscape paintings trends in the home decor stratosphere- good for them, but not so much for me!
But, did you know that you could easily create your own knock-off landscape paintings and art that look like antiques? Did you know that you can create the paintings for about $25? By using acrylics, which I find much easier to use than creating a watercolor landscape, the process becomes much more simple!
*This post may contain affiliate links. Please see full disclosure at the end of the post.
If you’re a little bit creative and willing to try your hand at it, there’s a simple, super easy way, to create your own masterpiece painting without paying the prices that landscape artists demand!
Step One: Find a landscape photo on your phone or something not copyrighted online that you like the look and feel of.
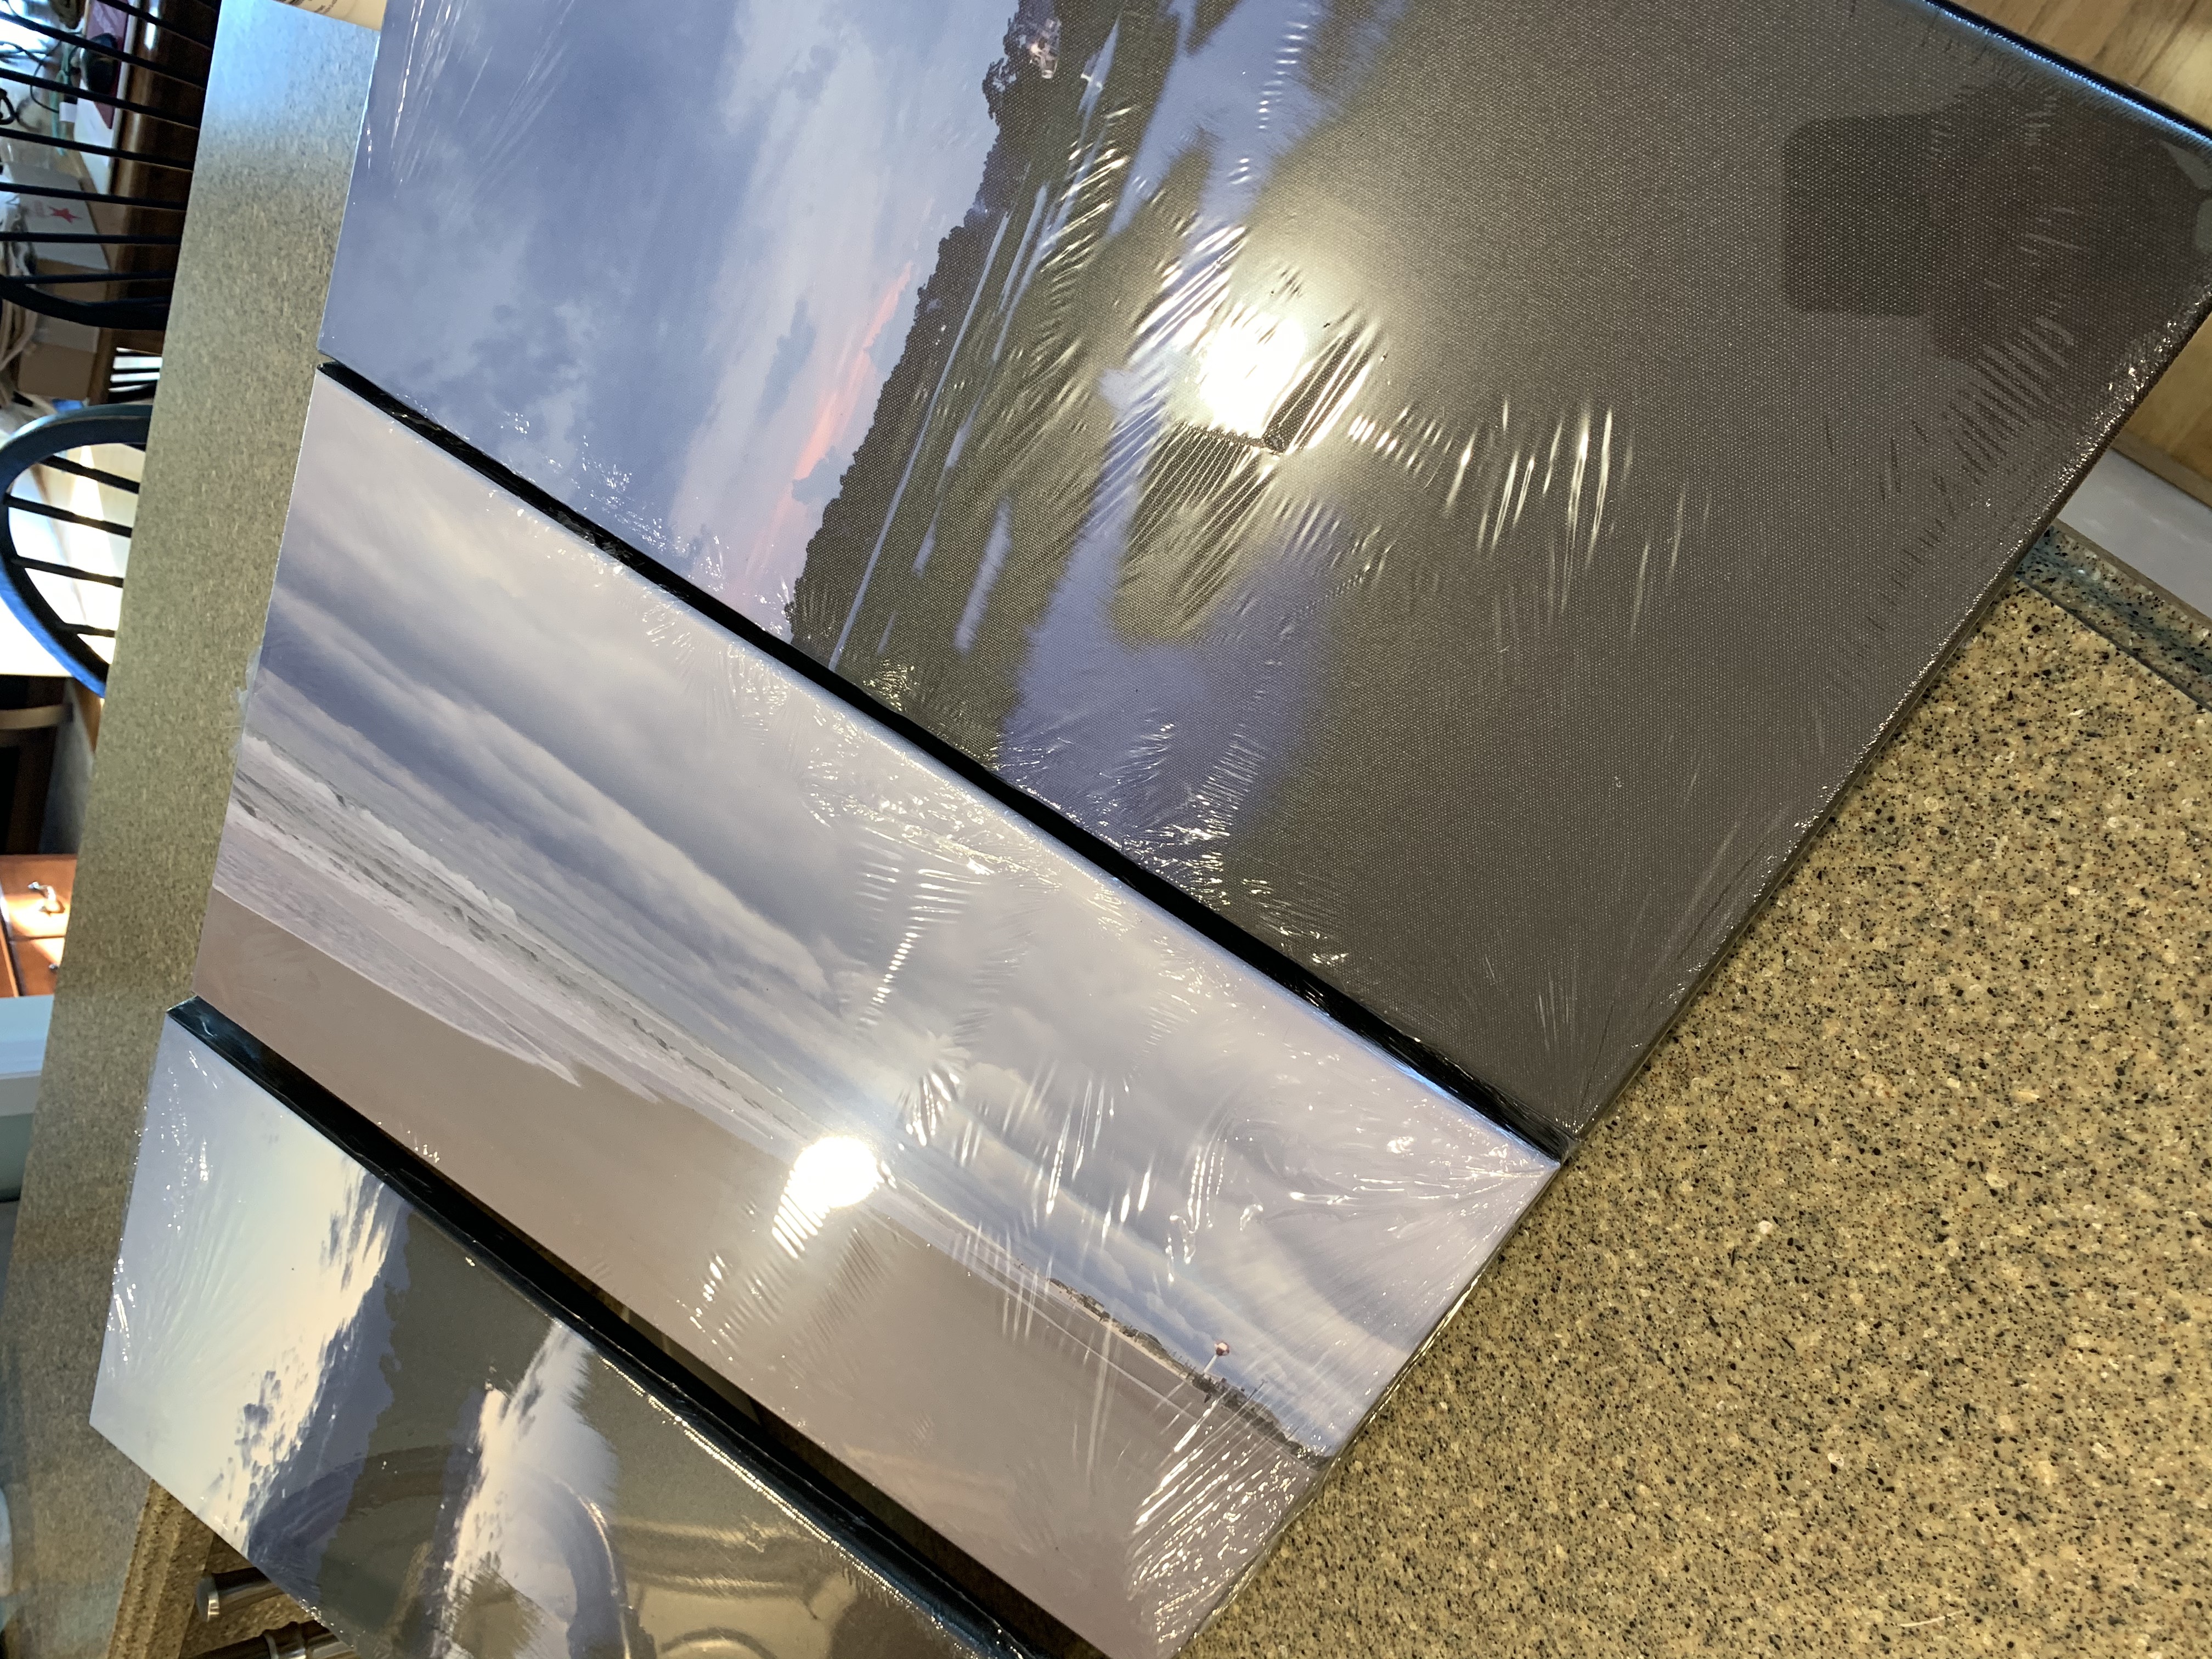
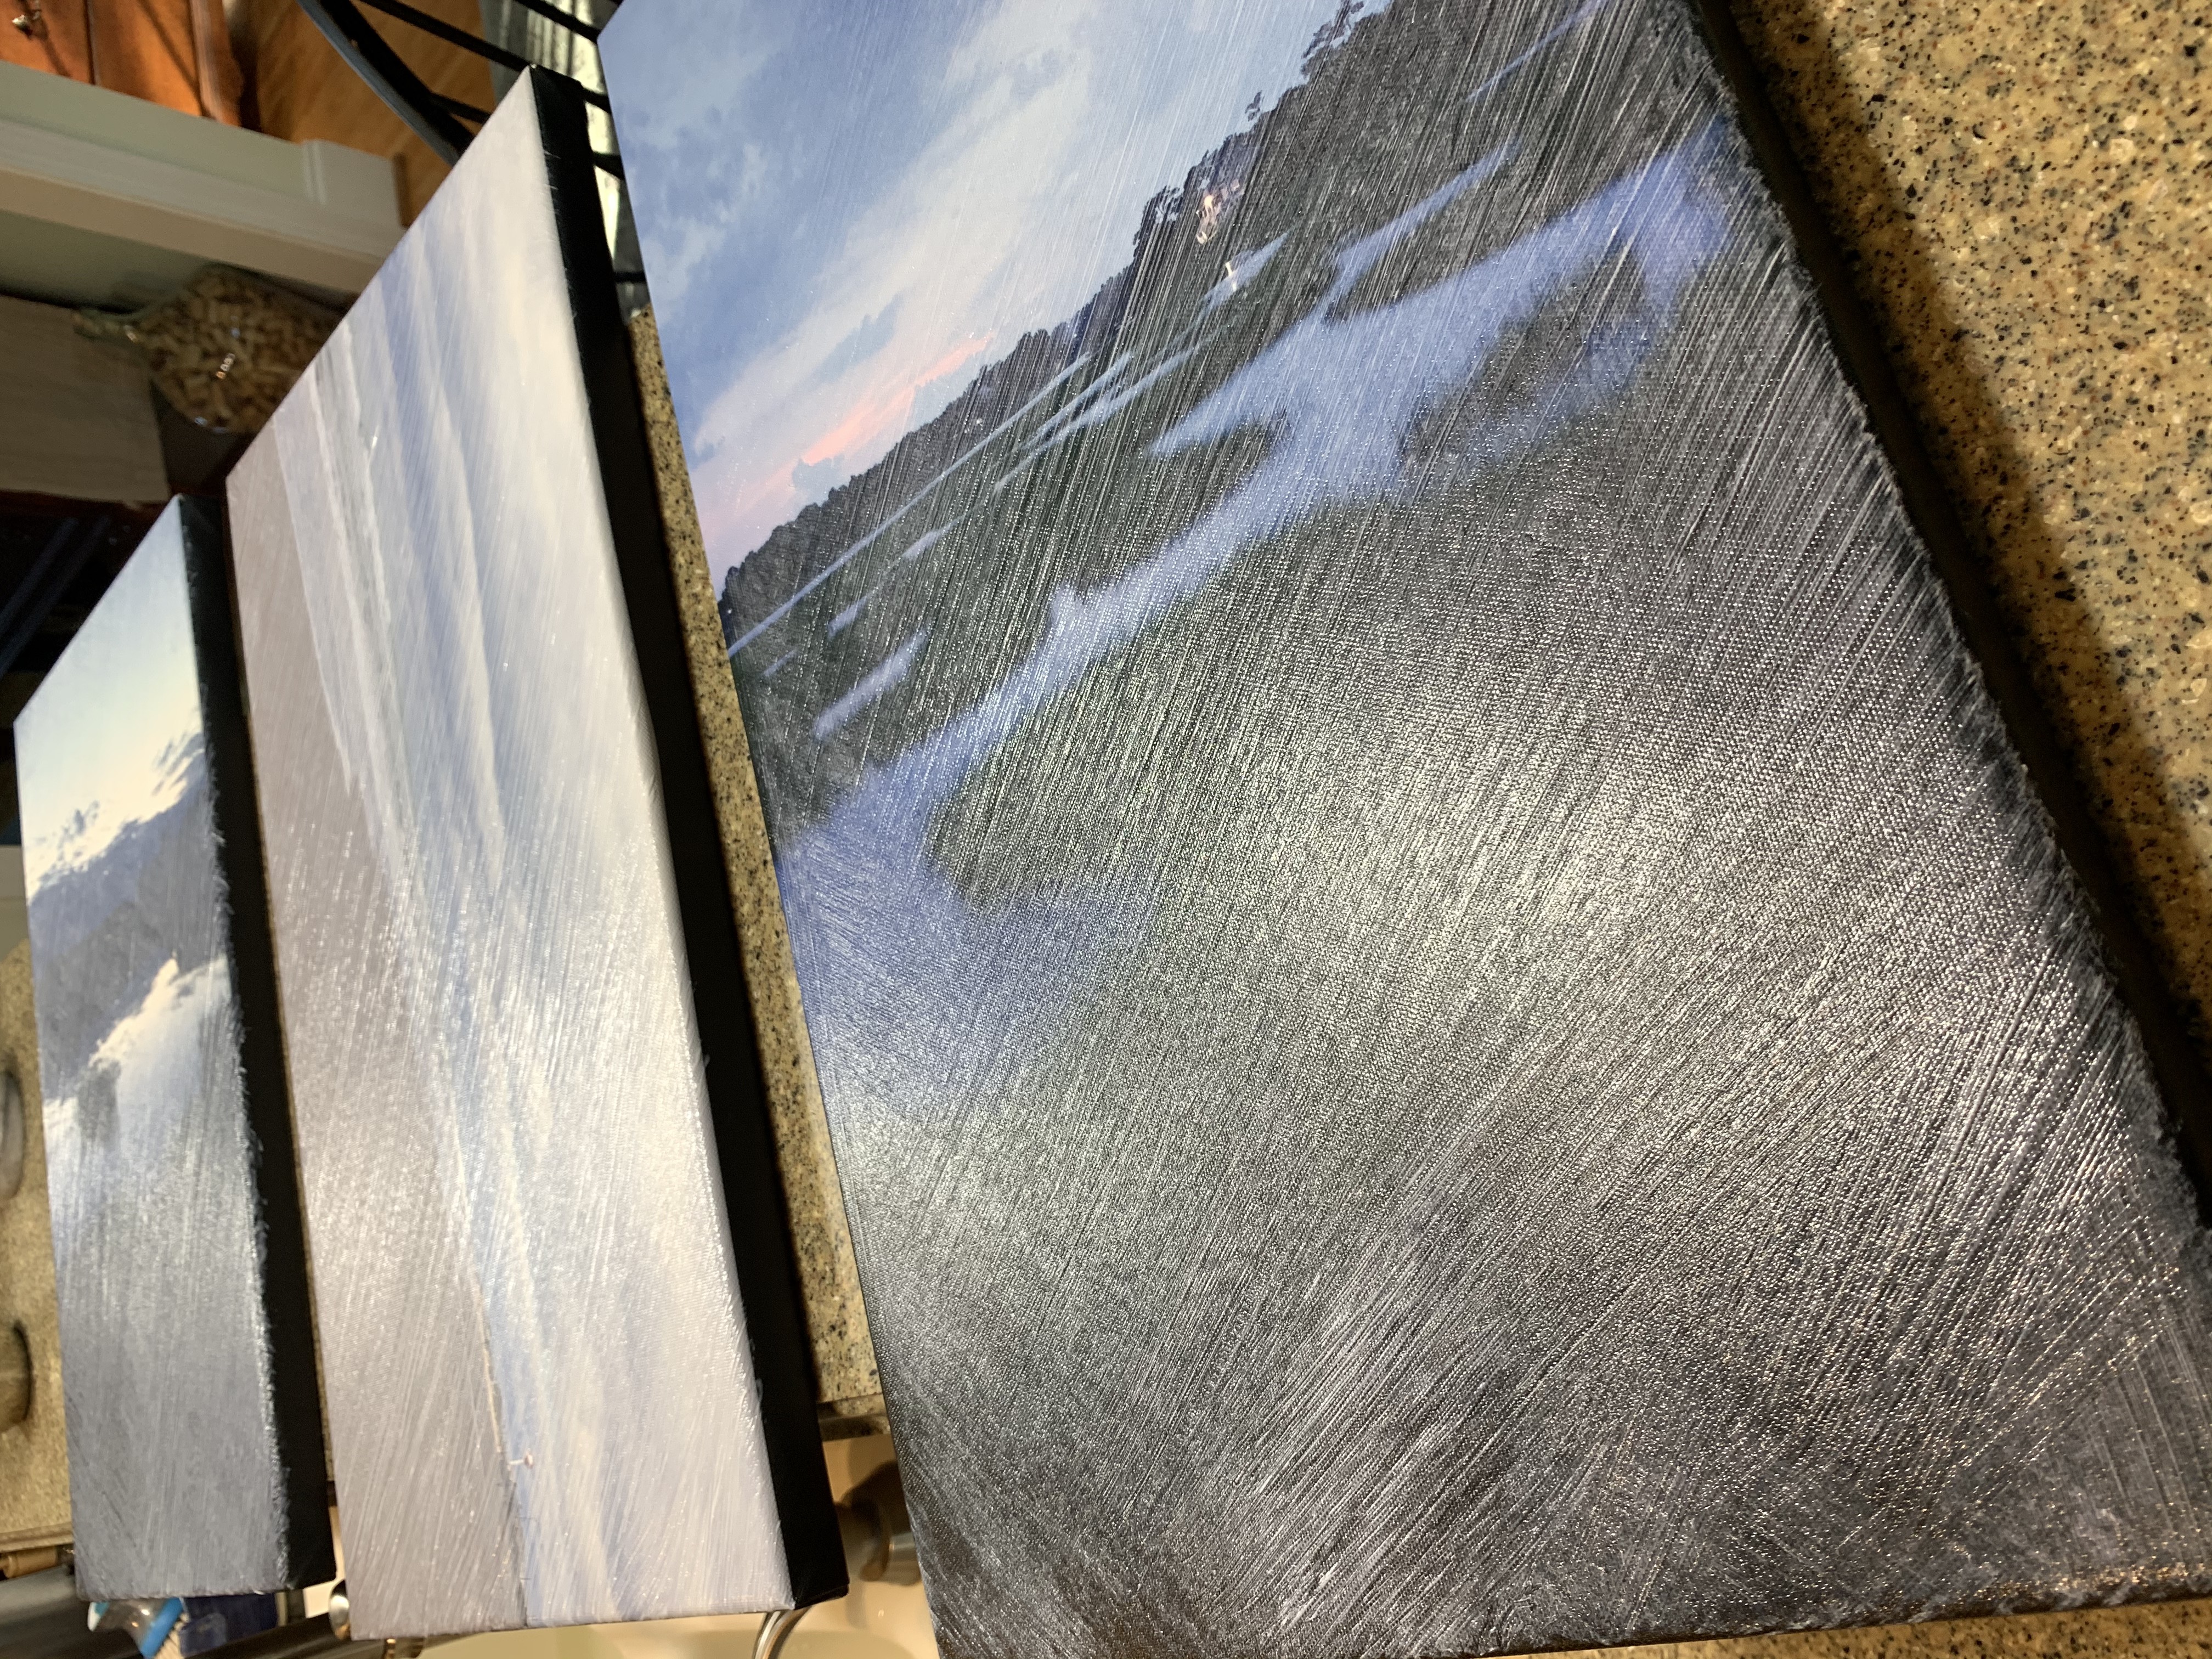
Step Two: Print the size you want from a Discount Canvas Company. They’re always having sales, and we bought these for less than $20 each. It doesn’t have to be a clear photo, and it’s absolutely okay for it to be grainy.
I purchased four that I had sitting on my phone of the ocean a few minutes away and the tidal creek near our house.
The Easy Way To DIY Breathtaking Landscape and Scenery Paintings
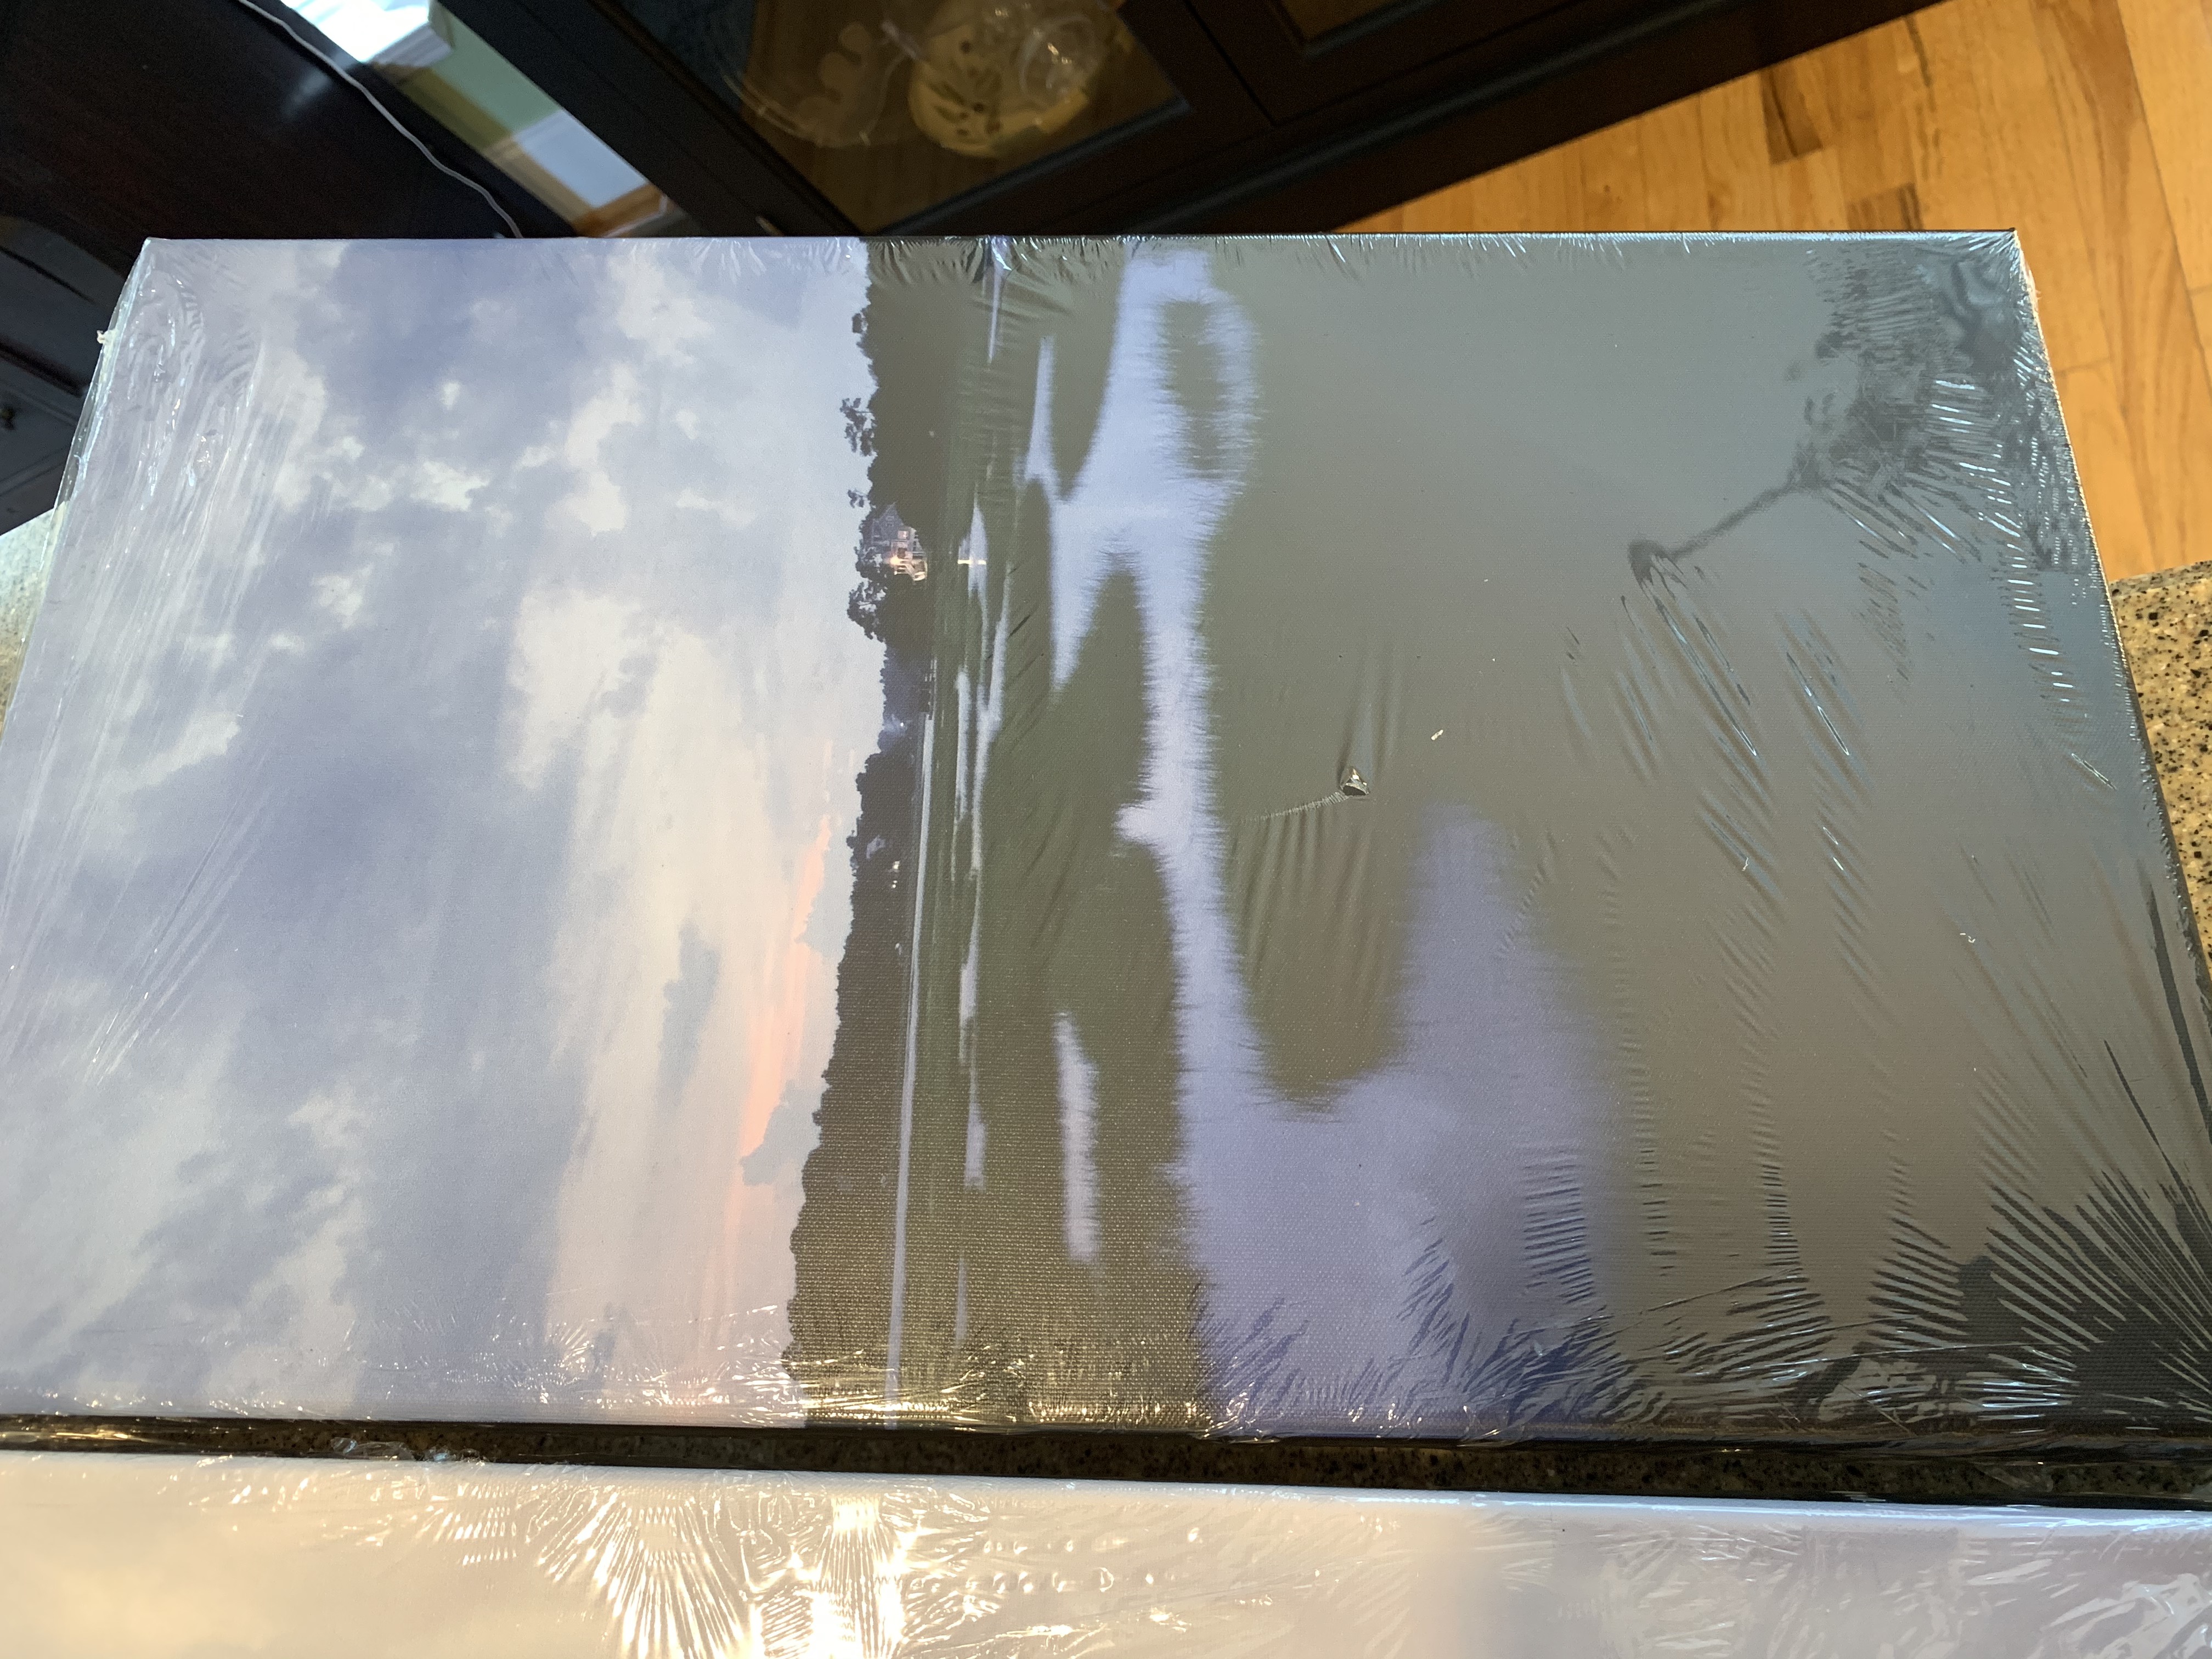
This is the photo canvas I’ll be using to demonstrate the painting:
The Easy Way To DIY Breathtaking Landscape and Scenery Paintings
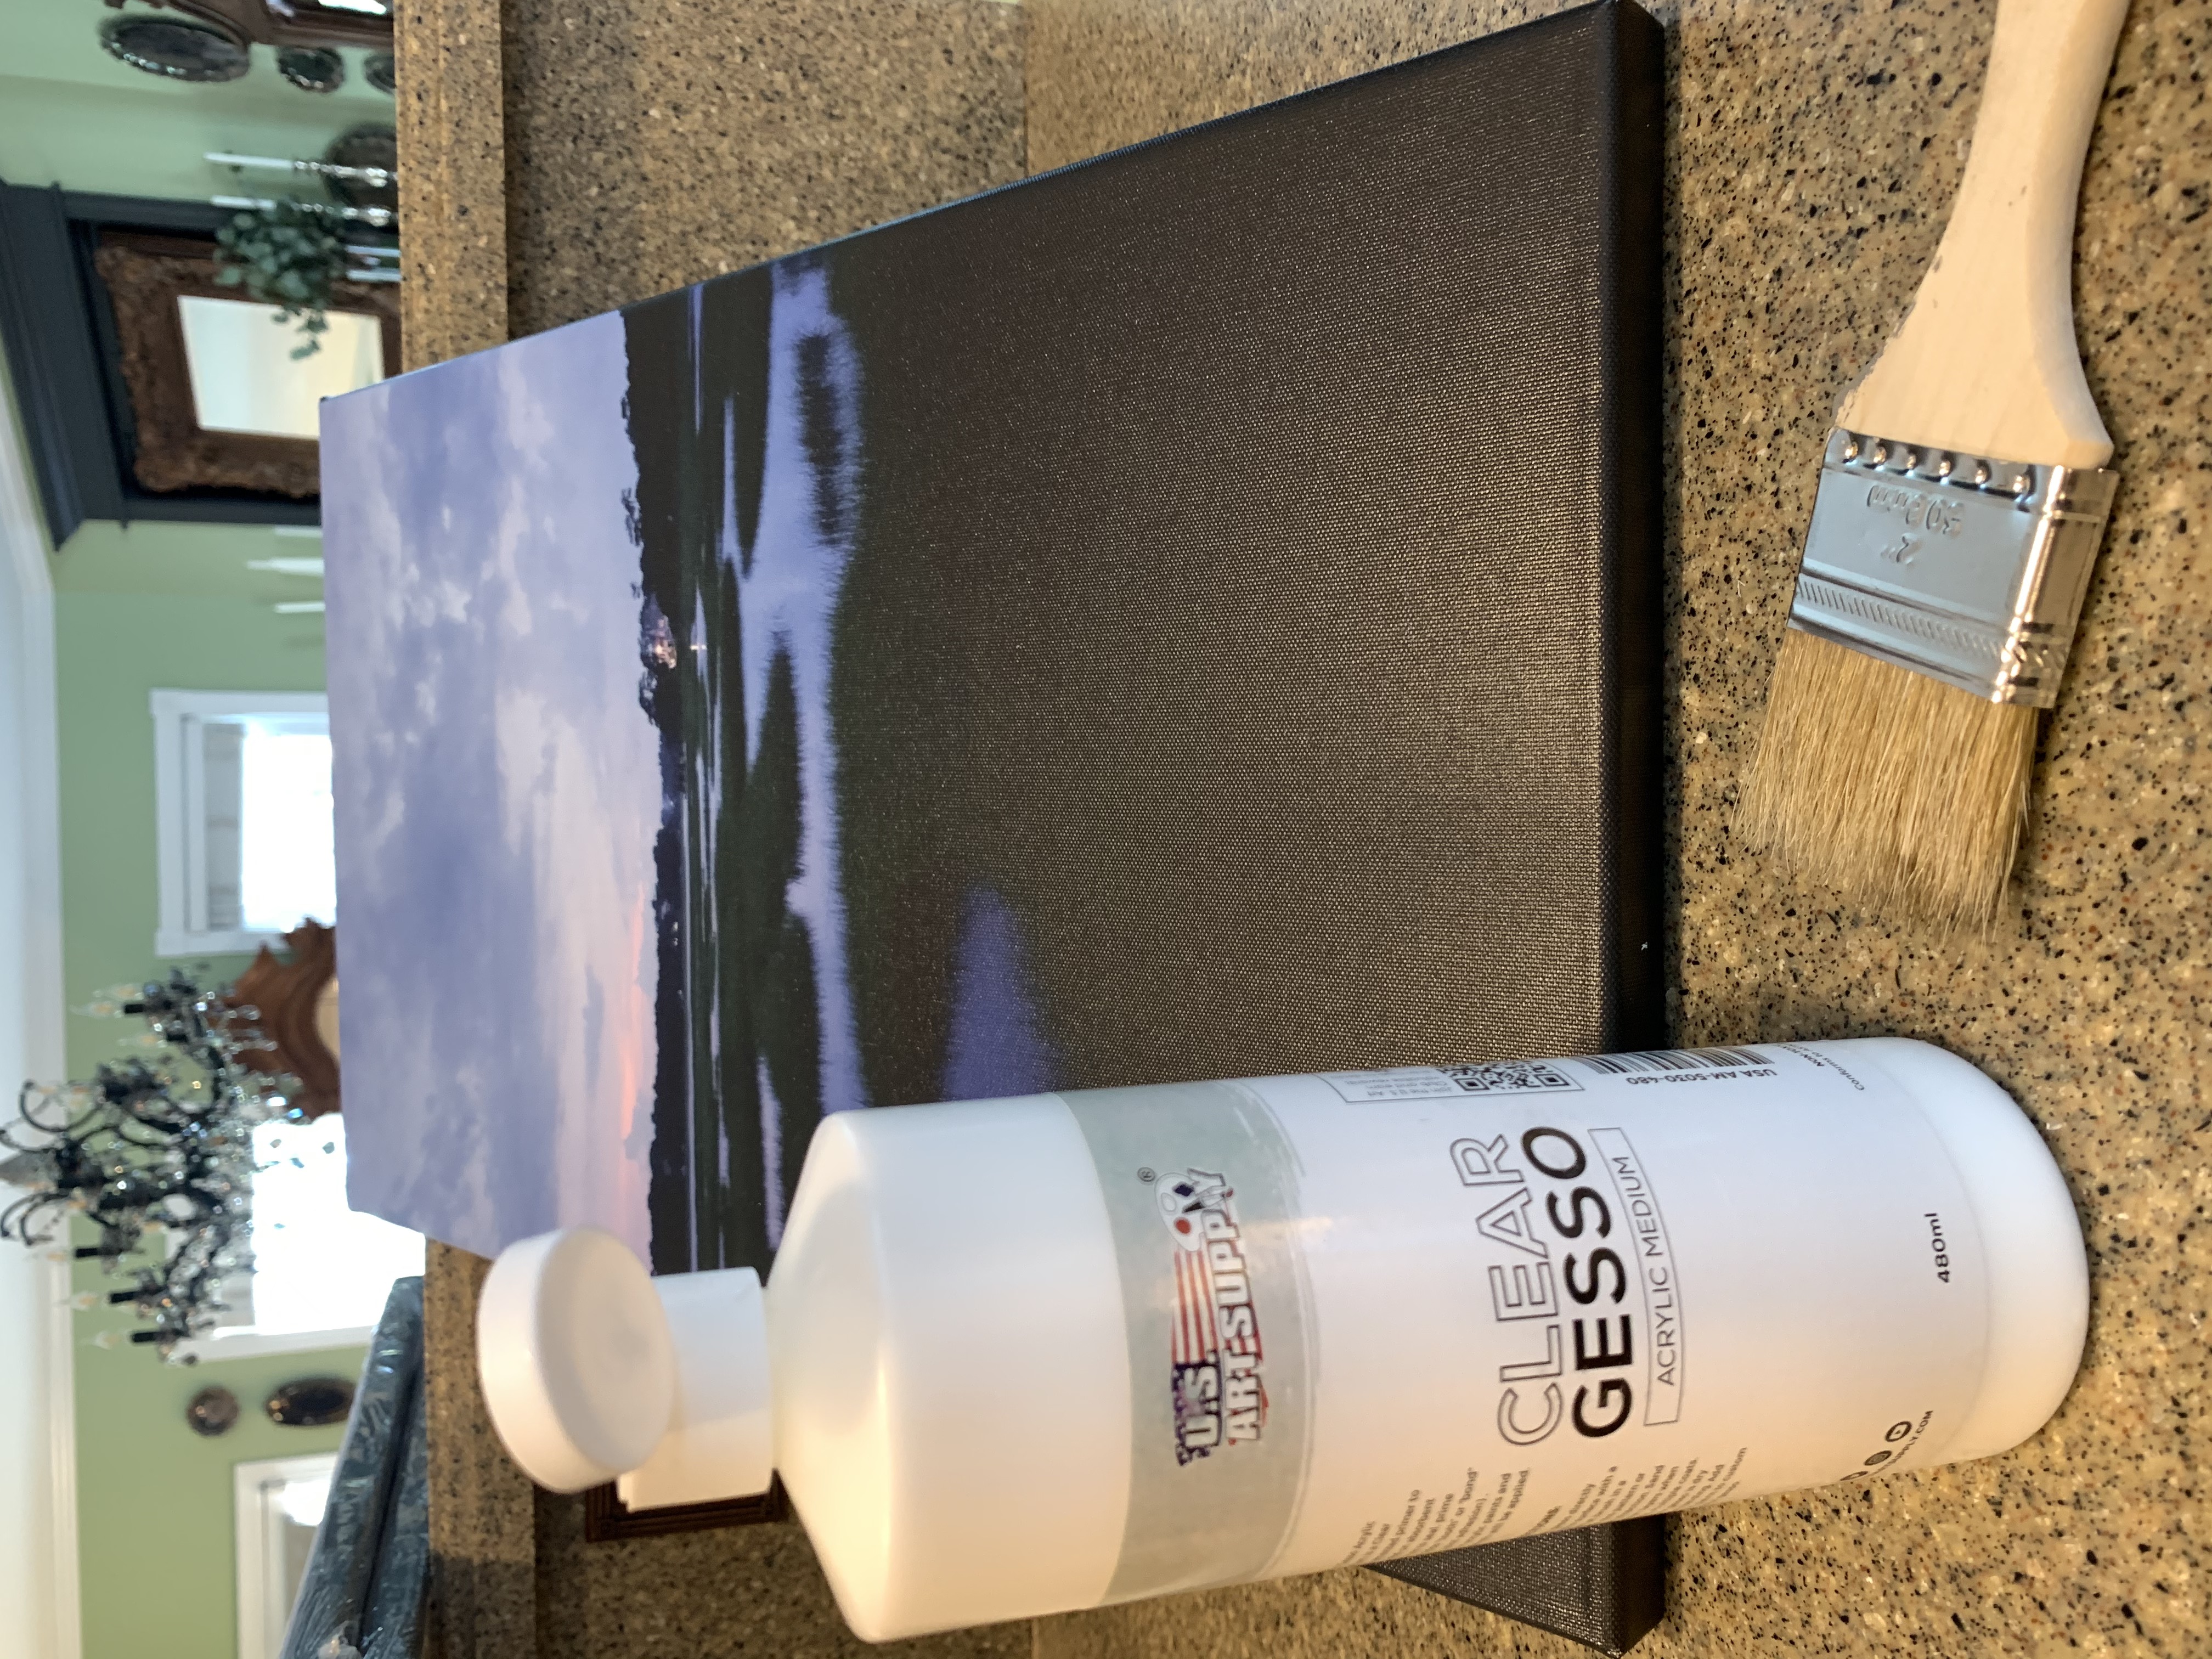
Step Three: After you’ve unpackaged the canvasses, paint the front of each canvas in a cross-thatch pattern (X) with a large brush using Clear Gesso.It appears white, but trust me, it will dry clear. The idea is to make sure that you’re filling in all of the tiny crevices on the canvas so you won’t need to layer your paint as much.
The Easy Way To DIY Breathtaking Landscape and Scenery Paintings
Tip: Make sure you’ve pulled off any loose hairs on the brush so they don’t stick inside the gesso.
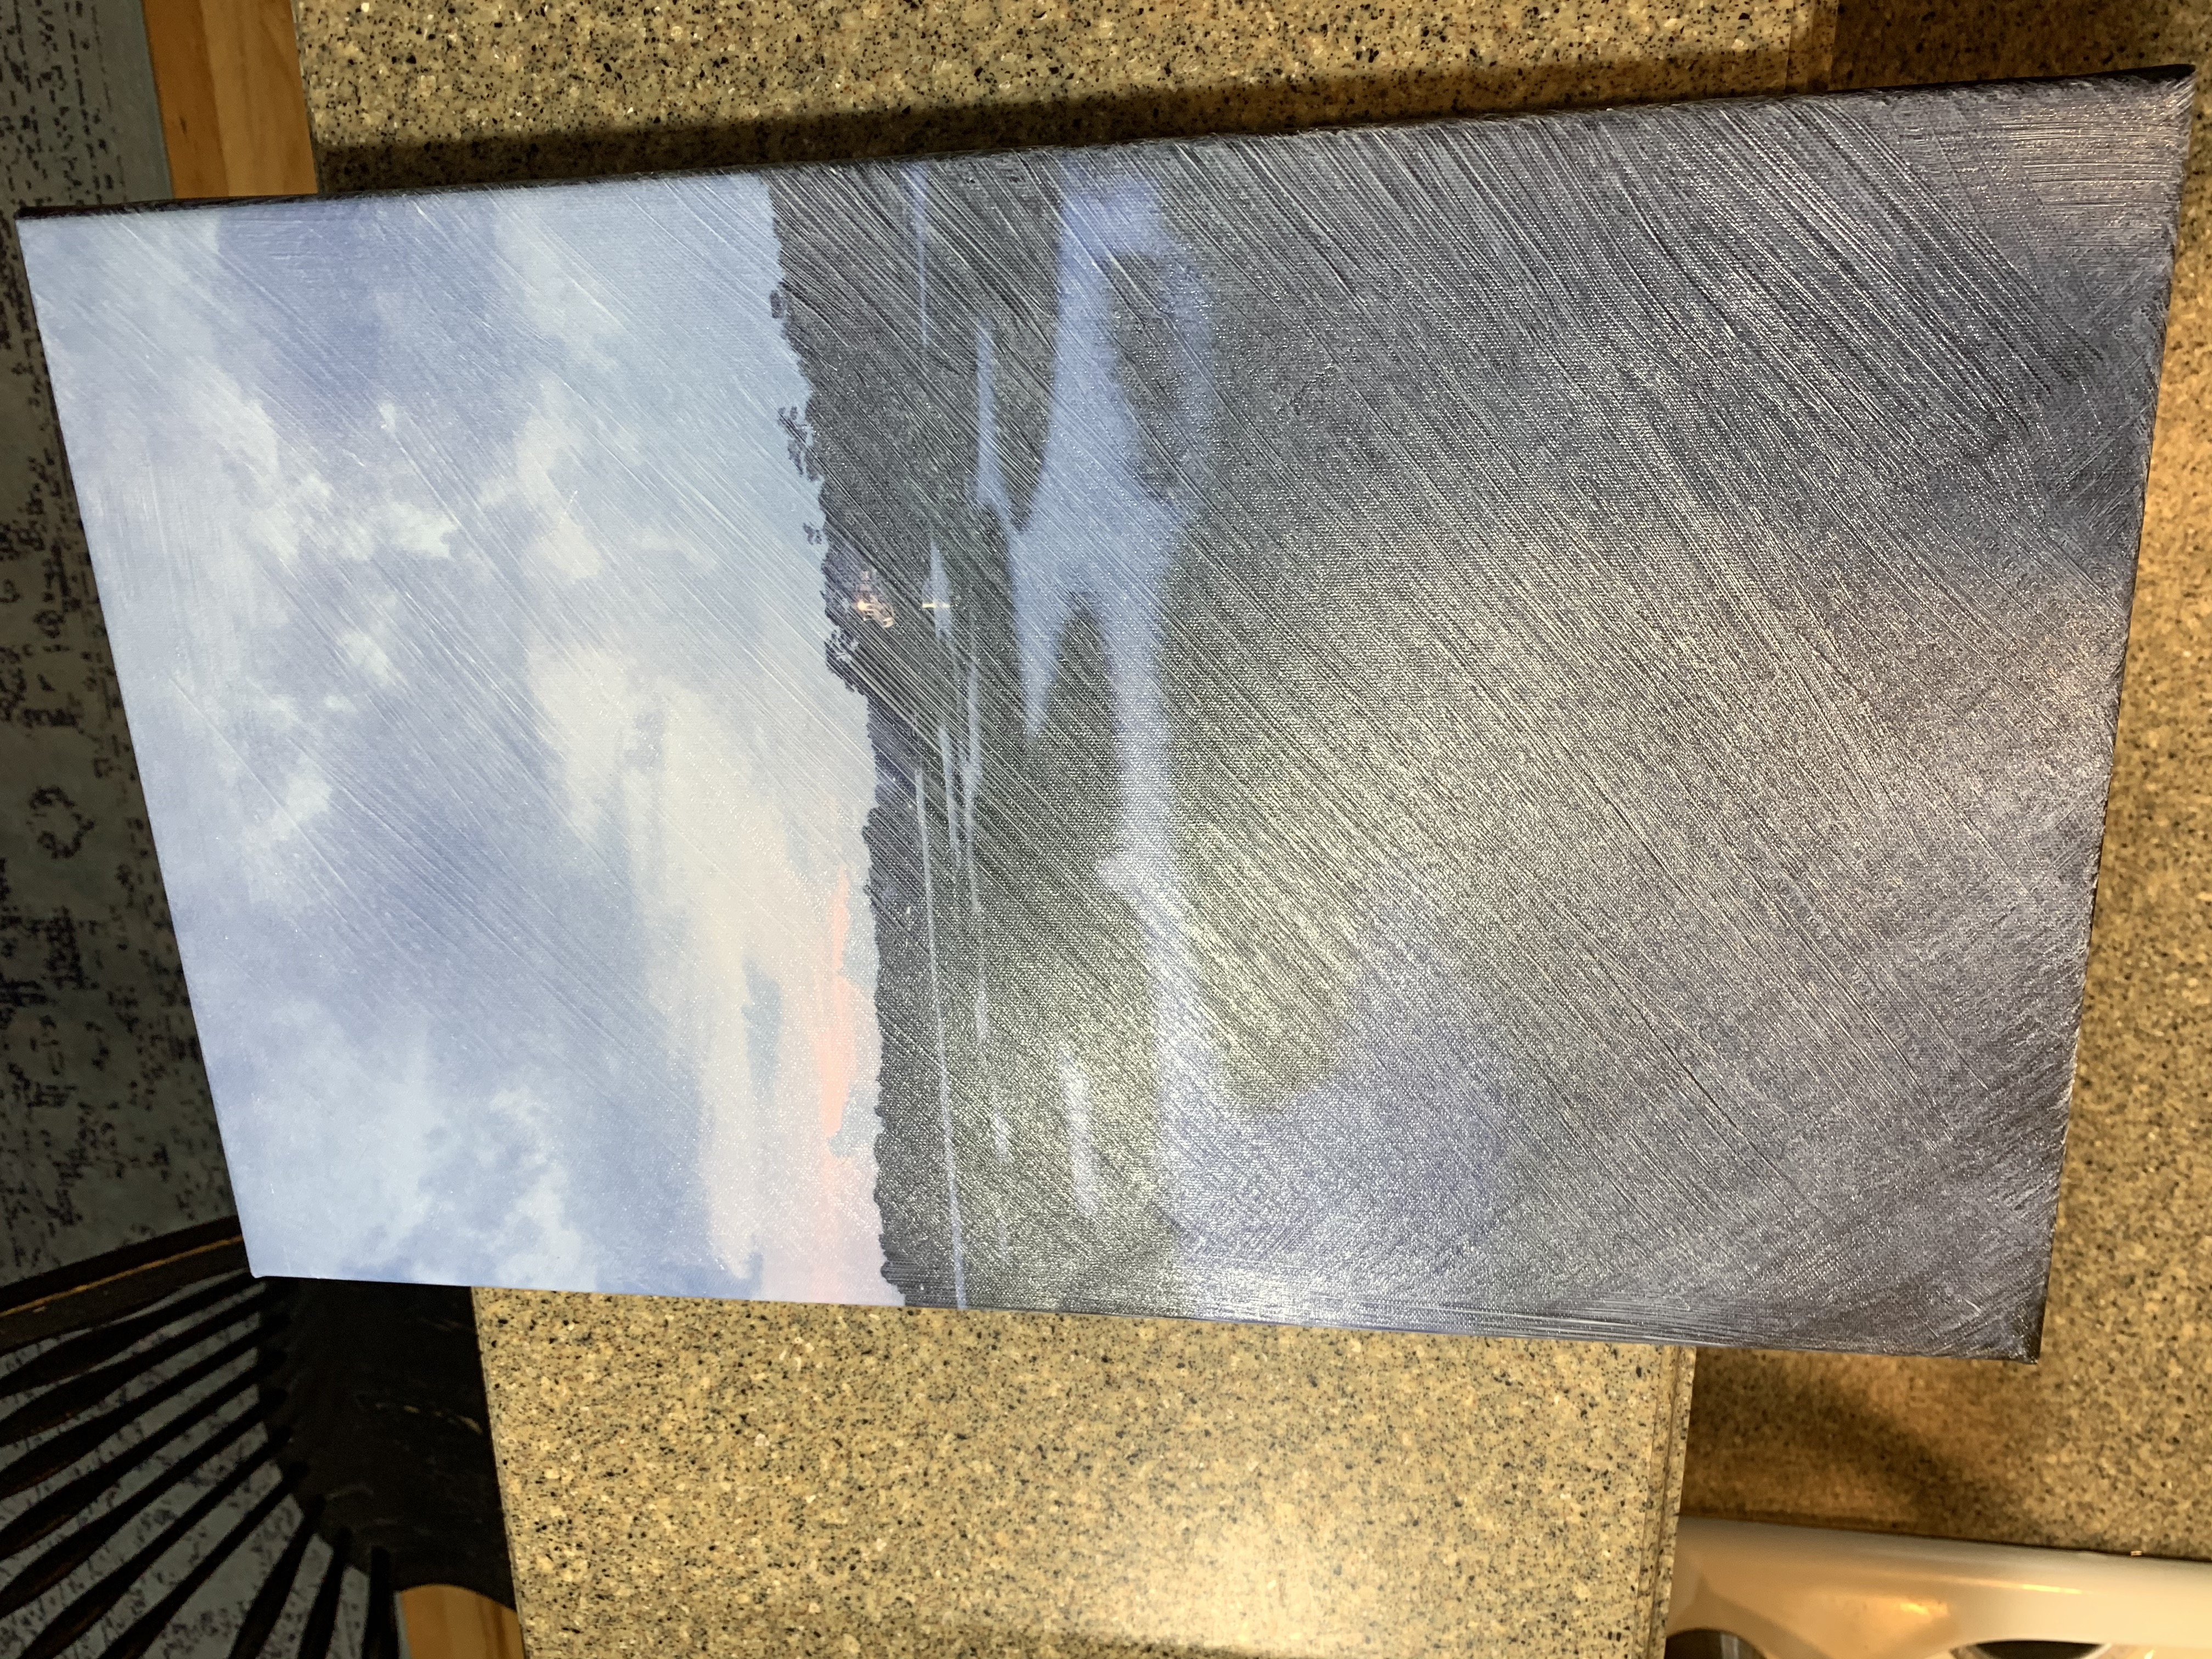
This is what your canvasses will look like after you apply the gesso, but before it dries:
The Easy Way To DIY Breathtaking Landscape and Scenery Paintings
Here is the one I will be painting with the gesso applied:
The Easy Way To DIY Breathtaking Landscape and Scenery Paintings
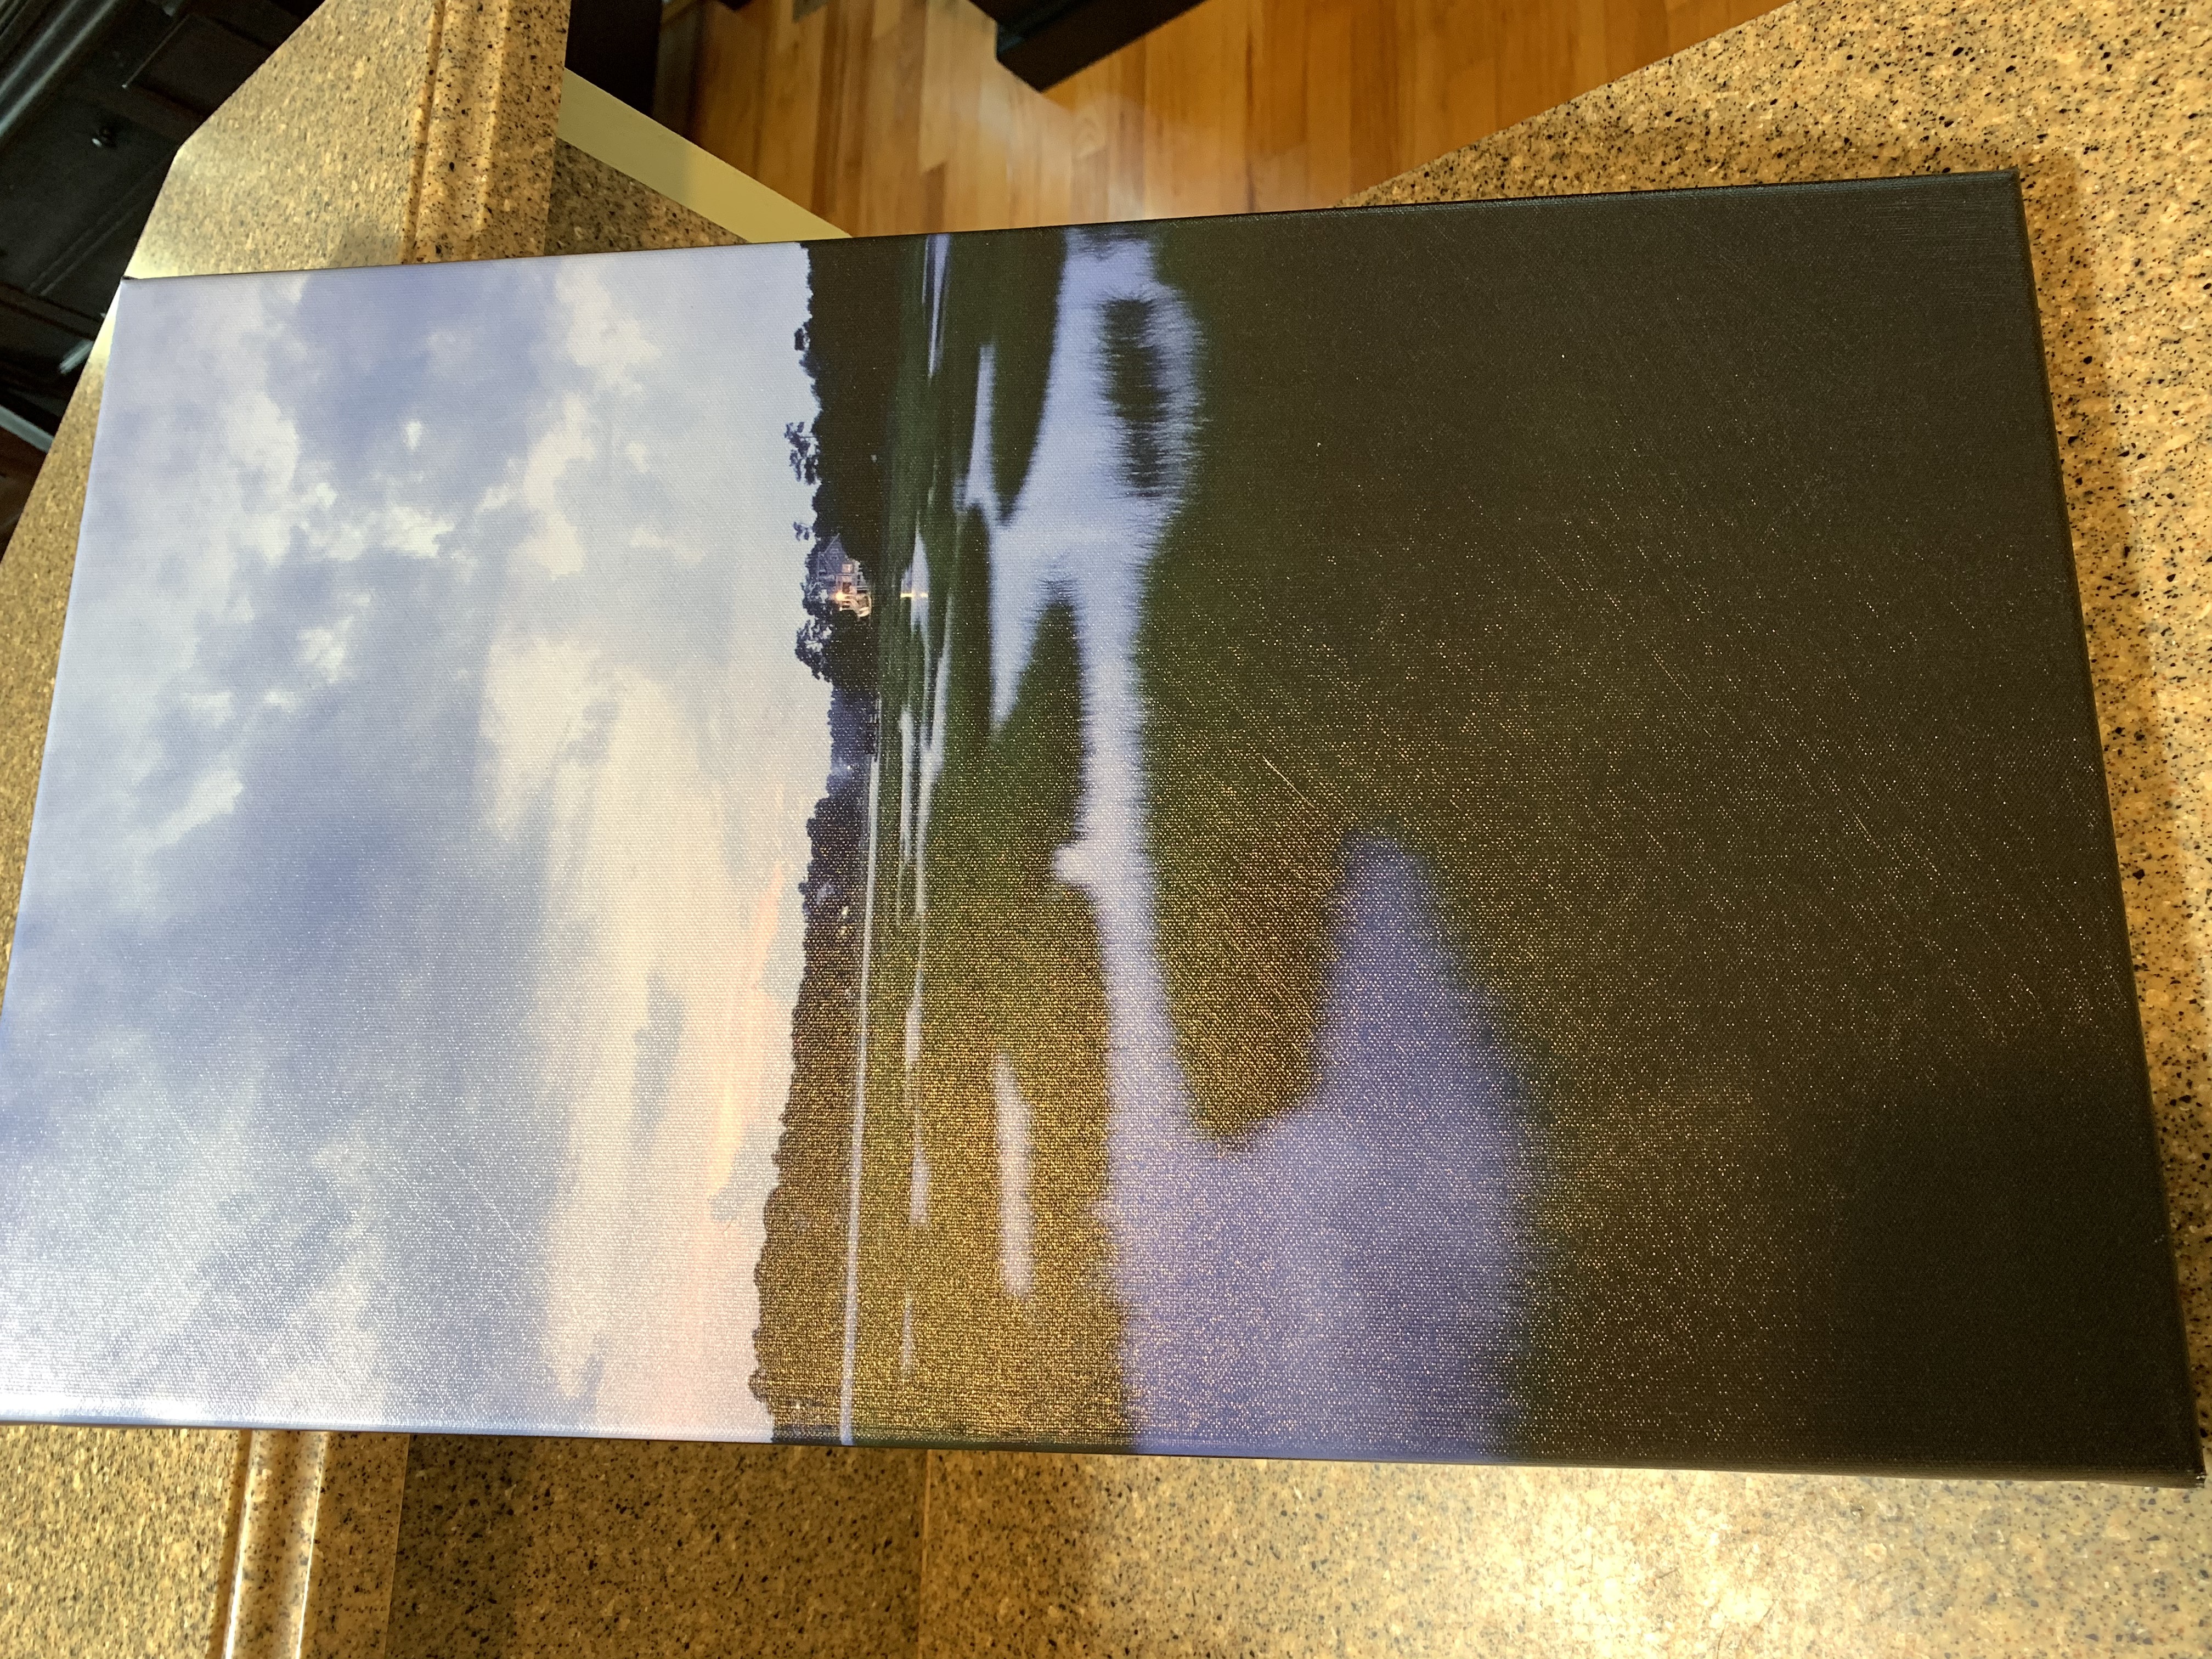
This is what it looks like after it dries. Totally clear, though you can see the faint cross-thatch pattern.
The Easy Way To DIY Breathtaking Landscape and Scenery Paintings
Now you are ready for paint!
Step Four: Get out your acrylic paint, brushes, water for rinsing brushes, palette, and (optional) adjustable easel. If you don’t have an acrylic paint set: I use Liquitex Acrylics and you can get a basic set of colors relatively cheaply. I like mixing my own colors so I have a small set of mostly primary colors. They also save forever if you keep the caps tightly closed: I’ve had the same set for more than a decade and the paint is still good.
Tip: I like to start with the lighter sections and move to the darker sections. Then you can always come back and add highlights in lighter colors or details in darker colors.
The beauty of this process is that it doesn’t need to exactly match your photo. Try doing an impressionist painting, then try one with a more blended look. A great way to achieve a foggy landscape look is to blur your eyes over the photo and try to mix the edge colors.
Tip: Try mixing some of your colors with gesso if you need them to remain wet for longer (if you want to blend the edges). It also makes the colors slightly less opaque.
Step Five: Paint! Turn on some relaxing music, pour yourself some hot tea, and get to mixing colors on your palette and painting!
Tip: Don’t be afraid to try different brushes and strokes! The beautiful thing about acrylics is that you can layer over the top if you don’t like it!
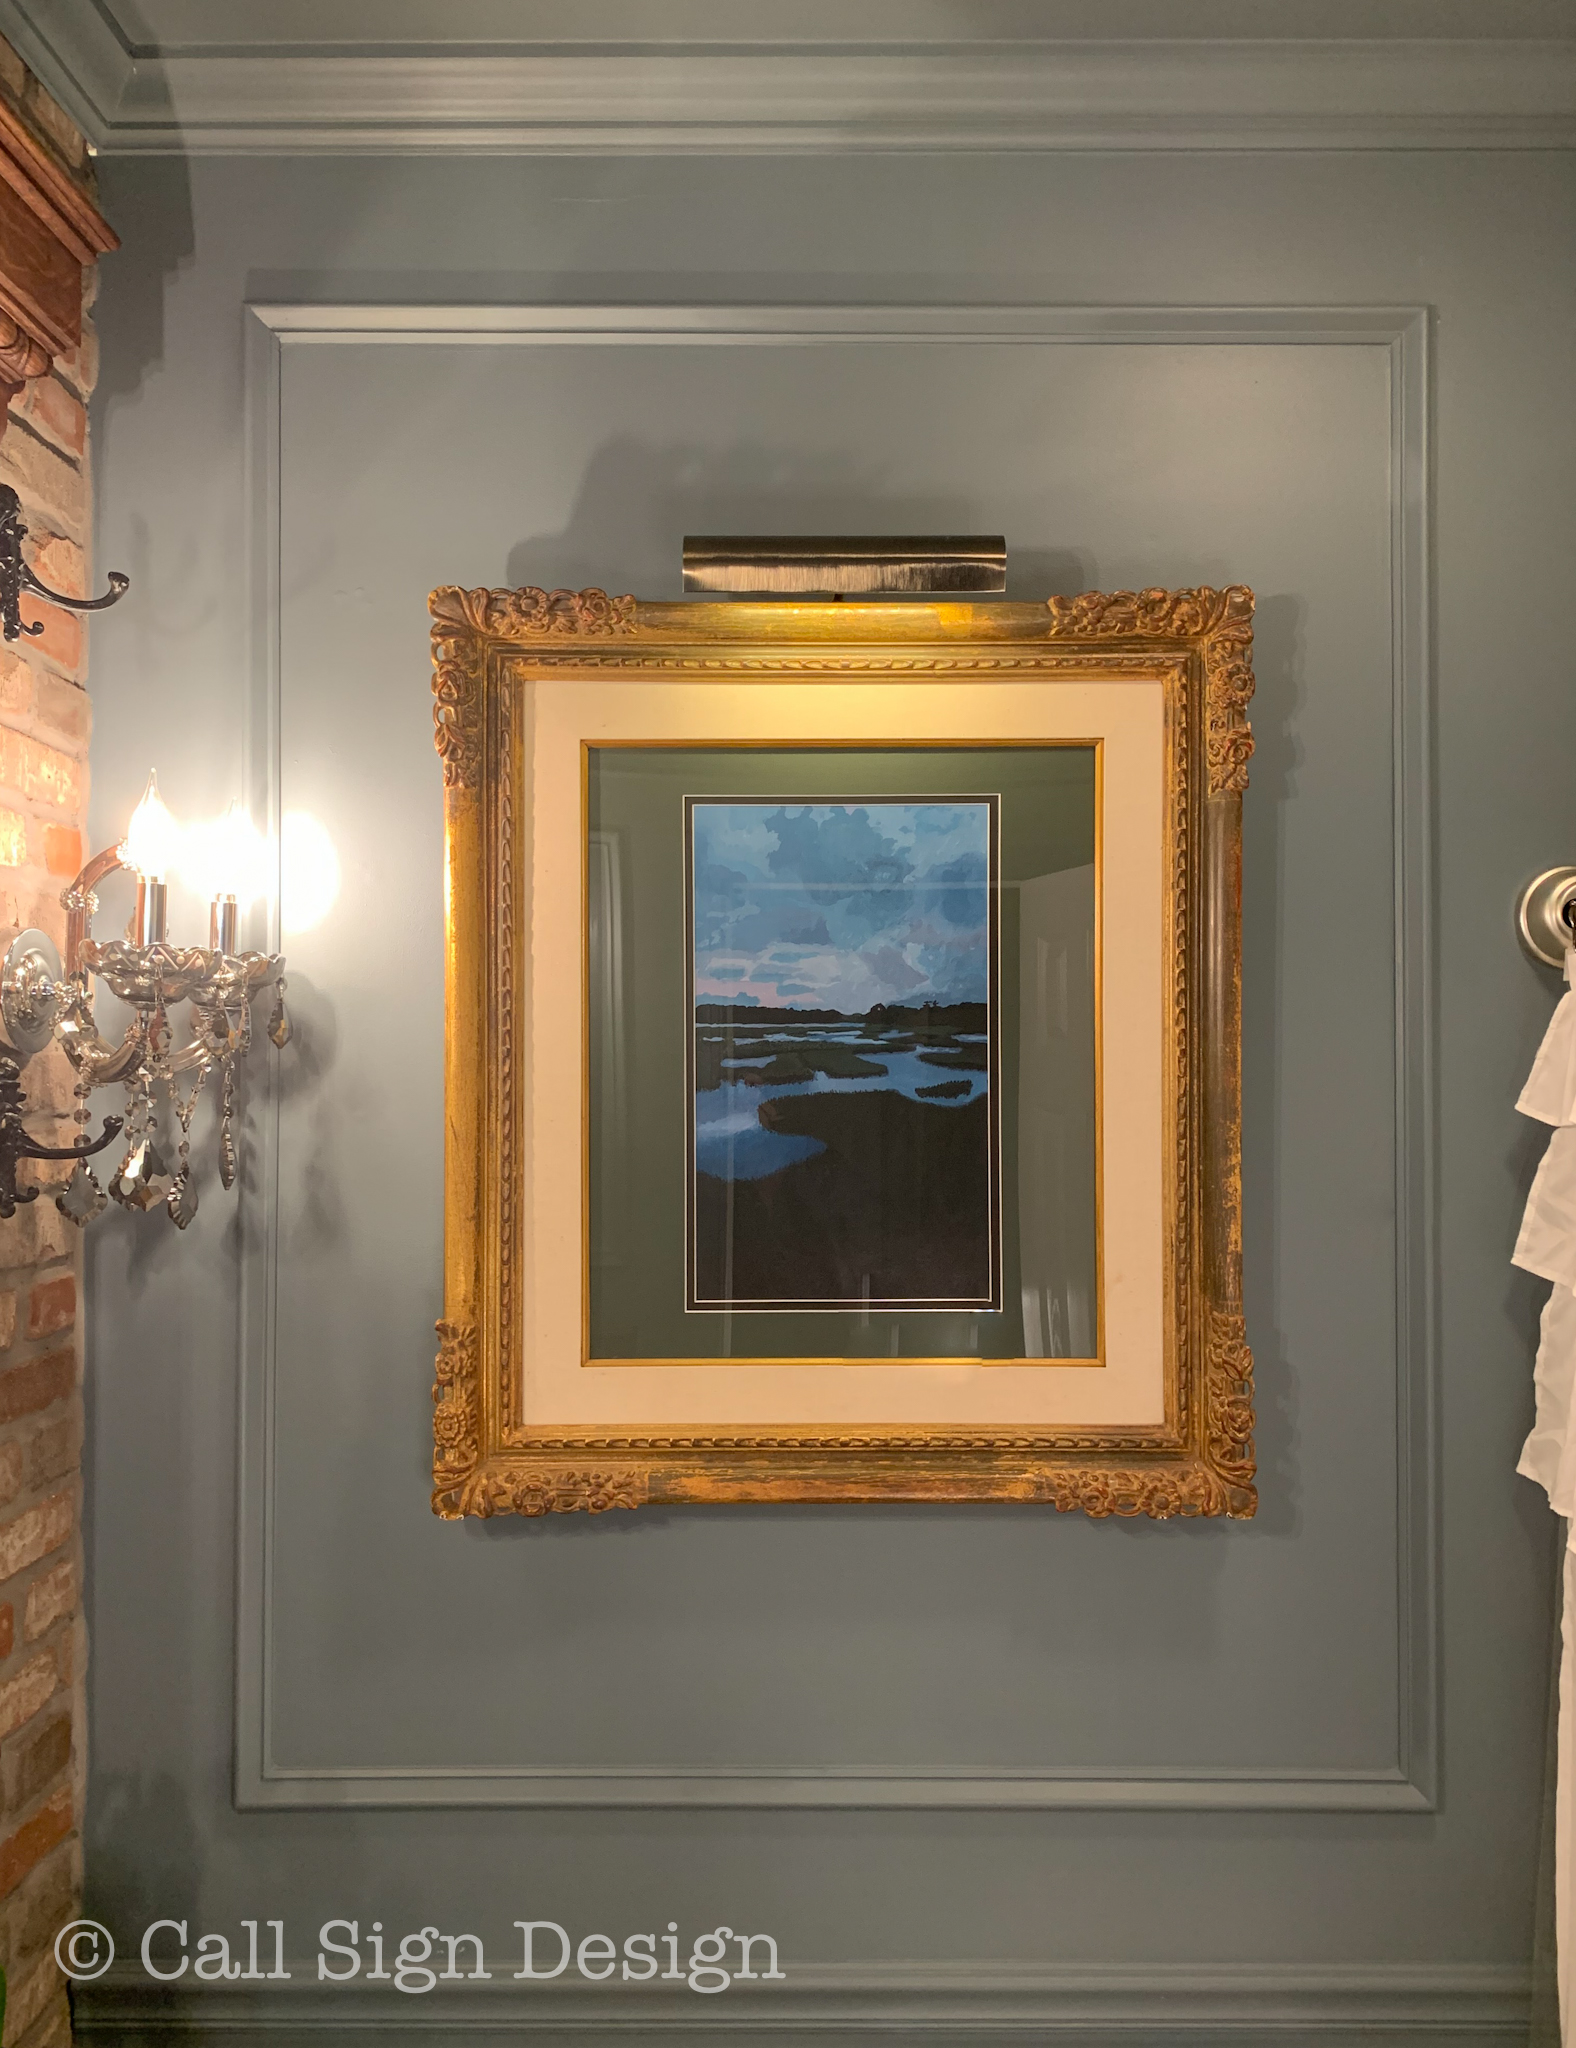
Step Six (Optional): Scour craigslist/letgo/Facebook for the perfect gold frame. I frequently find BAD old art with great frames, so this is a fantastic way to upcycle those frames into something wonderful for your wall!
Tip: If you want to really do this on the cheap: find your frame with matting FIRST, and order the correct sized canvas to fit. You can paint the matting to match and then you don’t get into expensive items like new matting.
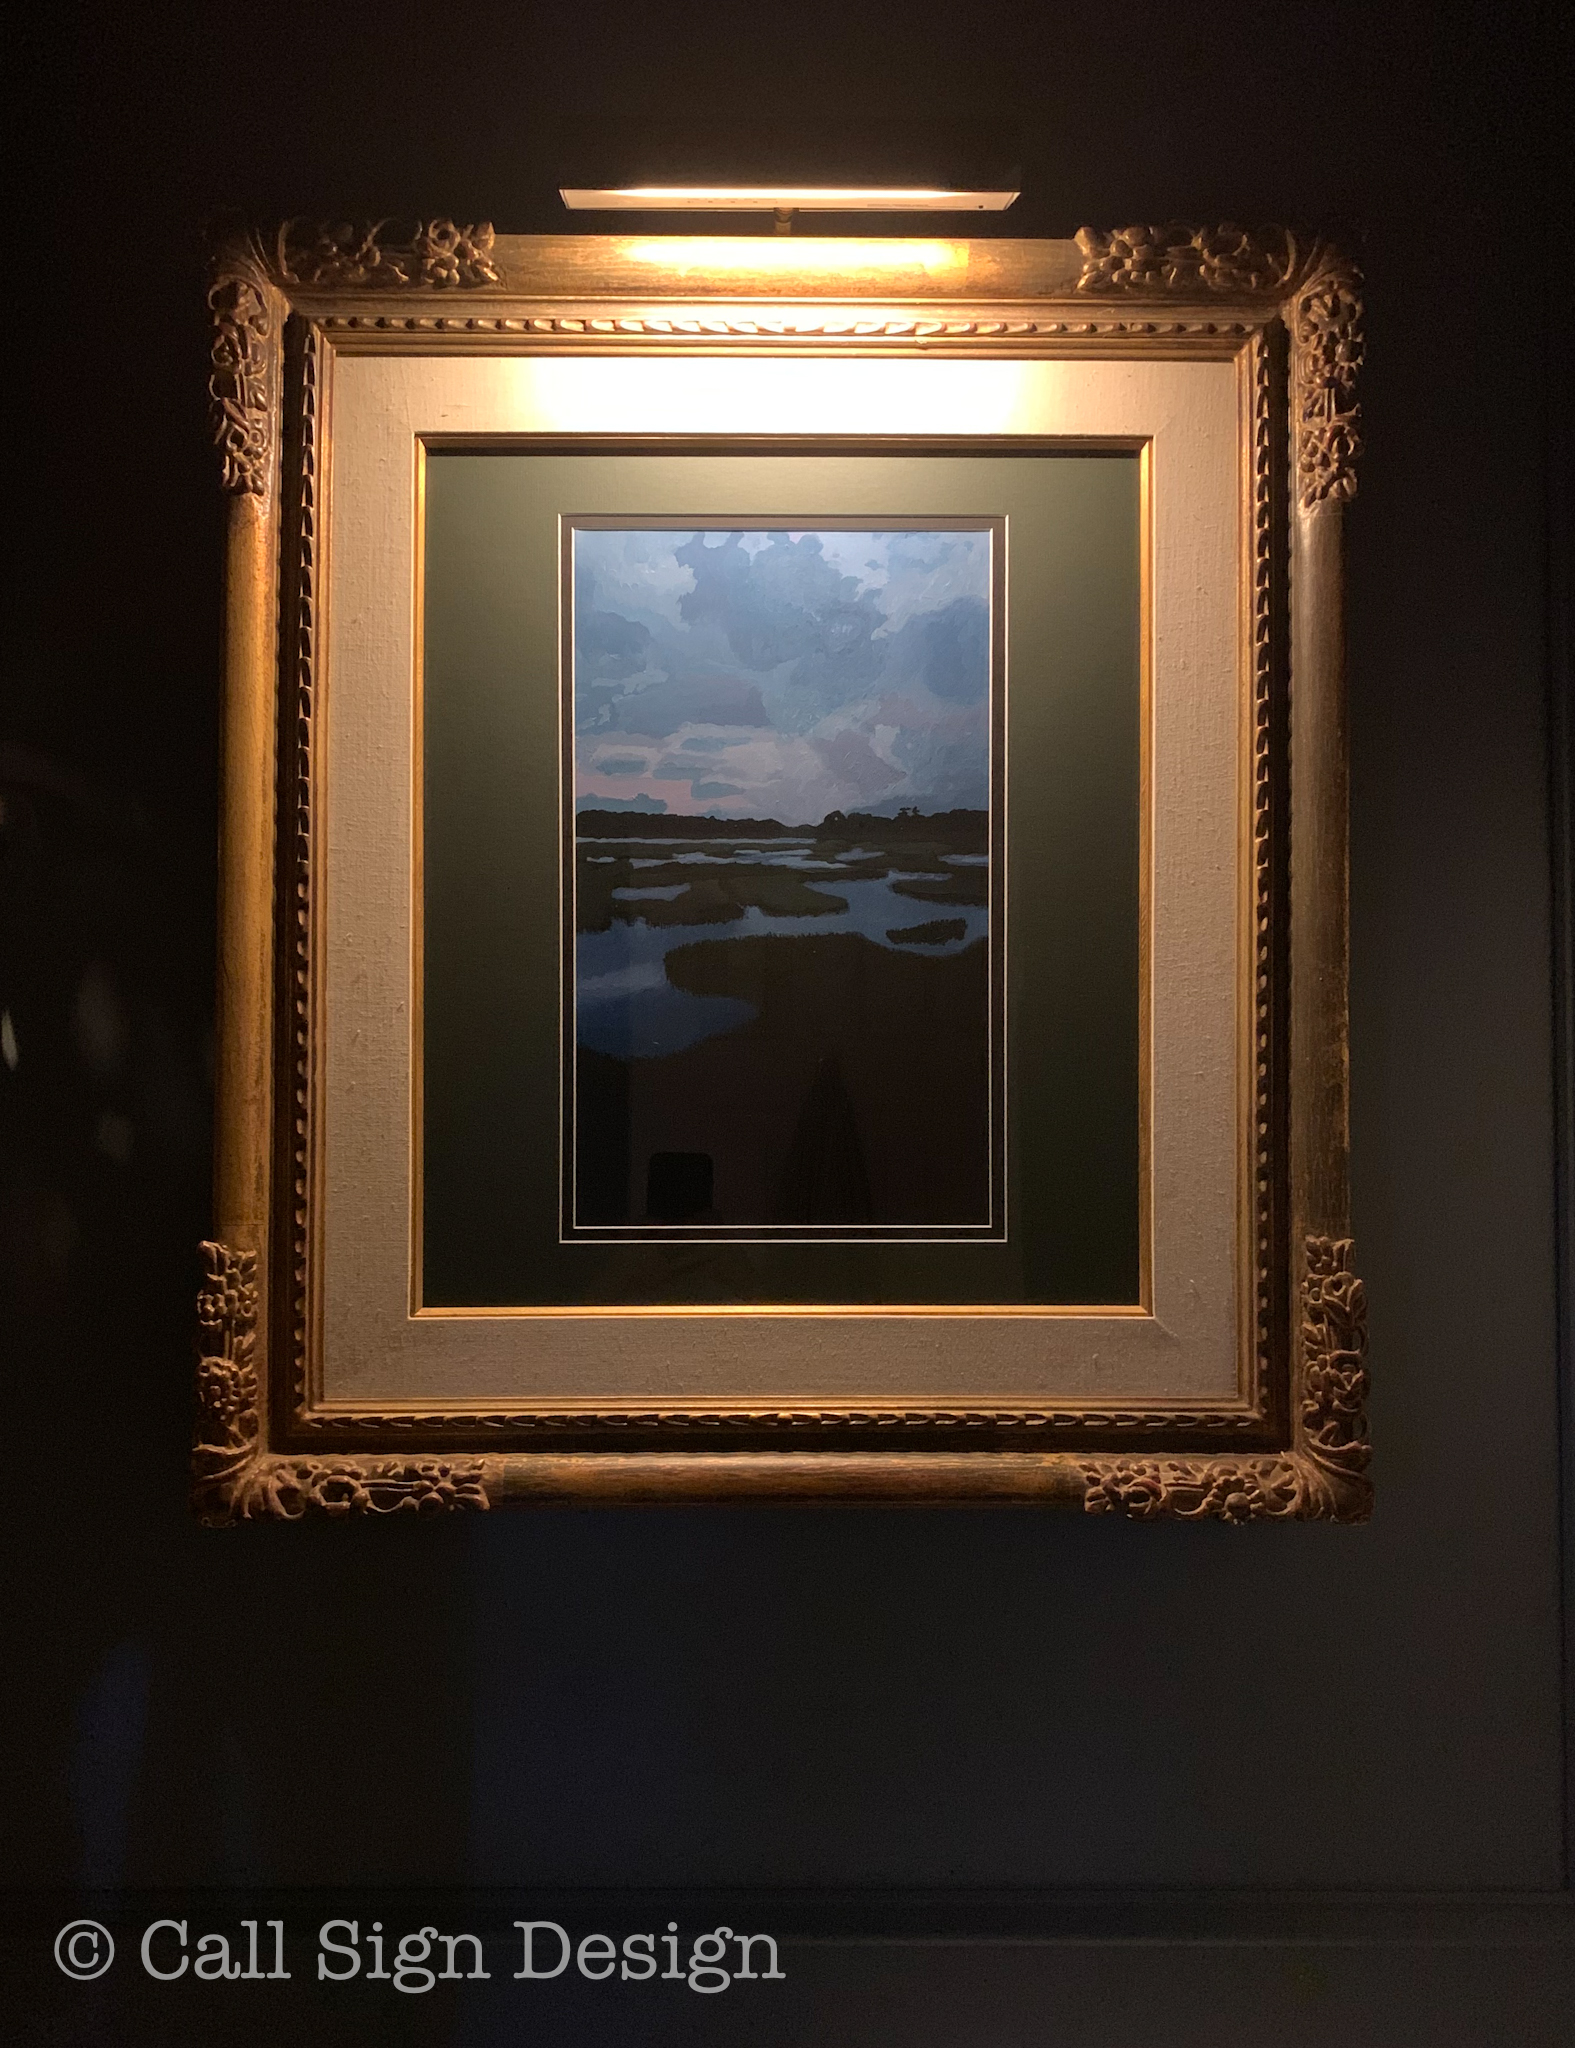
What do you think of our “masterpiece”?
The Easy Way To DIY Breathtaking Landscape and Scenery Paintings
Congratulations! You have just created your first landscape painting and you can proudly hang it on your wall!
Total: $313.95 (Yes, I absolutely recommend buying your frame before the canvas to cut out the re-matting cost!)
How about one more with that pretty light on?
The Easy Way To DIY Breathtaking Landscape and Scenery Paintings
What do you think?
I would love to see how your paintings turned out!
Want to know how to Stage Your Bathroom for real estate or for entertaining? Check out our simple guide!
Follow along with us on the blog for more great DIY tutorials and design inspiration! Cheers!
*Legal stuff:
I am honest about my experiences with different products and write because I enjoy it. I do however, have the opportunity to earn money for my writing, also.
Slavetodiy.com is a participant in the Amazon Services LLC Associates Program, an affiliate advertising program designed to provide a means for sites to earn advertising fees by advertising and linking to amazon.com. Amazon offers a small commission on products sold through their affiliate links. Each of your purchases via our Amazon affiliation links supports our cause at no additional cost to you.
If a blogger links to an Amazon product (with a special code for affiliates embedded in the link), and a reader places an item in their “shopping cart” through that link within 24 hours of clicking the link, the blogger gets a small percentage of the sale. Amazon links are not “pay per click.” If you click on the product link and stay around Amazon and purchase something else, however, I will get a commission on that sale.
This site also contains affiliate links through //Commerce/Sovrn. //Commerce or our Publishers may be compensated when you click through links on our site.
For those of you that follow along with us, you already know that we’ve been in the middle of kitchen planning, designing, and installing on a kitchen in another state. I am in North Carolina and the kitchen that I designed for my mom’s forever home is in Vermont. Luckily for me, my sister and brother (who is our “contractor” and carpenter) are in Vermont and have done almost all of the heavy lifting themselves. My sister, who owns the home, has painted more than she ever wanted to paint in her life.
When we began talking about this project (when the property that adjoined my sister’s farm came up for sale), I think it was sometime around February (2020). When we started actually planning it, the idea was for my brother to have everything ready for me and my husband to drive up and help with the installation (especially because he thinks some of the design choices I made are a major pain in the butt). But, then this weird thing happened: a pandemic. Our trip obviously got delayed. But, on the positive side, my sister and brother were able to continue working on the rehab and the kitchen just about full time since everything was closed due to Covid.
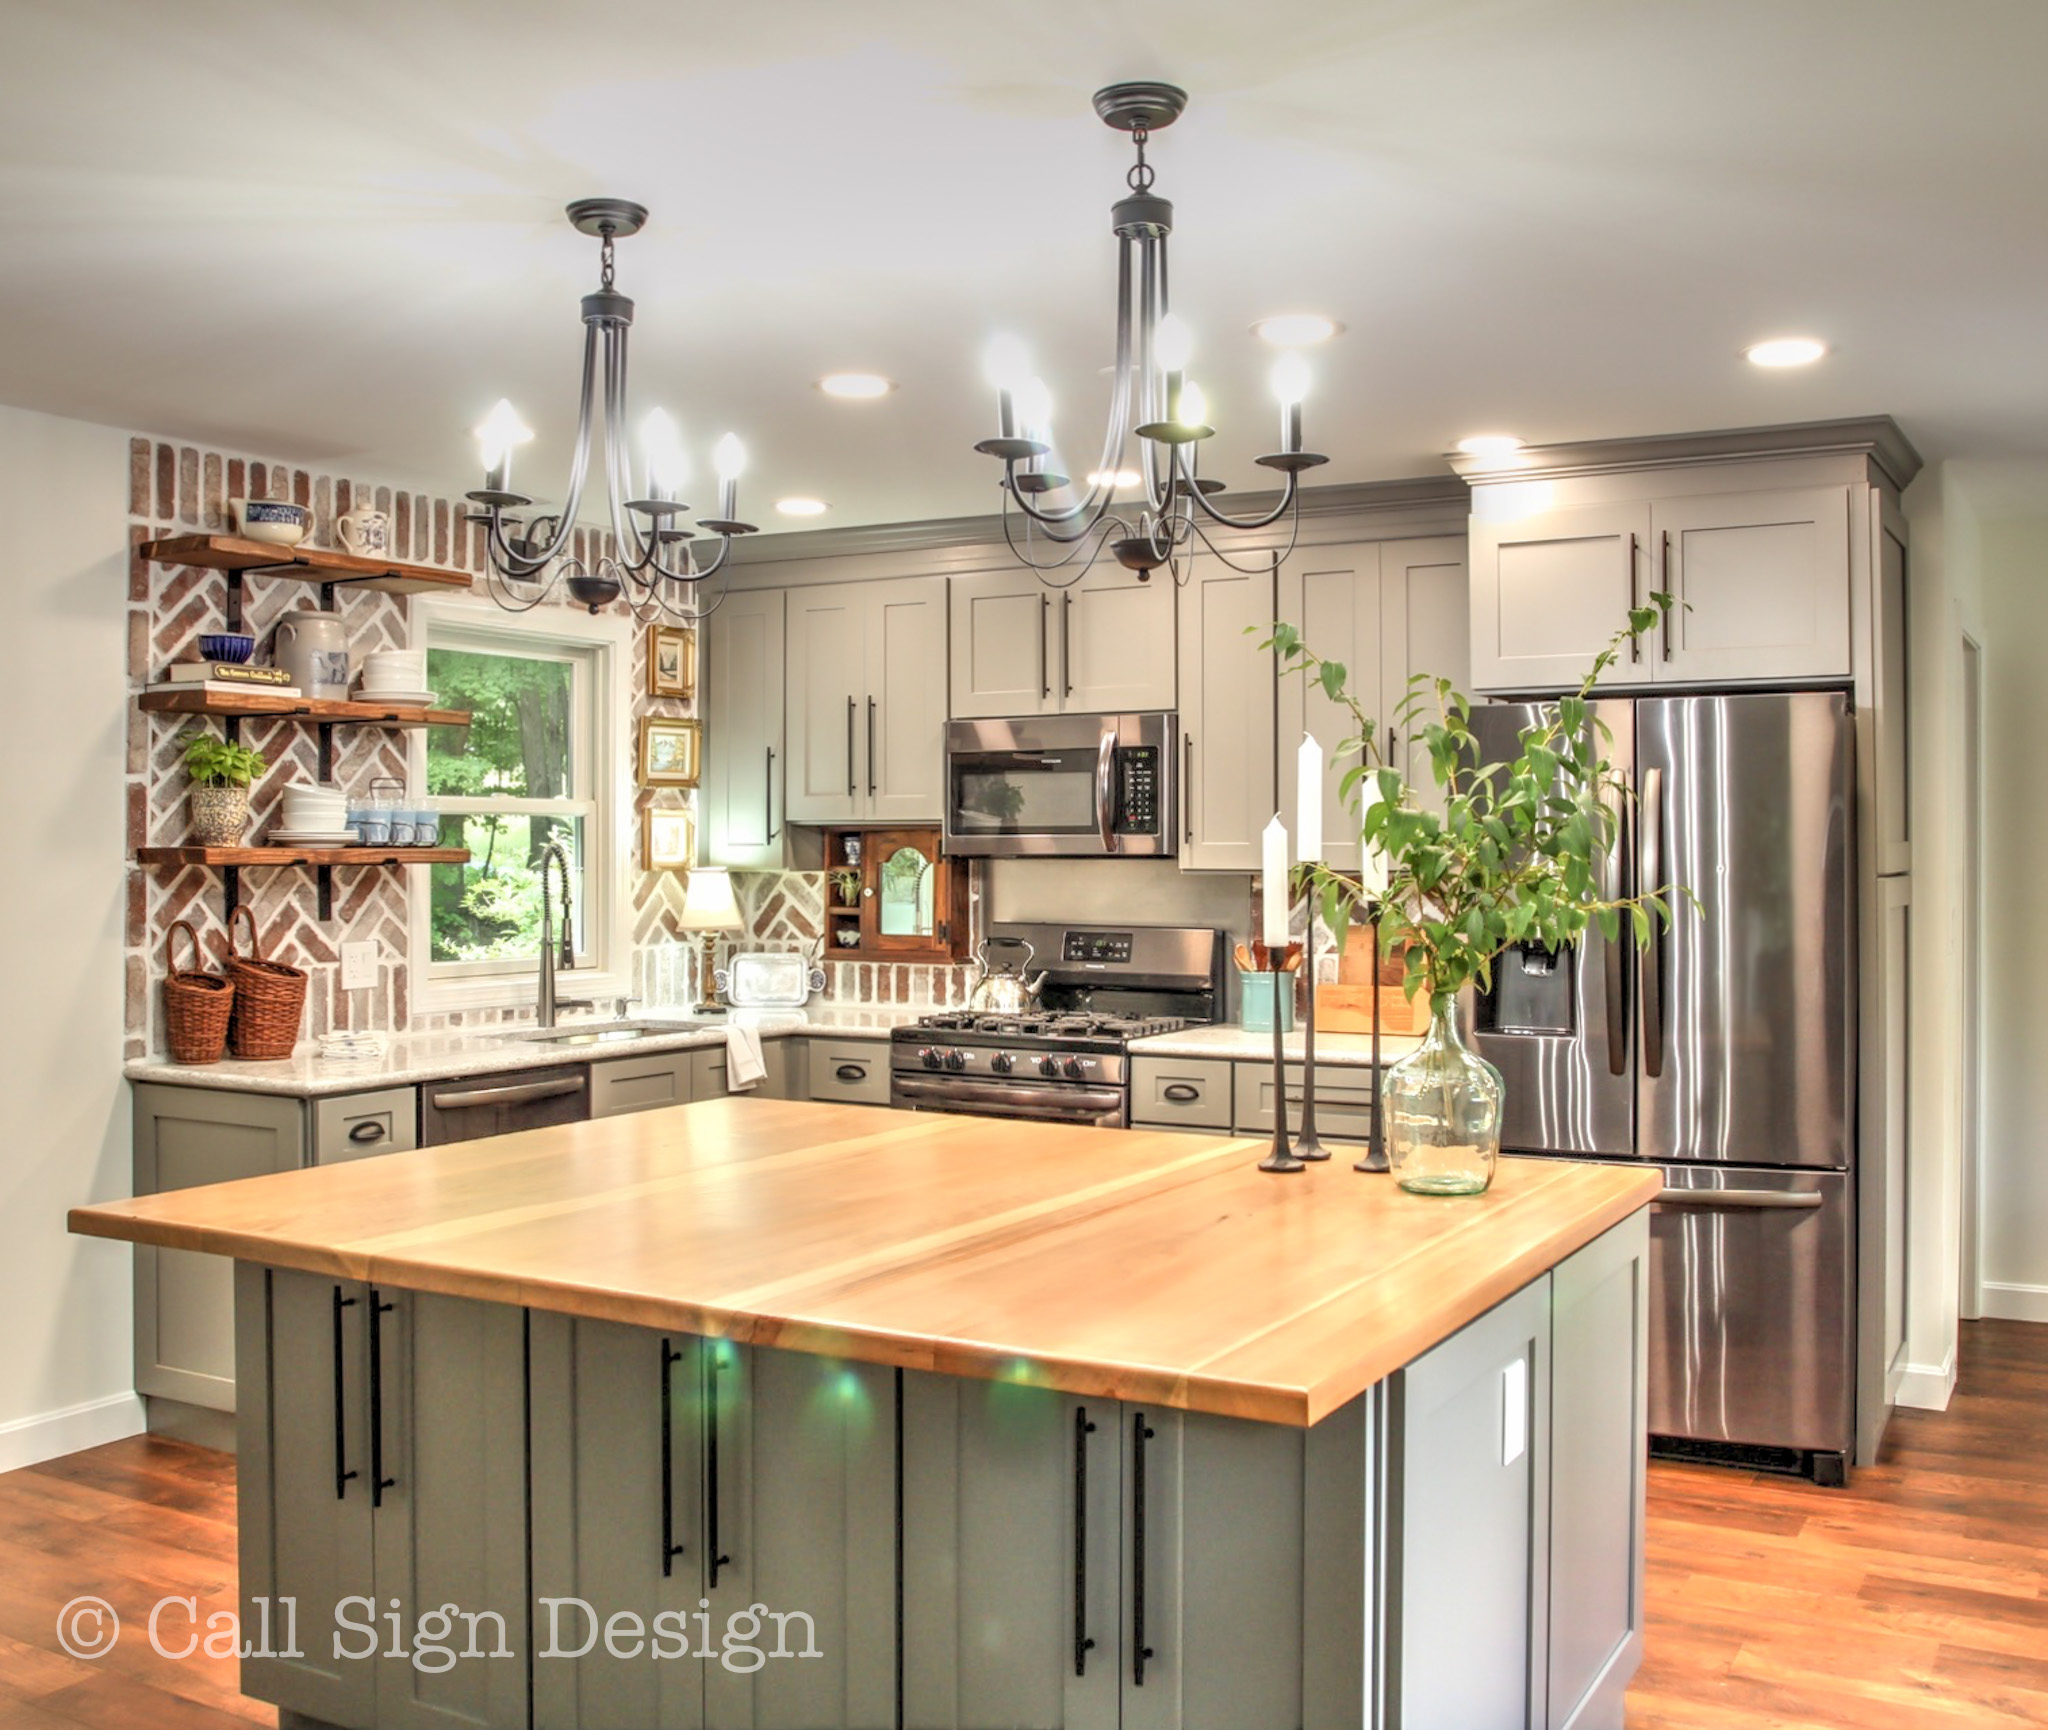
Sneak Peek (the AFTER):
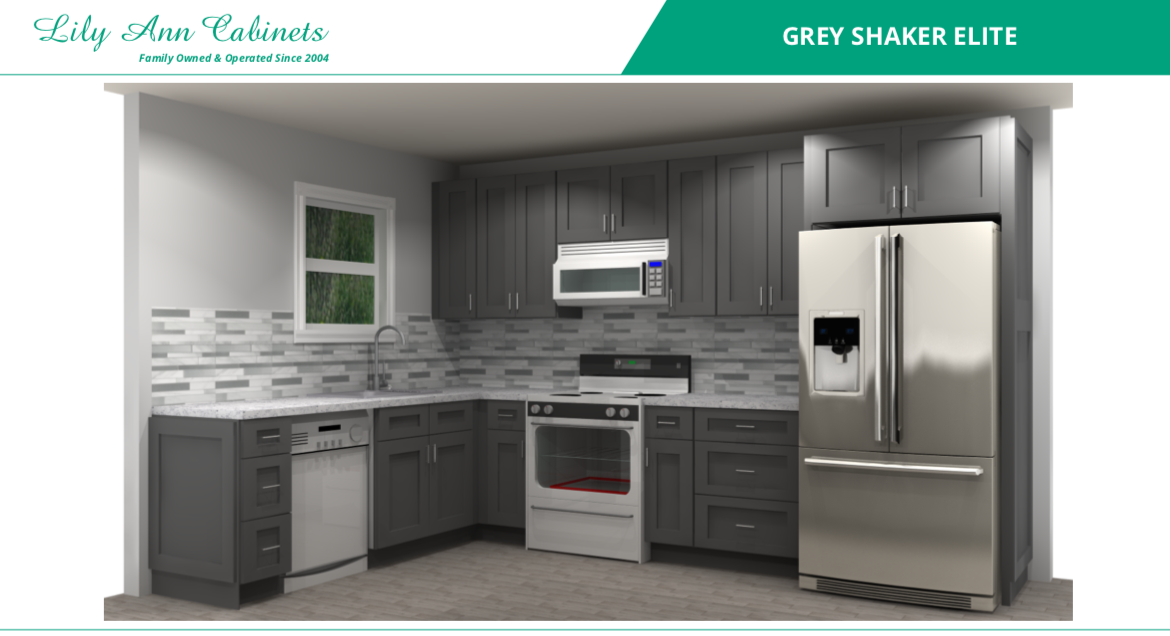
Before and After Pictures of Grandma’s New Vermont Cottage Kitchen: Sponsored by Lily Ann Cabinets and designed by @callsigndesign on Instagram and @slavetodiy on Pinterest.
*This post may contain affiliate links and is sponsored by Lily Ann Cabinets. Please see full disclosure at the end of the post.
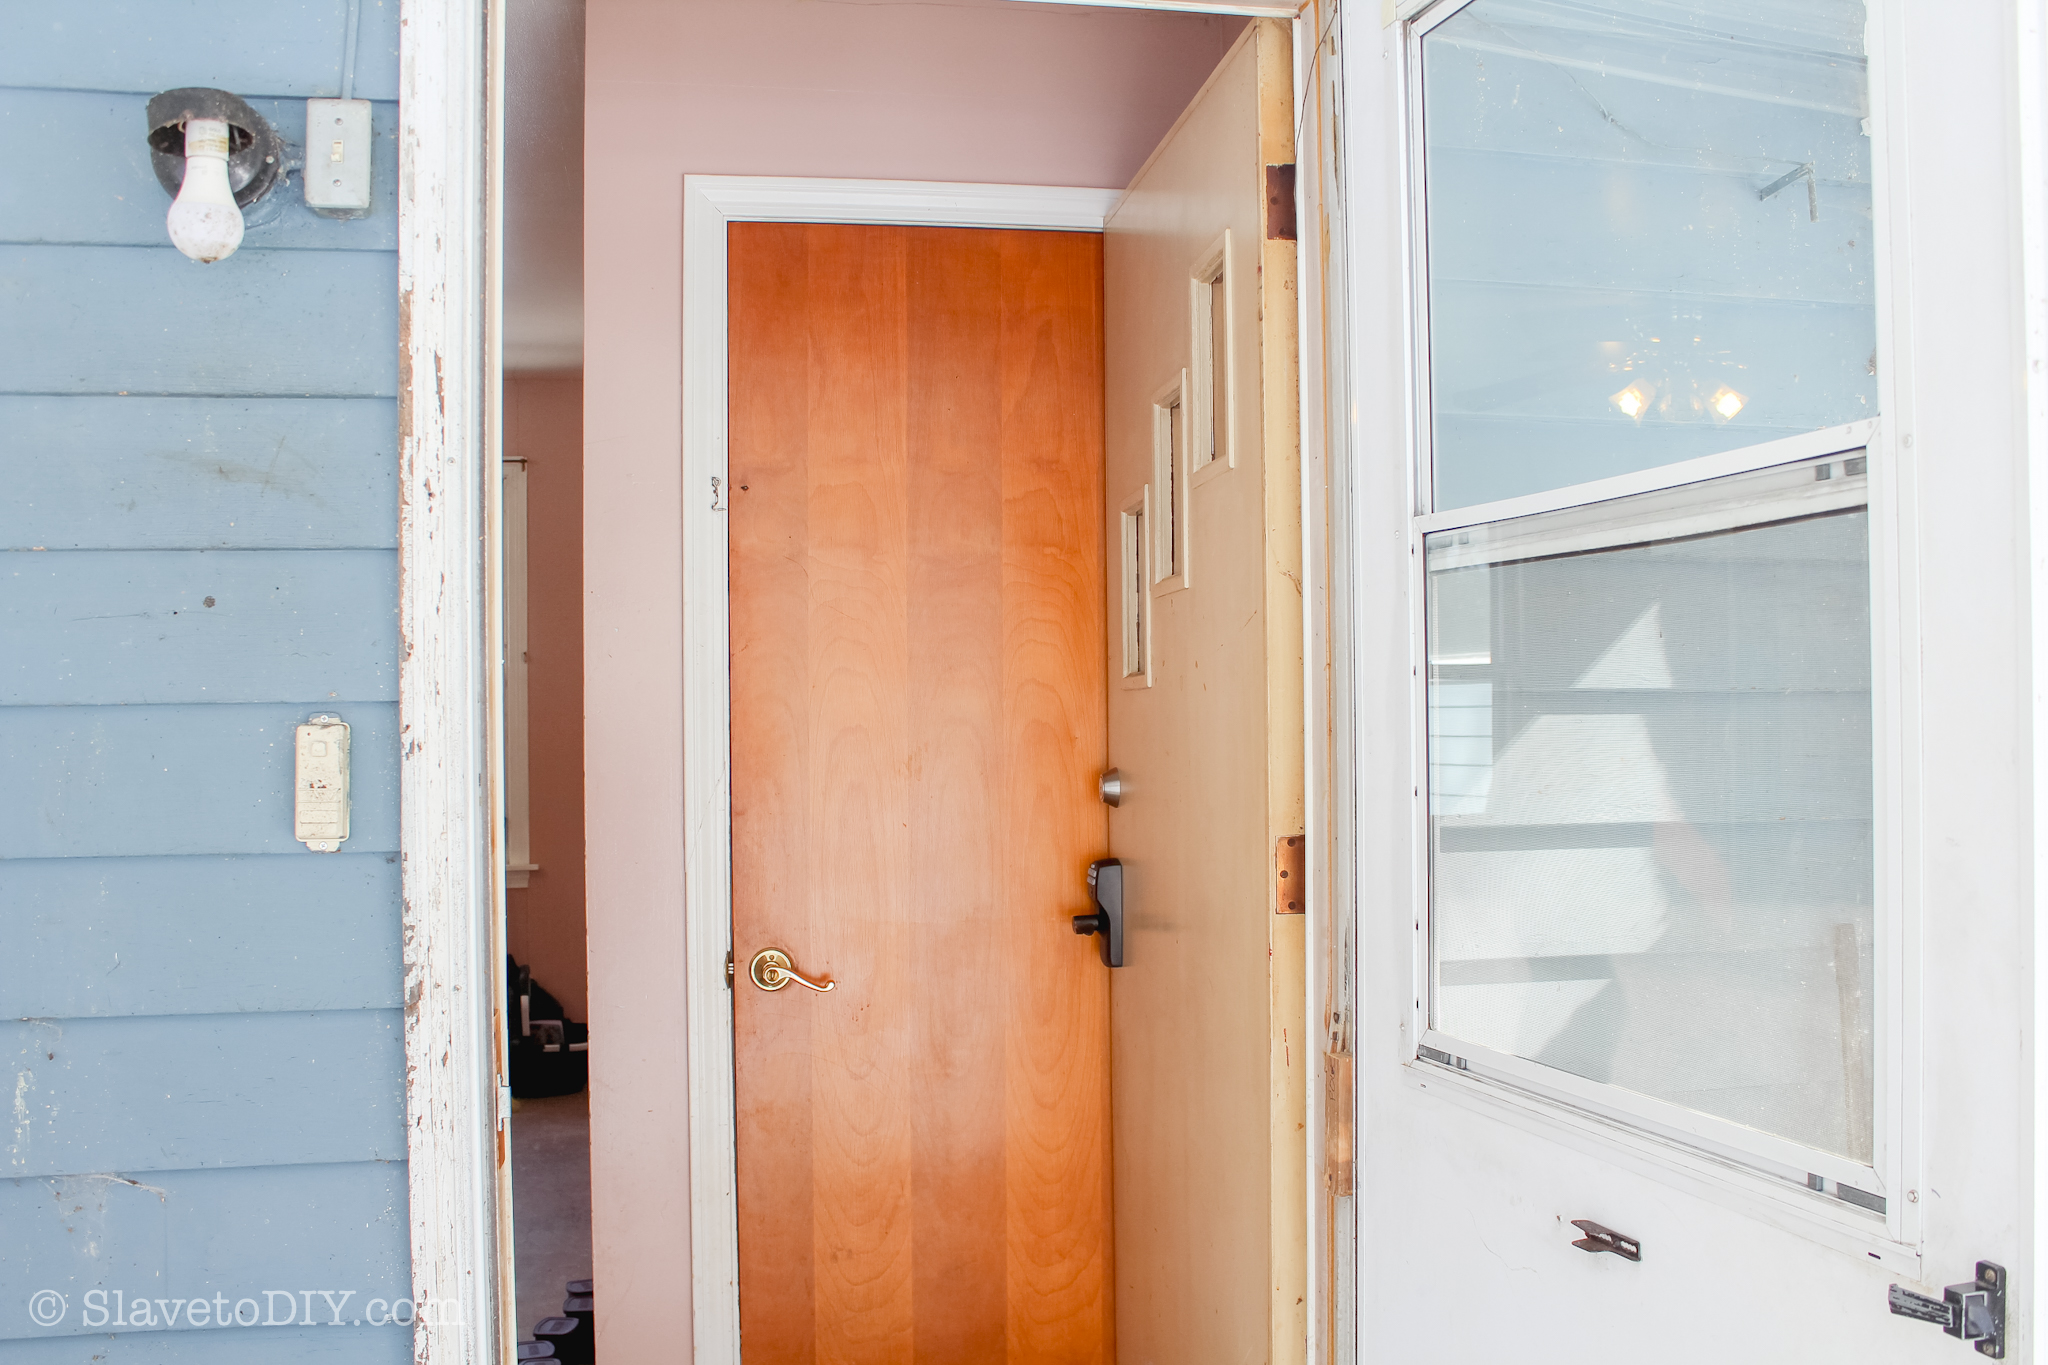
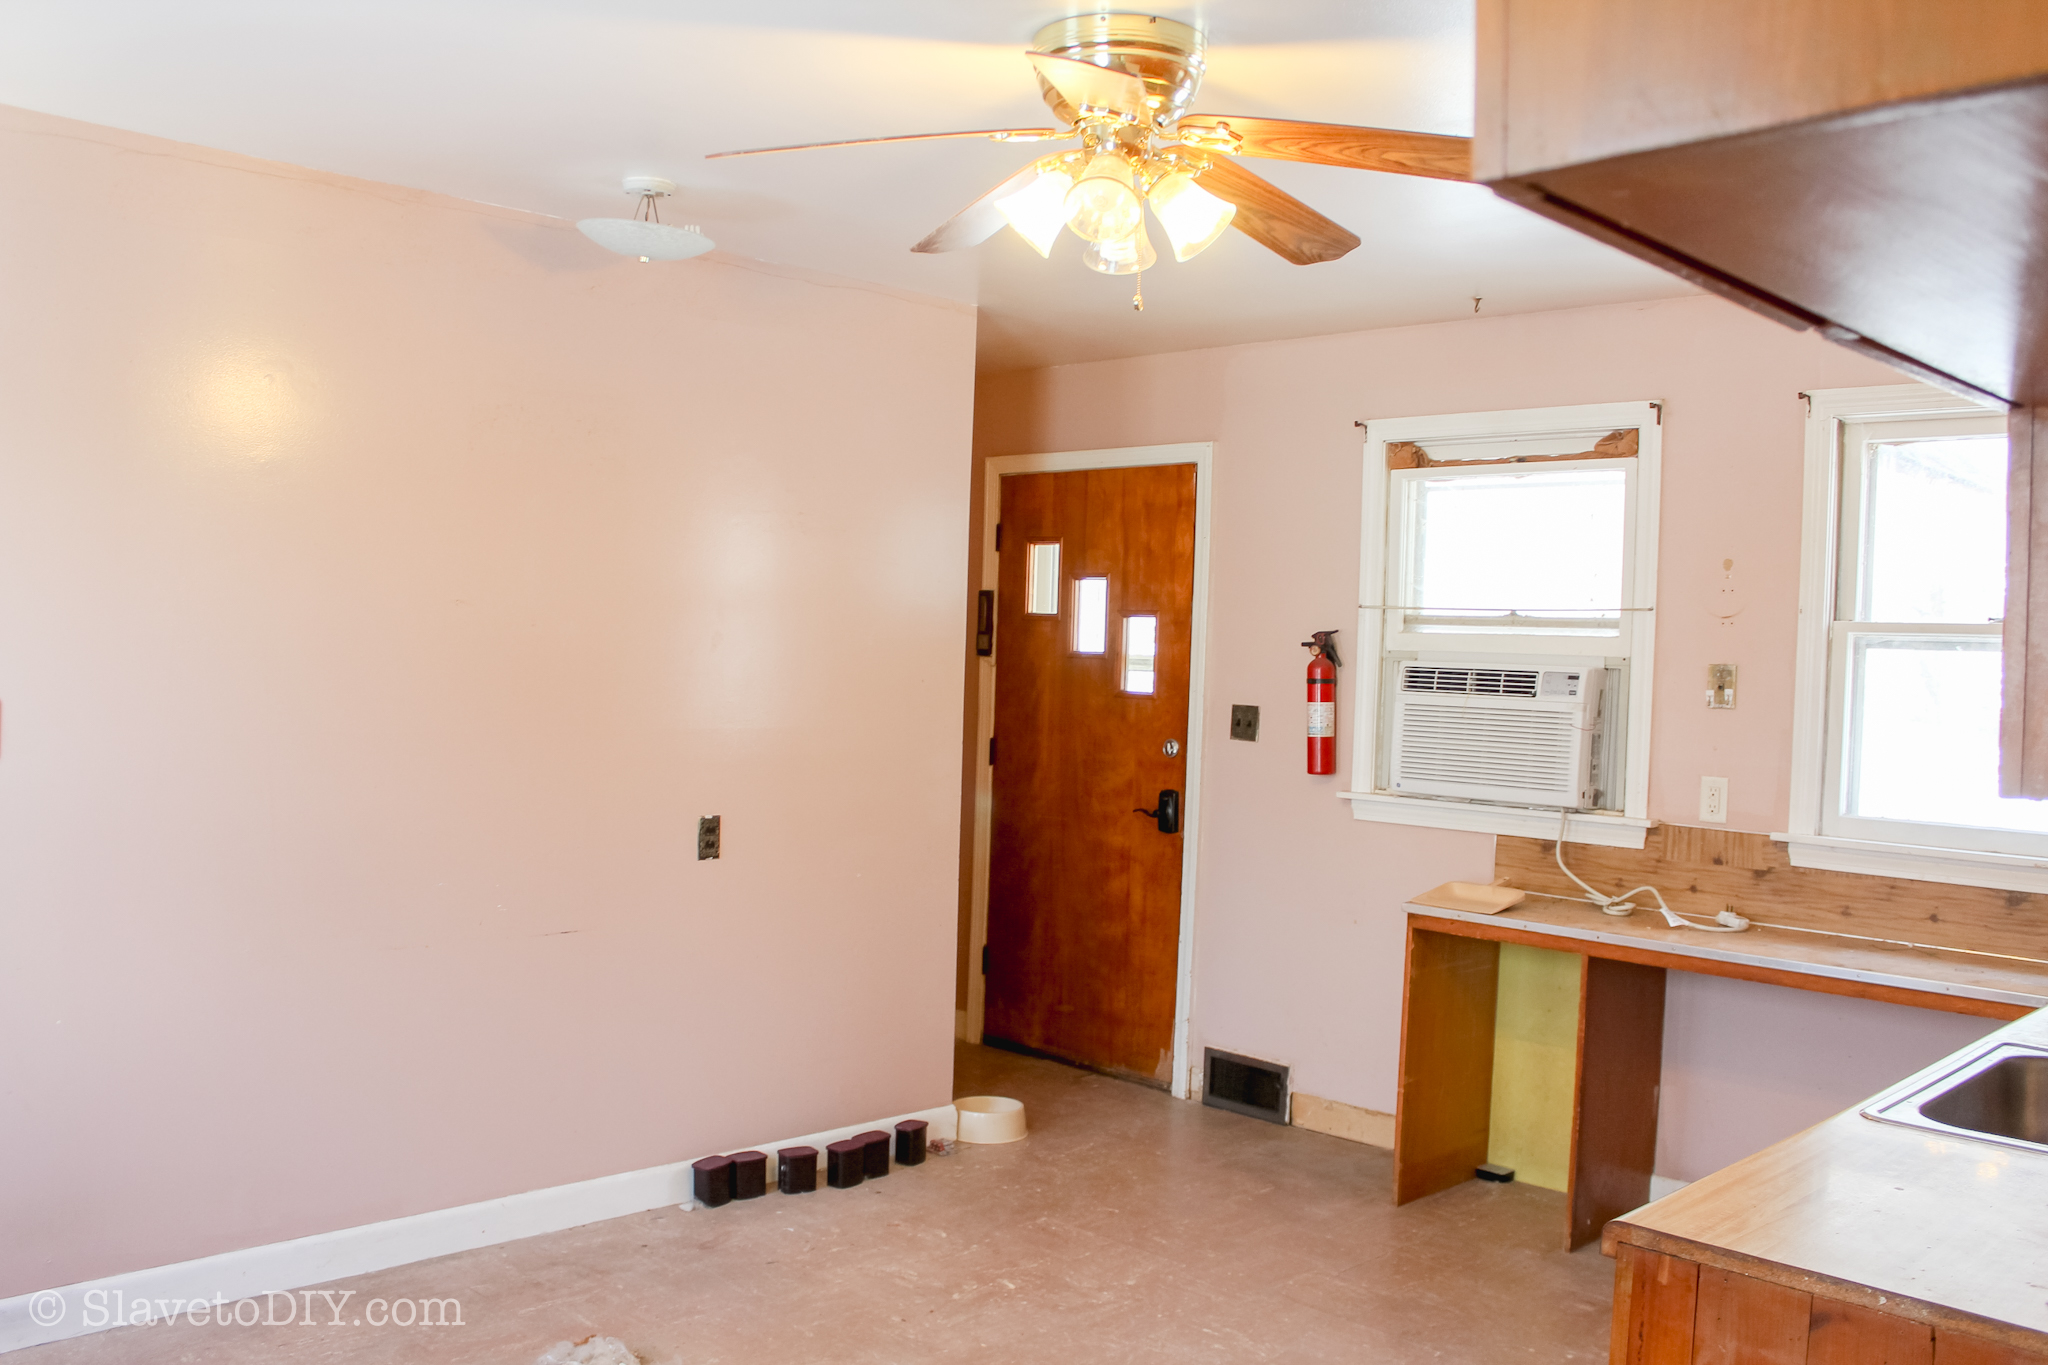
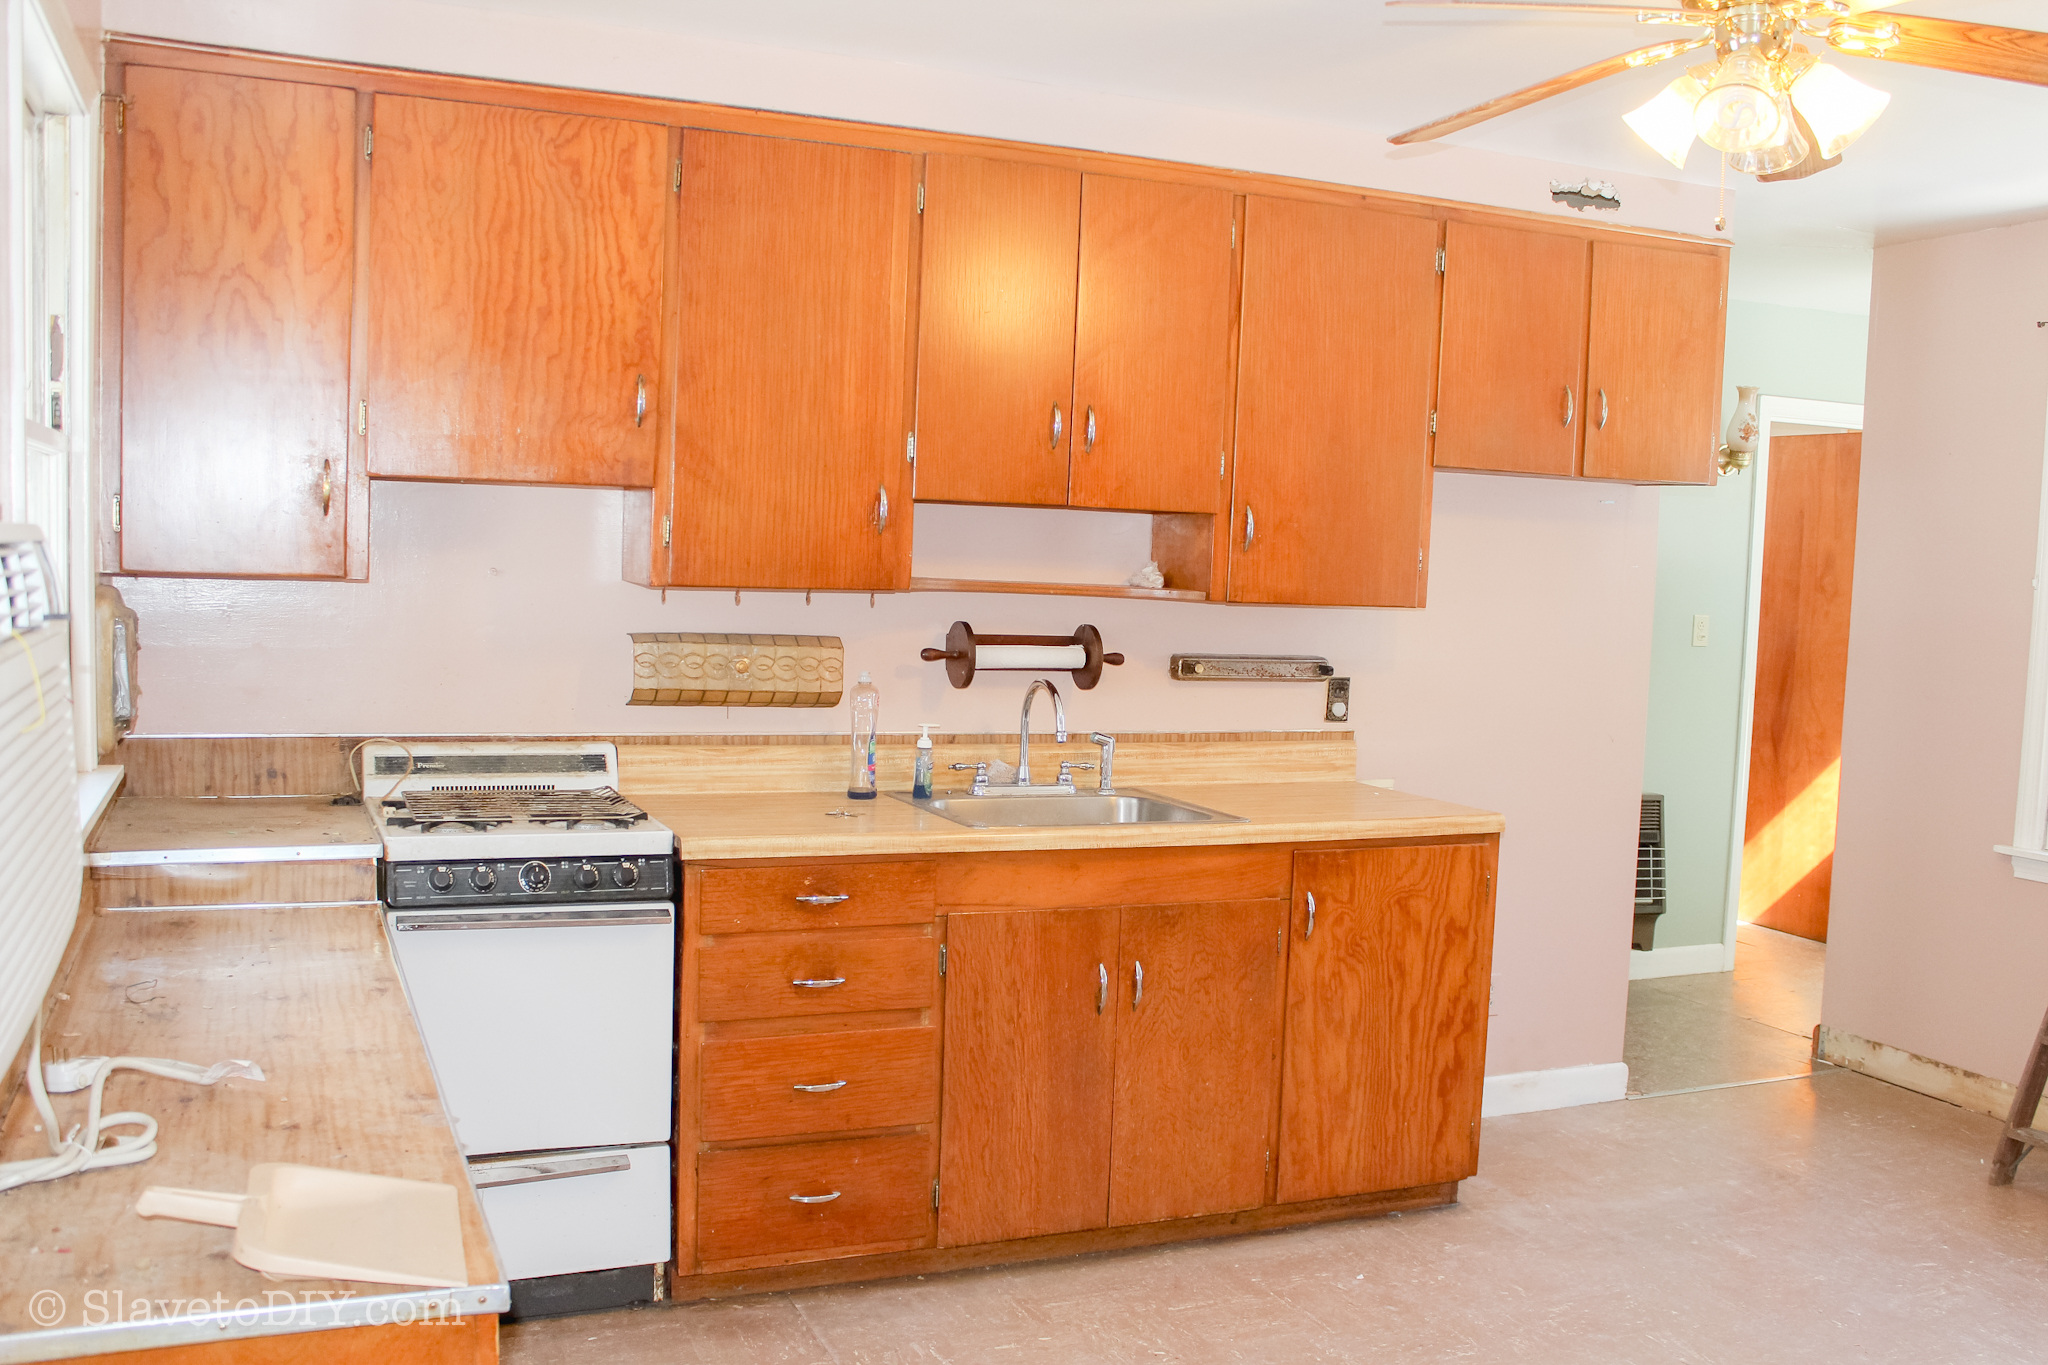
The Before
I was able to get a decent idea of the space from talking to my sister and lots of pictures and video chatting. I came up with a preliminary design that would save her time and money by leveraging the existing layout. We agreed it would be a nice kitchen.
In addition to detailed wall measurements, locations of lights, switches, plumbing, etc, I was working from the following before pictures:
Before and After Pictures of Grandma’s New Vermont Cottage Kitchen: Sponsored by Lily Ann Cabinets and designed by @callsigndesign on Instagram and @slavetodiy on Pinterest.
Before and After Pictures of Grandma’s New Vermont Cottage Kitchen: Sponsored by Lily Ann Cabinets and designed by @callsigndesign on Instagram and @slavetodiy on Pinterest.
Before and After Pictures of Grandma’s New Vermont Cottage Kitchen: Sponsored by Lily Ann Cabinets and designed by @callsigndesign on Instagram and @slavetodiy on Pinterest.
The Design Style
I talked to my sister at length about the intended style of the house (she was doing a complete renovation, not just the kitchen). The house was, at the time of purchase, sort of a bad mid-century look. We agreed that “Vermont Cottage” was a good style to strive for, throwing in some modern conveniences, and some new cabinetry. Trying to save her money on the reno, I had suggested we try to paint and re-use some of the cabinets, but it would not have been as polished of an end look.
However, if it’s a total tear down, I have some great tips to save you money. The main component of a kitchen remodel is the cabinetry. There are so many cabinet options and they can run from $100 each to thousands of dollars each.
Thousands of dollars. “For a CABINET???” you ask. Oh yes, for a cabinet.
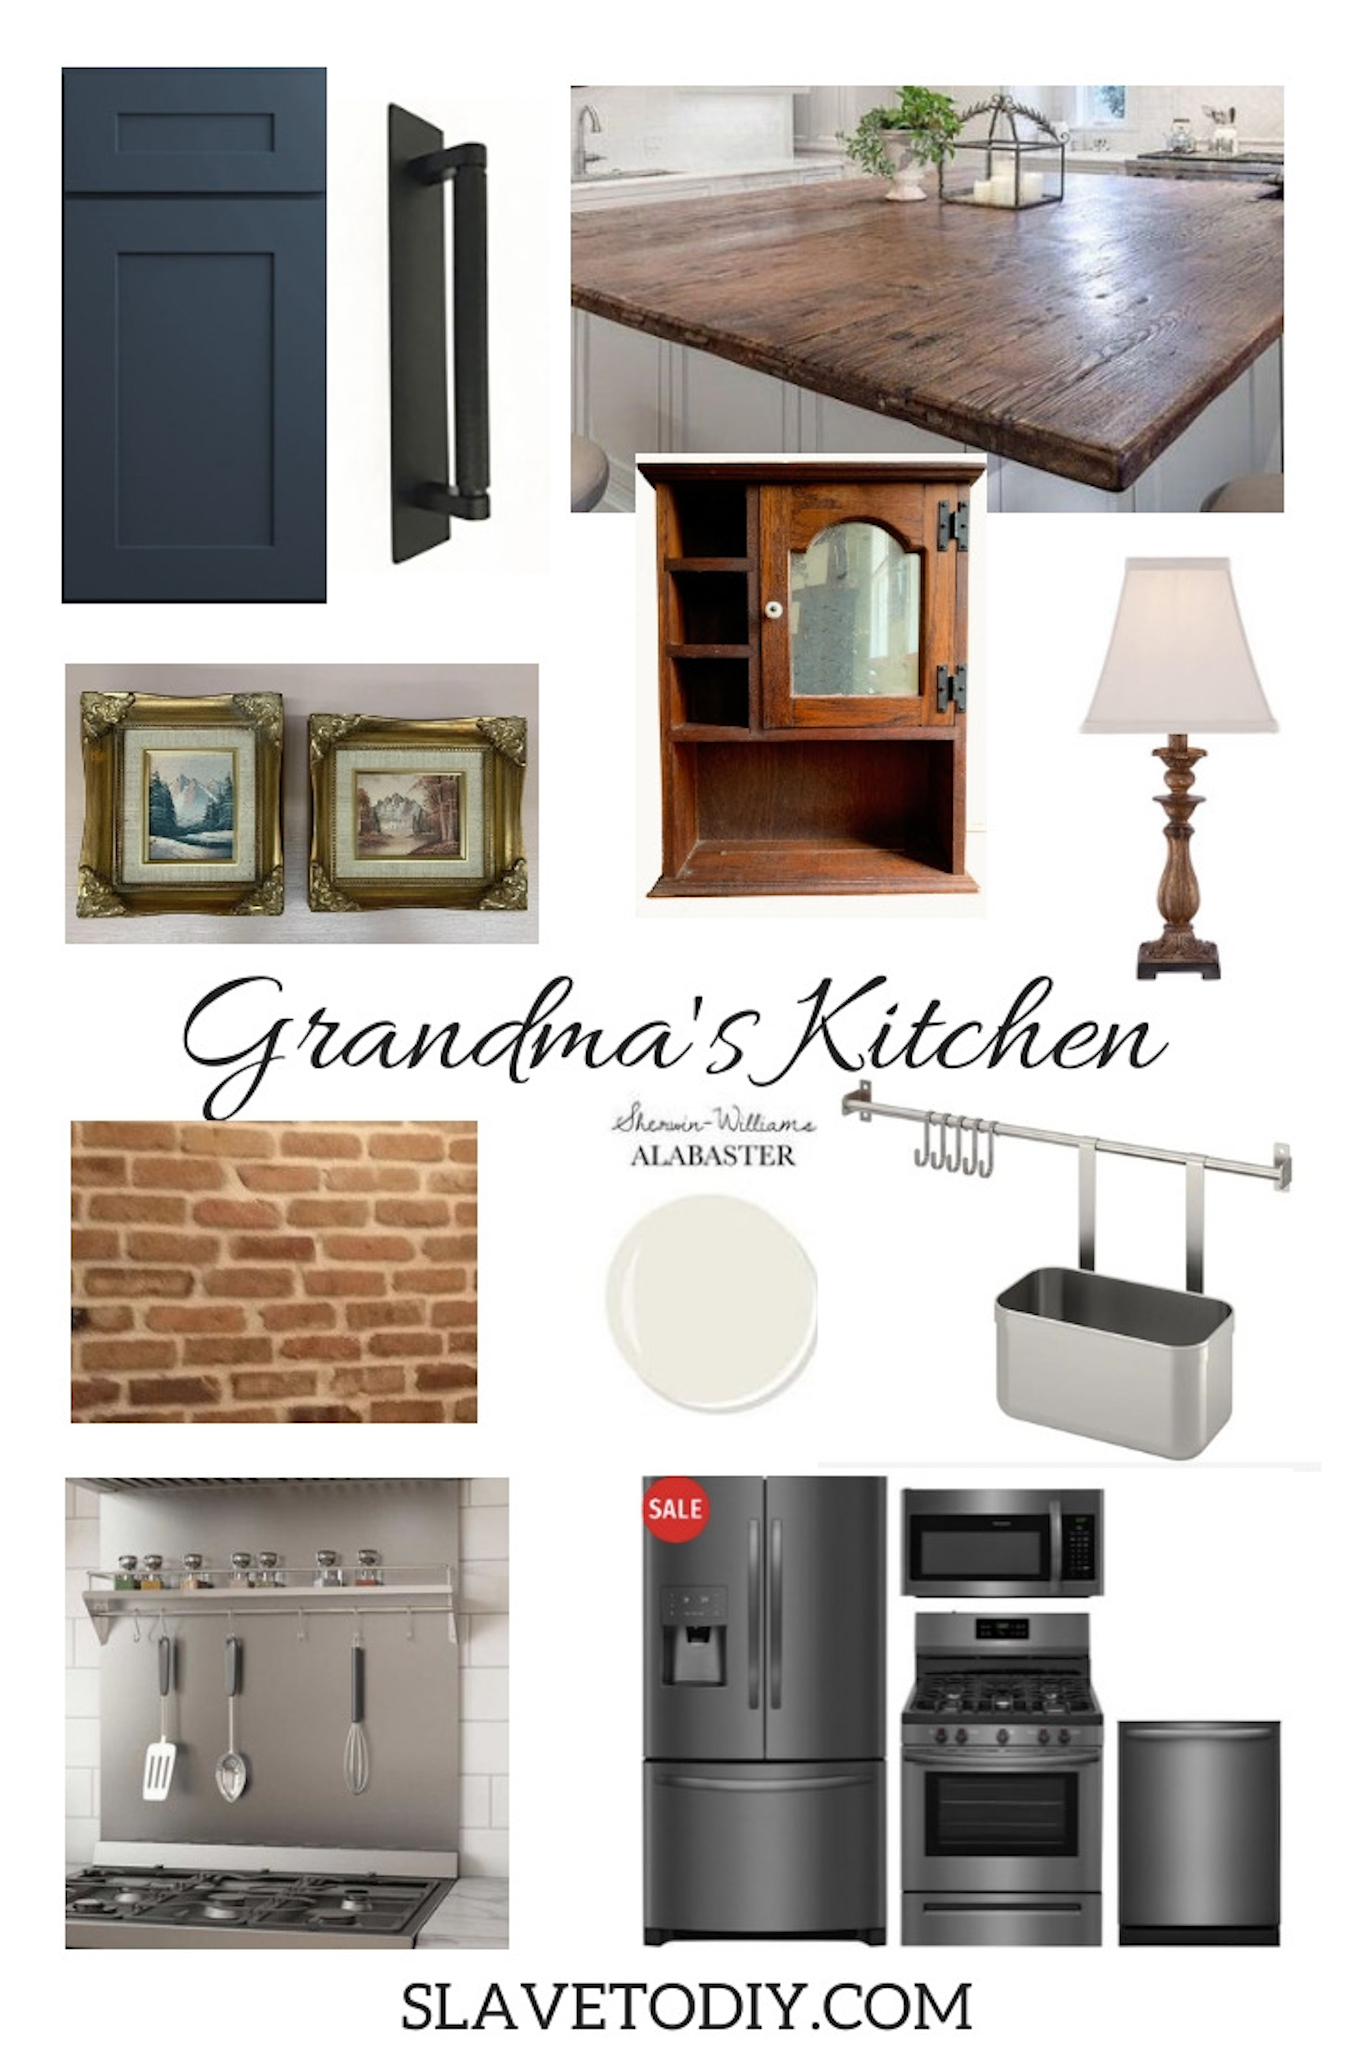
Anyway, here is the original “Vermont Cottage” mood board that I made for my mom’s forever kitchen to give my sister an idea of how I wanted the finished space to feel. You may notice that it has some polished elements, some rustic elements, and some commercial/industrial level elements also.
Before and After Pictures of Grandma’s New Vermont Cottage Kitchen: Sponsored by Lily Ann Cabinets and designed by @callsigndesign on Instagram and @slavetodiy on Pinterest.
For my mom and her husband, we had some specific design considerations on top of the usual desire to create a timeless kitchen:
Her husband cooks greasy steaks on high heat almost daily: Although a dedicated hood was not in the budget, we chose a microwave that was capable of venting to the outside. We also planned a stainless steel sheet as a stove backsplash to make clean-up easier.
Her husband is a mechanic: If any of you have a mechanic in your house, you know that black fingerprints are a fact of life. We chose dark stainless for the appliances and beefy black hardware to minimize smudges.
My preliminary design had options to use the existing layout and cabinets, add some cabinets and move the sink under the window, and to add some cabinets and bridge shelves from IKEA to the wall that was blank in the kitchen. This design was the most budget friendly.
Then my sister brought my brother in to look at the space before we agreed on a design. He said, “let’s open it up.” Read: please scrap your entire layout. We’re doing this differently.
The problem was: inbetween the closed off kitchen and living room were two walls and a staircase that went to the basement. Apparently, for carpenters that wear superman capes, this is a non-issue. He informed us he was going to move the staircase to the other end of the living room, frame the hole in, build a new staircase with kneewall, and we would have one BIG, FANTASTIC, open living space.
So, I revised my plan, which doubled the cabinet space we would have in the kitchen, plus the overall aesthetic was going to be awesome!
The Design Plan
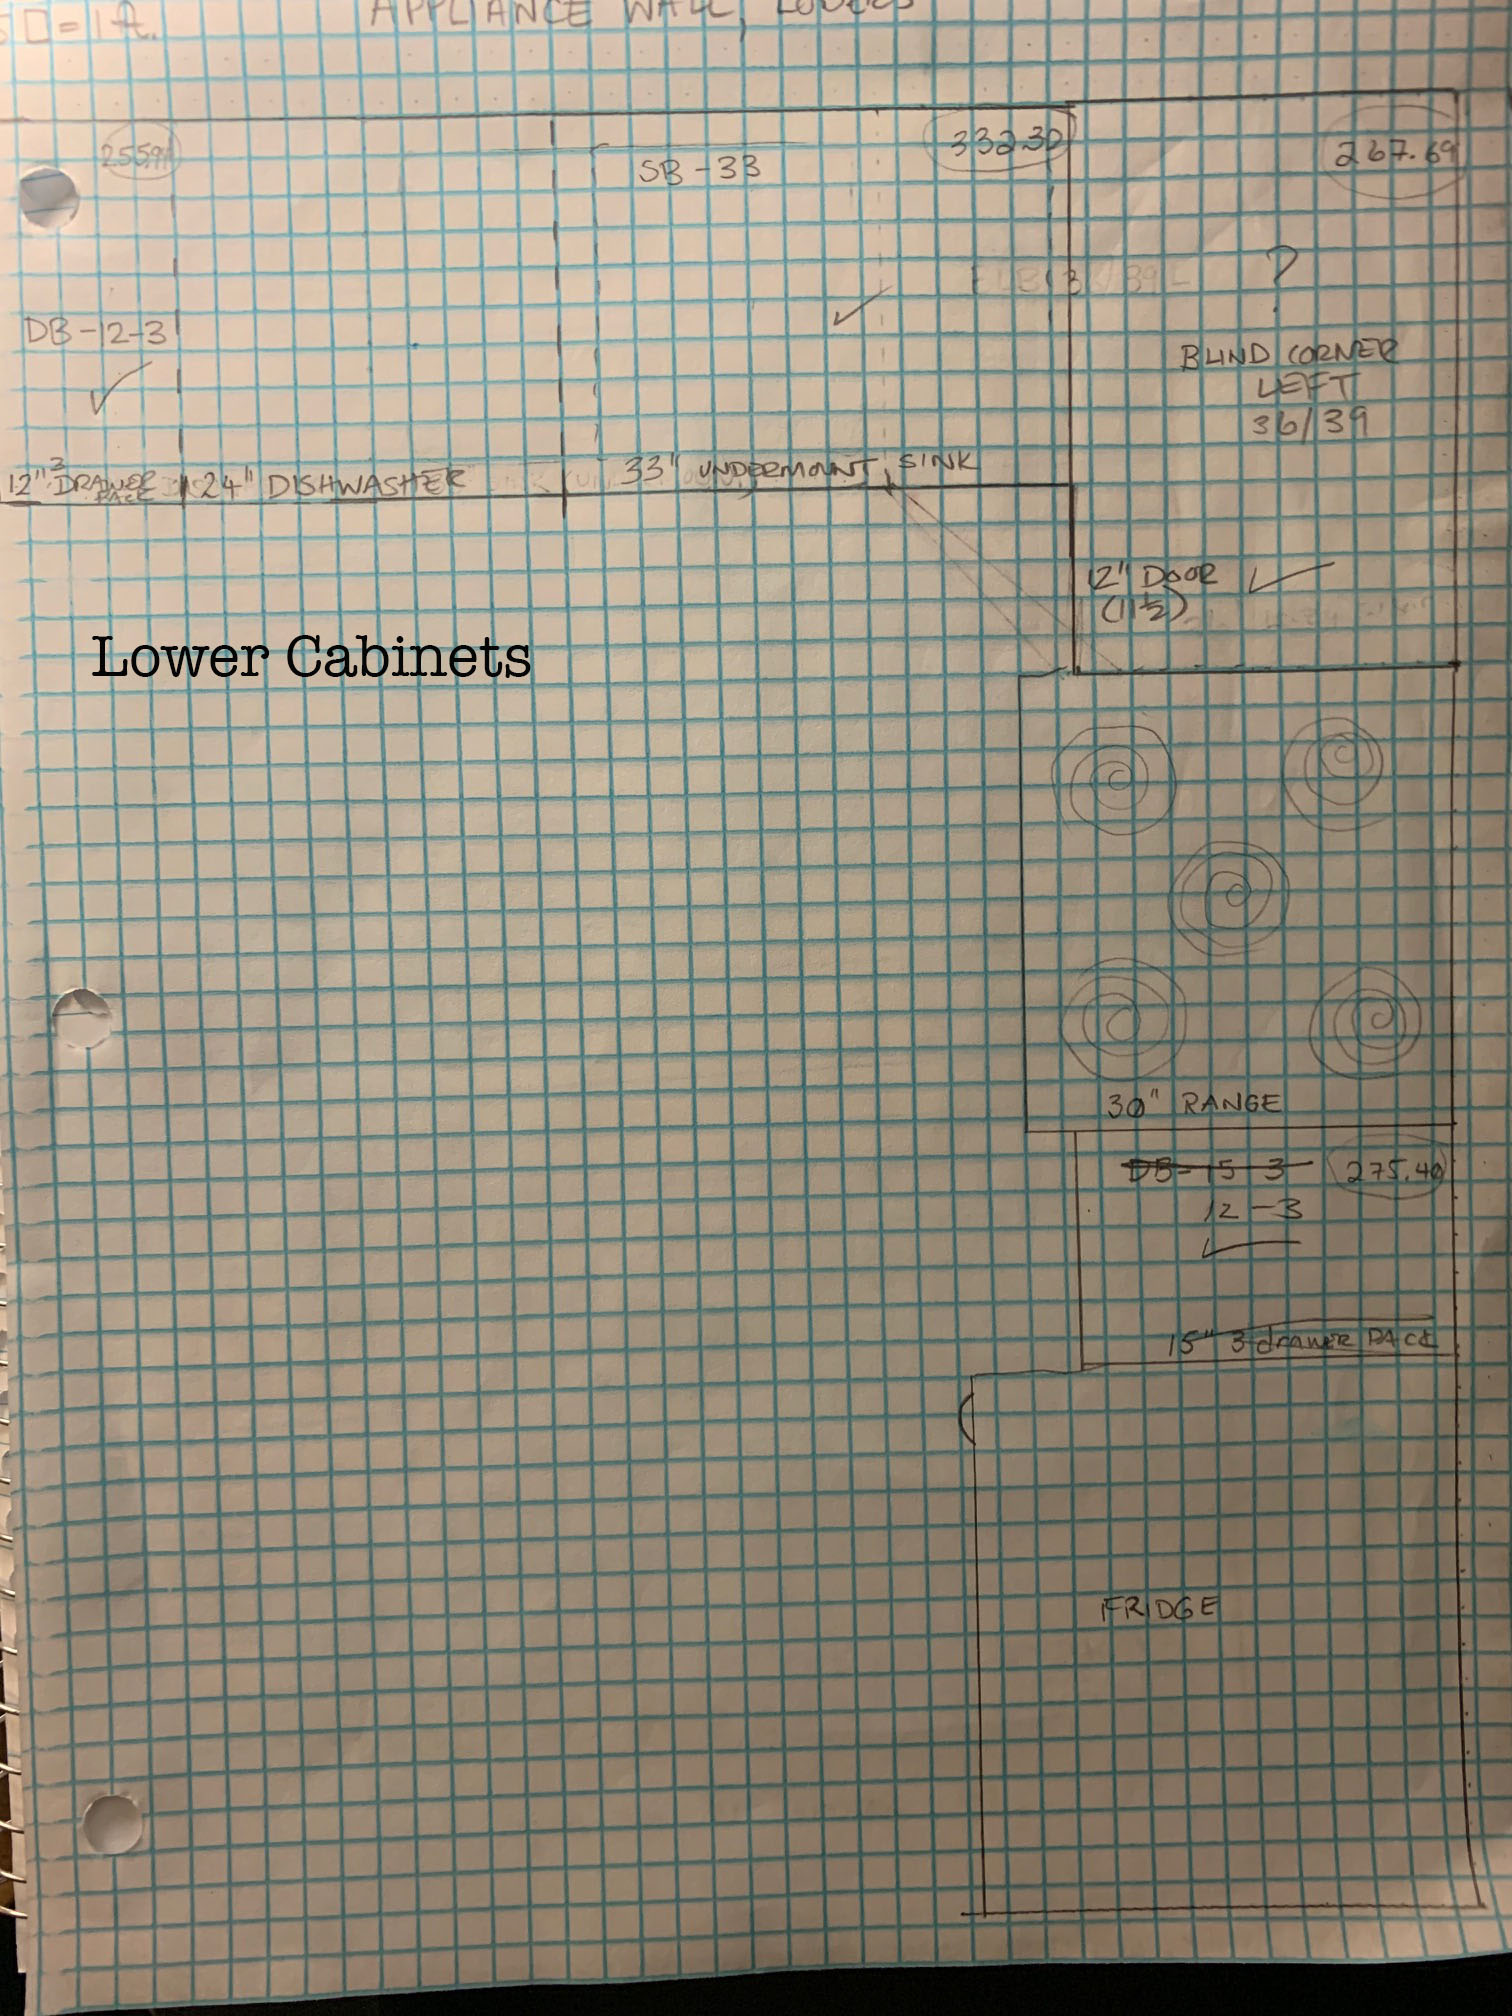
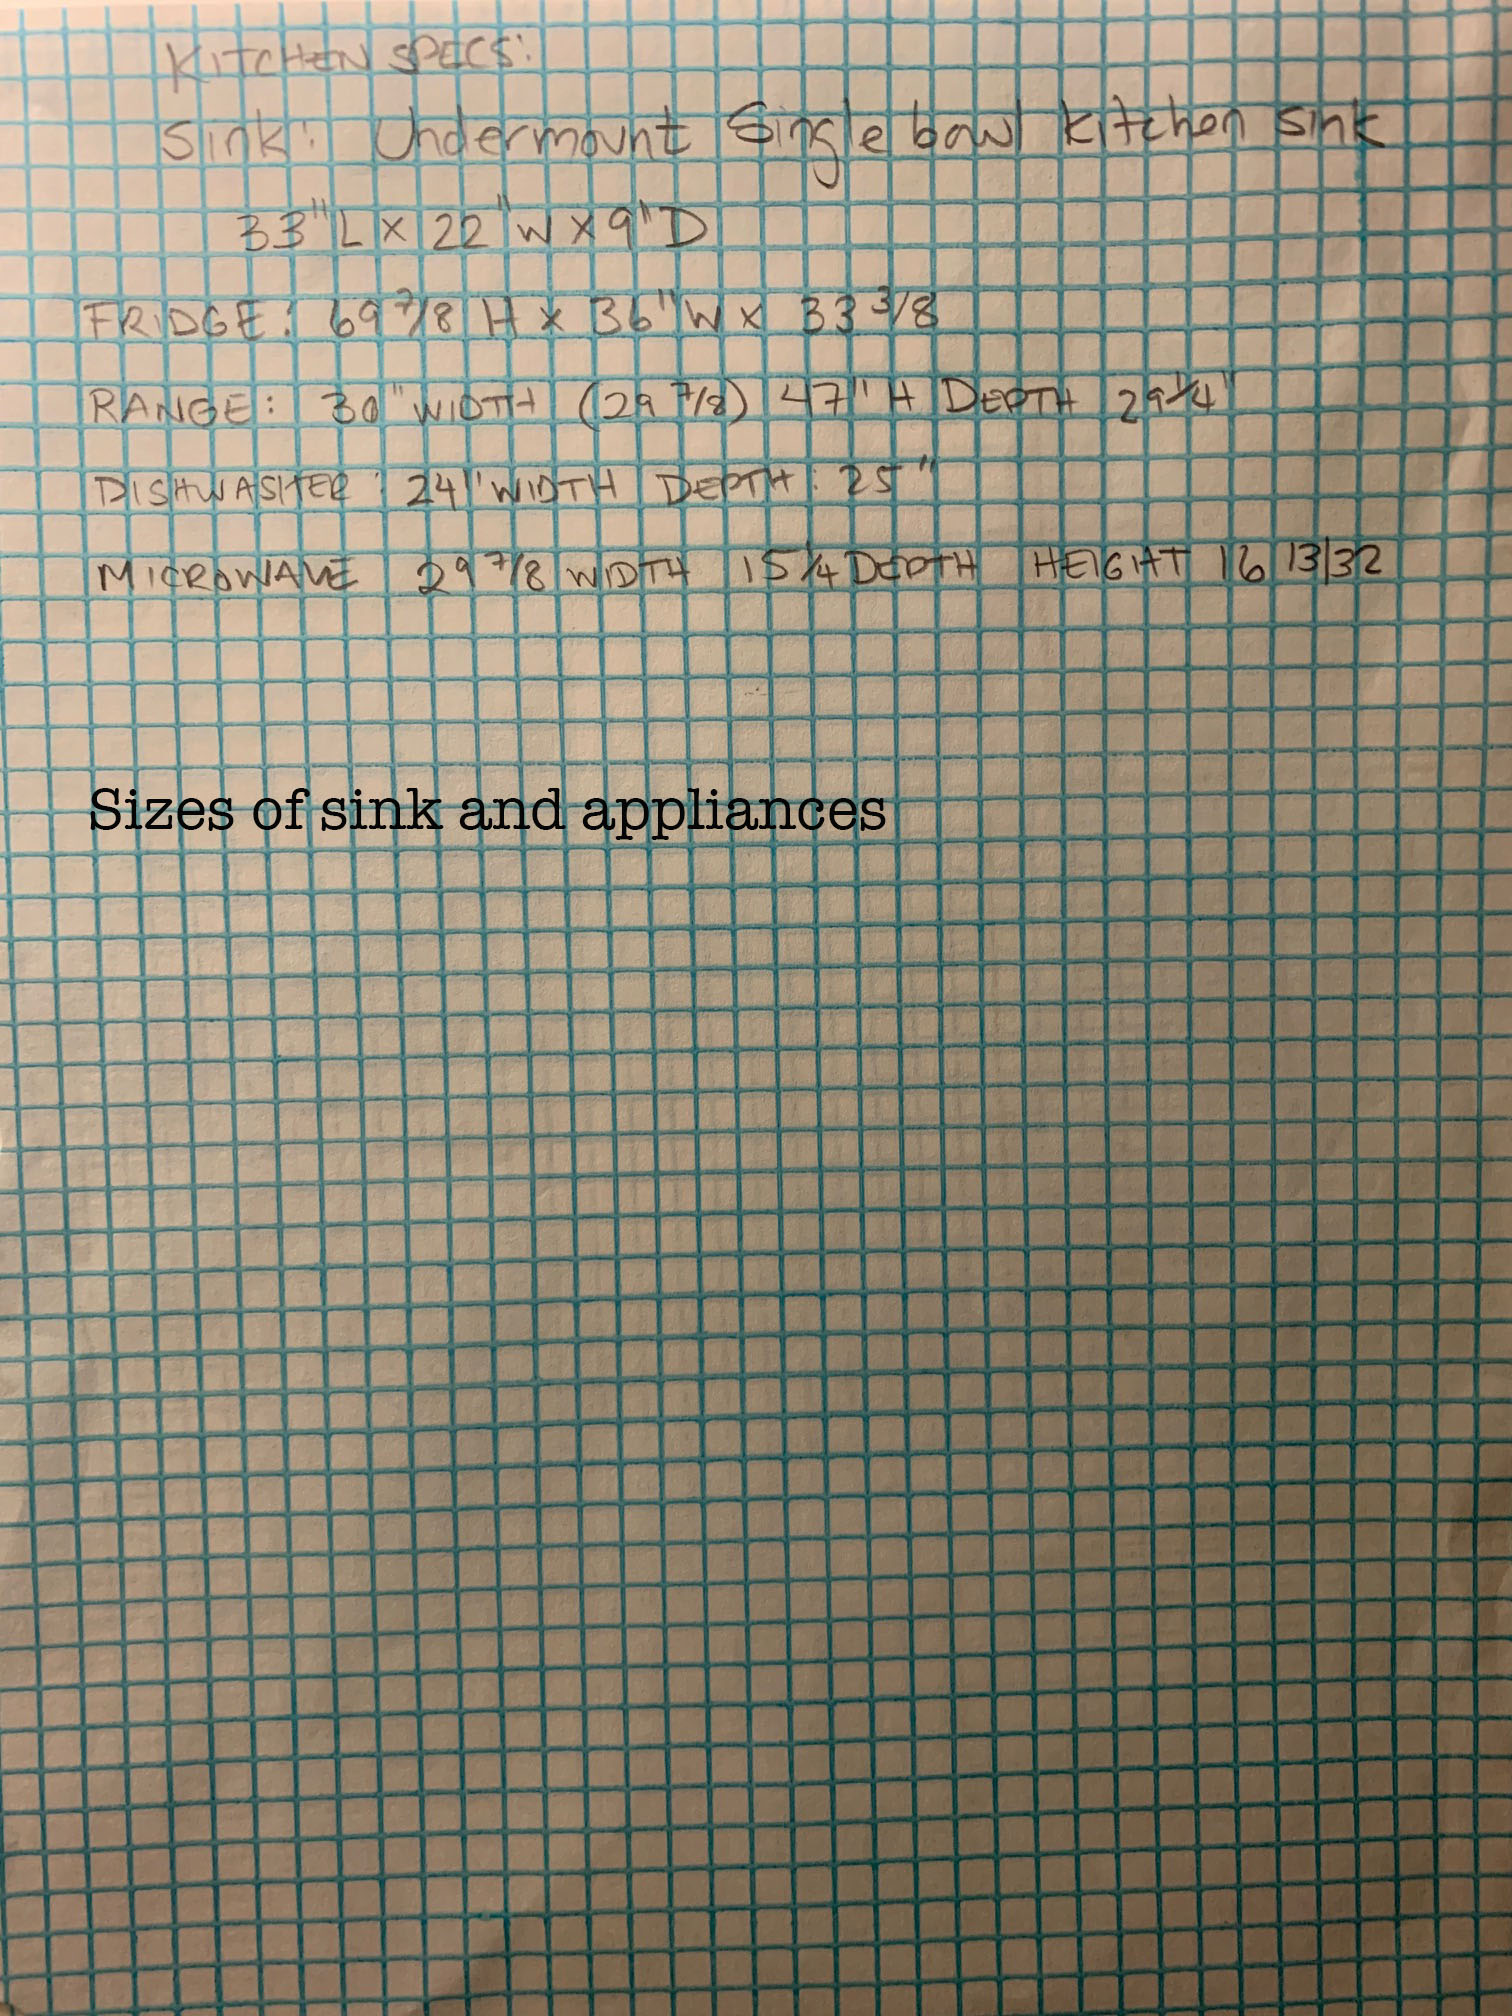
I got out my graph paper (yes, I am old school and I still use graph paper for my designs) and was back to the old drawing board. I put my wall measurements and locations of fixtures, etc (including appliance measurements) down onto graph paper and then proceeded to start filling in standard size (non-custom) cabinet sizes to see how much of the space I could use. It turns out, I was able to use almost every inch of the back wall and create a nice big kitchen.
While I was designing I was also researching pricing for cabinets. YIKES. There are a lot of options, and some of them, even their off the shelf prices (non-custom cabinets) are pricey. I’m always trying to find a good deal, especially when I’m spending someone else’s money. I found a company that was running a sale that has good reviews and had a cabinet style I liked. They also offered design services, so I figured getting a pro to look at my design couldn’t hurt, and I was curious to see what they would come up with.
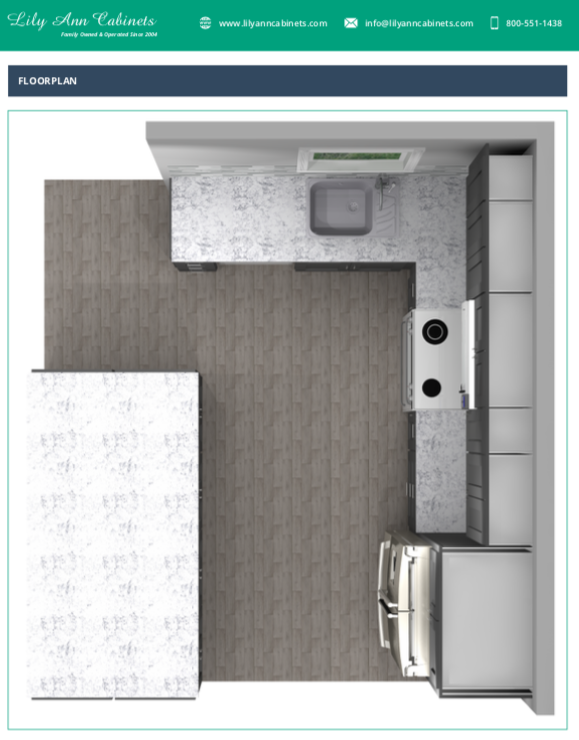
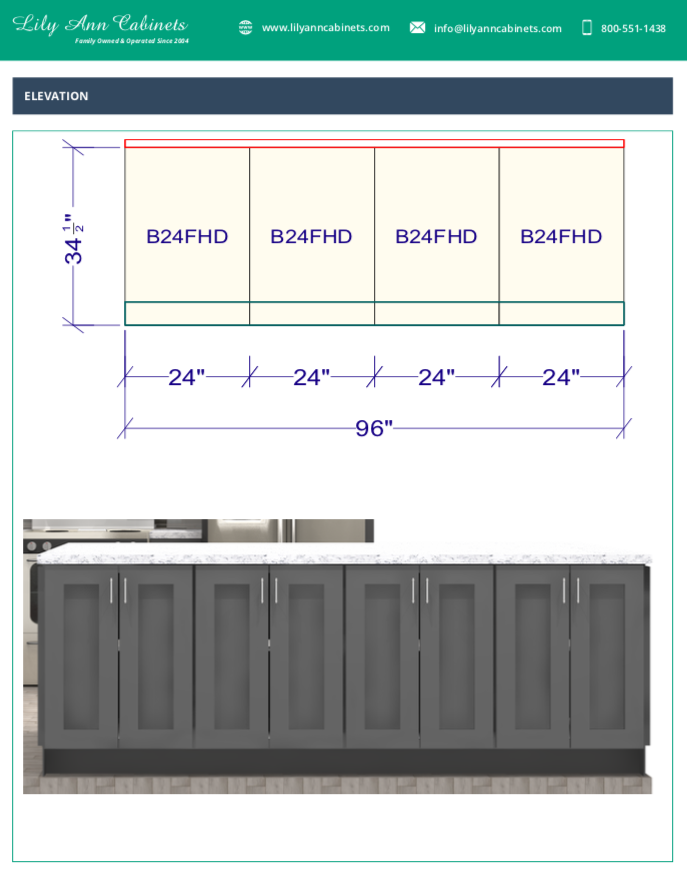
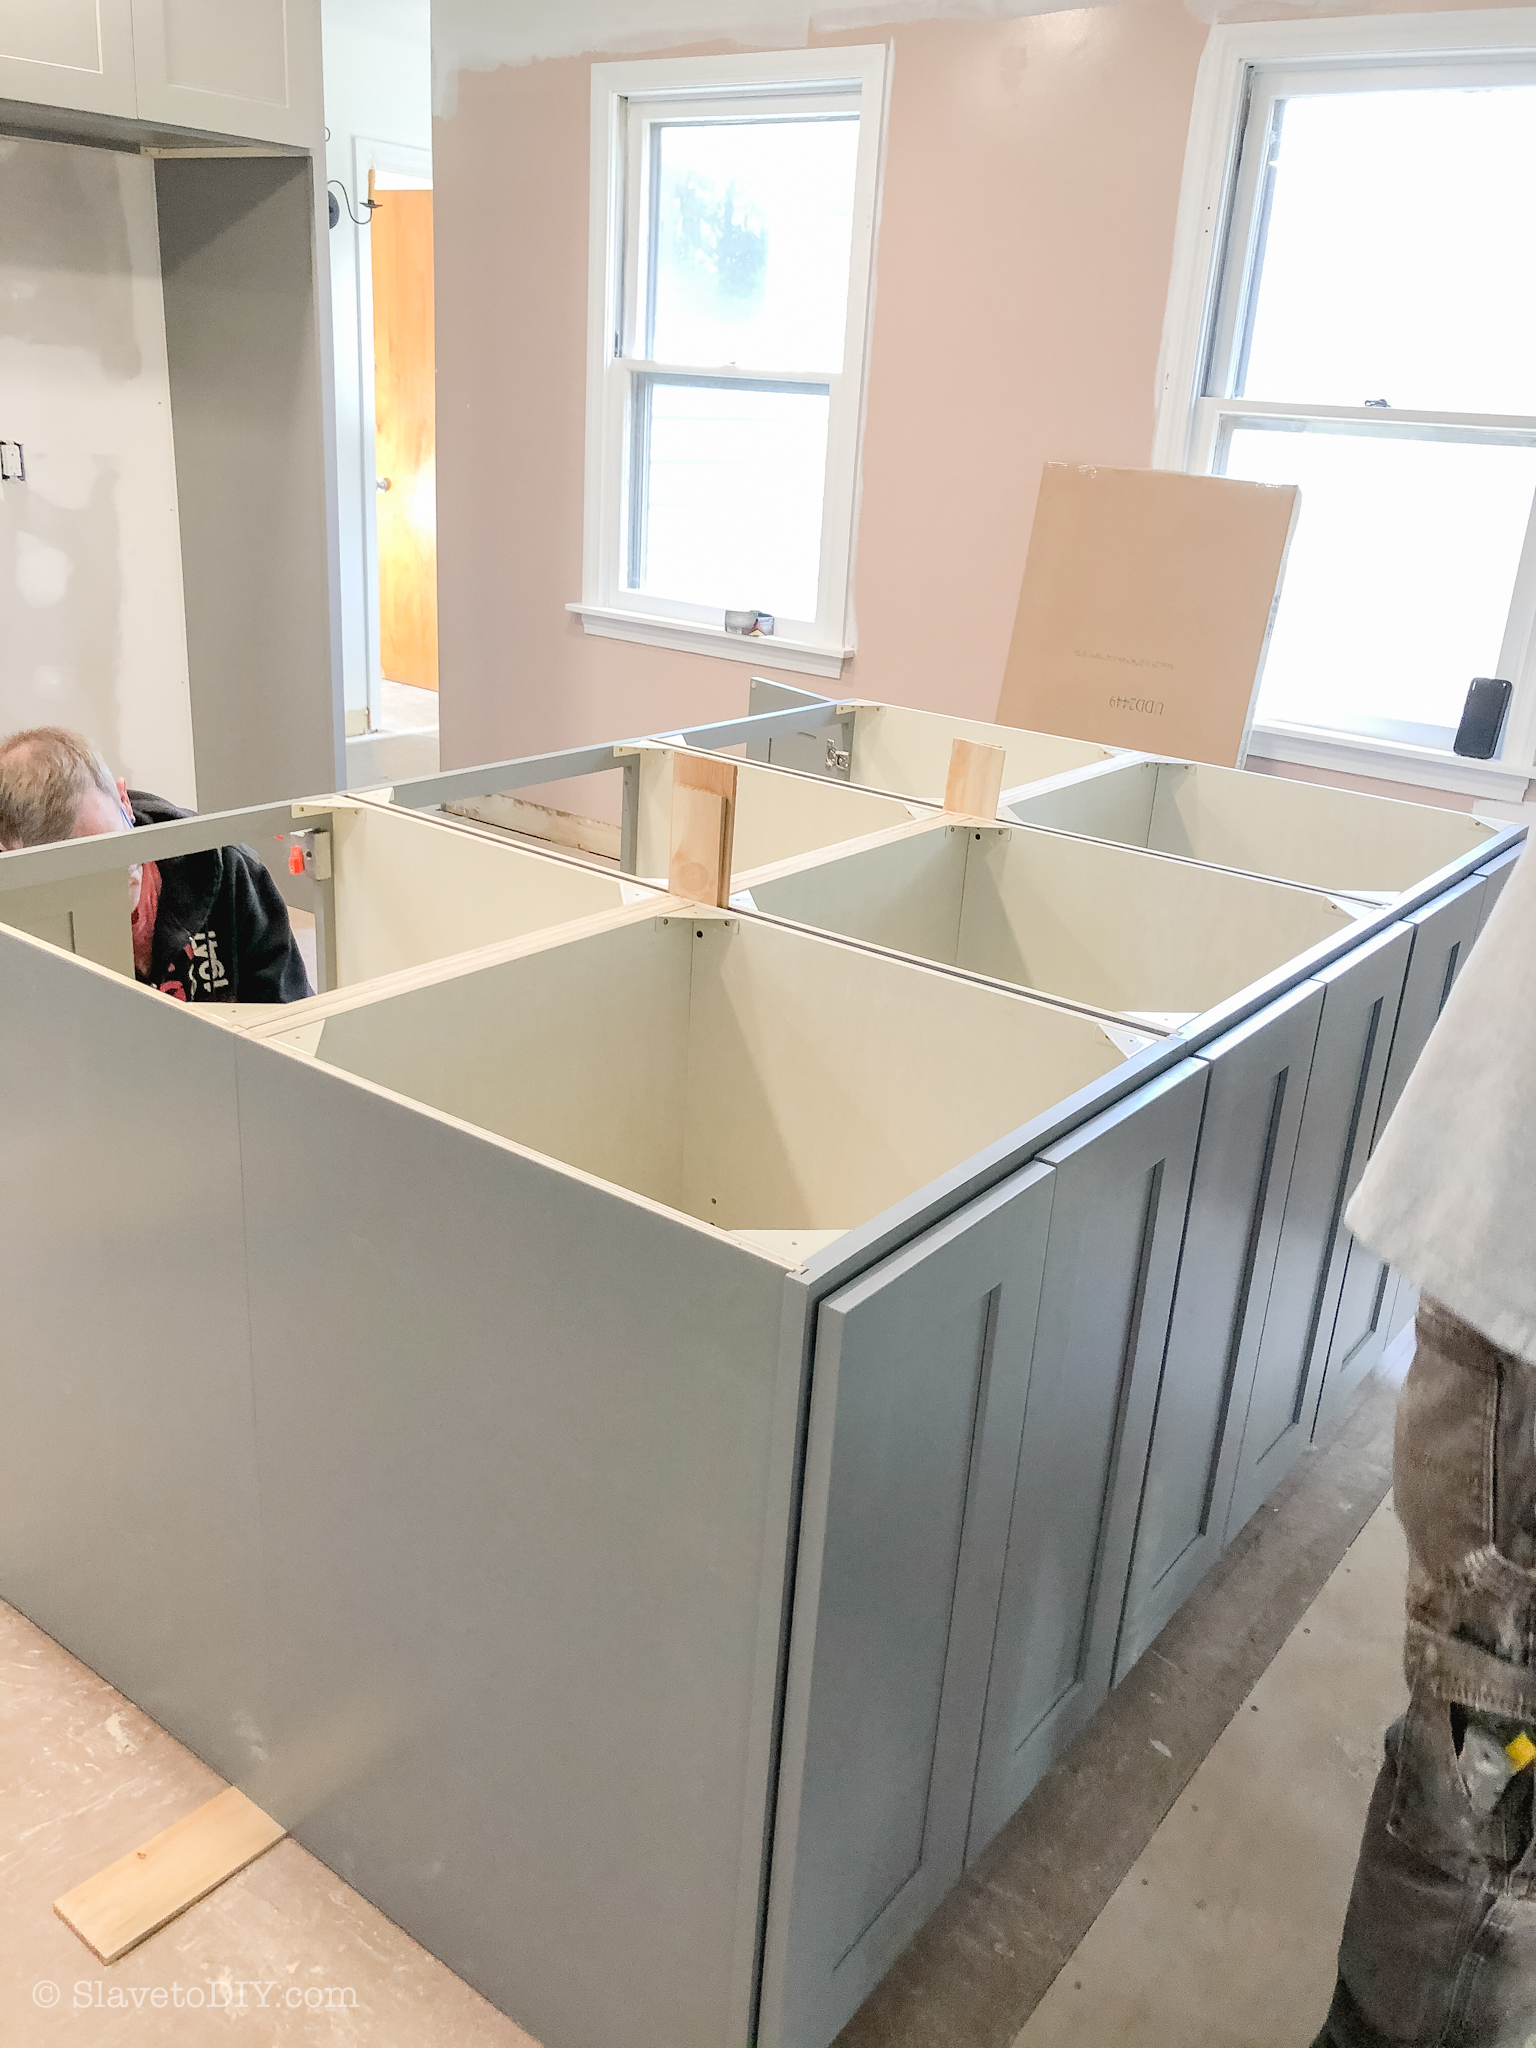
This is what I sent them (I also told the designer we wanted to do an island with four base cabinets on each side):
How To Measure For, Design, Order, and Install Your Dream Kitchen From RTA Cabinets: Graph Paper Design for the lower cabinets
How To Measure For, Design, Order, and Install Your Dream Kitchen From RTA Cabinets, Sink and appliances information
Fancy, right? Ha.
Tip: You don’t need anything near as detailed as what I sent to the cabinet company. You can send them basic wall dimensions with locations of outlets, plumbing and light fixtures, and doors and windows, and they will design the kitchen for you!
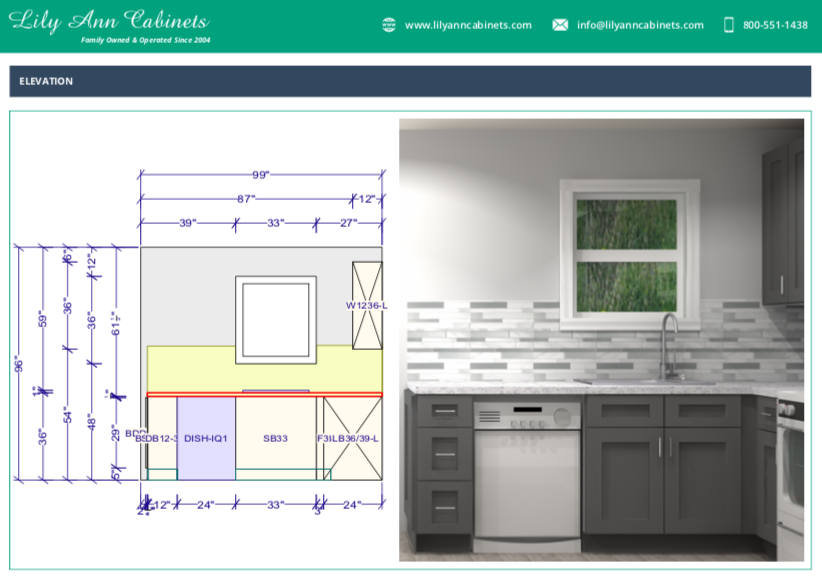
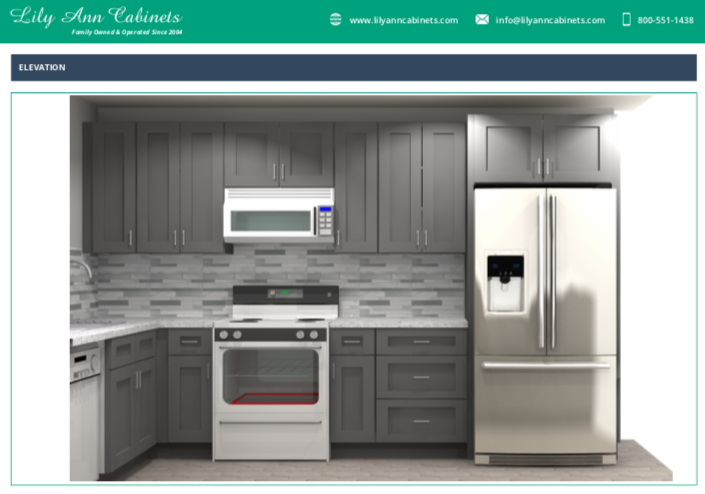
Well, this is what they sent me back (and why we ultimately went with the company):
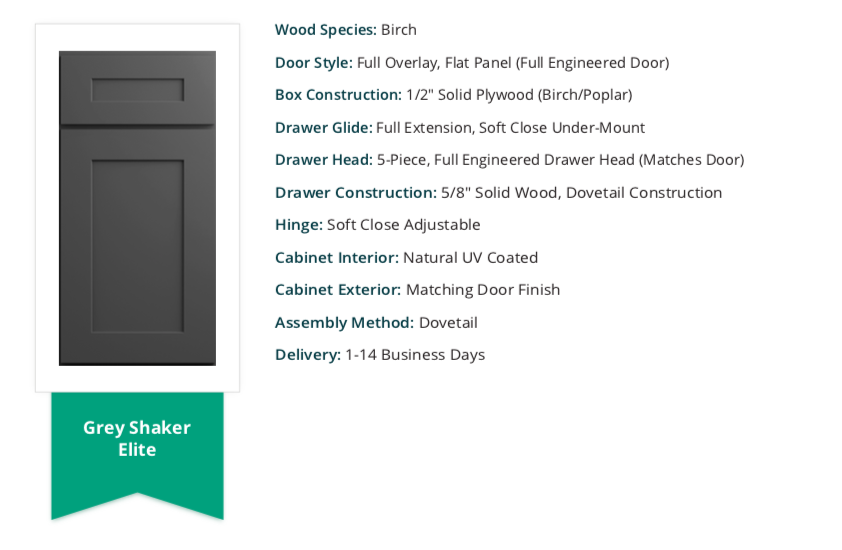
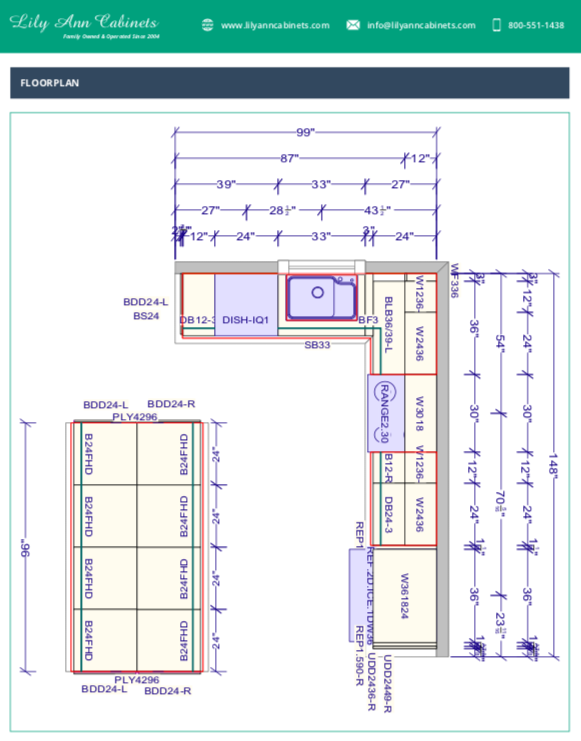
How To Measure For, Design, Order, and Install Your Dream Kitchen From RTA Cabinets: Lily Ann Cabinets Design Files
How To Measure For, Design, Order, and Install Your Dream Kitchen From RTA Cabinets: Lily Ann Cabinets Design Files
How To Measure For, Design, Order, and Install Your Dream Kitchen From RTA Cabinets: Lily Ann Cabinets Design Files
How To Measure For, Design, Order, and Install Your Dream Kitchen From RTA Cabinets: Lily Ann Cabinets Design Files
How To Measure For, Design, Order, and Install Your Dream Kitchen From RTA Cabinets: Lily Ann Cabinets Design Files
How To Measure For, Design, Order, and Install Your Dream Kitchen From RTA Cabinets: Lily Ann Cabinets Design Files
How To Measure For, Design, Order, and Install Your Dream Kitchen From RTA Cabinets: Lily Ann Cabinets Design Files
How To Measure For, Design, Order, and Install Your Dream Kitchen From RTA Cabinets: Lily Ann Cabinets Design Files
How To Measure For, Design, Order, and Install Your Dream Kitchen From RTA Cabinets: Lily Ann Cabinets Design Files
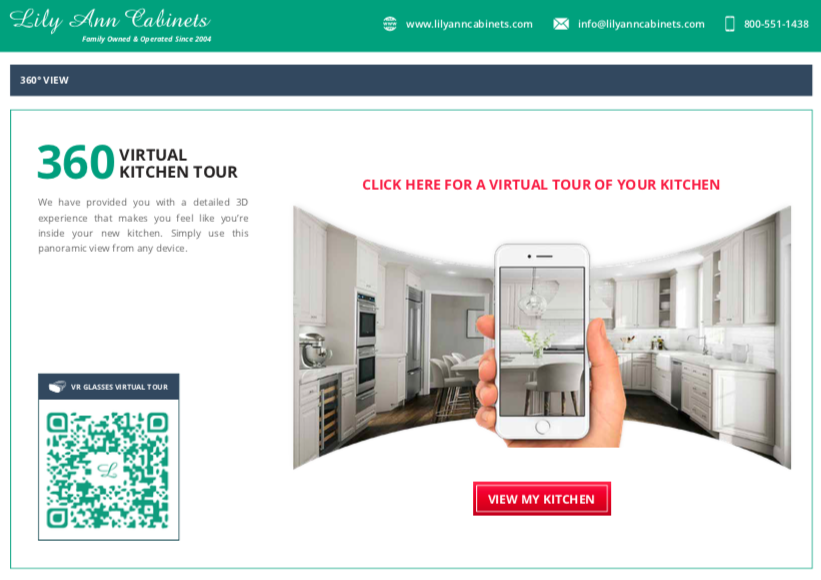
I was super impressed with the designer’s knowledge, and they have a whole tech team dedicated to rendering 3D images of your kitchen so you can easily visualize EXACTLY how it’s going to look.
I think it was about this time that I asked the company if they would like to sponsor our kitchen (we received a discount on the price of the cabinets), so we teamed up with Lily Ann Cabinets for the cabinets, and decided to go with RTA to save my sister some money on the ever-growing budget for the project. (Pssst, don’t tell them, but we were going to use them anyway because they were already the least expensive manufacturer I could find).
Ready to get started? My readers can use the code SDIY2018 at checkout to get 5% off your Lily Ann Cabinets order!
RTA cabinets are “ready to assemble” and my husband and I had previously installed some in our old kitchen, so the RTA thing didn’t scare me at all. My brother, on the other hand, flat refused to assemble them (and when he’s adamant I just go with it), and insisted we do it when we came for the kitchen install. We agreed and we moved forward with our planning.
Except, remember that whole COVID thing? The entire design and ordering process was accomplished by Lily Ann employees working from home, and the order assembled and shipped by a skeleton crew in their warehouse. Our planned working trip over the kids’ Spring Break was smack in the middle of the lockdown. And our ability to plan another trip was completely on hold with really no end in sight.
I sent the designer my sketch on Feb 28, 2020 and the cabinets were delivered April 14, 2020. The whole process, from starting the design to delivery of the cabinets, was less than seven weeks and that was during the pandemic lockdown.
Tip: Don’t hack up the old cabinets with a sledgehammer like the TV shows do. Why?
1) It’s super messy. Instead: you just need to remove a few screws to pop the whole thing off the wall.
2) You can either re-use the cabinets in your garage for extra storage or you can donate them to the Habitat For Humanity Re-store and get a donation slip from them that you can write off on your taxes (they’ll even come pick up your donations!).
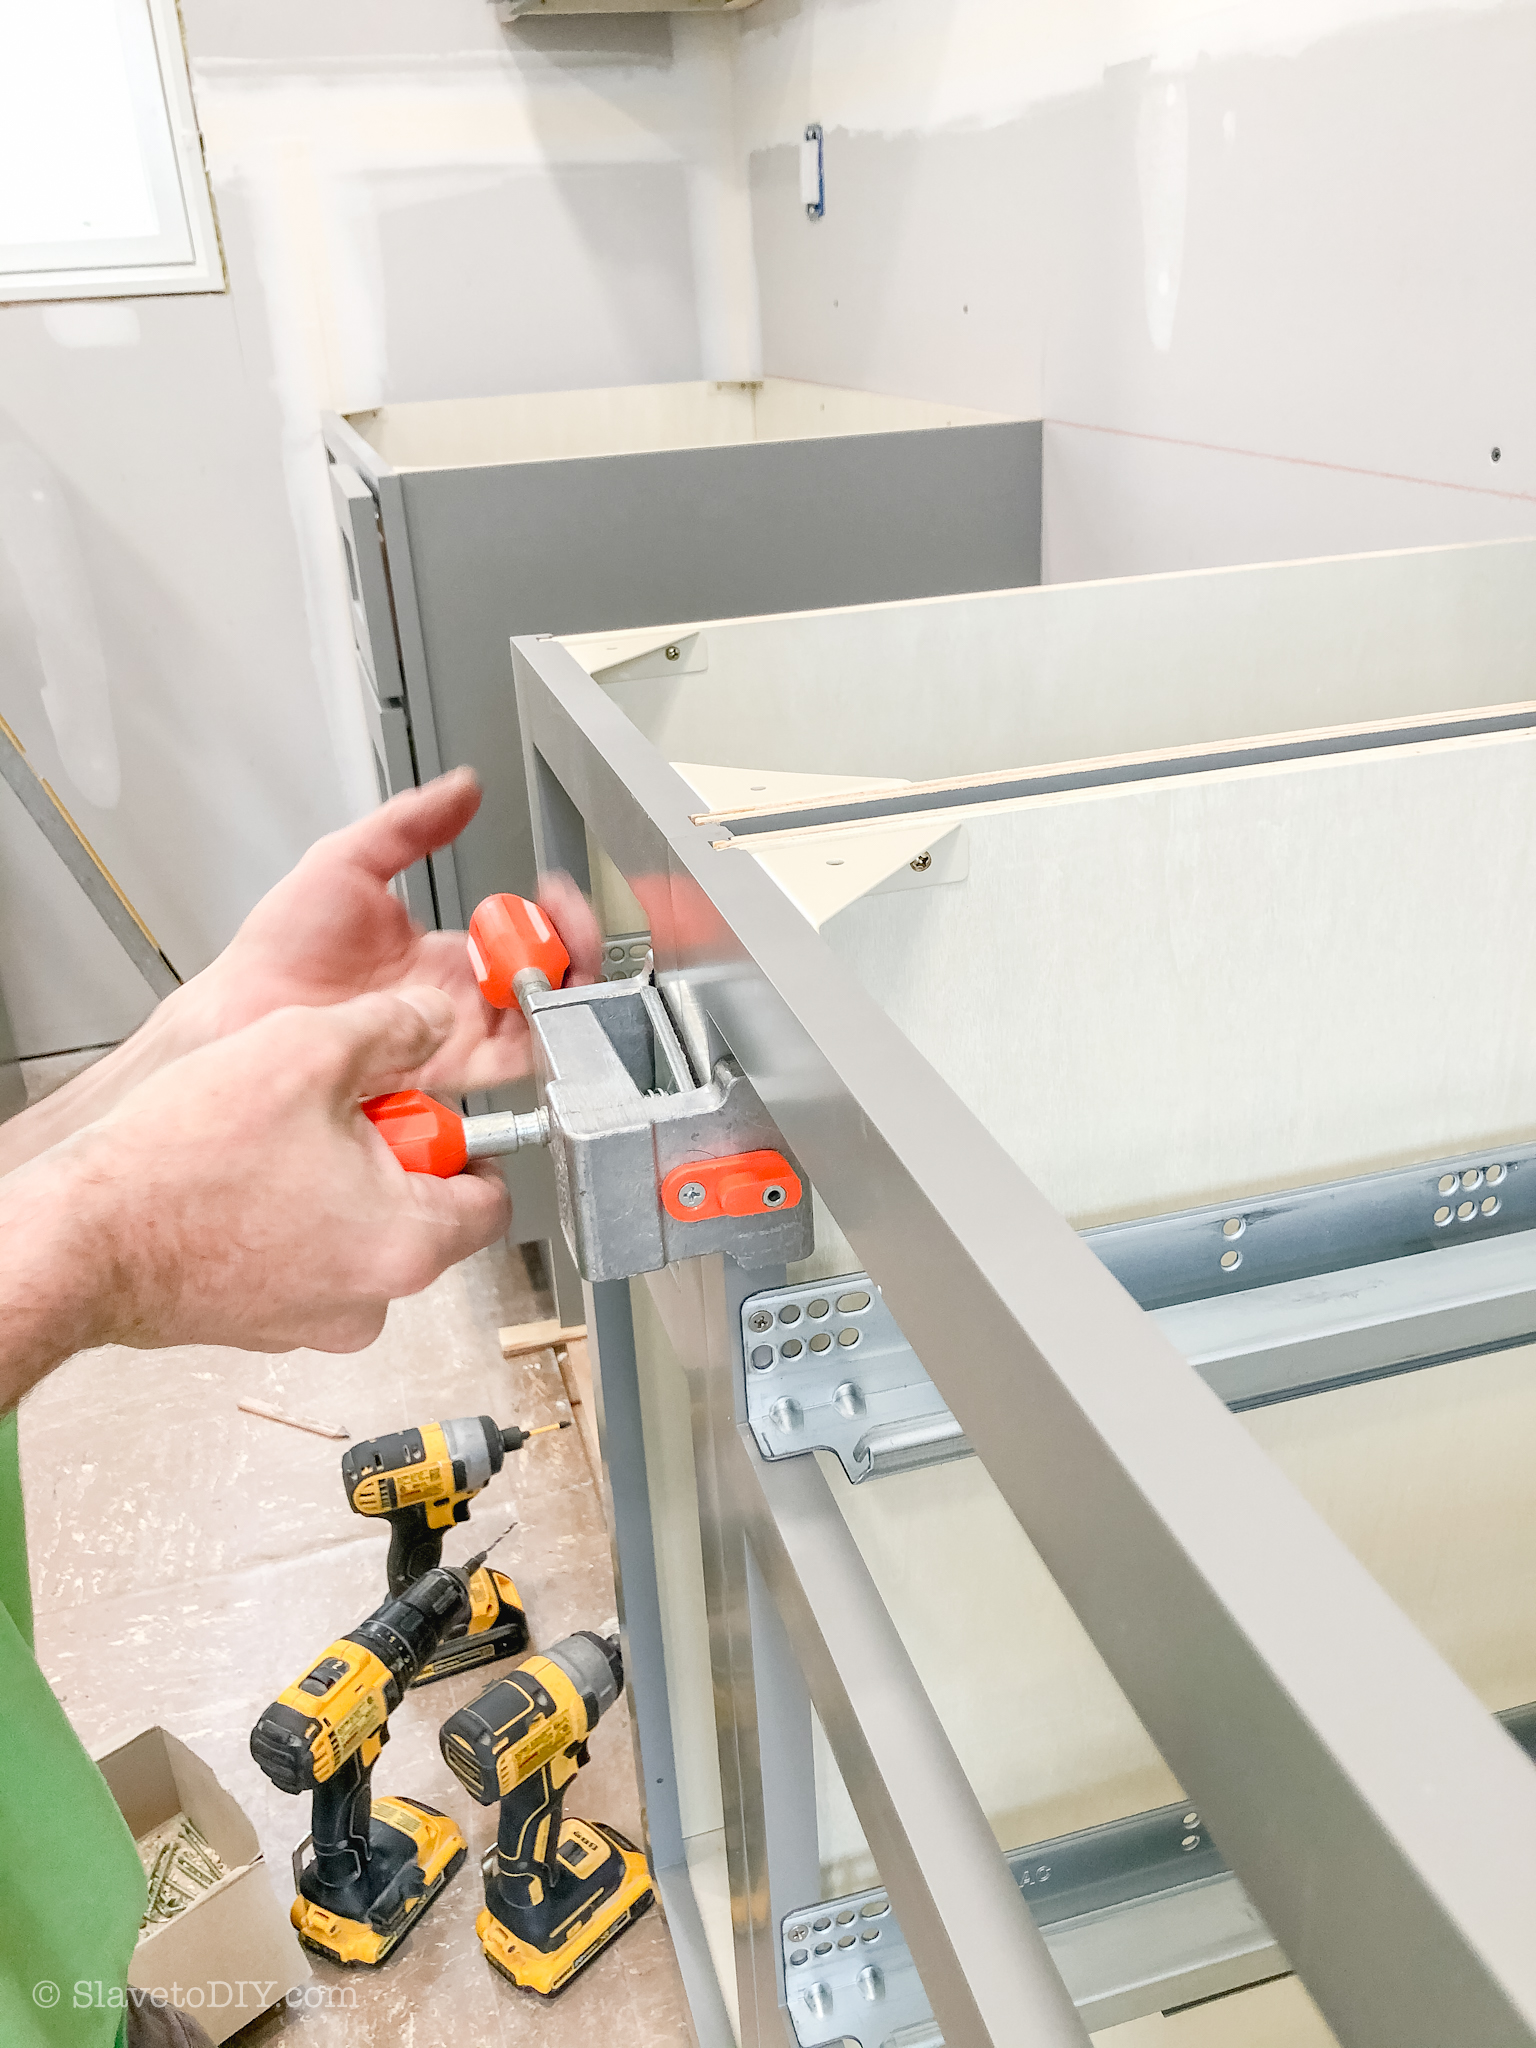
Cabinet Assembly
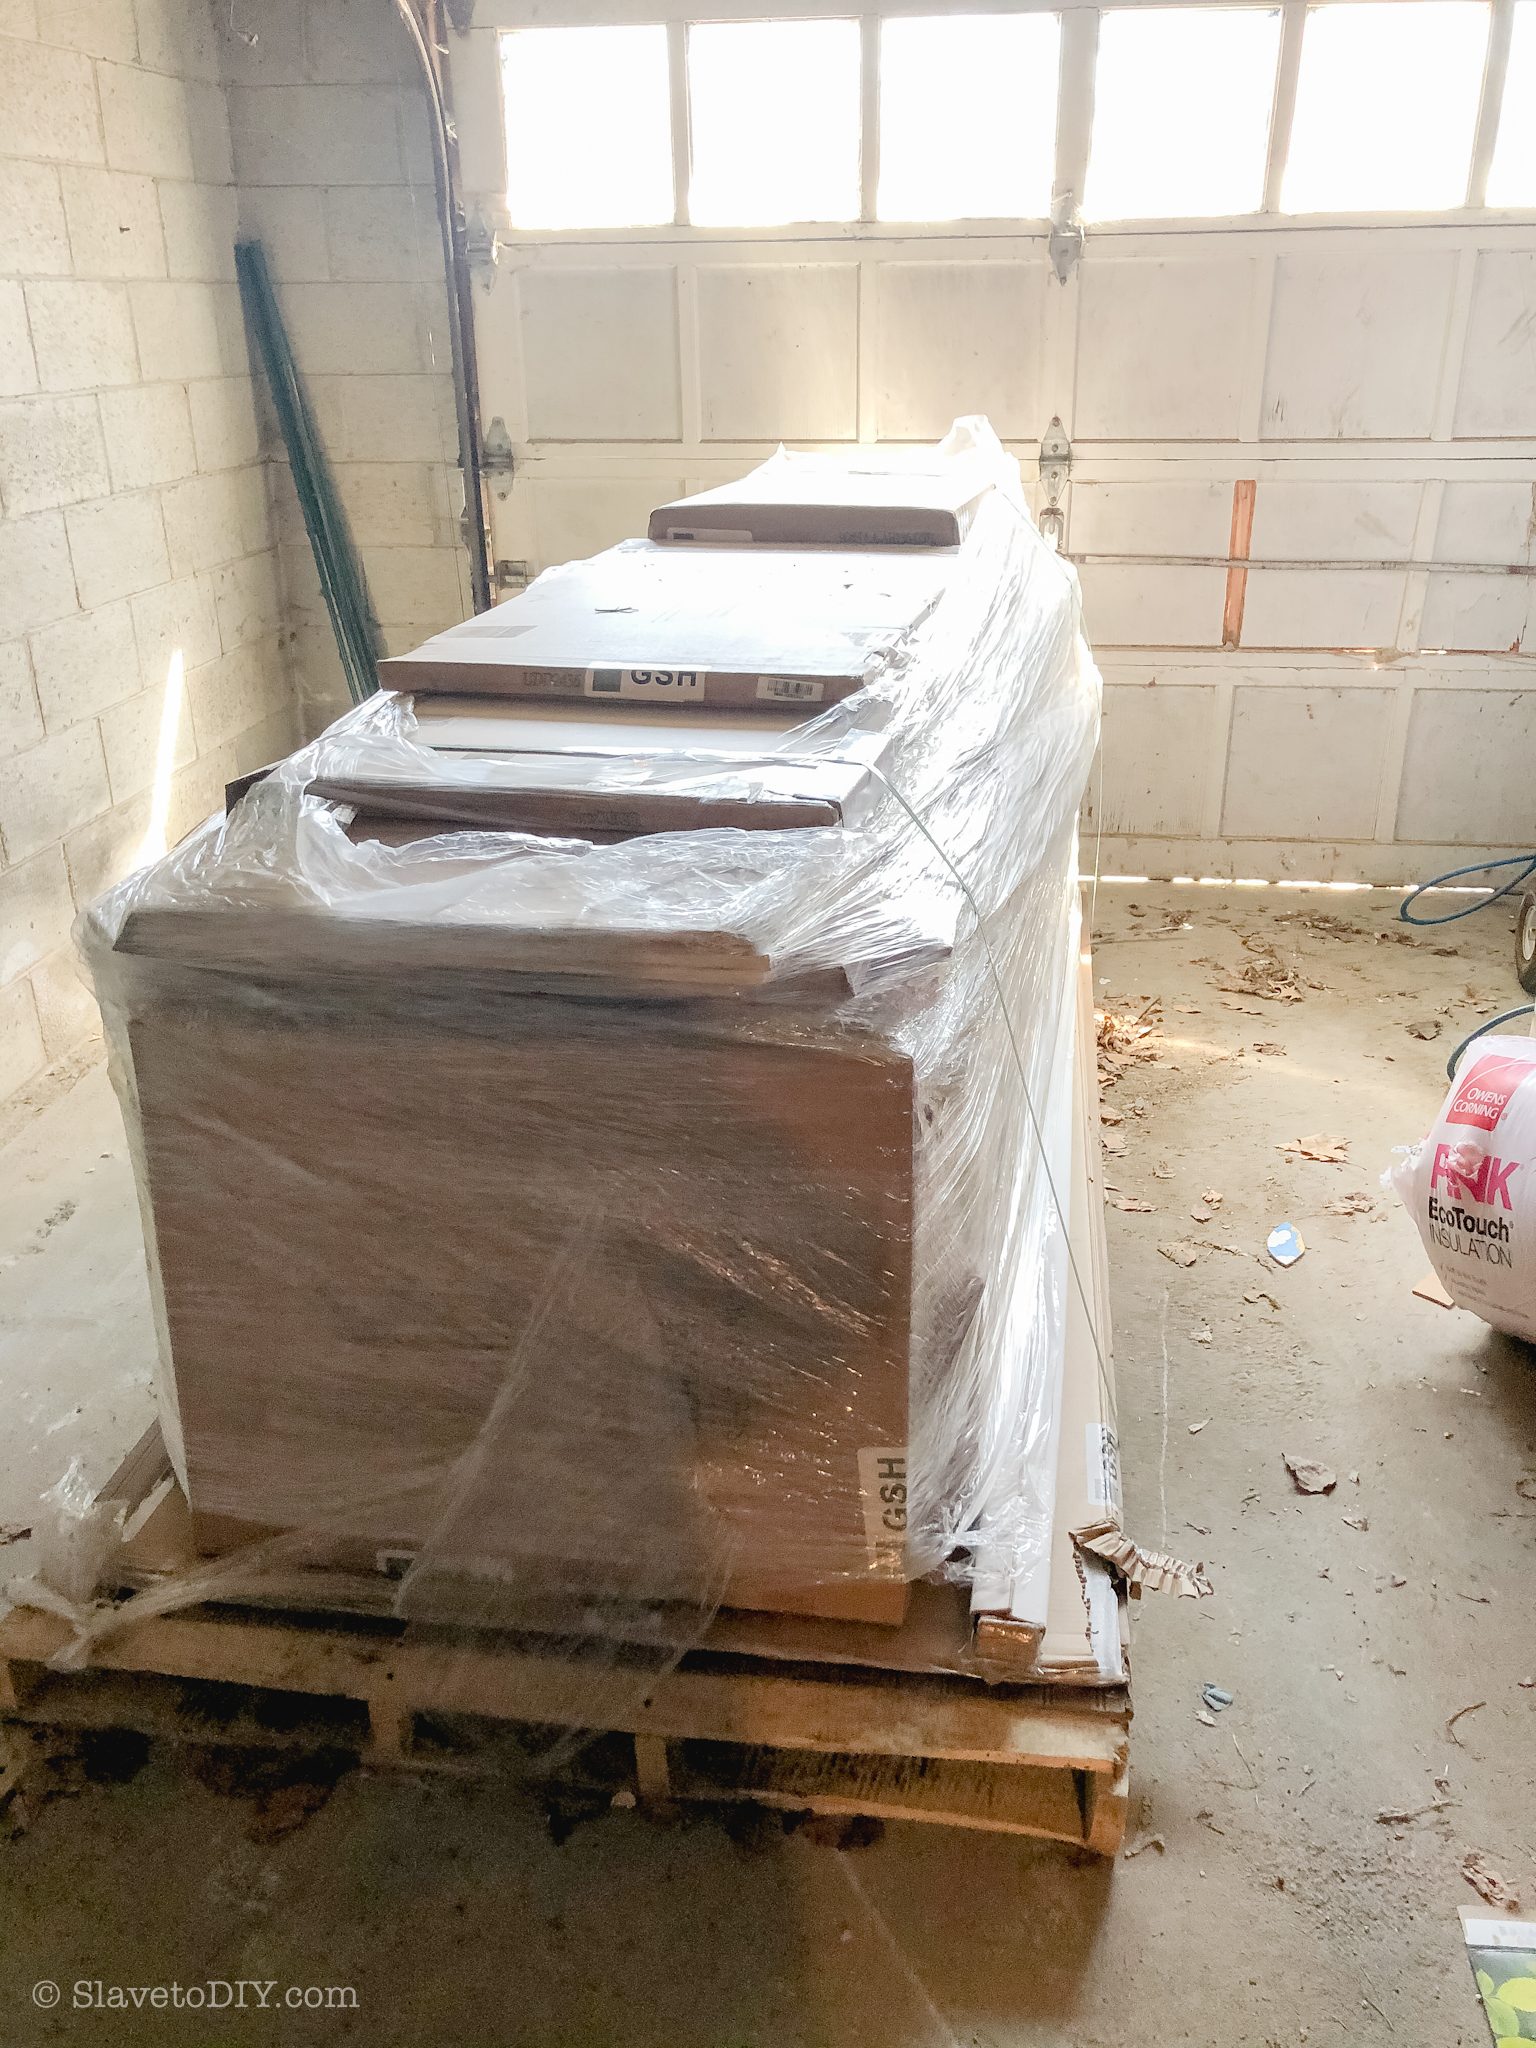
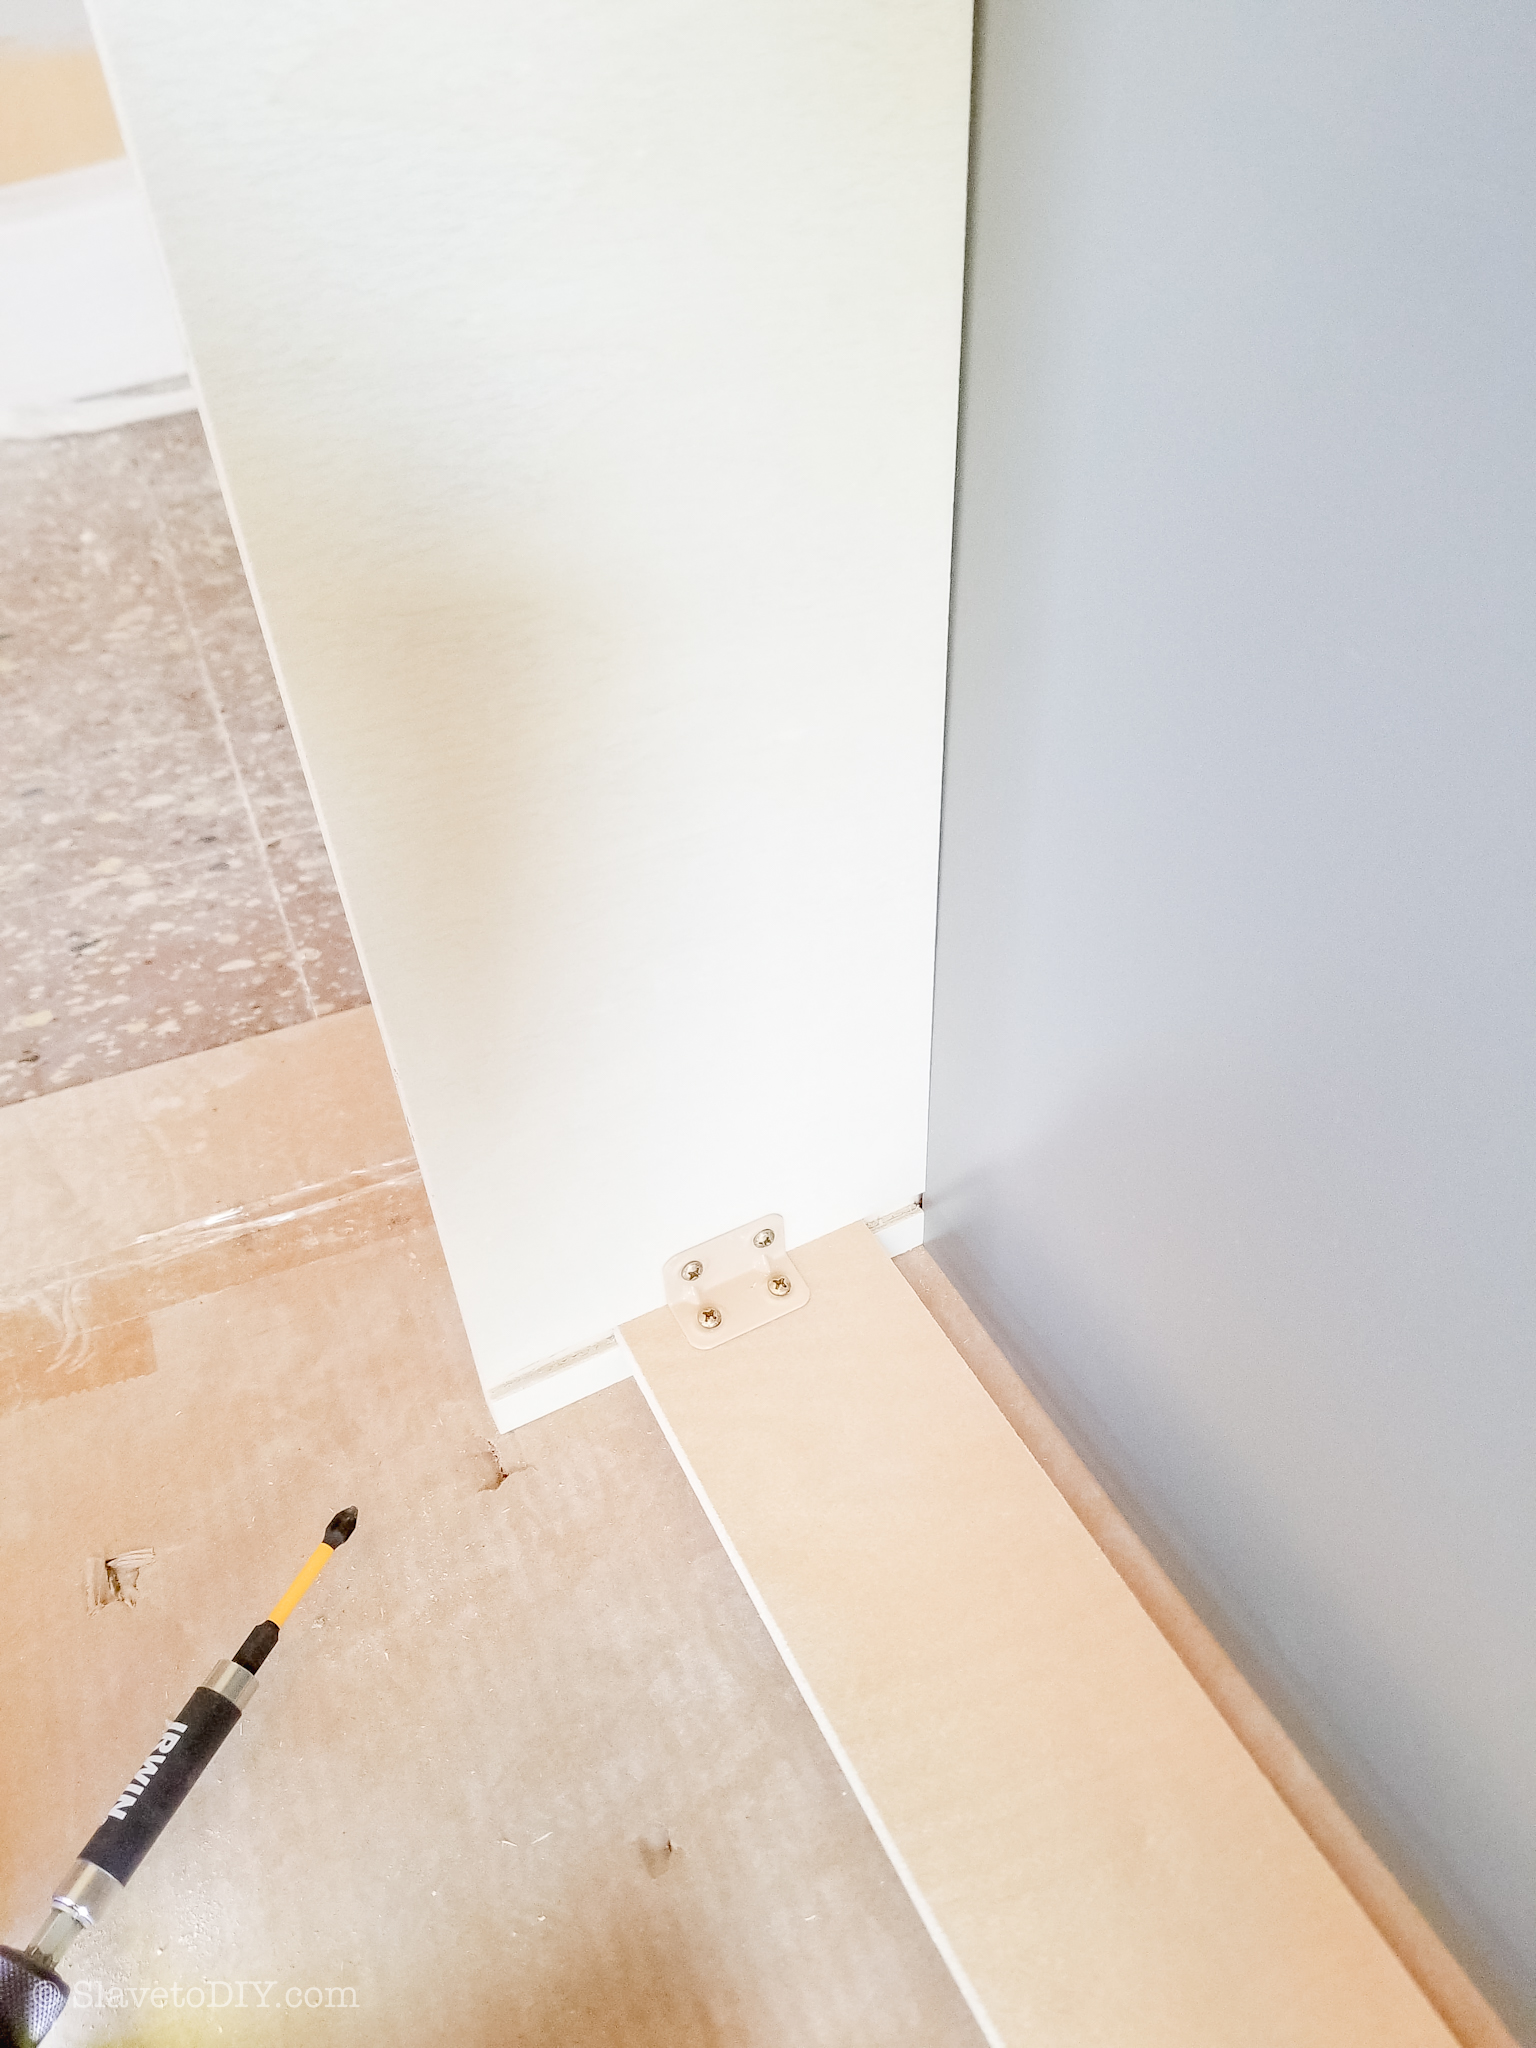
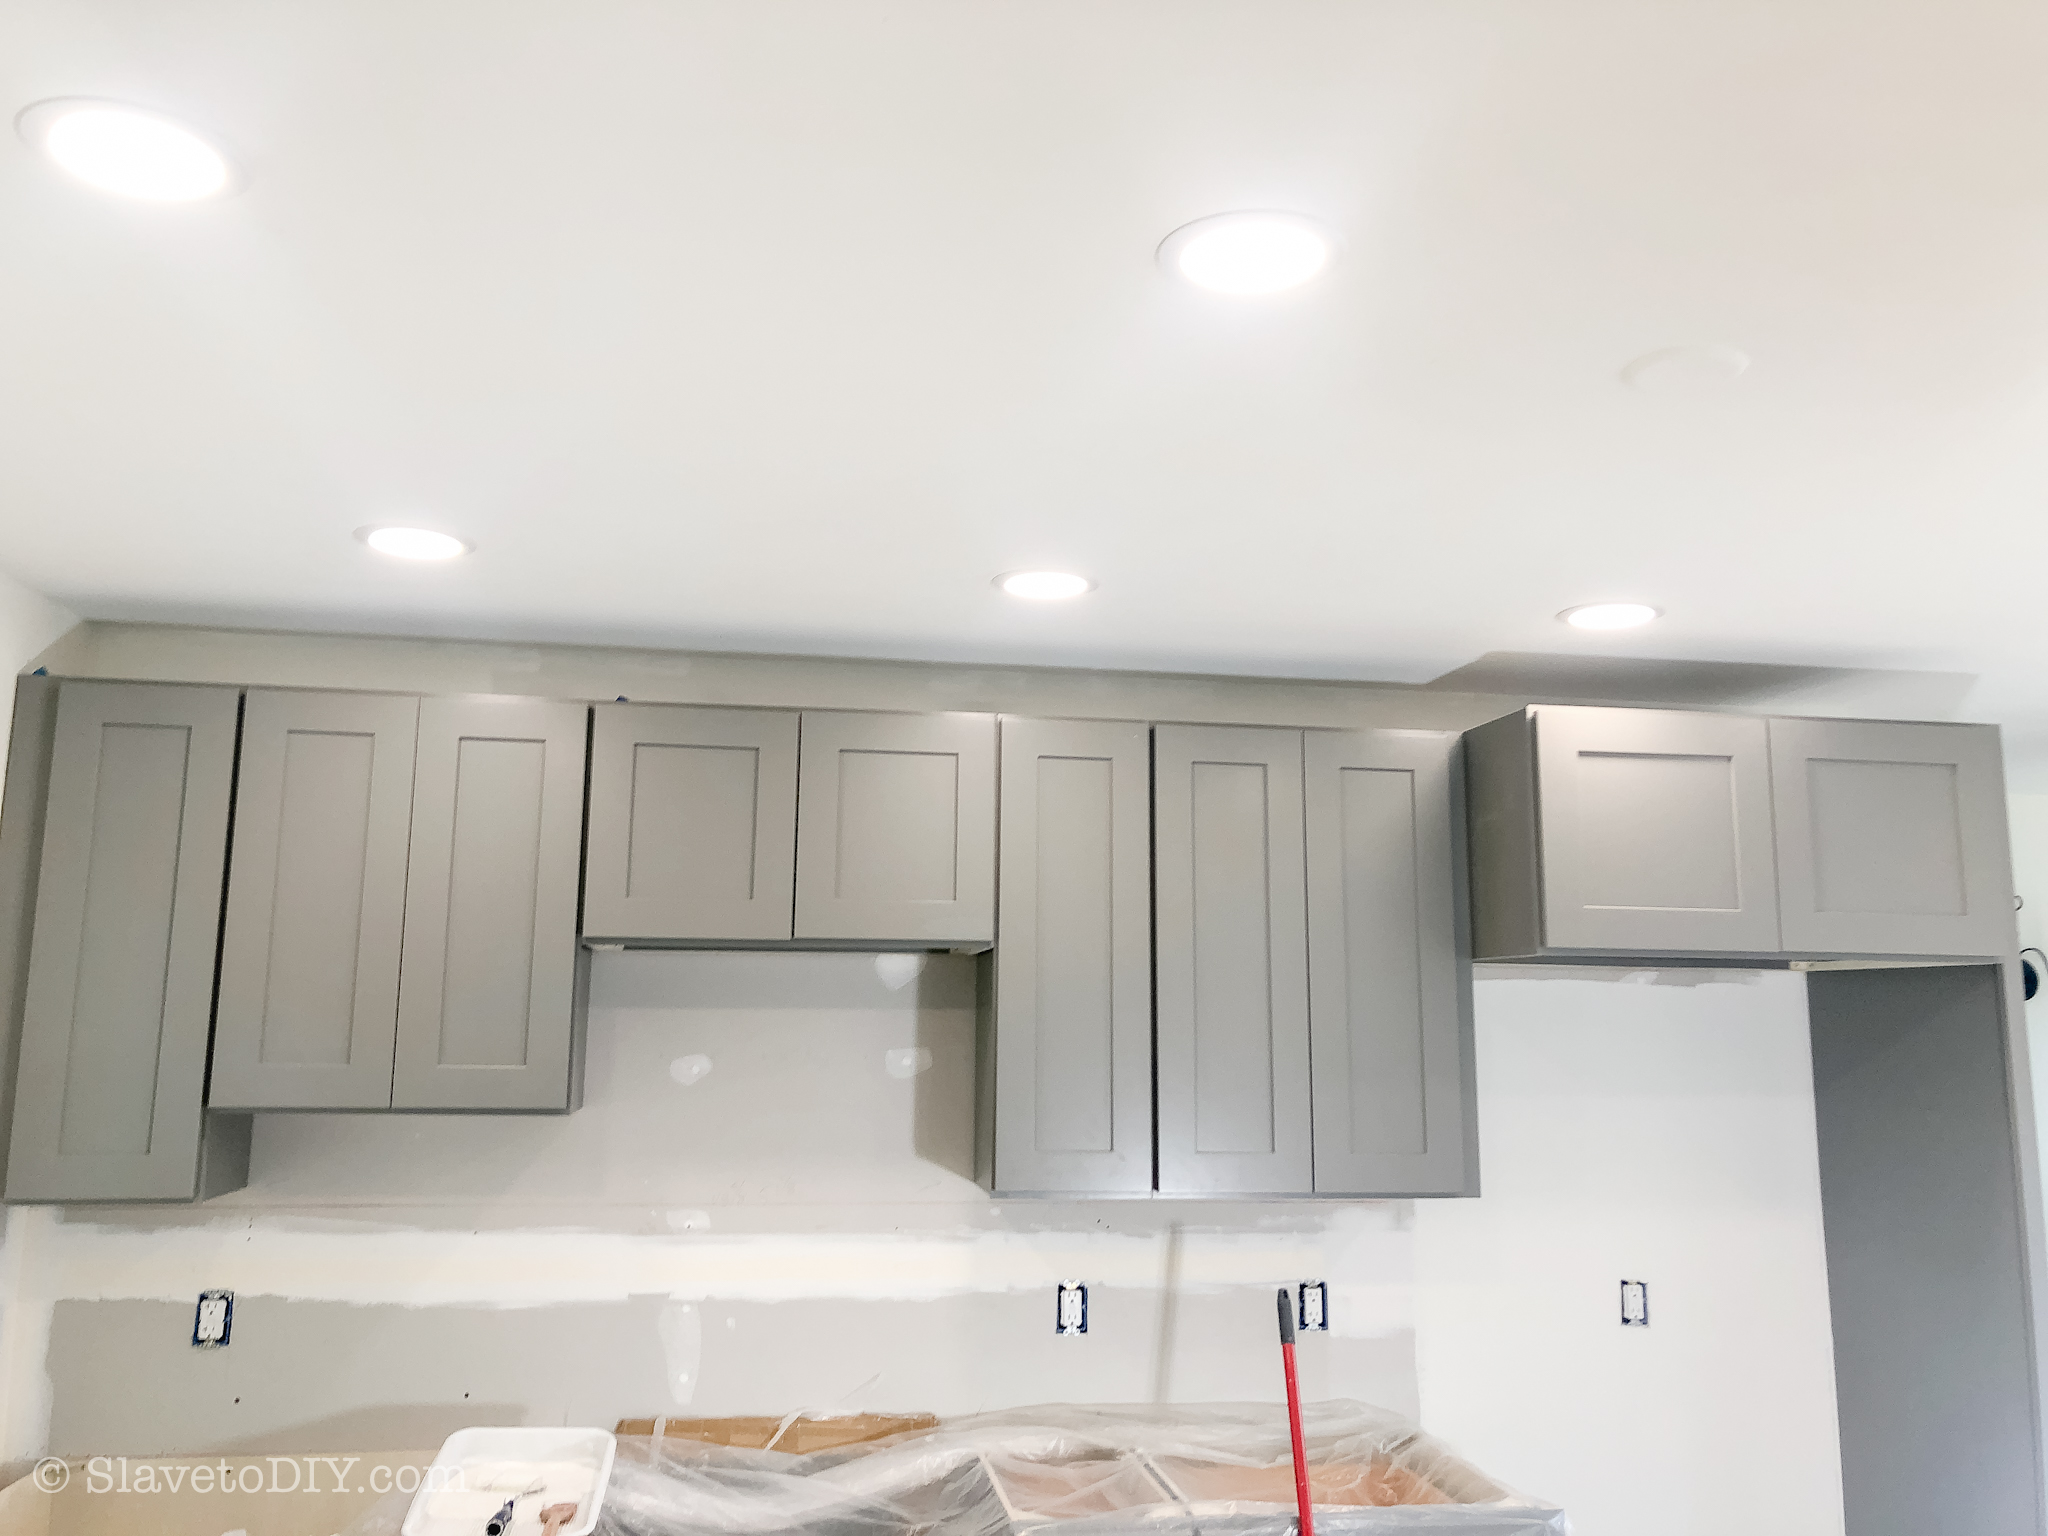
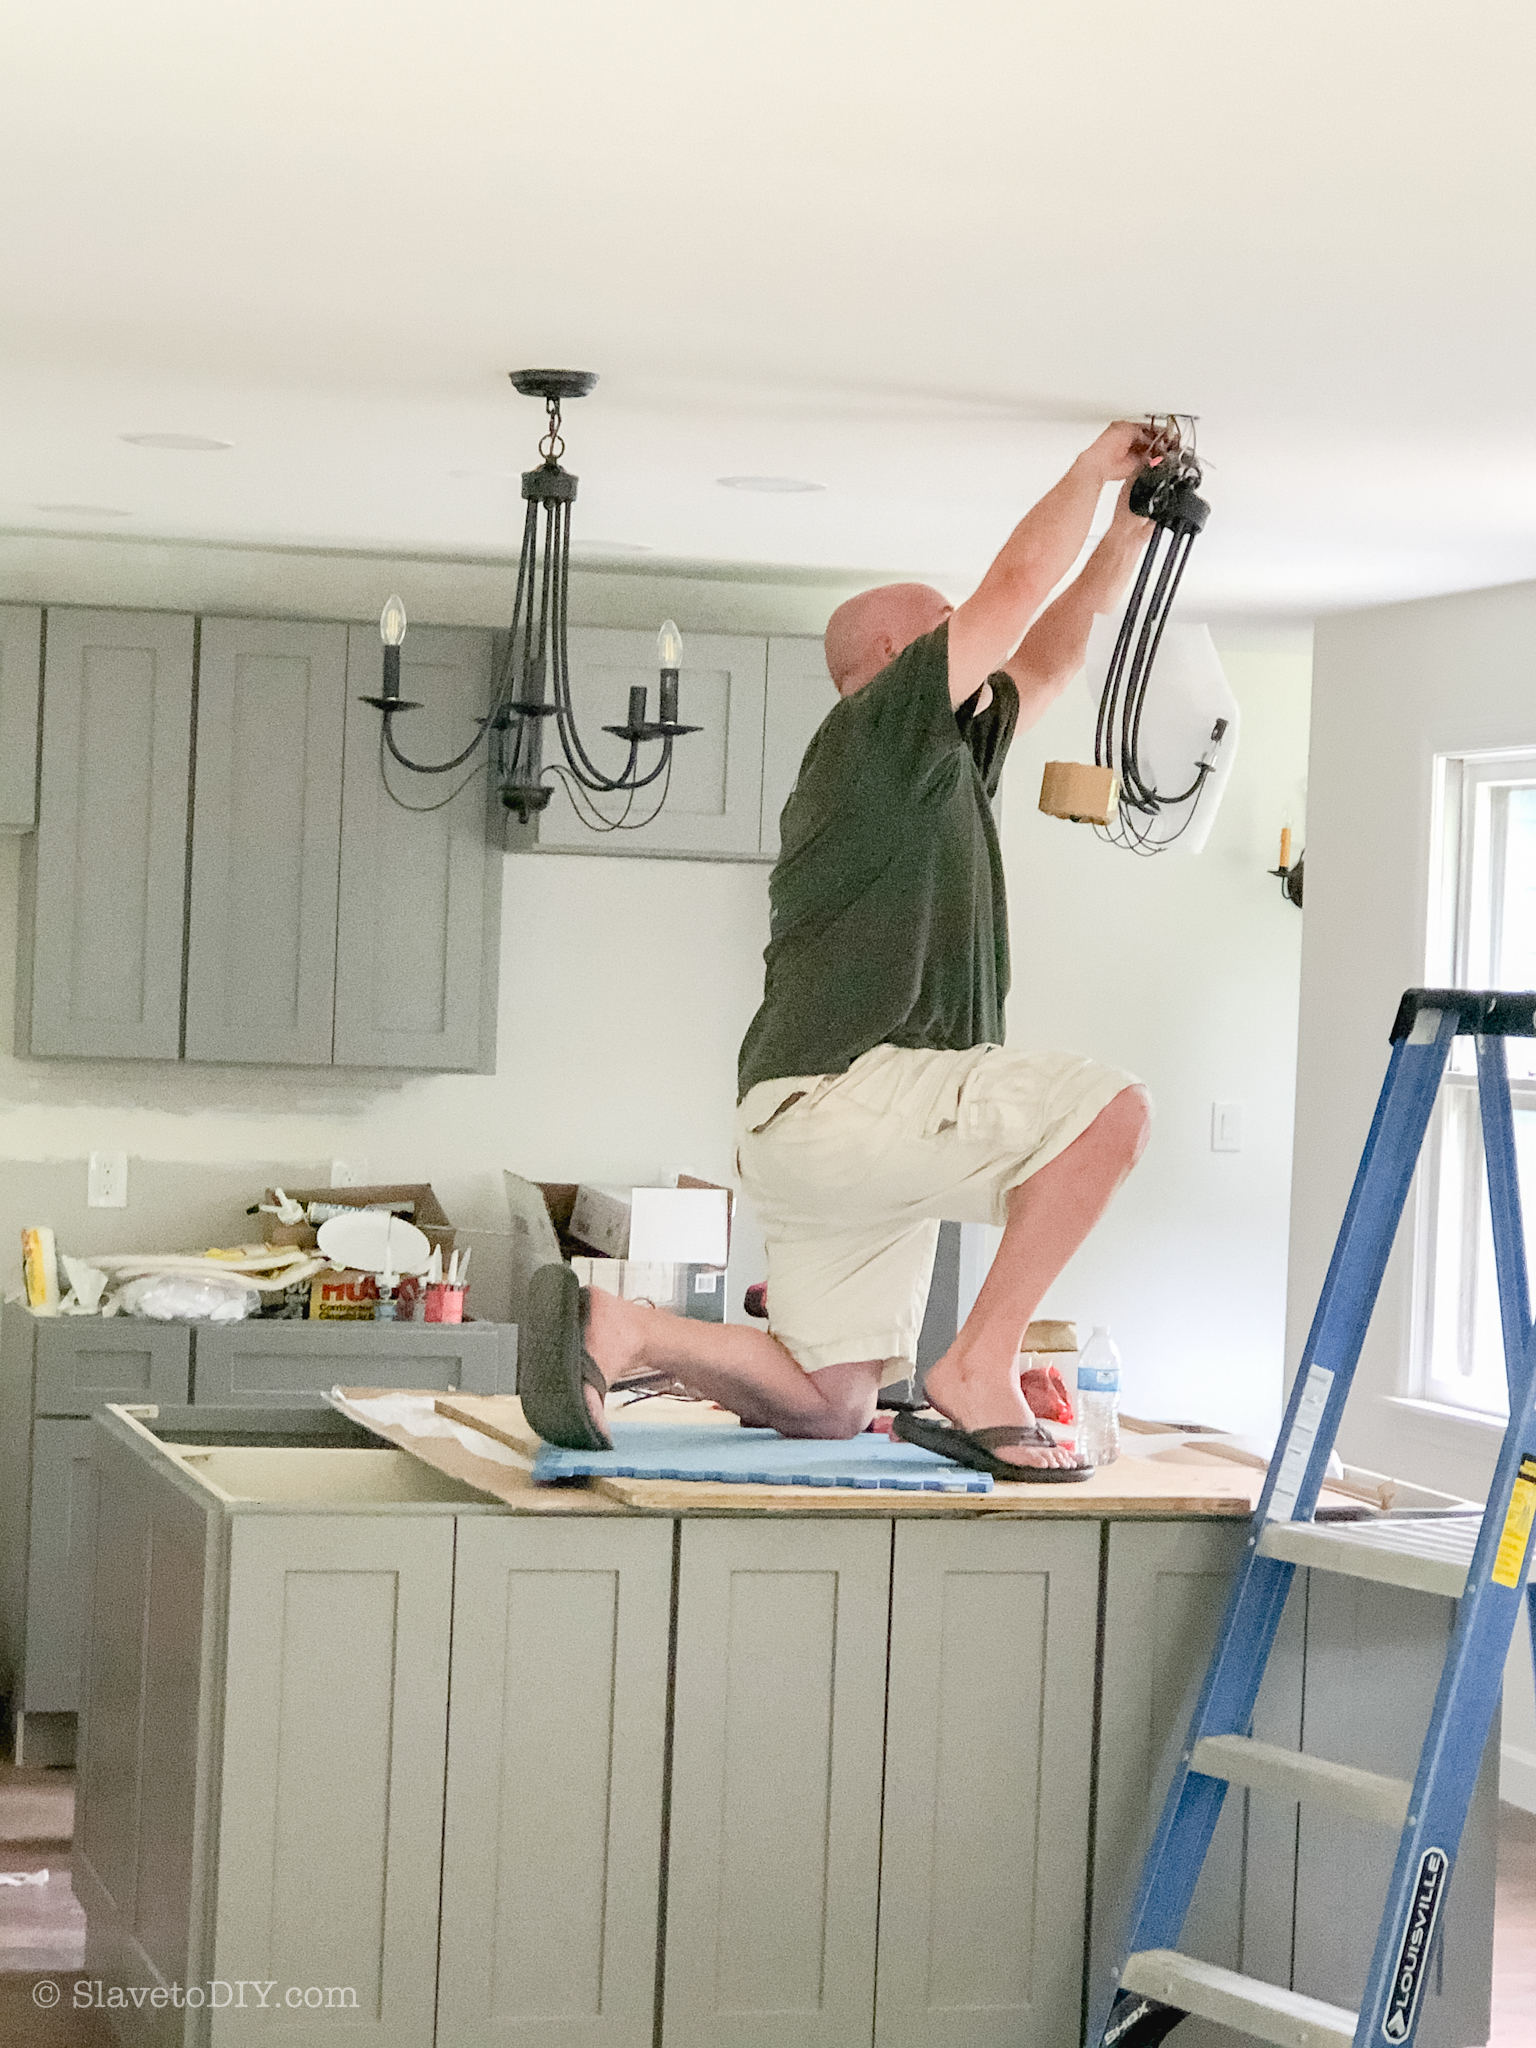
By this time, the cabinets had been delivered and were sitting in a neatly packed palette in the garage. I think my brother started getting antsy, because he was going to put the flooring down after the cabinets went in, and we were still on a travel lockdown. So, suddenly I started getting pictures of cabinets going together and up against the wall.
How To Measure For, Design, Order, and Install Your Dream Kitchen From RTA Cabinets: RTA Cabinet Assembly Pictures
I was a nervous wreck at first… I was holding my breath waiting for my brother to deliver the verdict that the cabinets were junk and were a nightmare to assemble. But, guess what? That didn’t happen. My brother, the wood snob/very talented carpenter was SUPER impressed with the quality craftsmanship and how easily the RTAs went together! I breathed a sigh of relief. Whew!
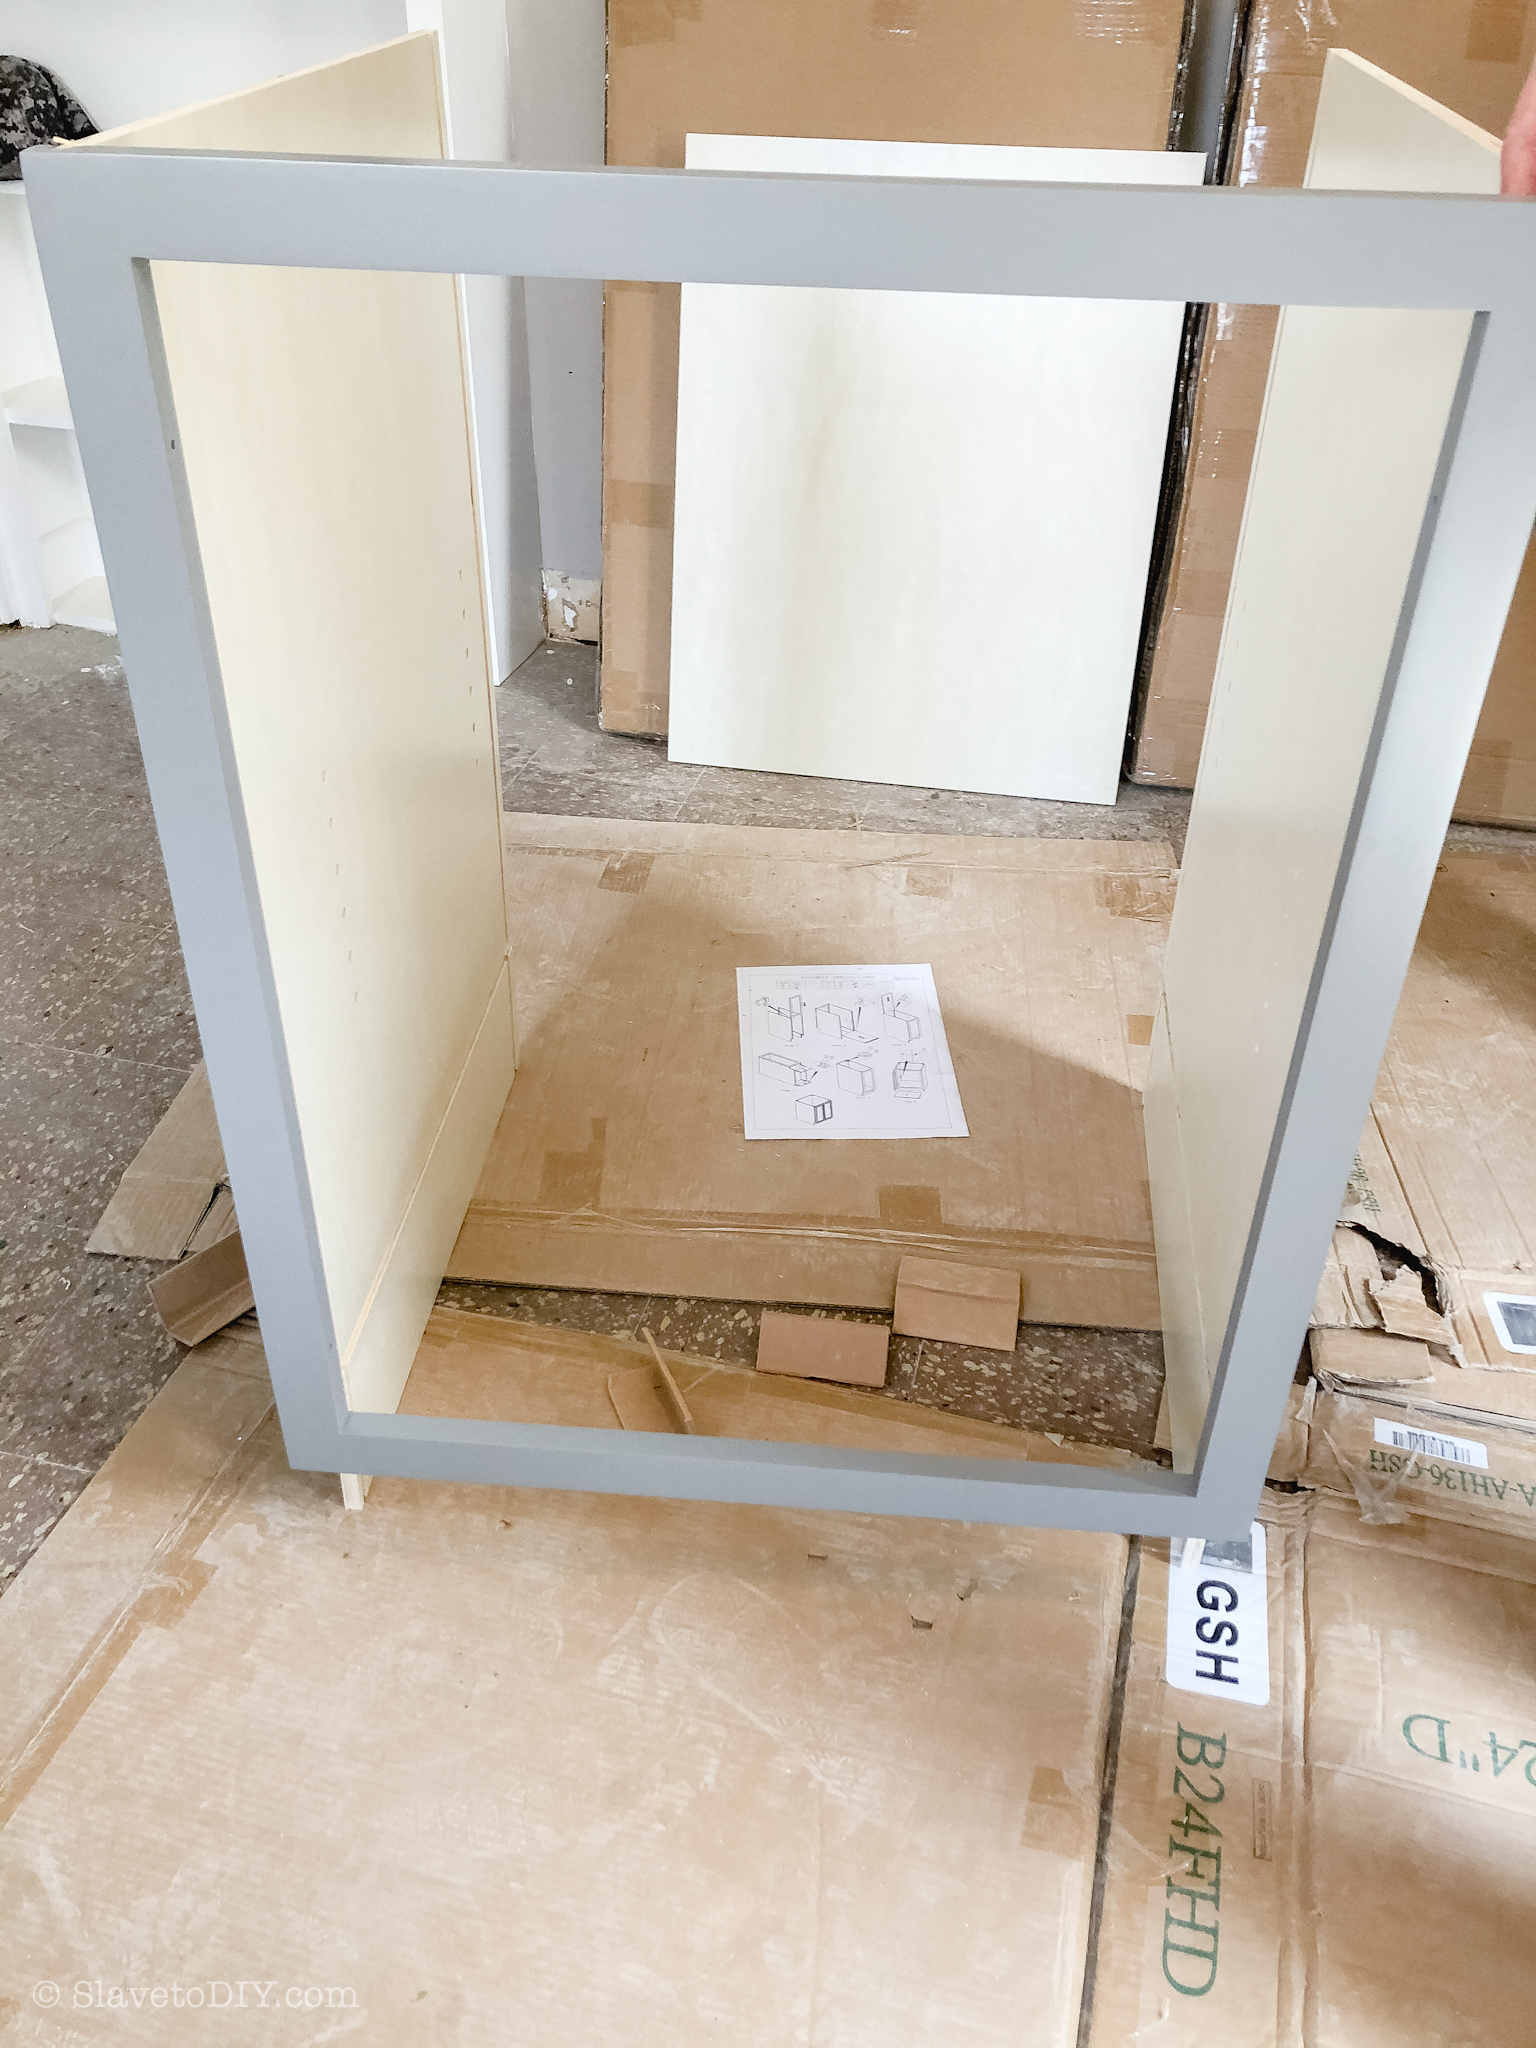
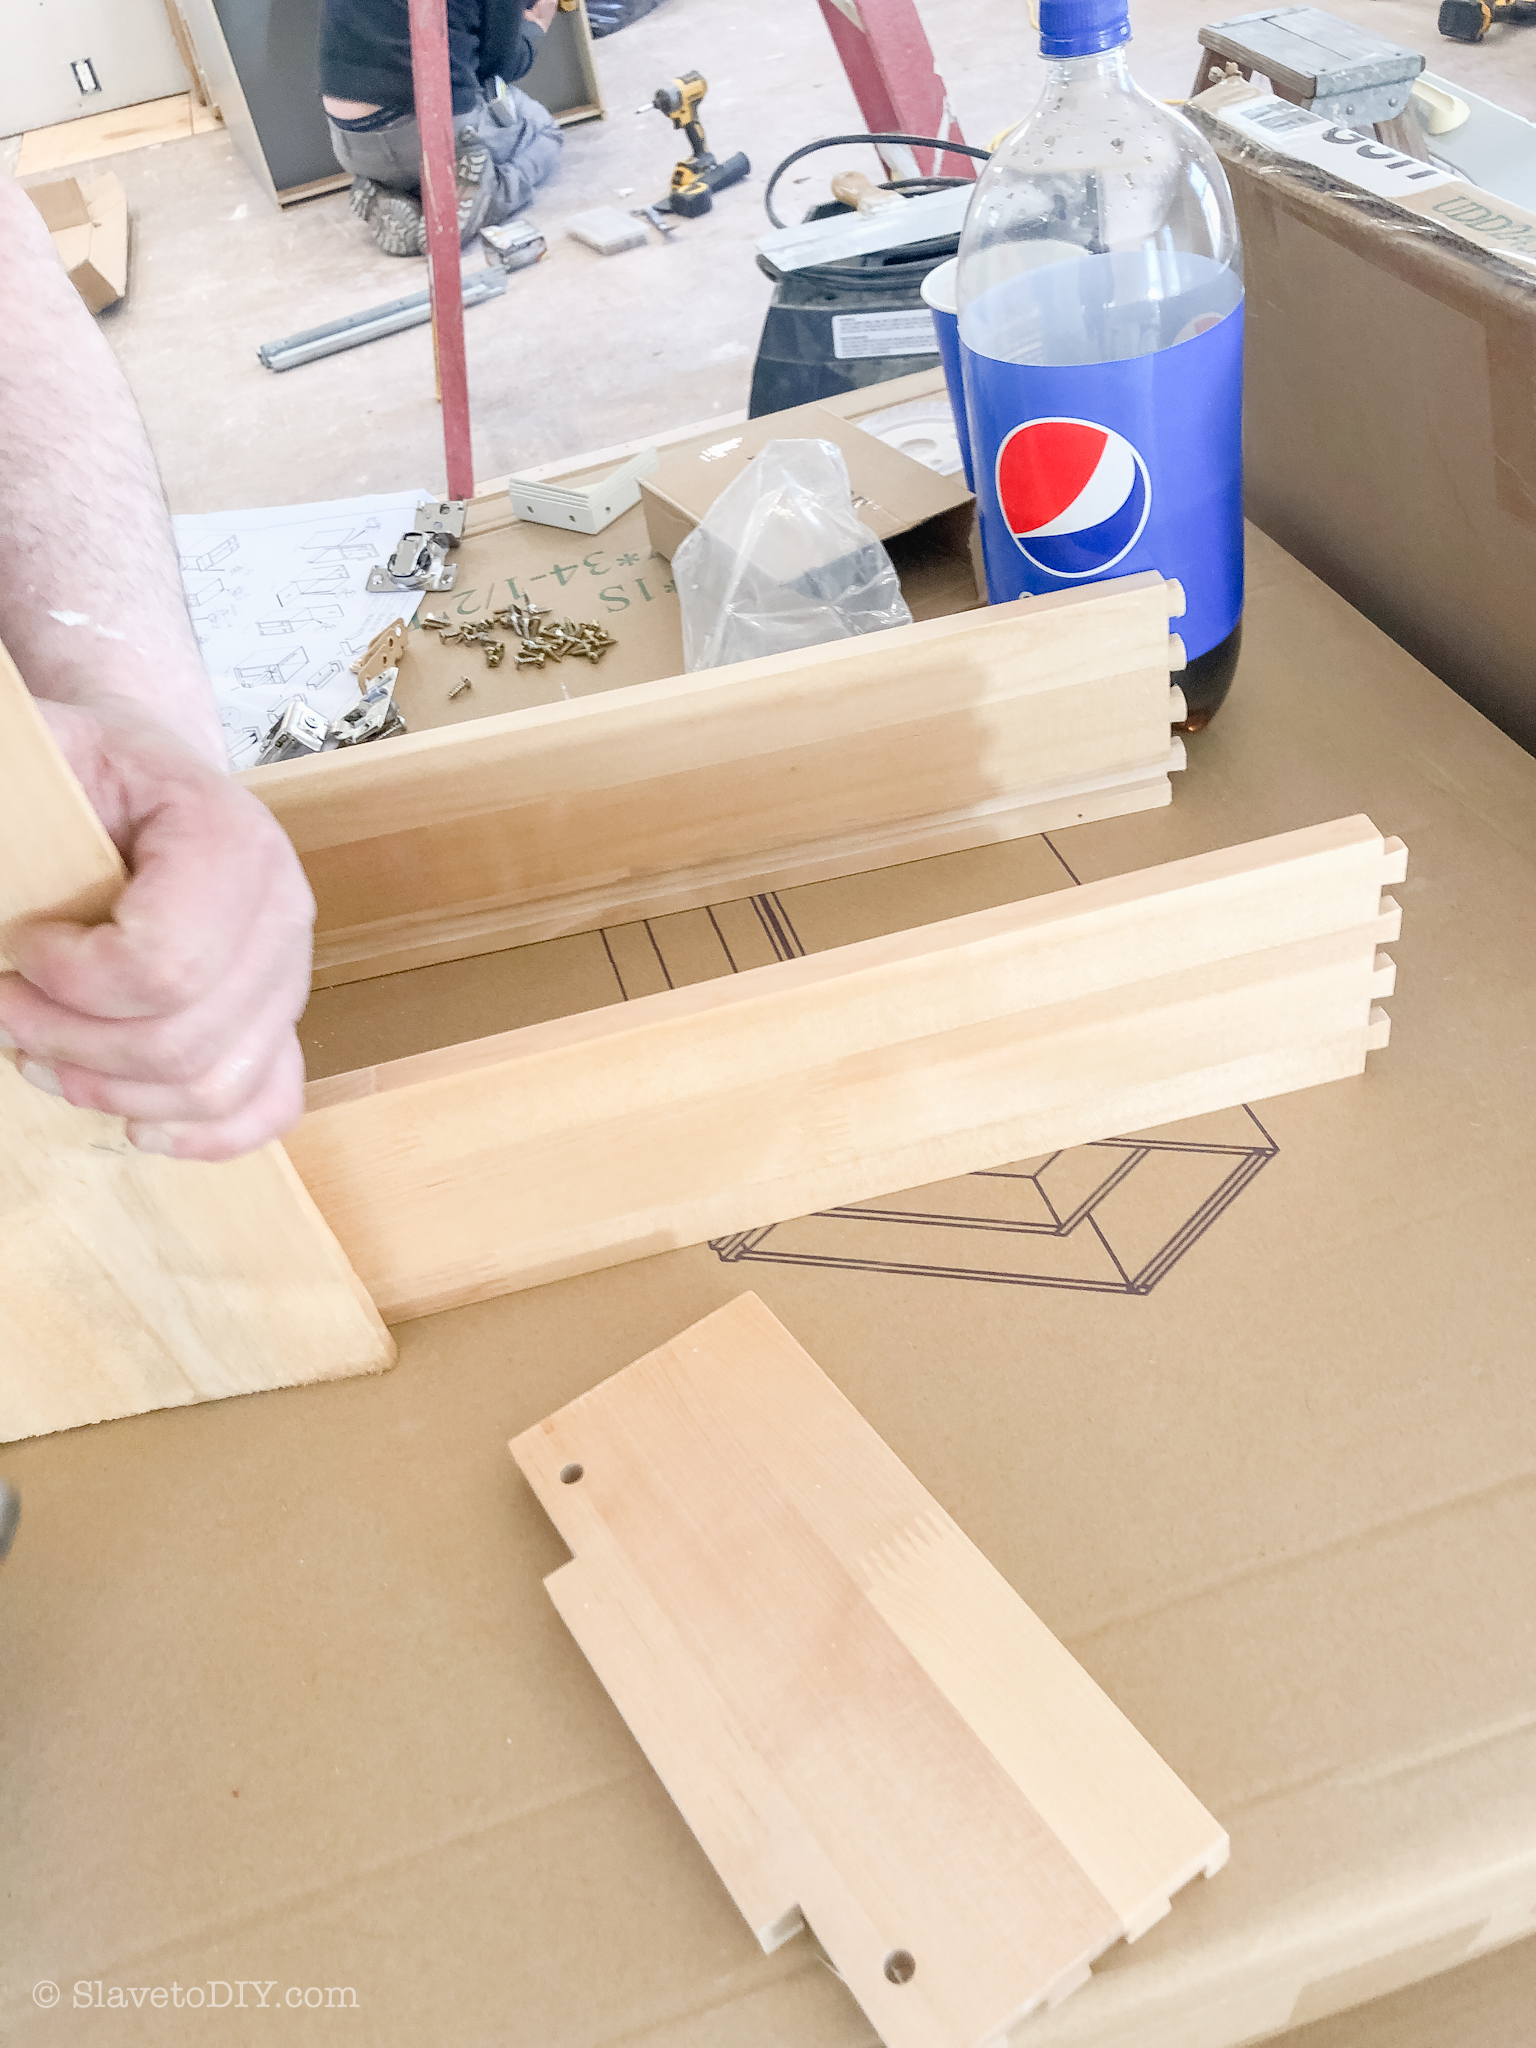
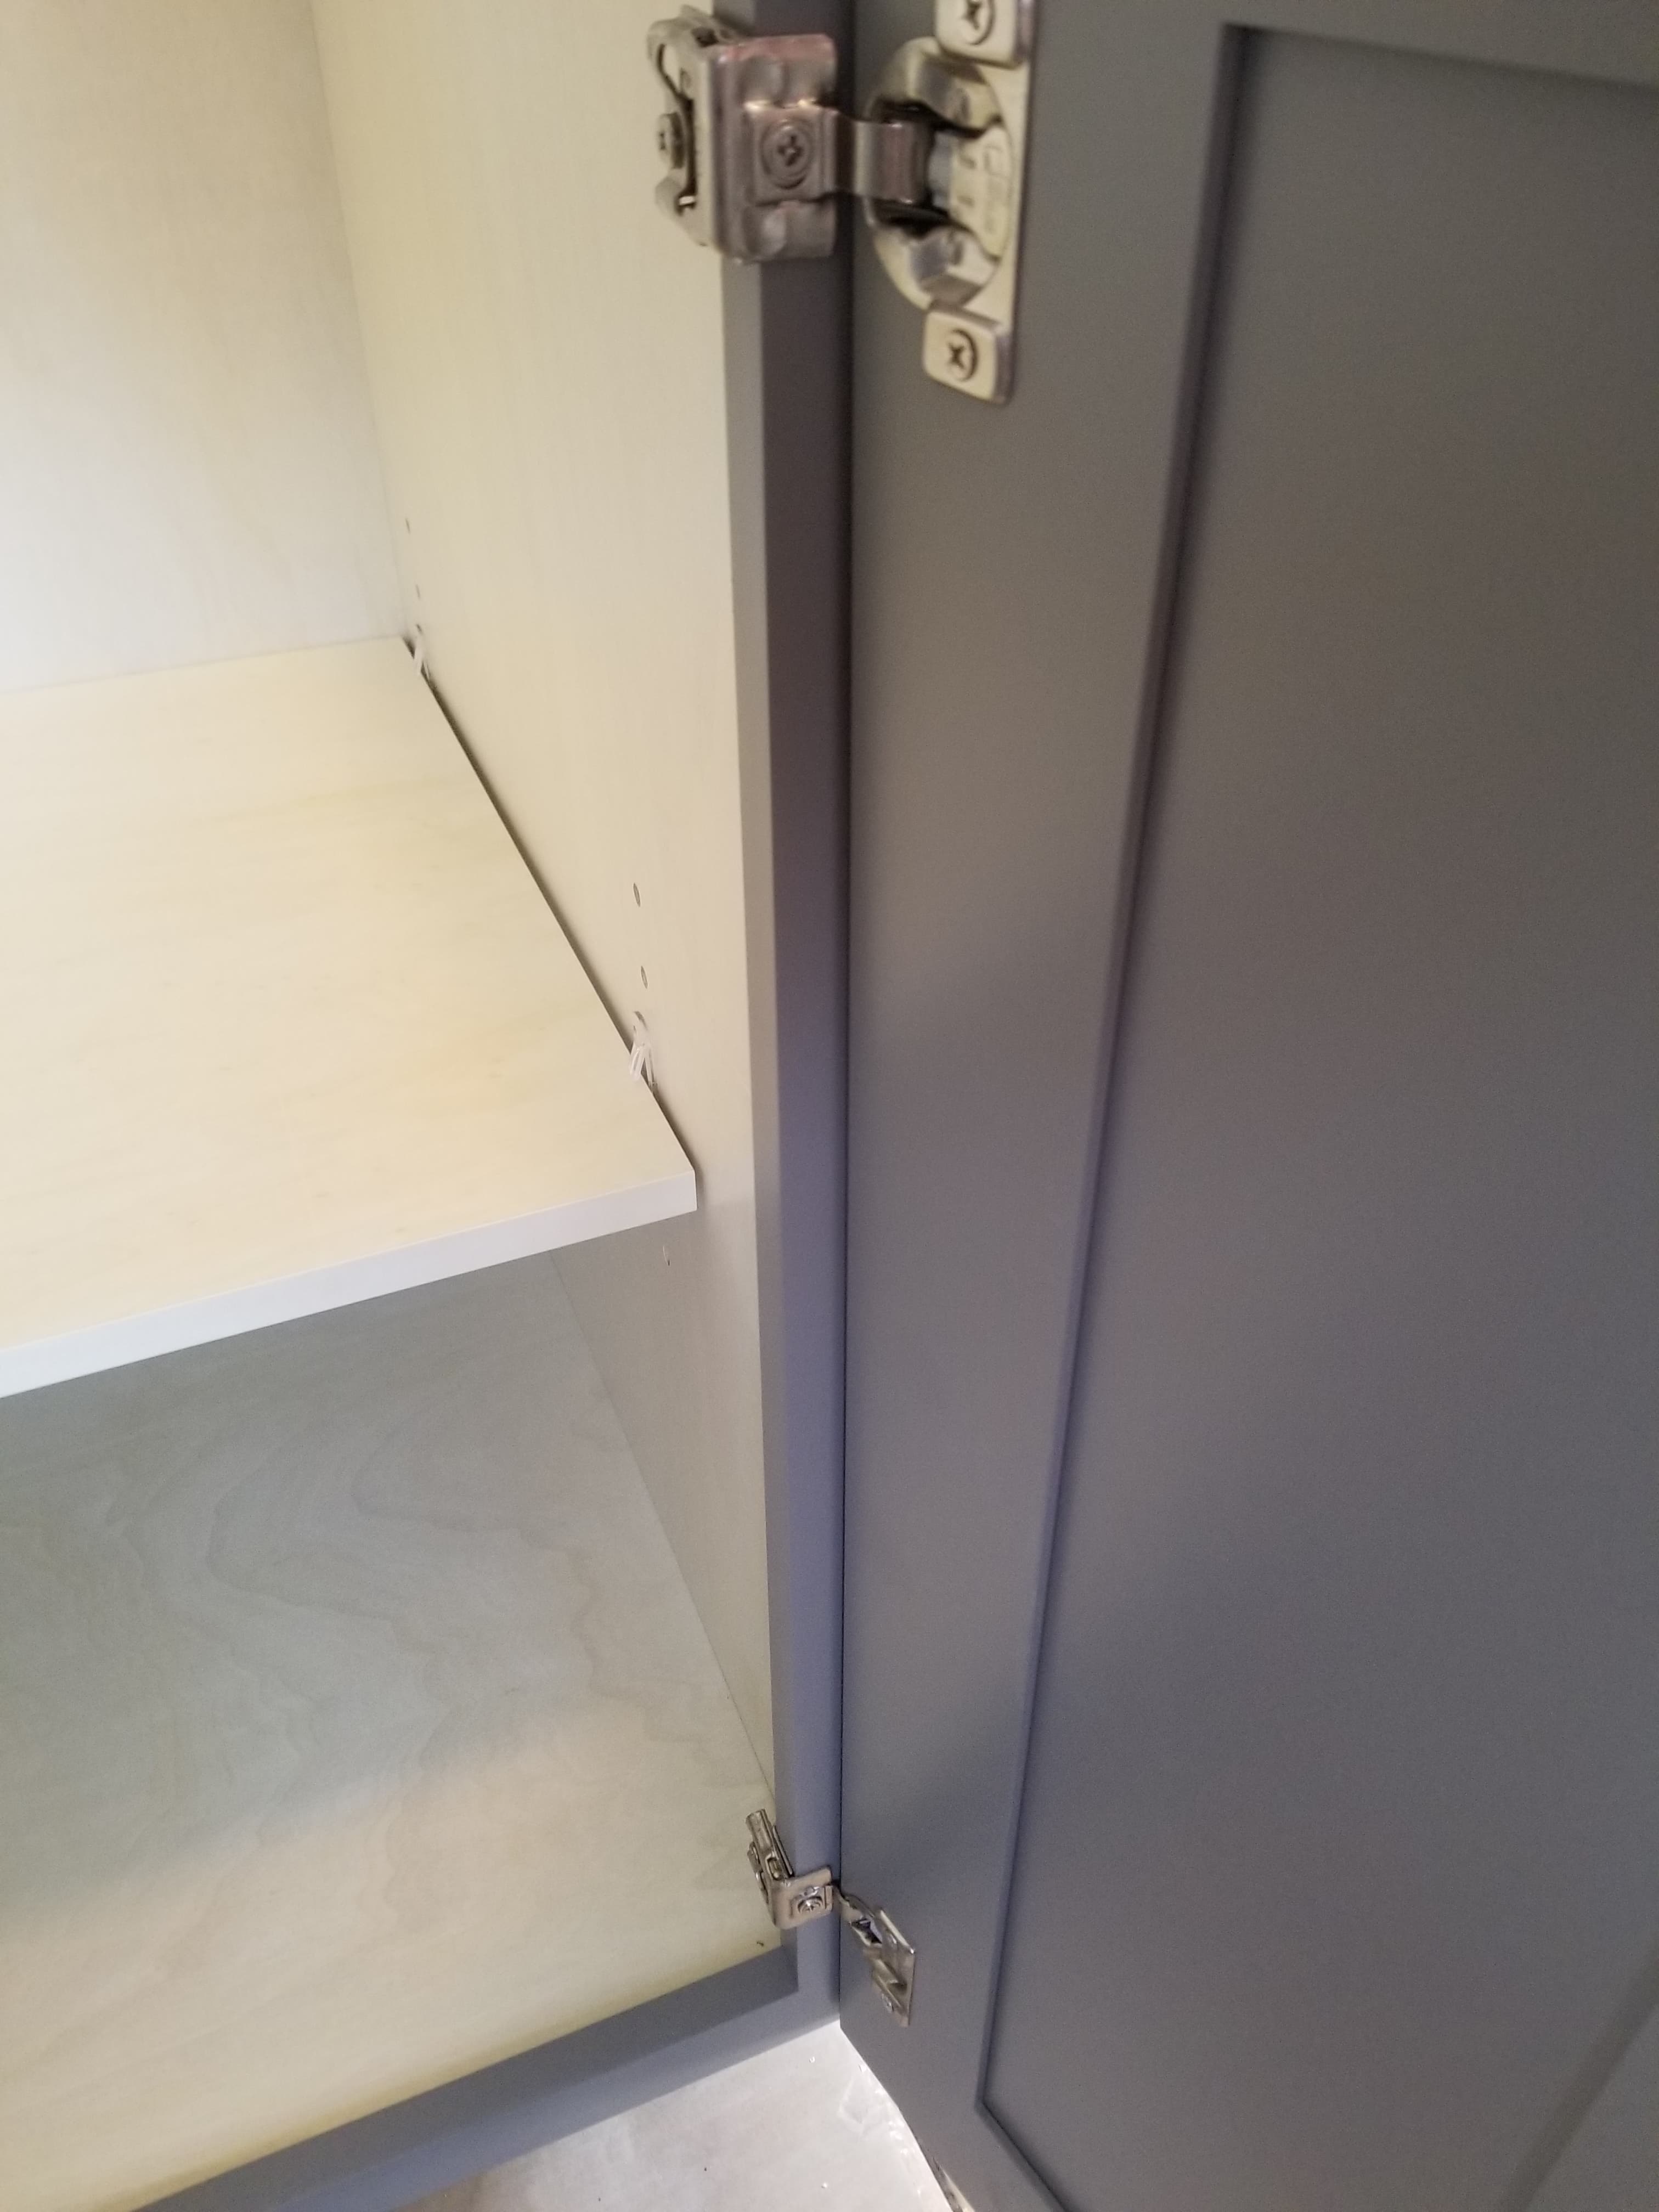
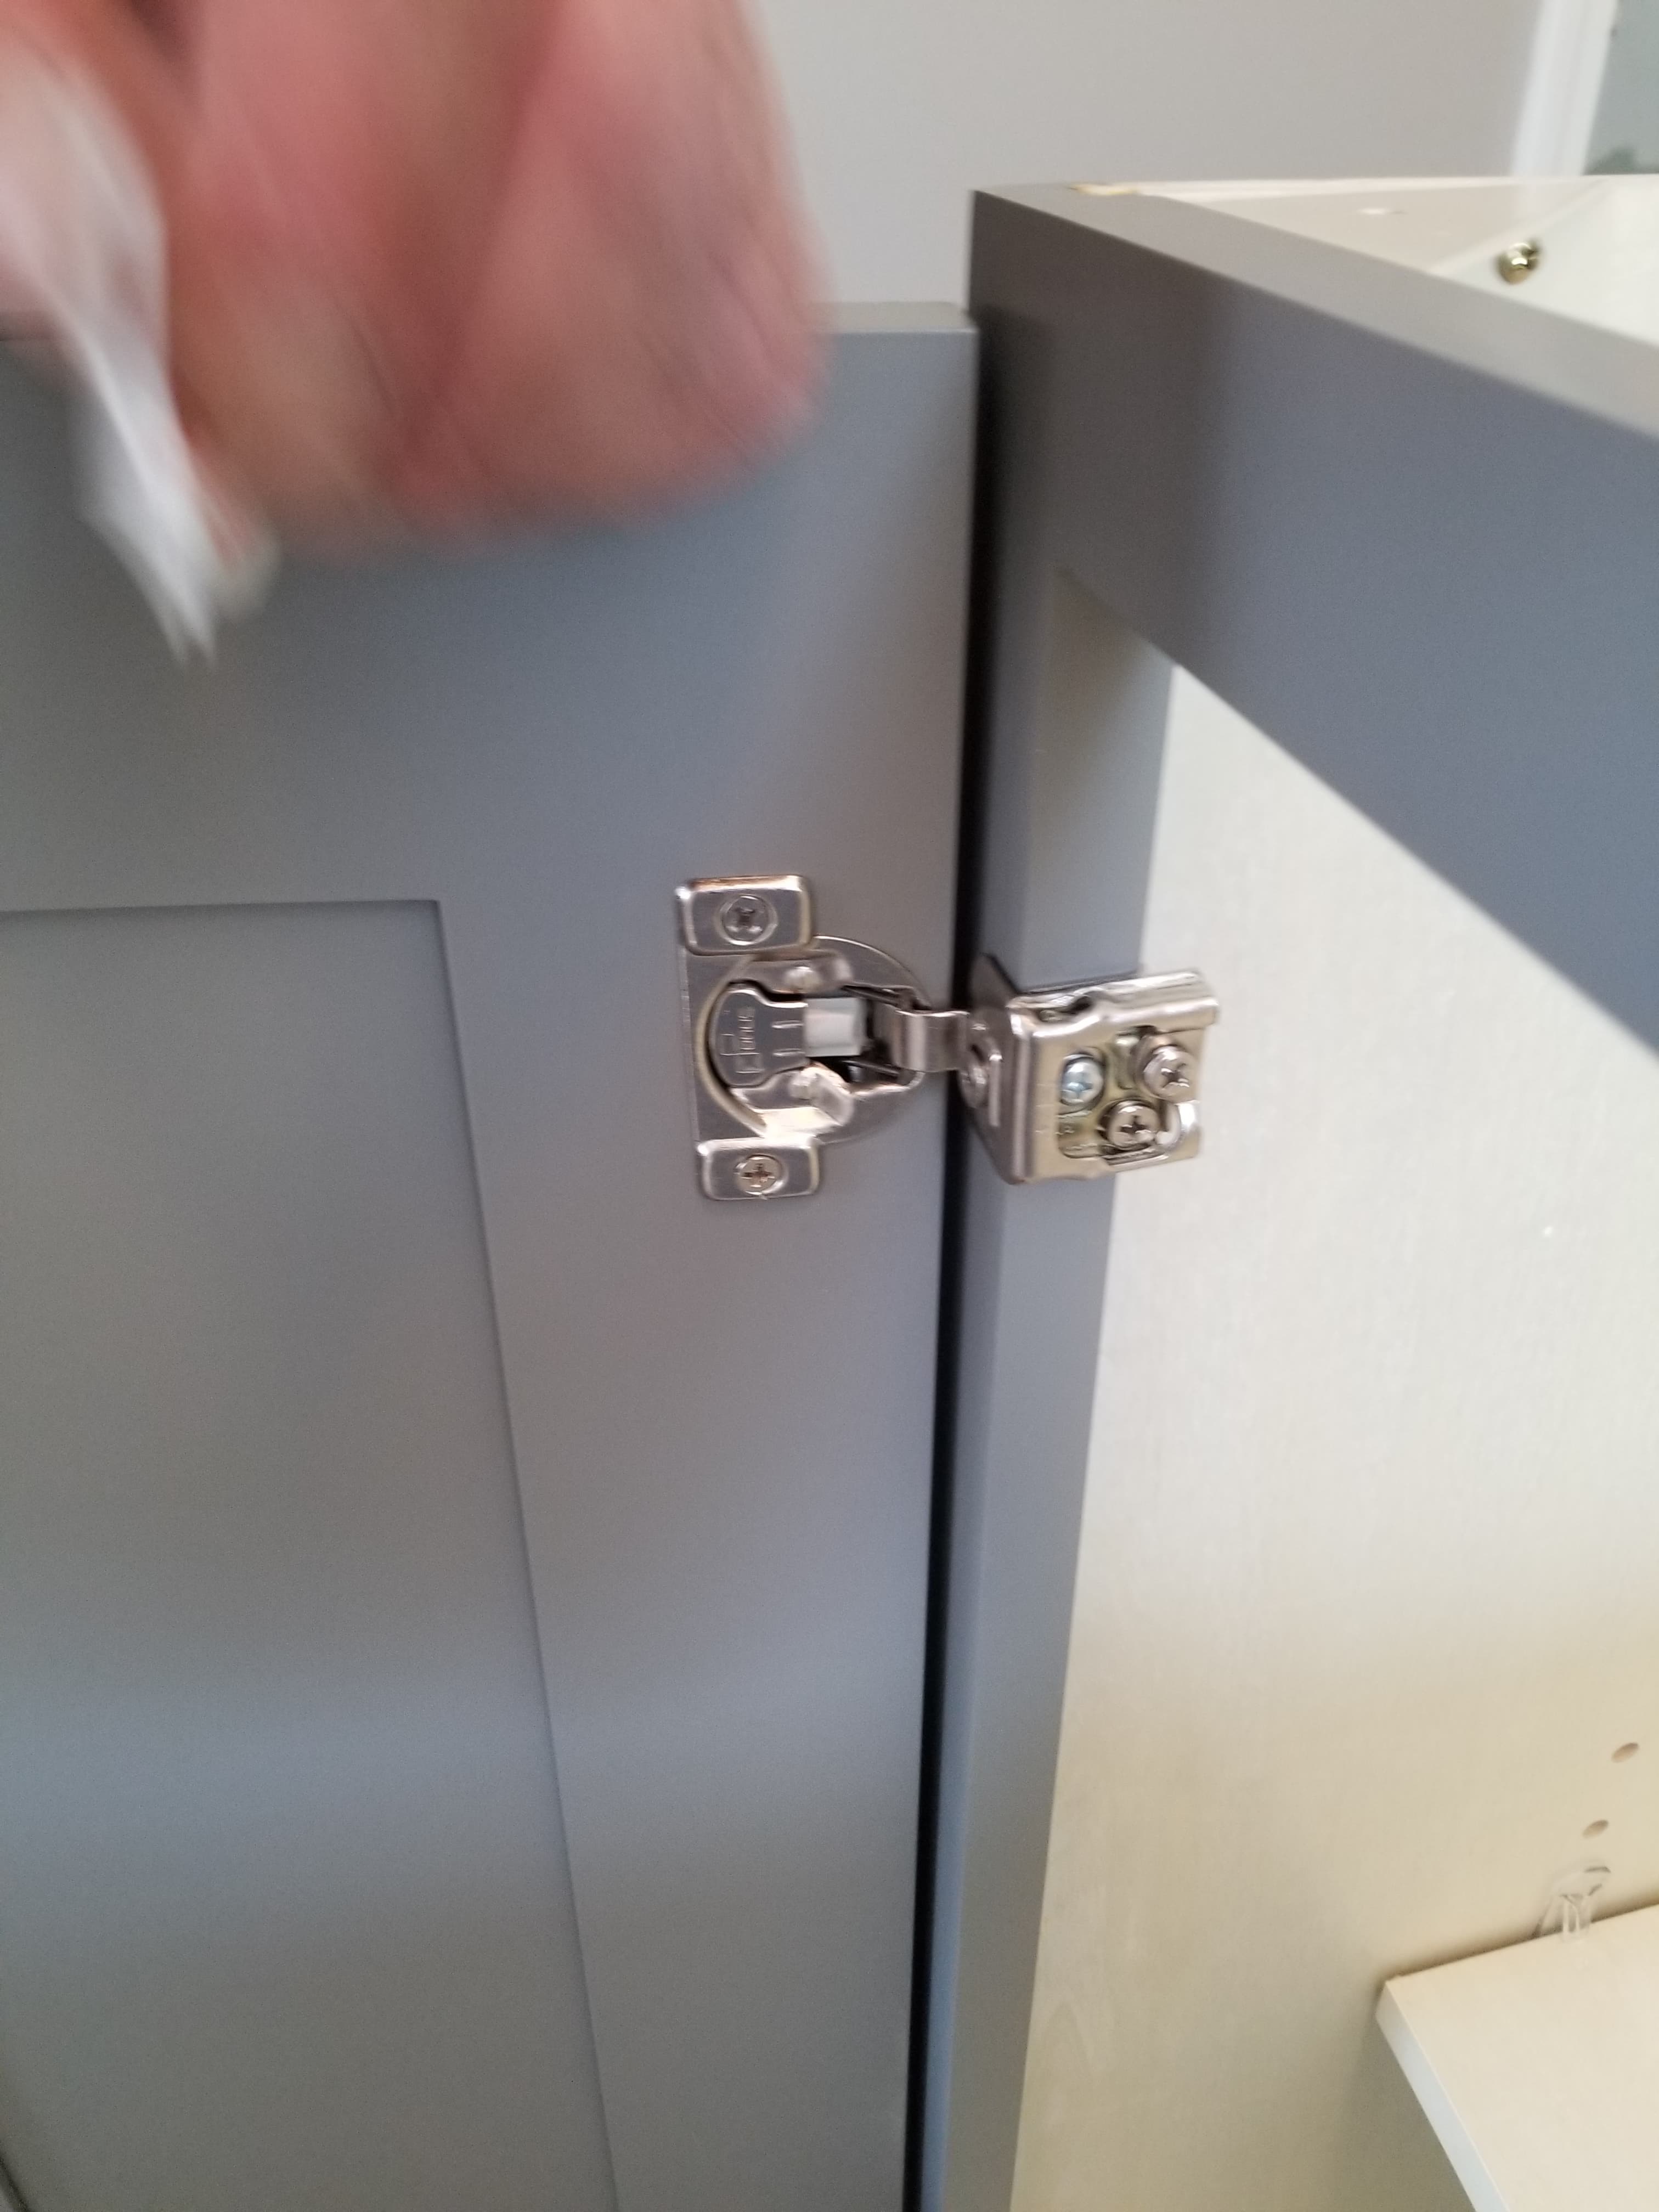
Not handy? It doesn’t even matter. Check out the following two videos from our build that show the complete assembly of an RTA cabinet box (which takes about 3 minutes total):
Of course, after the RTA box is assembled, the doors and drawers are attached, which takes a few minutes longer, but is still very simple.
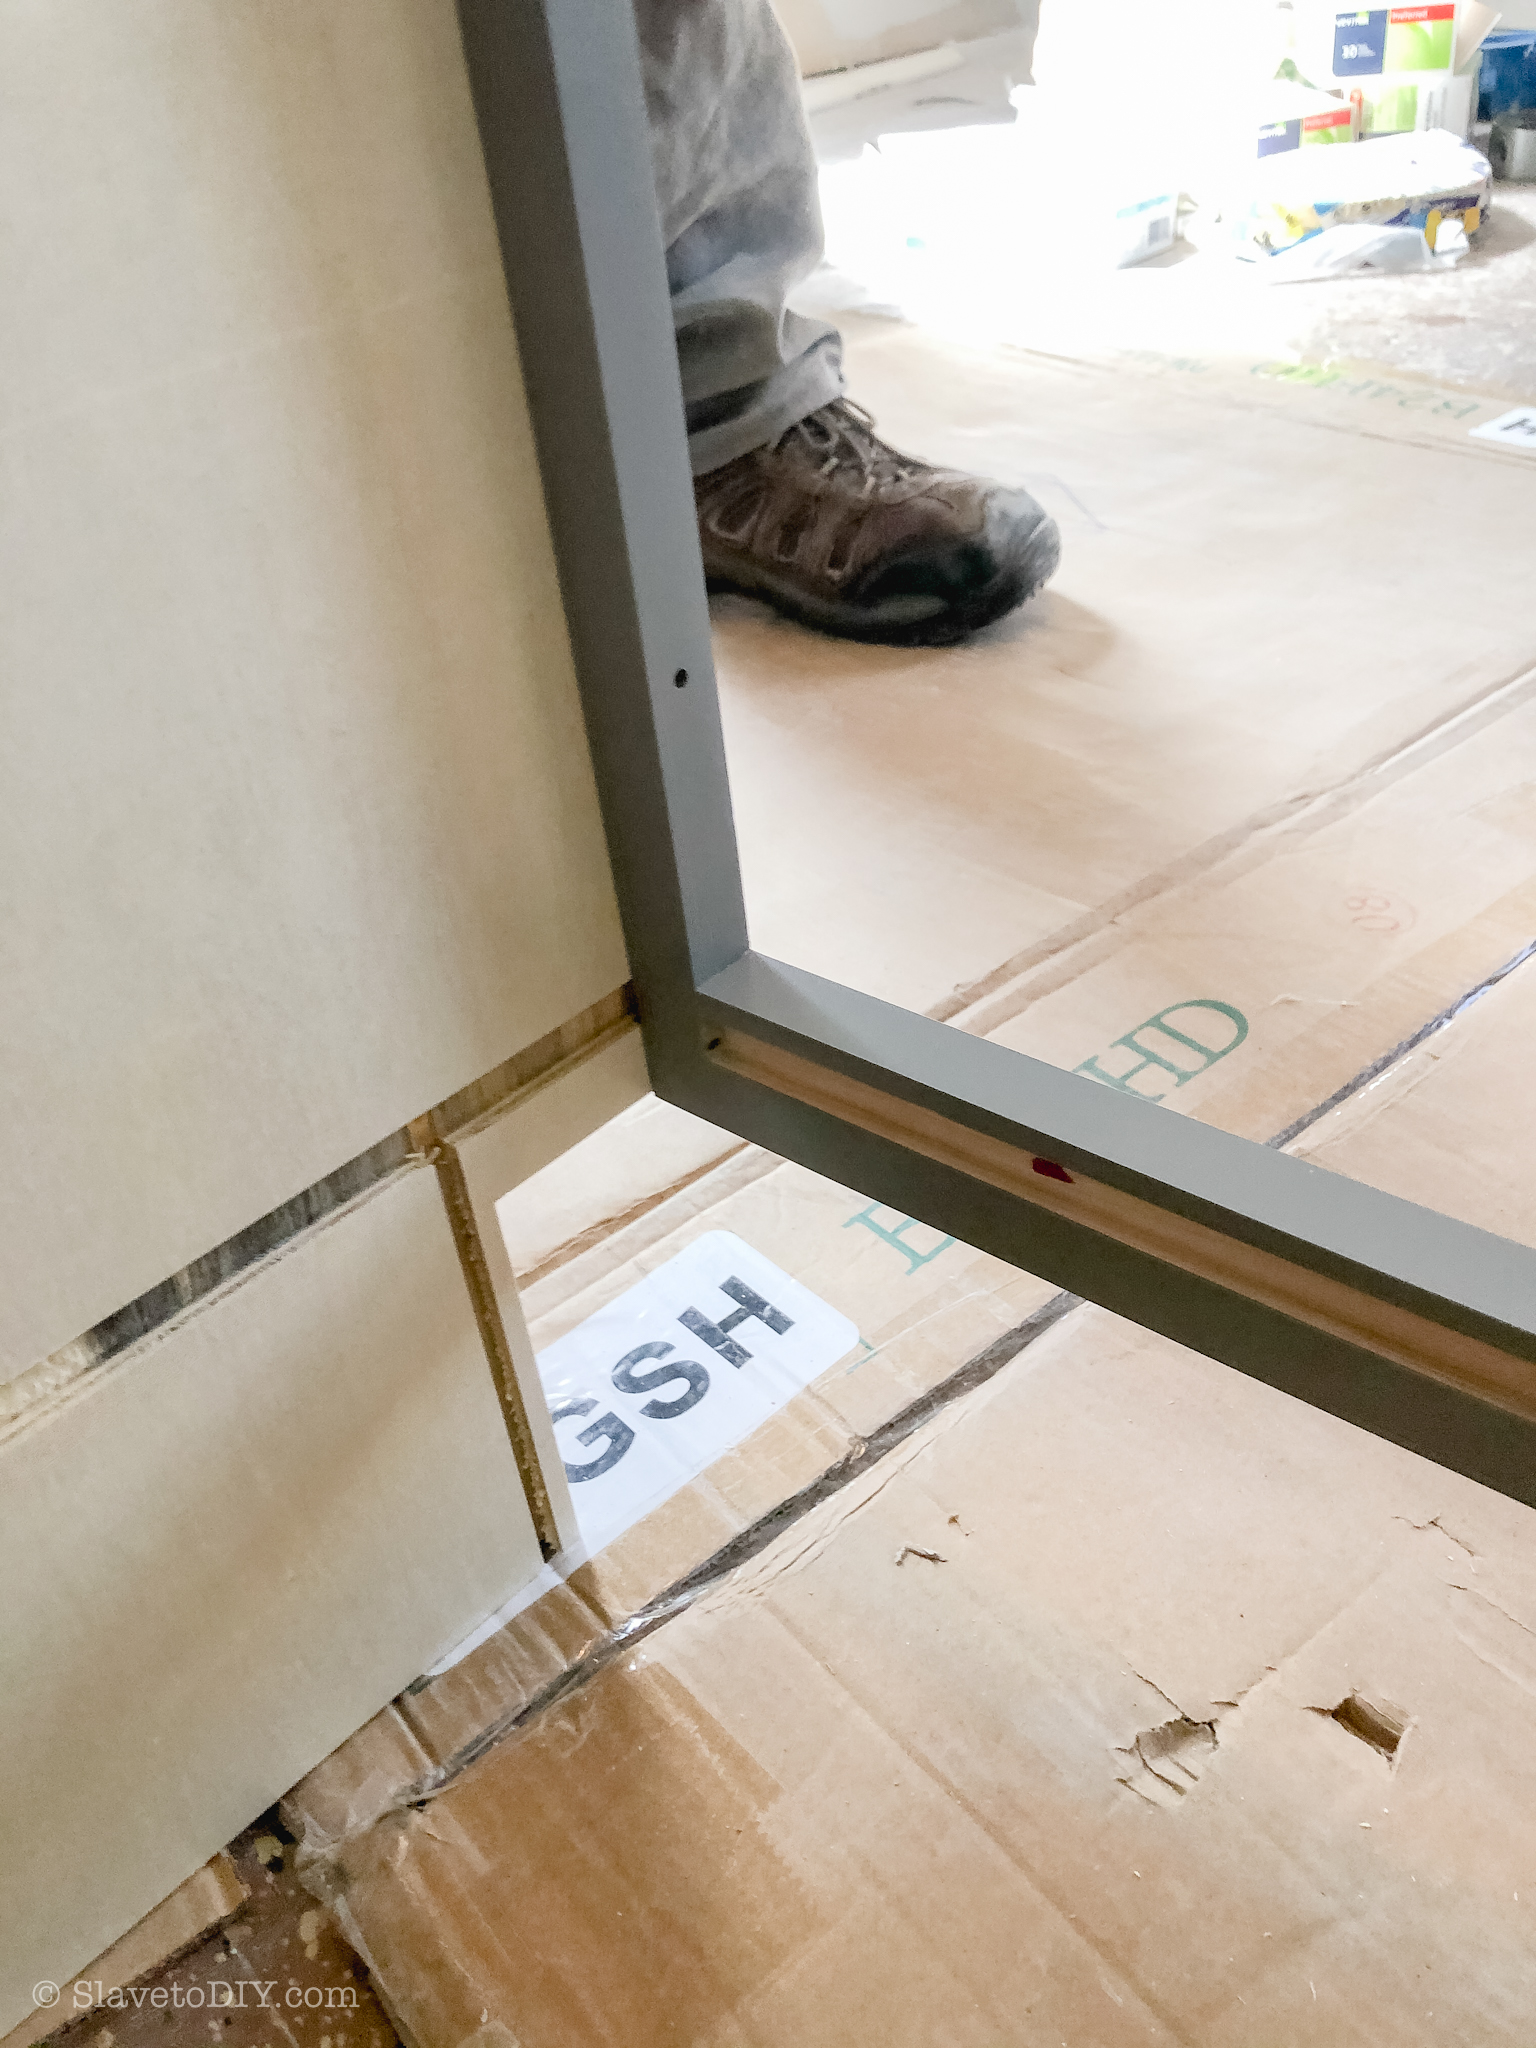
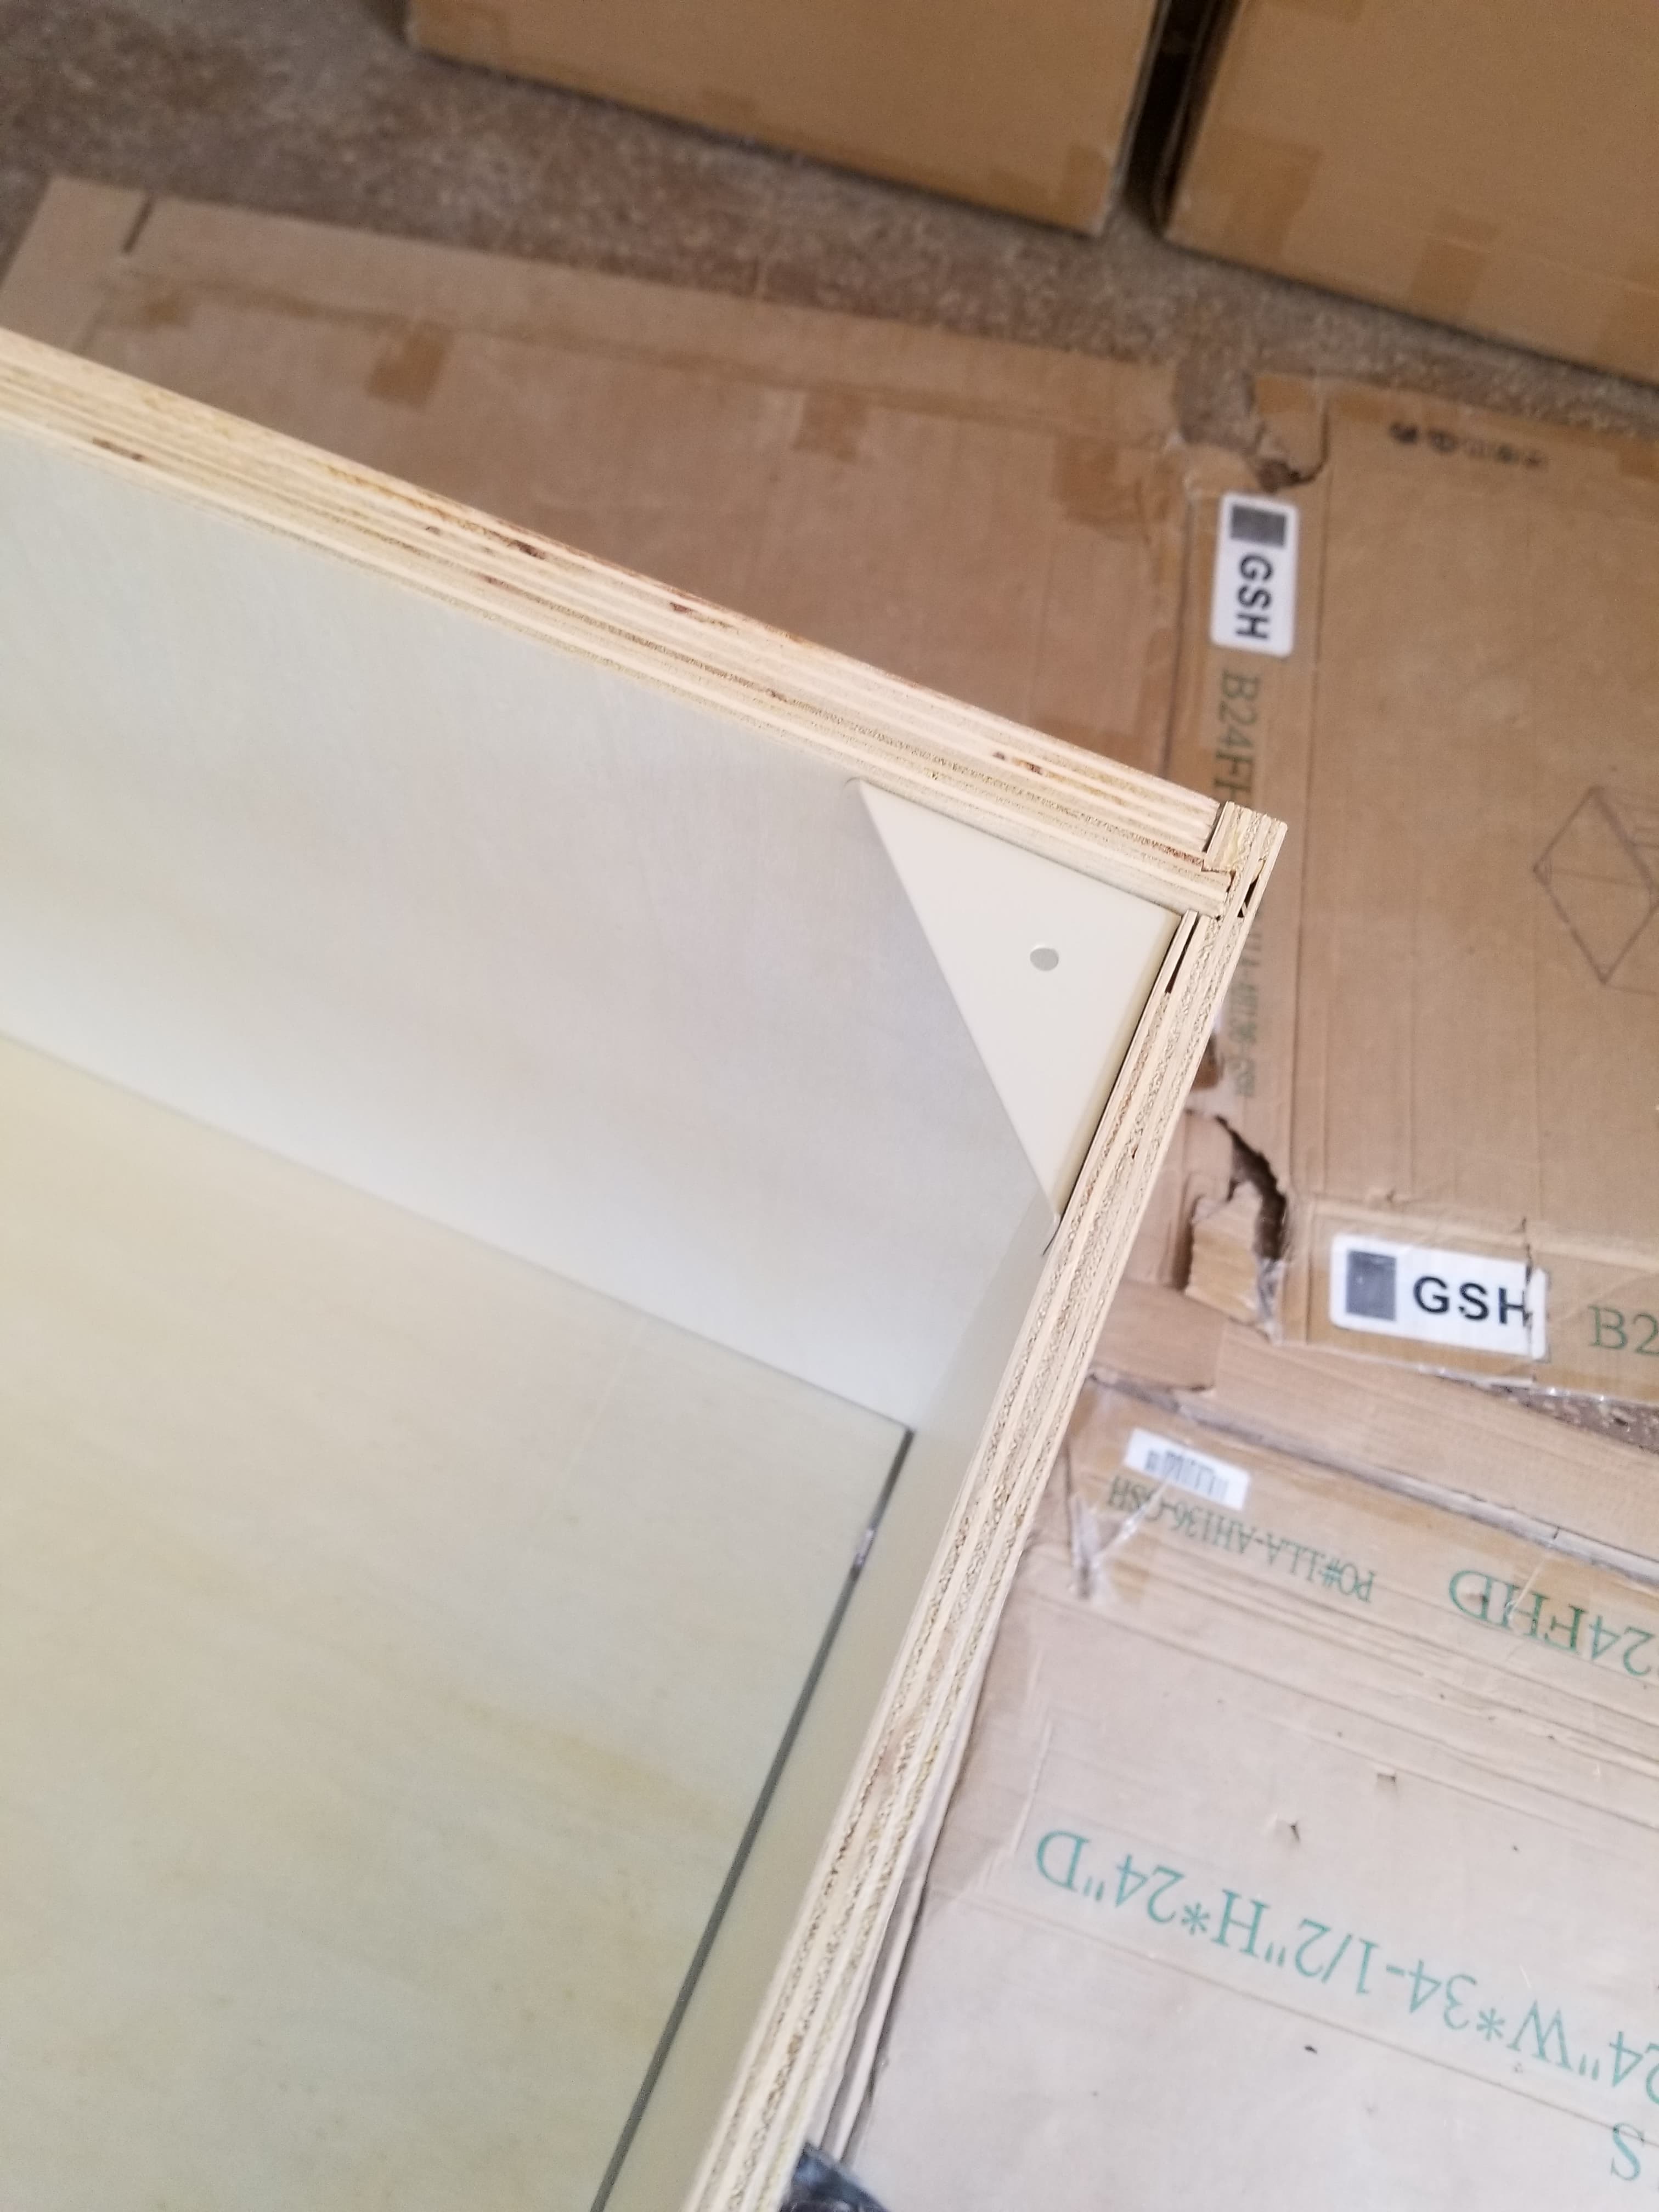
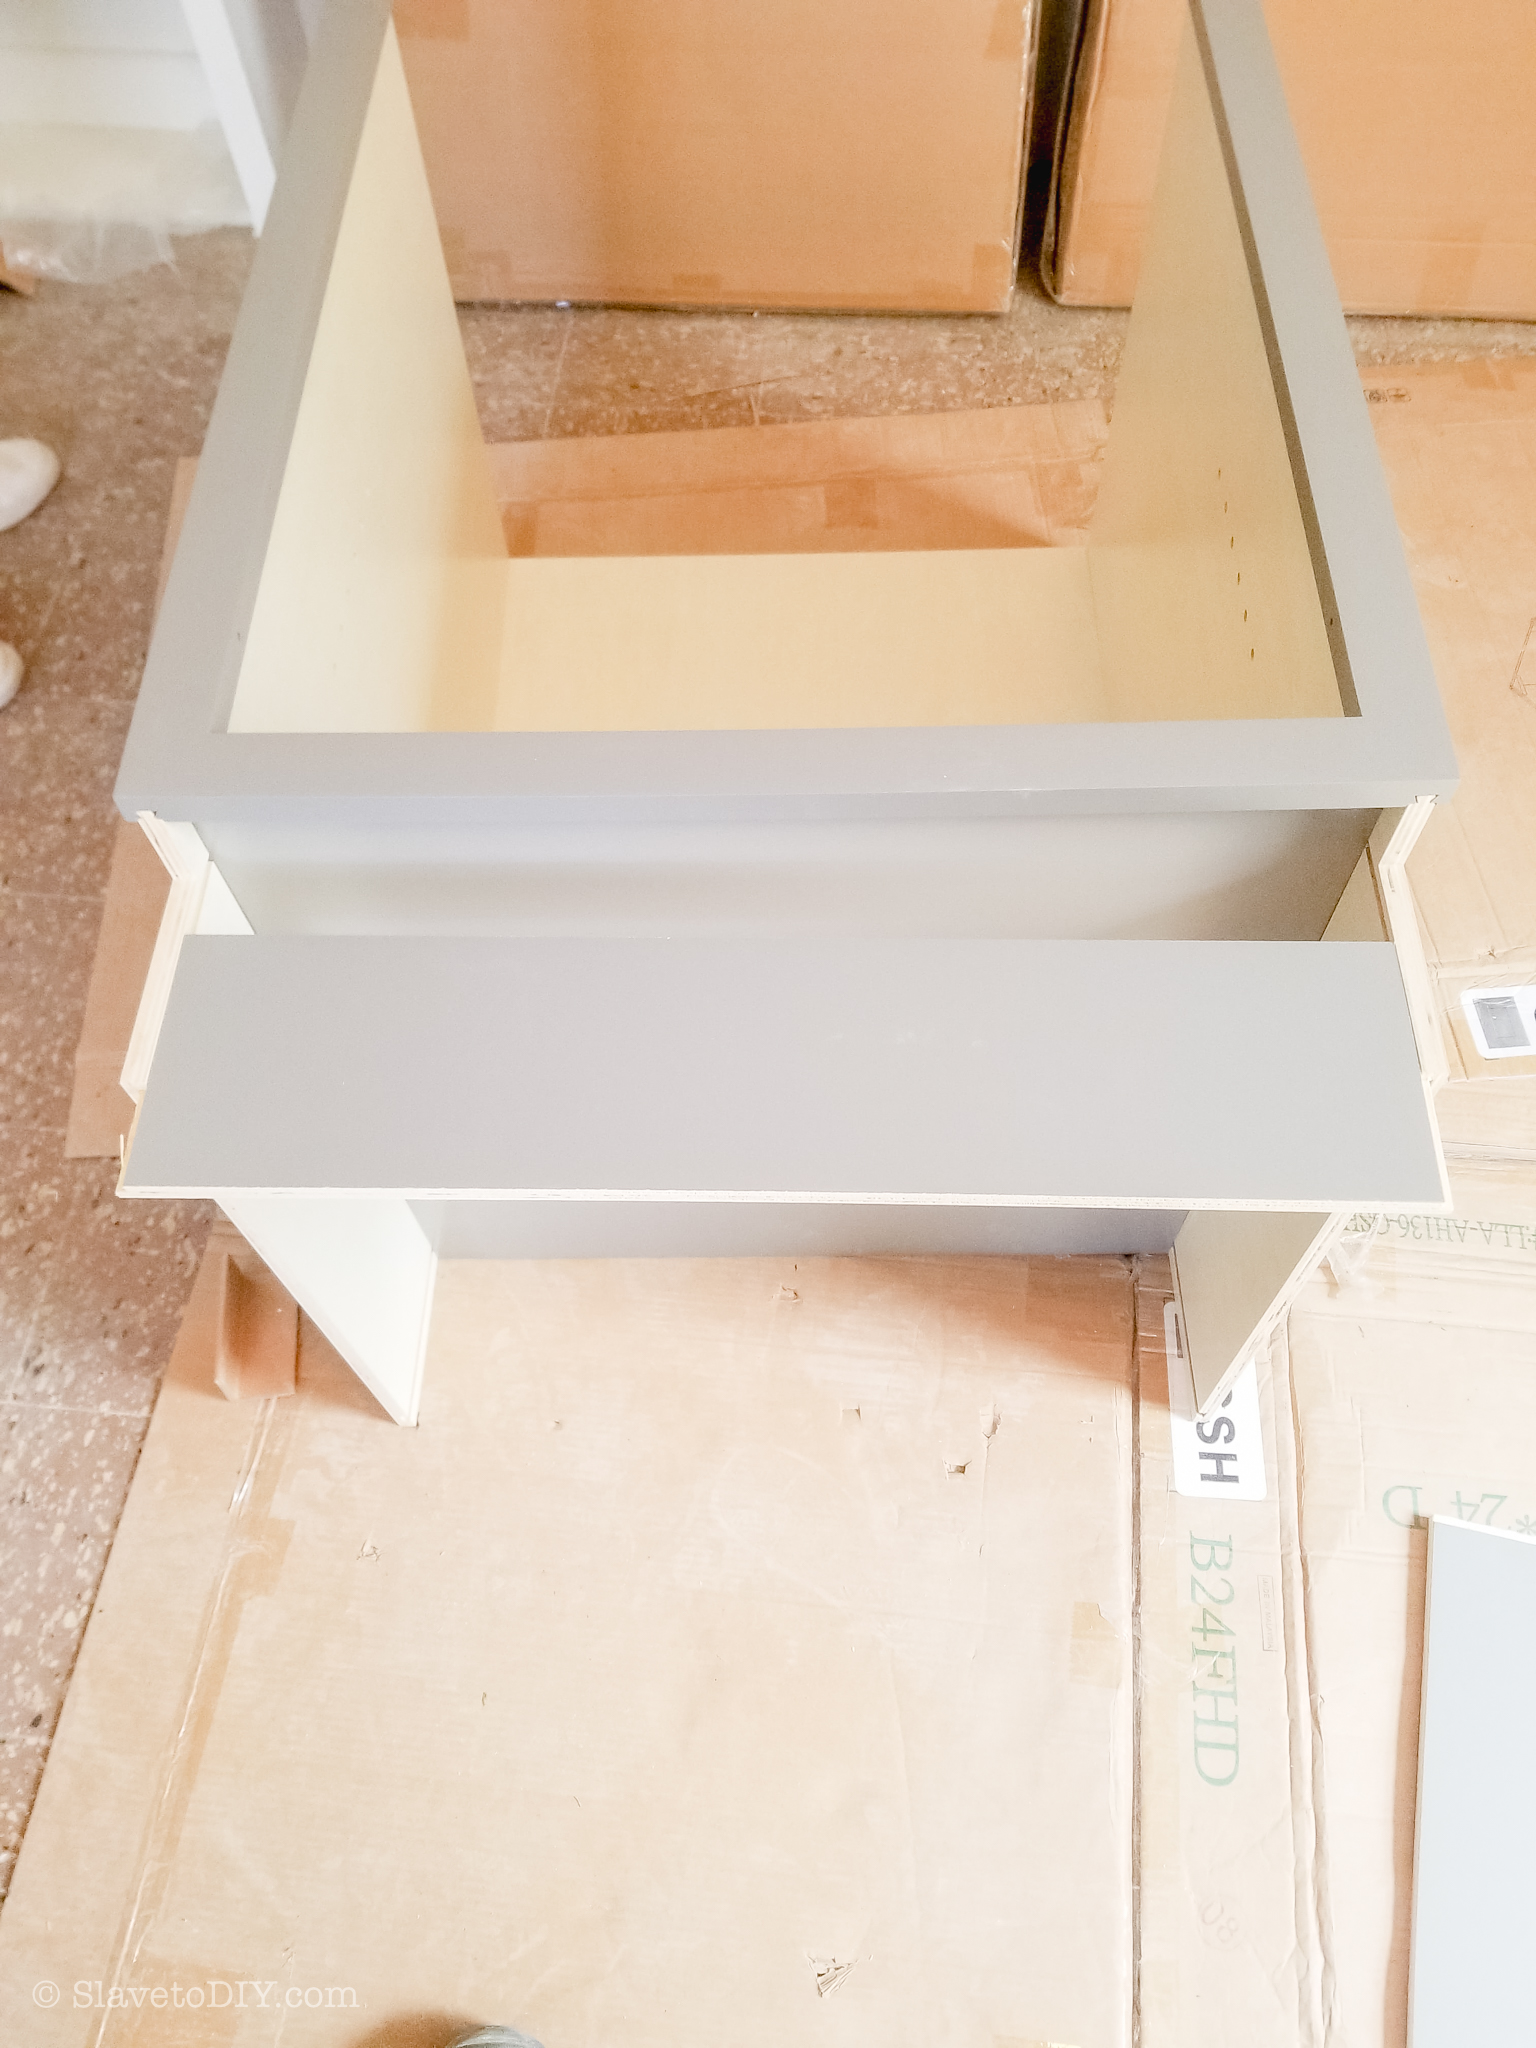
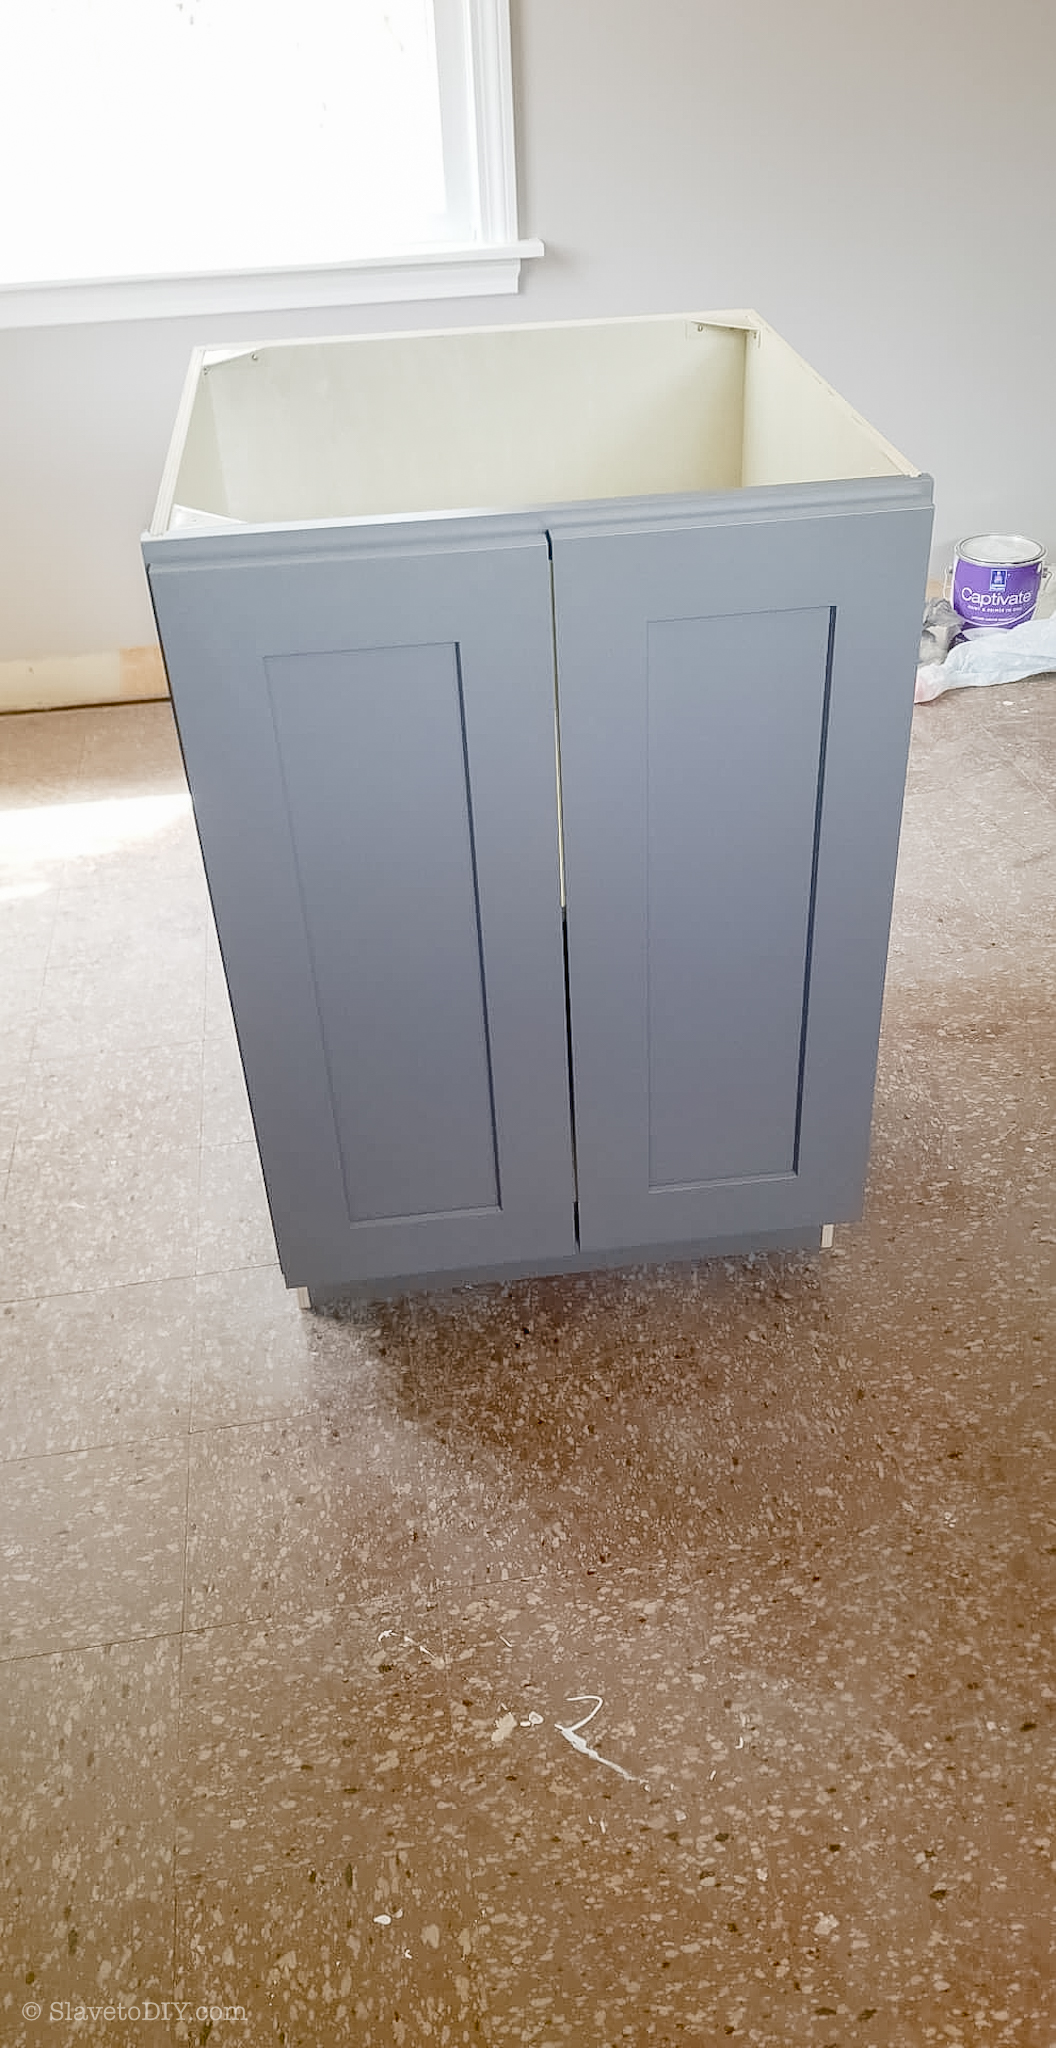
Is it really that simple?: Yes! Here are some more photos of the cabinet assembly:
How To Measure For, Design, Order, and Install Your Dream Kitchen From RTA Cabinets: RTA Cabinet Assembly Pictures
How To Measure For, Design, Order, and Install Your Dream Kitchen From RTA Cabinets: RTA Cabinet Assembly Pictures
How To Measure For, Design, Order, and Install Your Dream Kitchen From RTA Cabinets: RTA Cabinet Assembly Pictures
How To Measure For, Design, Order, and Install Your Dream Kitchen From RTA Cabinets: RTA Cabinet Assembly Pictures
How To Measure For, Design, Order, and Install Your Dream Kitchen From RTA Cabinets: RTA Cabinet Assembly Pictures
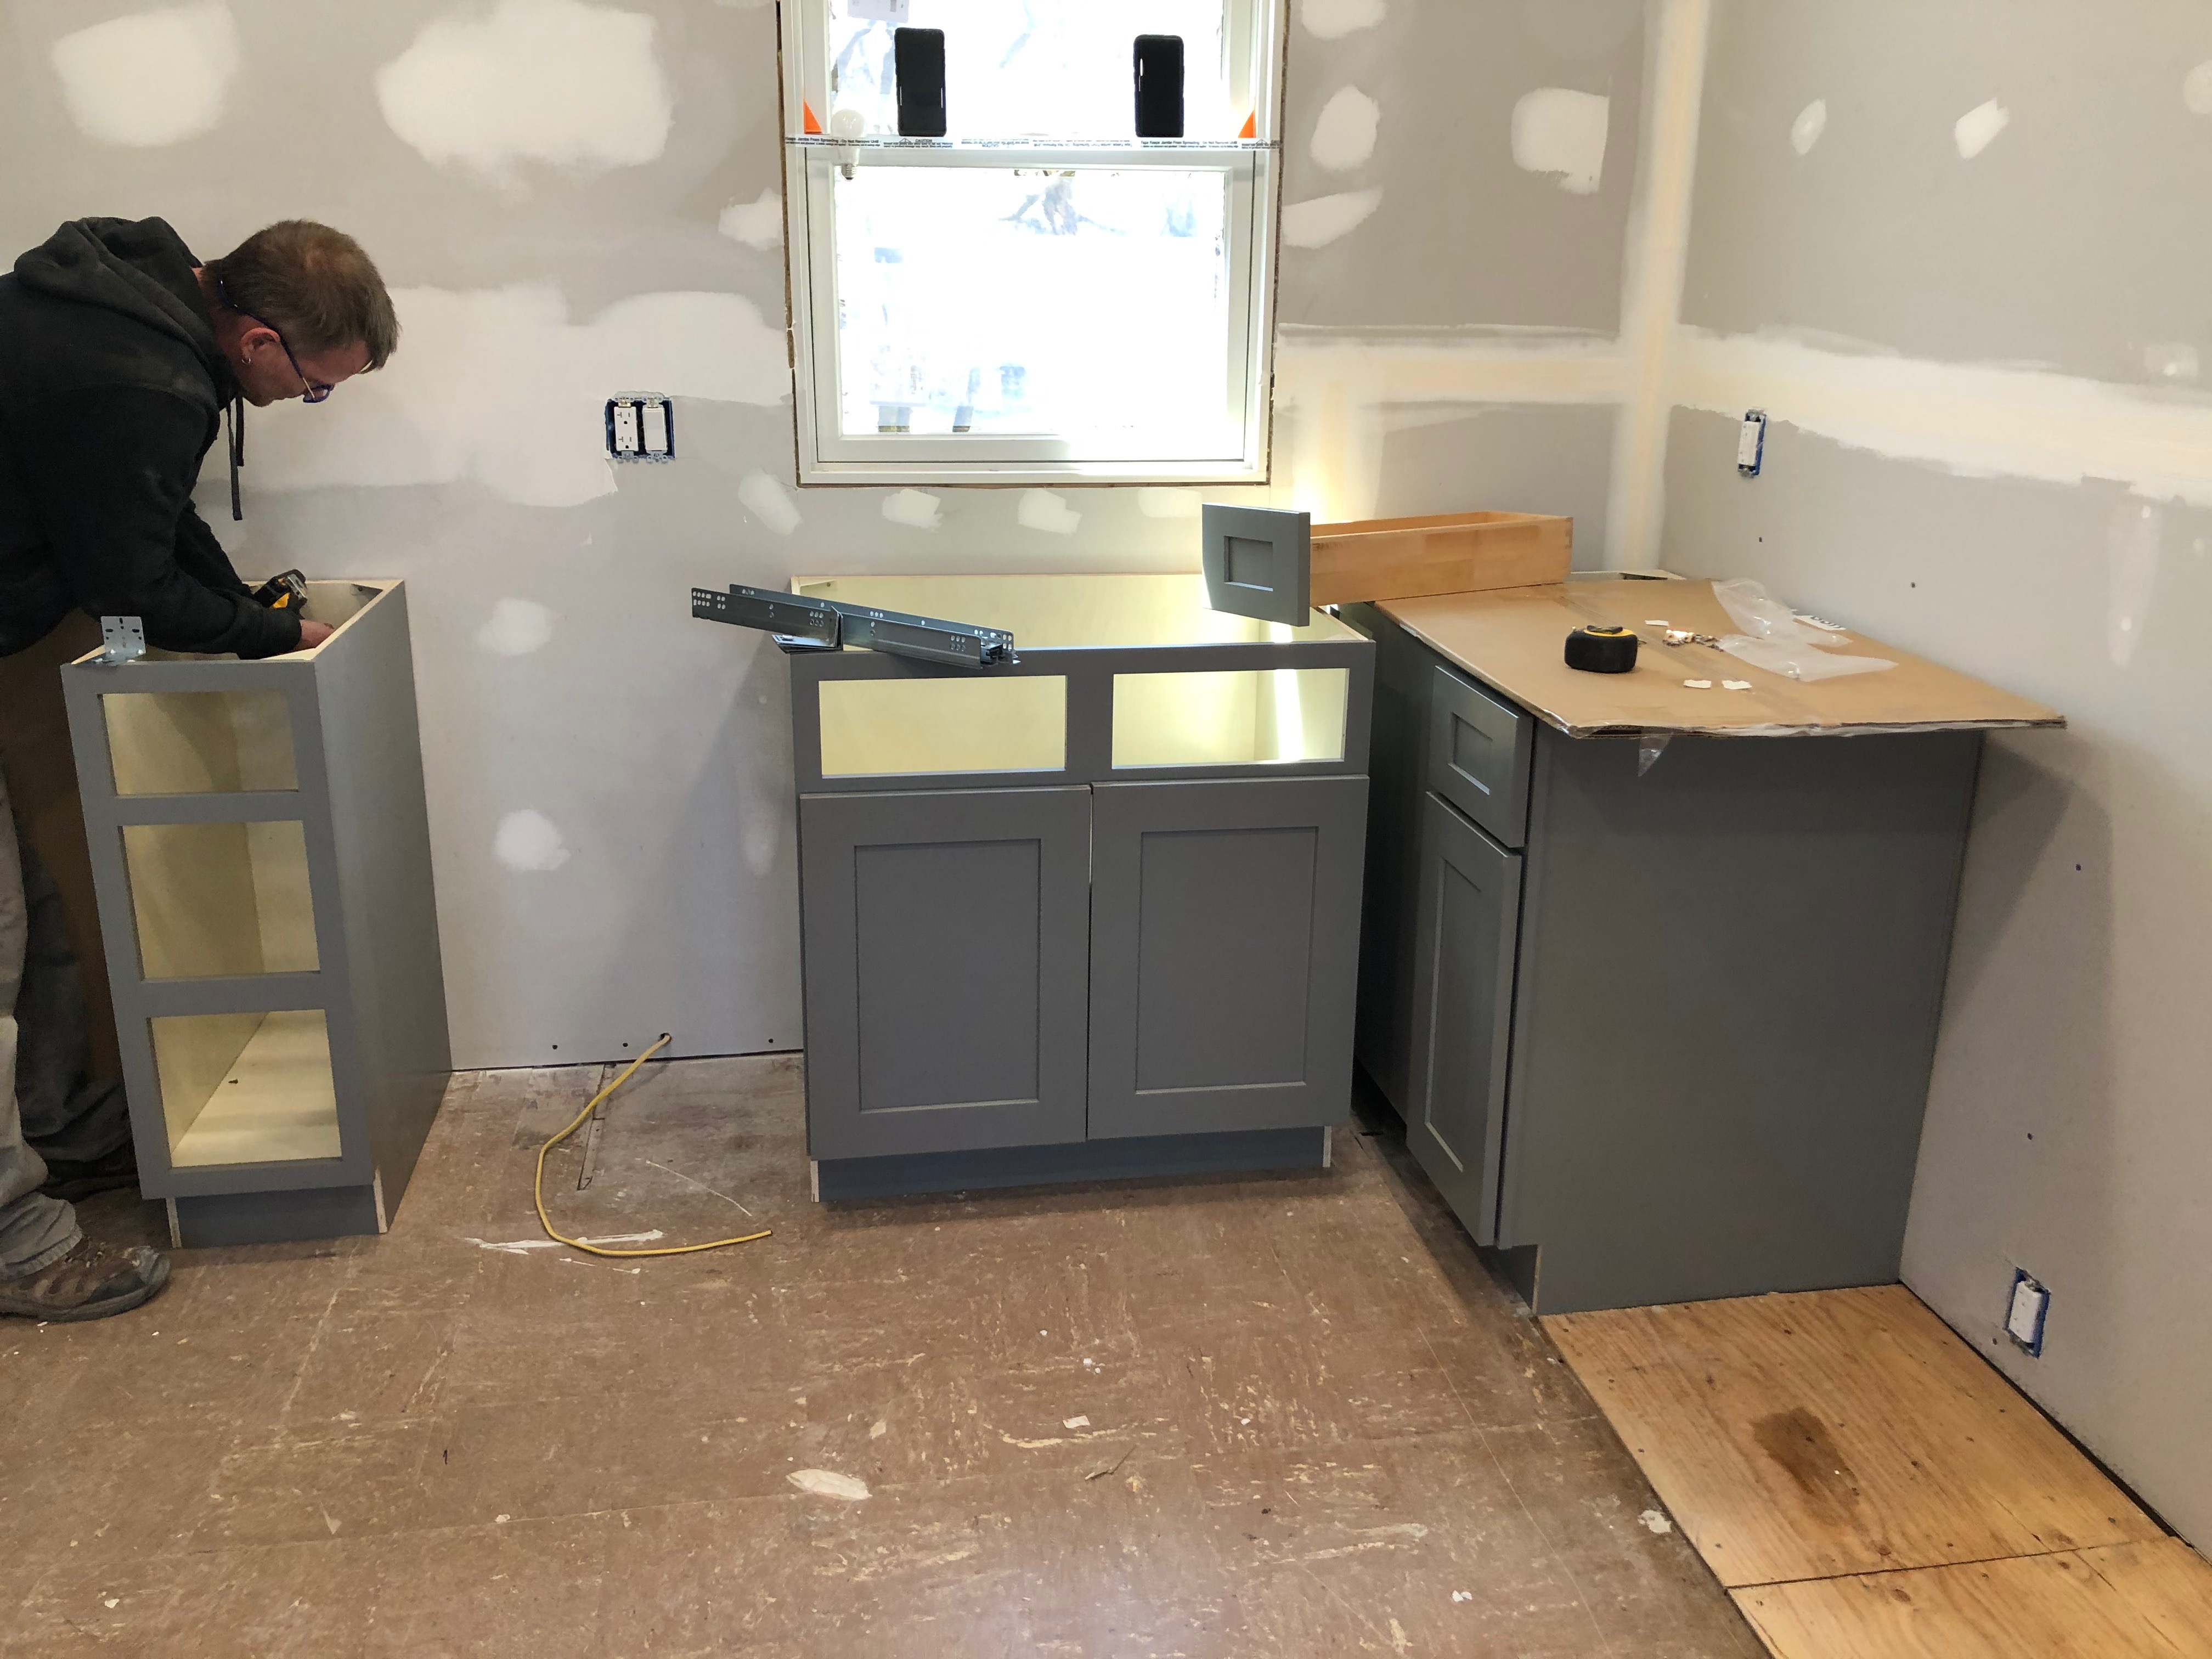
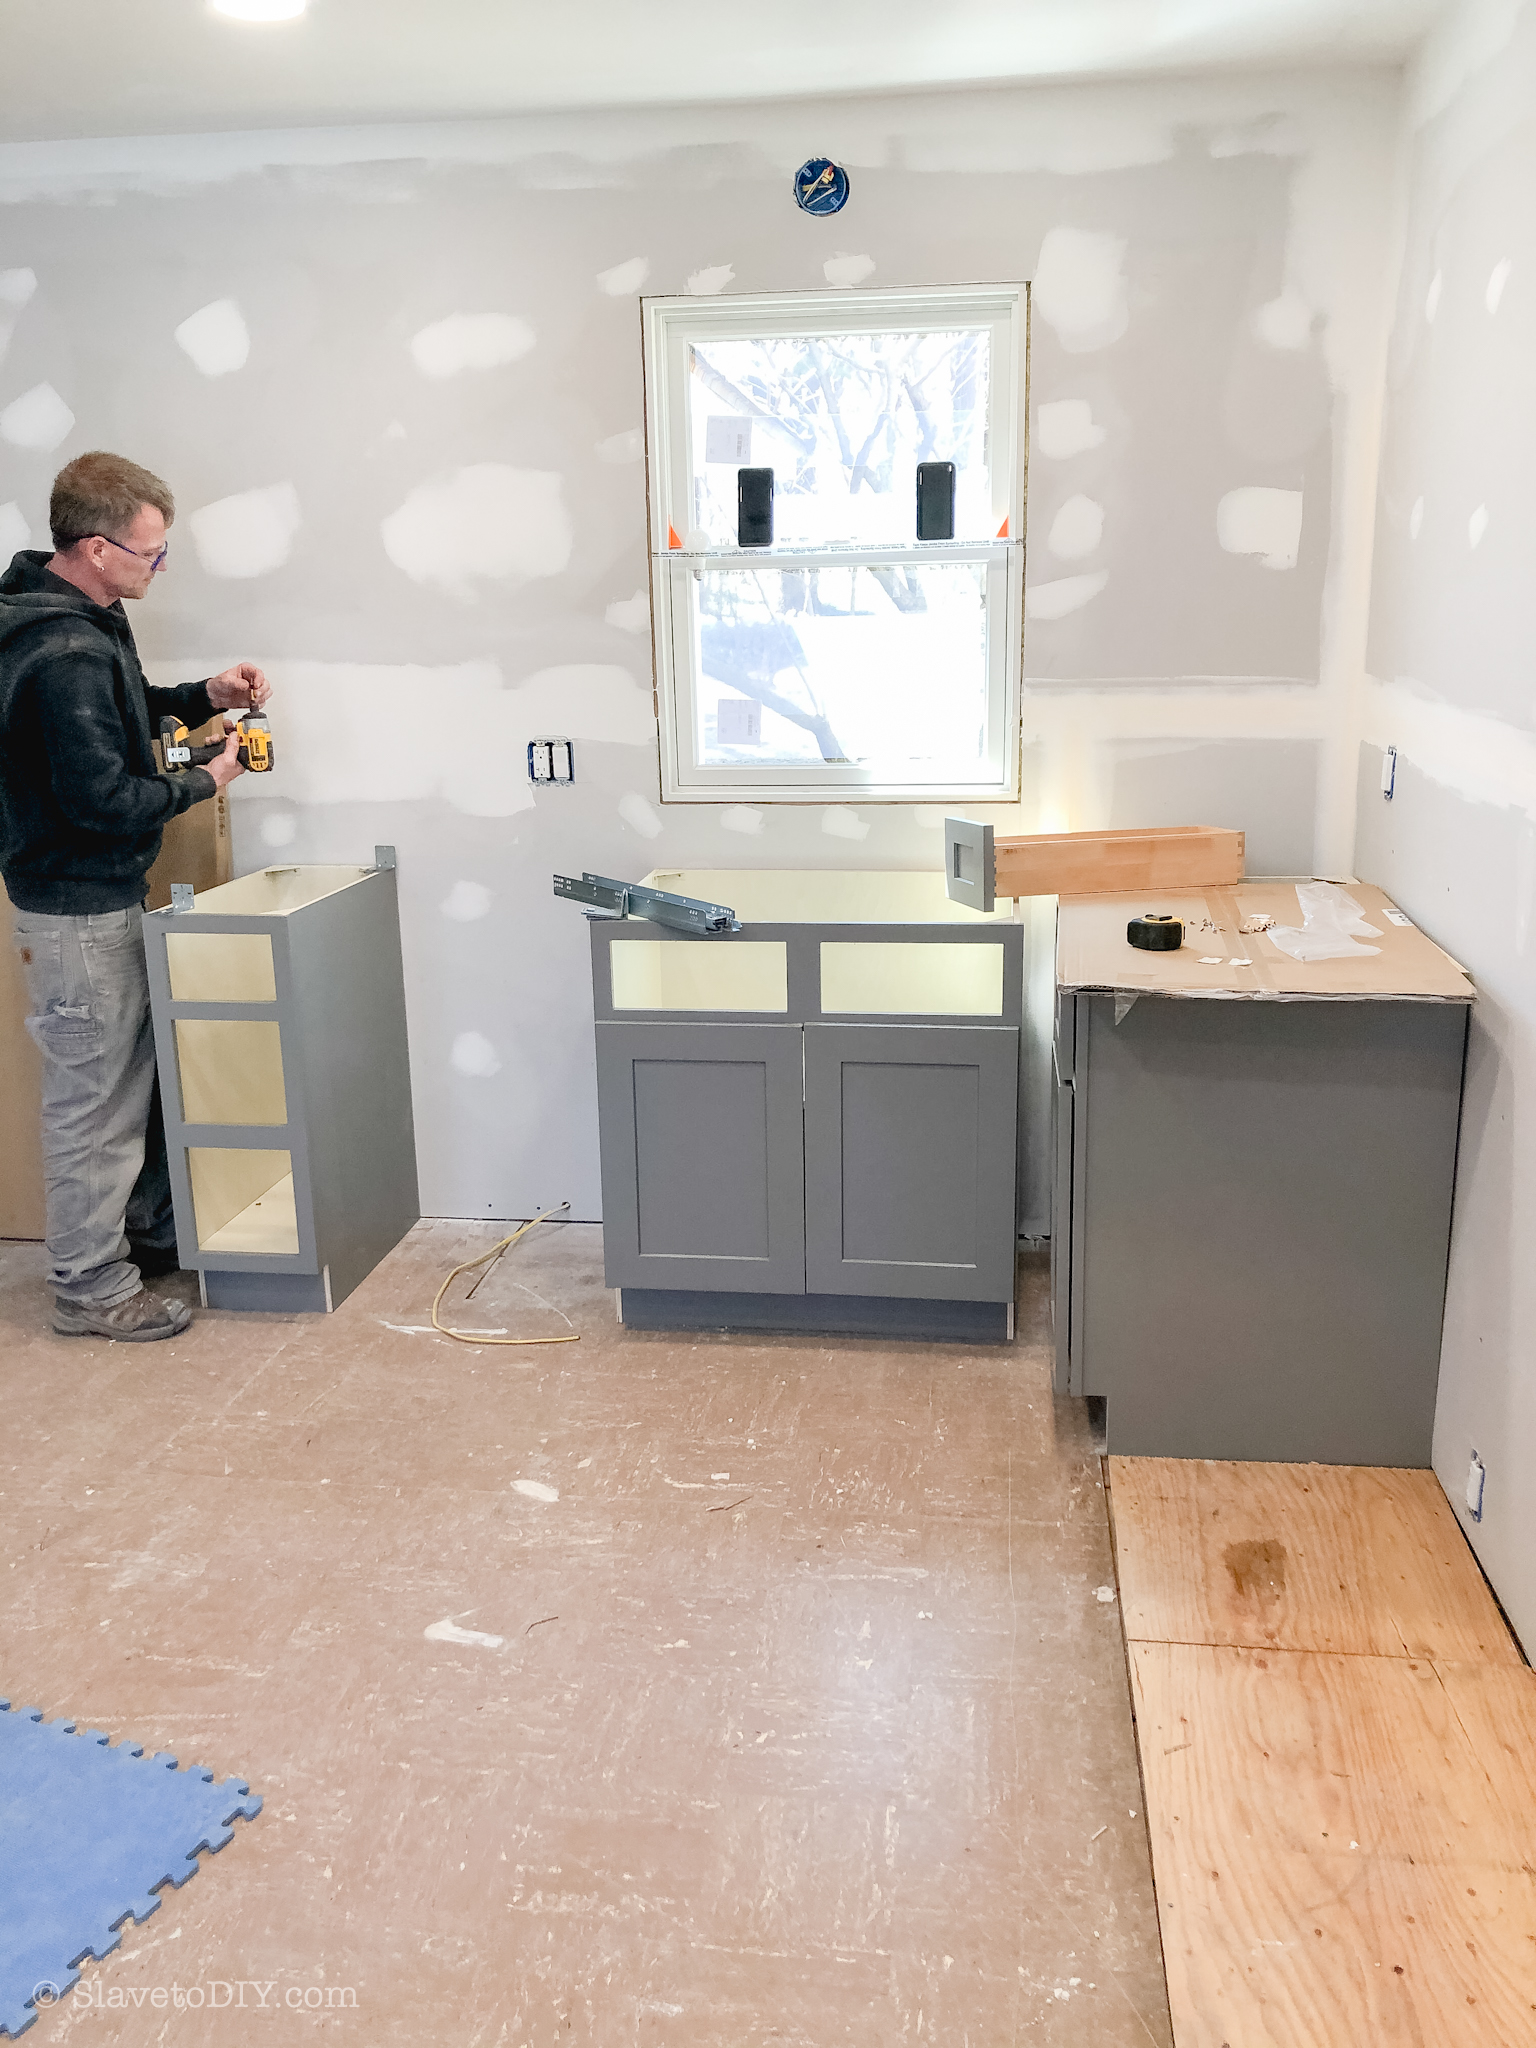
Installation
My brother quickly assembled all of the cabinets and started installing them. He was able to do this without me there, because he had a detailed layout guide from Lily Ann. With exact measurements he was able to do the entire installation.
Remember these?
How To Measure For, Design, Order, and Install Your Dream Kitchen From RTA Cabinets: Lily Ann Cabinets Design Files
How To Measure For, Design, Order, and Install Your Dream Kitchen From RTA Cabinets: Lily Ann Cabinets Design Files
How To Measure For, Design, Order, and Install Your Dream Kitchen From RTA Cabinets: Lily Ann Cabinets Design Files
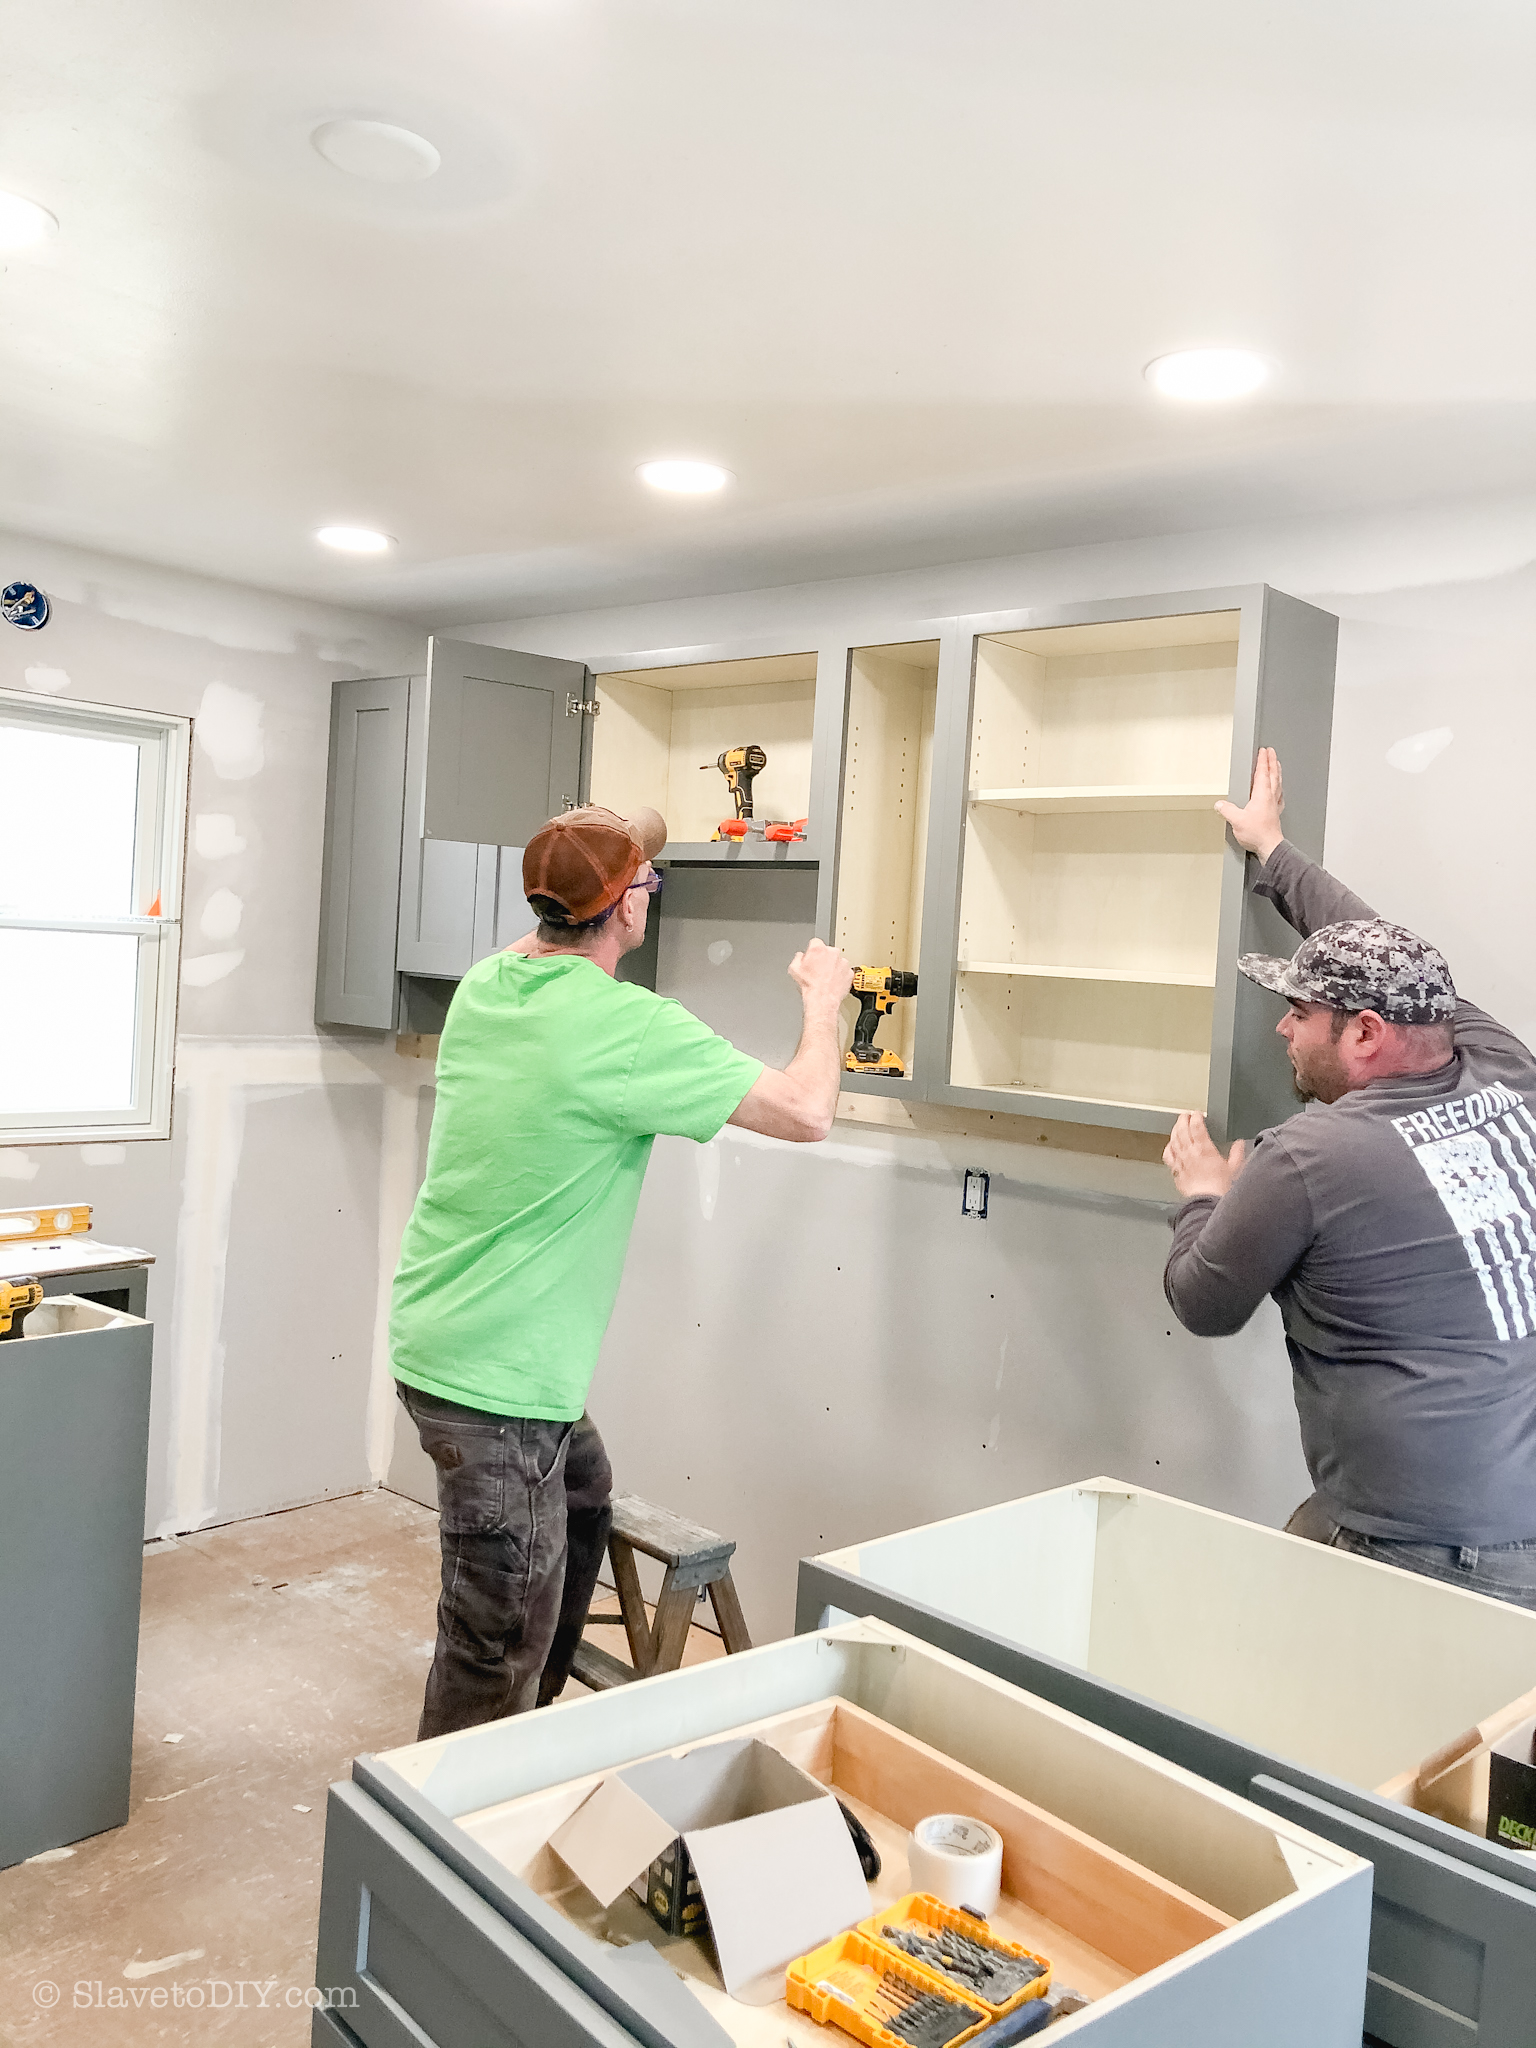
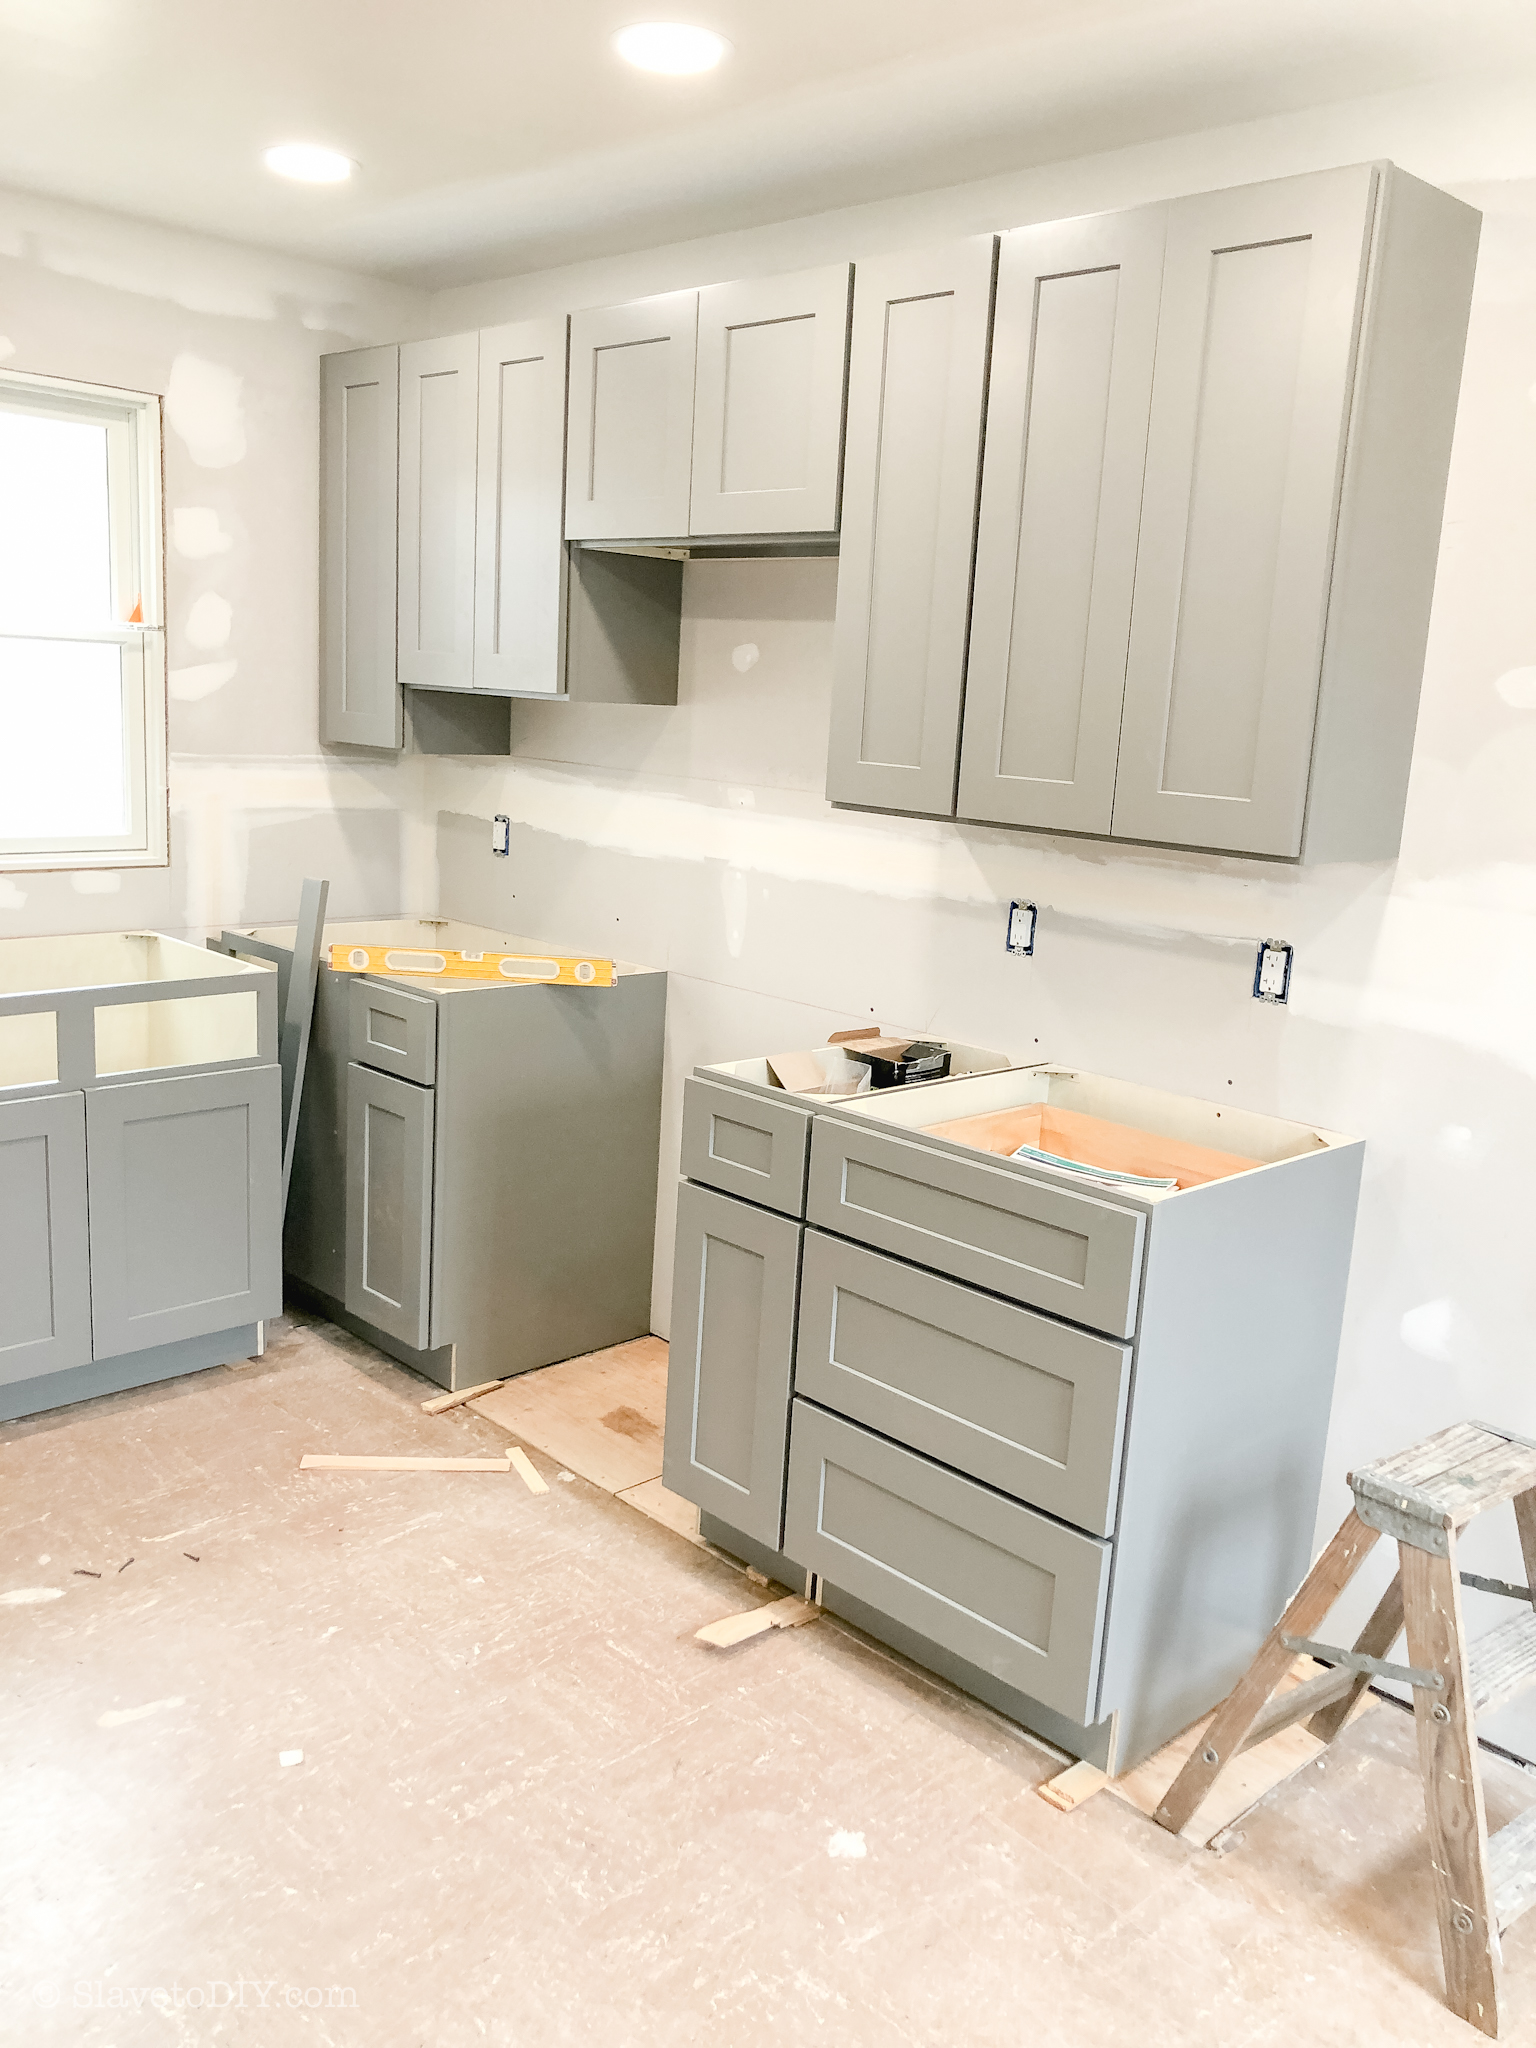
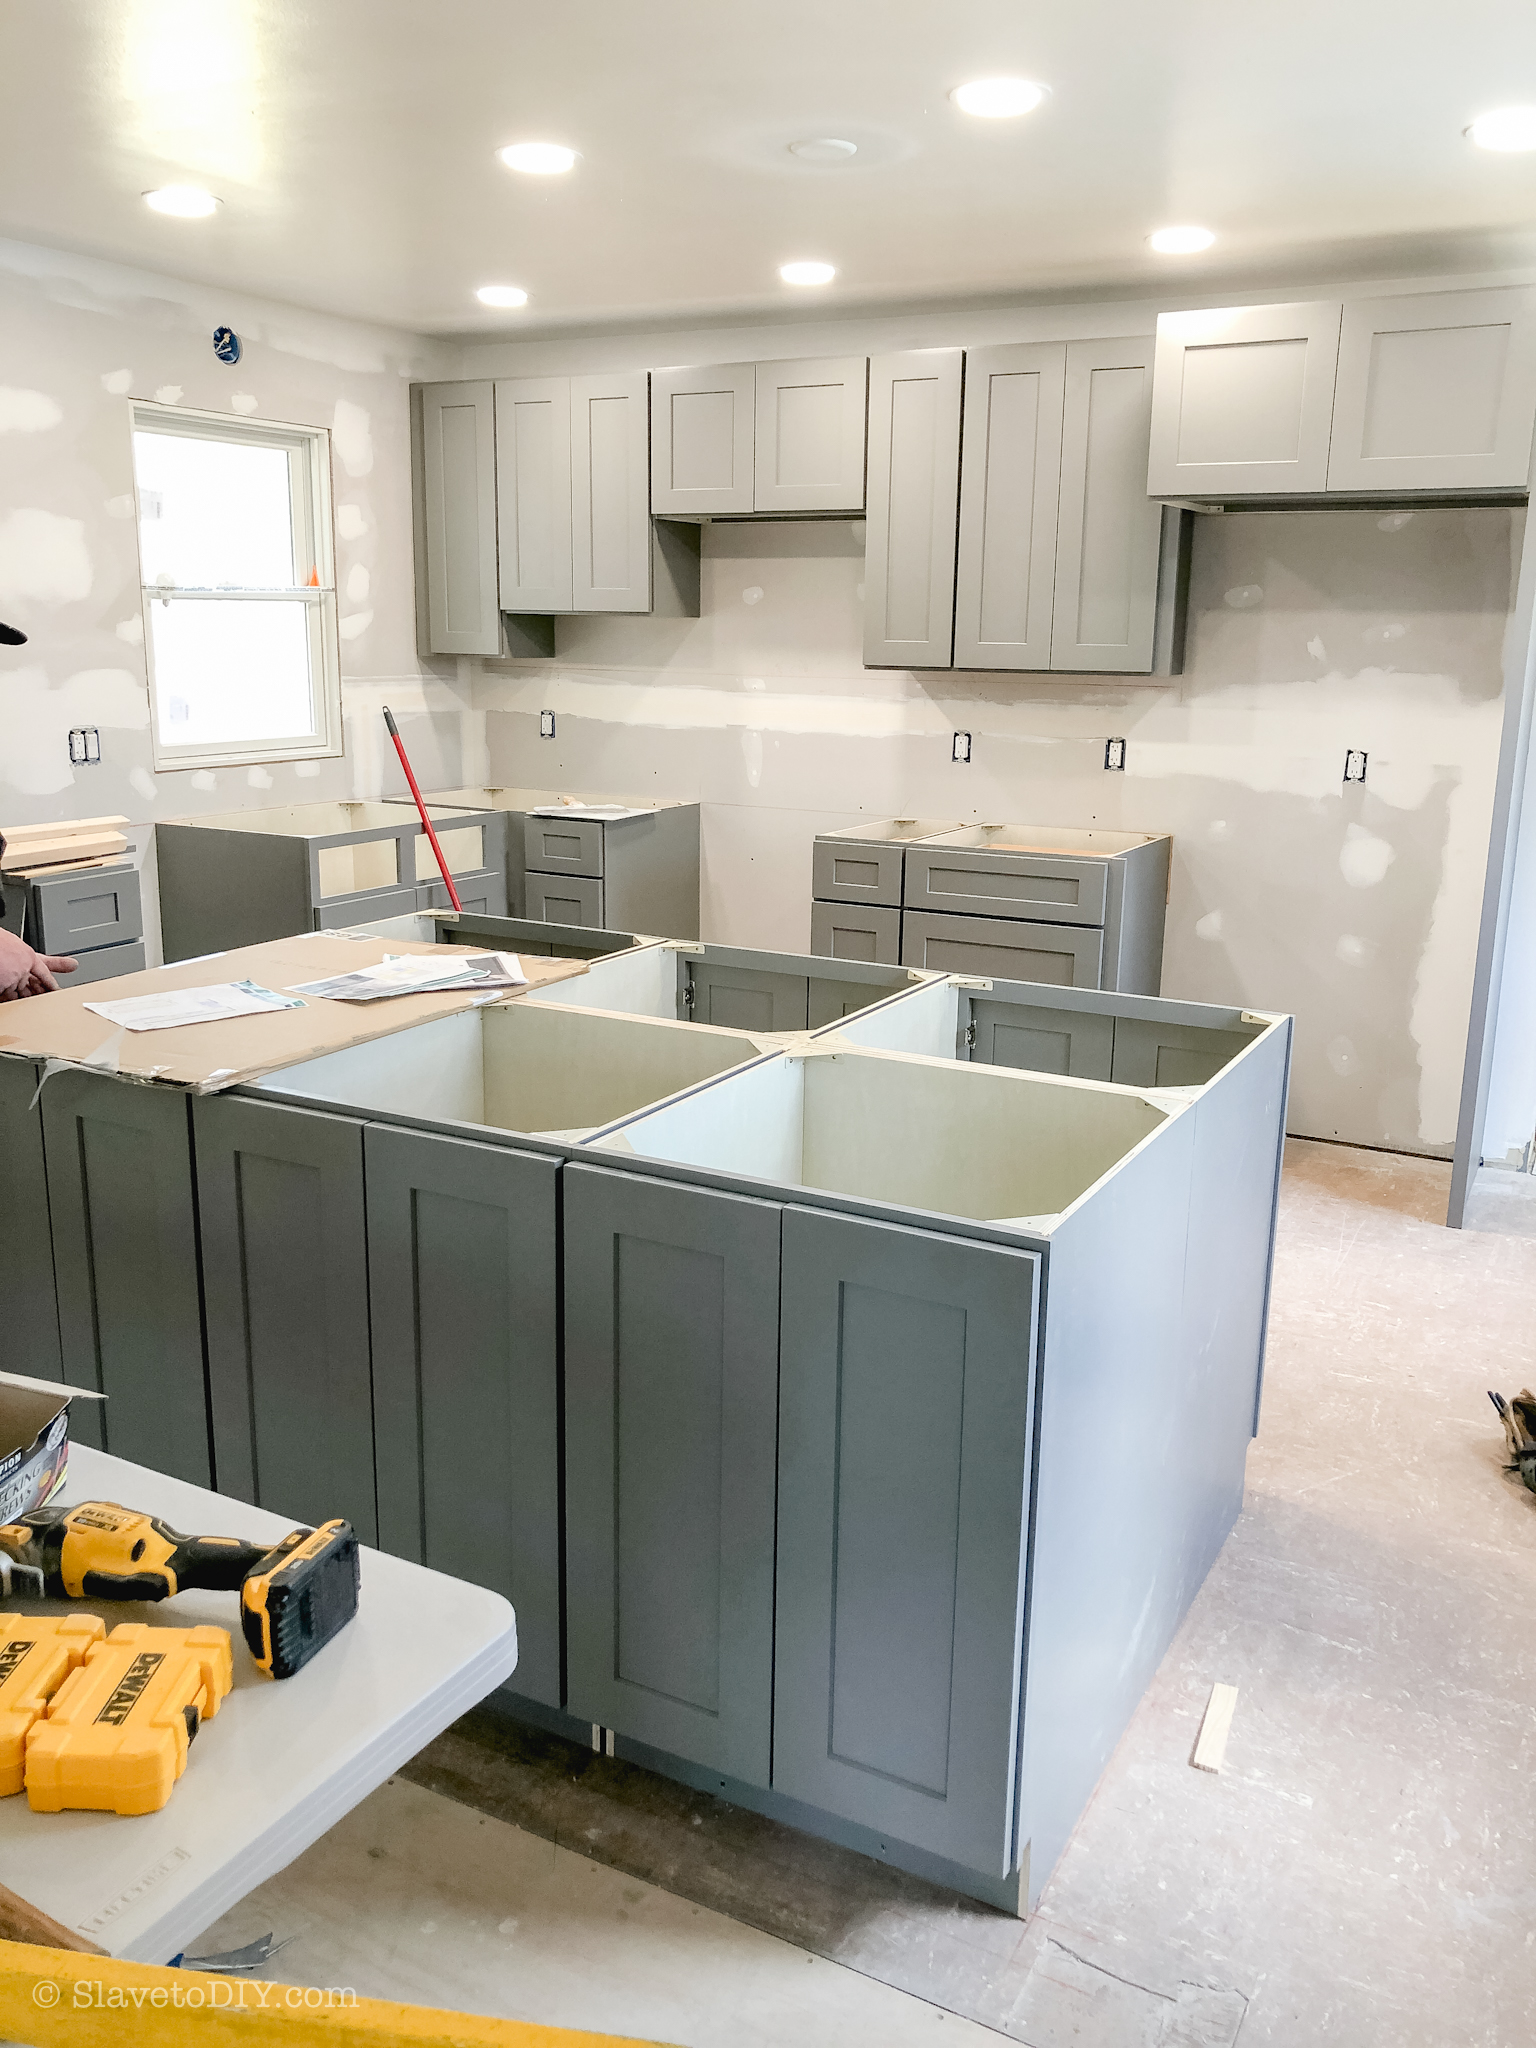
Following the detailed layout the designer provided: they started tying them into the walls and the kitchen was really starting to take shape!
How To Measure For, Design, Order, and Install Your Dream Kitchen From RTA Cabinets: RTA Cabinet Installation
How To Measure For, Design, Order, and Install Your Dream Kitchen From RTA Cabinets: RTA Cabinet Installation
How To Measure For, Design, Order, and Install Your Dream Kitchen From RTA Cabinets: RTA Cabinet Installation
How To Measure For, Design, Order, and Install Your Dream Kitchen From RTA Cabinets: RTA Cabinet Installation
How To Measure For, Design, Order, and Install Your Dream Kitchen From RTA Cabinets: RTA Cabinet Installation
How To Measure For, Design, Order, and Install Your Dream Kitchen From RTA Cabinets: RTA Cabinet Installation
Using the design, he had the electrician put in all new can lights, outlets, and receptacles for the other fixtures.
The Rest Of The Kitchen Installation
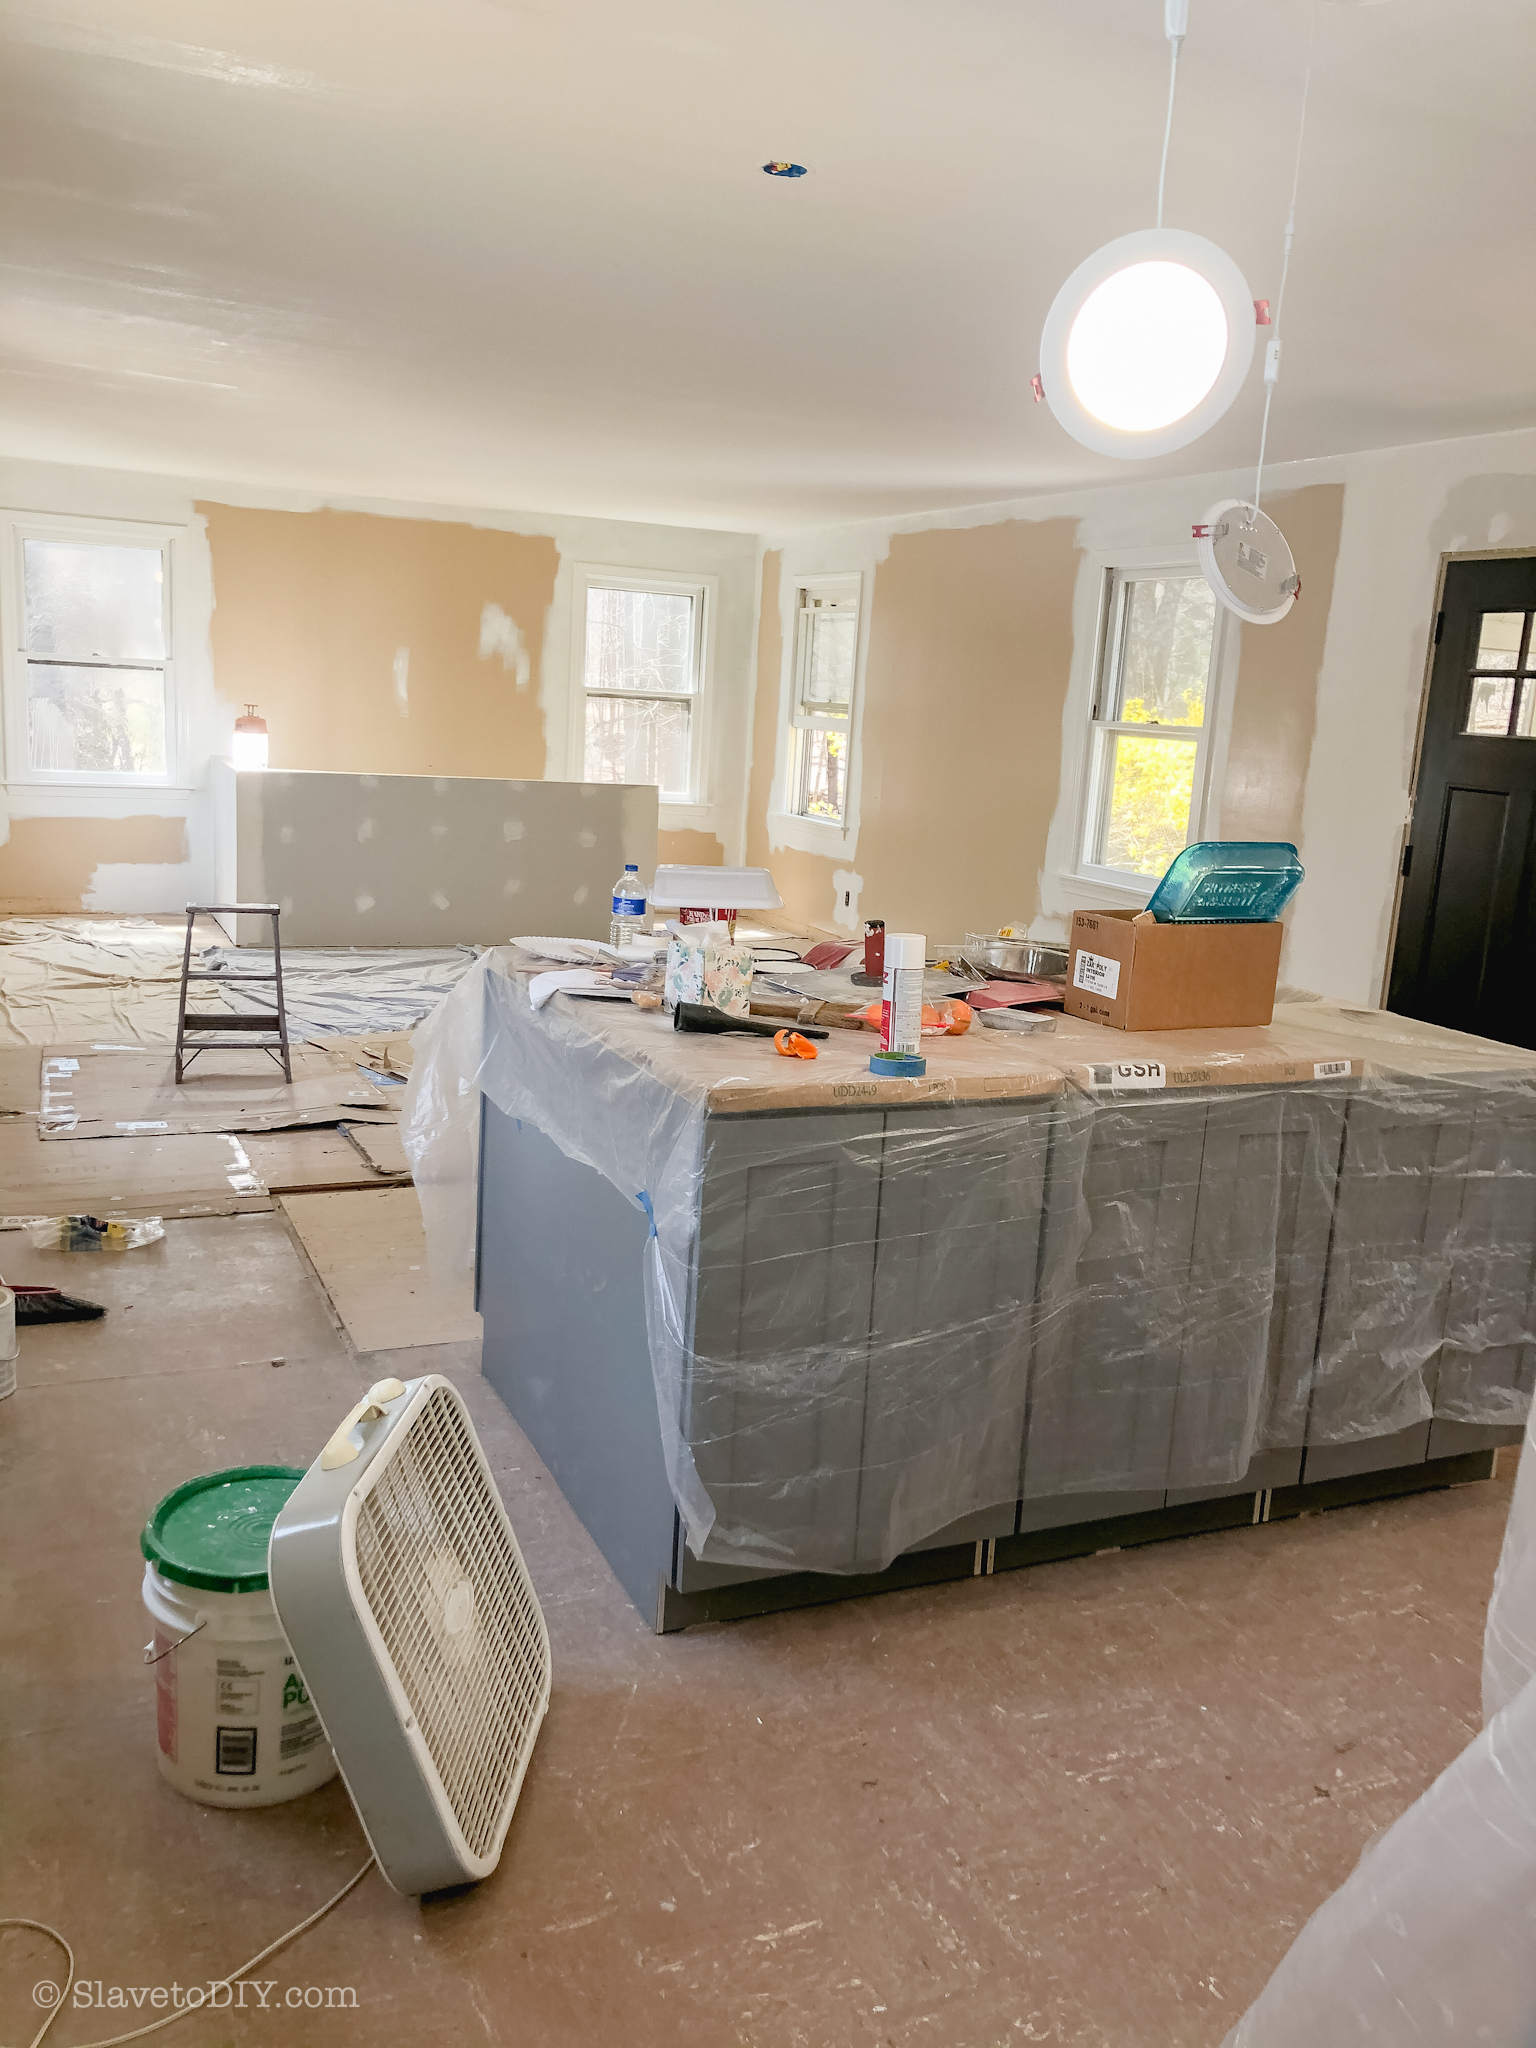
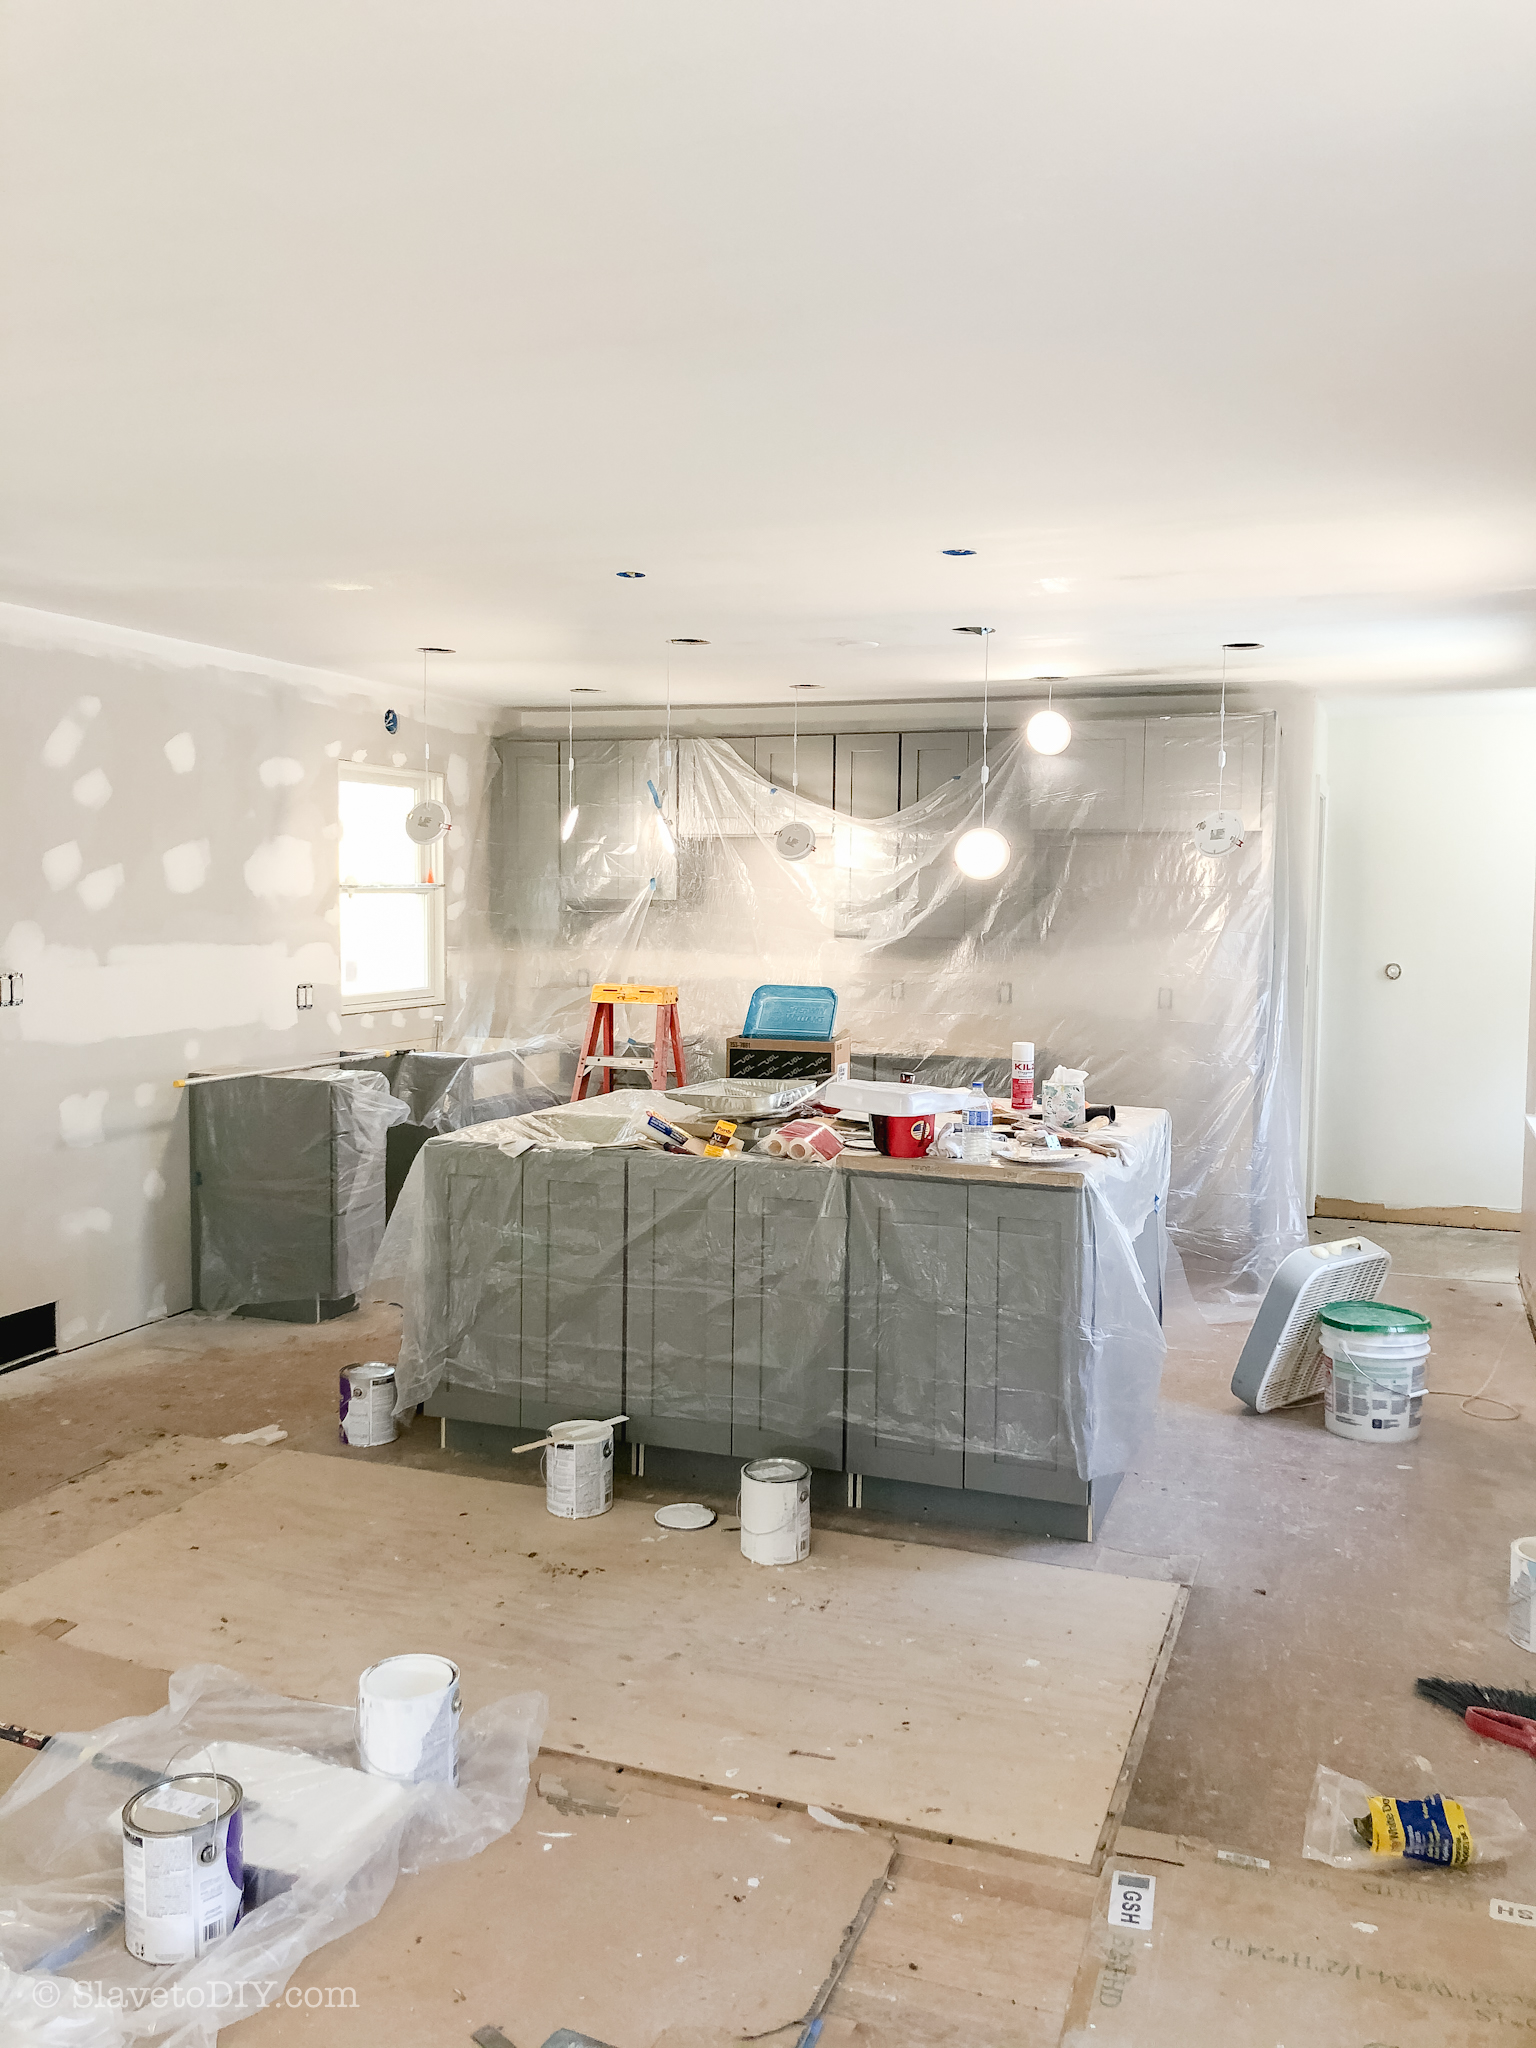
My sister immediately got going on painting in the main living spaces, including the kitchen. She very carefully covered the cabinets and went to work.
How To Measure For, Design, Order, and Install Your Dream Kitchen From RTA Cabinets: RTA Cabinet Installation
How To Measure For, Design, Order, and Install Your Dream Kitchen From RTA Cabinets: RTA Cabinet Installation
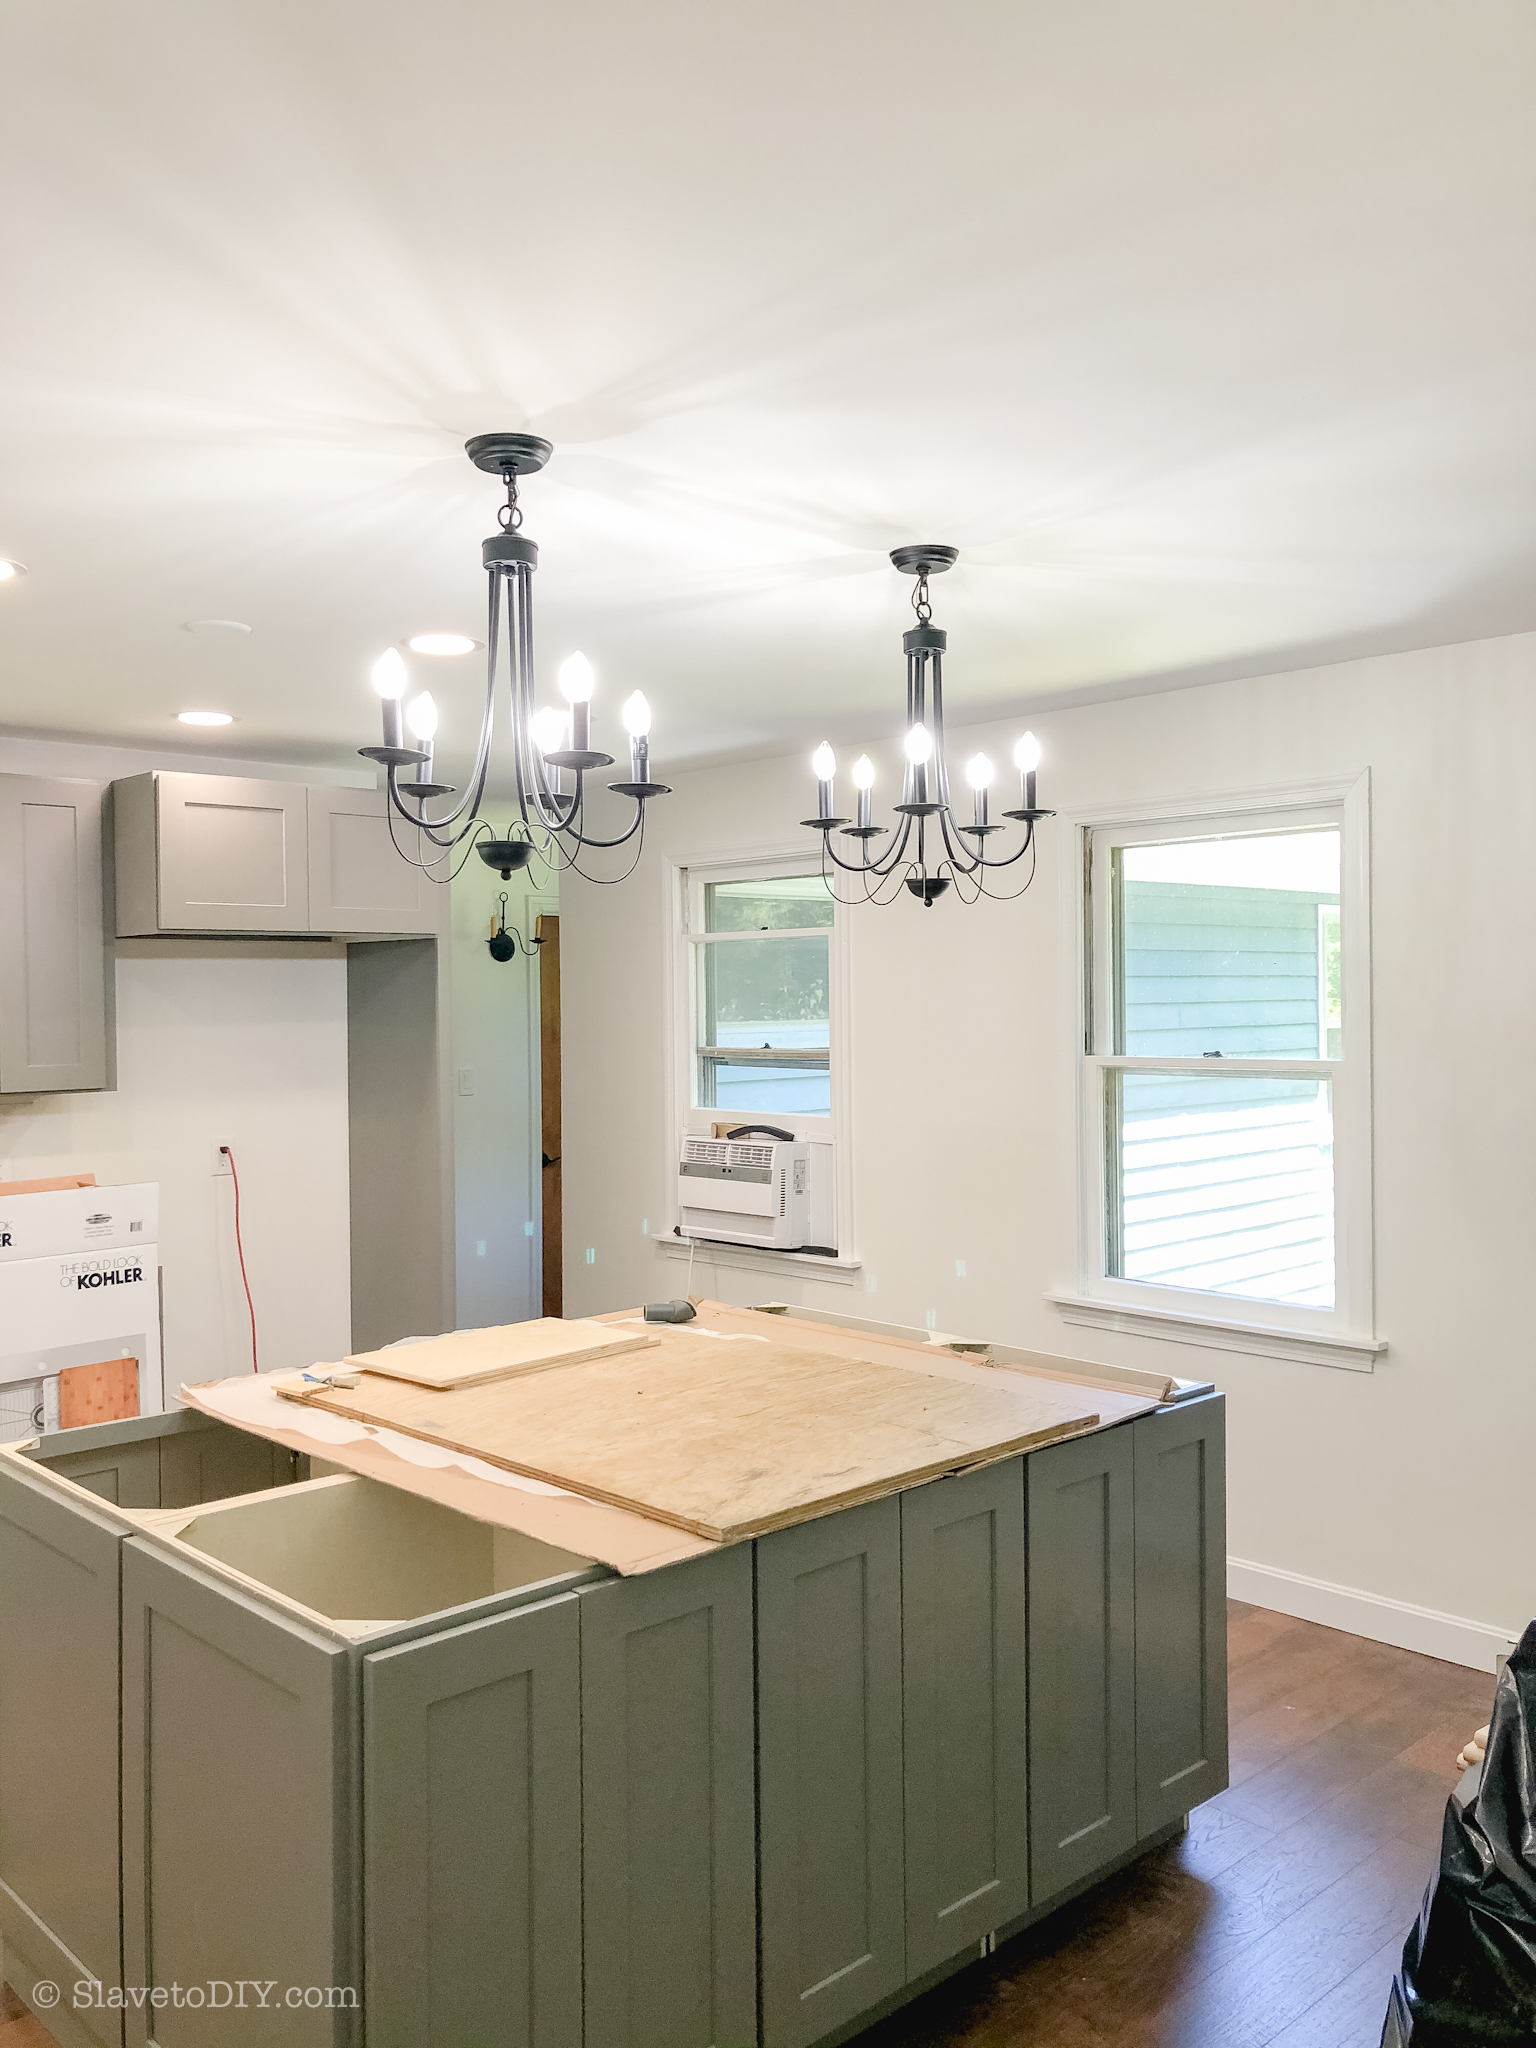
Later, the floors went down and lights went up. My brother also installed the decorative panels on the sides of the cabinets so that the countertop people could measure accurately.
How To Measure For, Design, Order, and Install Your Dream Kitchen From RTA Cabinets: Light fixture installation
How To Measure For, Design, Order, and Install Your Dream Kitchen From RTA Cabinets: RTA Cabinet Installation
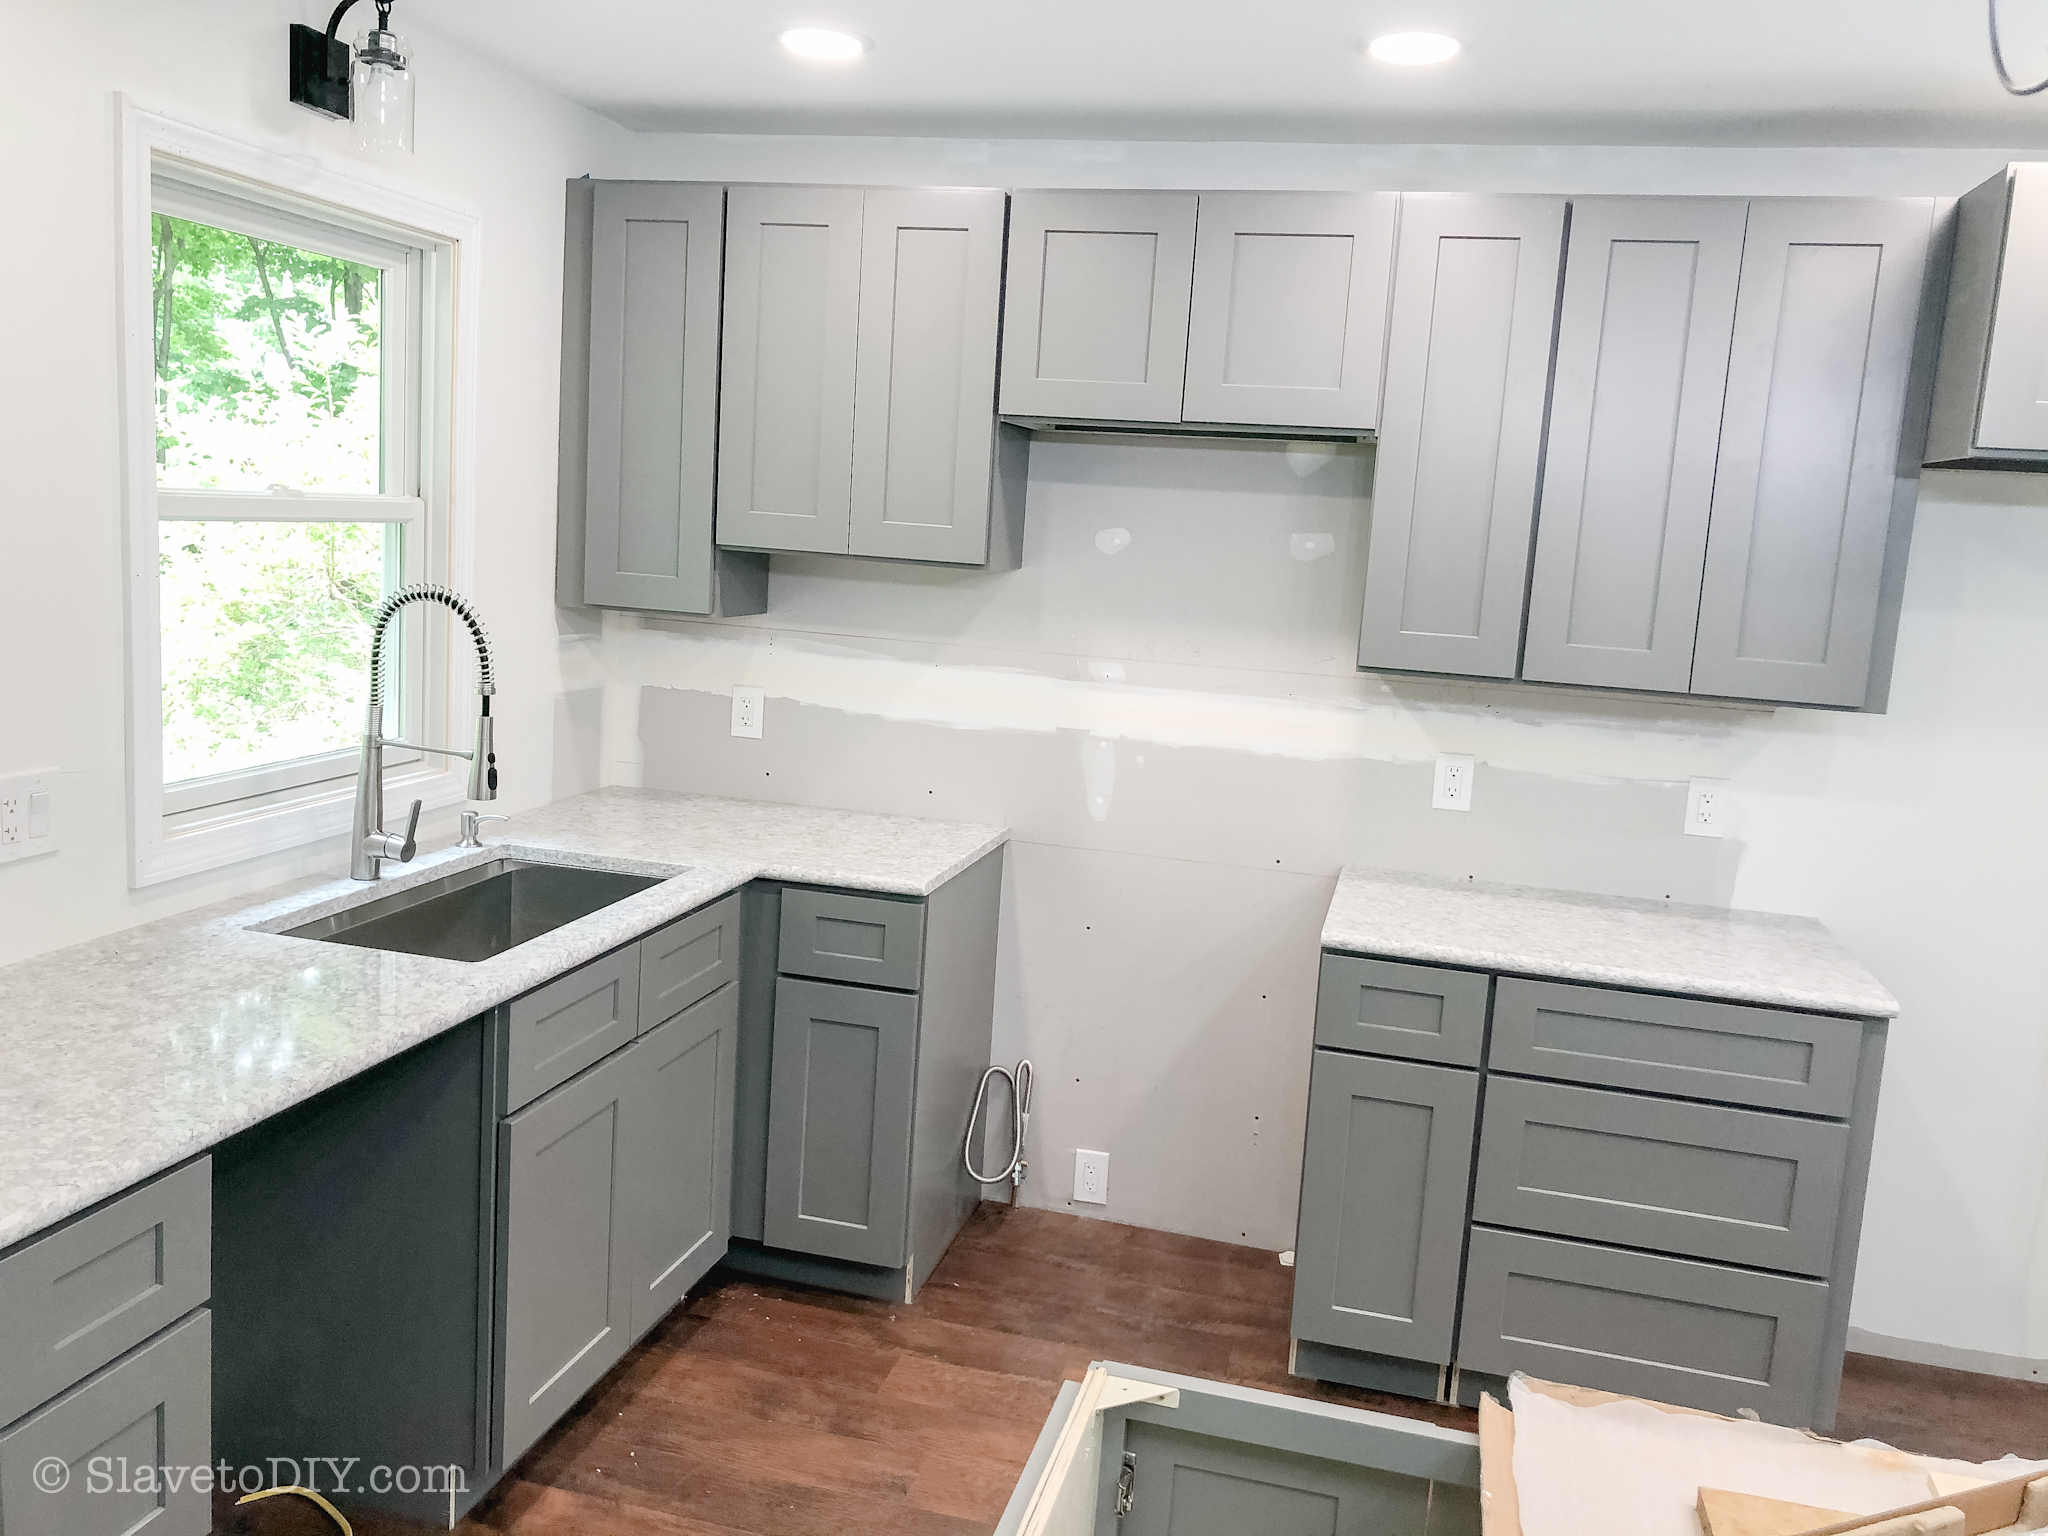
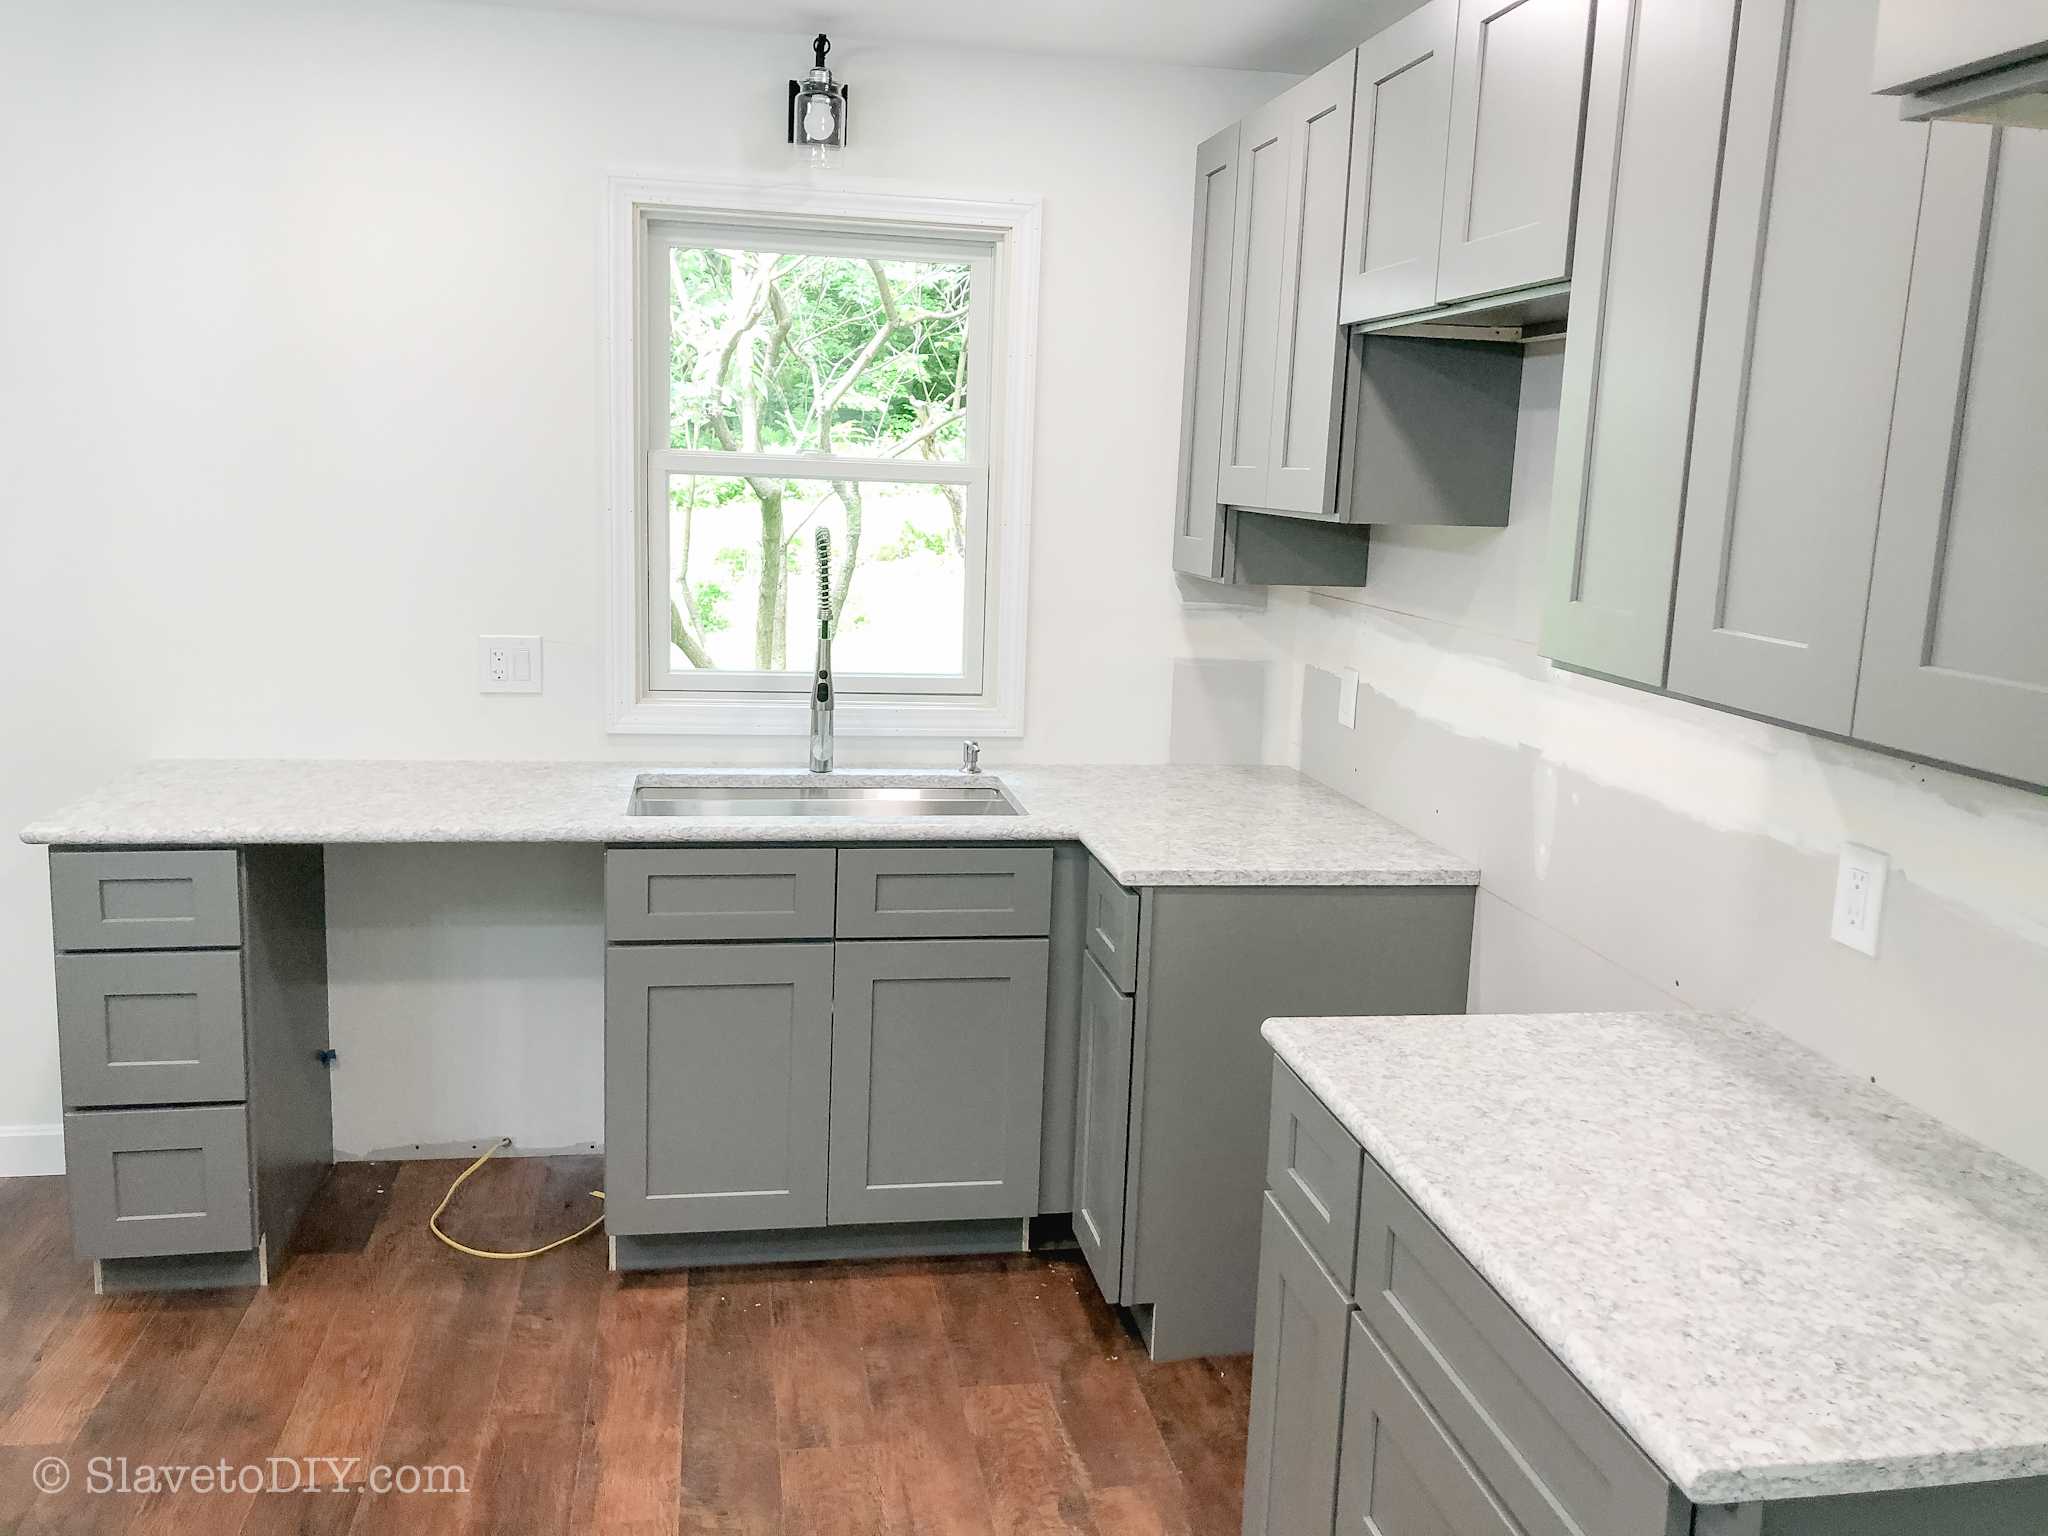
Next, the countertops went in (except for the kitchen island, which my brother had wood curing for).
How To Measure For, Design, Order, and Install Your Dream Kitchen From RTA Cabinets: Countertop installation
How To Measure For, Design, Order, and Install Your Dream Kitchen From RTA Cabinets: Countertop Installation
How To Measure For, Design, Order, and Install Your Dream Kitchen From RTA Cabinets: Countertop Installation
They were finally ready to bring the appliances up and it was amazing how it ALREADY looked, even though it wasn’t finished. And we had a little problem coming up… We were supposed to do the “reveal” on my mom’s birthday in July. But, we were still unable to travel north because of COVID.
So, my sister and brother did a mini-reveal to show her the progress, knowing that we would be up soon to finish the space that still needed: molding, an antique for a spice rack, the stove backsplash, the backsplash above the counter, the cabinet hardware, the hanging herb garden, and the open shelving to the left of the sink. But, the before was still pretty awesome and my mom was blown away. Here’s what it looked like on her reveal day with my brother’s custom island top he manufactured from wood on his property and his wood mill:
And who doesn’t love a good reveal video? Warning: it makes me weepy every time.
What do you think? Would you use RTA cabinets for your renovation? Let us know in the comments below!
Ready to get started? My readers can use the code SDIY2018 at checkout to get 5% off your Lily Ann Cabinets order!
Thanks again to the team at Lily Ann Cabinets for making our build possible, to my sister, brother, and brother-in-law in Vermont for all of their hard work, and to my favorite Rainman for doing working vacations with me without a single complaint!
Cheers!
*Legal stuff:
I am honest about my experiences with different products and write because I enjoy it. I do however, have the opportunity to earn money for my writing, also.
Slavetodiy.com is a participant in the Amazon Services LLC Associates Program, an affiliate advertising program designed to provide a means for sites to earn advertising fees by advertising and linking to amazon.com. Amazon offers a small commission on products sold through their affiliate links. Each of your purchases via our Amazon affiliation links supports our cause at no additional cost to you.
If a blogger links to an Amazon product (with a special code for affiliates embedded in the link), and a reader places an item in their “shopping cart” through that link within 24 hours of clicking the link, the blogger gets a small percentage of the sale. Amazon links are not “pay per click.” If you click on the product link and stay around Amazon and purchase something else, however, I will get a commission on that sale.
Slavetodiy.com is also a VigLink affiliate advertiser which works similarly.
I have been wondering about using a paint sprayer for years now, because of course I see all these gorgeous finishes on people’s cabinets, furniture, and small paint projects. So, I did a little research, and finally settled on a small project paint gun that is inexpensive, works really well, and is very simple to set up and clean up. Here is the process and what we used to get outstanding results!
*This post may contain affiliate links. Please see full disclosure at the end of the post.
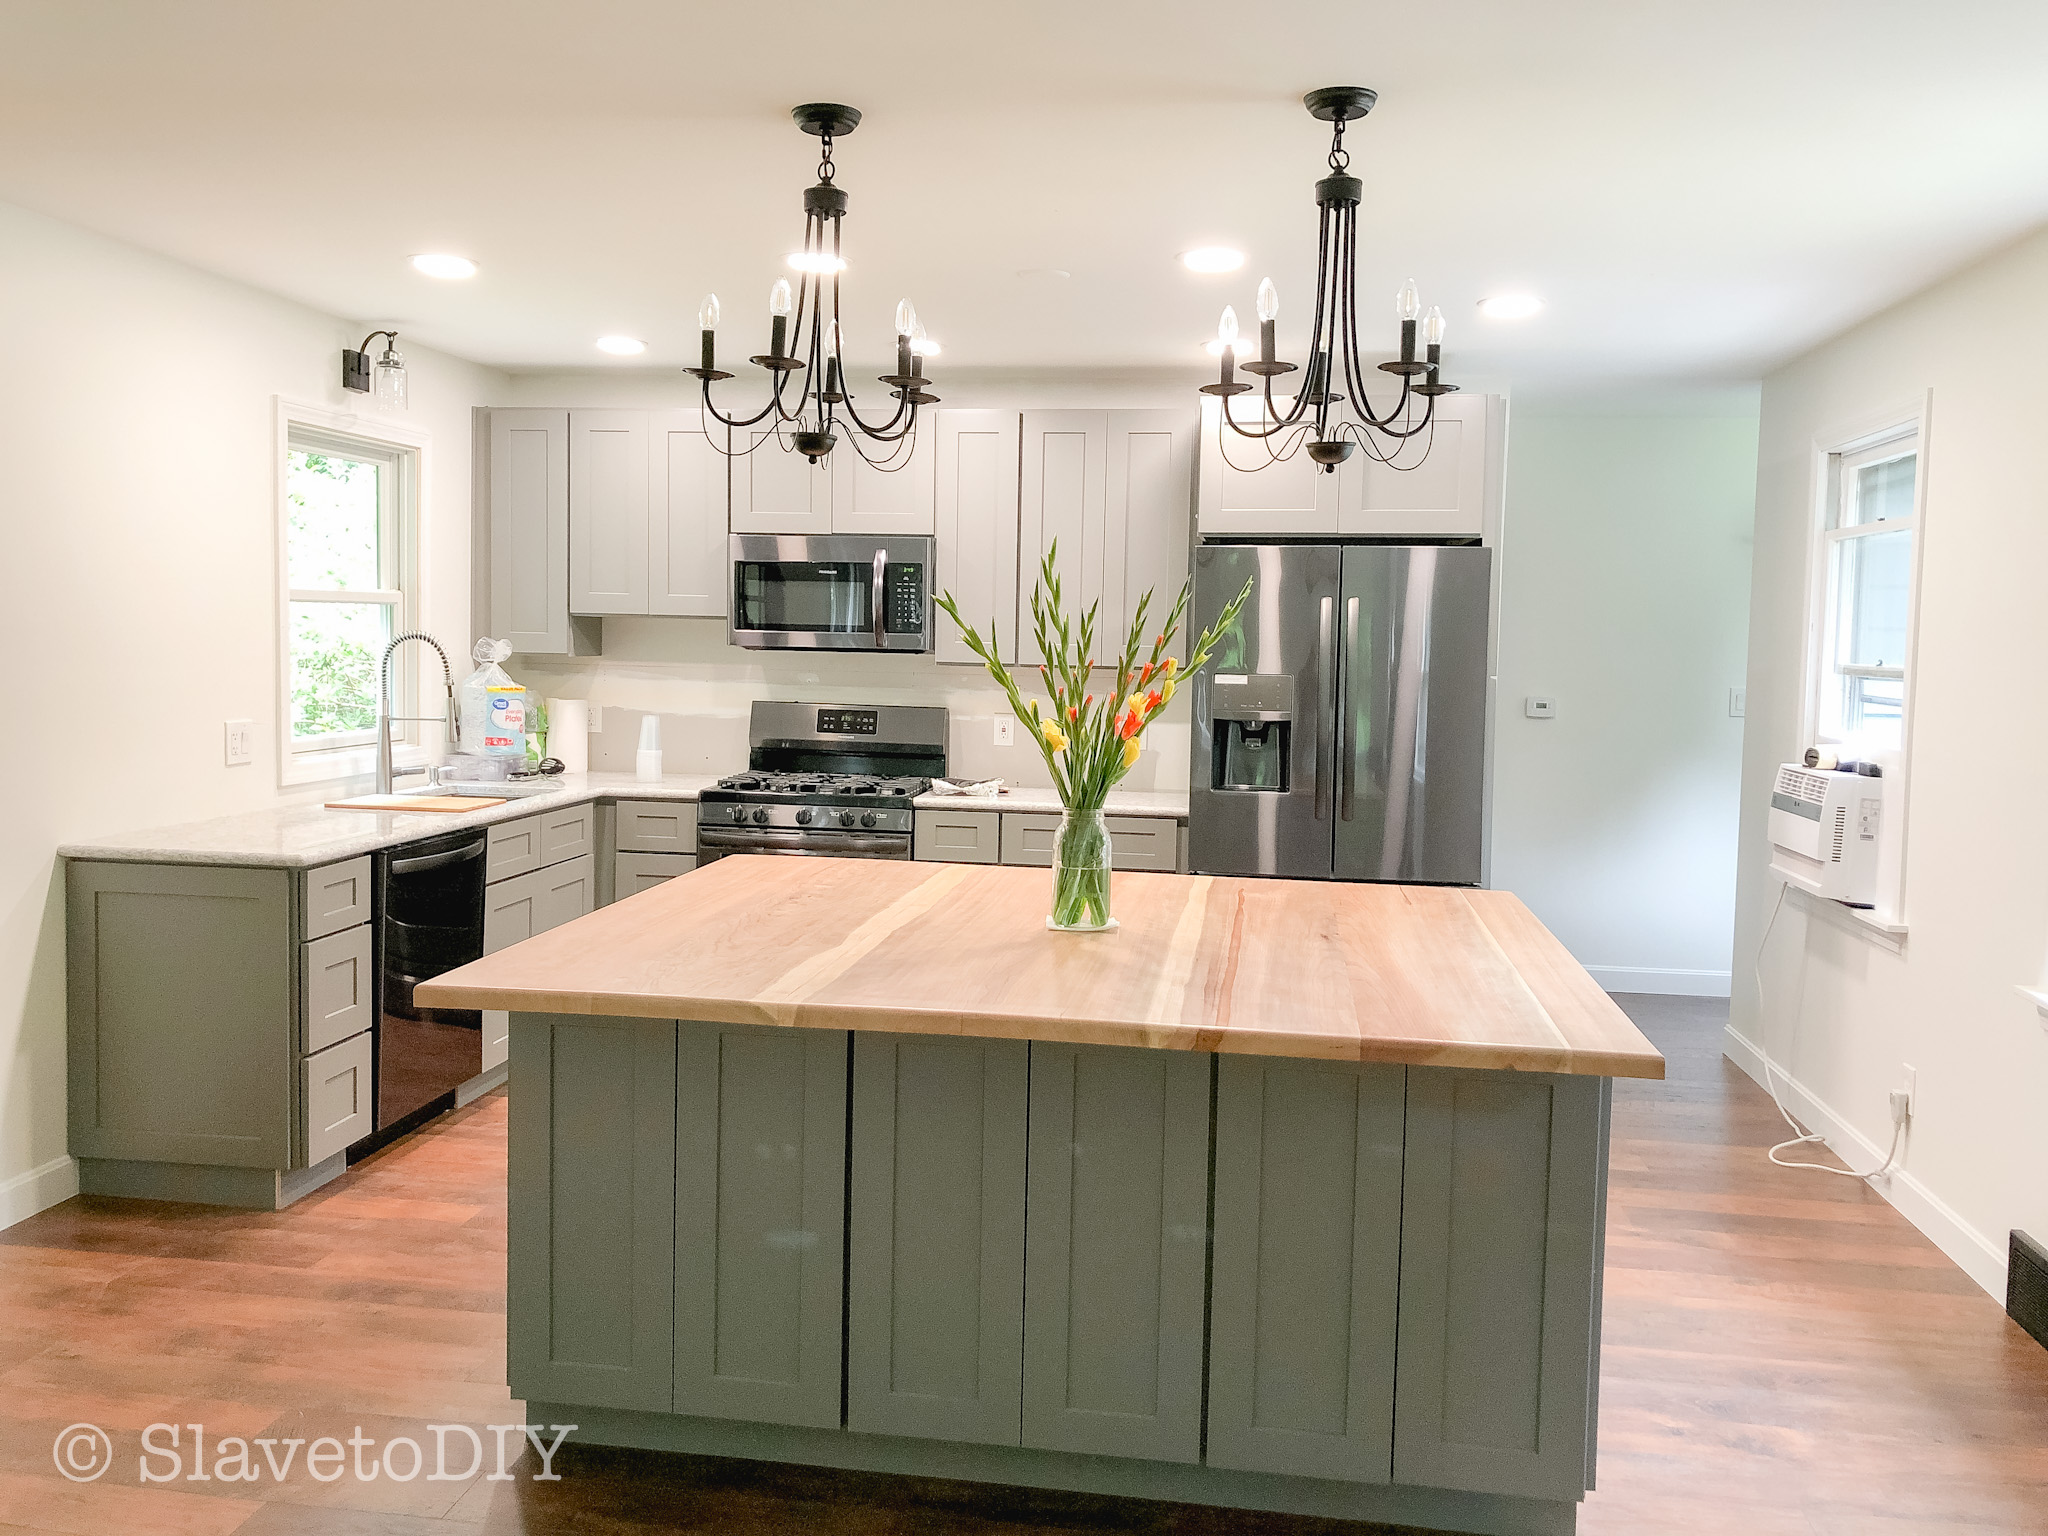
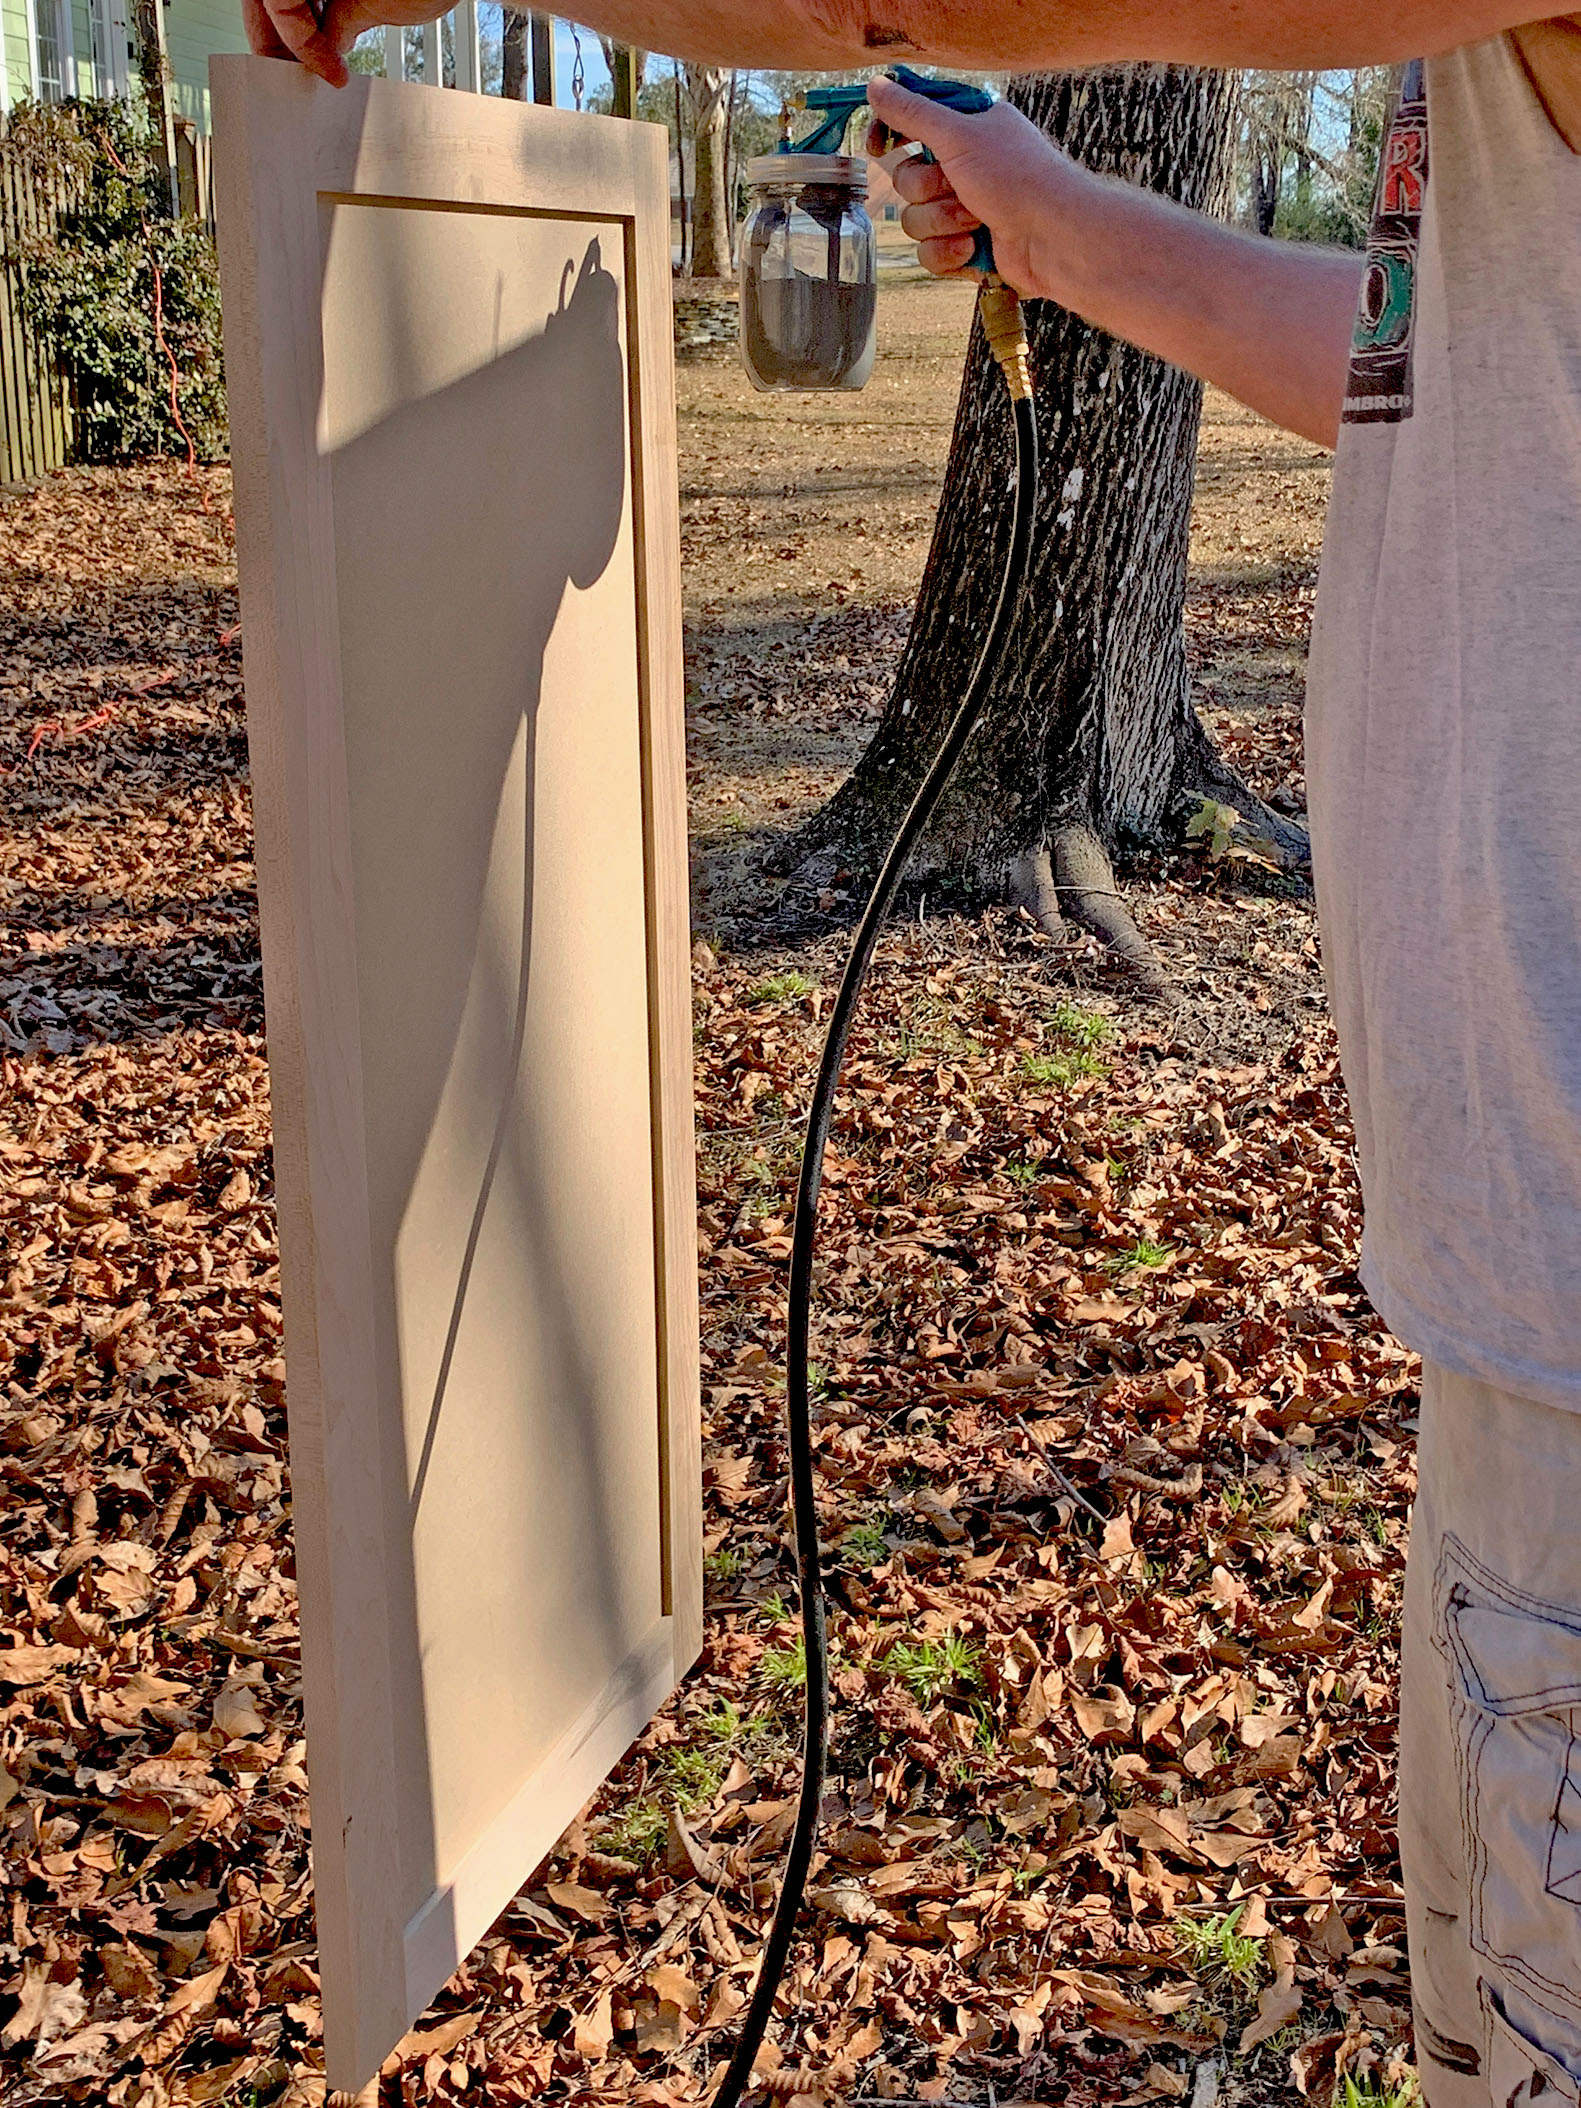
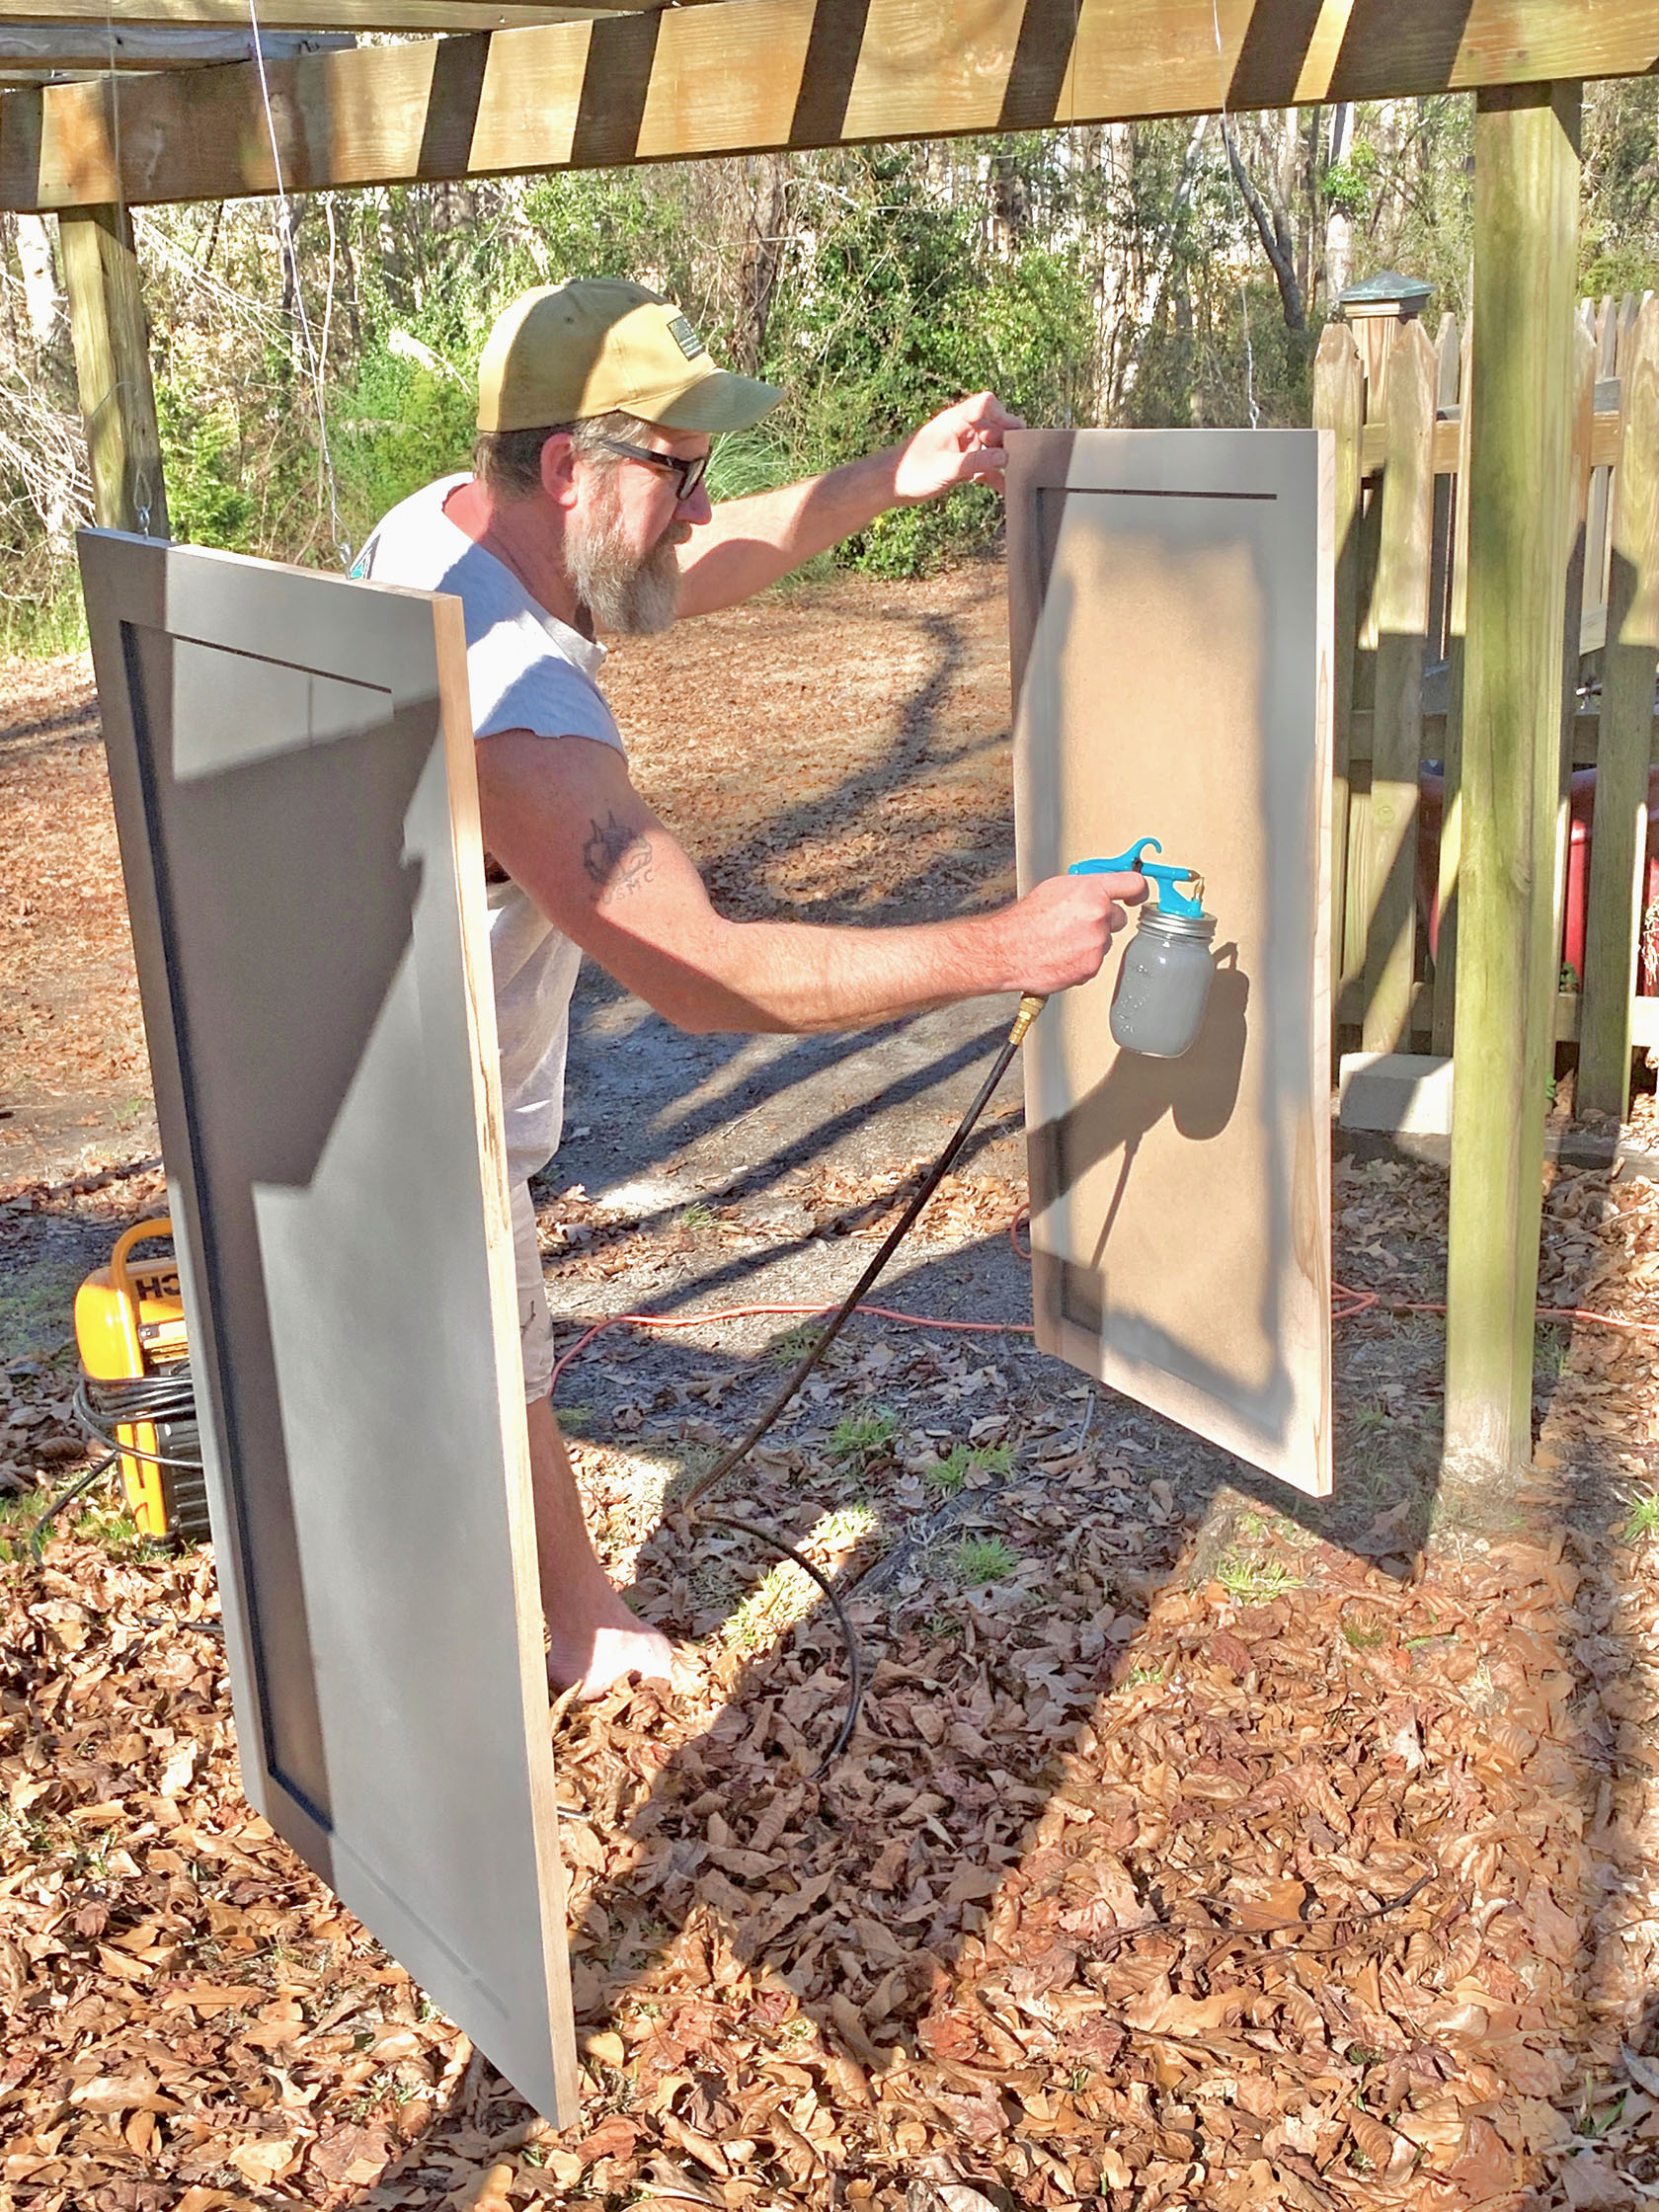
The first step is having a place to paint. Now these doors were unattached and I REALLY didn’t want to do prepwork inside to paint (especially because of the cats). So, we waited for a day when the wind was relatively still, and set up a clean work surface on the ground and screwed in eyelet screws into the top of the cabinet doors. Then we wired them to an outdoor arbor so they were suspended and accessible.
What you’ll need:
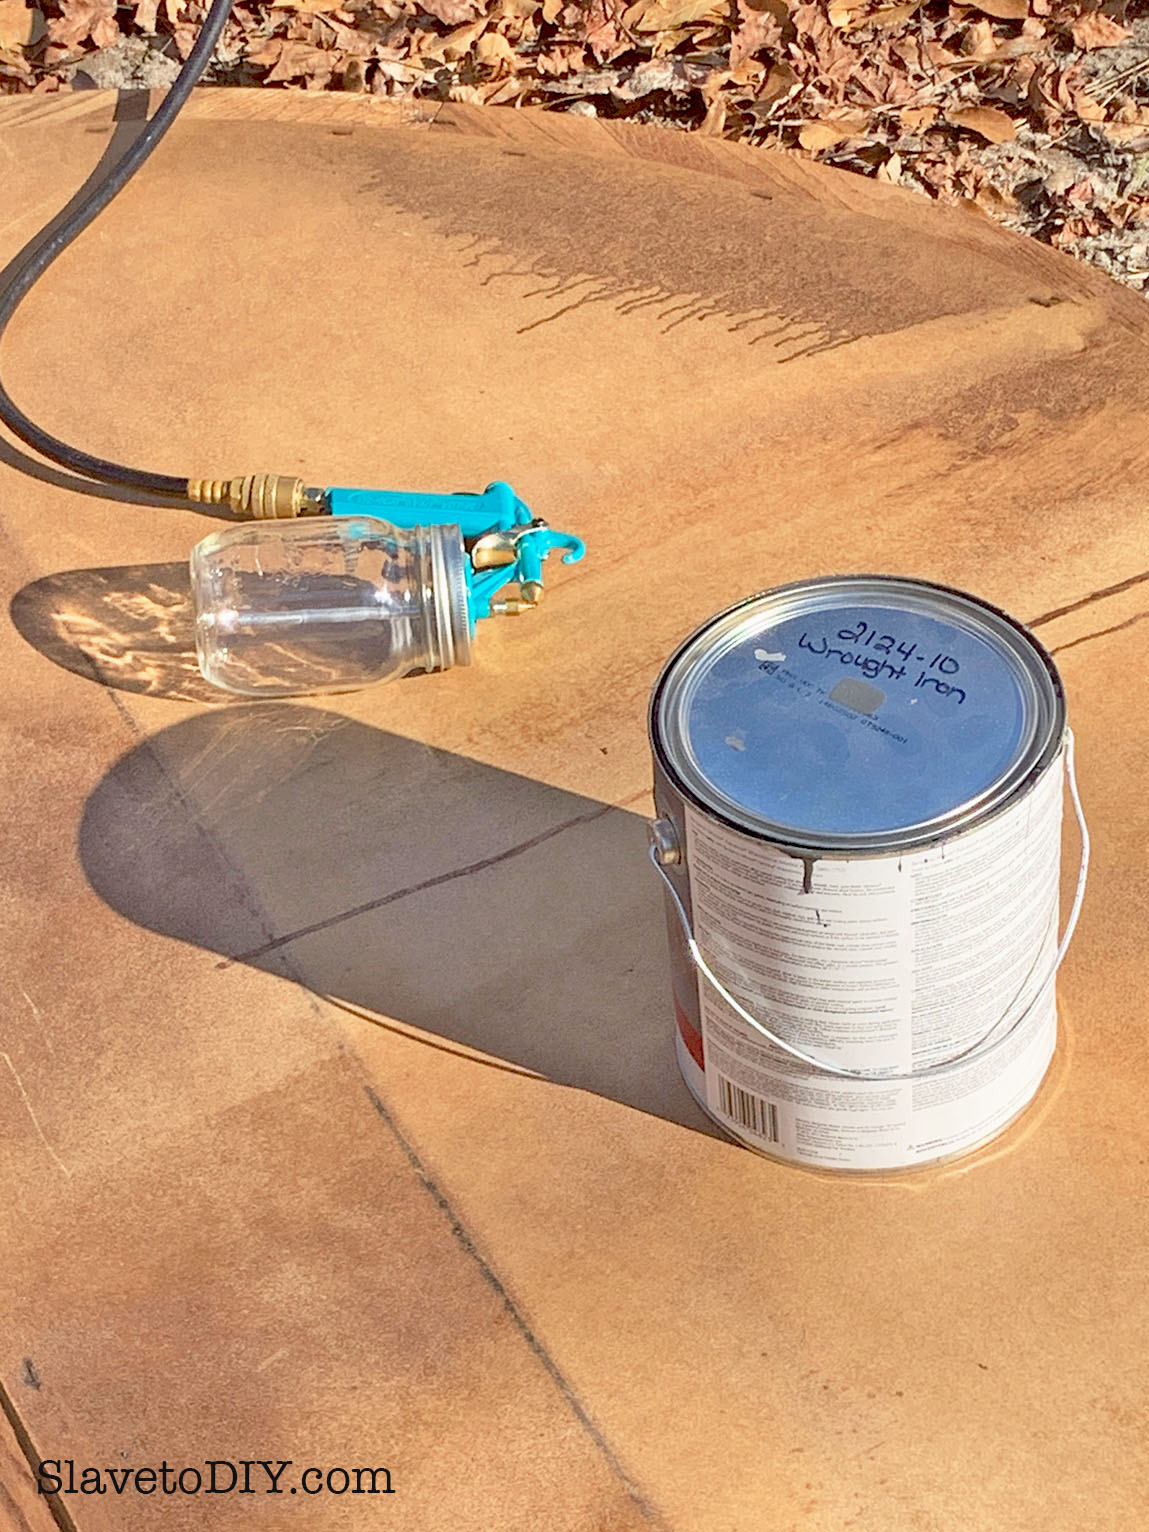
A paint gun: we used the Critter Paint Gun, (great design, very simple, and the best news: CHEAP!).
Paint straining bags: you can get these for a buck and change at hardware stores or buy them online: Paint Strainer Bags.
A compressor, hose, and basic attachments. We have a large Dewalt Compressor (which I bought apparently thinking we’d be framing walls and working in a commercial building environment) but we used the smaller and much more easy to wield Bostich Air Compressor for this project).
First we dry fitted everything on the gun to make sure it worked with the compressor hoses.
How To Use An Inexpensive Paint Sprayer and Get Outstanding Results
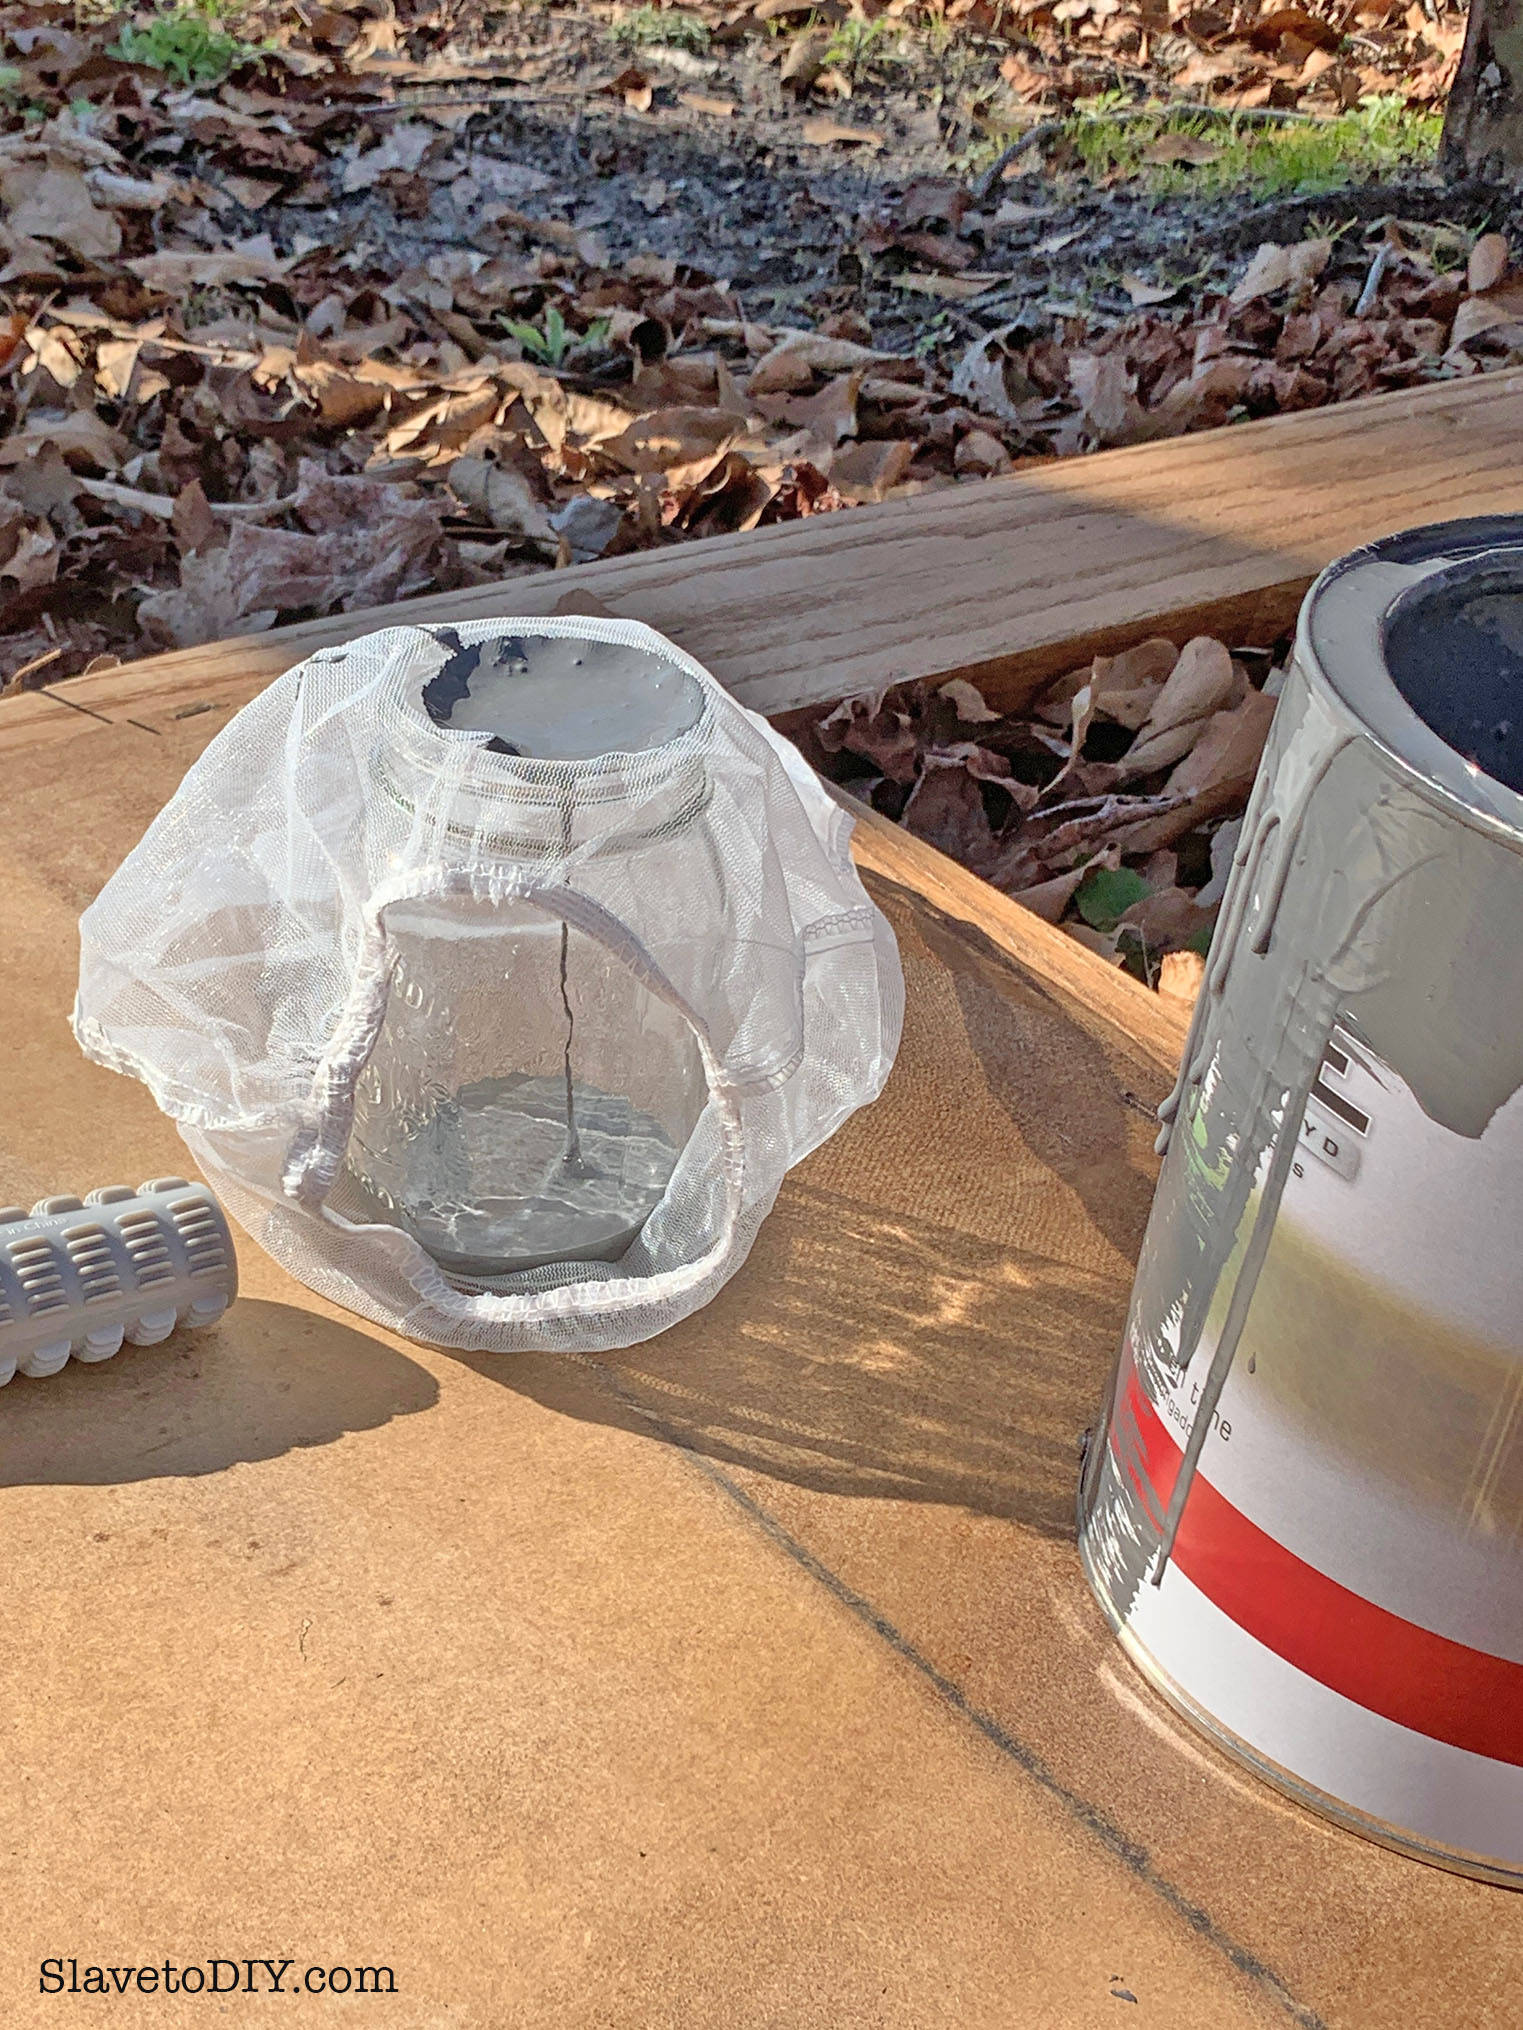
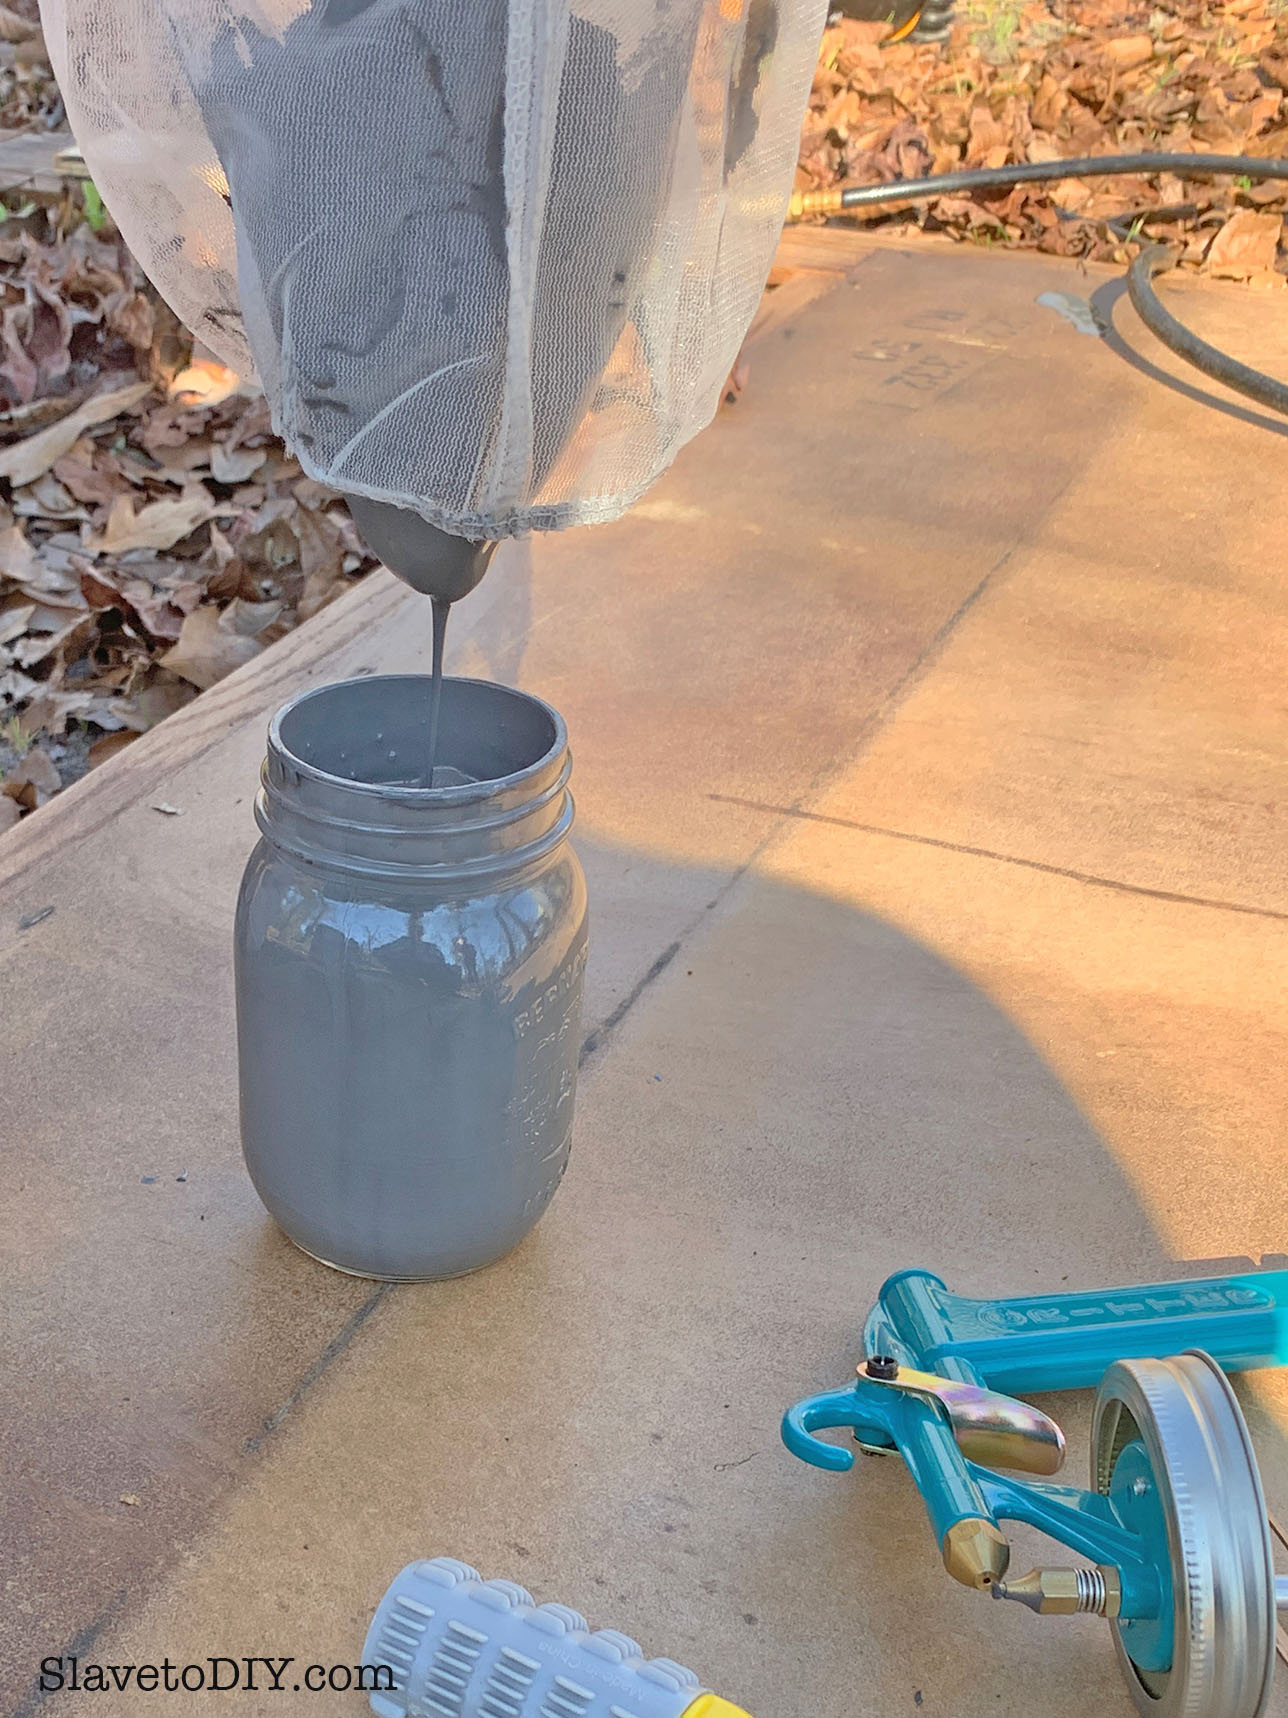
Then we used one of the paint strainers to strain the paint into the jar.
TIP FROM RAINMAN: THIS IS AN IMPORTANT STEP. If you don’t strain the paint, little chunks will clog up the tiny tube that feeds the sprayer.
How To Use An Inexpensive Paint Sprayer and Get Outstanding Results
We realized after the first few minutes that the best method is to put the strainer all the way in and then pour the paint in. It lends some weight to the process and makes it strain MUCH faster.
How To Use An Inexpensive Paint Sprayer and Get Outstanding Results
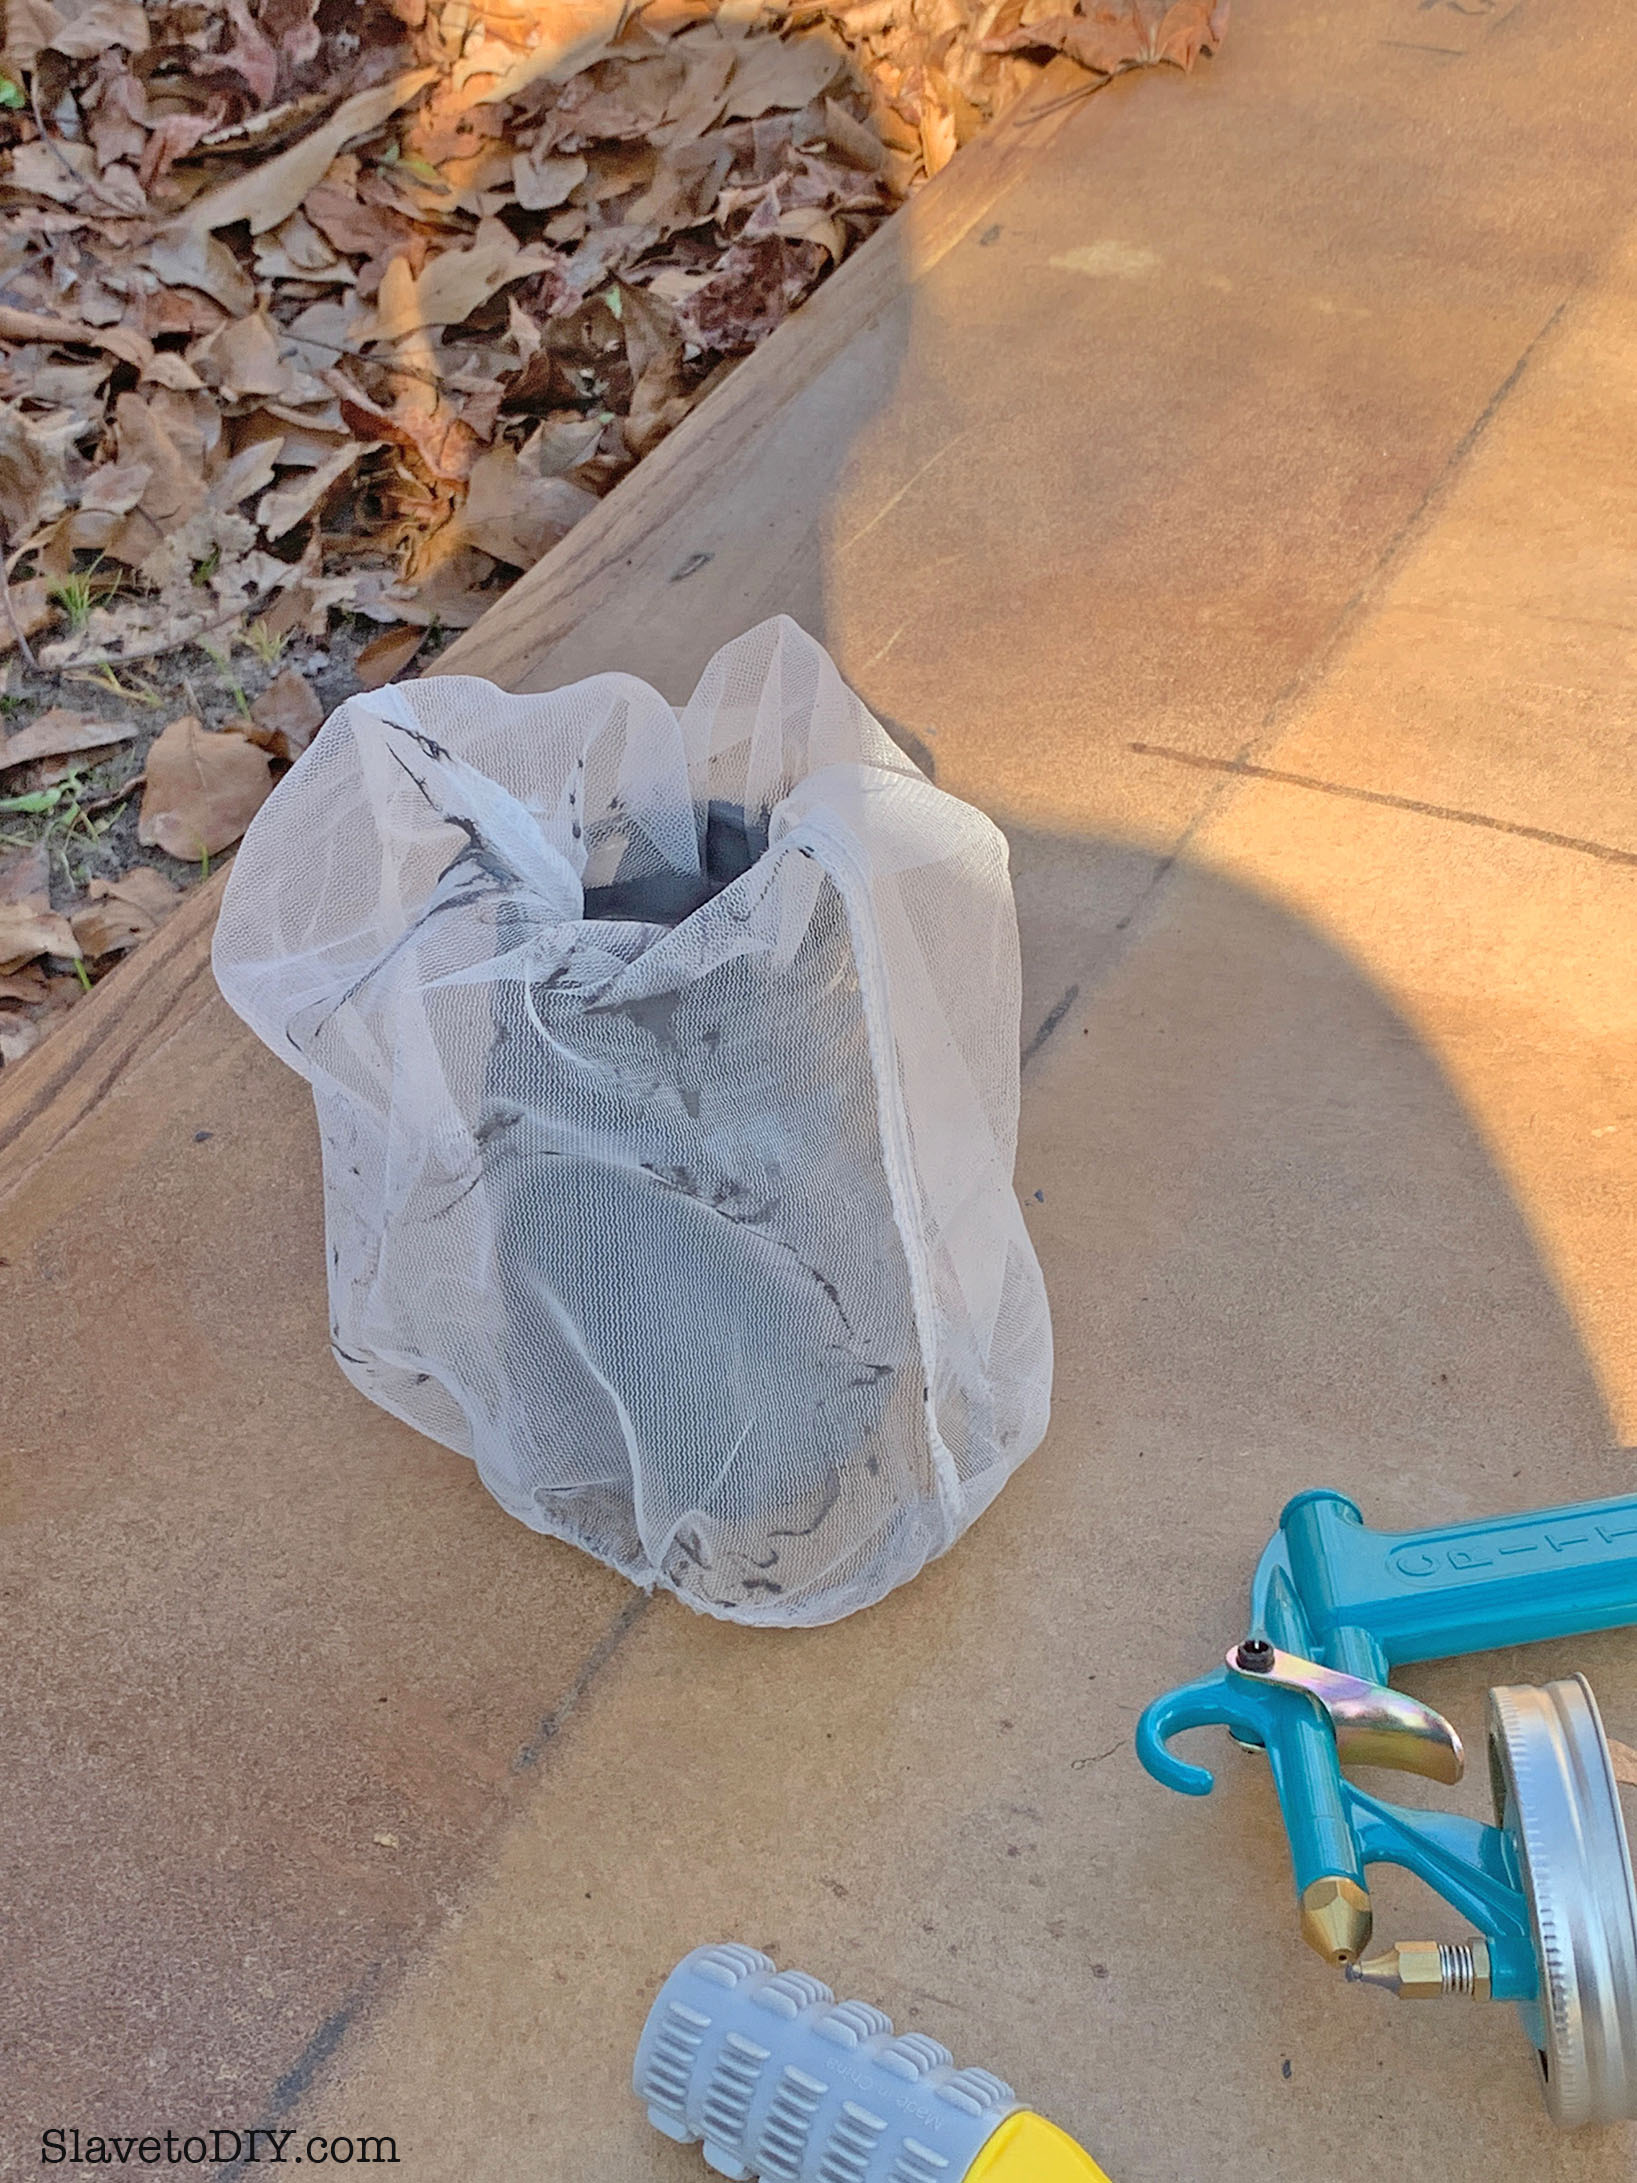
Once the paint is in, lift the strainer out until it has all drained into the mason jar. We layed the bag down on our clean surface, knowing we would use it again, but if you’re taking a long time, you might want to rinse it with a hose between uses (we have not found a non-messy way to do this).
How To Use An Inexpensive Paint Sprayer and Get Outstanding Results
Attach the mason jar back to the gun, and make sure your air compressor is set at 30 PSI.
TIP FROM RAINMAN: USE SCRAP WOOD TO GET PSI, LIQUID NOZZLE, AND DISTANCE SET (35 PSI WITH LIQUID NOZZLE CENTERED WORKED WELL WITH THIS PAINT AT AROUND 4 INCHES FROM SURFACE).
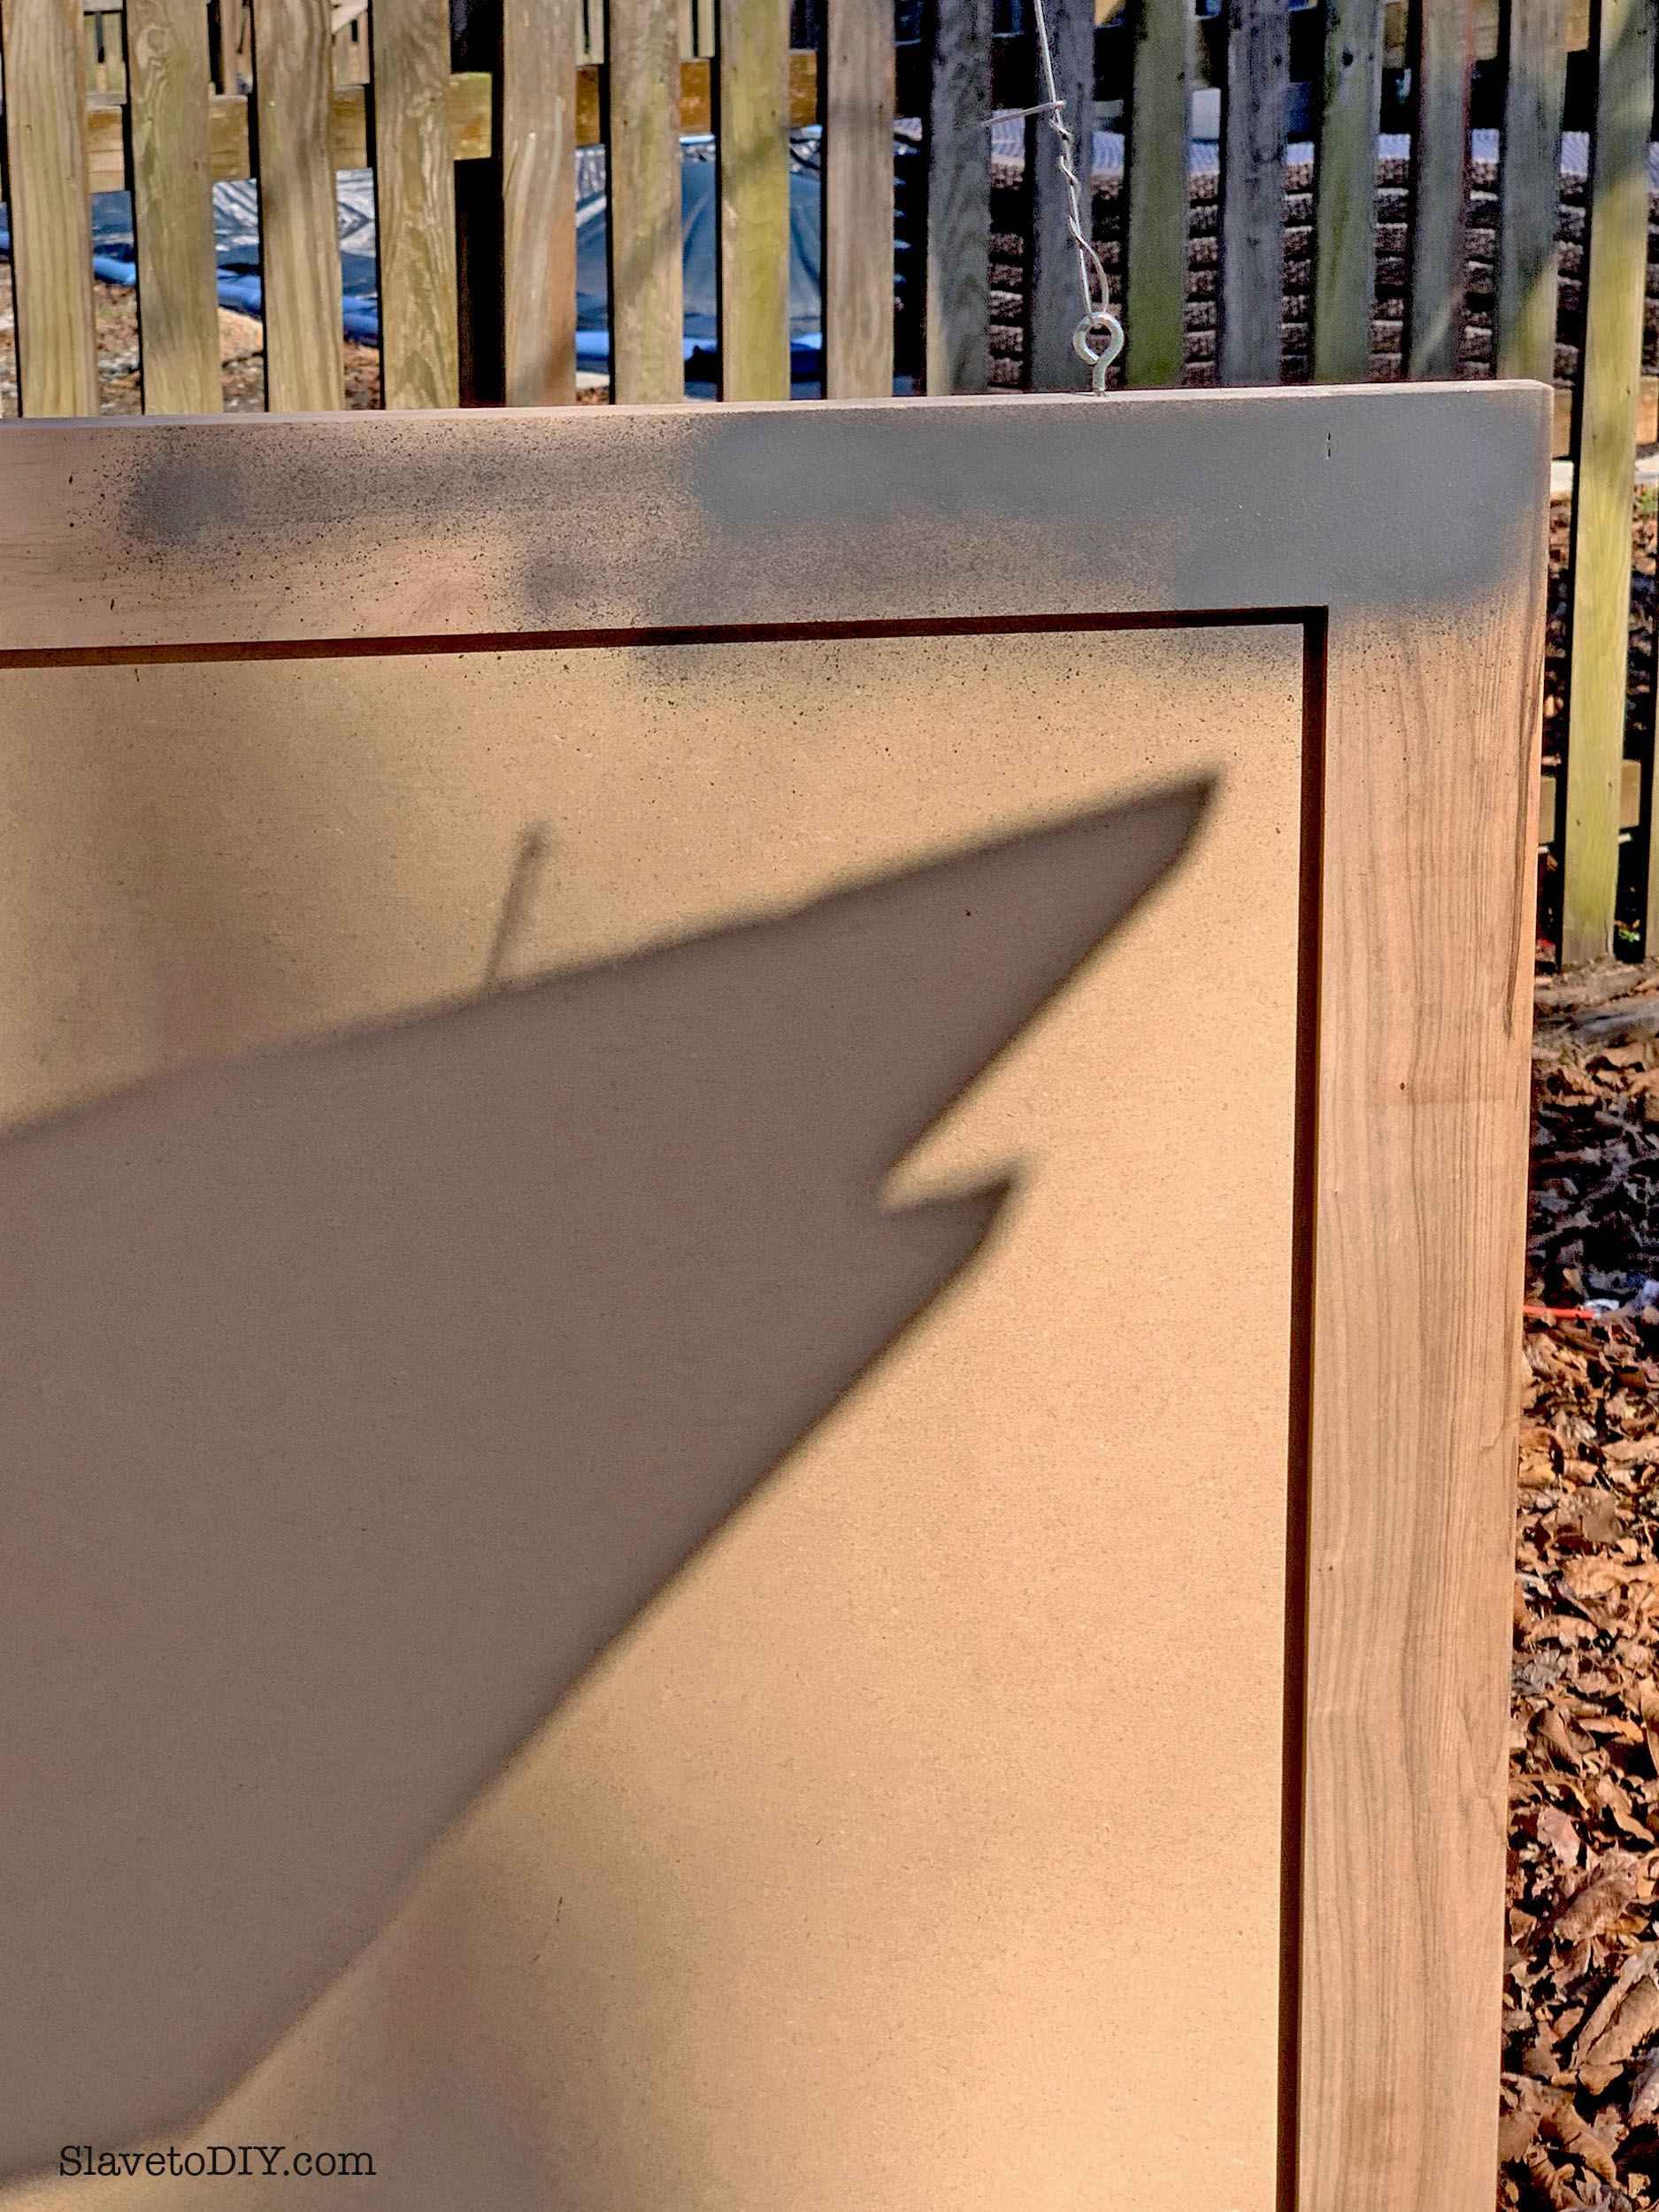
Rainman sprayed around the edges, then into the corners, then did a good layer, spraying back and forth across it.
How To Use An Inexpensive Paint Sprayer and Get Outstanding Results
Spraying around the outside:
How To Use An Inexpensive Paint Sprayer and Get Outstanding Results
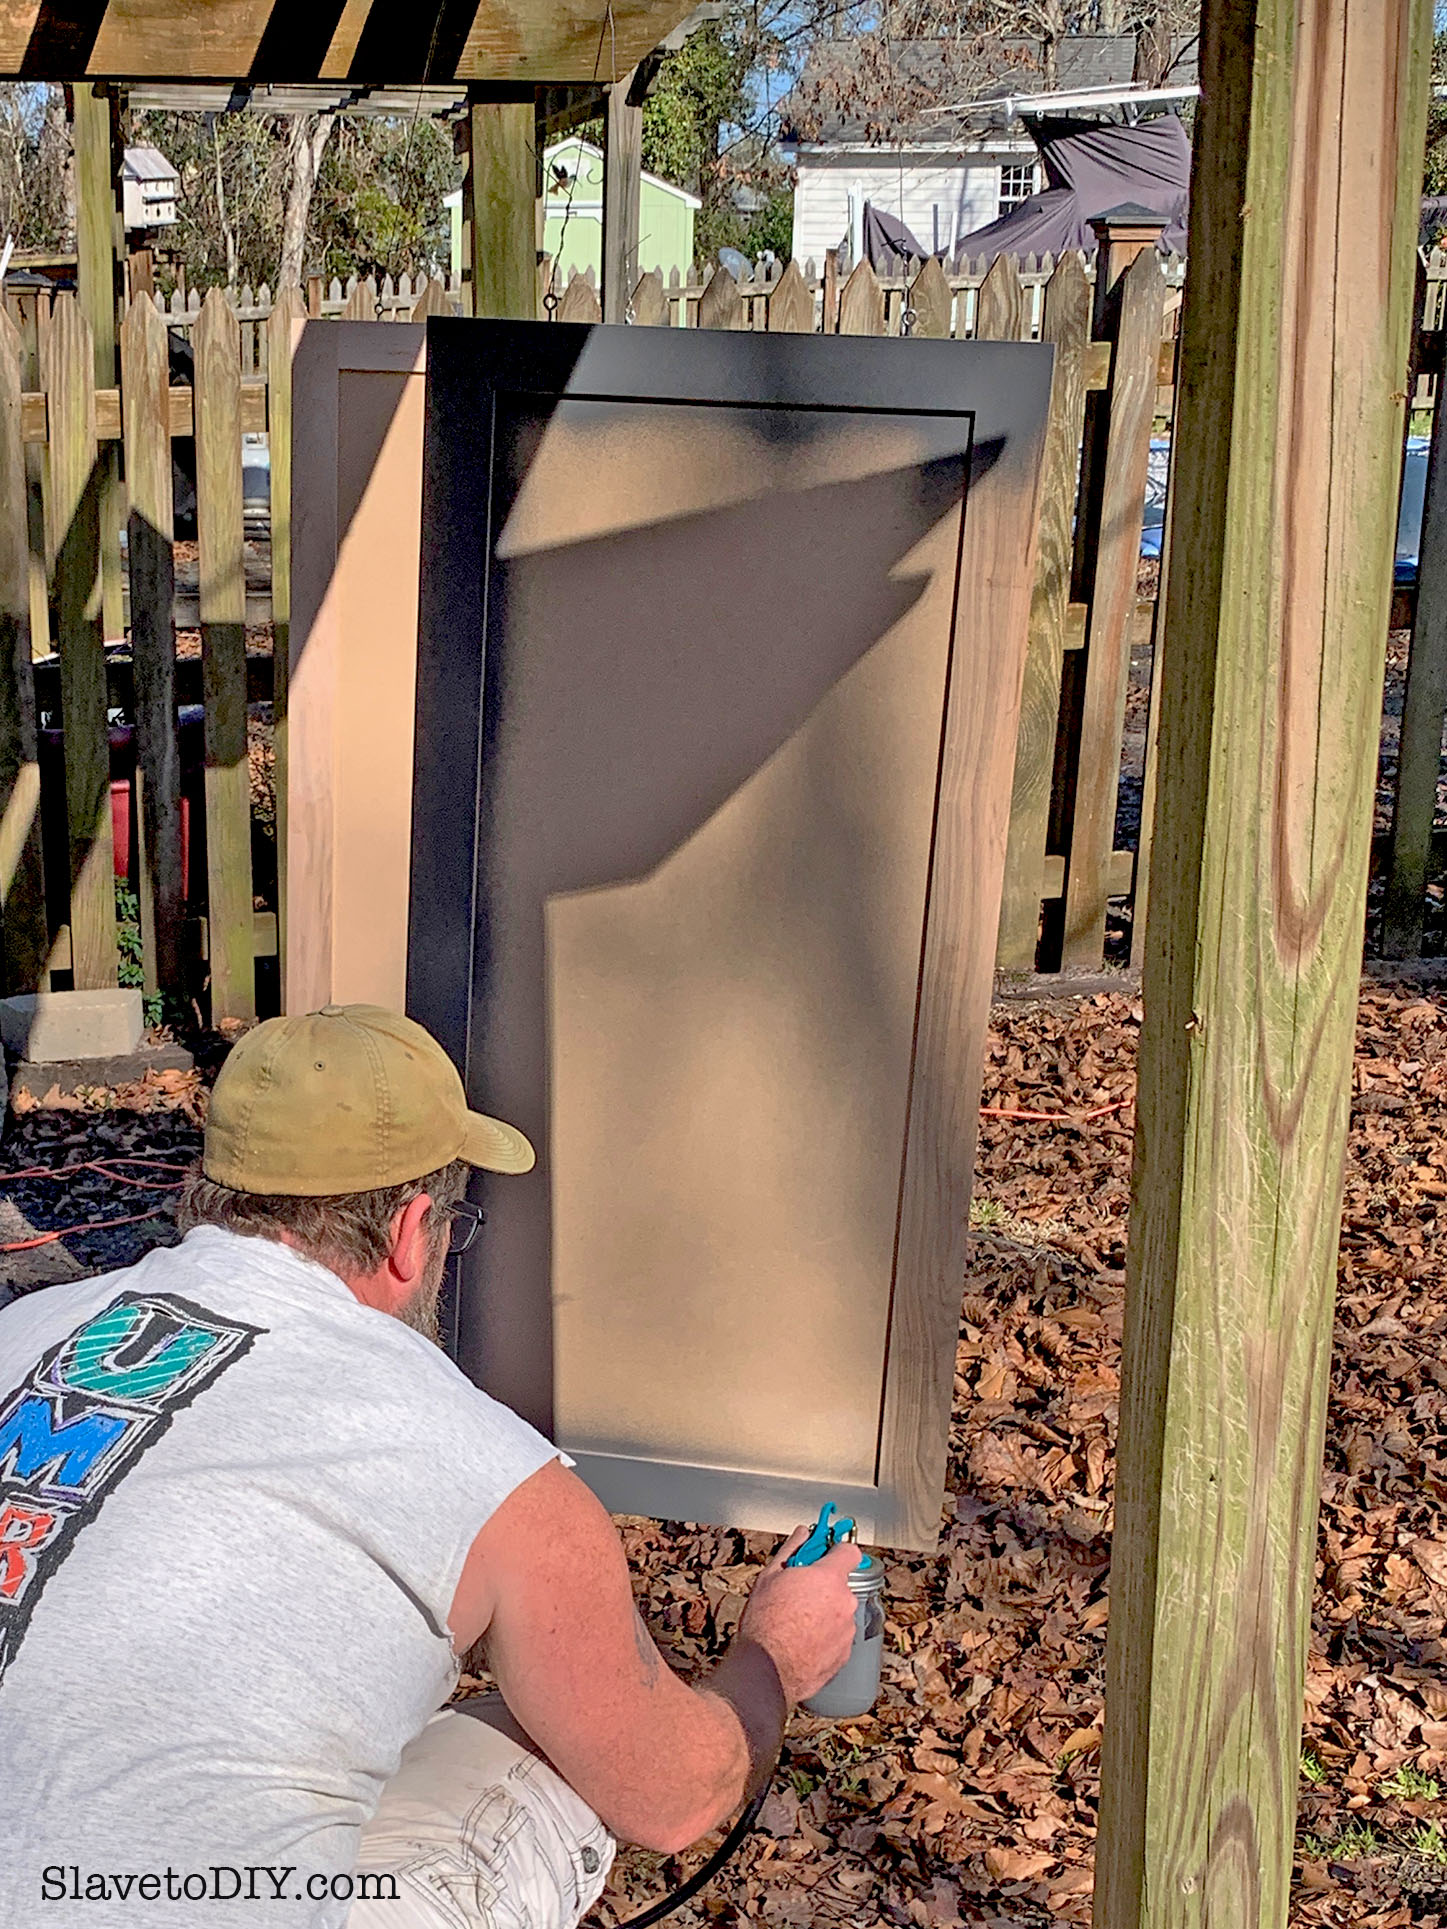
Door two: holding it steady to start spraying (this is where those eyelets and wire are handy).
How To Use An Inexpensive Paint Sprayer and Get Outstanding Results
Spray the front sides, then the back sides, and give it a little time to dry. Make sure you get any outside edges you will see.
The Dark and Moody Fireplace Update; Painting the doors with the Critter
Depending on the paint and color, you will need at least two coats. We did three for good measure and for even coverage.
TIP FROM RAINMAN: LIQUID NOZZLE MAY NEED TO BE CLEANED (PICK OFF ANY DRIED/DRYING PAINT), ESPECIALLY IF YOU LET THE GUN SIT BETWEEN APPLICATIONS.
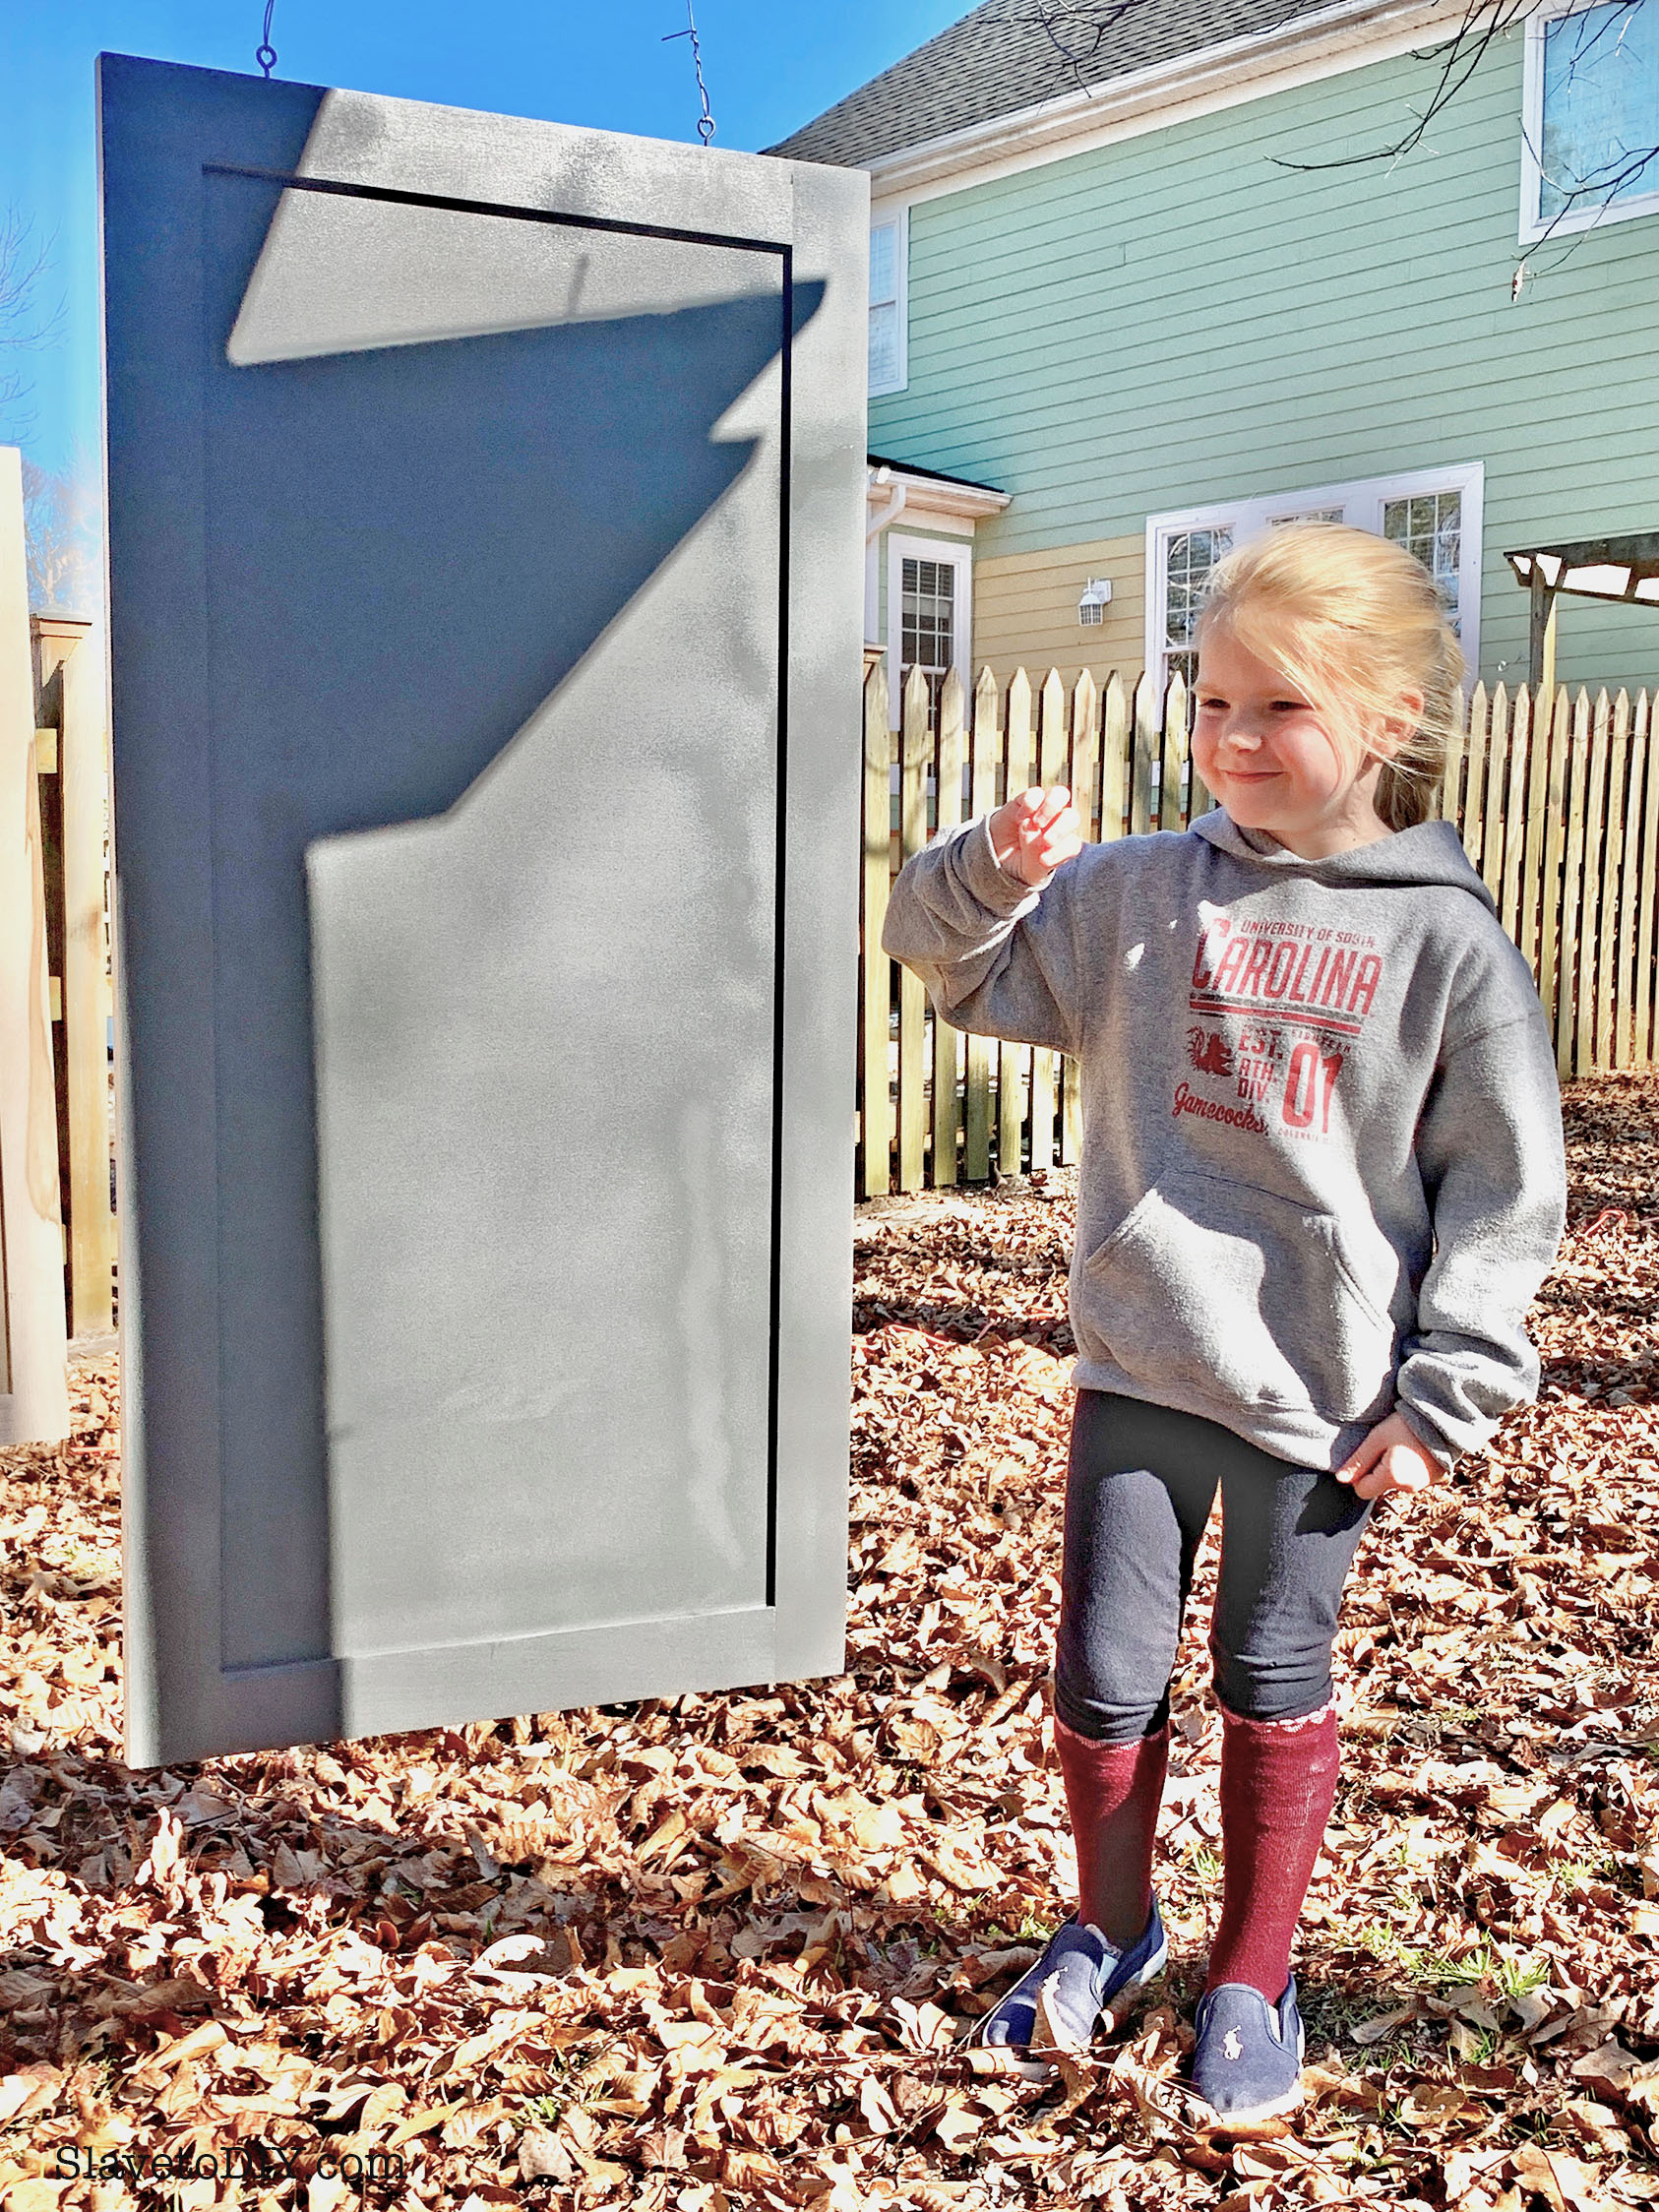
Pose for a “finished painting” photo:
The Dark and Moody Fireplace Update; Finished Painted Doors
We took the doors into the downstairs shower (where there are no cats if we close the door) and where we had a rod across the middle and resecured them to the rod for three days to make sure they were really good and dry before we mounted them.
TIP FROM RAINMAN: CLEAN GUN WITH PAINT THINNER BEFORE PAINT DRIES ON GUN SURFACES.
Clean-up: Rainman rinsed out all of the paint from the mason jar, rinsed all of the tubing and the outside of the paint gun off, and then added mineral spirits to the jar. He sprayed that all out to clean the inside of the tubing and the inside of the gun. Then he dumped that out, added water, and did it again. Take the components apart and let them dry completely before you put it back together. We stored it back in the box and will definitely use it again!
TIP FROM RAINMAN: NOT SURE HOW LONG JAR GASKET WILL LAST; PROBABLY NEED TO ORDER SPARES.
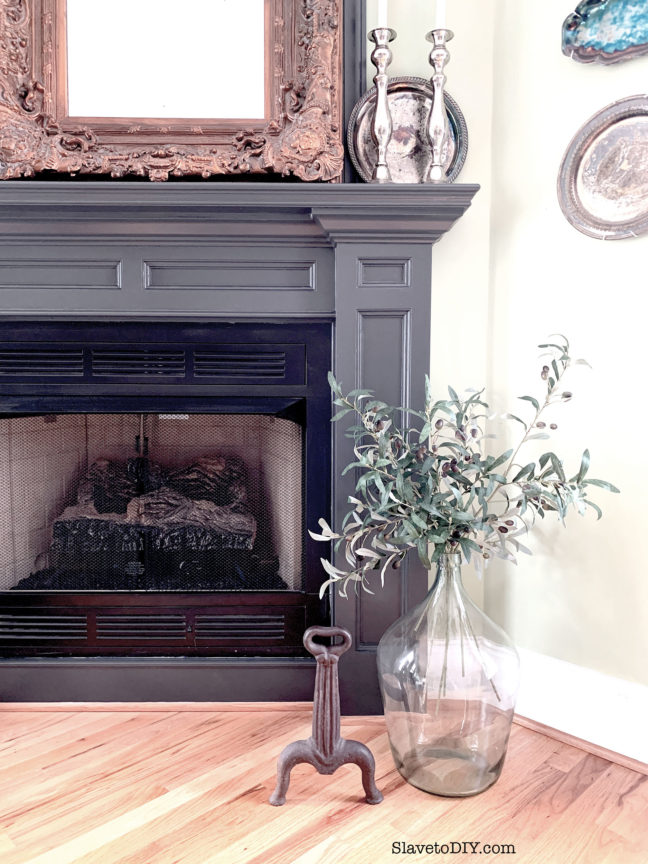
Here are the doors mounted on the fireplace:
How To Use An Inexpensive Paint Sprayer and Get Outstanding Results
Here they are mounted and COVERING THAT AWFUL GAPING HOLE!
How To Use An Inexpensive Paint Sprayer and Get Outstanding Results
We had already painted the rest of the fireplace with brushes and rollers. If I had realized how easy it was to use the sprayer and how little overspray there was, I would’ve used The Critter to paint that, as well. The finish looks VERY professional, and I’ll definitely be using it to do our cabinets once we get to that point.
I’d love to see your paint projects and hear about how this little paint gun worked for you! Please share in the comments below and check out more great project tutorials and inspiration over on our blog.
Cheers!
*Legal stuff:
I am honest about my experiences with different products and write because I enjoy it. I do however, have the opportunity to earn money for my writing, also.
Slavetodiy.com is a participant in the Amazon Services LLC Associates Program, an affiliate advertising program designed to provide a means for sites to earn advertising fees by advertising and linking to amazon.com. Amazon offers a small commission on products sold through their affiliate links. Each of your purchases via our Amazon affiliation links supports our cause at no additional cost to you.
If a blogger links to an Amazon product (with a special code for affiliates embedded in the link), and a reader places an item in their “shopping cart” through that link within 24 hours of clicking the link, the blogger gets a small percentage of the sale. Amazon links are not “pay per click.” If you click on the product link and stay around Amazon and purchase something else, however, I will get a commission on that sale.
Slavetodiy.com is also a VigLink affiliate advertiser which works similarly.
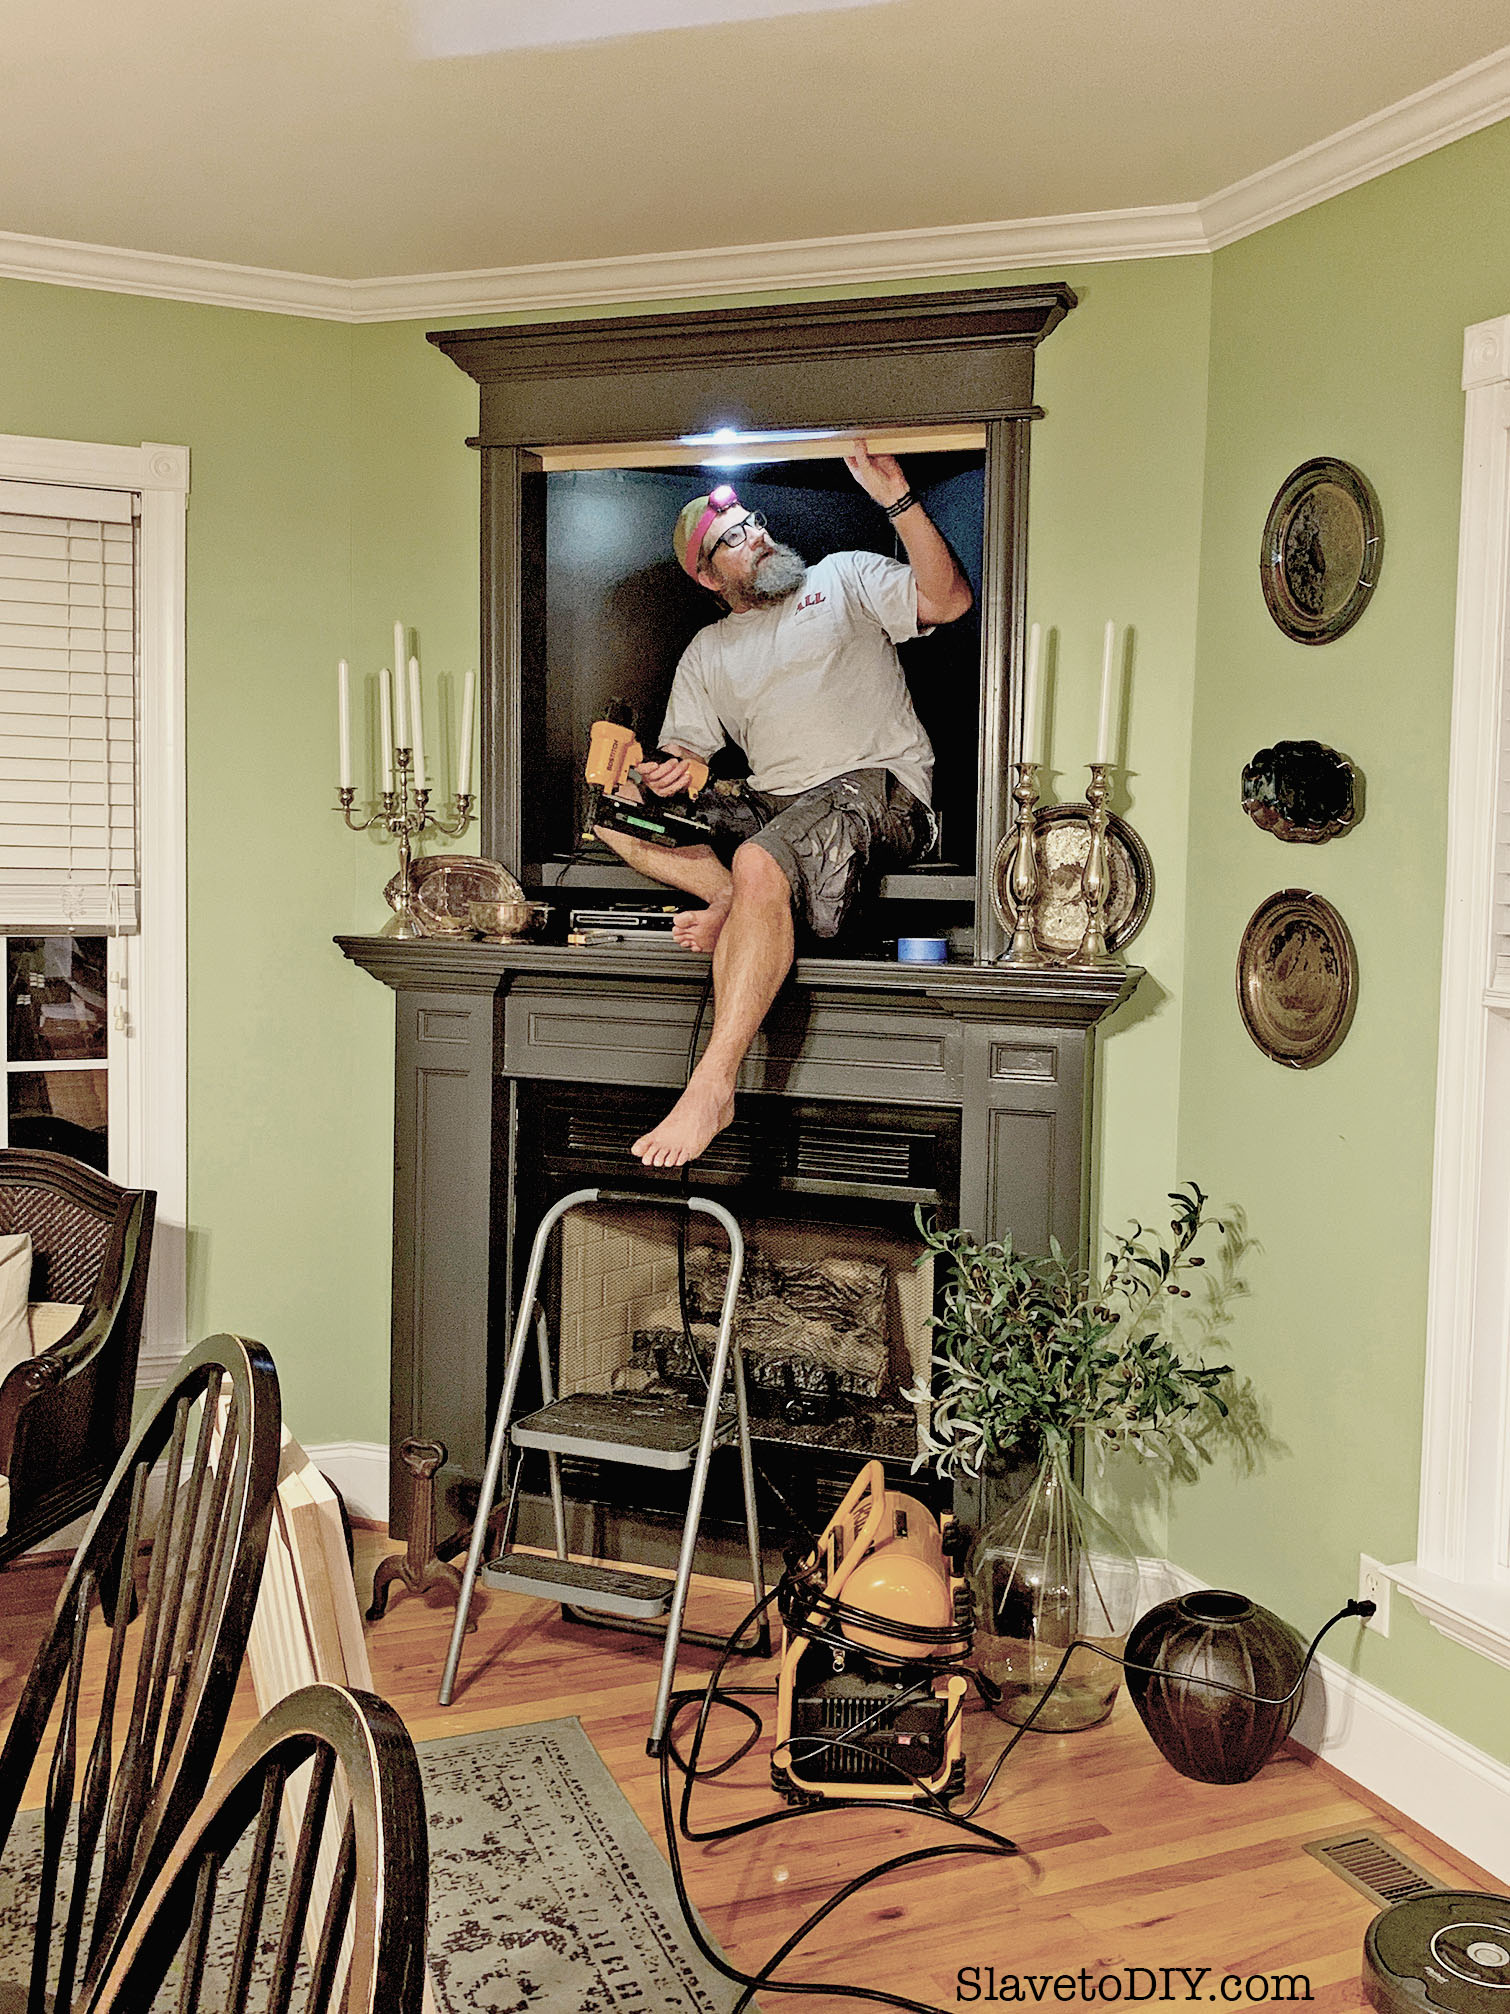
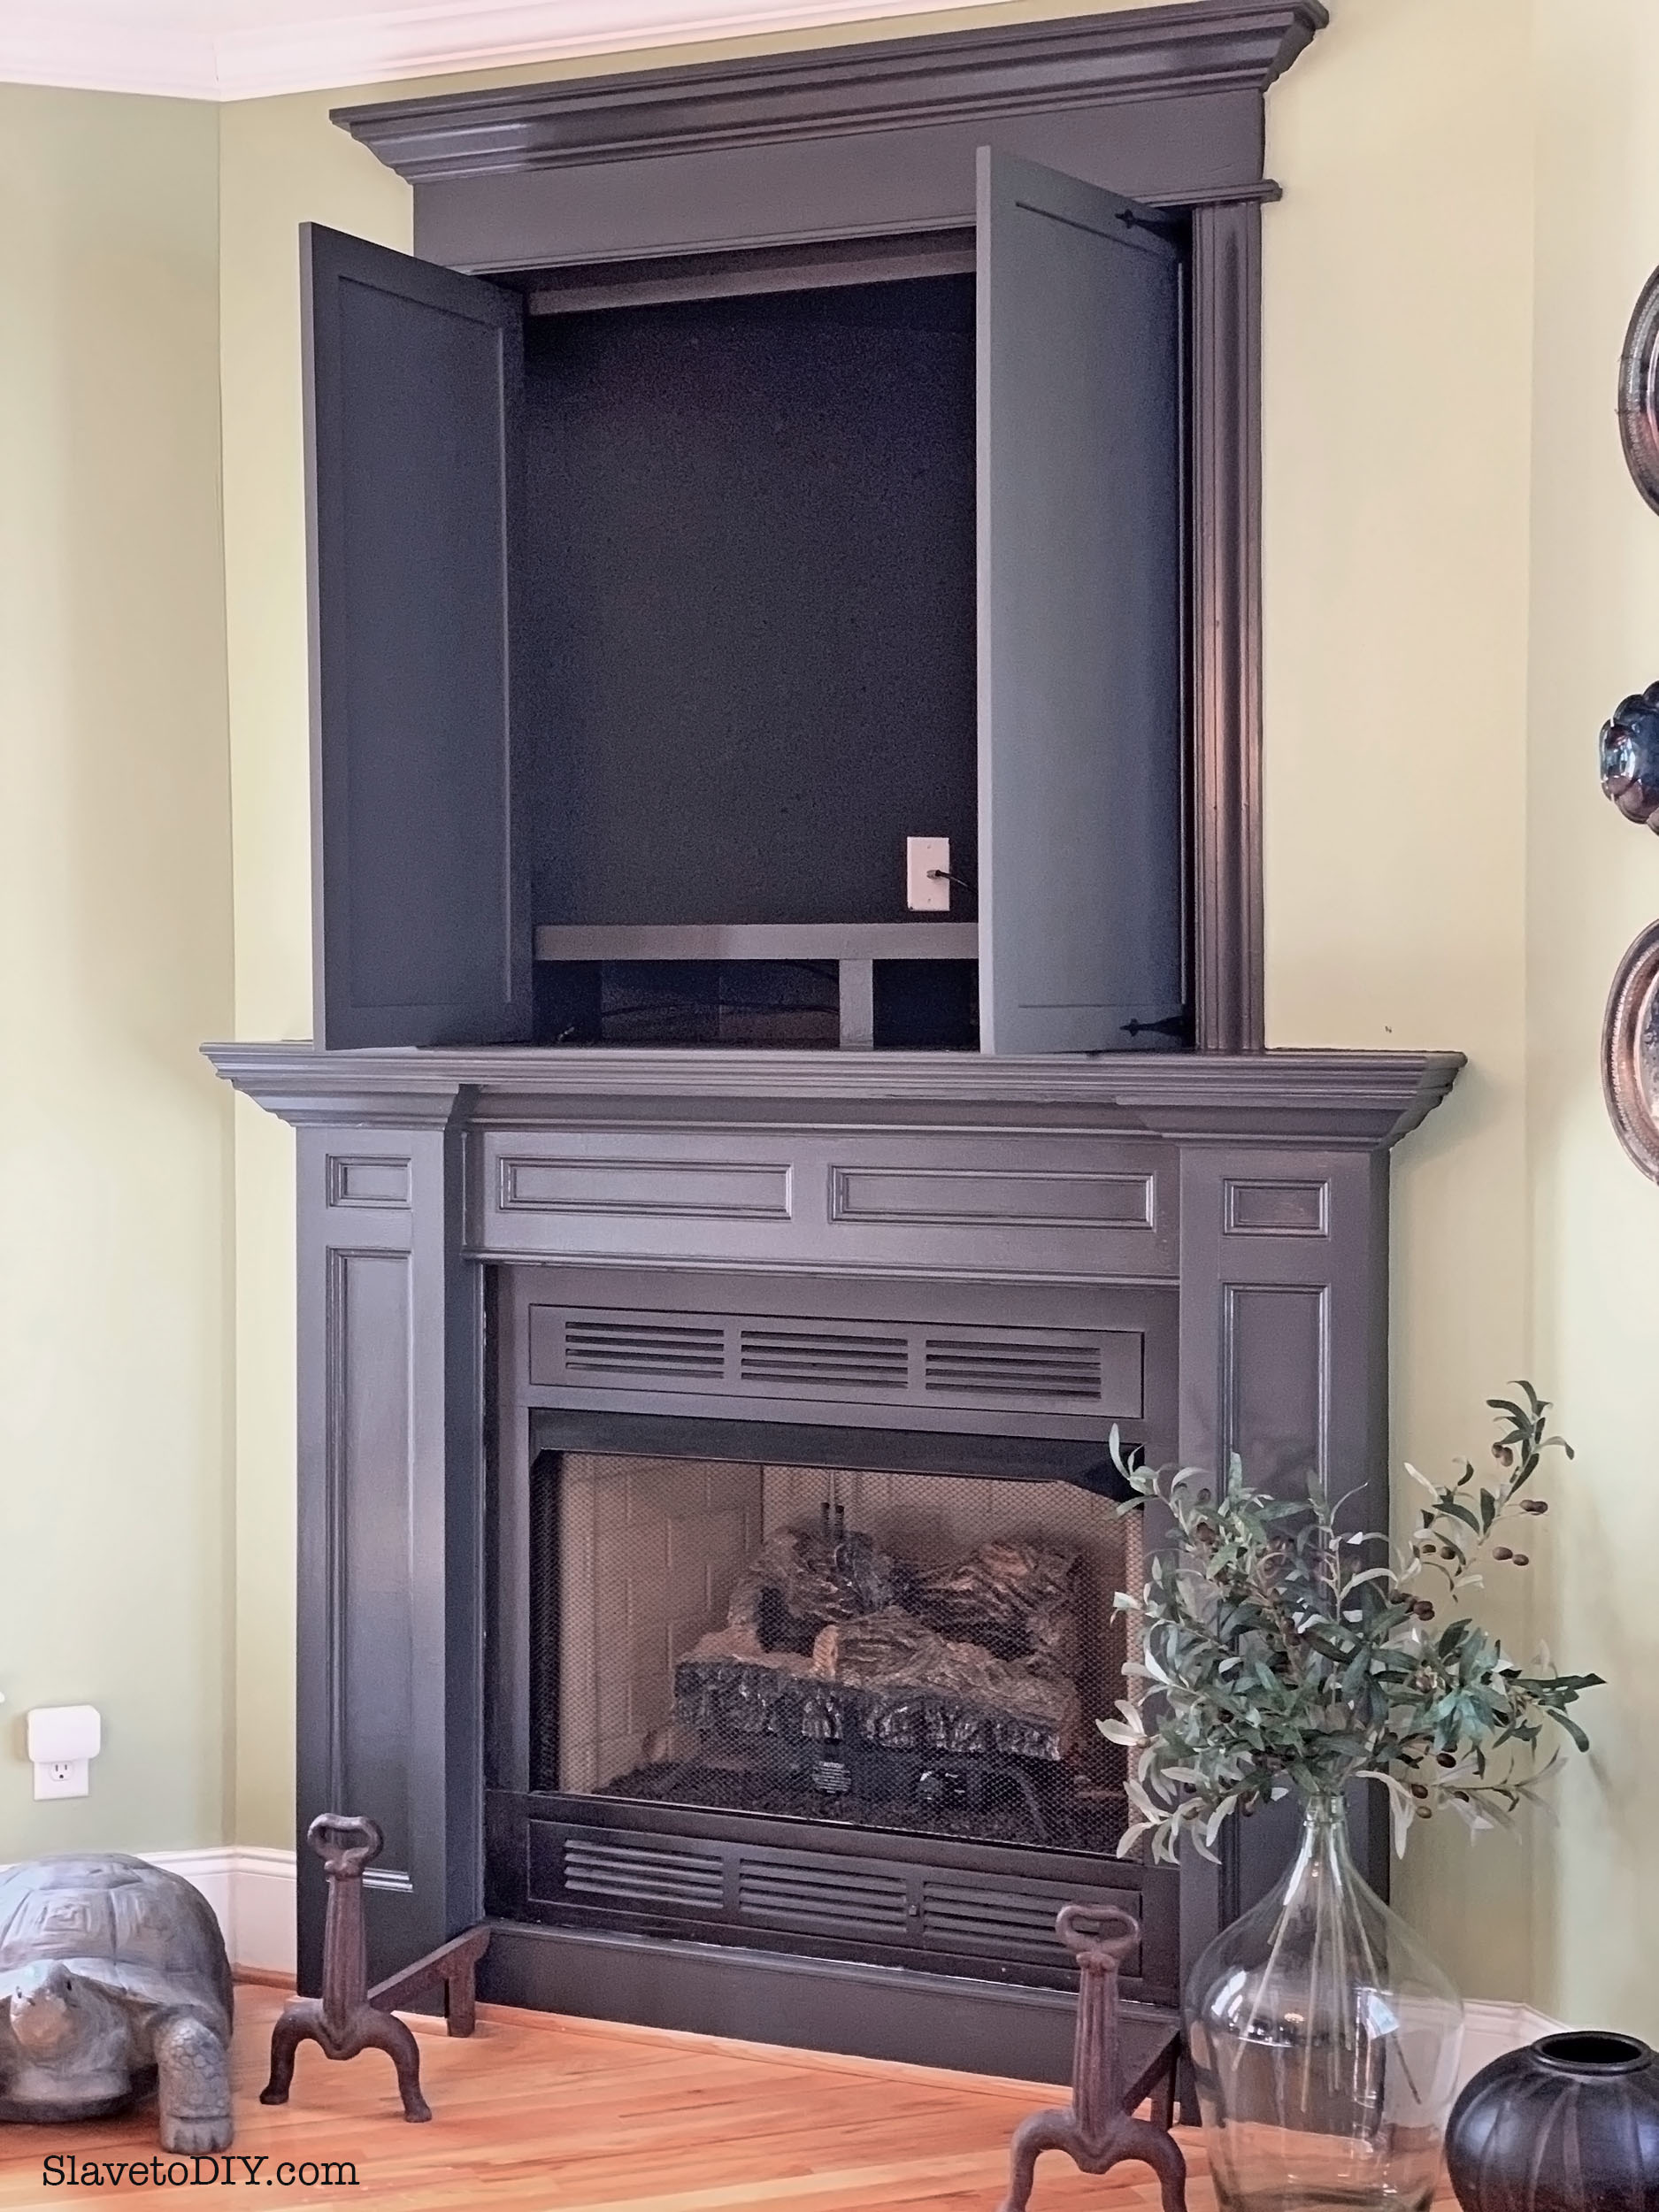
If you follow us, about a year ago I started thinking about the fireplace (and how NOT enamored with it I was). I dug up some fireplace inspiration in the hopes that I would find something awesome and reasonably cost friendly. The thing is, we have some really pretty millwork around the fireplace, but over the fireplace is an awful TV space, meant for one of those gigantic tube TVs. Aside from the part where it a terrible waste of space, it is a complete eyesore, as well.
*This post may contain affiliate links. Please see full disclosure at the end of the post.
The more I looked, however, the more I realized that I have REALLY expensive taste. The fireplaces I love would require a complete gut, a big mess, and a LOT of money (like upwards of $3000 just for the fireplace surround). So, the alternative is to keep what I have and build upon it. I came up with a design that I think I’m really going to love, that’s very US, and added to it a bit. Rainman is going to kill me when he sees what I added to the project (but ultimately he’ll love how it looks).
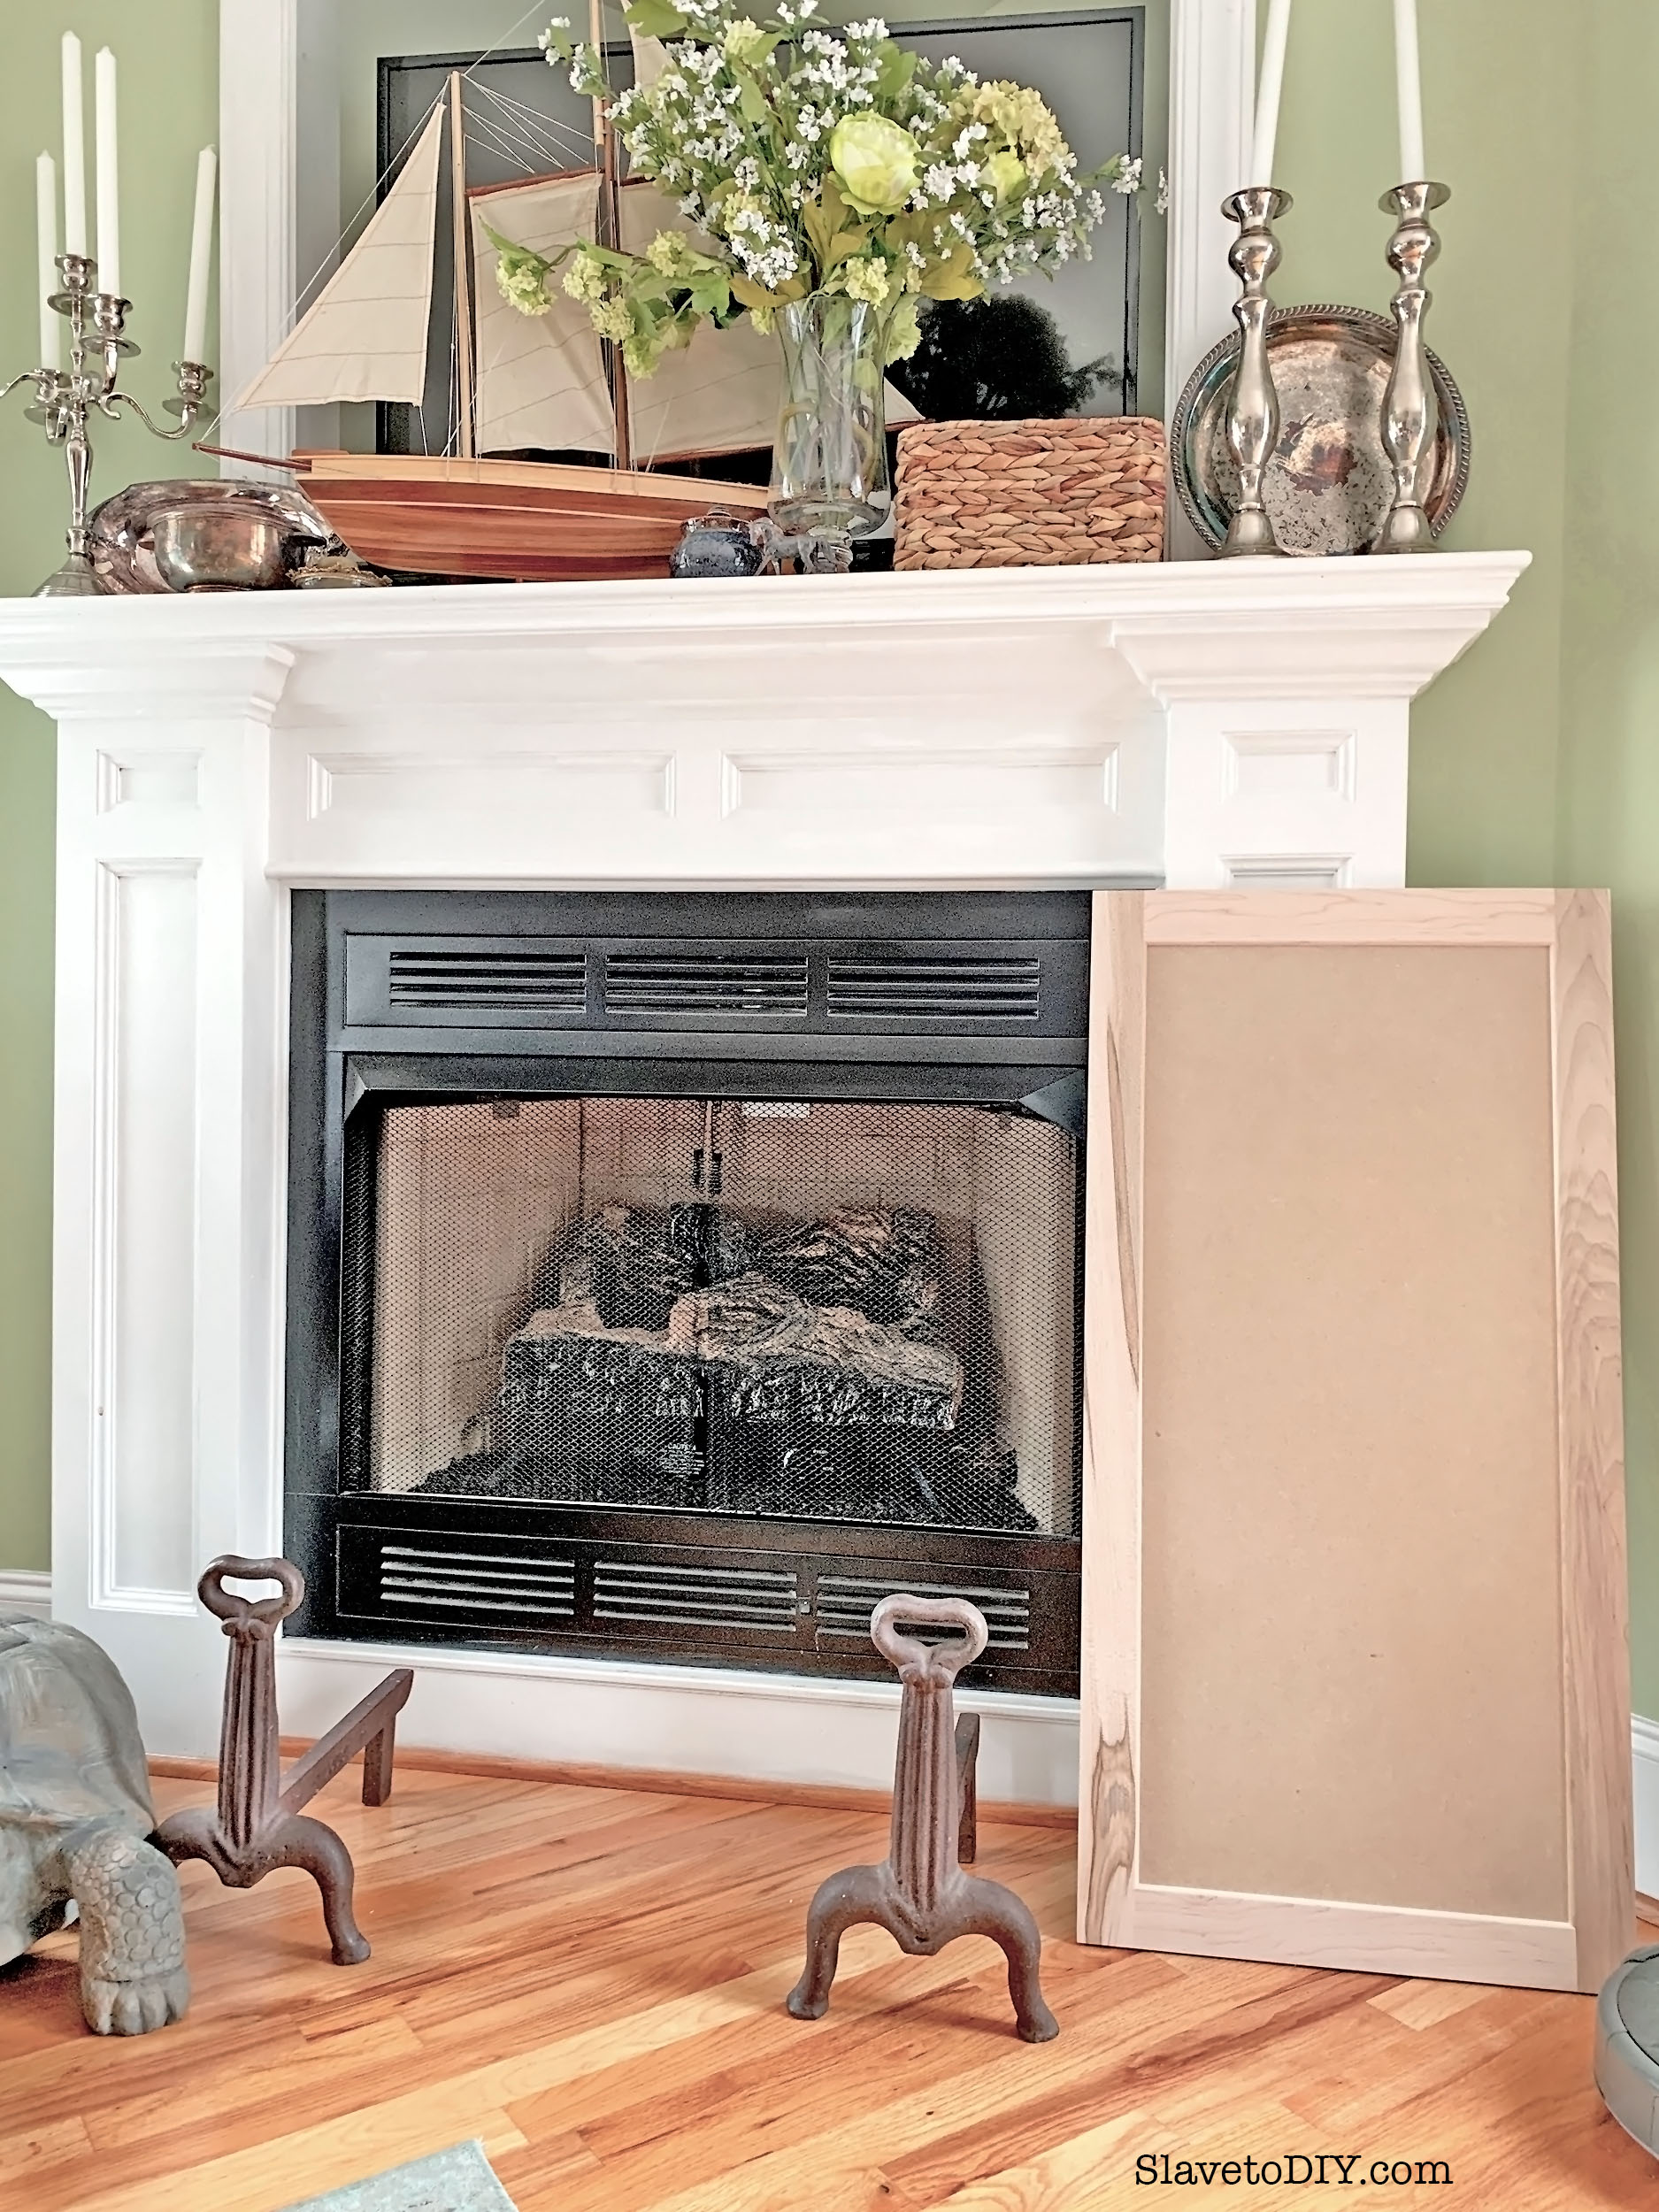
This is what we’re starting with (the before):
The Dark and Moody Fireplace Update, Before We Started
Okay, so it’s not really that bad. I should stop my crying and just stay with what I have, right? (insert evil laughter). We both know that’s not going to happen. And, is there a reason that I’m showing the whole wall and not just the fireplace? Oh yes, there is. But, we’ll get to that.
Right now, it is a very classic-ish, plain fireplace with some pretty mill-work and a crazy, giant opening up top. This is a shot of it with the cabinet doors that I ordered from Cabinet Door World. So, yeah, you can make cabinet doors (pretty easily), however, with no working wood shop currently, and very little time, I ended up ordering them instead. The quality is very good and the ordering process was easy. I got them exactly the size of the opening, so I’m sure we’ll need to do some sanding once we dry fit the hardware.
The Dark and Moody Fireplace Update; Doors To Be Mounted Above
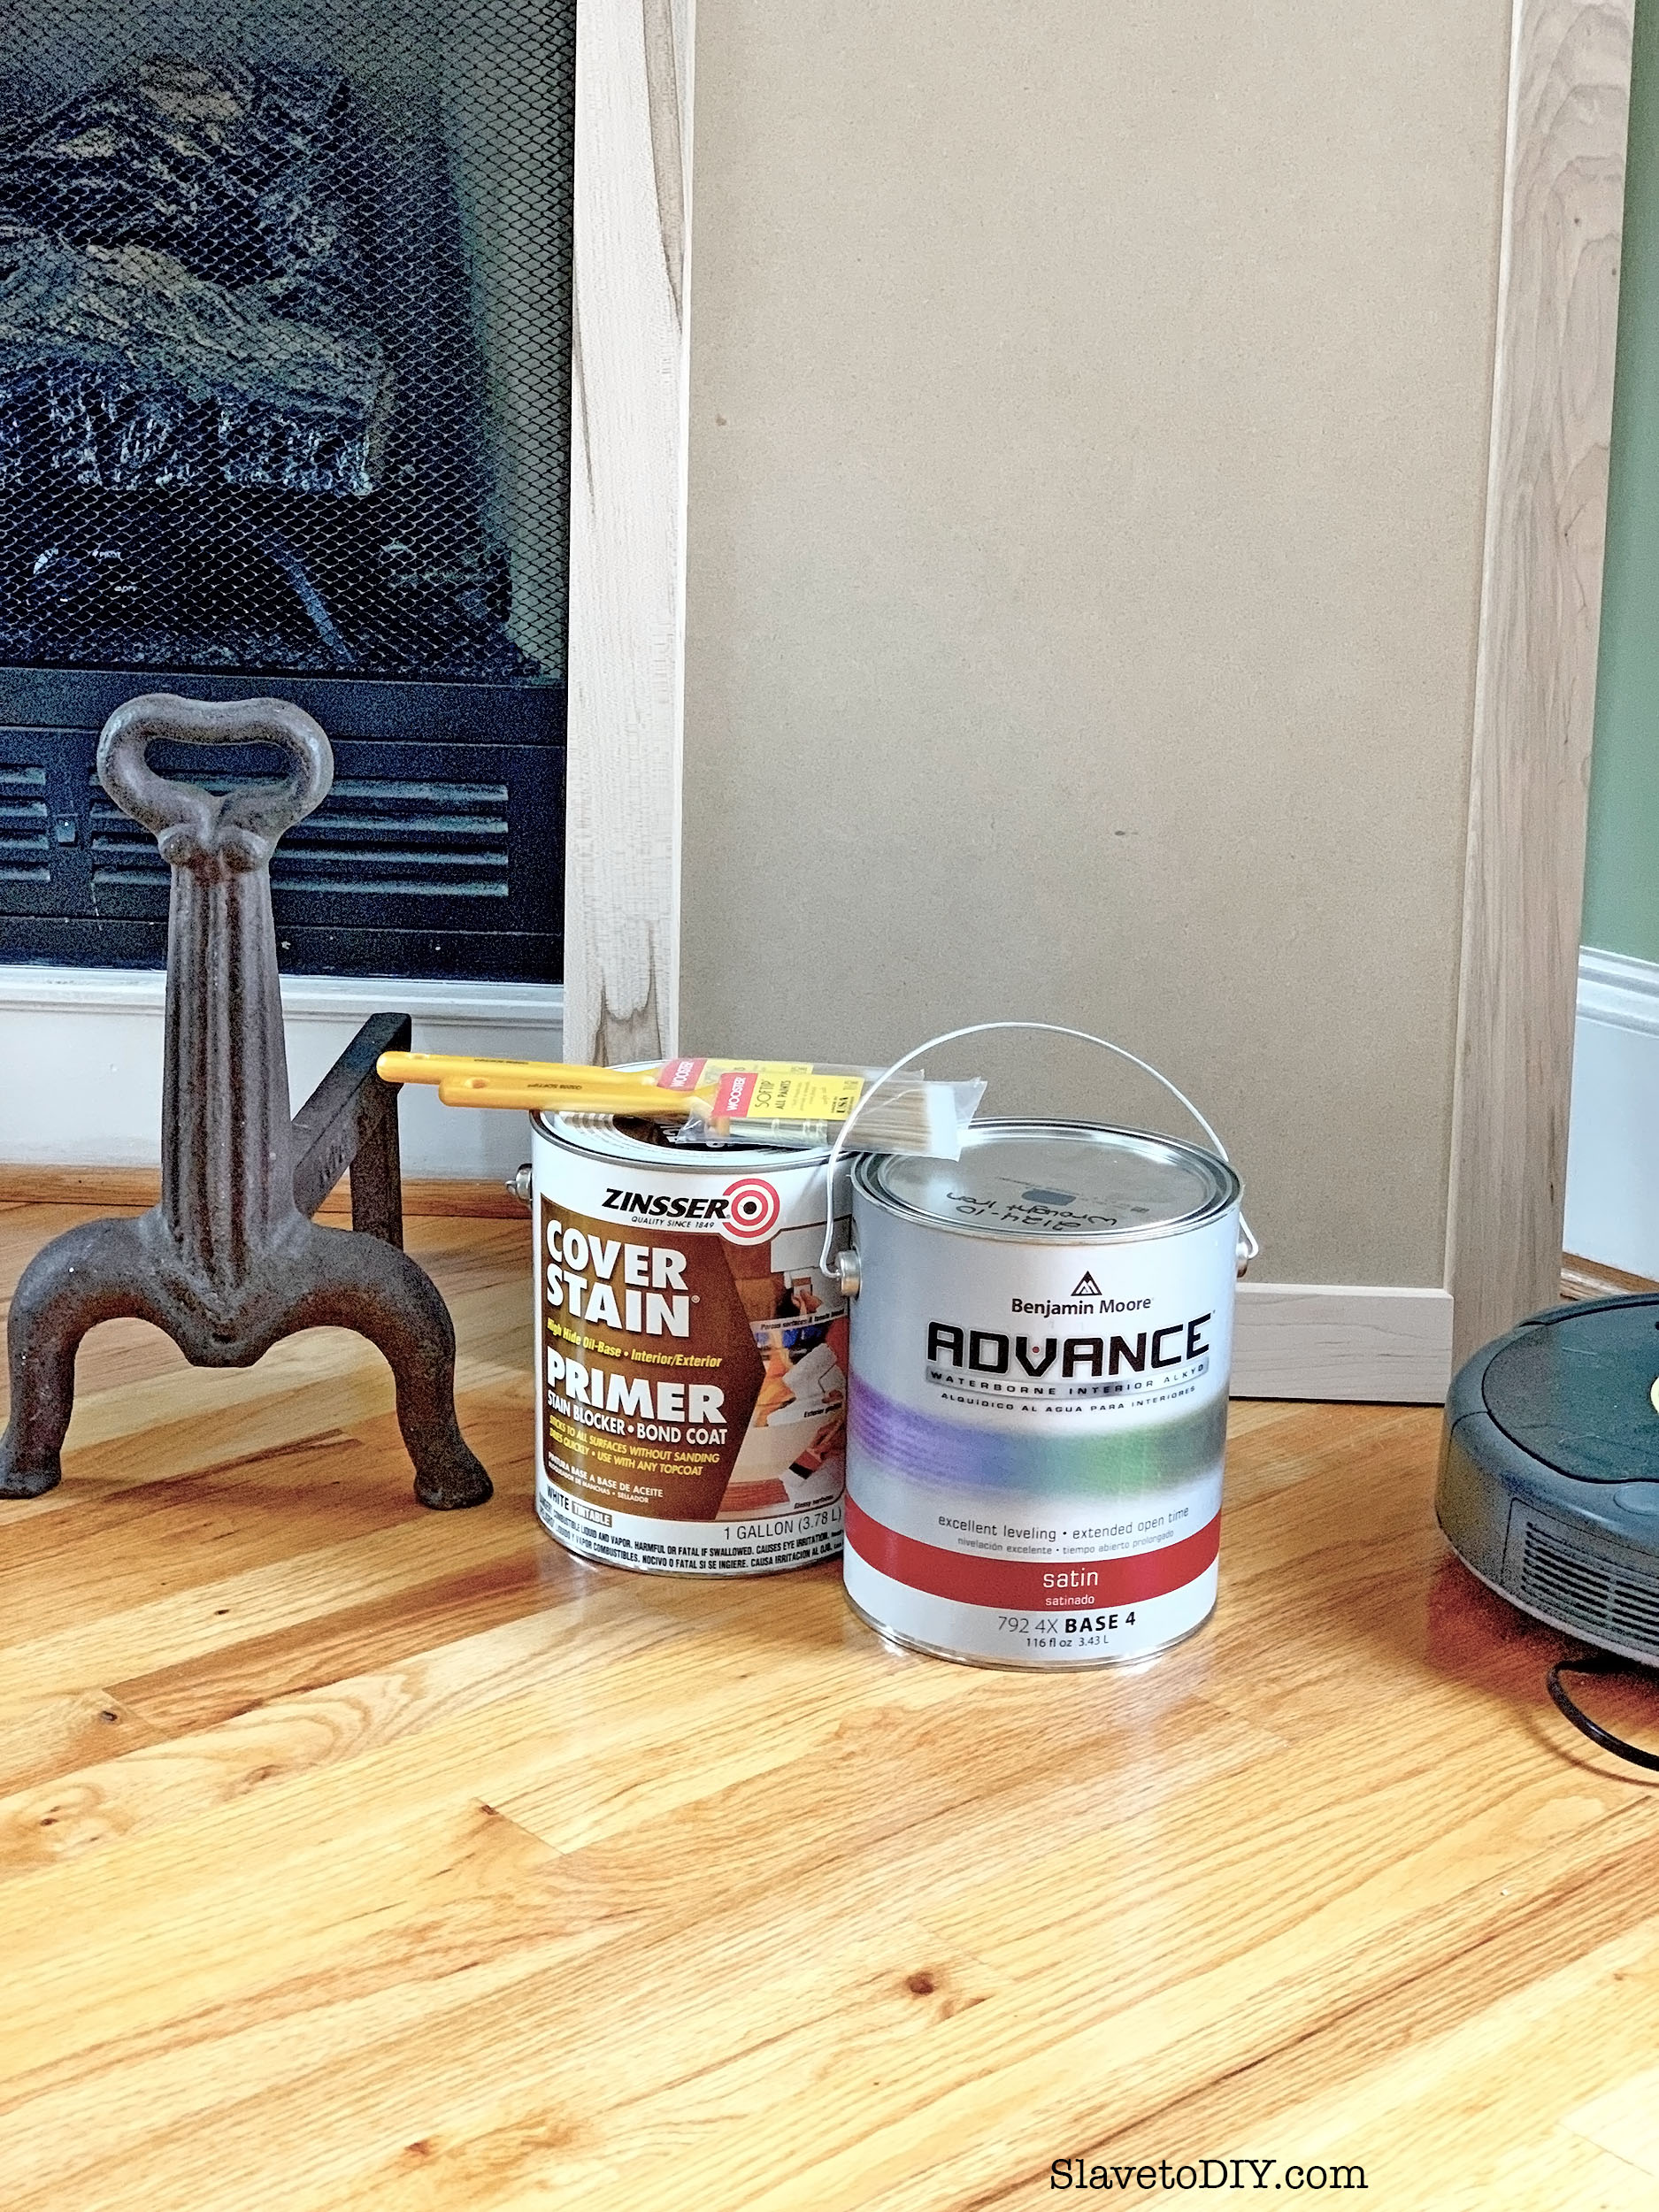
For the color we chose Benjamin Moore’s “wrought iron” and I think it will be fantastic. I’m planning on using it for the cabinets we’re moving out of the kitchen into the mudroom area, also, so this will be a good test run. Check out the tutorial on how we used a great, super cheap spray gun to paint the cabinet doors!
The Dark and Moody Fireplace Update; Our Favorite Paint! Benjamin Moore, Wrought Iron
Project tip: We were painting over a semi-gloss, so we sanded with a sanding block first, then wiped down the whole thing and let it dry before painting (a good three coats because of the color!).
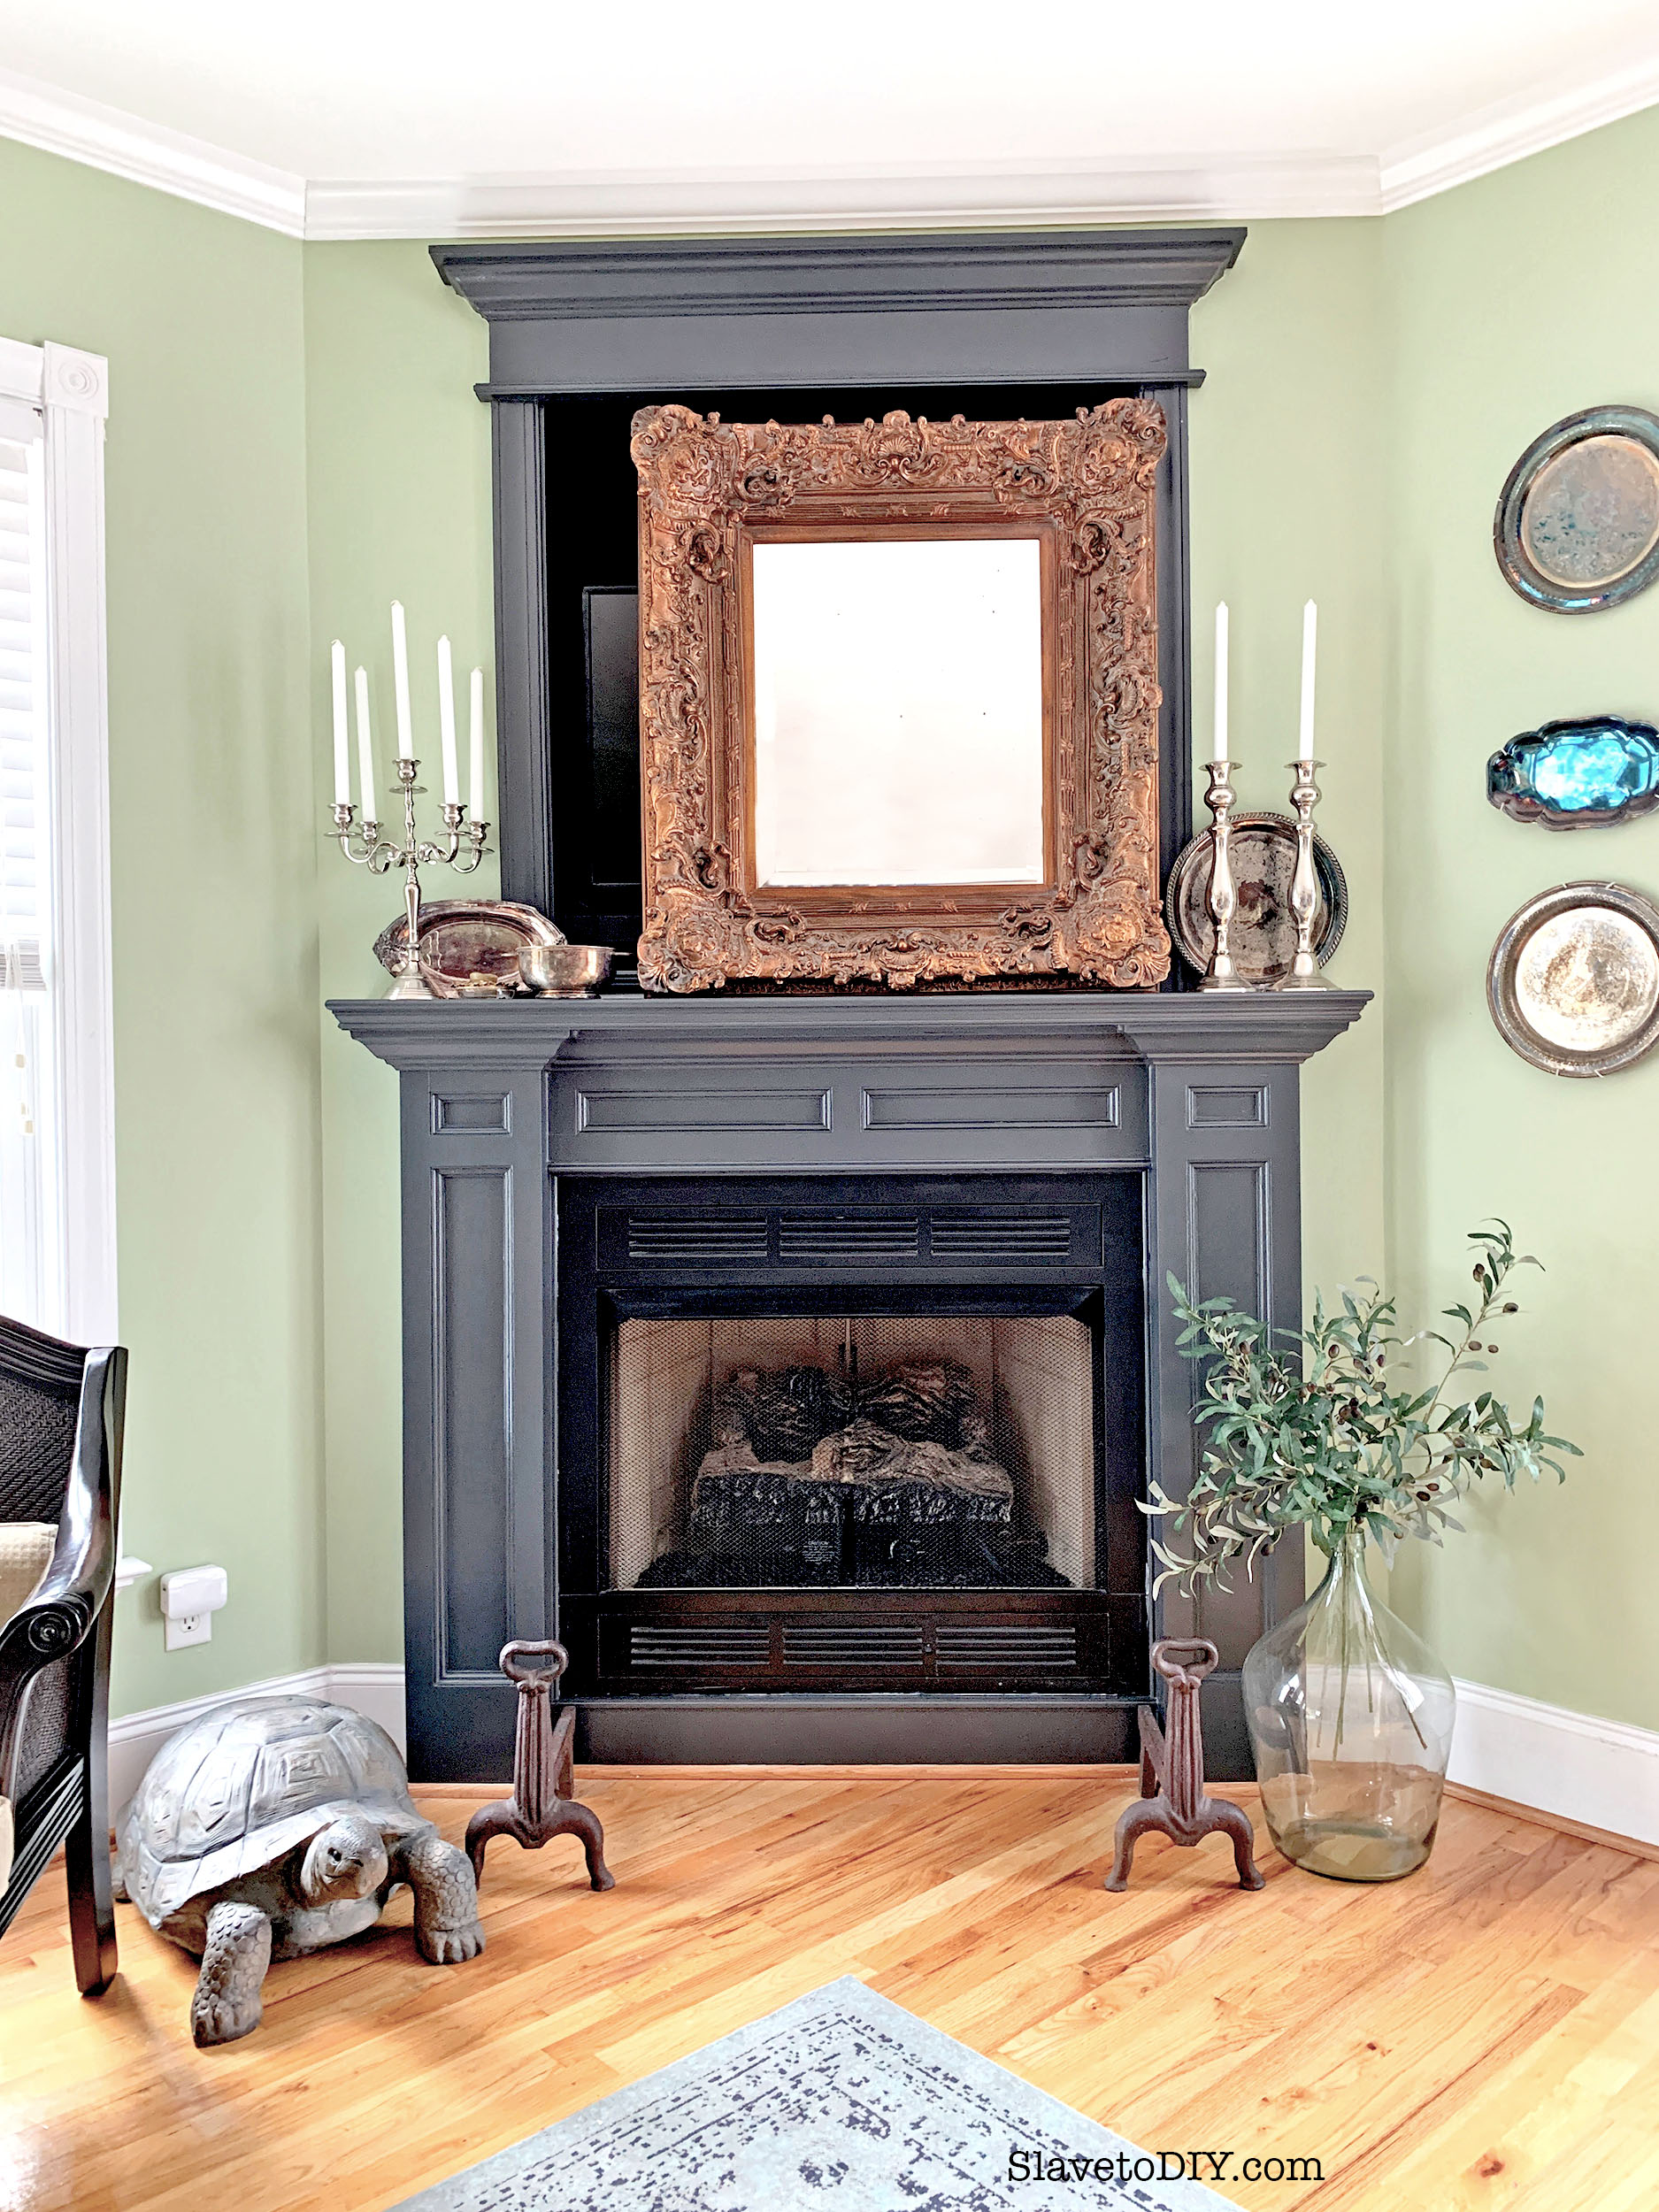
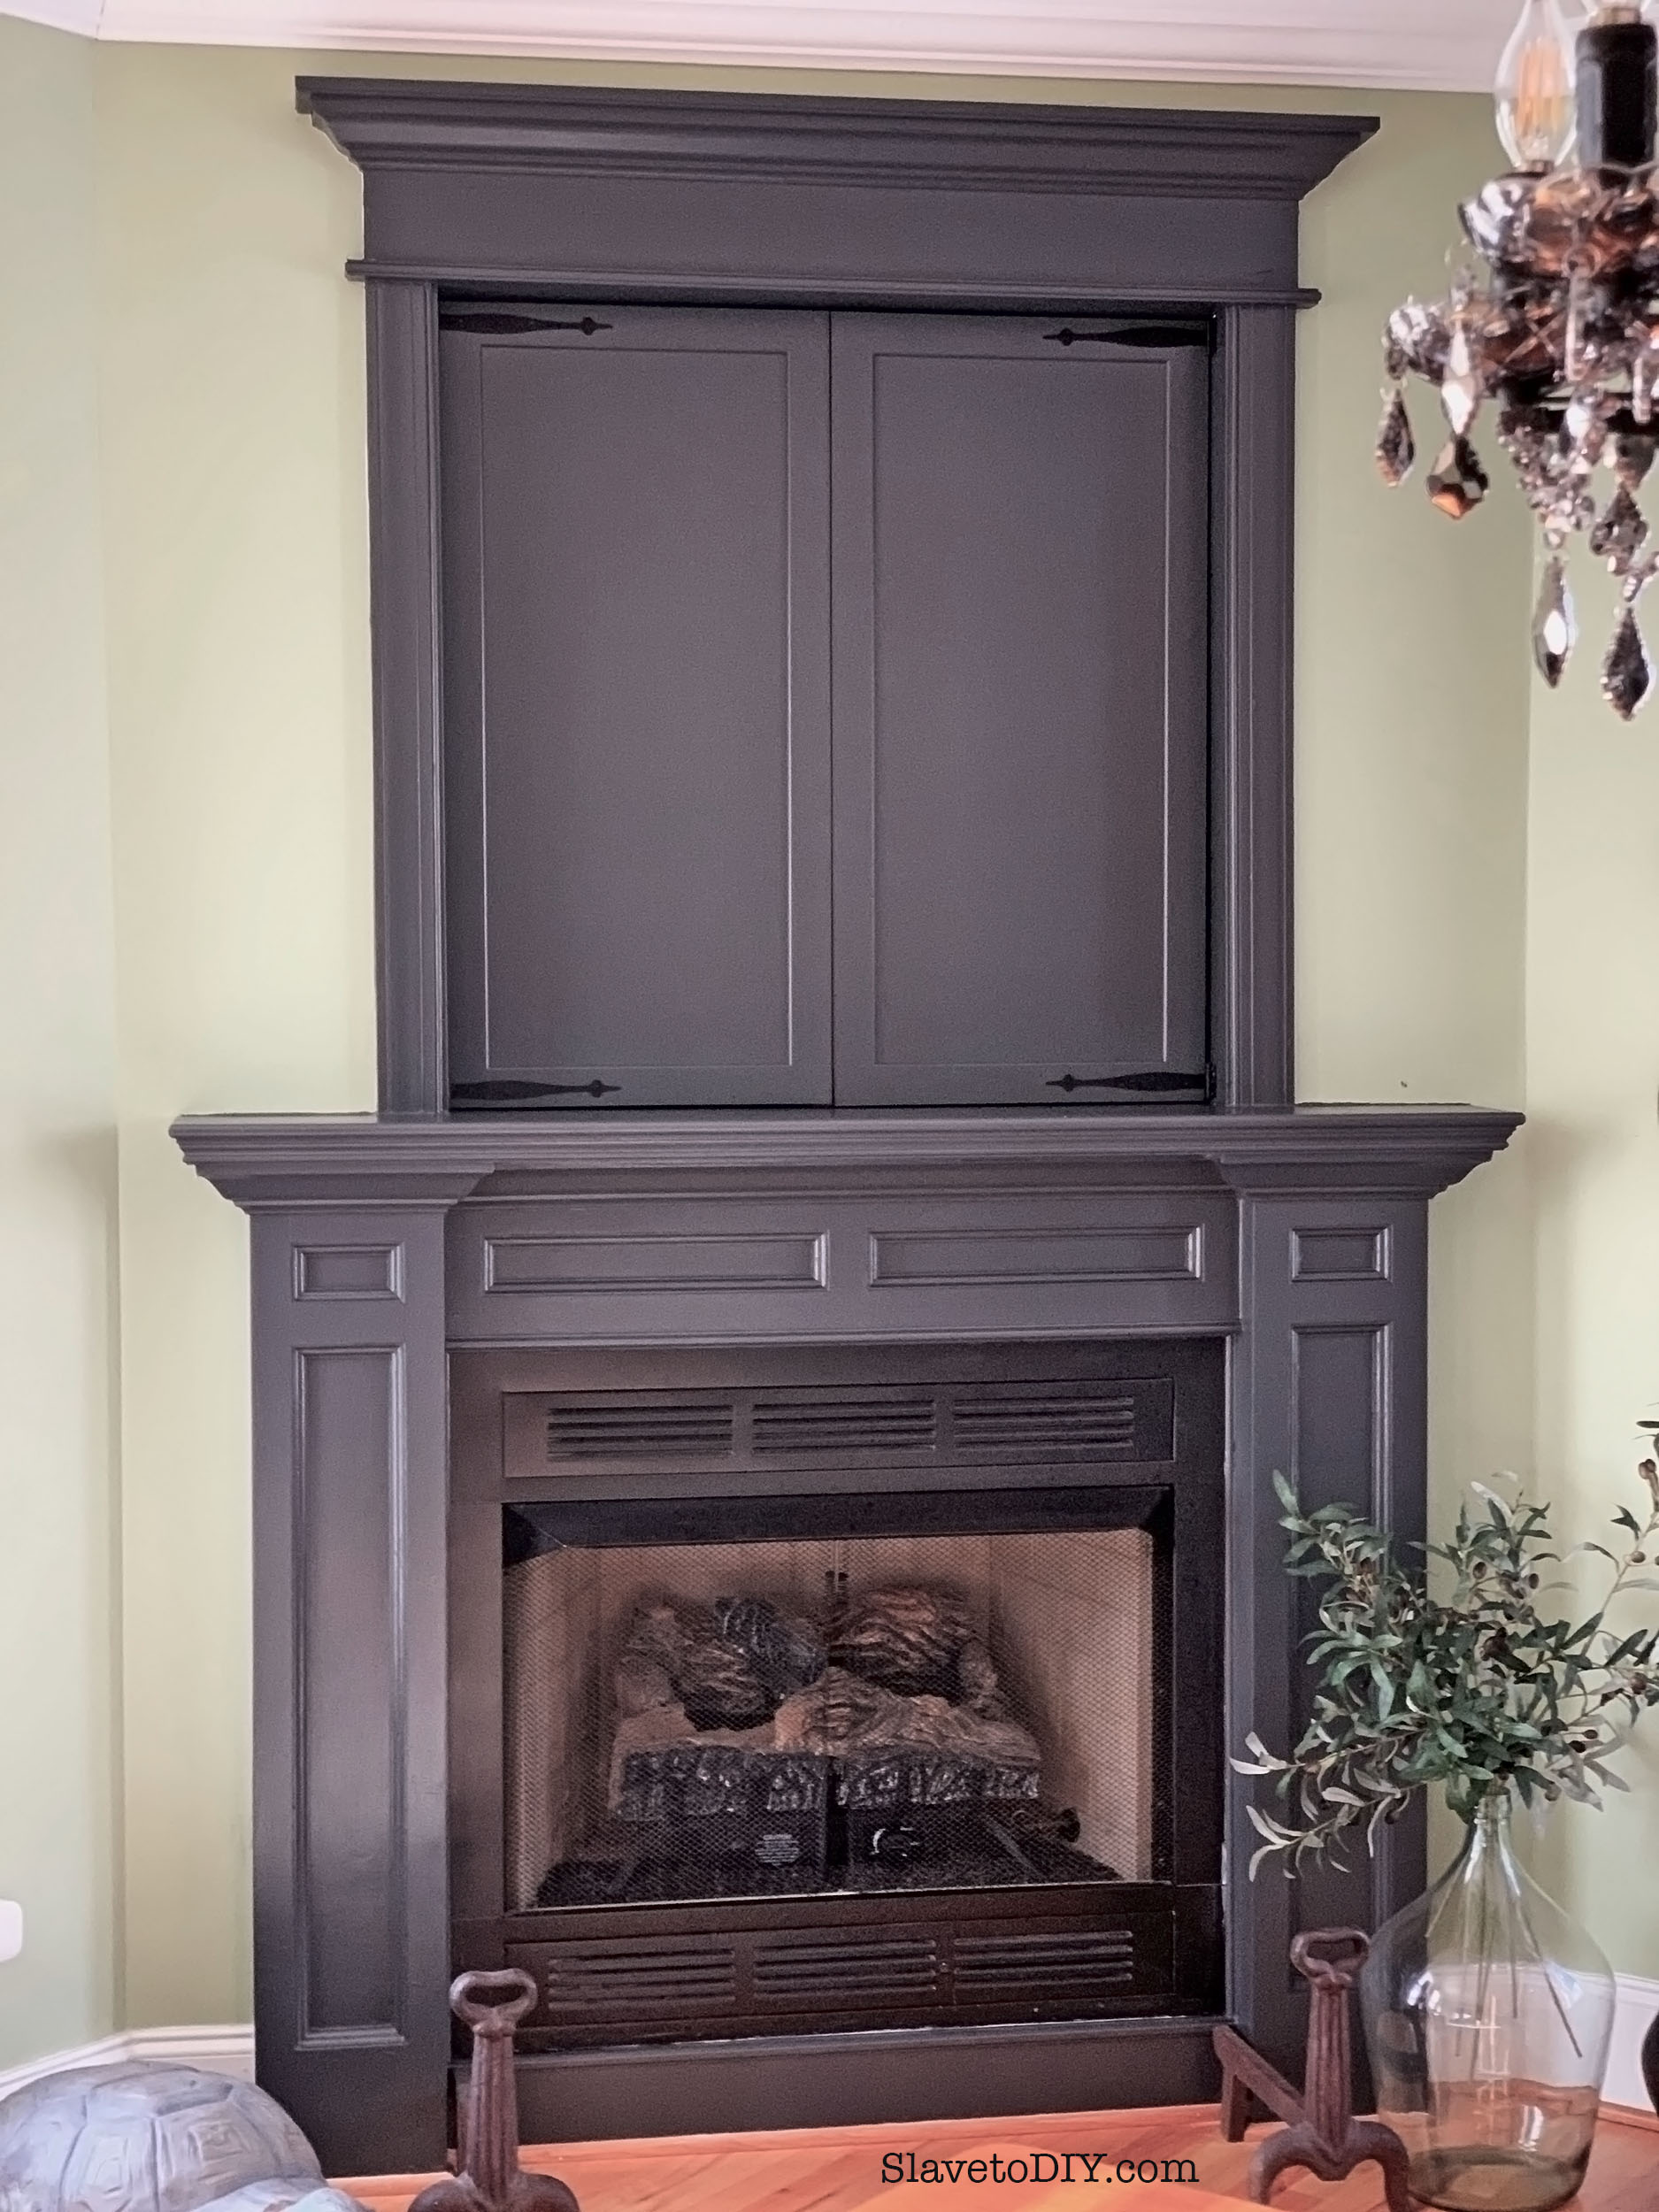
The cabinet hardware, from House Of Antique Hardware is still backordered, so I will update once that comes in and we get the doors up, but for now, I couldn’t WAIT to show you how amazing the fireplace looks with a fresh coat of paint! Drum roll, please.
The Dark and Moody Fireplace Update; Painted and Updated
It blows my mind sometimes how much a simple color change can transform a space! (And yes, I’m planning on painting the walls… but there are more dining room projects that have to happen first, like the new doors and the stone veneer on the wall to the left of the fireplace… Welcome to my project A.D.D.)
The Dark and Moody Fireplace Update
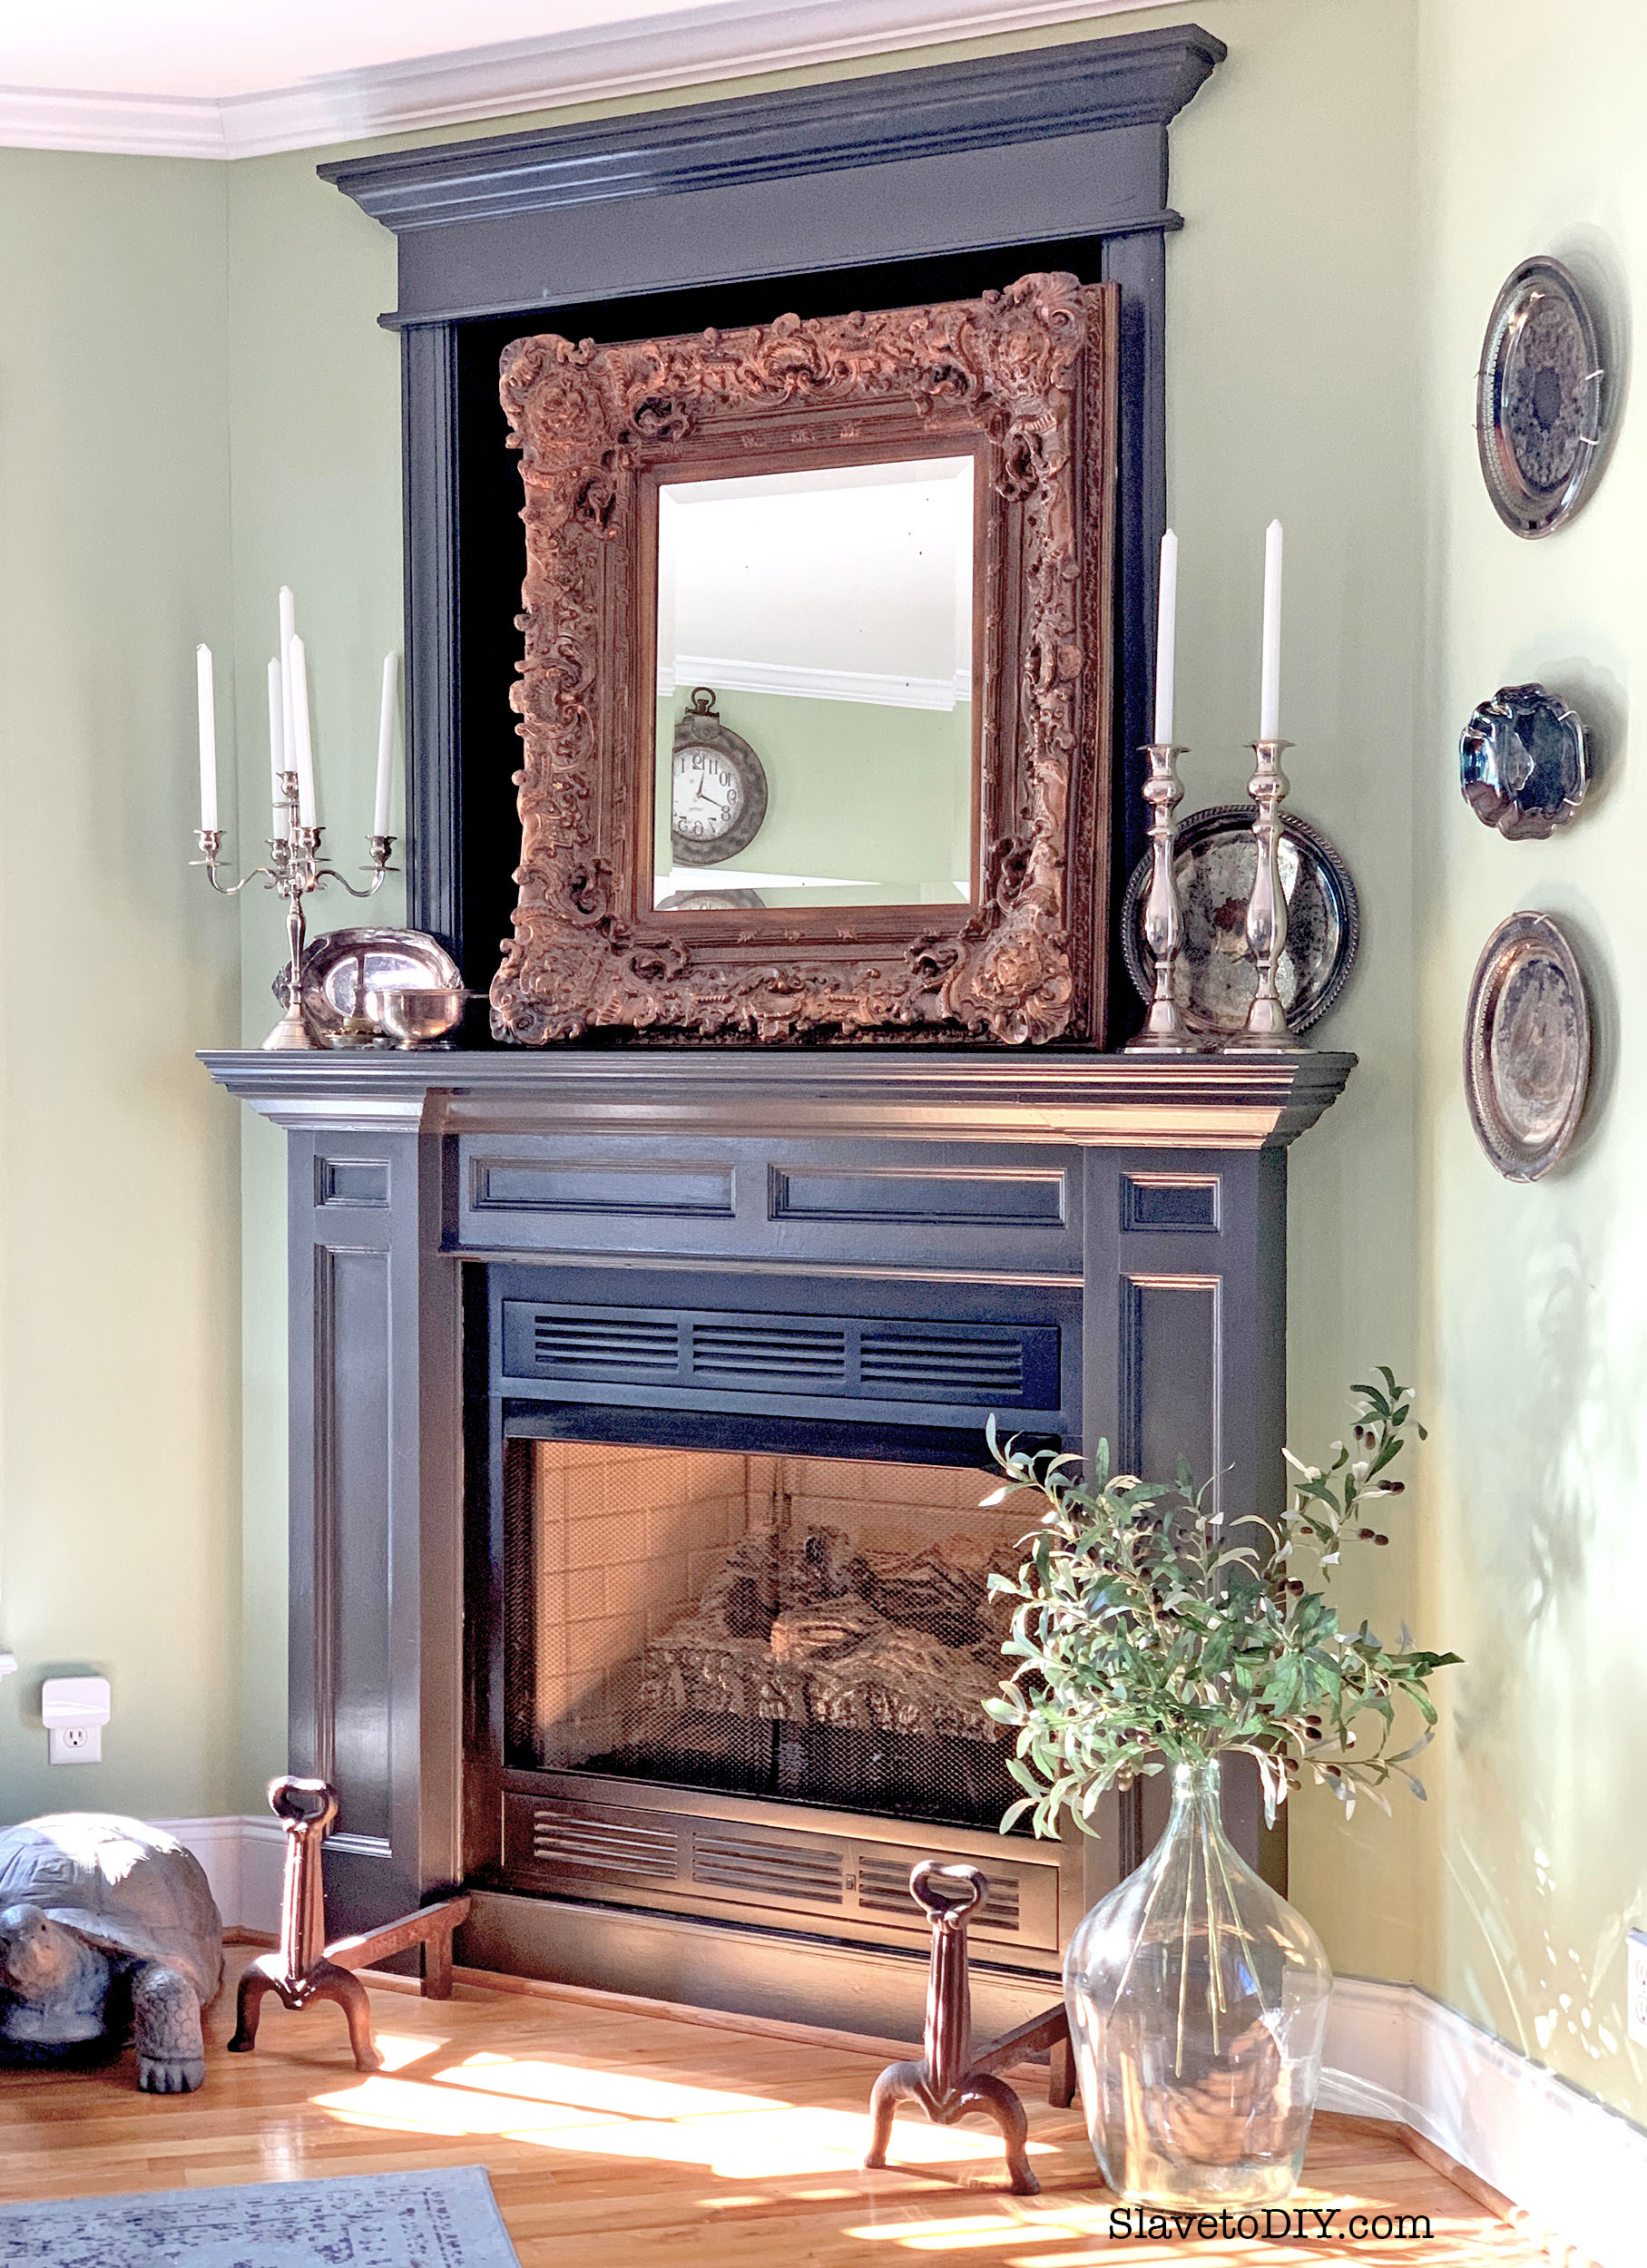
And one more, just because I’m so in love:
The Dark and Moody Fireplace Update; With Pretty Lighting
Project Update:
You’ll remember that we weren’t actually done, I just had to show you the paint because I was way too excited. The most difficult part of the project was still to come: actually installing the doors over the fireplace.
A quick word of advice: If you have to work with your spouse, find something that works for you. I find a combination of wine and a mute button work best when he’s doing something for me. I throw in some compliments and thank yous about the awesomeness of his work and shut my mouth. If I have the urge to OPEN my mouth and say something, I open it and insert wine. It has worked out pretty well thus far and has yielded tremendous results.
I ordered the doors so they exactly fit in the opening. That means that in order to account for the fact that the opening is not square and unlevel areas on the mantel, the doors had to be dry-fit, then trimmed down. Now, let me tell you, this is the most Rainman-iest project in Rainman land. It also means that we couldn’t paint them until they were fitted and trimmed.
Full disclosure: I love this man.
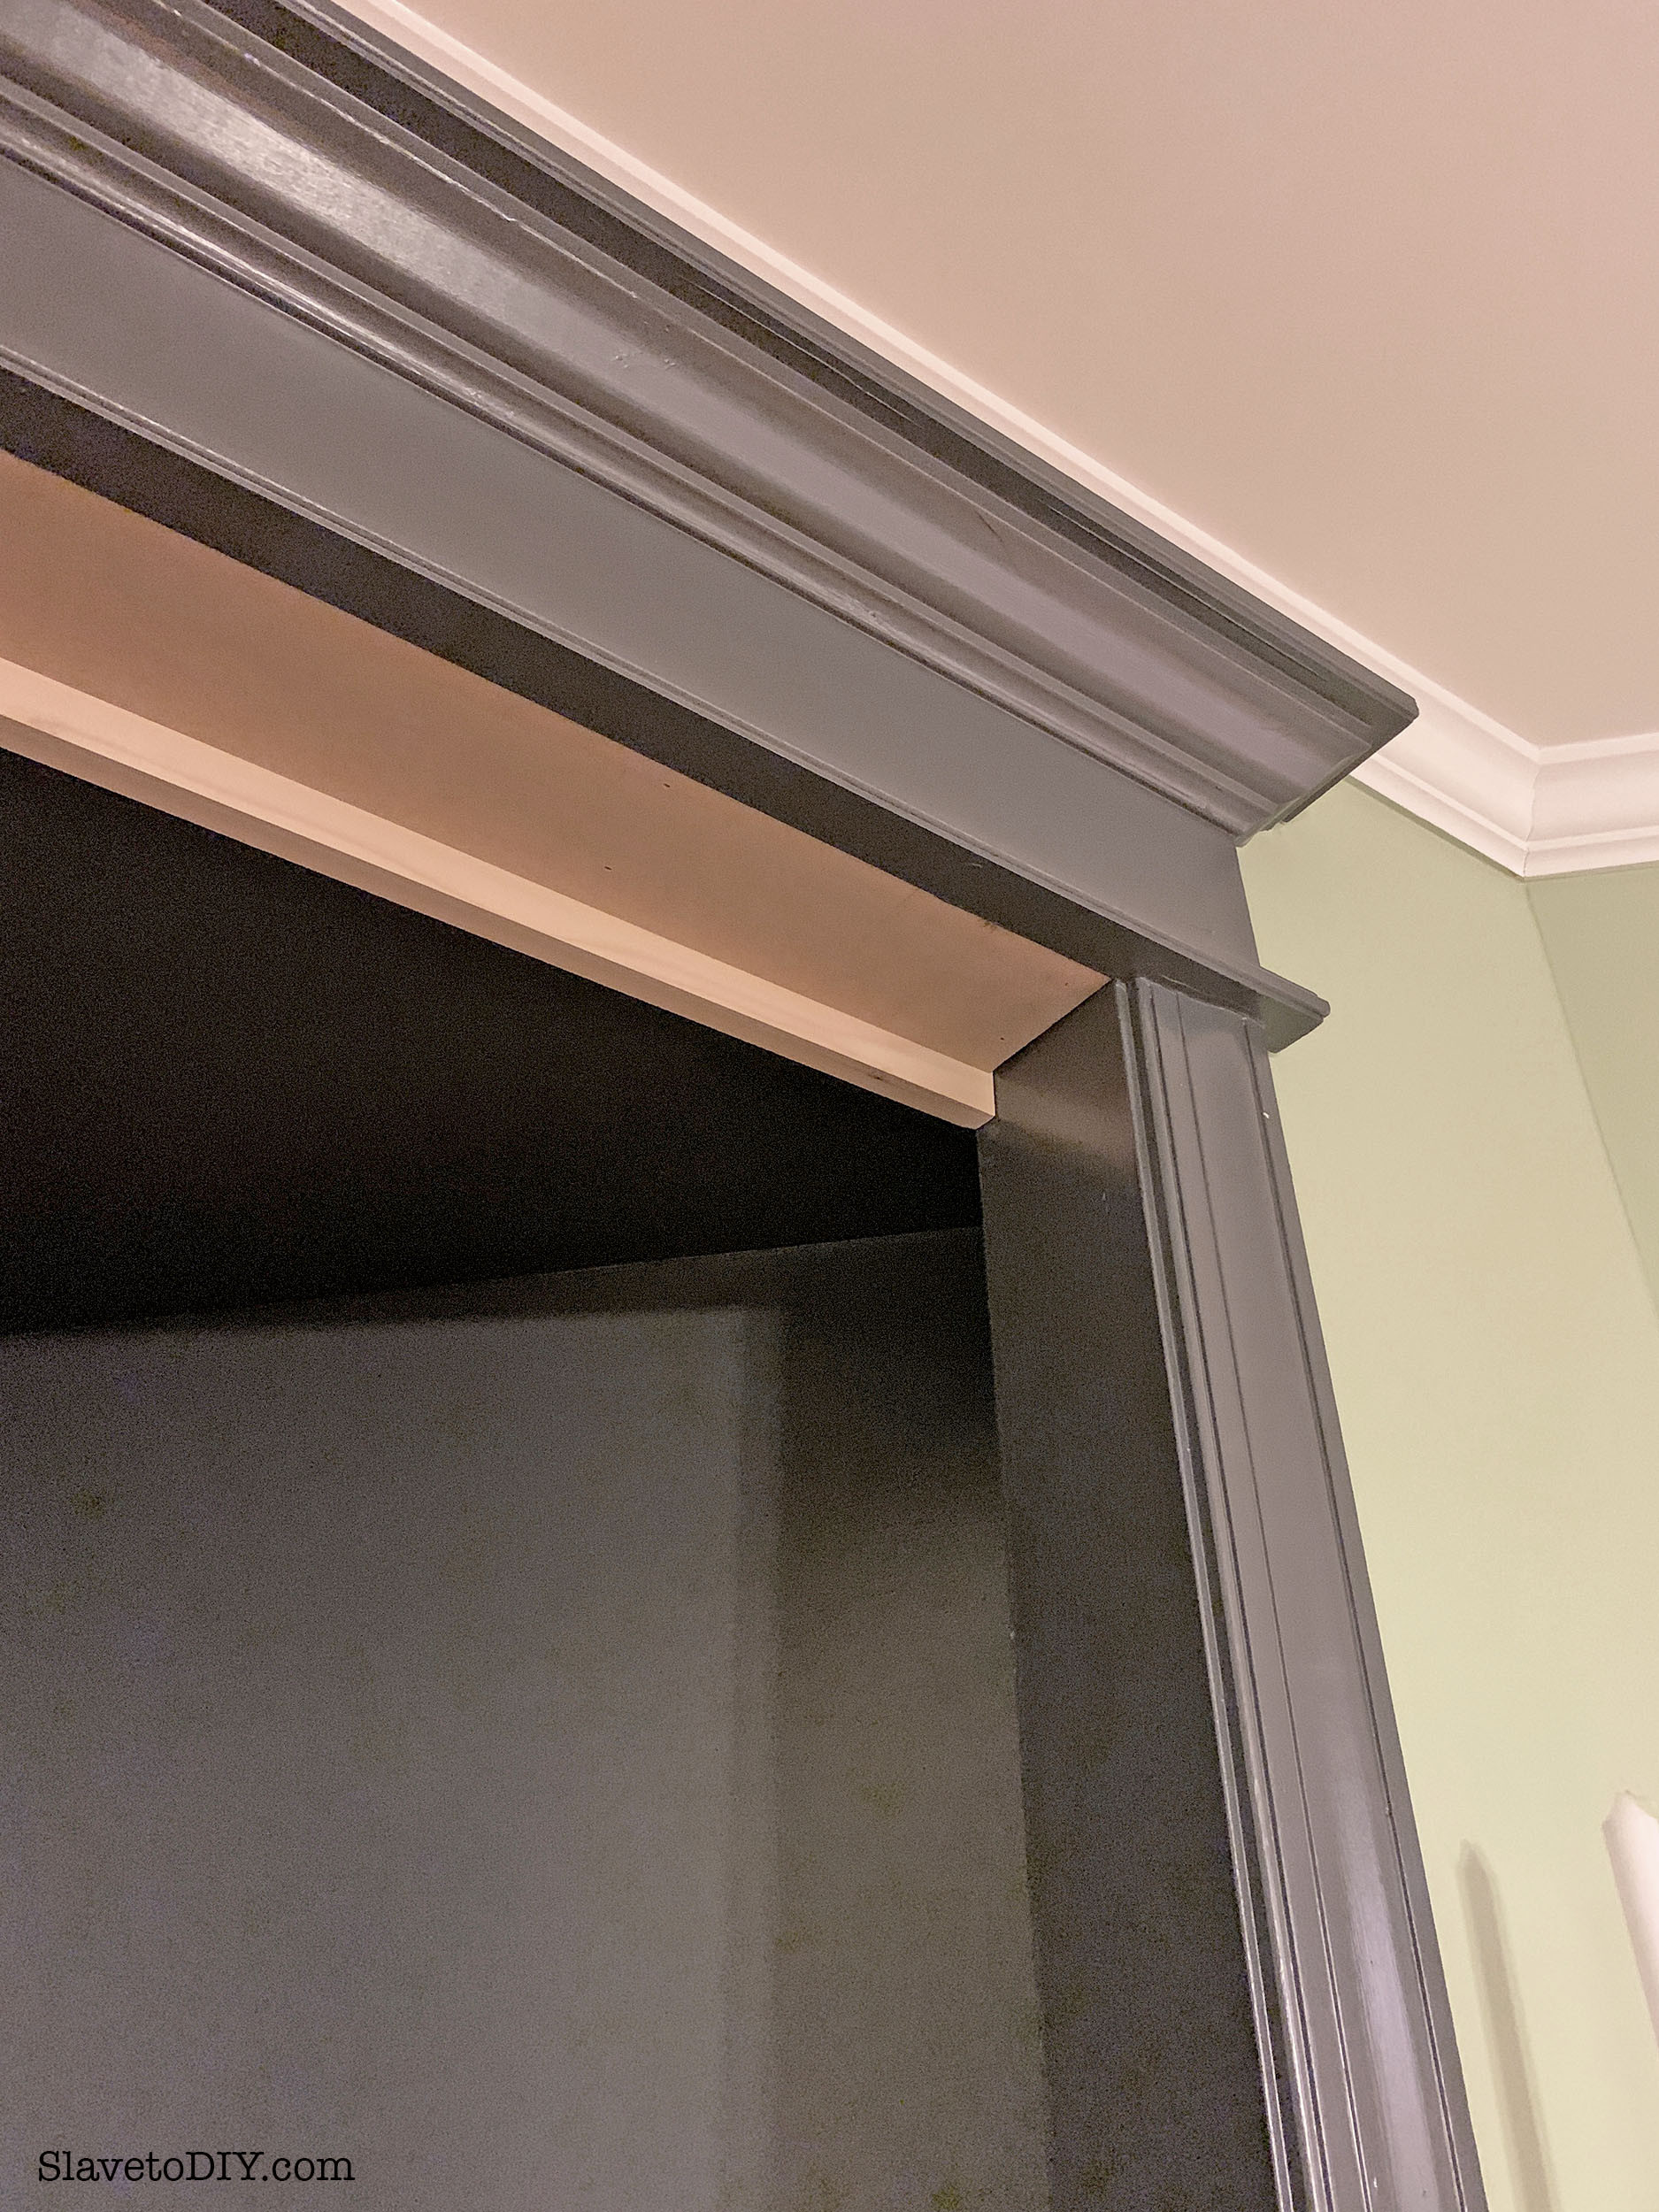
First, was the problem of explaining why we needed to build trim above to act as a stop for the doors and fill in the dead space above when the doors are closed. It’s not that he doesn’t understand my “I don’t want a gap above the doors”, it’s just that explaining something conceptually doesn’t always translate to something concrete in his brain. So, a little while later, he devised a solution.
The Dark and Moody Fireplace Update, Installing Trim Over Fireplace
“YES, my love, that will fill in the gap. It’s perfect. What’s the next step?” (sips wine)
The Dark and Moody Fireplace Update, Trim Above Doors
Back to Rainman Land:
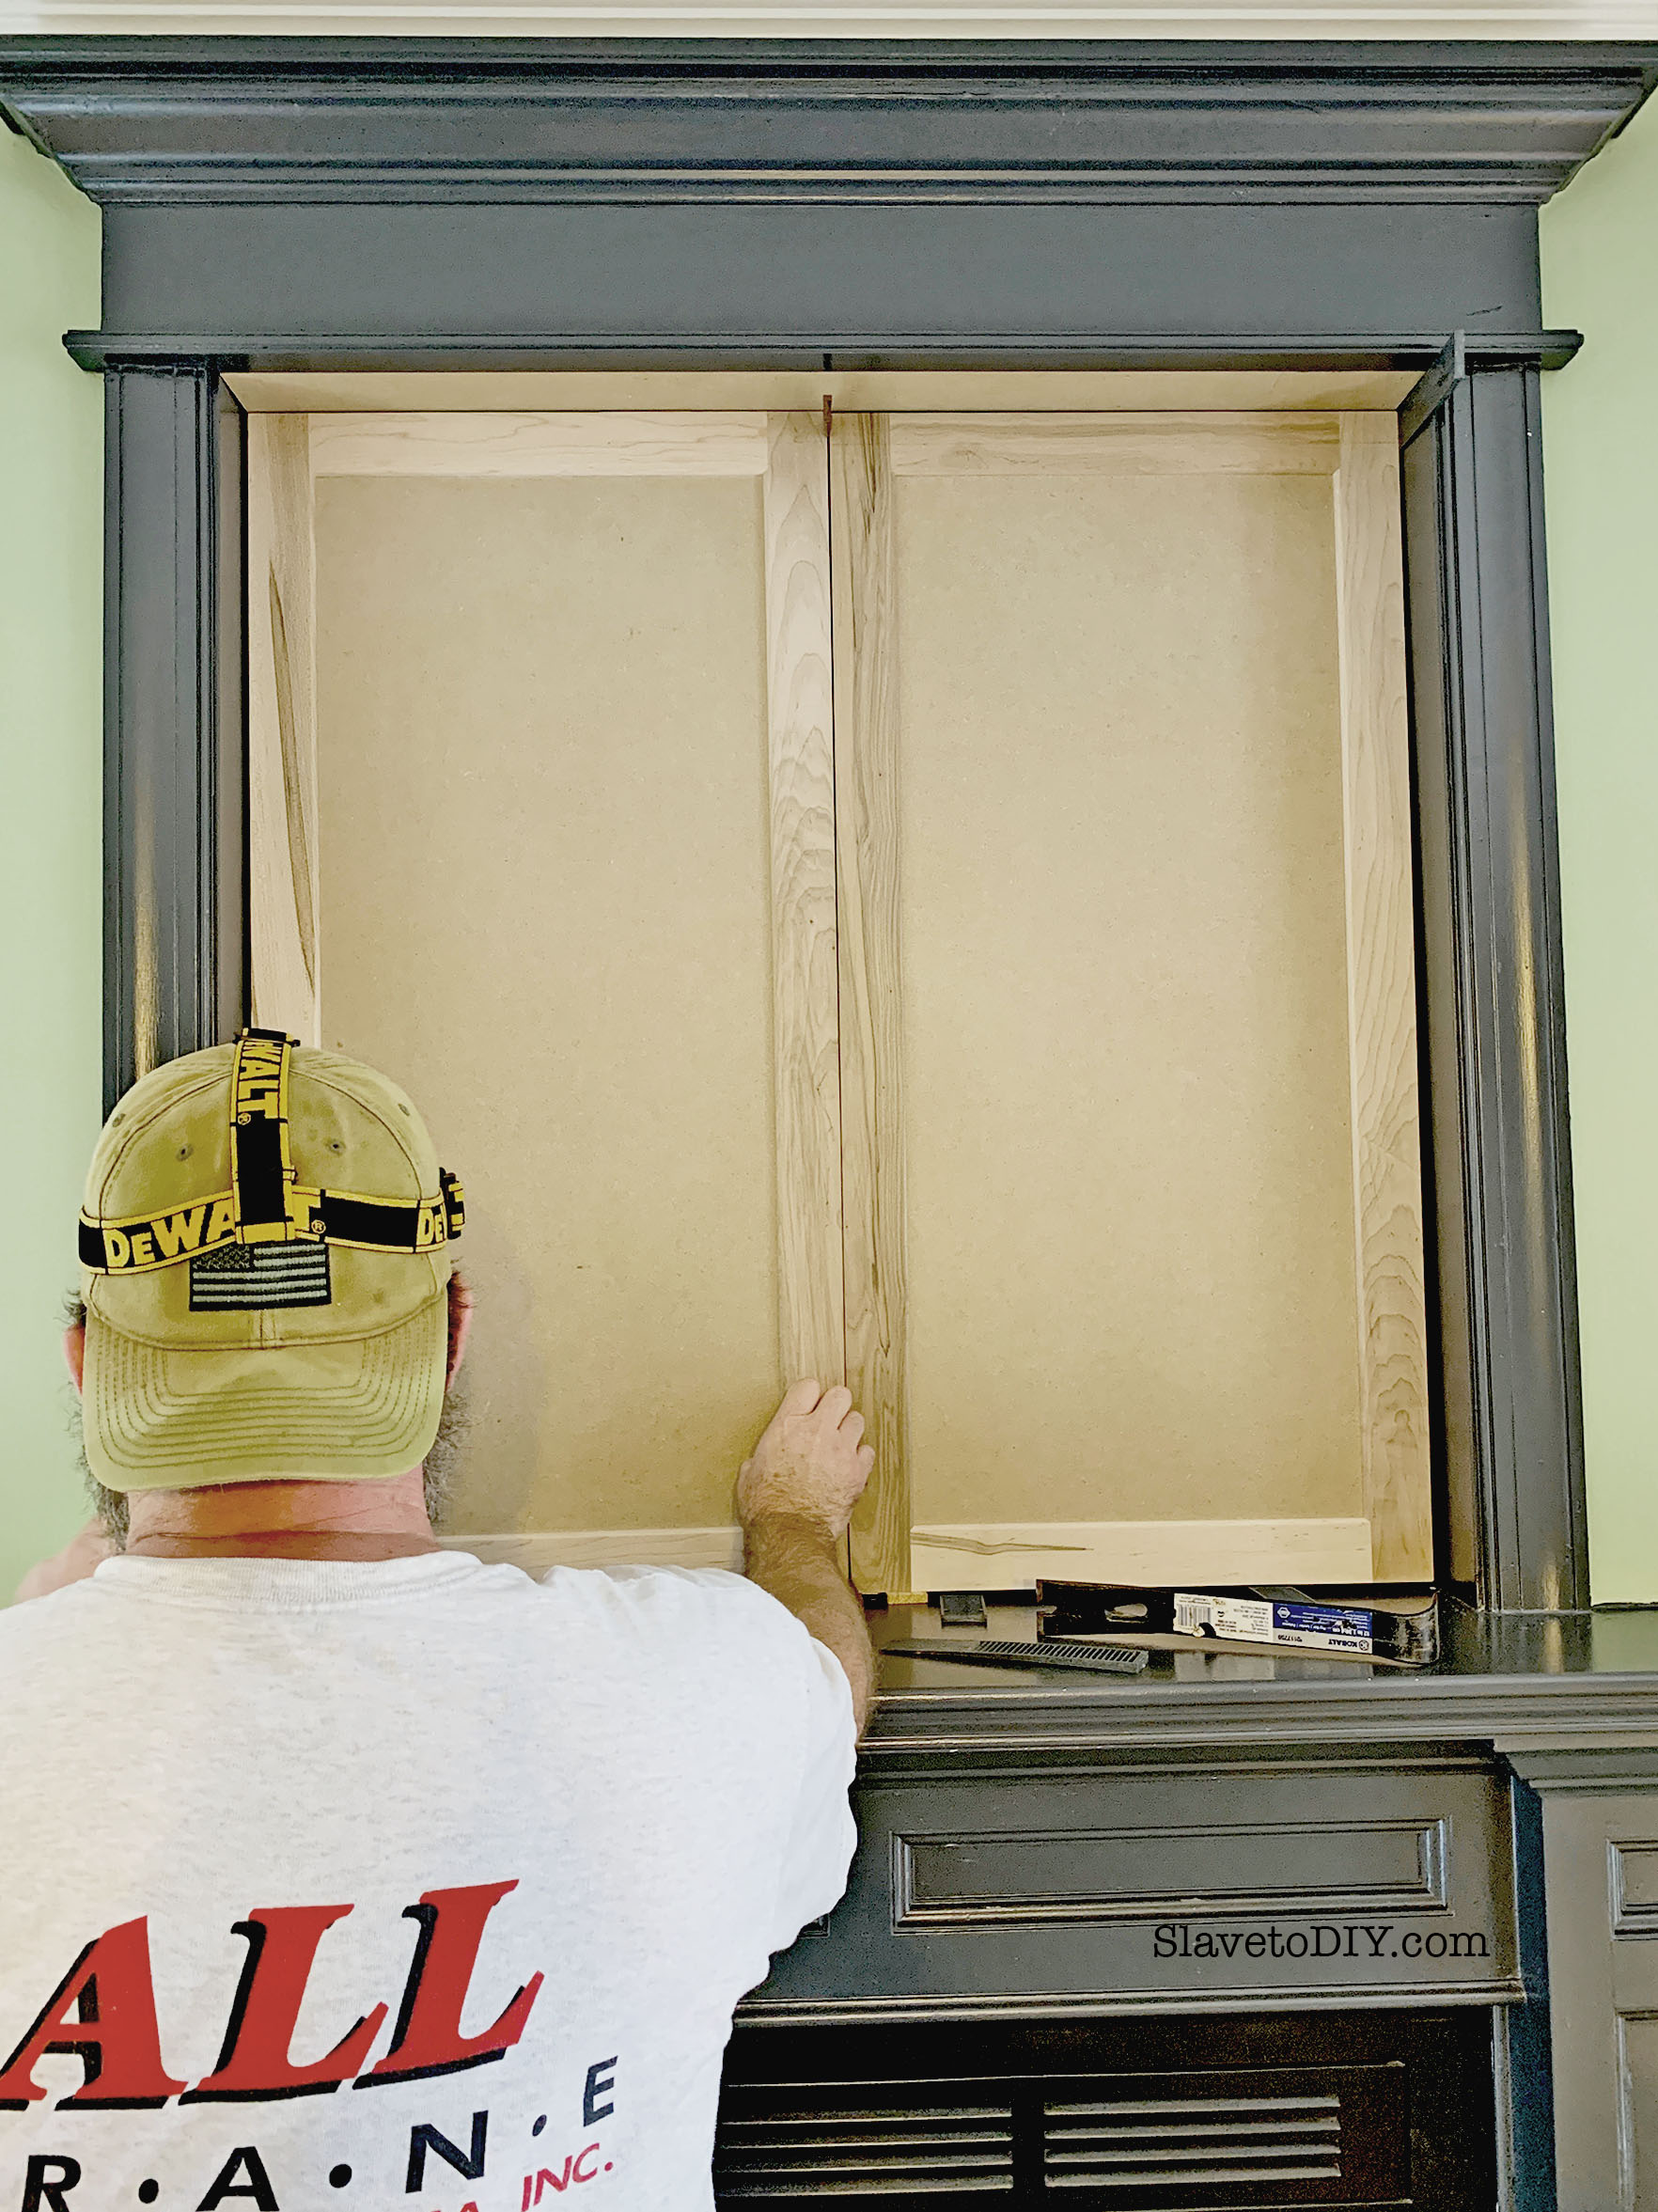
This installation involves a plumb-bob, multiple levels, obsessive measuring, remeasuring, shimming, shimming again, dry fitting, shimming again. Measuring again. Splitting the difference. Rainman muttering about the lack of squareness in the opening. Let’s just say that I may or may not have started drinking before 5 PM that day (but once again, in my hurry to slap it up there and be done with it, I’m quite sure it wouldn’t have been so downright balanced and lovely in the end).
The Dark and Moody Fireplace Update, Shimming Doors
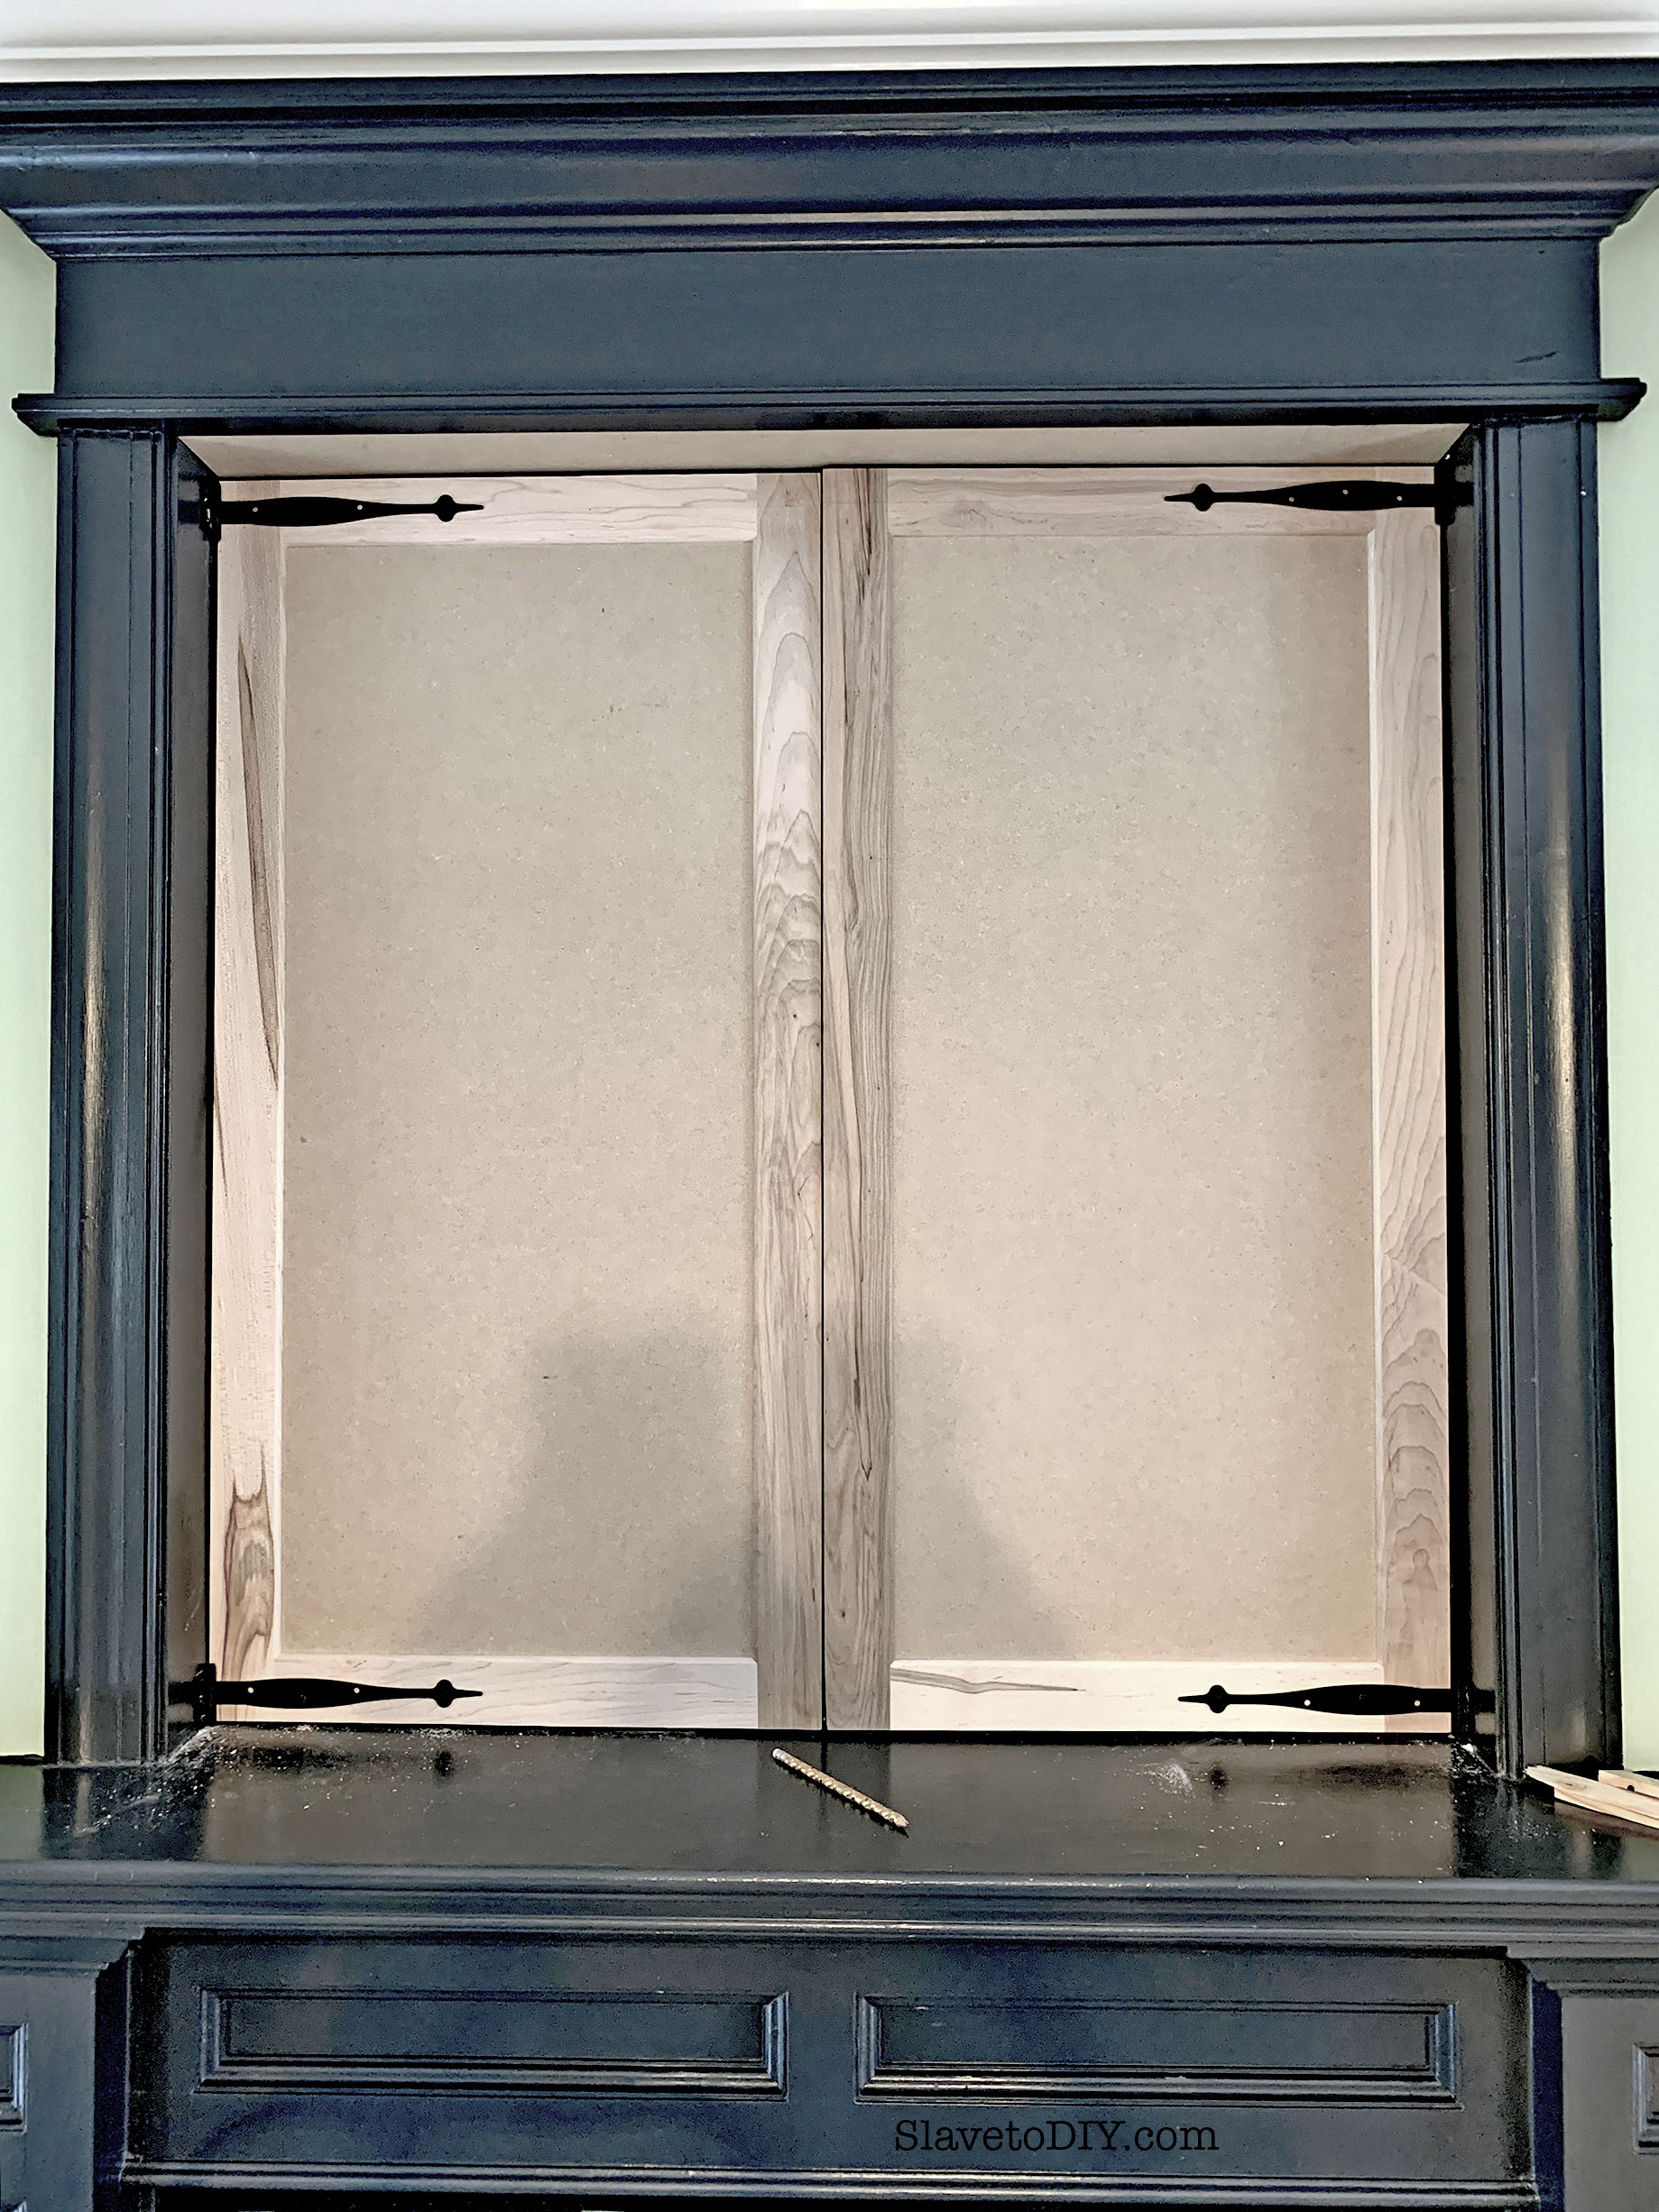
After it was shimmed (I don’t mean to undersell the length of that process), I held the doors while he aligned the hinges (more wine, more wine, more wine), and eventually, after much careful sanding and trimming, the doors were hung, and had all the clearance they needed to open and close.
The Dark and Moody Fireplace Update, Doors Dry Fitted
Now, we are waiting on it to be not blustery weather so we can take the doors down and paint them. And then we will actually be done.
Update: Finally painted!
The Dark and Moody Fireplace Update; Painting the doors with the Critter
The Dark and Moody Fireplace Update; Finished Painted Doors
I’m really fond of drum rolls, so let’s do that again. Here’s a shot with the doors on and DONE!
The Dark and Moody Fireplace Update: Doors On And Ready To Hide The TV
And one with the doors painted, on, and CLOSED. WOOT! (Can’t see the TV, can ya, Russ?)
The Dark and Moody Fireplace Update; Doors Painted, On, and CLOSED
It may seem like a small thing to other people, but this project has been on the list for a long time. It’s just a matter of making it a priority and having the time to do it. But, of course, that makes each little change that much more awesome!
Here is the breakdown:
Project Cost:
Benjamin Moore Paint and supplies: $96.66
Two Cabinet doors: $149.57 (delivered)
House of Antique Hardware 2X Pair of 9″ Smooth Iron Flush Mount Spear Strap Hinges: $43.94
Total: $290.17
And just for fun, let’s see that before and after one more time:
The Dark and Moody Fireplace Update, Before We StartedThe Dark and Moody Fireplace Update: The After: Doors above the fireplace, fresh paint, and a new light fixture
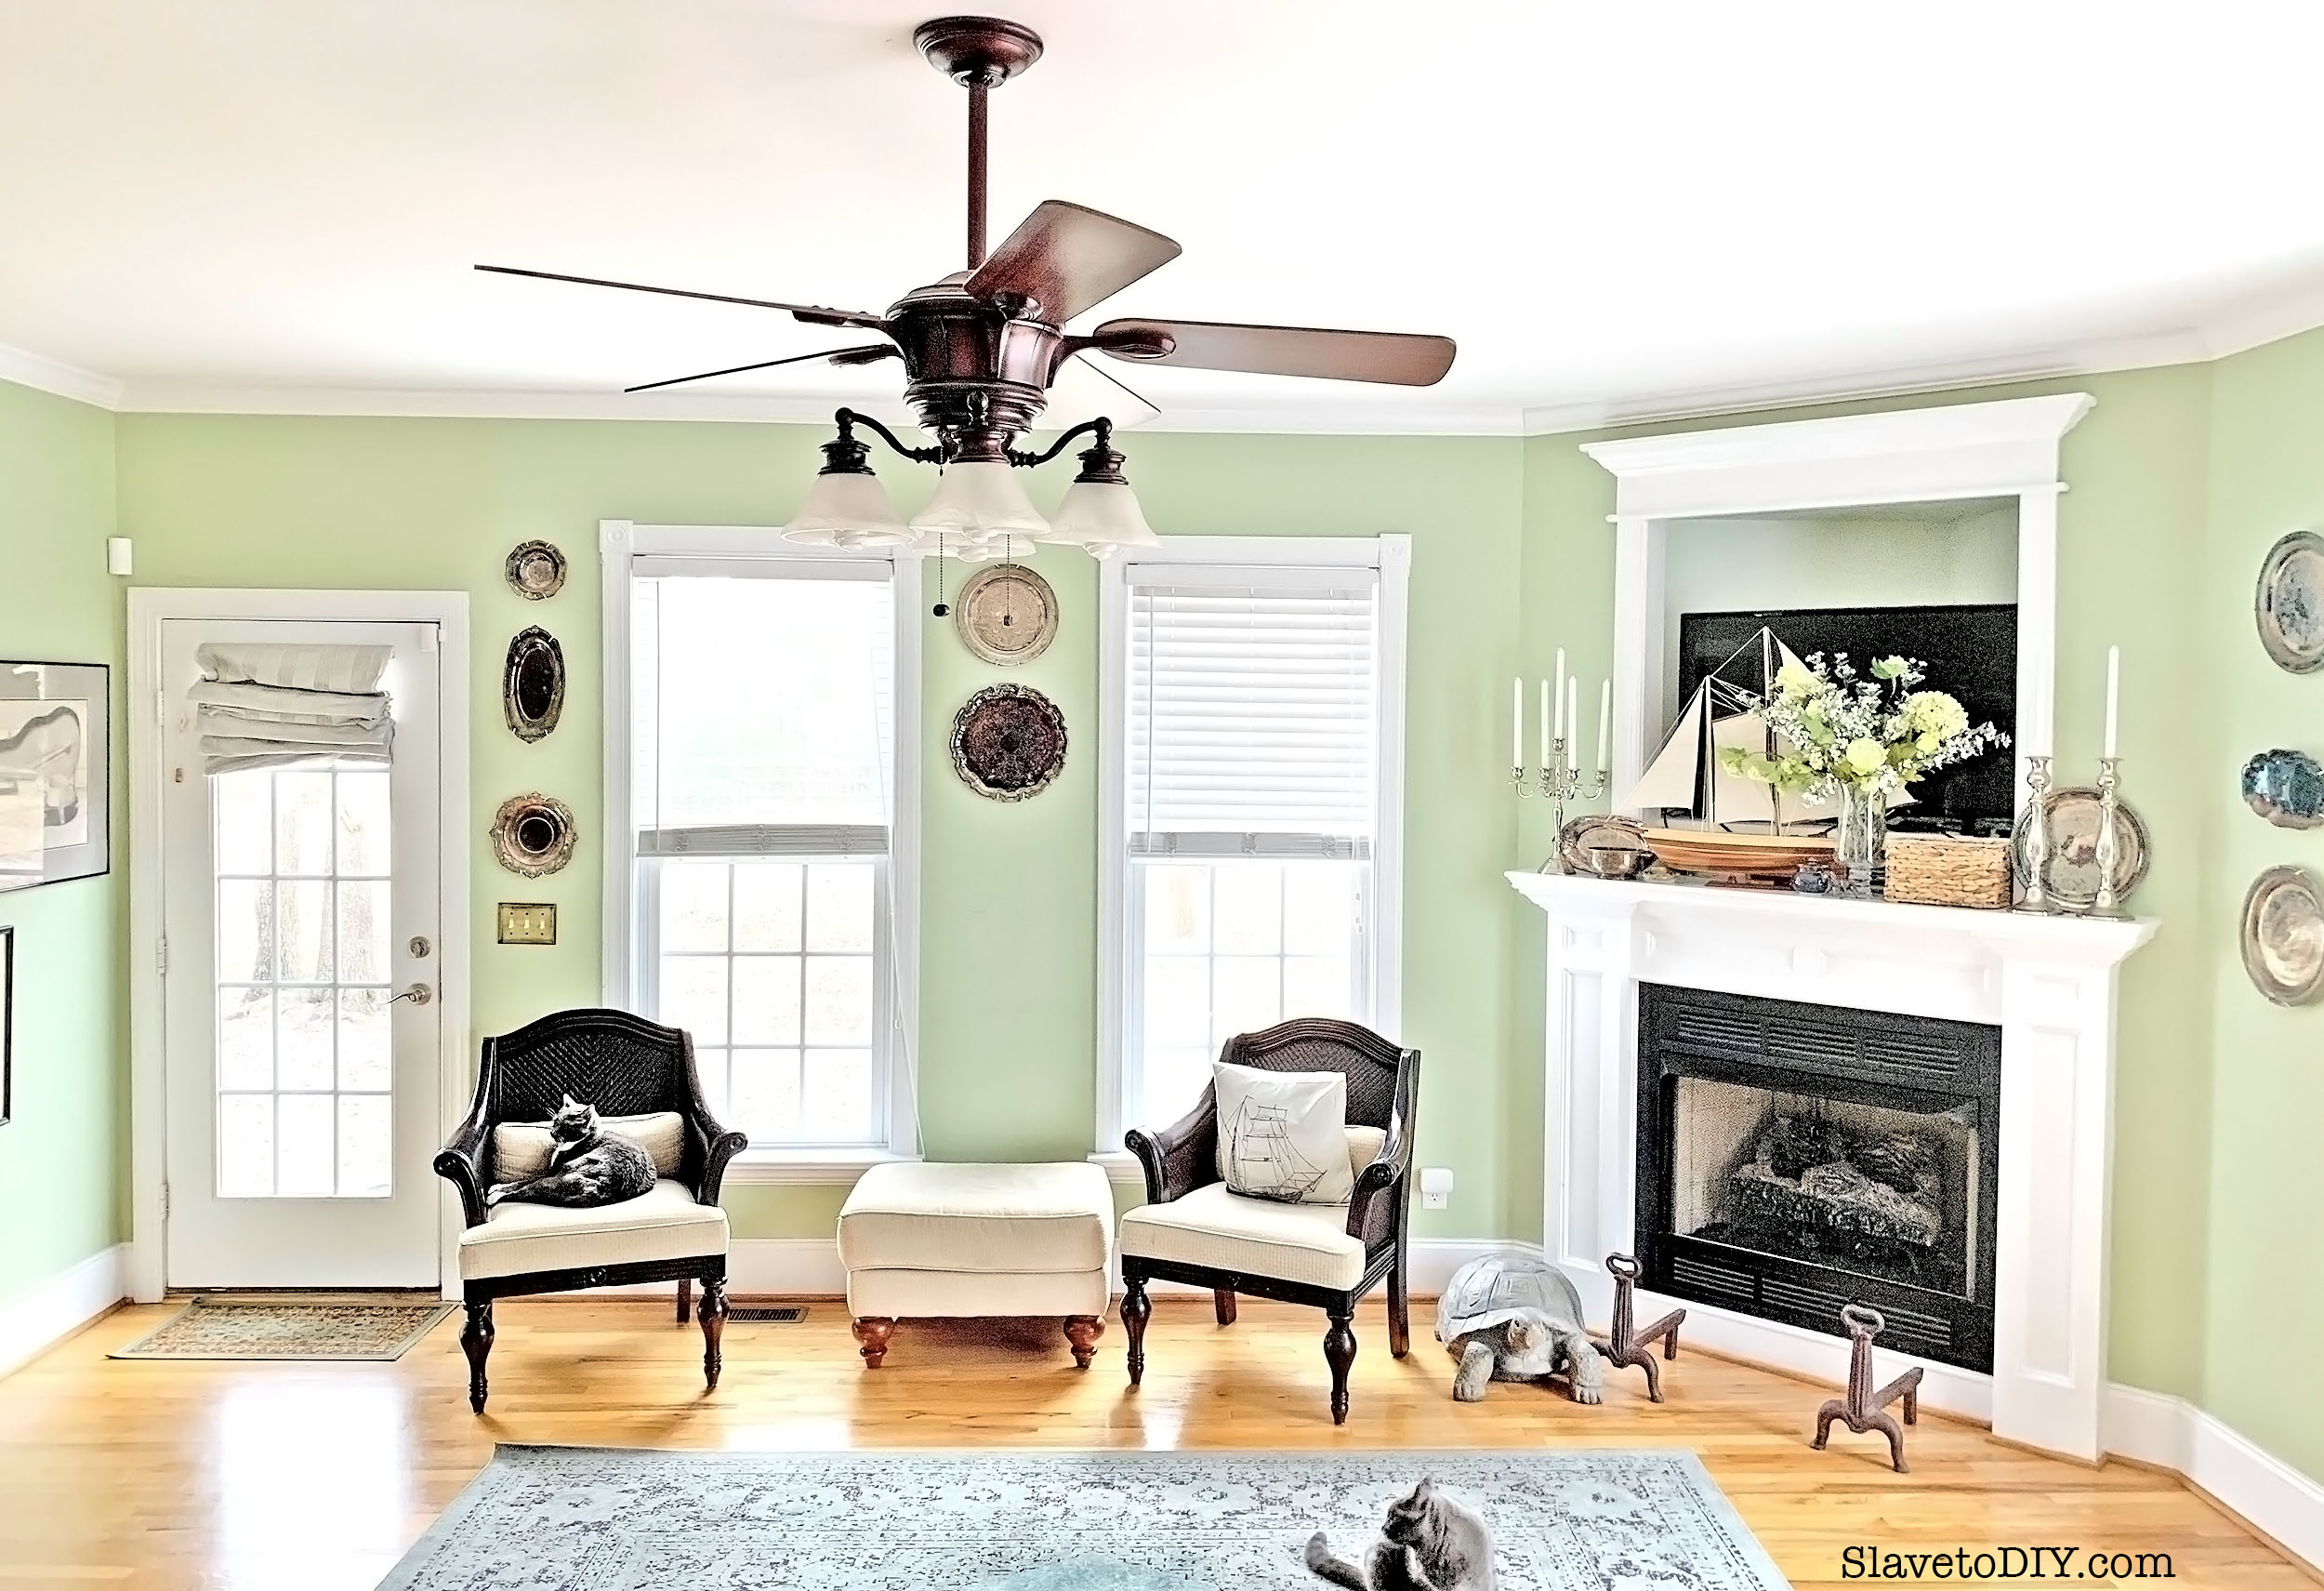
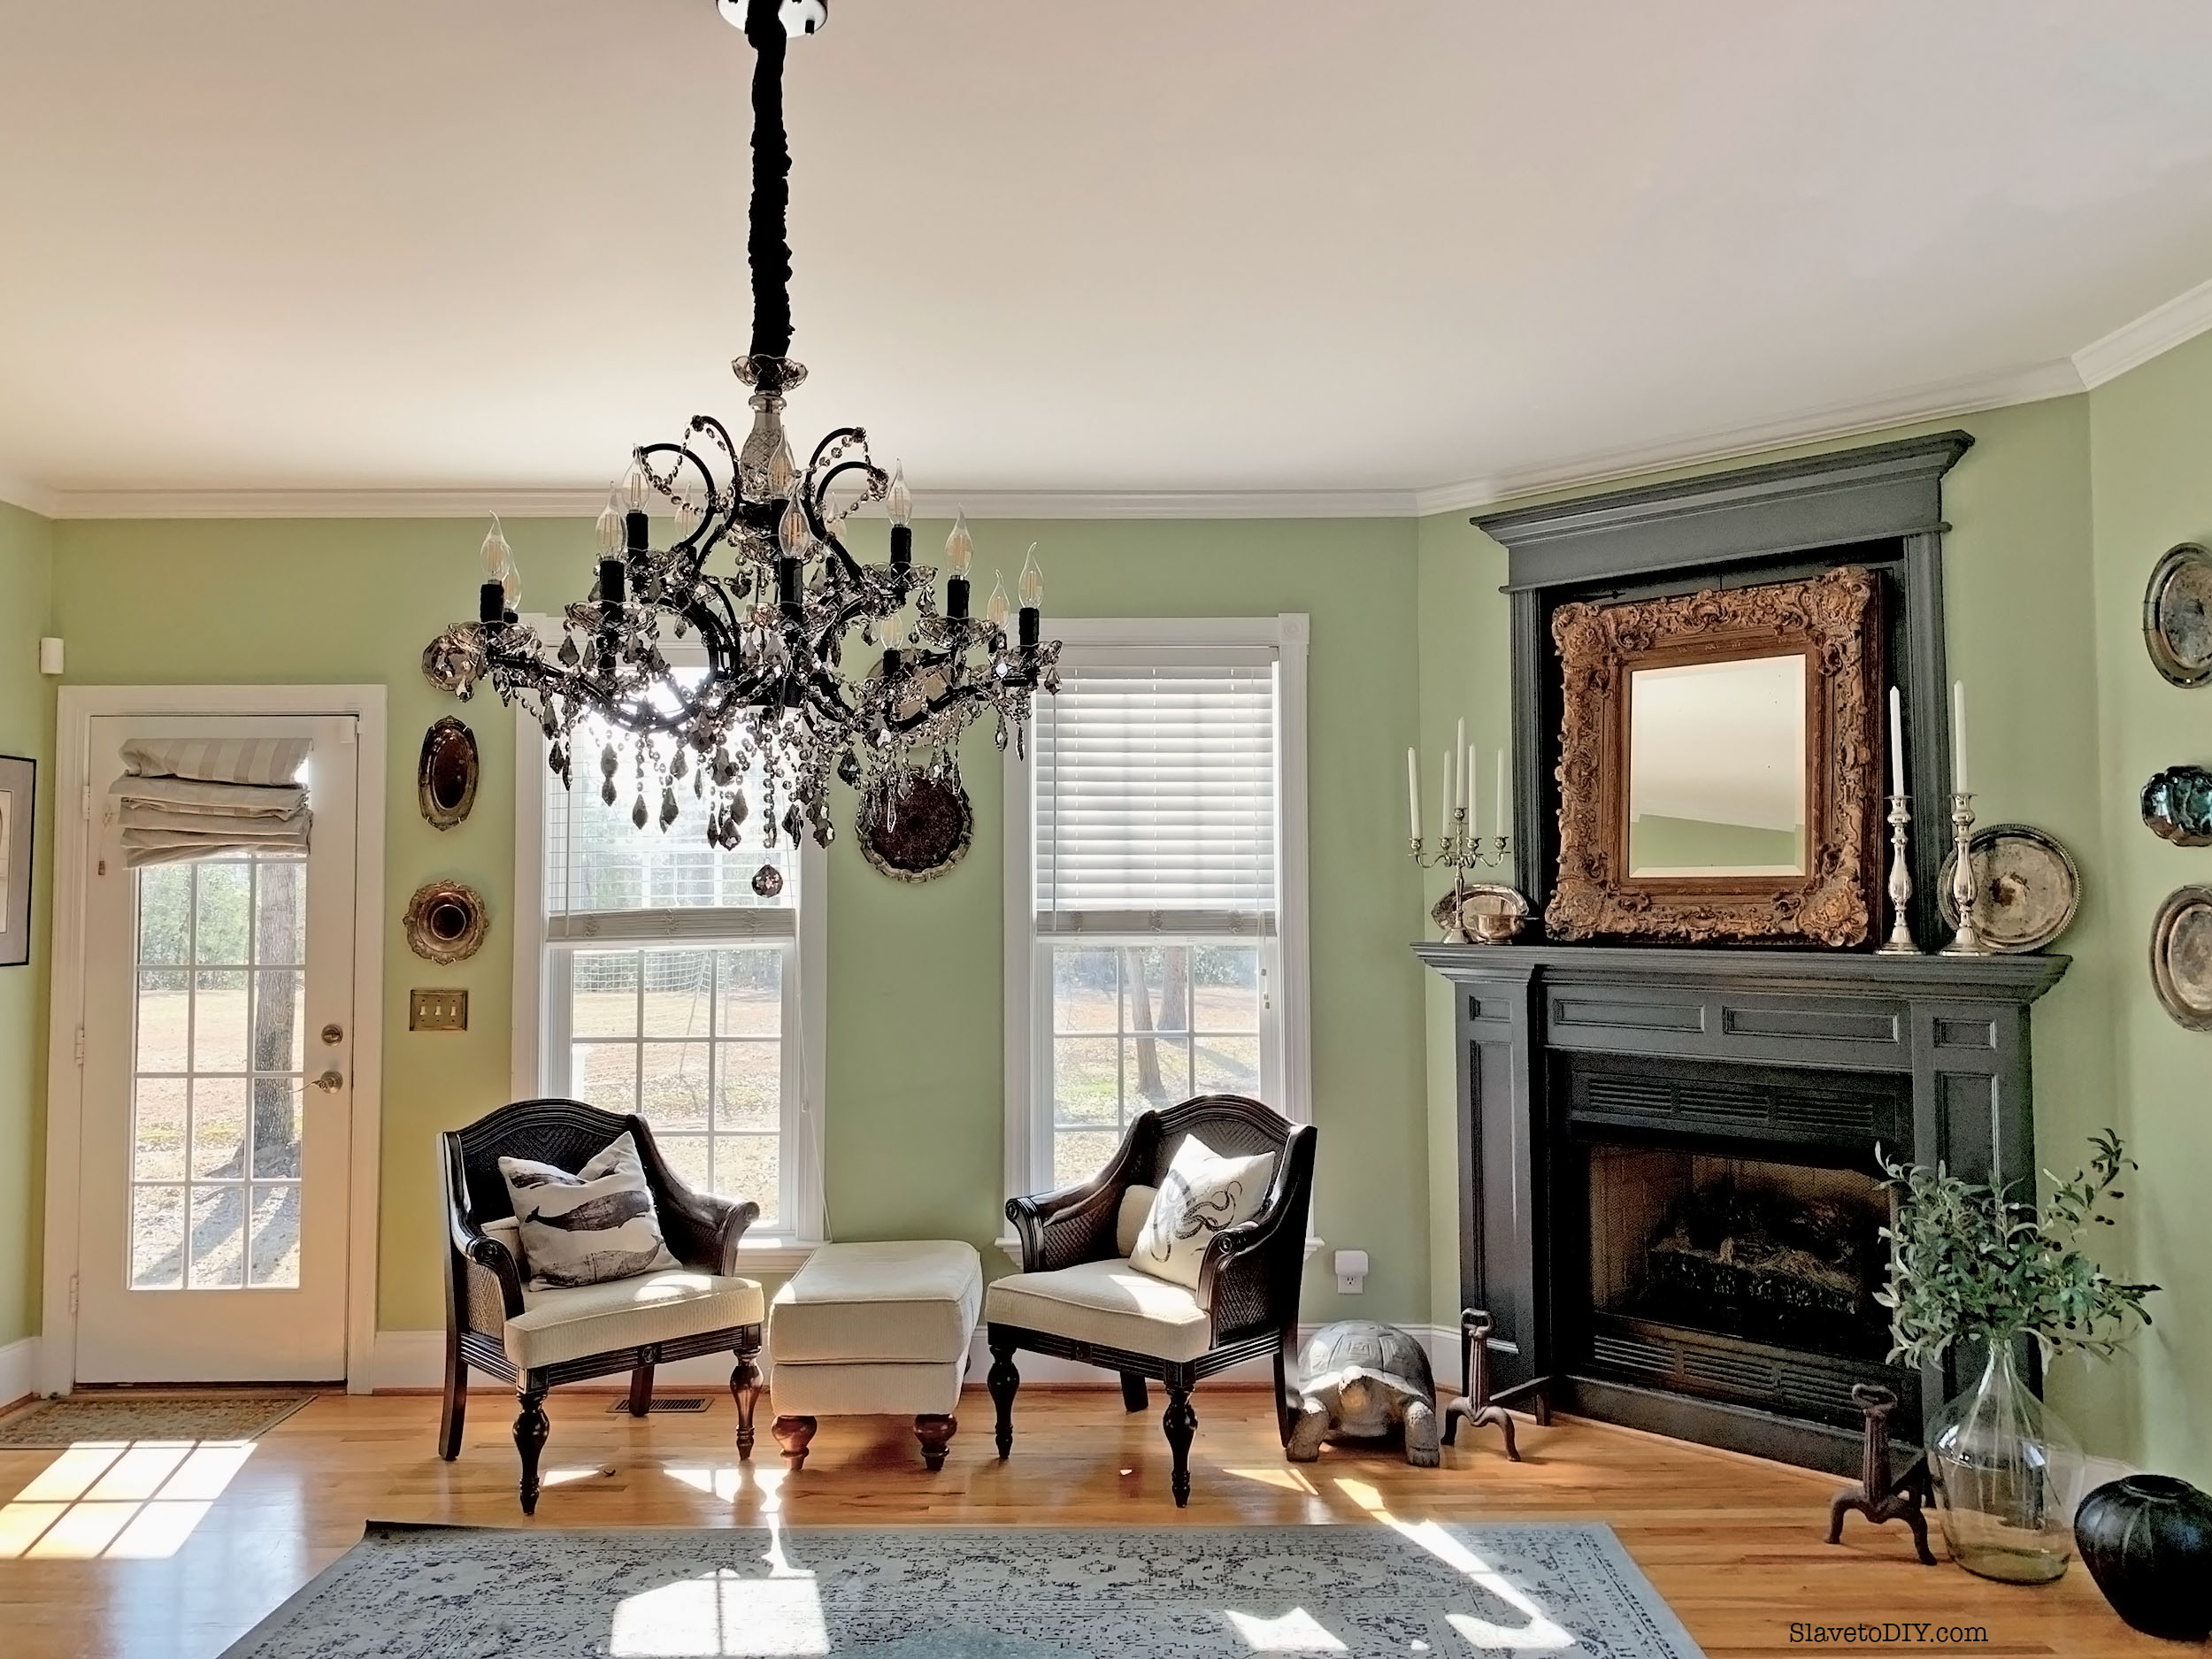
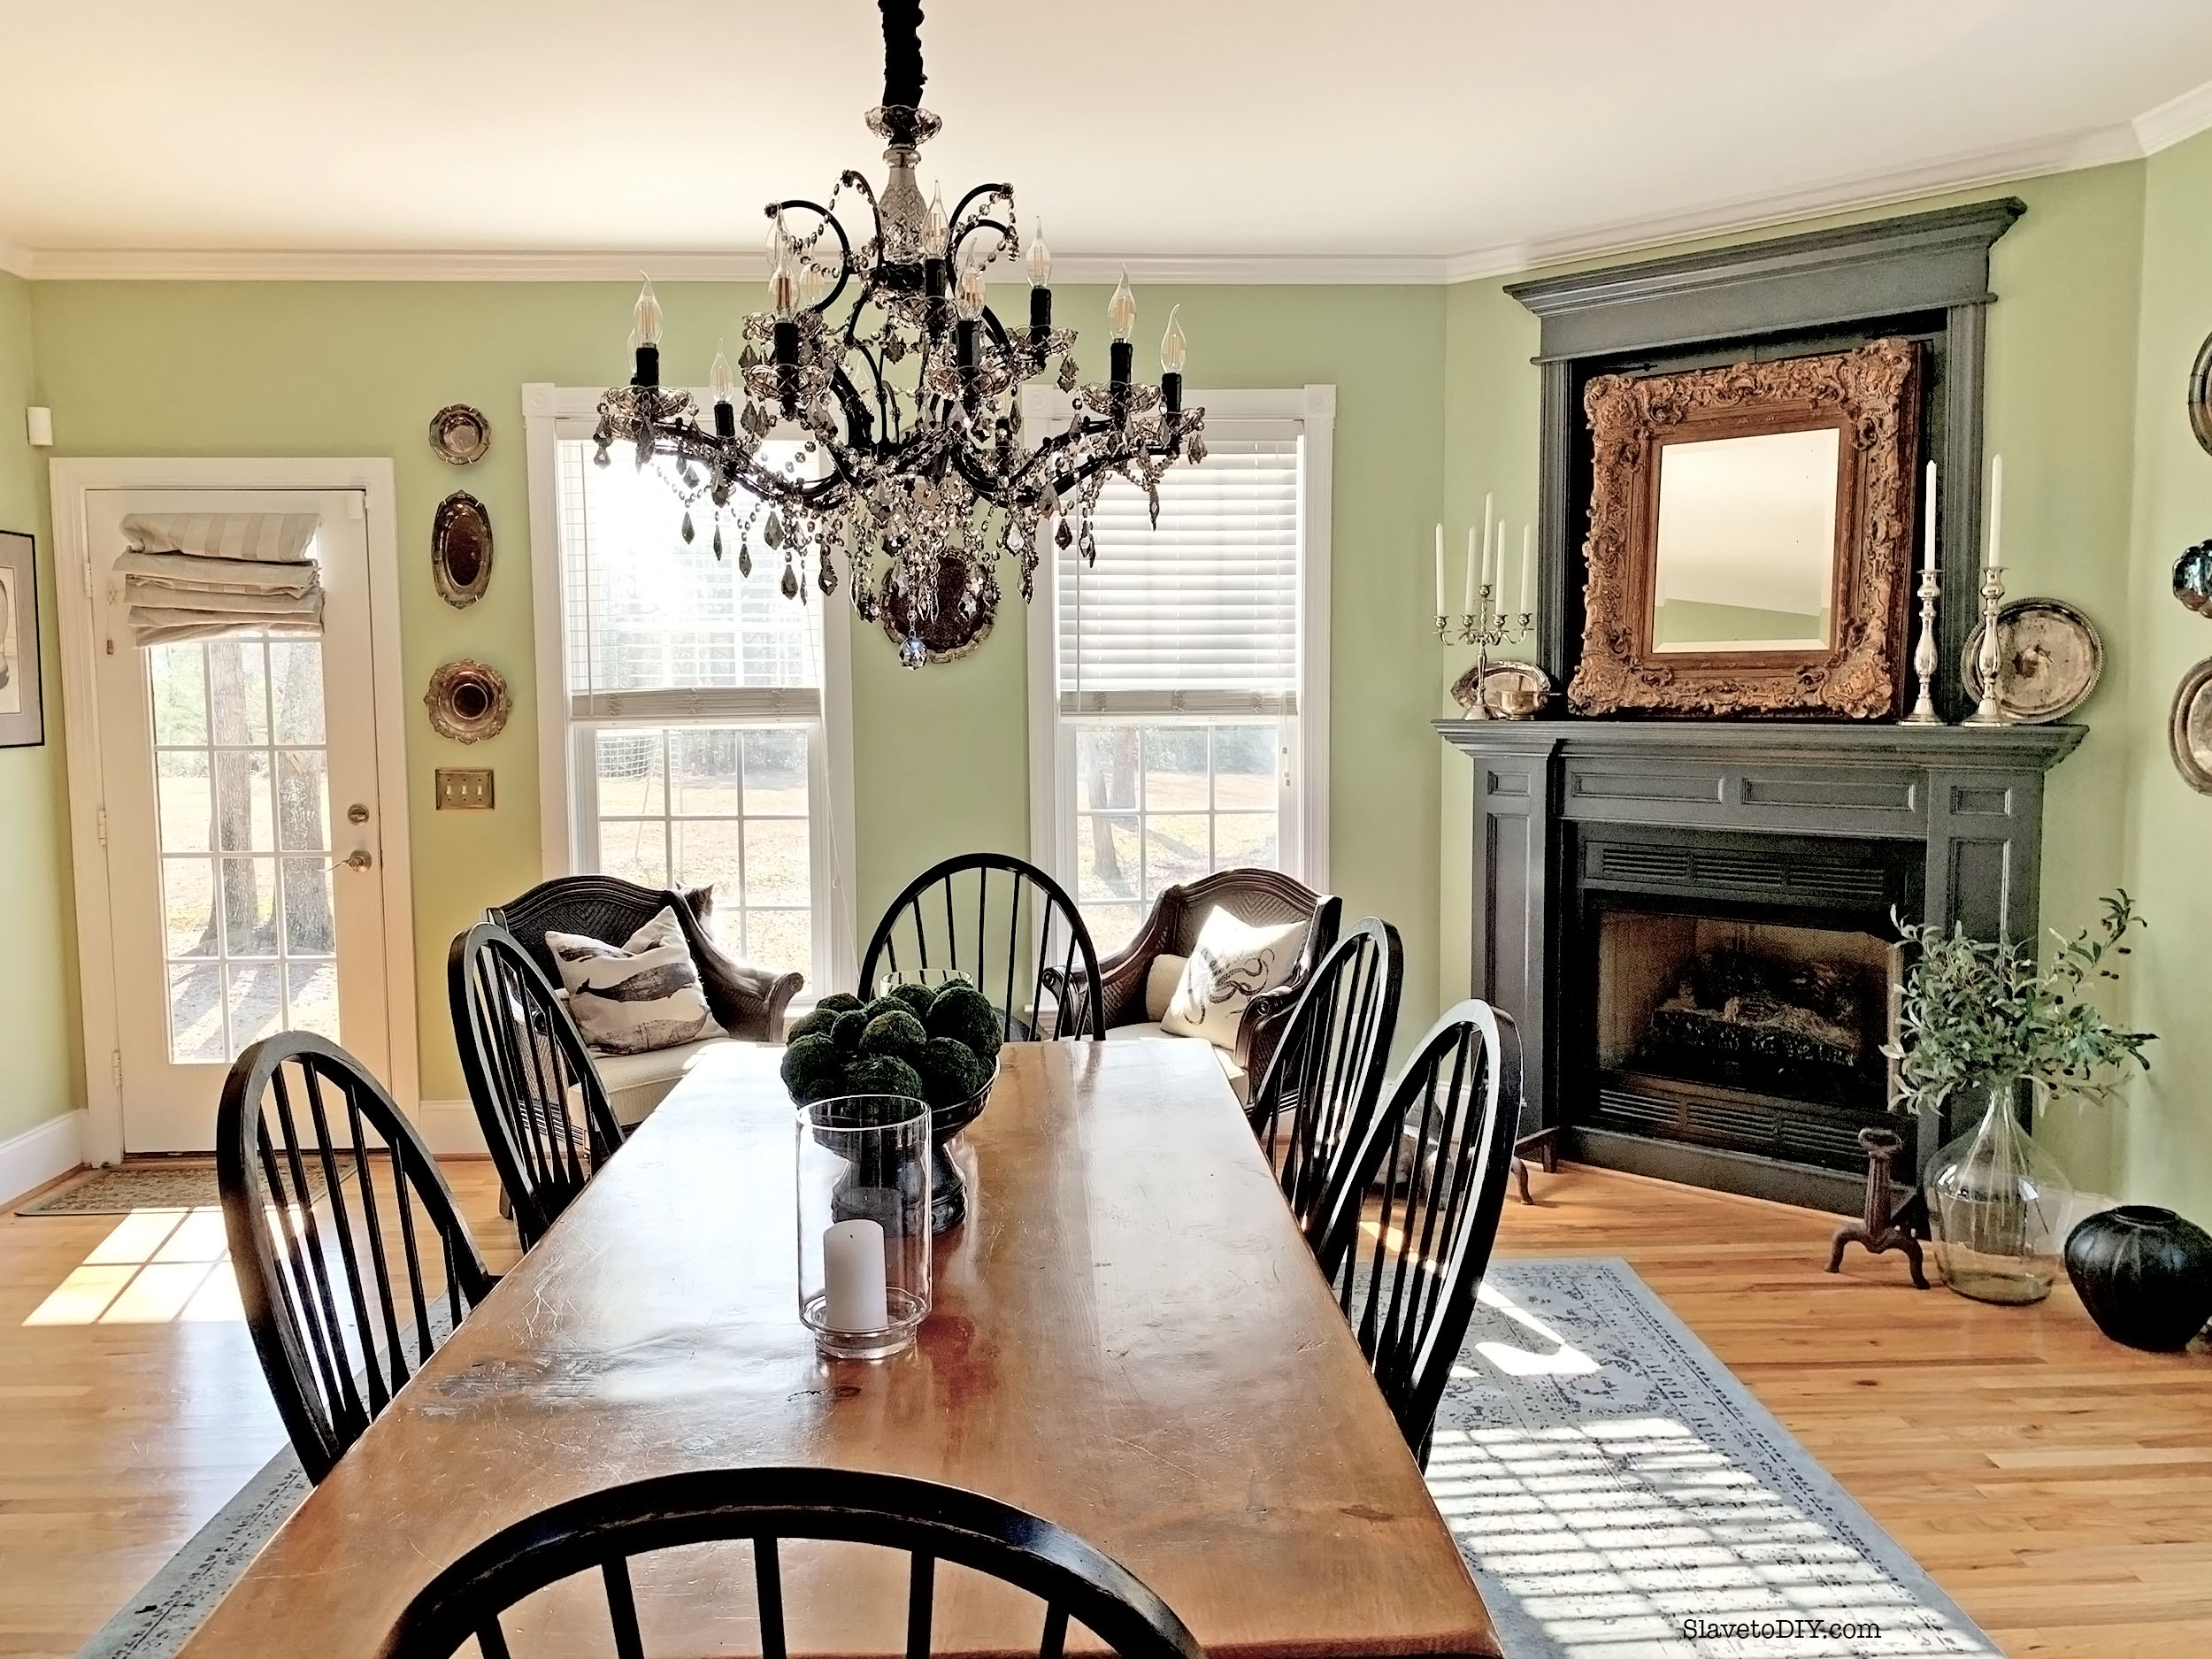
It sure is amazing what some doors, paint, and a light fixture can do to a room, right??? And, here’s a shot with what it looks like with the dining table and chairs (which will soon be replaced, but that’s a story for another day!).
The Dark and Moody Fireplace Update, Dining Room With Updated Fireplace and Light Fixture
I would love to see before and afters on your own paint projects! Thanks for playing with us and, of course, cheers to all of your updates in the New Year and check out more project awesomeness on our blog.
*Legal stuff:
I am honest about my experiences with different products and write because I enjoy it. I do however, have the opportunity to earn money for my writing, also.
Slavetodiy.com is a participant in the Amazon Services LLC Associates Program, an affiliate advertising program designed to provide a means for sites to earn advertising fees by advertising and linking to amazon.com. Amazon offers a small commission on products sold through their affiliate links. Each of your purchases via our Amazon affiliation links supports our cause at no additional cost to you.
If a blogger links to an Amazon product (with a special code for affiliates embedded in the link), and a reader places an item in their “shopping cart” through that link within 24 hours of clicking the link, the blogger gets a small percentage of the sale. Amazon links are not “pay per click.” If you click on the product link and stay around Amazon and purchase something else, however, I will get a commission on that sale.
Slavetodiy.com is also a VigLink affiliate advertiser which works similarly.
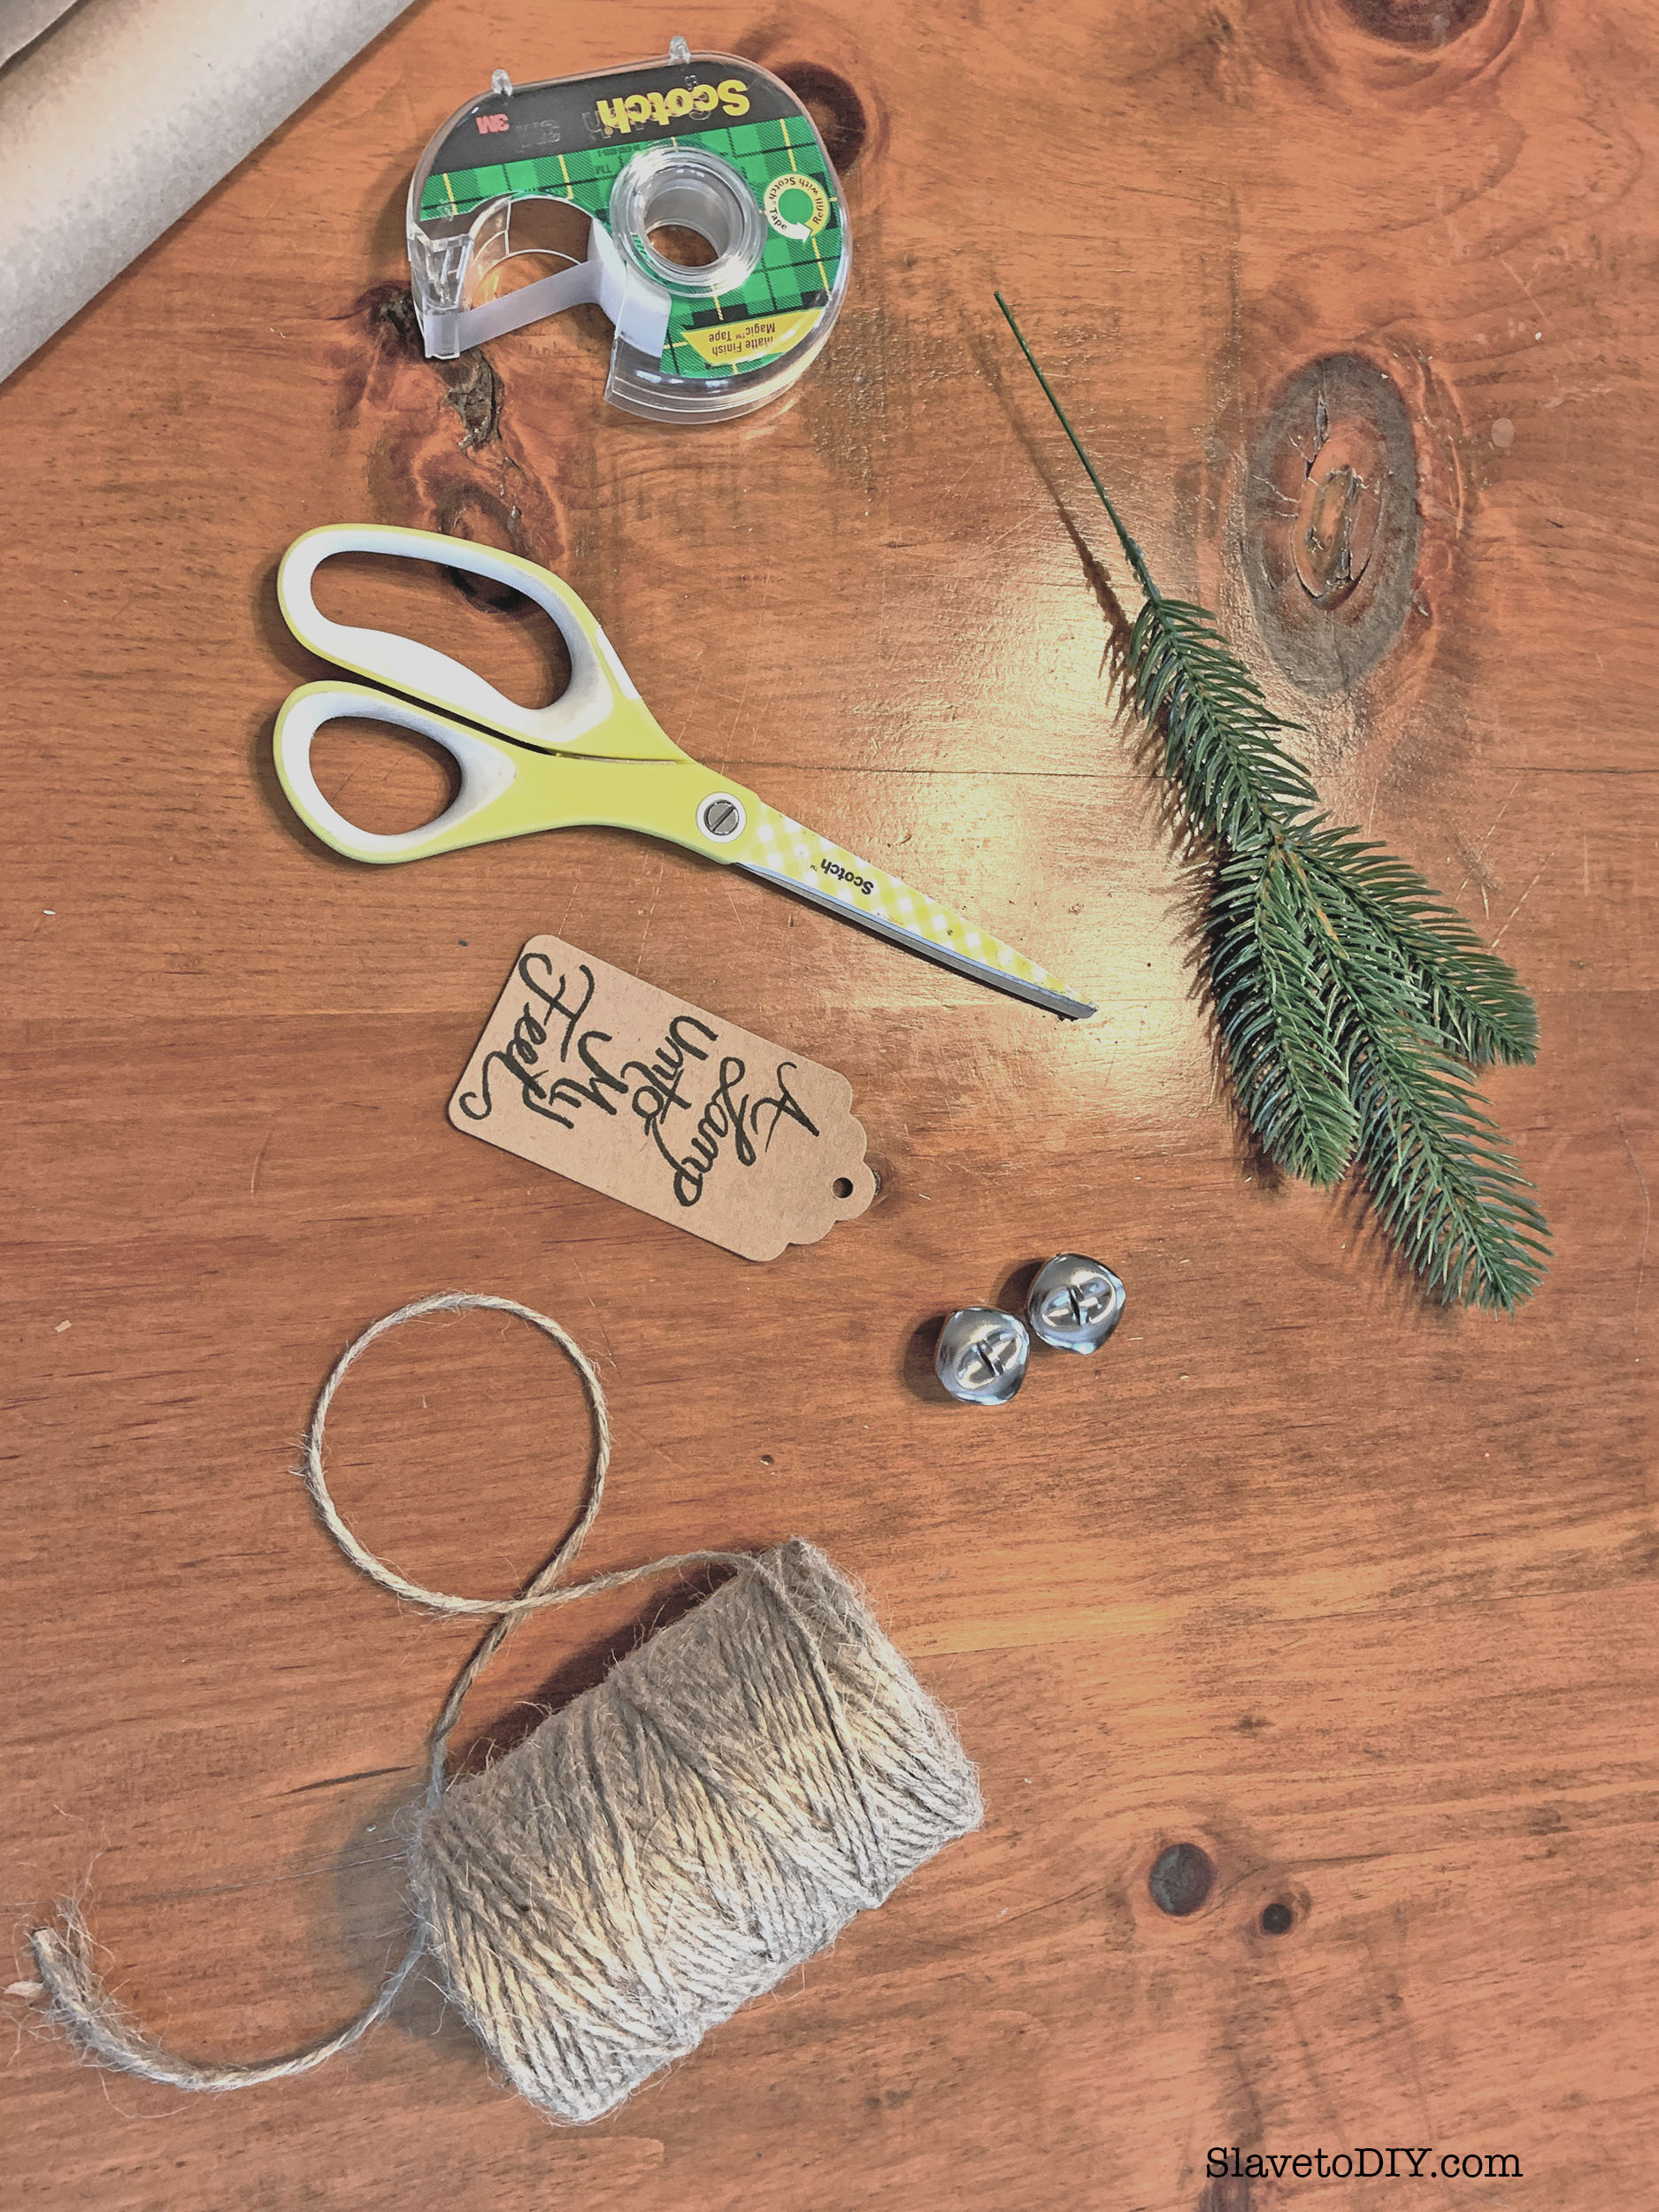
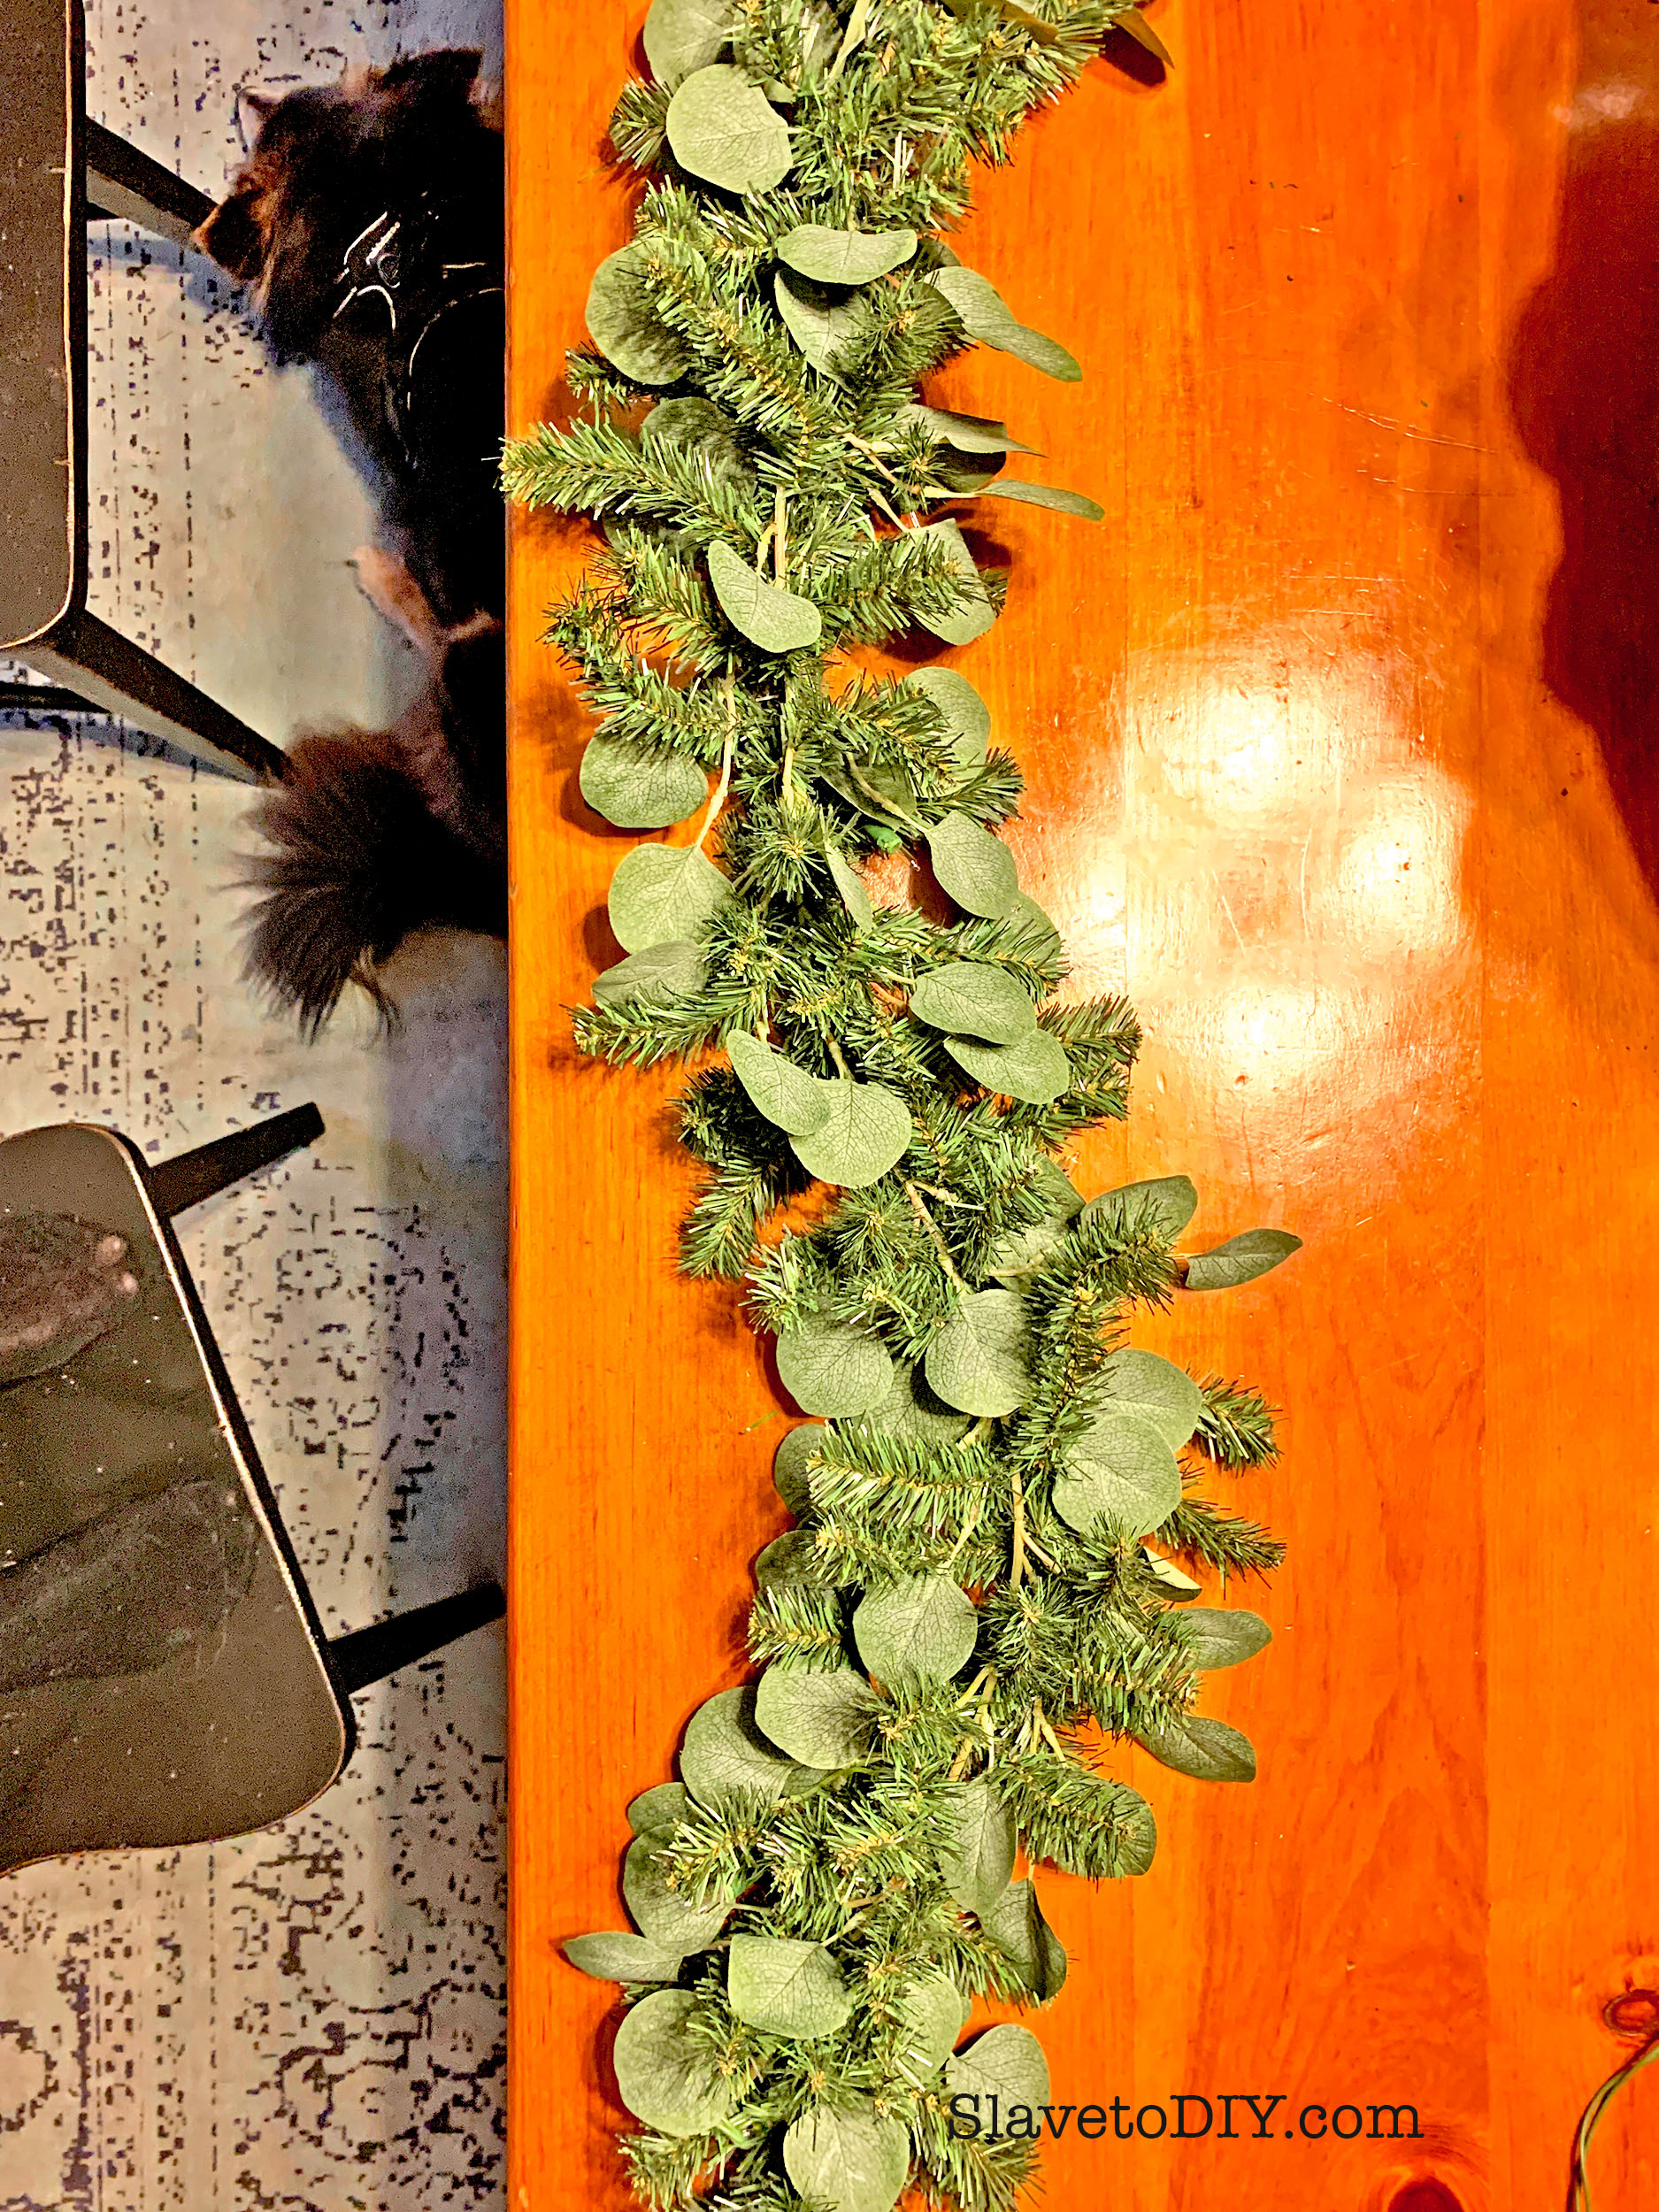
I used to do new gift wrap every year with different ribbons- but since we usually travel for Christmas all of my packages and pretty bows were smushed and the paper was torn by the time we arrived at our destination. So, I had an idea for something MUCH more forgiving and SIGNIFICANTLY cheaper. I’ve used this same set for several years now and I LOVE the effect. It’s simple, classic, and reminds me of years gone by! The great thing is, it is VERY inexpensive for those of us on a budget and comes in a large roll so you can use it for a long time! I’m including Amazon links so you can find everything quickly and easily!
*This post may contain affiliate links. Please see full disclosure at the end of the post.
The cool thing is, with just a few accessories this gift wrap set is classic and also somehow very NOW (for all of you farmhouse fanatics!). And guess what, you can wrap a medium package for $1.10 each (as shown in the photo)! Even very large packages wrap for only pennies more. I purchased the paper and twine two years ago and still have plenty for this Christmas and have only had to repurchase the decorations.
How To Do Classic Christmas Gift Wrap For $1 Per Package
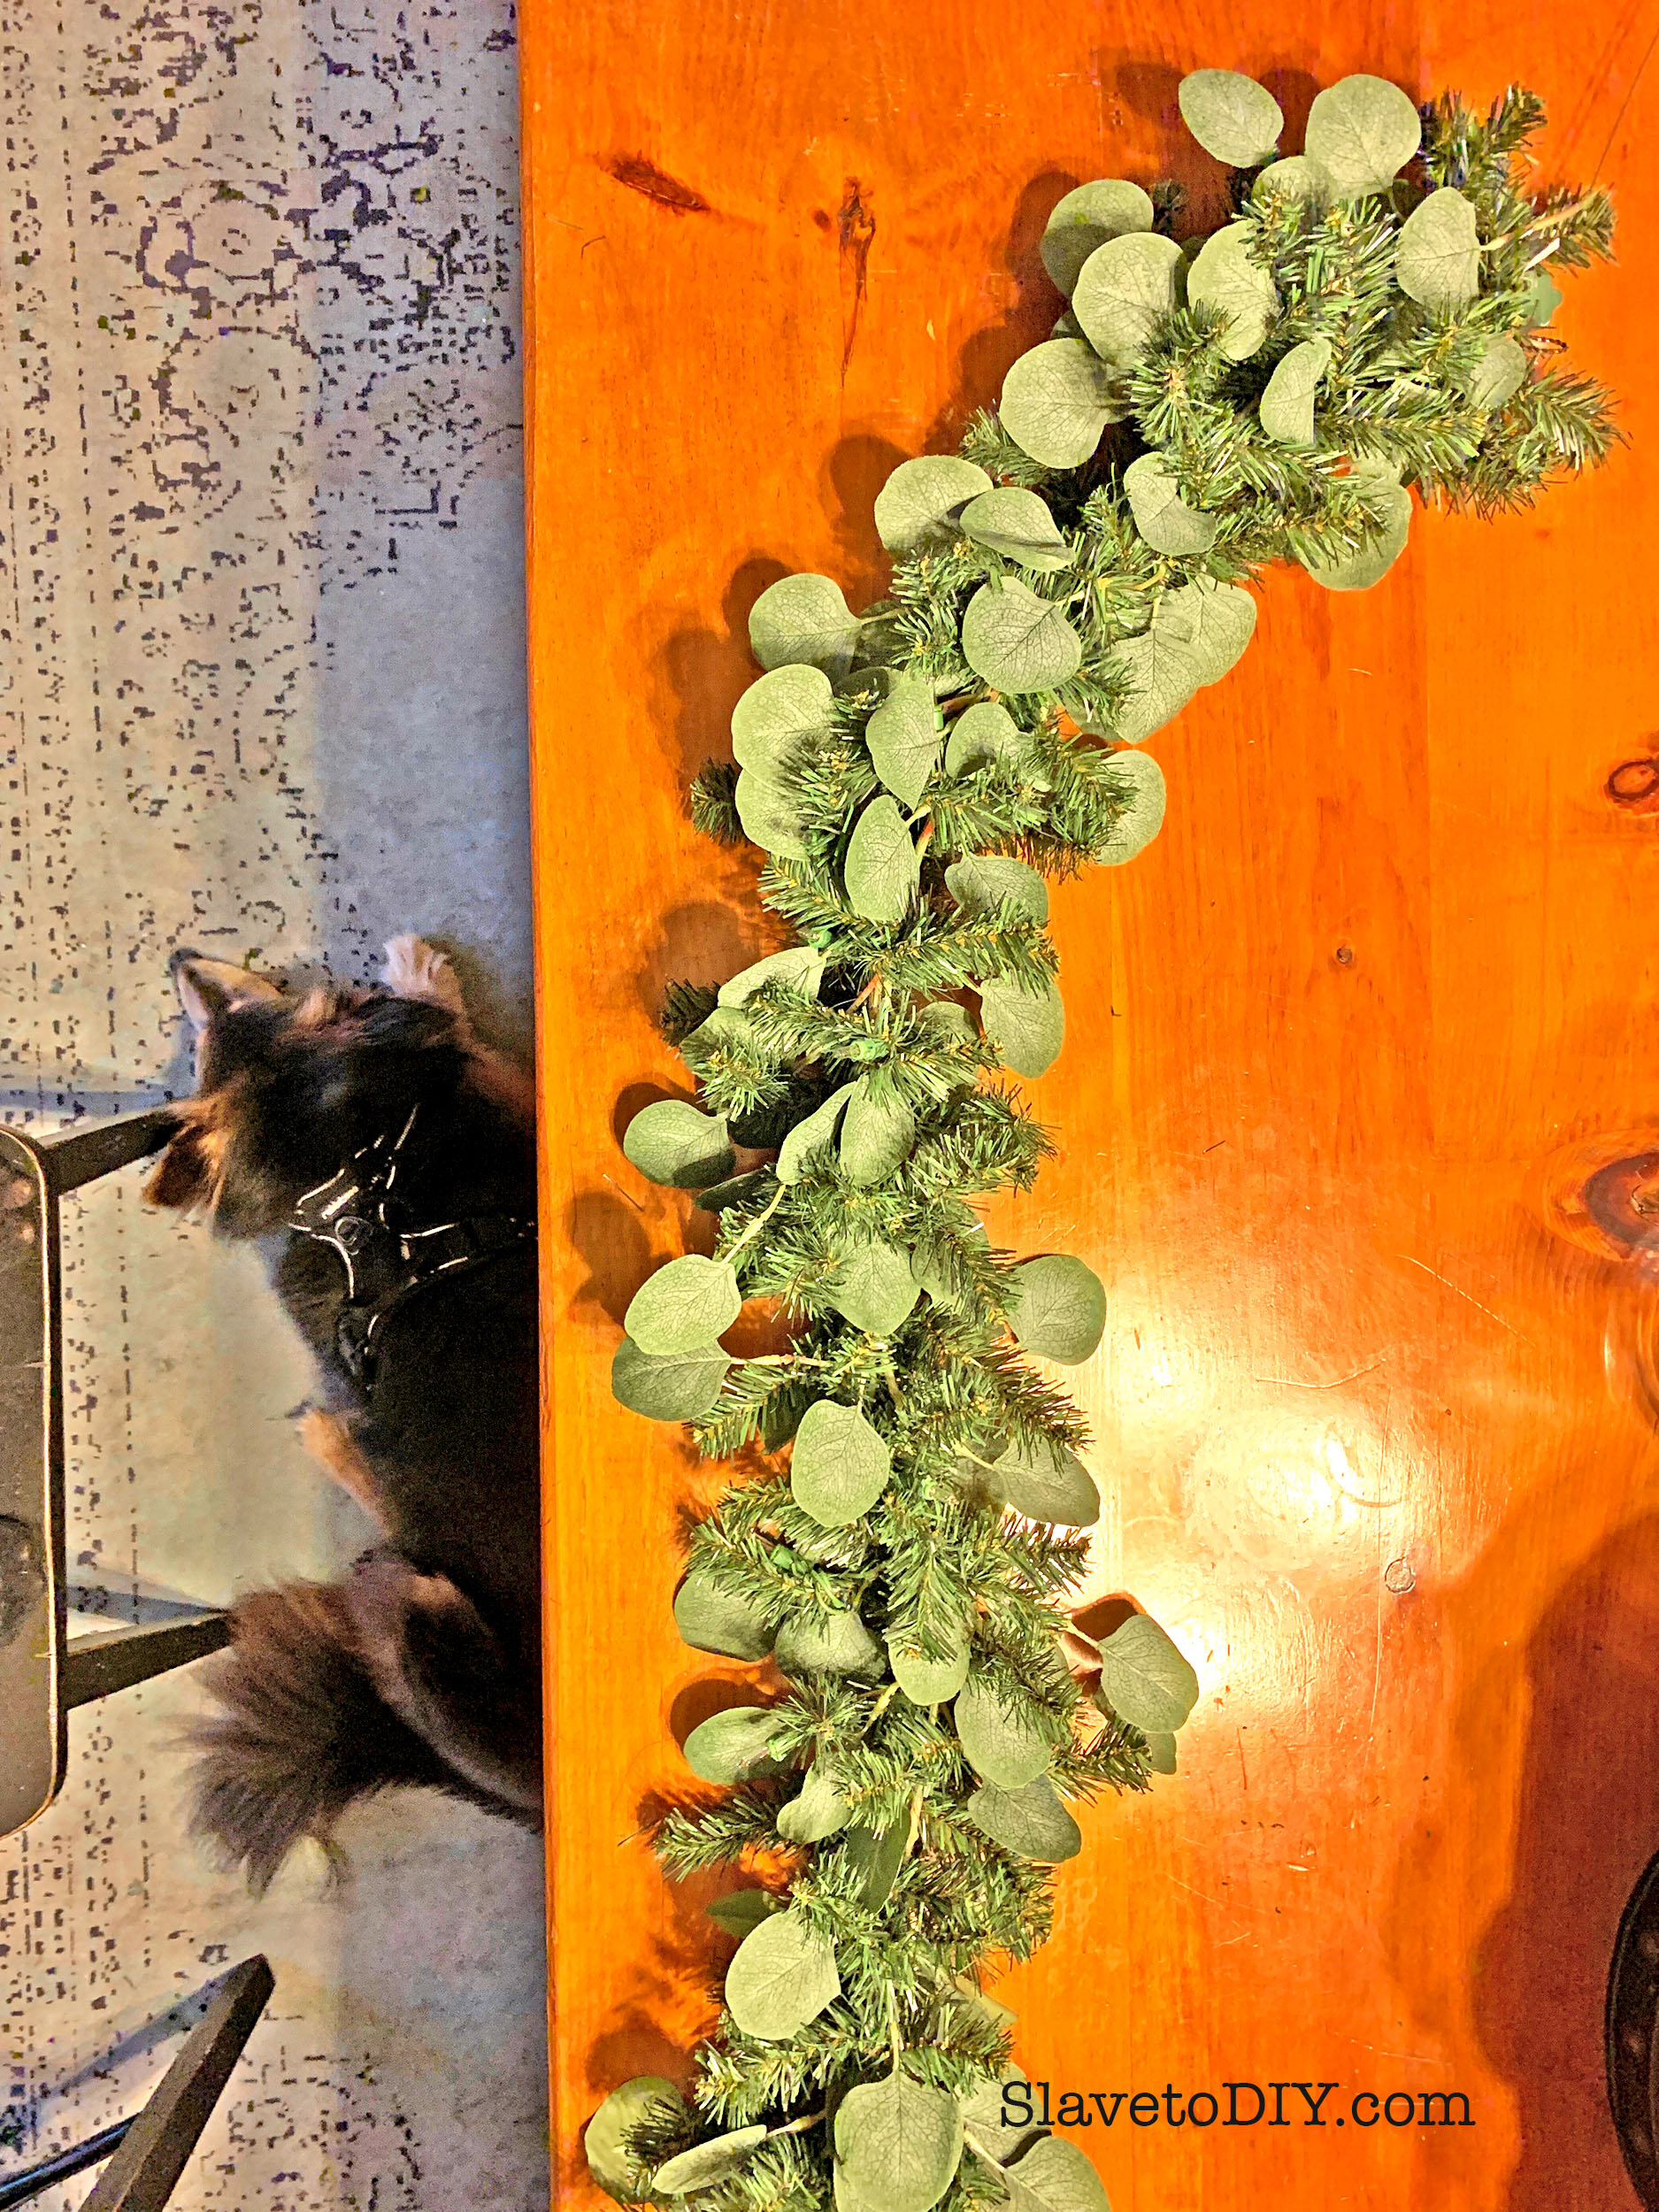
Artificial Pine Needles (30) – $.50 each (This is the most expensive piece, so if you have these in your yard, I’d use those- we just don’t have them where I live and these are VERY convincing)
As I write this, the entire kit costs about $50 to wrap ALL of your gifts. I can’t wait to see all of your beautiful presents!
How To Do Classic Christmas Gift Wrap For $1 Per Package
If you’re looking for a beginner calligraphy pen set to do that cool lettering, I found this one easy to use and inexpensive. This is literally (and obviously) my first attempt at calligraphy lettering and it’s cute even when it’s not great, so give it a shot!
For more great Christmas decor and DIY ideas check out our blog!
Cheers!
*Legal stuff:
I am honest about my experiences with different products and write because I enjoy it. I do however, have the opportunity to earn money for my writing, also.
Slavetodiy.com is a participant in the Amazon Services LLC Associates Program, an affiliate advertising program designed to provide a means for sites to earn advertising fees by advertising and linking to amazon.com. Amazon offers a small commission on products sold through their affiliate links. Each of your purchases via our Amazon affiliation links supports our cause at no additional cost to you.
If a blogger links to an Amazon product (with a special code for affiliates embedded in the link), and a reader places an item in their “shopping cart” through that link within 24 hours of clicking the link, the blogger gets a small percentage of the sale. Amazon links are not “pay per click.” If you click on the product link and stay around Amazon and purchase something else, however, I will get a commission on that sale.
Slavetodiy.com is also a VigLink affiliate advertiser which works similarly.
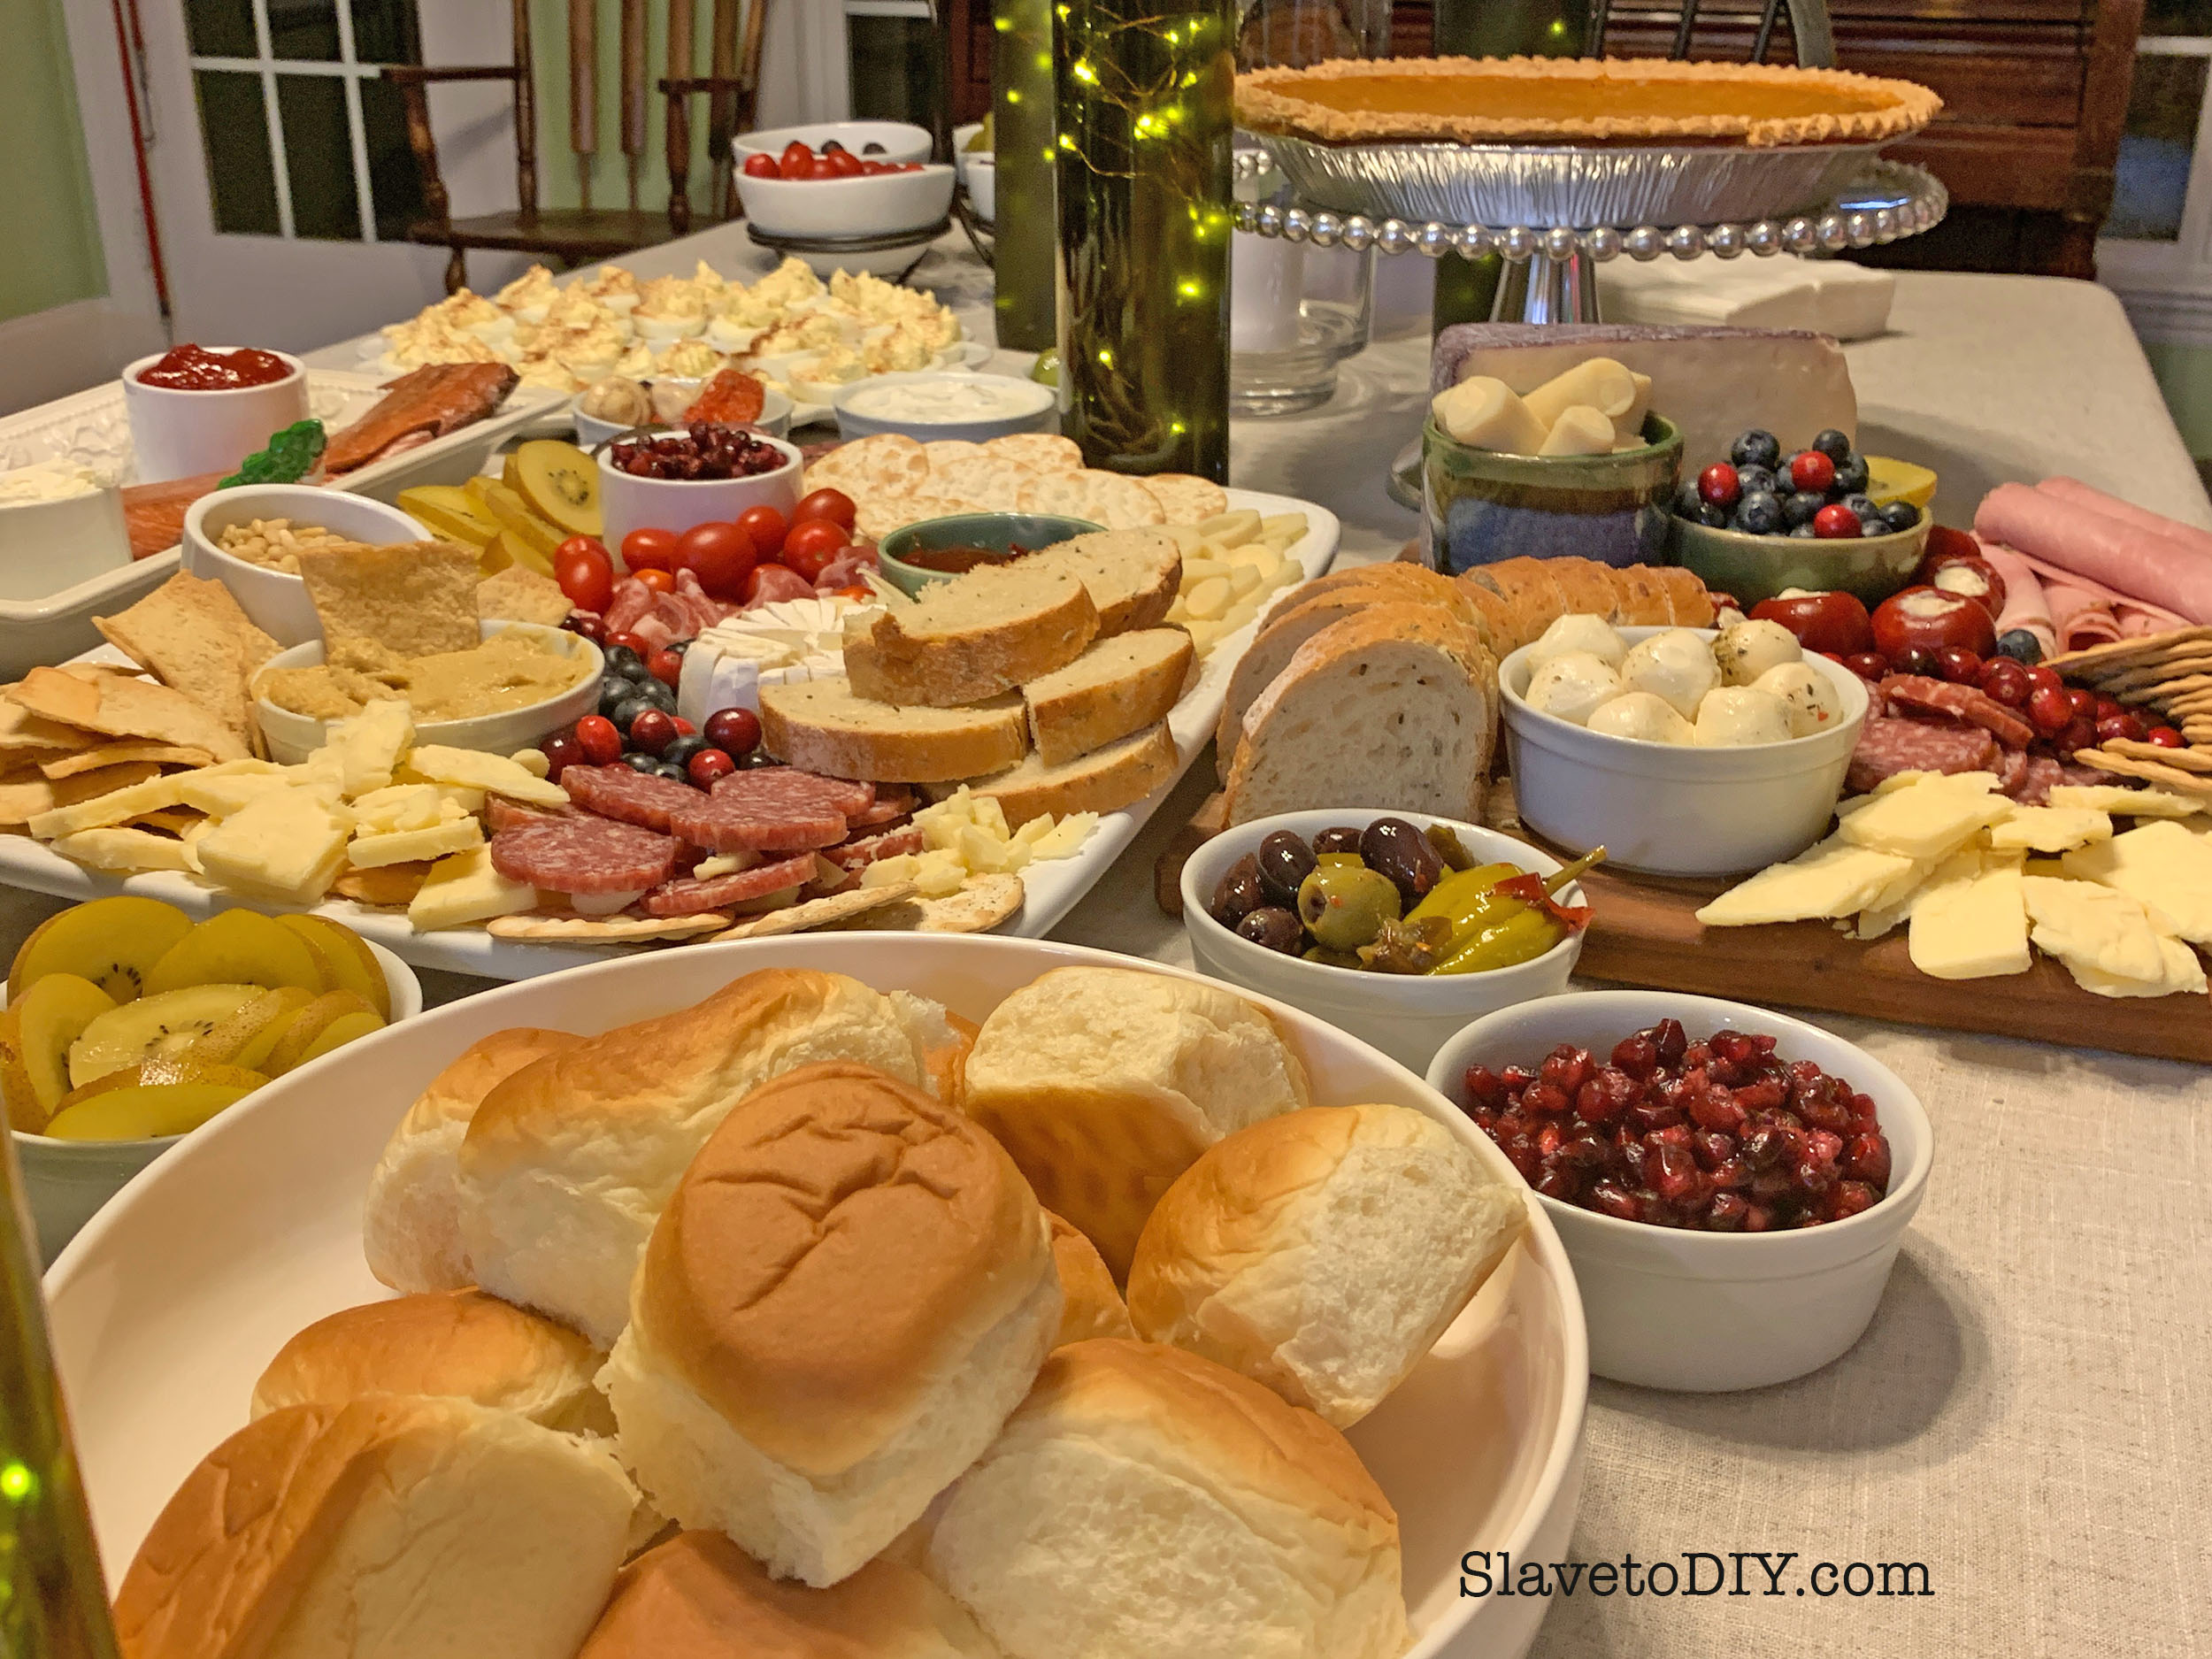
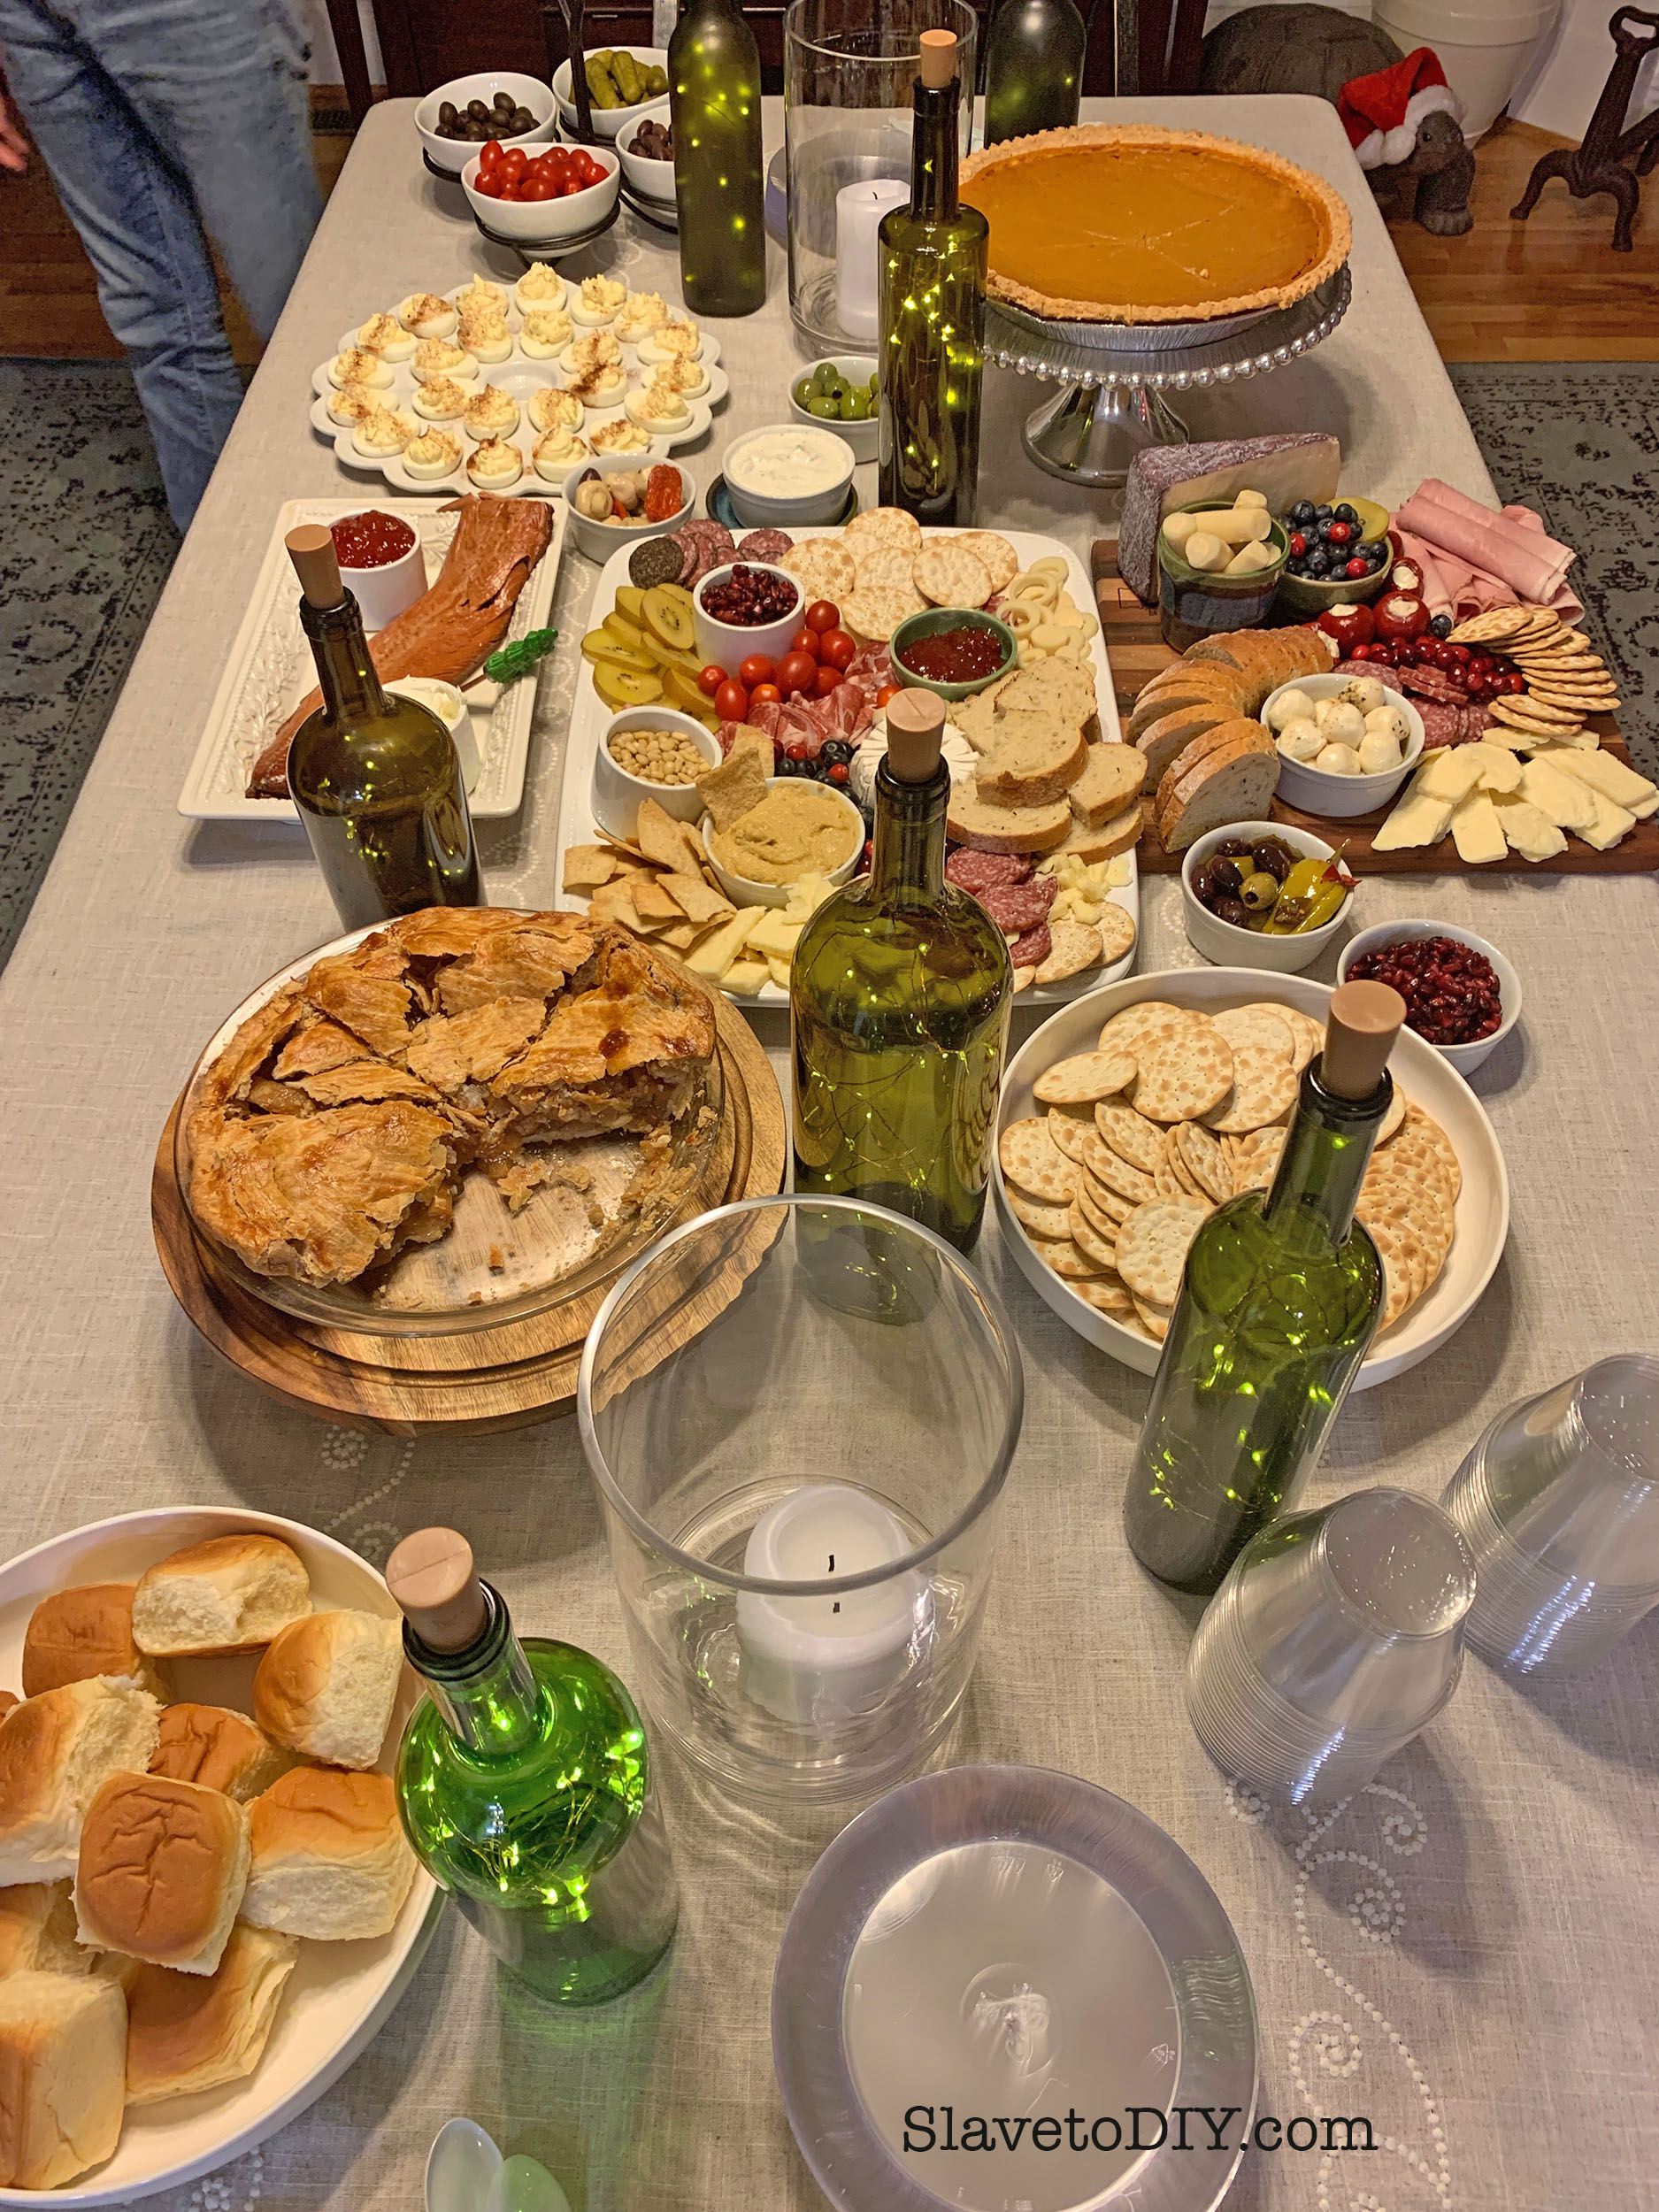
I know you’ve been stalking those beautiful Charcuterie Boards on Pinterest and Instagram, don’t lie. I too am LOVING the whole concept, and we recently hosted a Black Friday Party and just SLAYED the appetizers, presentation and all. I’m going to show you what we did, where we got our supplies and show you how they all came out- you can totally do this!
*This post may contain affiliate links. Please see full disclosure at the end of the post.
So, one of the things I was wondering when I gathered all of the goodies to make the boards (which we MOSTLY did with platters, but it’s the same concept) is if they would actually get eaten. To my surprise, people REALLY did dig in and eat just about everything but the garnish!
And, you know what’s so COOL? I got almost everything for the boards from Costco (and since Sams carries many of the same things, I’m betting you could shop this same list there).
The other coolest thing: I gave her all of the stuff and my daughter made all of the boards so I could finish cleaning and setting up the rest of the party. It’s so awesome having artistic kids!
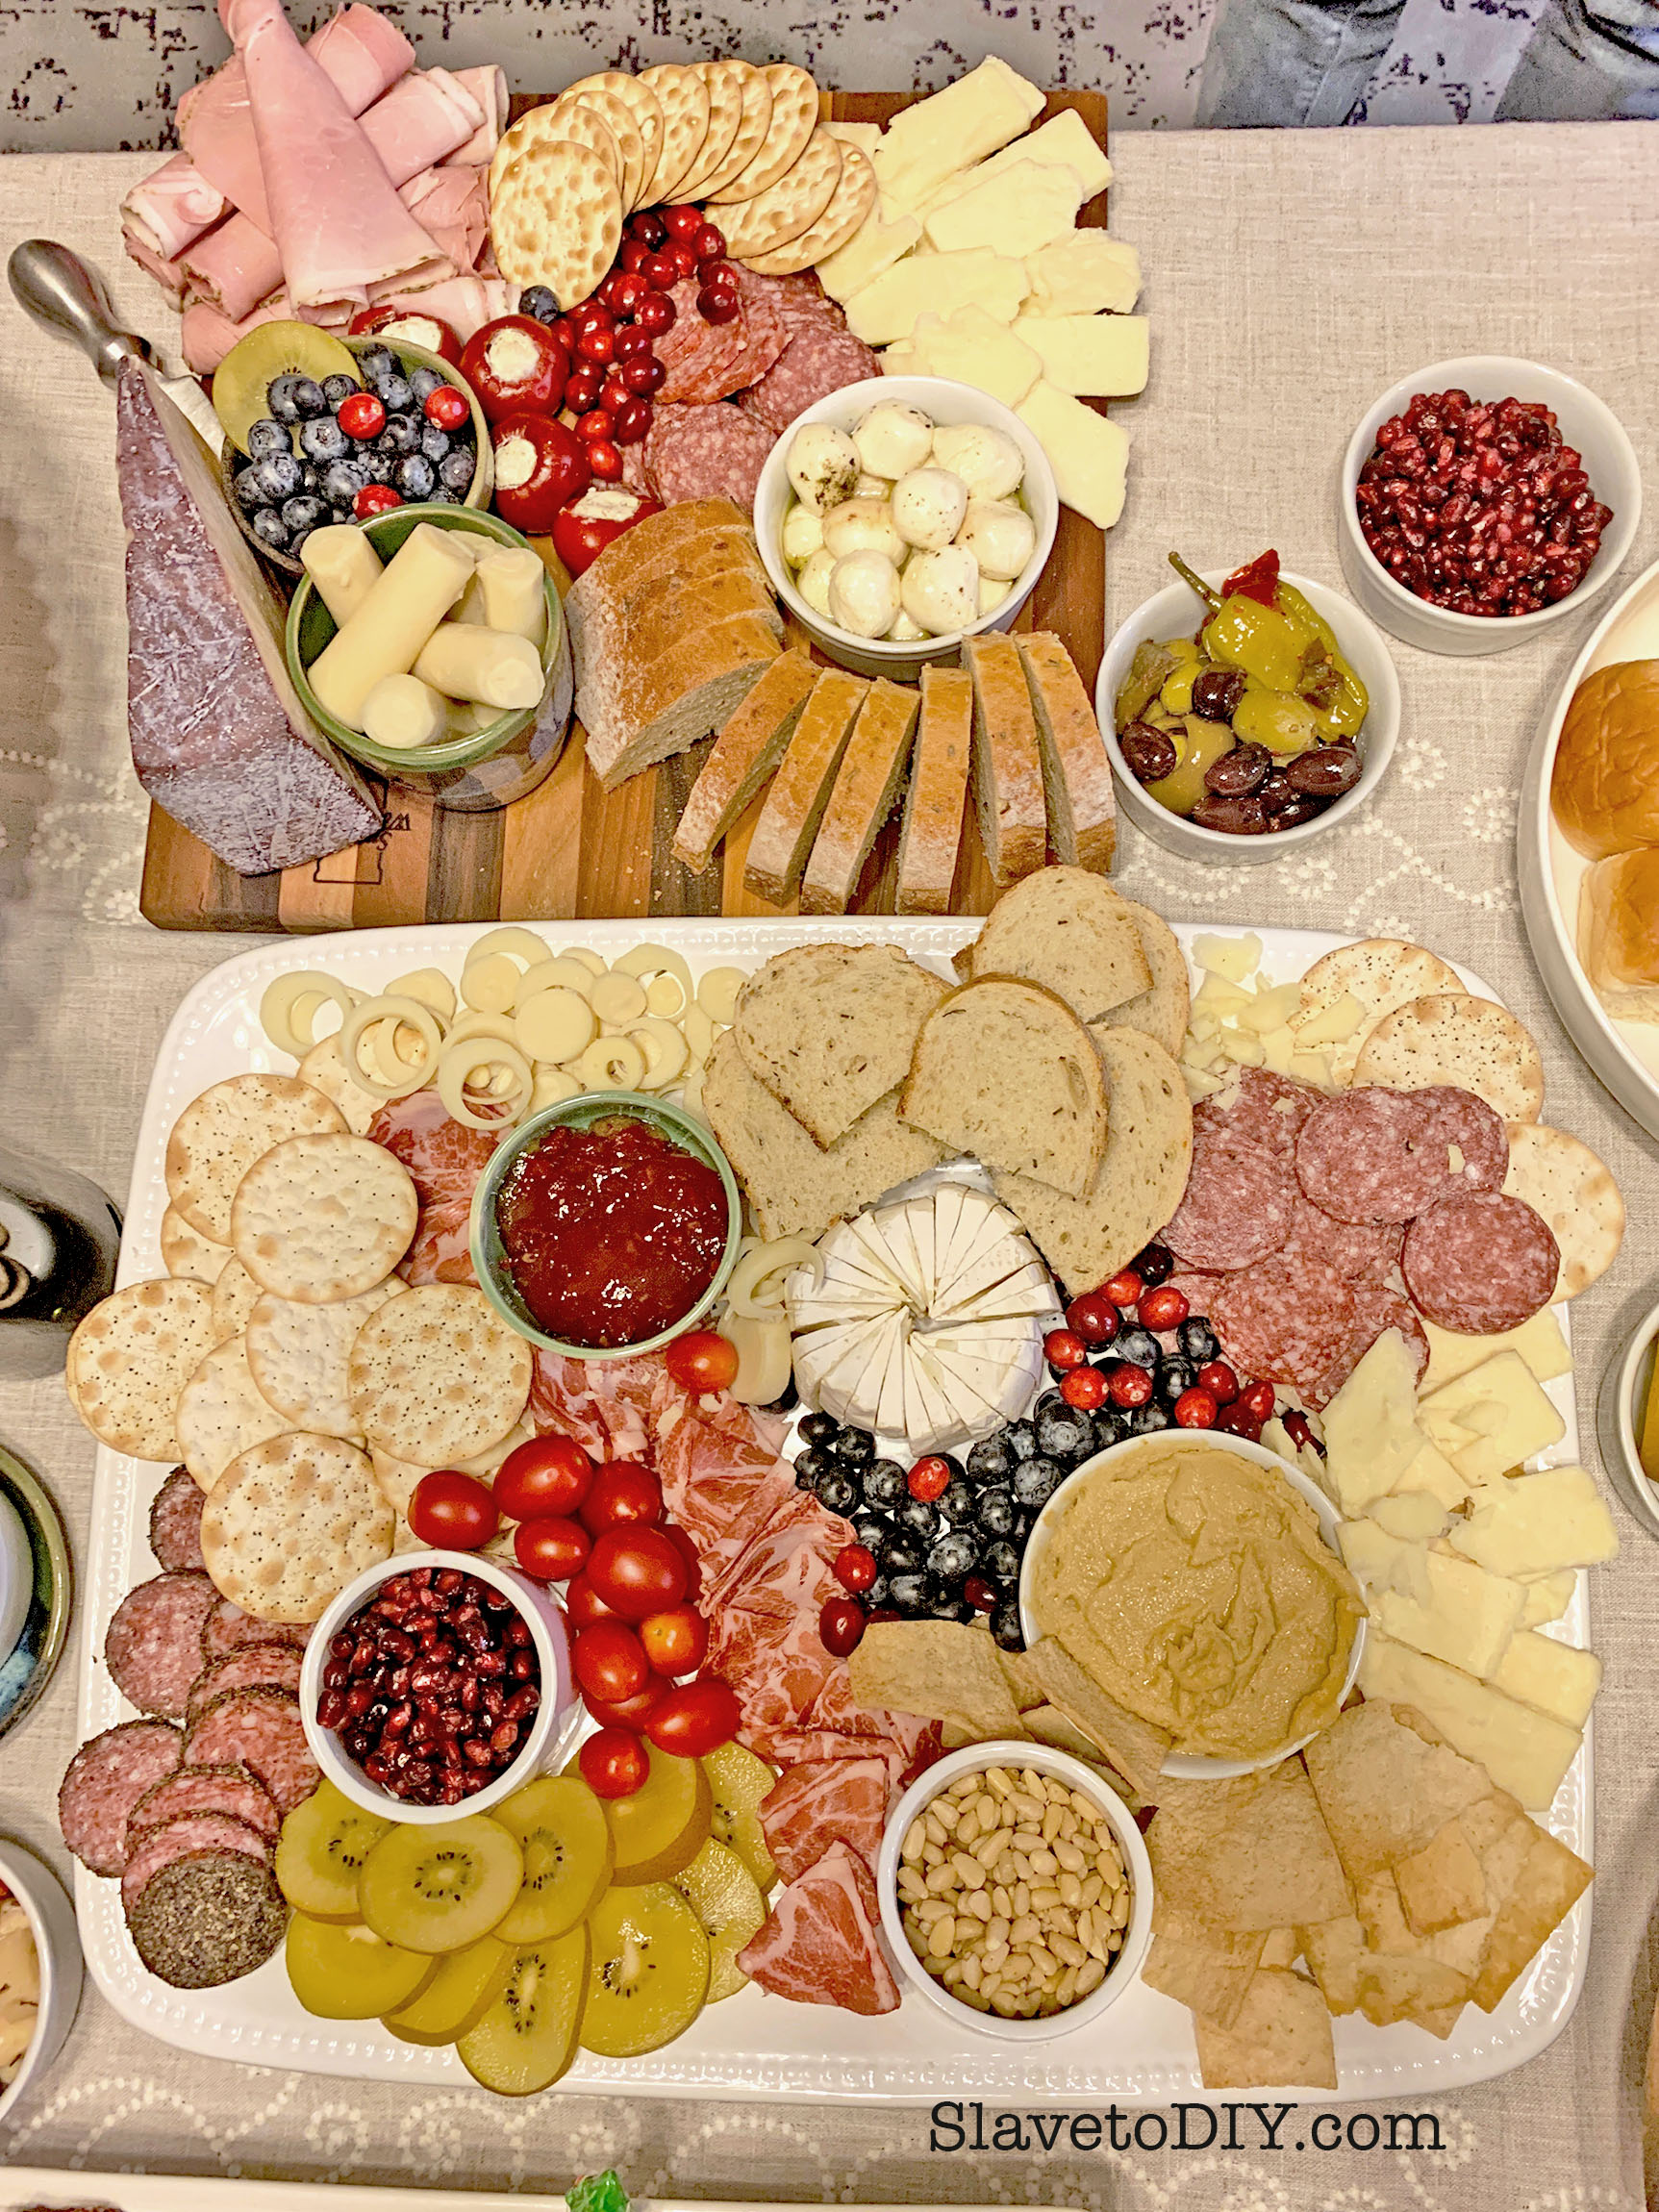
Charcuterie Boards: Easy Appetizers For Holiday Entertaining To Wow Your Guests
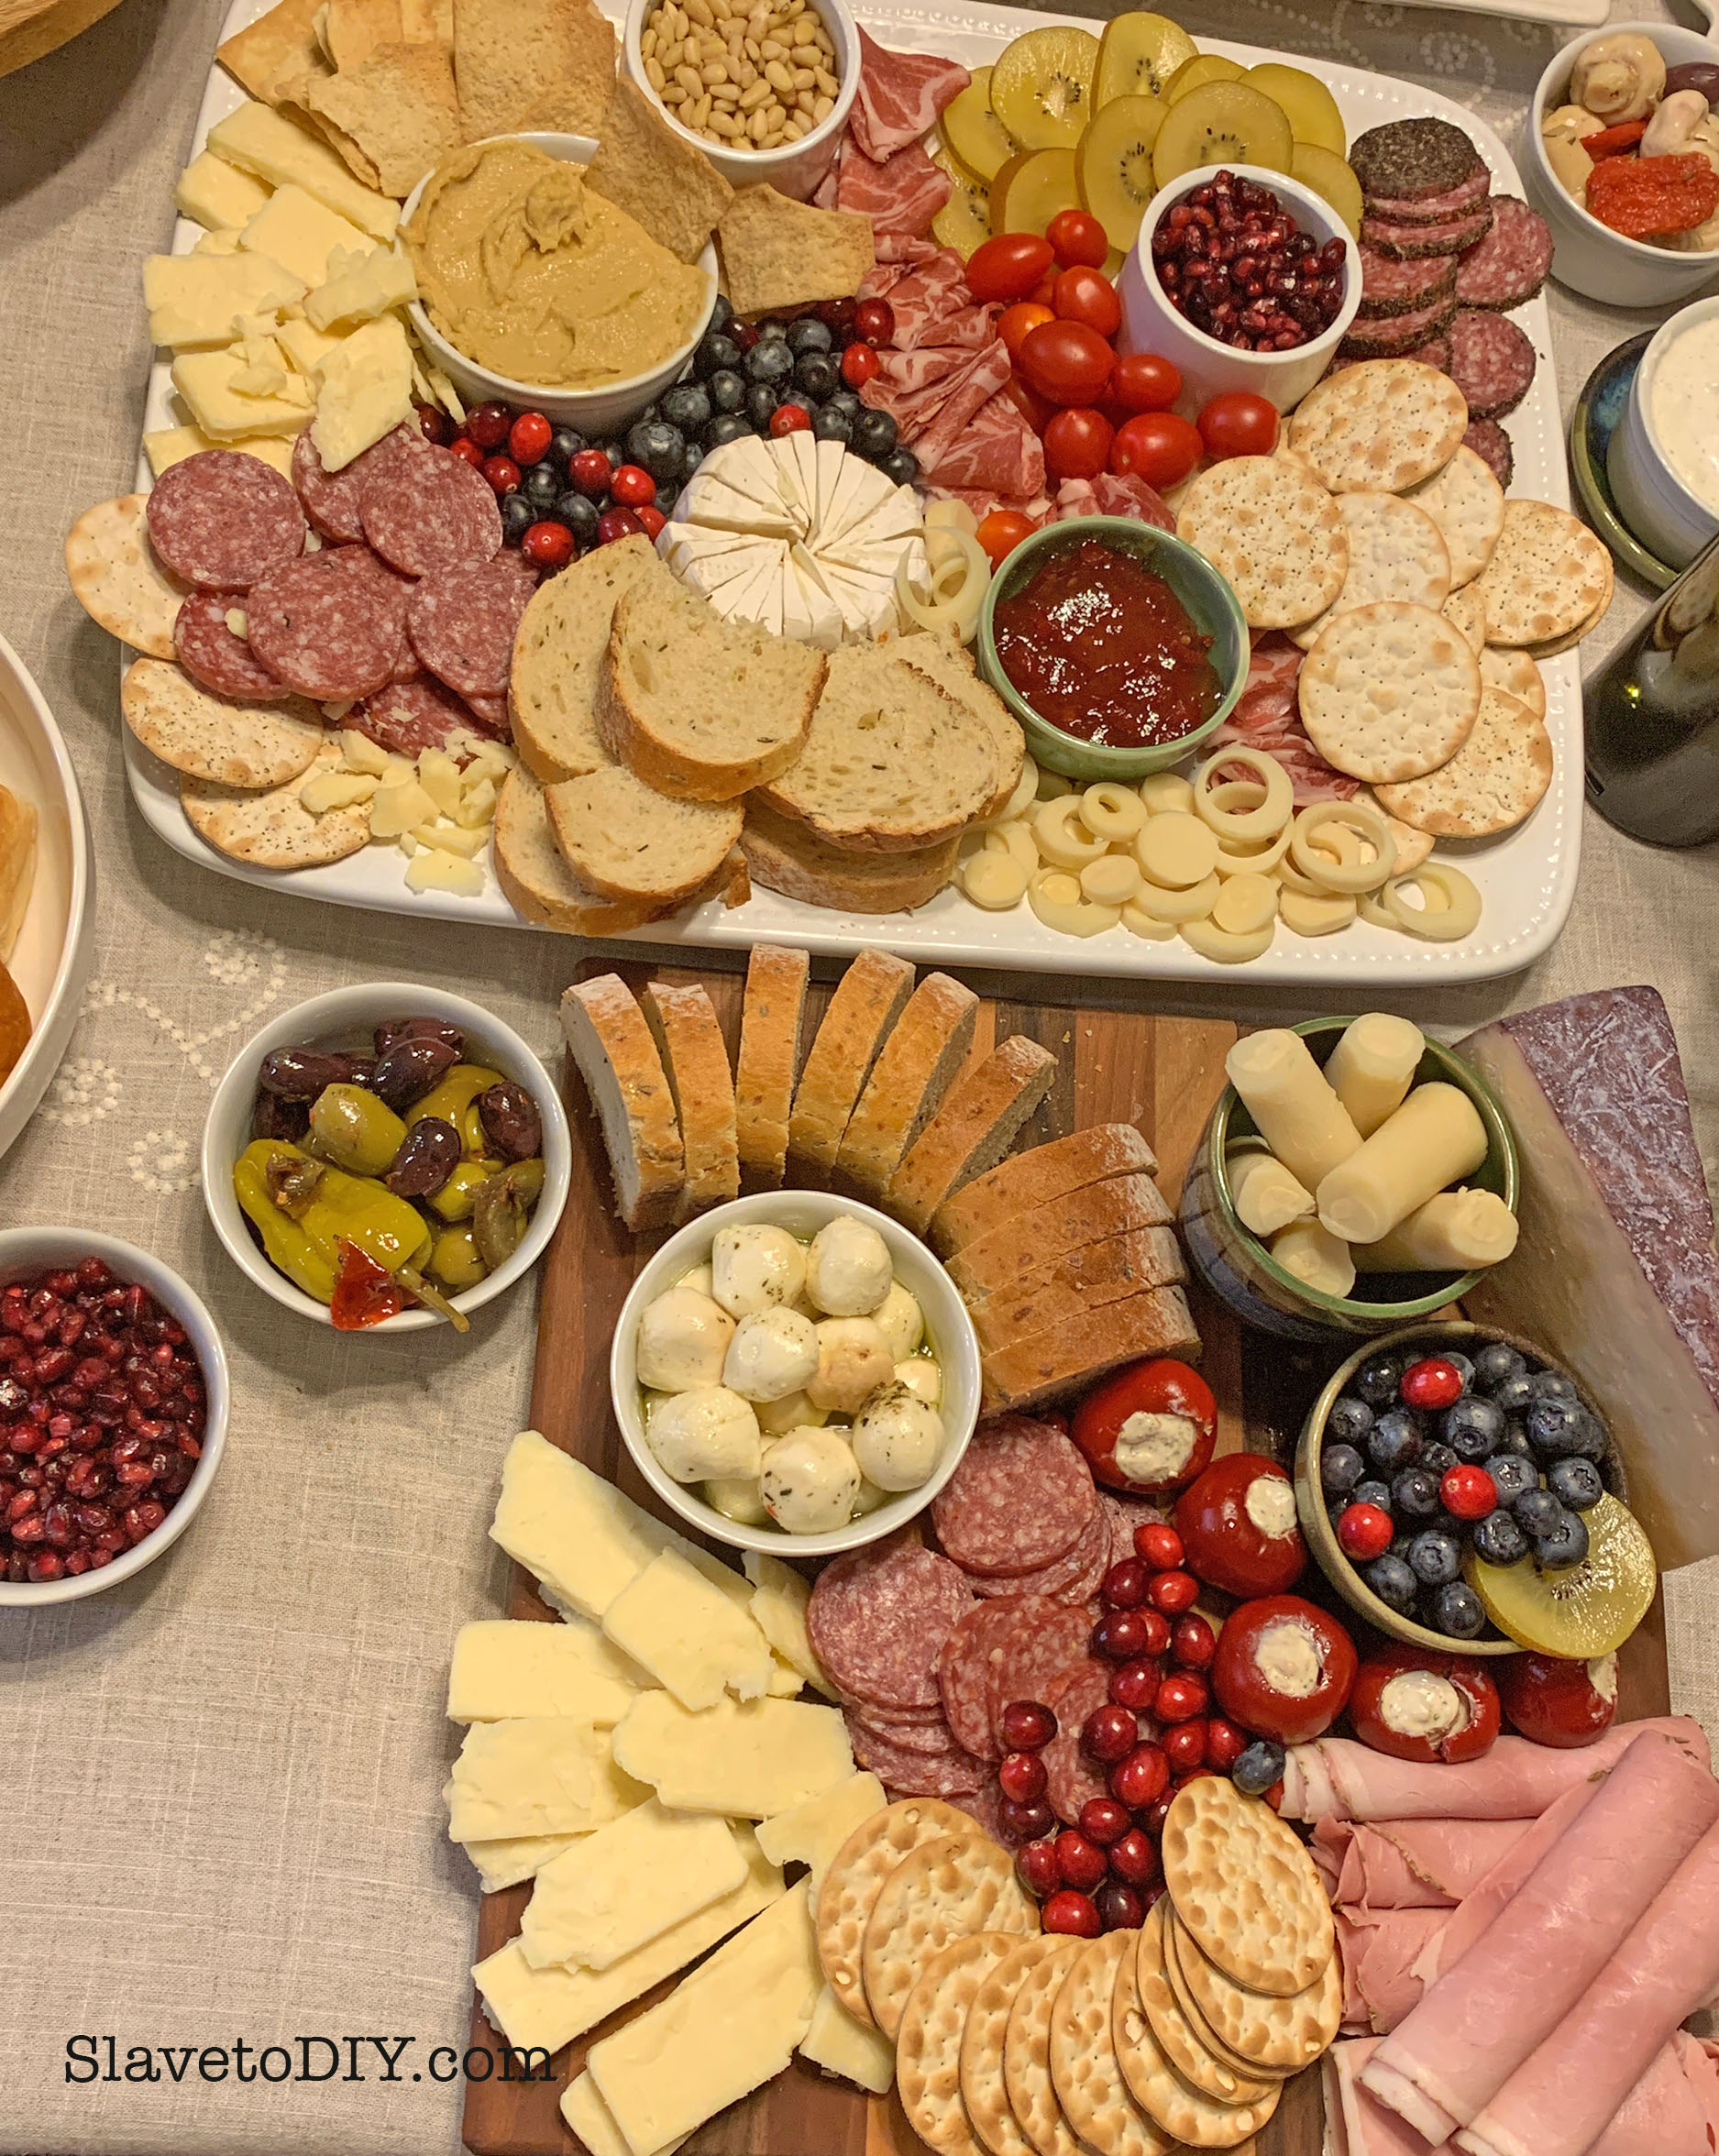
Step One: You don’t actually need those $200 boards. Use different cutting boards and platters you already have. Have some antique silver or pewter platters? Those work, too! I have a ton of little ramekins that I use for sauces etc every day and these work PERFECTLY in this instance to hold sauces or juicy things that you don’t want soaking the surrounding foods (nobody likes soggy crackers).
Charcuterie Boards: Easy Appetizers For Holiday Entertaining To Wow Your Guests
Step Two: Shop your list!
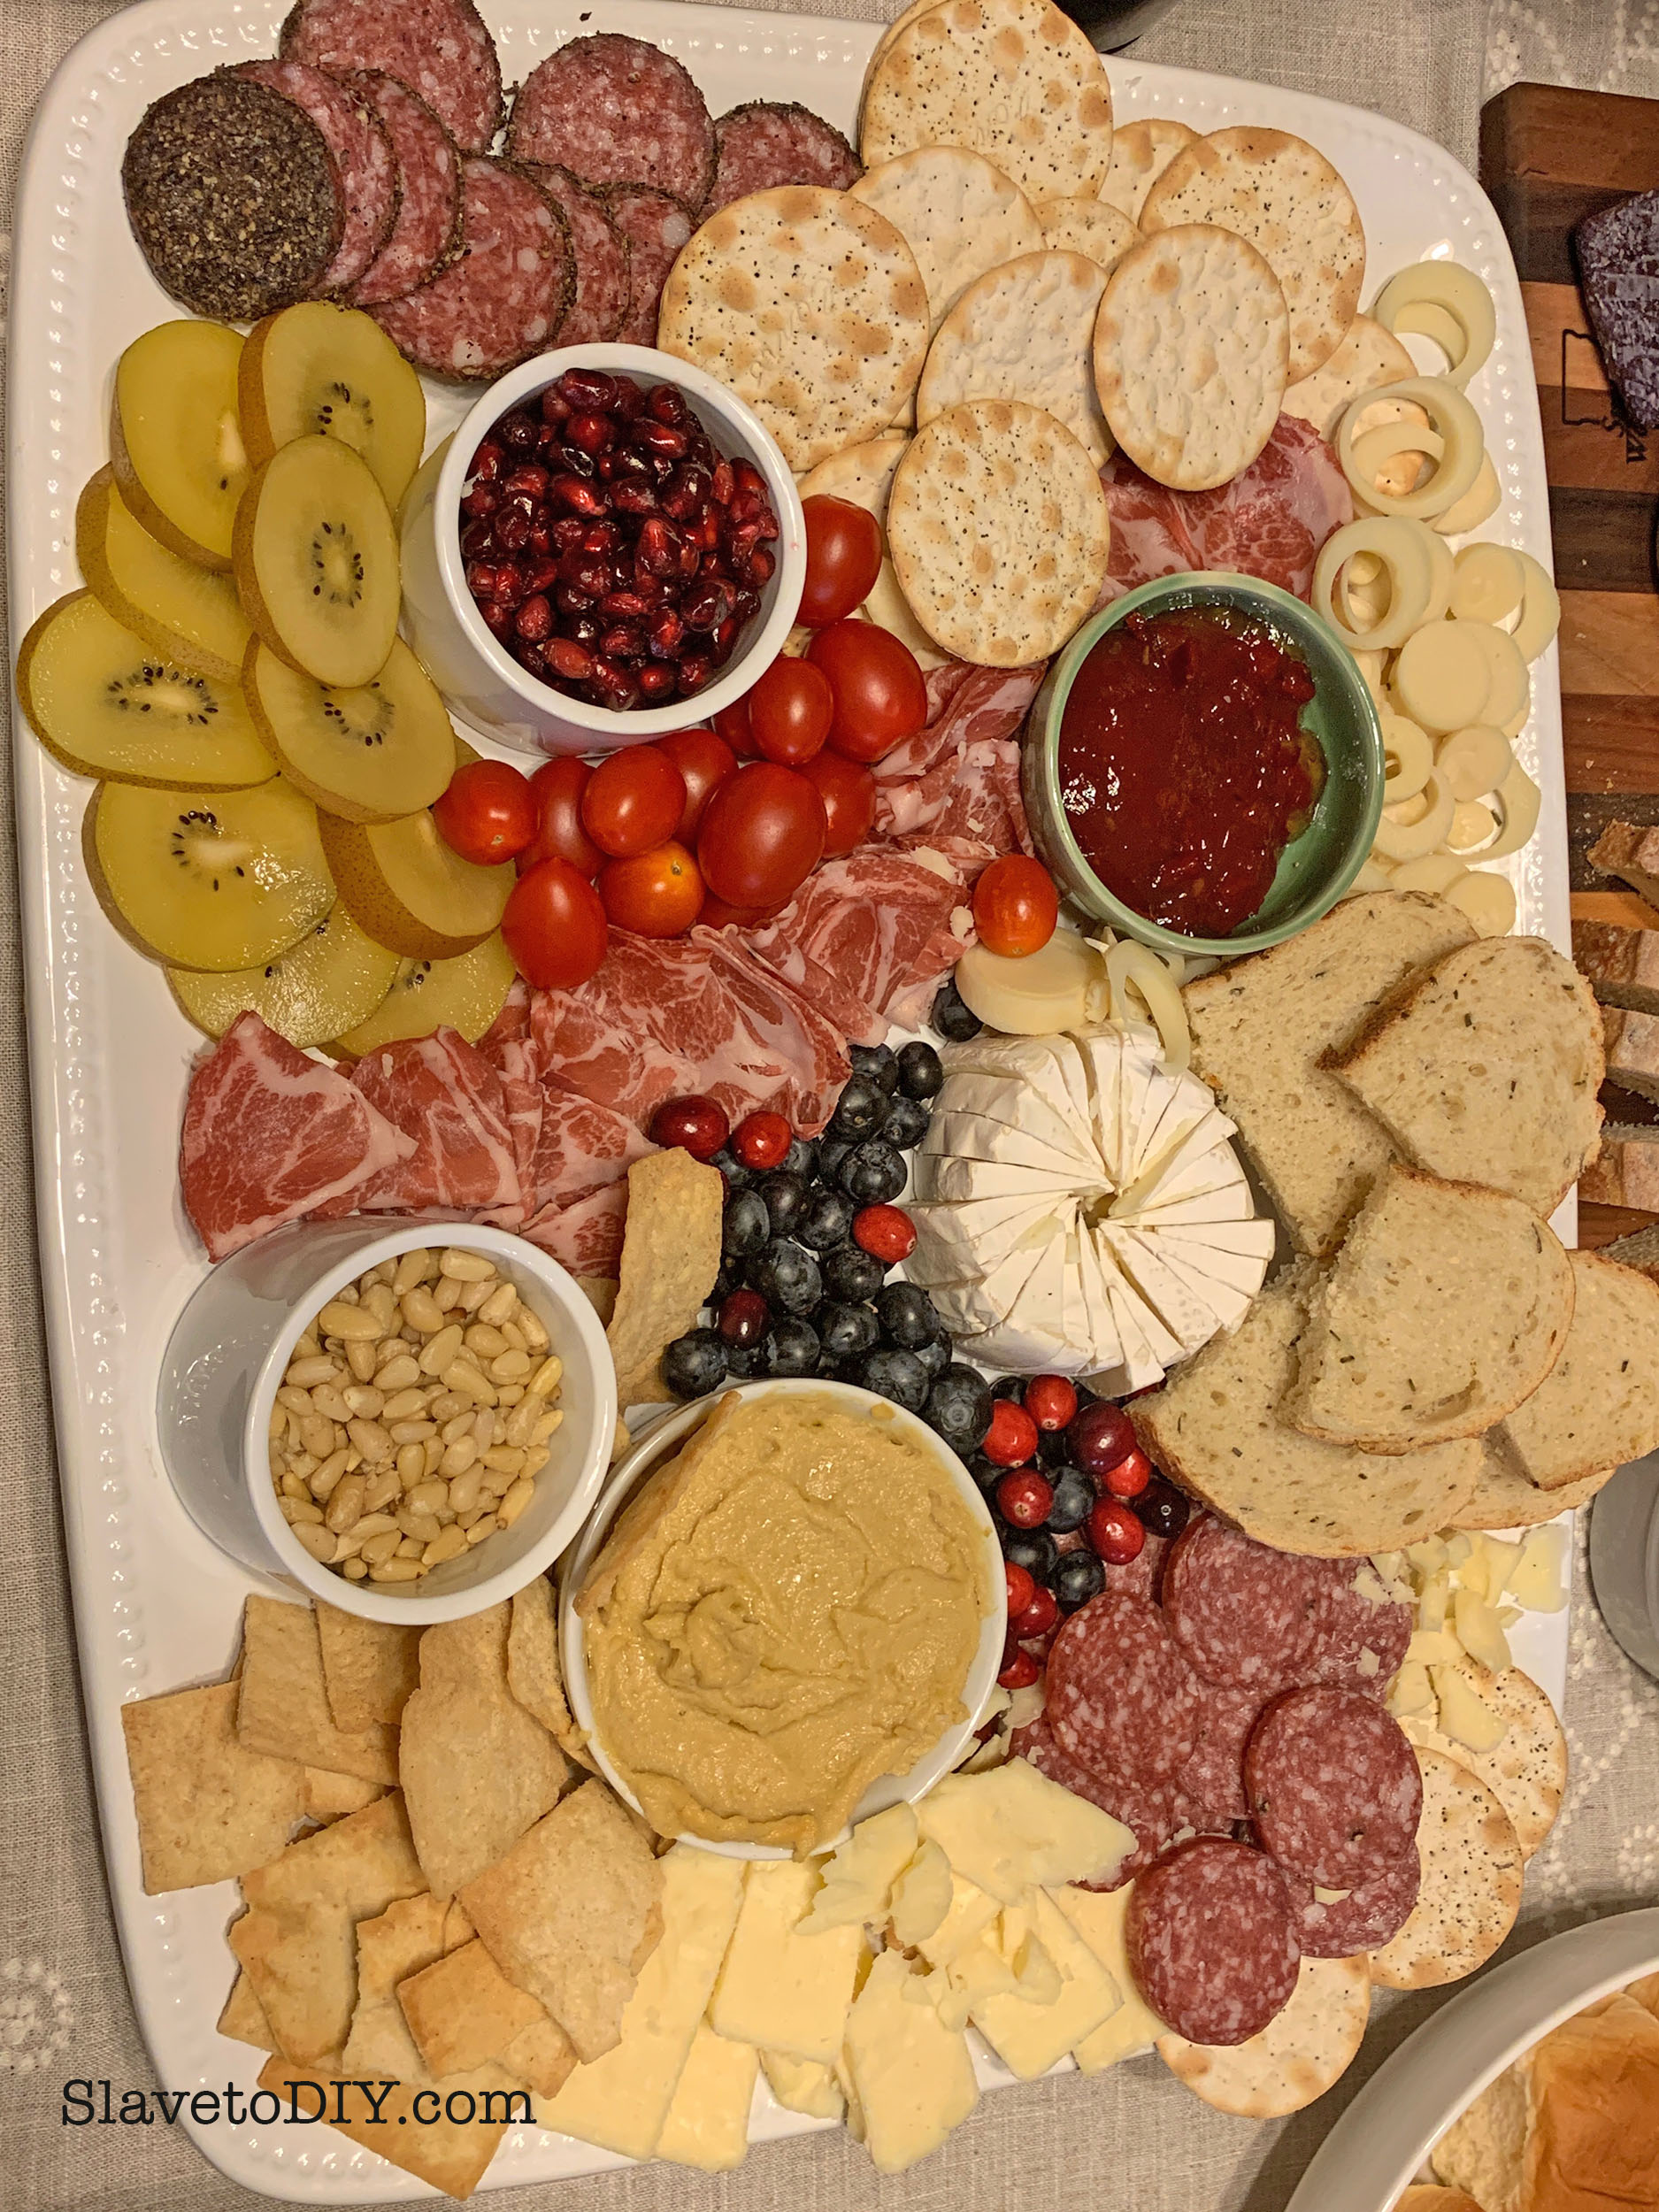
Get something to put all those dips and goodies on: We shopped Costco for crackers (we like Carr’s Water Table Crackers), Hawaiian Rolls, Artisan Breads, mini Naan bread, Stacy’s Pita Chips etc. These are to make little sandwiches and sample sauces, cheeses, and meats.
Salty foods: Black, green, and kalamata olives. Cocktail dill pickles, marinated artichoke hearts, stuffed tomatoes/peppers (Costco has a Charcuterie platter with these already made!), marinated mushrooms, and heart of palm.
Fresh, colorful foods: Cherry or grape tomatoes, cranberries, grapes, kiwis, strawberries, blueberries and pomegranates. Try to find good ones that are in season!
Cheeses: Costco has an artisan cheese section by the wine. Get an assortment of stinky cheeses, soft cheeses, marinated mozzarella balls, etc. Try some new ones!
Meats: In the same section as the cheese there are artisan and fancy meats: pepperoni, prosciutto, and smoked salmon. I went WAY overboard on meat. Keep in mind how big your platters are!
Garnish: Herbs are great for garnish to add a little green in places that need it.
Sauces and Dips: We used tzatziki, hummus, spinach dip (Knorr vegetable dip with fresh chopped spinach instead of cooked), cream cheese and red chili pepper spread (for the salmon).
Crunchy foods: We used pine nuts, but you can do little bowls of walnuts, pistachios, etc, also.
Charcuterie Boards: Easy Appetizers For Holiday Entertaining To Wow Your Guests
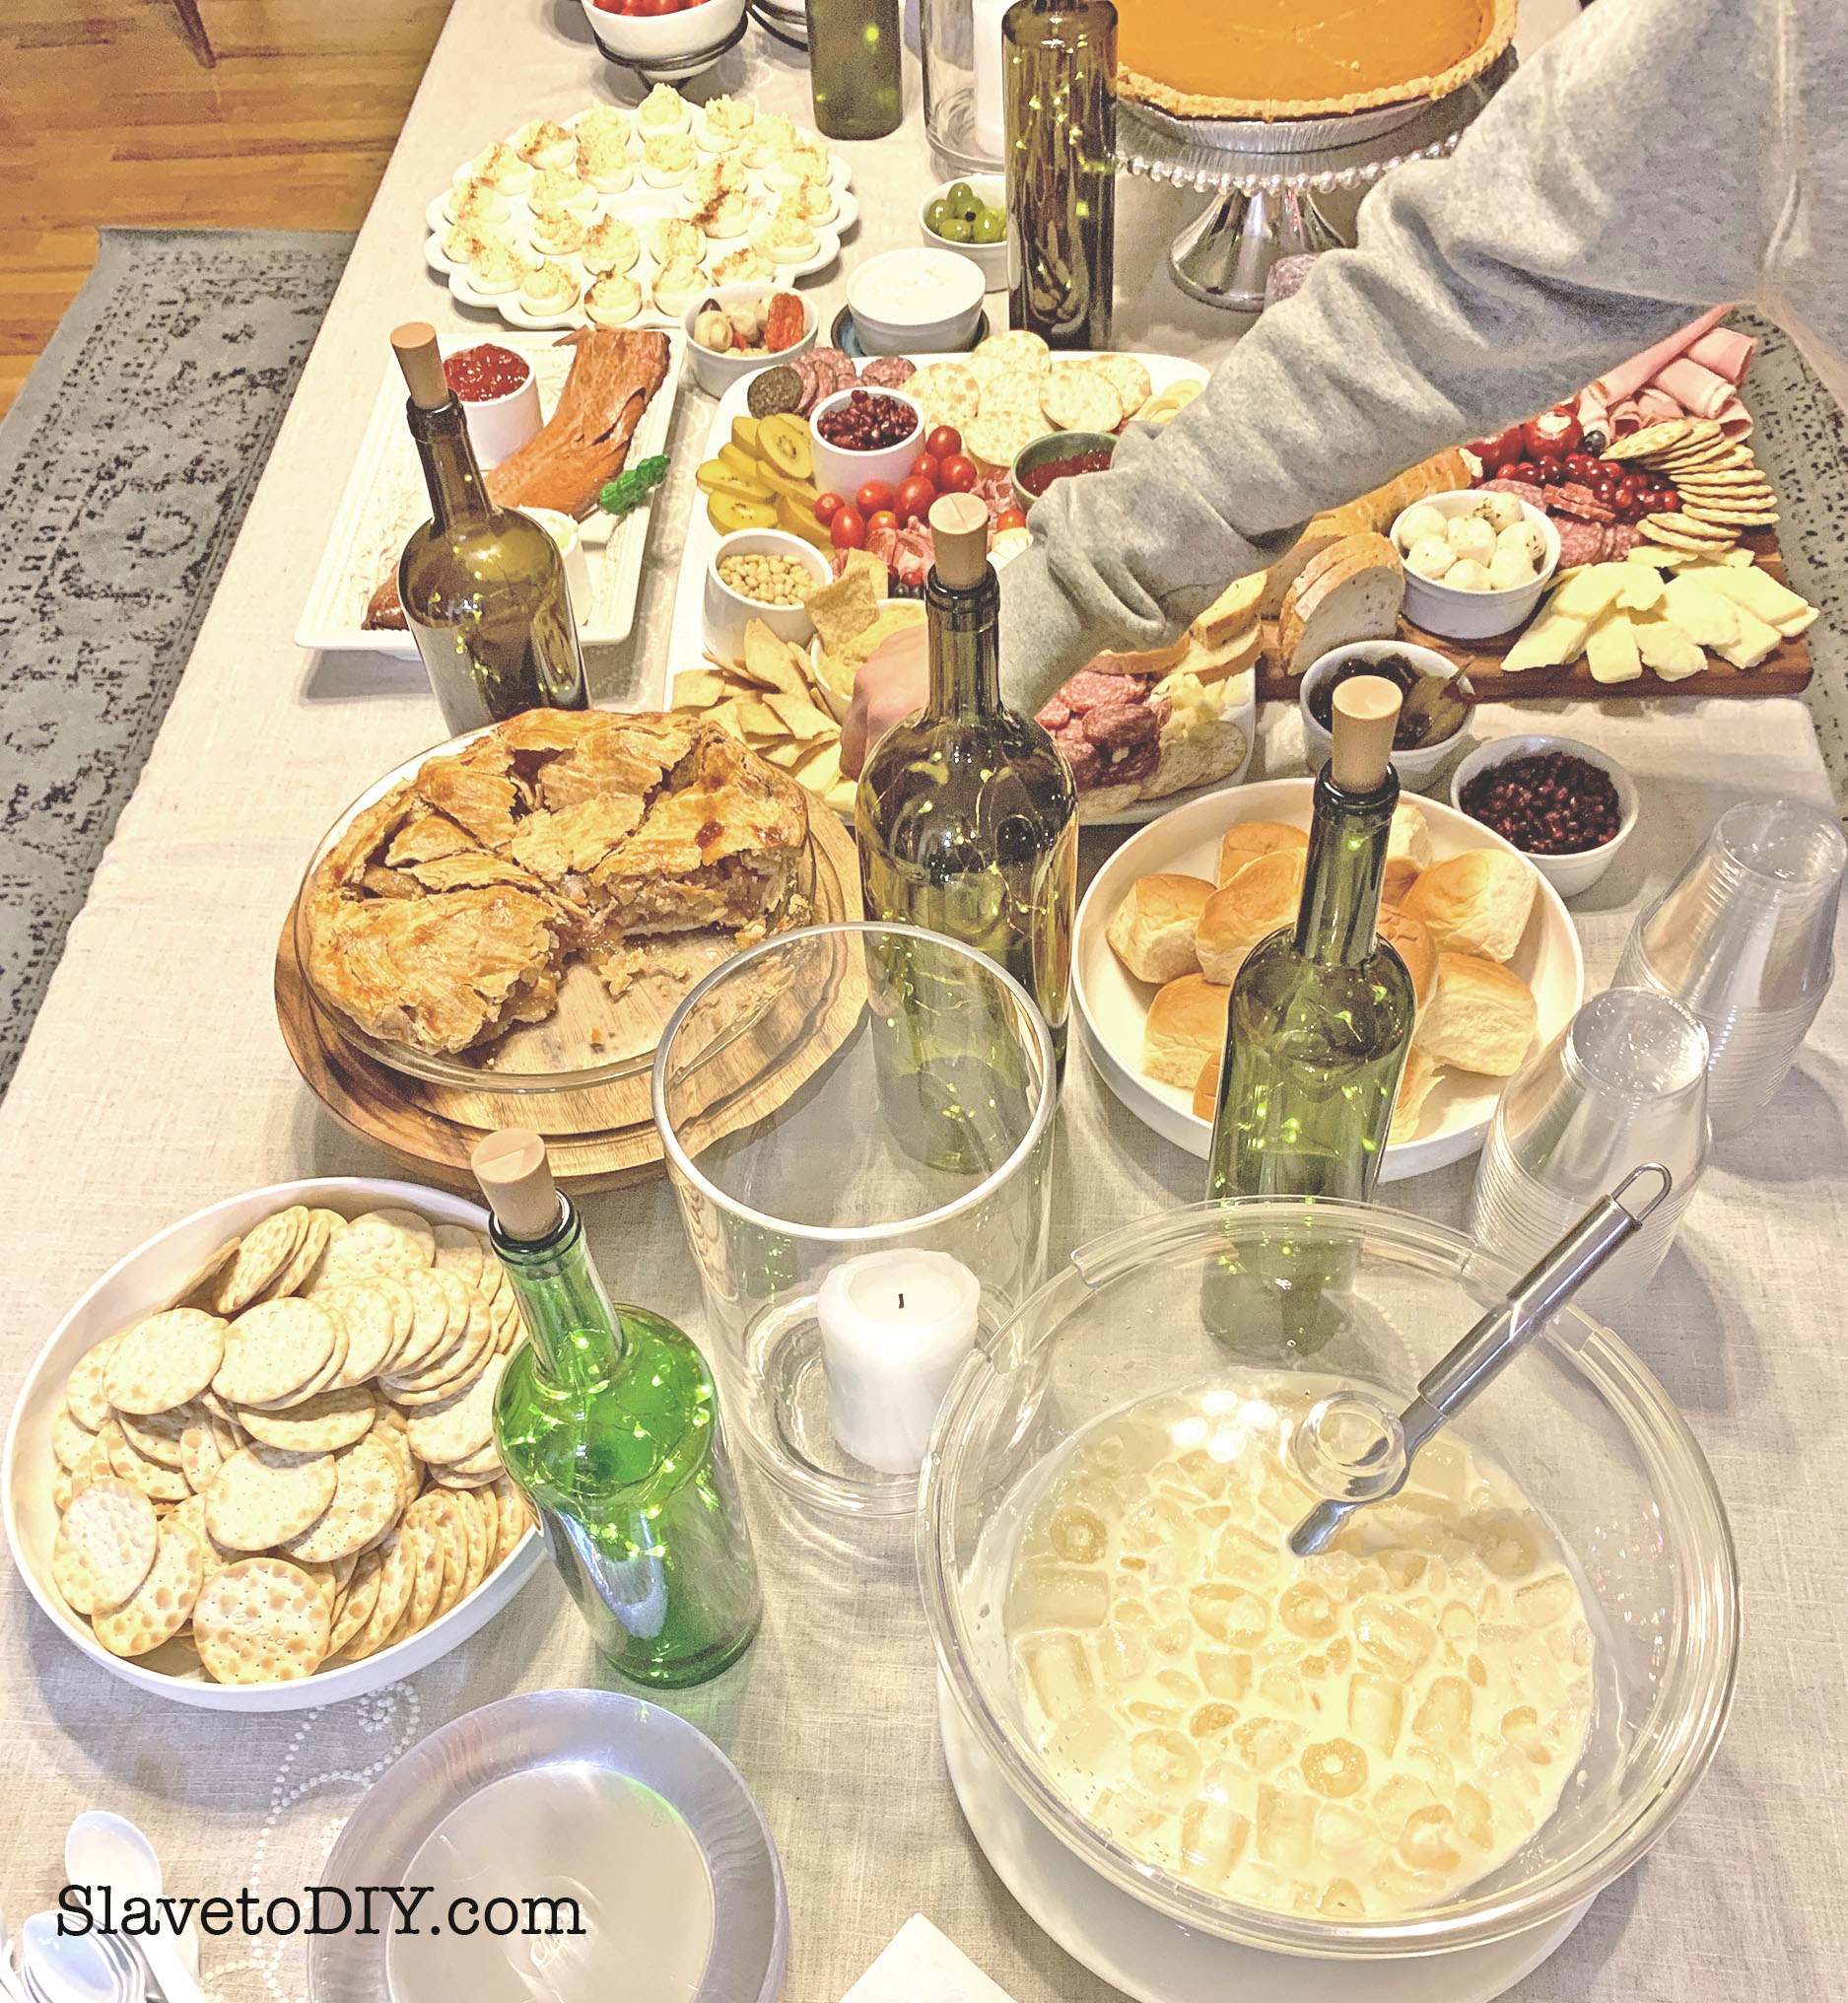
Preparing: It’s really tough to time this right, but with a little common sense, you can get these out just as your guests are arriving.
Tip: Not feeling creative? Use a picture from Pinterest and copy the board (the greatest form of flattery!).
Charcuterie Boards: Easy Appetizers For Holiday Entertaining To Wow Your Guests
Start with your crackers and room temperature items (black olives, nuts, etc). Then move to cutting the cheeses and meats (when you’re done, stick them back in the fridge to keep them cool until you’re ready to add them to the platters). Next add the cold fruits, the cheeses and meats, and finally the cold sauces and dips in ramekins.
The last thing you should be doing is toasting your bread just before the guests arrive!
Tip: Use clean, white flour sack towels to wrap over your warm rolls to keep them warm and moist until people start digging in!
Charcuterie Boards: Easy Appetizers For Holiday Entertaining To Wow Your Guests
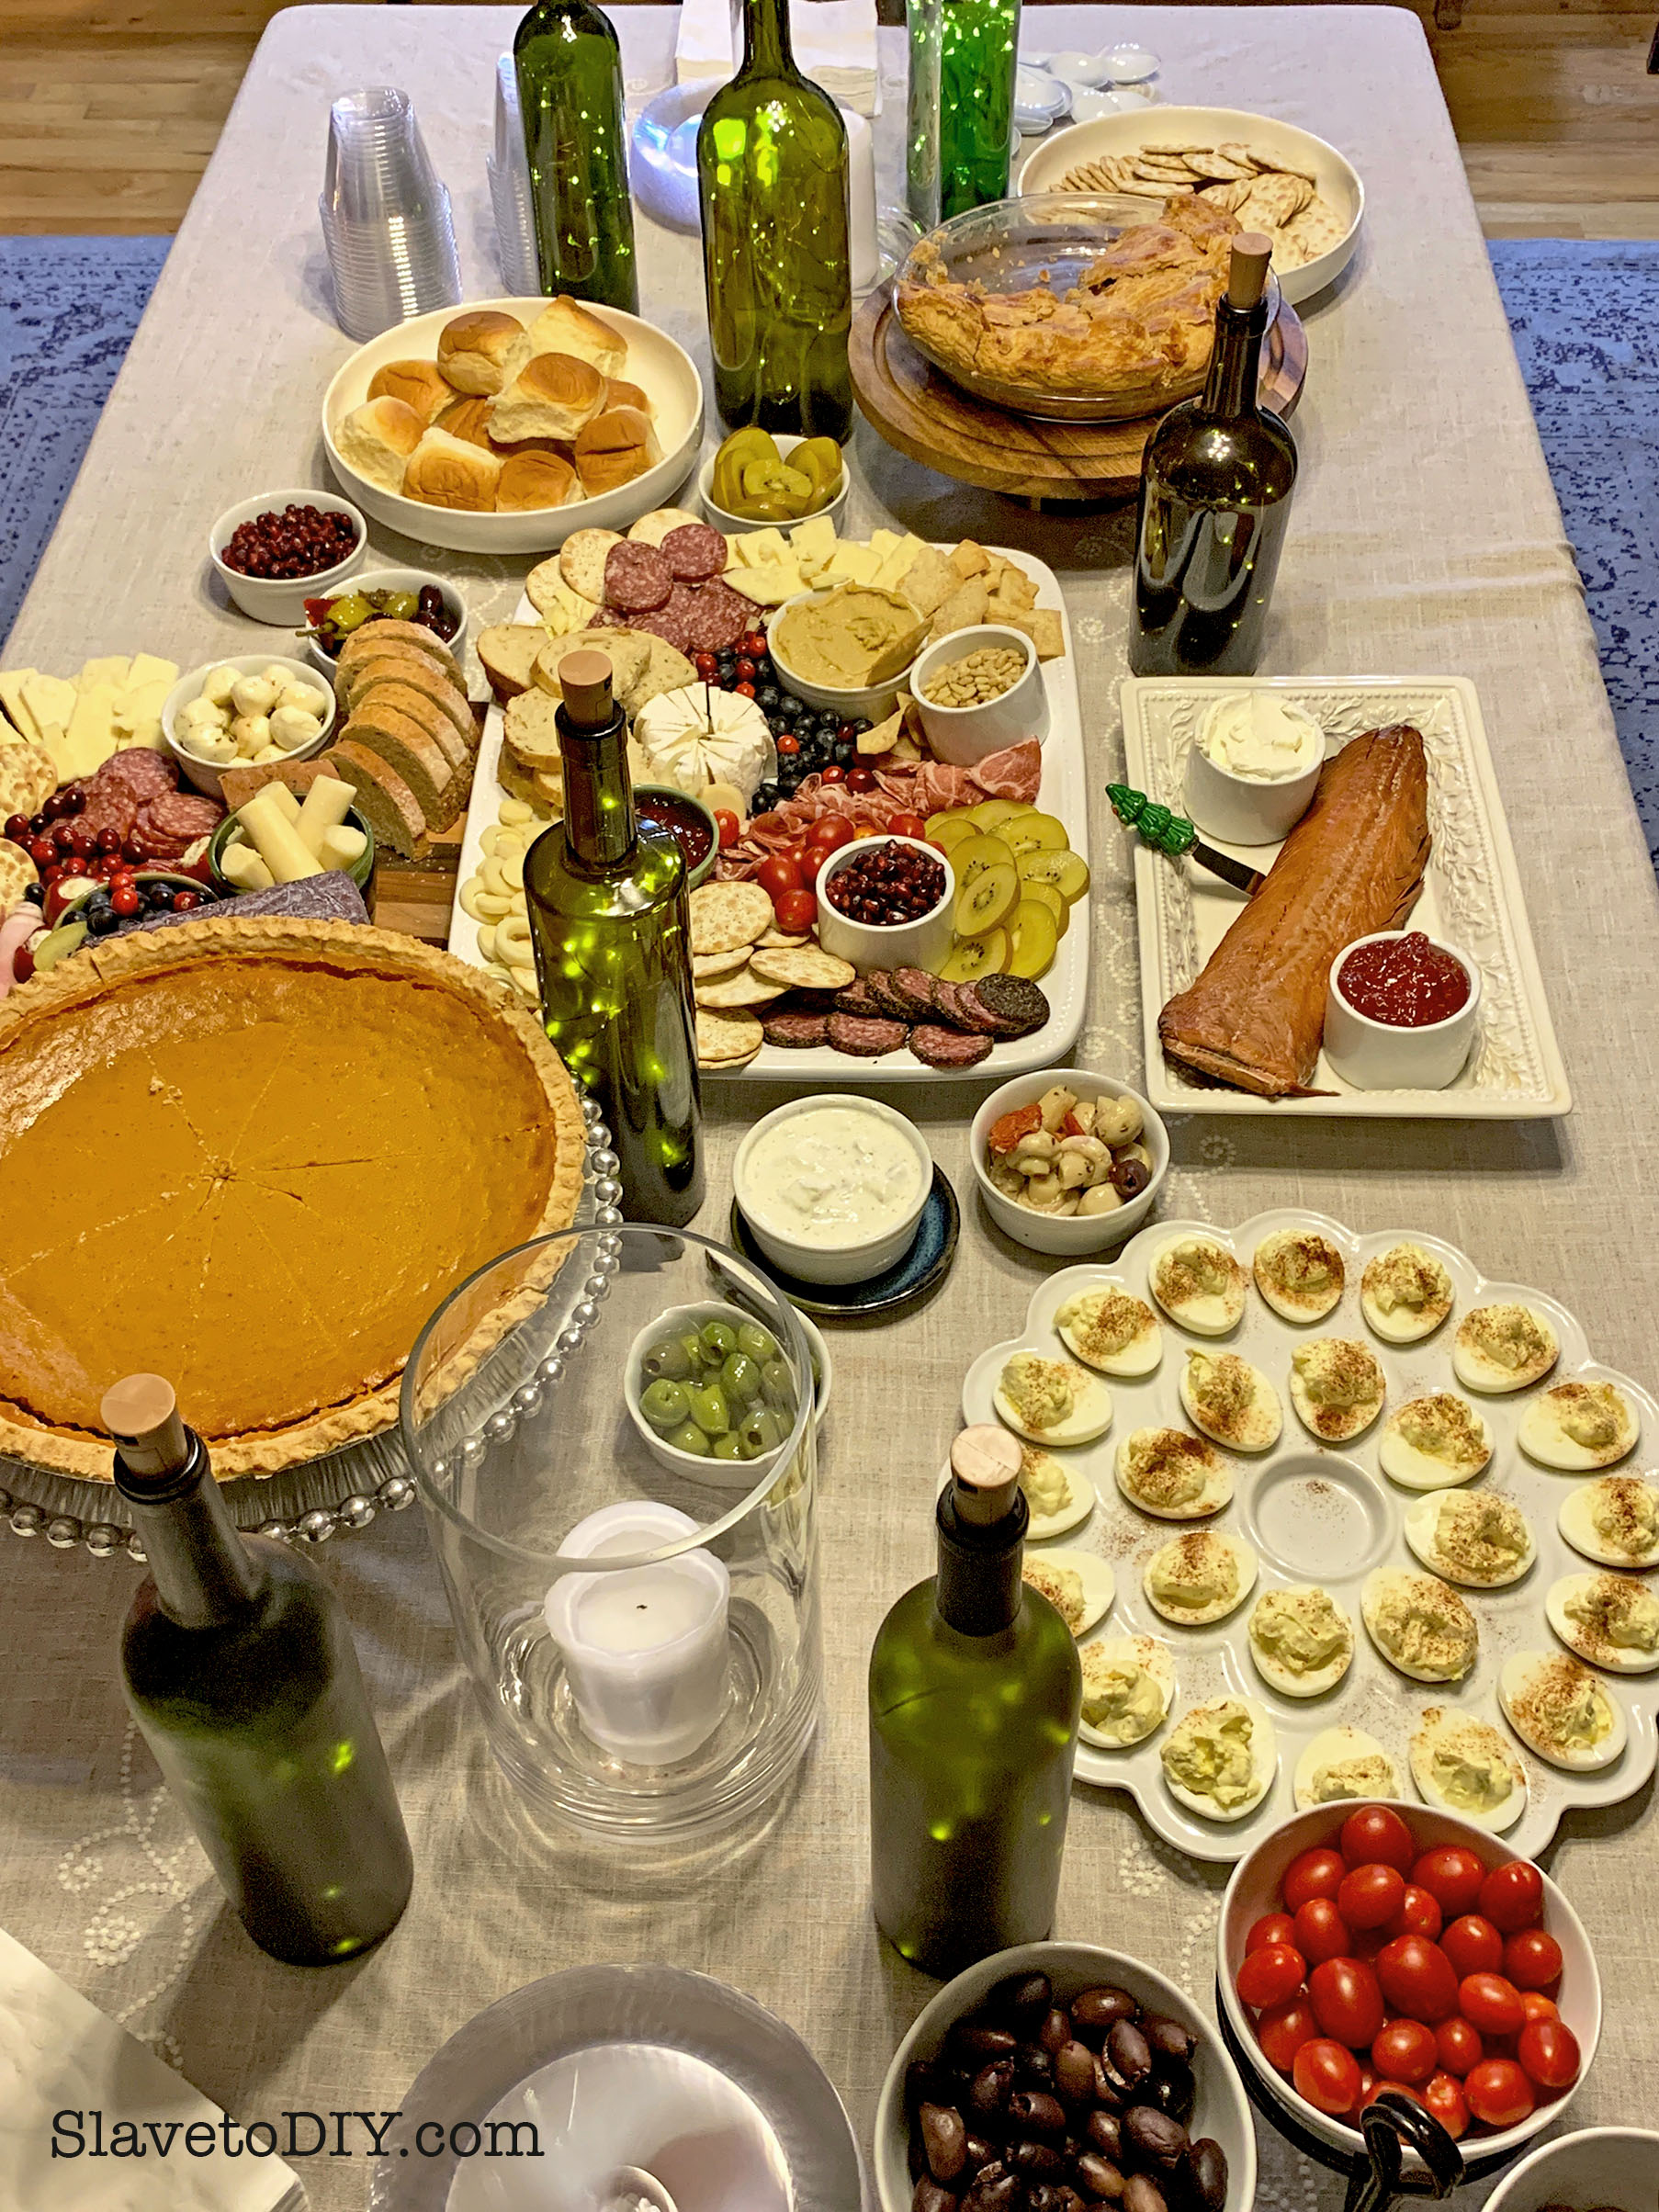
Arranging: The idea is to keep sets of complementary foods next to each other. On the smoked salmon platter we had the chili jelly and cream cheese and water crackers nearby to build a little sandwich on.
If you have something especially unusual or you just like labelling things, you can make little Alice in Wonderland signs “Try me on a cracker with red jelly and cream cheese!” These cardholders on Amazon are super cute and reusable!
Charcuterie Boards: Easy Appetizers For Holiday Entertaining To Wow Your Guests
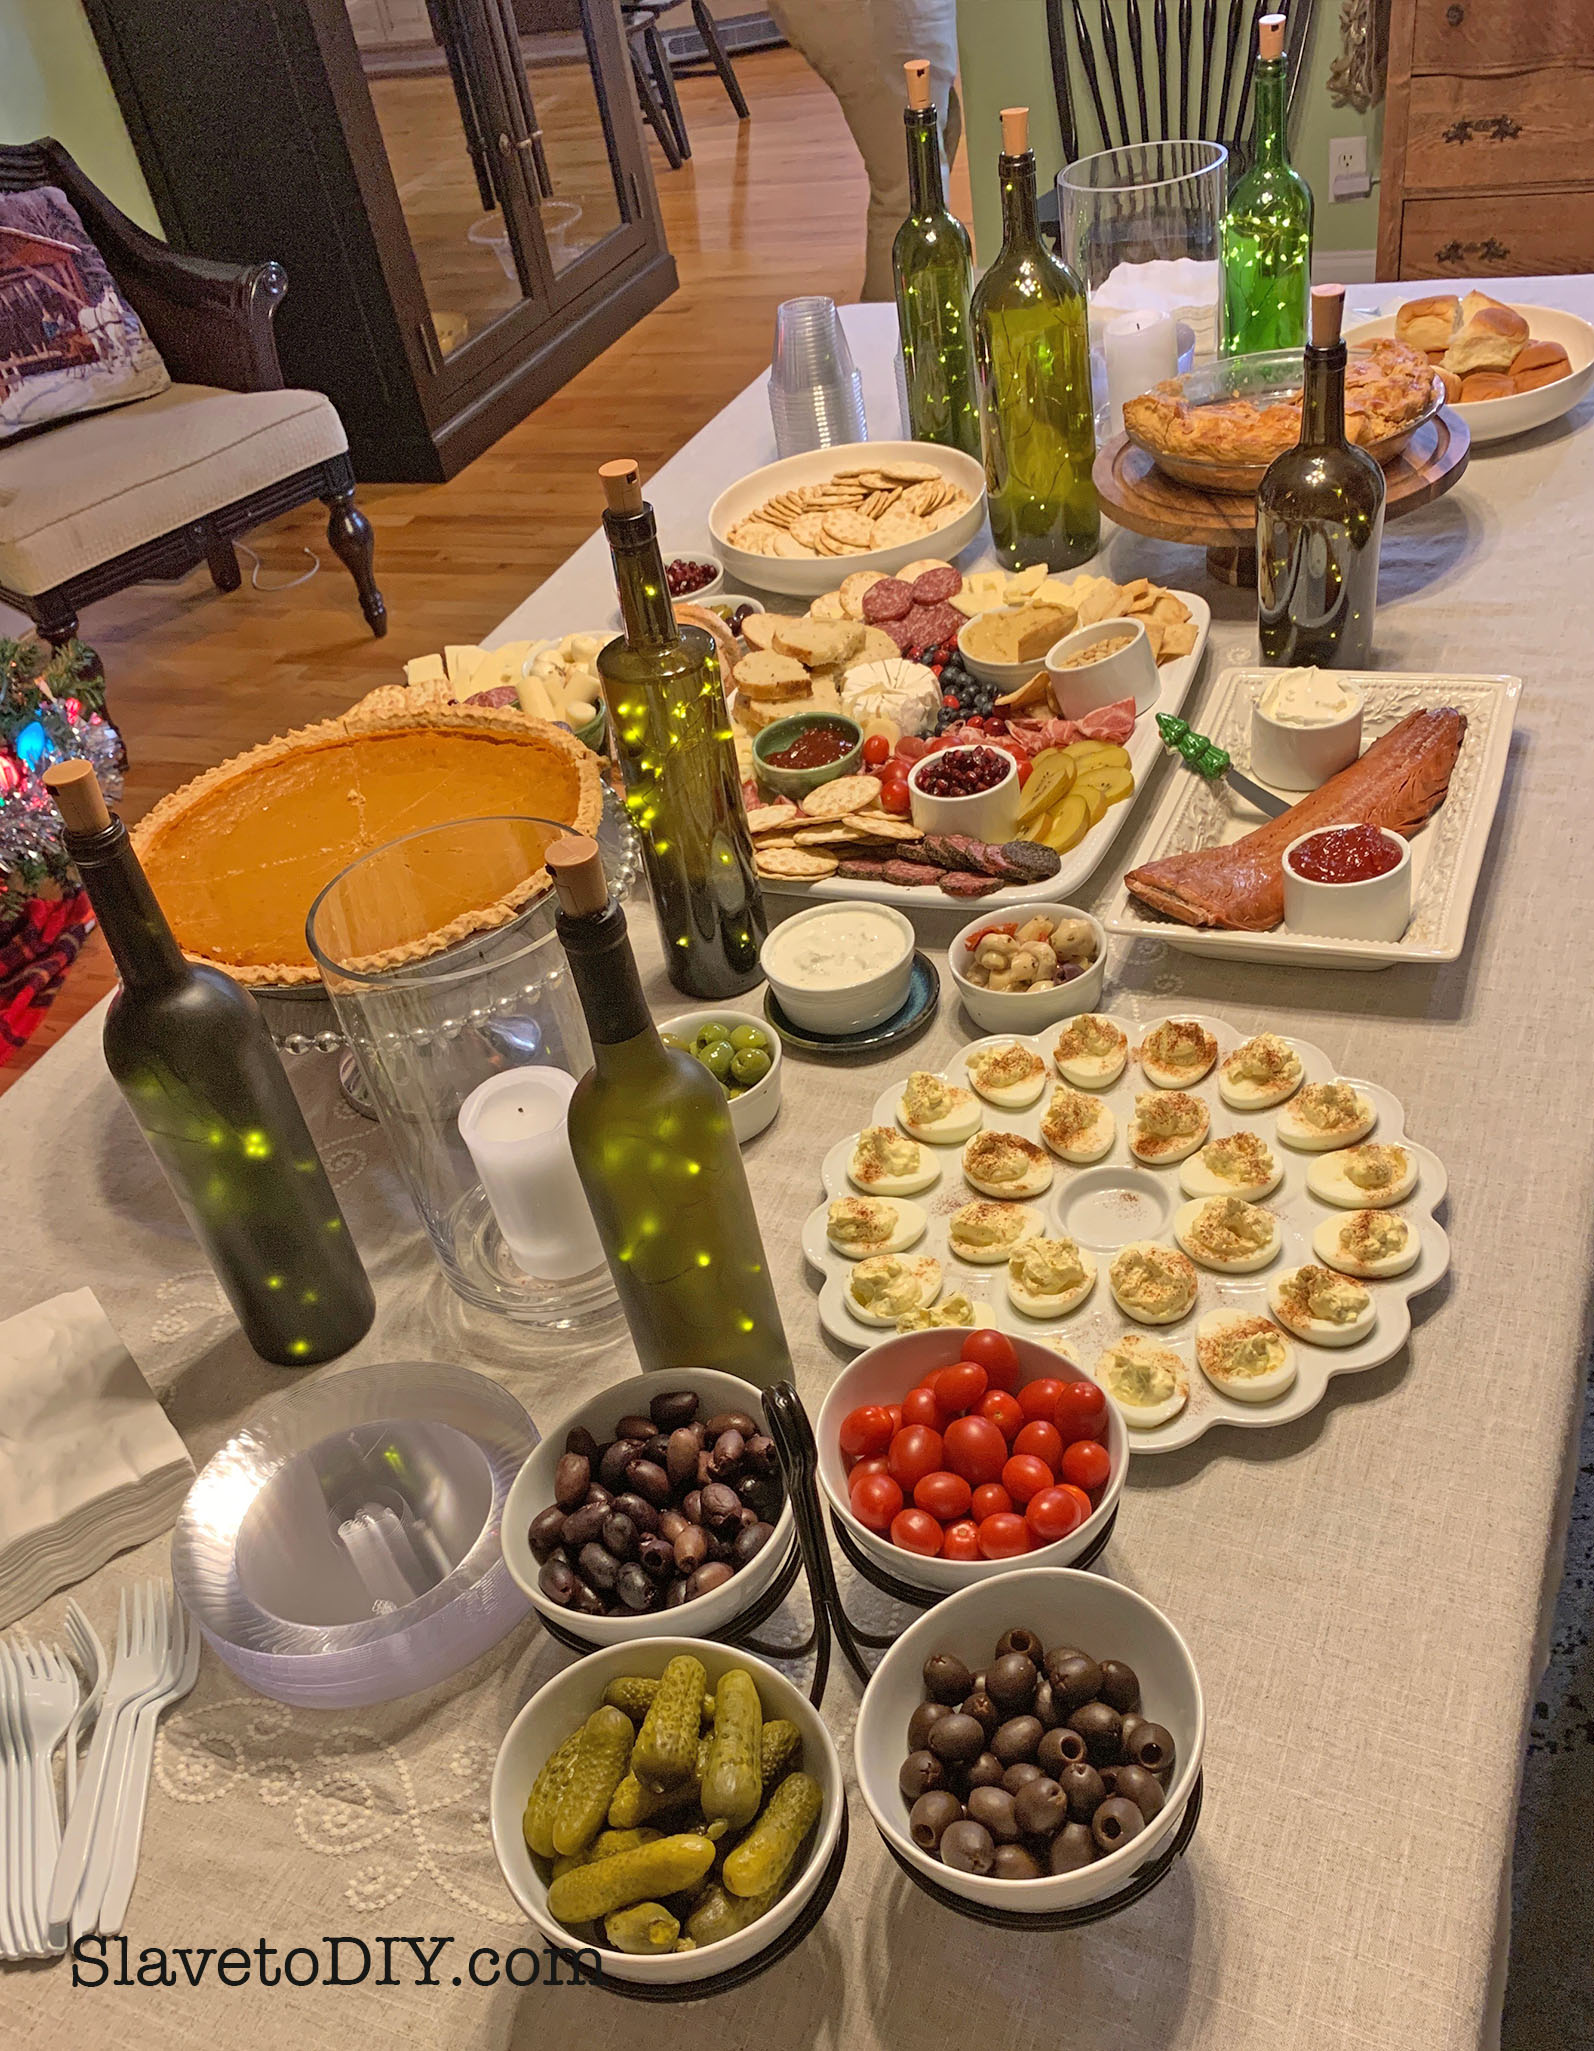
Displaying: I like using all of my serveware! If you have cake stands, etc, get those out and put your desserts on them. It gives the table different heights and depths.
Charcuterie Boards: Easy Appetizers For Holiday Entertaining To Wow Your Guests
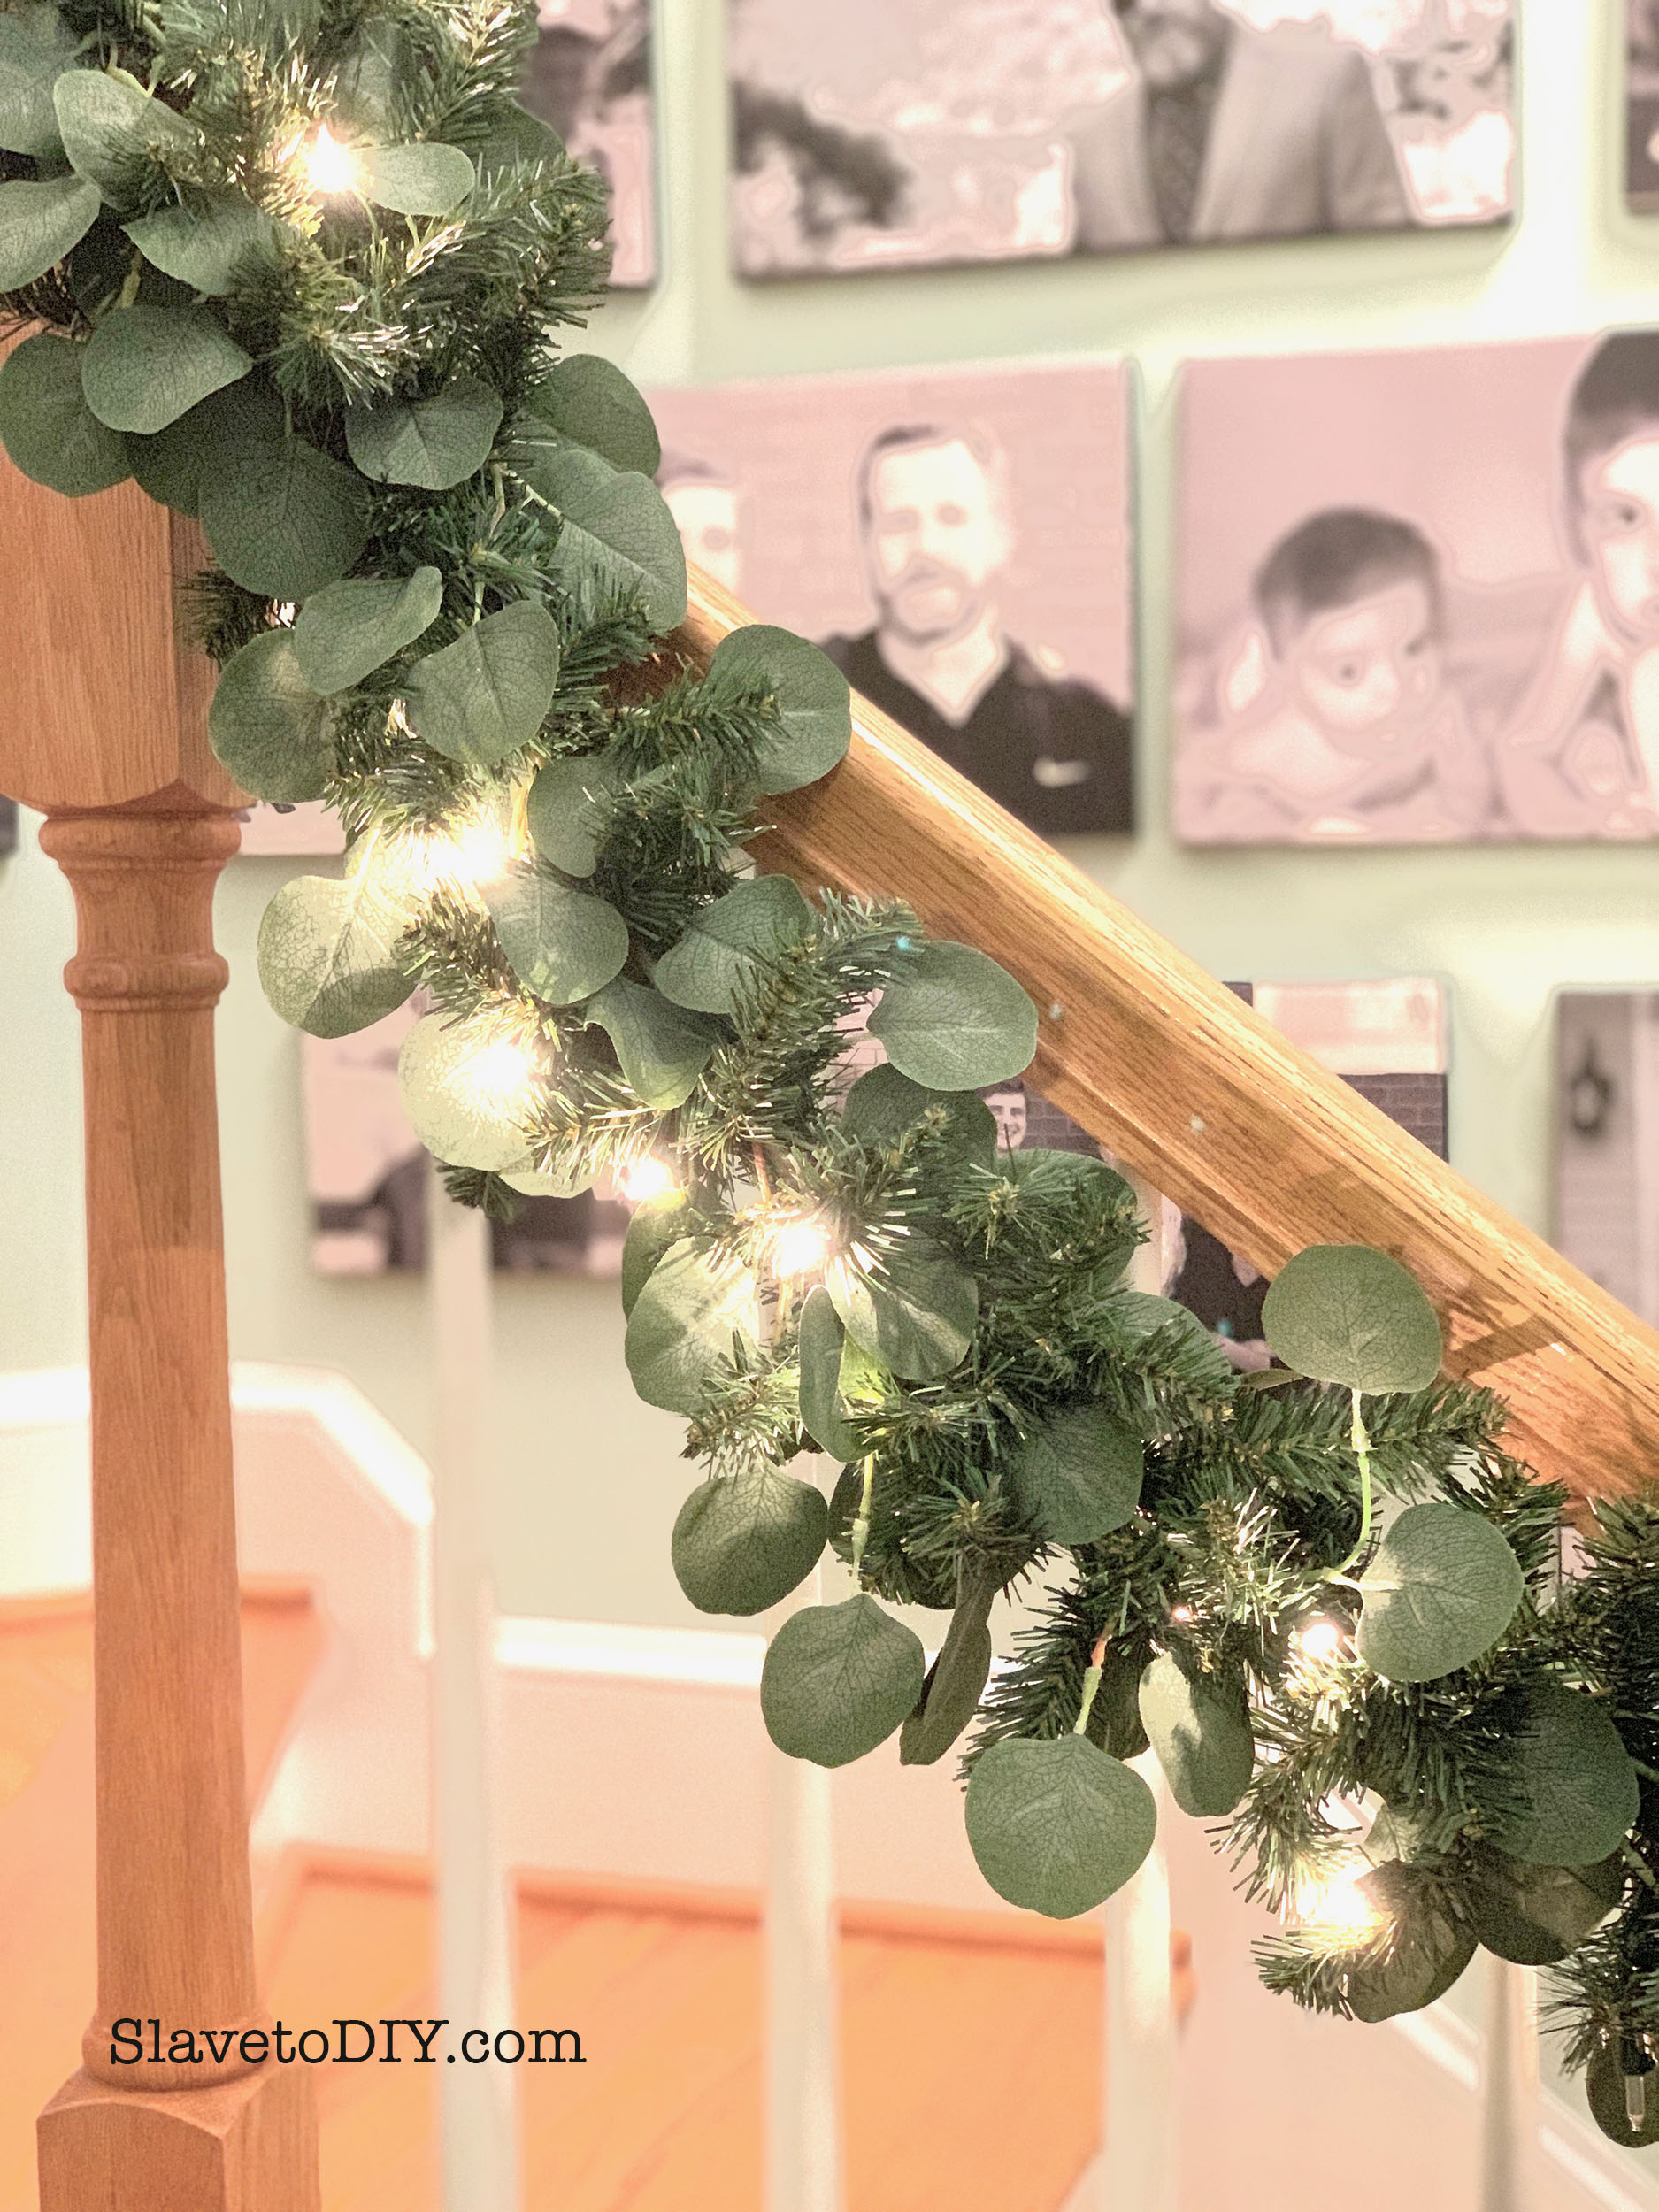
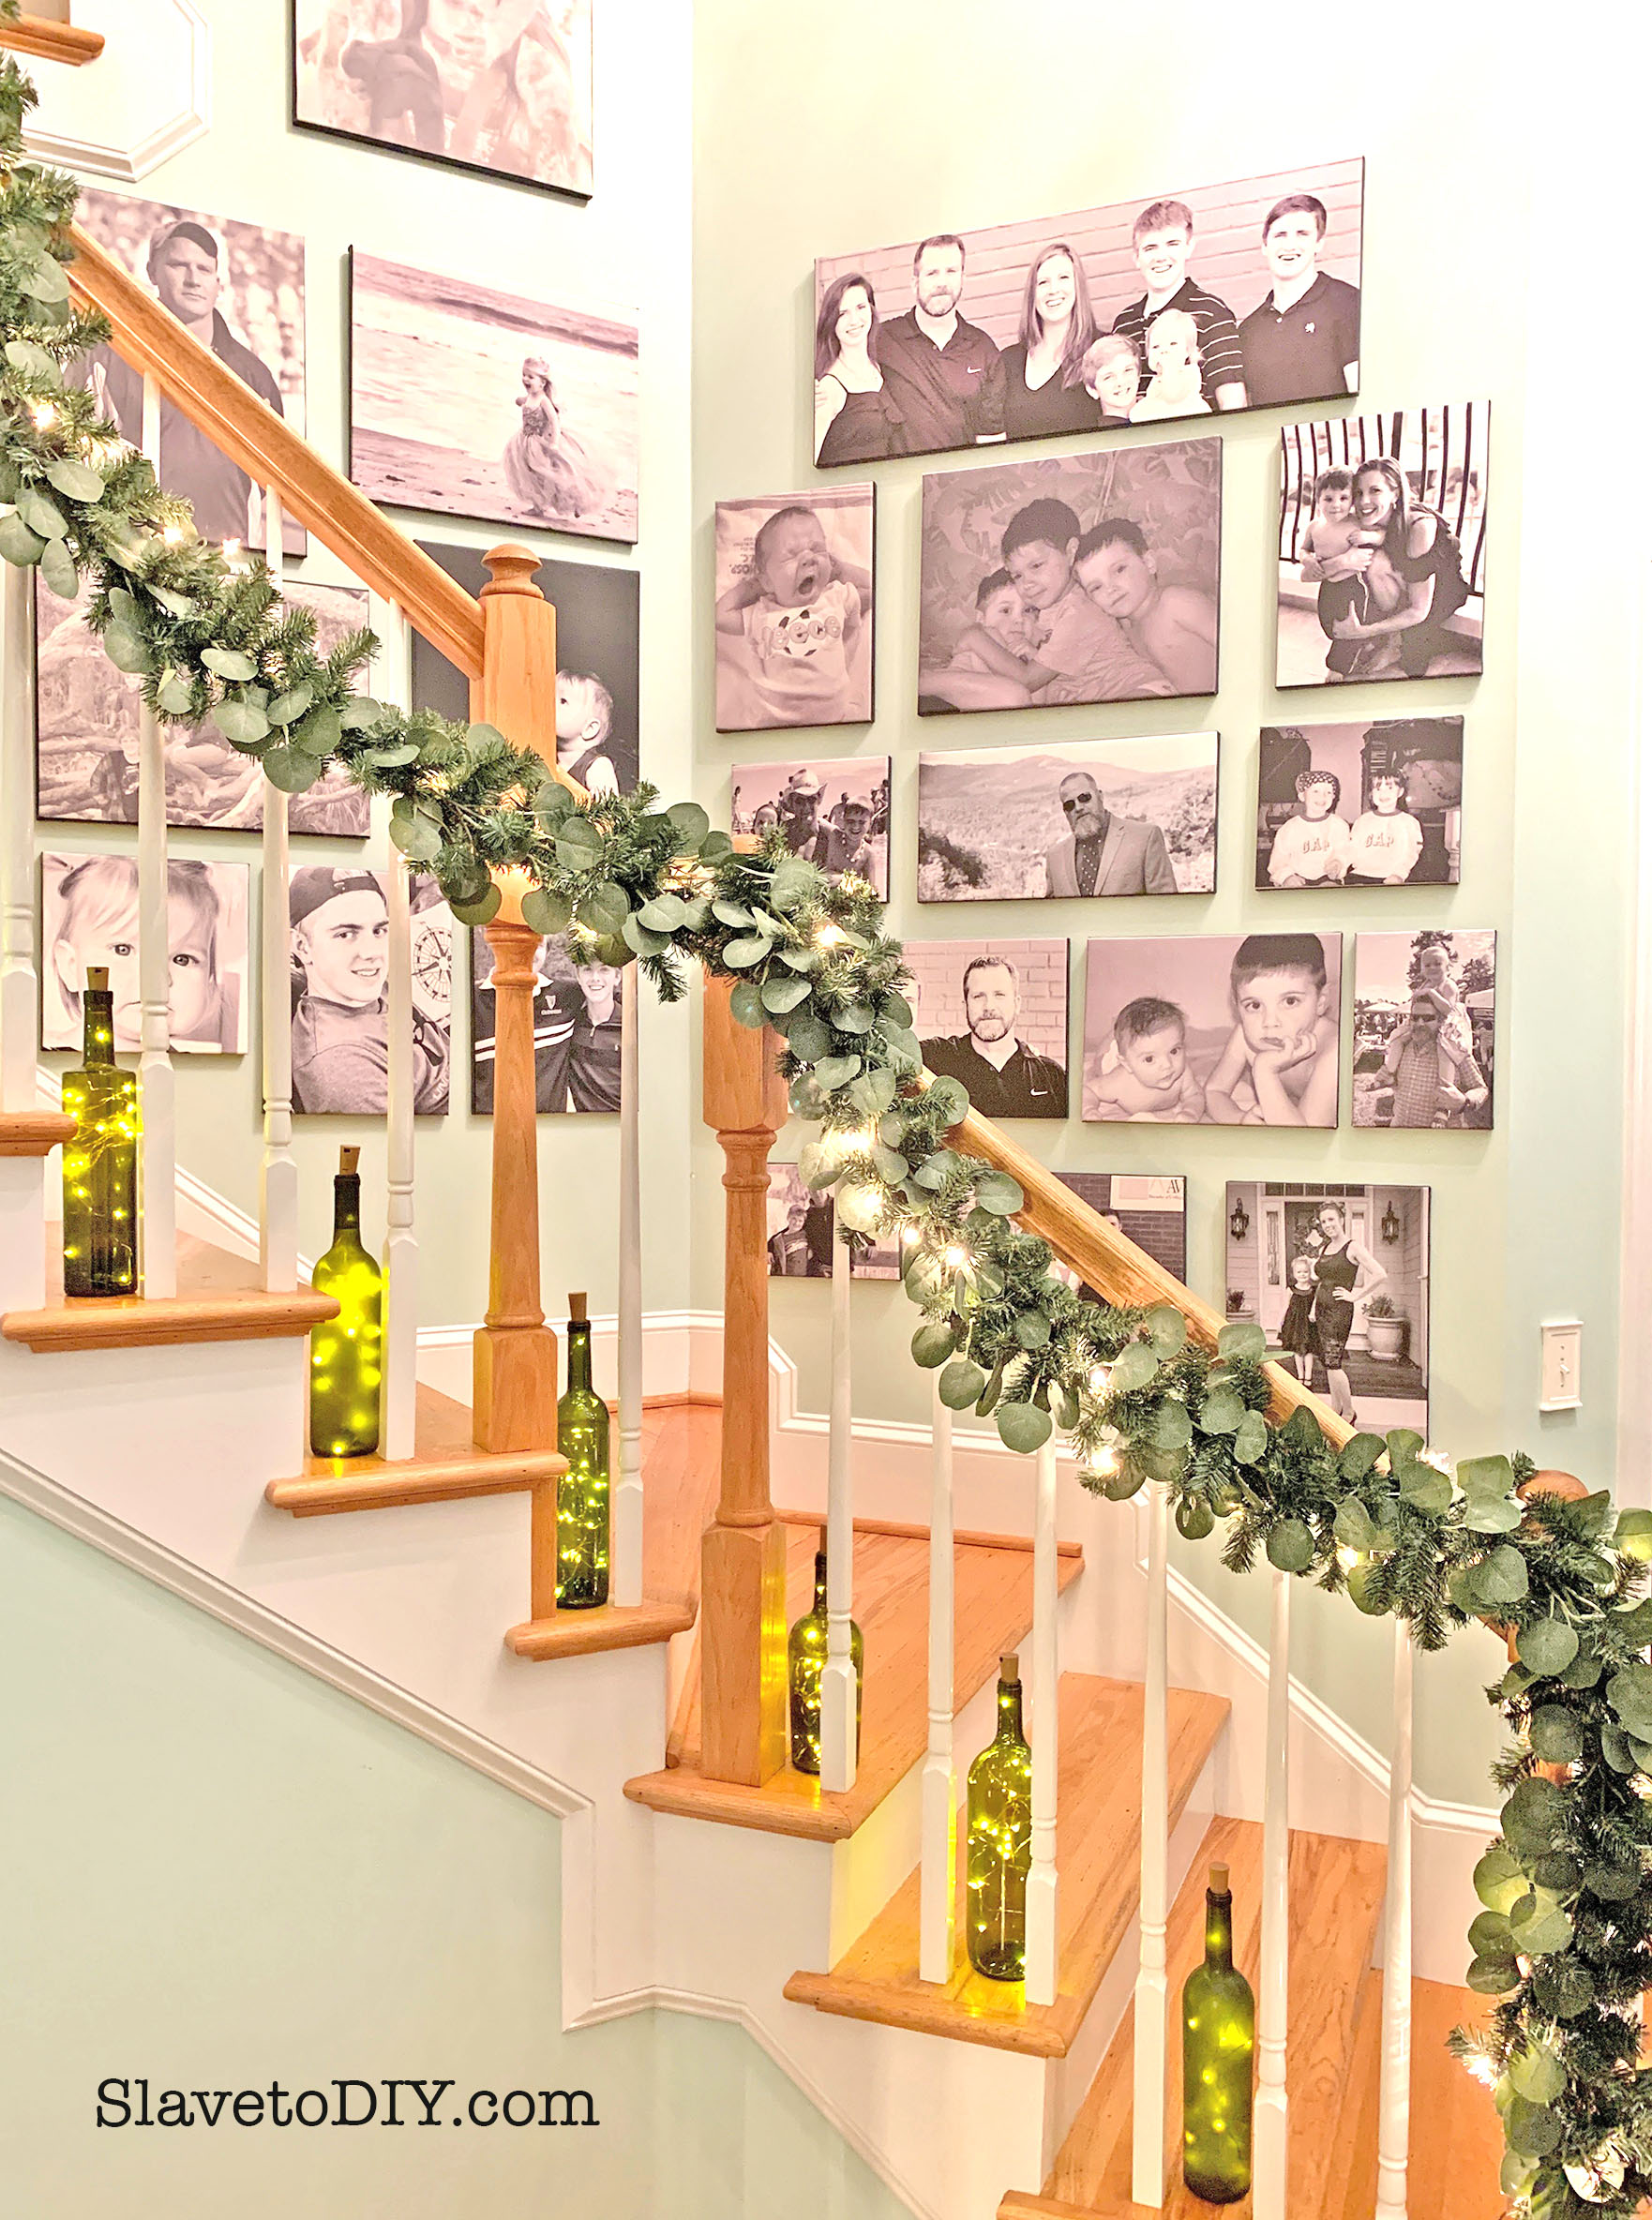
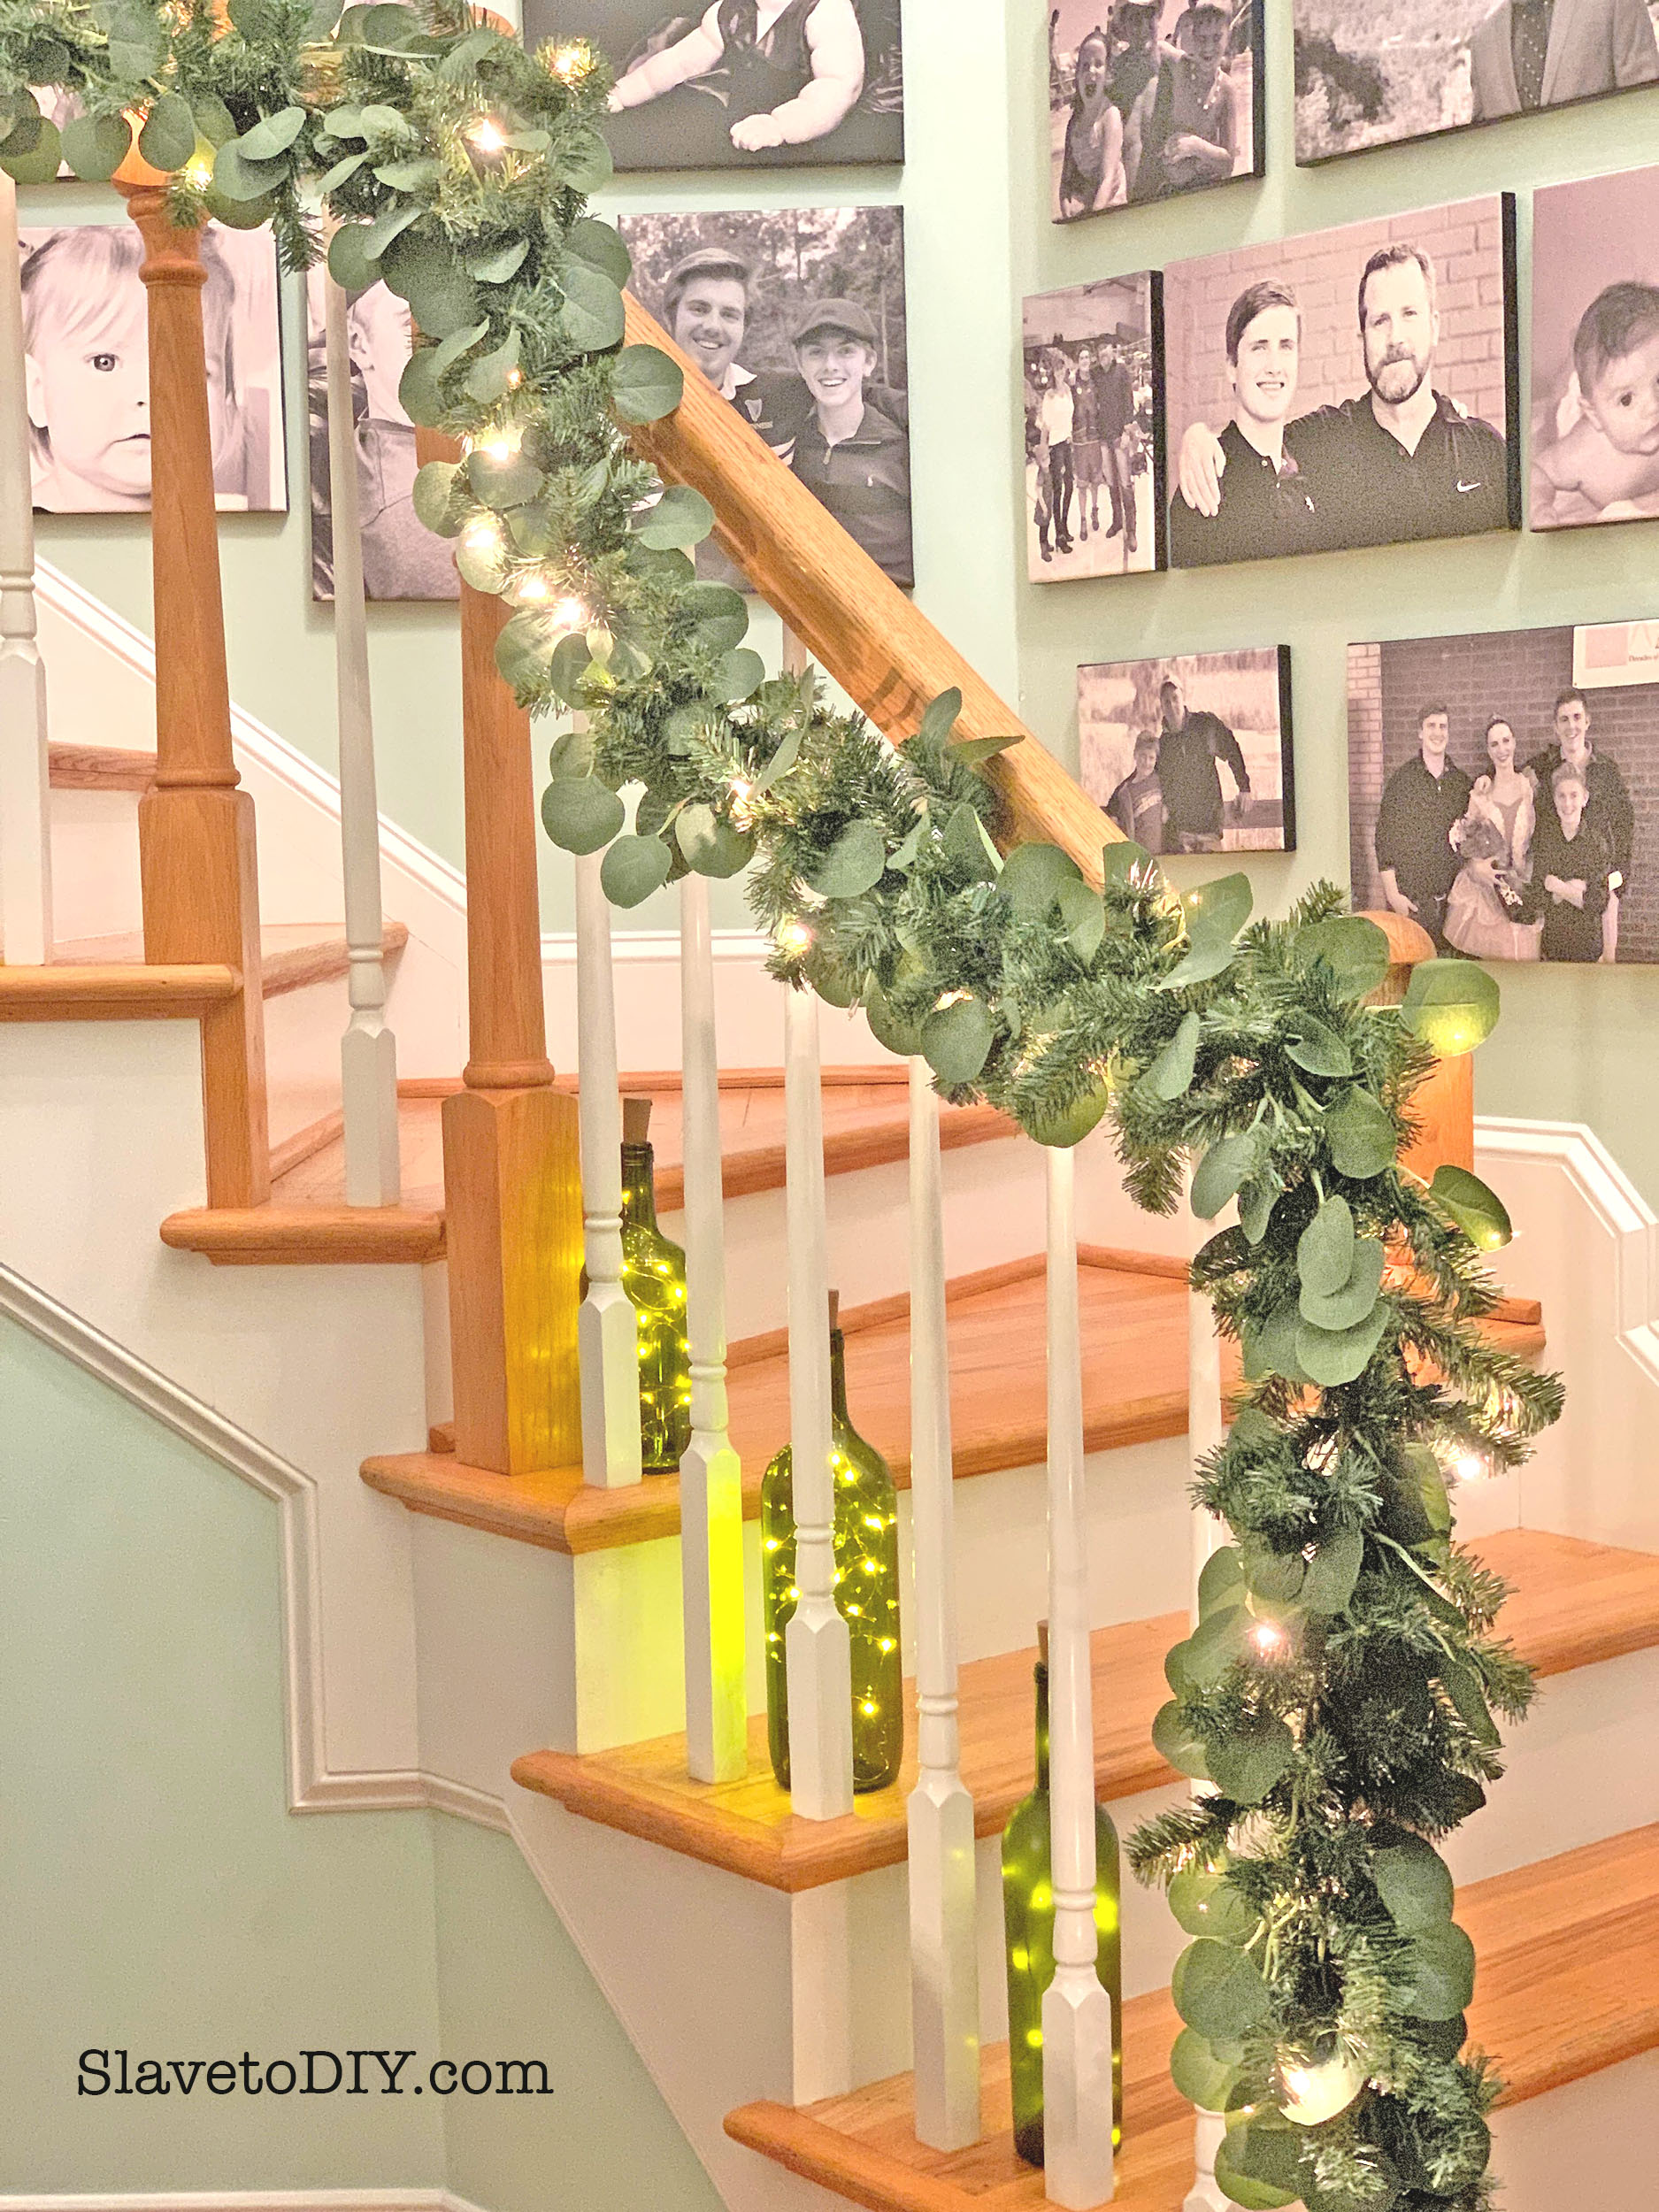
For fun centerpieces (that don’t take up a ton of room) check out these wine bottle cork fairy lights to put in your saved wine bottles- at about fifty cents apiece you really can’t go wrong! It gives the table some additional interest, height, and color!
Charcuterie Boards: Easy Appetizers For Holiday Entertaining To Wow Your Guests
These little porcelain ramekins are awesome and we use them for individual dipping sauces all the time. They have been super hardy and durable!
Charcuterie Boards: Easy Appetizers For Holiday Entertaining To Wow Your Guests
As you can see, I use the platters as a centerpiece and layer around them. We almost always have deviled eggs (because they’re MY favorite) and adding pies makes for a fun evening paired with your favorite wines and spirits. That beautiful wooden cake stand comes with a pretty glass dome and I use it all the time! The egg plate and four bowl server are both from Pottery Barn, but unfortunately I don’t think they’re available anymore.
Charcuterie Boards: Easy Appetizers For Holiday Entertaining To Wow Your Guests
For more ways to use your saved wine bottles, we have a Great Wine Bottle Post on upcycling! And those low white porcelain serving bowls with the bread and crackers are one of my new favorite brands: Dowan on Amazon, their stuff is sturdy, well made, sourced responsibly, and sturdy!
Charcuterie Boards: Easy Appetizers For Holiday Entertaining To Wow Your Guests
Do you have favorite goodies that you serve around the holidays? If you have combos you love on charcuterie boards, I’d love to hear about them in the comments section below!
I am honest about my experiences with different products and write because I enjoy it. I do however, have the opportunity to earn money for my writing, also.
Slavetodiy.com is a participant in the Amazon Services LLC Associates Program, an affiliate advertising program designed to provide a means for sites to earn advertising fees by advertising and linking to amazon.com. Amazon offers a small commission on products sold through their affiliate links. Each of your purchases via our Amazon affiliation links supports our cause at no additional cost to you.
If a blogger links to an Amazon product (with a special code for affiliates embedded in the link), and a reader places an item in their “shopping cart” through that link within 24 hours of clicking the link, the blogger gets a small percentage of the sale. Amazon links are not “pay per click.” If you click on the product link and stay around Amazon and purchase something else, however, I will get a commission on that sale.
Slavetodiy.com is also a VigLink affiliate advertiser which works similarly.
Unless you thought ahead last year and swept Michael’s post-Christmas sale you’re probably in the same boat as everyone else- seeing all these gorgeous Christmas displays on Instagram and Pinterest and wondering how they do that (and how do they afford it?!). The secret is, they don’t usually buy pre-made garlands (or at least some don’t), because they’re crazy expensive! They make their own. Well, guess what? Even if you don’t have the gift for arranging greenery (I DON’T EITHER), you can make a beautiful garland that will impress all your holiday guests!
*This post may contain affiliate links. Please see full disclosure at the end of the post.
I was checking out the Balsam Hill site and their eucalyptus garland is on sale for $119. Ha. I need six to do my stair and upstairs hallway railing. Quick math: that’s too expensive. So, I decided to transform the Mixed Pine Lighted Garland that I got a couple years ago from Michaels (on sale at the time for 50% off because I procrastinated long enough). They’re currently on sale for about $20.
Step one: Check to make sure the light kit is working (ask me why I put this first) and then lay it out on a flat work space (like the dining room table).
How To Make Your Own Eucalyptus-Fir Mixed Christmas Garland For A Fraction Of The Price
Step Two: Flatten out all of the branches evenly on both sides of the garland. Nothing should be sticking up or hiding underneath.
How To Make Your Own Eucalyptus-Fir Mixed Christmas Garland For A Fraction Of The Price
I found the Eucalyptus Garland on Amazon for about $10 each. They come looking flat and sad, but fluff nicely once you mess with them a little.
Step Three: Lay the eucalyptus flat on the fir garland. The foot of the garland should be lined up with the female end of your light kit if you want to drape them naturally (in this picture the plug end that goes into the wall is at the bottom of the picture).
How To Make Your Own Eucalyptus-Fir Mixed Christmas Garland For A Fraction Of The Price
This is what they look like up close:
How To Make Your Own Eucalyptus-Fir Mixed Christmas Garland For A Fraction Of The Price
This is what it looks like part way done:
How To Make Your Own Eucalyptus-Fir Mixed Christmas Garland For A Fraction Of The Price
Step Four: Starting at the base: Pull each eucalyptus branch away from the base and wrap the fir branch (that is directly below it) into the elbow, wrapping it across to the other side. Do this on the other side as well. This will make an X of fir branches over the eucalyptus.
How To Make Your Own Eucalyptus-Fir Mixed Christmas Garland For A Fraction Of The Price
Step Five: Once you’ve made Xs everywhere there is a eucalyptus branch, go back and arrange the leaves. You’ll see that on each branch there is a short leaf and a long leaf. Put the short leaves on top of the fir branches you twisted and the long leaf underneath.
How To Make Your Own Eucalyptus-Fir Mixed Christmas Garland For A Fraction Of The Price
This is what it will look like:
How To Make Your Own Eucalyptus-Fir Mixed Christmas Garland For A Fraction Of The Price
Here’s one more: (Don’t mess with it more until you get it up where it’s hanging, because it will move around a little once you get it hung).
How To Make Your Own Eucalyptus-Fir Mixed Christmas Garland For A Fraction Of The Price
Step Six: Hang your garland. I hang it on my railing with the flat part against the railing (the part that was laying on the table) so the fluffy side is out. I use the wire from the end of the garland to secure it to the top of the post but your method will depend on the size of your posts, etc.
How To Make Your Own Eucalyptus-Fir Mixed Christmas Garland For A Fraction Of The Price
Step Seven: Do your final fluffing! Here’s where you eyeball it and move leaves around if it looks a little thin in some places or too full in others.
How To Make Your Own Eucalyptus-Fir Mixed Christmas Garland For A Fraction Of The Price
More arranging:
How To Make Your Own Eucalyptus-Fir Mixed Christmas Garland For A Fraction Of The Price
Step Eight: Plug it in and enjoy!
How To Make Your Own Eucalyptus-Fir Mixed Christmas Garland For A Fraction Of The Price
Lighted and ready! (Those FABULOUS Wine Bottle Cork Lights are super reasonable and lots of fun).
How To Make Your Own Eucalyptus-Fir Mixed Christmas Garland For A Fraction Of The Price
And now I’m ready to go Christmas tree shopping!
How To Make Your Own Eucalyptus-Fir Mixed Christmas Garland For A Fraction Of The Price
I’m totally psyched I have this (mostly) done and that each strand costs only $30 to make.
Do you repurpose old decorations? Please share in the comments below! And, of course, check out more great content on our blog!
Cheers!
*Legal stuff:
I am honest about my experiences with different products and write because I enjoy it. I do however, have the opportunity to earn money for my writing, also.
Slavetodiy.com is a participant in the Amazon Services LLC Associates Program, an affiliate advertising program designed to provide a means for sites to earn advertising fees by advertising and linking to amazon.com. Amazon offers a small commission on products sold through their affiliate links. Each of your purchases via our Amazon affiliation links supports our cause at no additional cost to you.
If a blogger links to an Amazon product (with a special code for affiliates embedded in the link), and a reader places an item in their “shopping cart” through that link within 24 hours of clicking the link, the blogger gets a small percentage of the sale. Amazon links are not “pay per click.” If you click on the product link and stay around Amazon and purchase something else, however, I will get a commission on that sale.
Slavetodiy.com is also a VigLink affiliate advertiser which works similarly.