Seven Easy Steps To Stage A Powder Room Or Bathroom Like A Pro

Why should I care about staging my bathroom or powder room for sale (or entertaining), you ask? And I’ll tell you (because that’s sort of just what I do): This is the one room where your party guests, or potential buyers, are going to (probably) spend some alone time.

And you know what? They’re going to look, and they’re going to notice: how clean is it? How cluttered is it? You know what else they’re going to do? They’re going to look through your stuff. (Trust me, they will).

They’re also going to, hopefully, relax and feel like they might want to stay a while. Stay tuned and I will guide you through bathroom decor ideas, bathroom cleaning, and staging.

*This post may contain affiliate links. Please see full disclosure at the end of the post.

Your bath guests are looking to see if you’re Miss Piggy or Mary Poppins (practically perfect in every way). And although I don’t always like being Mary Poppins, in this case you should DEFINITELY be aiming for perfection and cleanliness and not being a disgusting, egotistical, irrational character that denies that she is anything less than absolutely perfect. Nobody likes Miss Piggy.

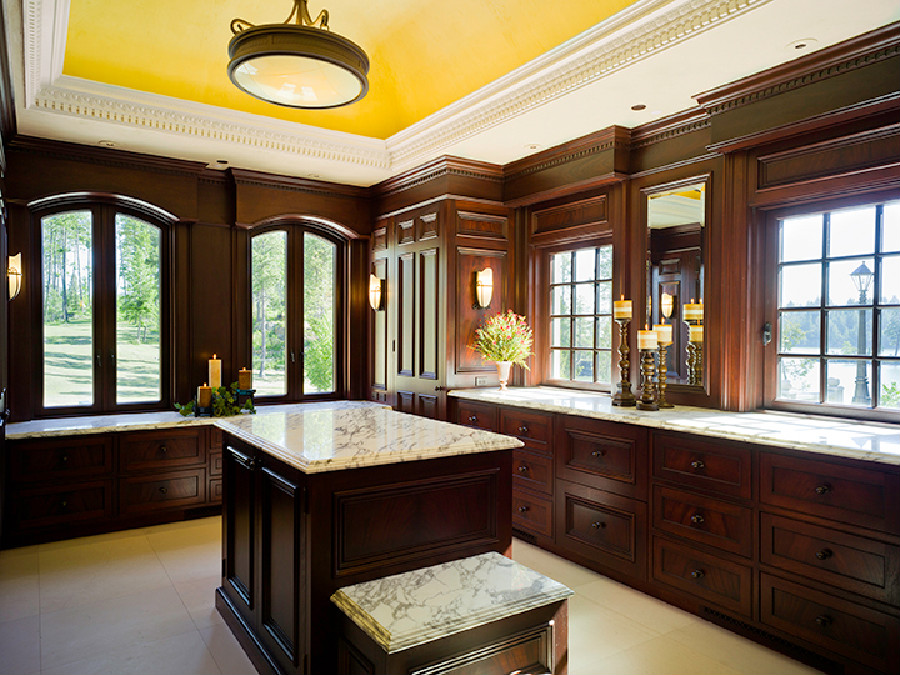
Ideally, your bathroom should be pretty… but, even if it’s not, you can still stage it to create a welcoming, spa-like space that will wow potential buyers and guests alike.

If you missed it, check out our post on How To Create A Historic Looking Bathroom In A New Home. You’d be surprised how economical making a gorgeous bath can be if you DIY it!

Here are the easy steps to stage your bathroom or powder room like a professional (with a complete source list at the end):

How To Create A Historic Bathroom In A New Home
Staging A Powder Room Or Bathroom Like A Pro


Deep Clean and Declutter.

I can’t emphasize this enough: This is the single most important step of bathroom staging. Scrub that sucker until it shines. I’m talking, rubber-gloves-and-buckets type cleaning.

I recommend unloading the vanity and reorganizing it (people will definitely look through your cabinets and drawers during a showing… but also during a party). If you unload the countertops and all of the floor items, you can wash and shine to your heart’s delight. In a bathroom, it’s okay for it to smell “bleachy”, it just tells people it’s clean.

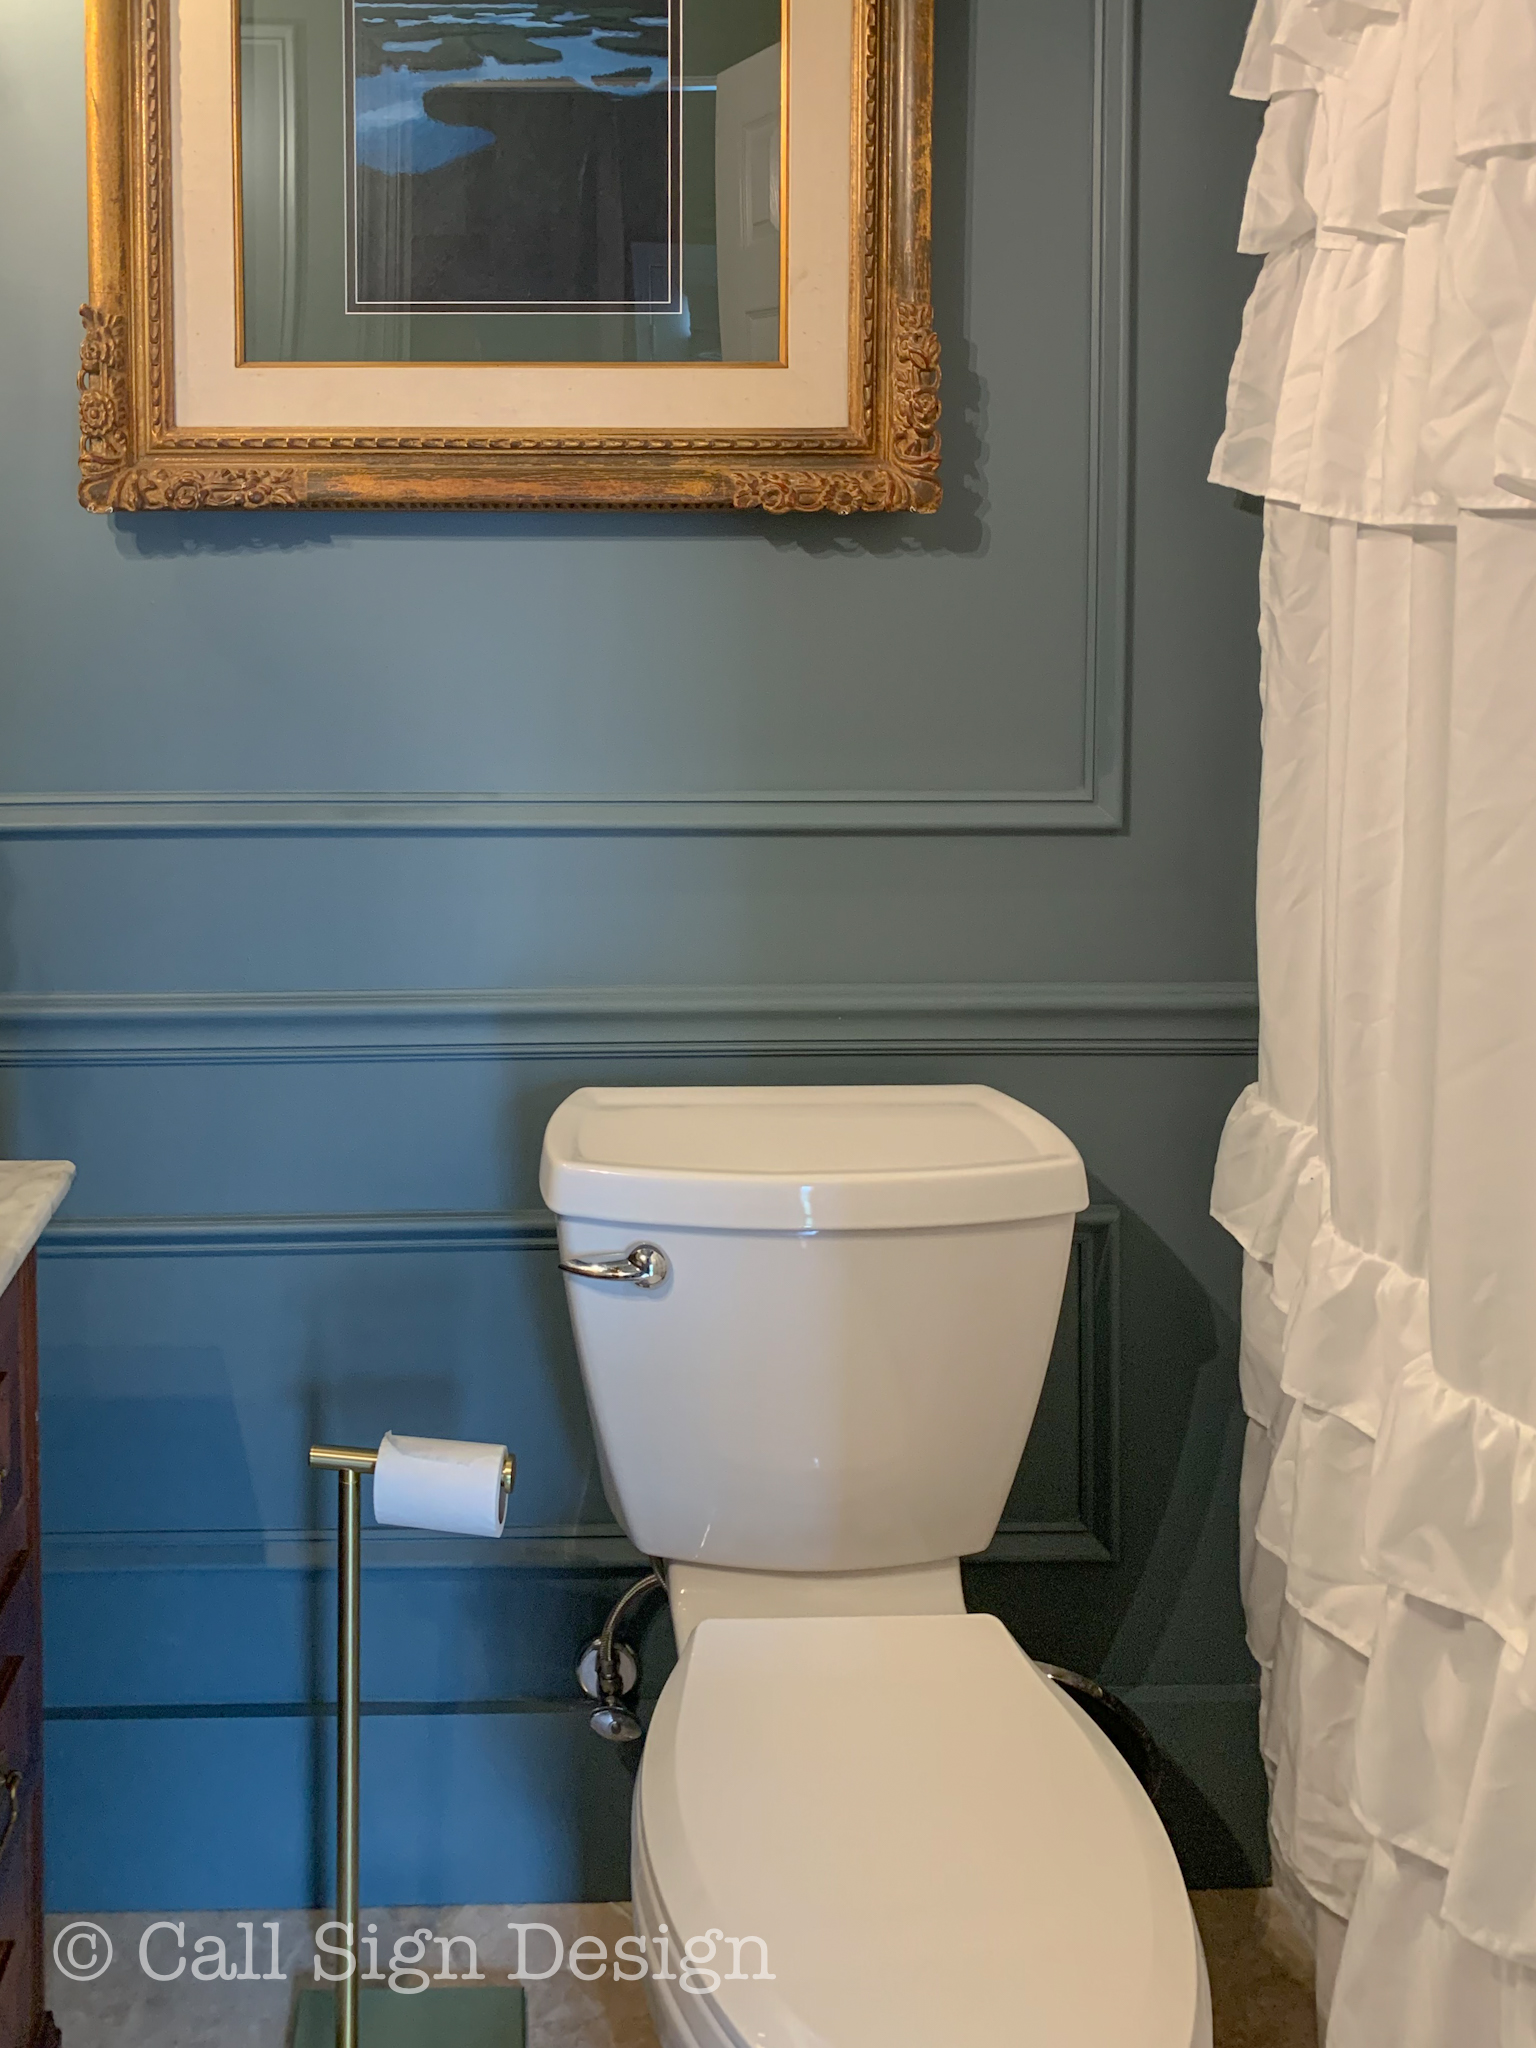
Pay special attention to the toilet (that part right behind the seat hinge where hair and BLECH accumulates), under the rim, the toilet seat (above and below), in front of and behind the bowl, and the floor (and wall) around the commode.


Stock.

Provide:

  • plenty of toilet paper and a stock of extra rolls in the cabinet/drawer: this is a great time to splurge on a new freestanding toilet paper holder that you can take to the next house (if you’re selling) 
  • spare toothbrushes and toothpaste in a clearly marked container (I like bamboo toothbrushes for my guests that are both biodegradable and compostable). You just never know who has goat-butt breath and is looking for rescue
  • ladies’ toilet essentials in a basket in a cabinet/drawer (in various sizes and shapes)
  • toilet cleaning brush and plunger: If you have room to keep the toilet cleaning brush and the plunger under the sink, that’s the best place for them (out of sight but accessible in case someone needs them). I don’t want anyone feeling mortified because they clogged the uncloggable toilet or made an unsightly mess in the toilet with no way to remedy it. (For staging, if you can’t hide it, put it somewhere else. They take all the magic out of the beautiful, photo ready bathroom)
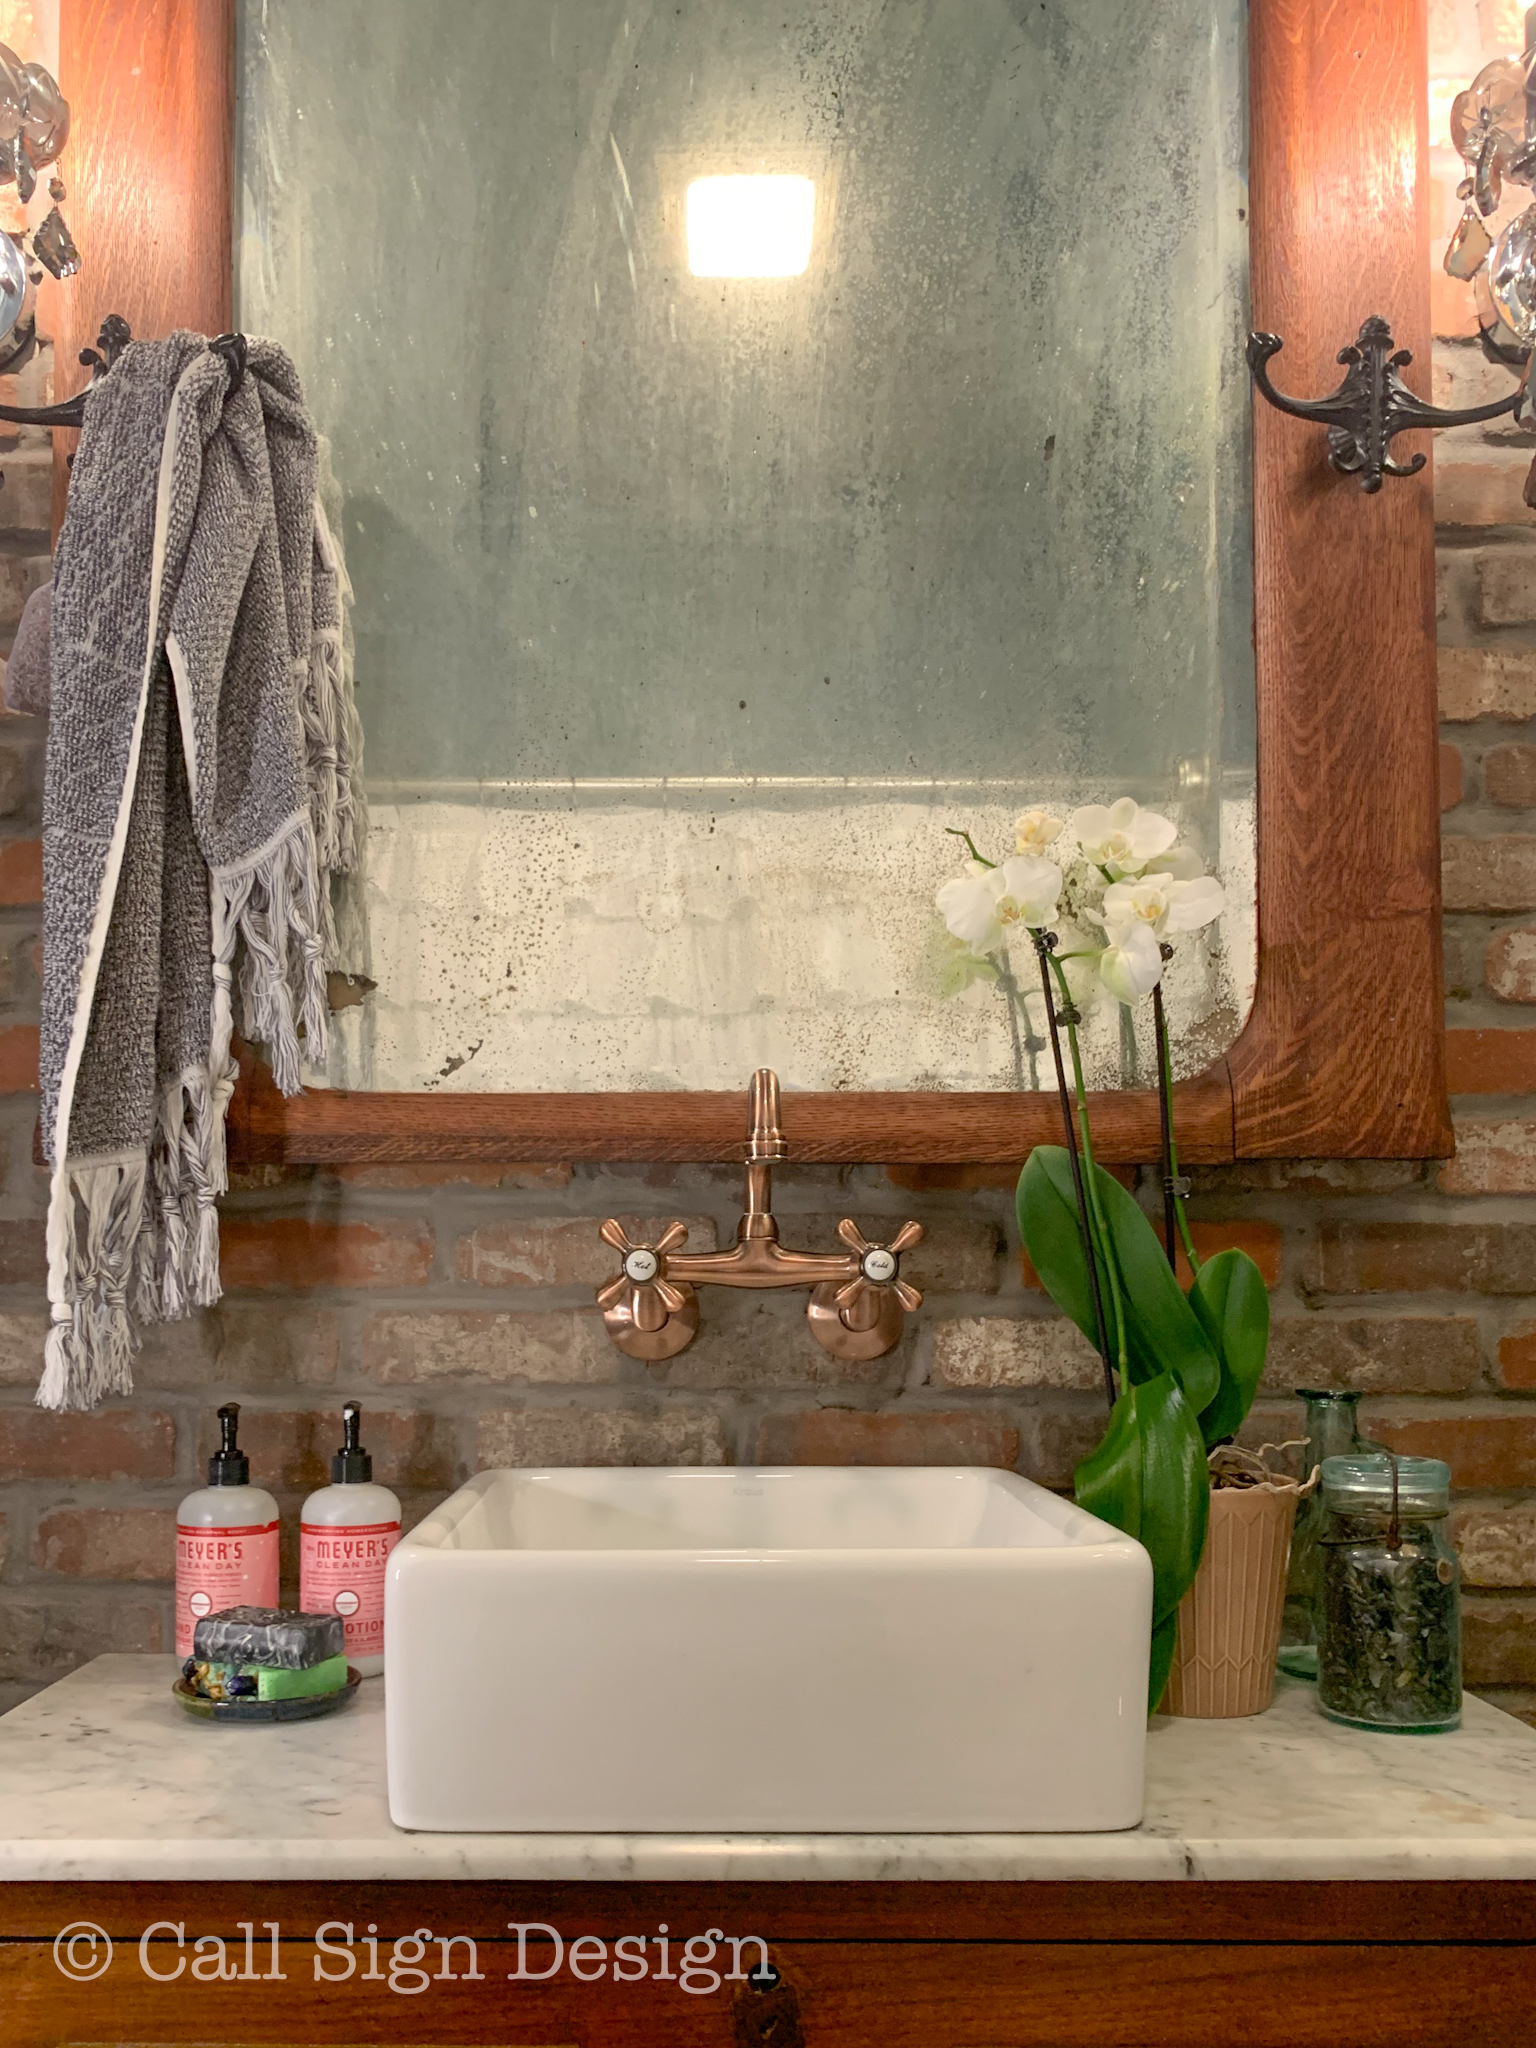
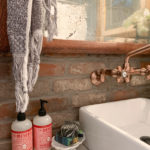
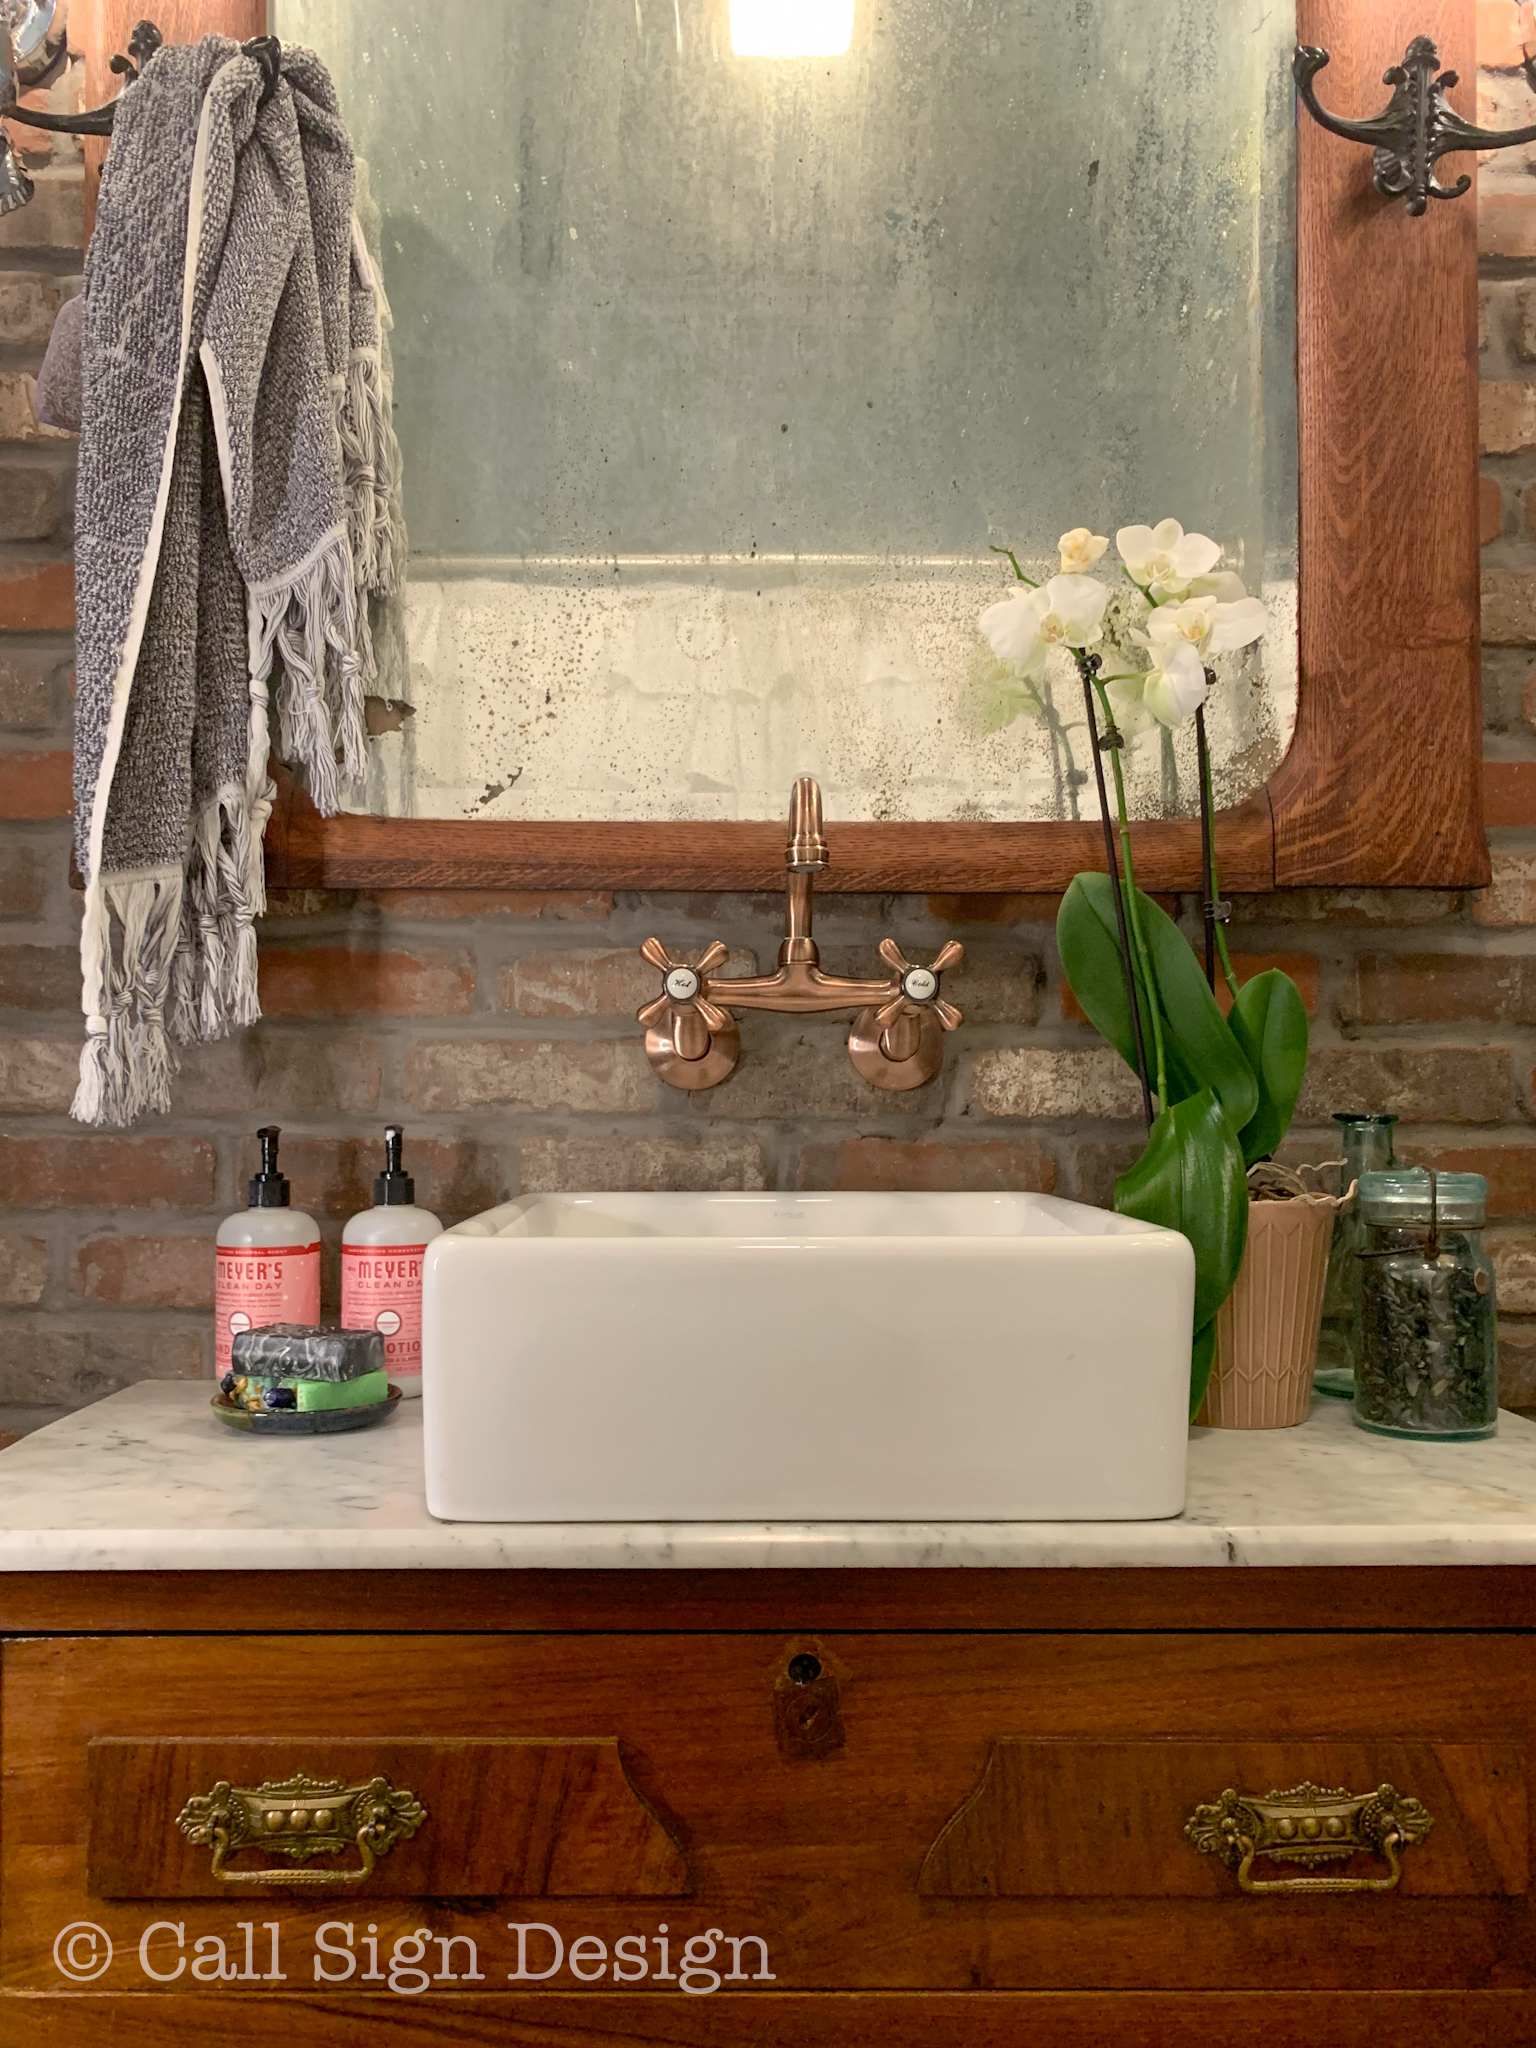
  • Mrs. Meyers Peppermint Handsoap, hand sanitizer, and lotion
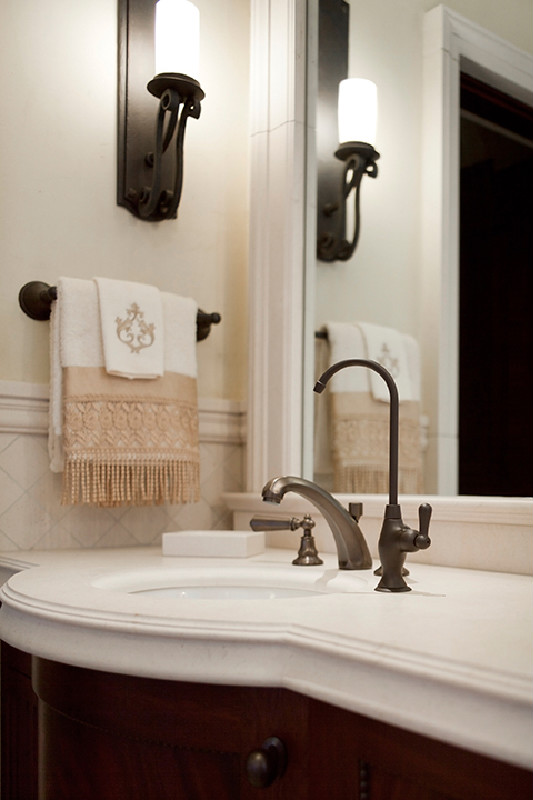
  • pretty, drapey (but also functional) towels: we love these Hitit Jacquard Yarn Dyed Turkish Hand Towels With Tassels in our new bathroom (say “no” to those stuffy, creased towels people are afraid to dry their hands on)
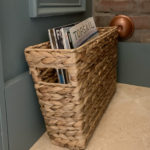
  • reading material in a water hyacinth magazine basket: keep these within reach of the toilet, but not so close that they soak up overspray from the commode
  • a lined, clean trash can


De-stock.

  • Lock up your medications
  • Lock up your medications
  • Lock up your medications

I’m not even going to get into this. Just please, do this one thing for me. If you fail to heed this advice: not only could your medications disappear, but I also find it to be a massive invasion of privacy when people are checking out your medications in your cabinet. AND THEY WILL.

See again: People will snoop. Put your stuff away.
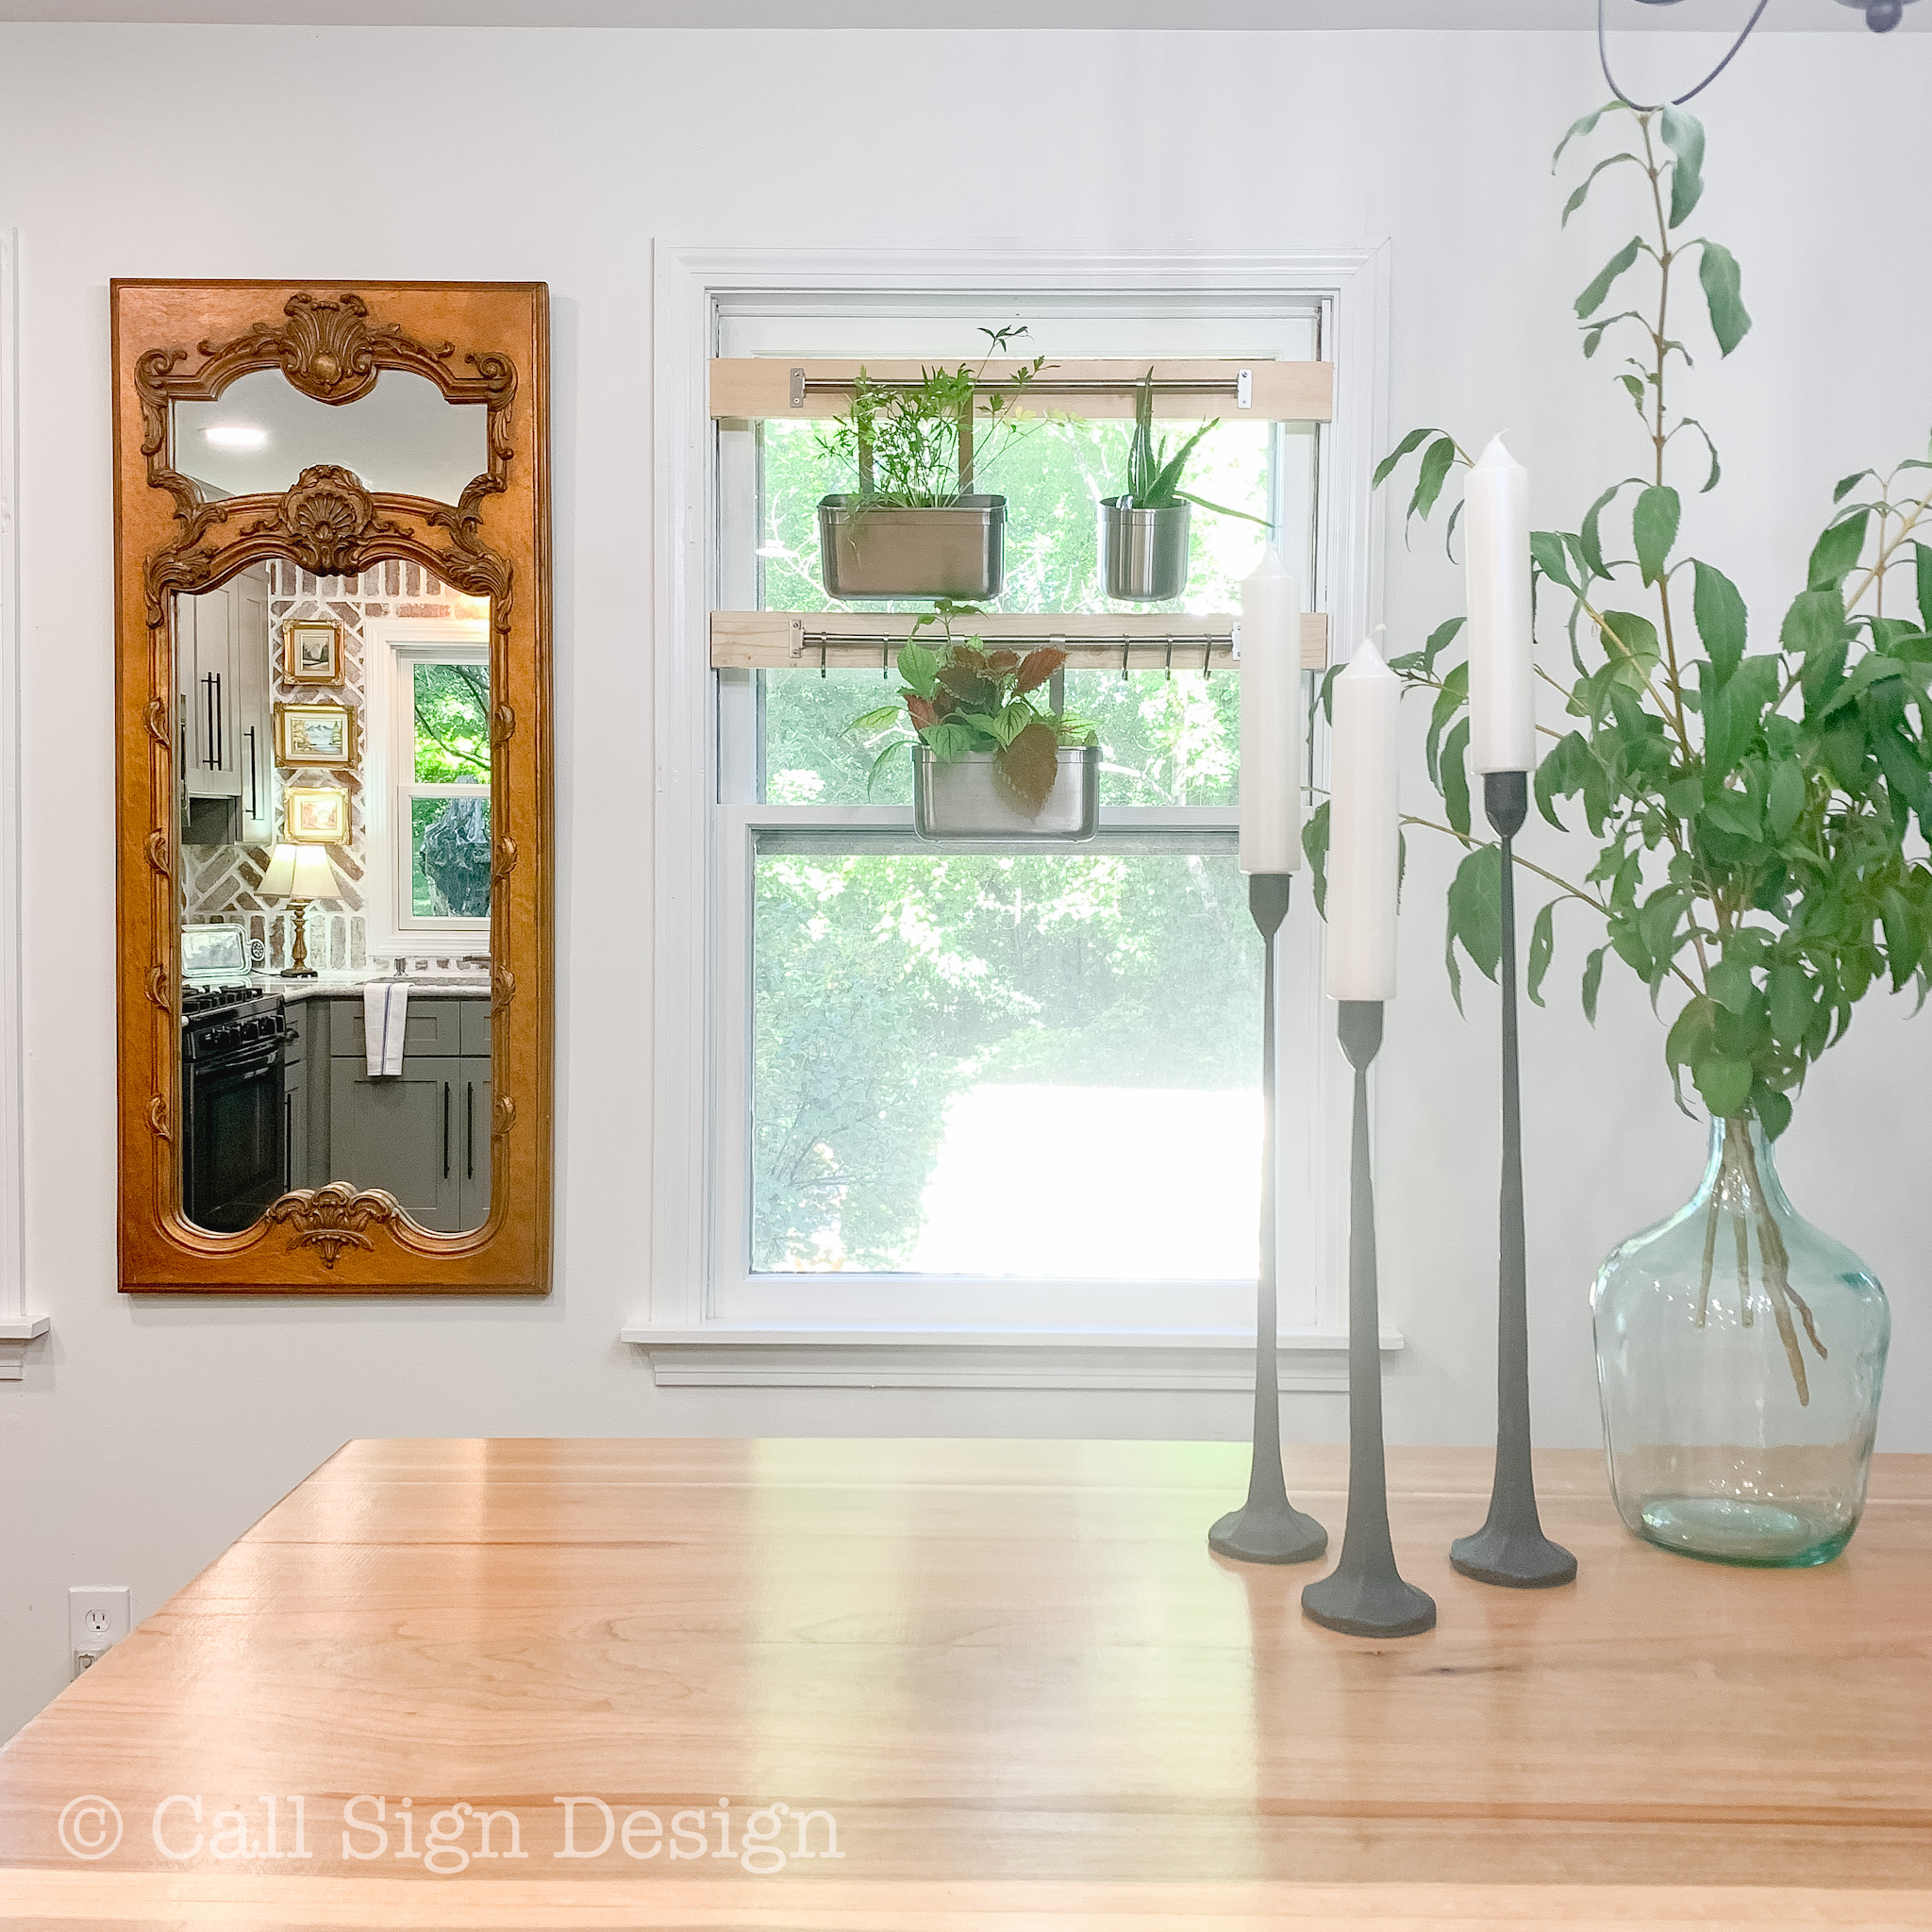
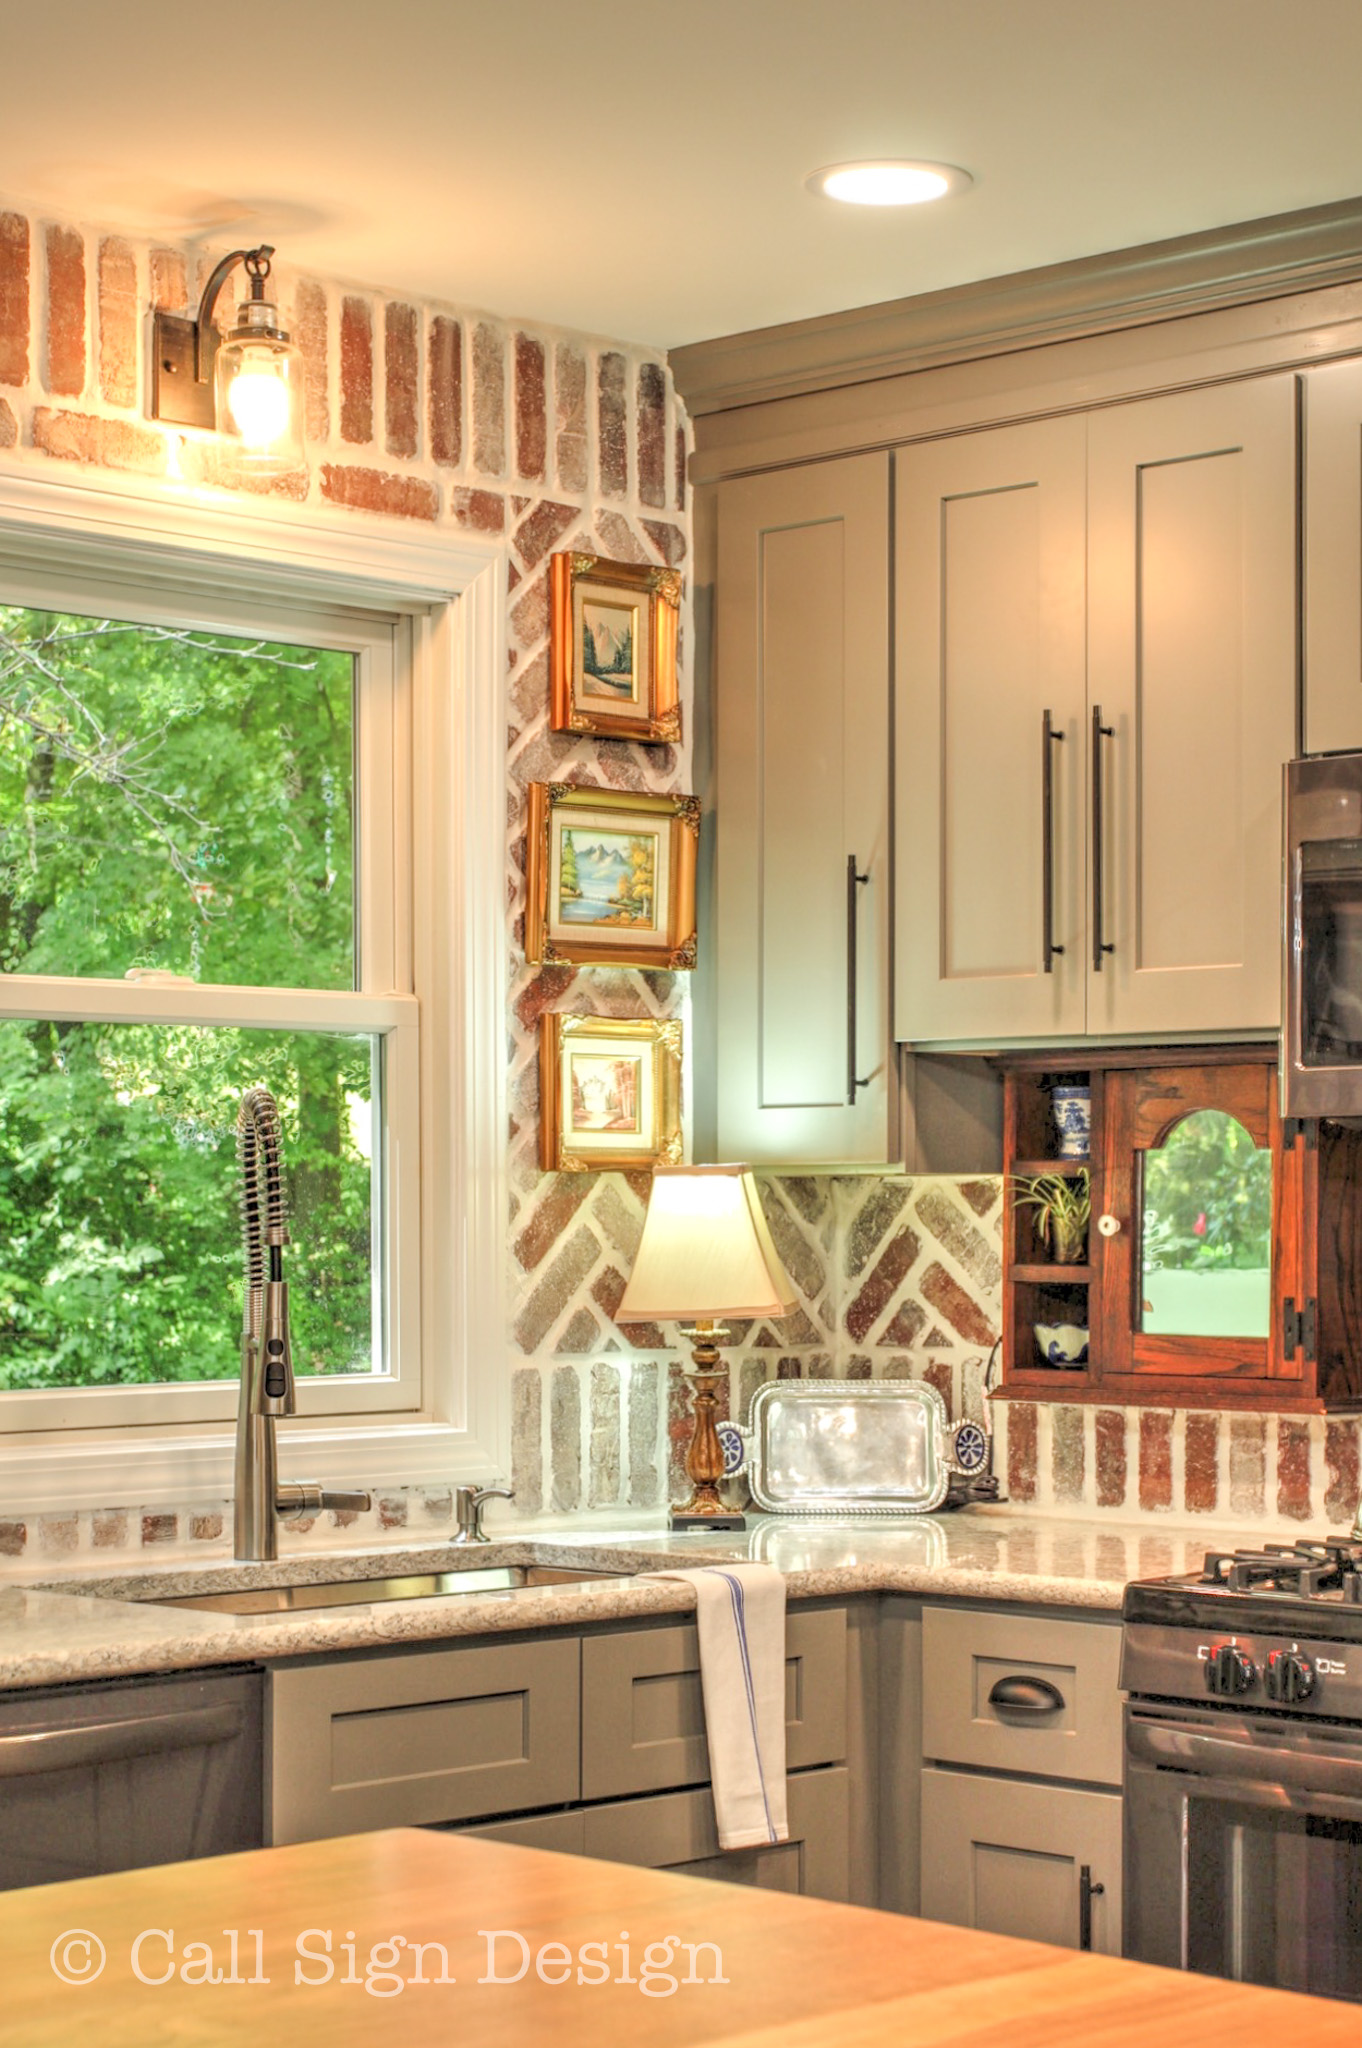
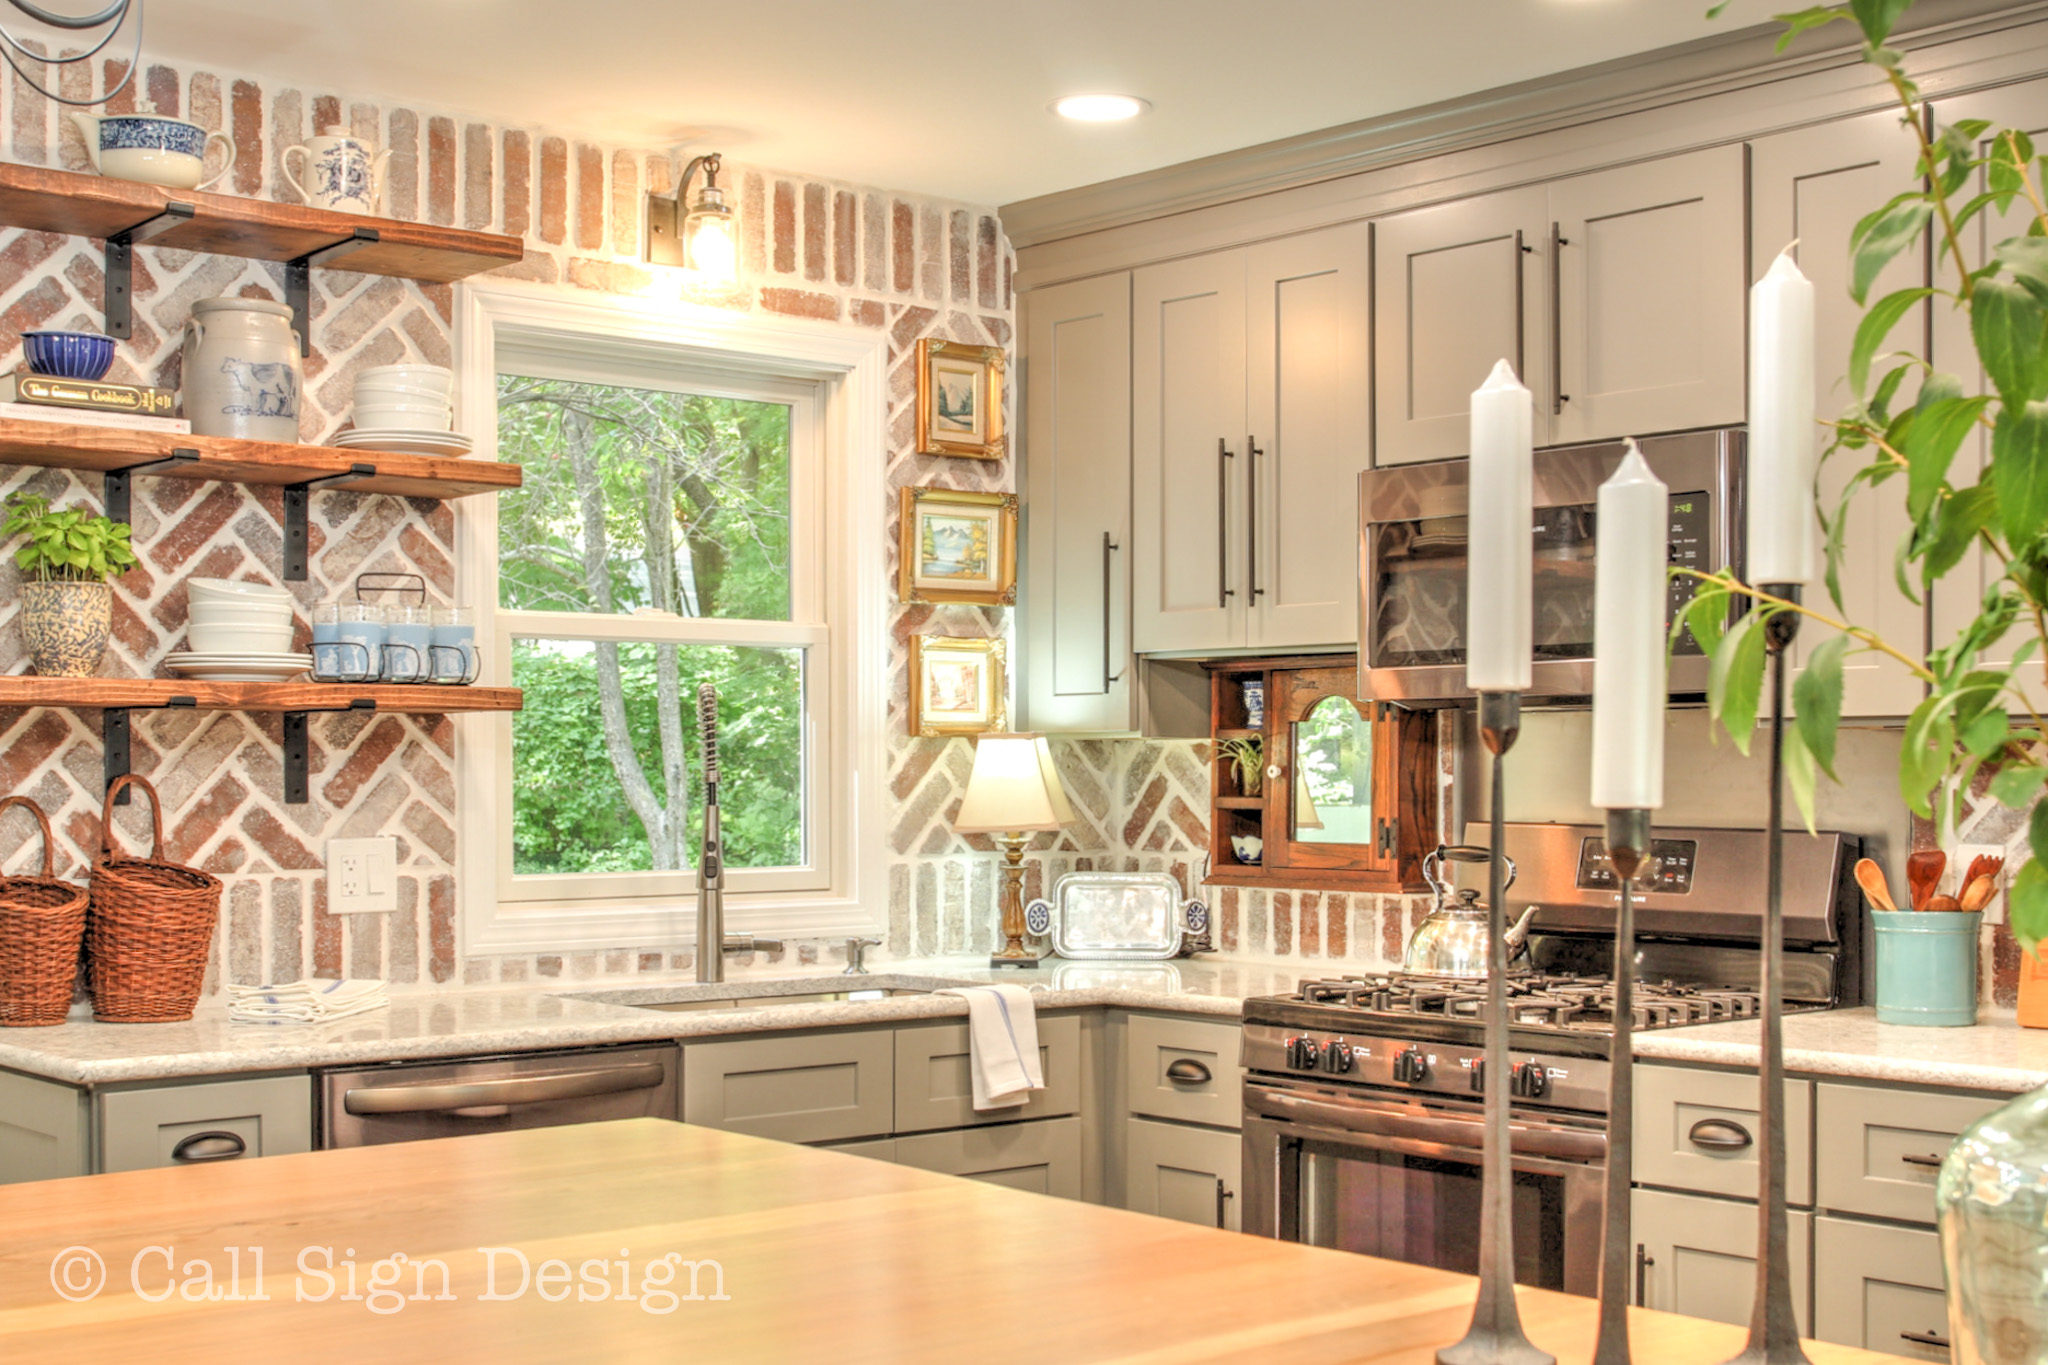
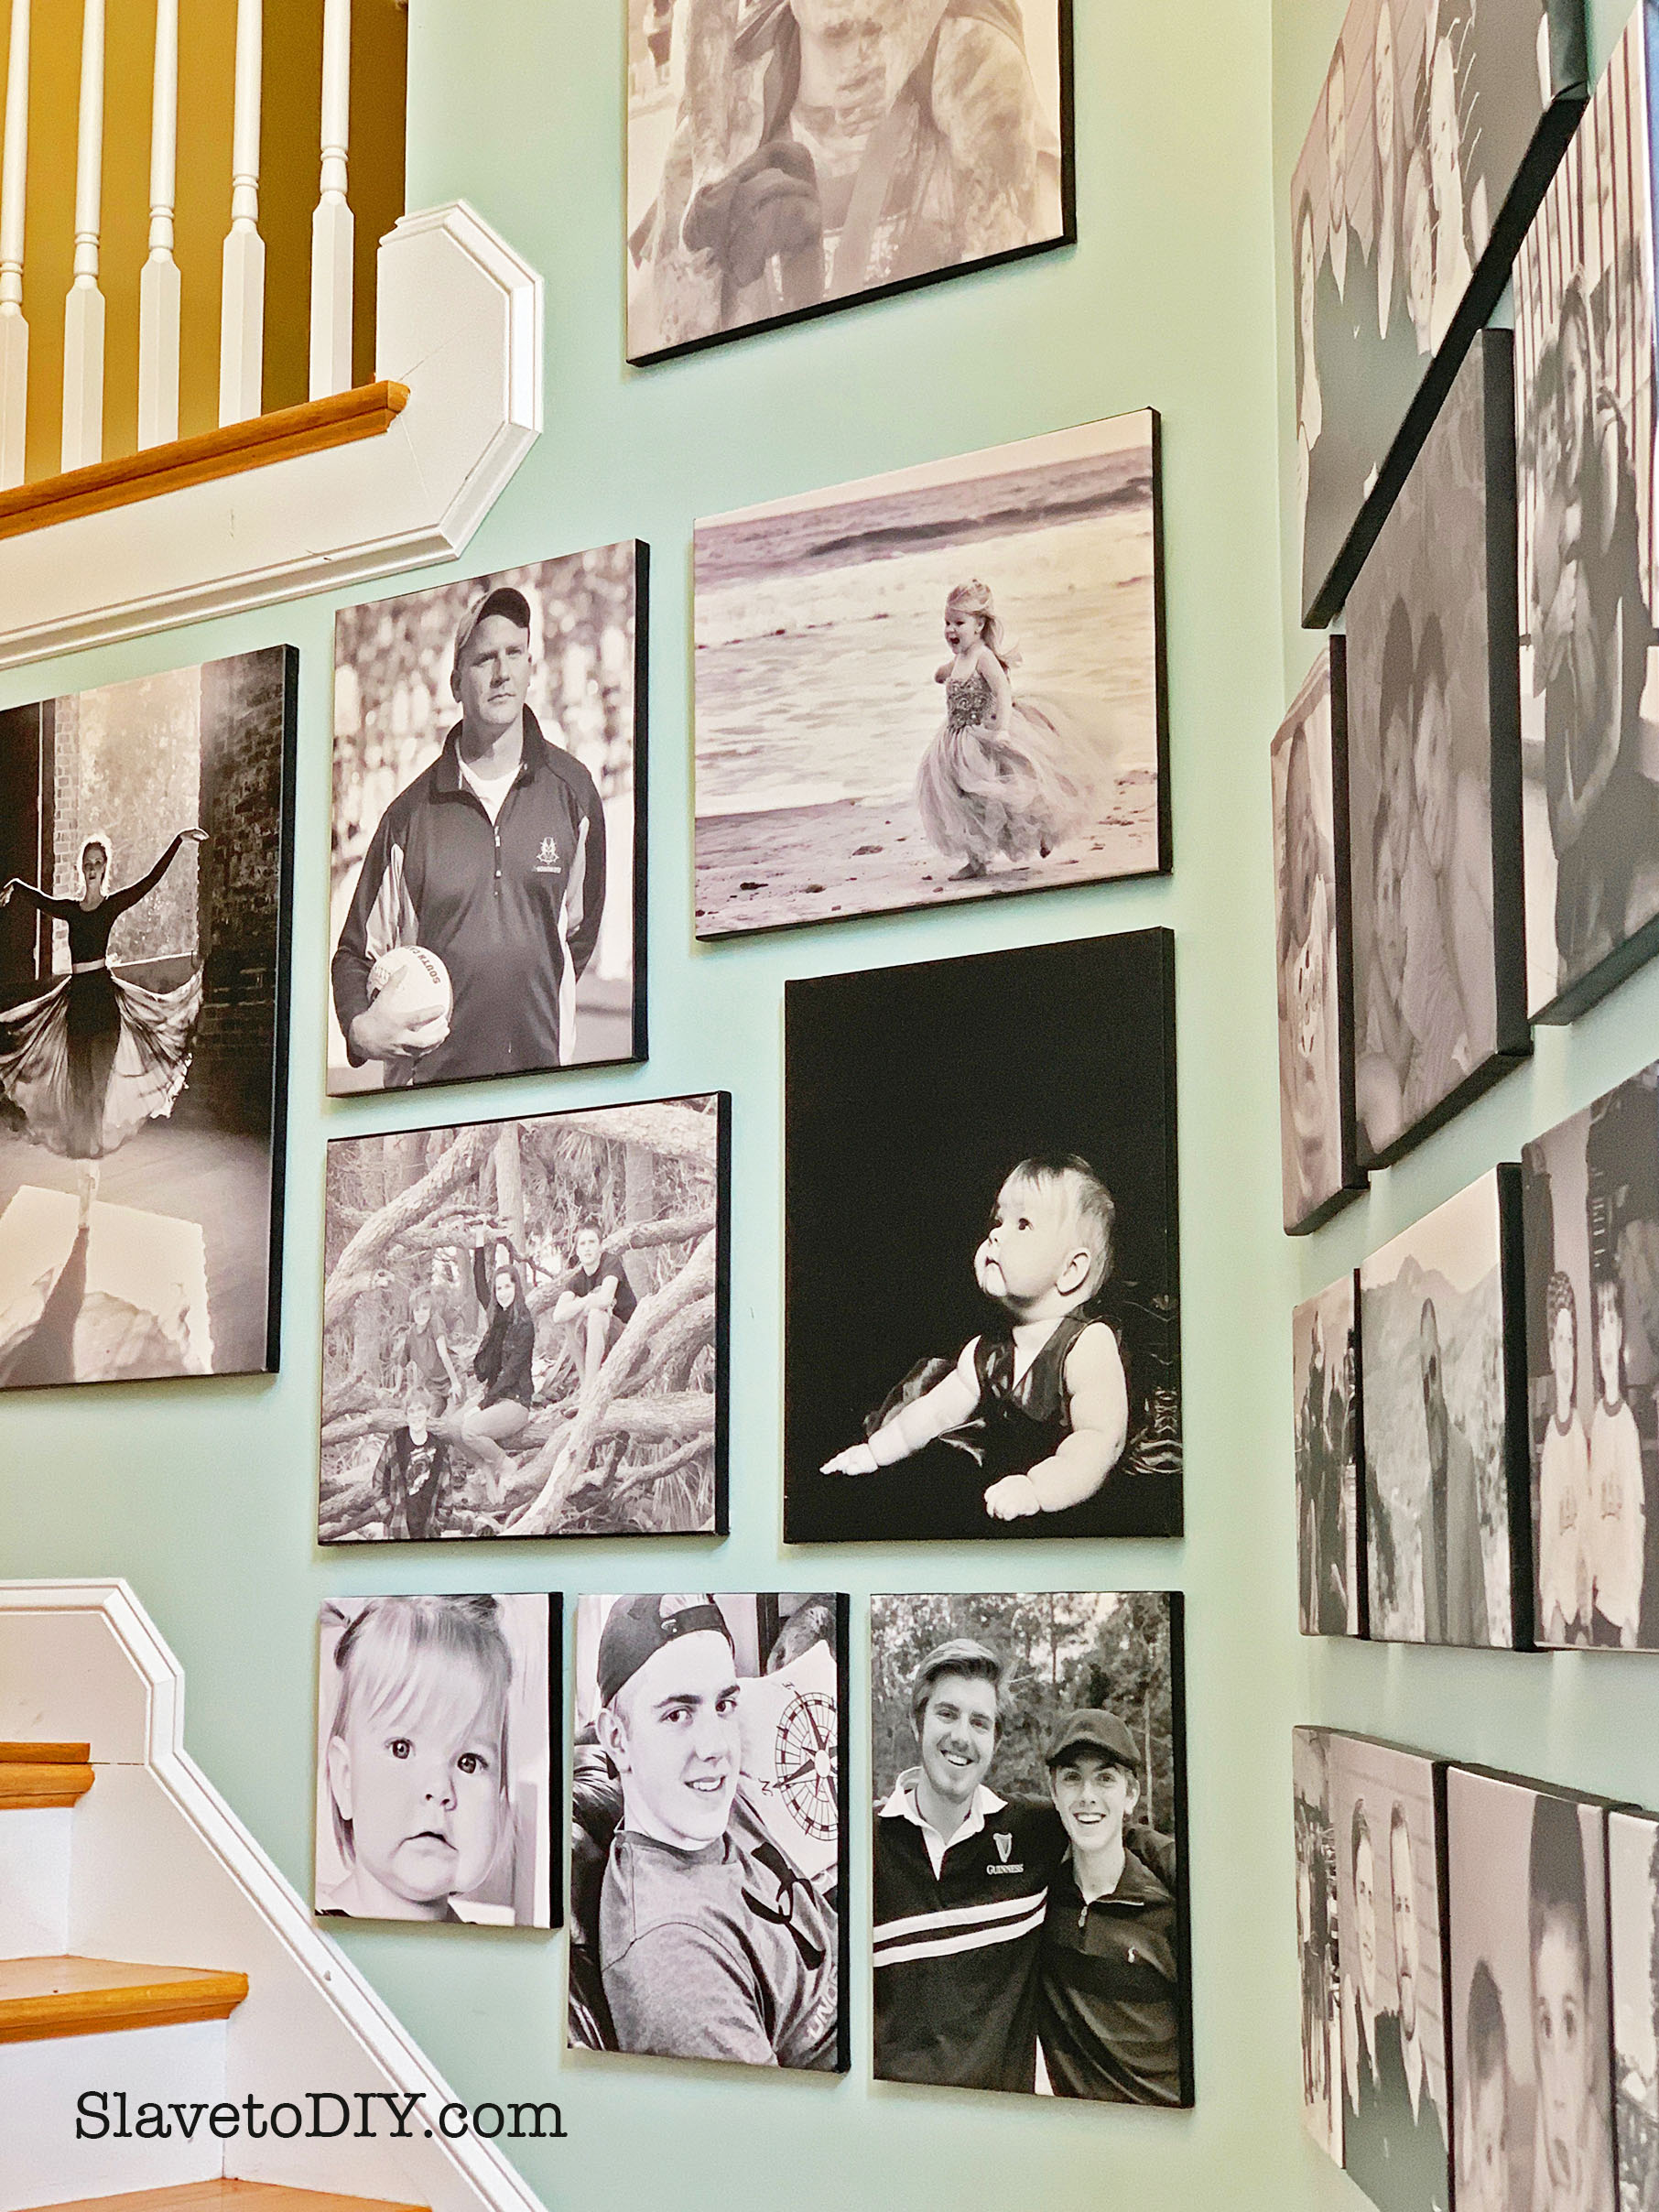
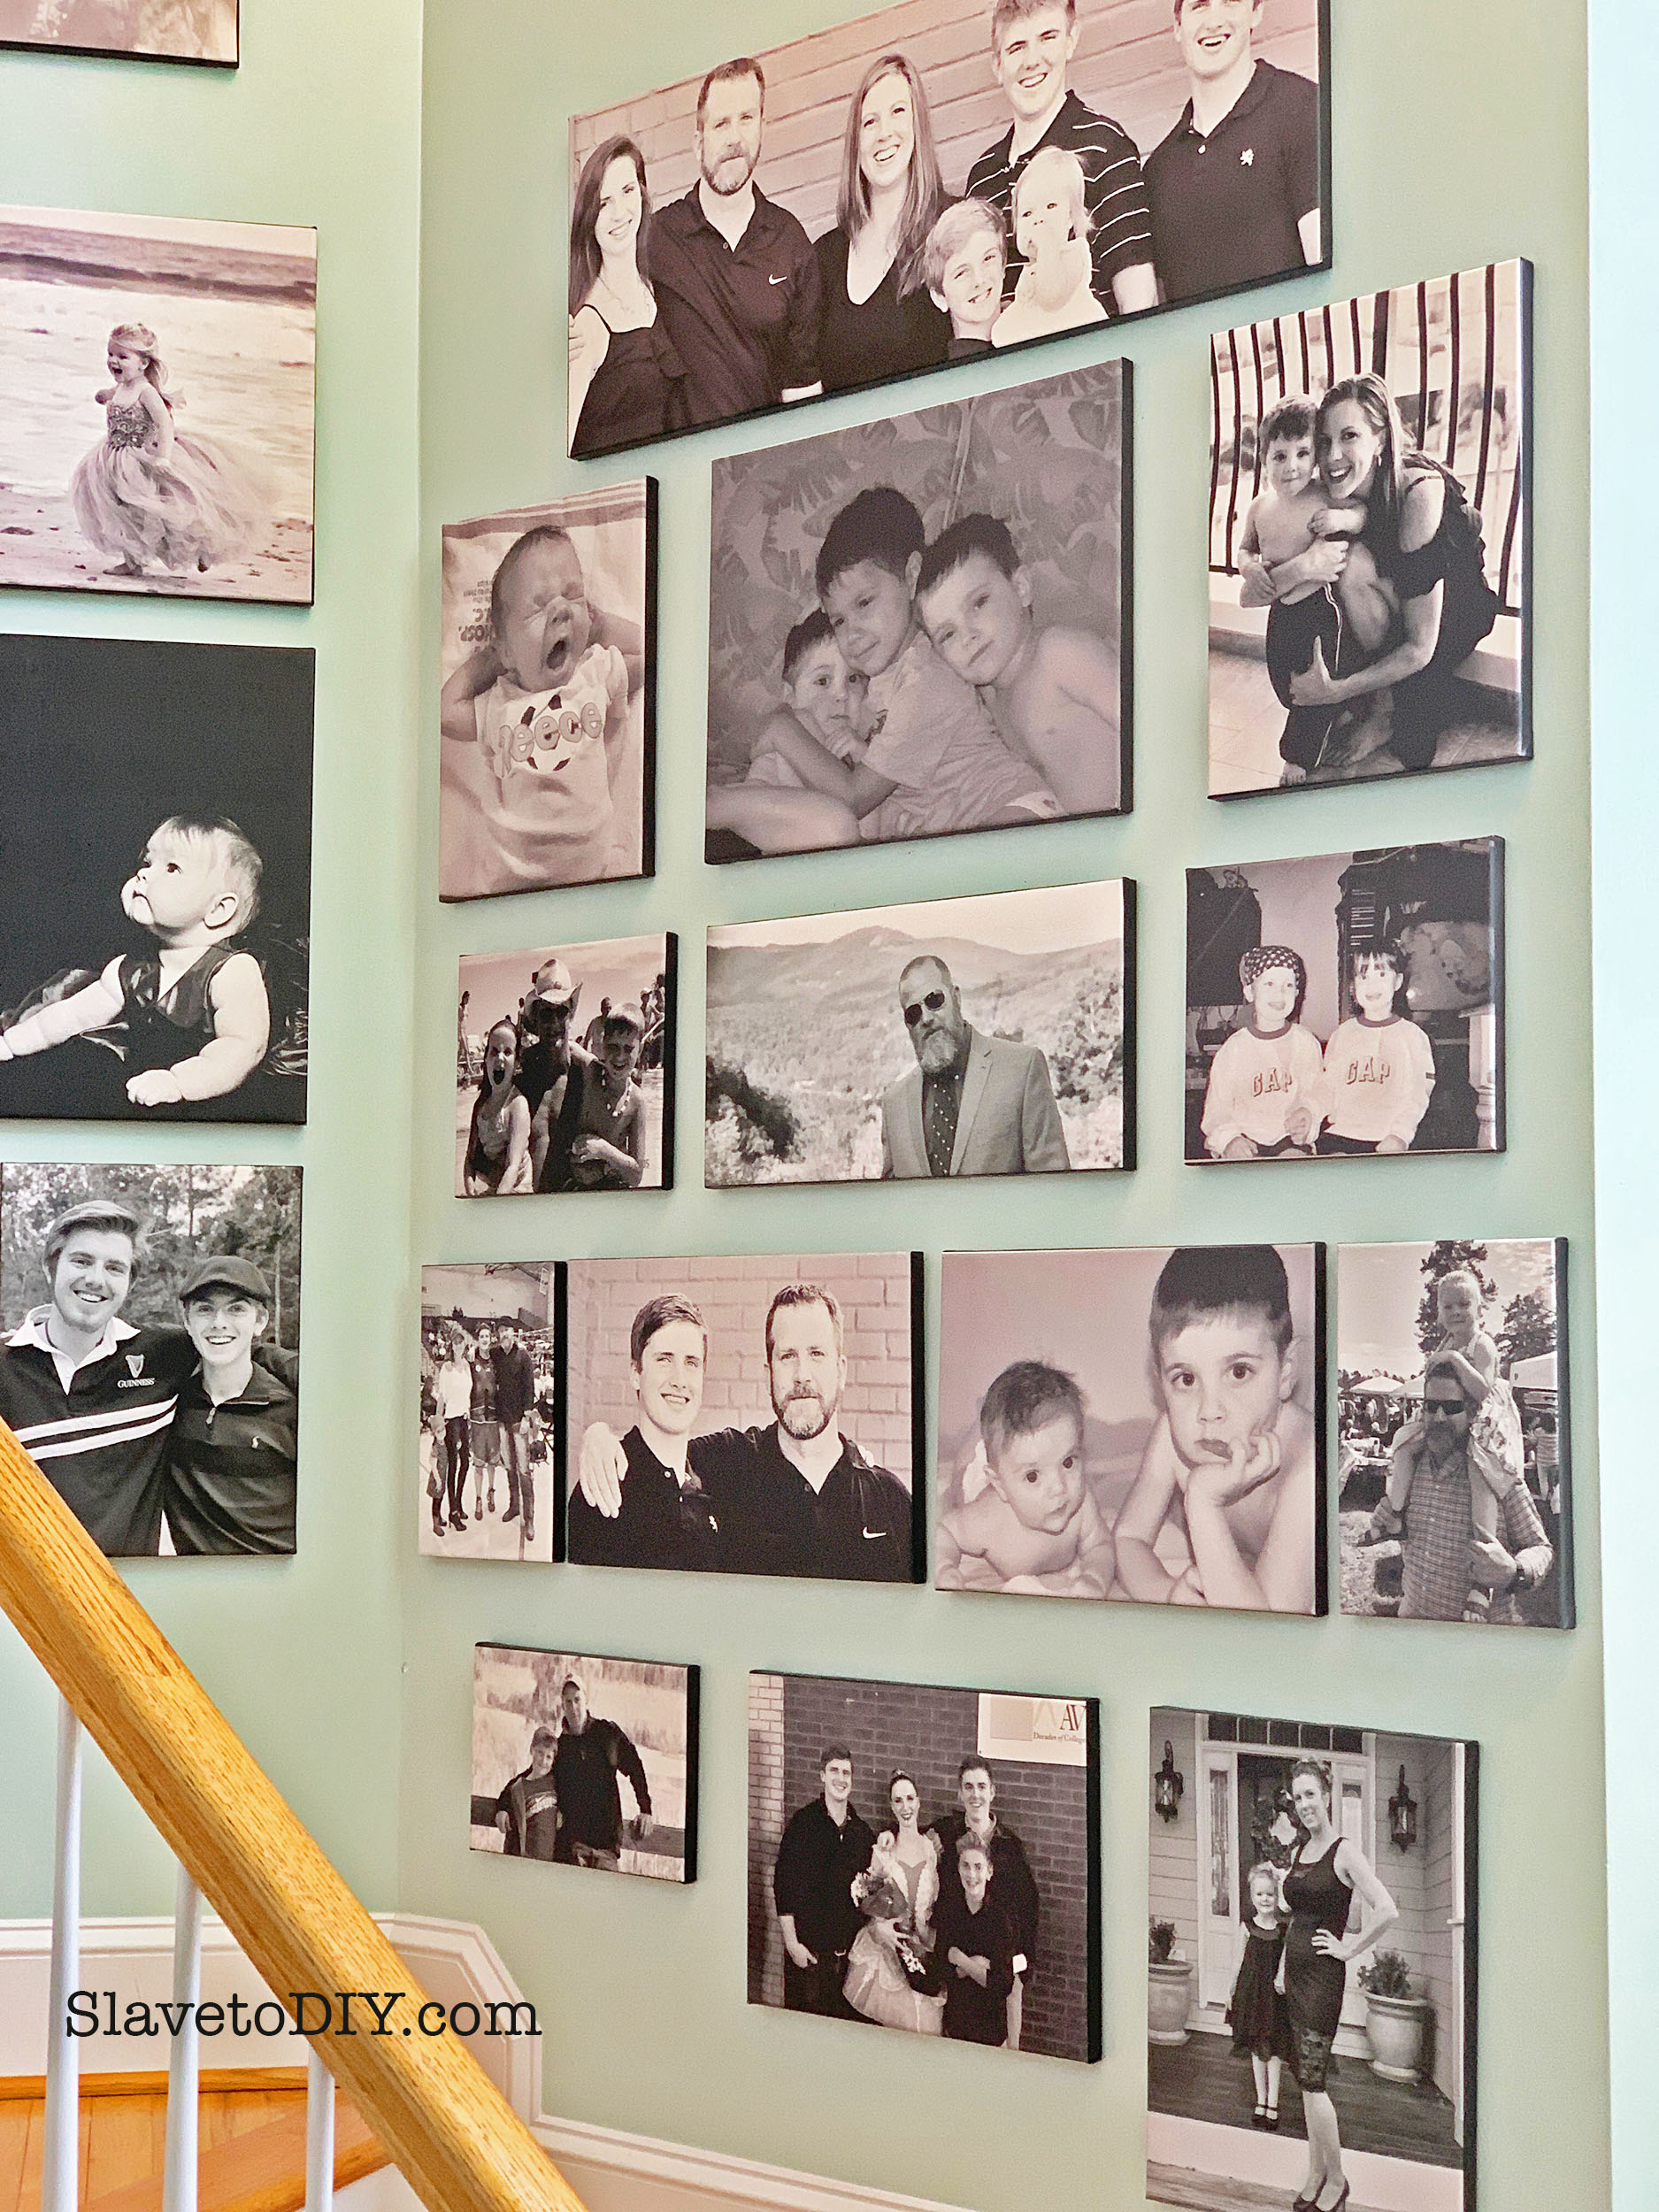
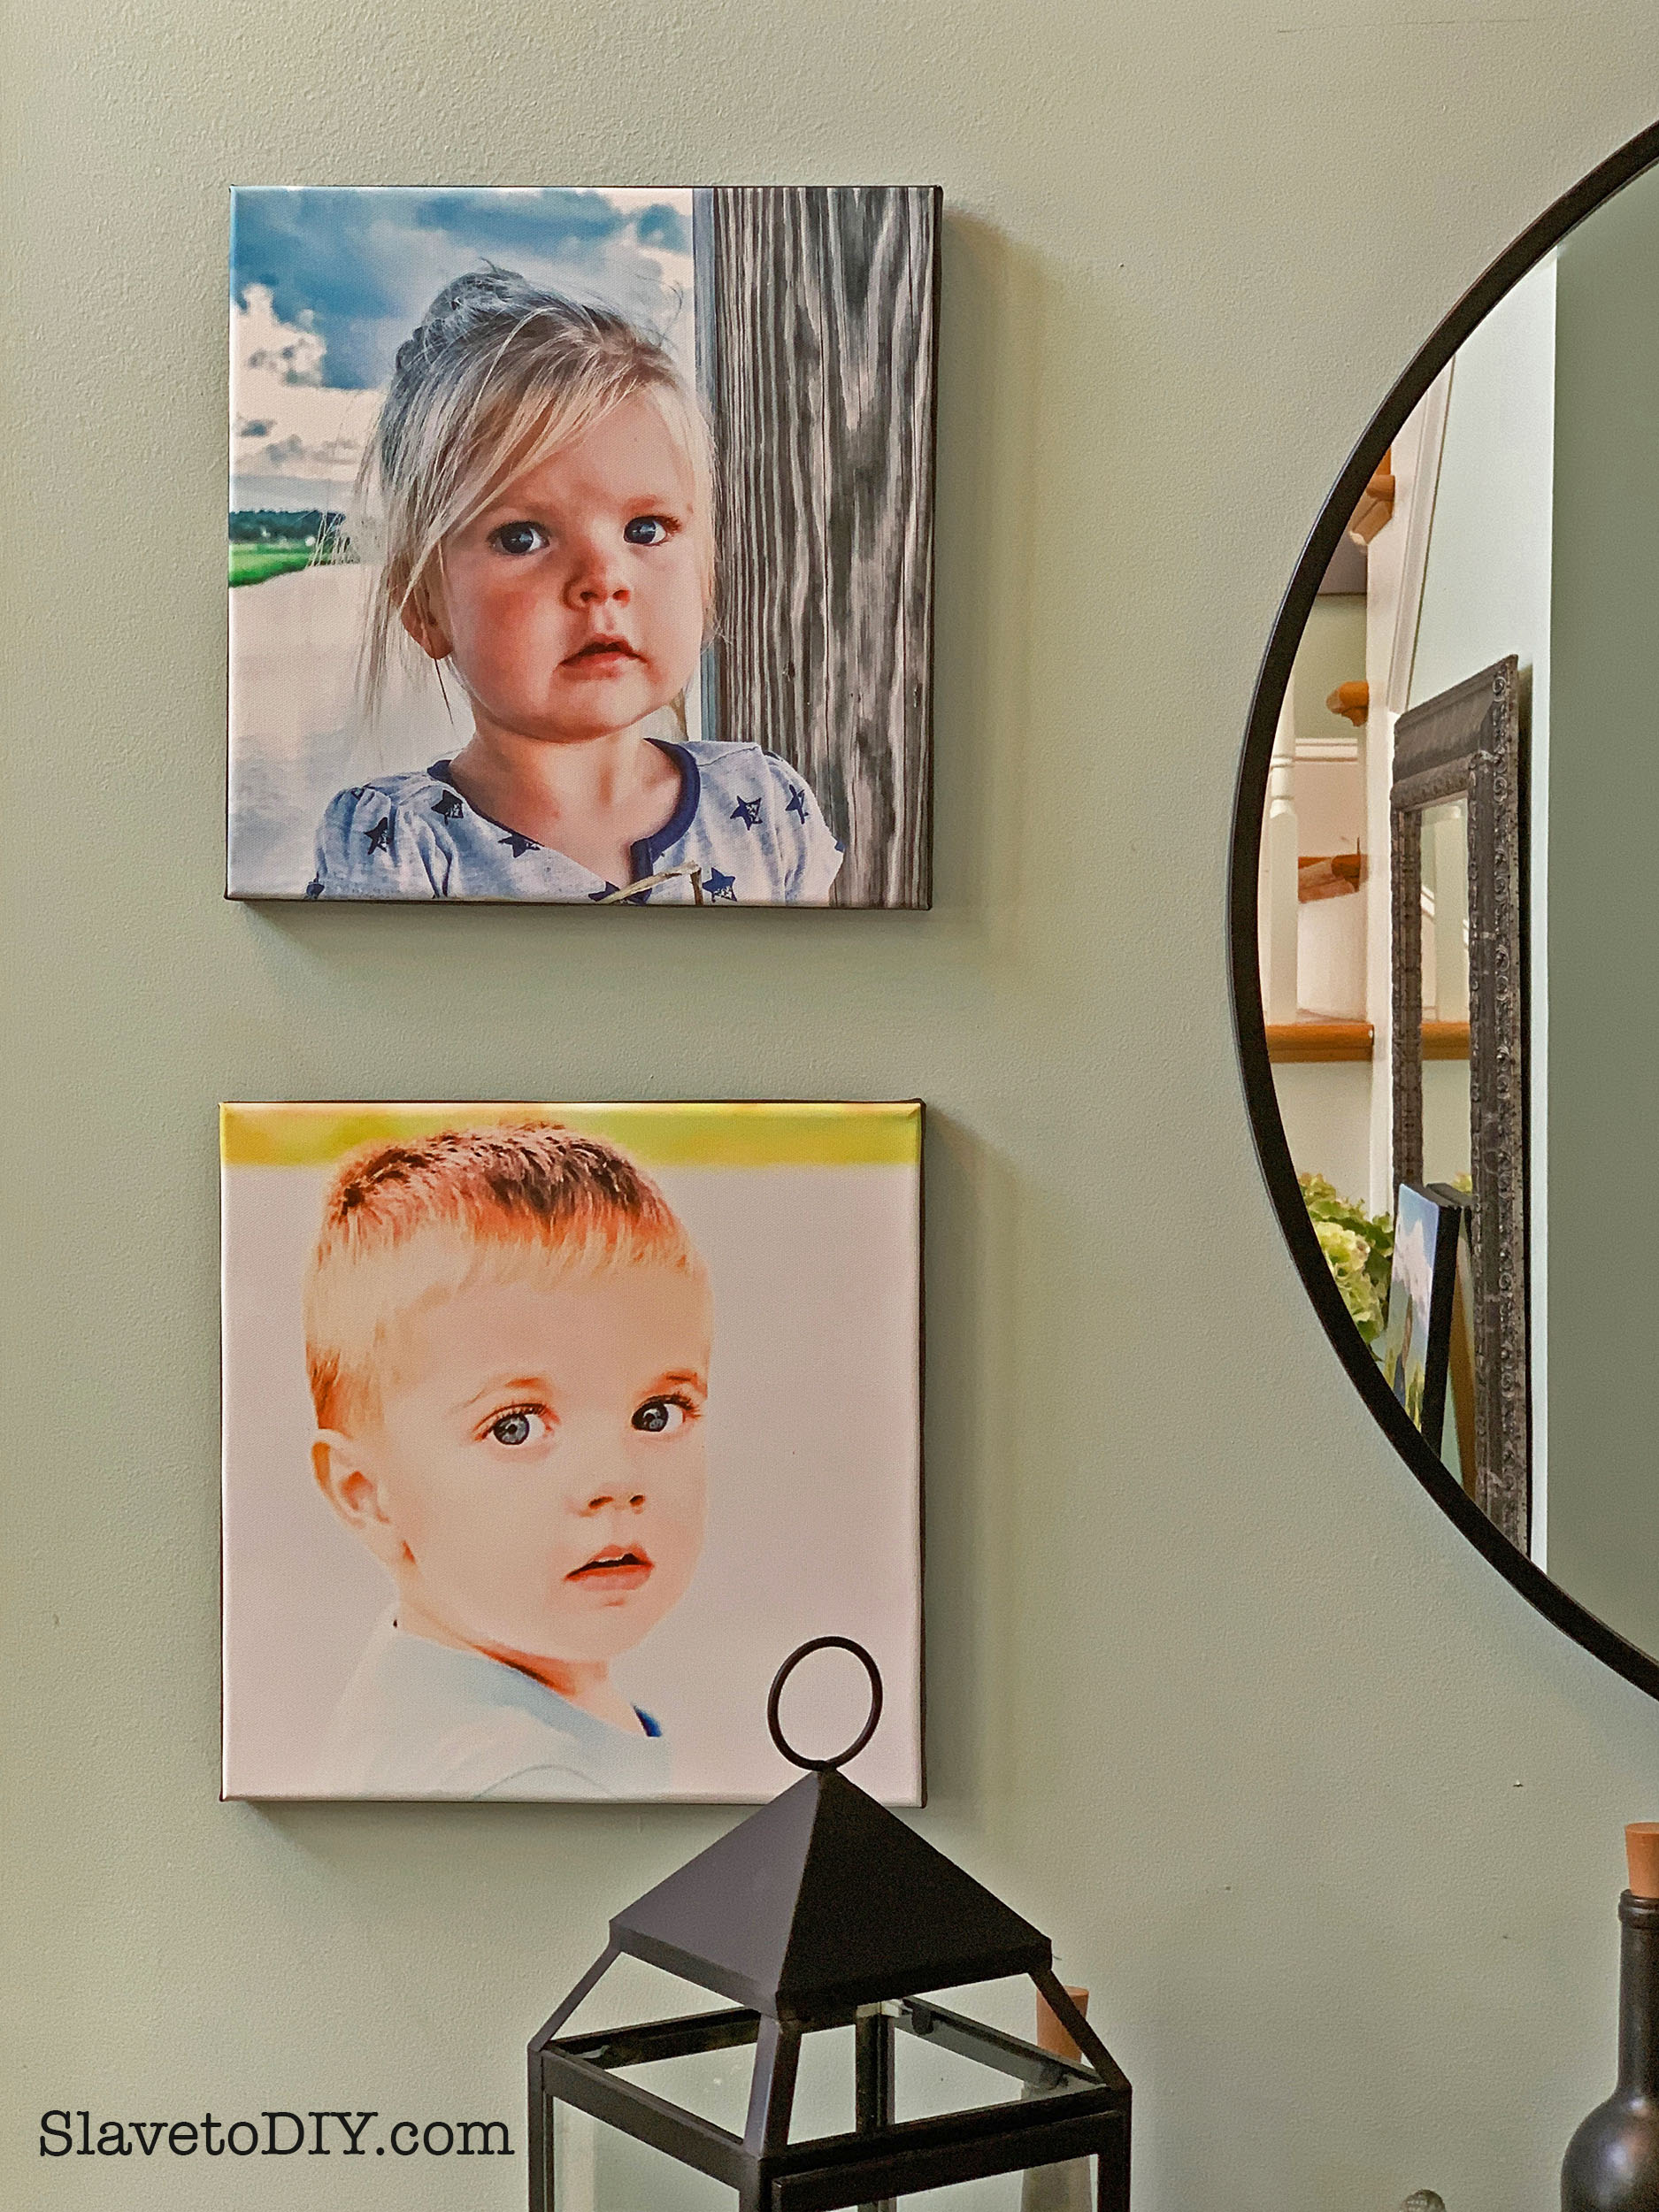
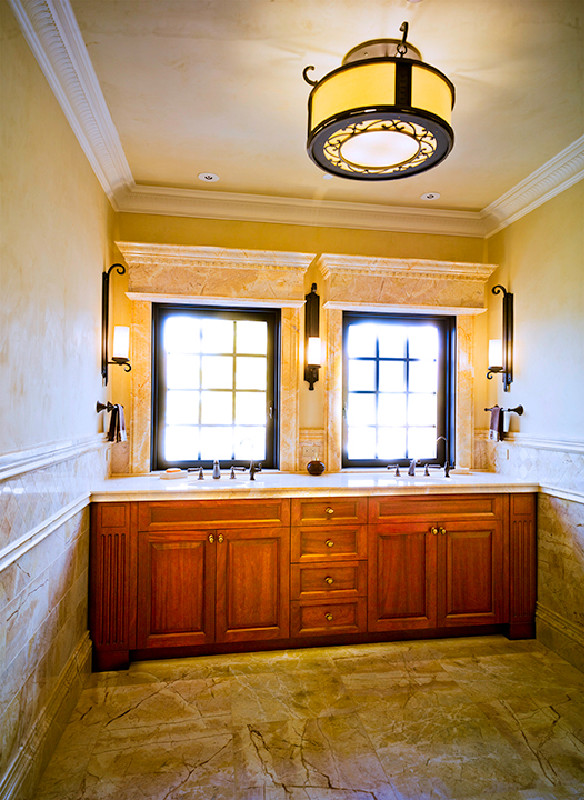
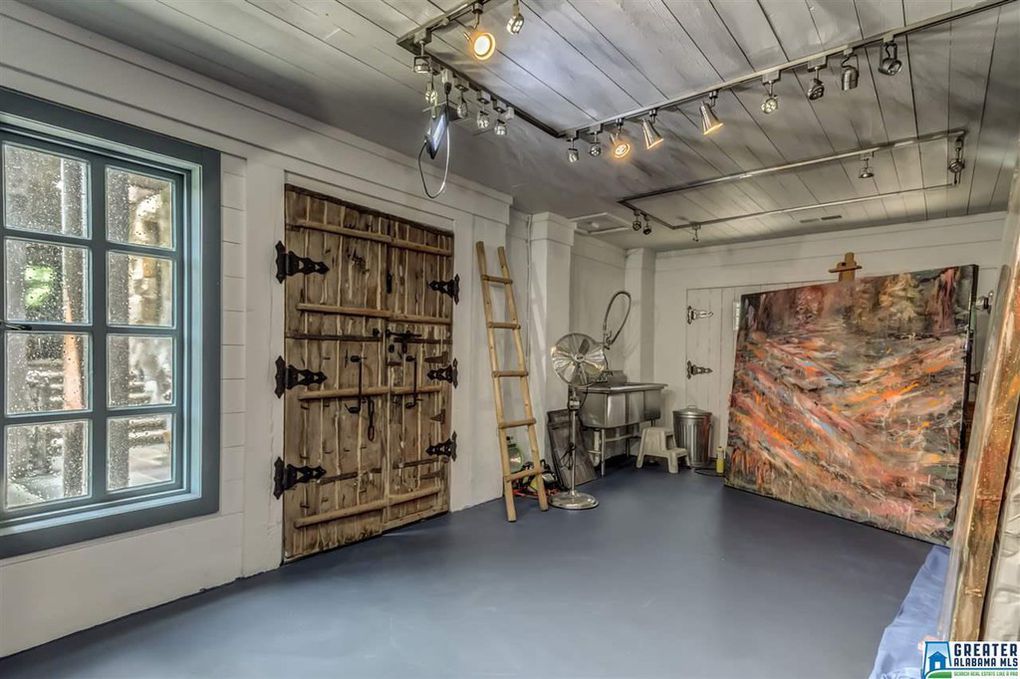
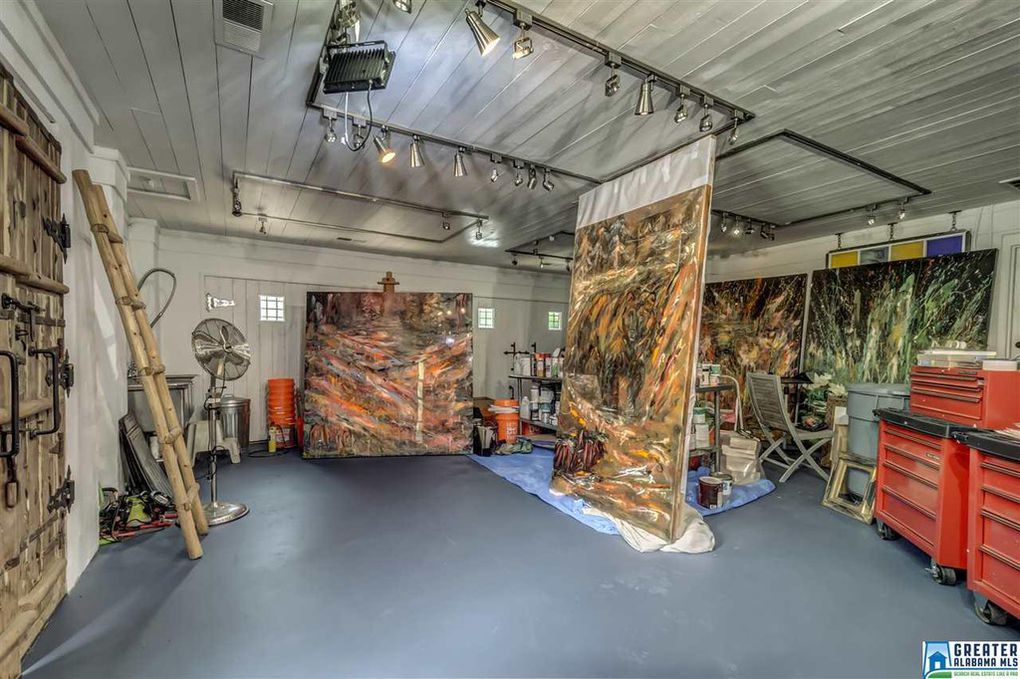
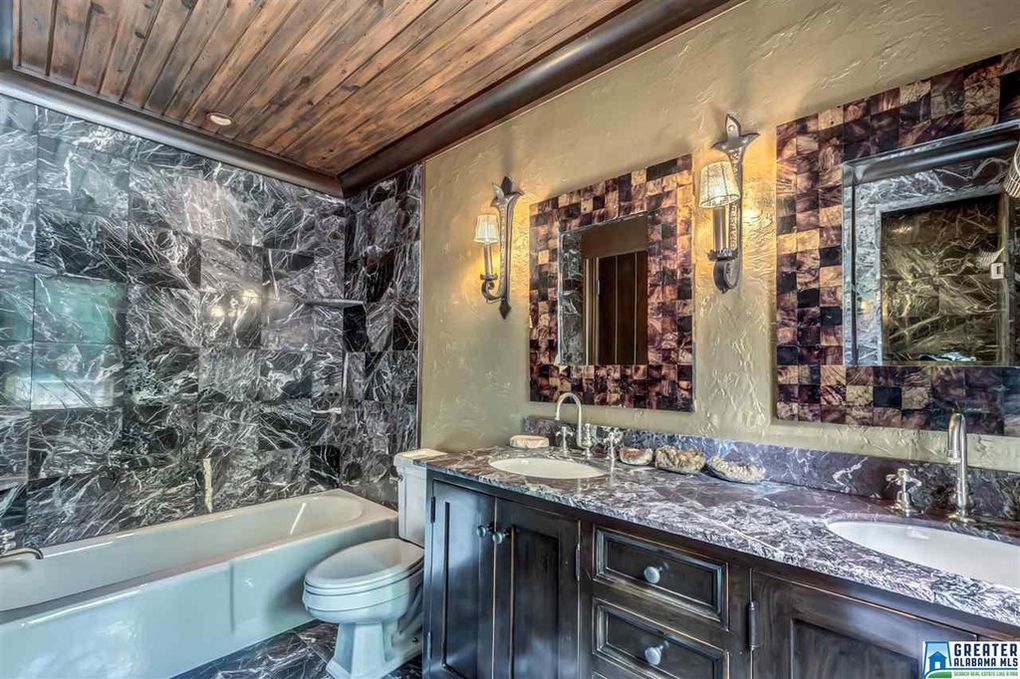
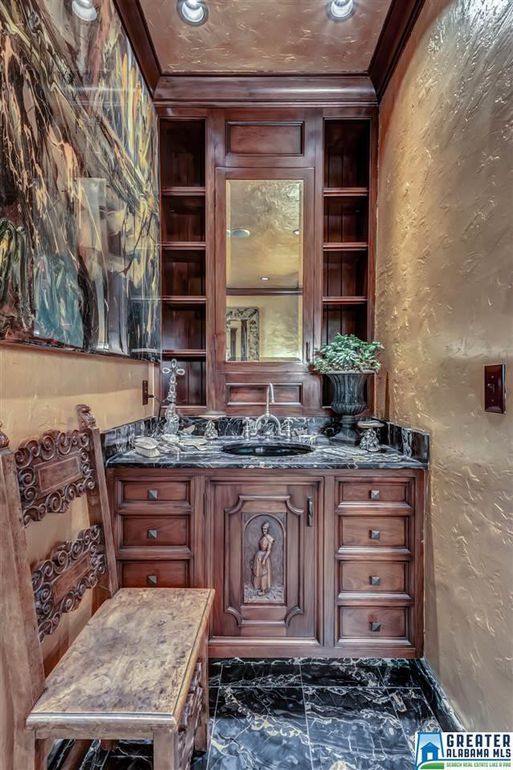
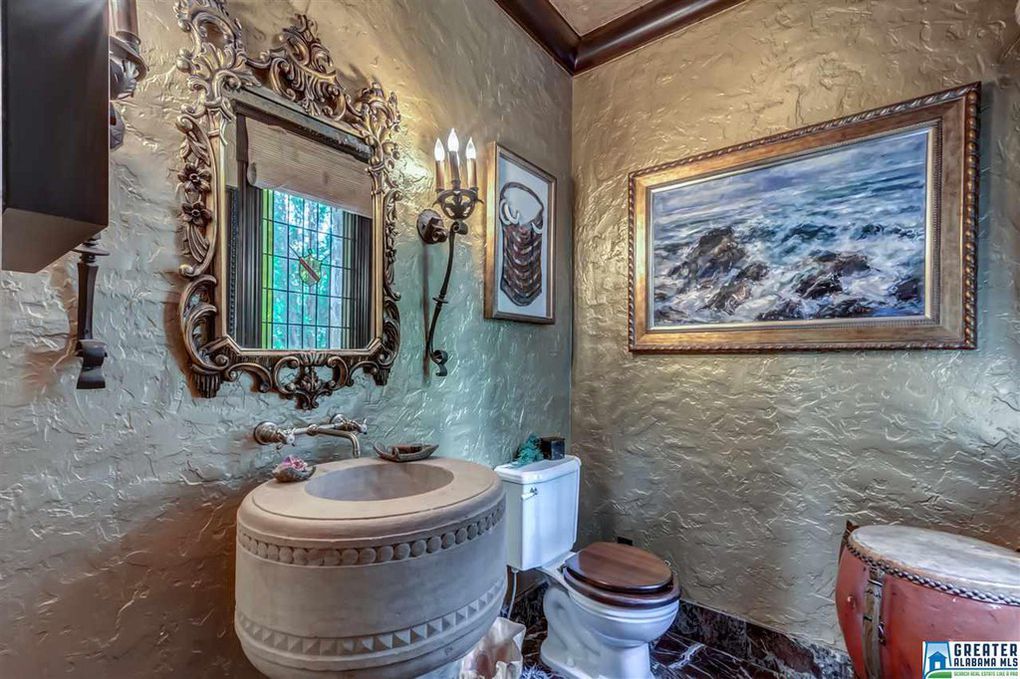
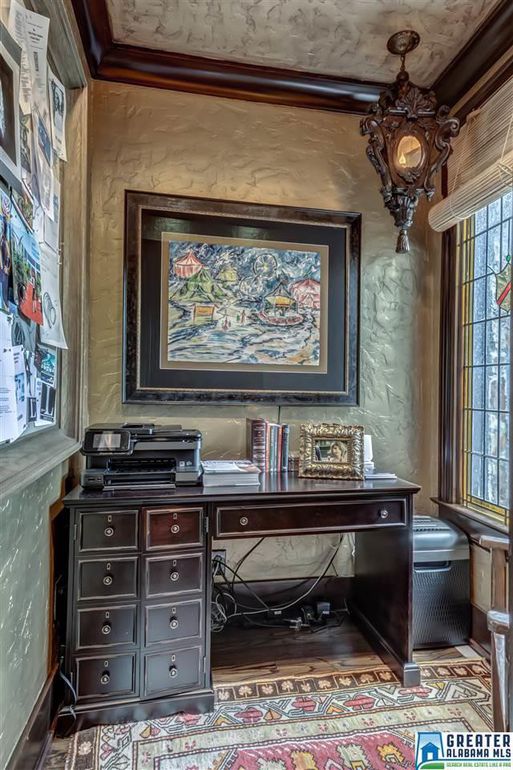
 

Hang Fantastic Art

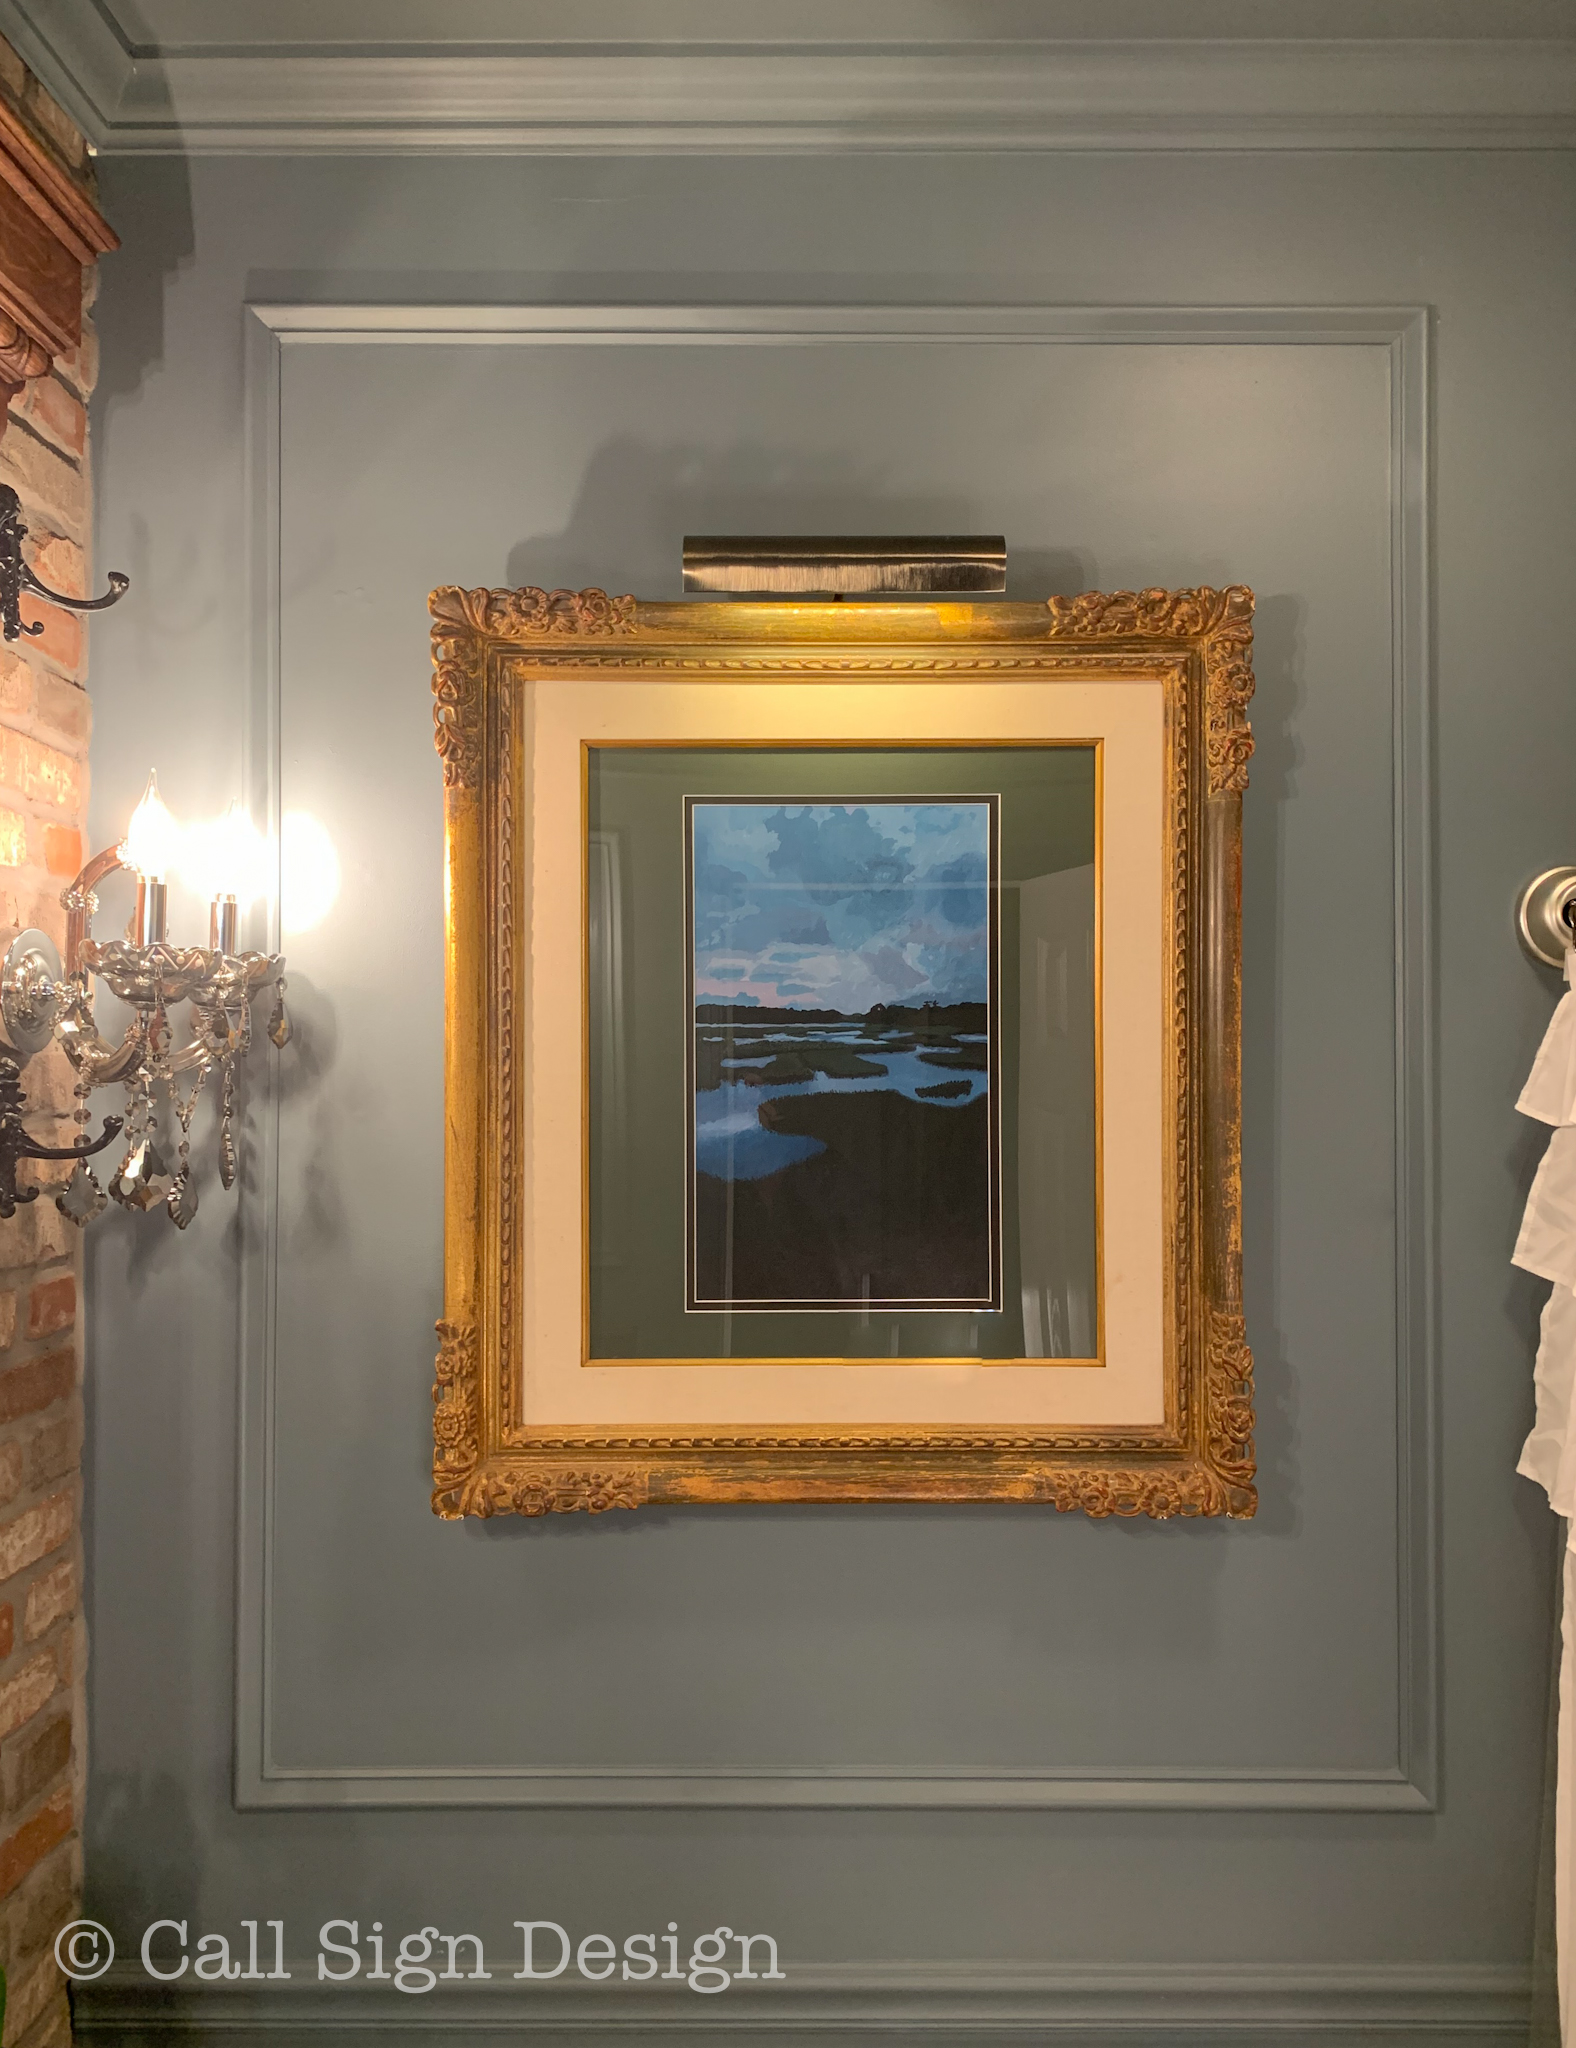
Bathroom wall art is an often overlooked item in bathrooms. You’d be surprised how an amazing piece of art in an ornate frame can make a whole room feel upscale (even if the room is just meh)… or how a bunch of little art pieces can make a bathroom feel a lot like your Great-Aunt Betty (Bless Her Heart) decorated it in 1978 (with add-ons from the entire decade of the 80s at which time she declared it perfect and never changed another thing ever again). I prefer one big piece to many little ones: it seems to make the room feel bigger and much more clean and uncluttered.

Looking for an economical way to DIY your own masterpiece for your wall? Check out our post on The Easy Way To DIY Breathtaking Landscape and Scenery Paintings.
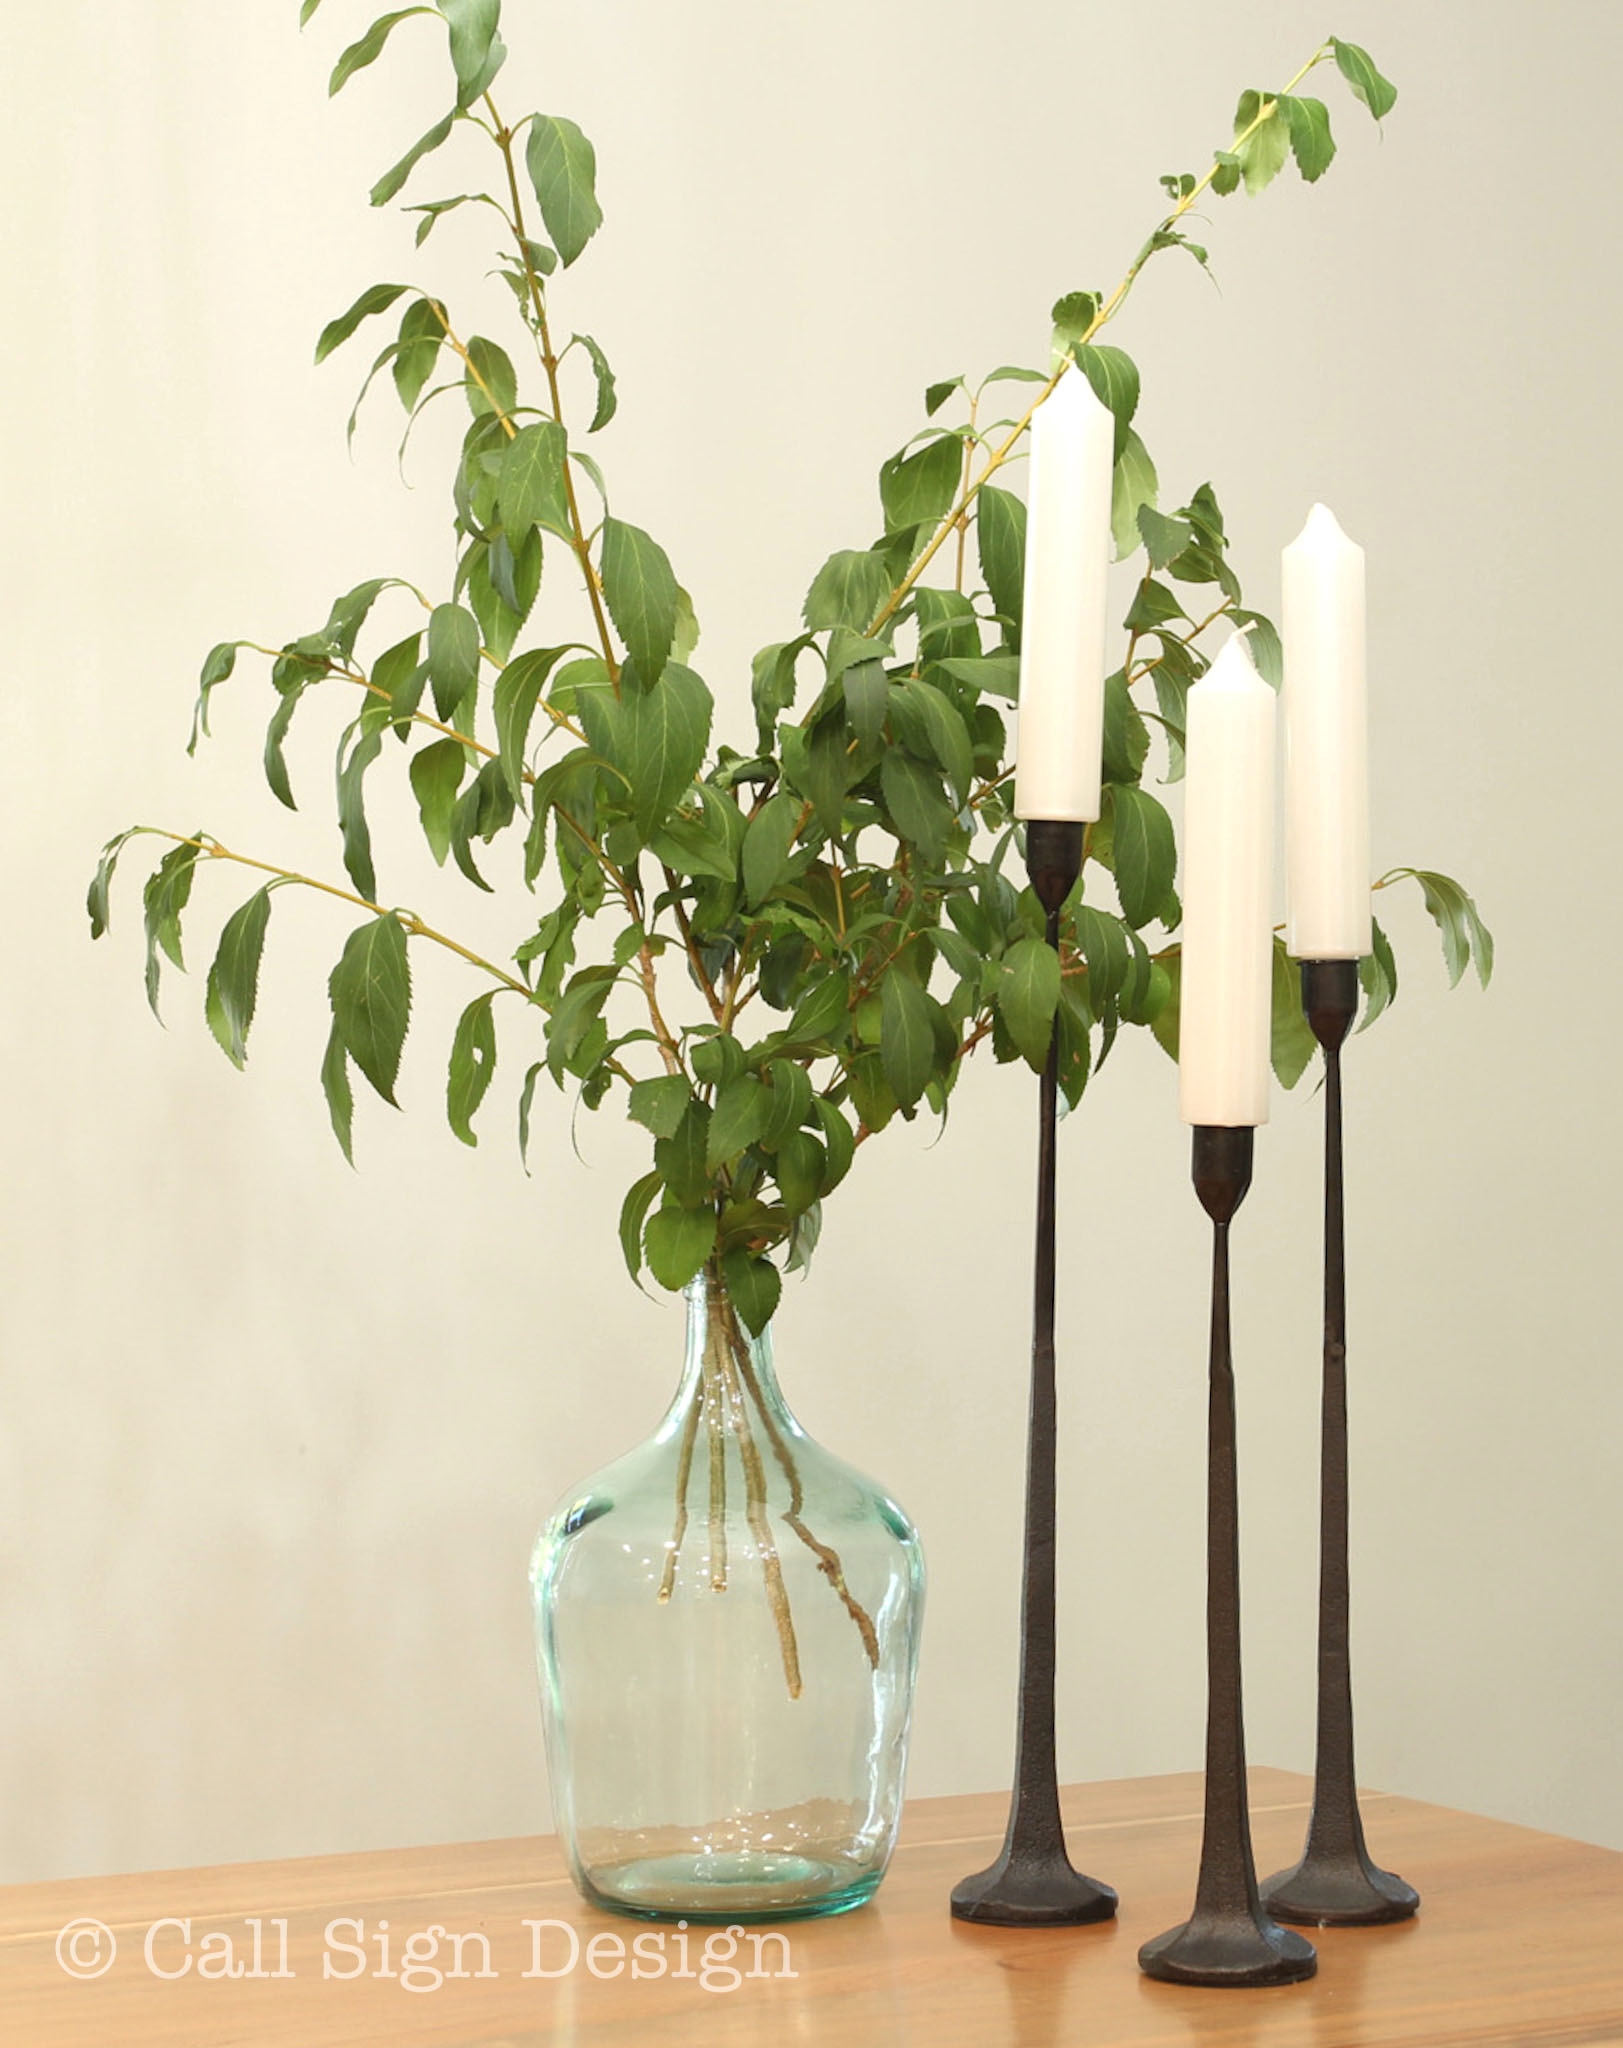
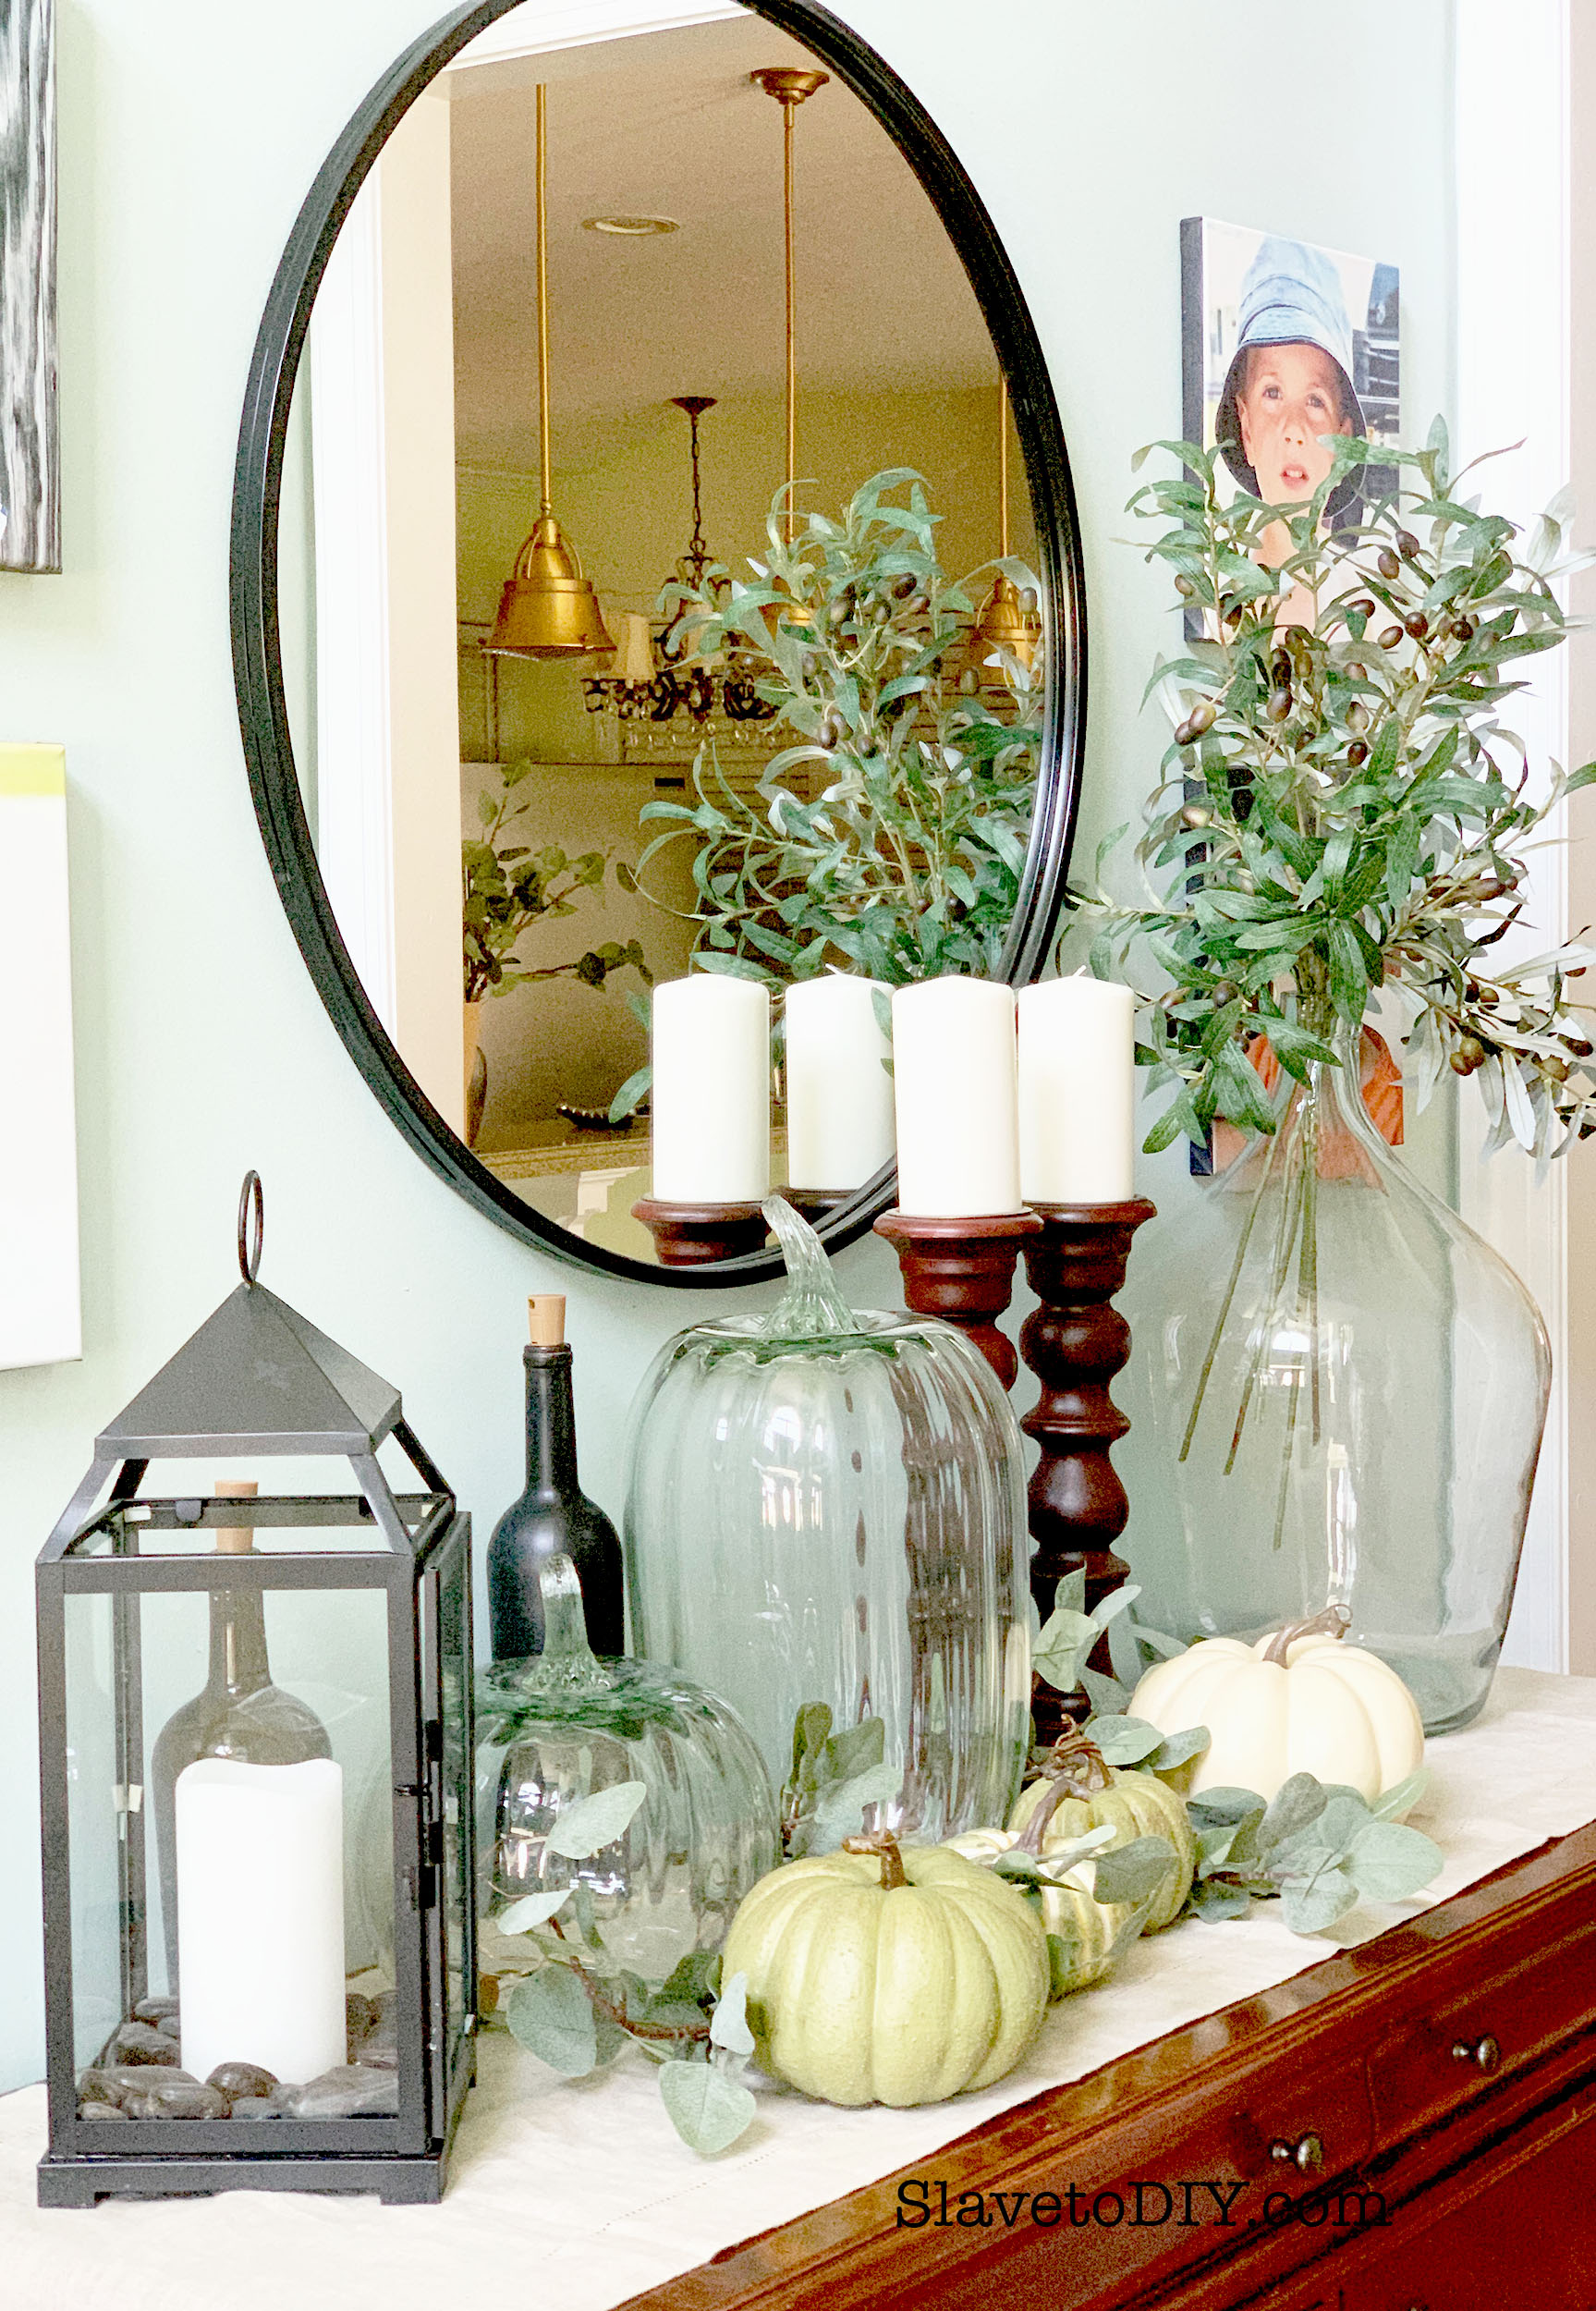
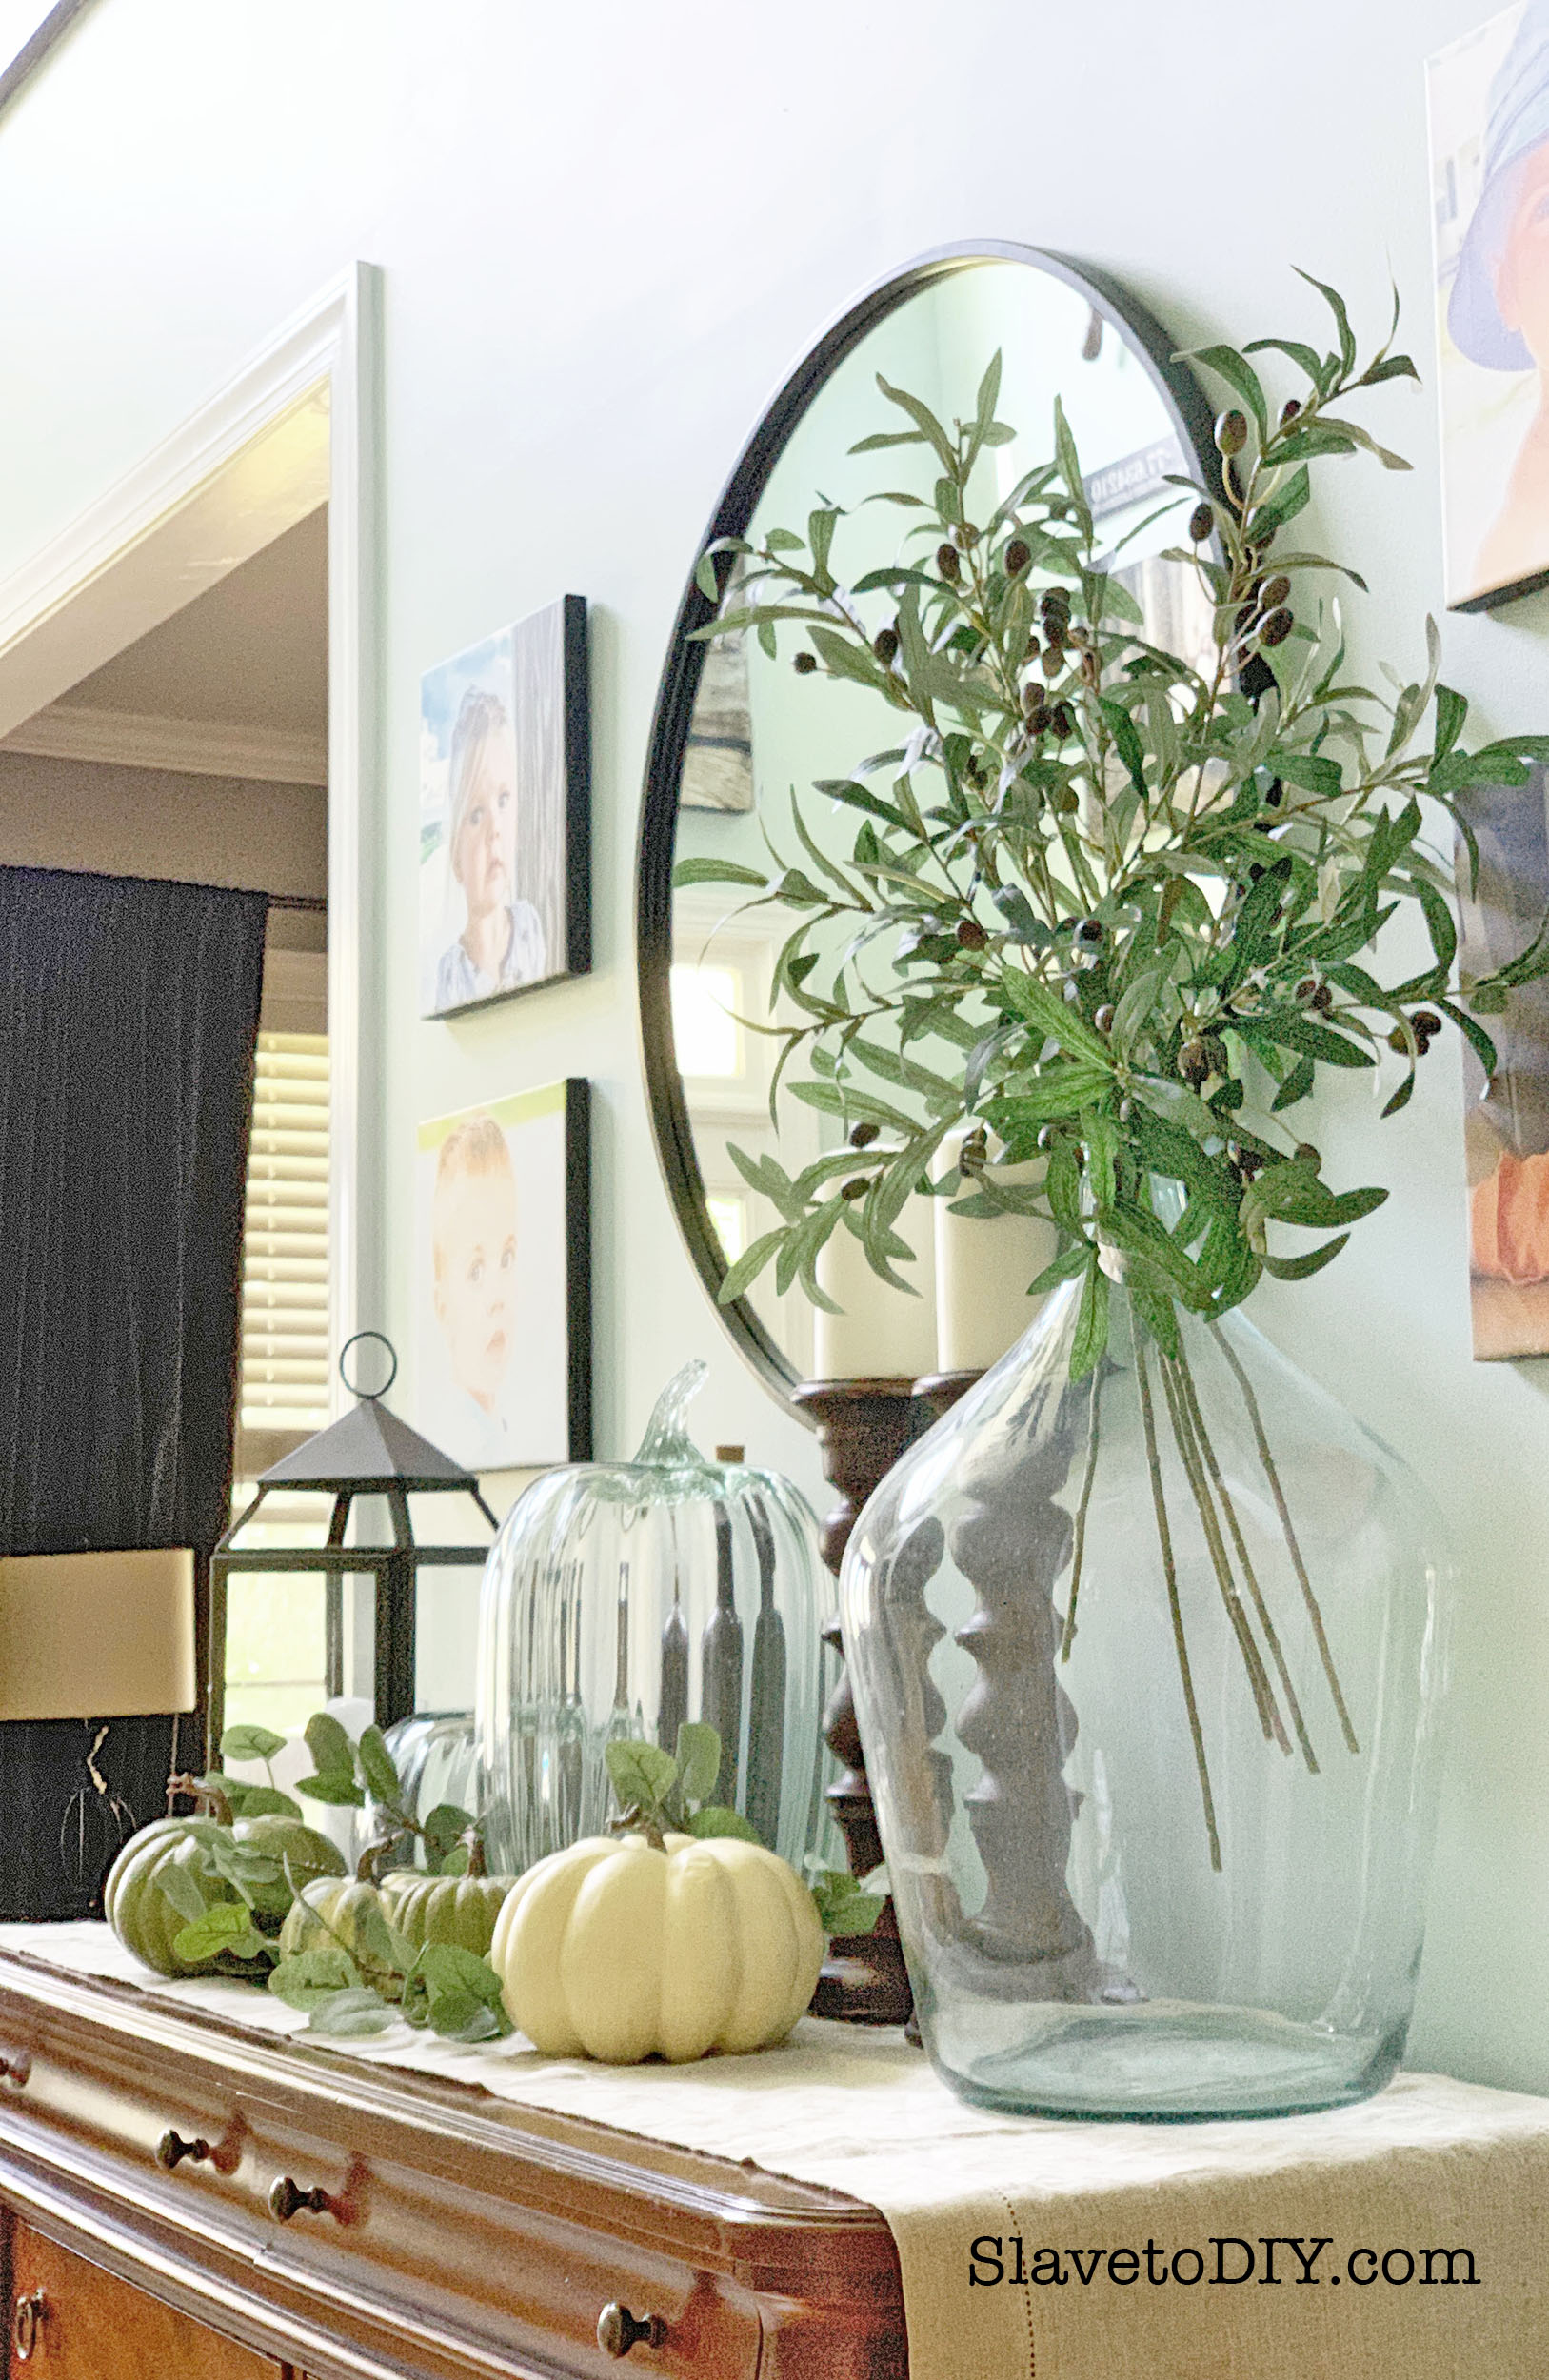
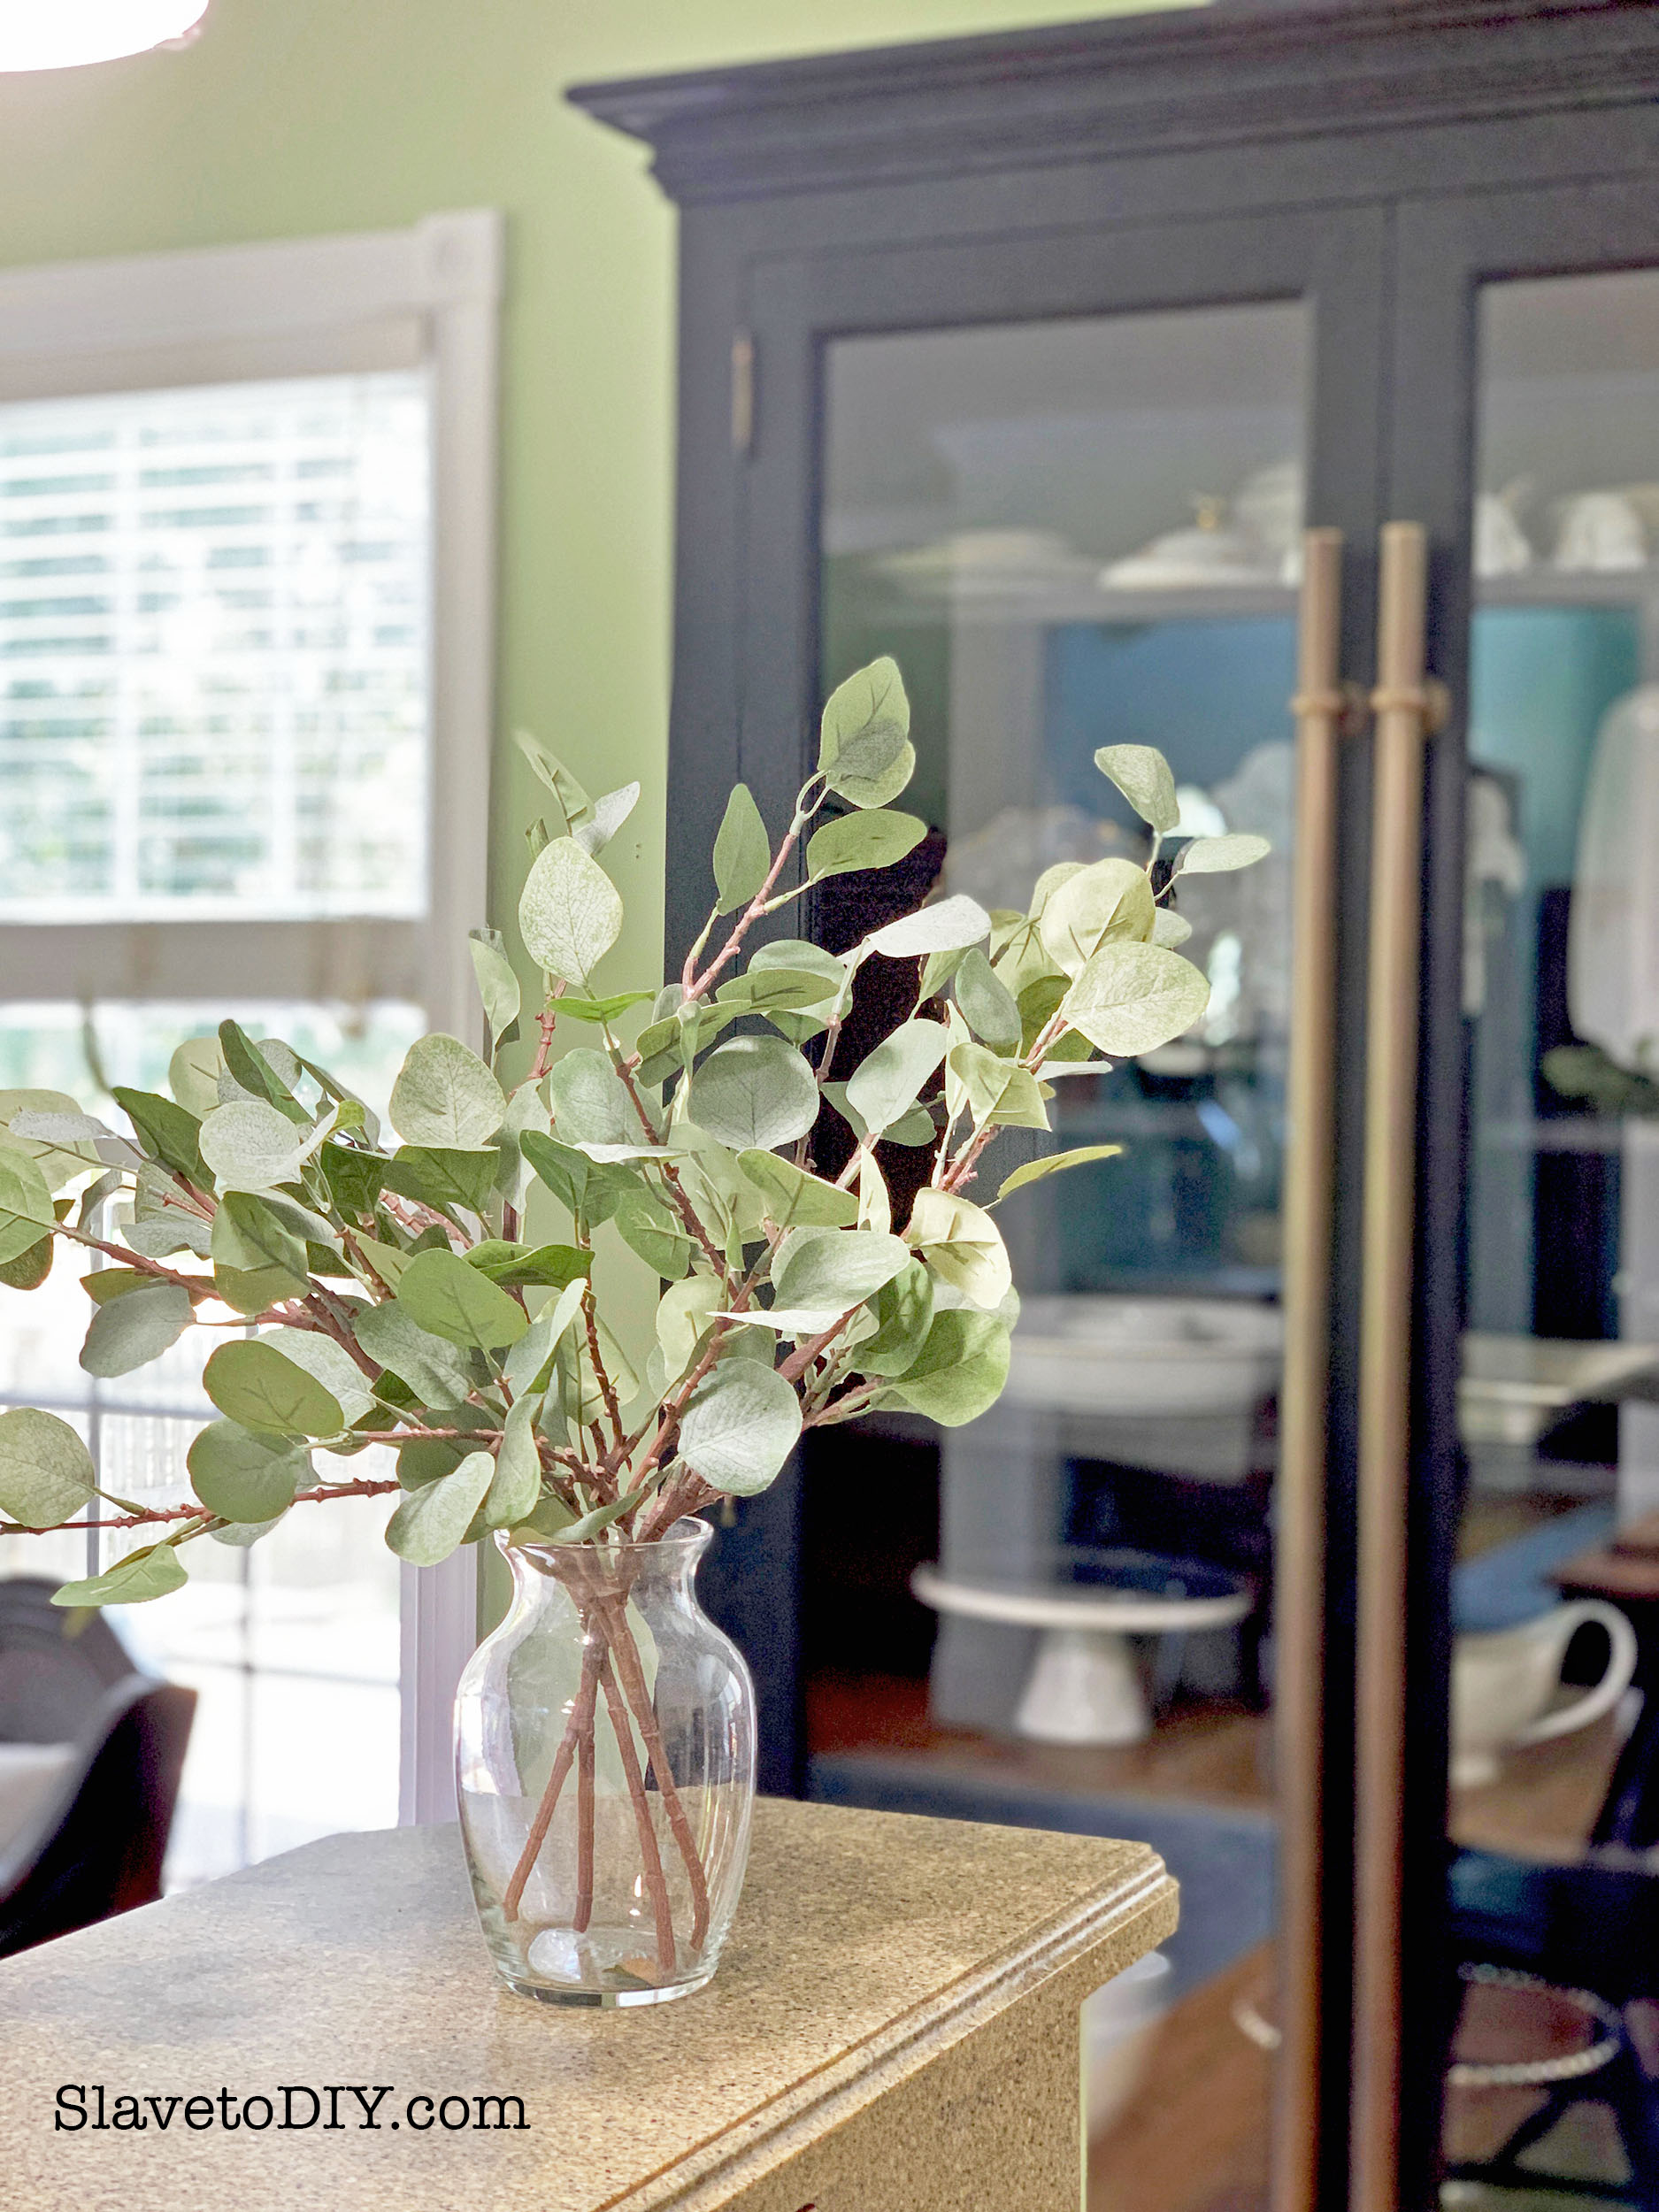
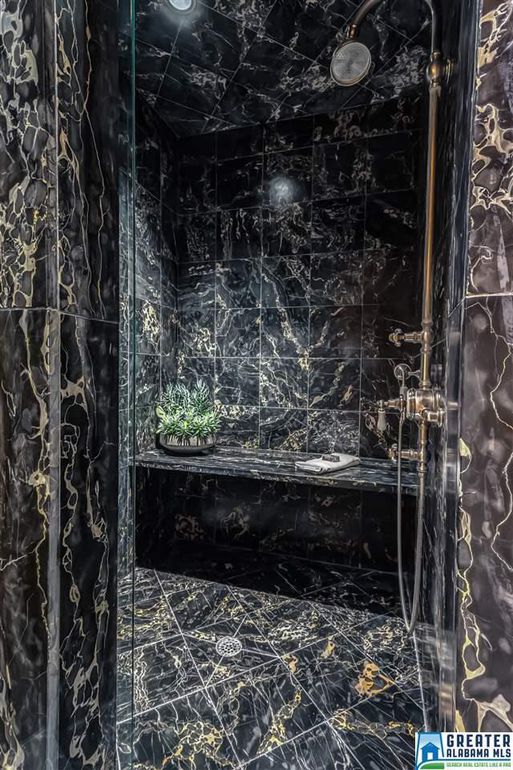
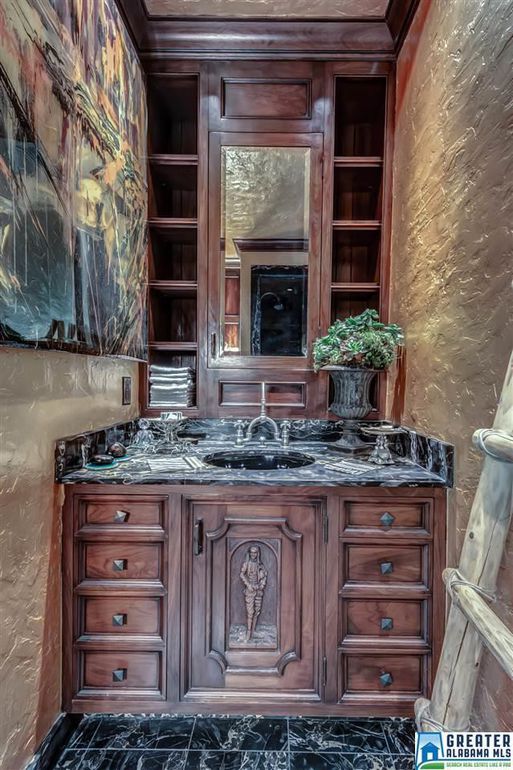
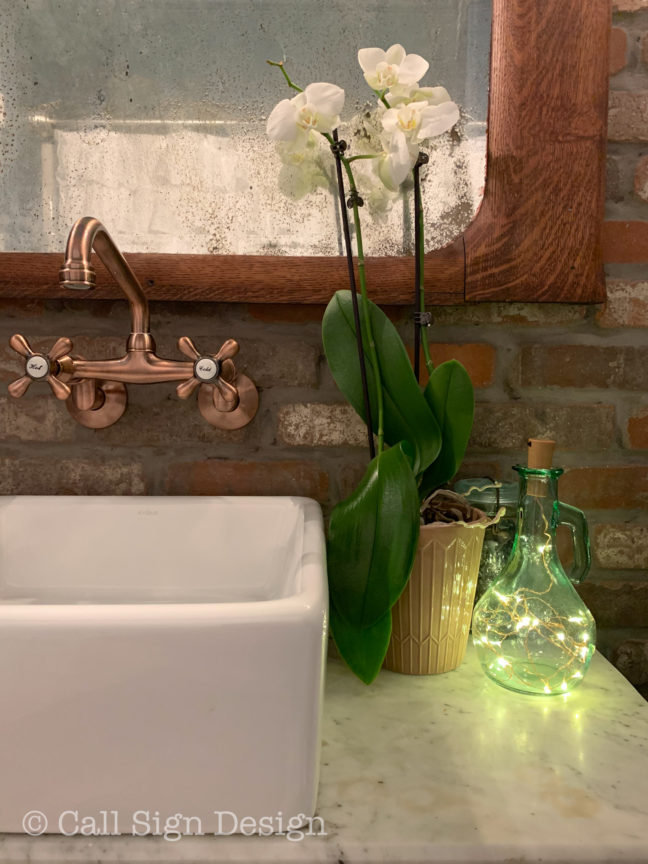
The Easy Way To DIY Breathtaking Landscape and Scenery Paintings


Flowers or Greenery

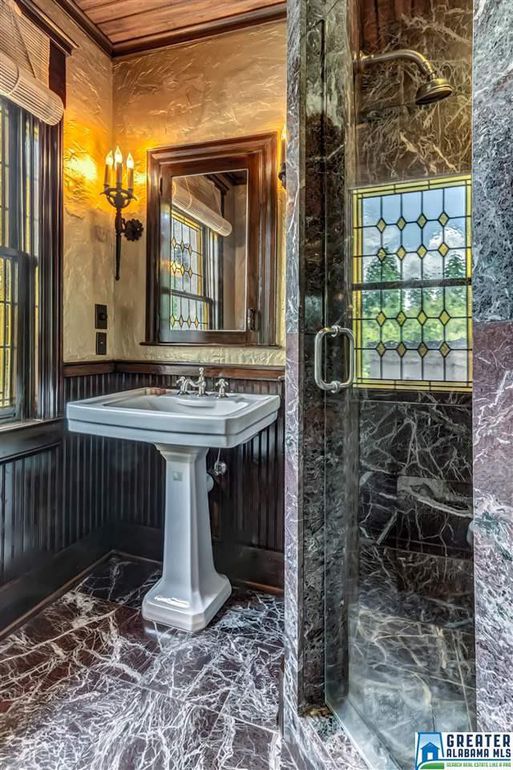
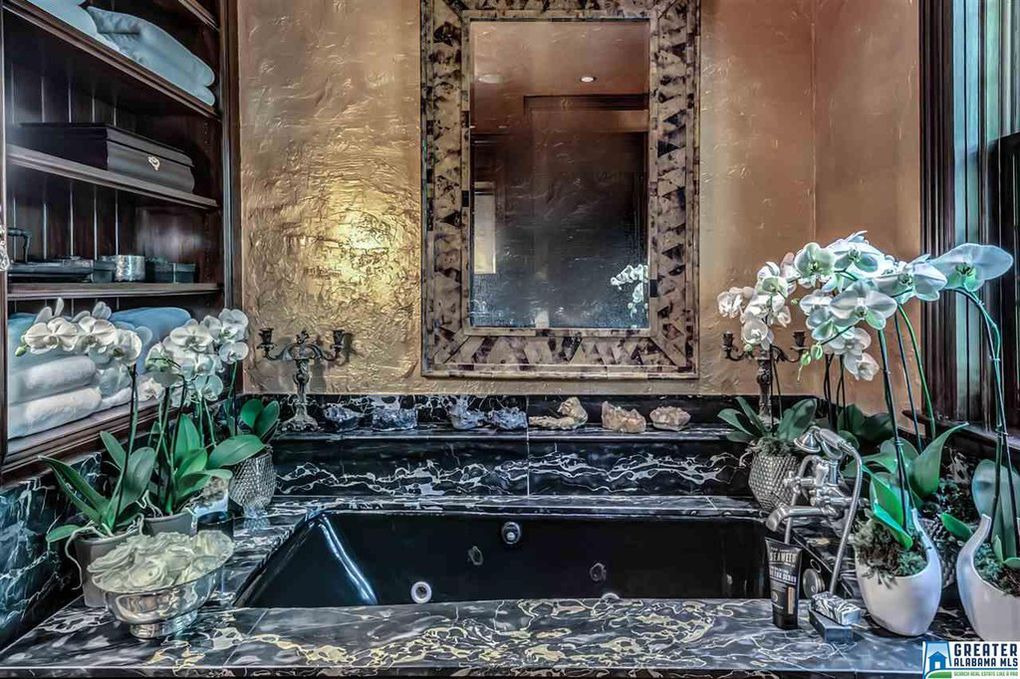
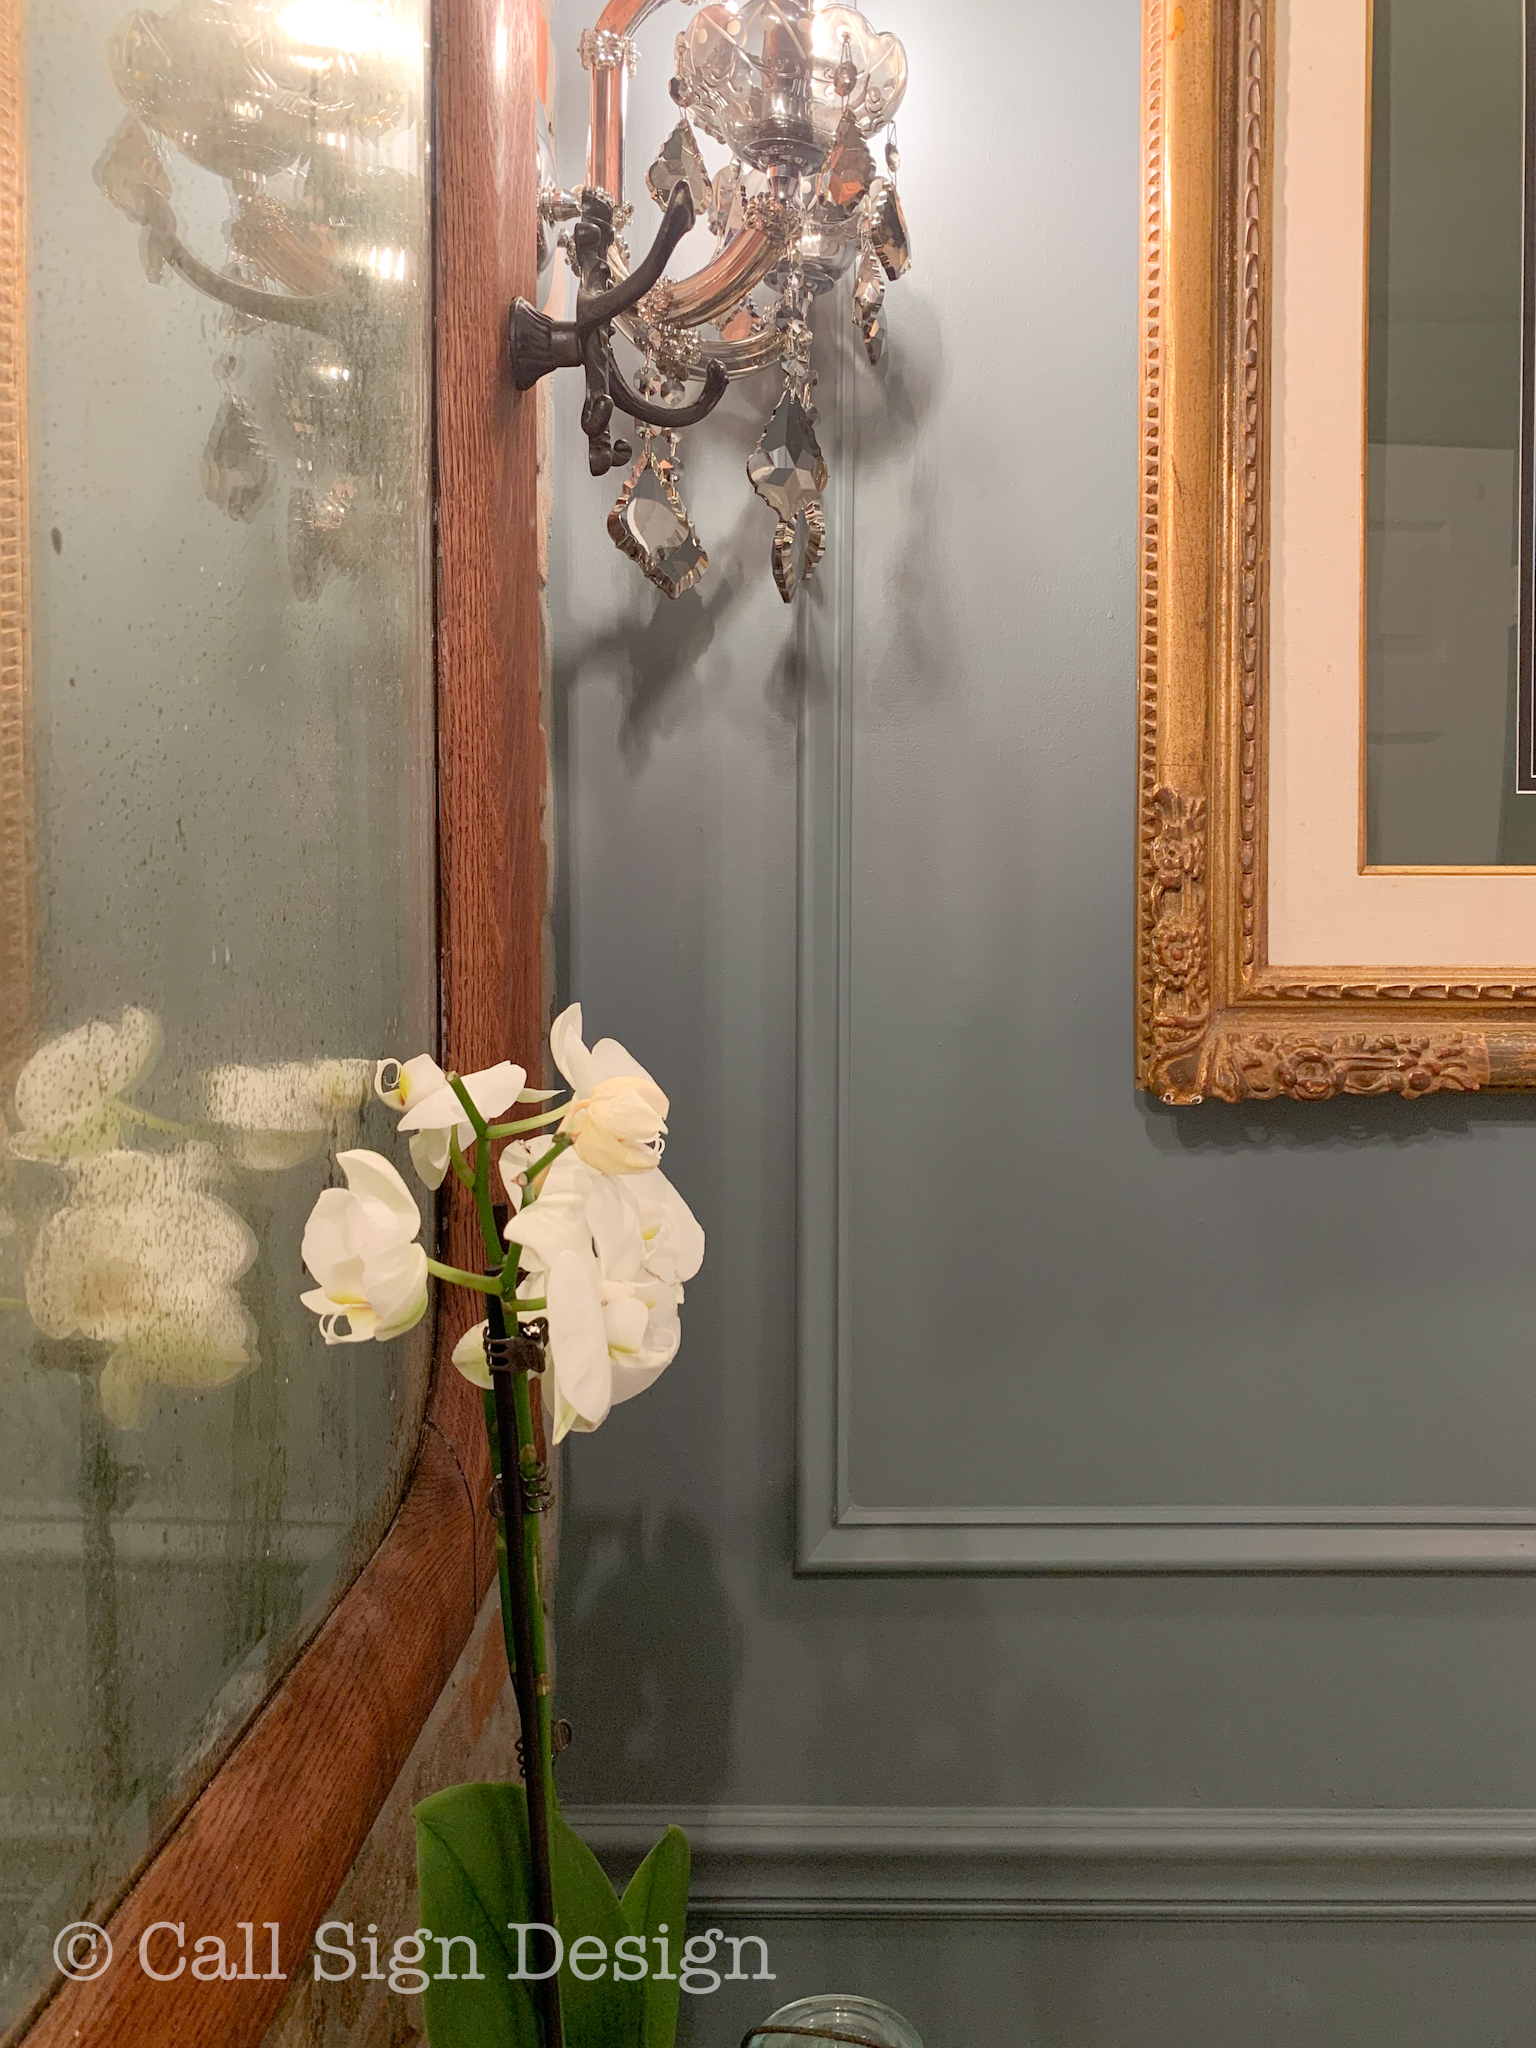
An orchid is a fantastic choice for bathroom staging… it doesn’t take up much countertop space and is easy to care for. It adds a dramatic flair and I just love ours in the new bathroom (like the brave woman that I am: I sent Rainman to the grocery store with directions to buy a tall, skinny flower arrangement and he NAILED IT). For staging, I also like a single palm frond or even a small branch, attractively arranged (just make sure these are bug free before you drag them inside!).

I prefer the orchid because no one harrasses me about it, like they do with the branches. (“Is that a tree branch?” “Where’d you find that tree branch?” “What’s with the tree branch?” “Is that a tiny snake on that tree branch… just kidding ha ha ha ha.” You see why it’s easier to just buy a plant).

Staging A Powder Room Or Bathroom Like A Pro


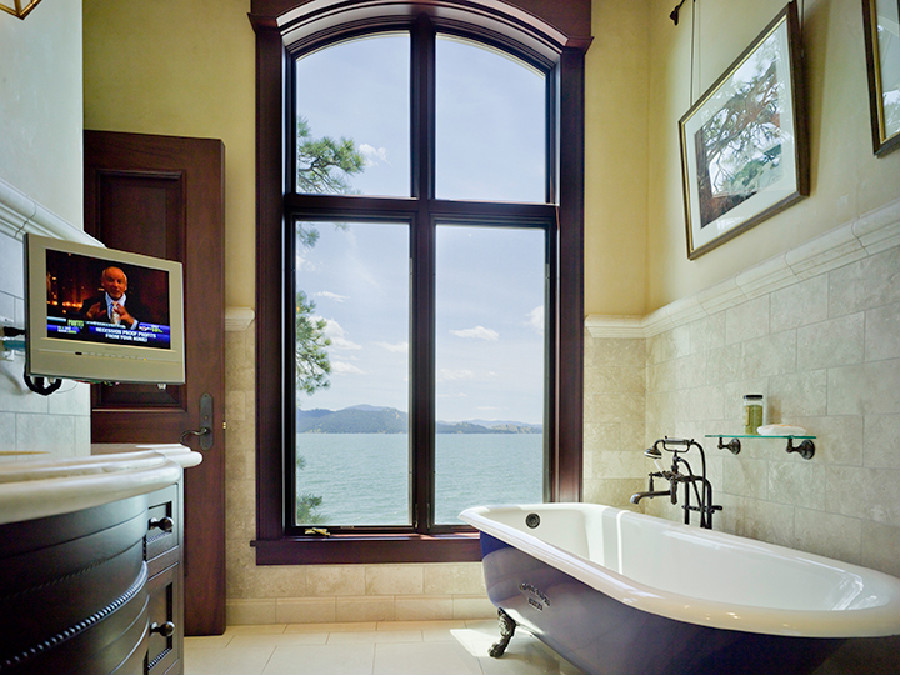
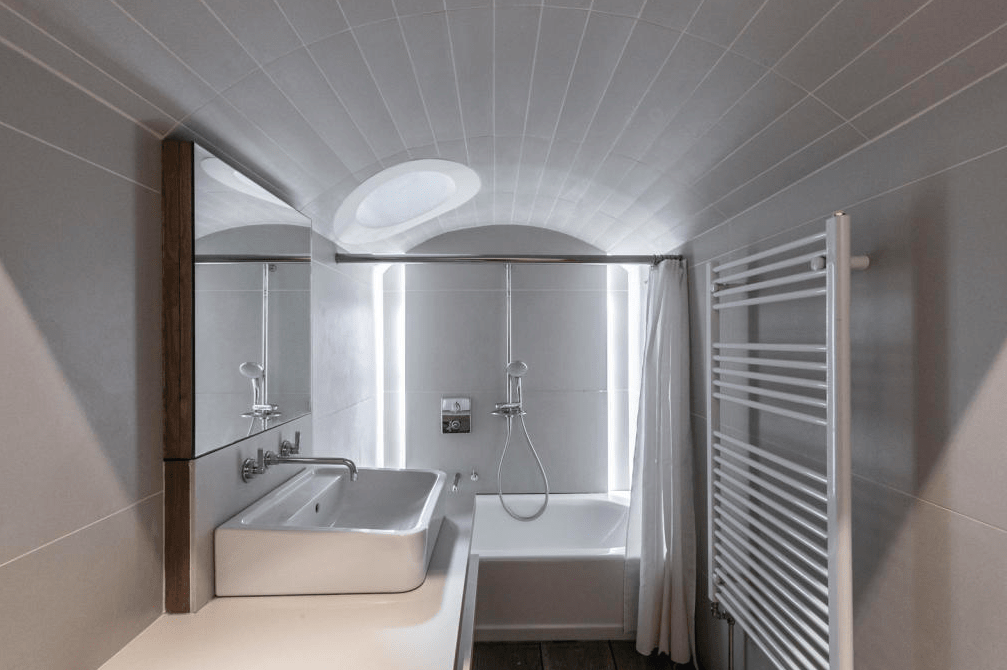
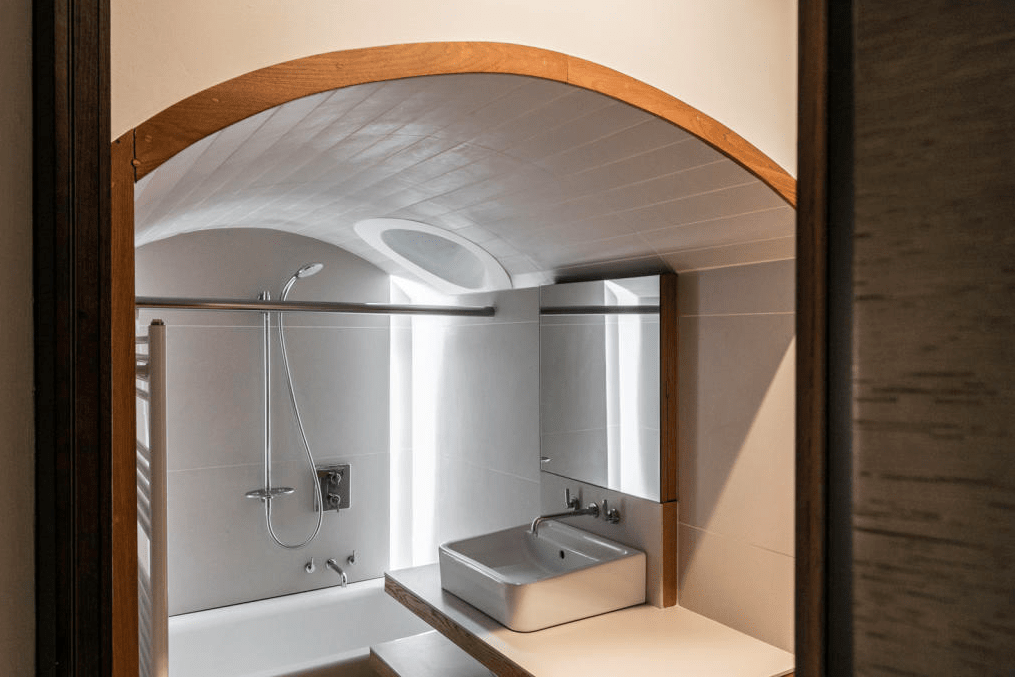
Buy A New, Pretty Shower Curtain

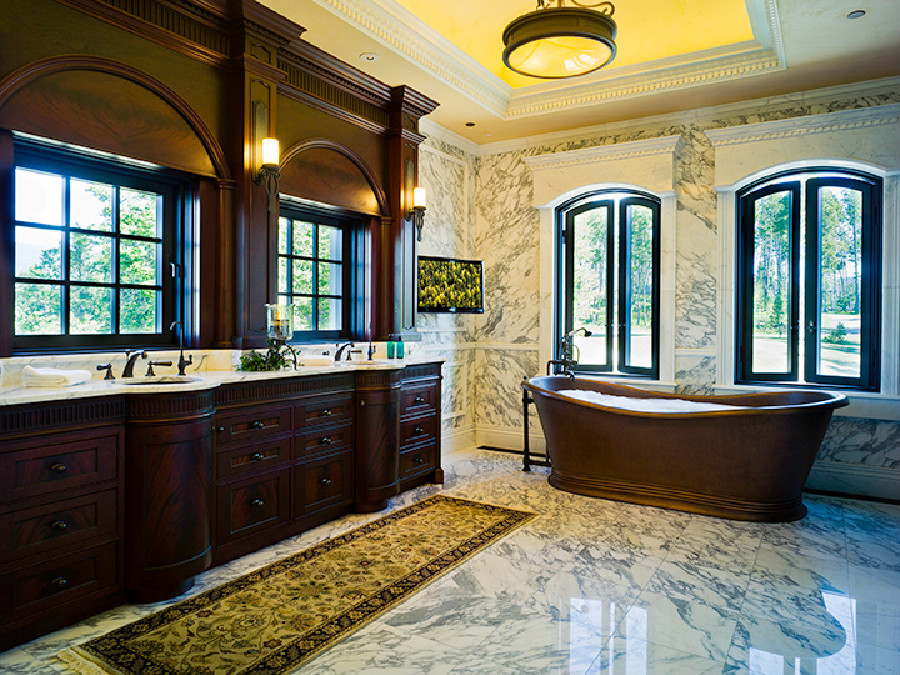
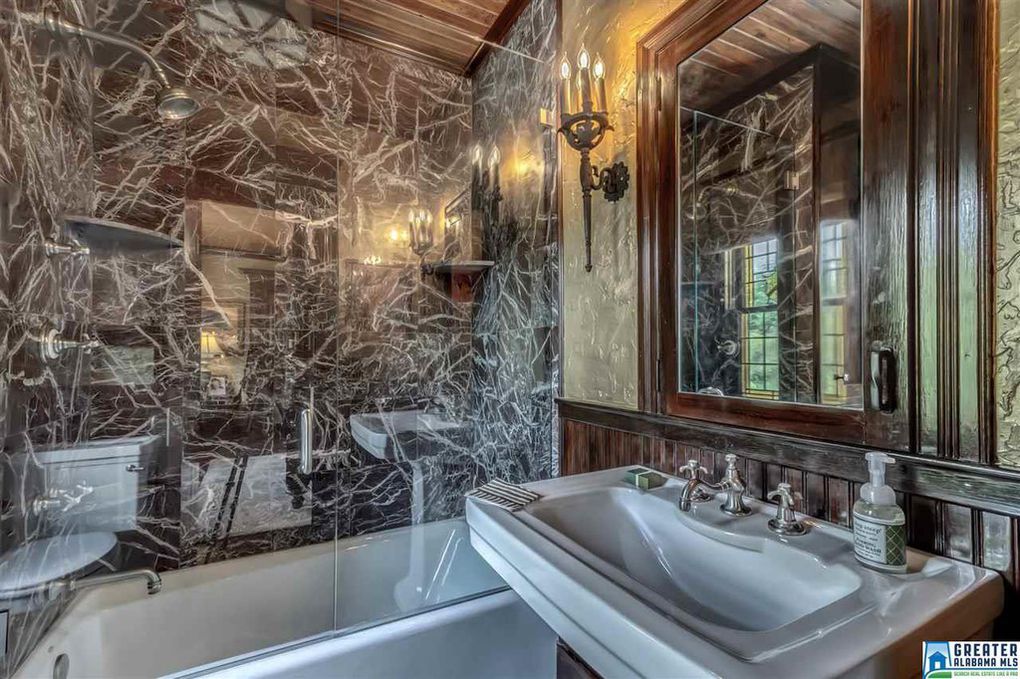
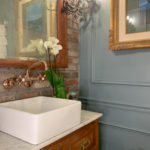
Seriously, when was the last time you inspected your shower curtain? It might be icky. If you haven’t thought about it in a while, it probably is. Even if you clean everything, if that shower curtain is greenish… that sends the buyer a message that you’re not taking care of the house (and will send them running out of there like an Alfred Hitchcock movie). Our bathroom here is quite masculine in design, so we went very feminine with the art and accessories to balance it. The clean, white, cotton ruffled shower curtain we used in this room is absolutely perfect and very economical.

During a recent party I may, or may not have, tucked the new shower curtain into the tub so it didn’t get peed on by the guests that were partaking. A girl’s gotta do what a girl’s gotta do.

Staging A Powder Room Or Bathroom Like A Pro


Scent Your Space

Even once you have deep cleaned, sometimes there are lingering noxious gasses in the bathroom. There are three good options: If you’ve read our Showing Day Checklist, then you already know that the ultimate scent for home buying is Apple/Cinnamon. I guess it takes people back to the smell of grandma’s apple pie or something. We use:

Also, make sure your guests/prospective buyers have access to Lysol, Febreze, or Poo-pourri, or something to prevent them from dying of embarrassment if your shrimp, spinach, sausage, garlic cream sauce doesn’t agree with them halfway through the evening.


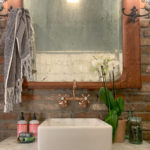
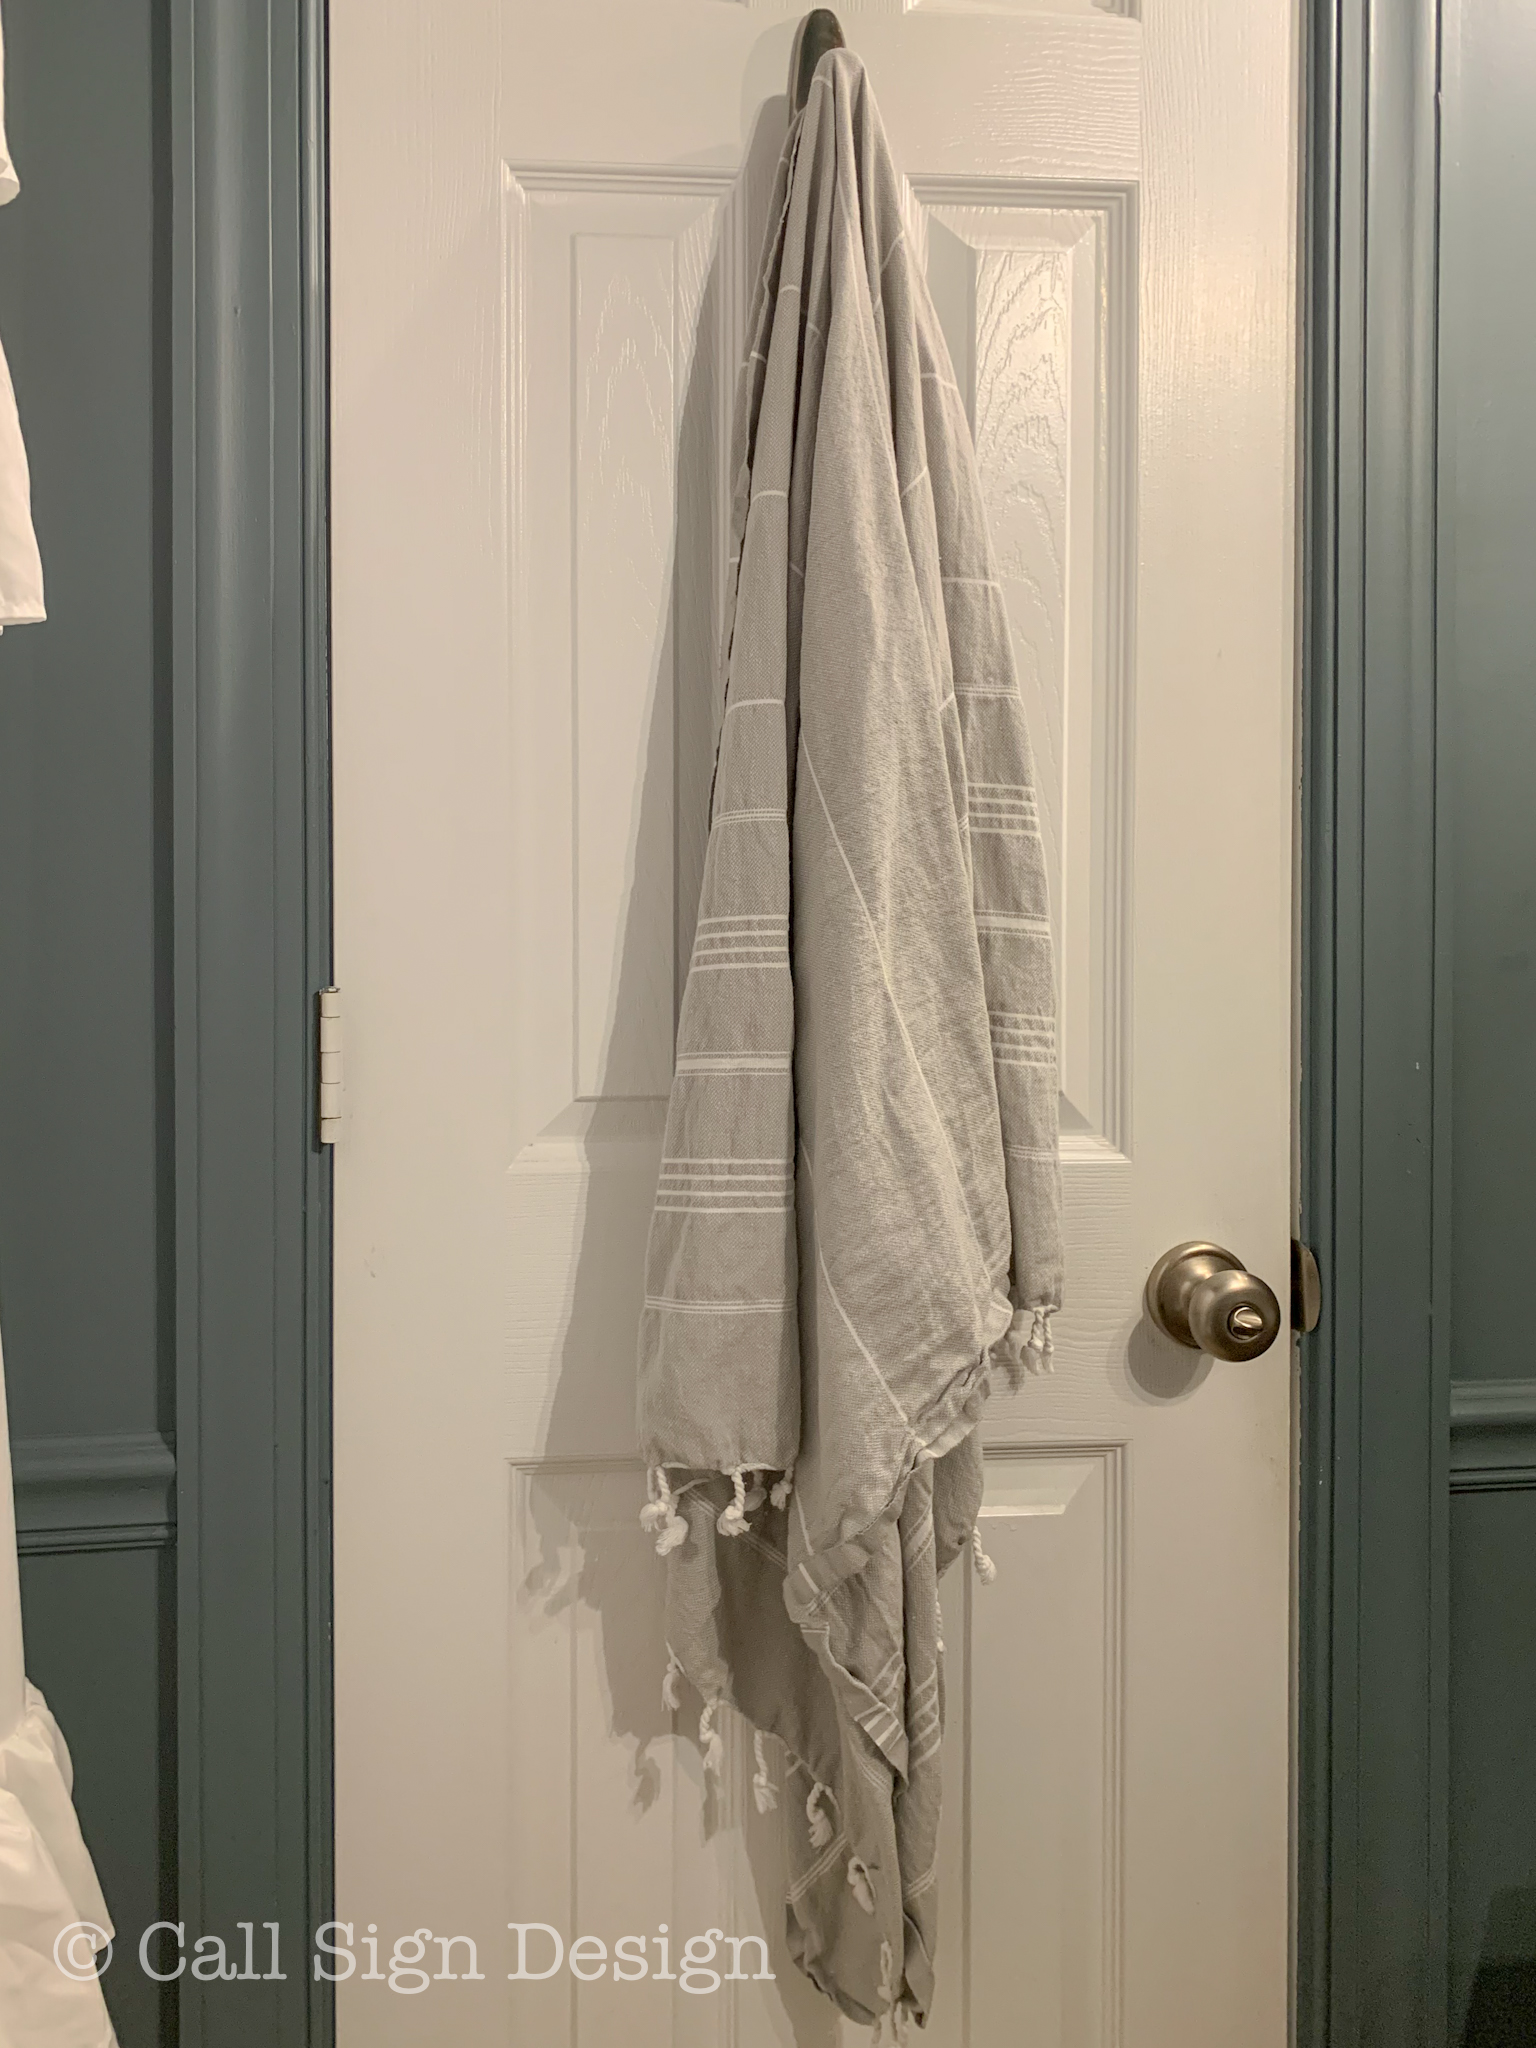
Spa Look Trick: We like to break up back of door spaces with hooks, and either a white spa robe or a pretty tasseled towel. We like the Pestemal Fouta Grey and White Turkish Cotton Bath/Beach Towel with a pretty monogram on it.

Staging A Powder Room Or Bathroom Like A Pro


Accessorize

Skip the bathroom sets. They come across as really matchy and unimaginative.

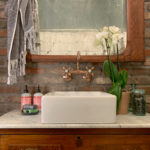
We like pretty, artisan soaps in a fancy ceramic pedestal dish. I like to provide lots of options for hand washing, so we have bar soap, liquid soap, and hand sanitizer available so there is absolutely NO excuse for not washing hands. Our favorite, aromatic artisan made goat milk soap is from Viney Creek Farm and I highly recommend them!

Bathrooms are best kept minimal with regard to accessories: other than soap, just a couple interesting items are needed:

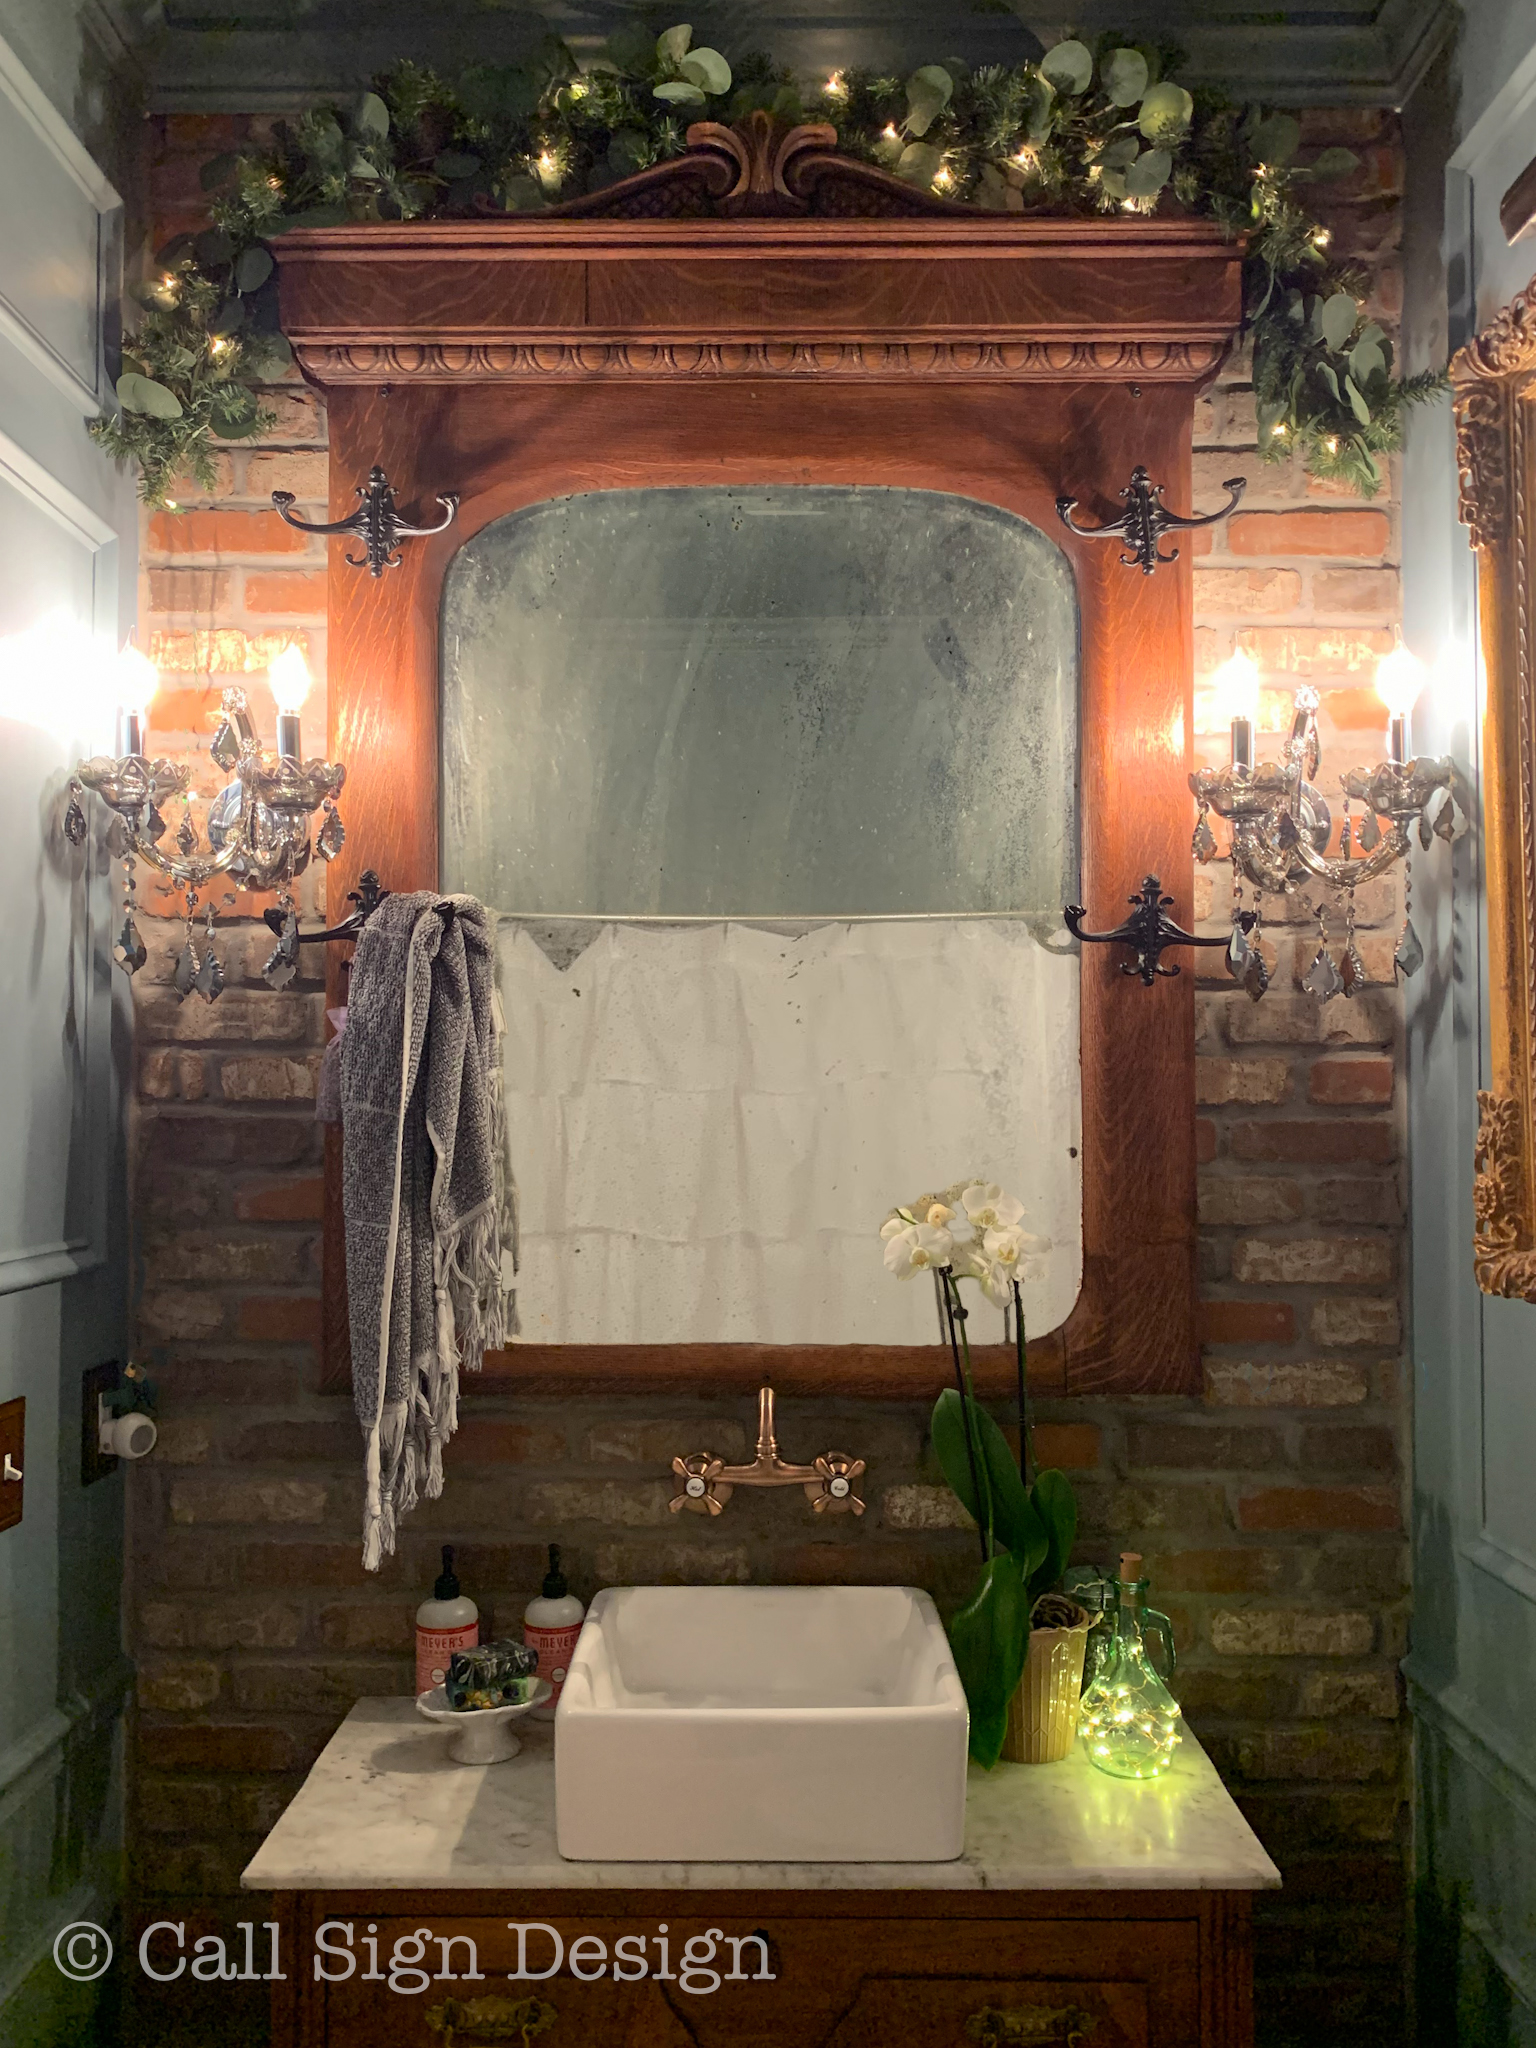
We have an antique jar filled with sharks teeth, a small glass pitcher with twinkle lights, the Orchid on one side and the soaps on the other. You seriously DON’T need to buy anything for this. Shop your house and you’ll find something wonderful.

Staging A Powder Room Or Bathroom Like A Pro


Holiday Decorating Tip: Give your bathroom a little love… and keep it generic (especially if your house is on the market). Some green lighted garland and twinkly Wine Stopper LED Twinkly Fairy Lights inside an antique bottle will go a long way!

Staging A Powder Room Or Bathroom Like A Pro


Staging A Powder Room Or Bathroom Like A Pro


Here is the complete source list for our bathroom staging:

Brushed Brass Freestanding Toilet Paper Holder

Cordless Remote Control LED 11.5″ Picture Light

Ruffled, Cotton Shower Curtain

Hitit Jacquard Yarn Dyed Turkish Hand Towels With Tassels

Mrs. Meyers Peppermint Handsoap

Water Hyacinth Magazine Basket

Canvas With Vintage Frame: Easy Canvas Prints and Craigslist

Pestemal Fouta Grey and White Turkish Cotton Bath/Beach Towel

Fancy Ceramic Pedestal Soap Dish

Wine Stopper LED Twinkly Fairy Lights

Bamboo Toothbrushes


Check out our Ultimate Pre-showing Checklist for Selling Your Home Fast! This is a great guide for how to quickly prep your house on Showing Day!

What are some of your favorite ways to stage a bathroom? Let us know in the comments below!

Cheers!


*Legal stuff:

I am honest about my experiences with different products and write because I enjoy it.  I do however, have the opportunity to earn money for my writing, also.

Slavetodiy.com is a participant in the Amazon Services LLC Associates Program, an affiliate advertising program designed to provide a means for sites to earn advertising fees by advertising and linking to amazon.com.  Amazon offers a small commission on products sold through their affiliate links.  Each of your purchases via our Amazon affiliation links supports our cause at no additional cost to you.

If a blogger links to an Amazon product (with a special code for affiliates embedded in the link), and a reader places an item in their “shopping cart” through that link within 24 hours of clicking the link, the blogger gets a small percentage of the sale.  Amazon links are not “pay per click.”  If you click on the product link and stay around Amazon and purchase something else, however, I will get a commission on that sale.

This site also contains affiliate links through //Commerce/Sovrn. //Commerce or our Publishers may be compensated when you click through links on our site.

.

How To Stage Your Kitchen Like A Pro

I have officially reached the end of Pinterest. I have saved every kitchen that I love in my kitchens folder. I AM NOW READY TO START RENOVATING MY KITCHEN. (Do you think he heard me?)

As you already know: I am ALWAYS in design mode on my own house and looking for ideas for clients. I’m also sort of a real estate junkie and I make it my business to know the local market and am always scouting for real estate deals! What do those things all have in common? KITCHEN OBSESSION. (Yes, I love that million dollar home but the kitchen… IS… AWFUL).

*This post may contain affiliate links. Please see full disclosure at the end of the post.

Yes, I am obsessed with kitchens. Recently, as I was staging for photographing our project in Vermont, something occurred to me: STAGING IS EVERYTHING.

Check out the before and afters on our Vermont Kitchen Project!

Whether you’re entertaining or showing your house that’s on the market, staging is the make it or break it of beautiful (or even MEH) kitchens. If you sift through your Kitchen board on Pinterest, what you’ll discover is that the ones you REALLY love are staged really well (which is why you saved it, whether you realize it or not!).  They have been tricking you all this time… You saved a beautiful flower or branch arrangement that happens to be in a kitchen. But, you saved it, which is the important take away!

Don’t believe me? I’ll show you!

Via @kellynuttdesign Instagram

This kitchen, though probably stunning in person, would be a washed out BLAH in photos without the greenery and fruit. Notice how the big tin bucket with branches anchors the right side of the photo.


Via @wdesigncollective Instagram

Just like the photo before, this kitchen is stunning. However, it has the potential in photos to appear too monochromatic and kind of cold. The branch arrangement, once again, anchors one side of the photo.


Via @ckandm Instagram

Look carefully… If you removed all of the accessories, would this space be very memorable? It’s not that it’s not an amazing kitchen, it’s breathtaking. But, in photos, it really needs some visual interest to look like a DREAM kitchen… which it certainly does here. They have arrangements on both sides here providing an interesting frame.

Would you save this photo? Of course you would!

And, wait, if you saved it… SO WILL YOUR FUTURE BUYERS! They’ll save it to their Pinterest board and obsess about it until they make you an offer over asking price and want to move in, like, yesterday!

So, how do we do that, Campers? Well, I’m going to tell you.  I promise.

Step one: take everything off the countertops. Take everything off the shelves. Then add a few, specific things and shop your own stuff!

It’s really that easy: I’m going to show you how and provide links for everything we used here! Altogether, we spent $350 on staging, not including dishes (shhh, don’t tell!!!) and here is how it turned out:


Before and After Pictures of Grandma's New Vermont Cottage Kitchen: Sponsored by Lily Ann Cabinets and designed by @callsigndesign on Instagram and @slavetodiy on Pinterest.
Before and After Pictures of Grandma’s New Vermont Cottage Kitchen: Sponsored by Lily Ann Cabinets and designed by @callsigndesign on Instagram and @slavetodiy on Pinterest.

A mirror in a kitchen you say?  I say YES. A blank wall in between two windows was begging for a mirror. Mirrors brighten small spaces and reflect light. Win, win. Scale it BIGGER! (Unexpected can be GOOD and in this case, it’s kind of awesome). If you have a tiny kitchen, or a dark kitchen, I’m talking to you.

This mirror we found on Craig’s List for $60. (“If you stalk long enough, you will have success,” I always say!)


The Complete Kit For Staging Your Kitchen Like A Pro
Kitchen Herb Kit from IKEA: The Complete Kit For Staging Your Kitchen Like A Pro

Don’t judge me. I have a thing for herbs in the kitchen, and this one wasn’t going without! The rails and bins are from the Kungsfors IKEA Collection. They are both beautiful and functional, and make the kitchen feel that much more cozy. The window is wider than the rails so we used scrap lumber and a Kreg Jig to install them.

Fresh herbs in the kitchen say, “There is some serious professional chef level cooking going down in this kitchen. You must buy this house.”

Don’t want to deal with hanging all those spice racks? Some fresh herbs tied with ribbon on the counter (in front of the chopping block) serves the same purpose for photos.


The Complete Kit For Staging Your Kitchen Like A Pro

HOW CUTE IS THIS???

Demijohn: I’ll admit, I’m a little bit of a demijohn snob. What is a demijohn, you ask? I’ll tell you: What is a demijohn and how to use it in your decorating… I like them enough I wrote a whole post about them, because I’m an obsessive nerd. We found this perfect little demijohn at Hobby Lobby for around $20 and it’s perfect for this application!

Candlesticks: Also shown here, these TOTALLY AWESOME real Iron Candlesticks from Hobby Lobby are about $20 each (which I just went on and purchased more of because they’re on sale).  Score!

Tree branch: Scalped right out of the woods on the kitchen property. FREE! (Visualize the clients AND Rainman looking at me sideways on staging/photo day walking toward the woods with pruning sheers in hand… “Where are you planning on putting a branch that big, Griswold?” But, I’ll leave it there, and keep it PG).

And that’s all you need for the corner of the island! As the photographer moves around, move your arrangement around so it’s anchoring the outside frame of the picture.


Before and After Pictures of Grandma's New Vermont Cottage Kitchen: Sponsored by Lily Ann Cabinets and designed by @callsigndesign on Instagram and @slavetodiy on Pinterest.
Before and After Pictures of Grandma’s New Vermont Cottage Kitchen: Sponsored by Lily Ann Cabinets and designed by @callsigndesign on Instagram and @slavetodiy on Pinterest.

For this next corner I borrowed some items that belonged to the client (shop your own house!)… The little silver tray I used to hide the cord from the lamp. The little vases and tiny plant were also hers, and they look adorable in the spice cabinet!

And that lamp? I looked at about 500 lamps before I found this one with just enough fancy and just enough cottage-style to be convincing. And after I spent hours looking… I finally found it no place other than Amazon: The Perfectly Sized French-Style Countertop Lamp for around $30. (Some of the other sites are REALLY proud of their lamps and I’m just trying to be reasonable here).

The little oil paintings with gilded frames were a bit of a splurge and I found them on Ebay. I’m pretty sure there are some fairly convincing knockoffs at Target if you don’t want to be too extravagant and you’ll ultimately achieve the same look.


Before and After Pictures of Grandma's New Vermont Cottage Kitchen: Sponsored by Lily Ann Cabinets and designed by @callsigndesign on Instagram and @slavetodiy on Pinterest.
Before and After Pictures of Grandma’s New Vermont Cottage Kitchen: Sponsored by Lily Ann Cabinets and designed by @callsigndesign on Instagram and @slavetodiy on Pinterest.

Notice how we moved the demijohn and candles for this shot? We moved them just enough so they’re anchoring an uninteresting side of the room and creating balance.


Before and After Pictures of Grandma's New Vermont Cottage Kitchen: Sponsored by Lily Ann Cabinets and designed by @callsigndesign on Instagram and @slavetodiy on Pinterest.
Before and After Pictures of Grandma’s New Vermont Cottage Kitchen: Sponsored by Lily Ann Cabinets and designed by @callsigndesign on Instagram and @slavetodiy on Pinterest.

Every time we changed the camera angle, we repositioned the candles and spun the branches so they looked nice and full, but also just wild enough to be wonderful and daring.


Before and After Pictures of Grandma's New Vermont Cottage Kitchen: Sponsored by Lily Ann Cabinets and designed by @callsigndesign on Instagram and @slavetodiy on Pinterest.
Before and After Pictures of Grandma’s New Vermont Cottage Kitchen: Sponsored by Lily Ann Cabinets and designed by @callsigndesign on Instagram and @slavetodiy on Pinterest.

Another angle for good measure! (Aren’t those fat candles just the coolest? Also on Hobby Lobby, if you’re looking).


Before and After Pictures of Grandma's New Vermont Cottage Kitchen: Sponsored by Lily Ann Cabinets and designed by @callsigndesign on Instagram and @slavetodiy on Pinterest.
Before and After Pictures of Grandma’s New Vermont Cottage Kitchen: Sponsored by Lily Ann Cabinets and designed by @callsigndesign on Instagram and @slavetodiy on Pinterest.

Now, if you haven’t mastered the art of the shelfie, here’s a quick crash course:

Arrange in threes and in triangles. Okay, so we have a couple “twos” but it’s all about balance.

Here, everything but the new blue stripe dish towels and the White Pantry Soup Bowls and Plates from Williams Sonoma the client already had! It’s just a matter of arranging them in a pretty, uncluttered way.

There is a triangle of “tall items” and a triangle of bowls and a triangle at the top of crocks and teapots.

Believe it or not, those shelves used to be the temporary stair treads to the basement. You can find the black metal shelf brackets here if you’re looking to open up some space on your own wall!

Is your kitchen atrocious and preventing your house from selling? Check out our ideas on The Best Ways To Transform An Outdated Kitchen On A Tiny Budget.


How To Stage Your Kitchen Like A Pro
Butcher block, cutting boards, and charcuterie boards, (Oh My)… How To Stage Your Kitchen Like A Pro. Designer: @callsigndesign (Instagram). Photographer: @loganbspring (Instagram). Cabinets @lilyanncabinets_ (Instagram)

The perfect cutting/charcuterie board corner: every one of these the client already had!

The Cambria Stoneware Kitchen Utensil Holder was from Pottery Barn but I think they may have been discontinued in that color. We displayed her wooden spoon collection in them and I think they look perfect!

Shades of blue created perfect, subtle pops of color in our staging. Wouldn’t you like to do some cooking in this kitchen?

If you’re in the market for quality RTA cabinets go to Lily Ann Cabinets and use offer code SDIY2018 to get 5% off! (The cabinets pictured are Grey Shaker Elite).

Have a house on the market? Download The Ultimate Home Showing Checklist FREE on how to get ready for and nail your real estate showings!

Can you think of some other important parts of staging a kitchen? Let us know in the comments!

Thanks for hanging out today! Cheers!


*All photos by @loganbspring on Instagram


*Legal stuff:

I am honest about my experiences with different products and write because I enjoy it.  I do however, have the opportunity to earn money for my writing, also.

Slavetodiy.com is a participant in the Amazon Services LLC Associates Program, an affiliate advertising program designed to provide a means for sites to earn advertising fees by advertising and linking to amazon.com.  Amazon offers a small commission on products sold through their affiliate links.  Each of your purchases via our Amazon affiliation links supports our cause at no additional cost to you.

If a blogger links to an Amazon product (with a special code for affiliates embedded in the link), and a reader places an item in their “shopping cart” through that link within 24 hours of clicking the link, the blogger gets a small percentage of the sale.  Amazon links are not “pay per click.”  If you click on the product link and stay around Amazon and purchase something else, however, I will get a commission on that sale.

Slavetodiy.com is also a VigLink affiliate advertiser which works similarly.

How To Use An Inexpensive Paint Sprayer For Painting Cabinets or Furniture

I have been wondering about using a paint sprayer for years now, because of course I see all these gorgeous finishes on people’s cabinets, furniture, and small paint projects. So, I did a little research, and finally settled on a small project paint gun that is inexpensive, works really well, and is very simple to set up and clean up. Here is the process and what we used to get outstanding results!

*This post may contain affiliate links. Please see full disclosure at the end of the post.

The first step is having a place to paint. Now these doors were unattached and I REALLY didn’t want to do prepwork inside to paint (especially because of the cats). So, we waited for a day when the wind was relatively still, and set up a clean work surface on the ground and screwed in eyelet screws into the top of the cabinet doors. Then we wired them to an outdoor arbor so they were suspended and accessible.

What you’ll need:

A paint gun: we used the Critter Paint Gun, (great design, very simple, and the best news: CHEAP!).

Paint straining bags: you can get these for a buck and change at hardware stores or buy them online: Paint Strainer Bags.

A compressor, hose, and basic attachments. We have a large Dewalt Compressor (which I bought apparently thinking we’d be framing walls and working in a commercial building environment) but we used the smaller and much more easy to wield Bostich Air Compressor for this project).

First we dry fitted everything on the gun to make sure it worked with the compressor hoses.

How To Use An Inexpensive Paint Sprayer and Get Outstanding Results


Then we used one of the paint strainers to strain the paint into the jar.

TIP FROM RAINMAN: THIS IS AN IMPORTANT STEP. If you don’t strain the paint, little chunks will clog up the tiny tube that feeds the sprayer.

How To Use An Inexpensive Paint Sprayer and Get Outstanding Results


We realized after the first few minutes that the best method is to put the strainer all the way in and then pour the paint in. It lends some weight to the process and makes it strain MUCH faster.

How To Use An Inexpensive Paint Sprayer and Get Outstanding Results


Once the paint is in, lift the strainer out until it has all drained into the mason jar. We layed the bag down on our clean surface, knowing we would use it again, but if you’re taking a long time, you might want to rinse it with a hose between uses (we have not found a non-messy way to do this).

How To Use An Inexpensive Paint Sprayer and Get Outstanding Results


Attach the mason jar back to the gun, and make sure your air compressor is set at 30 PSI.

TIP FROM RAINMAN: USE SCRAP WOOD TO GET PSI, LIQUID NOZZLE, AND DISTANCE SET (35 PSI WITH LIQUID NOZZLE CENTERED WORKED WELL WITH THIS PAINT AT AROUND 4 INCHES FROM SURFACE).

Rainman sprayed around the edges, then into the corners, then did a good layer, spraying back and forth across it.

How To Use An Inexpensive Paint Sprayer and Get Outstanding Results


Spraying around the outside:

How To Use An Inexpensive Paint Sprayer and Get Outstanding Results


Door two: holding it steady to start spraying (this is where those eyelets and wire are handy).

How To Use An Inexpensive Paint Sprayer and Get Outstanding Results


Spray the front sides, then the back sides, and give it a little time to dry. Make sure you get any outside edges you will see.

The Dark and Moody Fireplace Update
The Dark and Moody Fireplace Update; Painting the doors with the Critter


Depending on the paint and color, you will need at least two coats. We did three for good measure and for even coverage.

TIP FROM RAINMAN: LIQUID NOZZLE MAY NEED TO BE CLEANED (PICK OFF ANY DRIED/DRYING PAINT), ESPECIALLY IF YOU LET THE GUN SIT BETWEEN APPLICATIONS.

Pose for a “finished painting” photo:

The Dark and Moody Fireplace Update
The Dark and Moody Fireplace Update; Finished Painted Doors


We took the doors into the downstairs shower (where there are no cats if we close the door) and where we had a rod across the middle and resecured them to the rod for three days to make sure they were really good and dry before we mounted them.

TIP FROM RAINMAN: CLEAN GUN WITH PAINT THINNER BEFORE PAINT DRIES ON GUN SURFACES.

Clean-up: Rainman rinsed out all of the paint from the mason jar, rinsed all of the tubing and the outside of the paint gun off, and then added mineral spirits to the jar. He sprayed that all out to clean the inside of the tubing and the inside of the gun. Then he dumped that out, added water, and did it again. Take the components apart and let them dry completely before you put it back together. We stored it back in the box and will definitely use it again!

TIP FROM RAINMAN: NOT SURE HOW LONG JAR GASKET WILL LAST; PROBABLY NEED TO ORDER SPARES.

Here are the doors mounted on the fireplace:

How To Use An Inexpensive Paint Sprayer and Get Outstanding Results


Here they are mounted and COVERING THAT AWFUL GAPING HOLE!

How To Use An Inexpensive Paint Sprayer and Get Outstanding Results

We had already painted the rest of the fireplace with brushes and rollers. If I had realized how easy it was to use the sprayer and how little overspray there was, I would’ve used The Critter to paint that, as well. The finish looks VERY professional, and I’ll definitely be using it to do our cabinets once we get to that point.

I’d love to see your paint projects and hear about how this little paint gun worked for you!  Please share in the comments below and check out more great project tutorials and inspiration over on our blog.

Cheers!


*Legal stuff:

I am honest about my experiences with different products and write because I enjoy it.  I do however, have the opportunity to earn money for my writing, also.

Slavetodiy.com is a participant in the Amazon Services LLC Associates Program, an affiliate advertising program designed to provide a means for sites to earn advertising fees by advertising and linking to amazon.com.  Amazon offers a small commission on products sold through their affiliate links.  Each of your purchases via our Amazon affiliation links supports our cause at no additional cost to you.

If a blogger links to an Amazon product (with a special code for affiliates embedded in the link), and a reader places an item in their “shopping cart” through that link within 24 hours of clicking the link, the blogger gets a small percentage of the sale.  Amazon links are not “pay per click.”  If you click on the product link and stay around Amazon and purchase something else, however, I will get a commission on that sale.

Slavetodiy.com is also a VigLink affiliate advertiser which works similarly.

Giant Family Canvas Gallery Wall On A Budget

One of the things I get the most compliments on at our house is my giant, black and white canvas gallery wall. It is always a work in progress (sort of like arranging built ins) because I add to it on a regular basis. In fact, this wall has been in work for upwards of eight years!

We have five kids, and three of them are now grown: in college or graduated from college and newly in the work force. That definitely makes me feel old sometimes, but it helps me tremendously to have photos of the people that I love (AND MISS) in a place where I get to look at them on my way up and down the stairs, every day!

The problem with canvasses, obviously, is the cost. Regularly priced large, custom canvasses easily run into the hundreds of dollars. I can’t afford that, but I LOVE the look.

*This post may contain affiliate links. Please see full disclosure at the end of the post.

I can tell you that I’ve paid about $20 for each of my canvas prints and check out the awesome results:

Giant Family Canvas Gallery Wall On A Budget


Giant Family Canvas Gallery Wall On A Budget


Giant Family Canvas Gallery Wall On A Budget


Giant Family Canvas Gallery Wall On A Budget


Giant Family Canvas Gallery Wall On A Budget


Giant Family Canvas Gallery Wall On A Budget


The trick is PATIENCE (and having downright adorable children): getting on the email list and waiting for sales. Easy Canvas Prints is awesome because it seems like they are “having huge sales” all the time. I’m not sure why it’s not just the price, but whatever. They also generally have free shipping if you purchase a few so I’ve done them in sets.

The other thing is… Once I had a huge order (a Christmas order for grandparents and parents) and one of the canvasses was damaged and one of the others looked as though it was smeared. I emailed them and they reprinted the ENTIRE ORDER free and set it right back out the next day. Their customer service is top notch and I’m always surprised how quickly they print and ship. I am a very happy and loyal customer!

I’ve also had quite a few color prints done and the detail and colors are spectacular.

Giant Family Canvas Gallery Wall On A Budget


I have various color prints all over the house, too, but I’ll admit, the black and white wall is my favorite.

Tip: If you have them where you REALLY want them, use 3M double sided mounting tape on each corner so they won’t wiggle around when people walk by. But, that stuff stays, so make sure it’s really where you want them before you commit!

I use Easy Canvas Prints to print canvasses for grandparents and parents, because there’s nothing they’d rather receive then great photos of the people they love!

Do you like color or black and white canvasses better? Let me know in the comments below! Cheers!


*Legal stuff:

I am honest about my experiences with different products and write because I enjoy it.  I do however, have the opportunity to earn money for my writing, also.

Slavetodiy.com is a participant in the Amazon Services LLC Associates Program, an affiliate advertising program designed to provide a means for sites to earn advertising fees by advertising and linking to amazon.com.  Amazon offers a small commission on products sold through their affiliate links.  Each of your purchases via our Amazon affiliation links supports our cause at no additional cost to you.

If a blogger links to an Amazon product (with a special code for affiliates embedded in the link), and a reader places an item in their “shopping cart” through that link within 24 hours of clicking the link, the blogger gets a small percentage of the sale.  Amazon links are not “pay per click.”  If you click on the product link and stay around Amazon and purchase something else, however, I will get a commission on that sale.

This site also contains affiliate links through //Commerce/Sovrn. //Commerce or our Publishers may be compensated when you click through links on our site.

Mashup Monday 8: 13 Inspired Southern Vermont Pools That Will Have You Planning Your Pool Now

Even though we are currently living in balmy, soup-pot-climate North Carolina, my extended family hails from Southern Vermont. Sometimes, missing home, I get on Zillow and start searching properties up North. Although I’m quickly dissuaded when I visit during sub-zero winters, there’s no denying the charm of New England, and specifically, Vermont homes. One of the features I noticed during a late night search a few weeks ago was the varsity level pool game going on in Southern Vermont.

*This post may contain affiliate links. Please see full disclosure at the end of the post.

I don’t know whether it’s the design that incorporates the natural landscape, the extensive stonework (stone diving boards???), or the breathtaking views, but the poolscapes I saw were amazing.  What do you think?

*All photos are listing photos from Zillow and belong to the respective listing agents.


Mashup Monday: Inspired Southern Vermont Pools That Will Have You Planning Your Pool Now
Mashup Monday: Inspired Southern Vermont Pools That Will Have You Dreaming, Designing, and Planning Your Pool Now


Mashup Monday: Inspired Southern Vermont Pools That Will Have You Planning Your Pool Now
Mashup Monday: Inspired Southern Vermont Pools That Will Have You Dreaming, Designing, and Planning Your Pool Now


Mashup Monday: Inspired Southern Vermont Pools That Will Have You Planning Your Pool Now
Mashup Monday: Inspired Southern Vermont Pools That Will Have You Dreaming, Designing, and Planning Your Pool Now


Mashup Monday: Inspired Southern Vermont Pools That Will Have You Planning Your Pool Now
Mashup Monday: Inspired Southern Vermont Pools That Will Have You Dreaming, Designing, and Planning Your Pool Now


Mashup Monday: Inspired Southern Vermont Pools That Will Have You Planning Your Pool Now
Mashup Monday: Inspired Southern Vermont Pools That Will Have You Dreaming, Designing, and Planning Your Pool Now


Mashup Monday: Inspired Southern Vermont Pools That Will Have You Planning Your Pool Now
Mashup Monday: Inspired Southern Vermont Pools That Will Have You Dreaming, Designing, and Planning Your Pool Now


Mashup Monday: Inspired Southern Vermont Pools That Will Have You Planning Your Pool Now
Mashup Monday: Inspired Southern Vermont Pools That Will Have You Dreaming, Designing, and Planning Your Pool Now


Mashup Monday: Inspired Southern Vermont Pools That Will Have You Planning Your Pool Now
Mashup Monday: Inspired Southern Vermont Pools That Will Have You Dreaming, Designing, and Planning Your Pool Now


Mashup Monday: Inspired Southern Vermont Pools That Will Have You Planning Your Pool Now
Mashup Monday: Inspired Southern Vermont Pools That Will Have You Dreaming, Designing, and Planning Your Pool Now


Mashup Monday: Inspired Southern Vermont Pools That Will Have You Planning Your Pool Now
Mashup Monday: Inspired Southern Vermont Pools That Will Have You Dreaming, Designing, and Planning Your Pool Now


Mashup Monday: Inspired Southern Vermont Pools That Will Have You Planning Your Pool Now
Mashup Monday: Inspired Southern Vermont Pools That Will Have You Dreaming, Designing, and Planning Your Pool Now


Mashup Monday: Inspired Southern Vermont Pools That Will Have You Planning Your Pool Now
Mashup Monday: Inspired Southern Vermont Pools That Will Have You Dreaming, Designing, and Planning Your Pool Now


Mashup Monday 8: 13 Inspired Southern Vermont Pools That Will Have You Planning Your Pool Now
Mashup Monday: Inspired Southern Vermont Pools That Will Have You Dreaming, Designing, and Planning Your Pool Now


Mashup Monday 8: 13 Inspired Southern Vermont Pools That Will Have You Planning Your Pool Now
Mashup Monday: Inspired Southern Vermont Pools That Will Have You Dreaming, Designing, and Planning Your Pool Now


Mashup Monday 8: 13 Inspired Southern Vermont Pools That Will Have You Planning Your Pool Now
Mashup Monday: Inspired Southern Vermont Pools That Will Have You Dreaming, Designing, and Planning Your Pool Now


Mashup Monday 8: 13 Inspired Southern Vermont Pools That Will Have You Planning Your Pool Now
Mashup Monday: Inspired Southern Vermont Pools That Will Have You Dreaming, Designing, and Planning Your Pool Now


And although it would be a chilly dip, I think we can include a natural swimming hole in this mashup!

Mashup Monday: Inspired Southern Vermont Pools That Will Have You Planning Your Pool Now
Mashup Monday: Inspired Southern Vermont Pools That Will Have You Dreaming, Designing, and Planning Your Pool Now


Thanks for stopping by and check out more of our design mashups, cool projects, and DIY transformations on our blog!

Cheers!


*Legal stuff:

I am honest about my experiences with different products and write because I enjoy it.  I do however, have the opportunity to earn money for my writing, also.

Slavetodiy.com is a participant in the Amazon Services LLC Associates Program, an affiliate advertising program designed to provide a means for sites to earn advertising fees by advertising and linking to amazon.com.  Amazon offers a small commission on products sold through their affiliate links.  Each of your purchases via our Amazon affiliation links supports our cause at no additional cost to you.

If a blogger links to an Amazon product (with a special code for affiliates embedded in the link), and a reader places an item in their “shopping cart” through that link within 24 hours of clicking the link, the blogger gets a small percentage of the sale.  Amazon links are not “pay per click.”  If you click on the product link and stay around Amazon and purchase something else, however, I will get a commission on that sale.

Slavetodiy.com is also a VigLink affiliate advertiser which works similarly.

Mastering The Scene: Fall Decorating on a Dime

It’s that time of year again! The rest of you up North are probably enjoying cooler temperatures and those of us down South are decorating for Fall and still sweating our butts off. Anyway, by putting out my Autumn inspired decor it gives me hope that we will soon have cooler temperatures. Check out this awesome, easy entry table set up!

*This post may contain affiliate links. Please see full disclosure at the end of the post.

Here is the breakdown on the big pieces:

The demijohn is from Pottery Barn, but you can get an Imax Recycled Glass Demijohn quite a bit cheaper (but watch Pottery Barn for sales and free shipping)! The glass pumpkin cloches are also from Pottery Barn (I picked them up around March last year in their clearance section and they were a steal!). The lantern is also from Pottery Barn that I bought about ten years ago.

That beautiful black entry mirror you can get on Amazon now and it is REALLY a great find.  I love it!

The faux olive branchesfaux eucalyptus stems, and white pillar candles are all from Amazon. The pumpkins I got on sale last year at Michaels half price, and they’re always a steal at half off!


Fall Entry Table Decorating
Fall Entry Table Decorating on a Dime, from Pottery Barn, Michaels, and Amazon!


The other item you’ll see here is the linen tablerunner that I recently picked up, which gives it the right subdued hue and backdrop for a whitewashed pumpkin arrangement!


Fall Entry Table
Fall Entry Table Decorating on a Dime, from Pottery Barn, Michaels, and Amazon!


Then there’s the EVER versatile Faux Eucalyptus Arrangement that I use in pretty much EVERY season because it just works! It doesn’t get much easier than flattening out the leaves and arranging them a bit in a recycled florist vase. Simple. Easy. Classic.

Faux Eucalyptus Arrangement
Faux Eucalyptus Arrangement: Fall Decorating

What are you doing for Fall Decorating? Where do you stand on the neutral pumpkin debate? Let us know in the comments below!

Thanks for stopping by and check out more DIY and great projects on our Blog!  Cheers!


*Legal stuff:

I am honest about my experiences with different products and write because I enjoy it.  I do however, have the opportunity to earn money for my writing, also.

Slavetodiy.com is a participant in the Amazon Services LLC Associates Program, an affiliate advertising program designed to provide a means for sites to earn advertising fees by advertising and linking to amazon.com.  Amazon offers a small commission on products sold through their affiliate links.  Each of your purchases via our Amazon affiliation links supports our cause at no additional cost to you.

If a blogger links to an Amazon product (with a special code for affiliates embedded in the link), and a reader places an item in their “shopping cart” through that link within 24 hours of clicking the link, the blogger gets a small percentage of the sale.  Amazon links are not “pay per click.”  If you click on the product link and stay around Amazon and purchase something else, however, I will get a commission on that sale.

Slavetodiy.com is also a VigLink affiliate advertiser which works similarly.

Tips and Tricks for Designing, Planning, and Installing the Pool of Your Dreams

A few years ago we had a pool installed and had NO idea what we were doing.  You don’t know what you don’t know, right?  Never having had a pool before (other than the above ground one the previous owners put up and we were tearing down), I really had no idea. We did an okay job, but if I had it to over again there are a few adjustments I would make. As for the finished product, I was ultimately happy and here’s what we ended up with:

Pool Planning, Design, Tips and Considerations
Pool Planning, Design, Tips and Considerations: Our pool, after it was installed, finished, and very swimmable!

*This post may contain affiliate links. Please see full disclosure at the end of the post.


We loved the pool, so here are the basics of what we learned and some tips along the way of what to do, and of course, what NOT to do.

  1. Hardscaping: Hardscaping around the pool is your friend. The more, the better. You need more than a three foot apron.  Insist.

You know what happens when you trim your grass?  It all goes in the pool. I know you keep seeing all those super cool paver designs with the grass in between on Pinterest. Or the pool coping that runs right up to the edge of the grass. If you don’t have a landscaper and a pool guy, HARD PASS.

No matter what kind of hardscaping around the pool you do, do MORE. I know some people love the jungle, tropical look around the pool, but I don’t like it. Think: snakes and leaves in the pool. When we moved into our new place the pool was surrounded by gardens and bushes. I came face to face with a giant snake sunning itself on a branch by the pool without even realizing it. Then I asked Rainman, very nicely (and I’m sure very calmly), to get out the napalm and make the greenery go away.

Can you believe how overgrown this was??? NOT relaxing.

Pool Planning, Design, Tips and Considerations
Pool Planning, Design, Tips and Considerations: Overgrown areas around pools create habitats for snakes and the potential for more leaves and debris in the pool.

Also, think about where you live and how hot the surface will get. Concrete is okay where we are, even though it still gets VERY hot. If it’s in the budget: the best pool surface for hot climates is light travertine.  It’s beautiful and stays cooler.

Pool Planning, Design, Tips and Considerations
Pool Planning, Design, Tips and Considerations: Travertine Pavers from Poolpricer.com

When we installed our pool one side had tiered decks and a slate patio, all connecting to the pool coping. With the exception of the grass running up to the pool on the outside, it was awesome!

Pool Planning, Design, Tips and Considerations
Pool Planning, Design, Tips and Considerations: Tiered decks, patios, and pool coping

I’ve had so many questions about our awesome (and durable) deck chairs, shown above. You can buy them from Amazon with matching blue cushions.


2.  Lighting: You need at least two in the pool. Period. Pathways around the pool should also be lit in the evening for safety.

Think about night swimming (with teenagers this definitely happens). You want well lit spaces where no one can get lost in the shadows.

If you can, get more than two. Think about the shadows that each light will cast. Shelves or tanning ledges create shadows, as do depth changes. If you plan on using your pool in the evening, get more lights.

We discovered after our pool was installed that there was an additional light we could’ve installed that came with the kit. If we’d have known that, we would’ve paid extra to have it put in. We only had one light and it was in the shallow end, so there was a shadow in the deep end, and I was a nervous wreck watching for drowning kids.

Pool Planning, Design, Tips and Considerations
Pool Planning, Design, Tips and Considerations: Pool lighting from Leisurepoolusa.com


3.  Depth: That depends.

What are you planning to do in it? If you’re planning on diving you need an eight foot deep end. Some areas (like our current home) won’t accommodate deep pools because of the water table. If you only wade, you really only need a 4-6 foot pool.

I’ll admit I miss our eight foot deep end (the new pool is only six feet deep). We used to watch the kids and their friends have diving and trick competitions off of the big diving board and it really was a fun time.

The pool we installed had a graduated deep end with the ability to rope off the shallow end (which was still sizable) for younger kids. It was a handy set up for kids of different ages.

Pool Planning, Design, Tips and Considerations
Pool Planning, Design, Tips and Considerations: Diving boards should have at least an eight foot deep end


4.  Do I need a dedicated vacuum port?

YES. So, if you’re unfamiliar, hoses for vacuums either run off of their own port, or theres a port inside the clean outs (the flapper windows on the side of the pool). It’s more work for the pool contractor, so if you don’t ask, they’re not going to offer the dedicated port.

Why the dedicated port? If you don’t have a separate port for the pool you can’t vacuum the bottom of the pool and run the skimmer at the same time. That means that you either have bugs on top of the pool, or debris on the bottom. We have gotten around this by unhooking the vacuum about 45 minutes before we want to swim. It sure would be handy to be able to use both though.

What kind of vacuum? Look, you need a vacuum unless you’d like to spend HOURS a day vacuuming your pool. I’m not exaggerating. We have tried several different kinds of vacuums, but my favorite by far are the suction vacuums. Generic types are available (comparable to the Kreepy Krauly), complete with hoses, for less than a hundred bucks and I bought a Complete New Generic Suction Vacuum Set annually to replace dry rotted hoses, etc. If the vacuum is still going strong, but your hoses are cracking, you can buy replacement hoses instead of a whole new set for less.

I know there are some slick and EXPENSIVE motorized vacuums out there, but I just can’t convince myself to trust the electrical cord sitting in the water. No thanks.

Pool Planning, Design, Tips and Considerations
Pool Planning, Design, Tips and Considerations: Suction vacuum hoses and a CLEAN pool!


5.  Yes, you want the salt pool.

If you’re having a new pool installed, it’s probably about the same cost as the regular chlorine pool, anyway. Did you know that the salt pools are not actually salty (like the ocean)? The salt runs a chlorinator. The water is silky smooth and doesn’t bleach out swimsuits or turn hair green.

I don’t know if it’s true of every salt pool in every climate, but we added salt A LOT. However, the chemicals seemed easier to balance in the pool, and I had teenagers to haul salt from Lowe’s about every two weeks.

Our current pool is chlorine and I hate it. We will probably convert it before next season to salt as I’ve spent a small fortune this year trying to get the green out of my daughter’s hair, and it would probably be cheaper (not to mention more enjoyable) to have the salt pool. I’ve also found the chemical balance in the chlorine pool to be much more finicky and I spend quite a bit more on pool maintenance (with a pool half the size!).

Pool Planning, Design, Tips and Considerations
Pool Planning, Design, Tips and Considerations: Silky smooth salt pool


6.  How big does your pool need to be?

Everyone’s needs are different, but we went with the biggest size the installer had available. With four growing kids (at the time) and half the neighborhood swimming in the summer, I was psyched we got a pool that big. At 20X40 feet, with a 10X10 side bump-out, and 36,000 gallons it was a whopper and I loved it.

Your contractor can offer guidance on the size and shape of the pool that’s right for your family. Consider lots of options: depth changes, deep ends for diving or slides, tanning ledges, extra long thin pools for lap swimming, etc.

Pool Planning, Design, Tips and Considerations
Pool Planning, Design, Tips and Considerations: Enjoying a neighborhood sized pool


7.  What kind of inground pool should you install?

Well, this is sort of the million dollar question! There are three basic options for in ground pools: vinyl, fiberglass, and gunite. You should research this before you contact pool companies because if you don’t know what you want, many pool contractors “specialize” in one type (read: they have experience or make more profit off of certain types) and they will talk you into that even if it’s NOT the best kind for you.

Considerations: Size matters with respect to cost.

Gunite is the Daddy Warbucks pool. If money is not a concern, this is usually the choice because it is generally quite a bit pricier than the other options. They are awesome because they are hand poured in special concrete you can literally configure them ANY way you want to. These are more expensive than either of the other options regardless of size.

For a very small pool, it may be slightly cheaper (and MUCH faster) to install a pre-molded fiberglass pool. These are handy, stay clean, are quite durable, and are easy to repair if something happens to the finish. If your dogs go into your pool, these are a better choice as they are less likely to tear than vinyl pools.

Once you start looking at very large pools (like the one we installed) fiberglass pools get way too expensive. We went with vinyl and we loved it. Remember, you do have to budget every decade or so for a new vinyl liner as they warp, tear, fade, or just wear out over time. At about 5K a pop in our area, it’s no small thing.

Tip: If you choose a vinyl liner, SKIP THE EDGE DESIGN. They’ll ask you what design you want around the edge and what color the rest of the pool should be. Make it all the blue you choose with NO EDGE DESIGN. Trust me. It was the first time our contractor had the request, but if your liner lasts a long time, the thing that dates it and makes it look old is the stupid design around the edge. I went with a deep blue and it looked awesome. No outdated edge design, just beautiful blue all the way. For a gunite pool and a fiberglass I’d do the same thing. Any kind of decorative trim at the top ends up looking dated.

Pool Planning, Design, Tips and Considerations
Pool Planning, Design, Tips and Considerations: Blue vinyl pool with no edge design


8.  How do you find a contractor?

You can look on the internet, but I recommend asking a friend. I don’t think I’ve ever met anyone with lukewarm feelings about their pool contractor. They either loved them, or hated them. So, if you ask, you’ll find out.

Beware of companies with prices that seem to good to be true. In the town where we had our pool installed, there was a contractor who quoted us 10K less than the contractor we ultimately chose. After doing more research we saw that there were no positive reviews because they never actually finished pools. They would be in and out of a property for months and sometimes YEARS (then when they were sued for not finishing the job they would open up under a different name and go straight back to work ripping people off).

The company we chose did ONE POOL AT A TIME.  We gave them a small deposit to secure our place in line and, once they started, they were at our property every day from start to finish of the project.

They’ve continued to be available for questions and troubleshooting every time I’ve contacted them since then for the last eight years (even at our new house with a pool they didn’t install!).

For those of you in Eastern NC I highly recommend Crystal Coast Pools at (910) 330-0969. I’m not a paid affiliate, but we think they’re great!

Pool Planning, Design, Tips and Considerations
Pool Planning, Design, Tips and Considerations: Great, well designed pool by Crystal Coast Pools in Eastern NC


9.  How much does it cost a month to run a pool?

Running a pool pump seems to cost about $200 a month in Eastern North Carolina. That doesn’t include the cost of chemicals, shock, chlorine tabs, or salt. In our salt pool (36,000 gallons) we usually spent about $150 a month on chemicals during the summer and about $200 to open it, balance chemicals, and buy shock for the summer.

Buying shock and chlorine: We kept having problems with the stuff from the big box stores and the nice lady at the pool store recommended Zappit Pool Shock. It works much better and is cheaper. I buy my own shock and chlorine tabs (I purchase big buckets once a season online) but also found a local pool store that does free water samples. Then I don’t have to mess with trying to guess what I need to add and how much (they sell me the chemicals). It’s way easier.

Pool Planning, Design, Tips and Considerations
Pool Planning, Design, Tips and Considerations: Diving in a salt pool


10. Is caring for a pool a lot of work?

Yes. But, if you actually use it, it’s well worth it. If you’re not up to it, consider that even in NC where costs are relatively cheap, pool maintenance contractors charge about $75 an hour to care for your pool for you, plus the cost of chemicals, etc. If you don’t take care of it, then you have an expensive frog pond to deal with in the back yard.

11. What kind of fence do you need and pool safety equipment?

When you are interviewing pool contractors, find one that knows the local codes and will include those items as part of the installation. Many municipalities have rules on pool fences, self closing gates around the pool, door chimes leading to the pool, etc. The pool contracter should be knowledgeable and willing to complete the process for you.

In addition to the required items we like to have a pool safety ring on hand and when smaller kids are swimming we use the float ropes that mark where the shallow end transitions to the deep end. If we are having any kind of an event where we have lots of kids swimming I post responsible teenagers at two corners to act as lifeguards. It’s important to have a healthy fear of swimming pools and to create a safe environment for your family and friends.

Pool Planning, Design, Tips and Considerations
Pool Planning, Design, Tips and Considerations: Diving boards and safety lines


12. Do you need a pool cover?

We never invested in a pool cover at our old house because we didn’t have big trees and there wasn’t much debris blowing into the pool. I just assumed that the grueling process of turning green swamp water into clear blue water was a necessary part of the Spring-pool opening process (which took no less than a month, several hours a day, sweeping algae and messing with chemicals). What a pain.

Then when we got to our new house, there was a cover for the pool in the shed. With lots of big trees we thought it would be a good idea to cover it. So, we covered it the first winter, winterized the pool with chemicals, and crossed our fingers (this isn’t a fancy cover, it’s basically just a gigantic tarp held in place by water bags and a layer of water on top of the tarp). When we uncovered the pool in the spring, after siphoning off the water on top of the tarp, we peeled it back to find: crystal clear water. Now, our current cover is the ugliest pool cover I’ve ever seen (it looks a lot like a giant, black trash bag), but until we budget in a new safety cover, it’s working fine and I’d never go back to spending a month opening the pool.

Pool Planning, Design, Tips and Considerations
Pool Planning, Design, Tips and Considerations: Pool cover during our deck renovation


Ugh, it’s so ugly. I have my eye on a safety cover because I have nightmares about someone falling onto the pool cover and getting trapped. Hopefully we’ll get that into the budget soon.

Pool Planning, Design, Tips and Considerations
Pool Planning, Design, Tips and Considerations: The old pool waiting to turn green in the spring


13. Do you need to bury your wastewater/backwash line?

For those of you who already have pools, you’re like, duh of course it needs to be buried. Well, no one offered to conveniently run a waste line out to the ditch behind our house, and every time we backwashed the pool we pissed the neighbors off. Yup. We’d turn it on and it would shoot out at the fence and eventually settle into a mud pit right by their gate. We tried using temporary attached hoses but they usually worked themselves loose and then created a bigger mess than before (while also soaking us in the process). I had to time backwashing the pool around their mowing schedule to keep the peace in the neighborhood.

So, bury your backwash line.

14. Should you add extra features like cooling systems (for very hot climates), heaters (to extend pool season), or integrated hot tubs?

Look, I know they cost more money, but if you’re already laying out the money to install a pool, you should get what you want. If you’re a lap swimmer and can extend your swimming season a few months a year, then get an insulating cover and a heater. If you live in the deep south, get a cooling system or you won’t want to be in your hot tub of a pool in August. The biggest thing to remember with all of this is that it’s WAY, WAY cheaper to do during the initial installation than to add it after the fact!


POOL TIME!!!

So, here’s the fun part! This is our pool installation process in pictures (and I’m stressed just looking at it).

Most pool contractors will require a current survey. We blew up the survey and made copies so we could draw the shape and size of the pool on the survey. Then we measured the size we wanted and spray painted the lines on the grass to see what it really looked like in the yard. The kids fake-swam across the pool and decided it was big enough.

You’ll need to call the dig people and make sure you aren’t running into any problems where you want to install it (those of you that have septic systems- do you know where your tank and drainage field are?- plan accordingly!).

Pool Planning, Design, Tips and Considerations
Pool Planning, Design, Tips and Considerations: Digging the pool


After the pool contractor dug out all that dirt, me and Rainman built a retaining wall at the back of the property so we could use some of the dirt to level the yard (that previously had a steep angle of bank). Of course, we did this to save money, and it was some of the most back-breaking work we’ve ever undertaken.

Pool Planning, Design, Tips and Considerations
Pool Planning, Design, Tips and Considerations: Installing the new retaining wall


The retaining wall and dirt leveling took a while, and the contractor didn’t need to remove too much as we offered the excess dirt for fill to neighbors. Soon, the walls were framed with the metal band, plumbing and electricity installed, the floors smoothed with the concrete mix, the vinyl liner installed, and WATER!!!

Tip: If you call the local fire department, they will sometimes fill the pool cheaper than off of garden hoses (OOPS, our bill was $500 that month).

Pool Planning, Design, Tips and Considerations
Pool Planning, Design, Tips and Considerations: Filling the new pool


Once the dirt was all leveled out, and the pool filled, the concrete coping was poured around the pool.

Pool Planning, Design, Tips and Considerations
Pool Planning, Design, Tips and Considerations: Concrete coping installation


After the pool was finished, we added an eight foot privacy fence on top of the retaining wall for a secluded paradise in the back yard.

Pool Planning, Design, Tips and Considerations
Pool Planning, Design, Tips and Considerations: Adding a privacy fence


And finally, a finished pool the whole family can enjoy (complete with extended decks and hardscaping)!

Pool Planning, Design, Tips and Considerations
Pool Planning, Design, Tips and Considerations: A pool the whole family can enjoy!

Thanks for coming along and sharing our DIY journey!

Do you have things you wished you’d known before you installed a pool? Please share in the comments below!

Check out more of our great DIY, decor, and inspiration posts on our Blog.  Cheers!


*Legal stuff:

I am honest about my experiences with different products and write because I enjoy it.  I do however, have the opportunity to earn money for my writing, also.

Slavetodiy.com is a participant in the Amazon Services LLC Associates Program, an affiliate advertising program designed to provide a means for sites to earn advertising fees by advertising and linking to amazon.com.  Amazon offers a small commission on products sold through their affiliate links.  Each of your purchases via our Amazon affiliation links supports our cause at no additional cost to you.

If a blogger links to an Amazon product (with a special code for affiliates embedded in the link), and a reader places an item in their “shopping cart” through that link within 24 hours of clicking the link, the blogger gets a small percentage of the sale.  Amazon links are not “pay per click.”  If you click on the product link and stay around Amazon and purchase something else, however, I will get a commission on that sale.

Slavetodiy.com is also a VigLink affiliate advertiser which works similarly.

House Porn: Shelter Island Estate- A Private Island Mansion on Flathead Lake in Montana

I fell into a deep state of depression when I saw that this place sold in December of 2018. My dream of winning the lottery and buying my dream home were put off for the foreseeable future. I still want to share it with you, because it is truly unbelievable. I mean, it’s on it’s own island, as in only accessible by boat, and it’s about as remote as it gets. Yes, I’m in love.

*This post may contain affiliate links. Please see full disclosure at the end of the post.

First the stats: built by commercial real estate mogul Donald Abbey, this monster is 32000 sq ft and sits on 24 private acres. It neighbors Glacier National Park, so the privacy and solitude is unprecedented. The lake is one of the three cleanest lakes in the world. The main house has 5 bedrooms and 8 baths is 24000 sq ft and 10000 square feet of outdoor entertaining spaces, some heated. The entire structure sits on a granite foundation.

He originally listed it for $78 million but it was reduced over the years to just under $14 million.

The main house has a home gym overlooking the lake, an unbelievable wine room, is bathed in hand carved mahogany, natural stone, and, Dude, it has an indoor gun range. A big one.

There is a utility building and an 1,800 square foot workshop on the property that is styled the same as the main home and guest house. The total building space on the estate is more than 44000 square feet, with space remaining on the island for three more compounds.

Photos are from privateislandsonline.com.  Check it out!

Views of the house and island:

House Porn: Shelter Island-A Private Island Mansion on Flathead Lake in Montana


House Porn: Shelter Island-A Private Island Mansion on Flathead Lake in Montana
House Porn: Shelter Island-A Private Island Mansion on Flathead Lake in Montana, Dock Space at Main House and Private Heated Boat Garage


House Porn: Shelter Island-A Private Island Mansion on Flathead Lake in Montana
House Porn: Shelter Island-A Private Island Mansion on Flathead Lake in Montana, Rail System Leading to Heated Boat Stall on Ground Floor of Main House


House Porn: Shelter Island-A Private Island Mansion on Flathead Lake in Montana
House Porn: Shelter Island-A Private Island Mansion on Flathead Lake in Montana, View From the Lake


House Porn: Shelter Island-A Private Island Mansion on Flathead Lake in Montana
House Porn: Shelter Island-A Private Island Mansion on Flathead Lake in Montana, Aerial View of the Main House


House Porn: Shelter Island-A Private Island Mansion on Flathead Lake in Montana
House Porn: Shelter Island-A Private Island Mansion on Flathead Lake in Montana, View from the Island Side


House Porn: Shelter Island-A Private Island Mansion on Flathead Lake in Montana
House Porn: Shelter Island-A Private Island Mansion on Flathead Lake in Montana, Aerial View of the Island


The guest house/boat house has two additional bedrooms and four bathrooms and houses another double boat garage. Before I skim over that little fact, let me tell you… There is a rail system that takes the boat from the lake directly into the boat house with a garage door that drops guests INSIDE the house. Seriously? Coolest thing ever. The guest house is 5289 sq ft with nice amenities like two granite fireplaces and a steam room.

House Porn: Shelter Island-A Private Island Mansion on Flathead Lake in Montana
House Porn: Shelter Island-A Private Island Mansion on Flathead Lake in Montana, Guest House Dock Space and Boat Rail Systems


House Porn: Shelter Island-A Private Island Mansion on Flathead Lake in Montana
House Porn: Shelter Island-A Private Island Mansion on Flathead Lake in Montana, Guest House Docks and Rail Systems


Main House Exterior Spaces:

House Porn: Shelter Island-A Private Island Mansion on Flathead Lake in Montana
House Porn: Shelter Island-A Private Island Mansion on Flathead Lake in Montana, 10000 Square Feet of Outdoor Living Space at the Main House


House Porn: Shelter Island-A Private Island Mansion on Flathead Lake in Montana
House Porn: Shelter Island-A Private Island Mansion on Flathead Lake in Montana, Outdoor Entertaining Space at Main House


The copper conservatory:

House Porn: Shelter Island-A Private Island Mansion on Flathead Lake in Montana
House Porn: Shelter Island-A Private Island Mansion on Flathead Lake in Montana, The Copper Conservatory Overlooking Outdoor Living Spaces and the Lake


House Porn: Shelter Island-A Private Island Mansion on Flathead Lake in Montana
House Porn: Shelter Island-A Private Island Mansion on Flathead Lake in Montana, Copper Conservatory


House Porn: Shelter Island-A Private Island Mansion on Flathead Lake in Montana


House Porn: Shelter Island-A Private Island Mansion on Flathead Lake in Montana
House Porn: Shelter Island-A Private Island Mansion on Flathead Lake in Montana, View of the House Overlooking the Lake


Living Spaces:

House Porn: Shelter Island-A Private Island Mansion on Flathead Lake in Montana
House Porn: Shelter Island-A Private Island Mansion on Flathead Lake in Montana, Soaring Ceilings in the Main Hall, Wrapped in Mahogany, with Custom Railings and a Limestone Fireplace


House Porn: Shelter Island-A Private Island Mansion on Flathead Lake in Montana
House Porn: Shelter Island-A Private Island Mansion on Flathead Lake in Montana, Main Hall and Living Space


House Porn: Shelter Island Estate-A Private Island Mansion on Flathead Lake in Montana
House Porn: Shelter Island Estate-A Private Island Mansion on Flathead Lake in Montana, Custom Iron Railings Detail Leading to Main Hall


House Porn: Shelter Island Estate-A Private Island Mansion on Flathead Lake in Montana
House Porn: Shelter Island Estate-A Private Island Mansion on Flathead Lake in Montana, View of the Main Hall From Above


House Porn: Shelter Island-A Private Island Mansion on Flathead Lake in Montana
House Porn: Shelter Island-A Private Island Mansion on Flathead Lake in Montana, Inside the Copper Conservatory


House Porn: Shelter Island-A Private Island Mansion on Flathead Lake in Montana
House Porn: Shelter Island-A Private Island Mansion on Flathead Lake in Montana, Inside the Copper Conservatory


House Porn: Shelter Island-A Private Island Mansion on Flathead Lake in Montana
House Porn: Shelter Island-A Private Island Mansion on Flathead Lake in Montana, Ceiling of the Copper Conservatory


The Kitchen:

House Porn: Shelter Island Estate-A Private Island Mansion on Flathead Lake in Montana
House Porn: Shelter Island Estate-A Private Island Mansion on Flathead Lake in Montana, Double Islands, A 60inch Professional Viking Range, Double Ovens, and Mahogany Cabinetry


House Porn: Shelter Island-A Private Island Mansion on Flathead Lake in Montana
House Porn: Shelter Island-A Private Island Mansion on Flathead Lake in Montana, Breakfast Nook With a Lake View


Office (Part of Master Suite):

House Porn: Shelter Island-A Private Island Mansion on Flathead Lake in Montana
House Porn: Shelter Island-A Private Island Mansion on Flathead Lake in Montana, Limestone Fireplace and Mahogany In Office


Formal Dining Room:

House Porn: Shelter Island-A Private Island Mansion on Flathead Lake in Montana
House Porn: Shelter Island-A Private Island Mansion on Flathead Lake in Montana, Formal Dining Room


House Porn: Shelter Island-A Private Island Mansion on Flathead Lake in Montana
House Porn: Shelter Island-A Private Island Mansion on Flathead Lake in Montana, Dining Area in Guesthouse


House Porn: Shelter Island-A Private Island Mansion on Flathead Lake in Montana
House Porn: Shelter Island-A Private Island Mansion on Flathead Lake in Montana, View From the Formal Dining Room Overlooking the Lake


The Wine Room:

House Porn: Shelter Island-A Private Island Mansion on Flathead Lake in Montana
House Porn: Shelter Island-A Private Island Mansion on Flathead Lake in Montana, Wine Room on the Ground Floor with Natural Granite on Floor, Part of the Home’s Foundation


Cool Features:

House Porn: Shelter Island-A Private Island Mansion on Flathead Lake in Montana
House Porn: Shelter Island-A Private Island Mansion on Flathead Lake in Montana, Commercial-Grade Elevator Serves All Floors of the Main House


House Porn: Shelter Island-A Private Island Mansion on Flathead Lake in Montana
House Porn: Shelter Island-A Private Island Mansion on Flathead Lake in Montana, 1,200 foot utility building with 100 kW diesel generator and electrical panels.


House Porn: Shelter Island Estate-A Private Island Mansion on Flathead Lake in Montana
House Porn: Shelter Island Estate-A Private Island Mansion on Flathead Lake in Montana, Utility Room With Shower and Commercial Stainless Sink


Main House Boat Garage:

House Porn: Shelter Island-A Private Island Mansion on Flathead Lake in Montana
House Porn: Shelter Island-A Private Island Mansion on Flathead Lake in Montana, Ground Floor, Main House, Heated Boat Garage


The Master Suite:

House Porn: Shelter Island Estate-A Private Island Mansion on Flathead Lake in Montana
House Porn: Shelter Island Estate-A Private Island Mansion on Flathead Lake in Montana. Master bedroom with Mahogany Bed and Fireplace, Wraparound Porches and Porticos


House Porn: Shelter Island Estate-A Private Island Mansion on Flathead Lake in Montana
House Porn: Shelter Island Estate-A Private Island Mansion on Flathead Lake in Montana, Master Bedroom With a View and Outdoor Living Space


House Porn: Shelter Island-A Private Island Mansion on Flathead Lake in Montana
House Porn: Shelter Island-A Private Island Mansion on Flathead Lake in Montana, Mahogany and Carrera Marble Master Closet with Refrigerator


House Porn: Shelter Island-A Private Island Mansion on Flathead Lake in Montana
House Porn: Shelter Island-A Private Island Mansion on Flathead Lake in Montana, Mahogany and Carrera Marble Master Bath With Copper Tub


House Porn: Shelter Island Estate-A Private Island Mansion on Flathead Lake in Montana
House Porn: Shelter Island Estate-A Private Island Mansion on Flathead Lake in Montana, Master Bath with Steam Room and Shower


Additional Guest Spaces:

House Porn: Shelter Island Estate-A Private Island Mansion on Flathead Lake in Montana
House Porn: Shelter Island Estate-A Private Island Mansion on Flathead Lake in Montana, Guest Bedroom with Mahogany Furnishings


House Porn: Shelter Island Estate-A Private Island Mansion on Flathead Lake in Montana
House Porn: Shelter Island Estate-A Private Island Mansion on Flathead Lake in Montana, Guest Bedroom With Stone Fireplace


House Porn: Shelter Island Estate-A Private Island Mansion on Flathead Lake in Montana
House Porn: Shelter Island Estate-A Private Island Mansion on Flathead Lake in Montana, Guest Bath with Copper Tub and Carrera Marble


House Porn: Shelter Island Estate-A Private Island Mansion on Flathead Lake in Montana
House Porn: Shelter Island Estate-A Private Island Mansion on Flathead Lake in Montana, Guest Bath With A View From the Clawfoot Tub


House Porn: Shelter Island Estate-A Private Island Mansion on Flathead Lake in Montana
House Porn: Shelter Island Estate-A Private Island Mansion on Flathead Lake in Montana, Guest Bath


The Devil is in the details, and they’re AMAZING:

House Porn: Shelter Island Estate-A Private Island Mansion on Flathead Lake in Montana
House Porn: Shelter Island Estate-A Private Island Mansion on Flathead Lake in Montana, Mahogany and Granite Details on Fireplace


House Porn: Shelter Island Estate-A Private Island Mansion on Flathead Lake in Montana
House Porn: Shelter Island Estate-A Private Island Mansion on Flathead Lake in Montana, Domed Ceiling and Hidden Lighting Details


House Porn: Shelter Island Estate-A Private Island Mansion on Flathead Lake in Montana
House Porn: Shelter Island Estate-A Private Island Mansion on Flathead Lake in Montana, Coffered Mahogany Ceiling Details


House Porn: Shelter Island Estate-A Private Island Mansion on Flathead Lake in Montana
House Porn: Shelter Island Estate-A Private Island Mansion on Flathead Lake in Montana, Limestone Fireplace Details


House Porn: Shelter Island Estate-A Private Island Mansion on Flathead Lake in Montana
House Porn: Shelter Island Estate-A Private Island Mansion on Flathead Lake in Montana, Sink Fixture, Stone, and Mahogany Details


House Porn: Shelter Island Estate-A Private Island Mansion on Flathead Lake in Montana
House Porn: Shelter Island Estate-A Private Island Mansion on Flathead Lake in Montana, Carrera Marble Details


House Porn: Shelter Island Estate-A Private Island Mansion on Flathead Lake in Montana
House Porn: Shelter Island Estate-A Private Island Mansion on Flathead Lake in Montana, Architectural Molding Details in Ceiling


House Porn: Shelter Island Estate-A Private Island Mansion on Flathead Lake in Montana
House Porn: Shelter Island Estate-A Private Island Mansion on Flathead Lake in Montana, Stone Sink and Mahogany Details in Bath

Maybe one day it will be back on the market again someday… I could definitely see myself living here.  Could you?  Tell me your favorite part of the house in the comments below!

Check out more of our great content on our blog!  Cheers!


*Legal stuff:

I am honest about my experiences with different products and write because I enjoy it.  I do however, have the opportunity to earn money for my writing, also.

Slavetodiy.com is a participant in the Amazon Services LLC Associates Program, an affiliate advertising program designed to provide a means for sites to earn advertising fees by advertising and linking to amazon.com.  Amazon offers a small commission on products sold through their affiliate links.  Each of your purchases via our Amazon affiliation links supports our cause at no additional cost to you.

If a blogger links to an Amazon product (with a special code for affiliates embedded in the link), and a reader places an item in their “shopping cart” through that link within 24 hours of clicking the link, the blogger gets a small percentage of the sale.  Amazon links are not “pay per click.”  If you click on the product link and stay around Amazon and purchase something else, however, I will get a commission on that sale.

Slavetodiy.com is also a VigLink affiliate advertiser which works similarly.

House Porn: The Coolest Luxury Bunker For The Zombie Apocalypse

It’s not everyday that you find a home that appeals to your zombie-apocalypse-prepper side and your interior designer side.  If you’re fortunate enough to live in the UK you can see this place, the Martello Tower Y, in Bawdsey, Suffolk.

For 1,250,000 Euros, or about 1.4m dollars, you can own this award winning “Martello Tower,” originally styled after similar structures built to protect against a hypothetical Napoleonic invasion in the 16th century.  Built in the early 19th century, and redesigned in 2010 by architect Stuart Piercy and designer Duncan Jackson, it is a masterpiece and is a designated future historical site.  With a breathtaking ocean and marsh view, it doesn’t get much better than this.

*This post may contain affiliate links. Please see full disclosure at the end of the post.

This place is currently a holiday rental, so even if you can’t afford the whopping price tag, it’s a two hour ride by train from London, and I’m betting, a wonderful get away.

It is listed by The Modern House, London: 020-3795-5920, and all photo credits go to the listing agency.

The exterior is intriguing in an unbelievable ocean setting:


House Porn: The Coolest Luxury Bunker For The Zombie Apocalypse
House Porn: The Coolest Luxury Bunker For The Zombie Apocalypse. View of the bunker across the marsh
House Porn: The Coolest Luxury Bunker For The Zombie Apocalypse
House Porn: The Coolest Luxury Bunker For The Zombie Apocalypse. Another exterior view along the marsh.
House Porn: The Coolest Luxury Bunker For The Zombie Apocalypse
House Porn: The Coolest Luxury Bunker For The Zombie Apocalypse, A Close Up View of The Exterior
House Porn: The Coolest Luxury Bunker For The Zombie Apocalypse
House Porn: The Coolest Luxury Bunker For The Zombie Apocalypse, Exterior With Stormy Skies
House Porn: The Coolest Luxury Bunker For The Zombie Apocalypse
House Porn: The Coolest Luxury Bunker For The Zombie Apocalypse, Stormy Skies behind The Structure


If you didn’t know what you were approaching, the first clue that something magical is on its way is the entrance stairway to the incredible, weathered door.

House Porn: The Coolest Luxury Bunker For The Zombie Apocalypse
House Porn: The Coolest Luxury Bunker For The Zombie Apocalypse, Entrance
House Porn: The Coolest Luxury Bunker For The Zombie Apocalypse
House Porn: The Coolest Luxury Bunker For The Zombie Apocalypse, Front Door with Metal Banding


The exterior patios offer ocean views and fresh, sea air.

House Porn: The Coolest Luxury Bunker For The Zombie Apocalypse
House Porn: The Coolest Luxury Bunker For The Zombie Apocalypse, Patio
House Porn: The Coolest Luxury Bunker For The Zombie Apocalypse
House Porn: The Coolest Luxury Bunker For The Zombie Apocalypse, More Patio Views


The rustic brick entrance with smooth finish wood and glass doors is your first clue inside that the home will offer an array of architecturally stunning staircases, passageways, and rooms, cleverly tucked away.

House Porn: The Coolest Luxury Bunker For The Zombie Apocalypse
House Porn: The Coolest Luxury Bunker For The Zombie Apocalypse, Interior Entranceway
House Porn: The Coolest Luxury Bunker For The Zombie Apocalypse
House Porn: The Coolest Luxury Bunker For The Zombie Apocalypse, Interior Open Staircase
House Porn: The Coolest Luxury Bunker For The Zombie Apocalypse
House Porn: The Coolest Luxury Bunker For The Zombie Apocalypse, Incredible Curved Brick Hallway
House Porn: The Coolest Luxury Bunker For The Zombie Apocalypse
House Porn: The Coolest Luxury Bunker For The Zombie Apocalypse, Curved Walkway and Stairs Lined in Brick
House Porn: The Coolest Luxury Bunker For The Zombie Apocalypse
House Porn: The Coolest Luxury Bunker For The Zombie Apocalypse, Interior Hallway and Staircases in Brick
House Porn: The Coolest Luxury Bunker For The Zombie Apocalypse
House Porn: The Coolest Luxury Bunker For The Zombie Apocalypse, Central Staircase View


Multi-level living spaces offer the opportunity for both warm, family spaces and bright, open living spaces with a tremendous view.

House Porn: The Coolest Luxury Bunker For The Zombie Apocalypse
House Porn: The Coolest Luxury Bunker For The Zombie Apocalypse, Wood Burning Fireplace in Family Room
House Porn: The Coolest Luxury Bunker For The Zombie Apocalypse
House Porn: The Coolest Luxury Bunker For The Zombie Apocalypse, All-Brick Walls in the Family Room with Natural=Light Hatches to the Outside
House Porn: The Coolest Luxury Bunker For The Zombie Apocalypse
House Porn: The Coolest Luxury Bunker For The Zombie Apocalypse, View to the Other Side of the Family Room
House Porn: The Coolest Luxury Bunker For The Zombie Apocalypse
House Porn: The Coolest Luxury Bunker For The Zombie Apocalypse, More Mid-Level Family Room with Central Staircase
House Porn: The Coolest Luxury Bunker For The Zombie Apocalypse
House Porn: The Coolest Luxury Bunker For The Zombie Apocalypse, Upstairs Living Area
House Porn: The Coolest Luxury Bunker For The Zombie Apocalypse
House Porn: The Coolest Luxury Bunker For The Zombie Apocalypse, Upstairs Living Area and Staircase Entrance
House Porn: The Coolest Luxury Bunker For The Zombie Apocalypse
House Porn: The Coolest Luxury Bunker For The Zombie Apocalypse, Looking Out to the Patio From the Living Space
House Porn: The Coolest Luxury Bunker For The Zombie Apocalypse
House Porn: The Coolest Luxury Bunker For The Zombie Apocalypse, Incredible, Practical, Rustic-Modern Kitchen with Views
House Porn: The Coolest Luxury Bunker For The Zombie Apocalypse
House Porn: The Coolest Luxury Bunker For The Zombie Apocalypse, View Through the Dining Area to Kitchen
House Porn: The Coolest Luxury Bunker For The Zombie Apocalypse
House Porn: The Coolest Luxury Bunker For The Zombie Apocalypse, The Living Room
House Porn: The Coolest Luxury Bunker For The Zombie Apocalypse
House Porn: The Coolest Luxury Bunker For The Zombie Apocalypse, Another View of the Dining Area, Living Space, and Patio


The tricky part in this type of home would be making cozy bedrooms that still get good natural light.  The architect and designer decided on light portals in all of the downstairs spaces that prevent them from feeling like caves.  The bedrooms and baths are unique, comfortable, and modern.

House Porn: The Coolest Luxury Bunker For The Zombie Apocalypse
House Porn: The Coolest Luxury Bunker For The Zombie Apocalypse, Bedroom with Light Portal
House Porn: The Coolest Luxury Bunker For The Zombie Apocalypse
House Porn: The Coolest Luxury Bunker For The Zombie Apocalypse, Bedroom with Natural Light
House Porn: The Coolest Luxury Bunker For The Zombie Apocalypse
House Porn: The Coolest Luxury Bunker For The Zombie Apocalypse, Bedroom With Natural Light and Curved Brick Wall Detail
House Porn: The Coolest Luxury Bunker For The Zombie Apocalypse
House Porn: The Coolest Luxury Bunker For The Zombie Apocalypse, Cozy Nook
House Porn: The Coolest Luxury Bunker For The Zombie Apocalypse
House Porn: The Coolest Luxury Bunker For The Zombie Apocalypse, Modern Bath with Natural and Artificial Light
House Porn: The Coolest Luxury Bunker For The Zombie Apocalypse
House Porn: The Coolest Luxury Bunker For The Zombie Apocalypse, Bathroom with Wood Detail

There is something very attractive about the safety of living in a bunker, and of course, the cozy feel of the home juxtaposed with the modern coolness of the architecture.  I could definitely see myself living here.  Could you?  Tell me your favorite part of the house in the comments below!

Check out more of our great content on our blog!  Cheers!

*Legal stuff:

I am honest about my experiences with different products and write because I enjoy it.  I do however, have the opportunity to earn money for my writing, also.

Slavetodiy.com is a participant in the Amazon Services LLC Associates Program, an affiliate advertising program designed to provide a means for sites to earn advertising fees by advertising and linking to amazon.com.  Amazon offers a small commission on products sold through their affiliate links.  Each of your purchases via our Amazon affiliation links supports our cause at no additional cost to you.

If a blogger links to an Amazon product (with a special code for affiliates embedded in the link), and a reader places an item in their “shopping cart” through that link within 24 hours of clicking the link, the blogger gets a small percentage of the sale.  Amazon links are not “pay per click.”  If you click on the product link and stay around Amazon and purchase something else, however, I will get a commission on that sale.

Slavetodiy.com is also a VigLink affiliate advertiser which works similarly.

House Porn: An Artist’s Masterpiece in Alabama

I have a confession to make: I’m bored to tears with white.  There was a time when texture and color were okay, and i desperately miss those days. I recently found a place where every surface: every wall, floor, fixture, and cabinet door has interest.  Like a breath of fresh air: hand carved details, custom wall finishes, hand hewn floors… I love it all. Check out the home tour in photos below.

The listing, at 2740 Abingdon Rd, Mountain Brook, AL is 4 bedrooms, 5.5 baths, and a sprawling 4337 sq. ft.  The listing photos are the property of the Realtor, Brooke Wahl, at ARC realty and can be reached at 855-822-3469 for anyone interested in purchasing.

*This post may contain affiliate links. Please see full disclosure at the end of the post.

The exterior:

A two acre lot feels big and is beautifully manicured, perfect for outdoor entertaining and family time.  Sculptures are placed throughout the landscape, rolling hills, and stone gardens and patios.  The pool is a tasteful addition and blends with the rest of the exterior seamlessly.


Birmingham Alabama artist's home with incredible textures and finishes
Exterior stone, chimneys, and descending rooflines
Birmingham Alabama artist's home with incredible textures and finishes
Incredible lush, sloping lawn with mature trees
Birmingham Alabama artist's home with incredible textures and finishes
Curb appeal, view of the exterior
Birmingham Alabama artist's home with incredible textures and finishes
Leaded glass windows with stained glass inlays, sculptural detailed window crowns, blue stone patio, stone containers and wrought iron lanterns.
Birmingham Alabama artist's home with incredible textures and finishes
Sweeping stone patios with a firepit and custom hewn log furniture
Birmingham Alabama artist's home with incredible textures and finishes
Extensive stacked stone garden walls
Birmingham Alabama artist's home with incredible textures and finishes
View of the outdoor entertaining area with large sculptures flanking the pool
Birmingham Alabama artist's home with incredible textures and finishes
Large sculptures outside Birmingham home flanking pool
Birmingham Alabama artist's home with incredible textures and finishes
Incredible stone tiered outside patio terrace leading to incredible pool with bluestone pavers
Birmingham Alabama artist's home with incredible textures and finishes
Pool with sculptures and blue stone pavers
Birmingham Alabama artist's home with incredible textures and finishes
Beautiful pool with bluestone pavers
Birmingham Alabama artist's home with incredible textures and finishes
Outdoor volleyball court between stone walls
Birmingham Alabama artist's home with incredible textures and finishes
Entrance walk leading up to the house


Special spaces:

I felt like Alice in Wonderland exploring this place, and the details are incredible. One of my favorite places?  The art studio.

Birmingham Alabama artist's home with incredible textures and finishes
The side entrance leading to the art studio.
Birmingham Alabama artist's home with incredible textures and finishes
Side patio leading to art studio, with custom iron railings, tiered stone patio, and custom hewn log furniture
Birmingham Alabama artist's home with incredible textures and finishes
Interior art studio, light and bright with tons of space and track lighting
Birmingham Alabama artist's home with incredible textures and finishes
Interior shop and art studio


The interior:

Deep autumn hues wrap the entire interior in a warm, homey hug, yet it’s sophisticated and creative.  Extensive recessed lighting, and warm wrought iron fixtures and chandeliers, ensure that it’s still bright even with the maximalist style and textured walls, ceilings, and floors.

Birmingham Alabama artist's home with incredible textures and finishes
Front entrance with rustic wood doors and inlaid leaded glass, textured walls with a sheen to maintain cleanliness, crystal lighting, walnut floors, custom wooden railings, and stacked pews.
Birmingham Alabama artist's home with incredible textures and finishes
Custom leaded/stained glass windows, textured walls, wooden ceilings, stone floors, modern lighting, cast iron railing, and carved wooden crest
Birmingham Alabama artist's home with incredible textures and finishes
Properly scaled, massive metal hood with an aged patina over 60 inch gas stove, flanked by wooden cabinetry with hand carved doors
Birmingham Alabama artist's home with incredible textures and finishes
Two islands in a rich, multi-texture kitchen with modern and period lighting
Birmingham Alabama artist's home with incredible textures and finishes
Kitchen details: antique glass in cabinet inset with electric sconces and leaded glass grid windows and marble
Birmingham Alabama artist's home with incredible textures and finishes
Rich drapes and sculptural details around a one of a kind wooden mantel
c2505216b535fd30653e6ae2d622f3b2l-m11xd-w1020_h770_q80
Living area with real wood paneling, beams, and modern lighting
Birmingham Alabama artist's home with incredible textures and finishes
Living space with wood walls and details
Birmingham Alabama artist's home with incredible textures and finishes
Incredible arrangements, unique light fixtures, and professionally done draperies
Birmingham Alabama artist's home with incredible textures and finishes
Cozy reading nook with textured walls and wooden builtins
Birmingham Alabama artist's home with incredible textures and finishes
Living area looking through to the front hall
Birmingham Alabama artist's home with incredible textures and finishes
Study with walnut paneling, custom wood burning fireplace, textured ceilings, and soft golden lighting
Birmingham Alabama artist's home with incredible textures and finishes
Majestic dining room with properly scaled art and furnishings and grand, tall leaded windows
Birmingham Alabama artist's home with incredible textures and finishes
Large leaded grid windows surround an informal dining area, bathed in natural light
Birmingham Alabama artist's home with incredible textures and finishes
Twin beds upstairs in a guest bedroom
Birmingham Alabama artist's home with incredible textures and finishes
Master suite with crystal chandelier
Birmingham Alabama artist's home with incredible textures and finishes
Rustic wrought iron chandelier and sconces, textured walls, and wooden ceiling paneling in an alternate guest bedroom
Birmingham Alabama artist's home with incredible textures and finishes
Guest bedroom with a view, out leaded windows
Birmingham Alabama artist's home with incredible textures and finishes
Another unique large scale bedroom
c2505216b535fd30653e6ae2d622f3b2l-m33xd-w1020_h770_q80
Guest bathroom with marble and glass shower, iron sconces, textured walls, and wood plank ceiling
Birmingham Alabama artist's home with incredible textures and finishes
Marble tub surround with textured walls, built in shelves and window
Birmingham Alabama artist's home with incredible textures and finishes
Marble shower with bench
Birmingham Alabama artist's home with incredible textures and finishes
Additional bath with marble, planked ceiling, recessed lighting, textured walls, and iron sconces
Birmingham Alabama artist's home with incredible textures and finishes
Half bath with custom carved vanity, textured walls, recessed lighting, and wooden builtins
Birmingham Alabama artist's home with incredible textures and finishes
Custom, carved vanity
Birmingham Alabama artist's home with incredible textures and finishes
Half bath with stone pedestal sink, textured walls, gilded mirror, and iron sconces
Birmingham Alabama artist's home with incredible textures and finishes
Marble shower with glass door and textured walls
Birmingham Alabama artist's home with incredible textures and finishes
Guest bath with marble, glass, wood molding, textured walls, plank wood ceiling, and iron sconces
Birmingham Alabama artist's home with incredible textures and finishes
Laundry room with beautiful wood cabinetry, custom door, and marble counters
Birmingham Alabama artist's home with incredible textures and finishes
Office nook with textured ceilings, hand carved light fixture, and leaded glass window with crest inlay
Birmingham Alabama artist's home with incredible textures and finishes
Hallway with textured walls, wooden floors, wooden hand railings, leaded and stained glass windows

What do you think?  Are you ready to ditch those boring white walls for texture and layers of color?

Thanks for checking out our post!  Get more awesomeness on our blog.  Cheers!


*Legal stuff:

I am honest about my experiences with different products and write because I enjoy it.  I do however, have the opportunity to earn money for my writing, also.

Slavetodiy.com is a participant in the Amazon Services LLC Associates Program, an affiliate advertising program designed to provide a means for sites to earn advertising fees by advertising and linking to amazon.com.  Amazon offers a small commission on products sold through their affiliate links.  Each of your purchases via our Amazon affiliation links supports our cause at no additional cost to you.

If a blogger links to an Amazon product (with a special code for affiliates embedded in the link), and a reader places an item in their “shopping cart” through that link within 24 hours of clicking the link, the blogger gets a small percentage of the sale.  Amazon links are not “pay per click.”  If you click on the product link and stay around Amazon and purchase something else, however, I will get a commission on that sale.

Slavetodiy.com is also a VigLink affiliate advertiser which works similarly.