Blog
How To Stay Safe on Facebook Marketplace and Find Cool Stuff Without Being Abducted
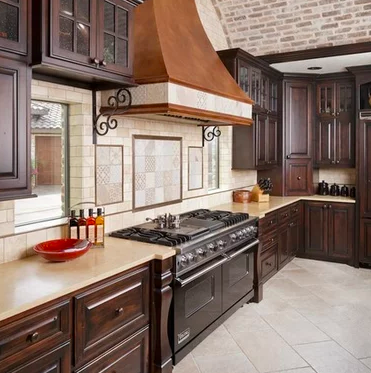
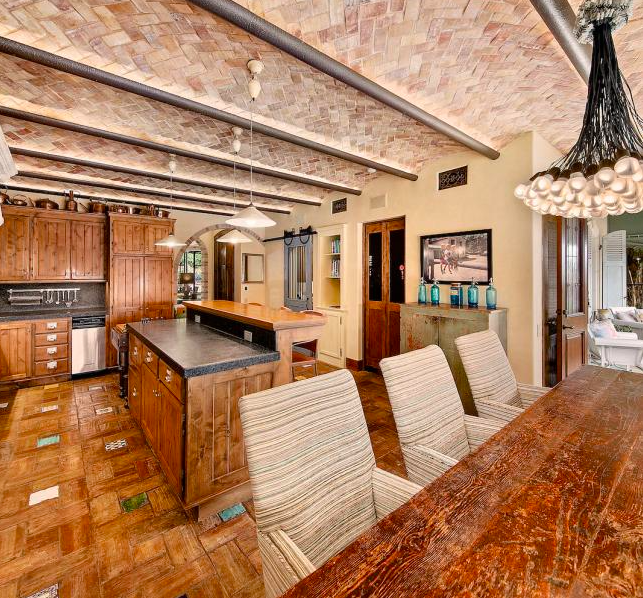
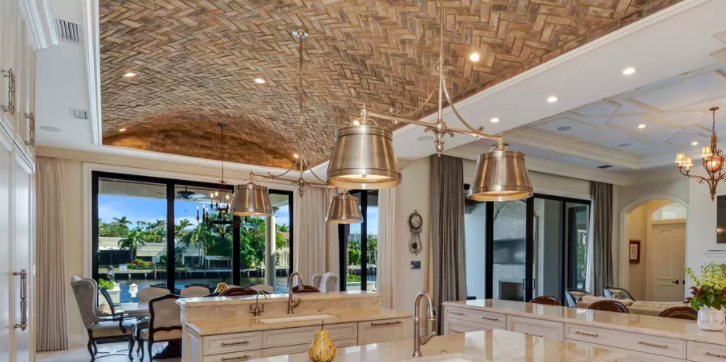
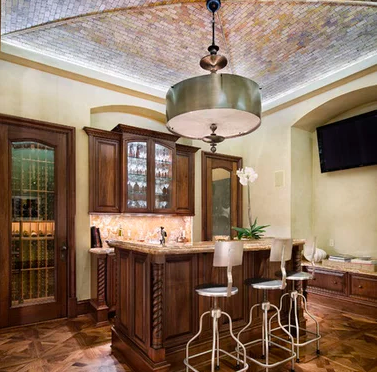
Mashup Monday: Brick Ceilings That Will Make You Swoon
“But, Lisa, ” you admonish me. “I’m not fancy enough to have brick ceilings.” And I snap back, “Rubbish!!!” (Because that’s how fancy people talk). “You, little love, can have a home that looks like a castle. Enough of your negativity!” In my BEST British accent. And I mean it.*
This post may contain affiliate links. Please see full disclosure at the end of the post.
Guess what? We’re doing this. And so can you.
You WILL NOT BELIEVE
- the impact a brick ceiling will make in the overall feel of a room (of a HOUSE).
- how much it could make you believe you’re not living in a home built in 1990.
- how much you’ll love it and want to make everyone who drives by your house, including random strangers, come in and see your brick ceiling. Well, at least post it on Instagram like the ridiculously proud parent of an honor student.
- how simple it is to do (I didn’t say EASY or NOT MESSY, I just said simple).
Make no mistake. Your body will hurt. Your hands will cramp. And at some point during your installation you will hate me. You’ll scream, “why, why, Lisa, did you lie to me?” as a clump of grout drops onto your tear-stained face.
But, the results. OH, THE CHAMPAGNE AND MASQUERADE BALL WORTHY RESULTS! You will pull the grout out of your hair, and crack your aching neck,… but you will lay down on the floor to gaze up at it in all of it’s wondrous glory, ignoring the dog licking your face and the cats laying on your belly.
Yes, you can.
Let me show you what I mean.
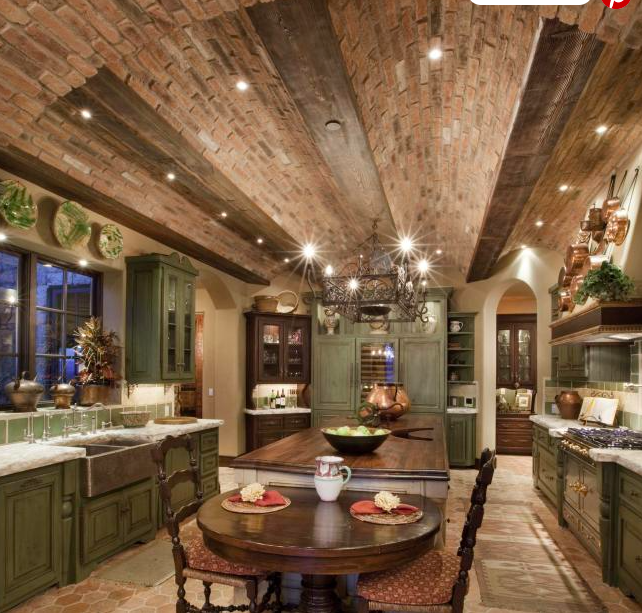
First up: I’d like to brag about our little brick ceiling in the breakfast nook in the kitchen. We had the best little angled ceiling bump out that was absolutely BEGGING to be swathed in brick. How could I deny her that? How ridiculously cute is THIS???
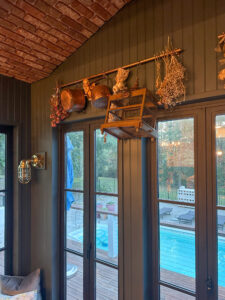
Want to try it? Check out our installation post on how simple the process really is (with tips and tricks since we’ve done this FIVE TIMES already in this house).
PSSSST: you can do it and we can give you a discount code on the brick! Go to Old Mill Brick’s Website and use our discount code CALLSIGN at checkout!
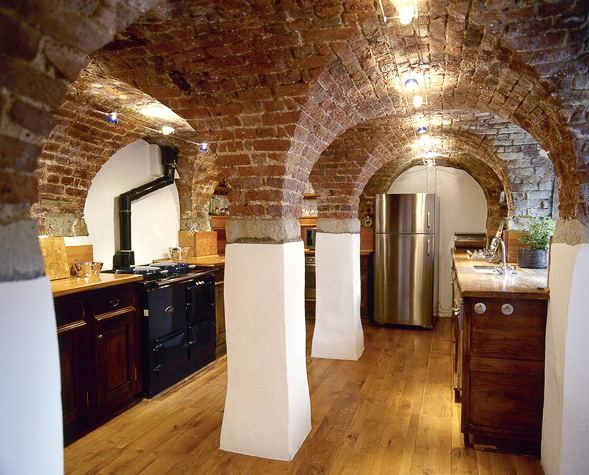
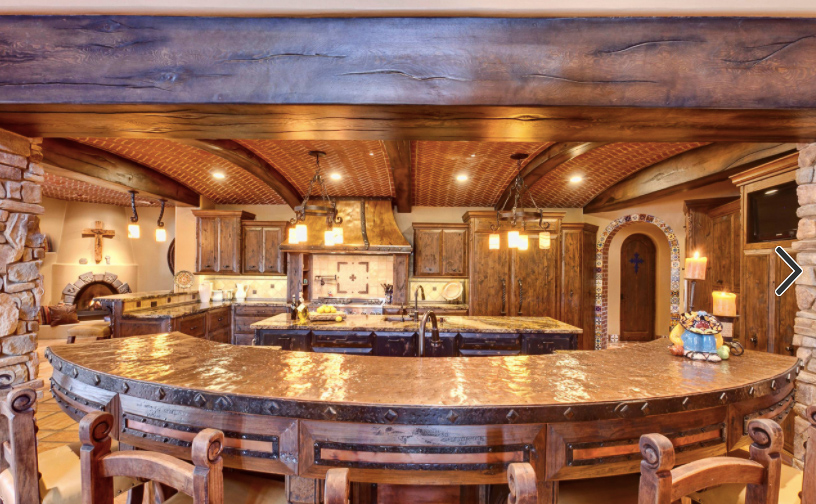
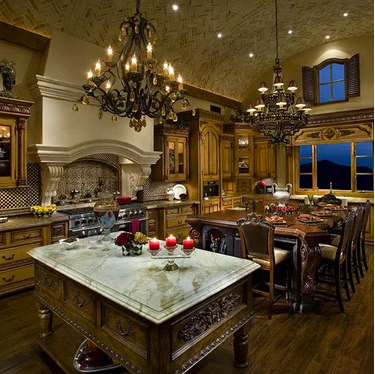
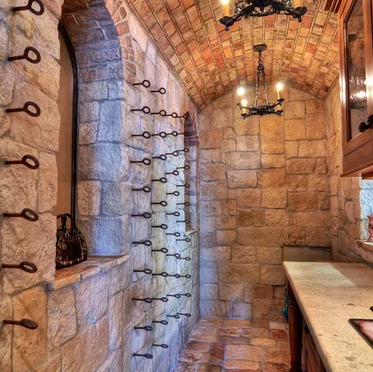
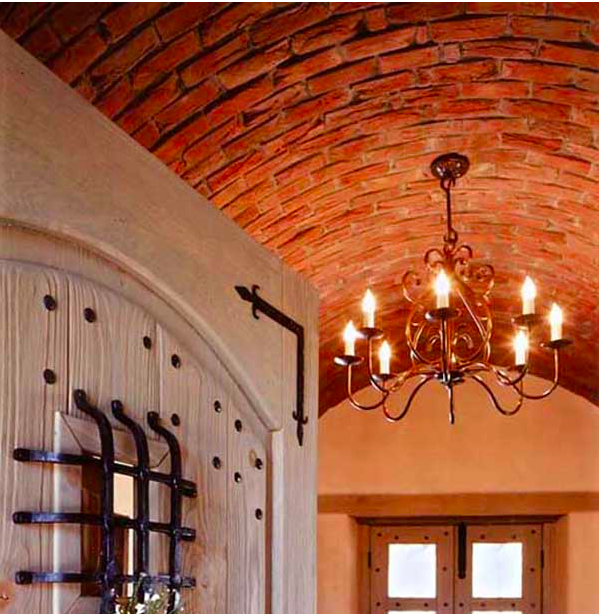
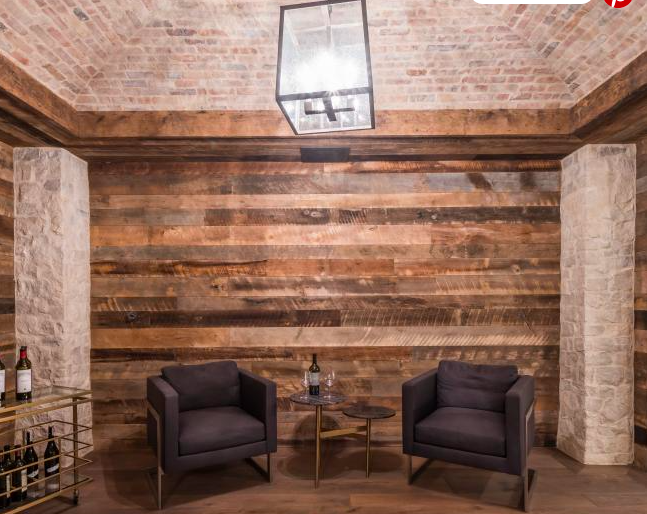
Now, here are some truly awesome pictures of brick ceilings in a whole bunch of amazing, fancy homes and buildings that I wish I could visit and kiss every single one of them…


*Legal stuff:
I am honest about my experiences with different products and write because I enjoy it. I do however, have the opportunity to earn money for my writing, also.
Slavetodiy.com is a participant in the Amazon Services LLC Associates Program, LTK, and other affiliate programs: affiliate advertising programs designed to provide a means for sites to earn advertising fees by advertising and linking to amazon.com and other sites. These programs offer a small commission on products sold through their affiliate links. Each of your purchases via our affiliation links supports our cause at no additional cost to you.
If a blogger links to a product (with a special code for affiliates embedded in the link), and a reader places an item in their “shopping cart” through that link within 24 hours of clicking the link, the blogger gets a small percentage of the sale. These links are not “pay per click.” If you click on the product link and stay around and purchase something else, however, I will get a commission on that sale.
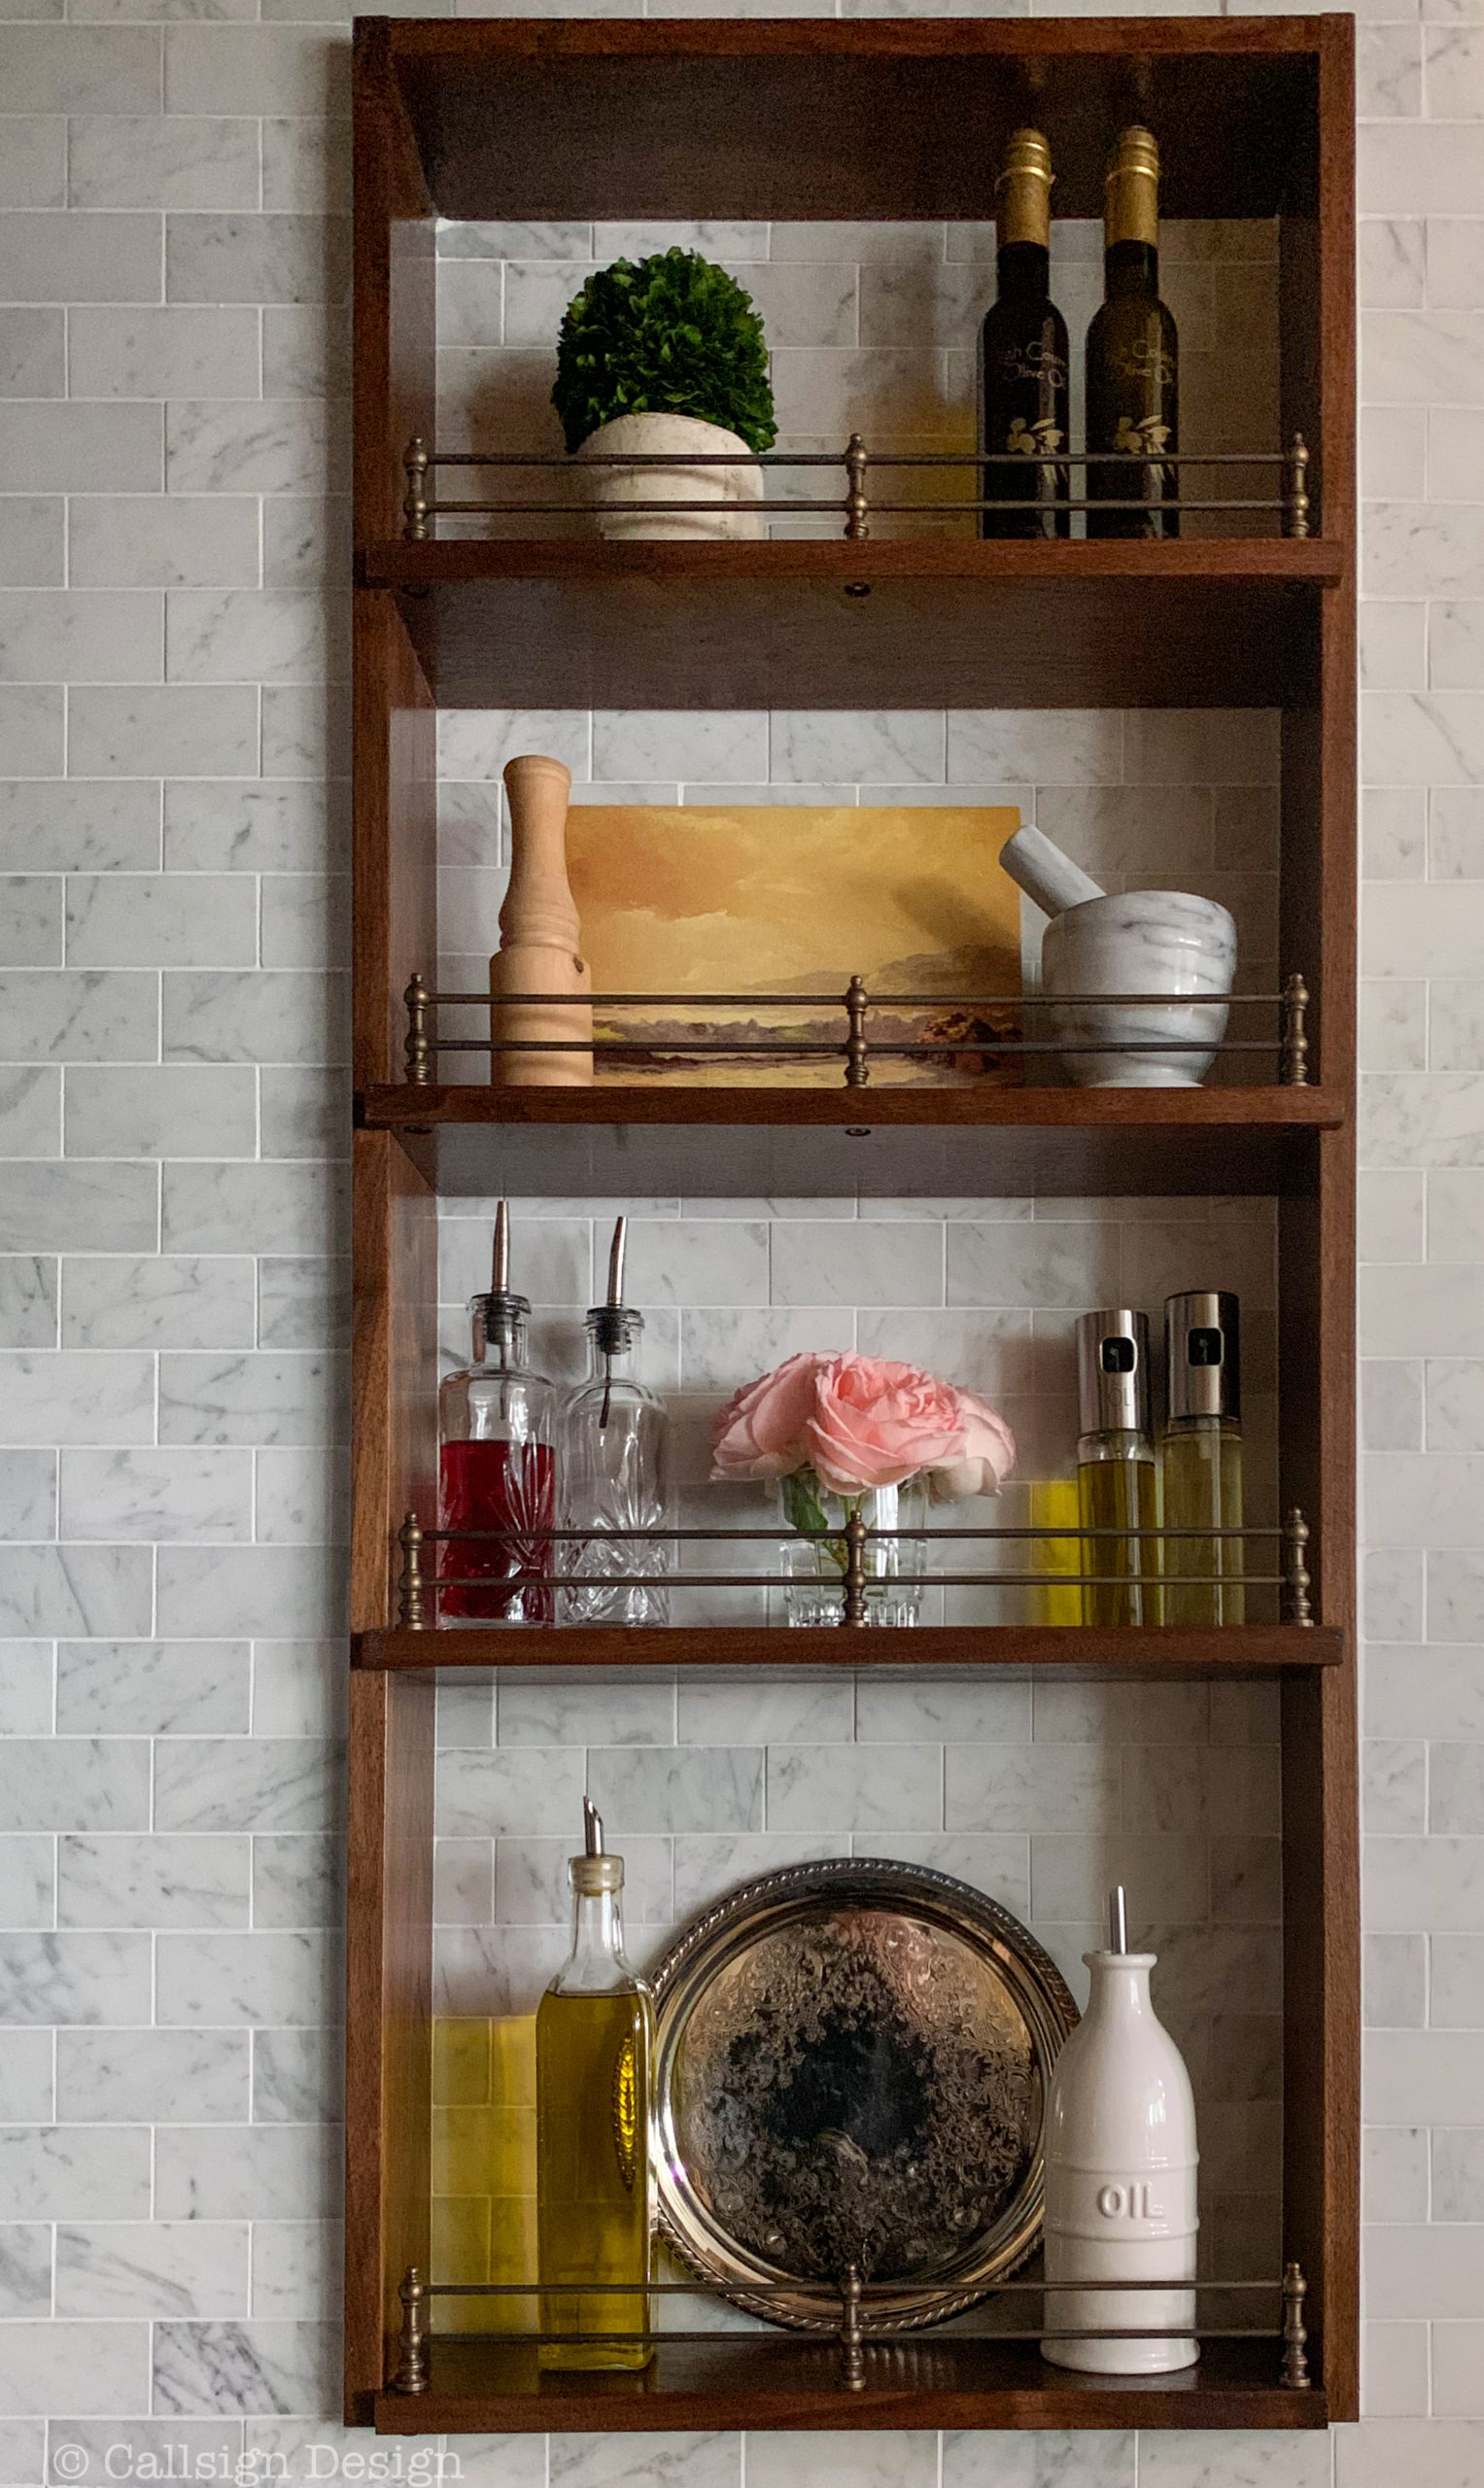
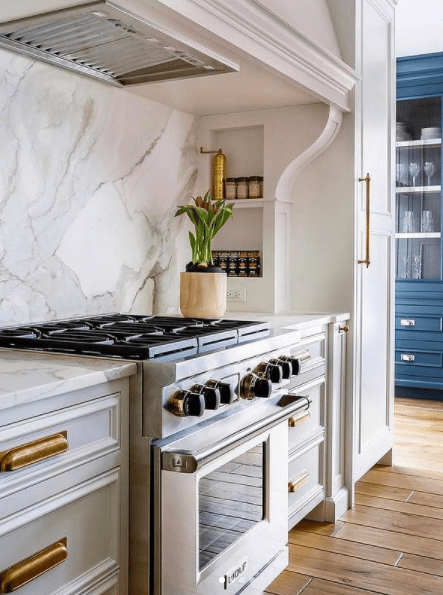
The Oil and Spice Shelf Nook Inside Your Range Hood Surround You Didn’t Know You Needed But You Absolutely Must Have
I’ve been getting some questions from concerned readers: “Where have we been???” They’re assuming we’ve been eaten by the half-finished kitchen. Well…. I’ve been sketching kitchen projects and my adorable Rainman has been fishing. It’s my fault that I approved the purchase of a small boat fixer upper (in addition to the larger boat we already have) and that all equates to FISHING and NOT WORKING INSIDE ON MY KITCHEN. But the Dewalt miter saw on the front porch makes it LOOK like we’re working, so that’s cool. “Sips wine.” (Supply links at the end of the post!)
*This post may contain affiliate links. Please see full disclosure at the end of the post.
Anyway, that’s not preventing me from forging ahead and obsessively planning every detail, and occasionally threatening to hire a carpenter if he doesn’t get his rumpus back in the house and start throwing some kitchen together. It’s getting to the point where I may ACTUALLY consider a carpenter… or start wielding tools at opportune moments so he will catch me and feel compelled to intervene. So… the current project (that I have ordered materials for and am just WAITING FOR SOMEONE TO INSTALL): A shelf nook for the range surround.
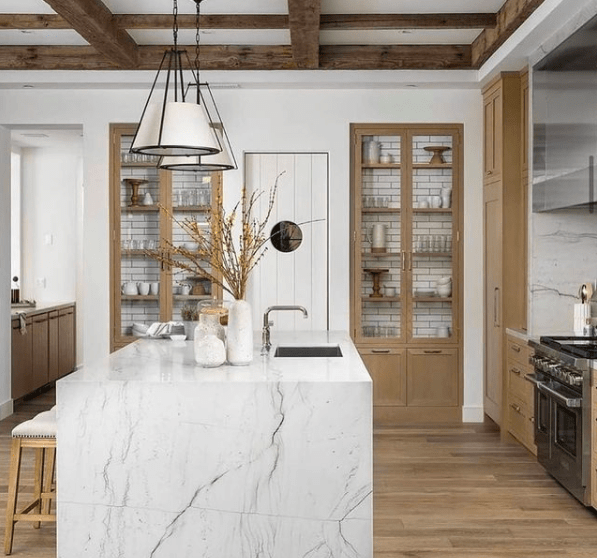
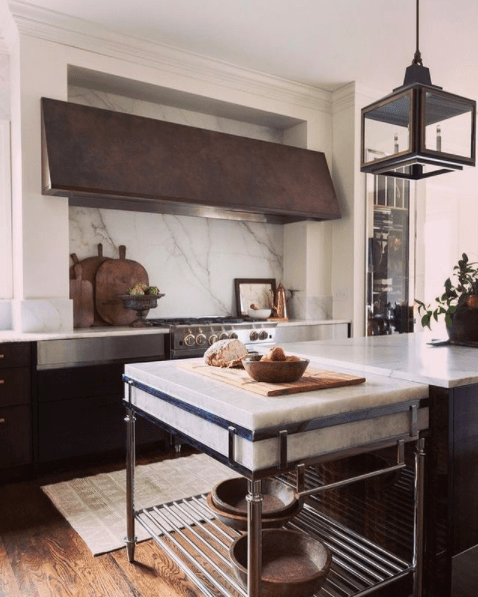
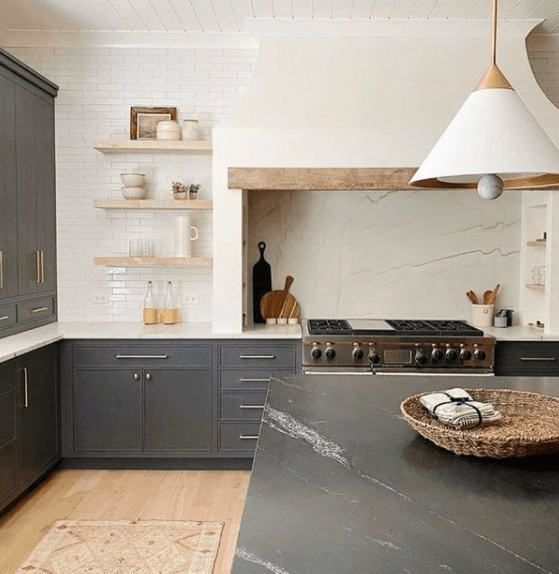
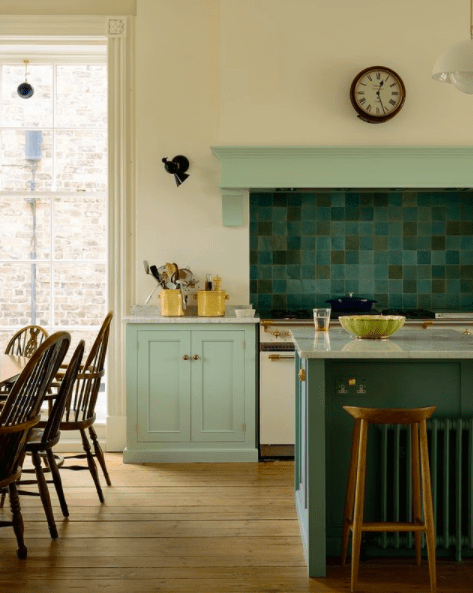
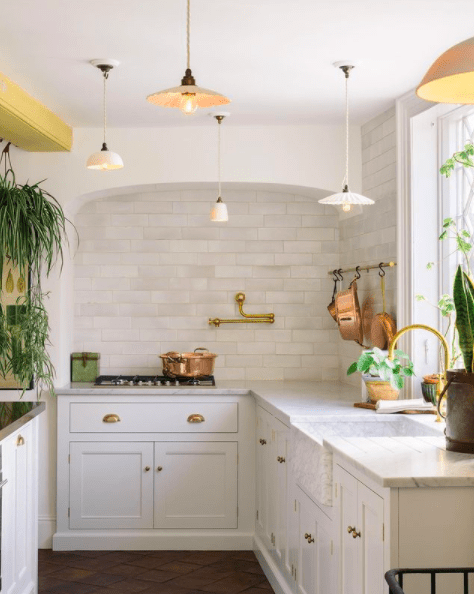
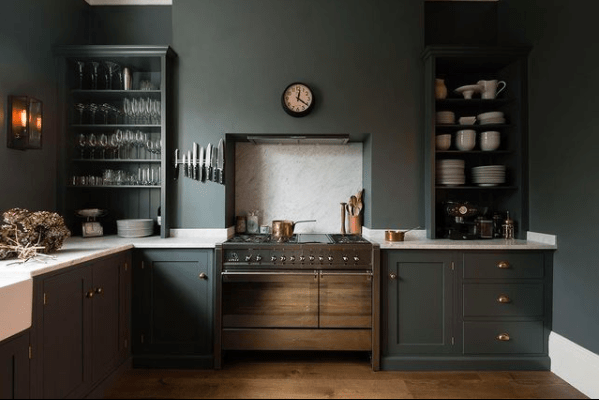
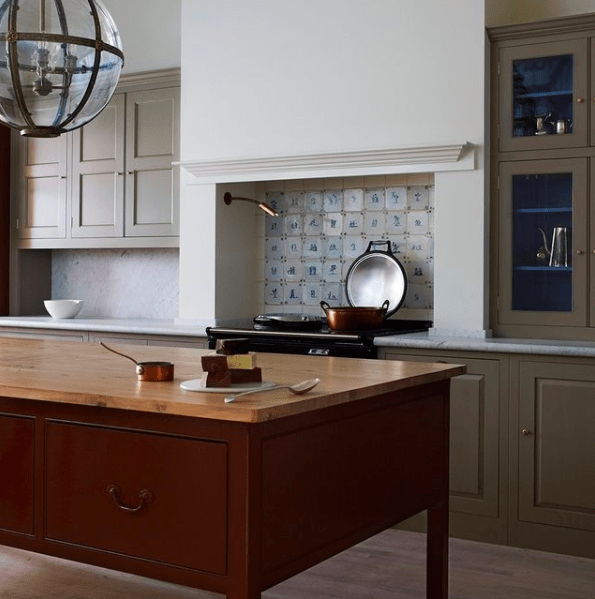
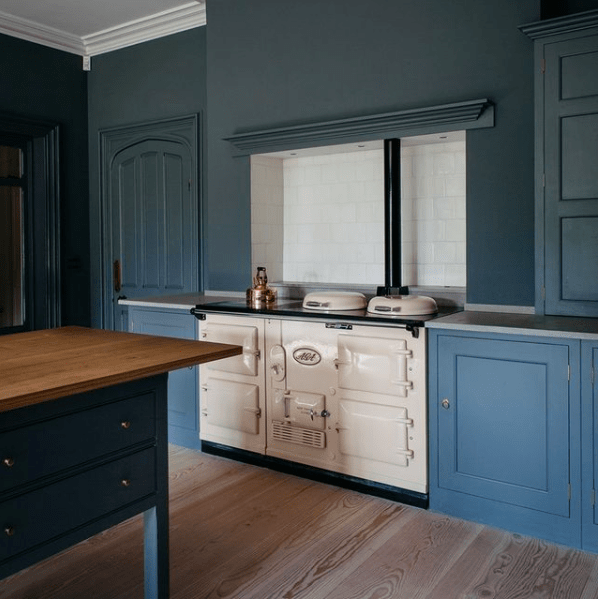
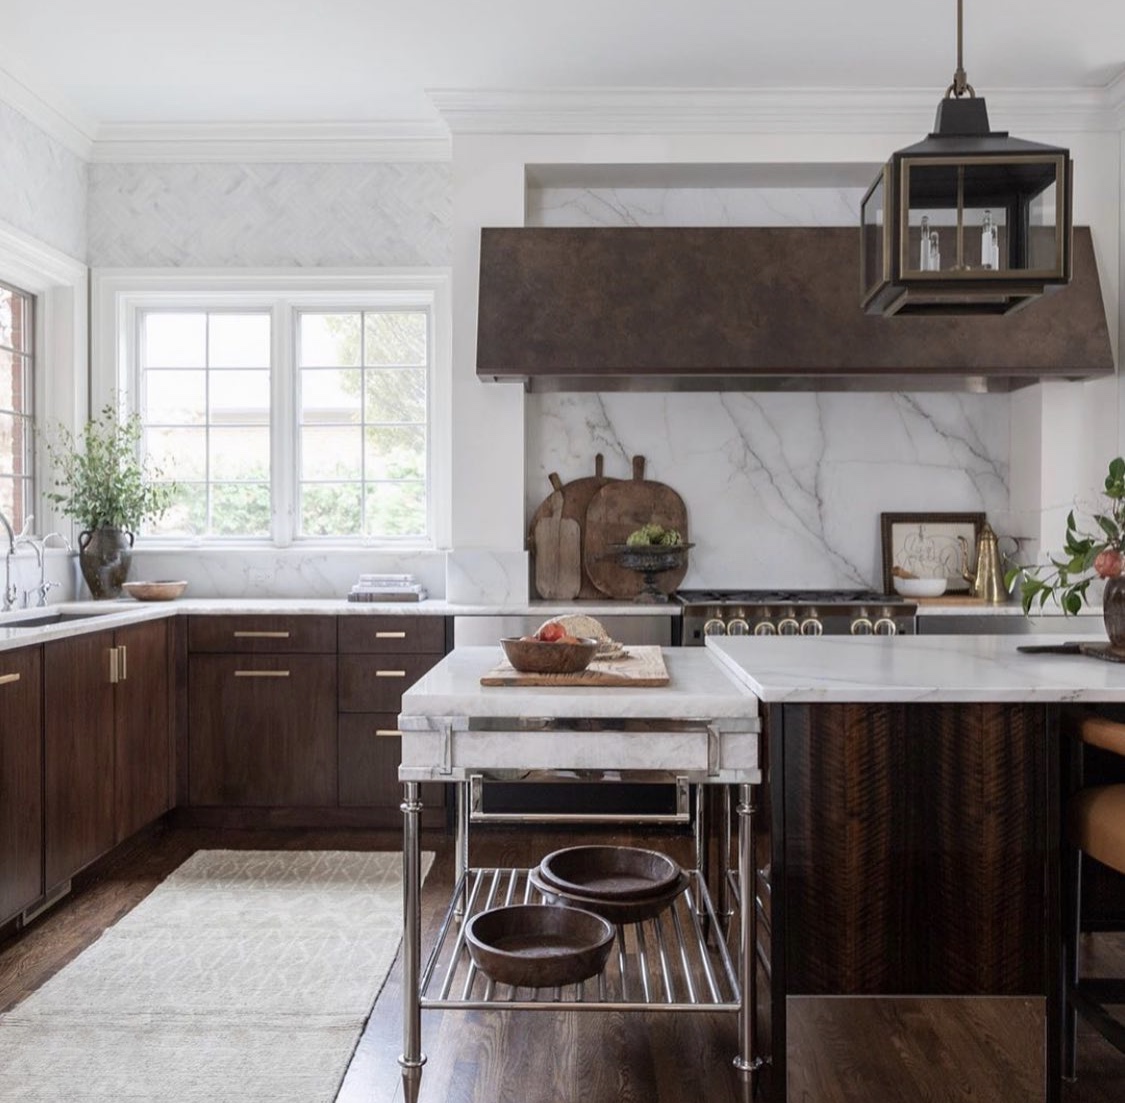
A shelf nook? Yes, it’s absolutely a thing. Think: incredible use of wall space for storing daily use items like olive oils and favorite spices within EASY REACH of your cooking space. We are in the middle beginning of a kitchen renovation and the focal point of the room is a large hood with a surround that encapsulates the entire space (range, hood, and cabinetry). Having looked at ALL of the kitchens on Pinterest and Instagram, I feel well informed and confident that I have planned all of the details well.
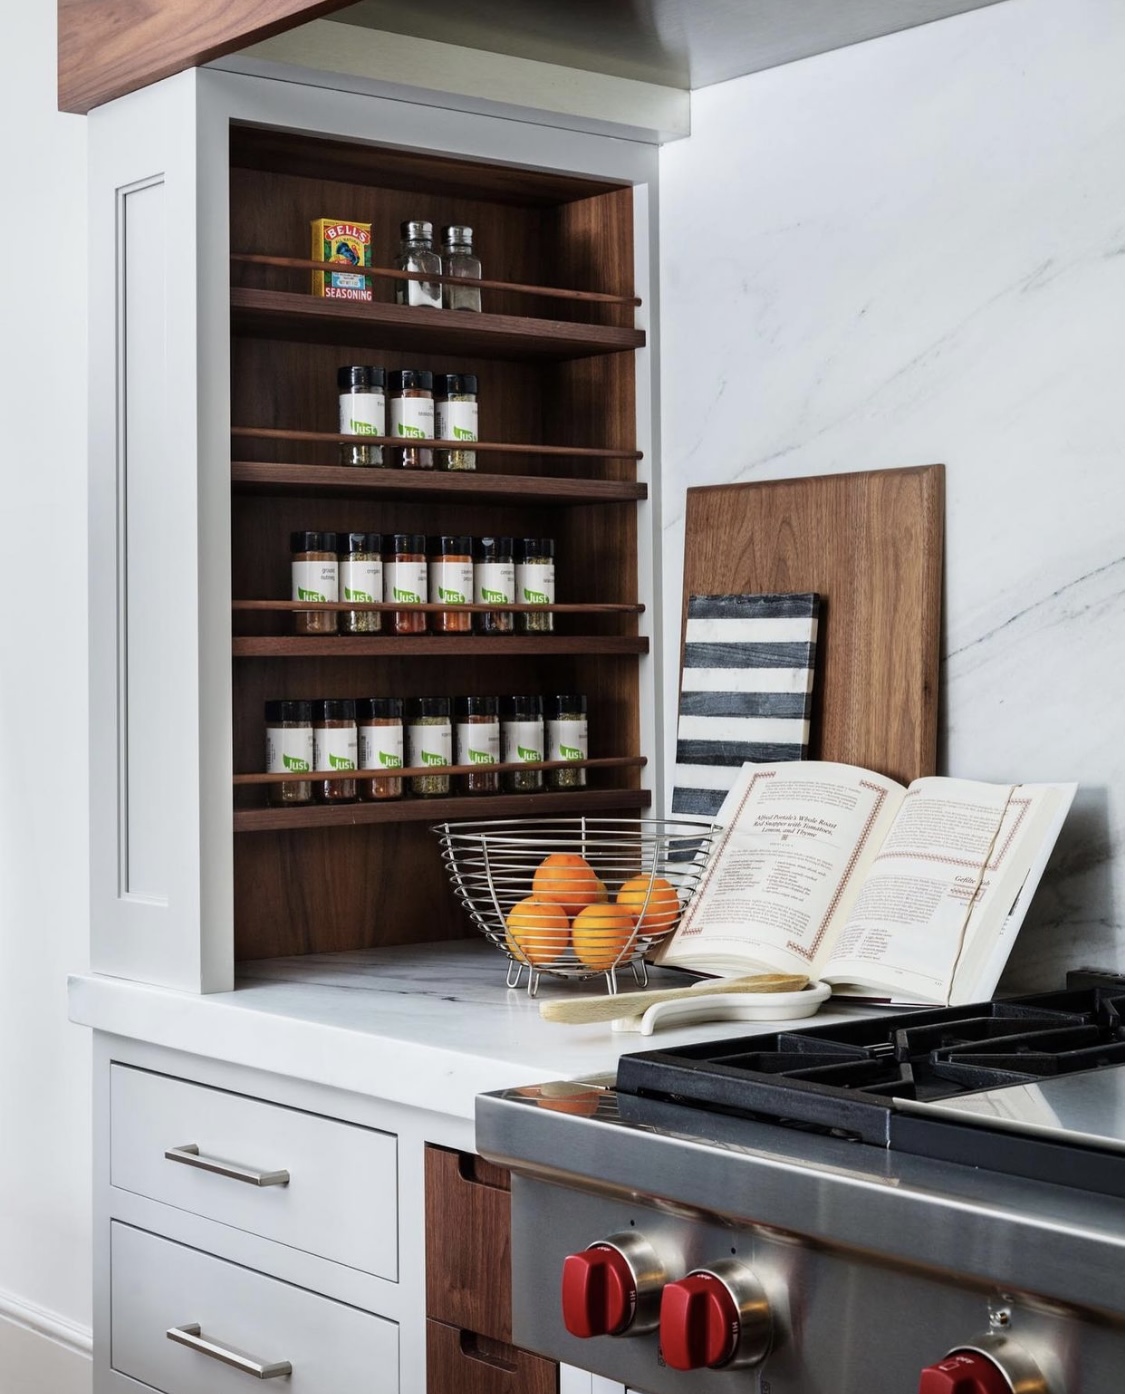
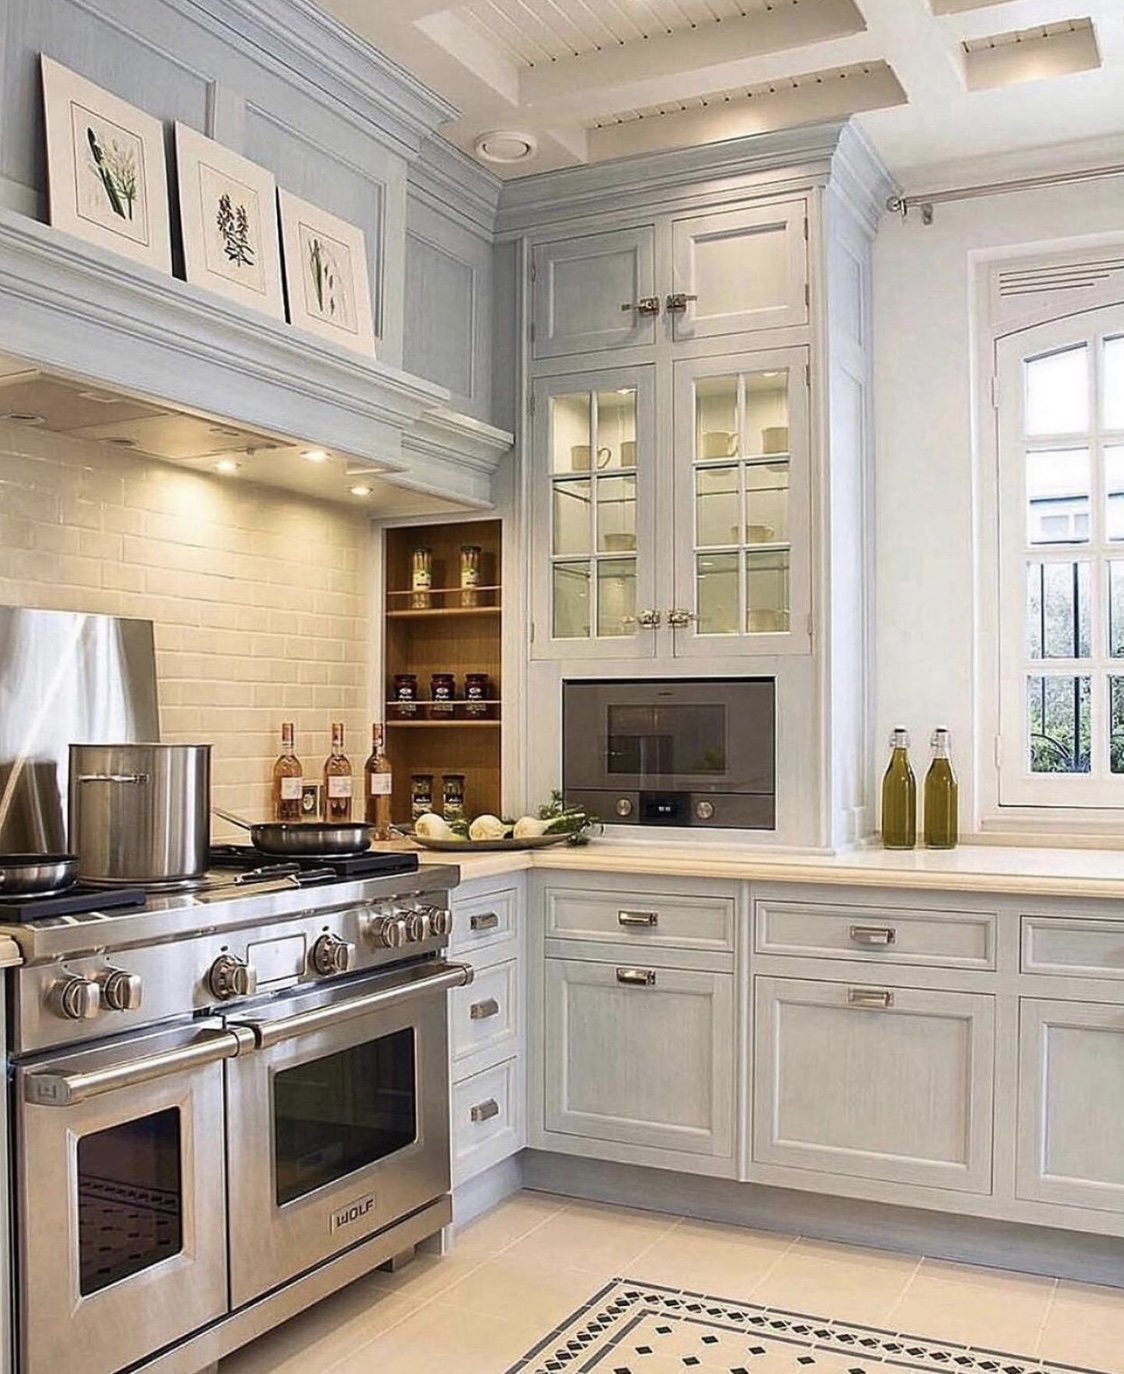
Not sure what I’m talking about? Here are two EXCELLENT representations of my idea by professional designers (and let me give a SHOUT OUT to these ladies/gents, because the amount of nit-noid planning that goes into designing these spaces is really next-level):
Are you IN??? Yeah, me too! Imagine wasting all of that space when you could have usable, adorable shelves (and trust me, you need the storage)!
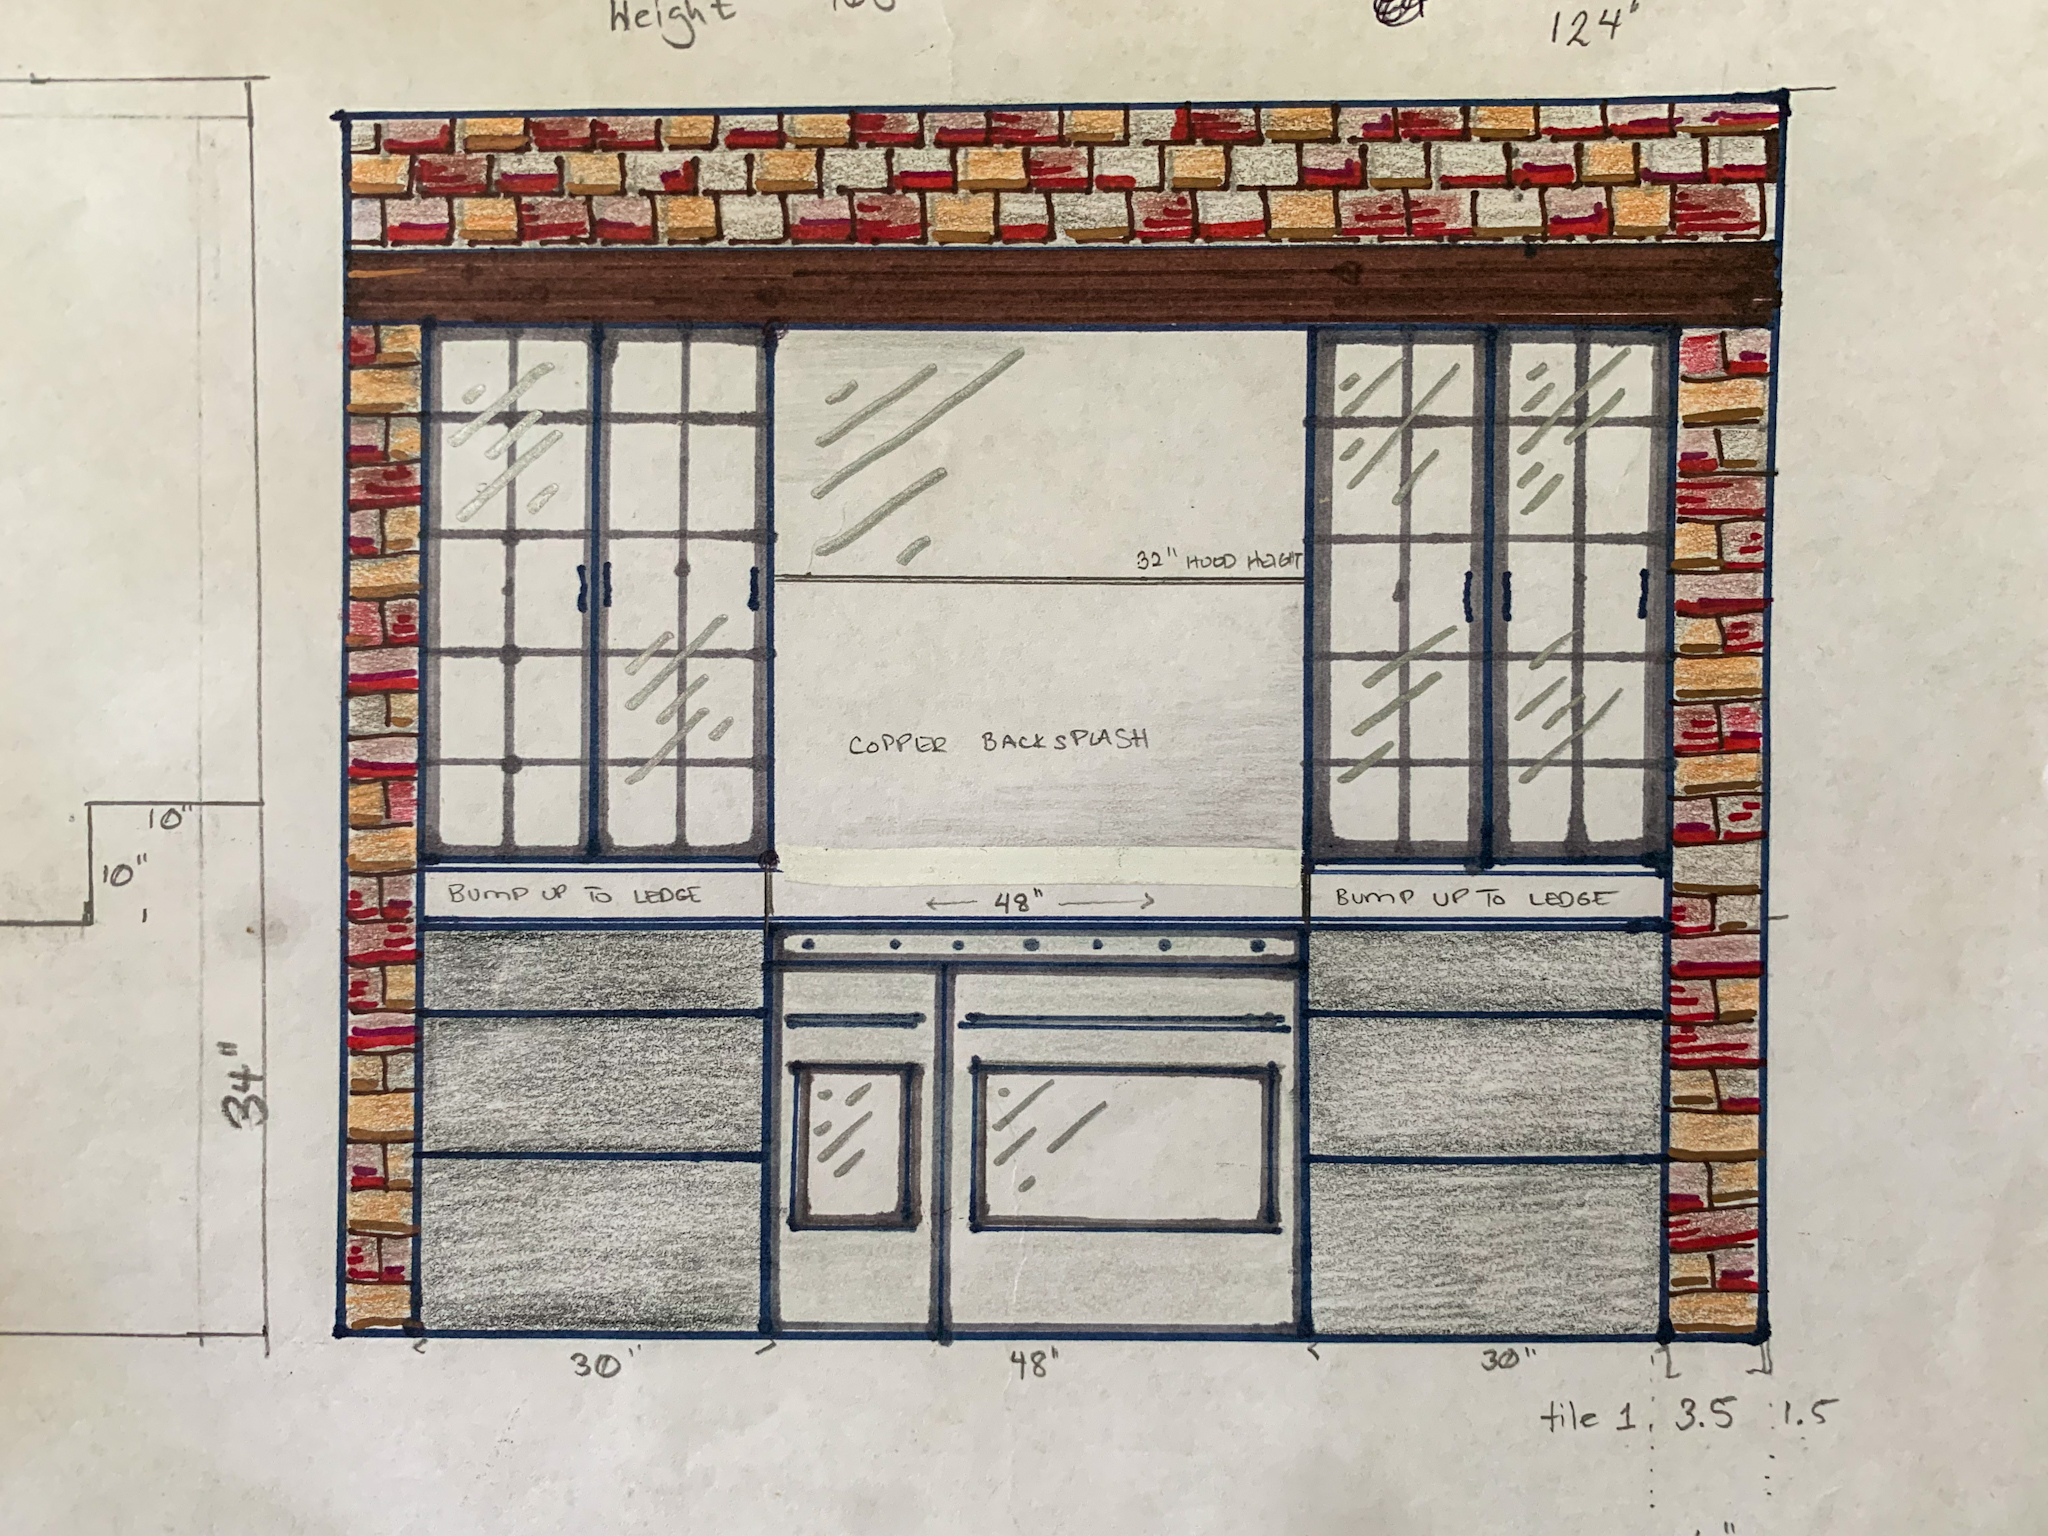
So, here’s my sketch of the front of our range wall:
And here is the sketch of the inside of the right-hand wall:
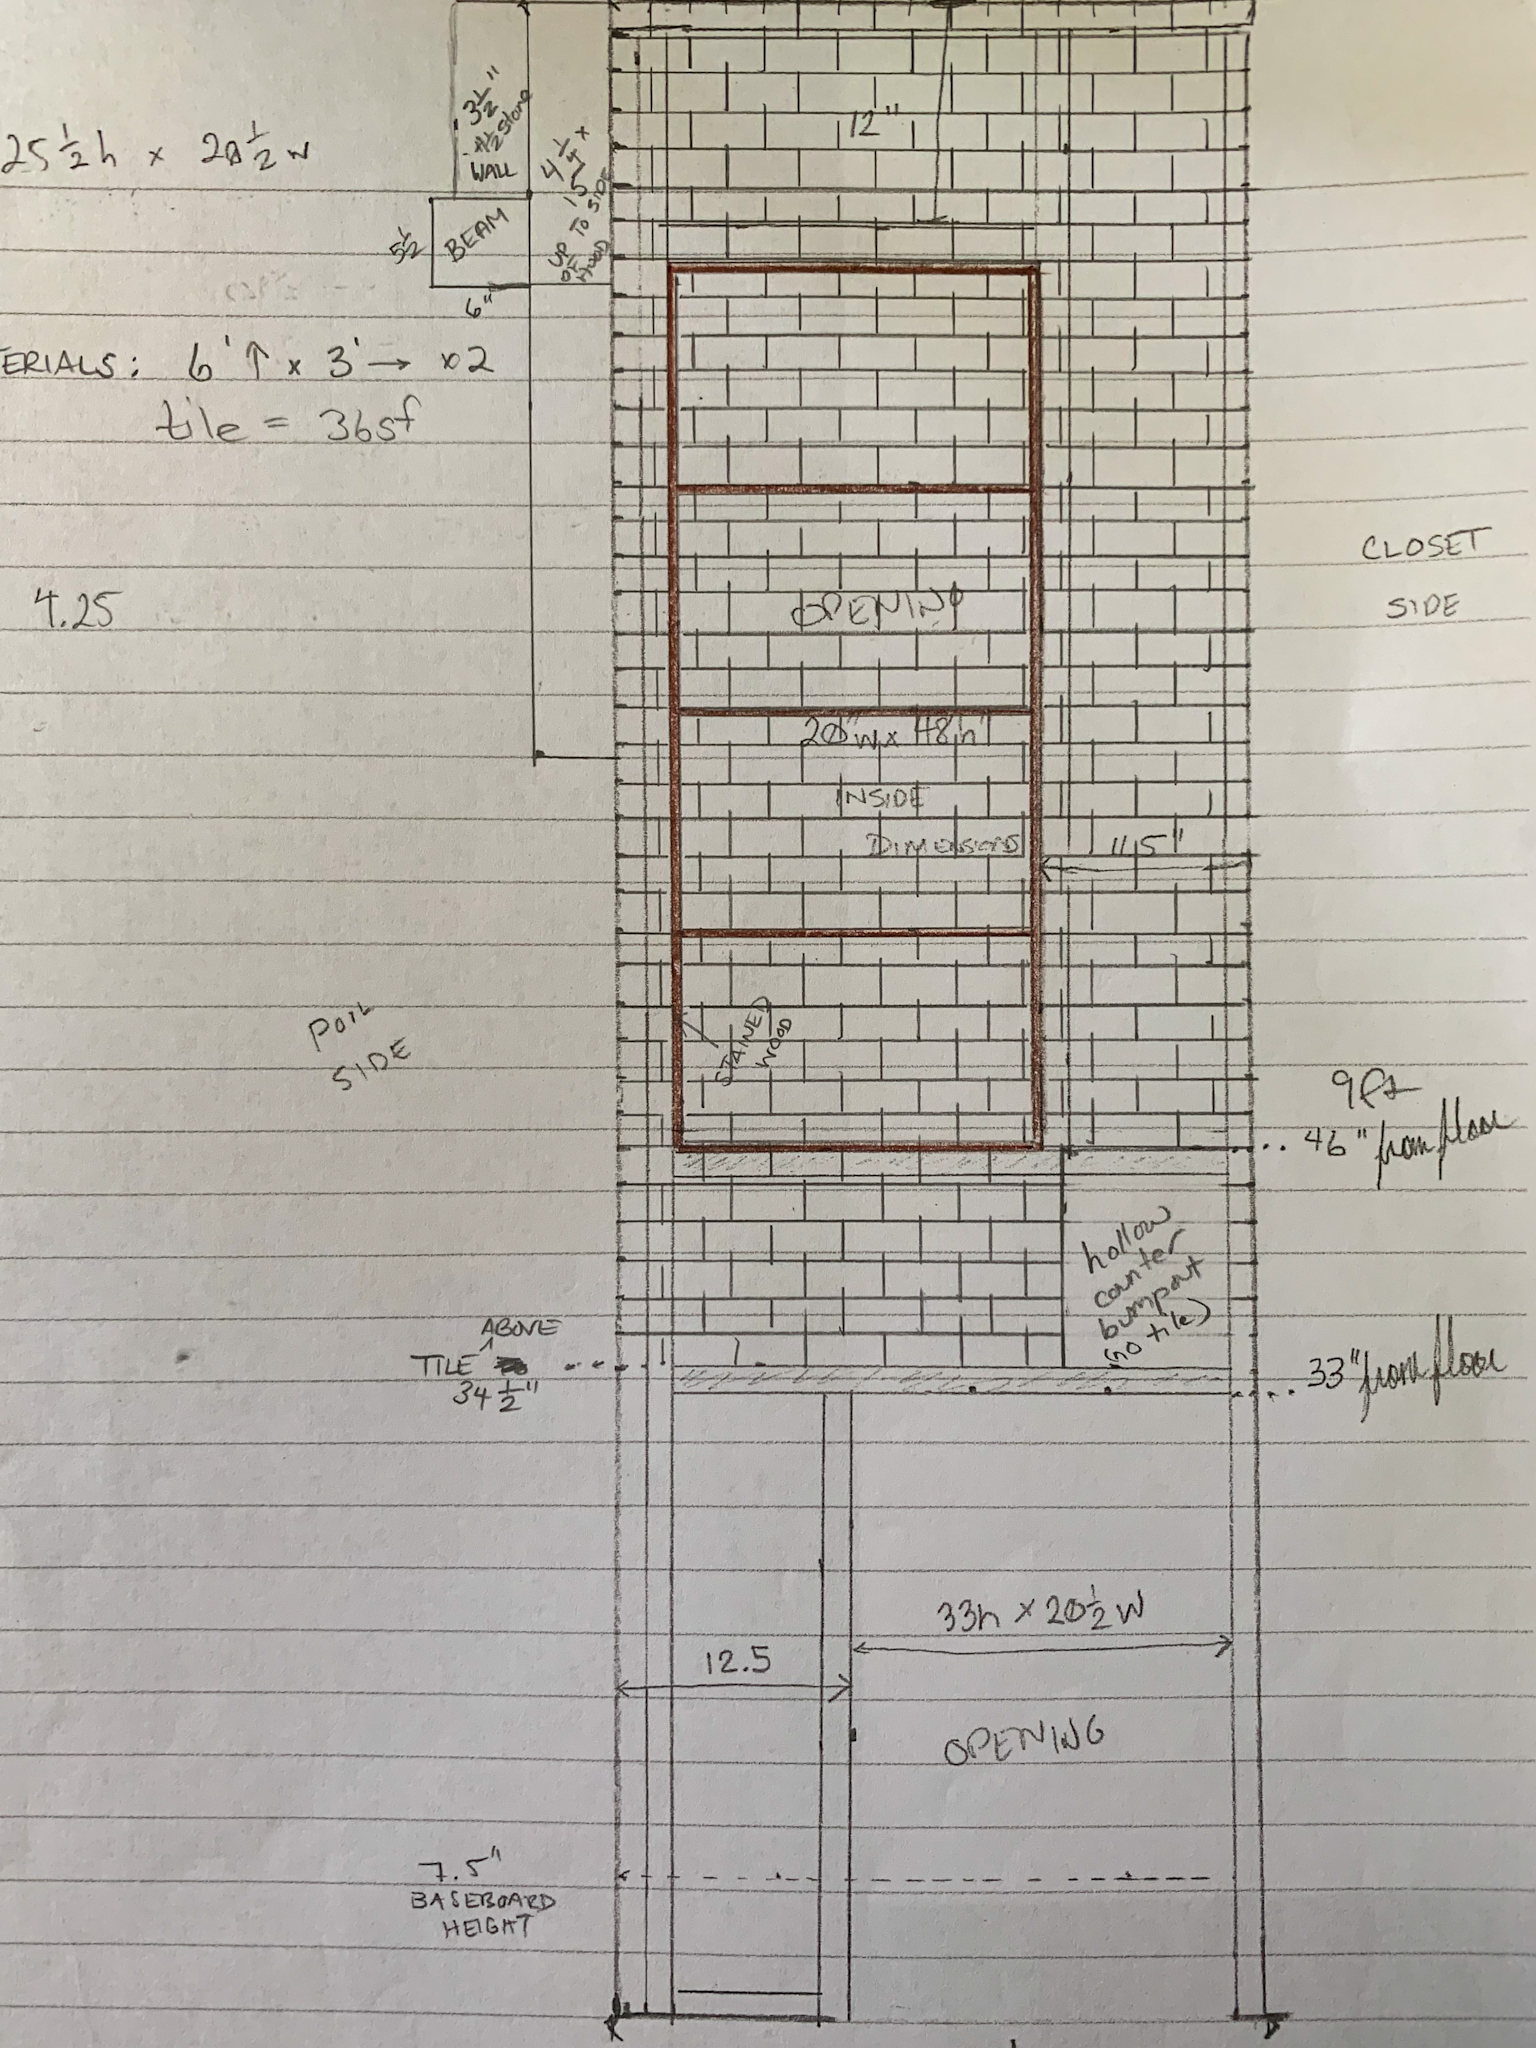
No fancy design software here! It’s so much easier for me to visualize when I sketch.
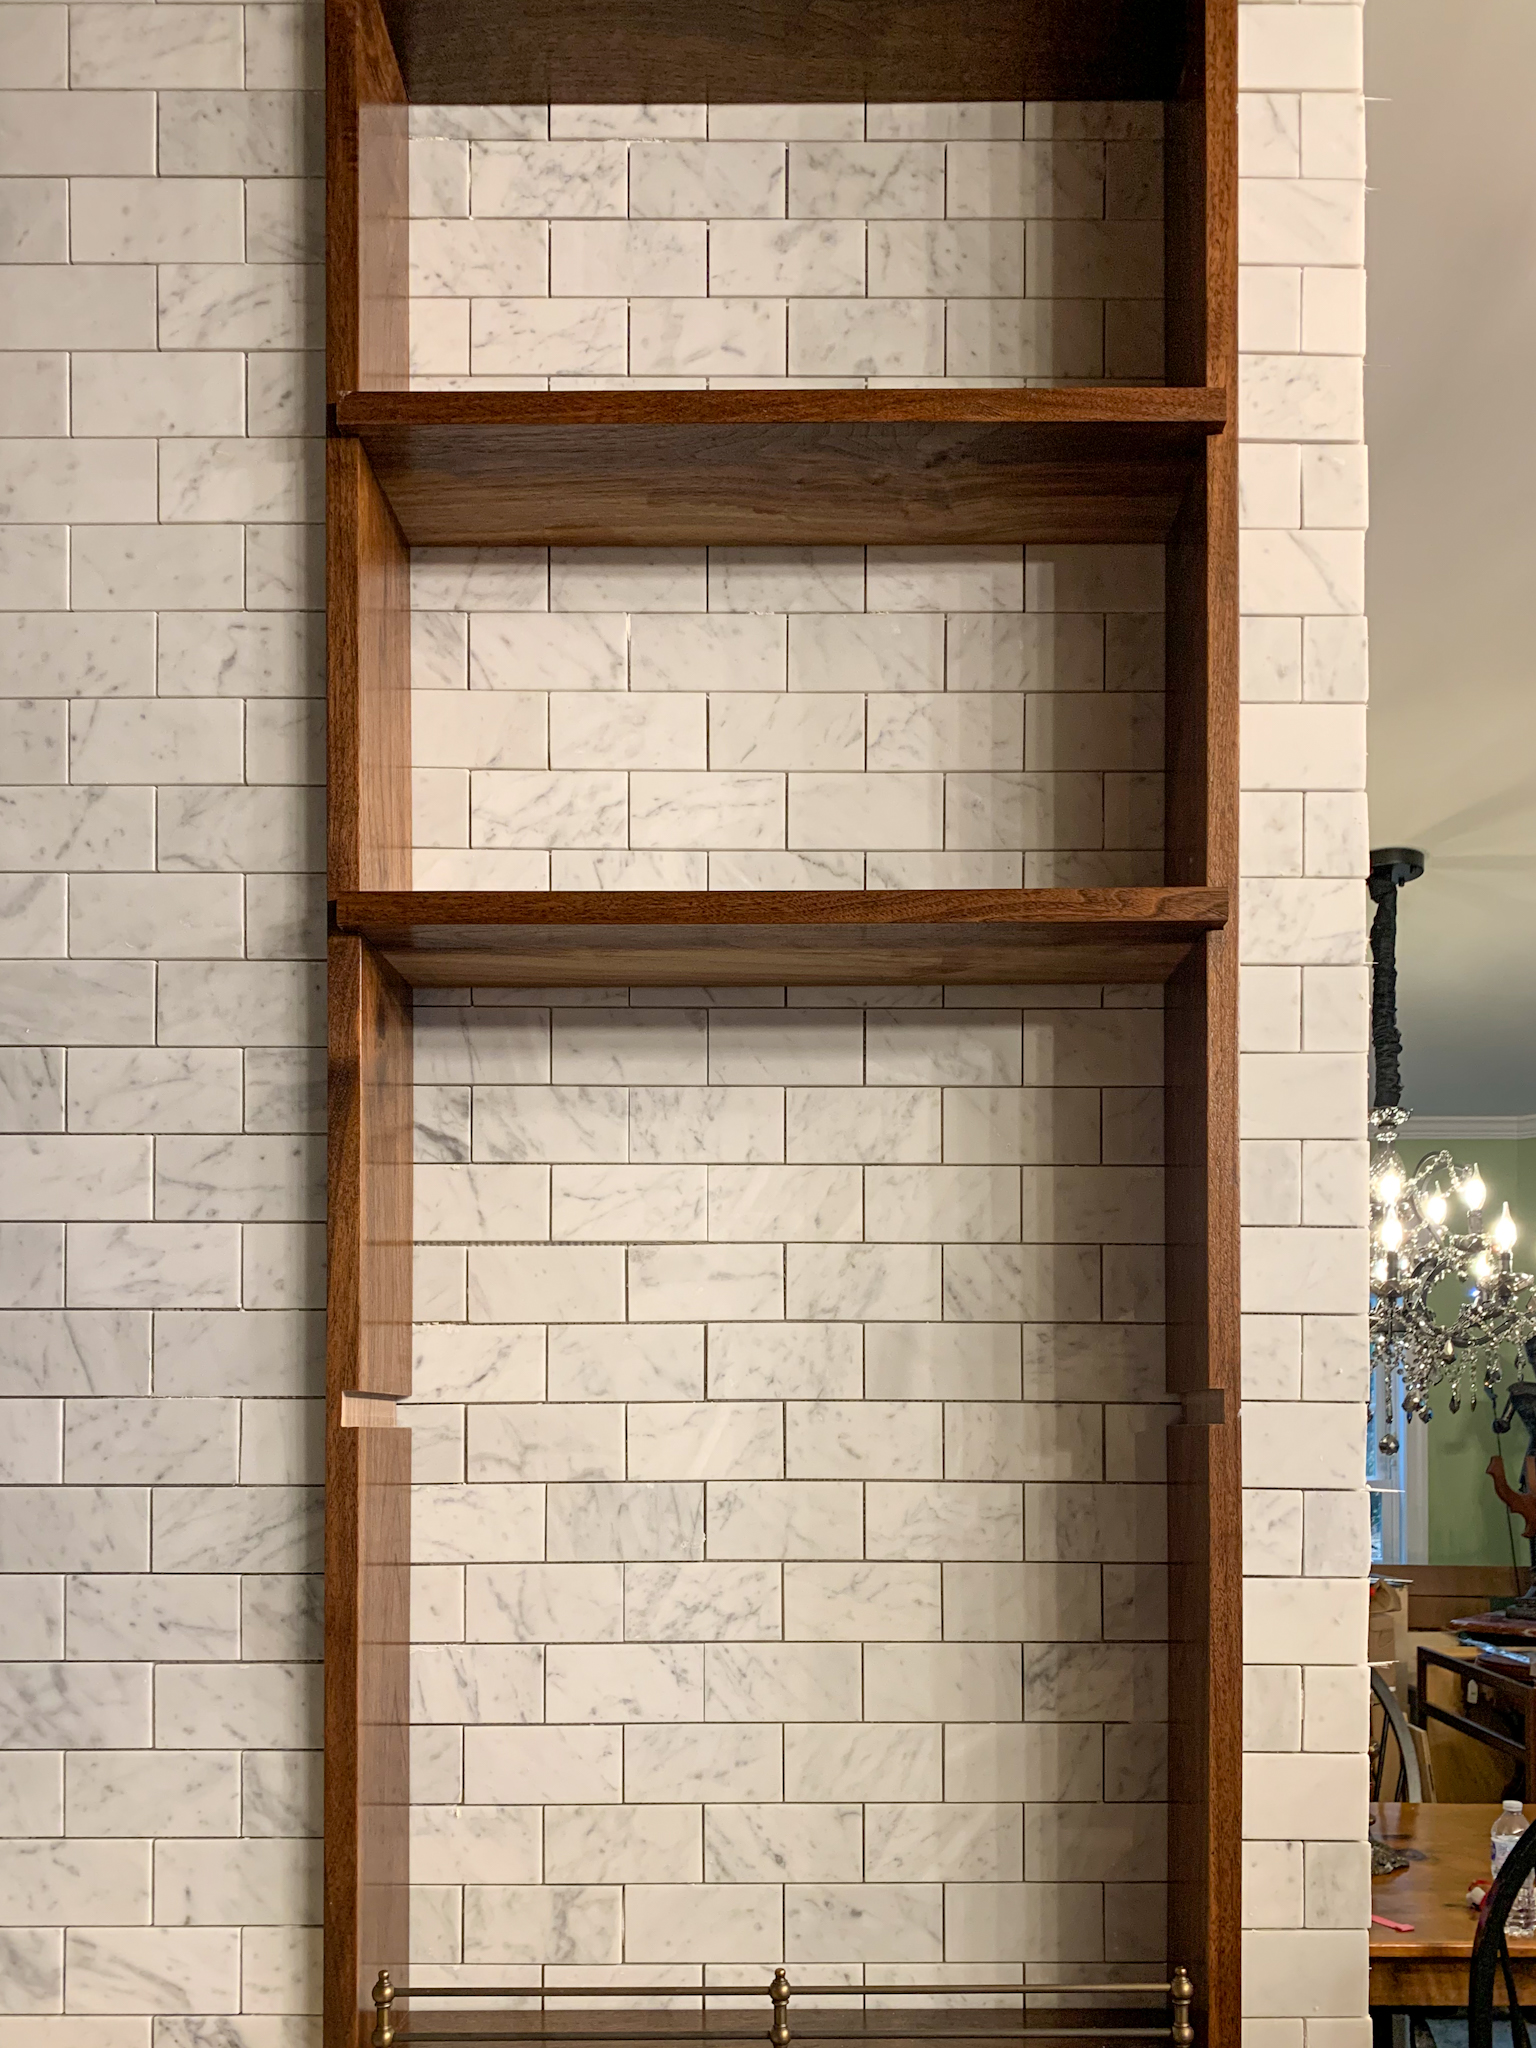
One of the most important design elements of this space was functionality: an excellent space to cook where all of the cook’s tools are within easy reach. It’s also important that the space be very easy to clean and hardy. Everything near the stove is a solid surface and non-scorch-able (including the metal upper cabinets). I allowed myself a little leniency with the shelf materials because they are 33 inches from the side of the range and the back of the shelves are still tiled. I briefly considered a shelf OVER the stove (it looks so pretty with the copper pots hanging there) but remembered that I don’t want to clean grease spatter off utensils, pots, and spices every time I cook.
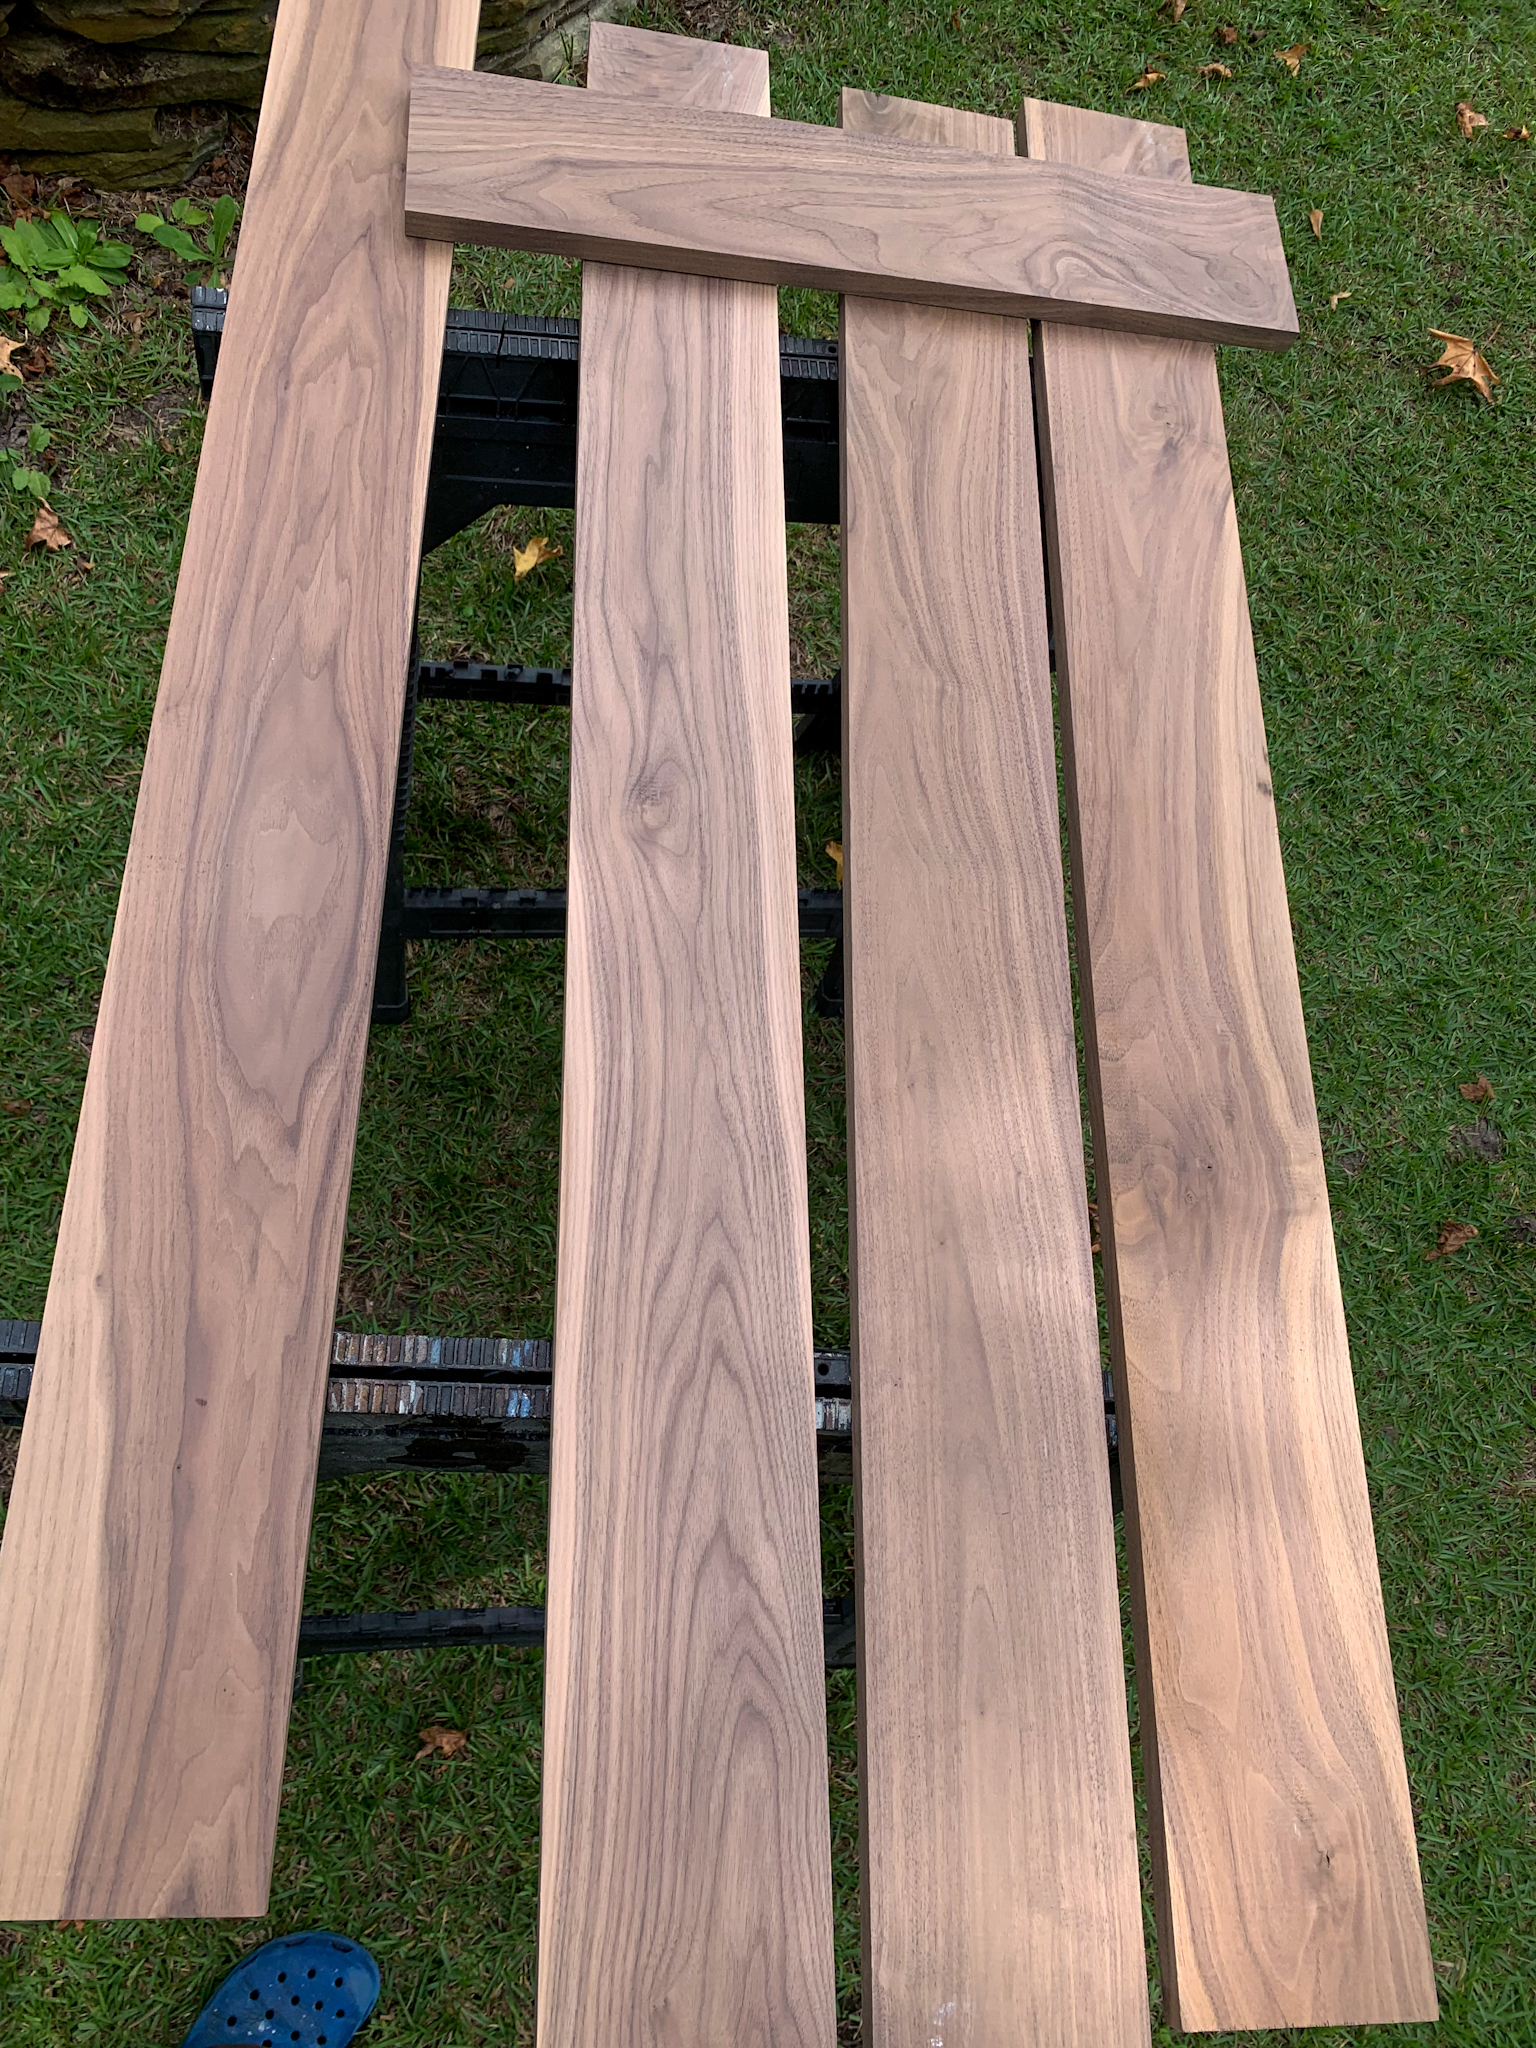
Anyhoo, after I actually threatened my husband with bodily harm for the lack of progress on the kitchen (i.e. fishing/casting on the boat instead of doing interior construction), this is the next project we came to in the build. One of the challenges was that walnut is really hard to find (read: expensive) right now, but since it wasn’t a lot square footage wise, I thought it would be fairly affordable. It was not. Not, to say that little detail changed my mind: I still got my walnut shelves. Just know that the species of wood you choose very much impacts the final cost.
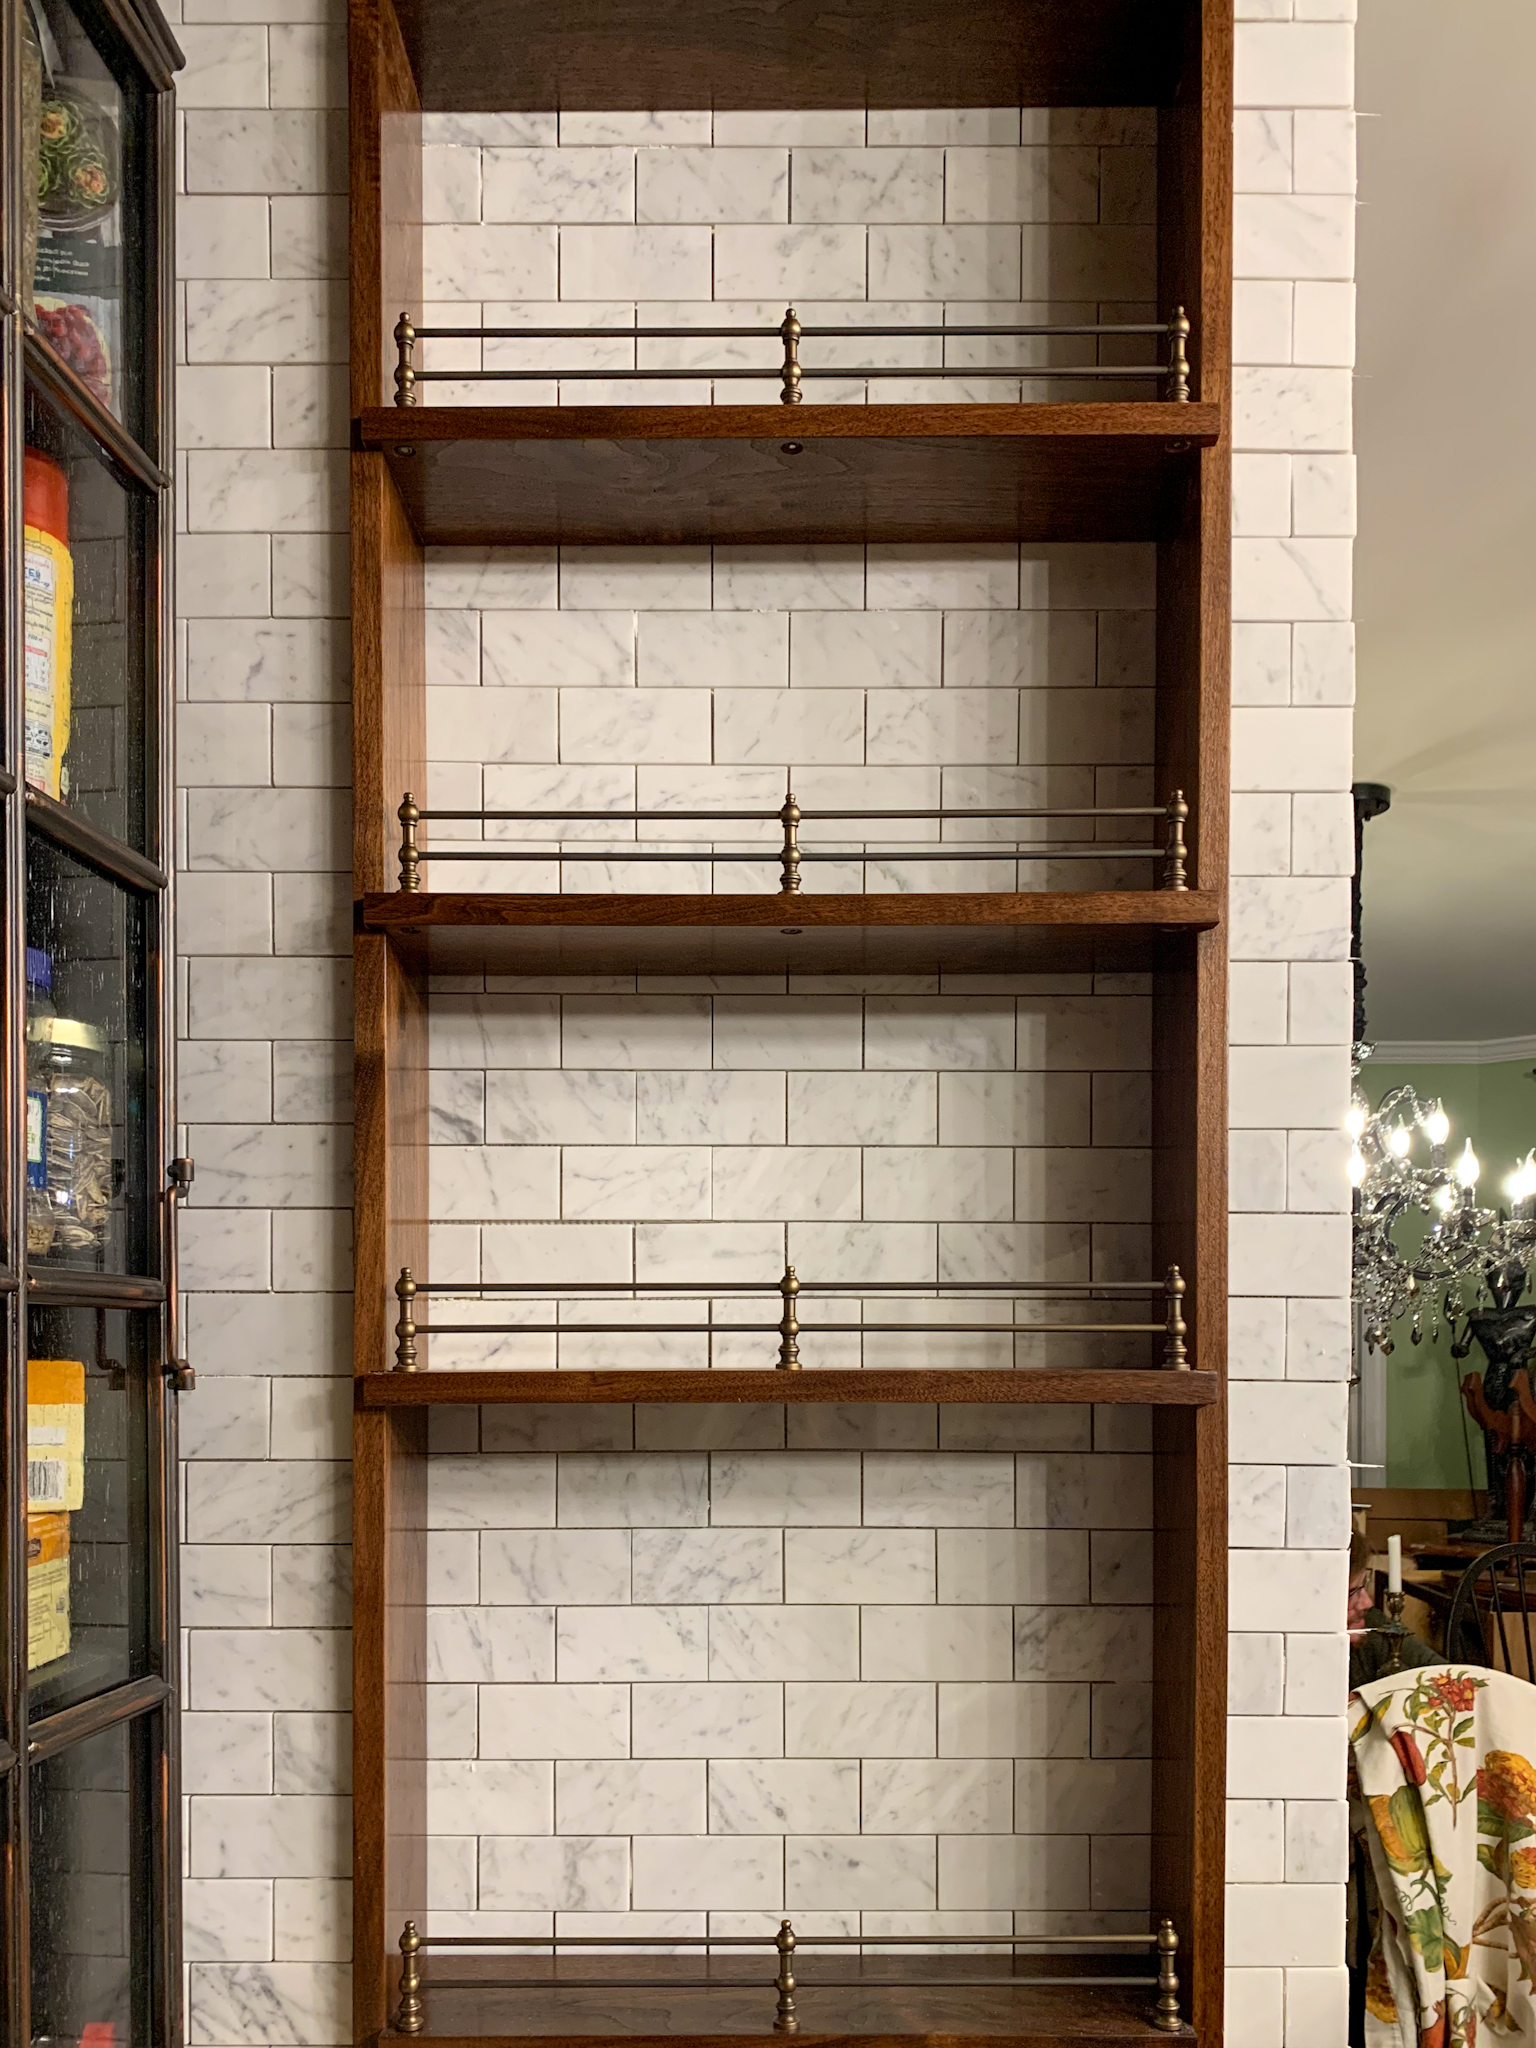
I also wanted some pretty gallery rails to prevent oil bottles from being knocked off and smashing into tiny pieces. Those were also not cheap, but they were necessary both from an aesthetic and functional standpoint. I had already purchased the Carrara marble subway tile for the interior range walls, and I have broken out the relative cost below.
Step one was framing the wall with the size I wanted and thinking about all the 3D things that could affect the functionality of the design.
Since we are doing one wall at a time… it is more difficult. I want to have a functional kitchen for as long as possible through the renovation, so there was an old peninsula with electrical and plumbing in the way on one side.
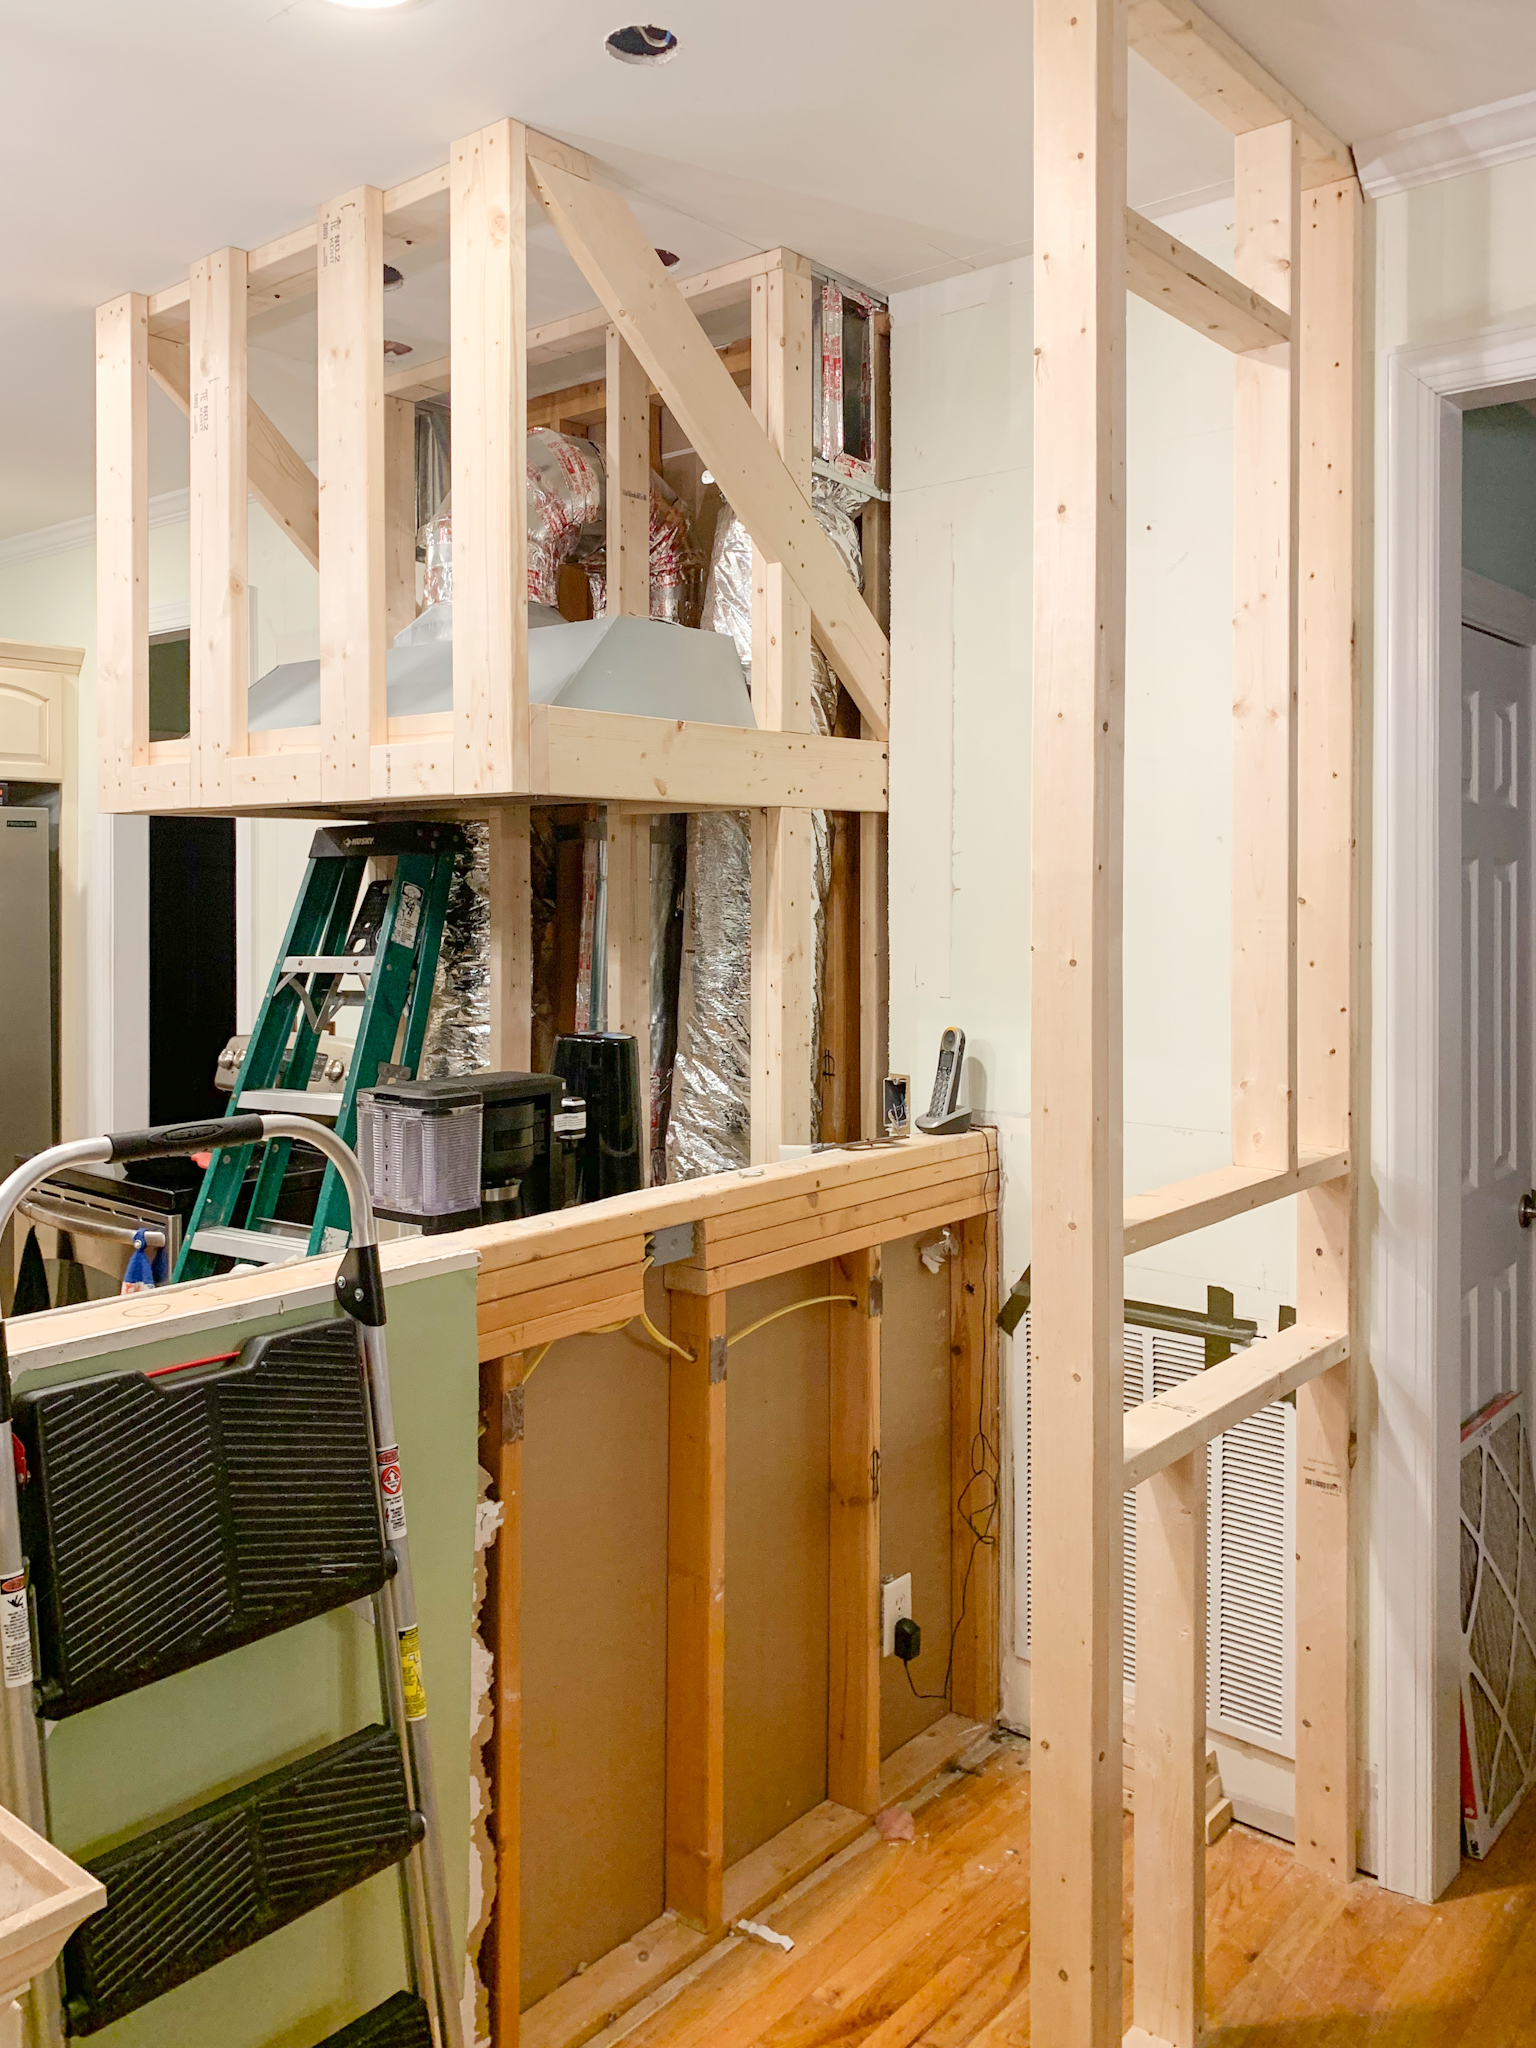
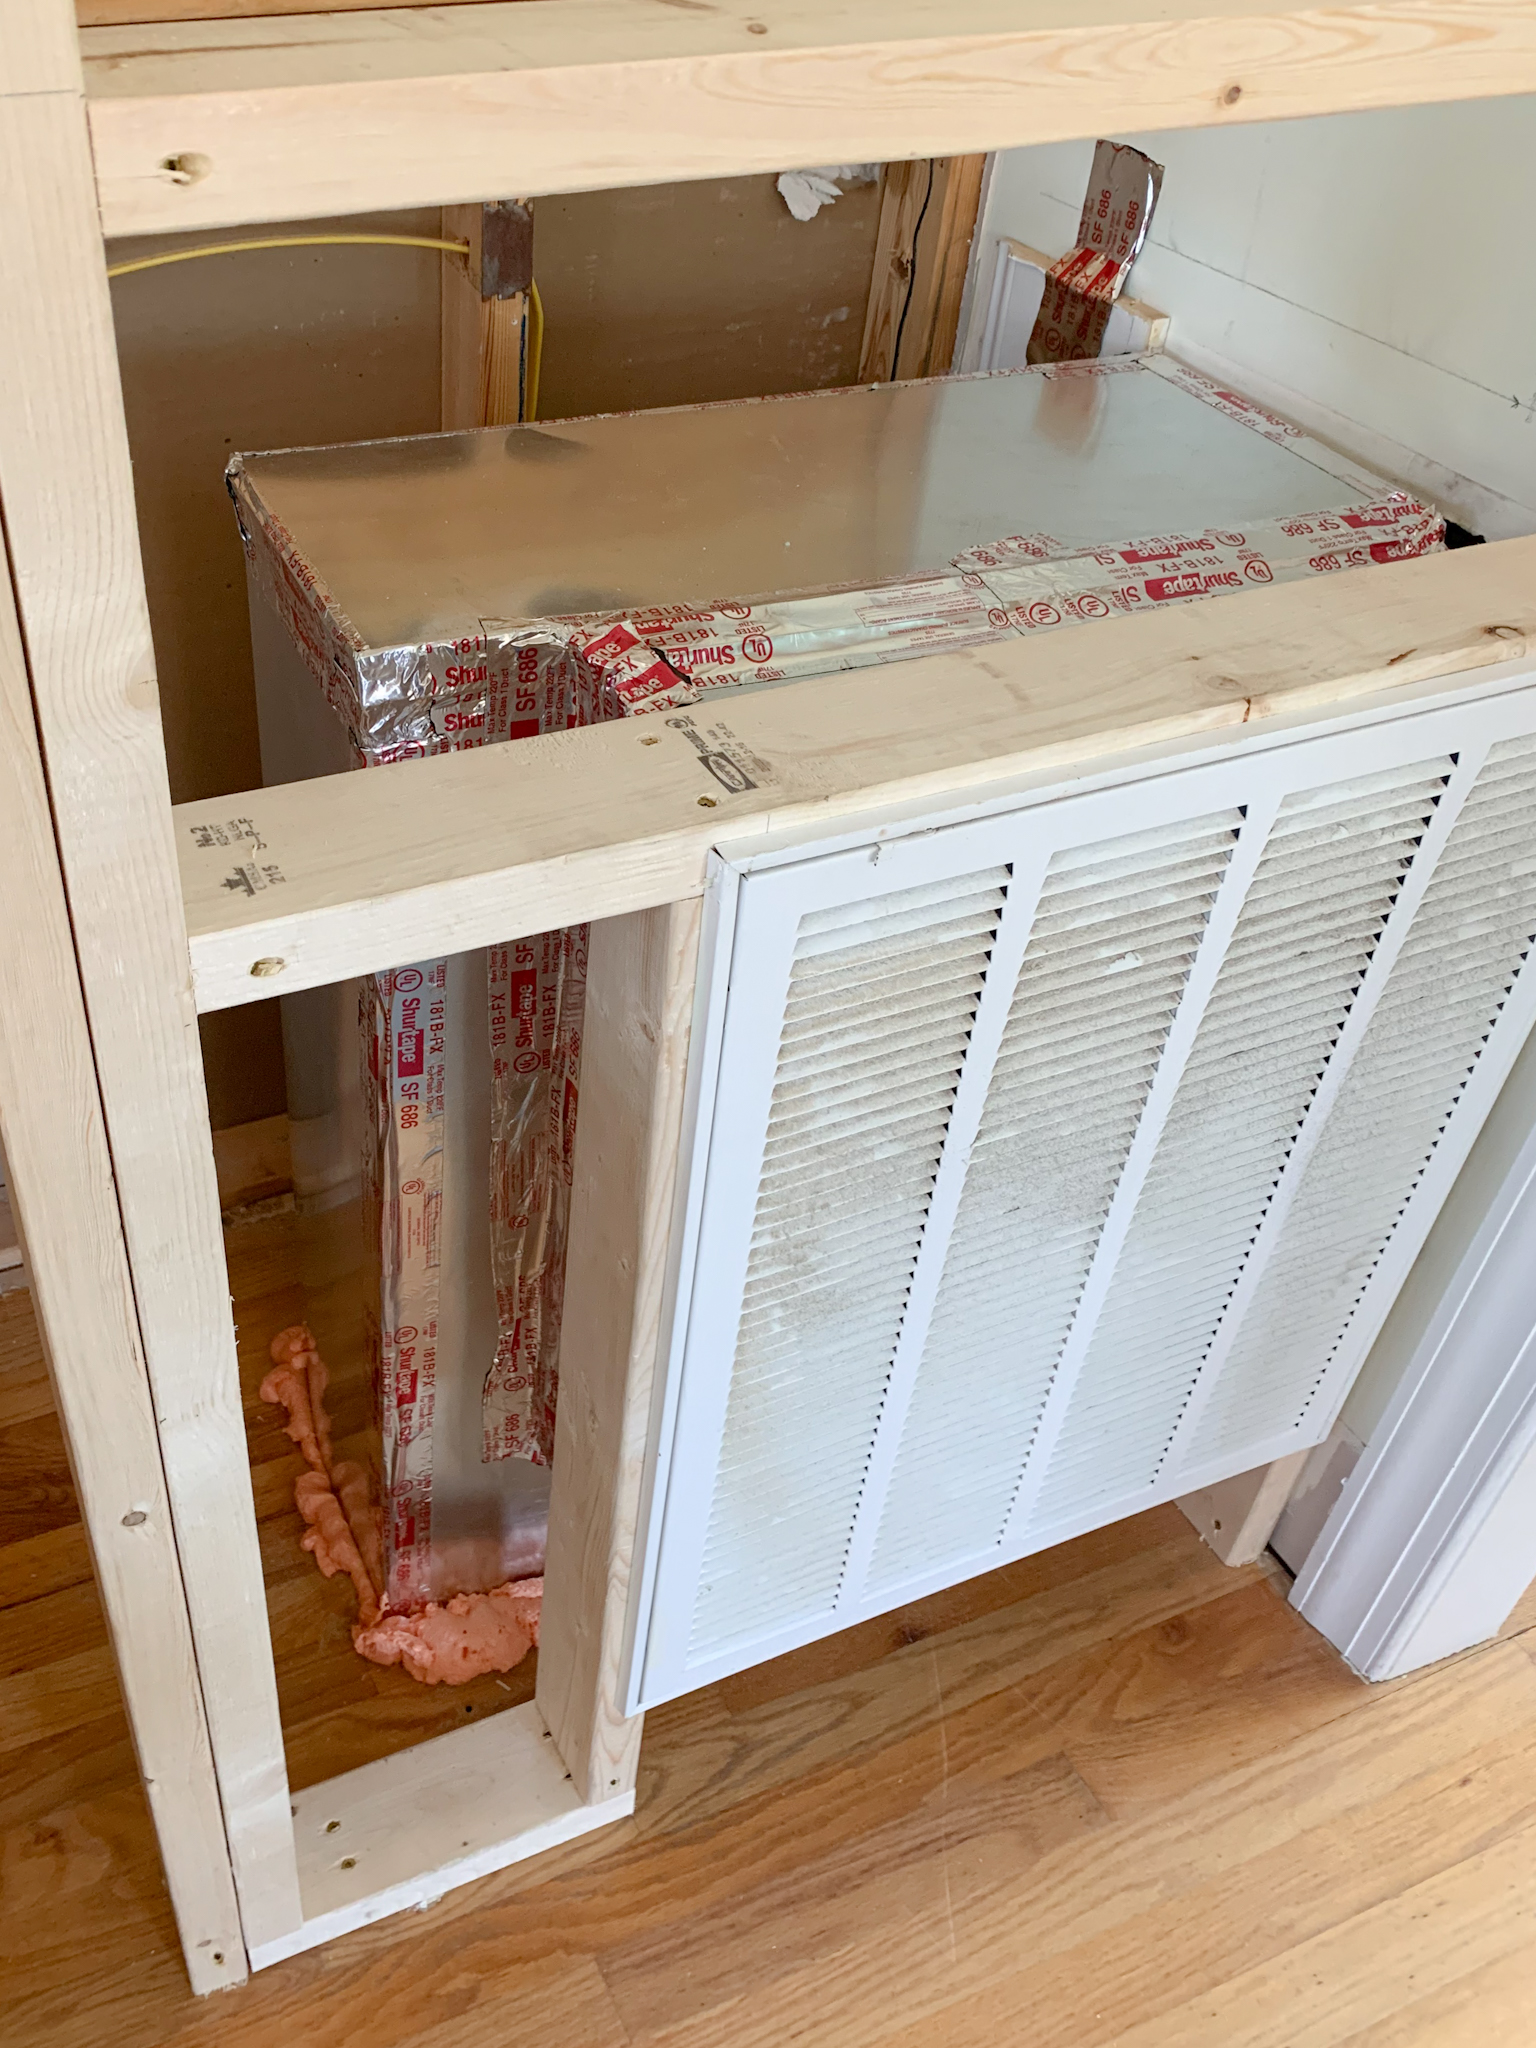
And then, of course, this little design treasure that I was feeling borderline homicidal about. Don’t worry, I fixed the look, but I’m still pretty torqued the HVAC crew couldn’t reroute the intake anywhere else. The worst part is it robbed me of half of my cabinet space on one side of the stove. NOT COOL. (It currently has a really pretty cover on it, and I ordered a false front for the cabinet so it will be invisible to anyone who doesn’t know).
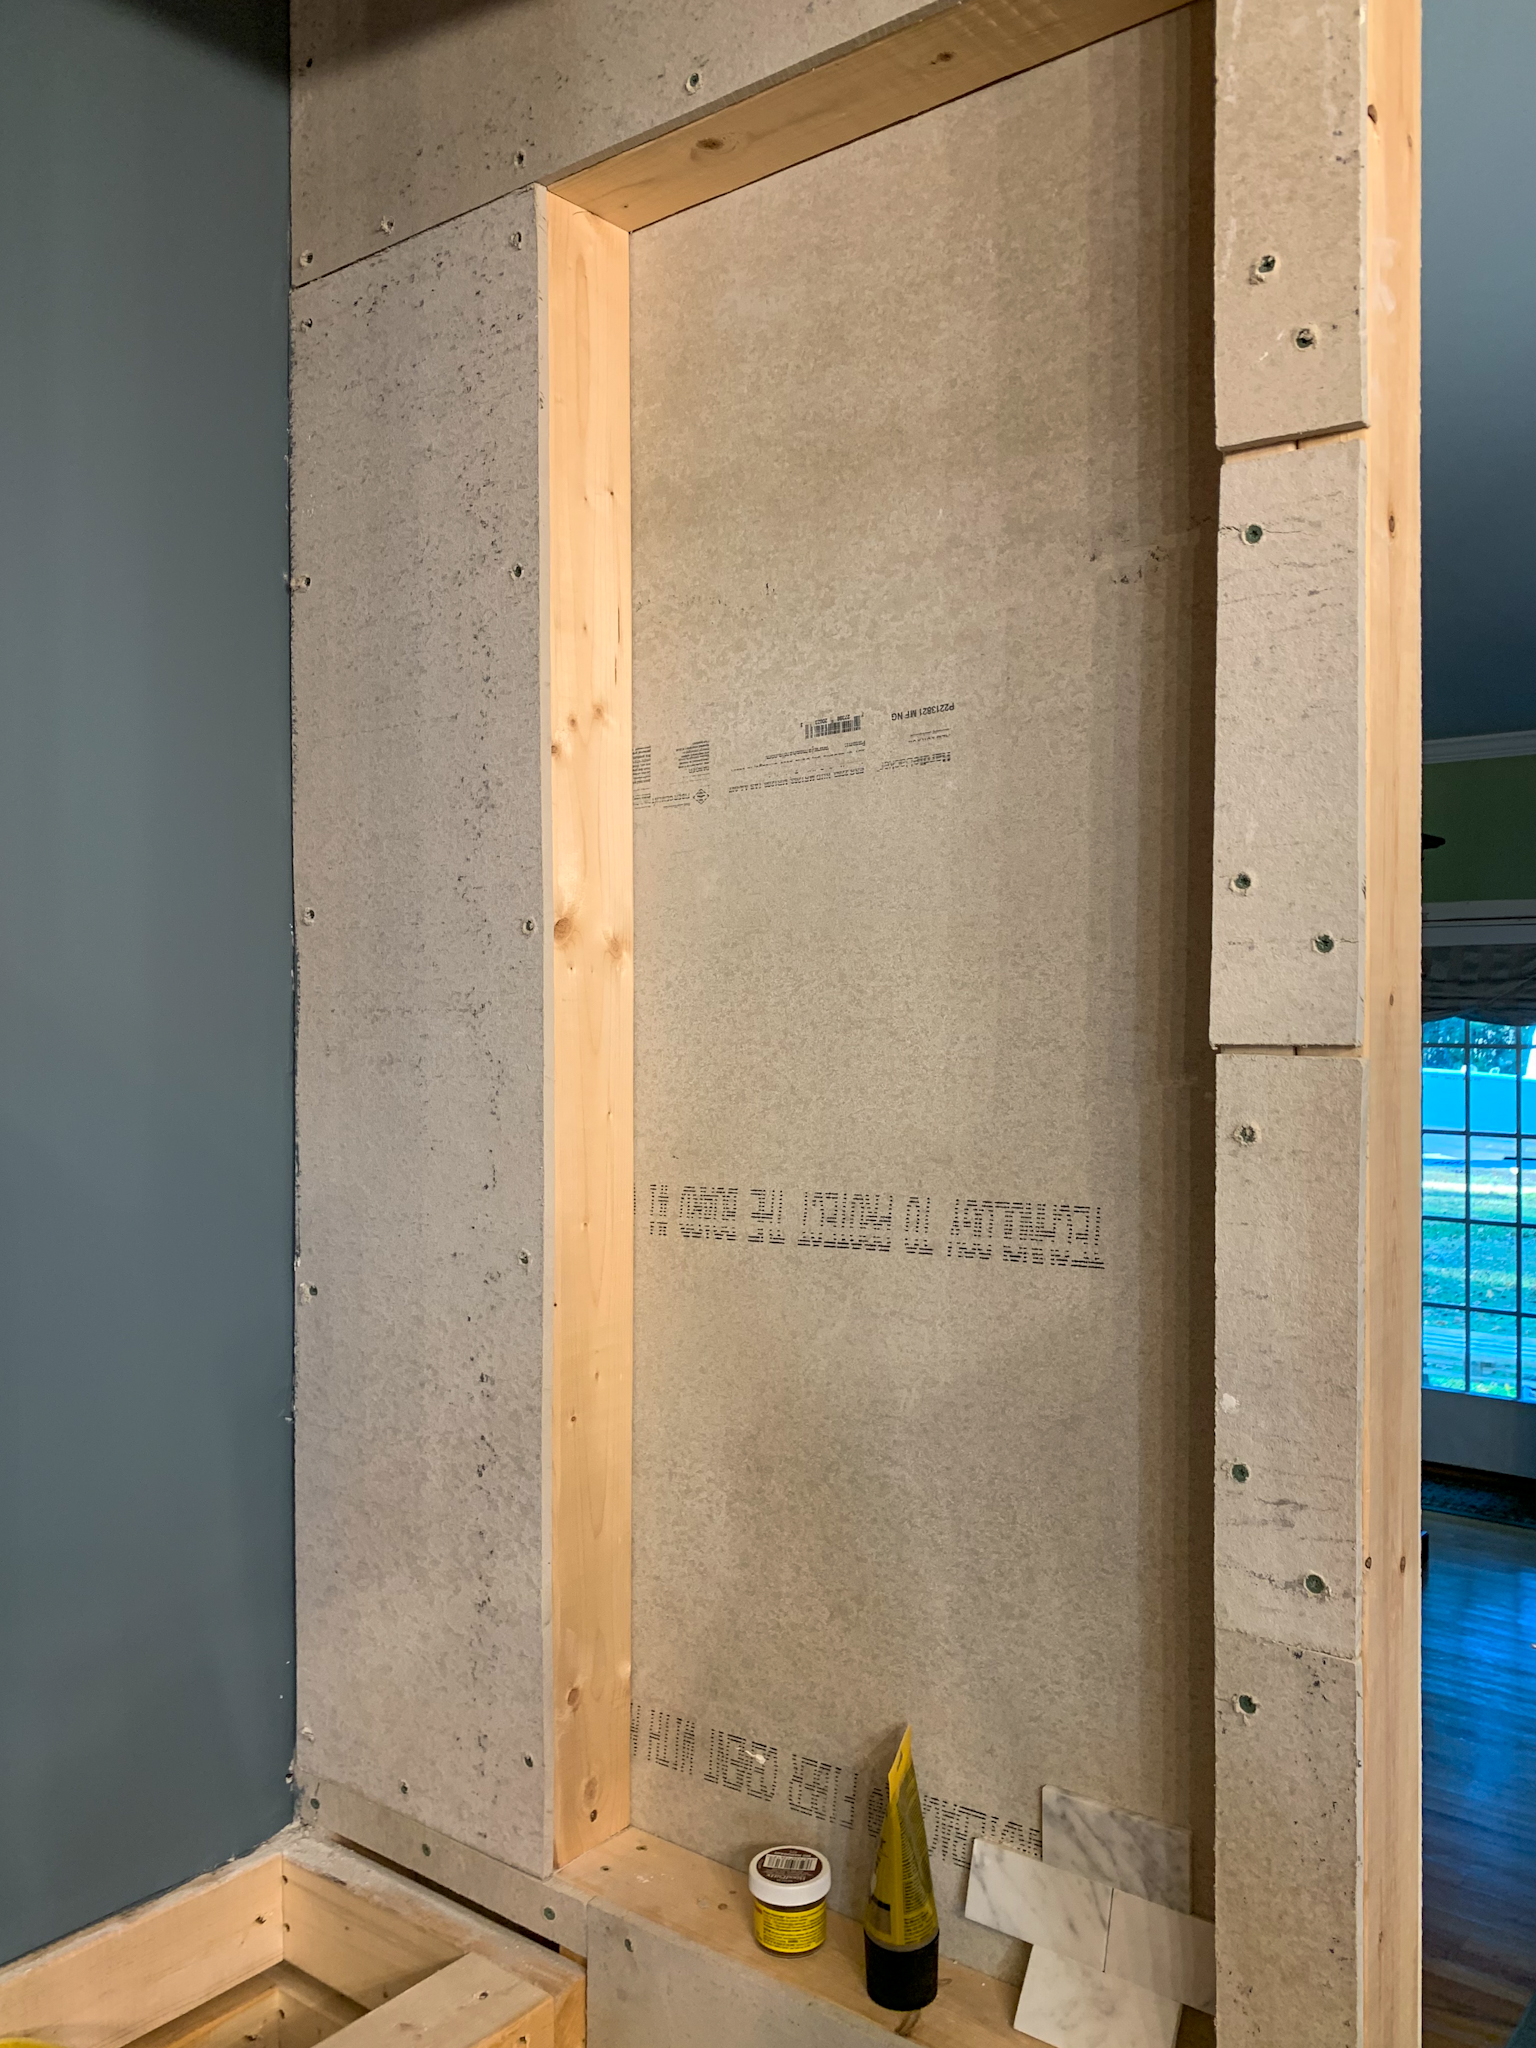
Step one: Install cement board for all tiled areas.
Step 2: Mortar.
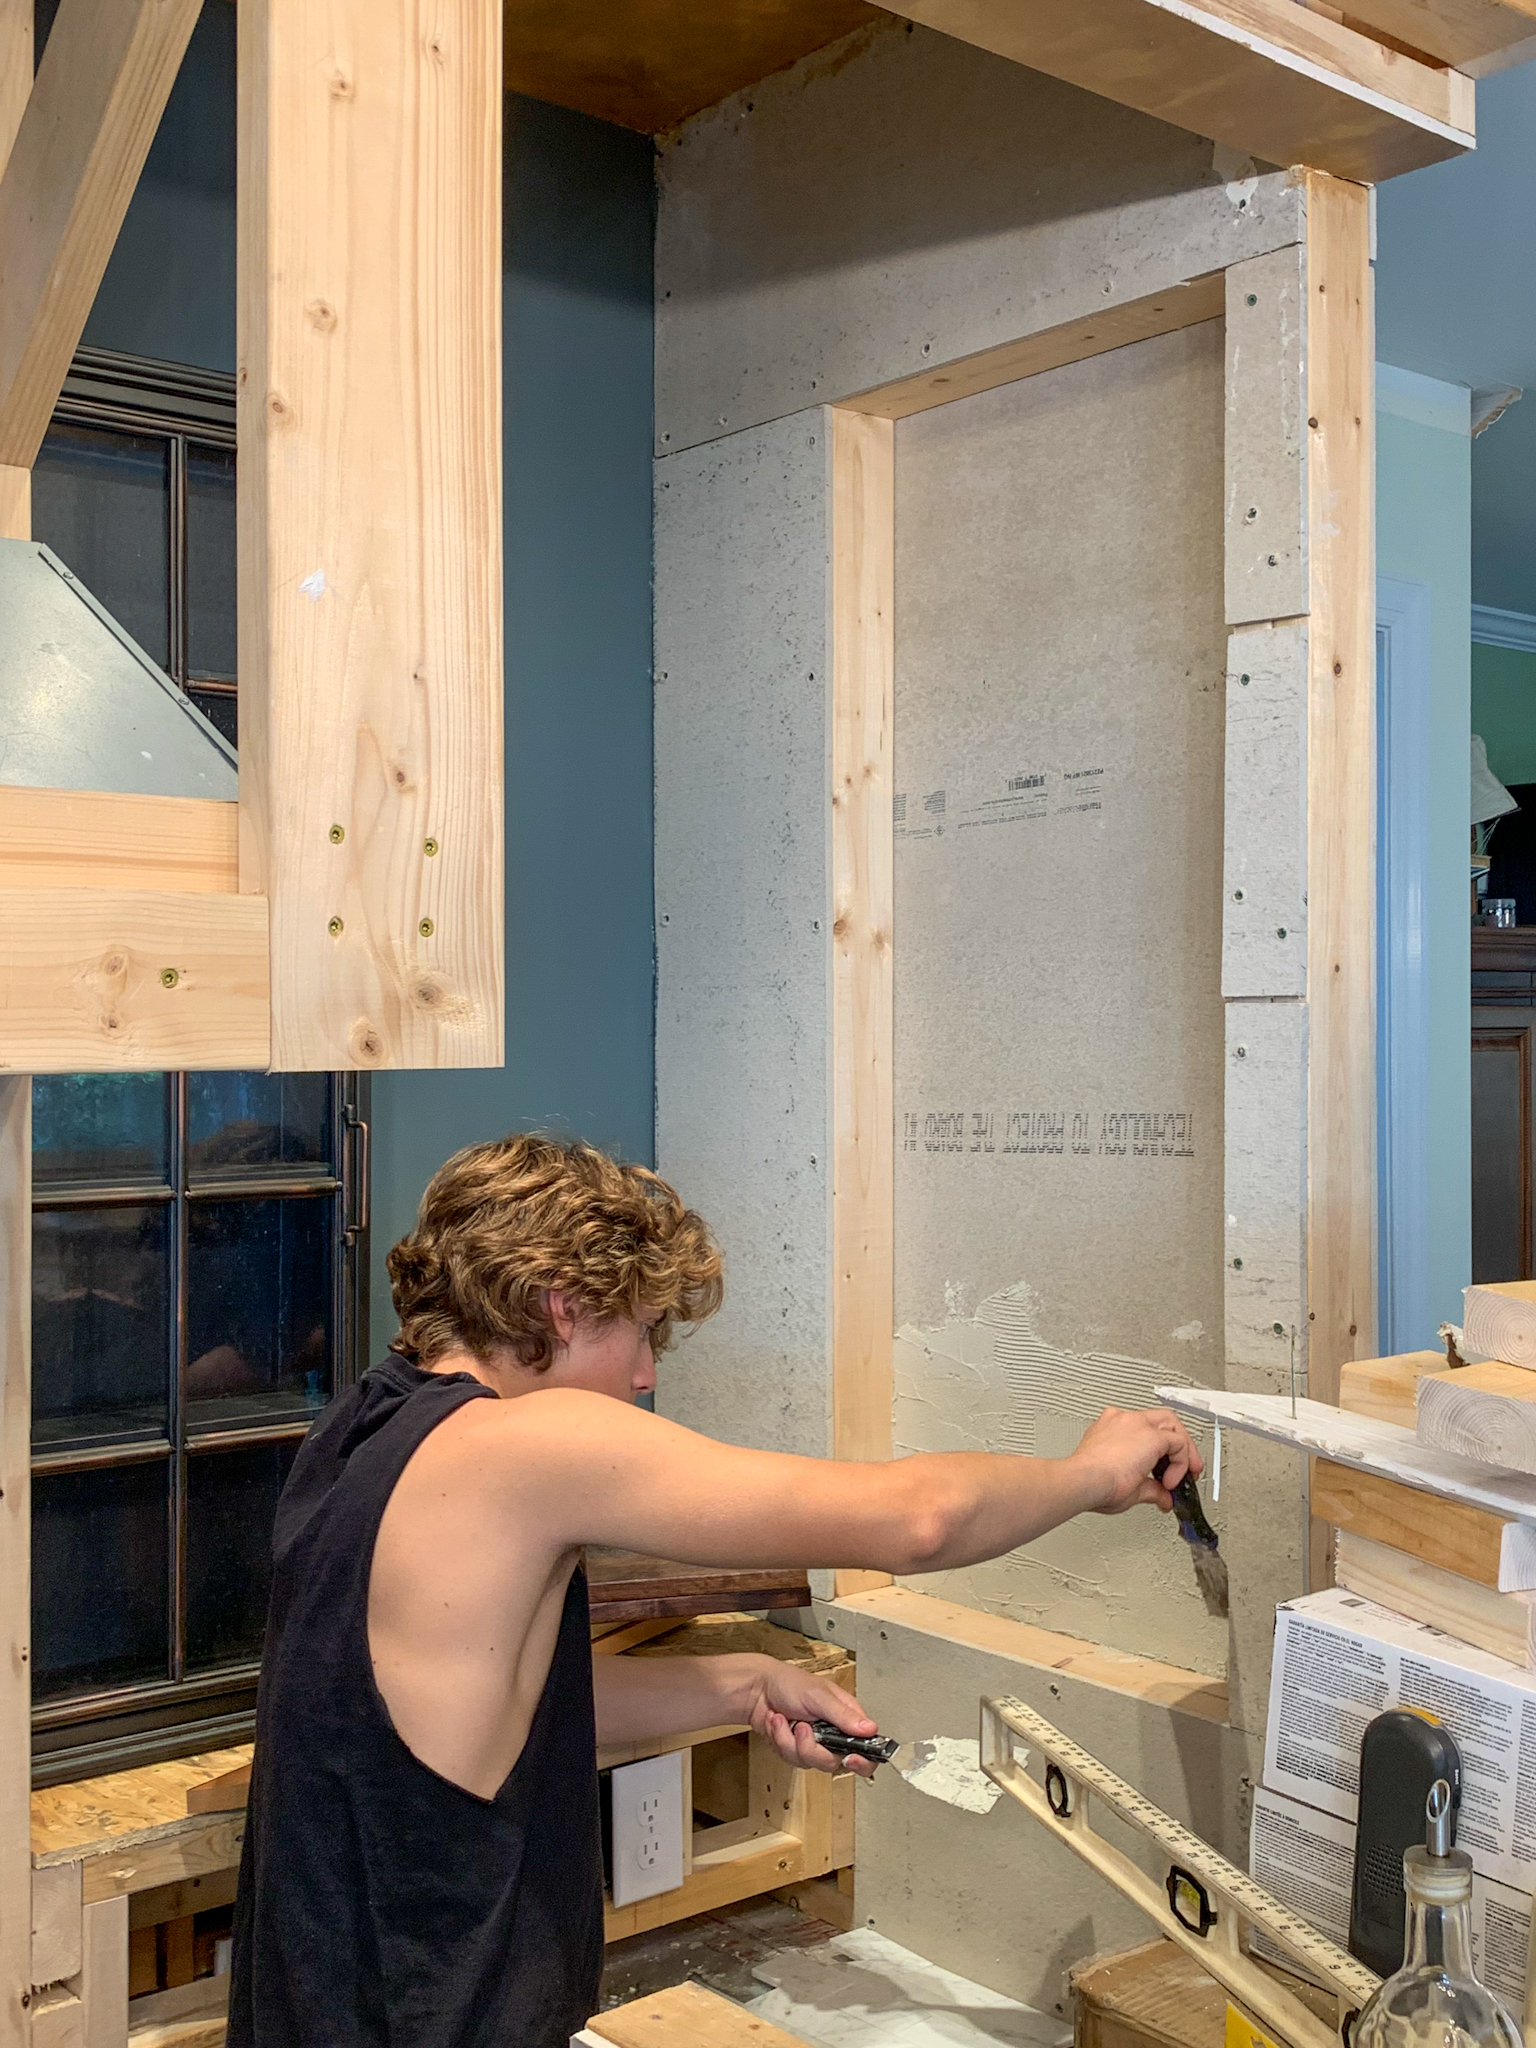
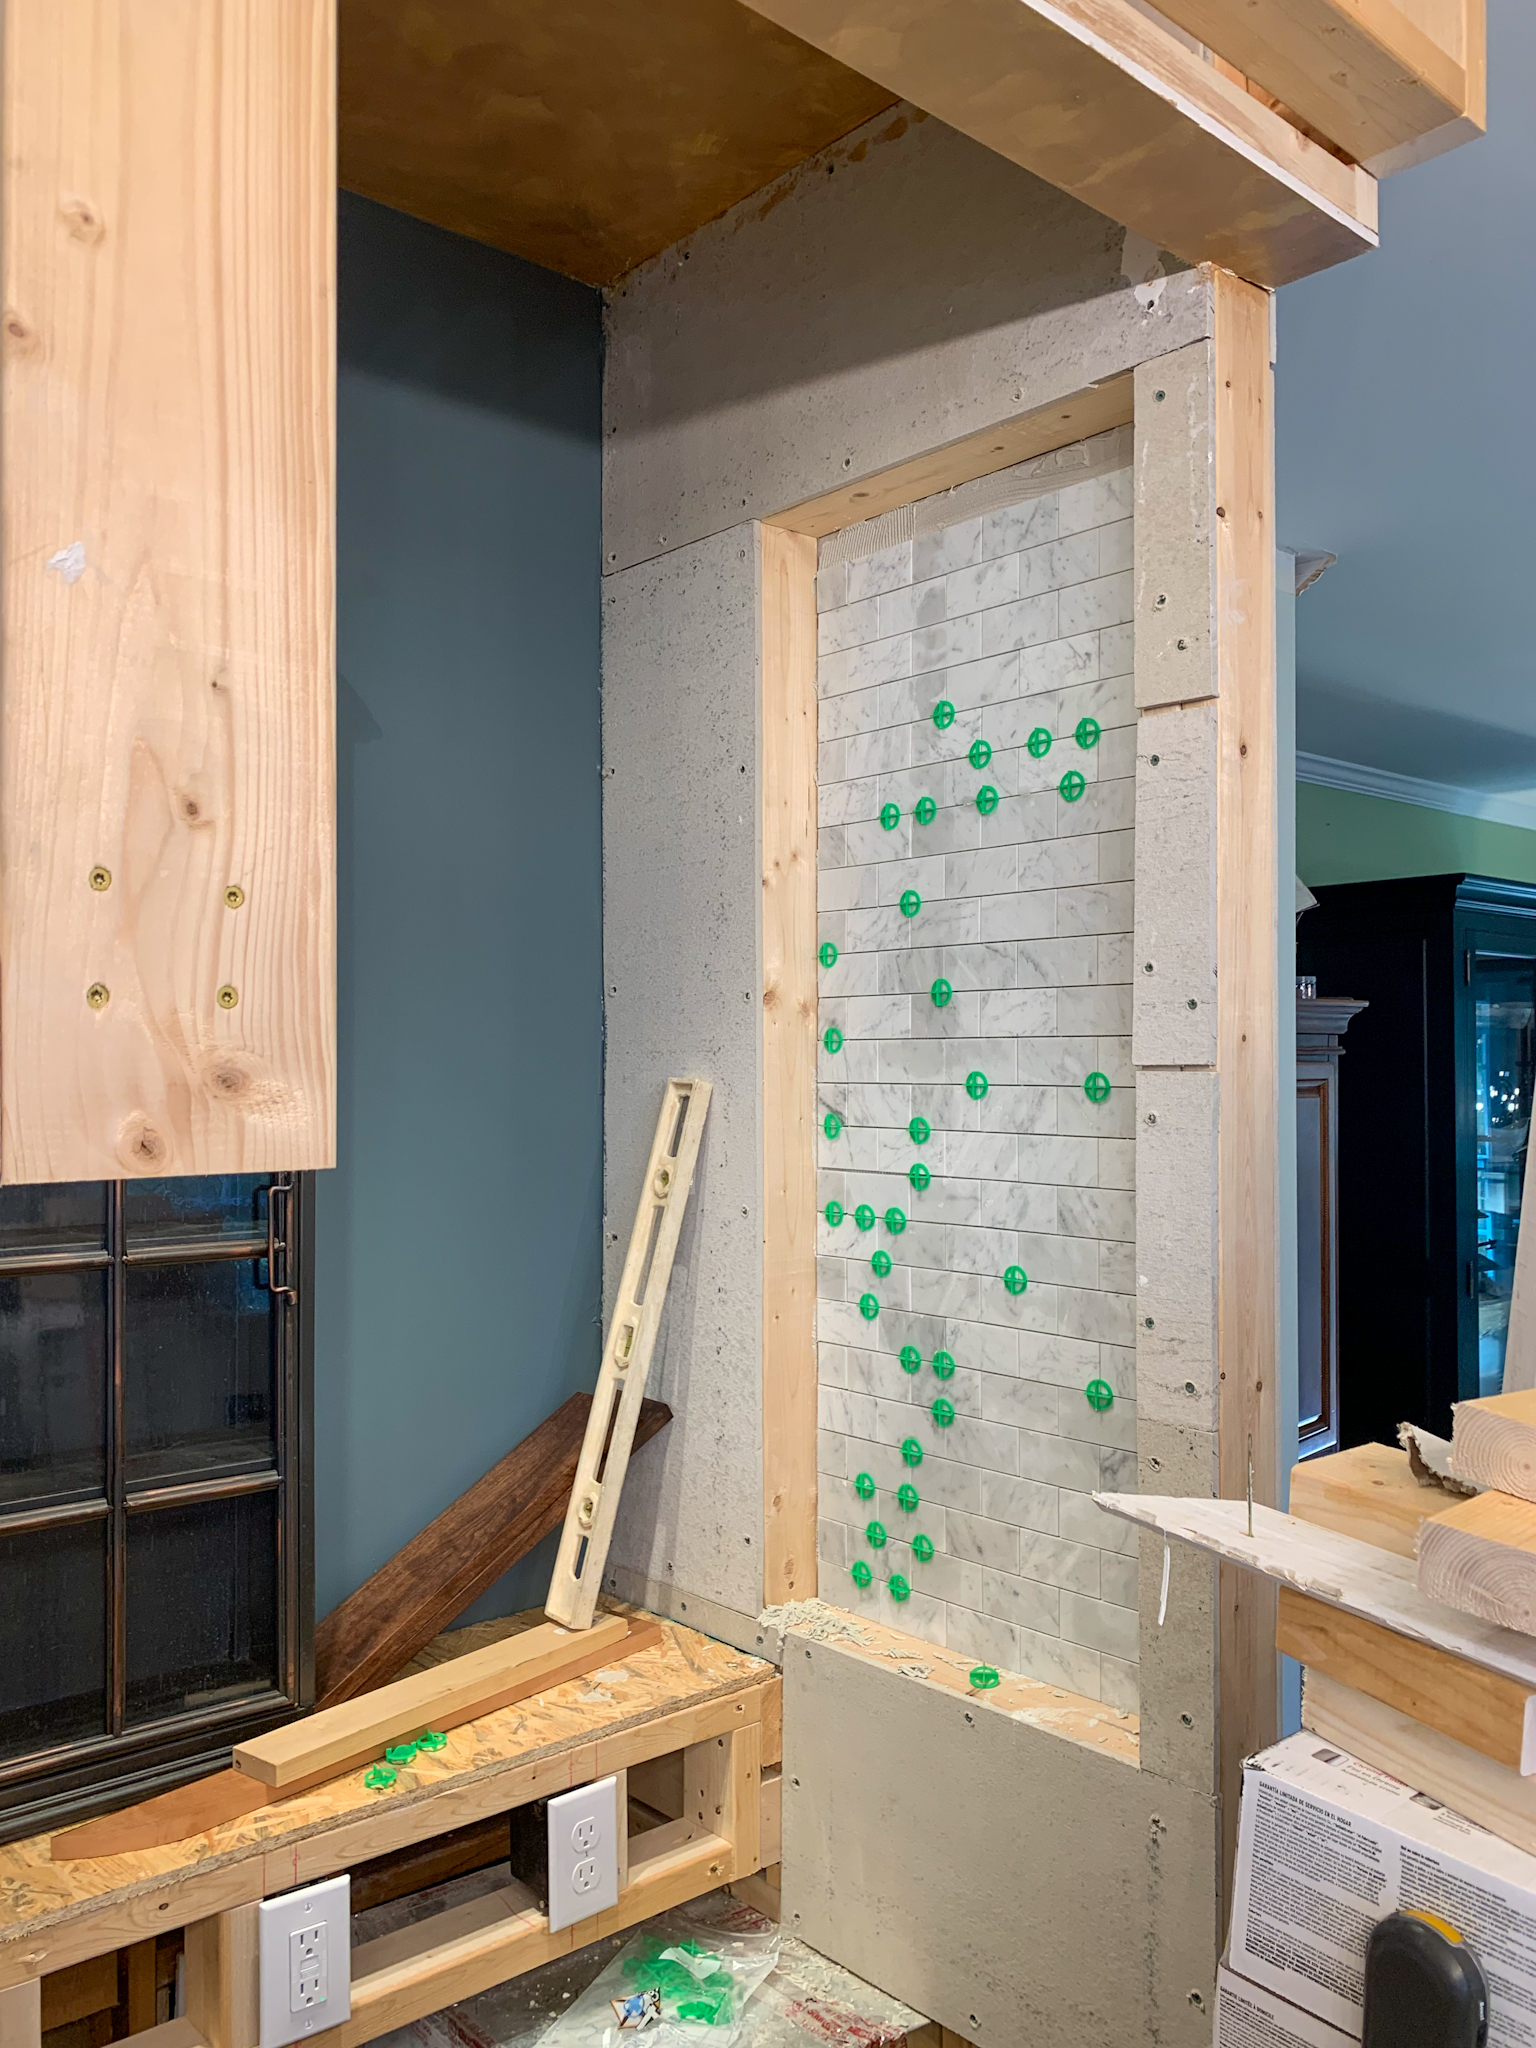
Step 3: Tile.
Step 4: Prefinish the walnut shelves prior to installation. I highly recommend lots of lacquer to prevent warping/staining from spills or drips.
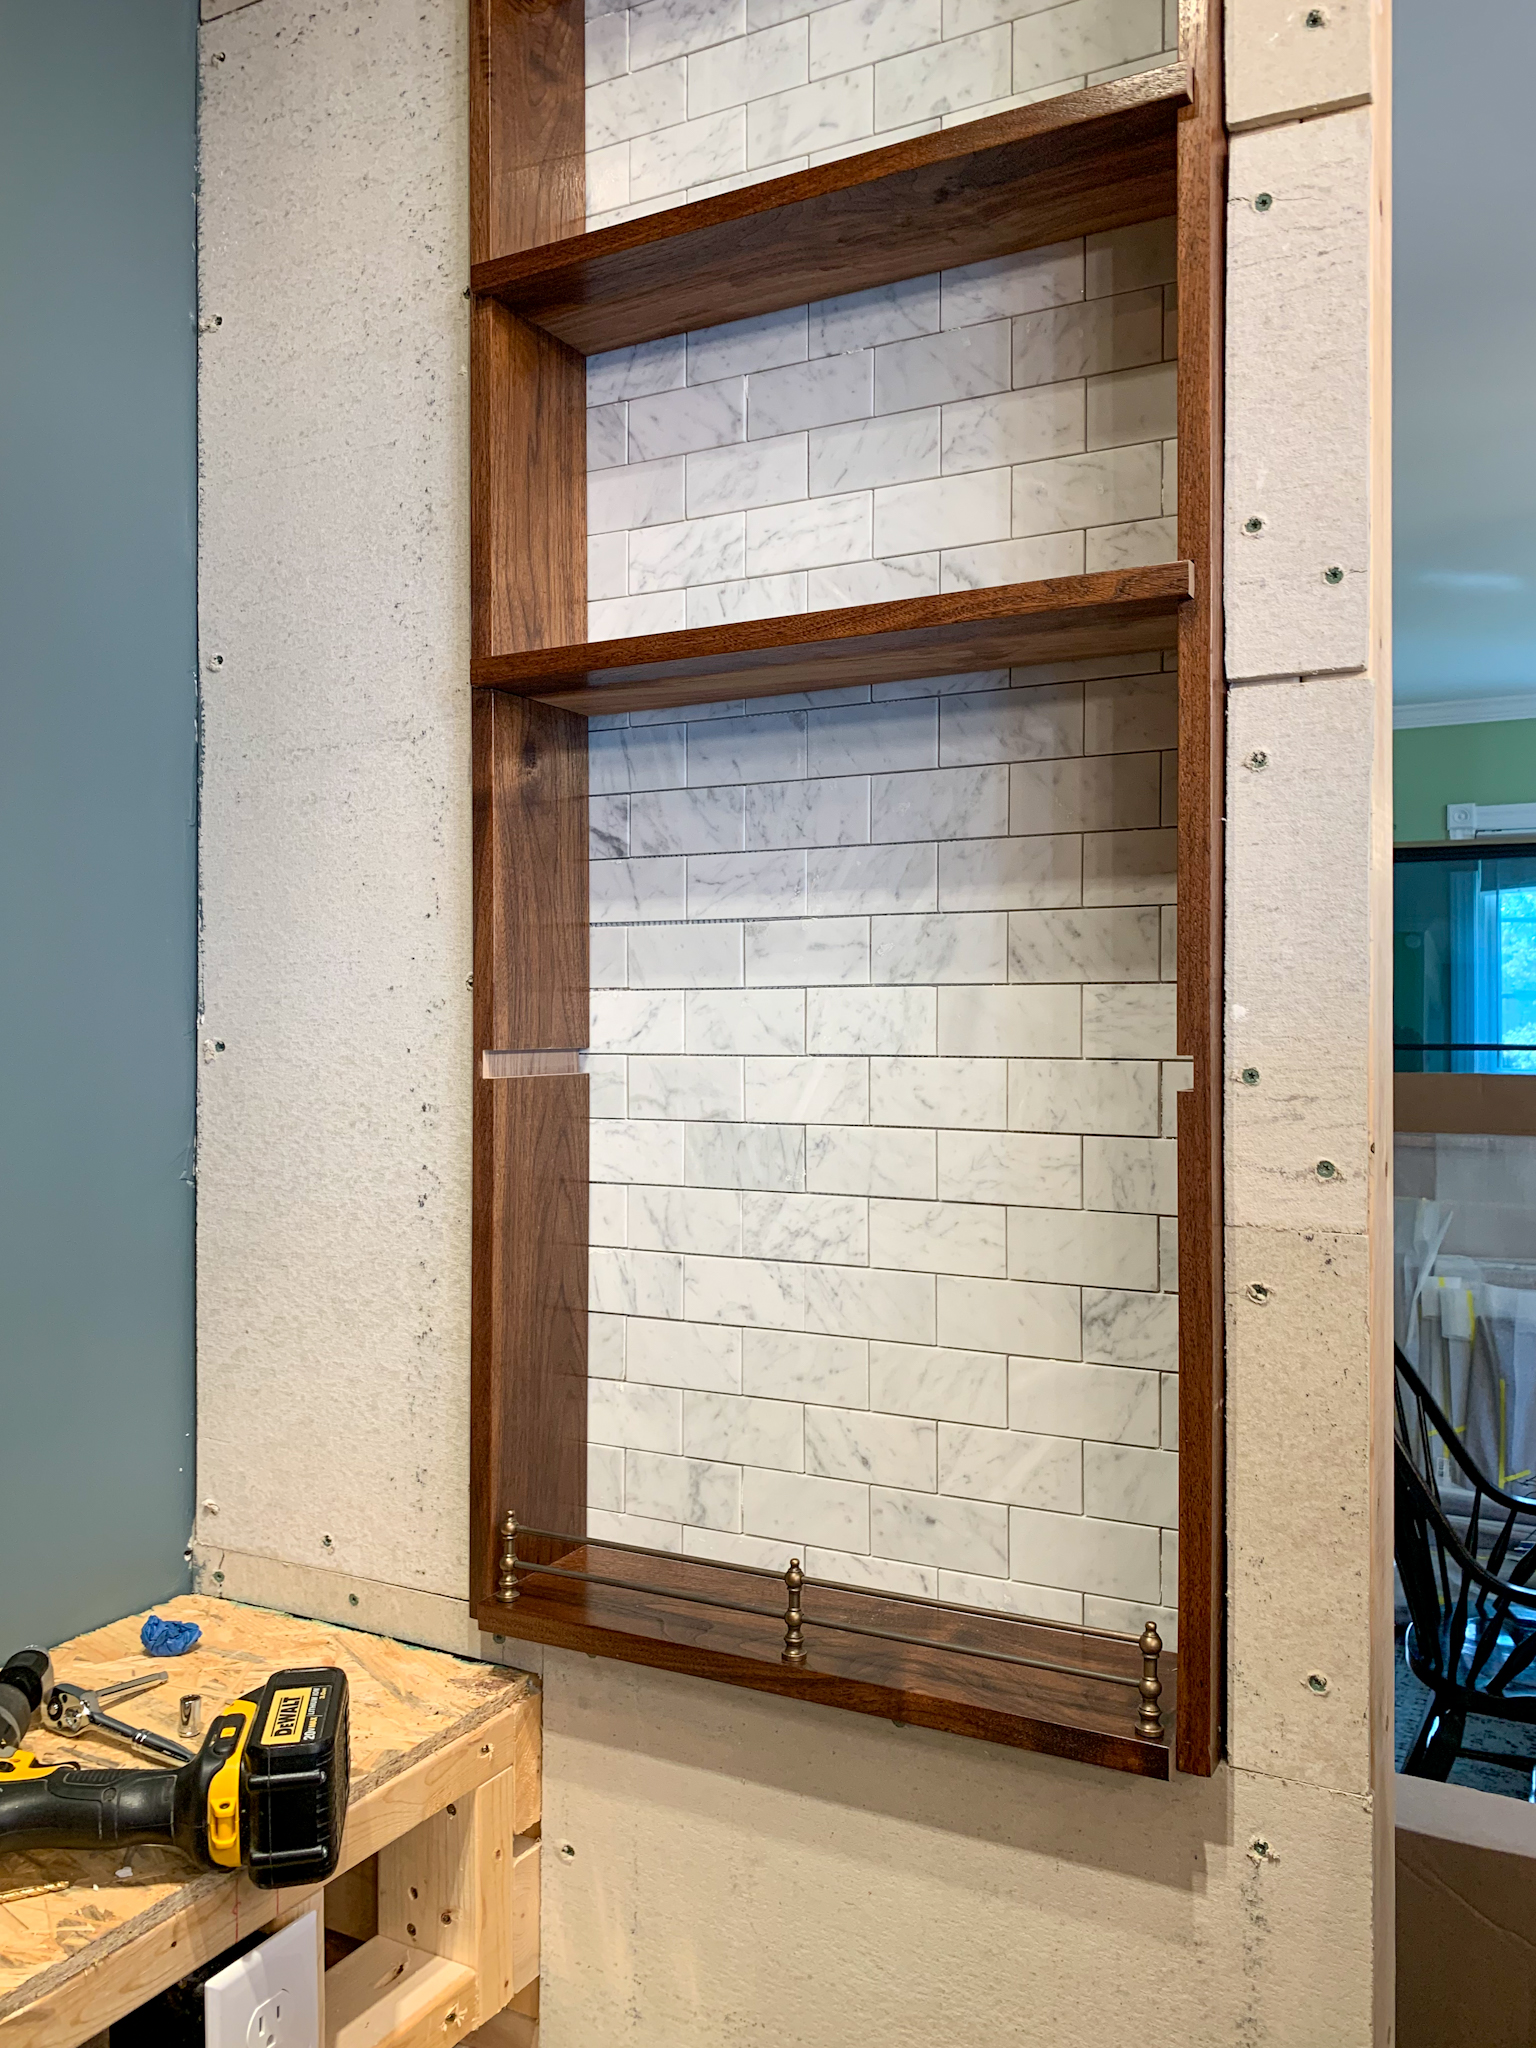
Step 5: Install wooden shelf surround (if you’re using gallery rails, I highly recommend attaching them to the shelves prior to installation). I recommend leaving the shelves unattached until you have completed the grouting process (it’s much easier to grout without the shelves in).
Step 6: Install remaining tile surrounding shelves.
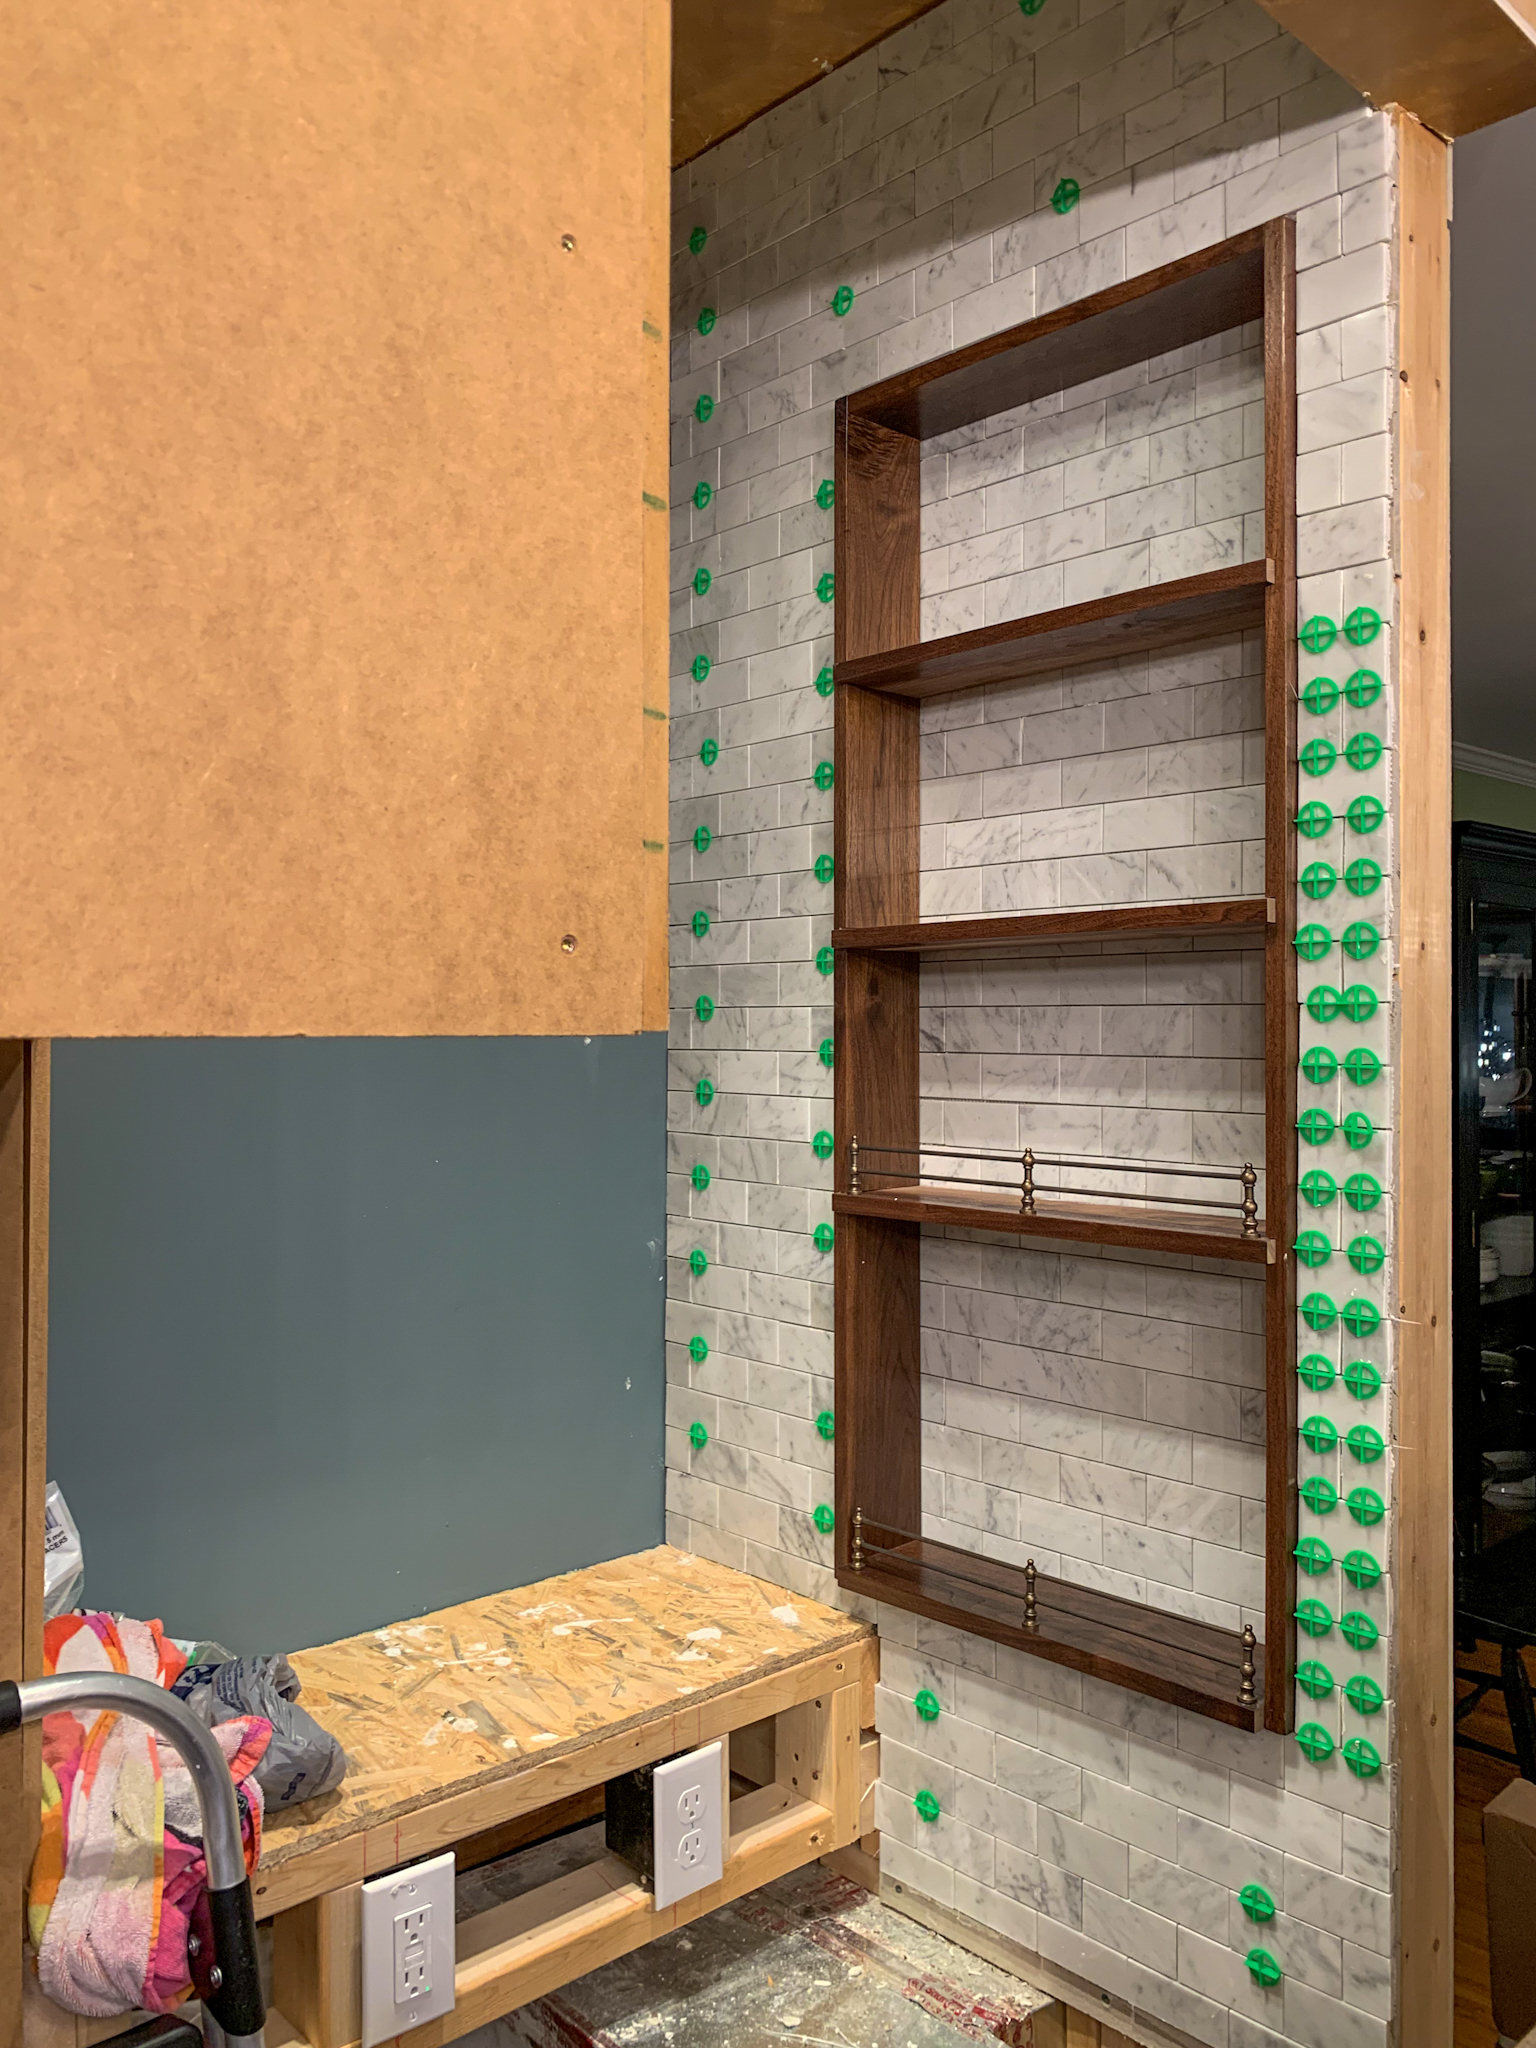
Step 7: Grout and caulk (don’t skip the caulk, it prevents fluids from getting behind the shelves and warping them).
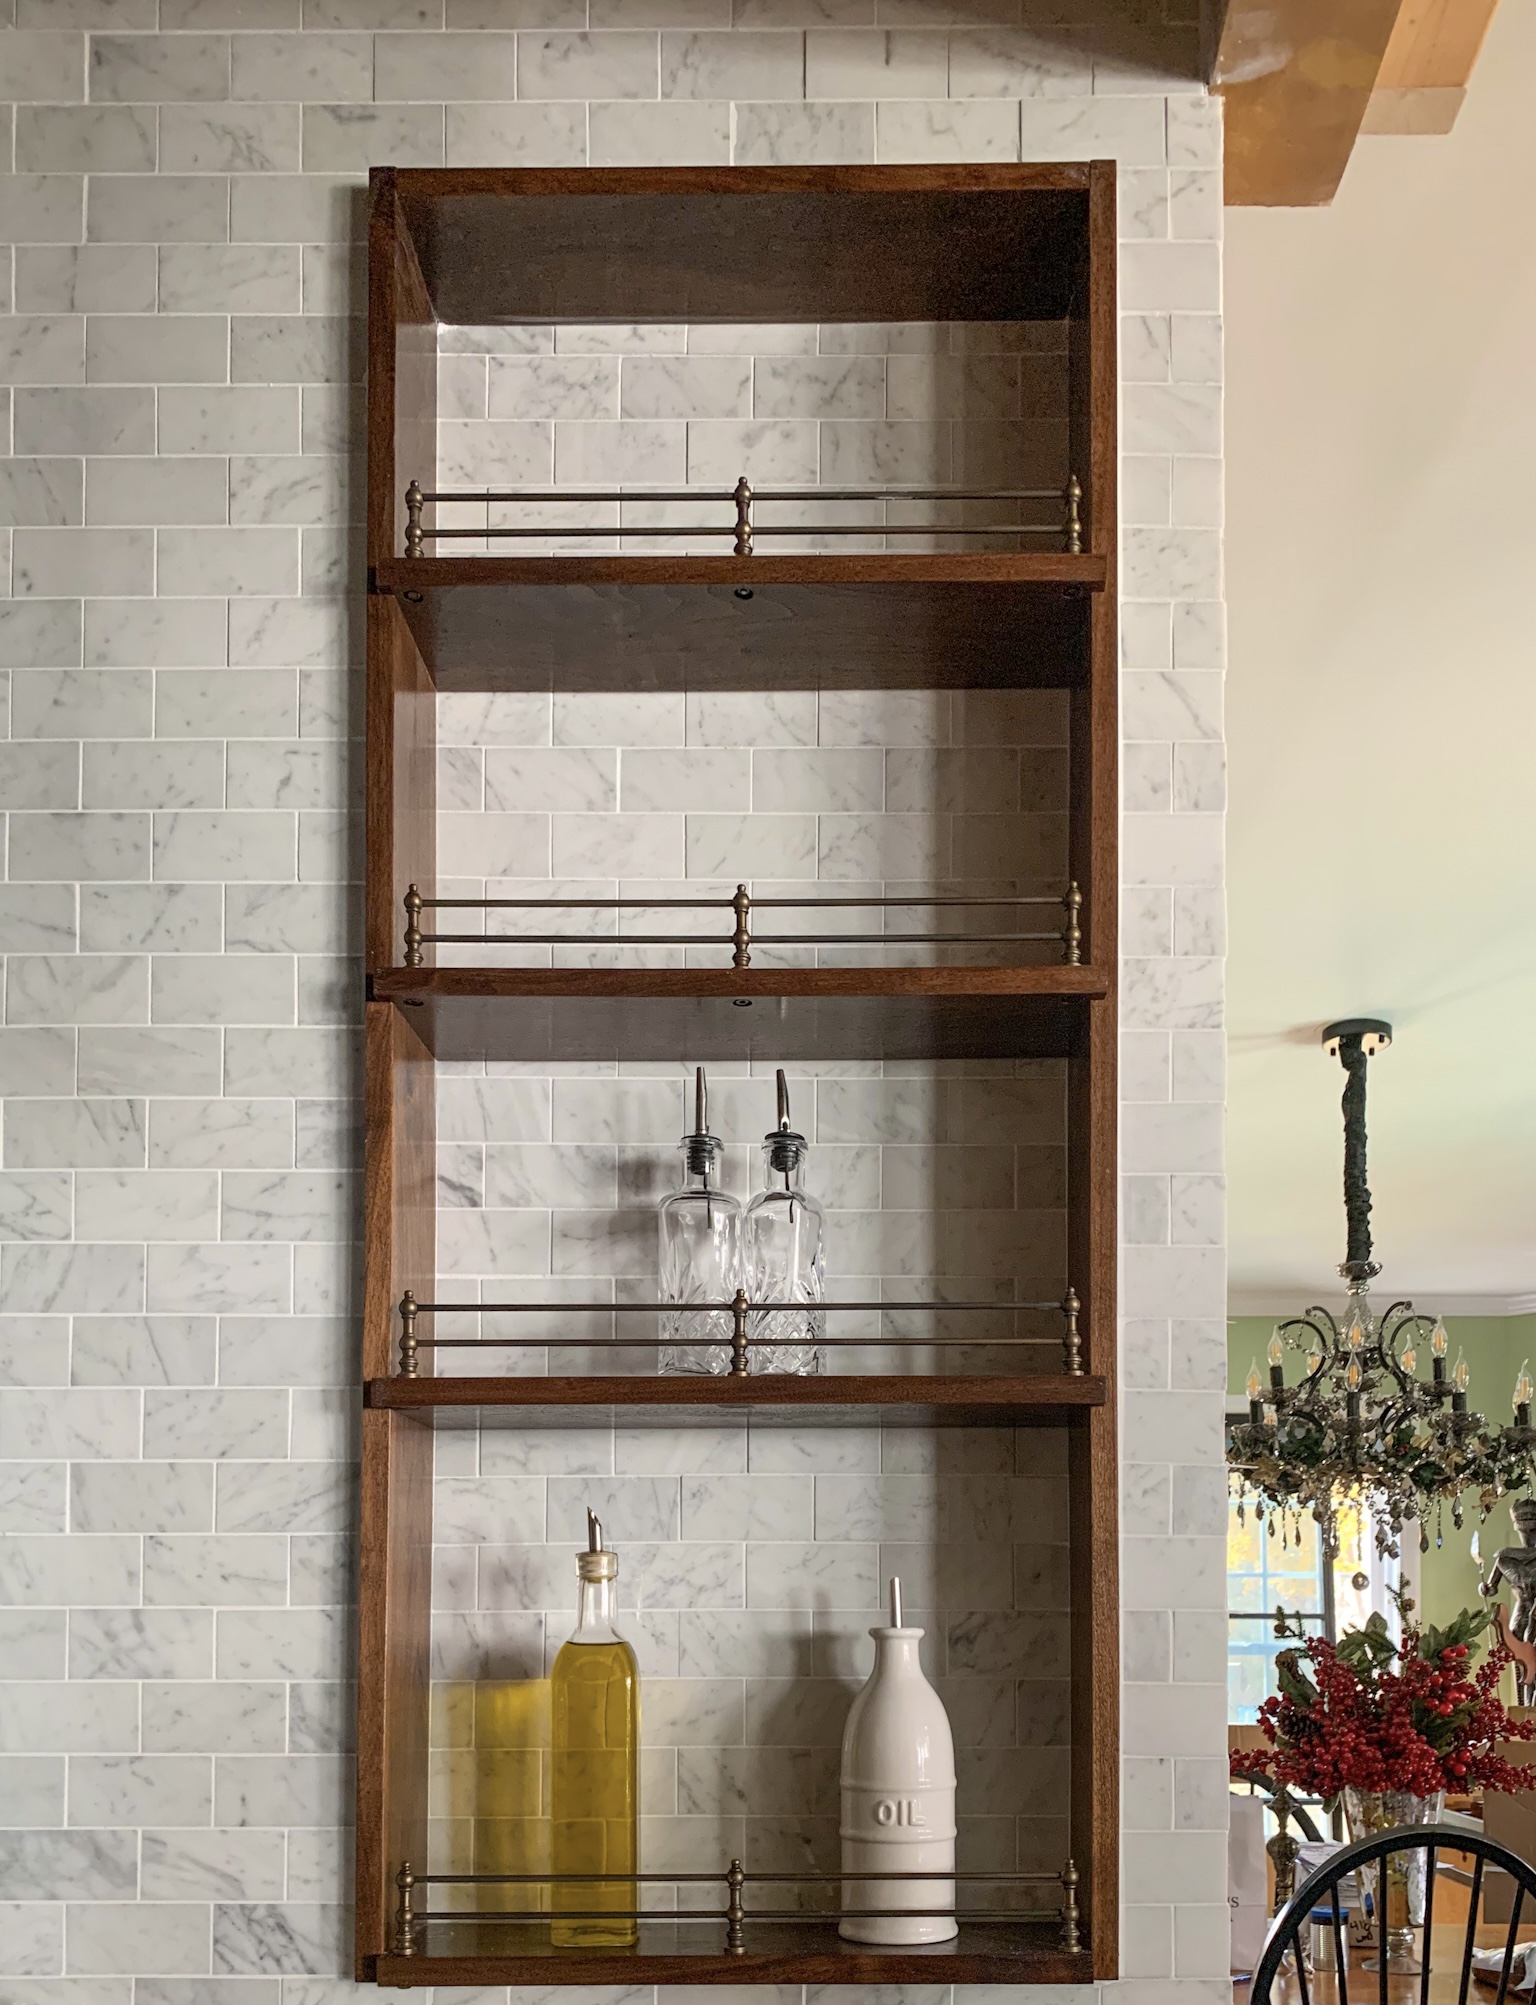
Step 8: Style: Like everything else in the kitchen, this shelf should be both beautiful and functional. Keep your favorite oils, vinegars, Worcestershire sauce, etc. within reach.
I don’t know if I mentioned this… but I LOVE my shelves!
Price breakdown: Shop This Project On Our LTK Store
Walnut shelves and lining $199.43
Double brass gallery rails: Vintage Hardware: $250.70
Carrara marble subway tiles behind shelves: Stone Center Online: About $100
Supplies for installing tile and shelves (mortar, grout, nails, stain, and lacquer): About $100
Total: $650.13
If you’re planning your dream kitchen, I highly recommend these!
*Legal stuff:
I am honest about my experiences with different products and write because I enjoy it. I do however, have the opportunity to earn money for my writing, also.
Slavetodiy.com is a participant in the Amazon Services LLC Associates Program, LTK, and other affiliate programs: affiliate advertising programs designed to provide a means for sites to earn advertising fees by advertising and linking to amazon.com and other sites. These programs offer a small commission on products sold through their affiliate links. Each of your purchases via our affiliation links supports our cause at no additional cost to you.
If a blogger links to a product (with a special code for affiliates embedded in the link), and a reader places an item in their “shopping cart” through that link within 24 hours of clicking the link, the blogger gets a small percentage of the sale. These links are not “pay per click.” If you click on the product link and stay around and purchase something else, however, I will get a commission on that sale.
How To Get That Antique Mirror Backsplash For a Fraction of the Price and Install it Like a Pro
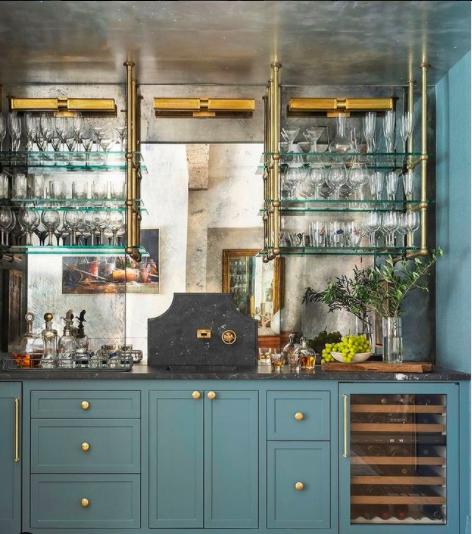
I’ve been dreaming of an antique mirrored backsplash since I first saw it on a simple home bar. The mirrored tiles are everything from one solid sheet, to tiles with beveled edges, to larger flat tiles. When I started researching where to buy the tiles for our own home bar backsplash (because of course I just HAD to have one) I was mortified. Those suckers are expensive. There are some sellers on ETSY selling these for $60 a square foot… which is well out of any budget I’m willing to spend on a backsplash. But look how beautiful they are!
*This post may contain affiliate links. Please see full disclosure at the end of the post.

So, what did we do? We DIYed it (of course). And it came out JUST as dreamy as those designer looks.
Before I start the tutorial, please know that this process is quite labor intensive and makes a huge mess. I recommend doing this with a buddy, a spouse, or a helper (my body was screaming at me for two days after the paint-stripping process because I had underestimated the amount of up and down and crouching). But, what do you get out of it? An awesome, one of a kind backsplash!
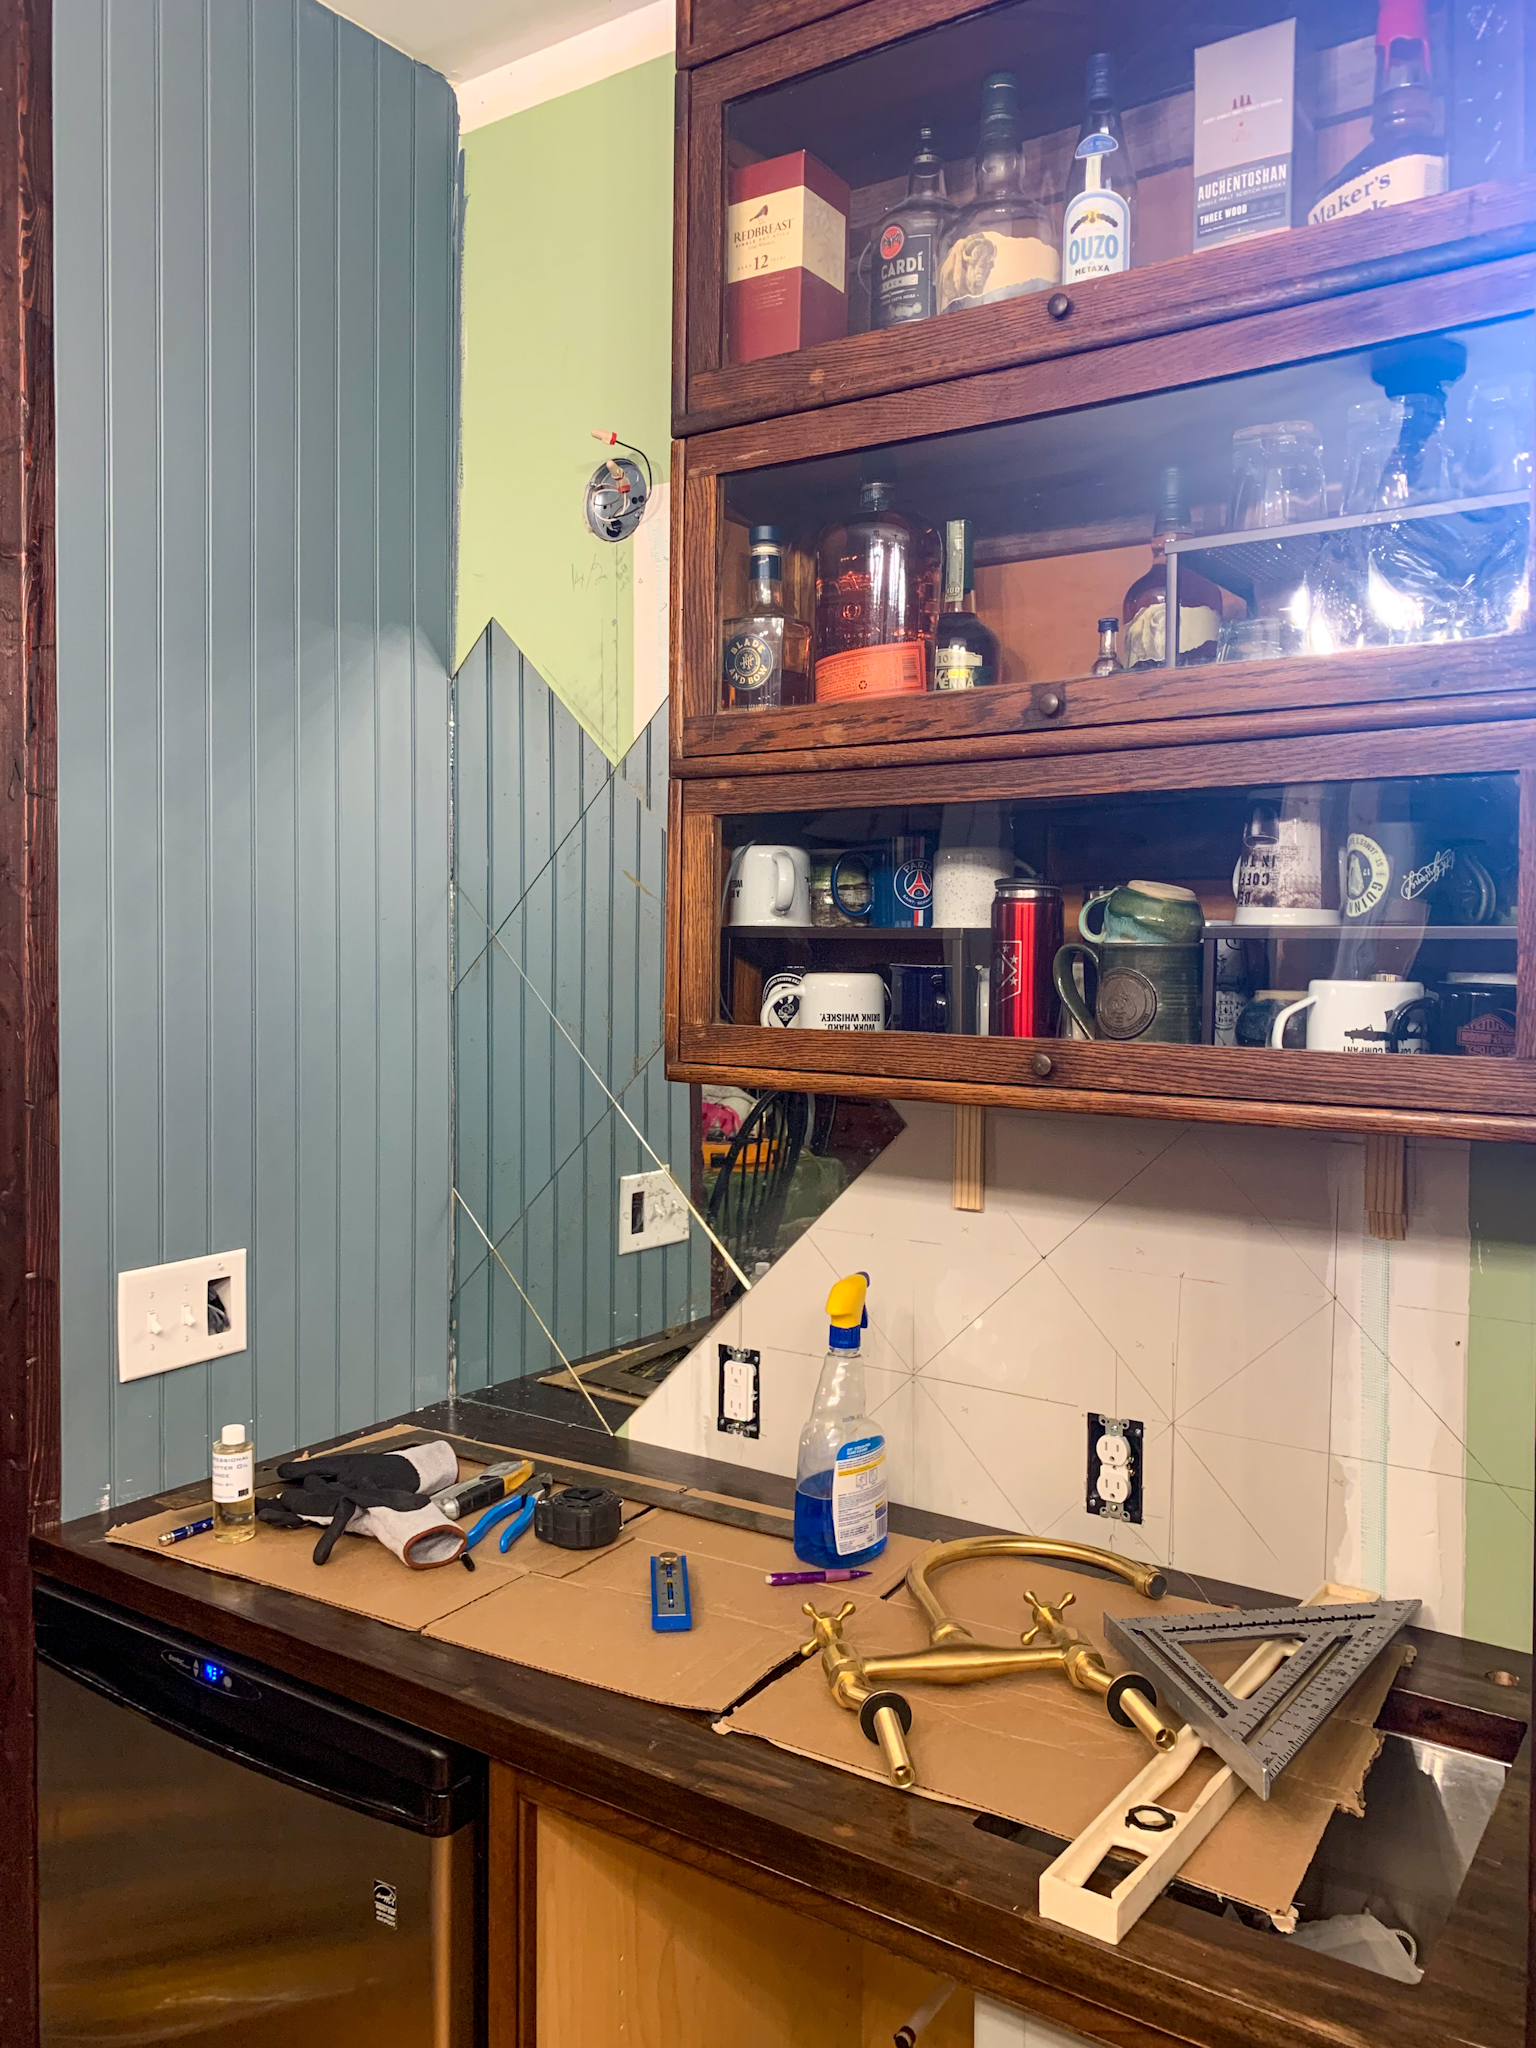
I did quite a bit of research and looked at a LOT of pictures before I got out the plastic dropcloth and laid out the mirrors. I encourage you to look at the finished photos of ours and adjust your plan accordingly. I wanted a lighter antiqued look with a glow… but if you want more antiquing, or a different color underneath, it will still look great!
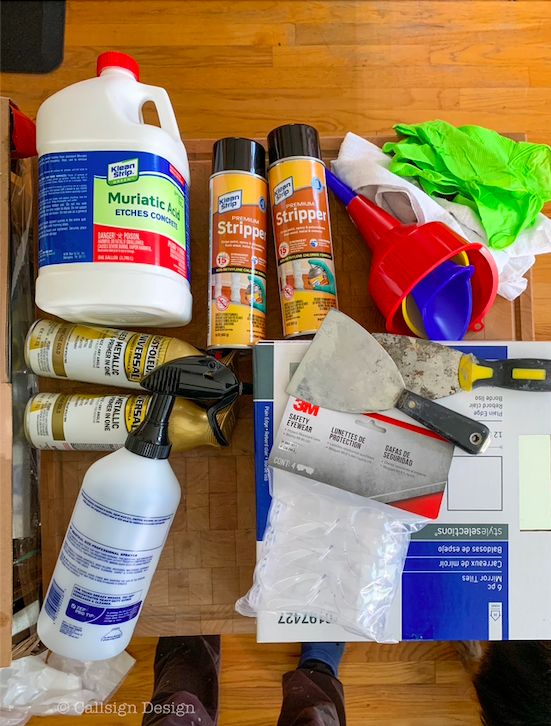
So, this is what our materials looked like before we began, but I can tell you up front that we made at least one MAJOR adjustment. Unless you’re doing a VERY small project, the stripper shown is not going to do the trick. I ended up using a bucket of stripper we had previously used on an antique mirror someone had painted, and slopping that on really did the trick (a full materials list is at the end of the post).
What you’ll need: two plastic drop cloths, muriatic acid, stripper, disposable gloves, eye protection, funnels, gold or gray spray paint, a spray bottle, 12×12″ mirror panels (you can cut these down later if you’d like smaller tiles), and a good putty or mudding knife. I apologize for some of the progress photos being missing: once I got into the middle of the stripping process I couldn’t stop and I had goop and acid on my gloves.
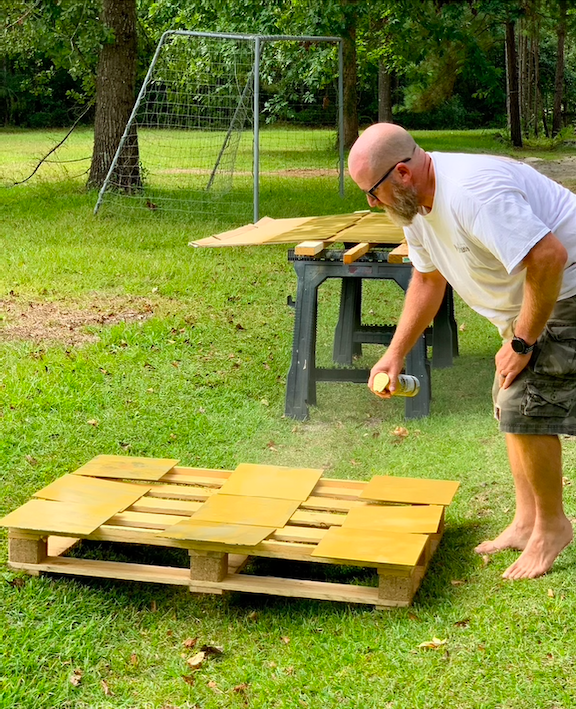
1 Put down your plastic sheet somewhere you can work and where you can get messy (we did this project on a deck we’ll be tearing out later).
2. Lay out your tiles so you can walk between them.
3. Put on your gloves and eye protection and slather the back of each tile (there is a thick layer of paint) with a good coat of stripper. To clarify, every step of this process, the “front” or glass face is down… you are only manipulating the backside finish.
Pro tip: Mirrored tiles are made up of three layers: Glass, silver reflective material, and a thick painted backing that protects the silver. This step removes the painted backing. It will lift EASILY when it is ready: don’t scrape at the mirrors or it will scratch through all of the layers and be visible later (ask me how I know).
4. When the backing is lifted (set it aside next to the tiles on the plastic drop cloth), spray off the back of each tile with water.
5. Move the tiles to a safe place, face down, where the front glass will not get scratched (we moved them to a smooth concrete slab and had individual paper towels down to protect the glass surface of each tile.
6. Put some dawn dishsoap on the back of each tile, wipe it down thoroughly (keep the hose running next to you here) rinse and dry it (it helps to have two people working on this step, one cleaning one drying). What you should have left at this point is just the silver backing. If there is leftover paint, that’s okay, it’s not going to show through, that area just will not be antiqued.
7. The next step it is VERY CRITICAL you are wearing protective eyewear, gloves, and clothing as you’ll be dealing with muriatic acid. Carefully use the funnel to pour muriatic acid into the spray bottle (I would use a NEW spray bottle to ensure you’re not mixing any other chemicals with the acid).
8. Gather up your used drop cloth (that should be very wet and filled with used goop) and put a new plastic dropcloth down so you don’t have any chemical reactions with the acid step. Lay your mirrored tiles glass side down again, spaced out.
9. This is sort of the fun part: now you’re antiquing! If you want heavy pieces of the silver gone you can spray it on more liberally. Mist the acid around the edges of the panels for a natural antiqued look, spraying some tiles more heavily and some less. Then you just let the acid do it’s work. Keep some clean rags on hand to blot excess acid in case you spray too much. You’ll be able to see when the acid is finished doing it’s work: you’ll be able to see through the clear glass to what’s beneath.
10. Get your hose out and spray off the panels to clear the acid.
11. Move the panels back to your washing and drying area and repeat the process of washing and drying (don’t forget to protect the face of the glass!). Your panels are now ready for paint!
12. We chose an antiqued gold spray paint instead of gray to give our panels a lighter, gilded feel, but gray works also if you’re into a moodier look.
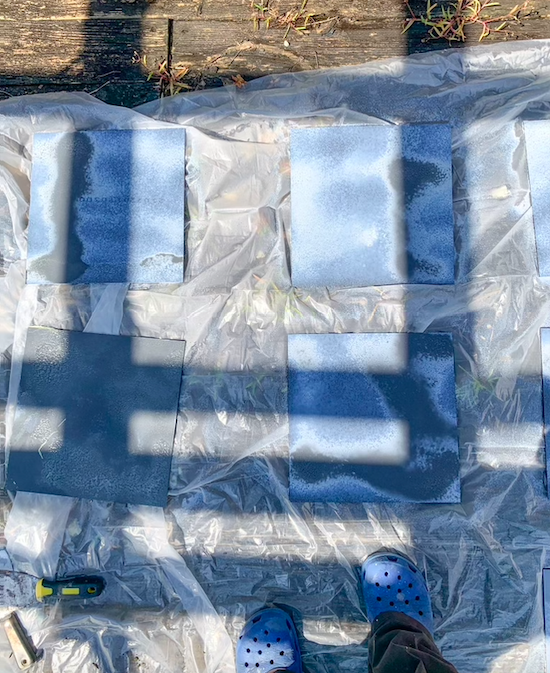
13. Lay out the panels in a place where you’ll have plenty of time to let them dry, glass side down. Rainman did two good layers of gold spraypaint with the panels laid out on cardboard, allowing the layers to dry inbetween.
14. When they are completely dry, you can store them stacked with cardboard between the panels to prevent scratching.
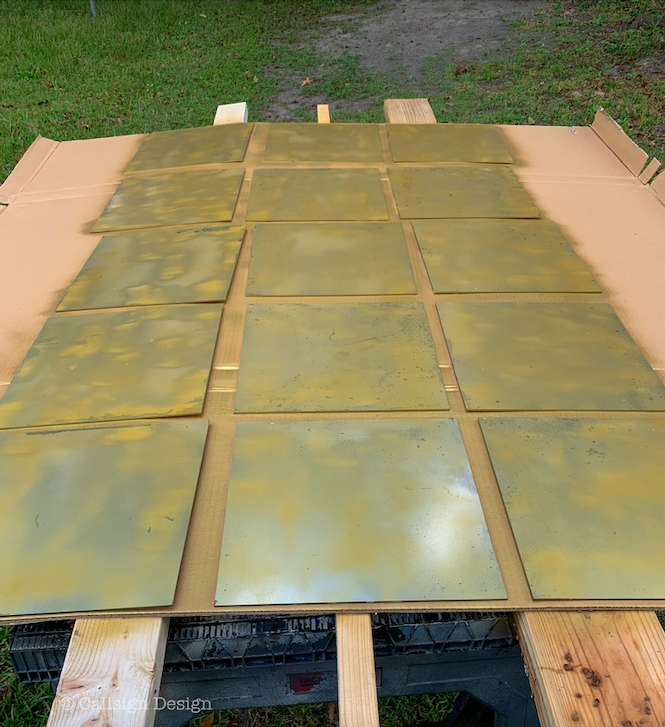
In the photo above, you can see the dark spots through the first layer of paint: those are the spots the acid etched into the panels, and where you will see through to the paint.
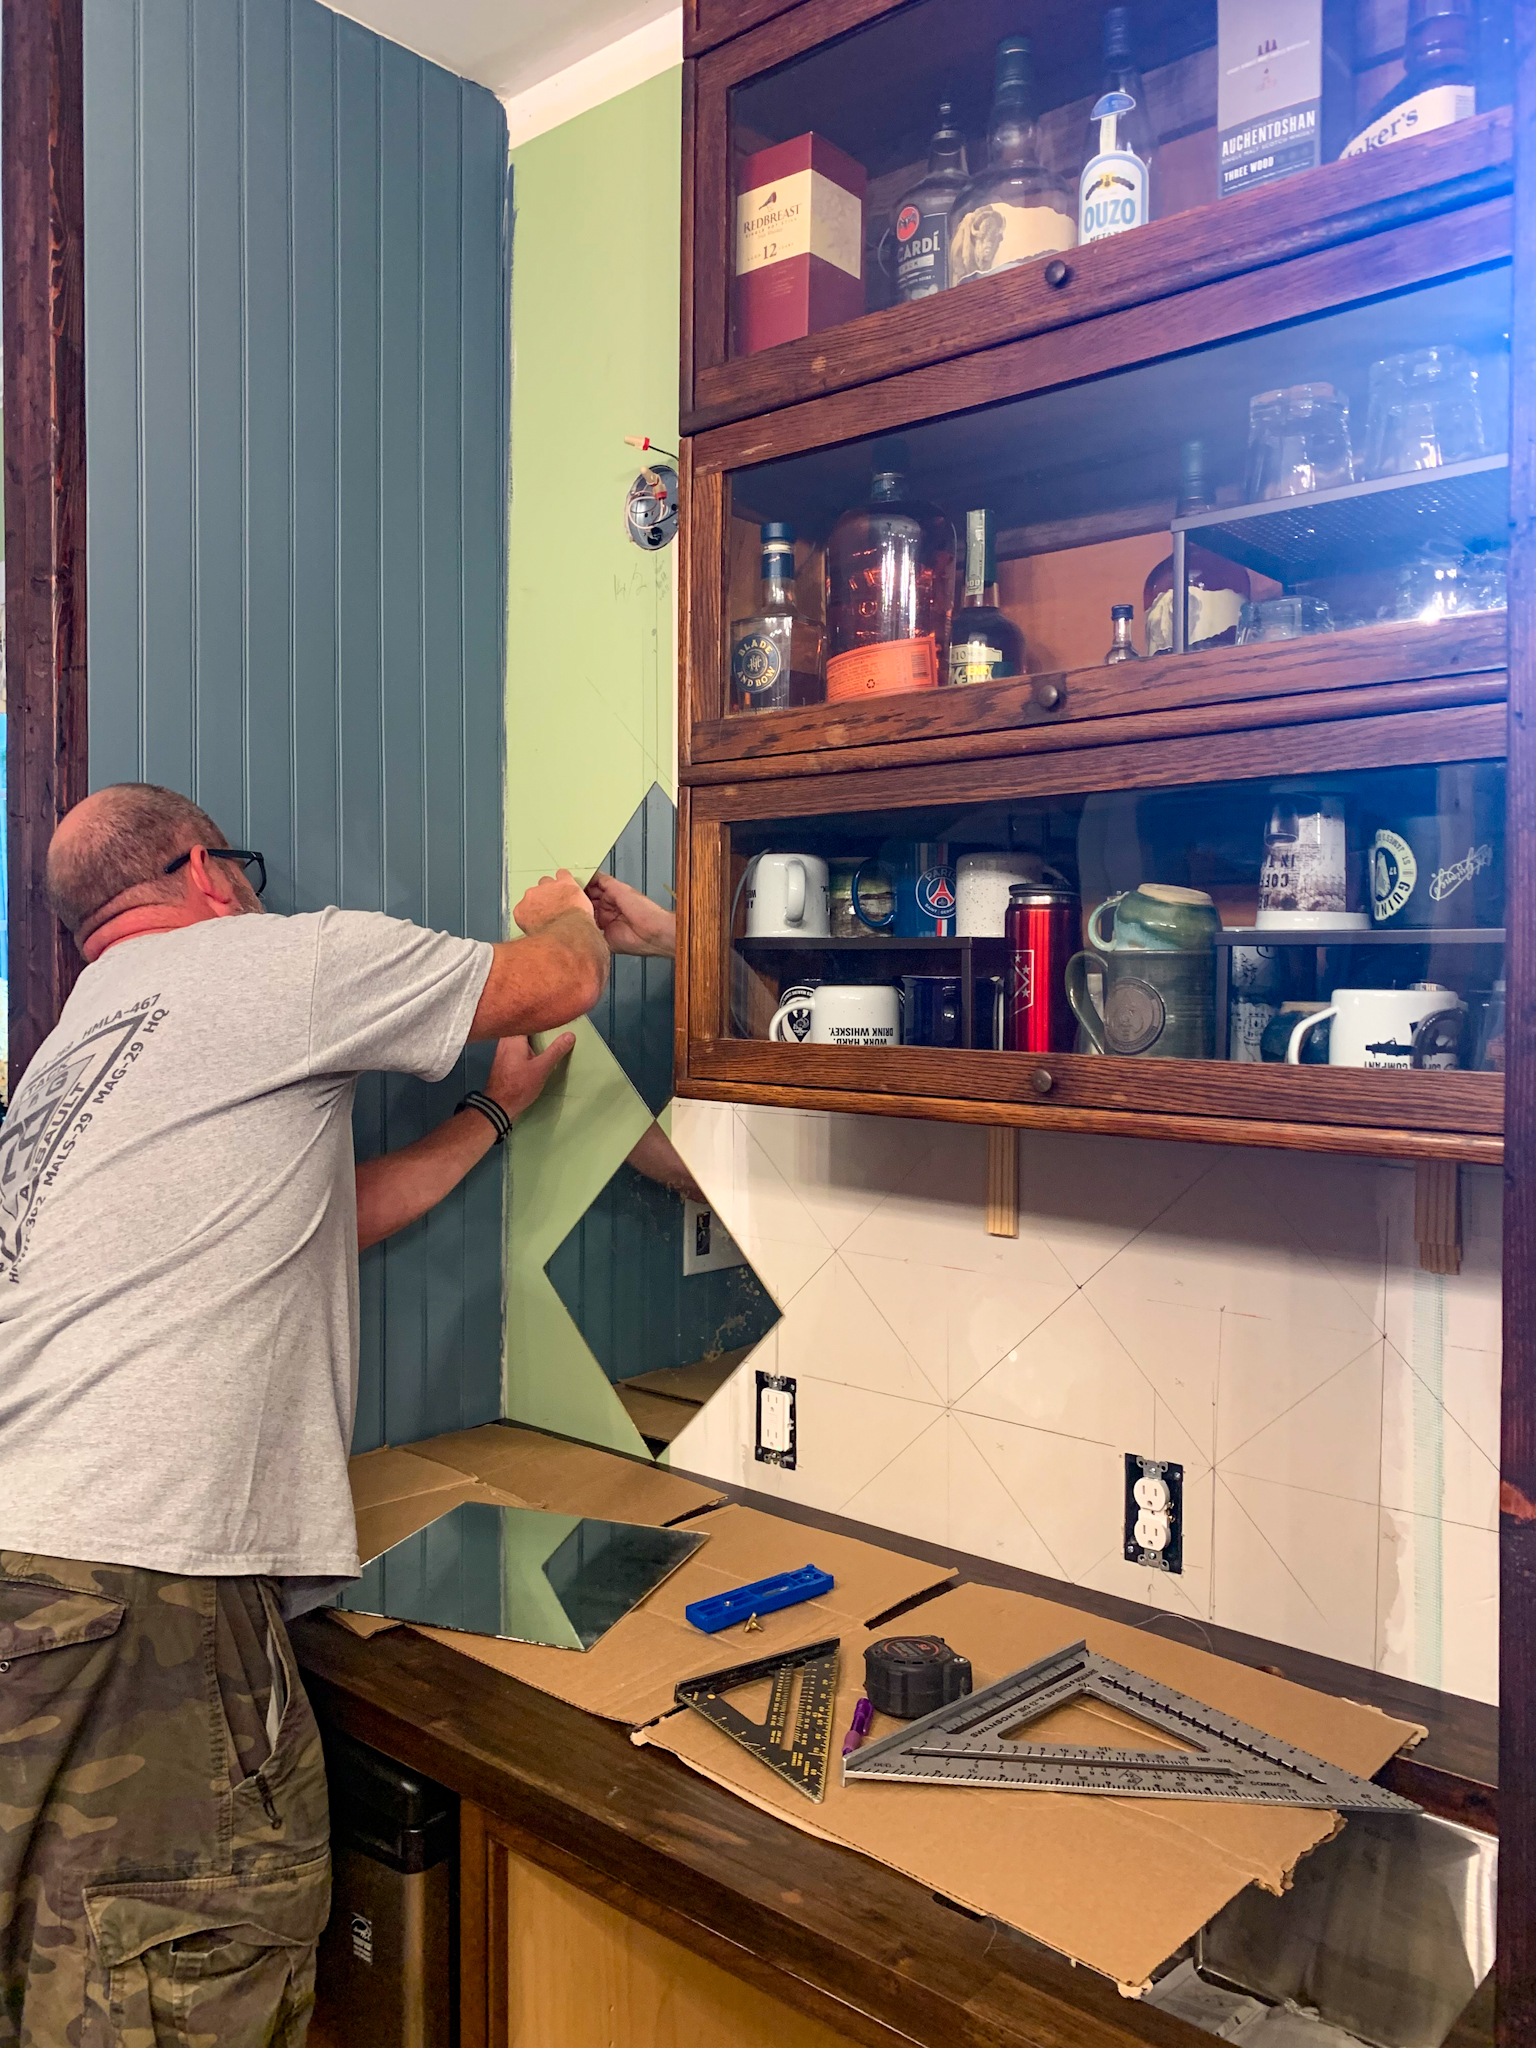
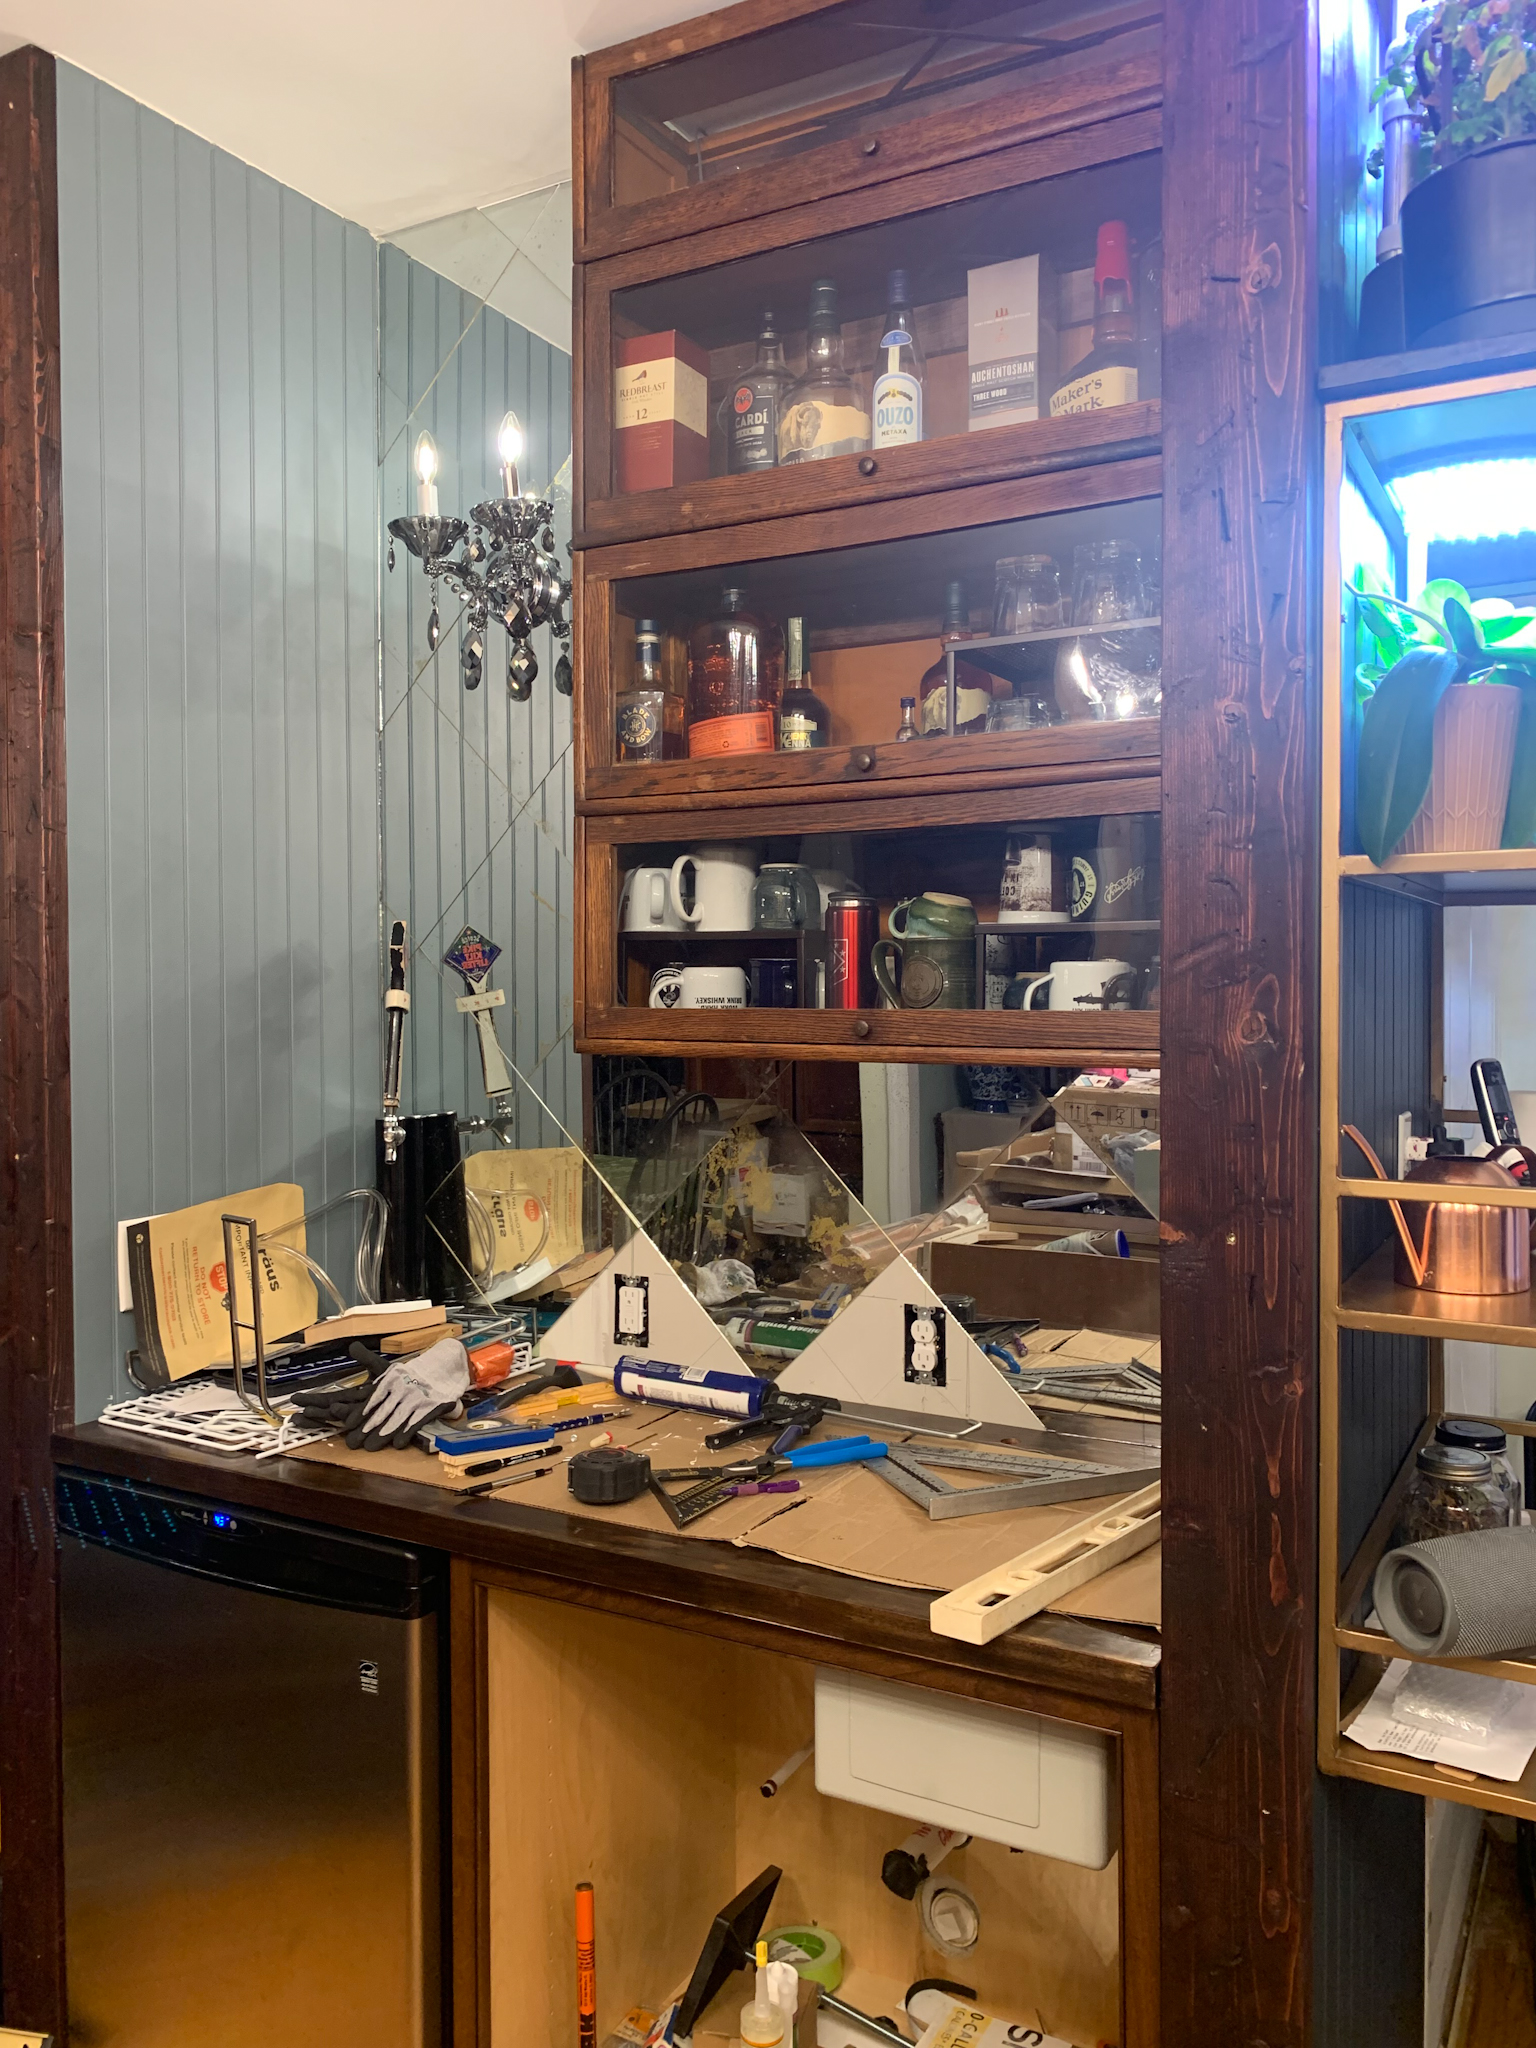
Now to the really fun part: cutting glass/mirrors isn’t difficult, but I recommend planning ahead for getting around outlets, light fixtures, or plumbing fixtures. There are one million tutorials on Youtube on how to cut glass or mirrors… so I recommend you look those up (the glass cutting tools I linked below are all that we needed to do cuts).
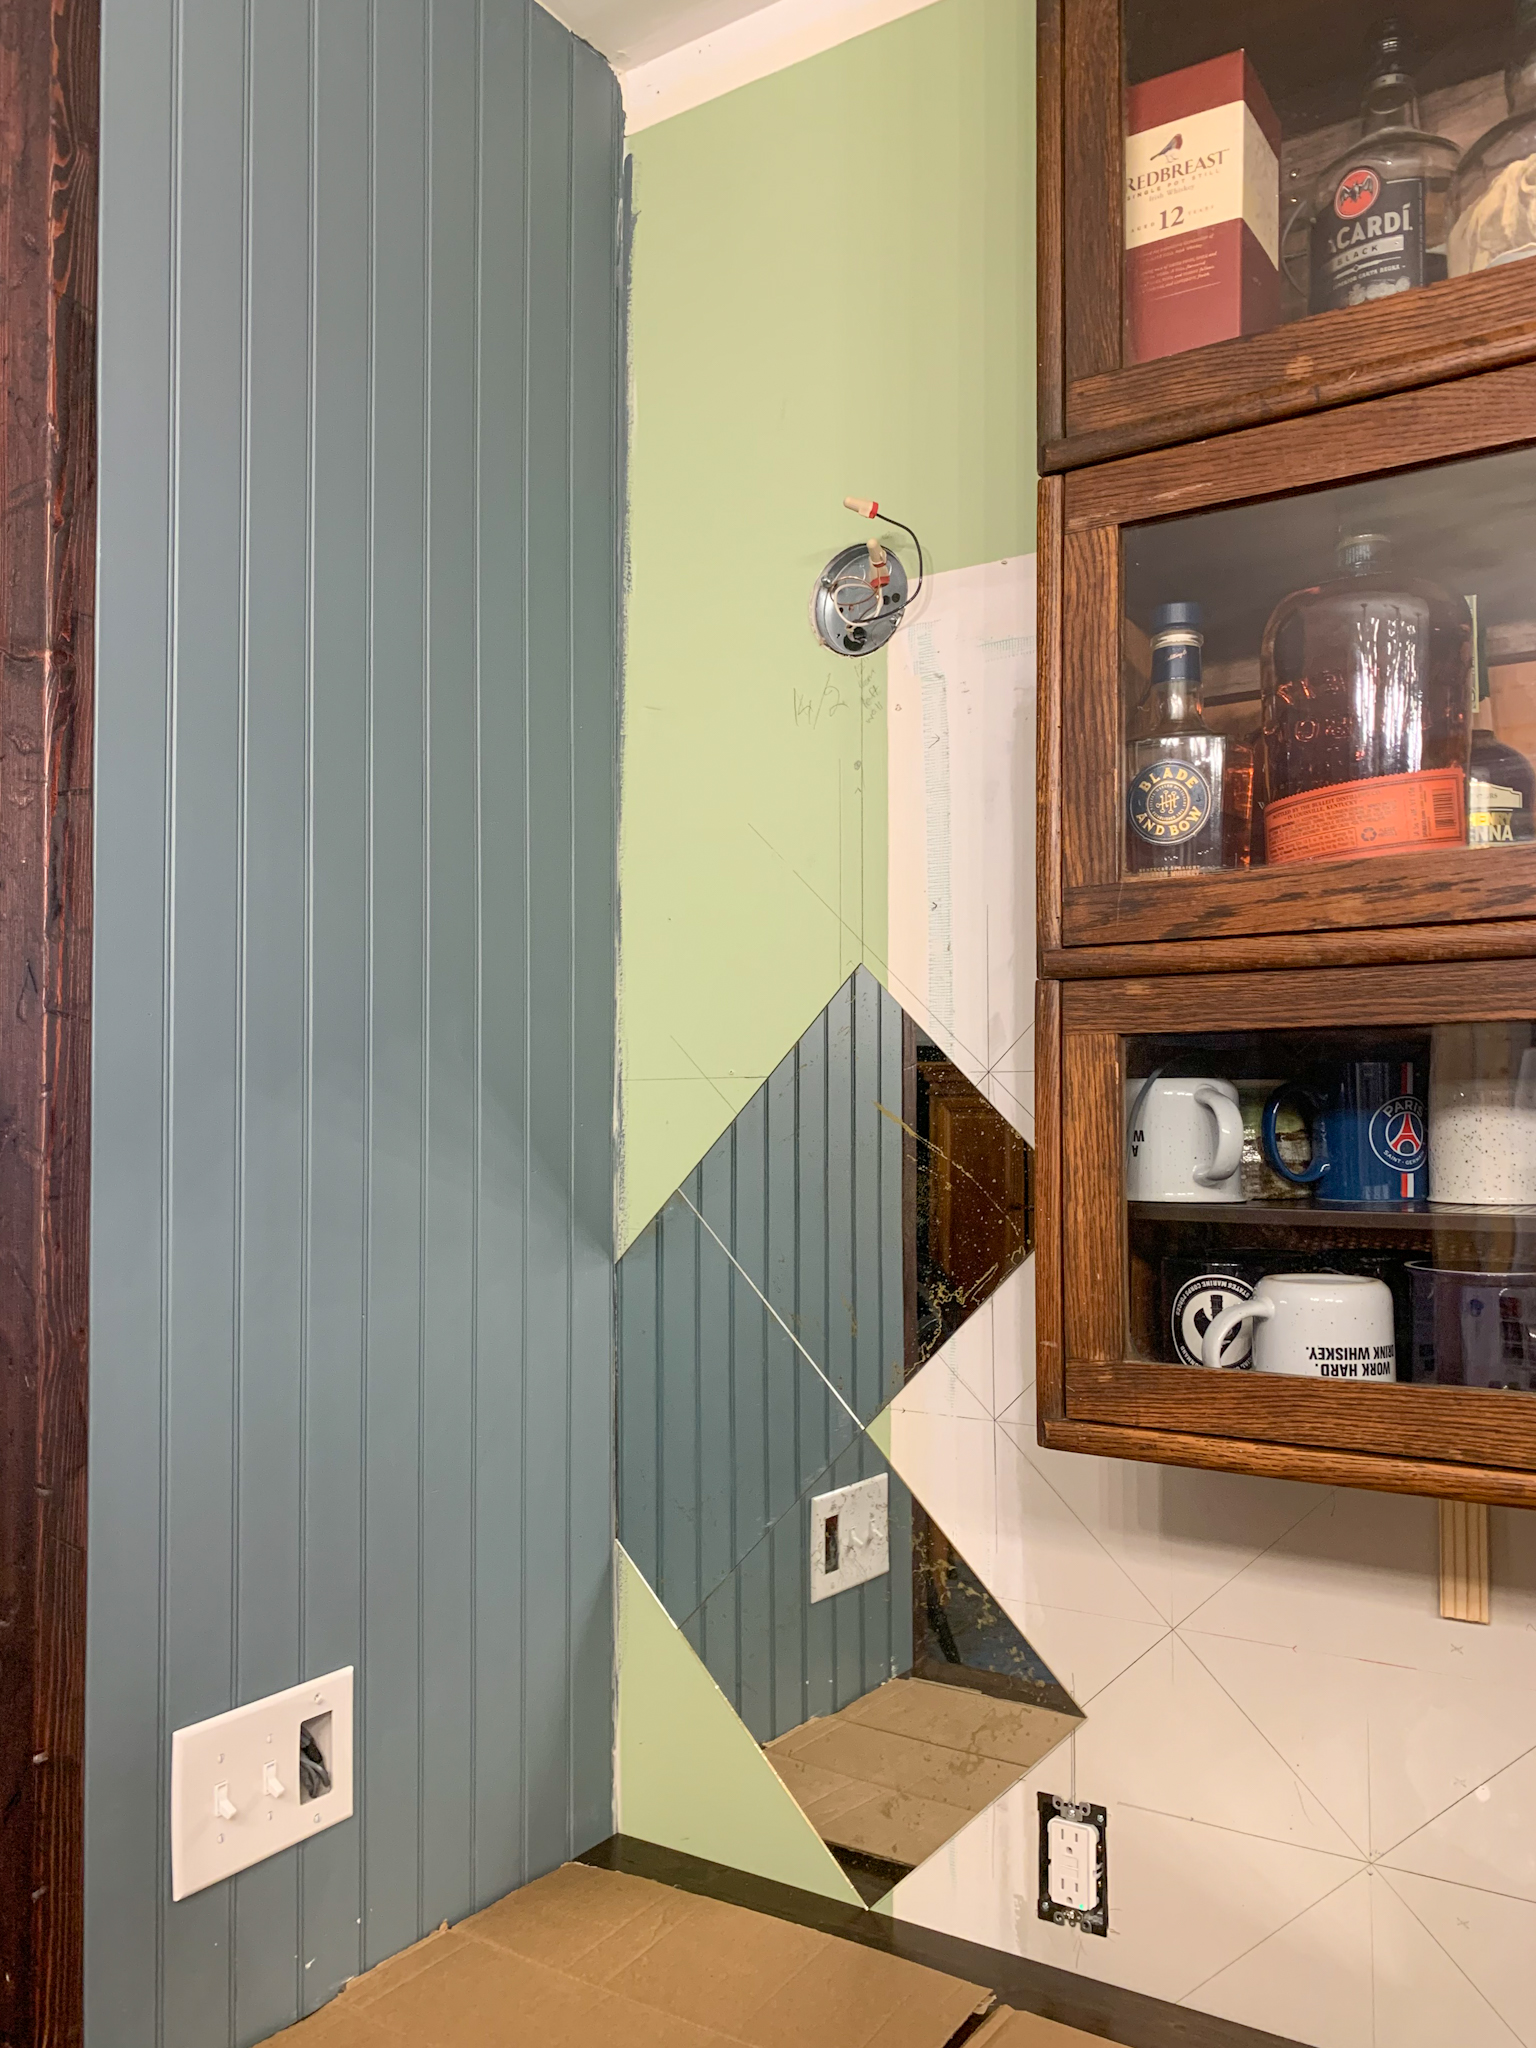
15. I recommend drawing out the tiles on the wall to make sure your cuts will be do-able. I also recommend doing test cuts on scrap before you start cutting your antiqued tiles (these tiles are only $3.50 apiece so don’t forget to grab some extra at the store). If you have cut outs to do for outlets or light fixtures, getting these on an edge or a corner is CRUCIAL. Otherwise, you will end up with cuts that show (we only had a couple and it still looks great, but if we did it again I would plan around that).
Pro tip: Make sure your wall is flat. If you have bumps, imperfections, or mounds the tiles will not lie flat.
16. Put mirror mastic on the back of the mirror as directed. If you start at the bottom, the mirrors hold each other up until the mastic dries.
$22.99 Set of 10 Plastic Drop Cloths
2 x $41.98 Box of 12 mirrors (12″ sq each)
$19.97 12 pack of safety goggles
$24.07 2 x Rust-Oleum Vintage Gold Spray Paint (get these at Lowe’s, they’re cheaper)
$11.97 Heavy duty spray bottles for muriatic acid
$4.98 Plastic Funnel Set (to get muriatic acid into the spray bottle without spills)
$44.41 Low VOC Stripper
3 x $11.99 Mirror Adhesive
$8.00 Glass Cutter Oil
$21.69 Glass cutter tool set
$289 (Compare this at $60 per 12″ panel on Etsy)
Accessories:
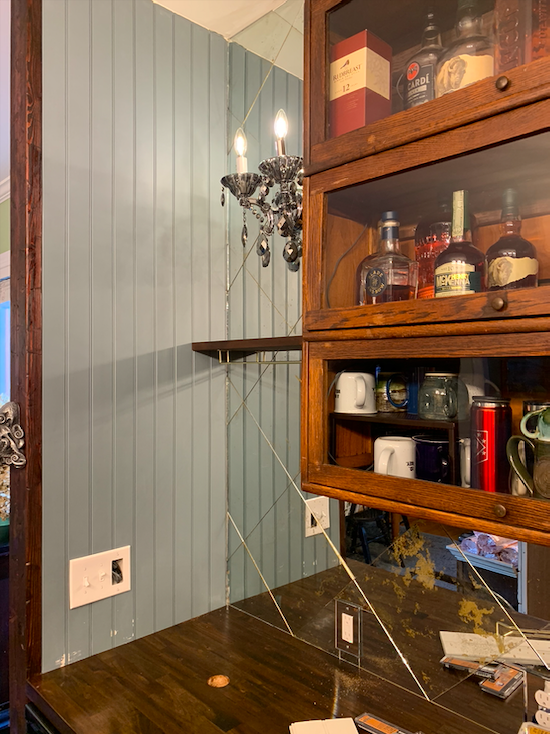
$161.99 Chrome Wall Sconce With Smoke Crystal
$8.02 GFI Mirrored Outlet Cover
$8.23 Duplex Mirrored Outlet Cover
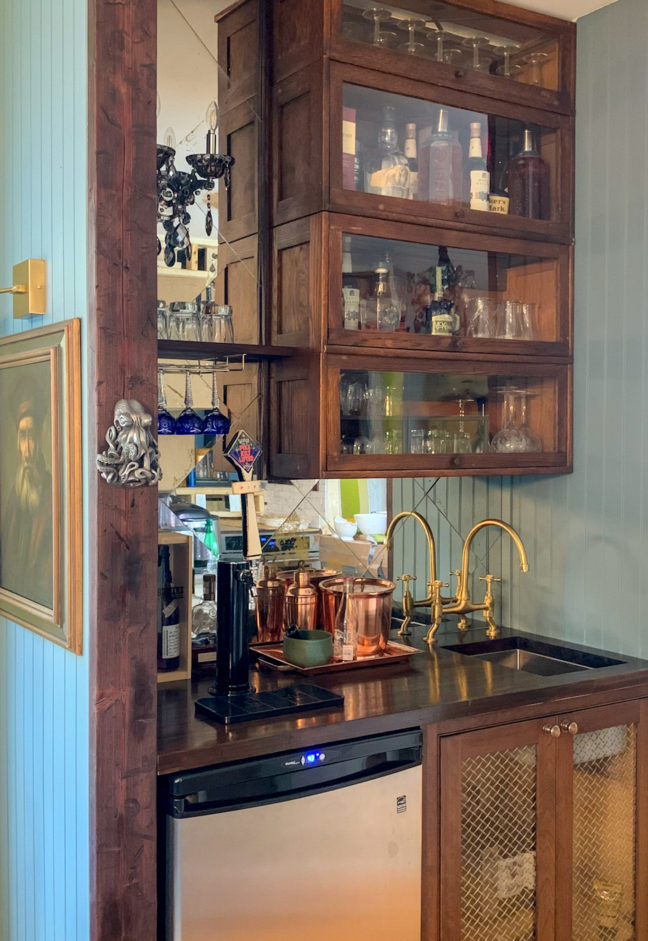
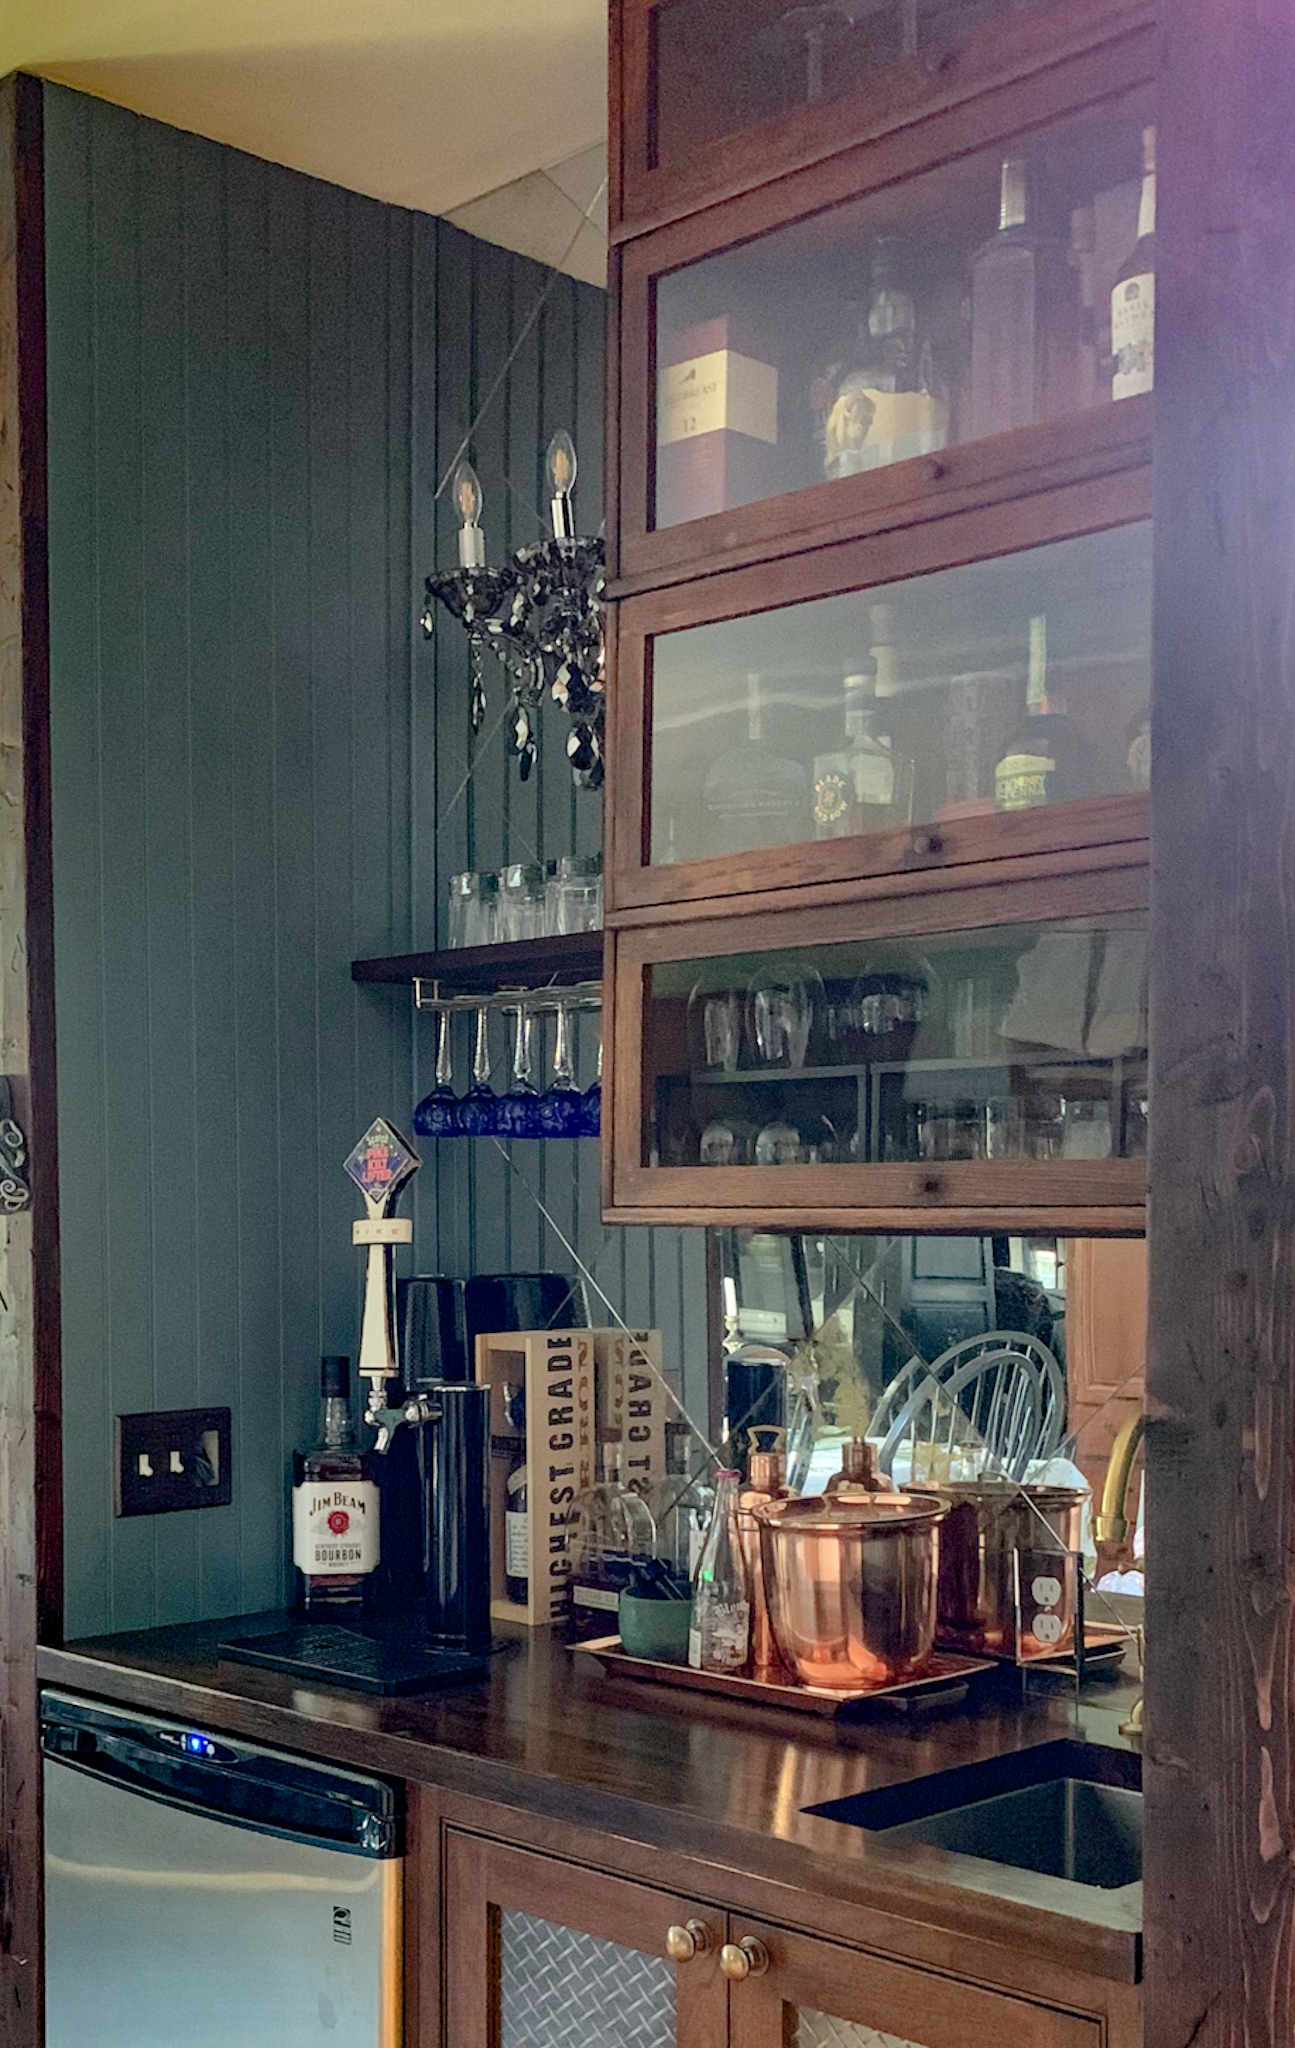
Want to see the finished product??? We’re pretty proud of how this bar came out, and the antique mirrored backsplash is a big part of it. You’ll have to forgive the reflection in the mirror showing our unfinished kitchen… but, you get the idea! Cheers!

*Legal stuff:
I am honest about my experiences with different products and write because I enjoy it. I do however, have the opportunity to earn money for my writing, also.
Slavetodiy.com is a participant in the Amazon Services LLC Associates Program, LTK, and other affiliate programs: affiliate advertising programs designed to provide a means for sites to earn advertising fees by advertising and linking to amazon.com and other sites. These programs offer a small commission on products sold through their affiliate links. Each of your purchases via our affiliation links supports our cause at no additional cost to you.
If a blogger links to a product (with a special code for affiliates embedded in the link), and a reader places an item in their “shopping cart” through that link within 24 hours of clicking the link, the blogger gets a small percentage of the sale. These links are not “pay per click.” If you click on the product link and stay around and purchase something else, however, I will get a commission on that sale.
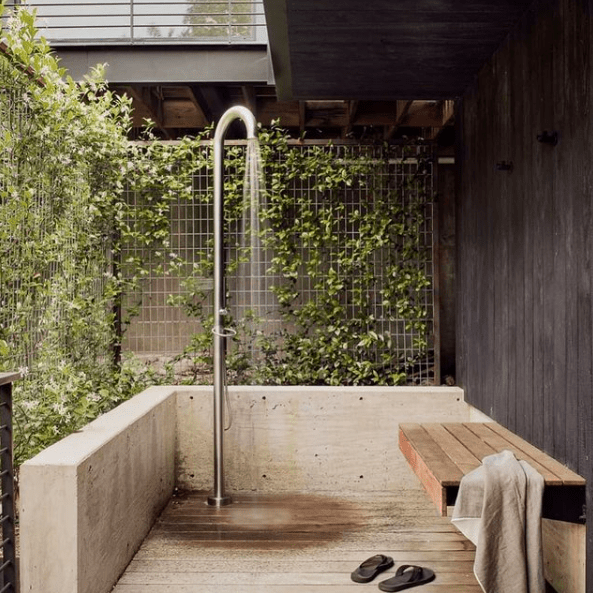
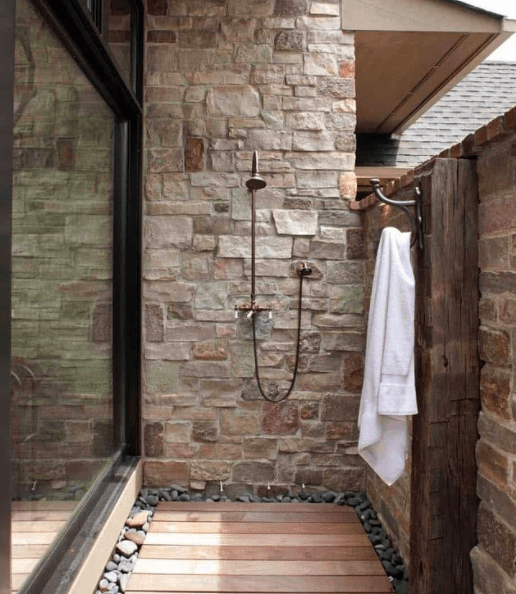
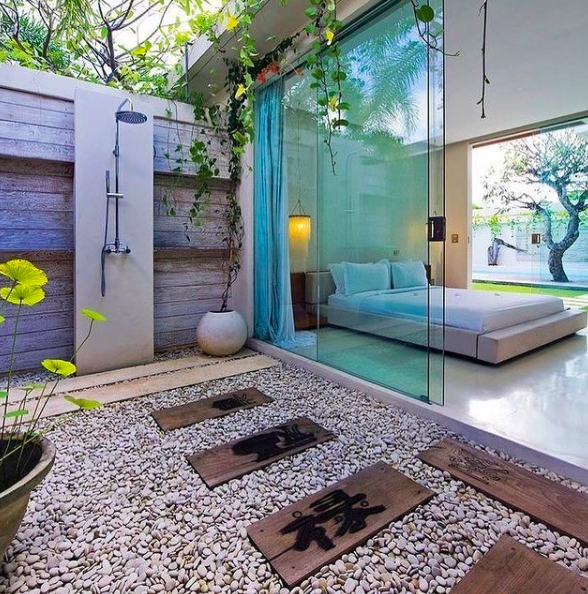
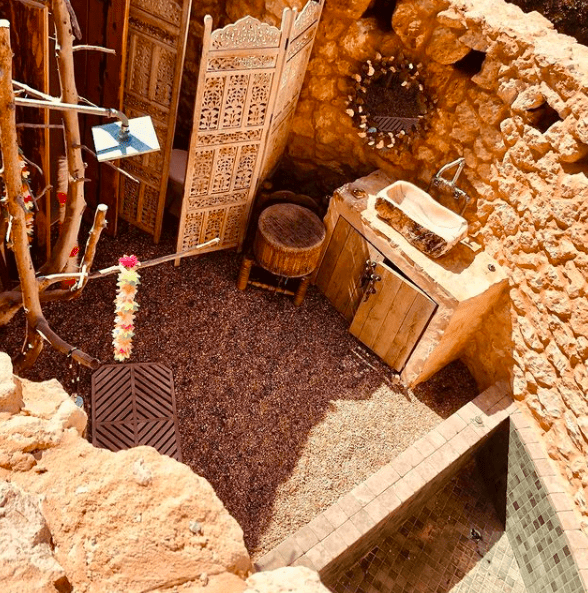
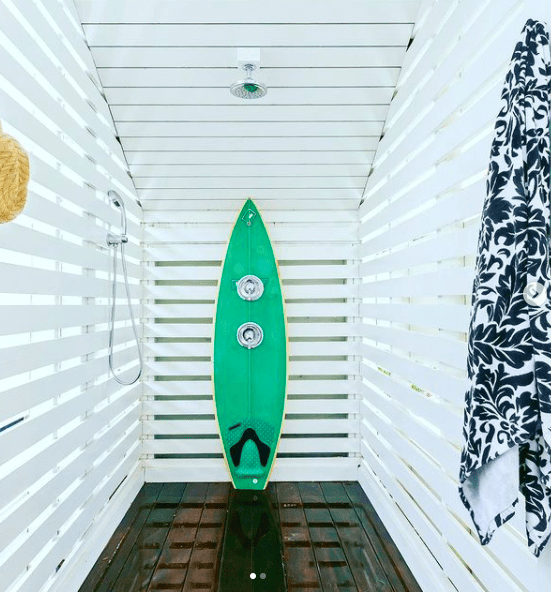
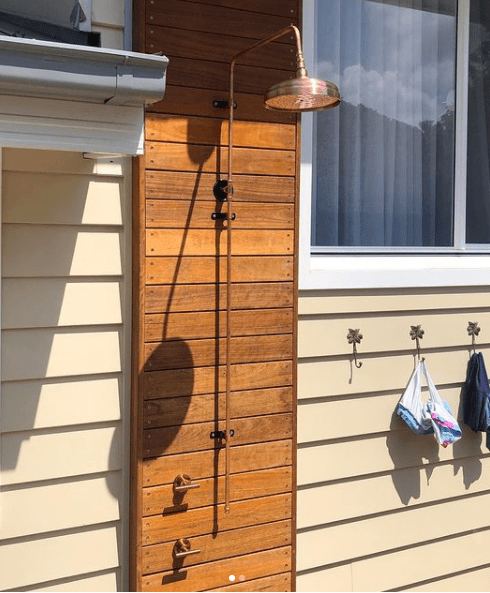
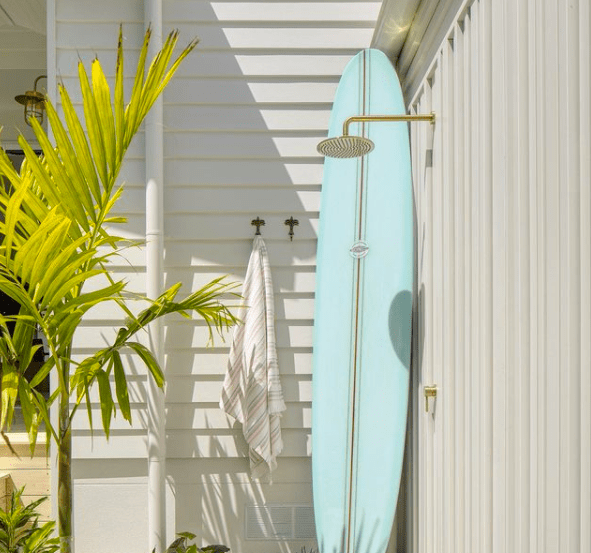
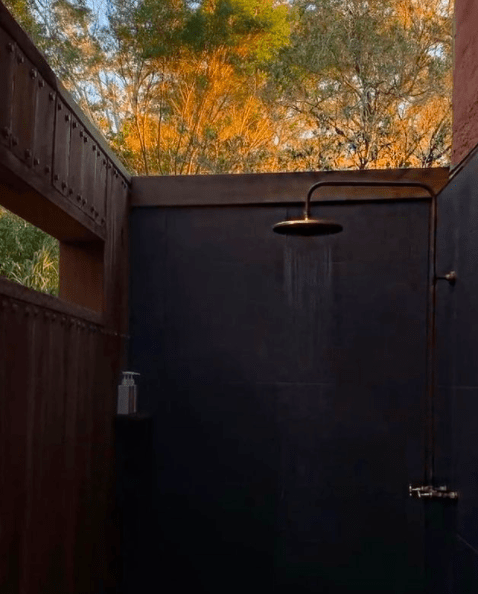
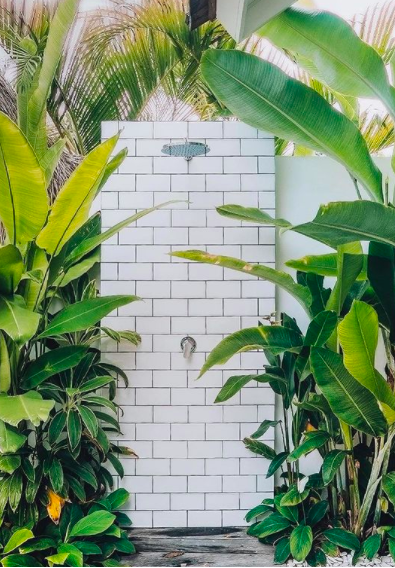
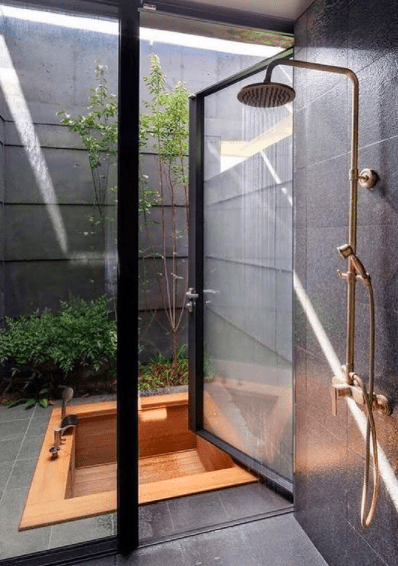
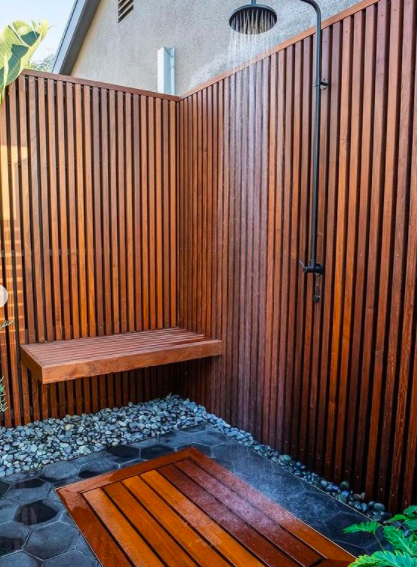
Mashup Monday: 21 Inspiring Outdoor Showers For Sunny Days, Water Fights, And Romantic Evenings
I currently have the space heater on in my office and my toes are freezing. Most of the country is buried under two feet of snow… so how dare I have the audacity to be writing about outdoor showers??? Outdoor showers that would be needed after the beach, or kayaking, or swimming, or if you’re super fancy… just having an outdoor shower because you’re a bit of an earthy exhibitionist. I get it.
*This post may contain affiliate links. Please see full disclosure at the end of the post.
I just thought it would be a great time to run through some inspiring examples, for those of you NOT enjoying the winter wonderland, of warmer days enjoyed under an amazing outdoor shower. I’m thinking of water fights and screaming kids, sandy bottoms, and evening showers with your partner and a glass of wine.
What do you think of these incredible designs?


Which one is your favorite? Let me know in the comments below! Check out more design inspiration and high-end DIYs on the blog!
Cheers!
*Legal stuff:
I am honest about my experiences with different products and write because I enjoy it. I do however, have the opportunity to earn money for my writing, also.
Slavetodiy.com is a participant in the Amazon Services LLC Associates Program, an affiliate advertising program designed to provide a means for sites to earn advertising fees by advertising and linking to amazon.com. Amazon offers a small commission on products sold through their affiliate links. Each of your purchases via our Amazon affiliation links supports our cause at no additional cost to you.
If a blogger links to an Amazon product (with a special code for affiliates embedded in the link), and a reader places an item in their “shopping cart” through that link within 24 hours of clicking the link, the blogger gets a small percentage of the sale. Amazon links are not “pay per click.” If you click on the product link and stay around Amazon and purchase something else, however, I will get a commission on that sale.
This site also contains affiliate links through //Commerce/Sovrn. //Commerce or our Publishers may be compensated when you click through links on our site.
.
Mashup Monday: 16 Inspired Kitchen Rangehood Vent Surrounds That Will Make You Swoon
We are in the middle of a kitchen renovation, which is sure to last through the next century (the renovation part, I mean). However, the pace of said renovation gives me the time to make sure that EVERY detail is correct. As I have been researching the perfect forever kitchen for the last five years (who am I kidding, it’s been more like forty) I absolutely fell in love with the concept of rangehood surrounds.
Since I have smoked the house out searing steak on a weekly basis for the last decade, I already knew that we needed a kitchen exhaust fan, or more specifically, a rangehood. Having a kitchen hood vent is imperative for people who actually cook. We were living in a kitchen with AN UNVENTED microwave over the stove. Also see: “why bother” in the dictionary. That is the worst ever possible solution to sucking smoky air out of your house and is honestly something builders like because it’s cheap and easy. Well, I’ve got their number.
*This post may contain affiliate links. Please see full disclosure at the end of the post.
Anyway, have you seen all of those delicious British kitchens? Well, they’ve had this figured out for… well, I think forever. Duh, if you’re cooking, you need a hood. Even if theirs are a bit more understated than their more extravagant American counterparts, the idea is the same:
A command post, at the center of the kitchen, from which you rule your house: where you sing to obnoxiously loud mom music and shout back at kids from across the house “I can’t hear you” as you prepare something you weren’t sure what it was going to be until you started adding ingredients (or on rare occasions, trying to follow a recipe). Read: the maternal-Zen-zone from which location you create foods made of pure love and chubby mom sweat.
These spaces must be both beautiful and functional, so I have a few rules:
- I absolutely must have counterspace on either side of the range. Seriously, the enclosures I see where it’s only the stove would in no way be conducive to actual cooking (but they sure are pretty). I recommend AT LEAST 24 inches of countertop on either side of the surround- we’re going with 30 a side.
- Use materials that can’t get scorched. If you’re cooking so professionally that you need one of those gigantic hoods that you have to keep the cat away from (lest they are sucked into the intake like a runaway tornado) don’t you think you might risk some cabinet scorching? What about grease splatter? There shouldn’t be ANYTHING THAT CAN GET BURNED within the surround. (We are doing a mix of copper sheet backsplash with sealed marble tile, METAL UPPER CABINETS, and a copper hood. Everything will be safe from harm.)
- It must be able to do whatever I want it to do. If I want to cook hibachi and make three-foot high flames, the hood better be able to handle it. Even though adding a hood that is anything over 400 CBMs requires an air exchange system, it is absolutely worth it. I usually get the most powerful ANYTHING that is offered, just to be sure.
(Speaking of which) Quick story: When I was researching hoods, I had the most appalling experience with an HVAC tradesman. I called him to get a quote on installing ducting in our kitchen for a range hood. He asked me how many CBMs my hood was going to have. I told him it was 1200 CBMs and he said, “Oh, you don’t need one with that many CBMs.” Please play that back in your head with the most absolutely misogynistic Eastern North Carolina accent you can conjure.
I took a deep breath, and said, “I’m listening.”
He proceeded to explain to me, in the most demeaning manner possible, how EVEN HE only had a 600 CBM hood and he had a big house made for entertaining, unlike mine, which he had never seen.
Now, I have strict rules about phone etiquette. I have taught my children by example that it’s very important (and almost ALWAYS works in your favor) to be kind to anyone on the phone. This applies to calling ANY CUSTOMER SERVICE ever. They deal with complaints all day, right? So, when you call them be the most patient customer they’ve ever had and be the one little bright shining light in their day! I have literally had customer service folks send me free stuff and thank me profusely for being nice to people whose fault it WASN’T that whatever problem it was happened. Catch my drift? Now here’s this guy, who I am about to ask to do a job for me, and I know that griping at him or complaining is not going to get me anywhere.
Well, I can tell you, I was two more condescending comments away from breaking my own phone rules. If I could’ve reached through the phone and grabbed him by the neck, I would’ve been unmoved by him choking on the gum he was loudly smacking in my ear between patronizing tidbits of advice.
He ACTUALLY said to me: “your husband’s going to be pissed at you if you’re running that fan in the kitchen and he can’t hear his football game.” I almost fell over.
So, after this man had given me his dissertation on why women like me don’t know jack or dog-poo about ducting or machines in general, I politely asked him, “So, say I wanted you to install this AND an air exchange system. Could you do it?”
“Well yeah, but it would be more money.”
“Okay that’s fine.” After he complained for a few more minutes about me wanting something I clearly didn’t need, he stopped short and told me if I was getting a rangehood it absolutely HAD to be a Wolf and nothing else would do (and I was being cheap if I decided to go with anything else), and pointed me toward “his” appliance salesman buddy in the next town.
By the time I got off the phone I was bewildered and… well…. I was PISSED (which is a relatively unnatural state of being for me). My husband got home from work and got a half an hour recount of the conversation I had with this… well I’ll leave out what I called him.
So Rainman politely asked me, “So, why don’t you call someone else?”
To be honest, this thought had not occurred to me. I was so wrapped around the axle I wanted to meet this guy so I could beat him at his game.
But I slowly deflated… and used a lifeline. I called my friend next door that had just had a beautiful new house built, and she gave me the number of their HVAC contractor- who came to the house, asked what I wanted done, devised a plan, and gave me a price. Oh, and he didn’t treat me like I had recently come to our world from another planet. They will have my business until I die.
Pro tip: The one thing that kept coming up over and over again during this discussion is that anything over 400 CBMs empties your house of air very quickly and that air is replaced by OUTSIDE air via the air exchange system (you know, the one Captain-pompous-pants didn’t want to install). I was warned that if that happened my home would be suddenly muggy in the summer or suddenly freezing in the winter. That is true, and it’s a concern. But it is also true that every time I sear meat it smokes my house out and we have to open all the doors and windows (and wrangle cats and a dog). You know what this does? You got it! Muggy and hot in the summer and freezing cold in the winter. I hope you can see me rolling my eyes from here.
But I digress. Here are a few neat ideas for rangehood surrounds I think you’ll enjoy:


What do you think? Could you see your space with a rangehood surround? I’m dying to show you ours!!!
Check out more of our design inspiration and high-end DIYs over on the blog!
Cheers!
*Legal stuff:
I am honest about my experiences with different products and write because I enjoy it. I do however, have the opportunity to earn money for my writing, also.
Slavetodiy.com is a participant in the Amazon Services LLC Associates Program, an affiliate advertising program designed to provide a means for sites to earn advertising fees by advertising and linking to amazon.com. Amazon offers a small commission on products sold through their affiliate links. Each of your purchases via our Amazon affiliation links supports our cause at no additional cost to you.
If a blogger links to an Amazon product (with a special code for affiliates embedded in the link), and a reader places an item in their “shopping cart” through that link within 24 hours of clicking the link, the blogger gets a small percentage of the sale. Amazon links are not “pay per click.” If you click on the product link and stay around Amazon and purchase something else, however, I will get a commission on that sale.
This site also contains affiliate links through //Commerce/Sovrn. //Commerce or our Publishers may be compensated when you click through links on our site.
.
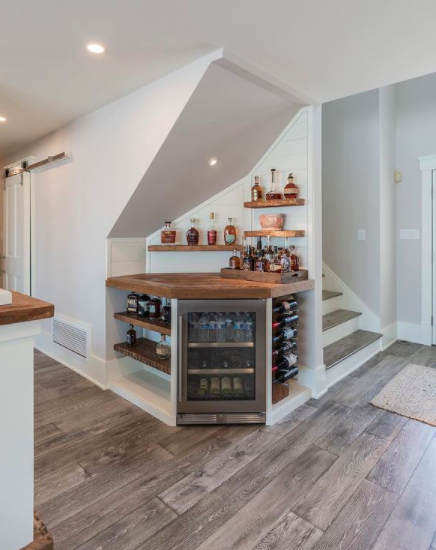
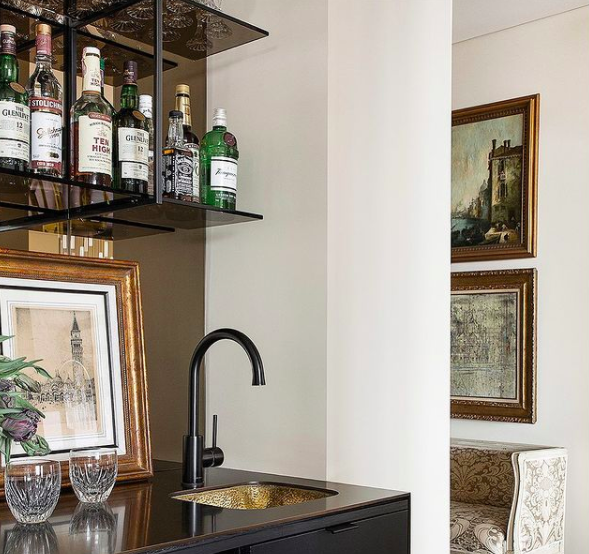
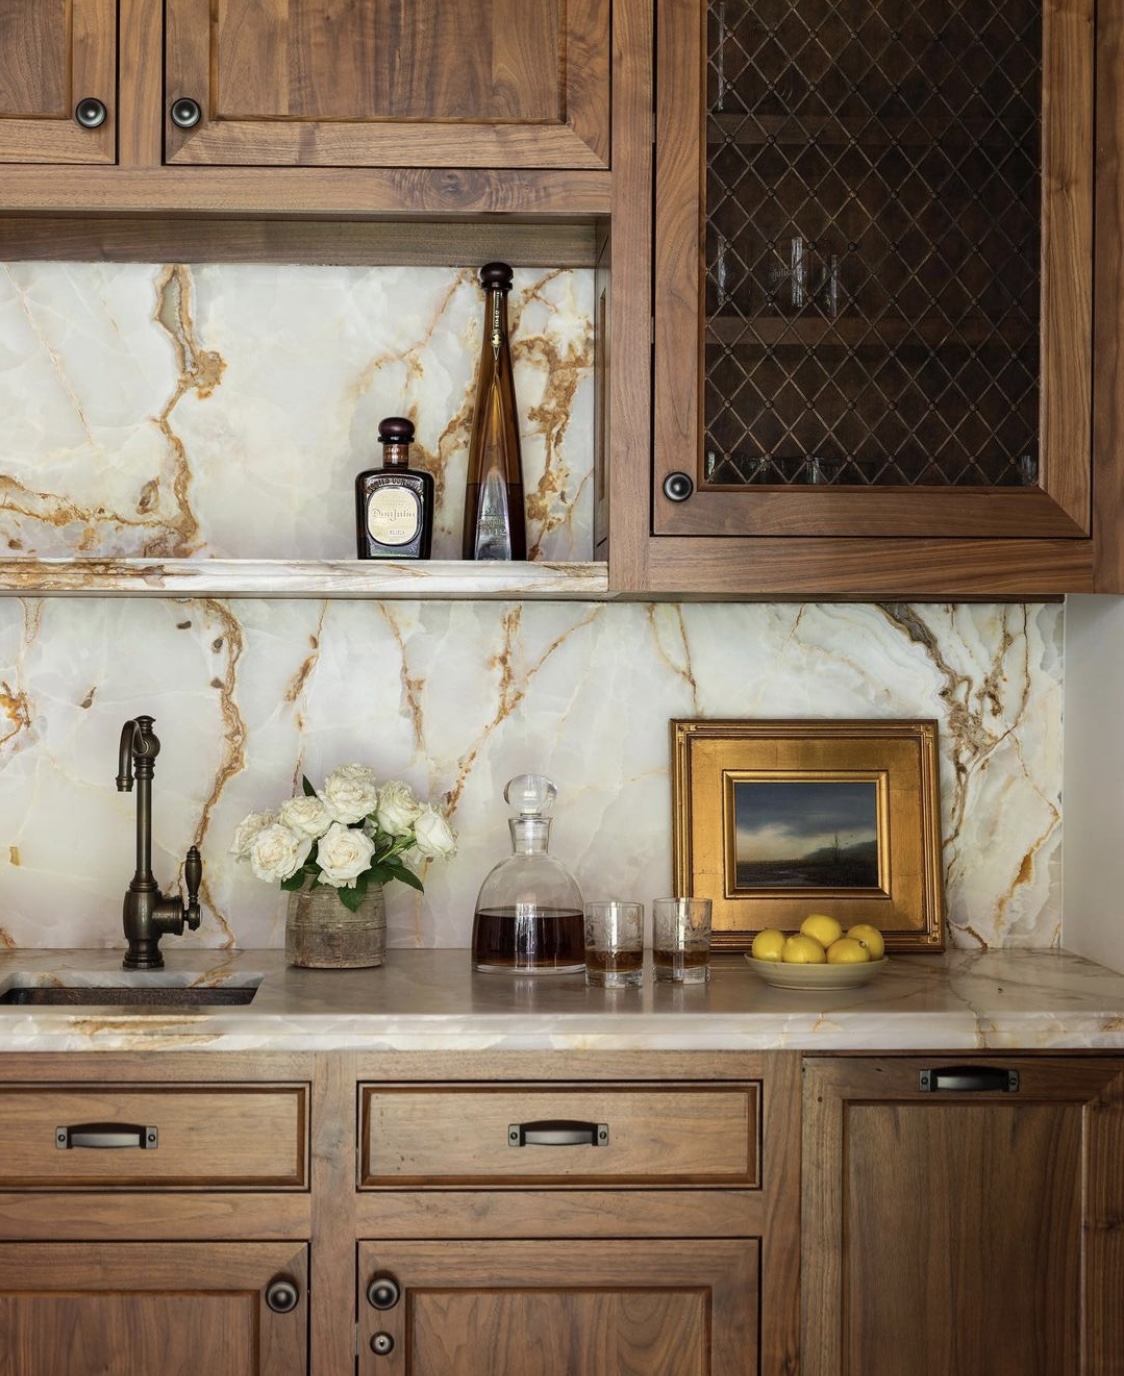
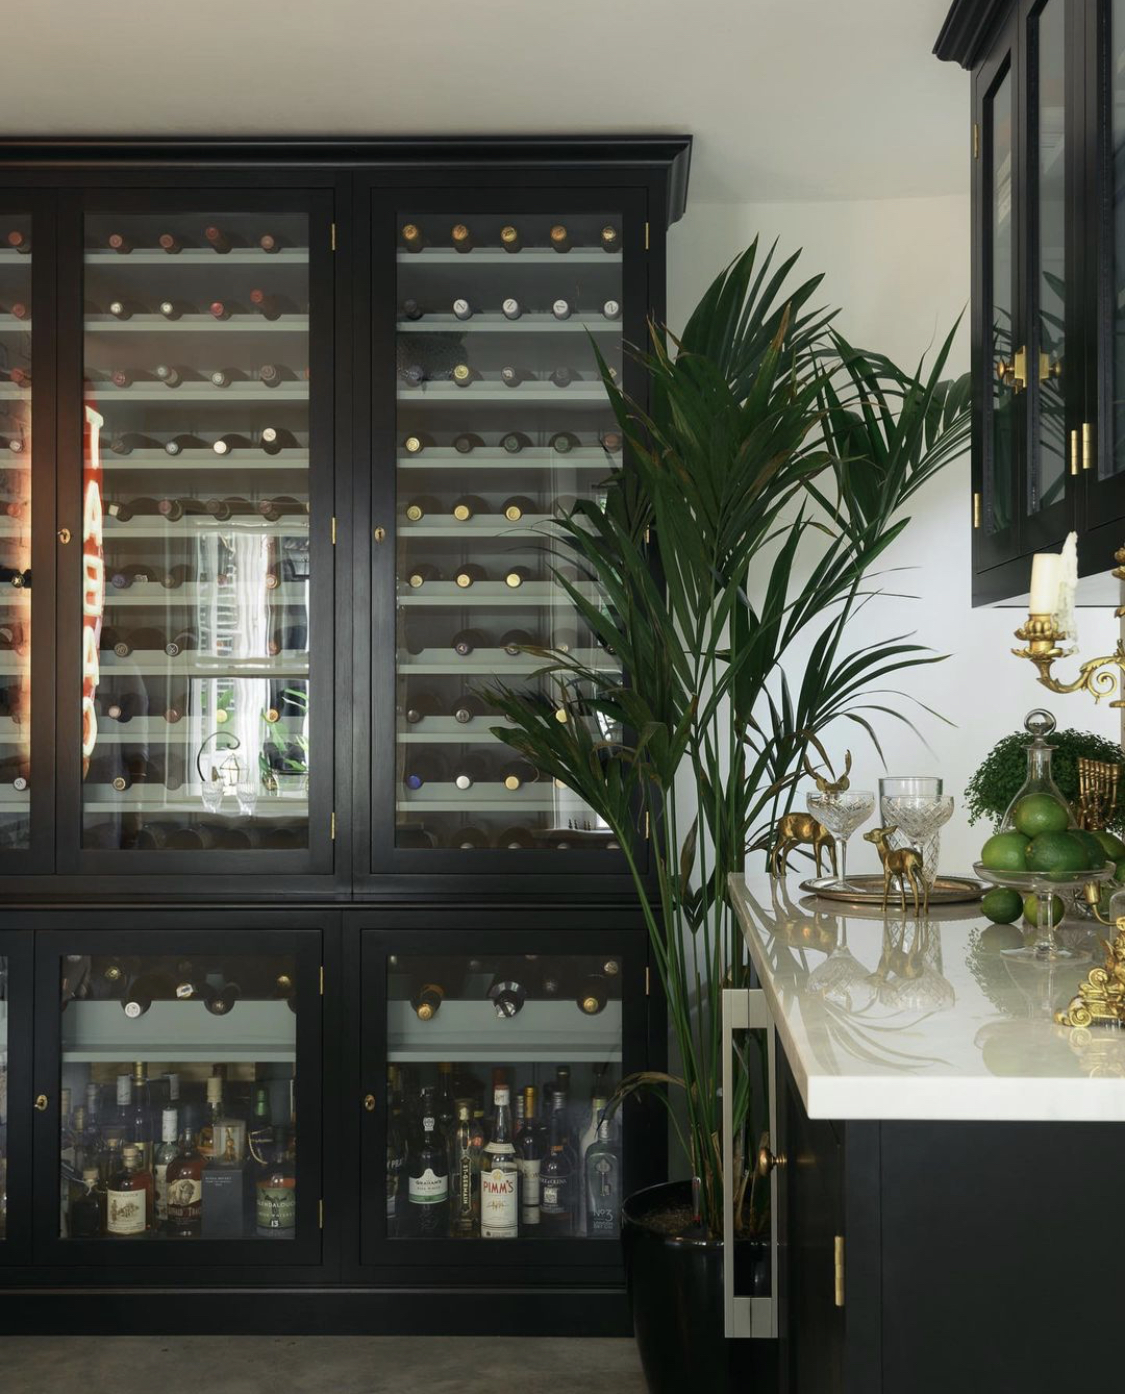
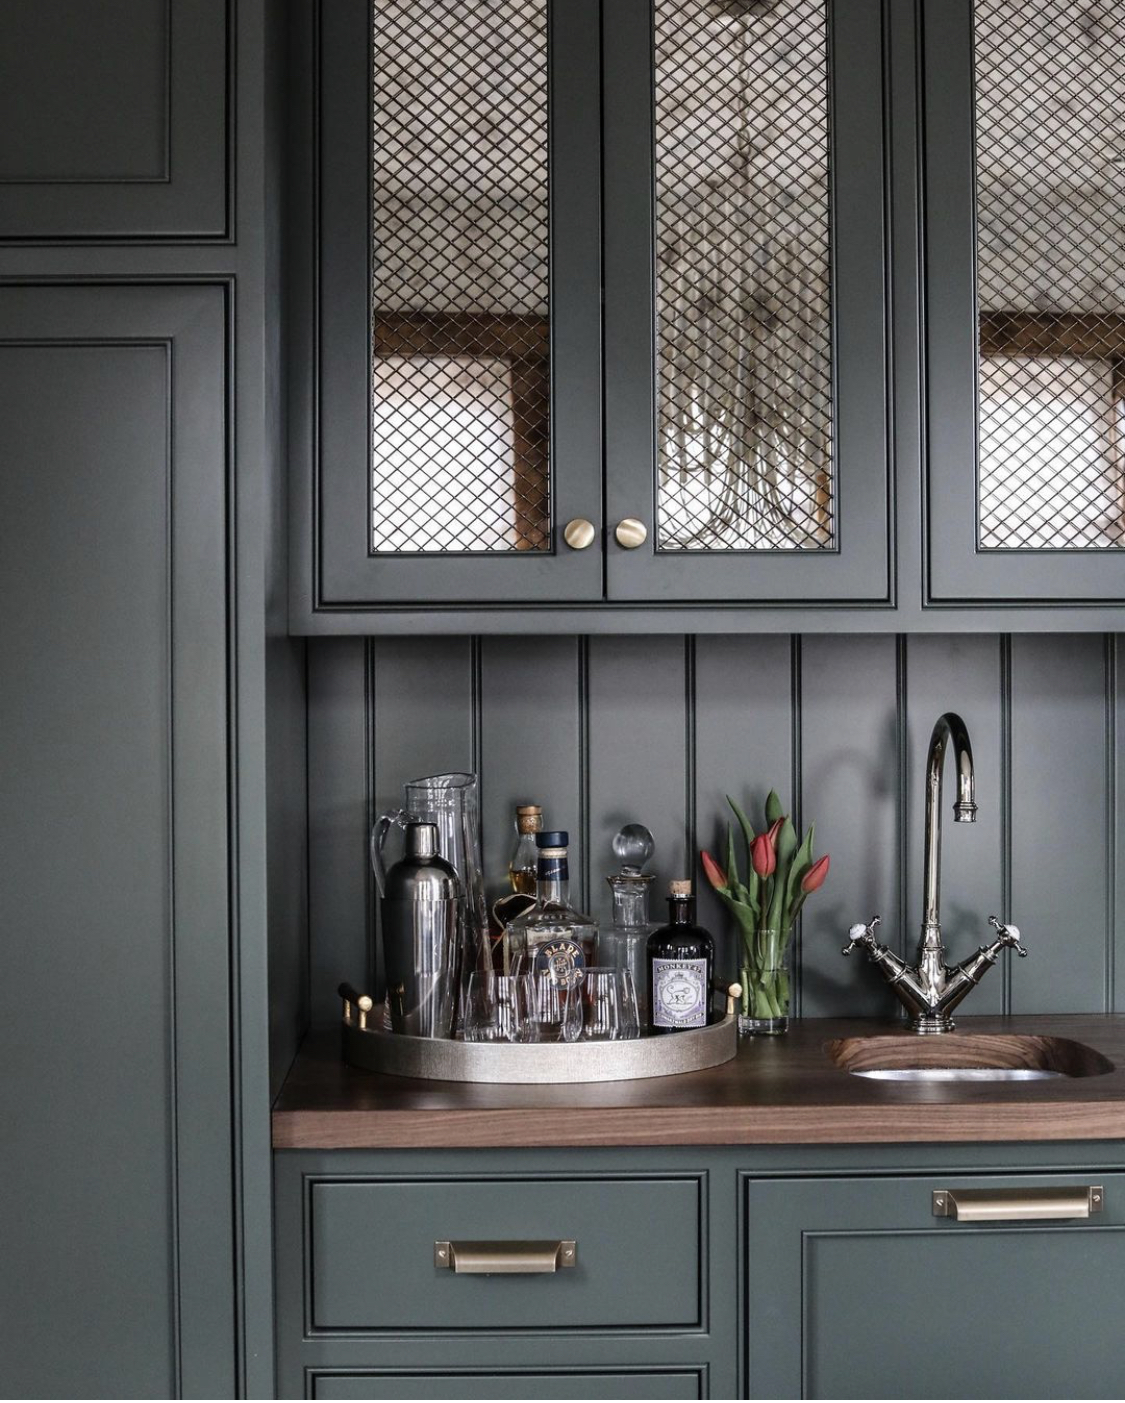
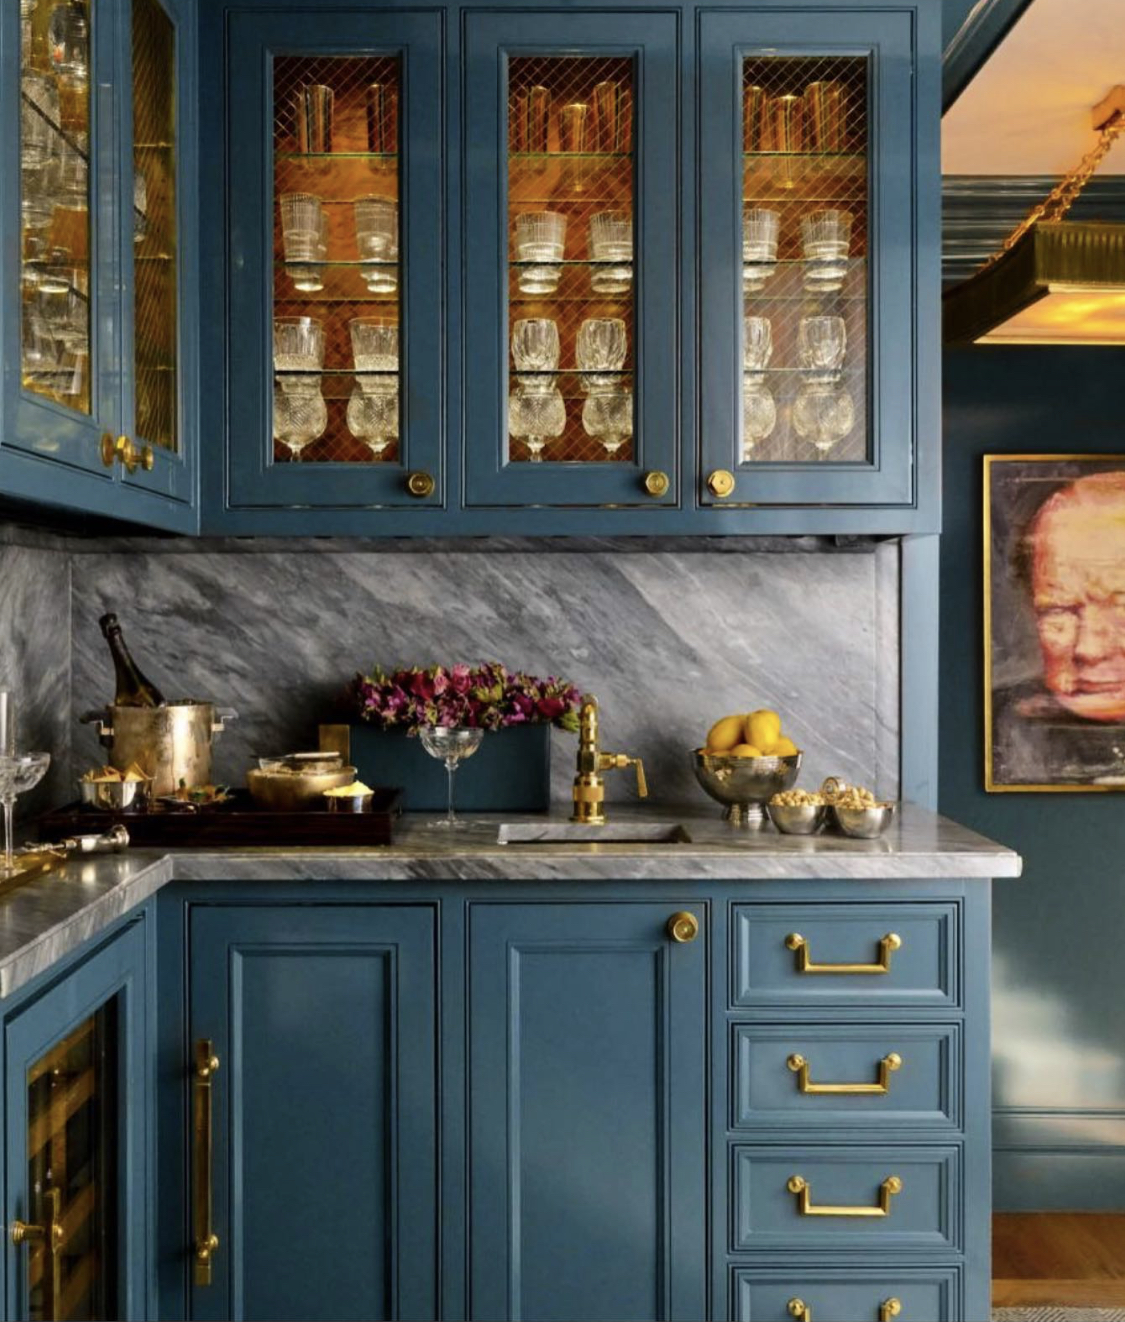
Mashup Monday: 22 Different Ways To Do A Combination Coffee Station And Beverage Bar
I don’t have a good coffee house near me. And honestly, even if I did, why would I want to pay coffee house prices when I can do my own Starbucks DIY? When I started developing my perfect design for a coffee bar at home,
(what really happened was I am almost done with the kitchen design and realized I have NO SPOT for the coffee),
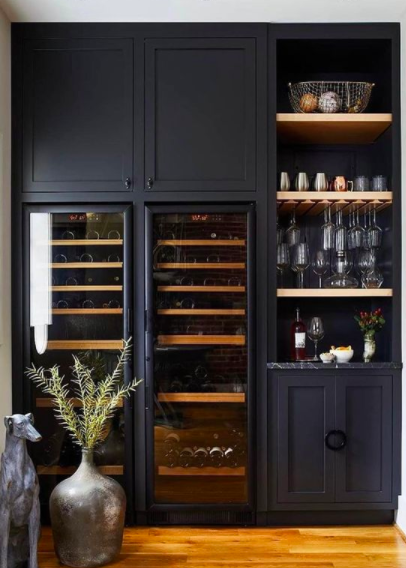
I suddenly realized that this space also needed to do double duty as a home whiskey/bourbon bar (with wine storage). With five kids and two home offices we are seriously short on extra real estate and it’s super important to make EVERY ROOM work really hard. So, here are my favorite DIY coffee bar ideas, that also happen to be able to accommodate a whiskey bar set up… P.S. It’s going in the dining room.
*This post may contain affiliate links. Please see full disclosure at the end of the post.
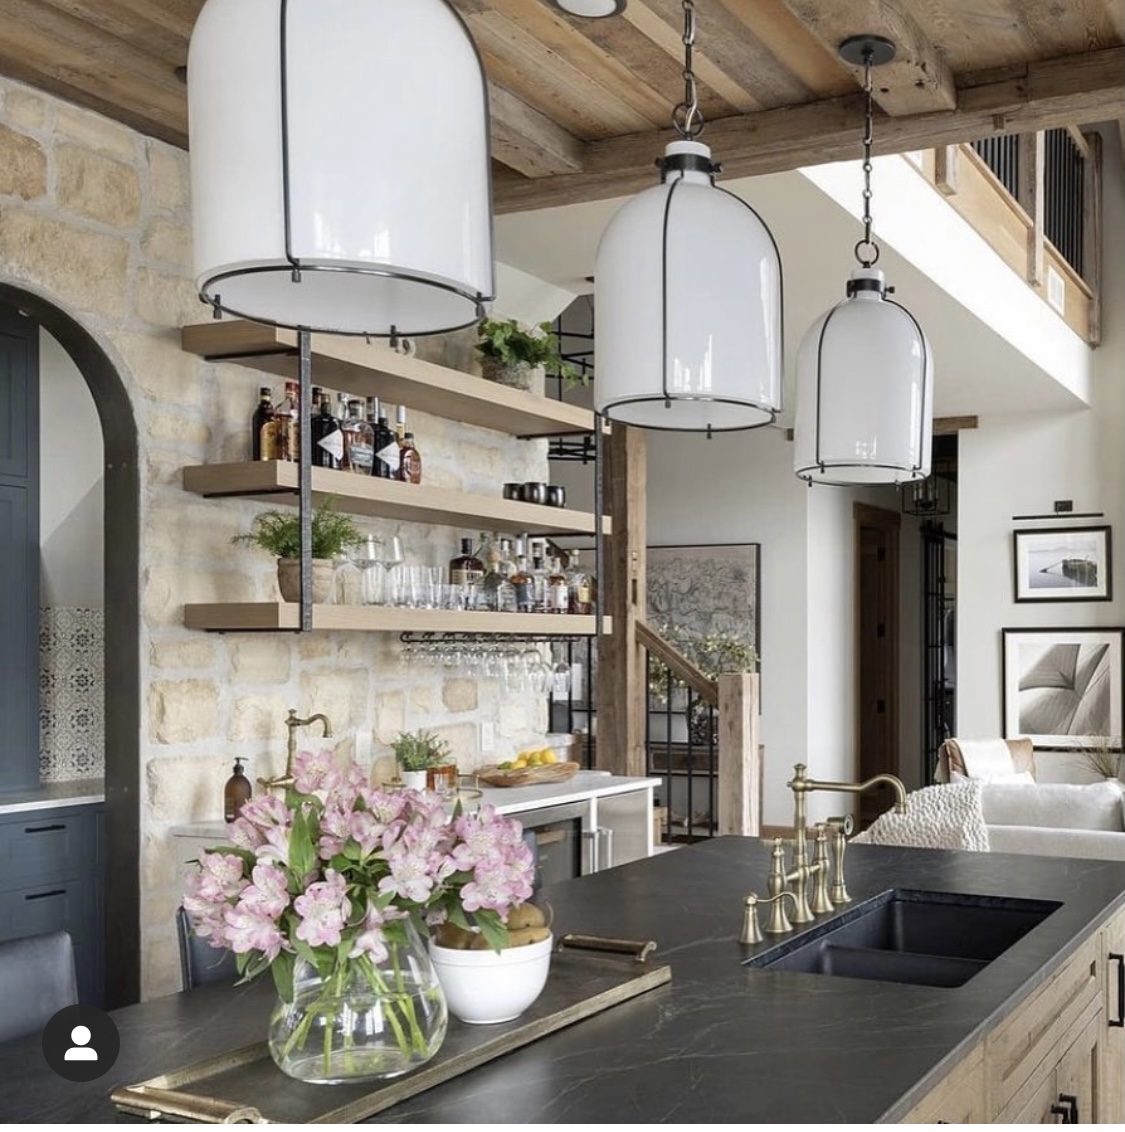
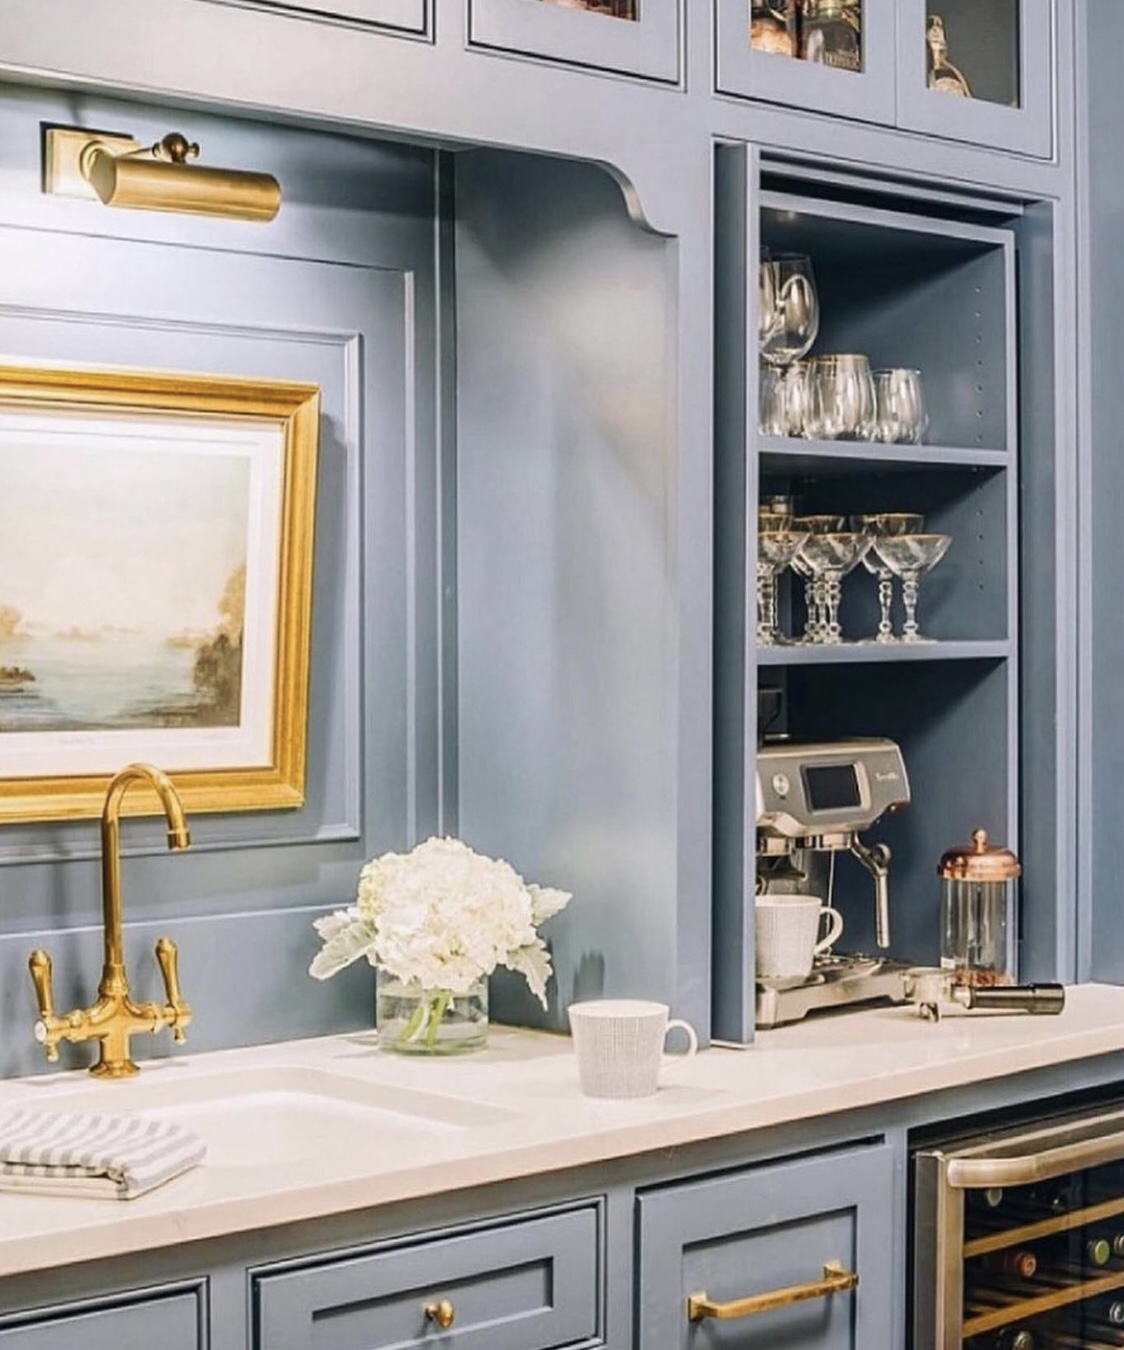
So, the first thing I did was make a wish list of what I wanted for the home bar:
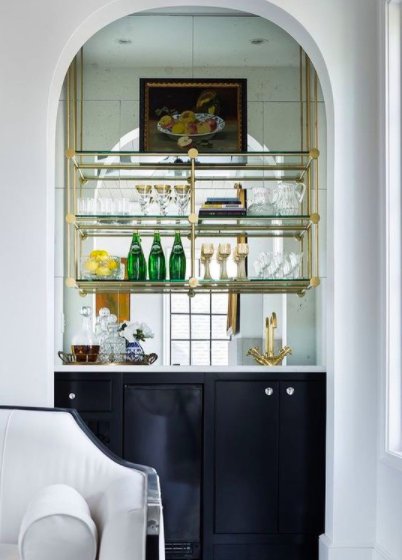
- A pretty bar sink (doing a dry bar is much cheaper, but in my forever home, I’m not going to skimp on the extras)
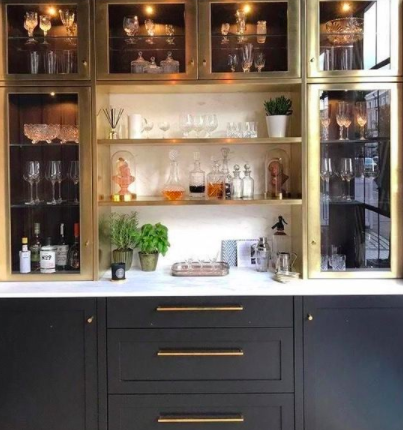
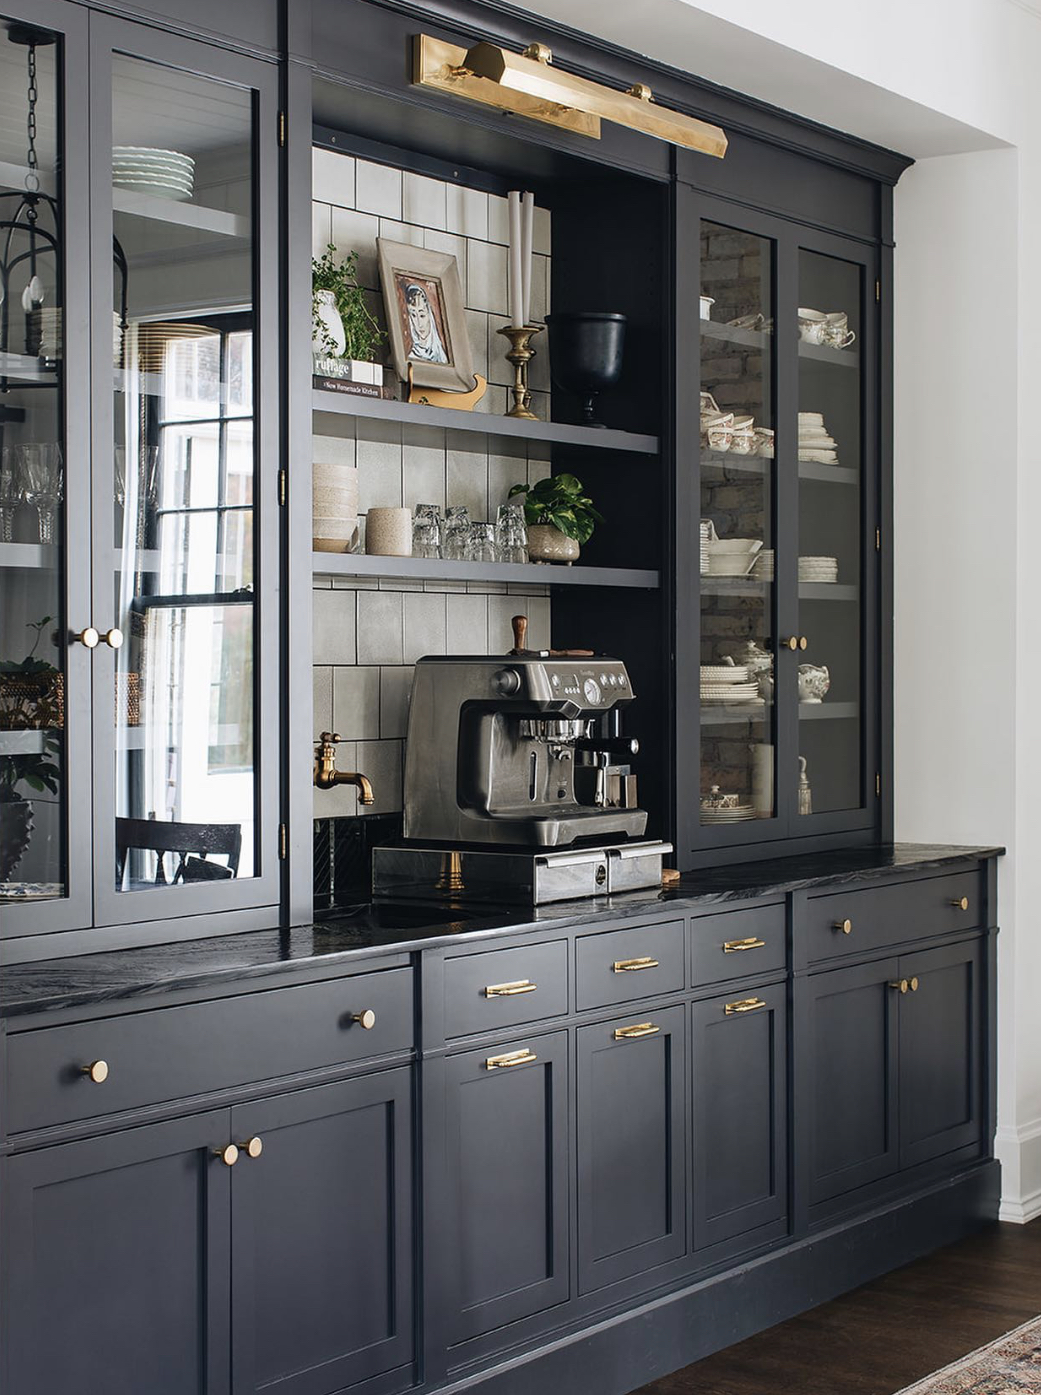
- Storage for bar glasses and extra mugs (Rainman has an extensive collection that I have not been able to smuggle out of the house into the garbage)
- Hanging under cabinet storage for wine glasses
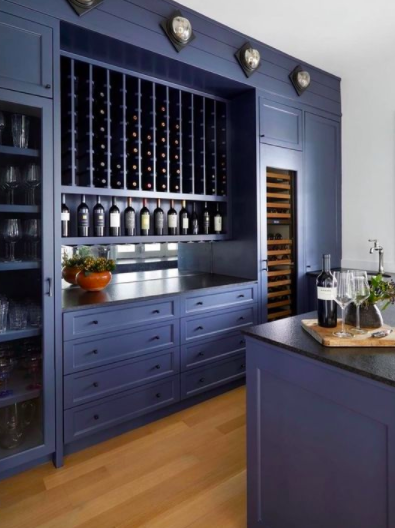
- A combination beverage fridge for white wine (we drink red wine at room temperature like uncultured heathens but I like to keep chardonnay on hand for friends that drink white) and soda mixers like ginger ale and coke
- Counter space for the coffee machine
- A pot filler for the coffee machine
- Storage for bags of coffee and my herbal tea collection
- Room on the counter for cocktail tools
- Room for displaying and storing liquor for cocktails
So, here are some of my favorites I found that are capable of hosting coffee, wine, and bourbon:
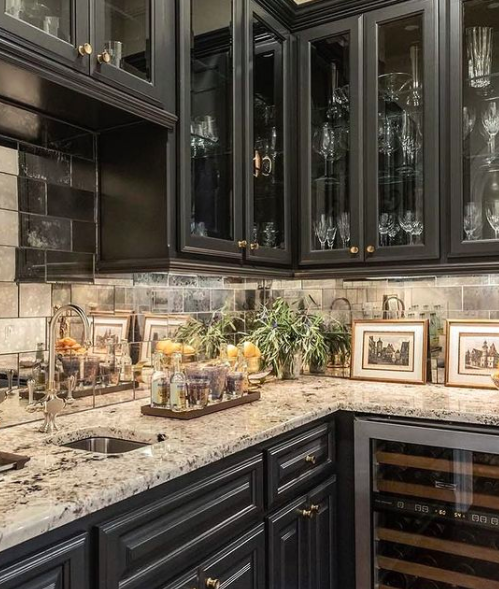

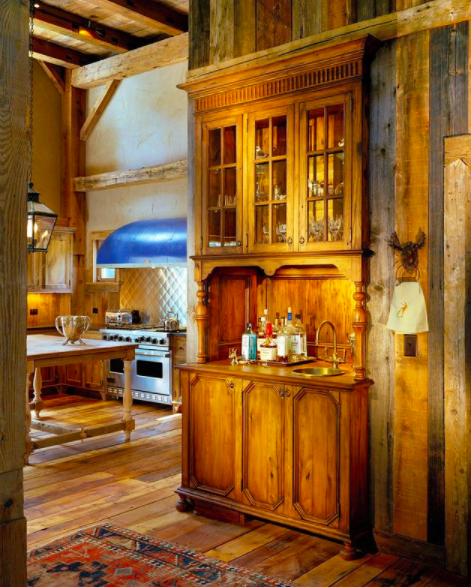
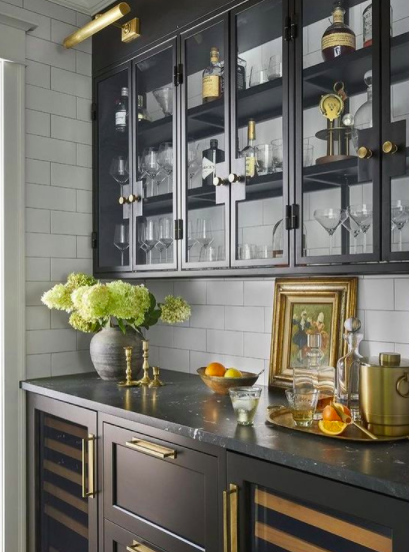
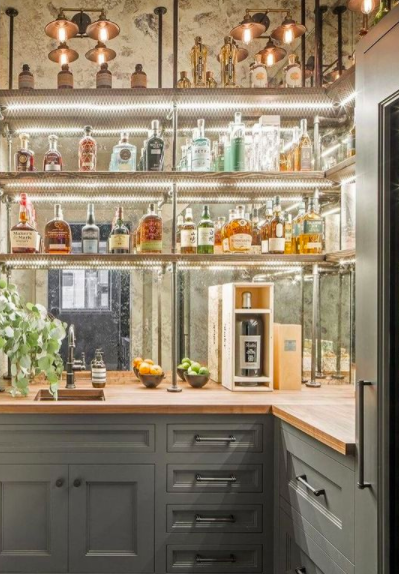


Which one is your favorite? Let us know in the comments below!
Check out more of our design inspiration and high-end DIYs on the blog! Cheers!
*Legal stuff:
I am honest about my experiences with different products and write because I enjoy it. I do however, have the opportunity to earn money for my writing, also.
Slavetodiy.com is a participant in the Amazon Services LLC Associates Program, an affiliate advertising program designed to provide a means for sites to earn advertising fees by advertising and linking to amazon.com. Amazon offers a small commission on products sold through their affiliate links. Each of your purchases via our Amazon affiliation links supports our cause at no additional cost to you.
If a blogger links to an Amazon product (with a special code for affiliates embedded in the link), and a reader places an item in their “shopping cart” through that link within 24 hours of clicking the link, the blogger gets a small percentage of the sale. Amazon links are not “pay per click.” If you click on the product link and stay around Amazon and purchase something else, however, I will get a commission on that sale.
This site also contains affiliate links through //Commerce/Sovrn. //Commerce or our Publishers may be compensated when you click through links on our site.
.
Christmas Hostess Gifts From Veteran Owned Small Businesses

Every year we do gift baskets for friends and neighbors and we do our very best to feature a small business that we love. We figure we are spending the money anyway… we might as well pay it forward with small businesses and make an even bigger impact. This year for our “small business gifts” we chose Semper Savage, a truly kick-ass salad dressing and marinades company.
*This post may contain affiliate links. Please see full disclosure at the end of the post.

Why them? I don’t know if you knew this, but in Rainman’s previous life he was a helicopter pilot in the Marines. I know. He wins the “my dad has a cooler job than yours” competition with some regularity.
I sometimes picture him in those Vietnam Era films with a Huey zooming along rice patty fields… because he’s pretty much my hero (please insert theme music: Fortunate Son by Creedence Clearwater Revival).
It was a no-brainer figuring out what we were getting for our small-business gifts this year when we discovered that a fellow-cool-guy-helicopter-pilot-friend of David’s owns a small business selling om-nom-nom salad dressings and marinades.

Want to try these for yourself or for Christmas gifting? Use code callsign at checkout for great product discounts!

The dressings, that are homemade and made with authentic, actual natural ingredients, are getting rave reviews and we think you’ll love them!

Have you purchased any Christmas gifts from small businesses this year? We love Semper Savage’s fast, free shipping and cannot wait to get these cute dressing sets out to our friends and family.
Semper Fi friends and Merry Christmas!
*Legal stuff:
I am honest about my experiences with different products and write because I enjoy it. I do however, have the opportunity to earn money for my writing, also.
Slavetodiy.com is a participant in the Amazon Services LLC Associates Program, an affiliate advertising program designed to provide a means for sites to earn advertising fees by advertising and linking to amazon.com. Amazon offers a small commission on products sold through their affiliate links. Each of your purchases via our Amazon affiliation links supports our cause at no additional cost to you.
If a blogger links to an Amazon product (with a special code for affiliates embedded in the link), and a reader places an item in their “shopping cart” through that link within 24 hours of clicking the link, the blogger gets a small percentage of the sale. Amazon links are not “pay per click.” If you click on the product link and stay around Amazon and purchase something else, however, I will get a commission on that sale.
This site also contains affiliate links through //Commerce/Sovrn. //Commerce or our Publishers may be compensated when you click through links on our site.
Seven Easy Steps To Stage A Powder Room Or Bathroom Like A Pro
Why should I care about staging my bathroom or powder room for sale (or entertaining), you ask? And I’ll tell you (because that’s sort of just what I do): This is the one room where your party guests, or potential buyers, are going to (probably) spend some alone time.
And you know what? They’re going to look, and they’re going to notice: how clean is it? How cluttered is it? You know what else they’re going to do? They’re going to look through your stuff. (Trust me, they will).
They’re also going to, hopefully, relax and feel like they might want to stay a while. Stay tuned and I will guide you through bathroom decor ideas, bathroom cleaning, and staging.
*This post may contain affiliate links. Please see full disclosure at the end of the post.
Your bath guests are looking to see if you’re Miss Piggy or Mary Poppins (practically perfect in every way). And although I don’t always like being Mary Poppins, in this case you should DEFINITELY be aiming for perfection and cleanliness and not being a disgusting, egotistical, irrational character that denies that she is anything less than absolutely perfect. Nobody likes Miss Piggy.
Ideally, your bathroom should be pretty… but, even if it’s not, you can still stage it to create a welcoming, spa-like space that will wow potential buyers and guests alike.
If you missed it, check out our post on How To Create A Historic Looking Bathroom In A New Home. You’d be surprised how economical making a gorgeous bath can be if you DIY it!
Here are the easy steps to stage your bathroom or powder room like a professional (with a complete source list at the end):
Deep Clean and Declutter.
I can’t emphasize this enough: This is the single most important step of bathroom staging. Scrub that sucker until it shines. I’m talking, rubber-gloves-and-buckets type cleaning.
I recommend unloading the vanity and reorganizing it (people will definitely look through your cabinets and drawers during a showing… but also during a party). If you unload the countertops and all of the floor items, you can wash and shine to your heart’s delight. In a bathroom, it’s okay for it to smell “bleachy”, it just tells people it’s clean.
Pay special attention to the toilet (that part right behind the seat hinge where hair and BLECH accumulates), under the rim, the toilet seat (above and below), in front of and behind the bowl, and the floor (and wall) around the commode.
Stock.
Provide:
- plenty of toilet paper and a stock of extra rolls in the cabinet/drawer: this is a great time to splurge on a new freestanding toilet paper holder that you can take to the next house (if you’re selling)
- spare toothbrushes and toothpaste in a clearly marked container (I like bamboo toothbrushes for my guests that are both biodegradable and compostable). You just never know who has goat-butt breath and is looking for rescue
- ladies’ toilet essentials in a basket in a cabinet/drawer (in various sizes and shapes)
- toilet cleaning brush and plunger: If you have room to keep the toilet cleaning brush and the plunger under the sink, that’s the best place for them (out of sight but accessible in case someone needs them). I don’t want anyone feeling mortified because they clogged the uncloggable toilet or made an unsightly mess in the toilet with no way to remedy it. (For staging, if you can’t hide it, put it somewhere else. They take all the magic out of the beautiful, photo ready bathroom)
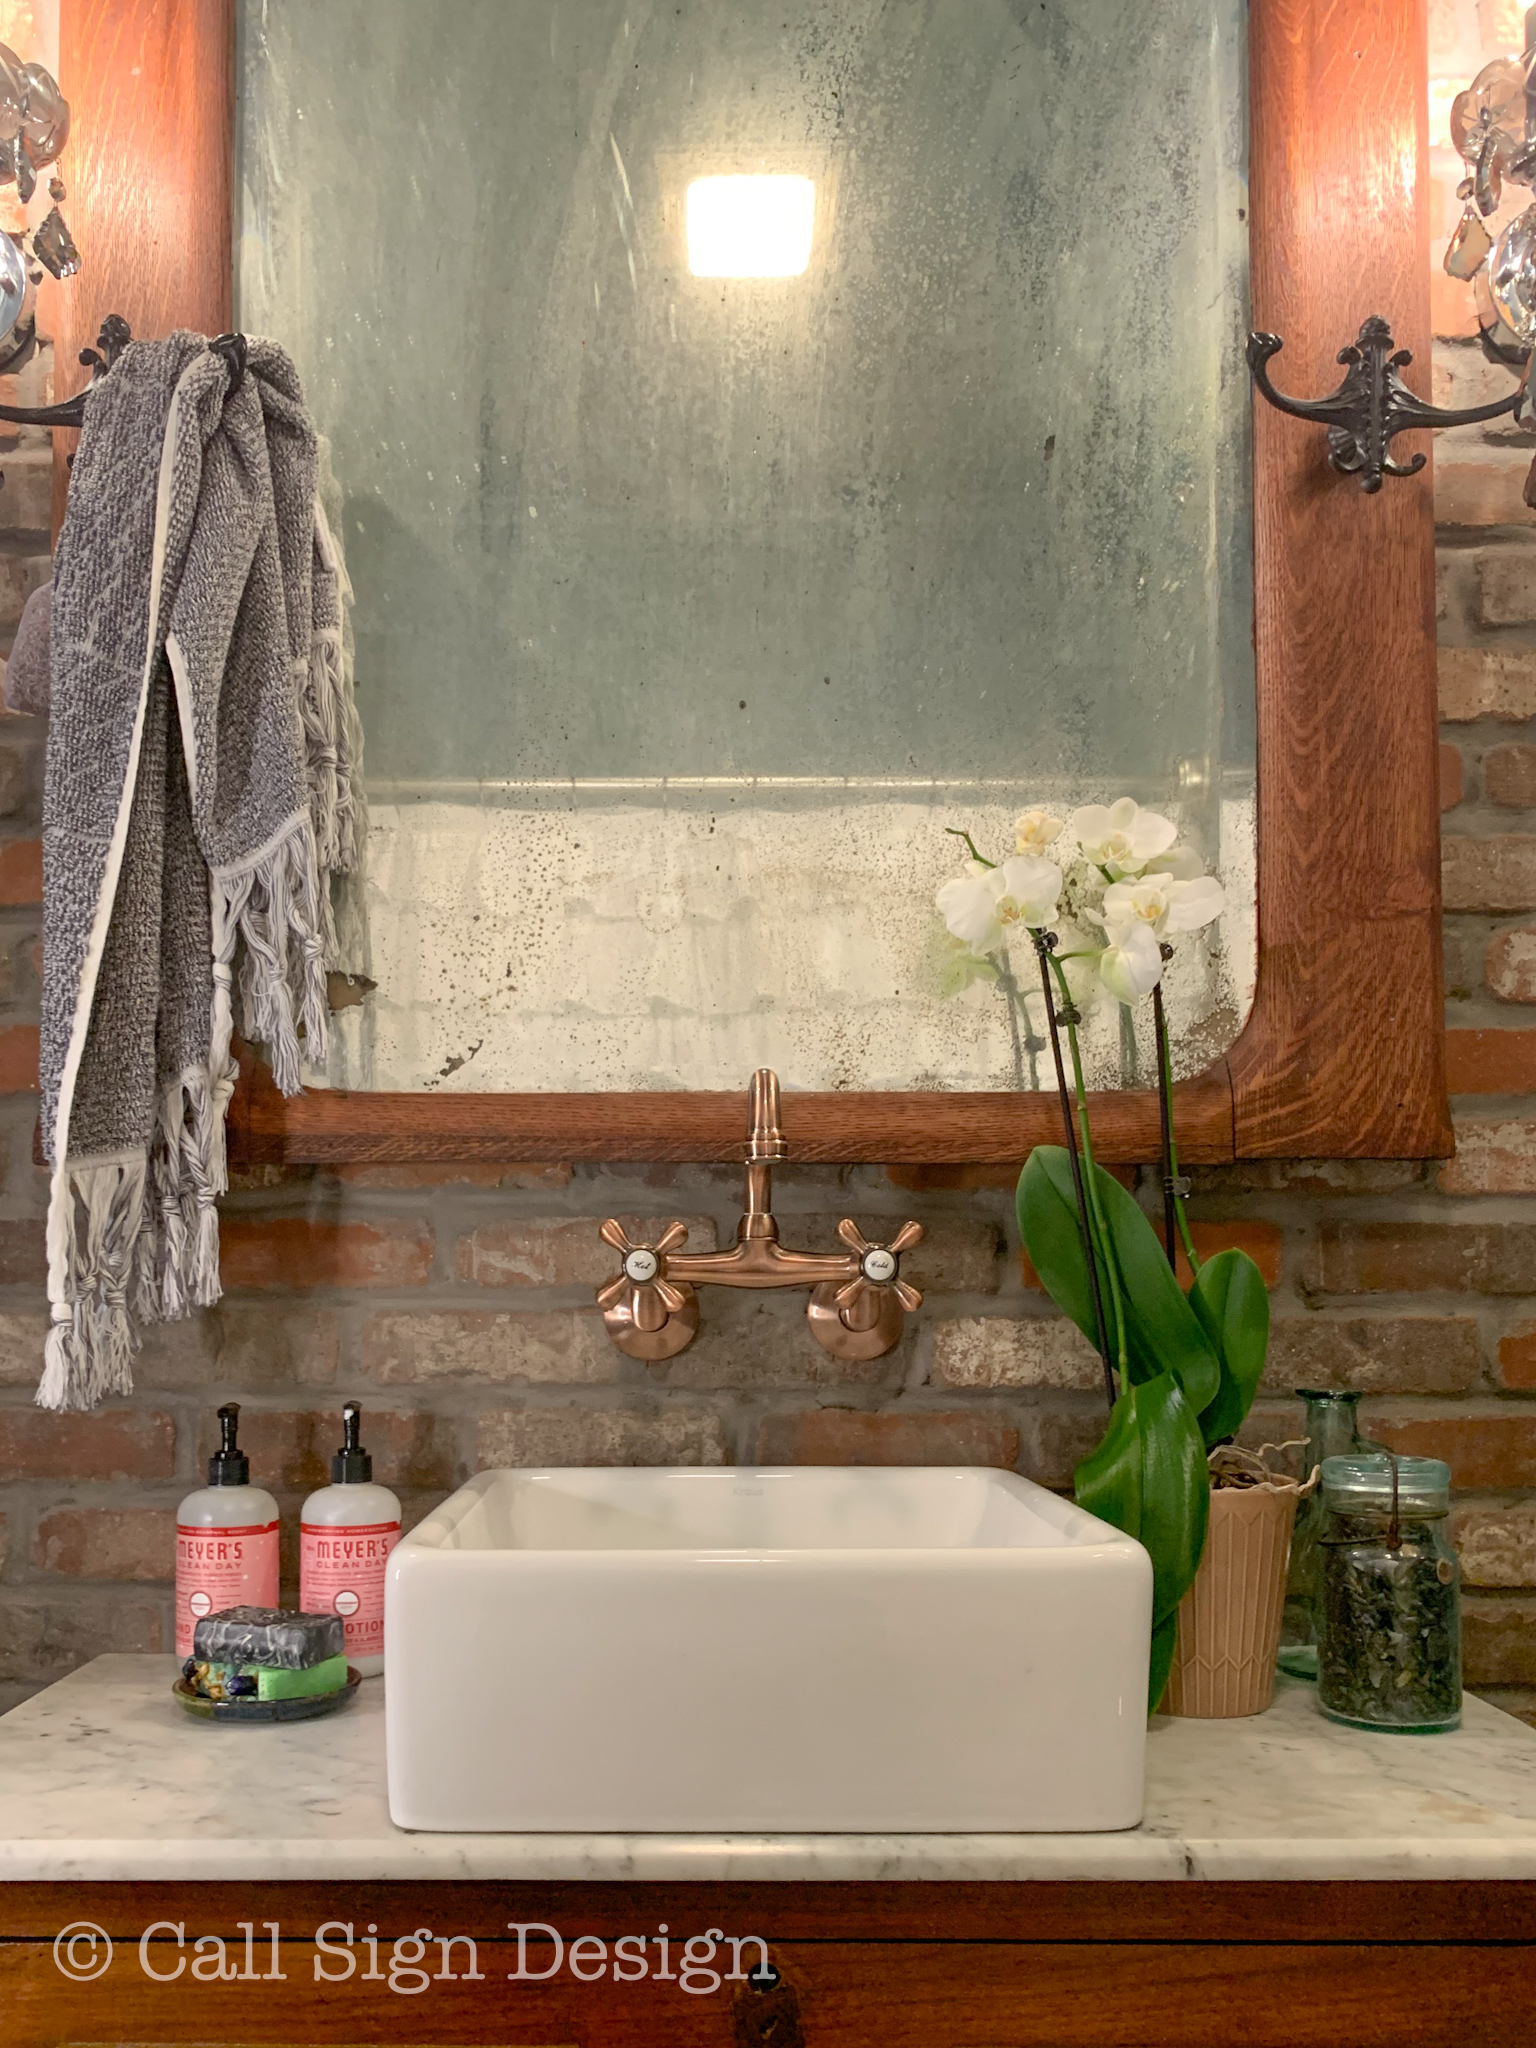
- Mrs. Meyers Peppermint Handsoap, hand sanitizer, and lotion
- pretty, drapey (but also functional) towels: we love these Hitit Jacquard Yarn Dyed Turkish Hand Towels With Tassels in our new bathroom (say “no” to those stuffy, creased towels people are afraid to dry their hands on)
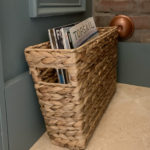
- reading material in a water hyacinth magazine basket: keep these within reach of the toilet, but not so close that they soak up overspray from the commode
- a lined, clean trash can

De-stock.
- Lock up your medications
- Lock up your medications
- Lock up your medications
I’m not even going to get into this. Just please, do this one thing for me. If you fail to heed this advice: not only could your medications disappear, but I also find it to be a massive invasion of privacy when people are checking out your medications in your cabinet. AND THEY WILL.
See again: People will snoop. Put your stuff away.
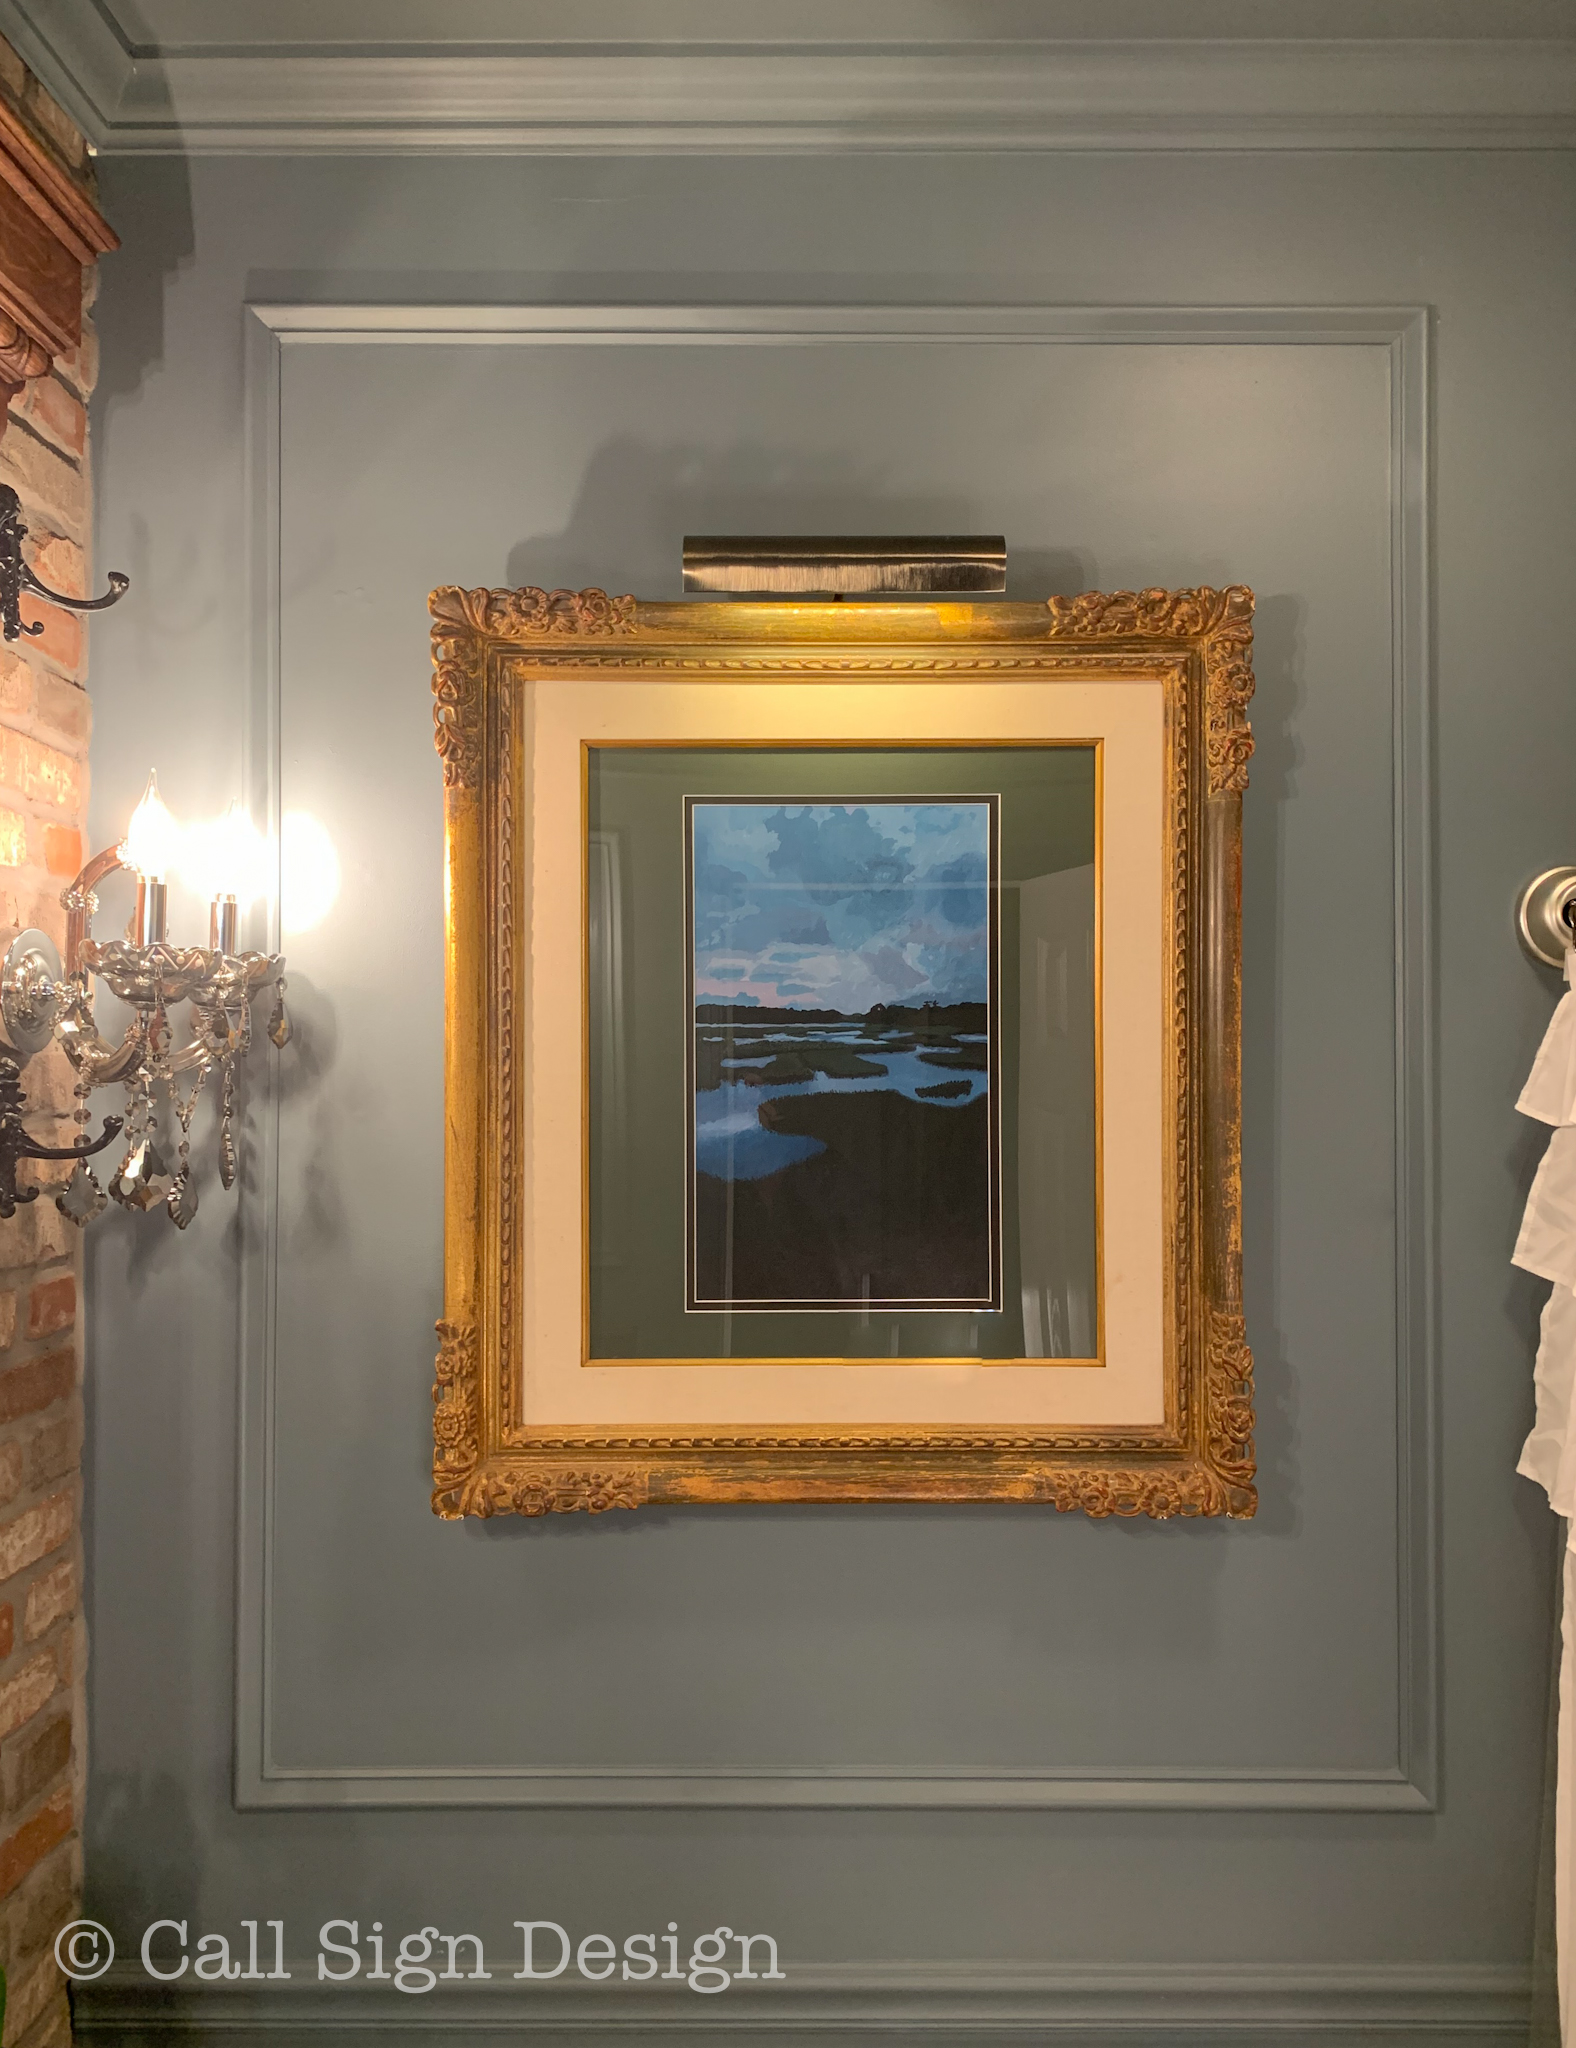
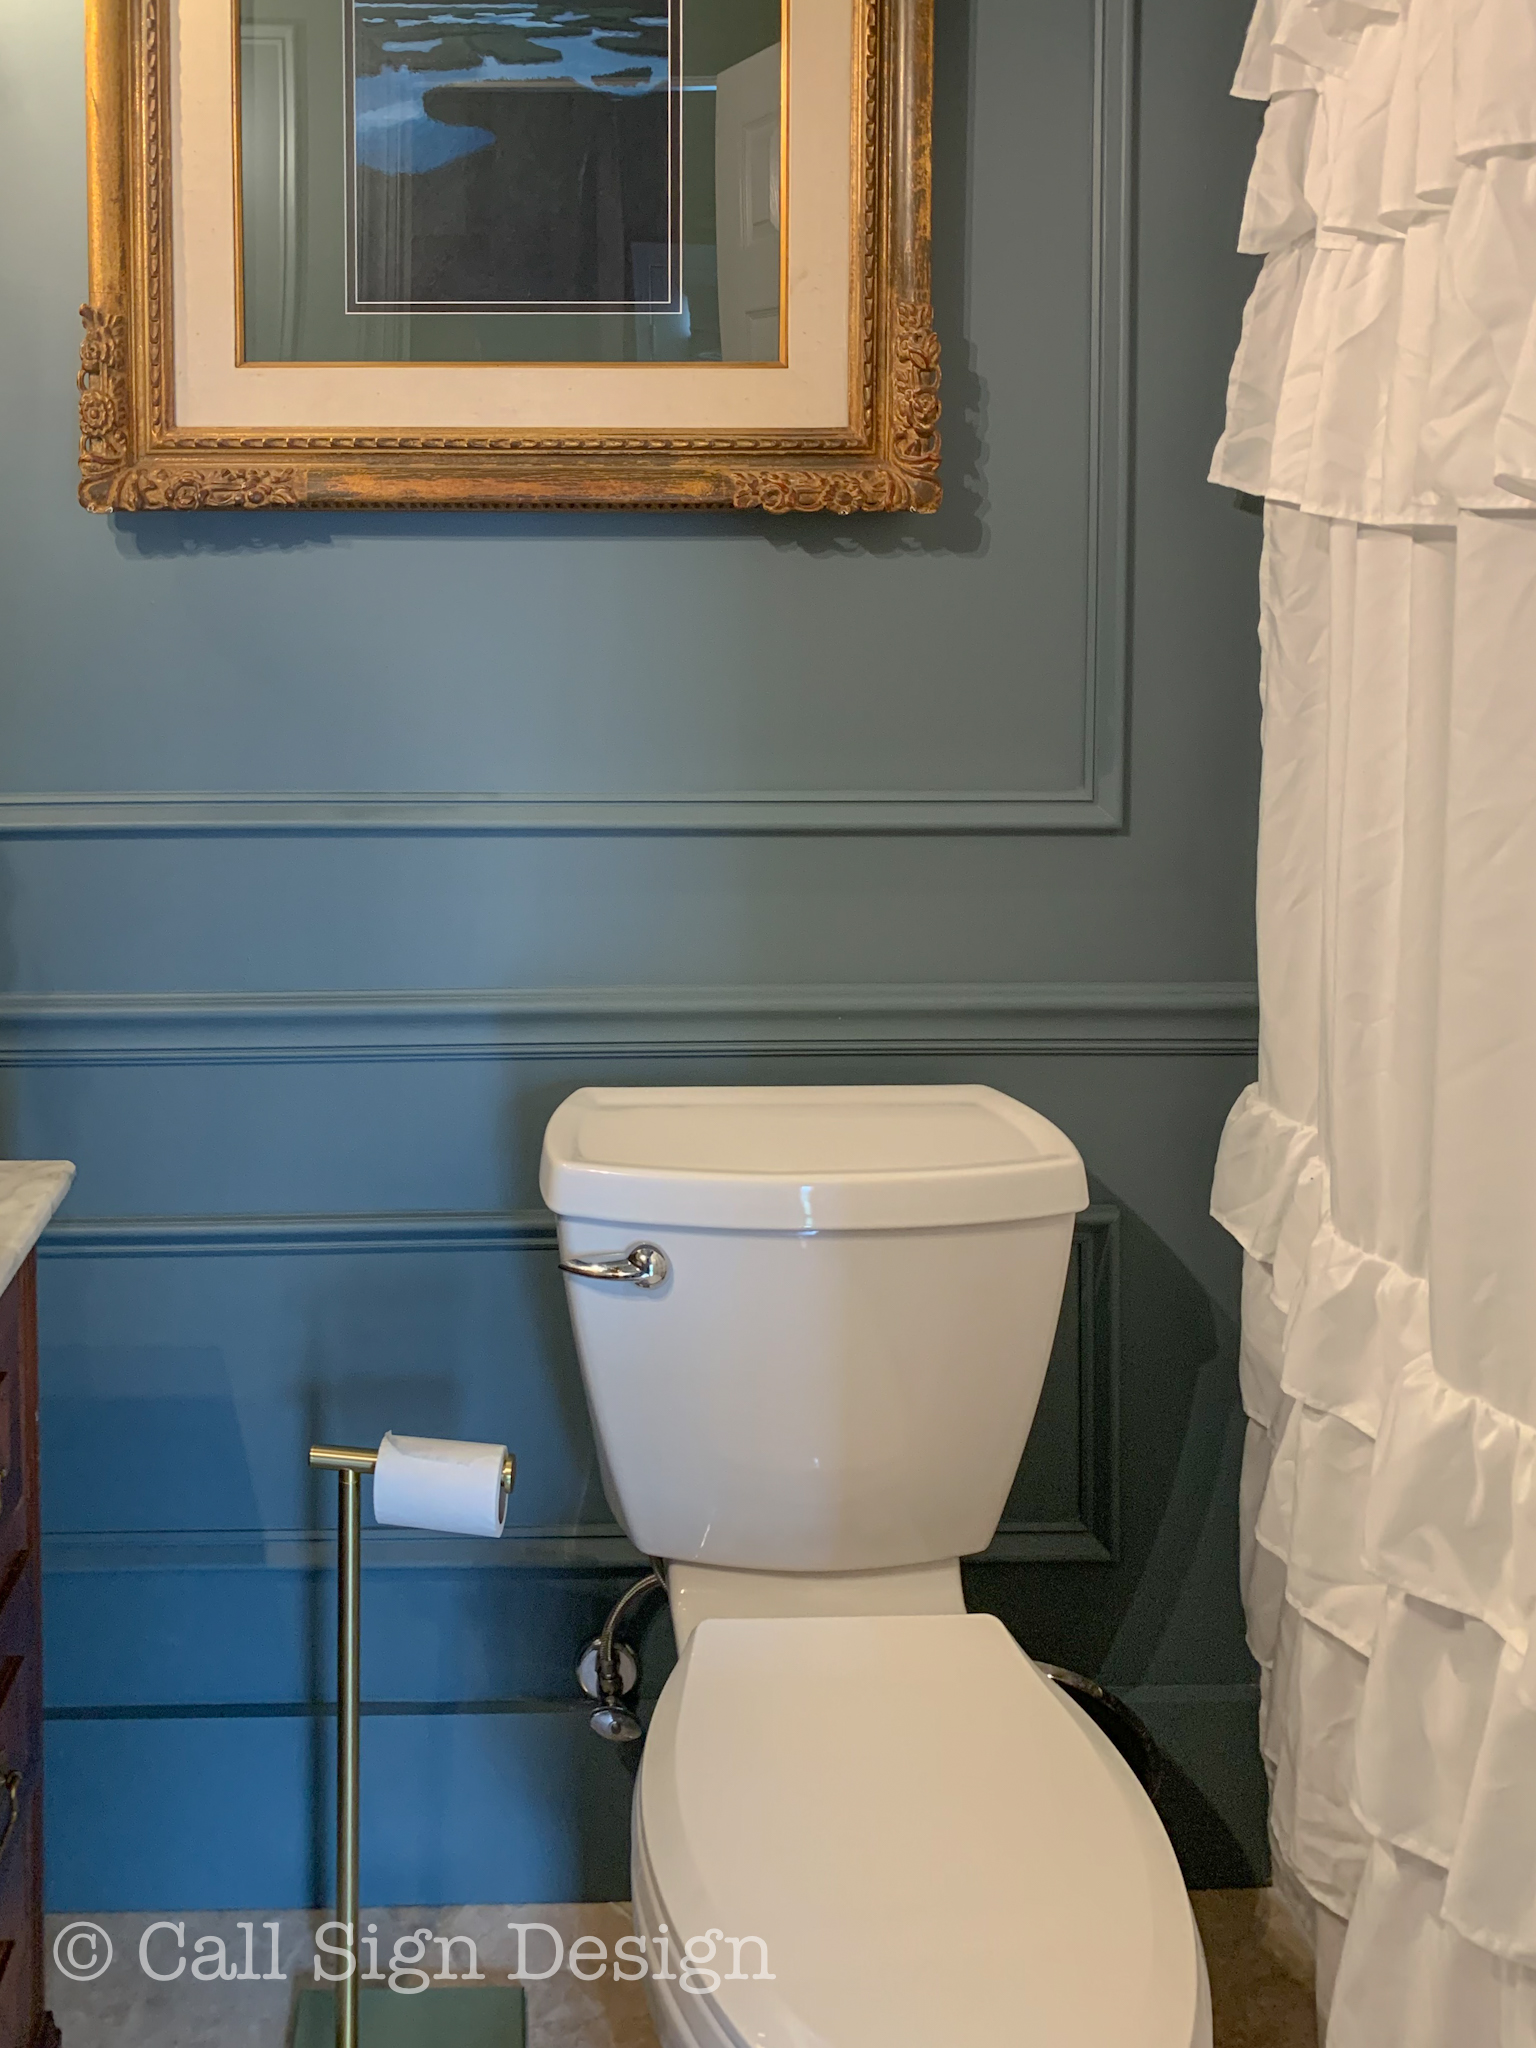
Hang Fantastic Art
Bathroom wall art is an often overlooked item in bathrooms. You’d be surprised how an amazing piece of art in an ornate frame can make a whole room feel upscale (even if the room is just meh)… or how a bunch of little art pieces can make a bathroom feel a lot like your Great-Aunt Betty (Bless Her Heart) decorated it in 1978 (with add-ons from the entire decade of the 80s at which time she declared it perfect and never changed another thing ever again). I prefer one big piece to many little ones: it seems to make the room feel bigger and much more clean and uncluttered.
Looking for an economical way to DIY your own masterpiece for your wall? Check out our post on The Easy Way To DIY Breathtaking Landscape and Scenery Paintings.
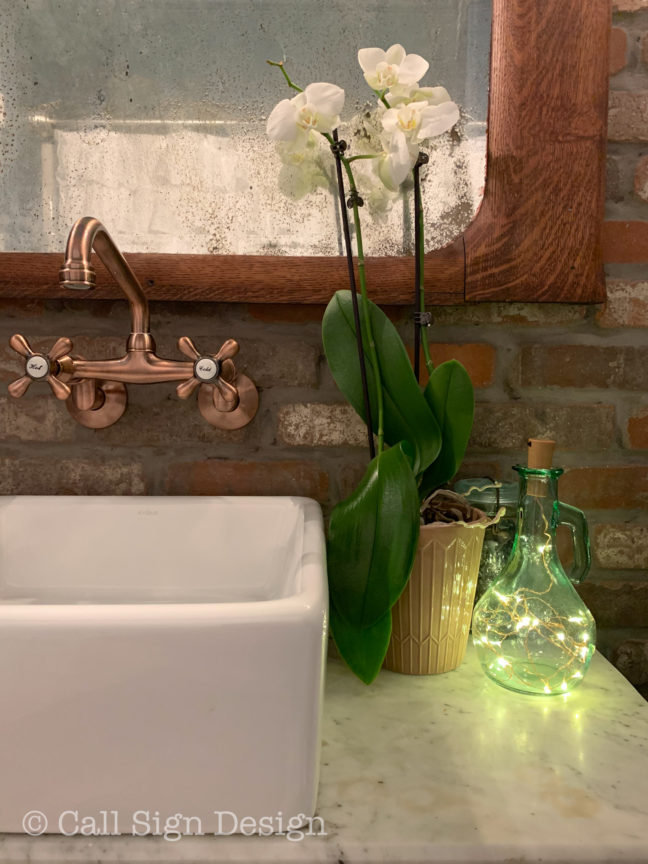
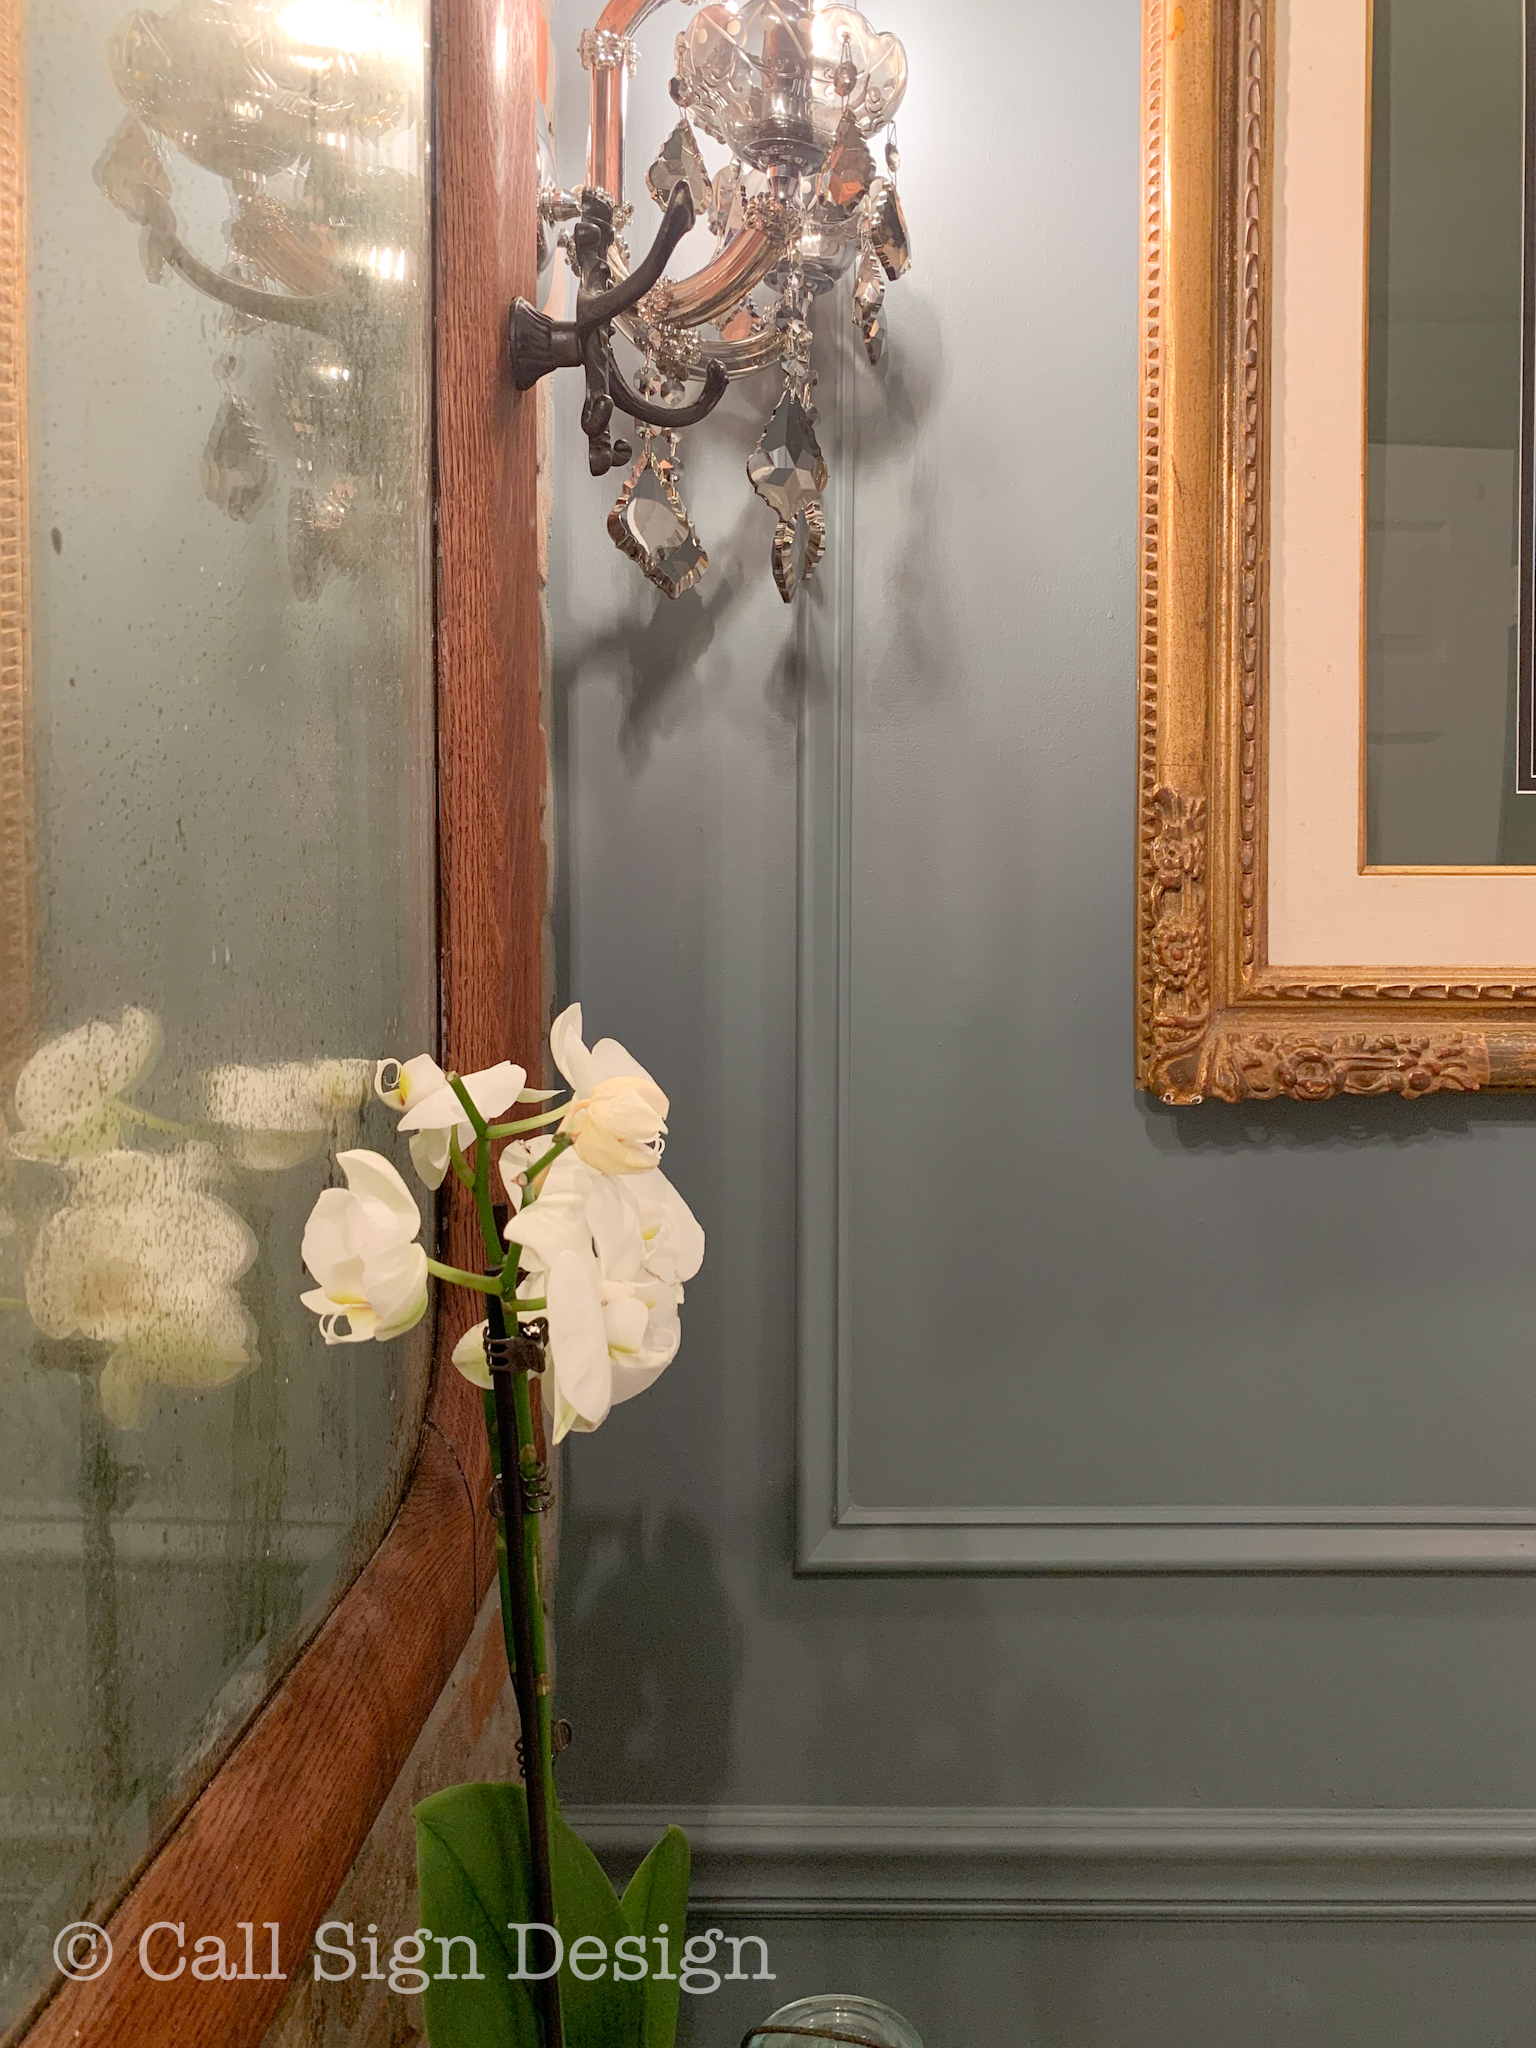
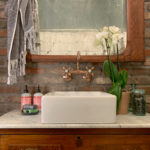
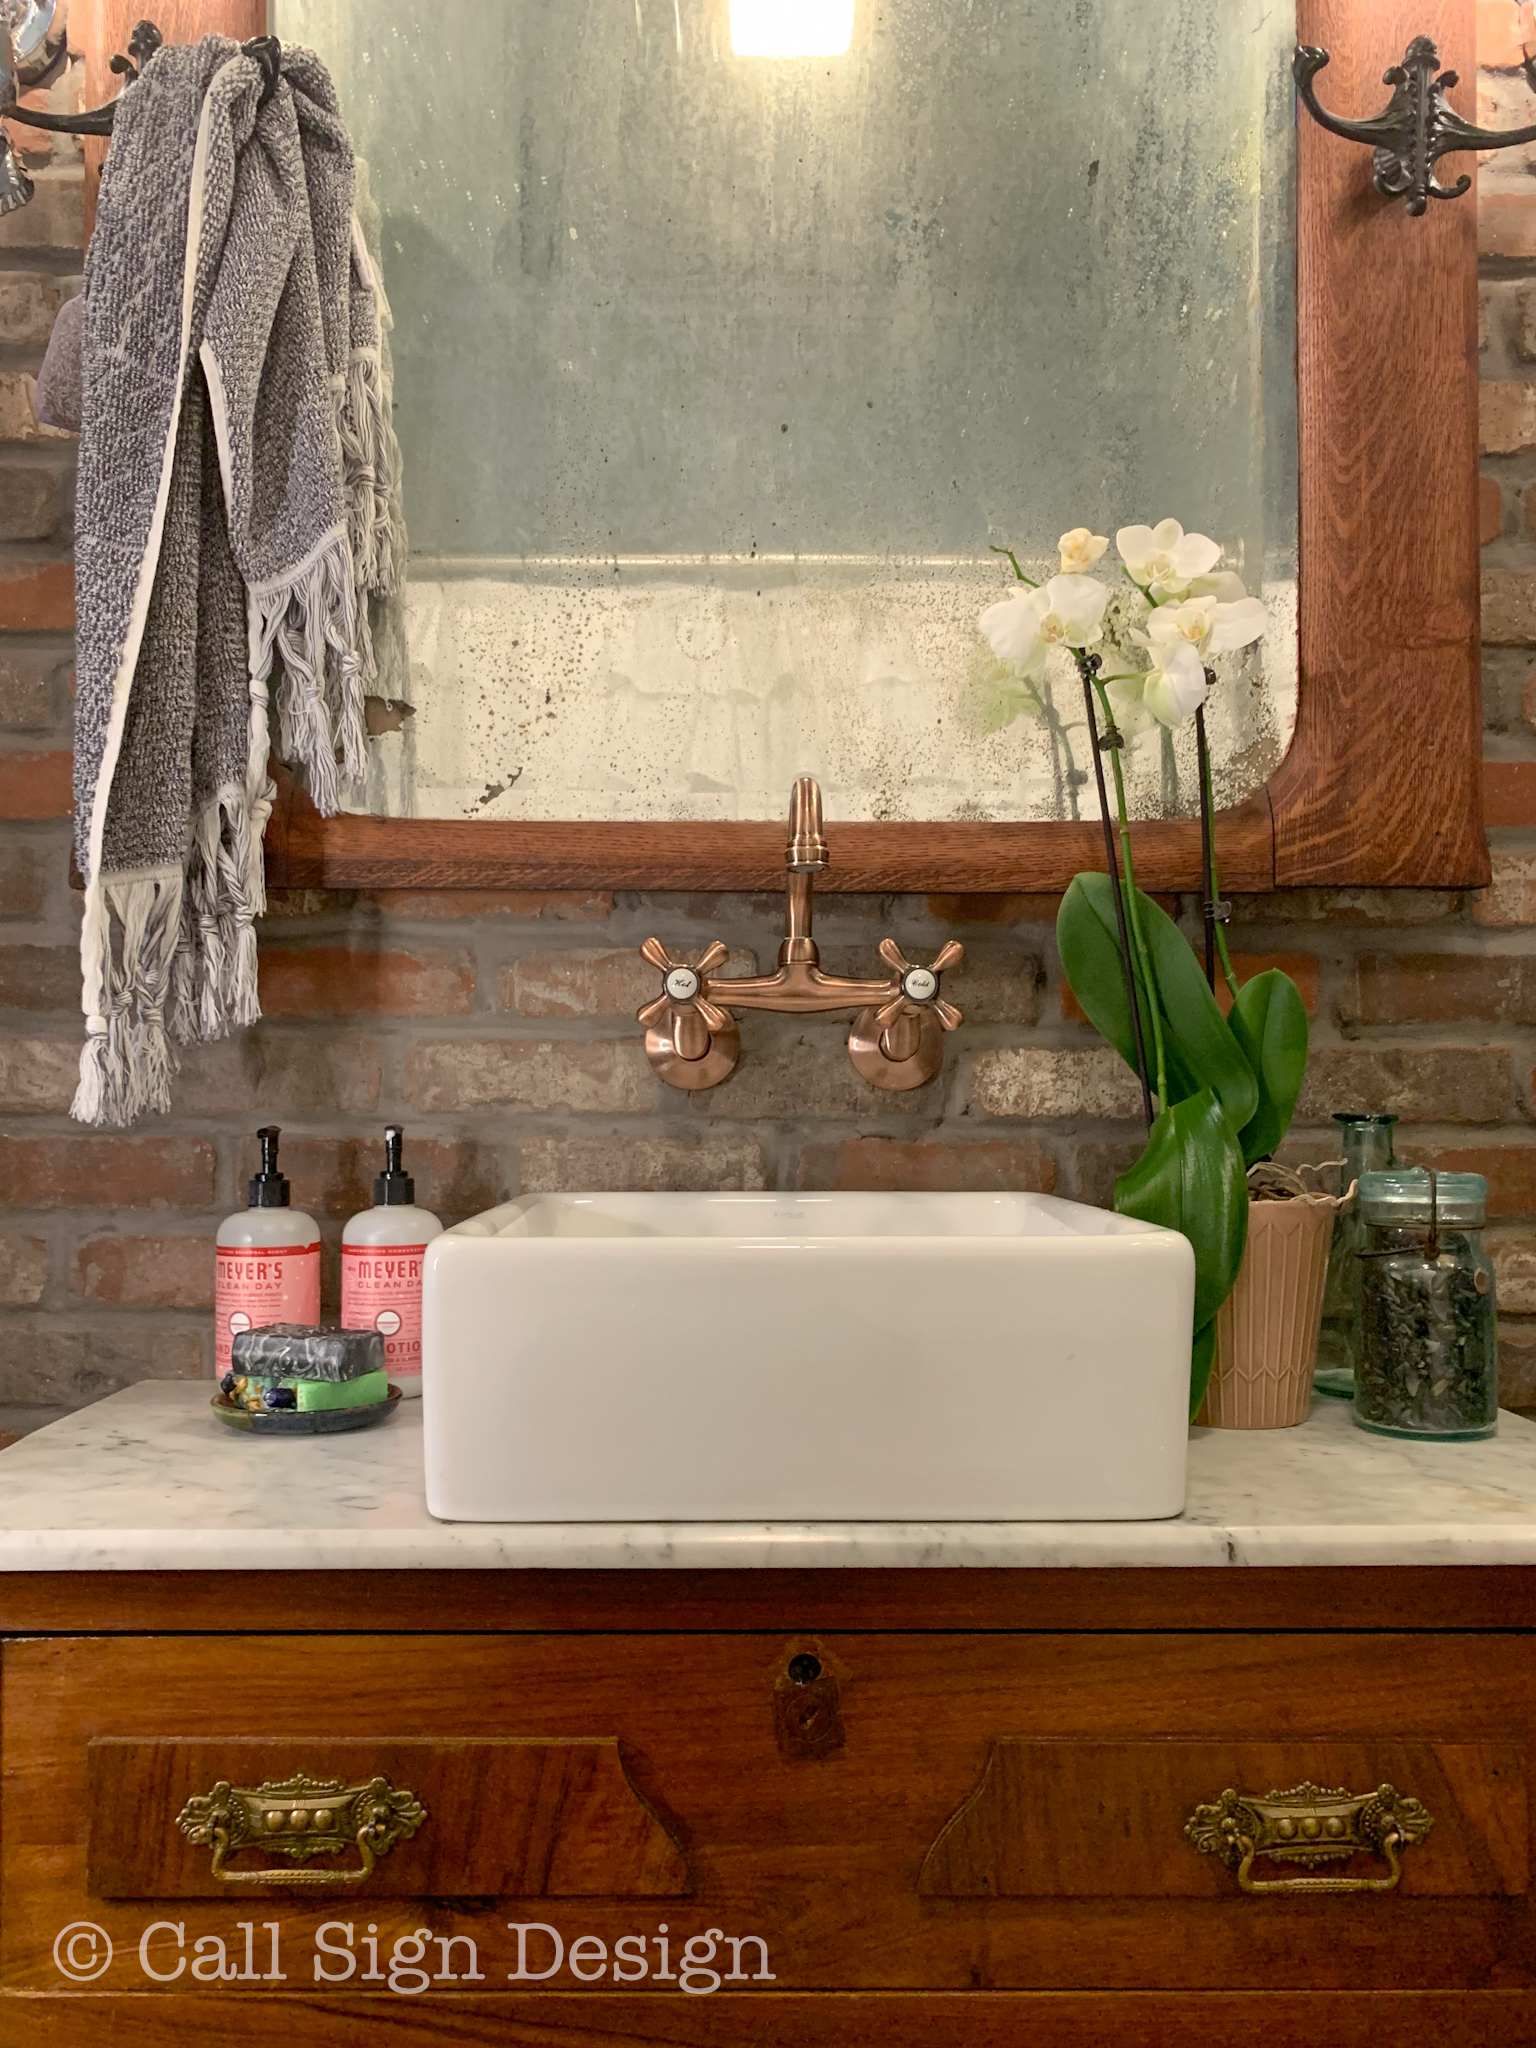
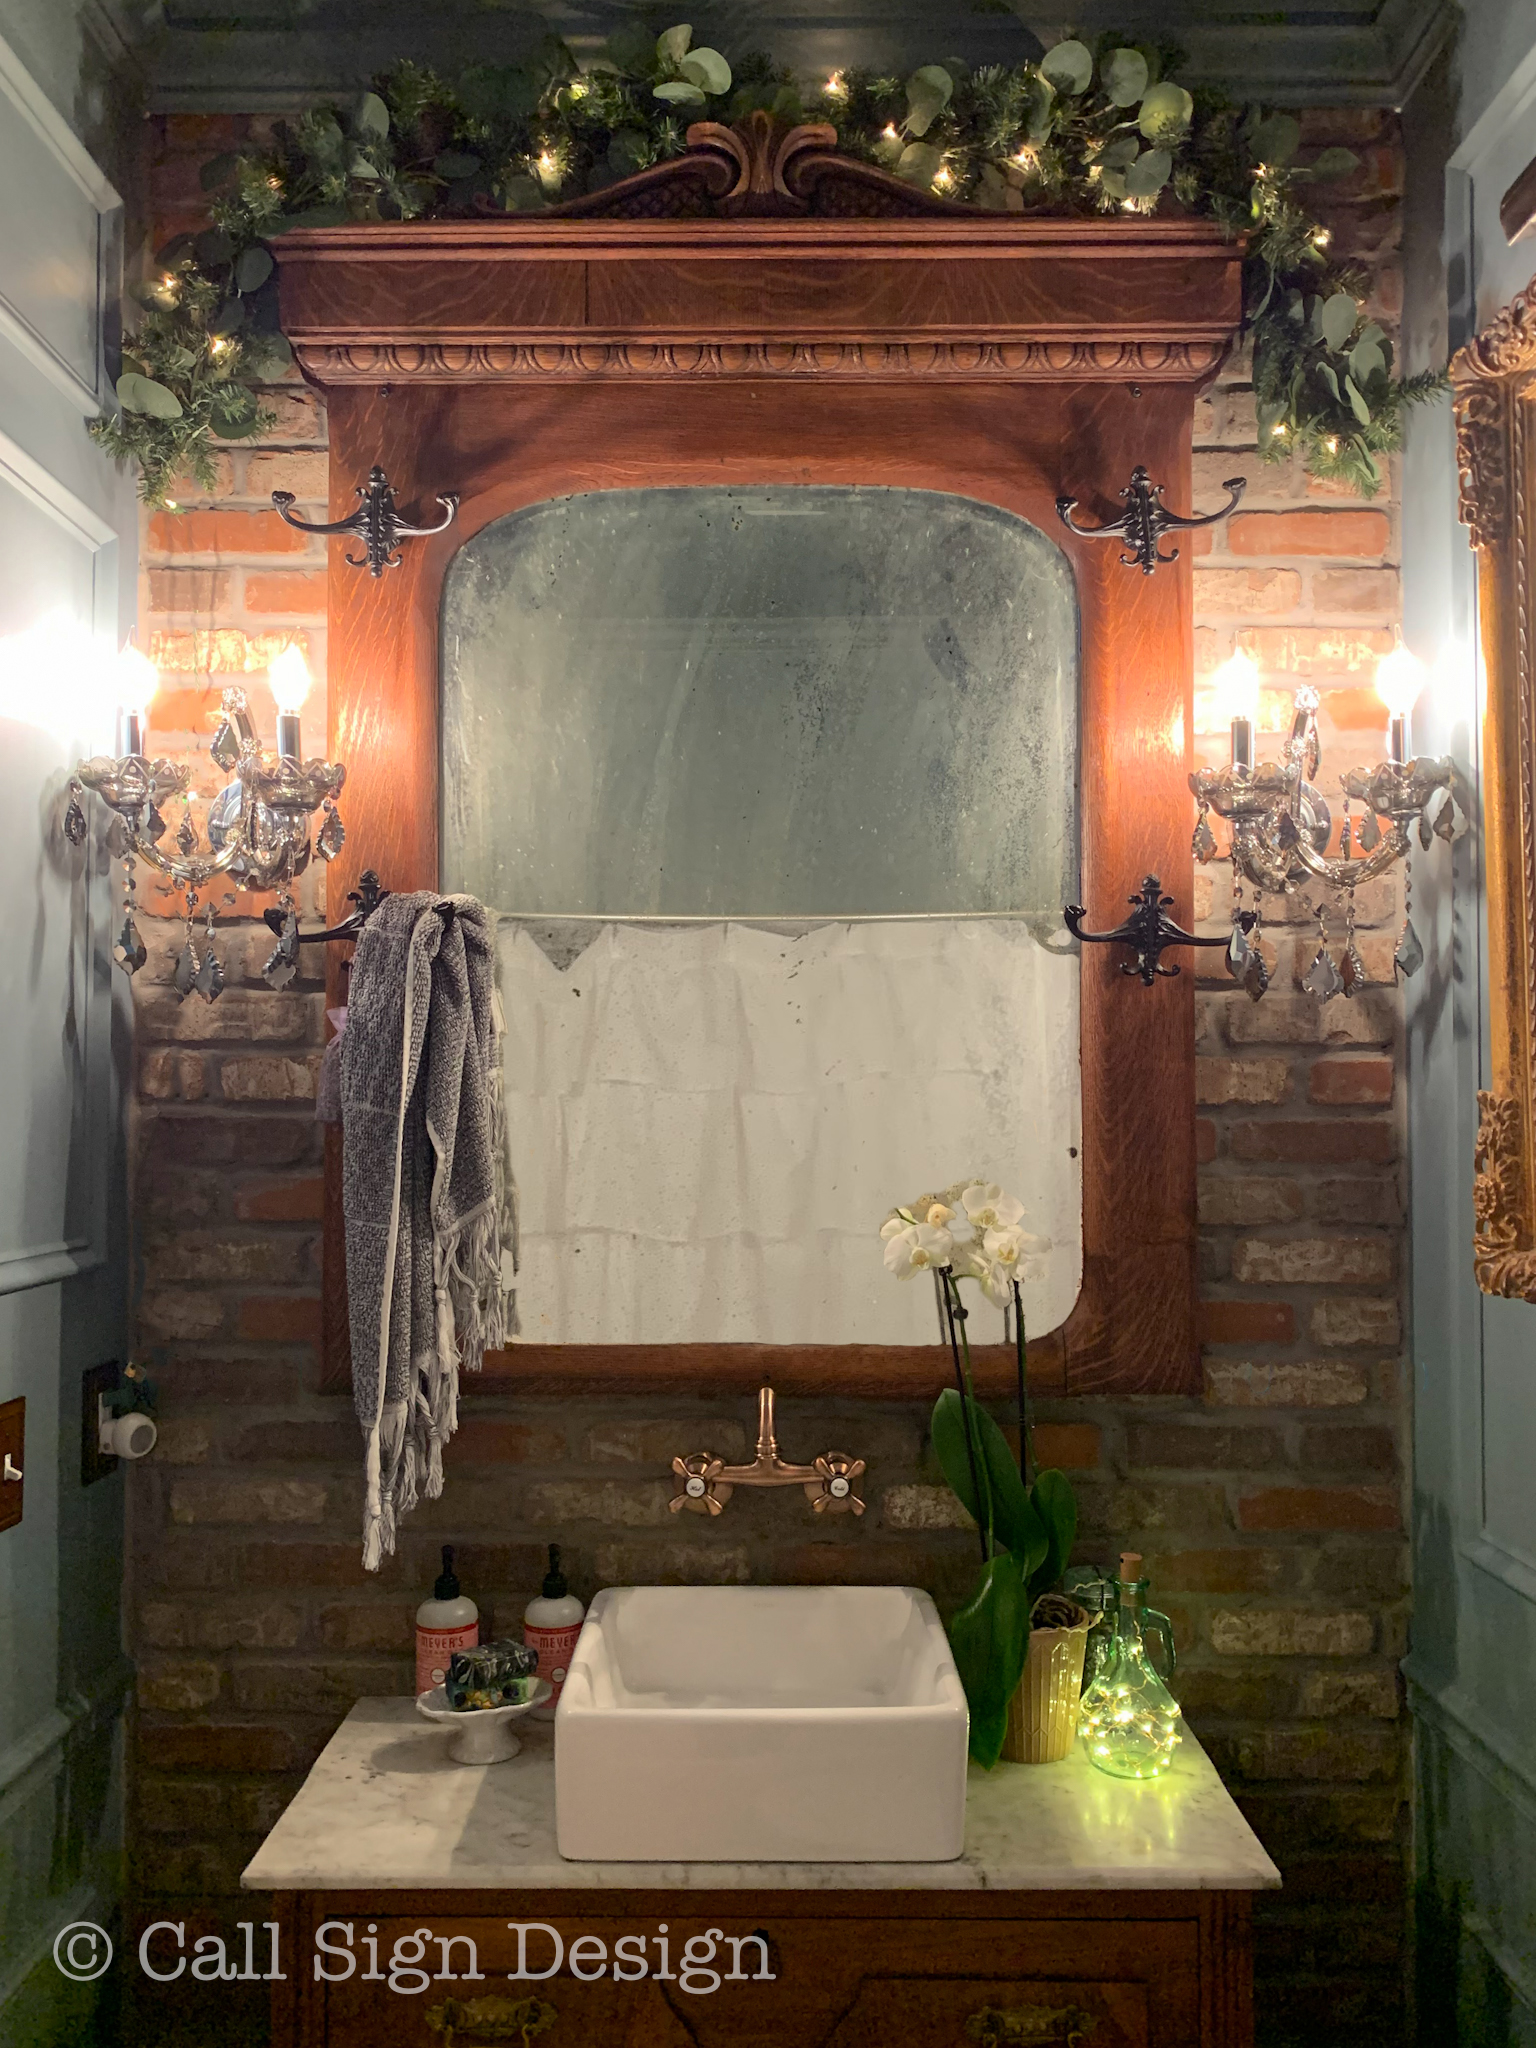
Flowers or Greenery
An orchid is a fantastic choice for bathroom staging… it doesn’t take up much countertop space and is easy to care for. It adds a dramatic flair and I just love ours in the new bathroom (like the brave woman that I am: I sent Rainman to the grocery store with directions to buy a tall, skinny flower arrangement and he NAILED IT). For staging, I also like a single palm frond or even a small branch, attractively arranged (just make sure these are bug free before you drag them inside!).
I prefer the orchid because no one harrasses me about it, like they do with the branches. (“Is that a tree branch?” “Where’d you find that tree branch?” “What’s with the tree branch?” “Is that a tiny snake on that tree branch… just kidding ha ha ha ha.” You see why it’s easier to just buy a plant).
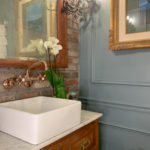
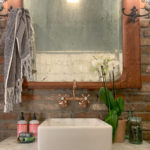
Buy A New, Pretty Shower Curtain
Seriously, when was the last time you inspected your shower curtain? It might be icky. If you haven’t thought about it in a while, it probably is. Even if you clean everything, if that shower curtain is greenish… that sends the buyer a message that you’re not taking care of the house (and will send them running out of there like an Alfred Hitchcock movie). Our bathroom here is quite masculine in design, so we went very feminine with the art and accessories to balance it. The clean, white, cotton ruffled shower curtain we used in this room is absolutely perfect and very economical.
During a recent party I may, or may not have, tucked the new shower curtain into the tub so it didn’t get peed on by the guests that were partaking. A girl’s gotta do what a girl’s gotta do.
Scent Your Space
Even once you have deep cleaned, sometimes there are lingering noxious gasses in the bathroom. There are three good options: If you’ve read our Showing Day Checklist, then you already know that the ultimate scent for home buying is Apple/Cinnamon. I guess it takes people back to the smell of grandma’s apple pie or something. We use:
- Air Wick Apple and Cinnamon Plugins (which I like for parties because it keeps working for longer)
- Glade Apple Cinnamon Spray (which I like for showings, and I used an entire can just before we left for each showing)
- Oil diffuser: This is varsity level sexy for entertaining. We like our black stone oil diffuser especially for a small space like the bathroom
Also, make sure your guests/prospective buyers have access to Lysol, Febreze, or Poo-pourri, or something to prevent them from dying of embarrassment if your shrimp, spinach, sausage, garlic cream sauce doesn’t agree with them halfway through the evening.
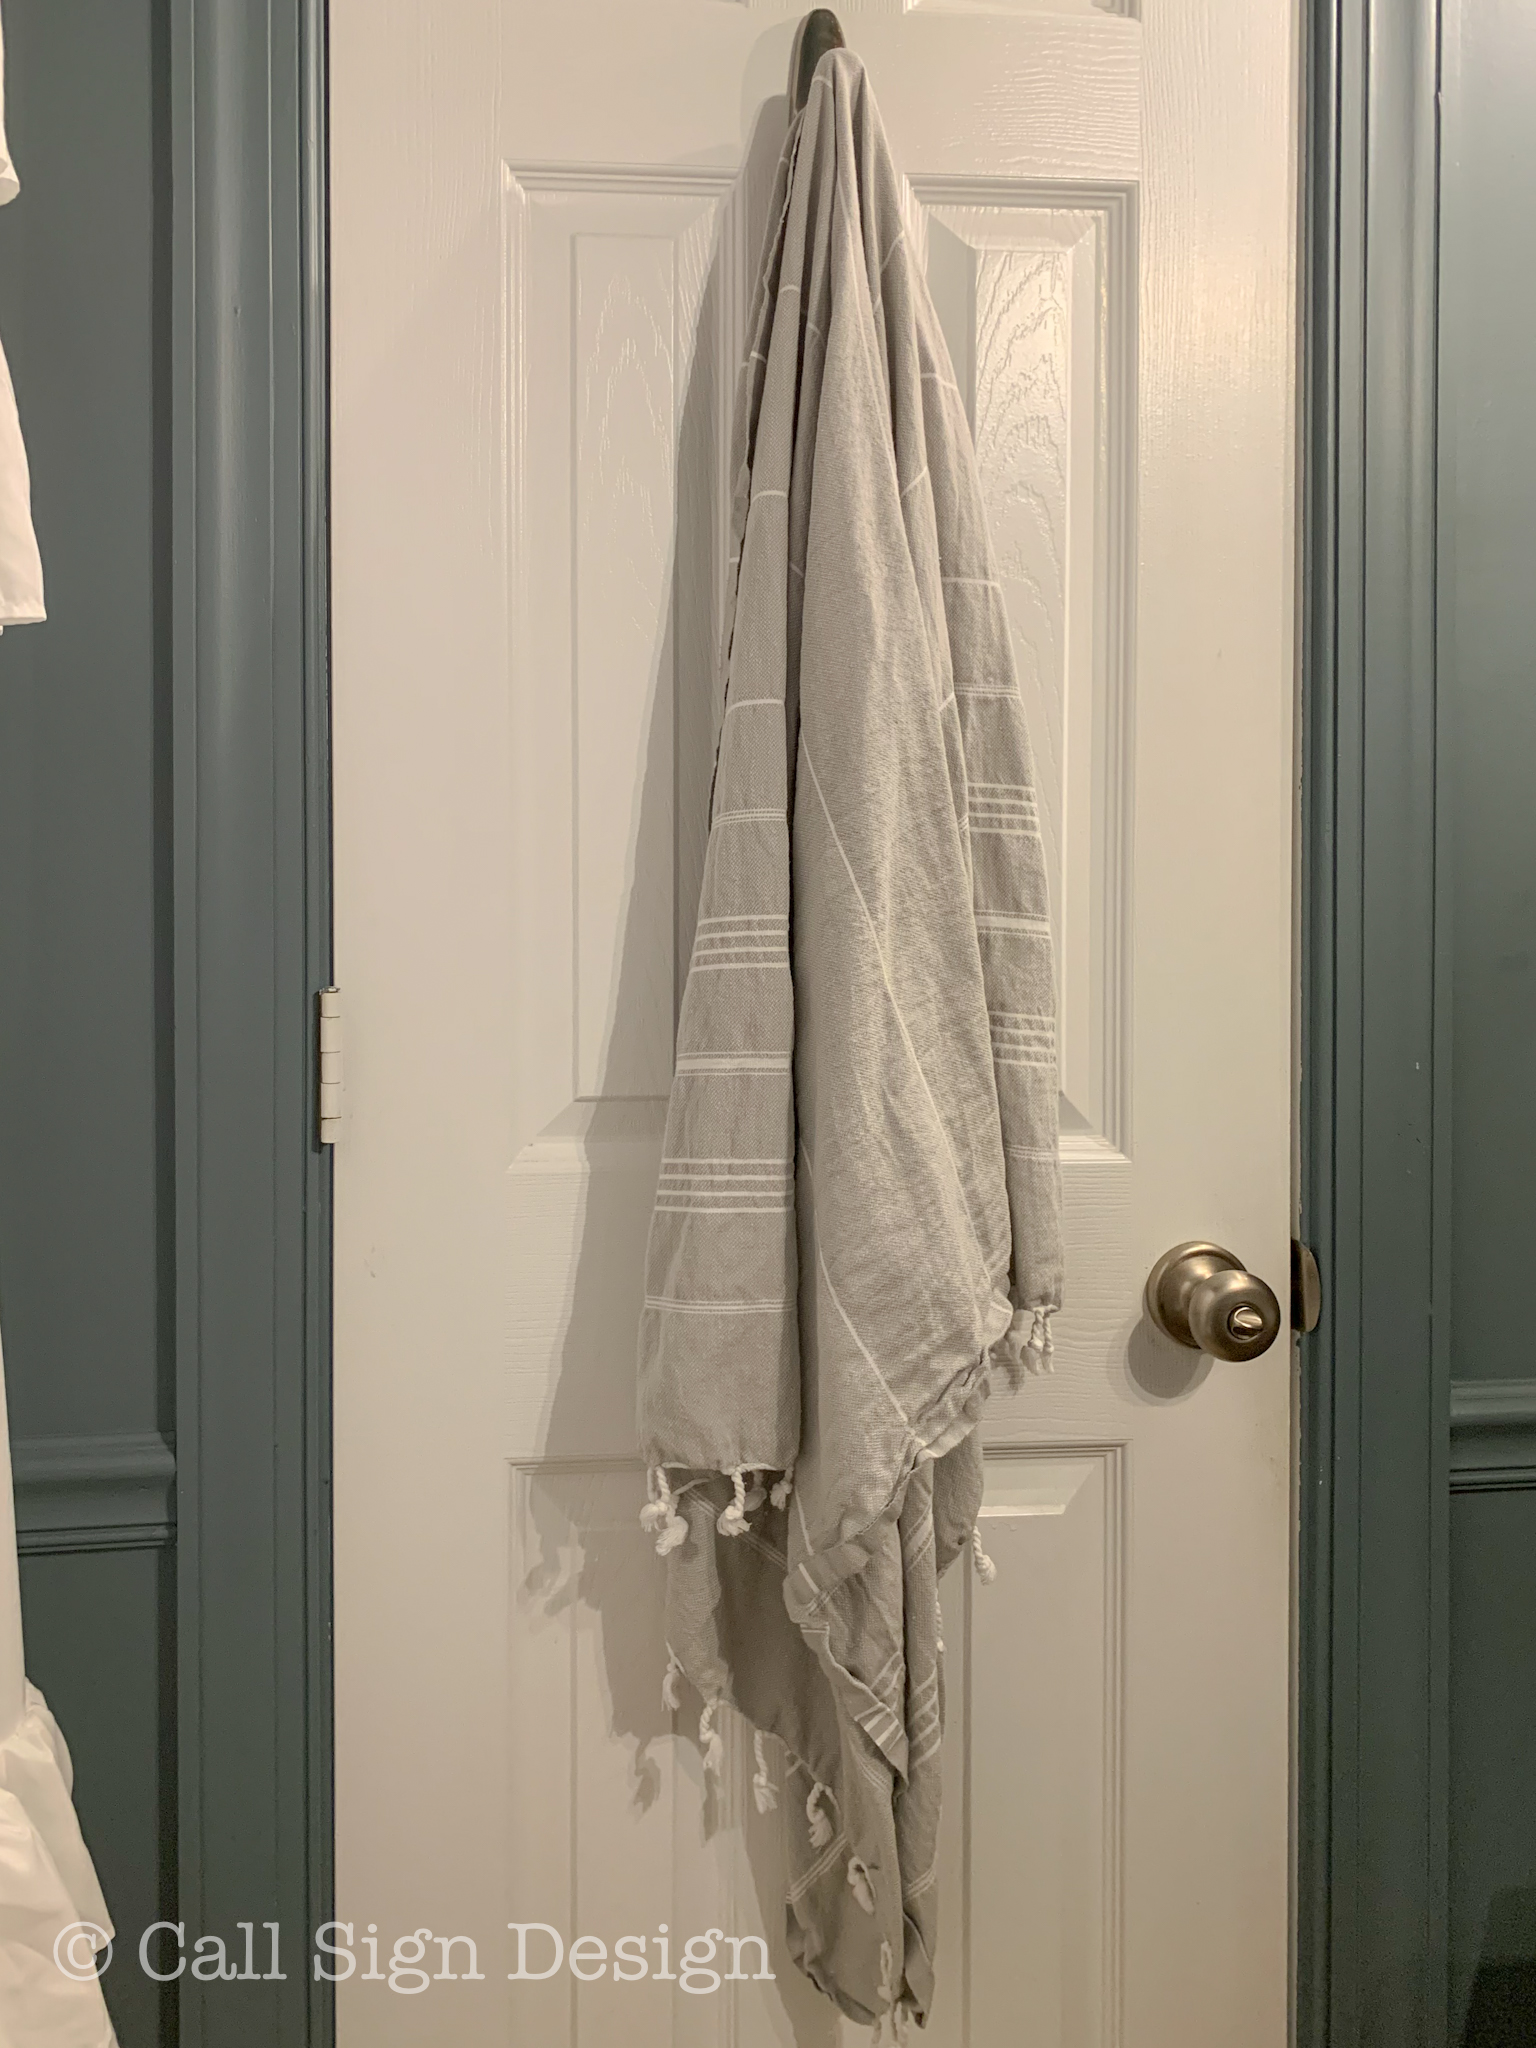
Spa Look Trick: We like to break up back of door spaces with hooks, and either a white spa robe or a pretty tasseled towel. We like the Pestemal Fouta Grey and White Turkish Cotton Bath/Beach Towel with a pretty monogram on it.
Accessorize
Skip the bathroom sets. They come across as really matchy and unimaginative.
We like pretty, artisan soaps in a fancy ceramic pedestal dish. I like to provide lots of options for hand washing, so we have bar soap, liquid soap, and hand sanitizer available so there is absolutely NO excuse for not washing hands. Our favorite, aromatic artisan made goat milk soap is from Viney Creek Farm and I highly recommend them!
Bathrooms are best kept minimal with regard to accessories: other than soap, just a couple interesting items are needed:
We have an antique jar filled with sharks teeth, a small glass pitcher with twinkle lights, the Orchid on one side and the soaps on the other. You seriously DON’T need to buy anything for this. Shop your house and you’ll find something wonderful.
Holiday Decorating Tip: Give your bathroom a little love… and keep it generic (especially if your house is on the market). Some green lighted garland and twinkly Wine Stopper LED Twinkly Fairy Lights inside an antique bottle will go a long way!

Here is the complete source list for our bathroom staging:
You can shop it all in one place on our LTK store! Shop this post!
Brushed Brass Freestanding Toilet Paper Holder
Cordless Remote Control LED 11.5″ Picture Light
Ruffled, Cotton Shower Curtain
Hitit Jacquard Yarn Dyed Turkish Hand Towels With Tassels
Mrs. Meyers Peppermint Handsoap
Water Hyacinth Magazine Basket
Canvas With Vintage Frame: Easy Canvas Prints and Craigslist
Pestemal Fouta Grey and White Turkish Cotton Bath/Beach Towel
Fancy Ceramic Pedestal Soap Dish
Wine Stopper LED Twinkly Fairy Lights
Check out our Ultimate Pre-showing Checklist for Selling Your Home Fast! This is a great guide for how to quickly prep your house on Showing Day!
What are some of your favorite ways to stage a bathroom? Let us know in the comments below!
Cheers!
*Legal stuff:
I am honest about my experiences with different products and write because I enjoy it. I do however, have the opportunity to earn money for my writing, also.
Slavetodiy.com is a participant in the Amazon Services LLC Associates Program, LTK, and other affiliate programs: affiliate advertising programs designed to provide a means for sites to earn advertising fees by advertising and linking to amazon.com and other sites. These programs offer a small commission on products sold through their affiliate links. Each of your purchases via our affiliation links supports our cause at no additional cost to you.
If a blogger links to a product (with a special code for affiliates embedded in the link), and a reader places an item in their “shopping cart” through that link within 24 hours of clicking the link, the blogger gets a small percentage of the sale. These links are not “pay per click.” If you click on the product link and stay around and purchase something else, however, I will get a commission on that sale.