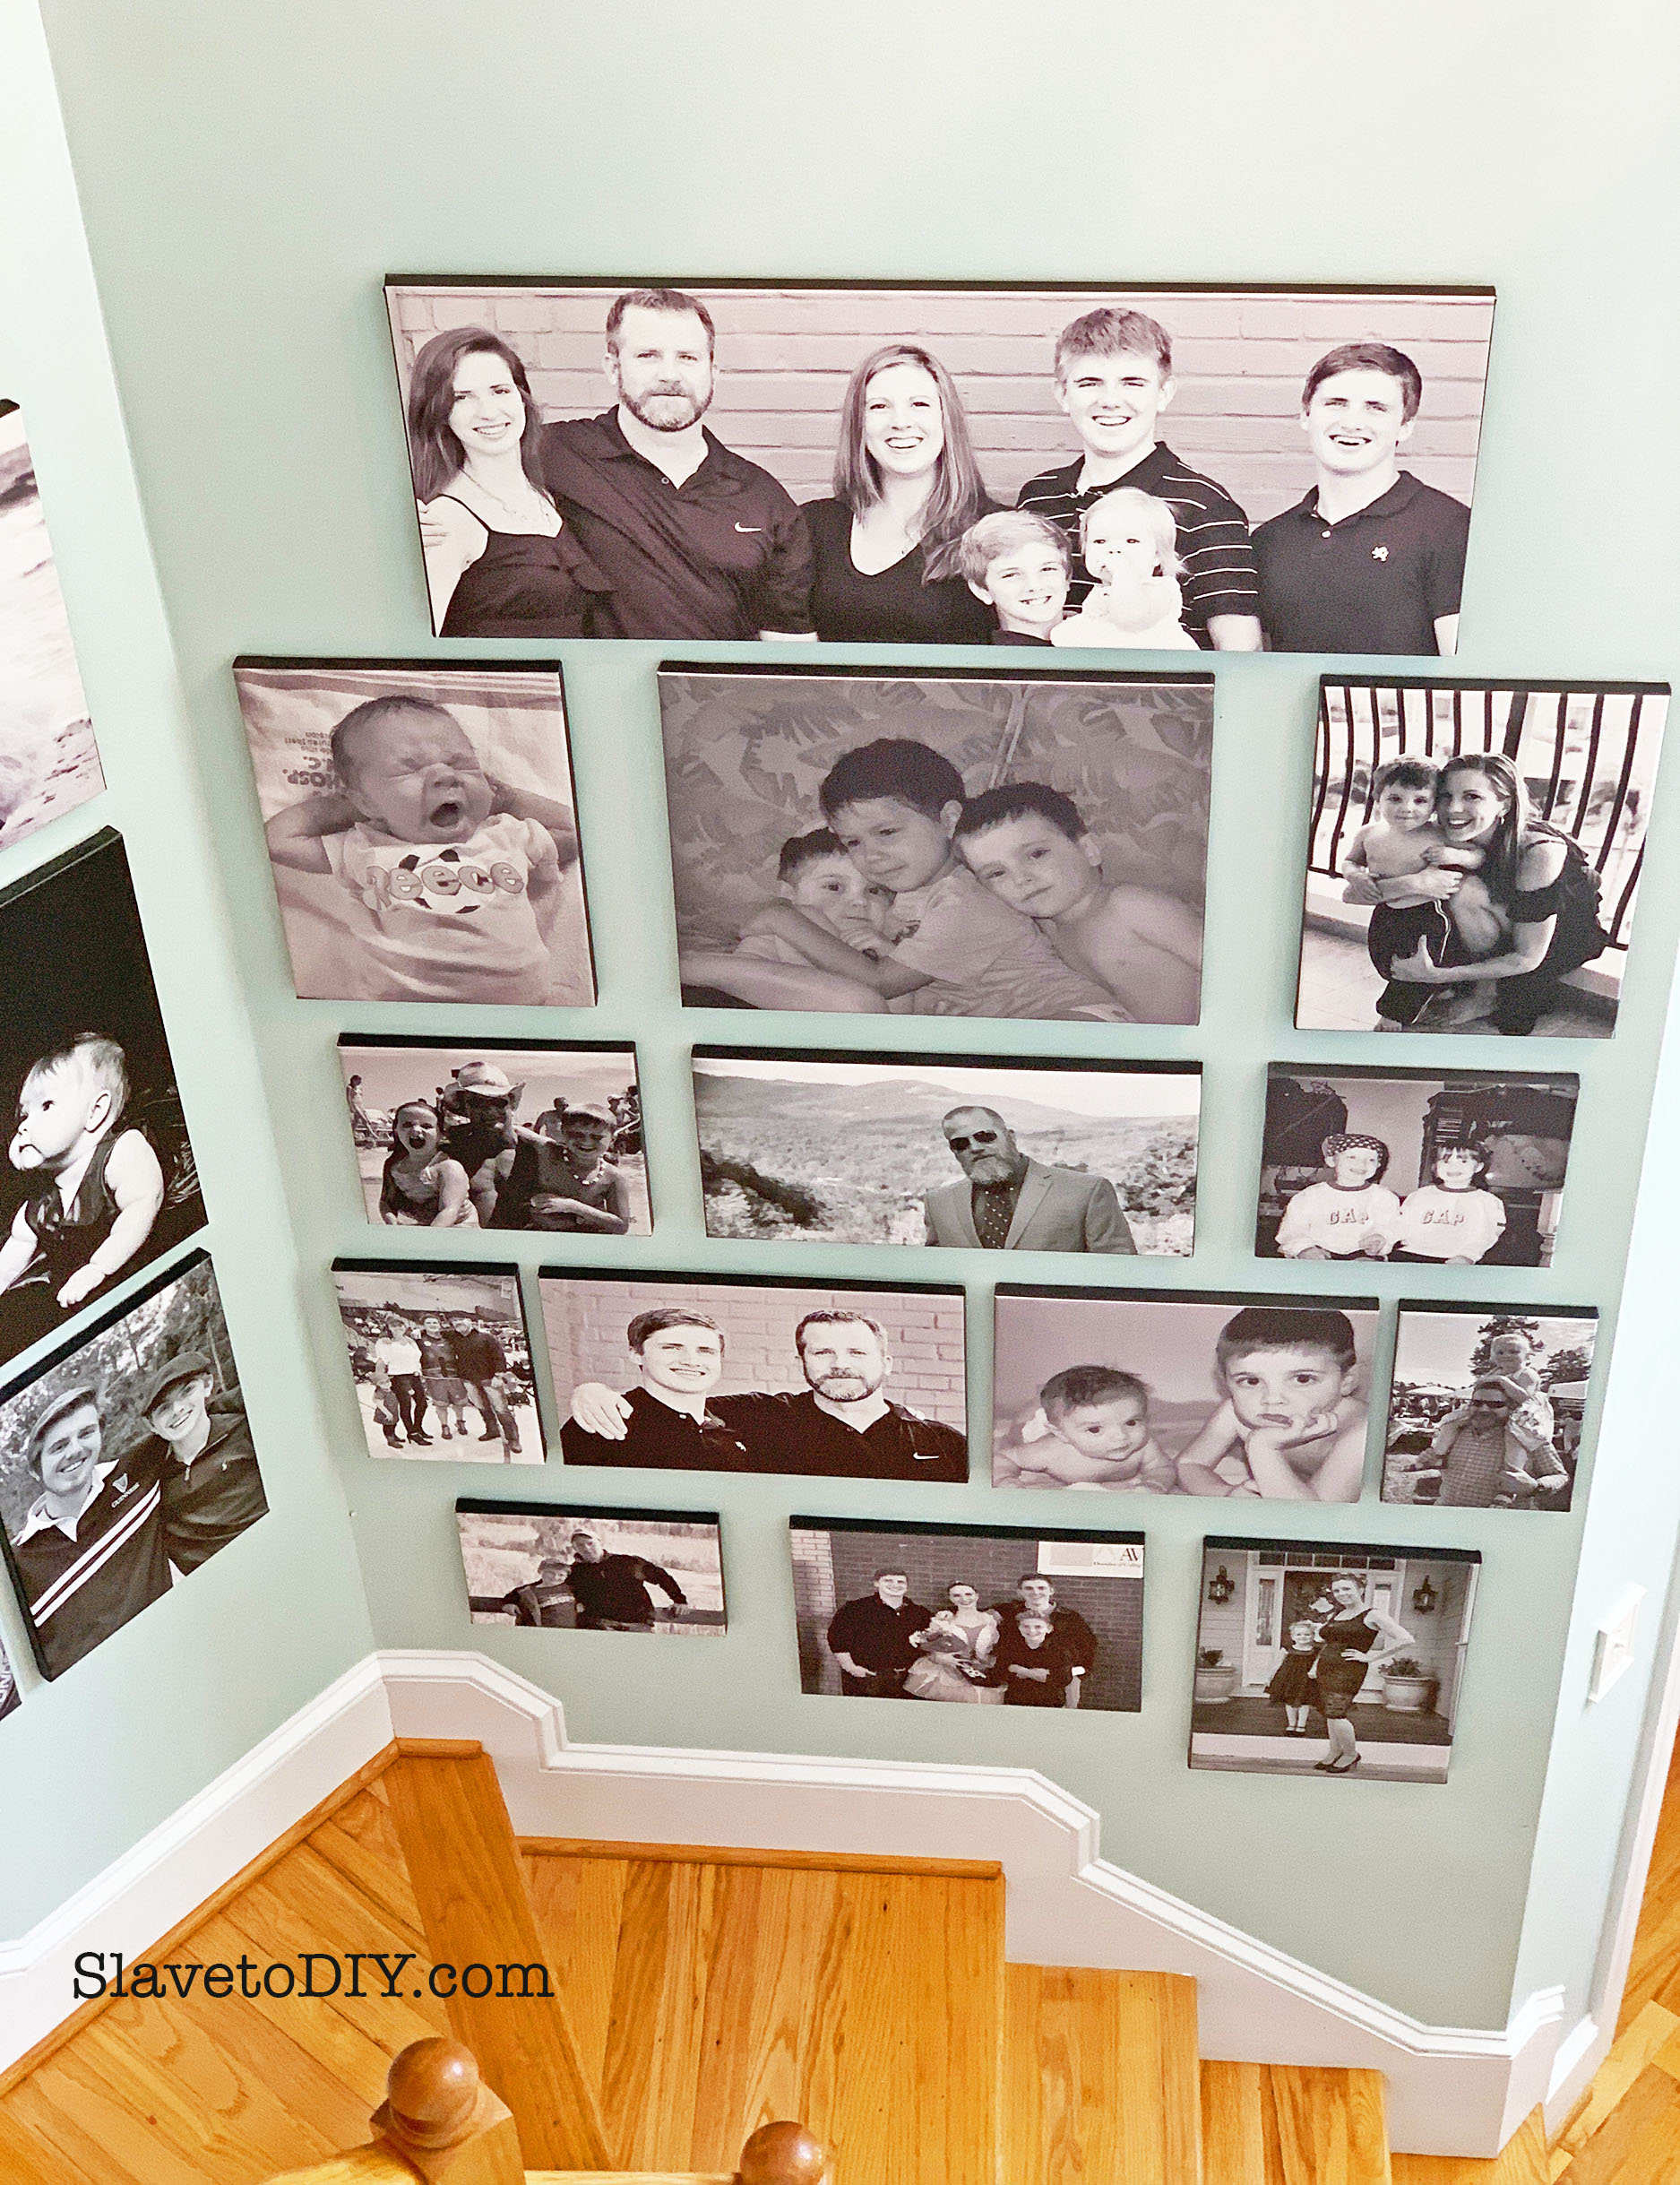
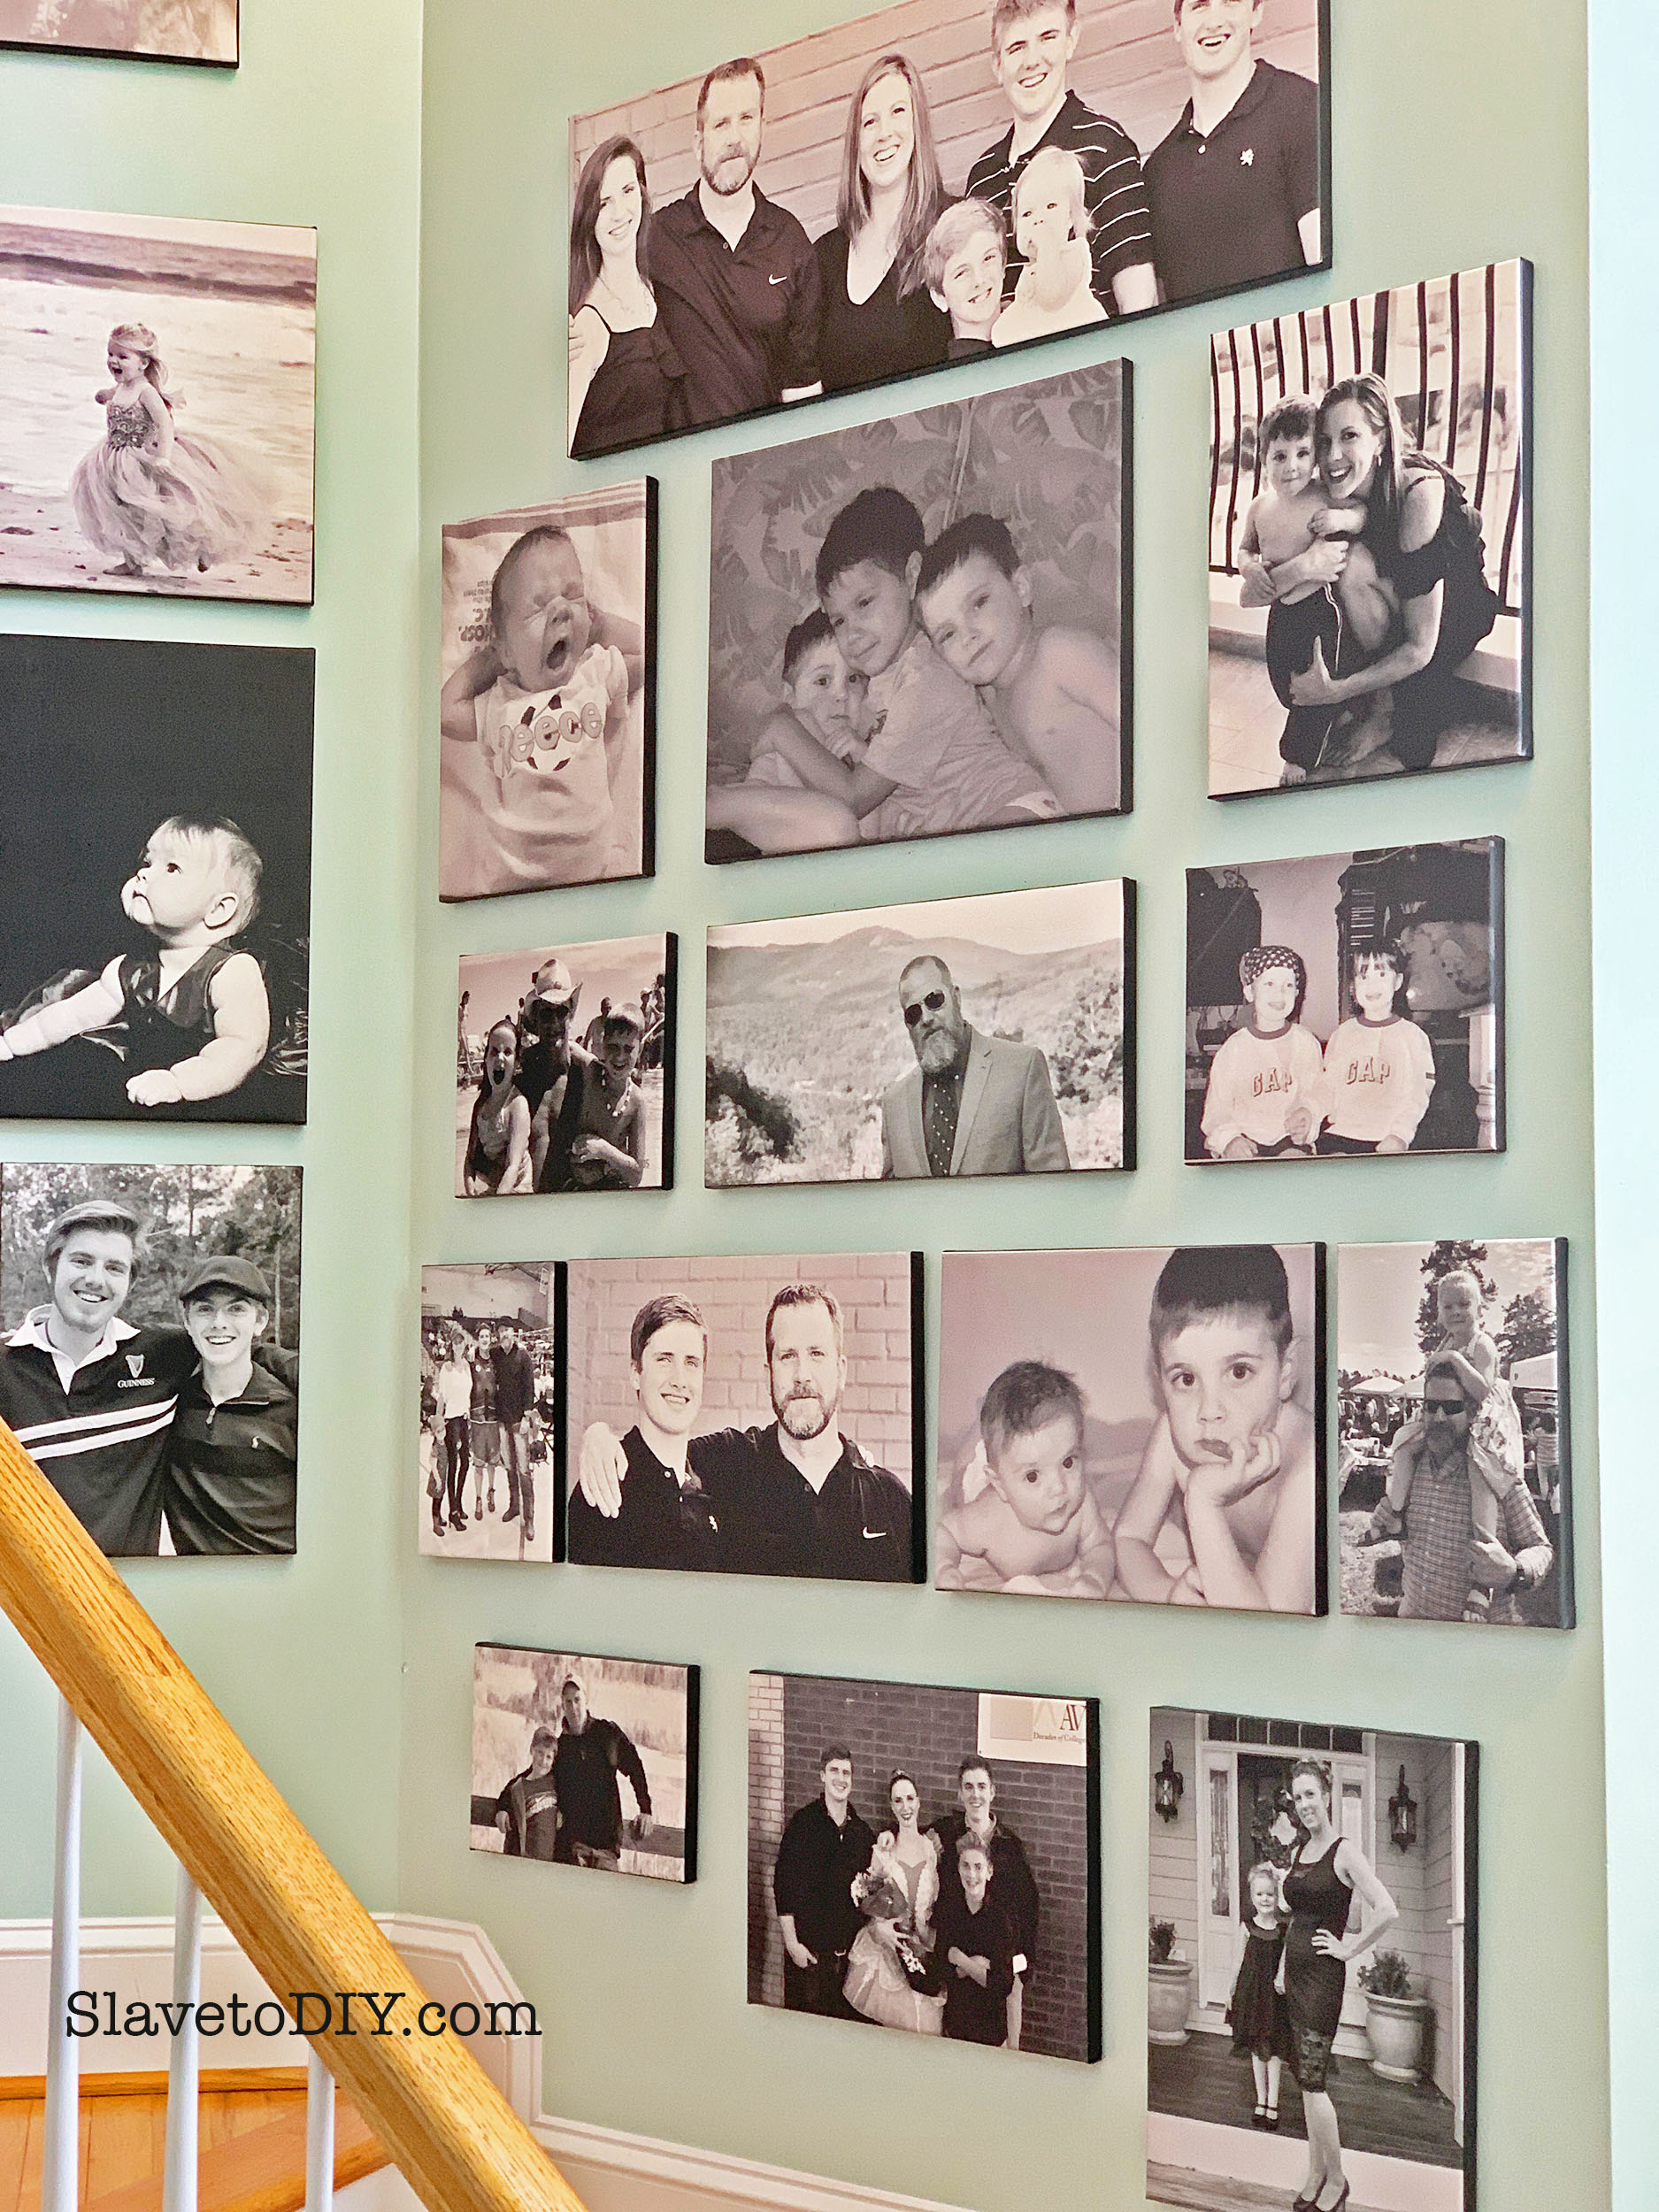
One of the things I get the most compliments on at our house is my giant, black and white canvas gallery wall. It is always a work in progress (sort of like arranging built ins) because I add to it on a regular basis. In fact, this wall has been in work for upwards of eight years!
We have five kids, and three of them are now grown: in college or graduated from college and newly in the work force. That definitely makes me feel old sometimes, but it helps me tremendously to have photos of the people that I love (AND MISS) in a place where I get to look at them on my way up and down the stairs, every day!
The problem with canvasses, obviously, is the cost. Regularly priced large, custom canvasses easily run into the hundreds of dollars. I can’t afford that, but I LOVE the look.
*This post may contain affiliate links. Please see full disclosure at the end of the post.
I can tell you that I’ve paid about $20 for each of my canvas prints and check out the awesome results:
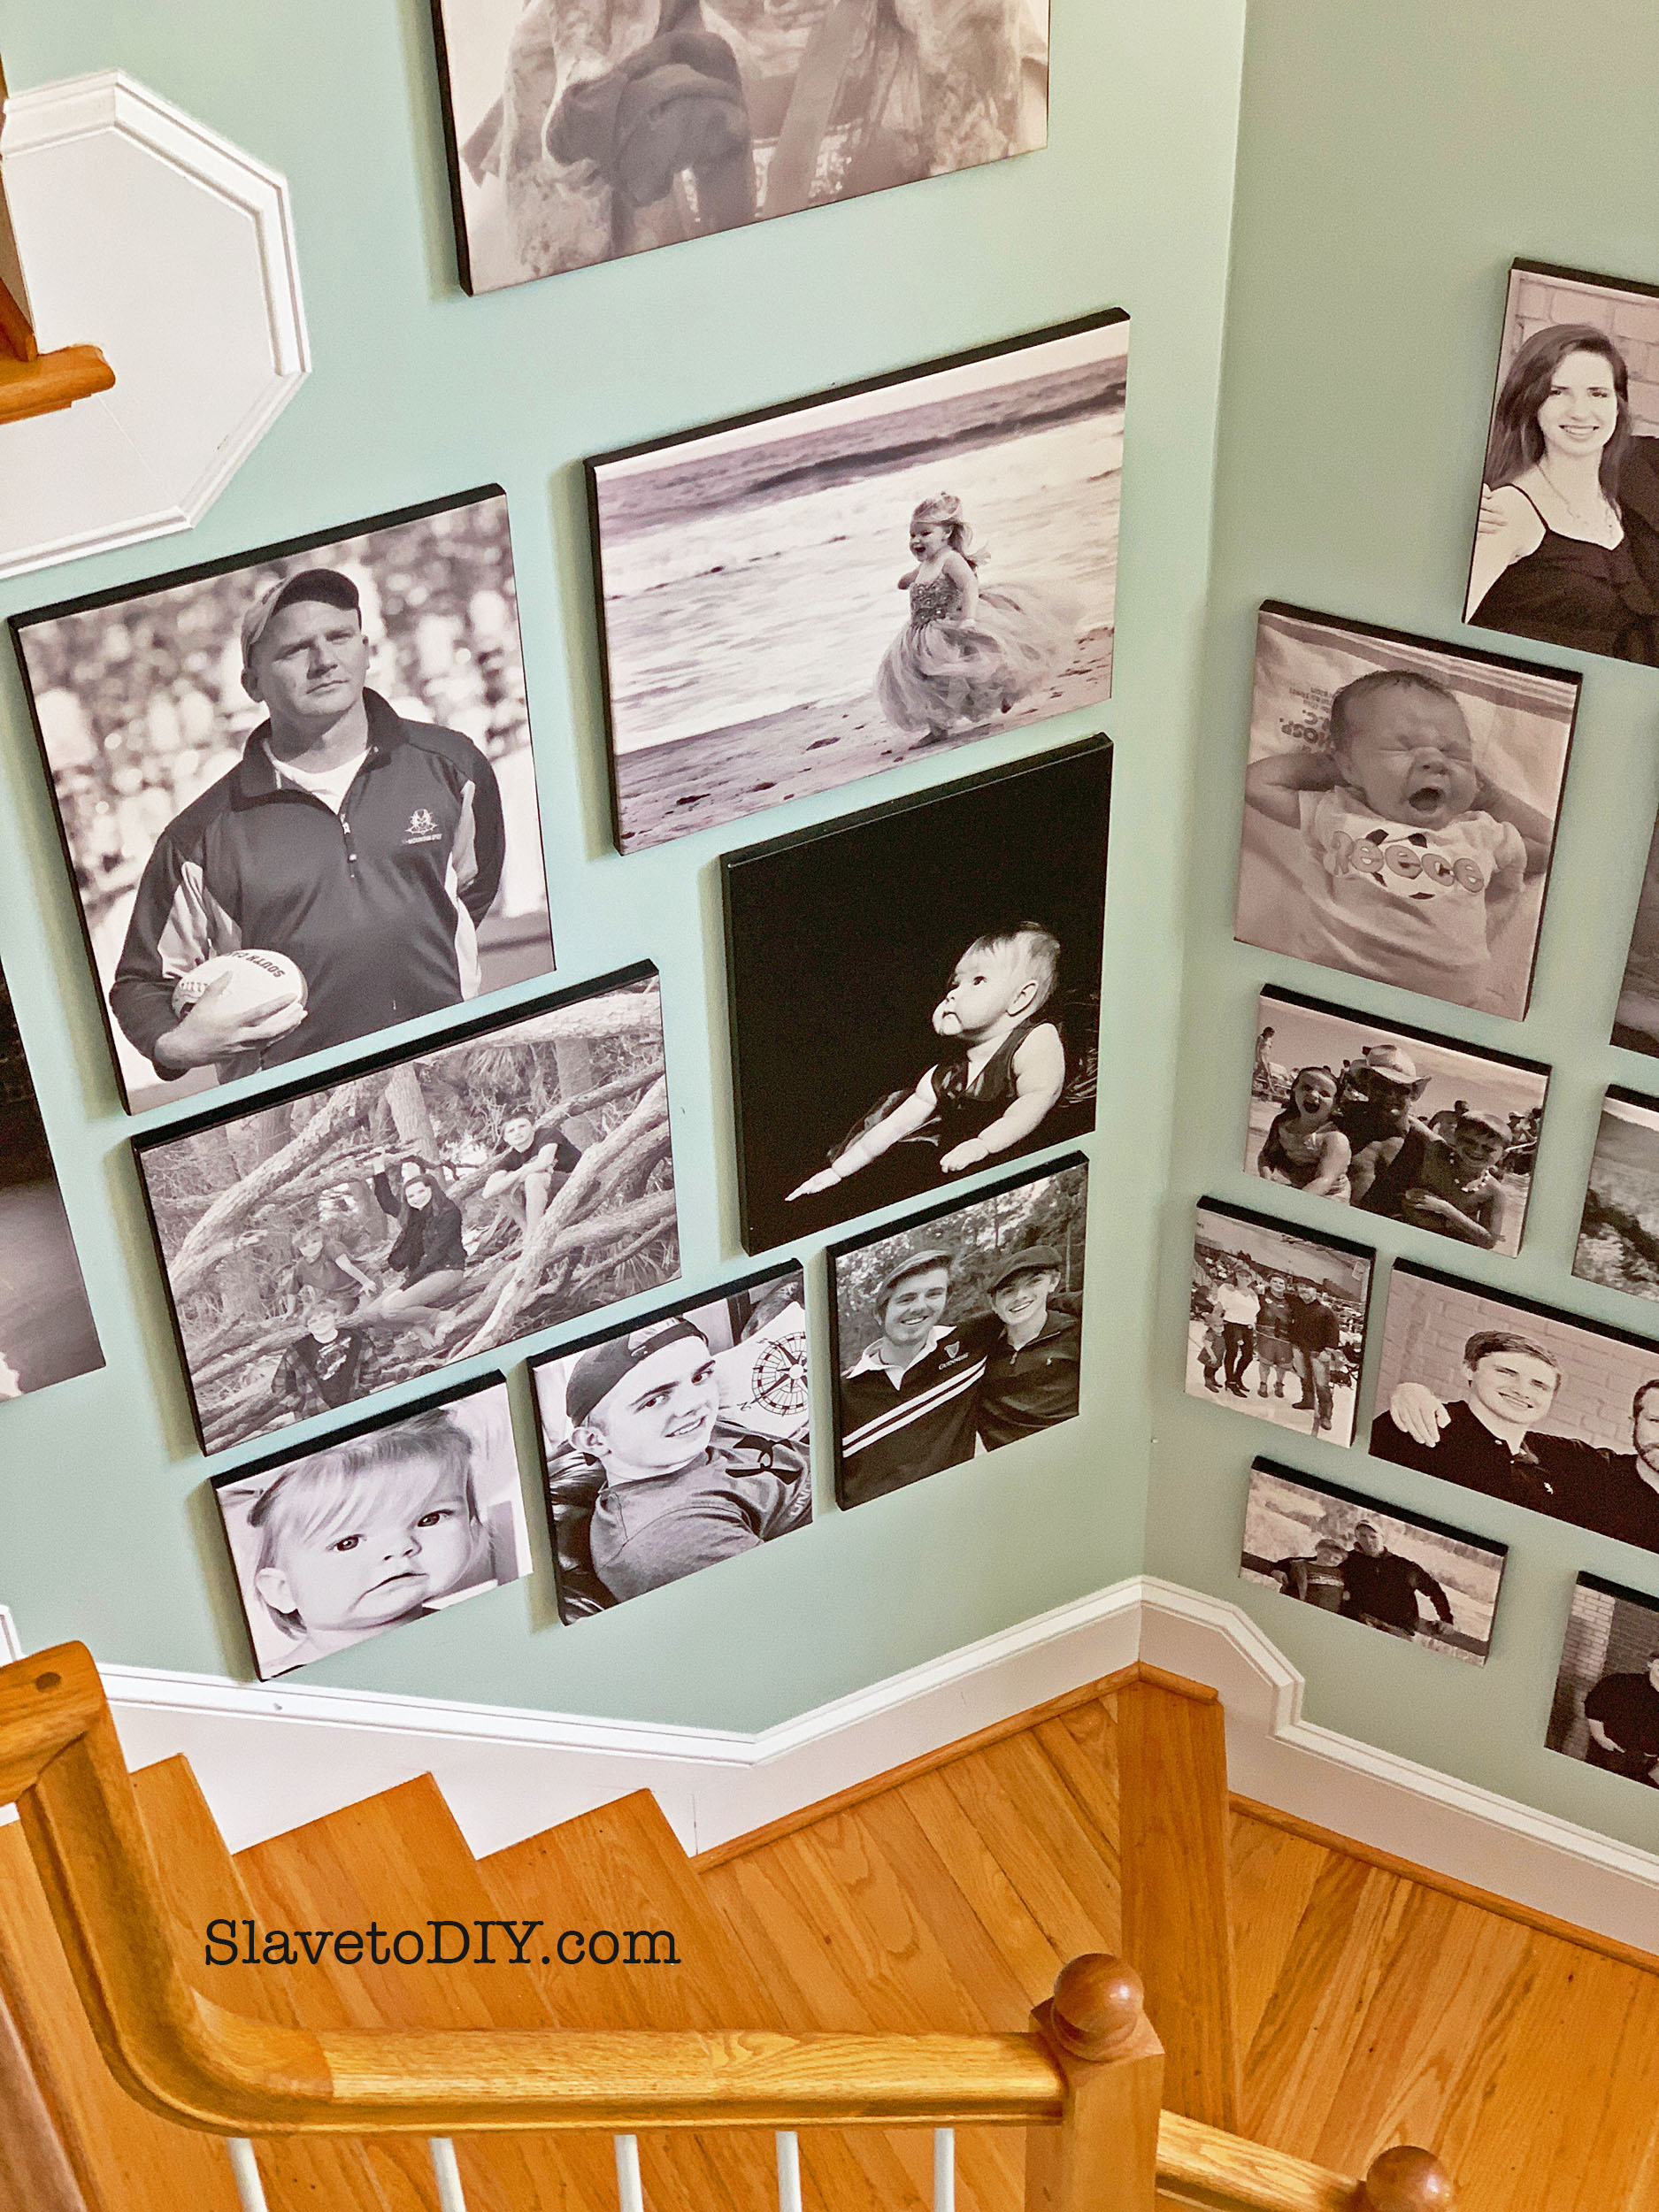
Giant Family Canvas Gallery Wall On A Budget
Giant Family Canvas Gallery Wall On A Budget
Giant Family Canvas Gallery Wall On A Budget
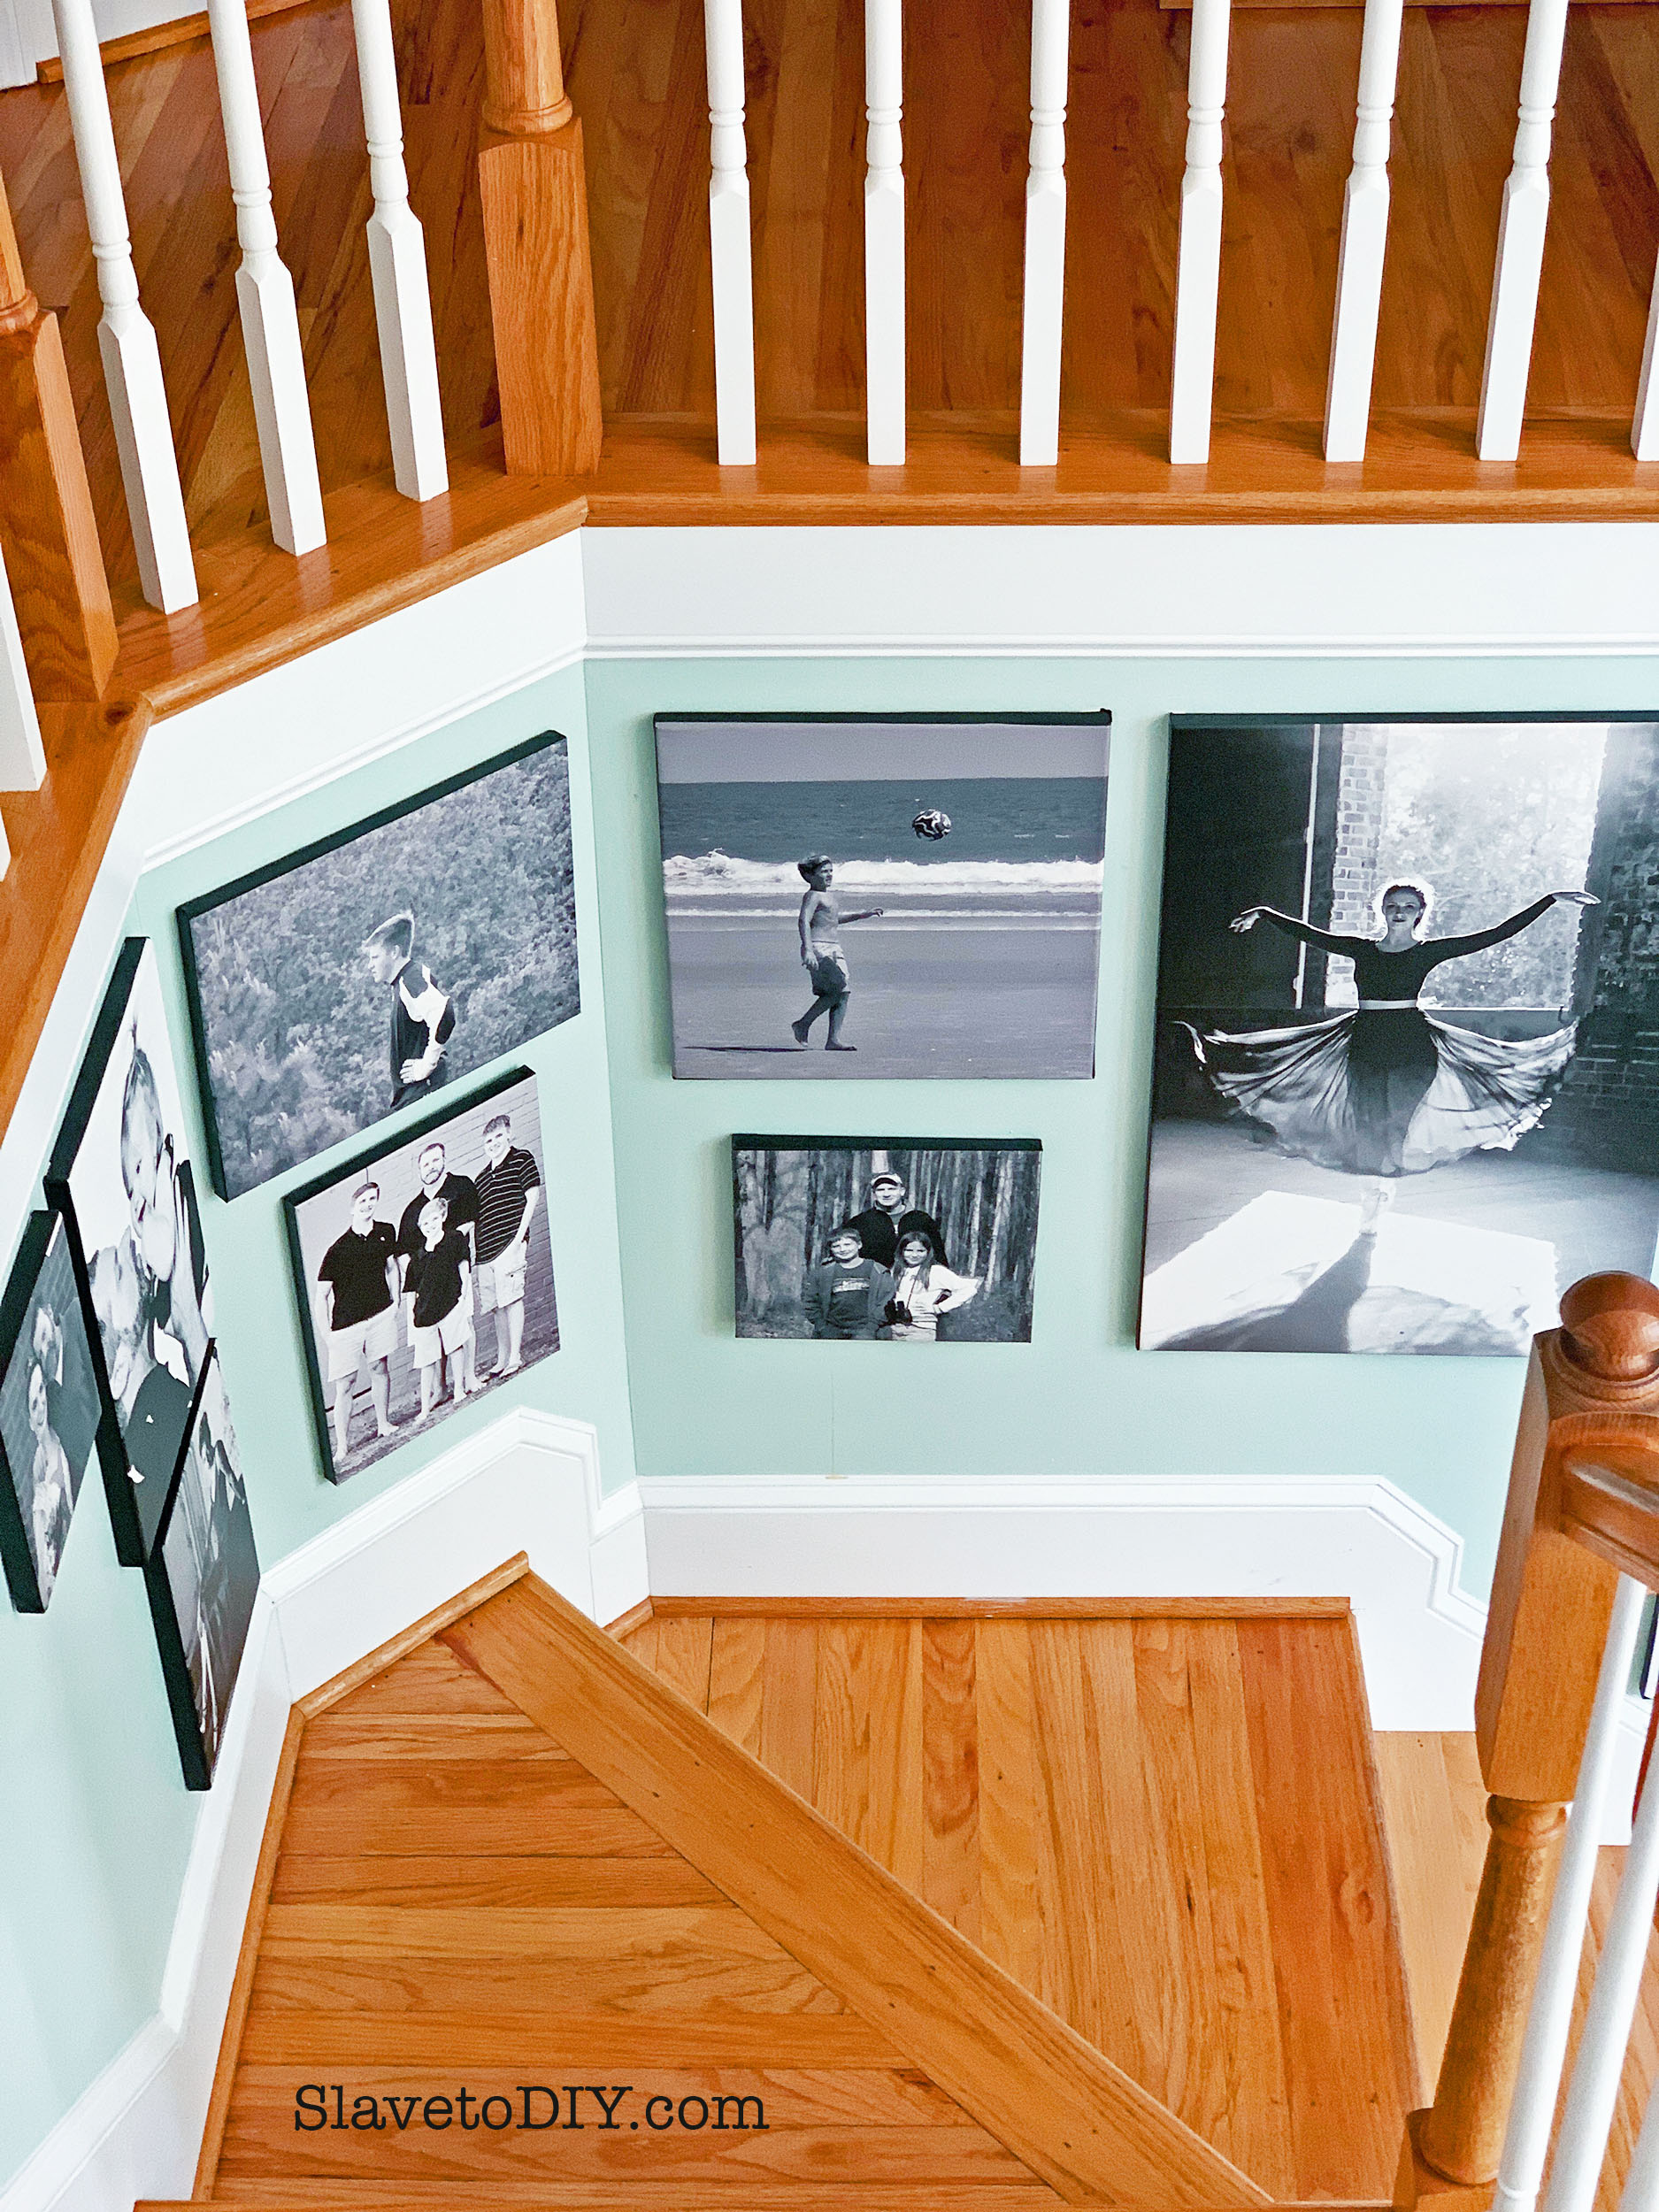
Giant Family Canvas Gallery Wall On A Budget
Giant Family Canvas Gallery Wall On A Budget
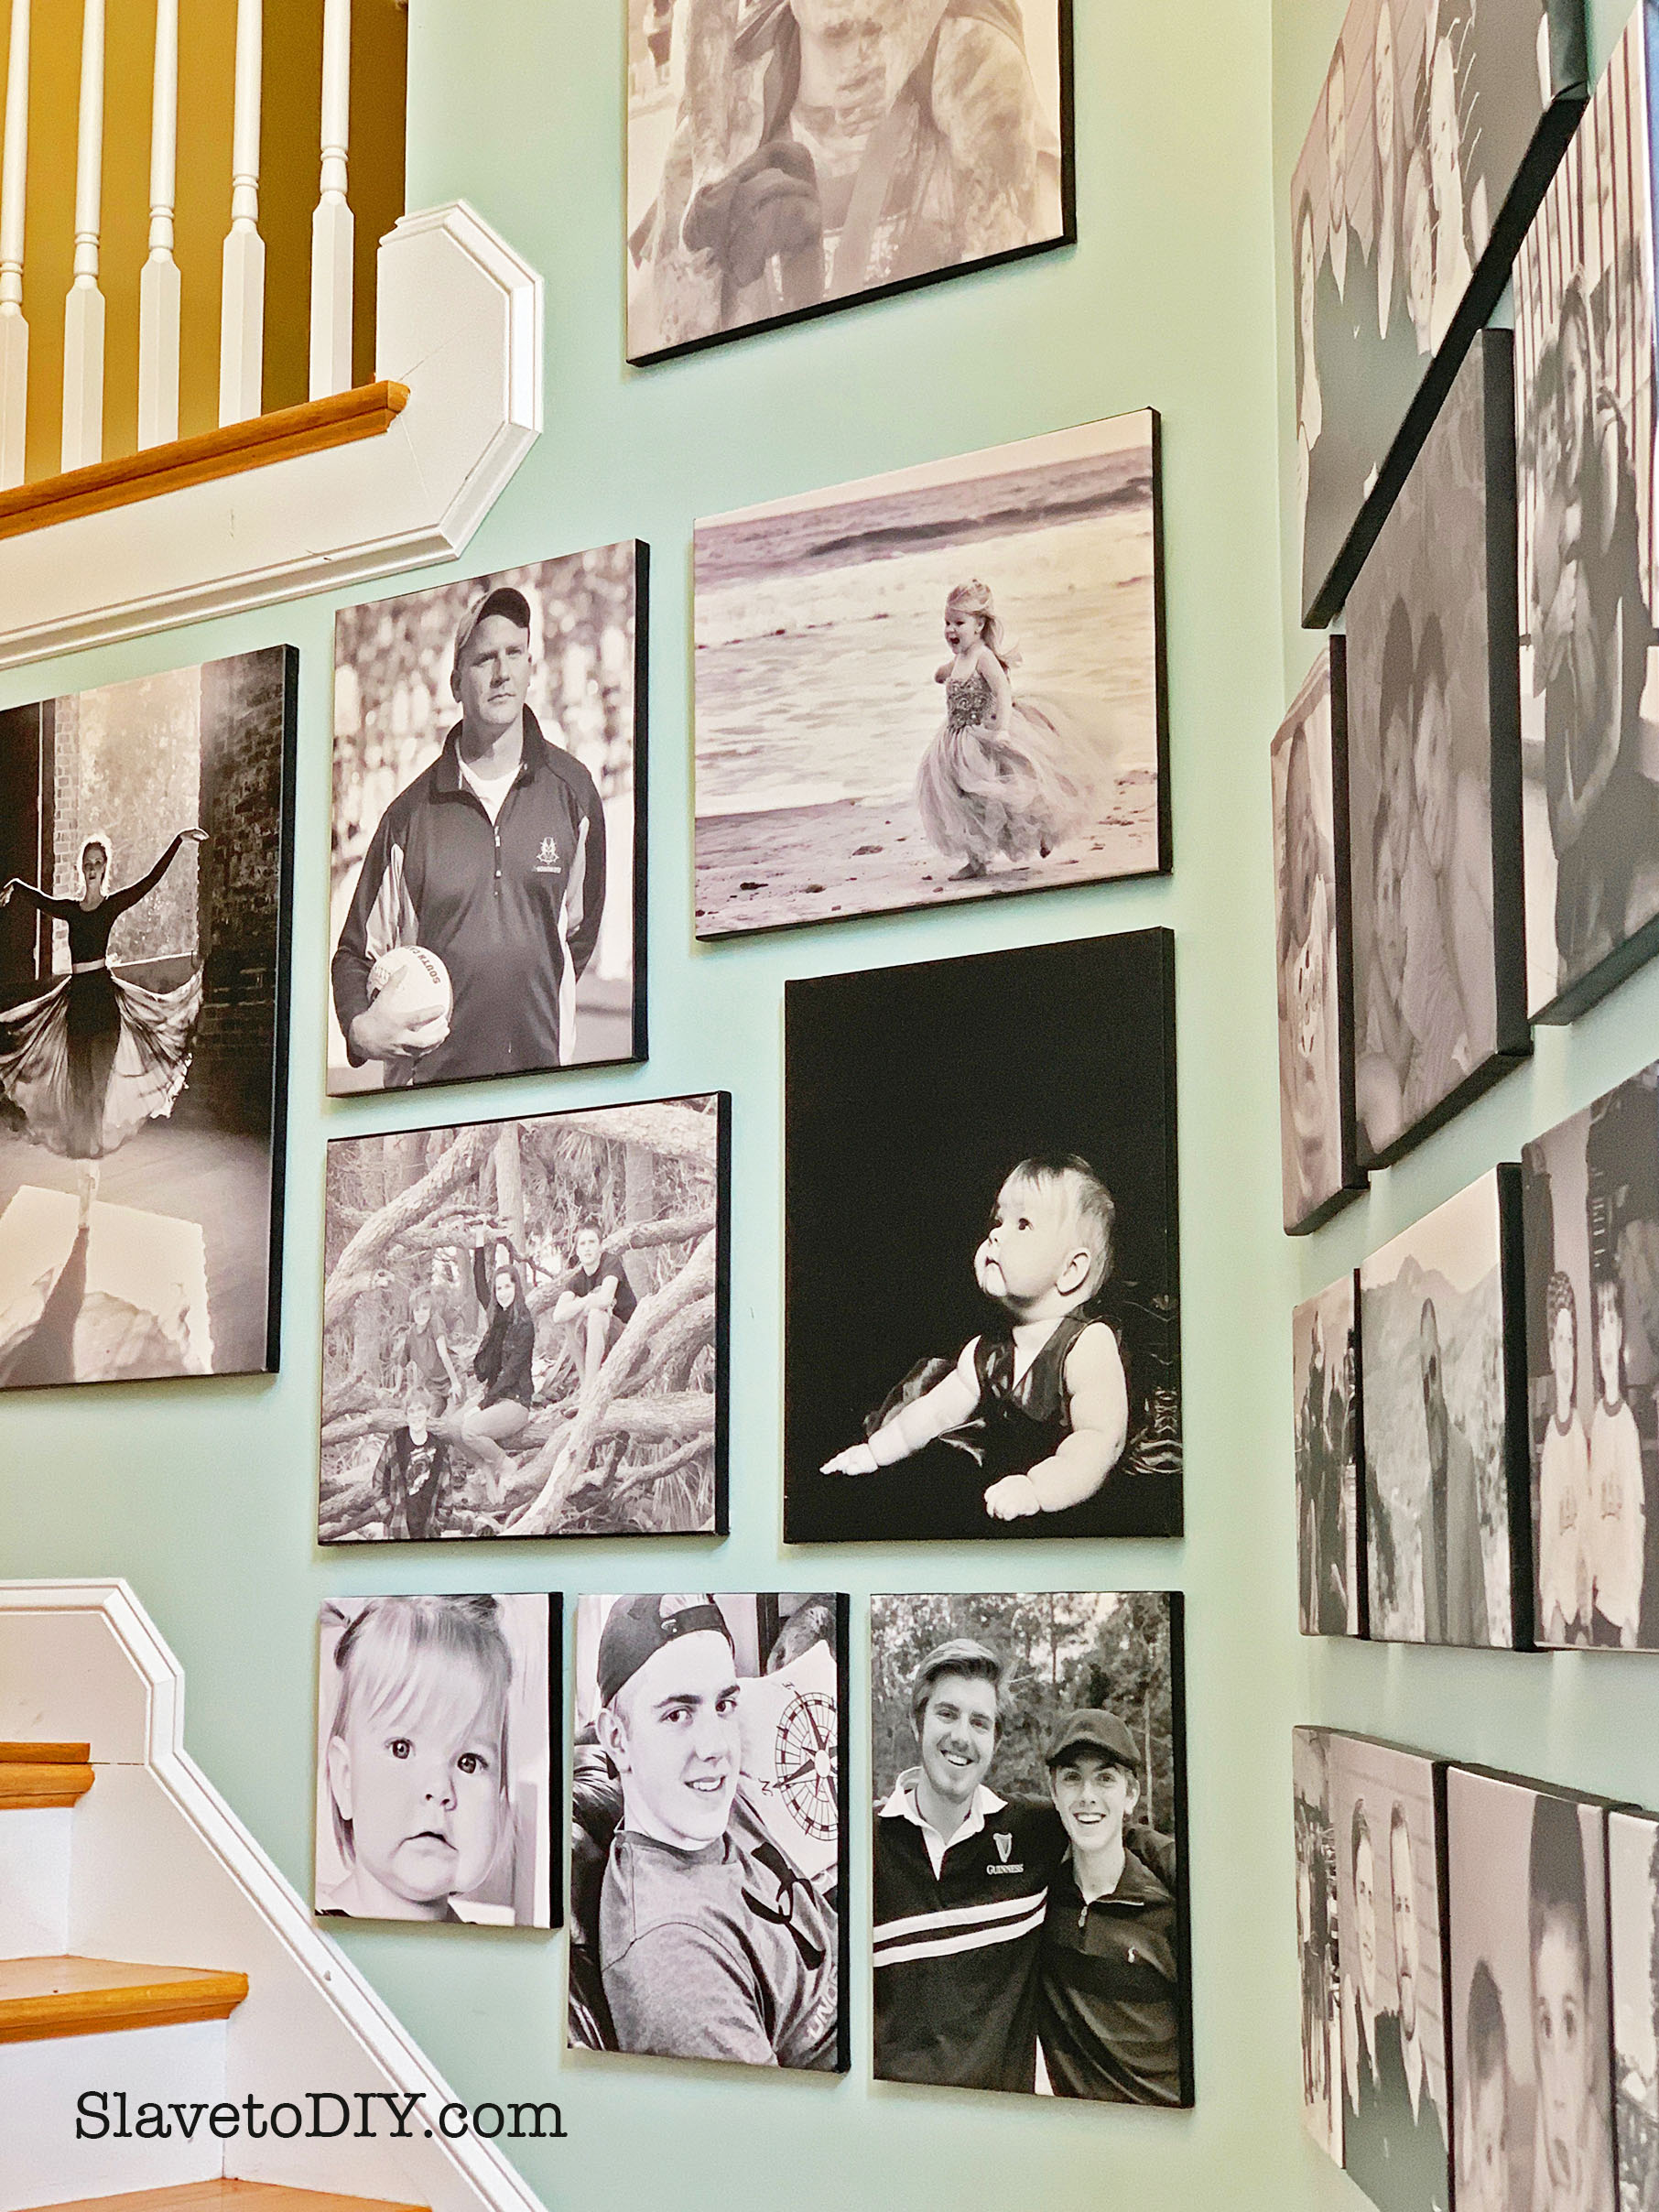
Giant Family Canvas Gallery Wall On A Budget
The trick is PATIENCE (and having downright adorable children): getting on the email list and waiting for sales. Easy Canvas Prints is awesome because it seems like they are “having huge sales” all the time. I’m not sure why it’s not just the price, but whatever. They also generally have free shipping if you purchase a few so I’ve done them in sets.
The other thing is… Once I had a huge order (a Christmas order for grandparents and parents) and one of the canvasses was damaged and one of the others looked as though it was smeared. I emailed them and they reprinted the ENTIRE ORDER free and set it right back out the next day. Their customer service is top notch and I’m always surprised how quickly they print and ship. I am a very happy and loyal customer!
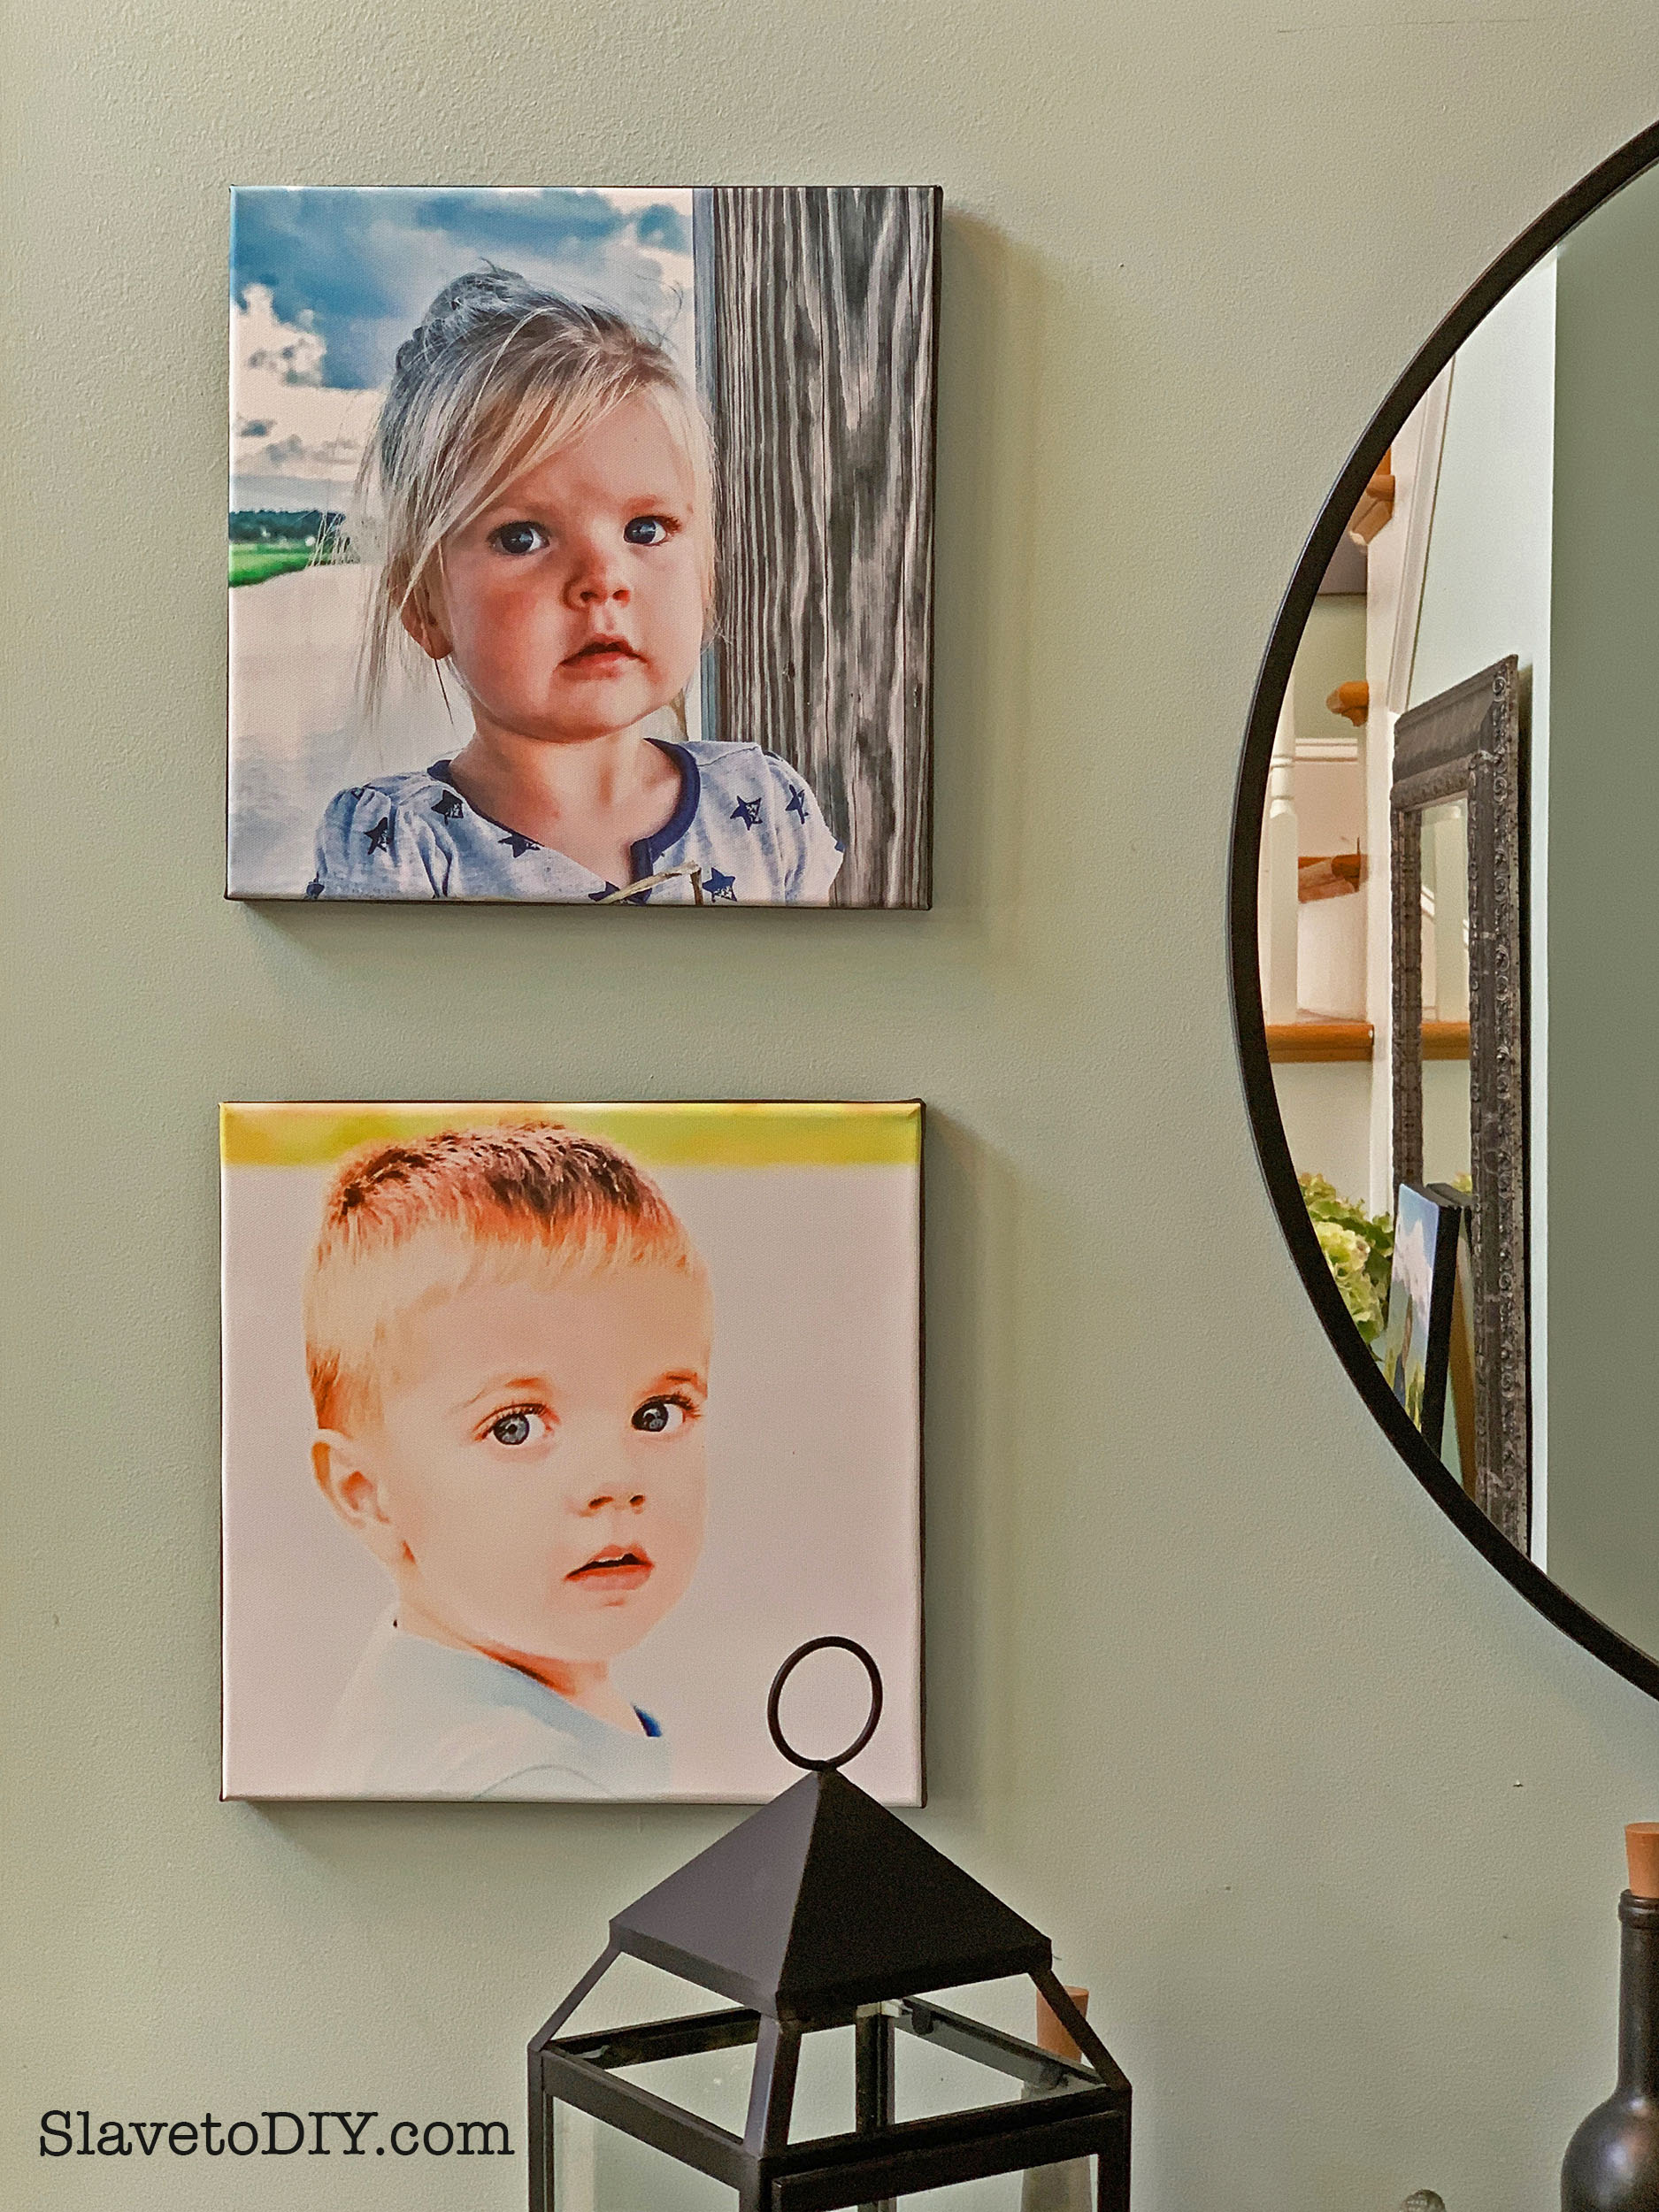
I’ve also had quite a few color prints done and the detail and colors are spectacular.
Giant Family Canvas Gallery Wall On A Budget
I have various color prints all over the house, too, but I’ll admit, the black and white wall is my favorite.
Tip: If you have them where you REALLY want them, use 3M double sided mounting tape on each corner so they won’t wiggle around when people walk by. But, that stuff stays, so make sure it’s really where you want them before you commit!
I use Easy Canvas Prints to print canvasses for grandparents and parents, because there’s nothing they’d rather receive then great photos of the people they love!
Do you like color or black and white canvasses better? Let me know in the comments below! Cheers!
*Legal stuff:
I am honest about my experiences with different products and write because I enjoy it. I do however, have the opportunity to earn money for my writing, also.
Slavetodiy.com is a participant in the Amazon Services LLC Associates Program, an affiliate advertising program designed to provide a means for sites to earn advertising fees by advertising and linking to amazon.com. Amazon offers a small commission on products sold through their affiliate links. Each of your purchases via our Amazon affiliation links supports our cause at no additional cost to you.
If a blogger links to an Amazon product (with a special code for affiliates embedded in the link), and a reader places an item in their “shopping cart” through that link within 24 hours of clicking the link, the blogger gets a small percentage of the sale. Amazon links are not “pay per click.” If you click on the product link and stay around Amazon and purchase something else, however, I will get a commission on that sale.
This site also contains affiliate links through //Commerce/Sovrn. //Commerce or our Publishers may be compensated when you click through links on our site.
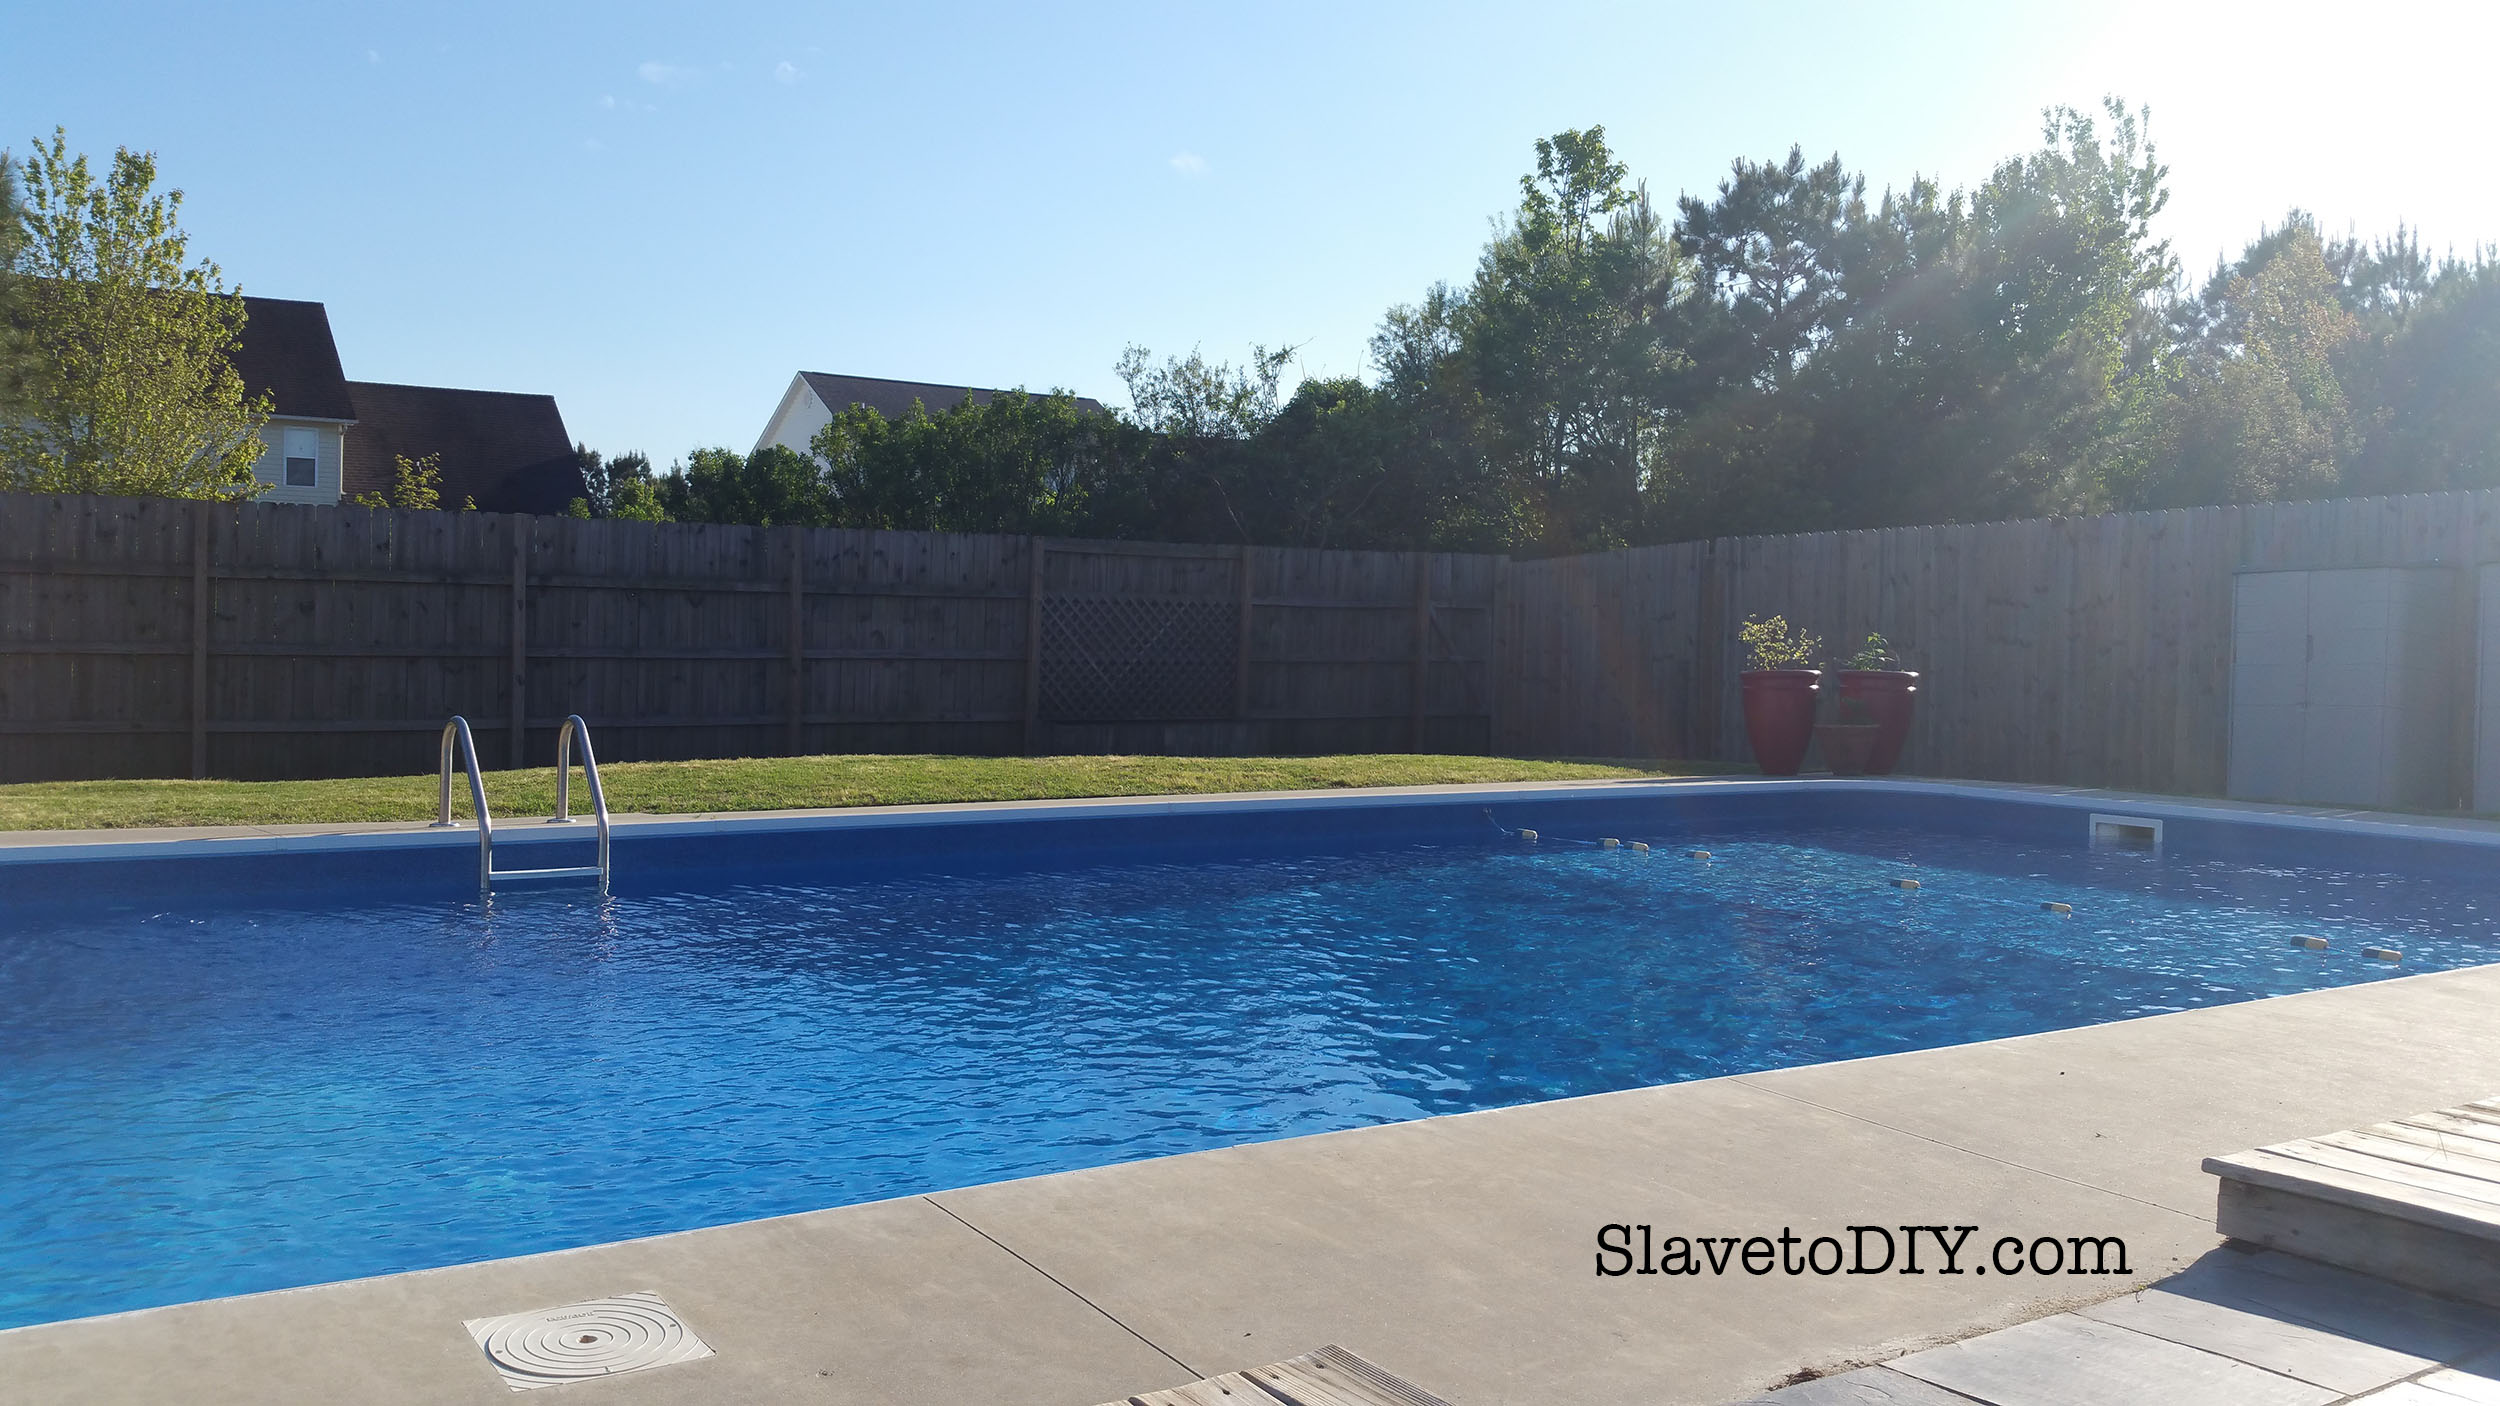
A few years ago we had a pool installed and had NO idea what we were doing. You don’t know what you don’t know, right? Never having had a pool before (other than the above ground one the previous owners put up and we were tearing down), I really had no idea. We did an okay job, but if I had it to over again there are a few adjustments I would make. As for the finished product, I was ultimately happy and here’s what we ended up with:
Pool Planning, Design, Tips and Considerations: Our pool, after it was installed, finished, and very swimmable!
*This post may contain affiliate links. Please see full disclosure at the end of the post.
We loved the pool, so here are the basics of what we learned and some tips along the way of what to do, and of course, what NOT to do.
Hardscaping: Hardscaping around the pool is your friend. The more, the better. You need more than a three foot apron. Insist.
You know what happens when you trim your grass? It all goes in the pool. I know you keep seeing all those super cool paver designs with the grass in between on Pinterest. Or the pool coping that runs right up to the edge of the grass. If you don’t have a landscaper and a pool guy, HARD PASS.
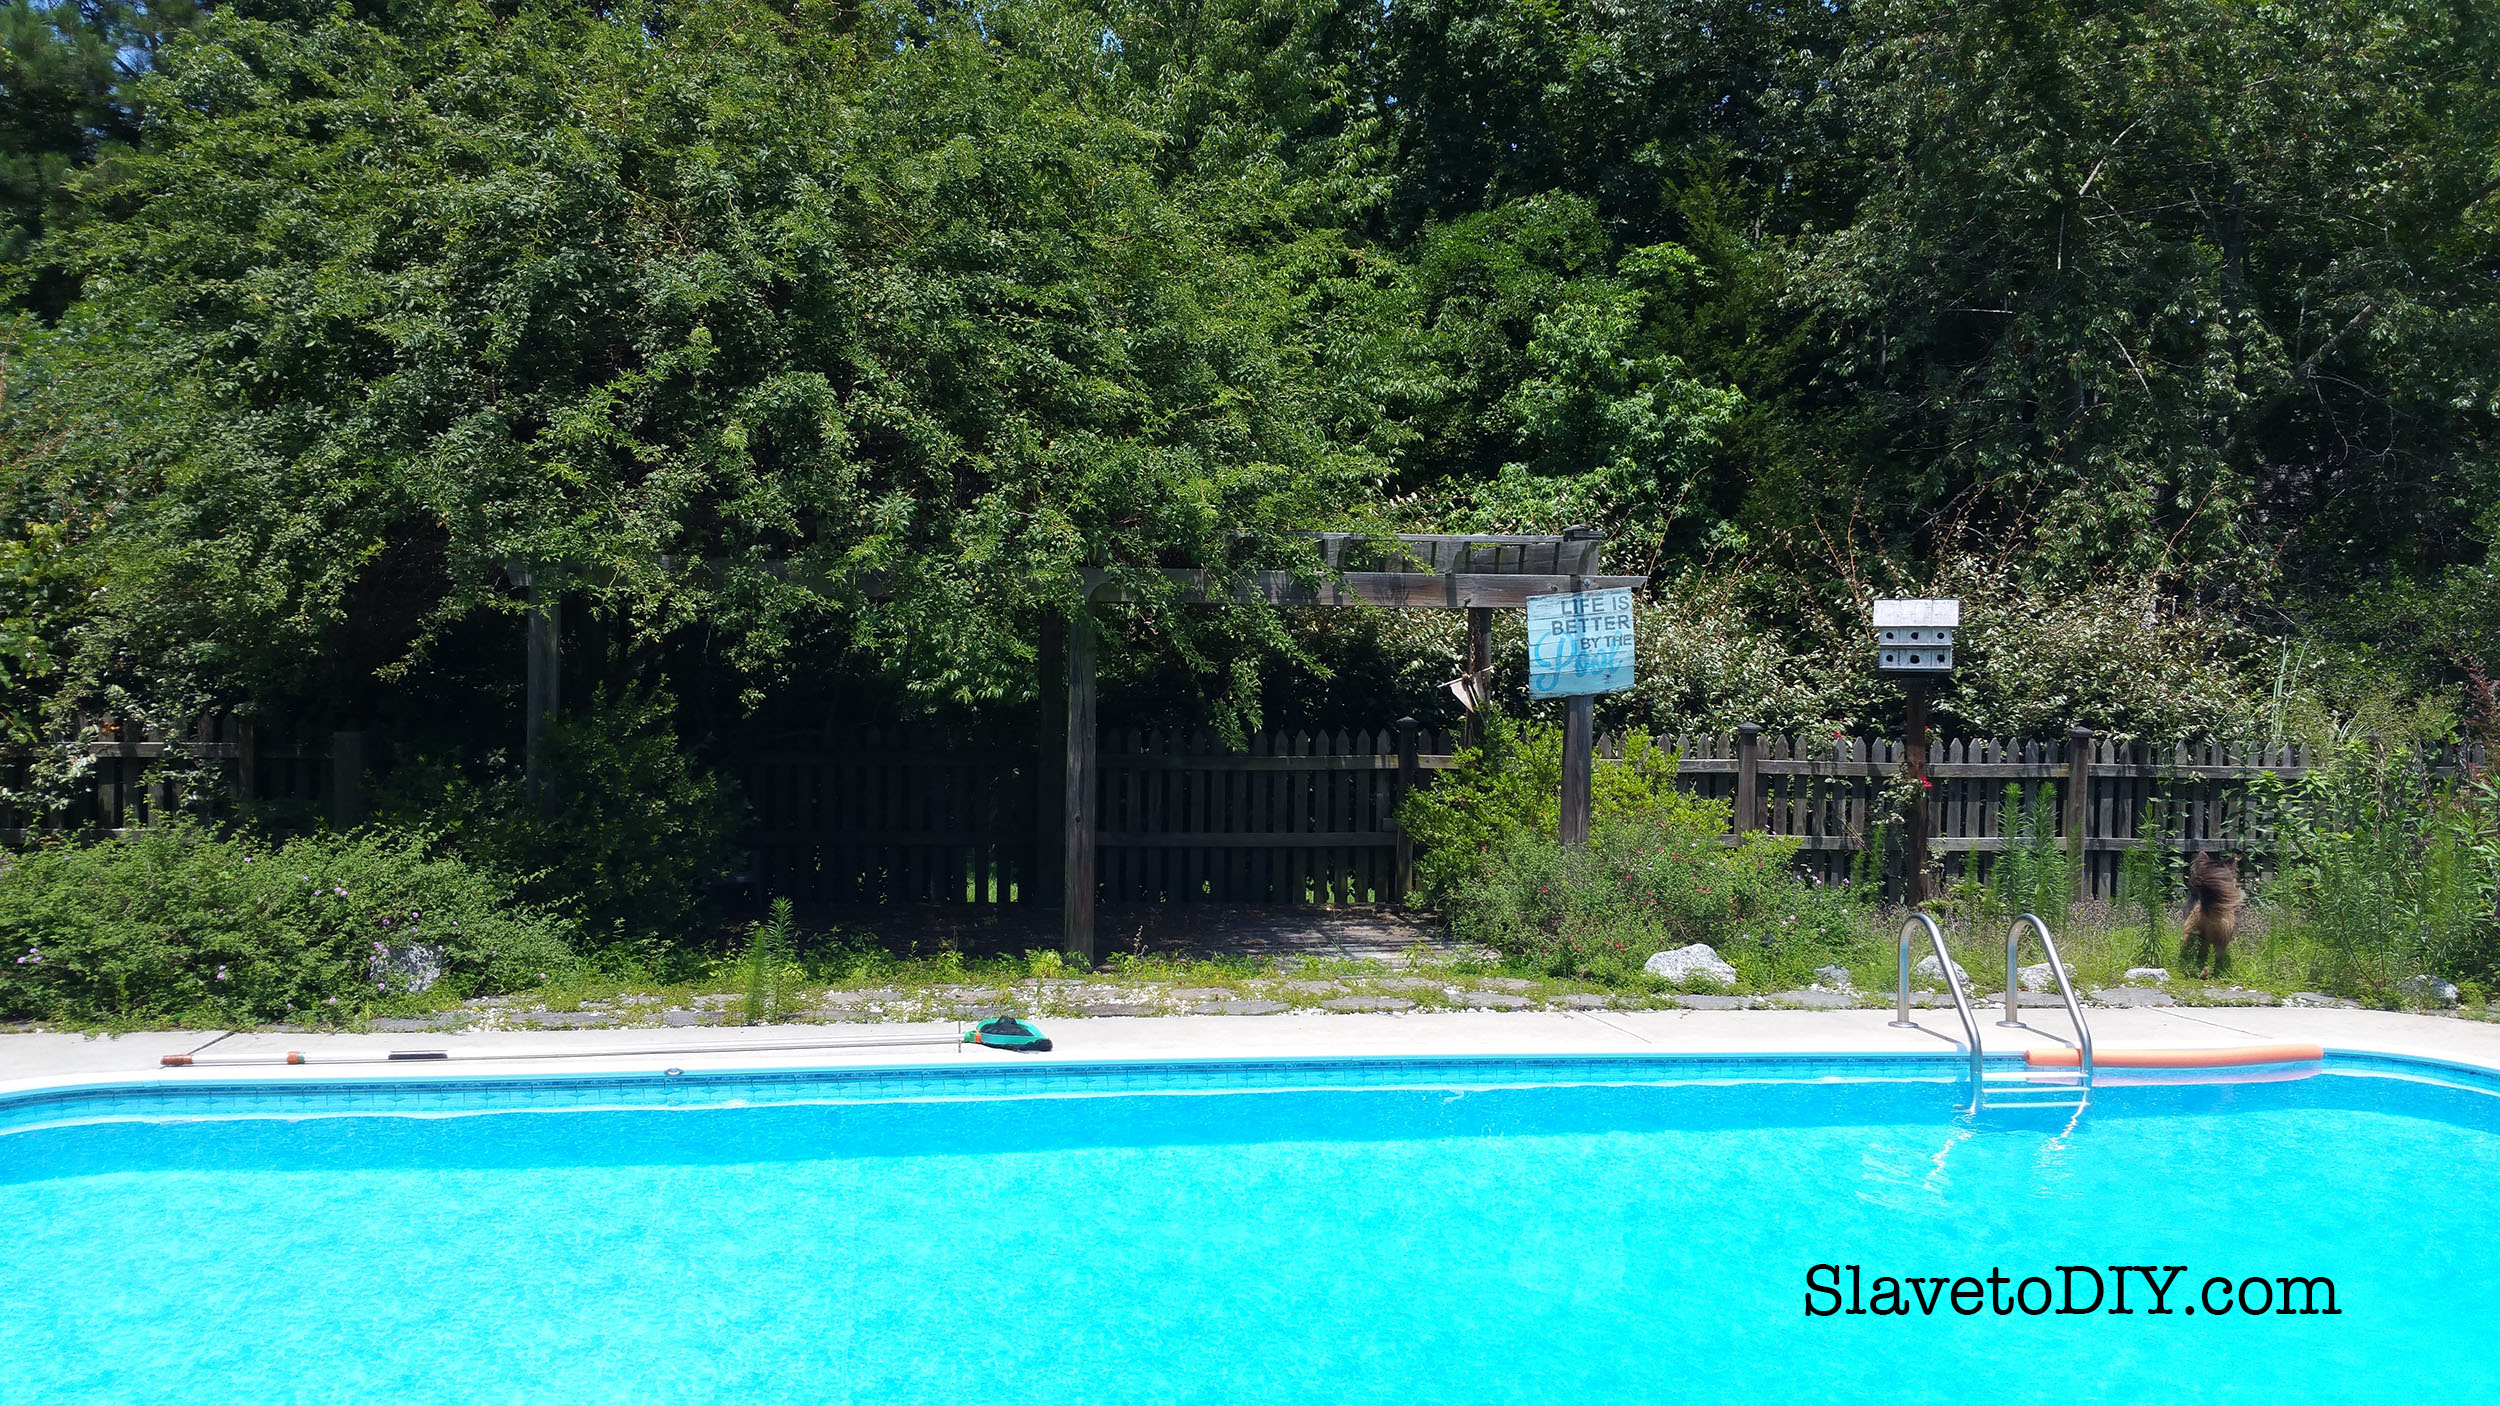
No matter what kind of hardscaping around the pool you do, do MORE. I know some people love the jungle, tropical look around the pool, but I don’t like it. Think: snakes and leaves in the pool. When we moved into our new place the pool was surrounded by gardens and bushes. I came face to face with a giant snake sunning itself on a branch by the pool without even realizing it. Then I asked Rainman, very nicely (and I’m sure very calmly), to get out the napalm and make the greenery go away.
Can you believe how overgrown this was??? NOT relaxing.
Pool Planning, Design, Tips and Considerations: Overgrown areas around pools create habitats for snakes and the potential for more leaves and debris in the pool.
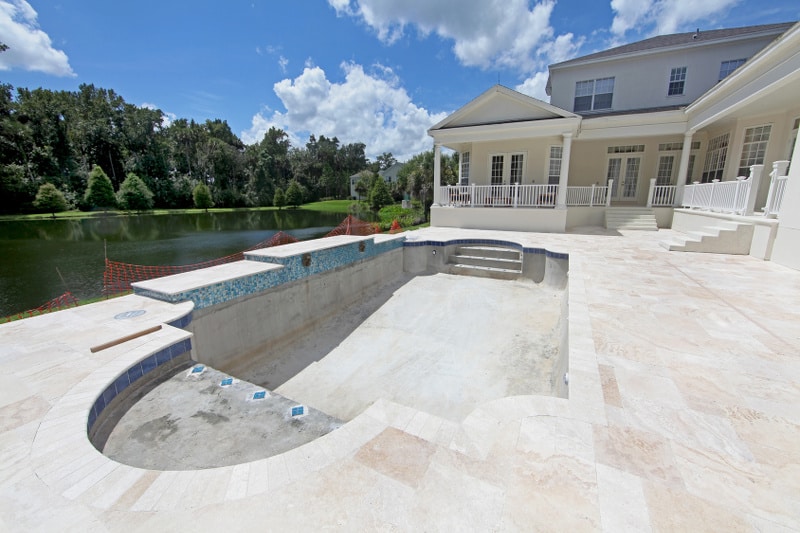
Also, think about where you live and how hot the surface will get. Concrete is okay where we are, even though it still gets VERY hot. If it’s in the budget: the best pool surface for hot climates is light travertine. It’s beautiful and stays cooler.
Pool Planning, Design, Tips and Considerations: Travertine Pavers from Poolpricer.com
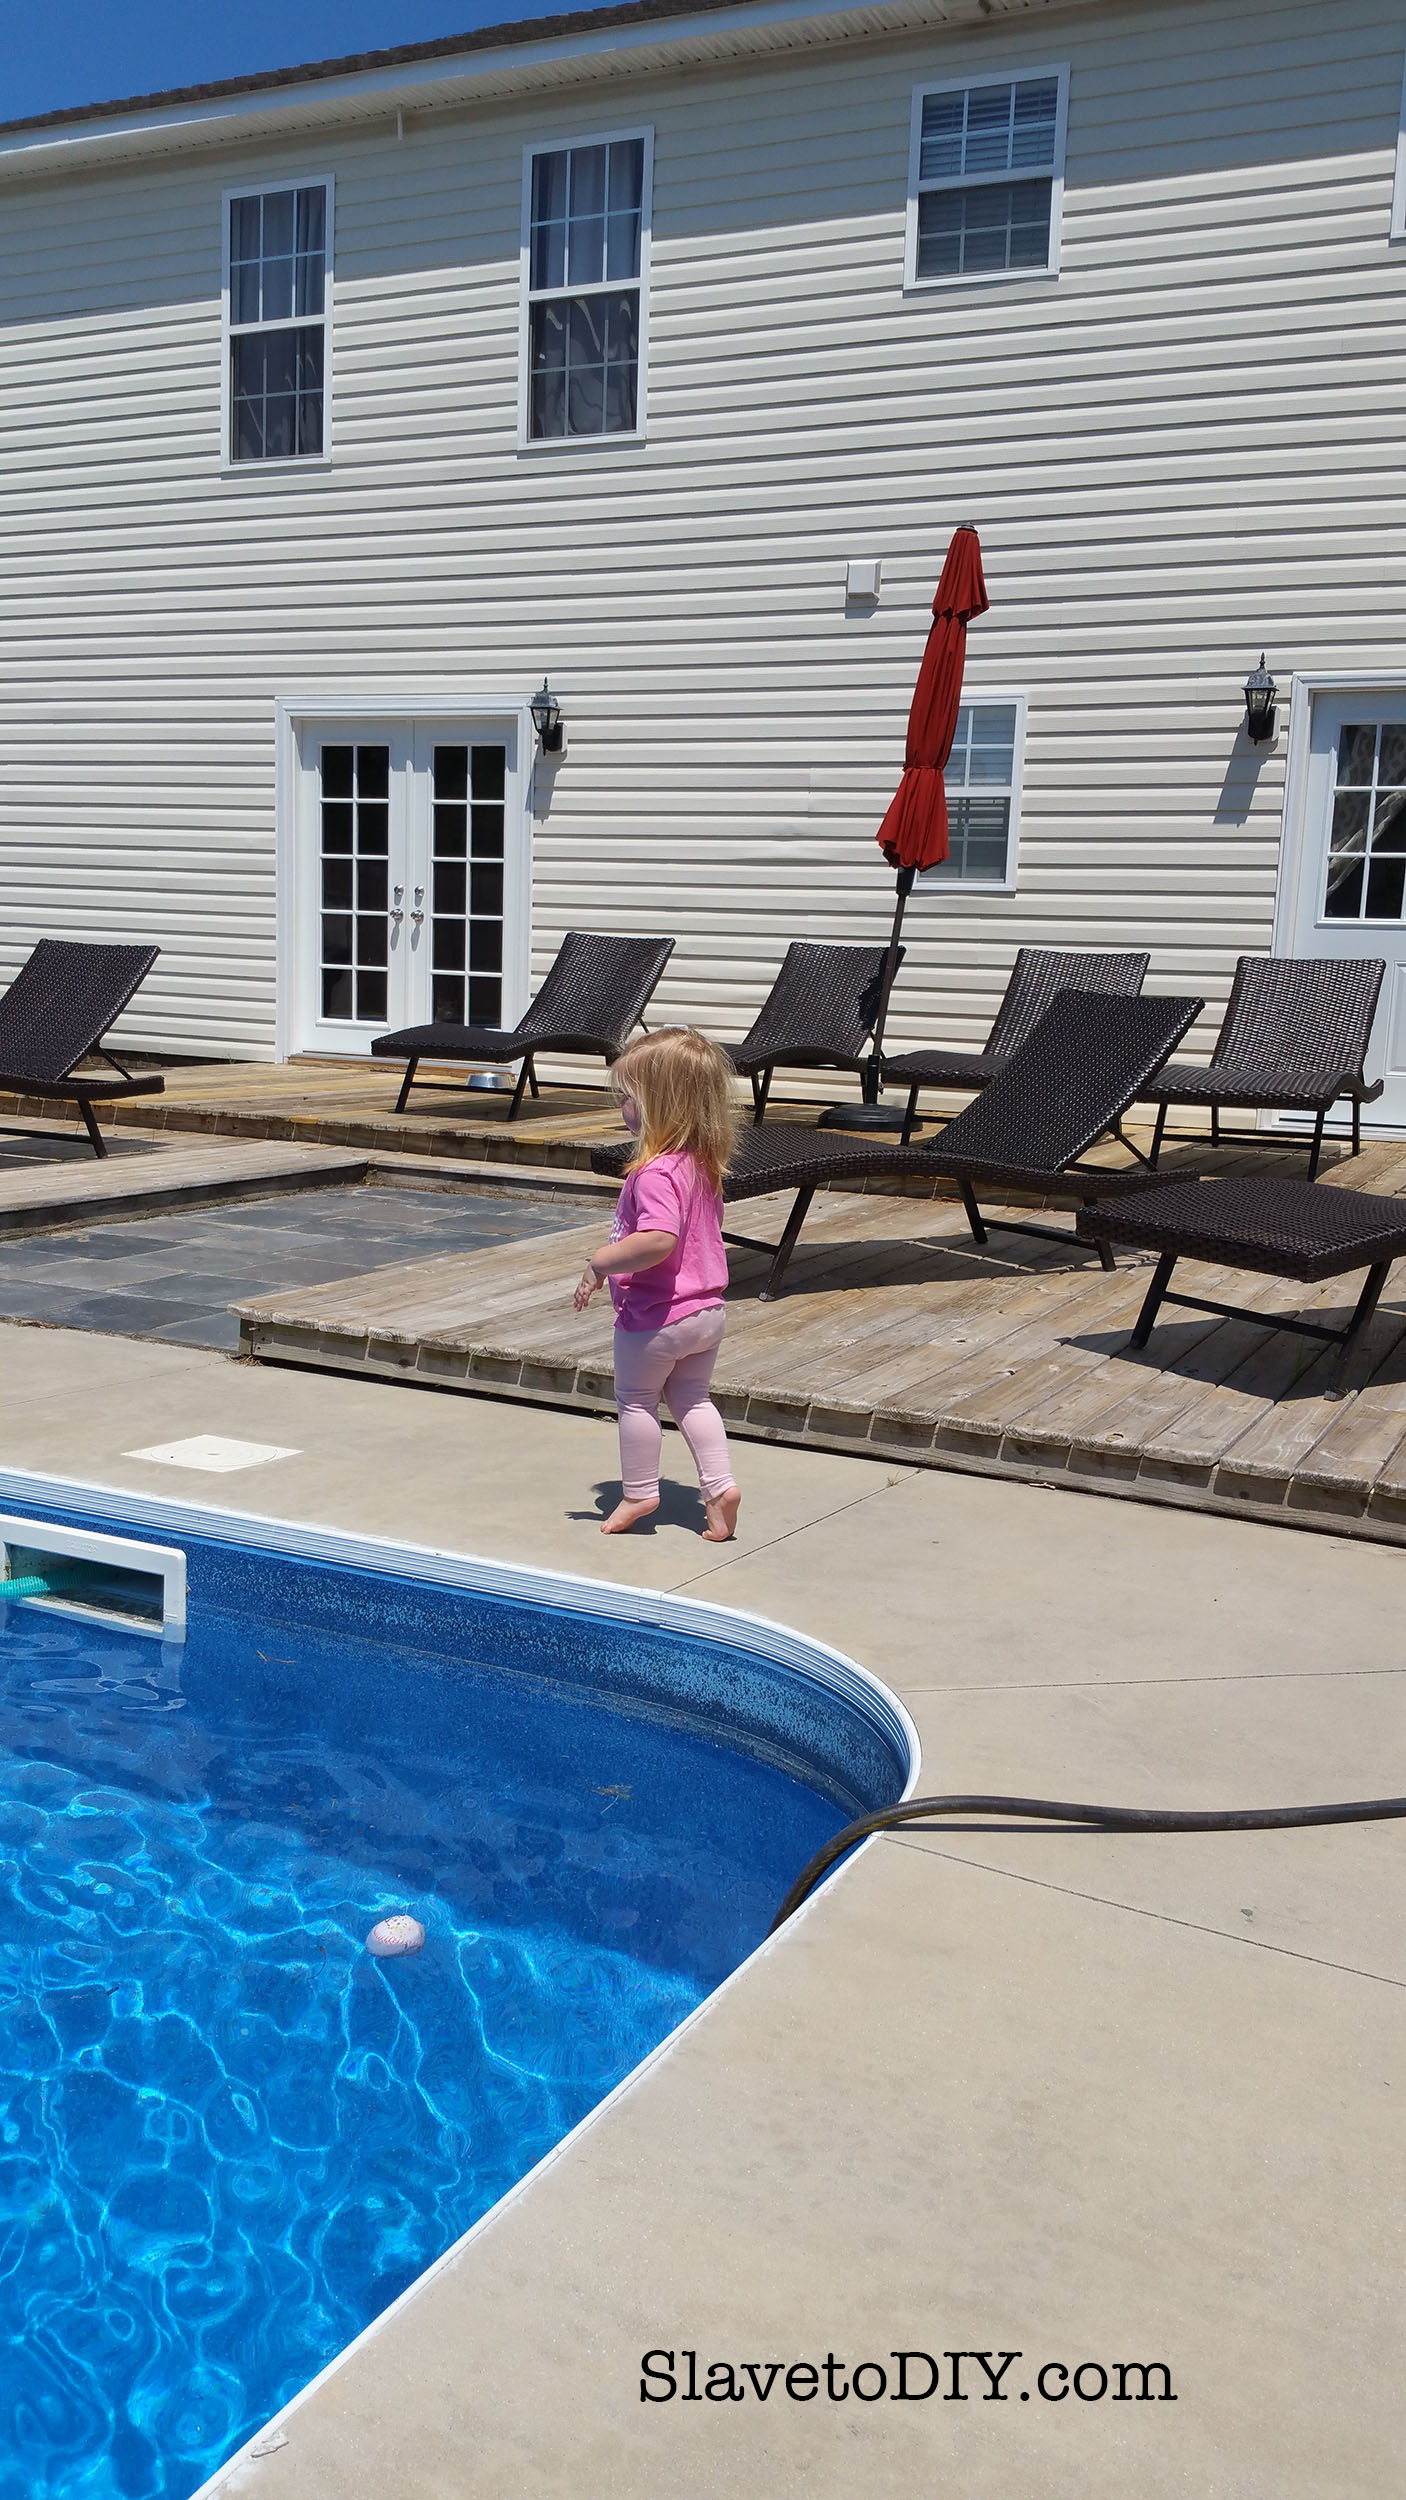
When we installed our pool one side had tiered decks and a slate patio, all connecting to the pool coping. With the exception of the grass running up to the pool on the outside, it was awesome!
Pool Planning, Design, Tips and Considerations: Tiered decks, patios, and pool coping
I’ve had so many questions about our awesome (and durable) deck chairs, shown above. You can buy them from Amazon with matching blue cushions.
2. Lighting: You need at least two in the pool. Period. Pathways around the pool should also be lit in the evening for safety.
Think about night swimming (with teenagers this definitely happens). You want well lit spaces where no one can get lost in the shadows.
If you can, get more than two. Think about the shadows that each light will cast. Shelves or tanning ledges create shadows, as do depth changes. If you plan on using your pool in the evening, get more lights.
We discovered after our pool was installed that there was an additional light we could’ve installed that came with the kit. If we’d have known that, we would’ve paid extra to have it put in. We only had one light and it was in the shallow end, so there was a shadow in the deep end, and I was a nervous wreck watching for drowning kids.
Pool Planning, Design, Tips and Considerations: Pool lighting from Leisurepoolusa.com
3. Depth: That depends.
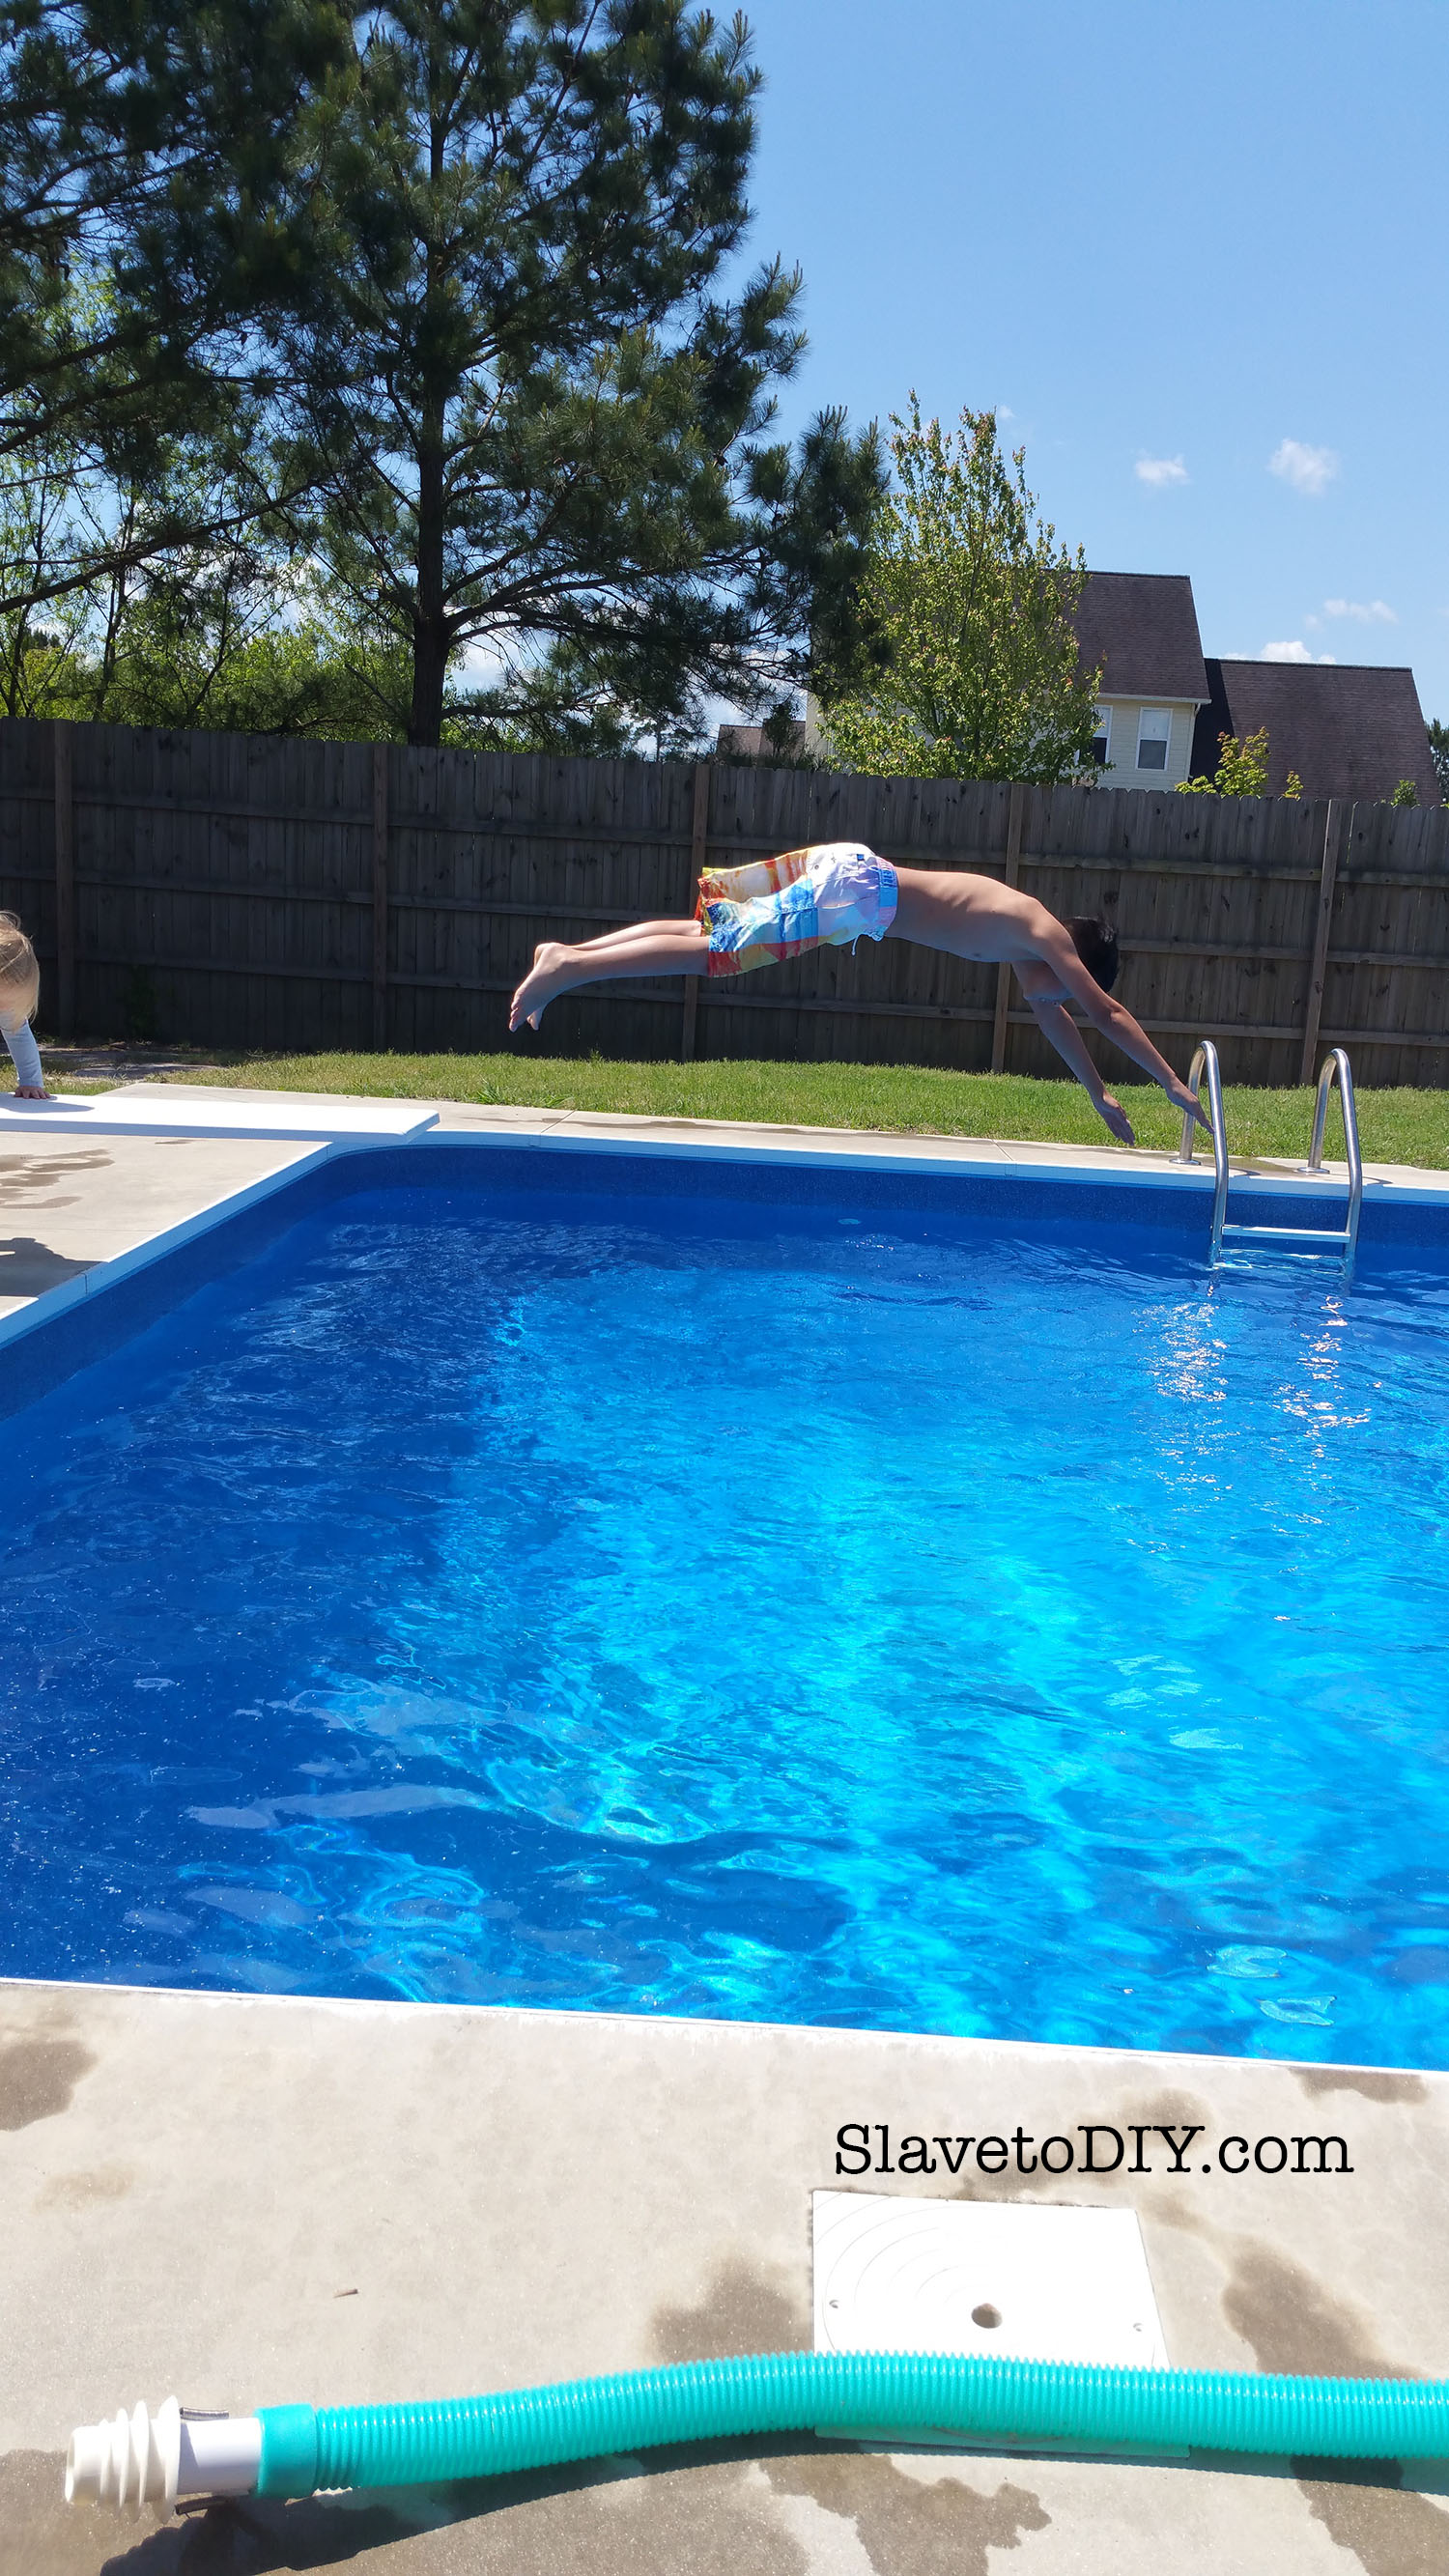
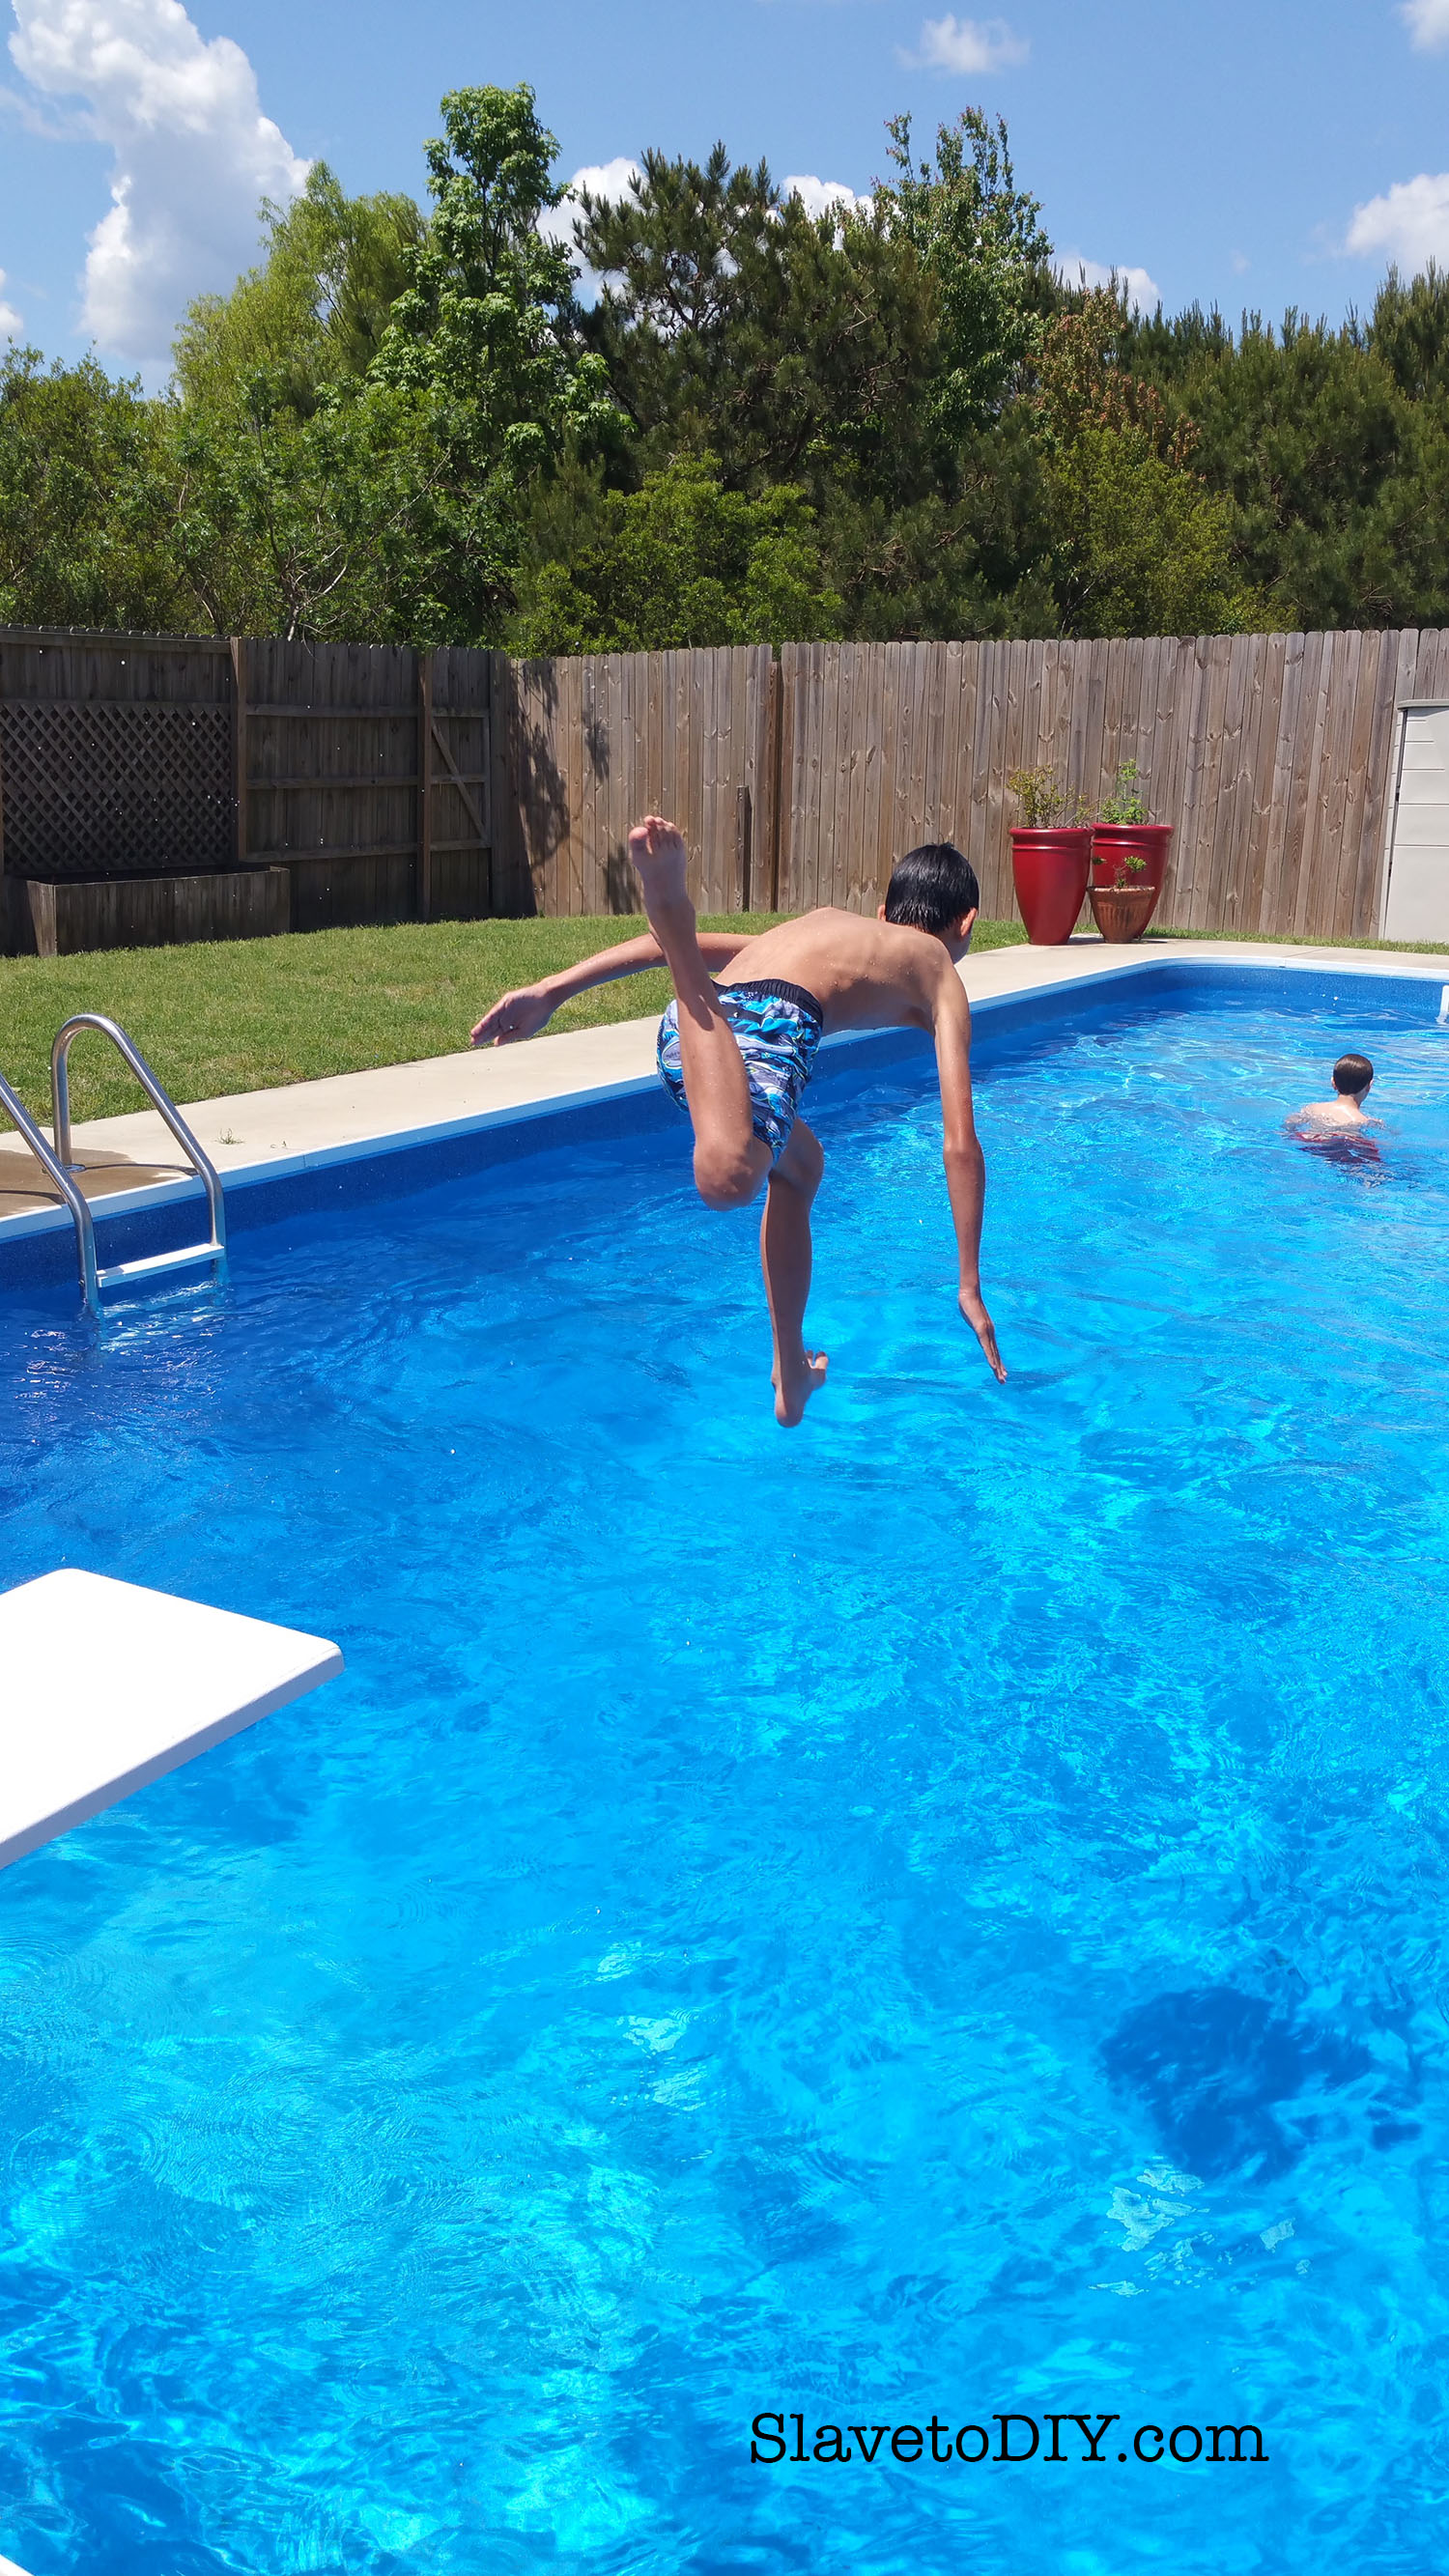
What are you planning to do in it? If you’re planning on diving you need an eight foot deep end. Some areas (like our current home) won’t accommodate deep pools because of the water table. If you only wade, you really only need a 4-6 foot pool.
I’ll admit I miss our eight foot deep end (the new pool is only six feet deep). We used to watch the kids and their friends have diving and trick competitions off of the big diving board and it really was a fun time.
The pool we installed had a graduated deep end with the ability to rope off the shallow end (which was still sizable) for younger kids. It was a handy set up for kids of different ages.
Pool Planning, Design, Tips and Considerations: Diving boards should have at least an eight foot deep end
4. Do I need a dedicated vacuum port?
YES. So, if you’re unfamiliar, hoses for vacuums either run off of their own port, or theres a port inside the clean outs (the flapper windows on the side of the pool). It’s more work for the pool contractor, so if you don’t ask, they’re not going to offer the dedicated port.
Why the dedicated port? If you don’t have a separate port for the pool you can’t vacuum the bottom of the pool and run the skimmer at the same time. That means that you either have bugs on top of the pool, or debris on the bottom. We have gotten around this by unhooking the vacuum about 45 minutes before we want to swim. It sure would be handy to be able to use both though.
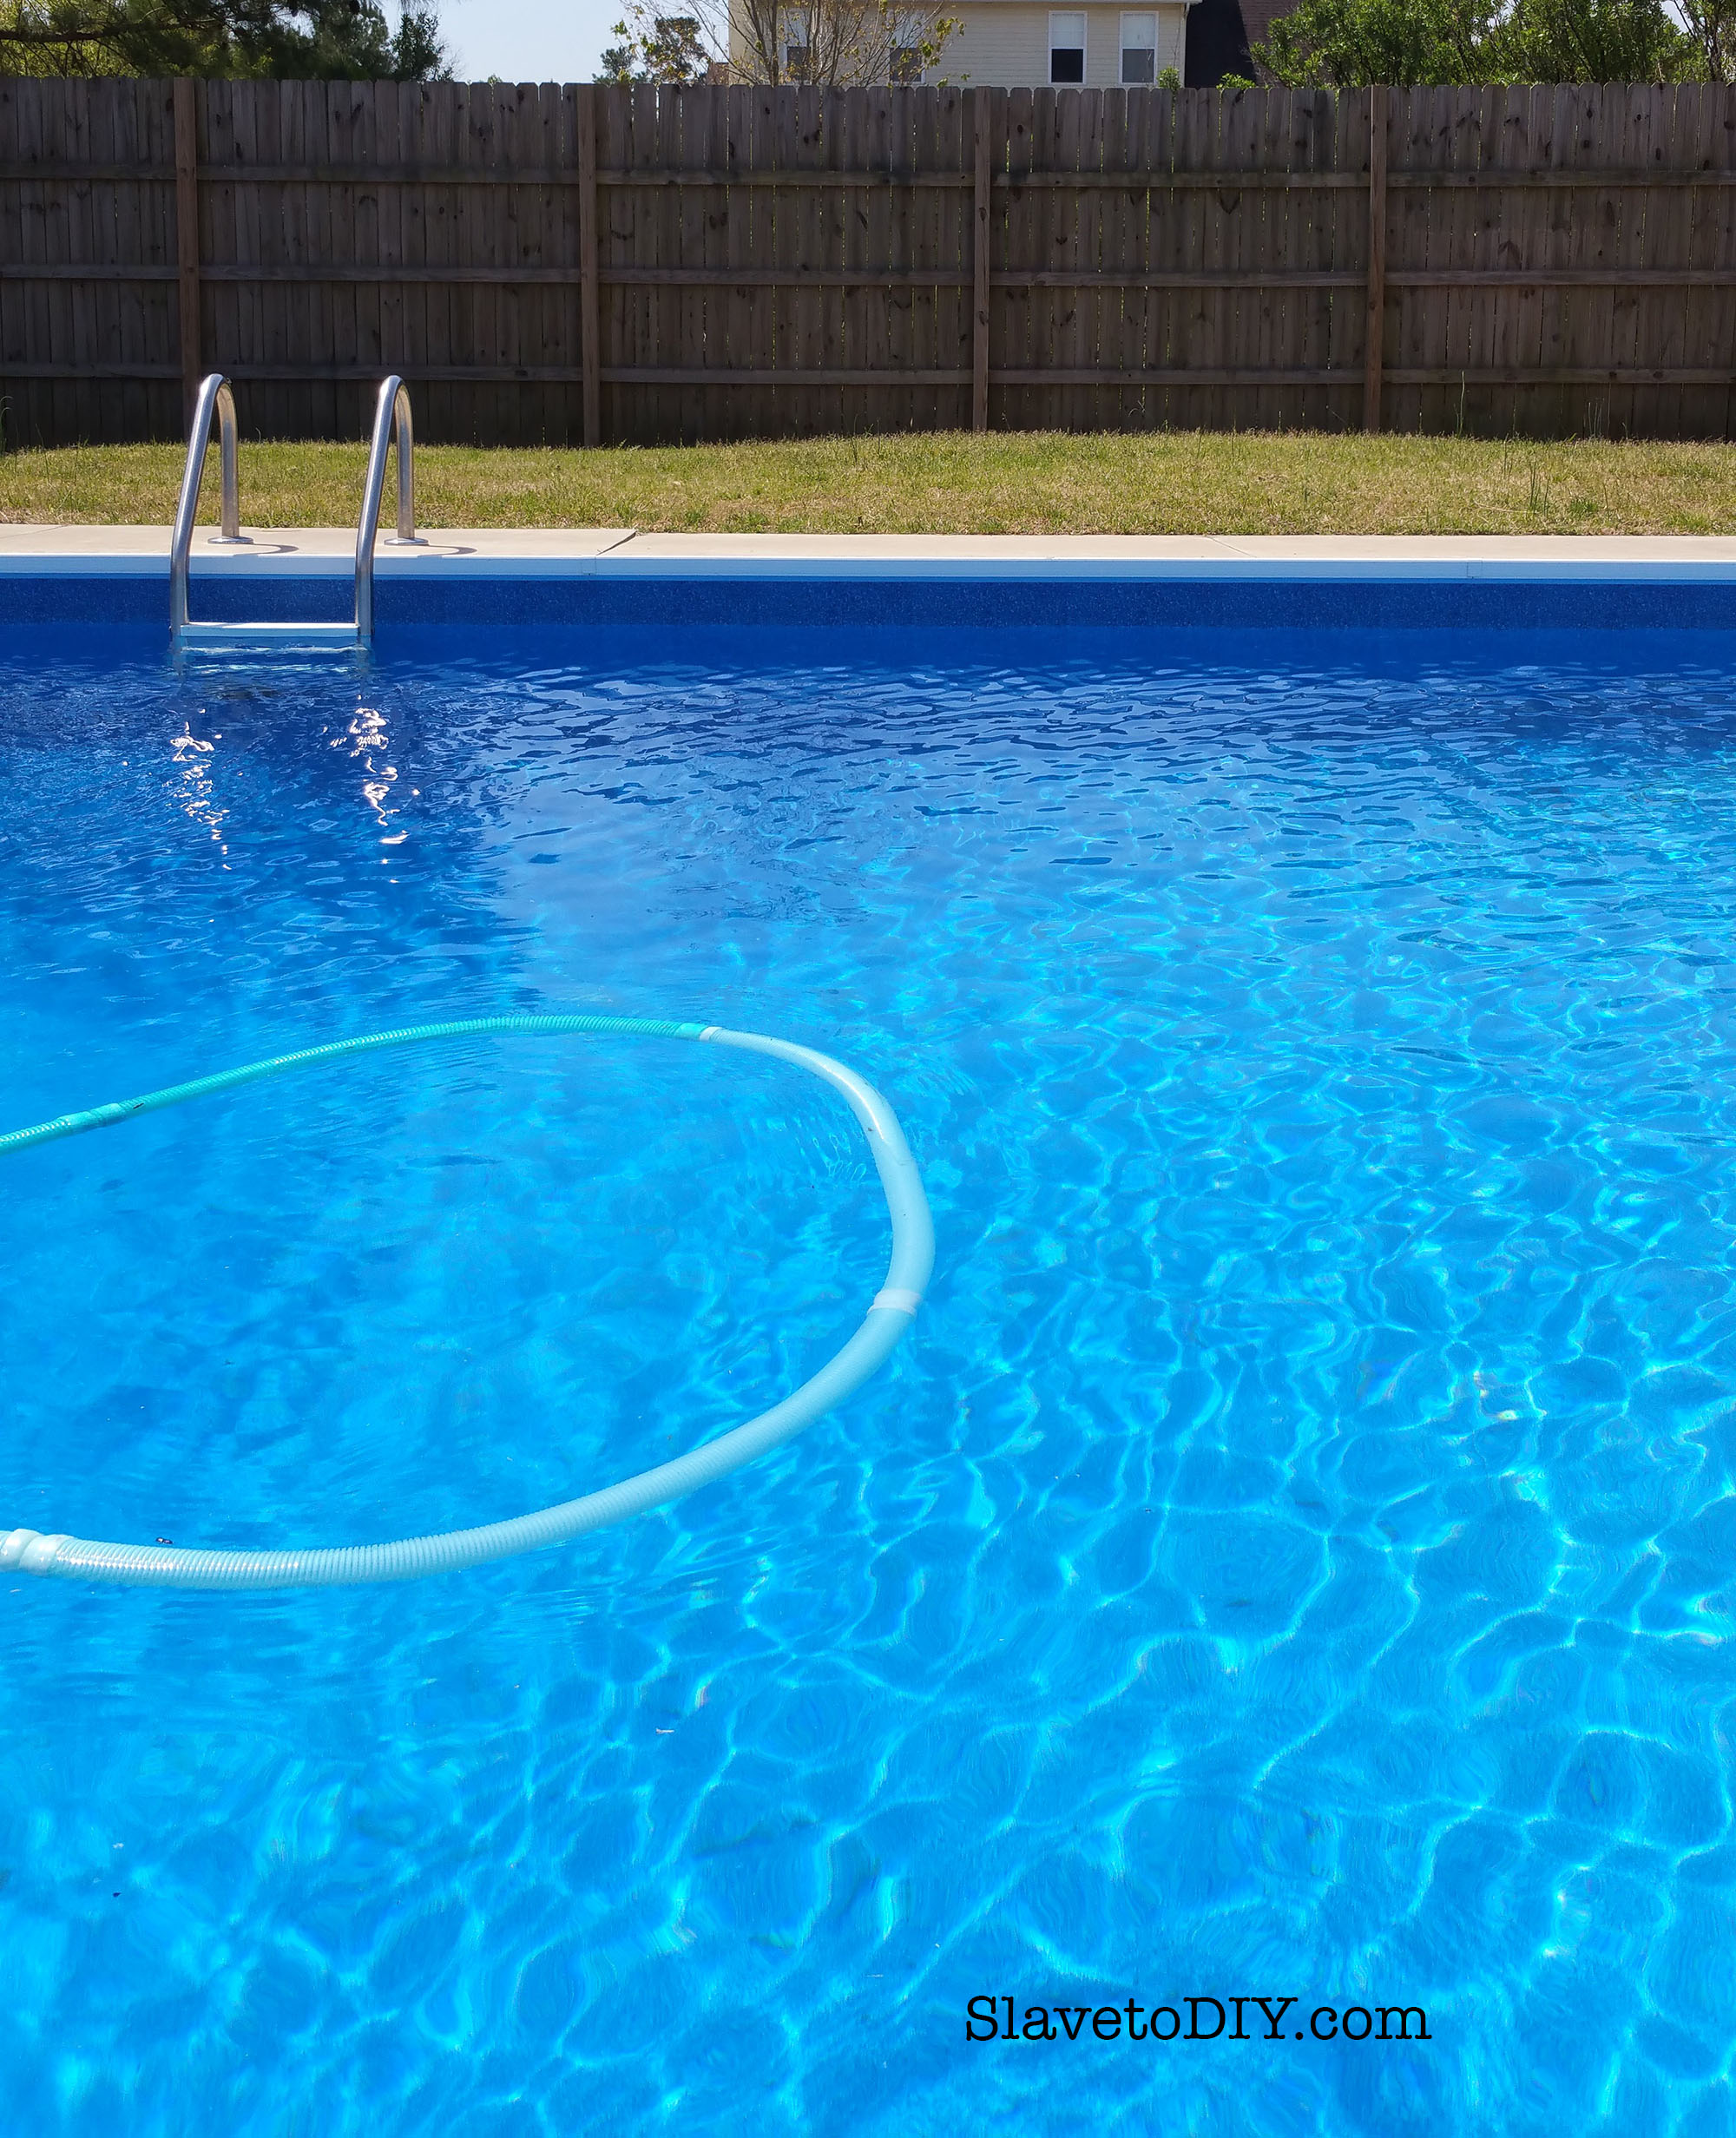
What kind of vacuum? Look, you need a vacuum unless you’d like to spend HOURS a day vacuuming your pool. I’m not exaggerating. We have tried several different kinds of vacuums, but my favorite by far are the suction vacuums. Generic types are available (comparable to the Kreepy Krauly), complete with hoses, for less than a hundred bucks and I bought a Complete New Generic Suction Vacuum Set annually to replace dry rotted hoses, etc. If the vacuum is still going strong, but your hoses are cracking, you can buy replacement hoses instead of a whole new set for less.
I know there are some slick and EXPENSIVE motorized vacuums out there, but I just can’t convince myself to trust the electrical cord sitting in the water. No thanks.
Pool Planning, Design, Tips and Considerations: Suction vacuum hoses and a CLEAN pool!
5. Yes, you want the salt pool.
If you’re having a new pool installed, it’s probably about the same cost as the regular chlorine pool, anyway. Did you know that the salt pools are not actually salty (like the ocean)? The salt runs a chlorinator. The water is silky smooth and doesn’t bleach out swimsuits or turn hair green.
I don’t know if it’s true of every salt pool in every climate, but we added salt A LOT. However, the chemicals seemed easier to balance in the pool, and I had teenagers to haul salt from Lowe’s about every two weeks.
Our current pool is chlorine and I hate it. We will probably convert it before next season to salt as I’ve spent a small fortune this year trying to get the green out of my daughter’s hair, and it would probably be cheaper (not to mention more enjoyable) to have the salt pool. I’ve also found the chemical balance in the chlorine pool to be much more finicky and I spend quite a bit more on pool maintenance (with a pool half the size!).
Pool Planning, Design, Tips and Considerations: Silky smooth salt pool
6. How big does your pool need to be?
Everyone’s needs are different, but we went with the biggest size the installer had available. With four growing kids (at the time) and half the neighborhood swimming in the summer, I was psyched we got a pool that big. At 20X40 feet, with a 10X10 side bump-out, and 36,000 gallons it was a whopper and I loved it.
Your contractor can offer guidance on the size and shape of the pool that’s right for your family. Consider lots of options: depth changes, deep ends for diving or slides, tanning ledges, extra long thin pools for lap swimming, etc.
Pool Planning, Design, Tips and Considerations: Enjoying a neighborhood sized pool
7. What kind of inground pool should you install?
Well, this is sort of the million dollar question! There are three basic options for in ground pools: vinyl, fiberglass, and gunite. You should research this before you contact pool companies because if you don’t know what you want, many pool contractors “specialize” in one type (read: they have experience or make more profit off of certain types) and they will talk you into that even if it’s NOT the best kind for you.
Considerations: Size matters with respect to cost.
Gunite is the Daddy Warbucks pool. If money is not a concern, this is usually the choice because it is generally quite a bit pricier than the other options. They are awesome because they are hand poured in special concrete you can literally configure them ANY way you want to. These are more expensive than either of the other options regardless of size.
For a very small pool, it may be slightly cheaper (and MUCH faster) to install a pre-molded fiberglass pool. These are handy, stay clean, are quite durable, and are easy to repair if something happens to the finish. If your dogs go into your pool, these are a better choice as they are less likely to tear than vinyl pools.
Once you start looking at very large pools (like the one we installed) fiberglass pools get way too expensive. We went with vinyl and we loved it. Remember, you do have to budget every decade or so for a new vinyl liner as they warp, tear, fade, or just wear out over time. At about 5K a pop in our area, it’s no small thing.
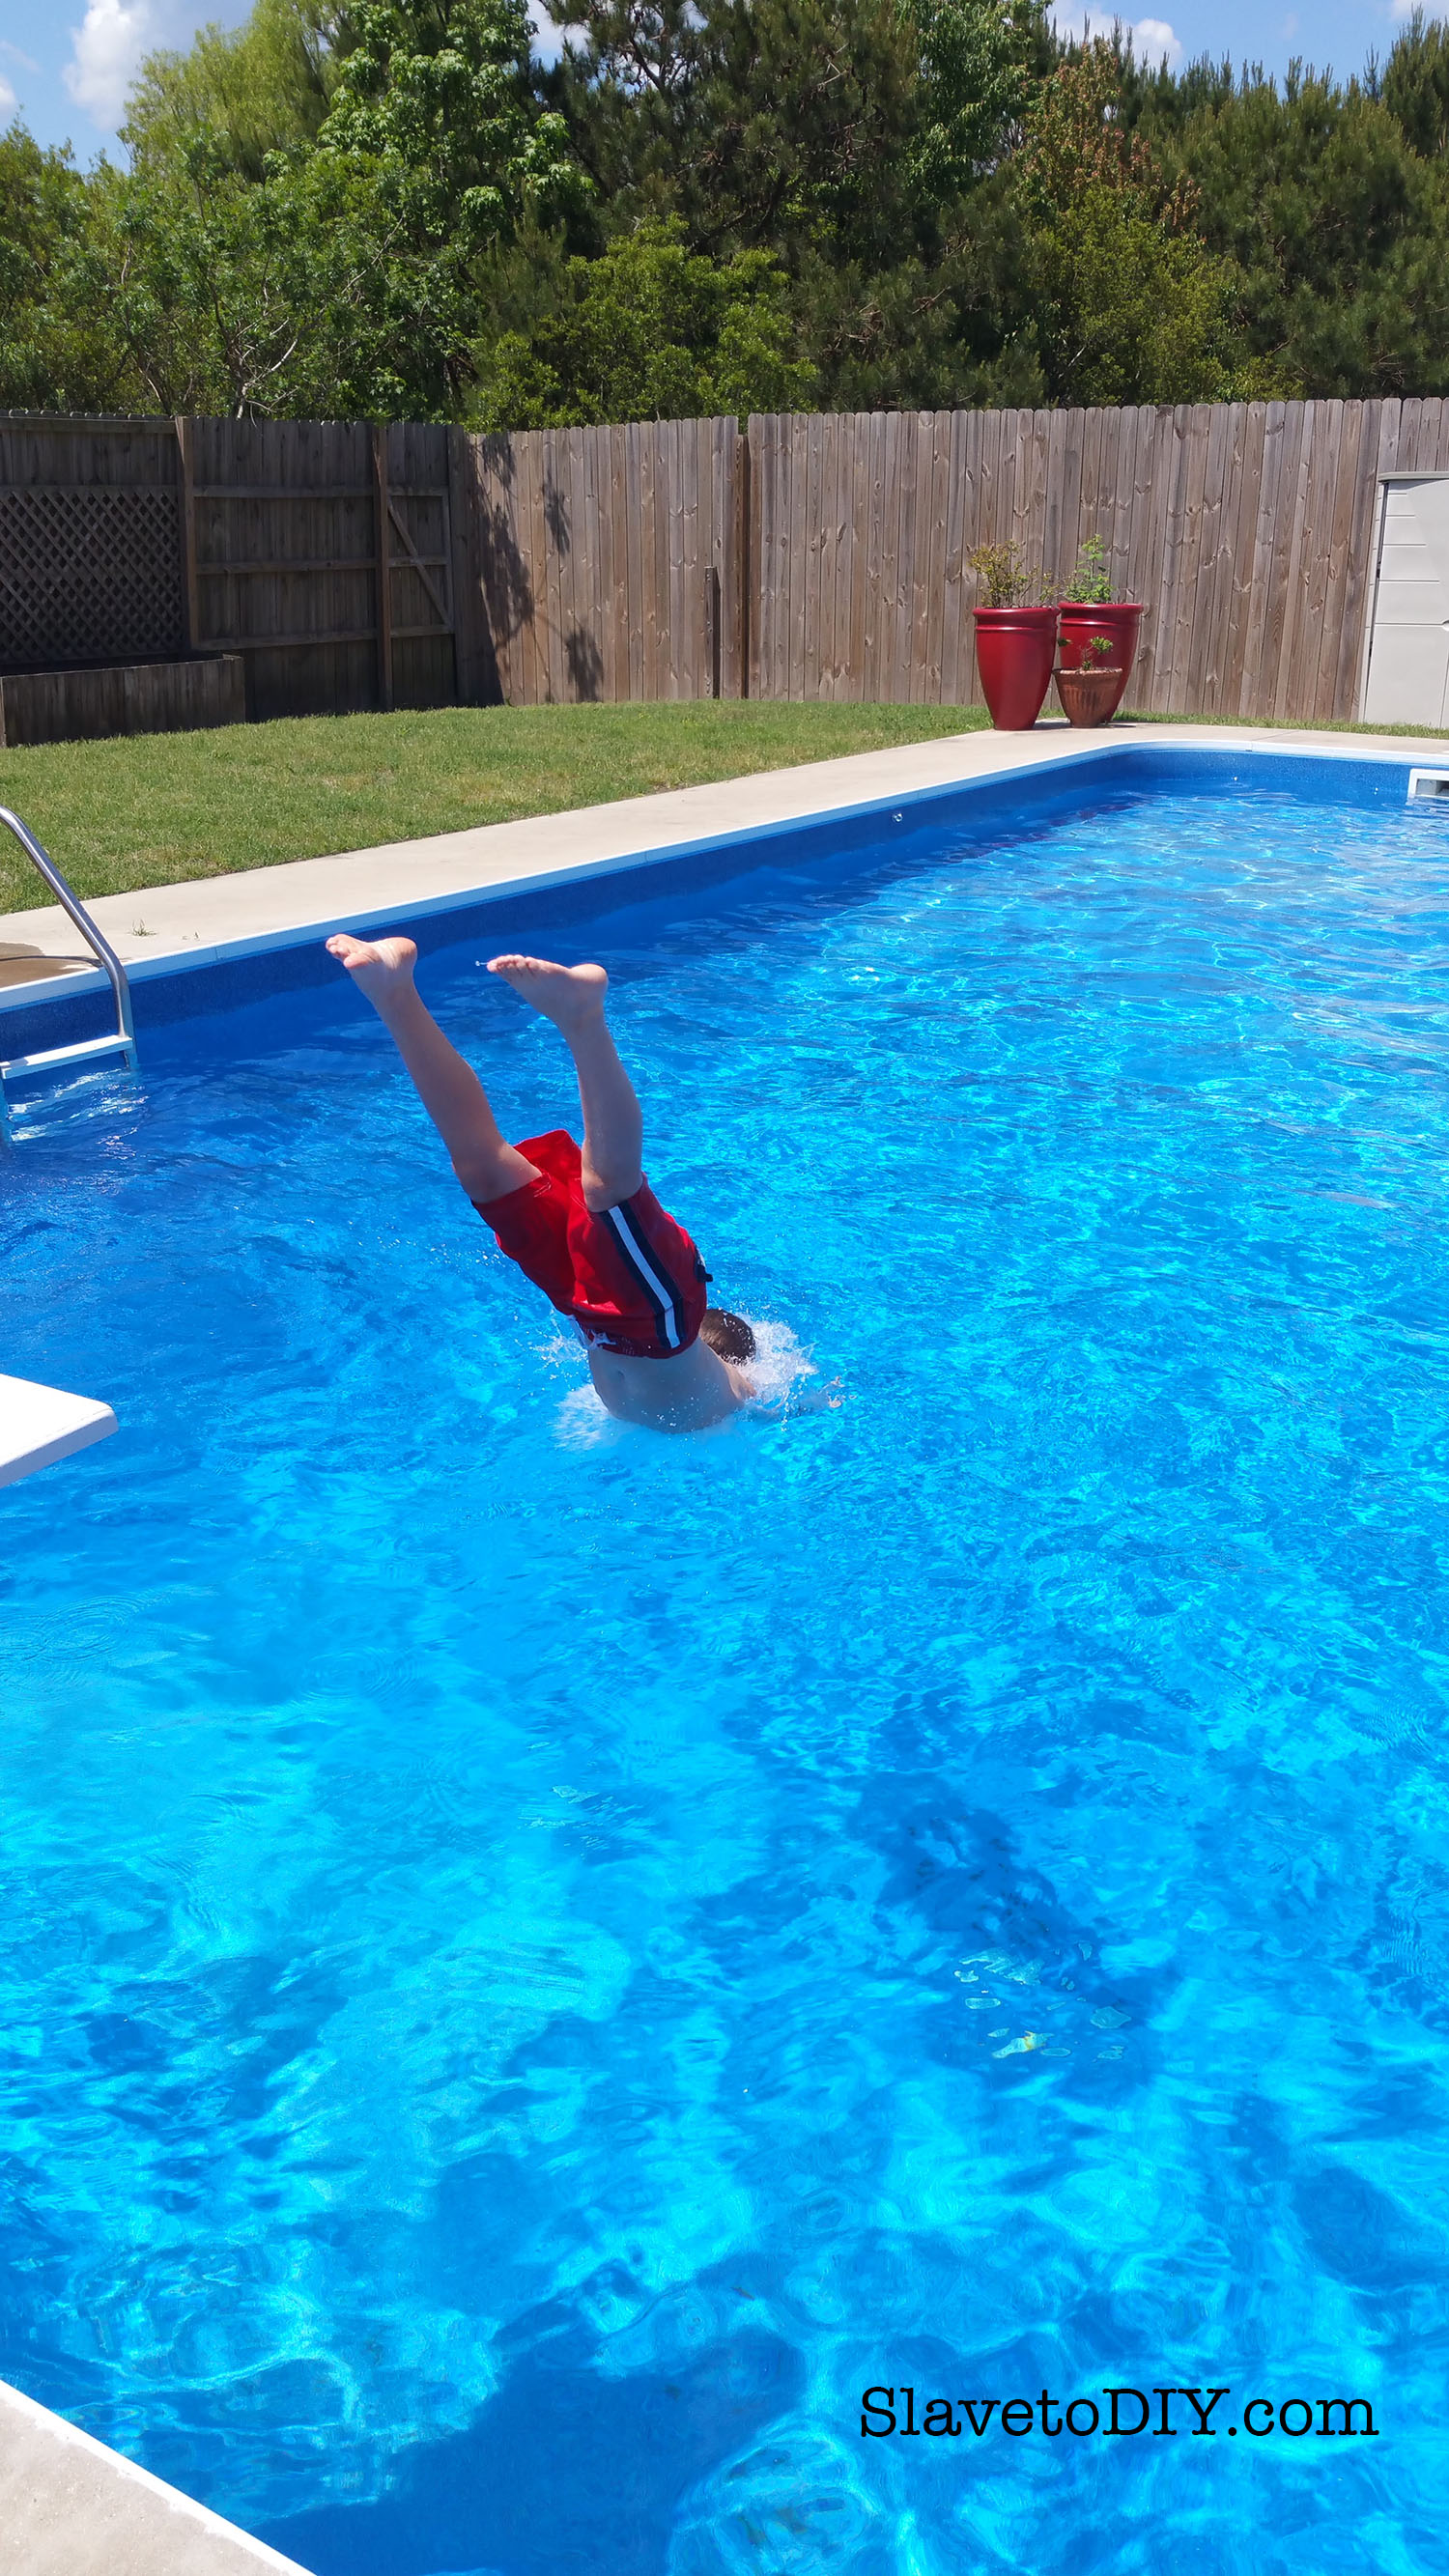
Tip: If you choose a vinyl liner, SKIP THE EDGE DESIGN. They’ll ask you what design you want around the edge and what color the rest of the pool should be. Make it all the blue you choose with NO EDGE DESIGN. Trust me. It was the first time our contractor had the request, but if your liner lasts a long time, the thing that dates it and makes it look old is the stupid design around the edge. I went with a deep blue and it looked awesome. No outdated edge design, just beautiful blue all the way. For a gunite pool and a fiberglass I’d do the same thing. Any kind of decorative trim at the top ends up looking dated.
Pool Planning, Design, Tips and Considerations: Blue vinyl pool with no edge design
8. How do you find a contractor?
You can look on the internet, but I recommend asking a friend. I don’t think I’ve ever met anyone with lukewarm feelings about their pool contractor. They either loved them, or hated them. So, if you ask, you’ll find out.
Beware of companies with prices that seem to good to be true. In the town where we had our pool installed, there was a contractor who quoted us 10K less than the contractor we ultimately chose. After doing more research we saw that there were no positive reviews because they never actually finished pools. They would be in and out of a property for months and sometimes YEARS (then when they were sued for not finishing the job they would open up under a different name and go straight back to work ripping people off).
The company we chose did ONE POOL AT A TIME. We gave them a small deposit to secure our place in line and, once they started, they were at our property every day from start to finish of the project.
They’ve continued to be available for questions and troubleshooting every time I’ve contacted them since then for the last eight years (even at our new house with a pool they didn’t install!).
For those of you in Eastern NC I highly recommend Crystal Coast Pools at (910) 330-0969. I’m not a paid affiliate, but we think they’re great!
Pool Planning, Design, Tips and Considerations: Great, well designed pool by Crystal Coast Pools in Eastern NC
9. How much does it cost a month to run a pool?
Running a pool pump seems to cost about $200 a month in Eastern North Carolina. That doesn’t include the cost of chemicals, shock, chlorine tabs, or salt. In our salt pool (36,000 gallons) we usually spent about $150 a month on chemicals during the summer and about $200 to open it, balance chemicals, and buy shock for the summer.
Buying shock and chlorine: We kept having problems with the stuff from the big box stores and the nice lady at the pool store recommended Zappit Pool Shock. It works much better and is cheaper. I buy my own shock and chlorine tabs (I purchase big buckets once a season online) but also found a local pool store that does free water samples. Then I don’t have to mess with trying to guess what I need to add and how much (they sell me the chemicals). It’s way easier.
Pool Planning, Design, Tips and Considerations: Diving in a salt pool
10. Is caring for a pool a lot of work?
Yes. But, if you actually use it, it’s well worth it. If you’re not up to it, consider that even in NC where costs are relatively cheap, pool maintenance contractors charge about $75 an hour to care for your pool for you, plus the cost of chemicals, etc. If you don’t take care of it, then you have an expensive frog pond to deal with in the back yard.
11. What kind of fence do you need and pool safety equipment?
When you are interviewing pool contractors, find one that knows the local codes and will include those items as part of the installation. Many municipalities have rules on pool fences, self closing gates around the pool, door chimes leading to the pool, etc. The pool contracter should be knowledgeable and willing to complete the process for you.
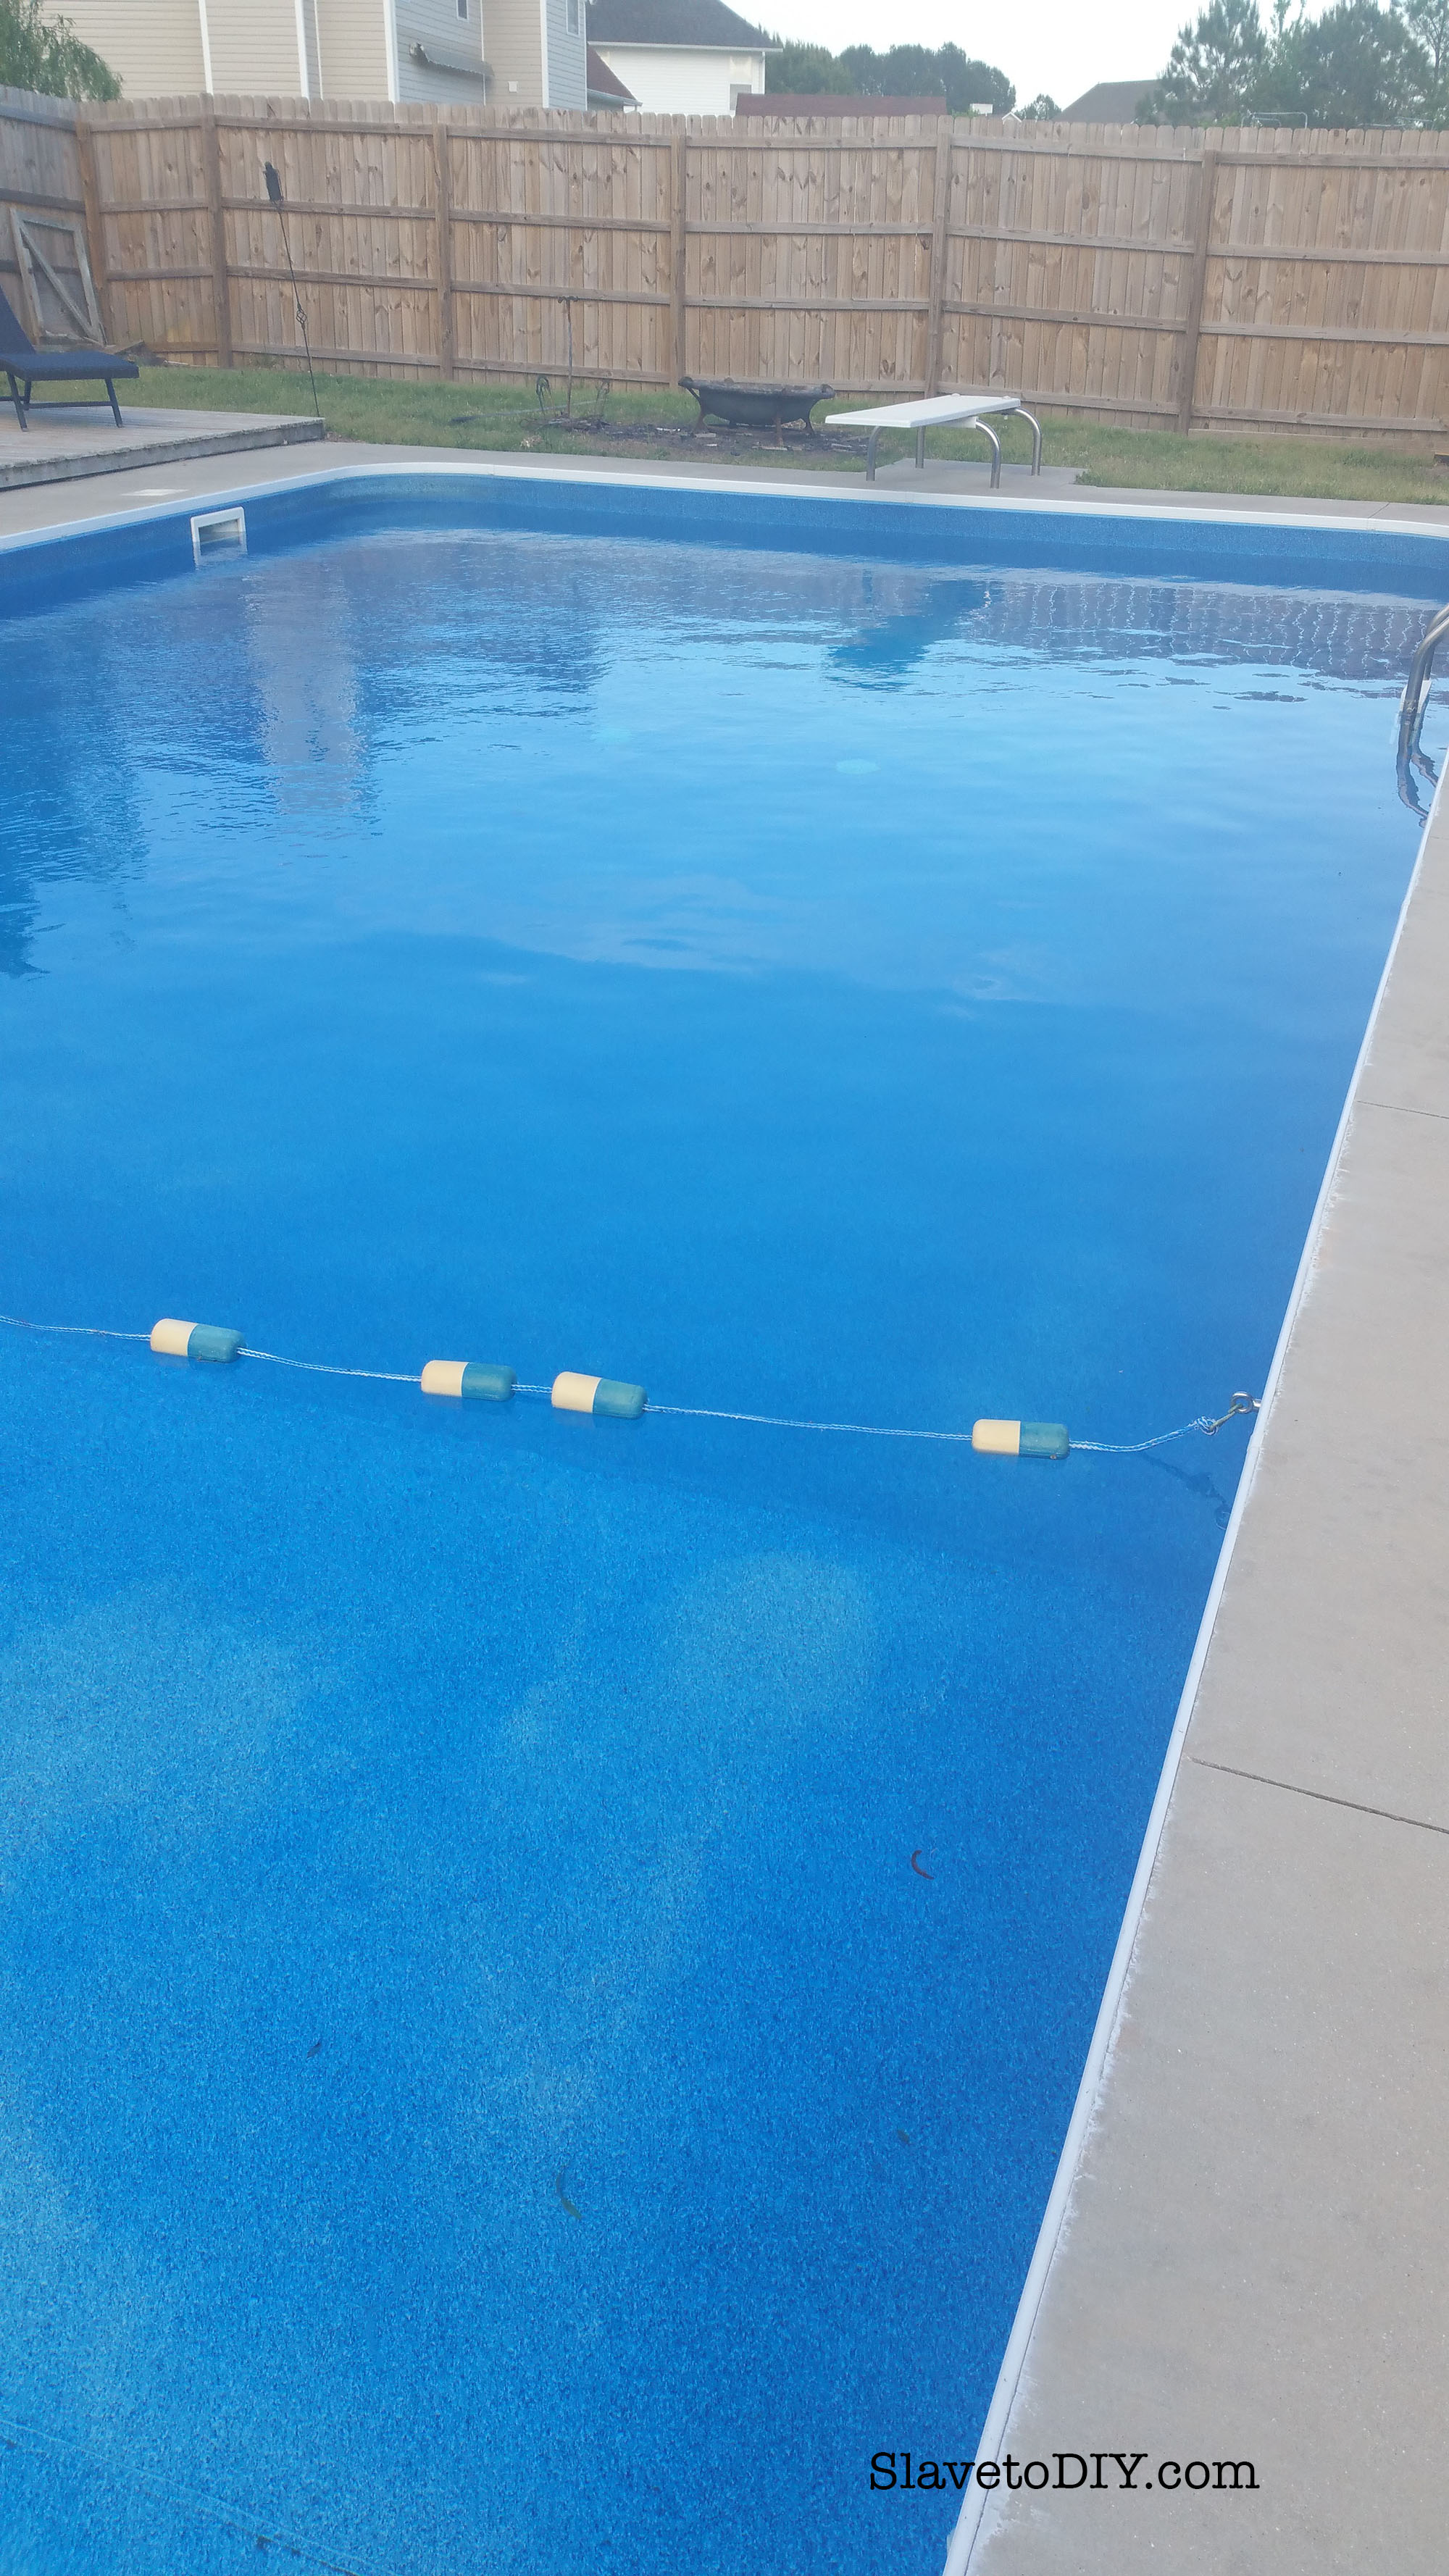
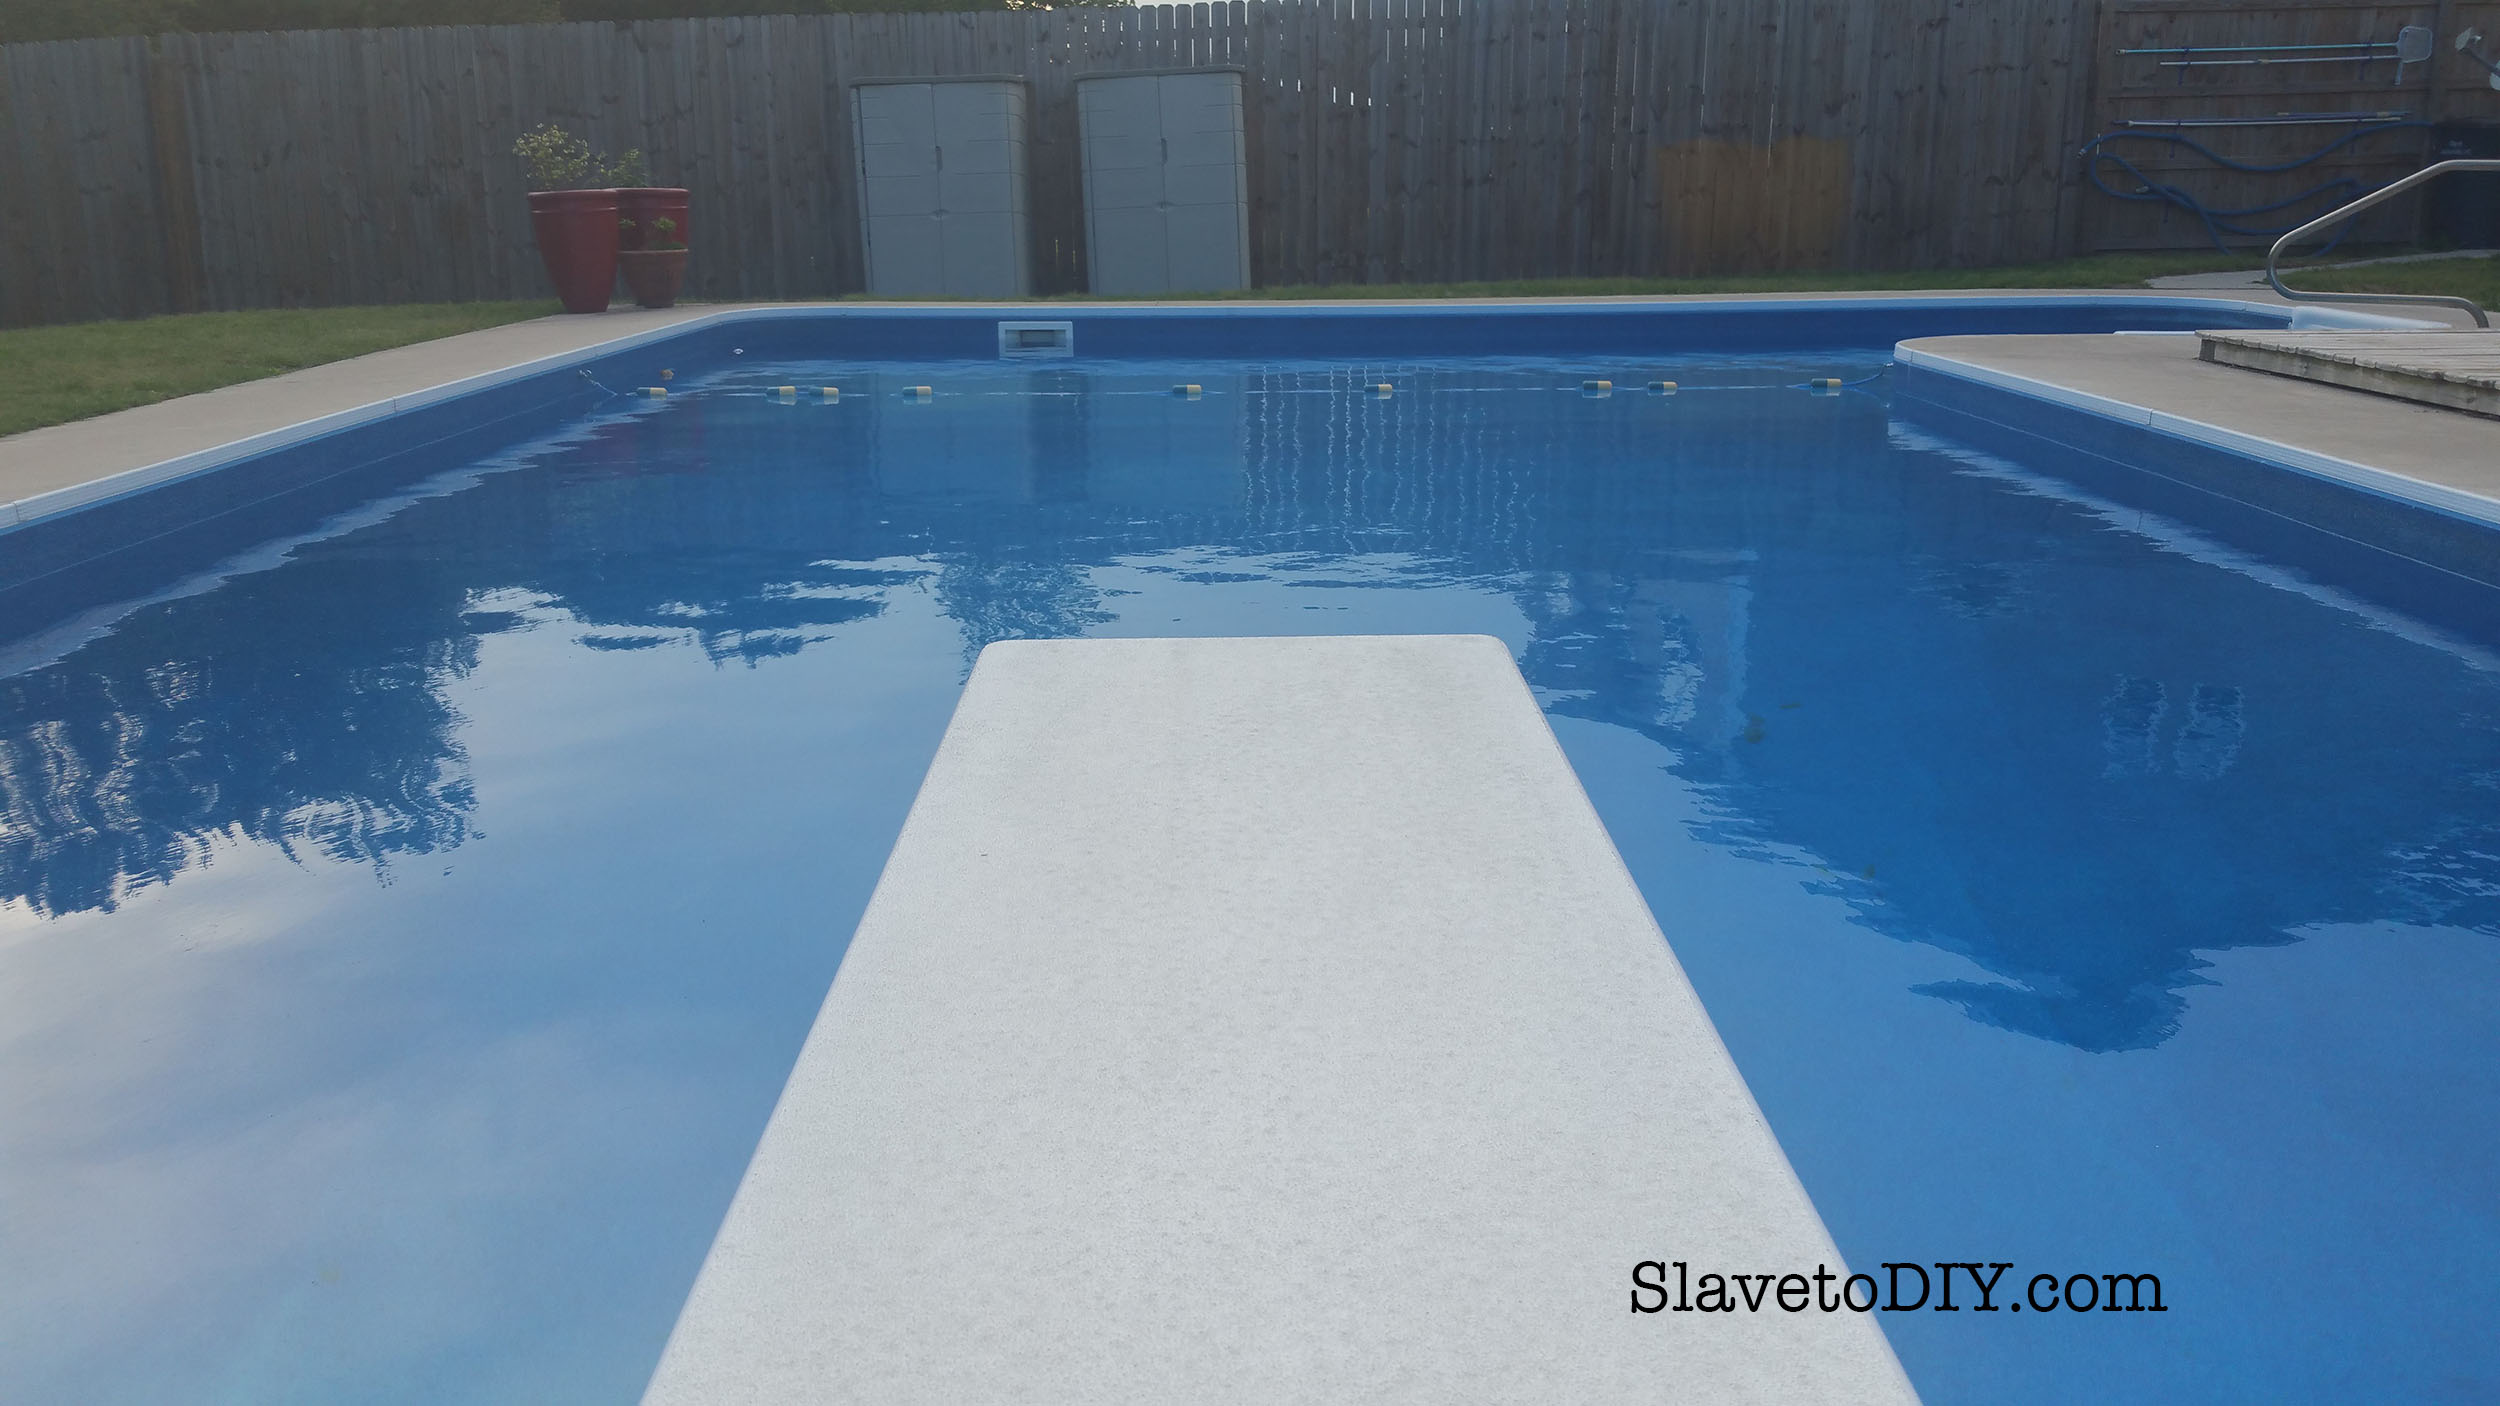
In addition to the required items we like to have a pool safety ring on hand and when smaller kids are swimming we use the float ropes that mark where the shallow end transitions to the deep end. If we are having any kind of an event where we have lots of kids swimming I post responsible teenagers at two corners to act as lifeguards. It’s important to have a healthy fear of swimming pools and to create a safe environment for your family and friends.
Pool Planning, Design, Tips and Considerations: Diving boards and safety lines
12. Do you need a pool cover?
We never invested in a pool cover at our old house because we didn’t have big trees and there wasn’t much debris blowing into the pool. I just assumed that the grueling process of turning green swamp water into clear blue water was a necessary part of the Spring-pool opening process (which took no less than a month, several hours a day, sweeping algae and messing with chemicals). What a pain.
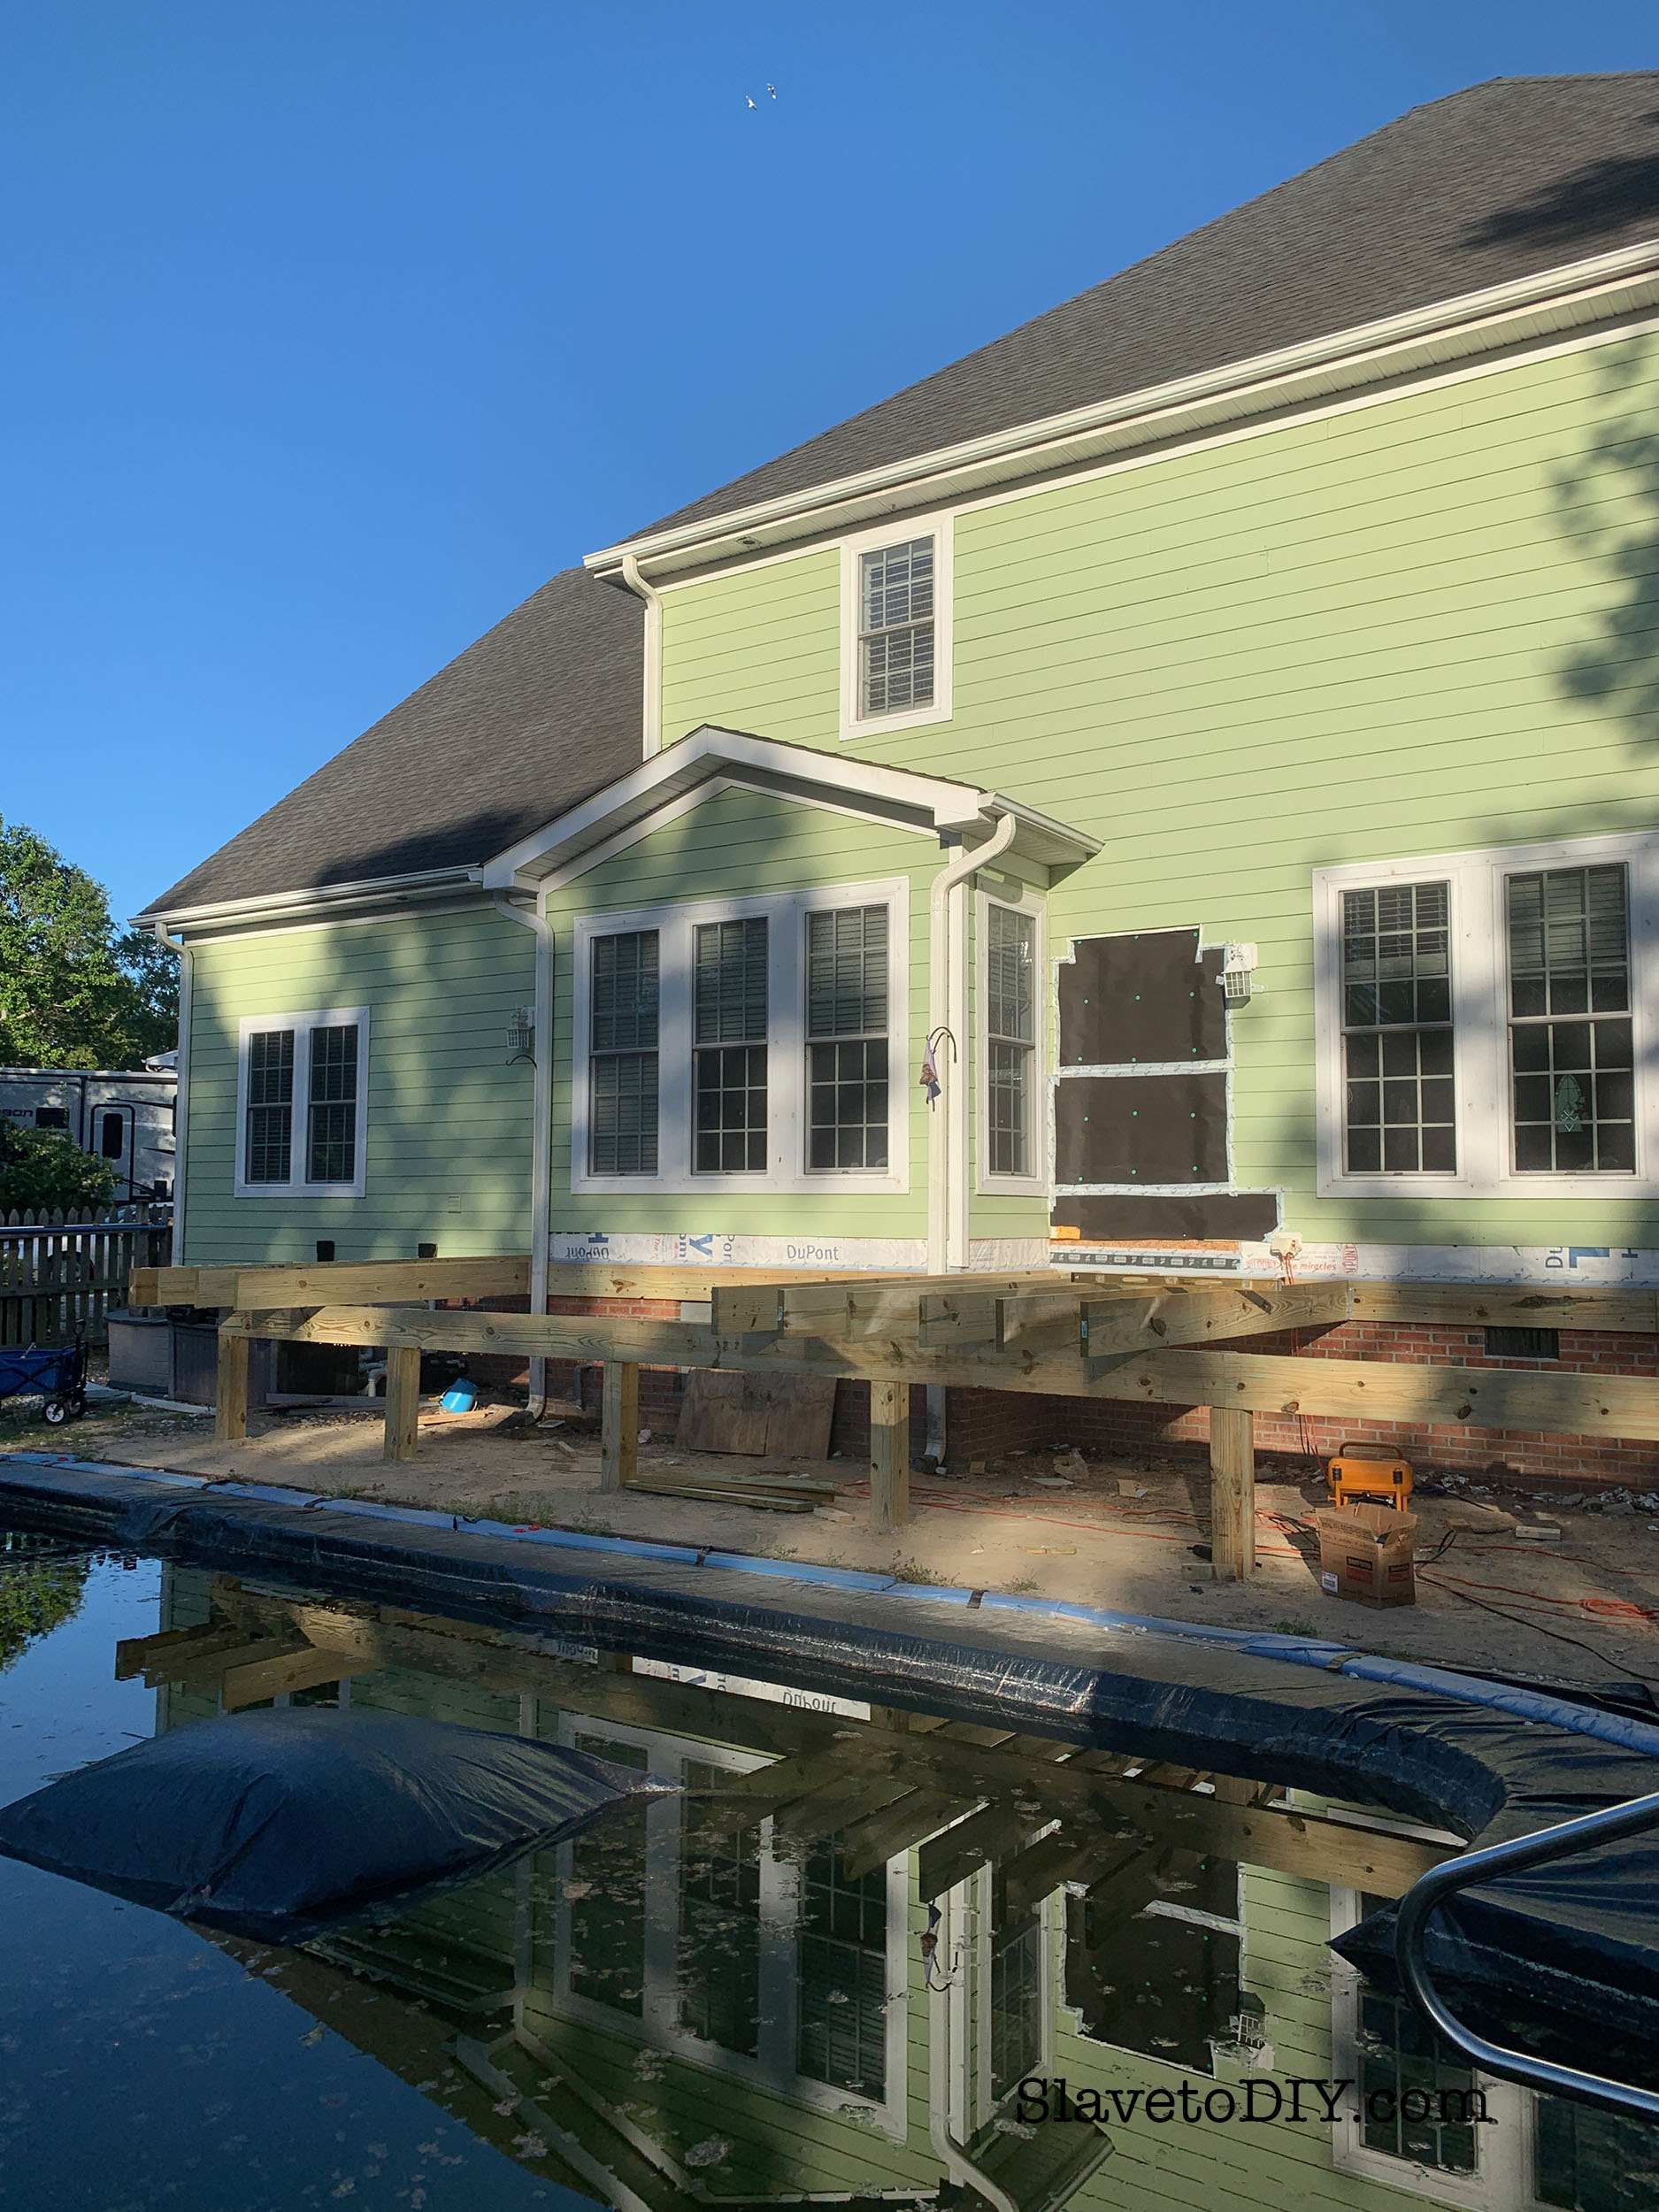
Then when we got to our new house, there was a cover for the pool in the shed. With lots of big trees we thought it would be a good idea to cover it. So, we covered it the first winter, winterized the pool with chemicals, and crossed our fingers (this isn’t a fancy cover, it’s basically just a gigantic tarp held in place by water bags and a layer of water on top of the tarp). When we uncovered the pool in the spring, after siphoning off the water on top of the tarp, we peeled it back to find: crystal clear water. Now, our current cover is the ugliest pool cover I’ve ever seen (it looks a lot like a giant, black trash bag), but until we budget in a new safety cover, it’s working fine and I’d never go back to spending a month opening the pool.
Pool Planning, Design, Tips and Considerations: Pool cover during our deck renovation
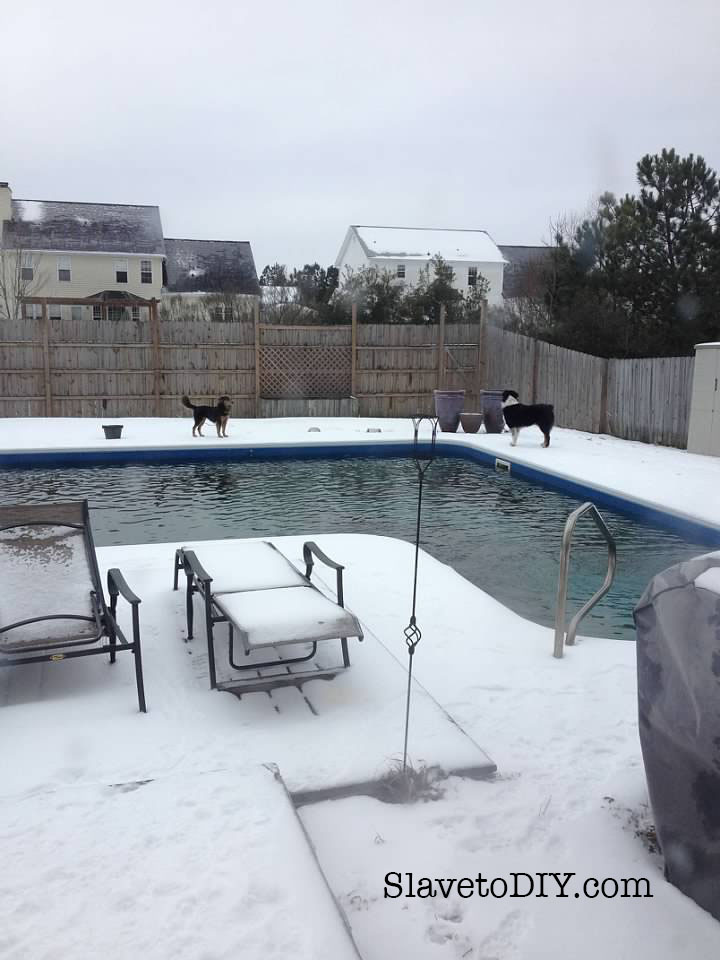
Ugh, it’s so ugly. I have my eye on a safety cover because I have nightmares about someone falling onto the pool cover and getting trapped. Hopefully we’ll get that into the budget soon.
Pool Planning, Design, Tips and Considerations: The old pool waiting to turn green in the spring
13. Do you need to bury your wastewater/backwash line?
For those of you who already have pools, you’re like, duh of course it needs to be buried. Well, no one offered to conveniently run a waste line out to the ditch behind our house, and every time we backwashed the pool we pissed the neighbors off. Yup. We’d turn it on and it would shoot out at the fence and eventually settle into a mud pit right by their gate. We tried using temporary attached hoses but they usually worked themselves loose and then created a bigger mess than before (while also soaking us in the process). I had to time backwashing the pool around their mowing schedule to keep the peace in the neighborhood.
So, bury your backwash line.
14. Should you add extra features like cooling systems (for very hot climates), heaters (to extend pool season), or integrated hot tubs?
Look, I know they cost more money, but if you’re already laying out the money to install a pool, you should get what you want. If you’re a lap swimmer and can extend your swimming season a few months a year, then get an insulating cover and a heater. If you live in the deep south, get a cooling system or you won’t want to be in your hot tub of a pool in August. The biggest thing to remember with all of this is that it’s WAY, WAY cheaper to do during the initial installation than to add it after the fact!
POOL TIME!!!
So, here’s the fun part! This is our pool installation process in pictures (and I’m stressed just looking at it).
Most pool contractors will require a current survey. We blew up the survey and made copies so we could draw the shape and size of the pool on the survey. Then we measured the size we wanted and spray painted the lines on the grass to see what it really looked like in the yard. The kids fake-swam across the pool and decided it was big enough.
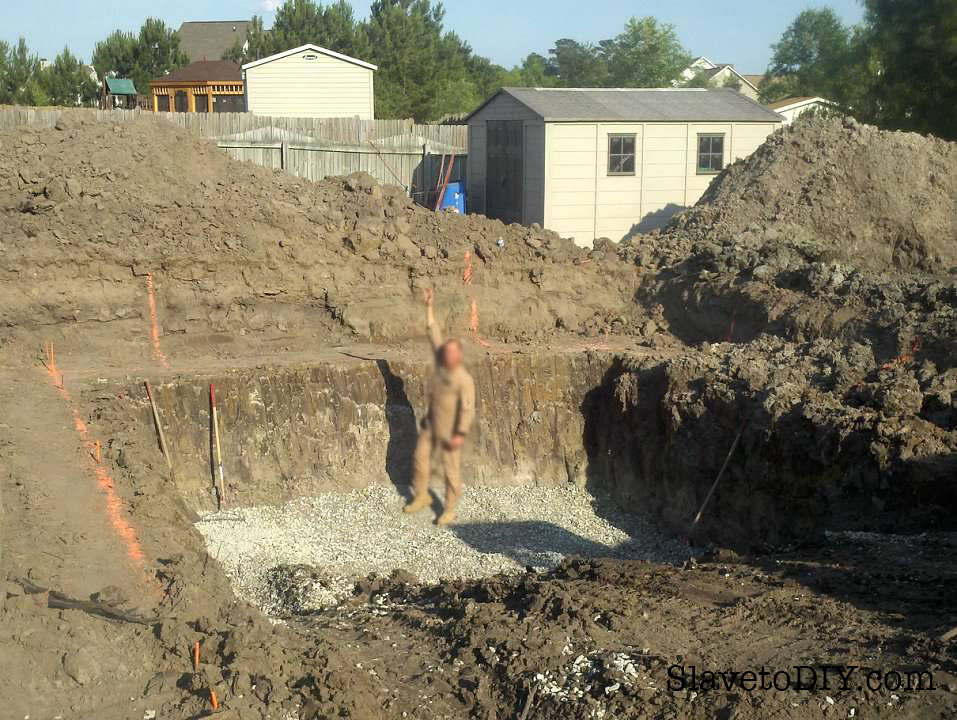
You’ll need to call the dig people and make sure you aren’t running into any problems where you want to install it (those of you that have septic systems- do you know where your tank and drainage field are?- plan accordingly!).
Pool Planning, Design, Tips and Considerations: Digging the pool
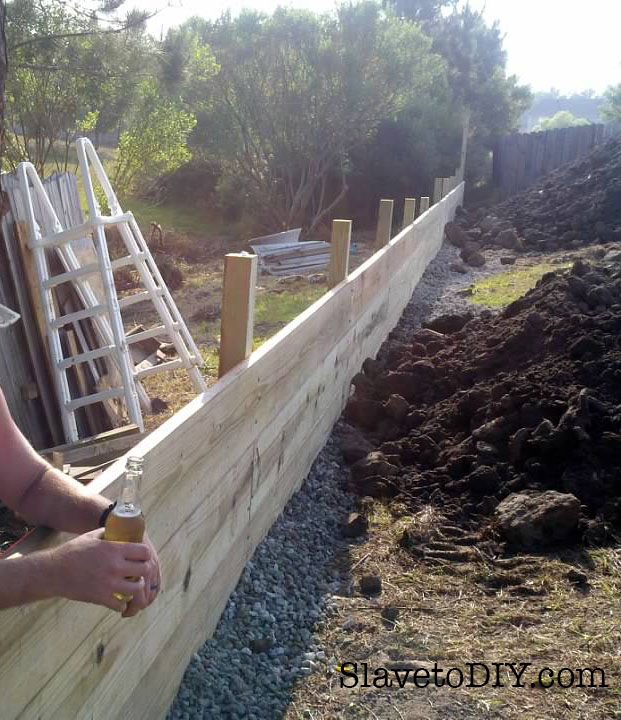
After the pool contractor dug out all that dirt, me and Rainman built a retaining wall at the back of the property so we could use some of the dirt to level the yard (that previously had a steep angle of bank). Of course, we did this to save money, and it was some of the most back-breaking work we’ve ever undertaken.
Pool Planning, Design, Tips and Considerations: Installing the new retaining wall
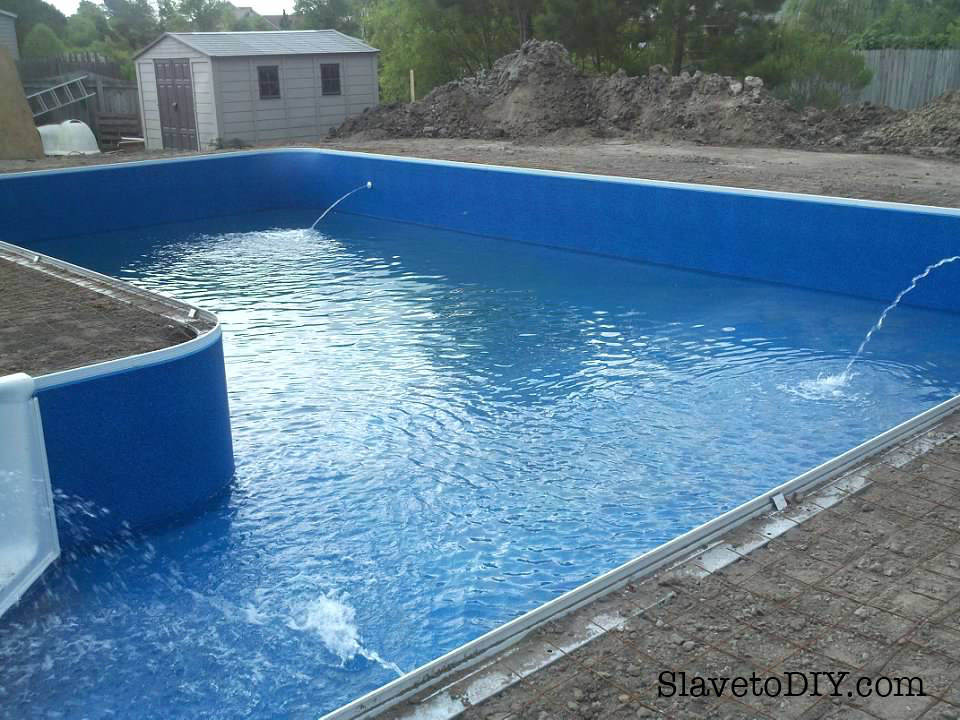
The retaining wall and dirt leveling took a while, and the contractor didn’t need to remove too much as we offered the excess dirt for fill to neighbors. Soon, the walls were framed with the metal band, plumbing and electricity installed, the floors smoothed with the concrete mix, the vinyl liner installed, and WATER!!!
Tip: If you call the local fire department, they will sometimes fill the pool cheaper than off of garden hoses (OOPS, our bill was $500 that month).
Pool Planning, Design, Tips and Considerations: Filling the new pool
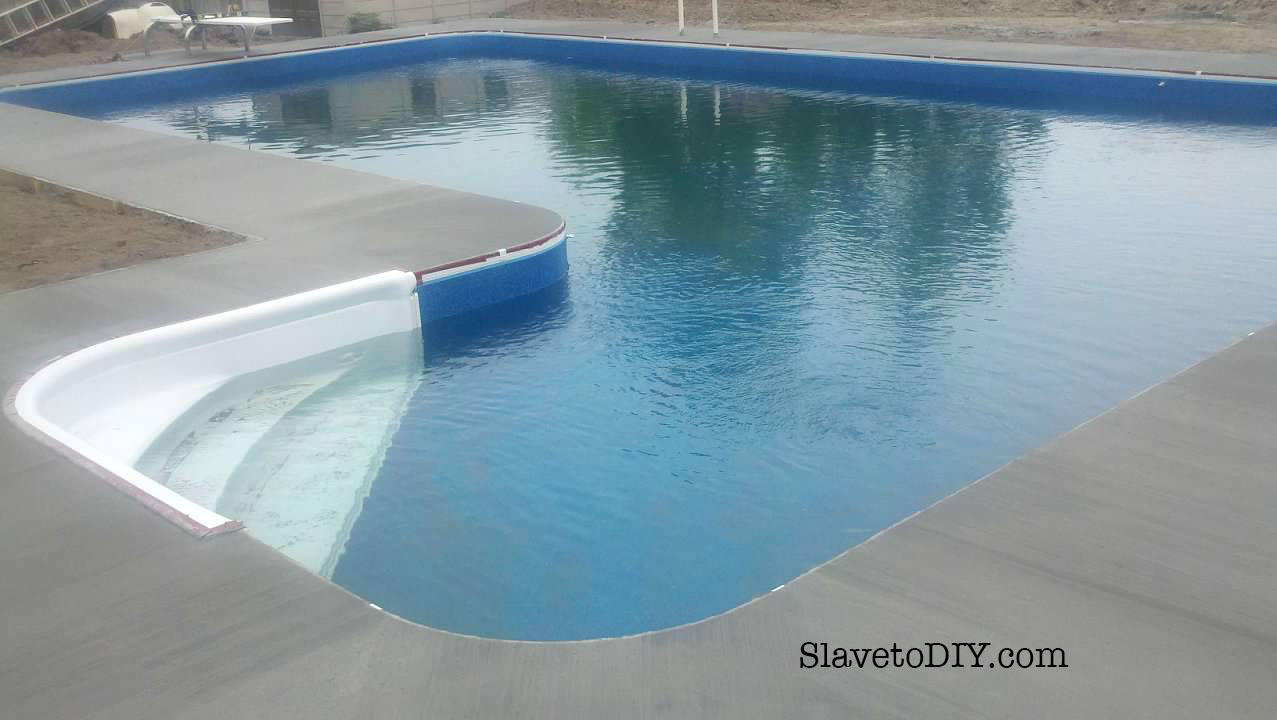
Once the dirt was all leveled out, and the pool filled, the concrete coping was poured around the pool.
Pool Planning, Design, Tips and Considerations: Concrete coping installation
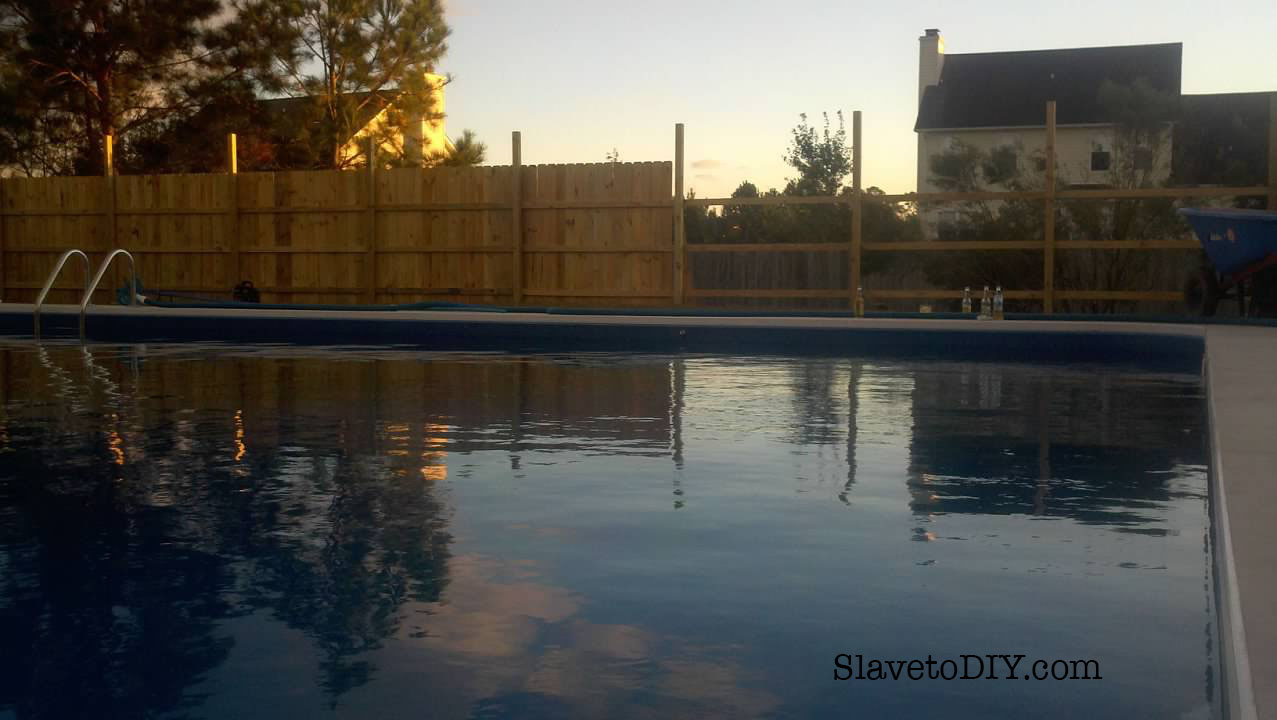
After the pool was finished, we added an eight foot privacy fence on top of the retaining wall for a secluded paradise in the back yard.
Pool Planning, Design, Tips and Considerations: Adding a privacy fence
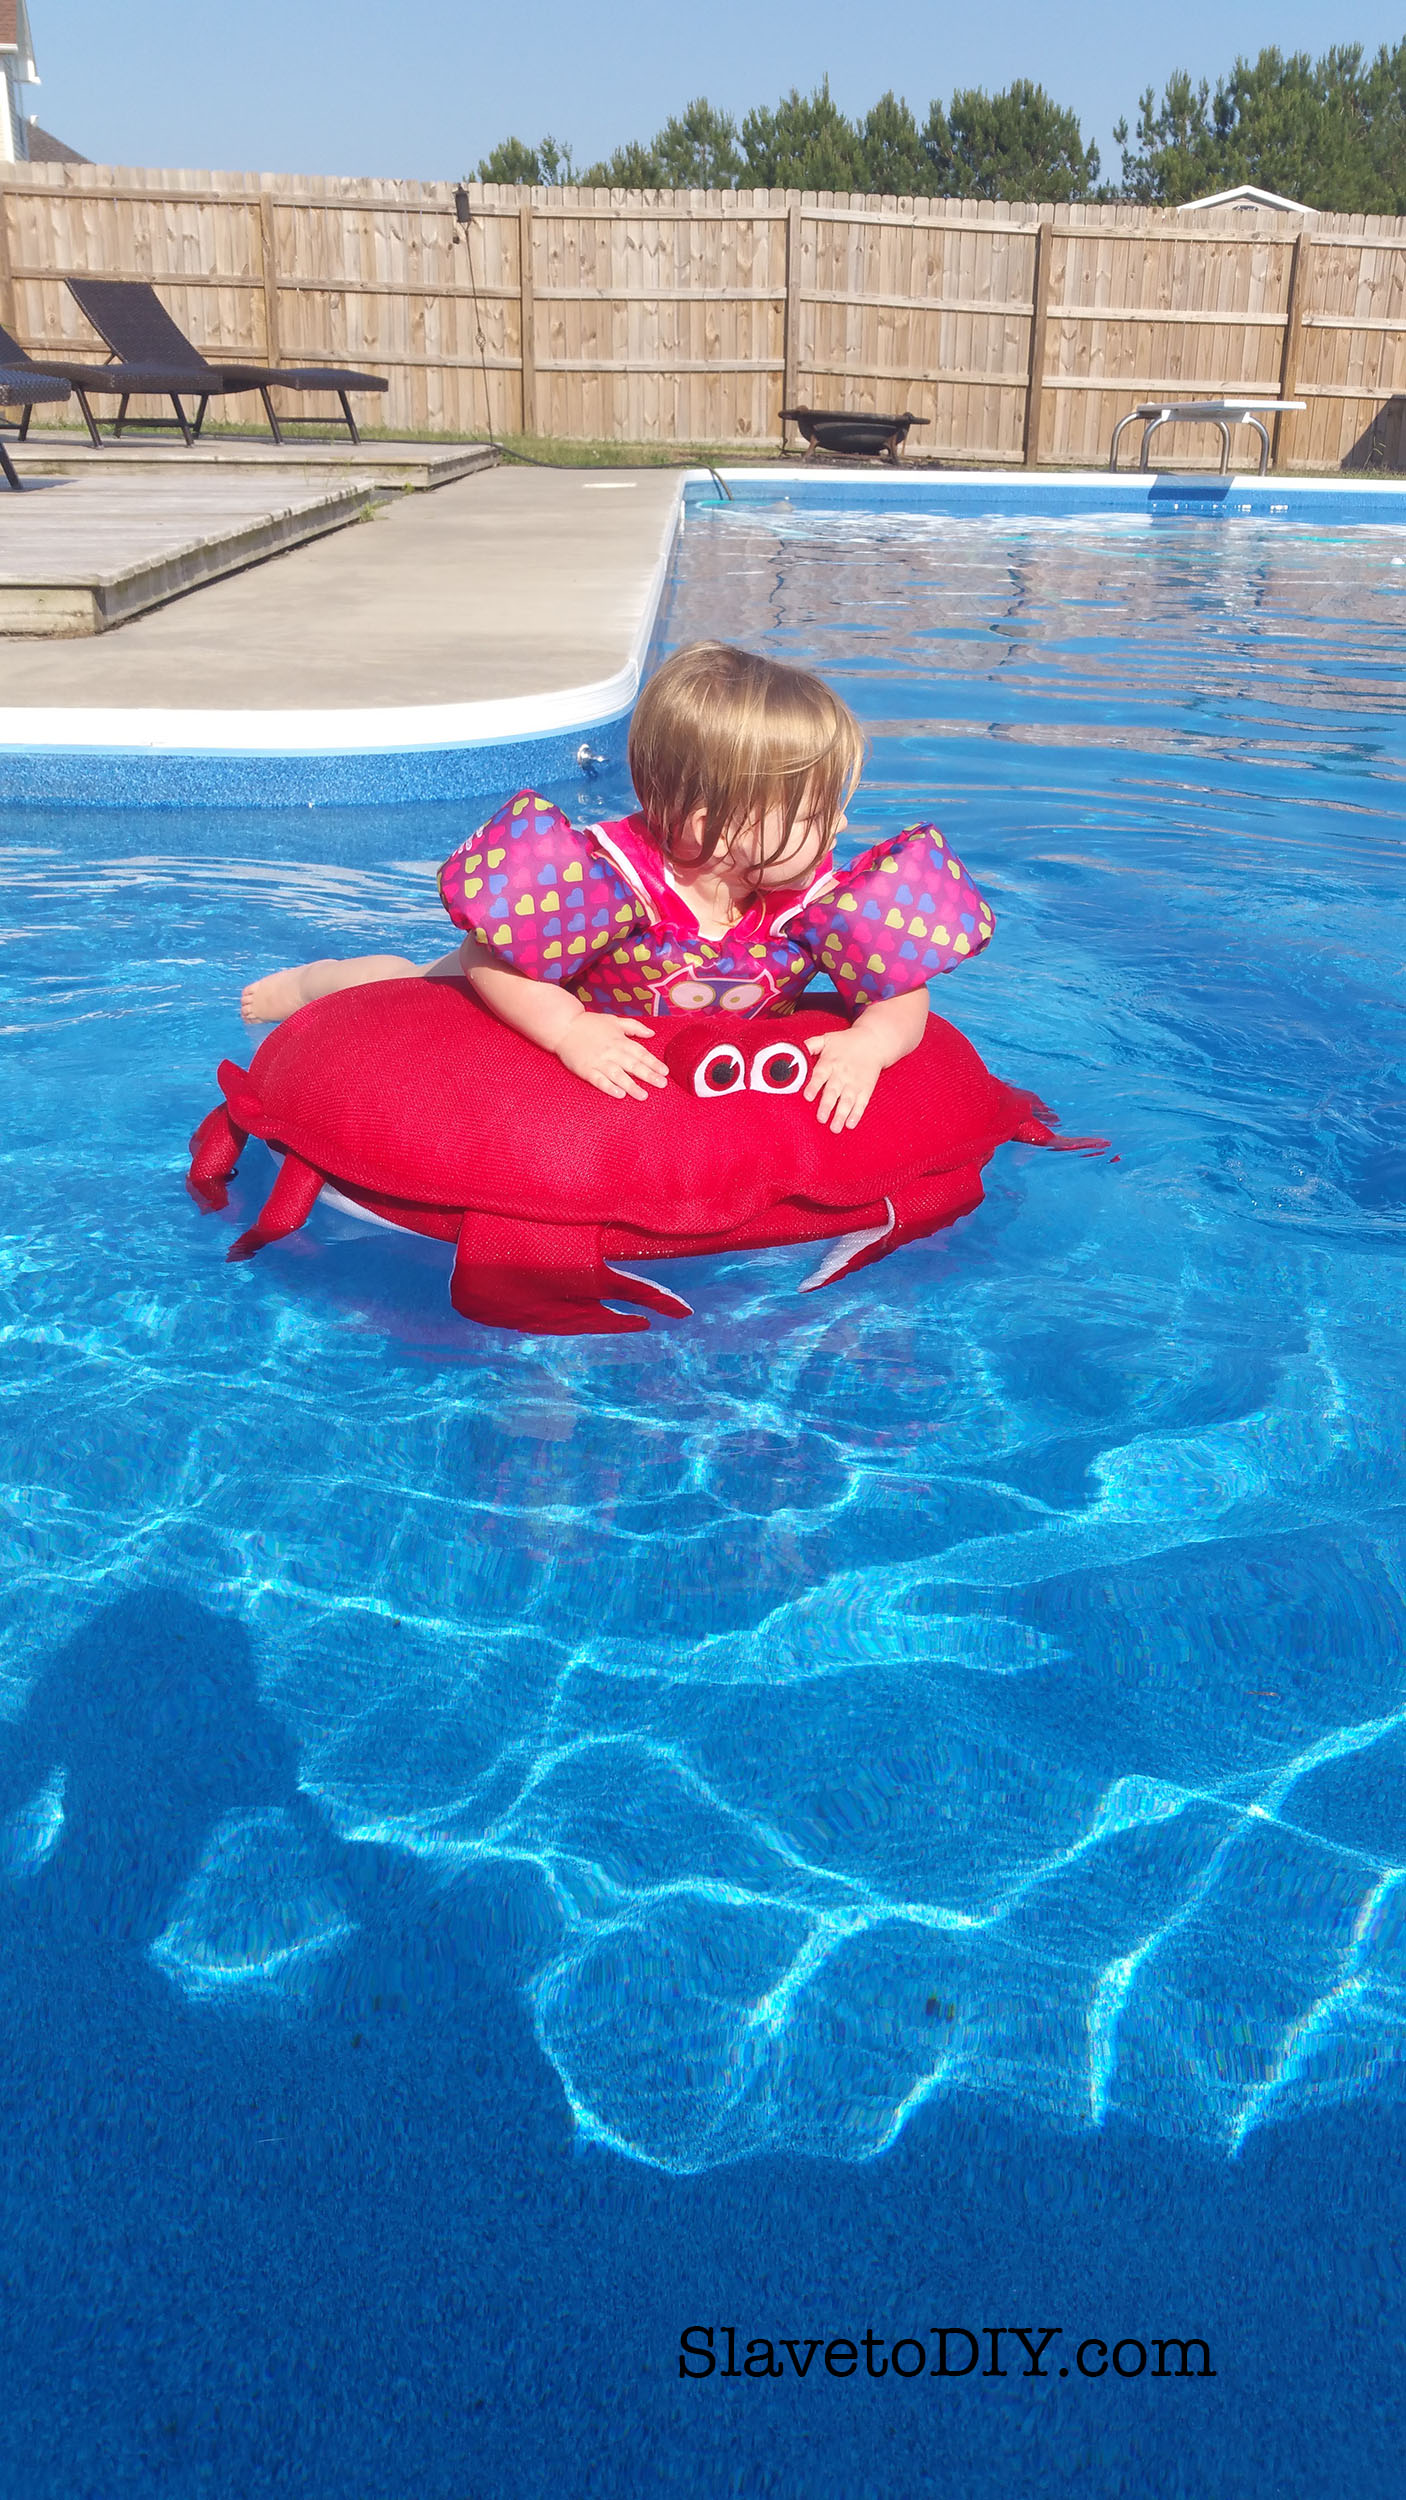
And finally, a finished pool the whole family can enjoy (complete with extended decks and hardscaping)!
Pool Planning, Design, Tips and Considerations: A pool the whole family can enjoy!
Thanks for coming along and sharing our DIY journey!
Do you have things you wished you’d known before you installed a pool? Please share in the comments below!
Check out more of our great DIY, decor, and inspiration posts on our Blog. Cheers!
*Legal stuff:
I am honest about my experiences with different products and write because I enjoy it. I do however, have the opportunity to earn money for my writing, also.
Slavetodiy.com is a participant in the Amazon Services LLC Associates Program, an affiliate advertising program designed to provide a means for sites to earn advertising fees by advertising and linking to amazon.com. Amazon offers a small commission on products sold through their affiliate links. Each of your purchases via our Amazon affiliation links supports our cause at no additional cost to you.
If a blogger links to an Amazon product (with a special code for affiliates embedded in the link), and a reader places an item in their “shopping cart” through that link within 24 hours of clicking the link, the blogger gets a small percentage of the sale. Amazon links are not “pay per click.” If you click on the product link and stay around Amazon and purchase something else, however, I will get a commission on that sale.
Slavetodiy.com is also a VigLink affiliate advertiser which works similarly.
The beautiful thing about this particular renovation, is that our house flooded. Yes, I said the GOOD thing. Bear with me. Hang on. I’ll explain.
This post may contain affiliate links. Please see the full disclosure at the bottom of the post.
Before
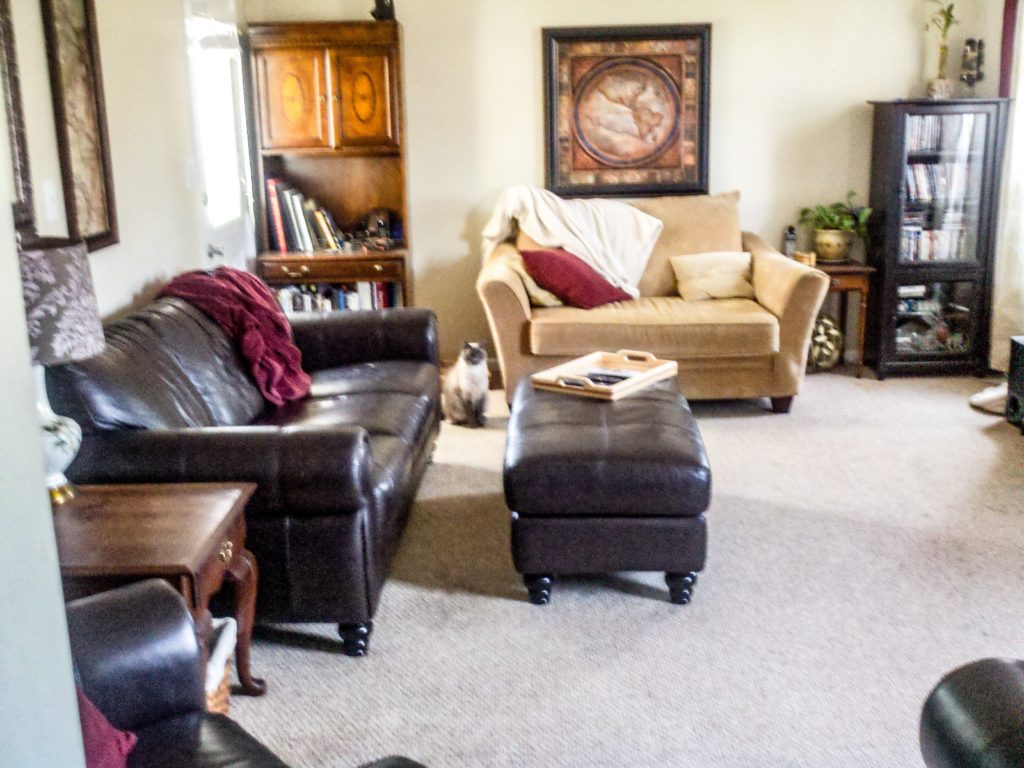
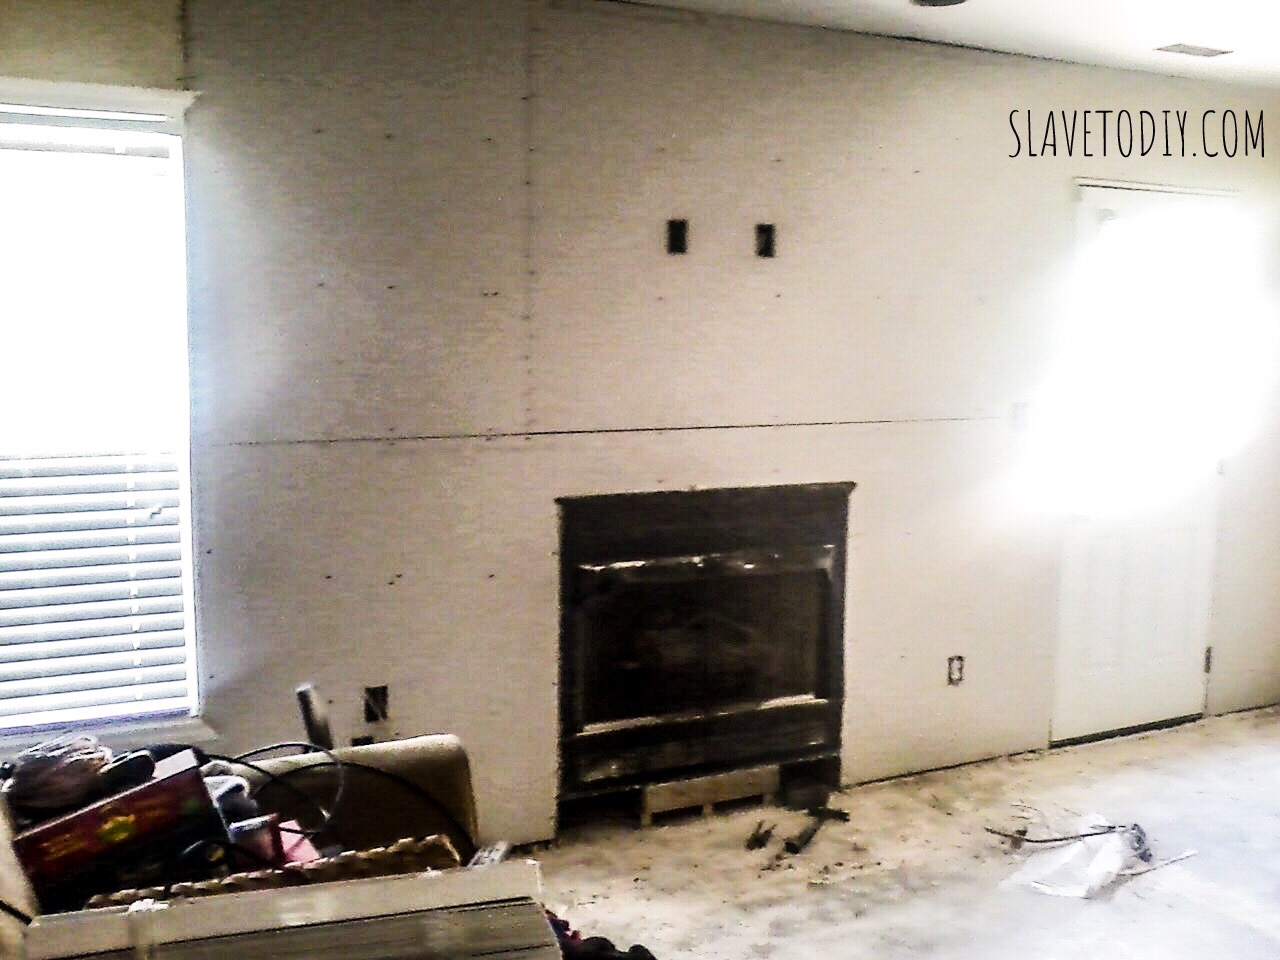
I’m so embarrassed. This is the living room before the flood:
The poor living room in need of help (and at the bottom of the honey-do-list) before the flood.
We had lived in our old house for several years and, aside from the fact that we were packed in there like sardines, we didn’t have the time or energy to get to some of the upgrades on our ever-growing-wish-list. We have a STUFF problem. As in, we have too much of it. Without builtins, there was stuff everywhere, with no rhyme or reason, just looking cluttered and awful. For me, this creates stress, and no matter how clean the house was, I never felt settled.
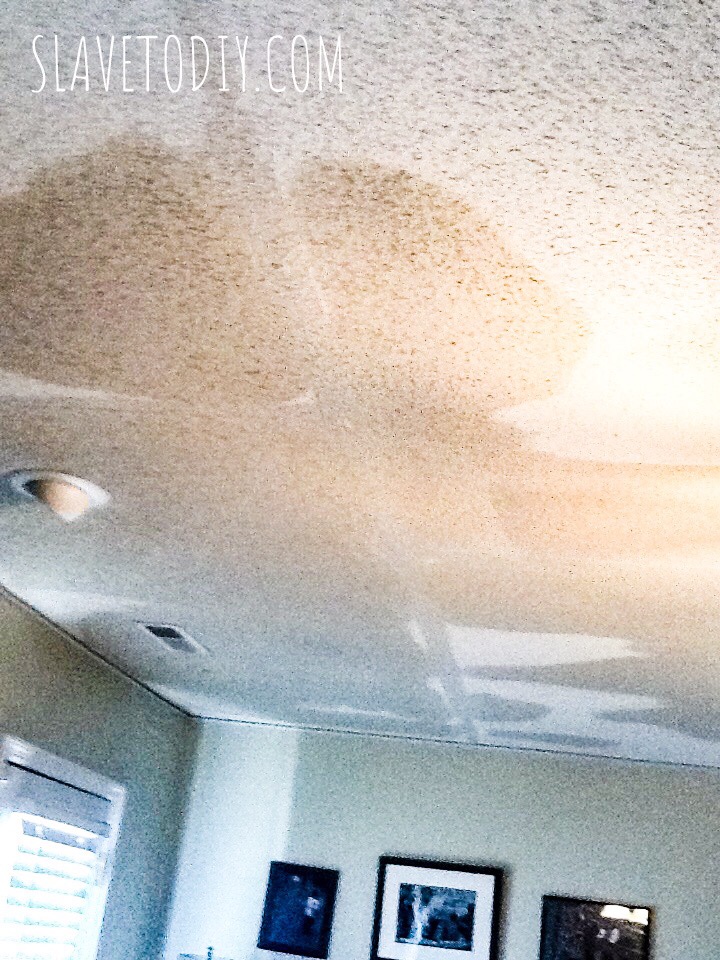
So, then the clouds parted, and the rain came. Well, not actual rain. The hot water supply line under the master bedroom sink broke in the middle of the night (directly above the living room) and completely destroyed the living room and most of the contents.
The Flood
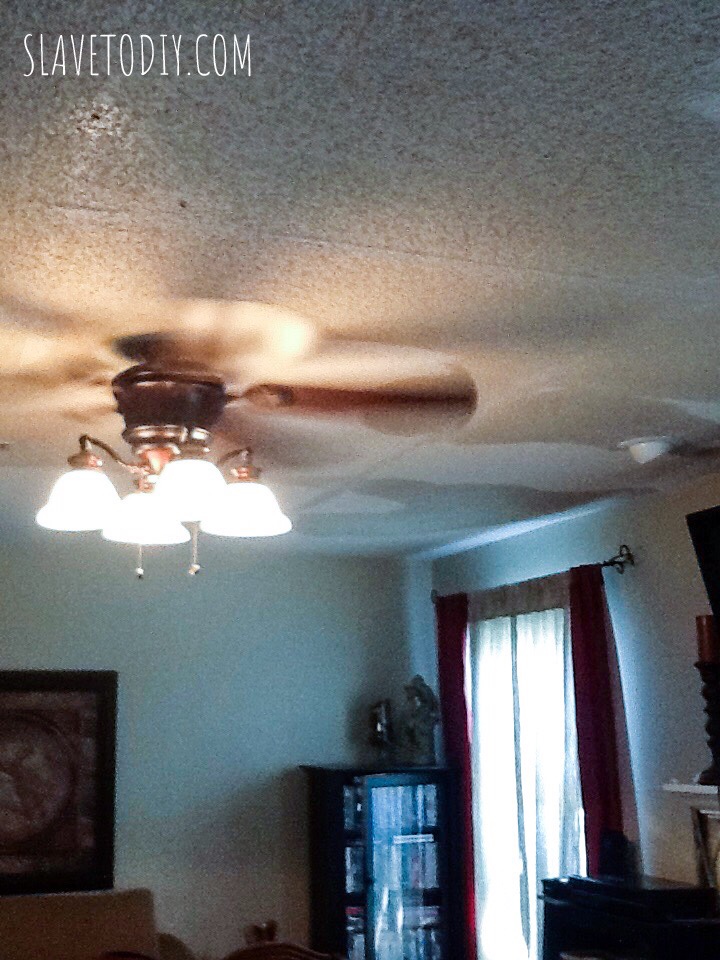
Imagine waking up in the middle of the night to a hot, steamy room. “Is the shower on?” Nope. No shower. But, I stepped down into ankle deep water to investigate, UPSTAIRS. Not good.
Wet living room ceiling from bathroom flood upstairs.
Wet living room ceiling from bathroom flood upstairs.
This offered up an opportunity for a few things, since we have fantastic homeowners insurance. I’d like to take a moment to give a shout out to my homies at USAA who made the insurance claims process painless. The contractors were so relieved when we said we had USAA. That was enough to solidify my belief in their awesomeness.
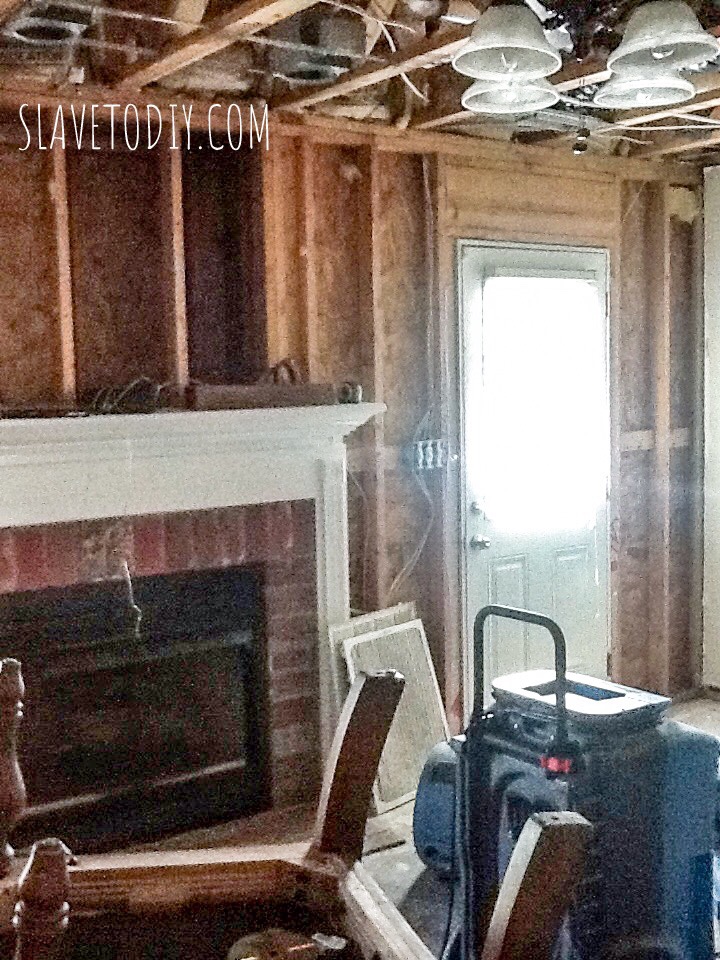
Demolition
The first thing that happened was the ripping out of the all of the sheetrock and flooring in the living room. Which made it look really weird. But, also awesome. Why? Two words: Popcorn ceilings. Even one room without those would be amazing and it was on my list of stuff to make happen.
Ceiling Sheetrock removed from living room ceiling.
A week and a half of industrial blowers and dehumidifiers later, the living room was dry and ready for REconstruction.
Wet Sheetrock removed.
Reconstruction
So, honestly, the hardest part of a renovation is getting started. My favorite way to kickstart the process is to walk into a room with a crowbar or a sledgehammer and start swinging. Then Rainman sighs, and says, “so, that’s the next project, then?” But, in this case, we HAD to do the renovation, because it flooded. YAY!
So, demolition complete, the living room was ready to start rebuilding. Keep in mind, I knew this was not our forever home, so I took some design chances I probably wouldn’t duplicate now.
Sheetrock
The crew came in and put in sheetrock (we paid an additional $250 to have the ceiling flat finished instead of popcorn which felt a lot like extortion, but it was worth it).
Roughed in Sheetrock, ready to be finished.
Tips: When we were “interviewing” contractors we asked if we could make changes to the insurance-approved punchlist after the fact to make sure they were on board. Many contractors will work with you, using the existing insurance payout, plus your add ons, to do upgrades. They will also give you credit for things you do yourself to help pay for some of the upgrades. Why not do upgrades when you have free labor? For instance, in order to put up the sheetrock the fan had to come down first. After the sheetrock was installed, the fan had to go back up. There was a $150 charge approved by the insurance company for an electrician to take it down, and another $150 to put it back up. Rainman installed the damn fan in the first place. We arranged to do that (and several other things) and applied the credit to the upgrades we were having done elsewhere.
This inspiration post is JUST for the wainscoting and molding, although we did install builtins, completely redo the fireplace and surround, and install beautiful flooring. I’ll cover the others separately.
Customizing
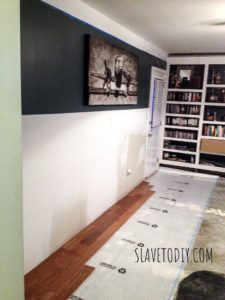
I painted my accent color first after Rainman drew me straight lines based upon where I pointed. That way I was sure I liked the height. I also wanted to make sure my awesome industrial airplane canvas fit where I wanted it mounted (I am notorious for prematurely hanging things on walls still under construction and dressing un-finished builtins).
Roughing in paint before wainscoting and hanging the airplane art.
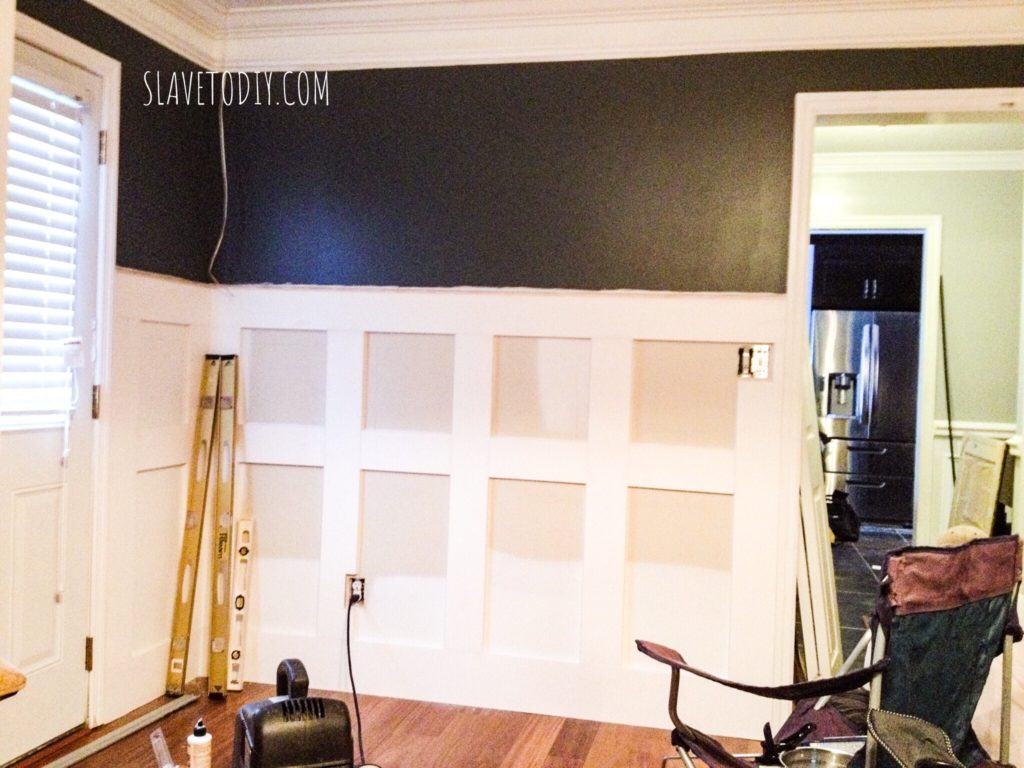
Designing the Board and Batten Layout
The artwork fit perfectly, so I was able to give him the go-ahead to draw out the grid for the boards. Now, here’s the customization part: depending on the scale of your space (we were dealing with standard eight foot ceiling height) you may want a tighter grid, or something more spaced out. You may want wider or thinner boards. We drew out our boards and I liked the look. We used 1″x6″ pine boards for a majority of the grid.
Crown molding going up on one wall to make sure we like the width of the crown “stripe.” If you look closely, you can see the grid for the board and batten penciled in.
We tried really hard to avoid going over light switches or outlets, but we did hit a few. Because the outlet was in an area that would be covered, we just did a cut out for it. Ditto for the dual light switch.
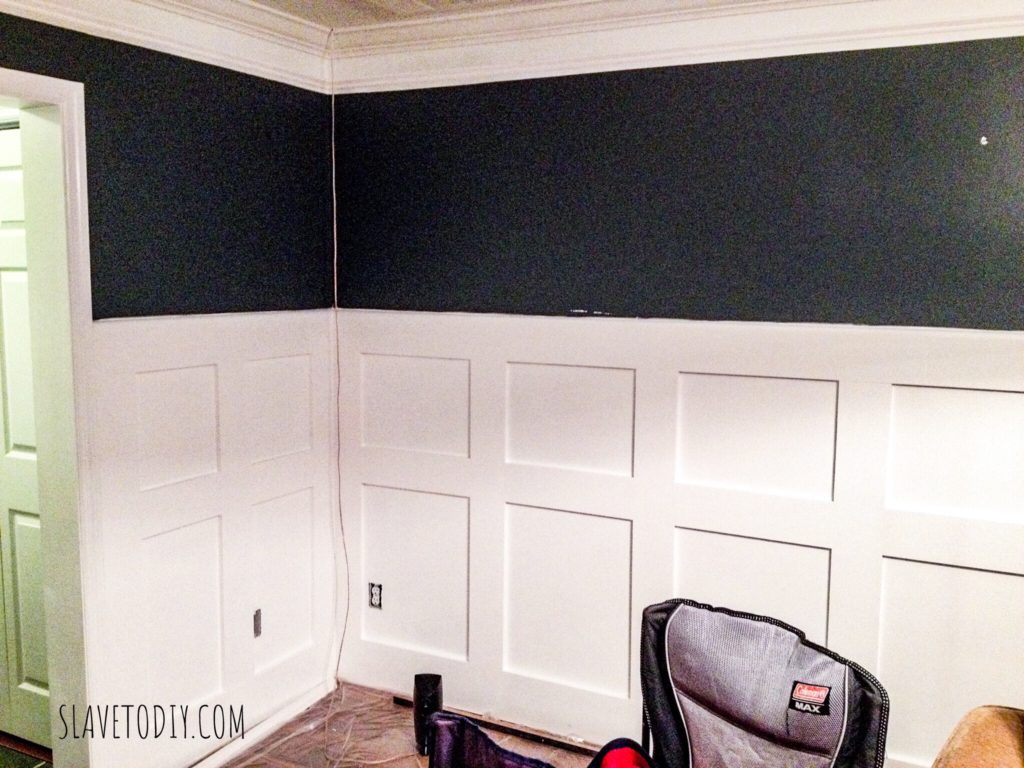
Board and batten grid going in. Before paint and finish work.
The grids were installed using finish nails, via a finish nailer and compressor. My husband got these Bostich nailers and compressor as a gift from his father like 15 years ago and they all still work great. We ran the vertical boards against the door frames and in the corners first, then the top and bottom horizontal boards (we used a wider baseboard), then the verticals (between the top and bottom), then the boards in between the verticals.
First round of caulk and paint.
We did quarter round to cap the wainscoting and a white quarterround to finish it out against the flooring, also.
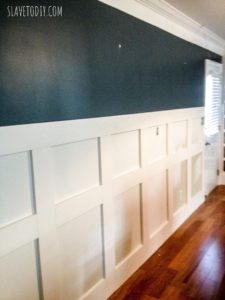
Board and batten grid on the long wall.
I apologize for the grainy photos (these are pre-blogging days and were on my phone). You can see the grid before we started the finish work. Above, the first layer of crown molding has gone up.
Finishing Touches, Crown Molding, and Engineered Brazilian Hardwood Flooring
The additional white quarter round against the flooring really set off the deep color in the gorgeous engineered Brazilian Cherry Hardwood. I absolutely love the contrast of white against wood.
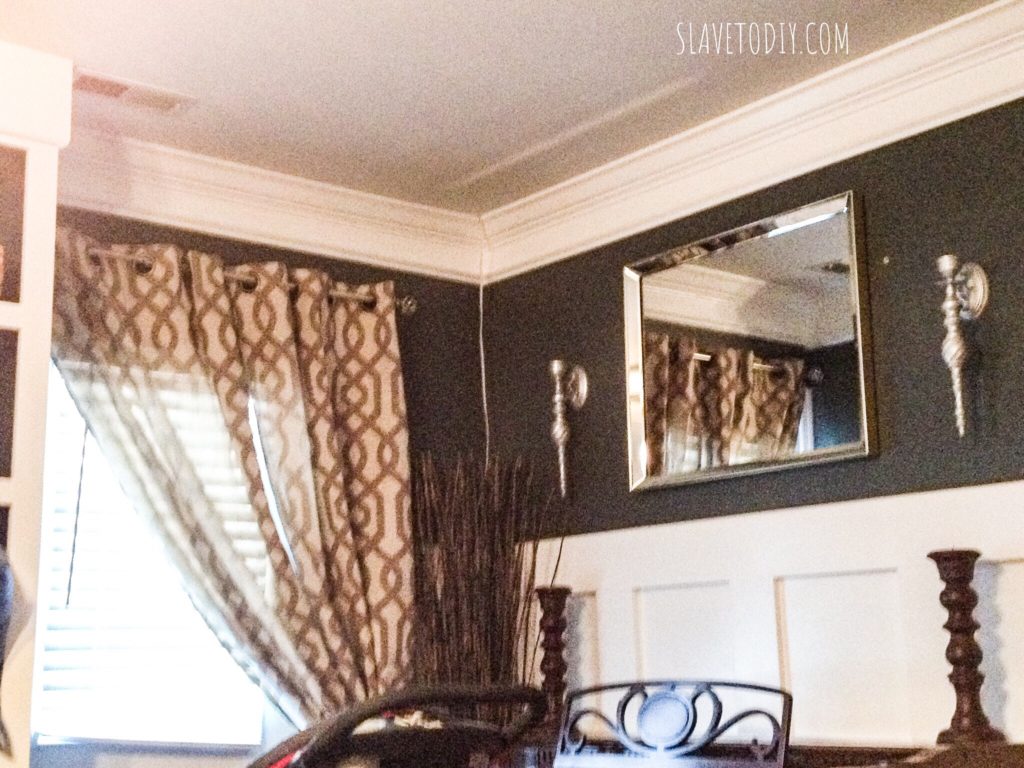
This shot shows the second detail layer below the crown and how the wainscoting looked. This is not a crown molding installation how-to. There’s a fantastic tutorial available from the Familyhandyman.com if you’re new at this. Rainman’s tool of choice on this (that we’ve used over and over) is The Dewalt Compound Sliding Miter Saw. We’ve used it to do an entire house of molding (at the old house) and it still does EVERYTHING we need at the new house.
So, this is an awful, grainy photo again. But, it shows how we continued the trim against the builtins. The top of the builtins was open. We capped the builtins with crown (so it continued around the room) and the detail piece tied it in beautifully.
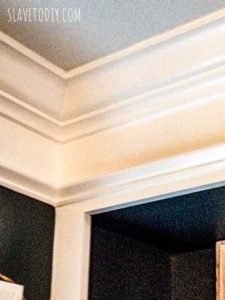
Two pieces of molding really add depth to the ceiling.
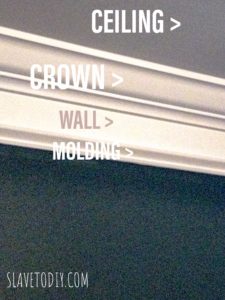
Here’s the final crown stack up, with only two pieces.
Crown molding stack-up.
And them labelled, for guidance.
The finish work was time intensive once all of the crown and wainscoting was up. All of the molding took two layers of caulk (around every edge of the grid and to fill nail holes) to really be finished and THREE layers of gloss white paint. But, it turned out beautifully.
The Finished Product
Beautiful new ceiling, builtins, fireplace, tile surround, new brazilian cherry engineered wood, wainscoting, and crown molding.
This was one of the listing photos of the living room. The white wainscoting and molding REALLY punch up the color contrast and finish the room beautifully. See the finished Old House Tour for more great makeovers.
Check out more of our DIY projects here. Thanks for stopping by!
*Legal stuff:
I am honest about my experiences with different products and write because I enjoy it. I do however, have the opportunity to earn money for my writing, also.
Slavetodiy.com is a participant in the Amazon Services LLC Associates Program, an affiliate advertising program designed to provide a means for sites to earn advertising fees by advertising and linking to amazon.com. Amazon offers a small commission on products sold through their affiliate links. Each of your purchases via our Amazon affiliation links supports our cause at no additional cost to you.
If a blogger links to an Amazon product (with a special code for affiliates embedded in the link), and a reader places an item in their “shopping cart” through that link within 24 hours of clicking the link, the blogger gets a small percentage of the sale. Amazon links are not “pay per click.” If you click on the product link and stay around Amazon and purchase something else, however, I will get a commission on that sale.
Slavetodiy.com is also a VigLink affiliate advertiser which works similarly.
This is not a staging checklist. It’s a showing checklist. So if your house isn’t staged yet, this article isn’t for you. There are a bazillion staging tutorials out there, but once you’re staged you’re ready for your first showing, and that’s where I come in.
This post may contain affiliate links. Please see the full disclosure at the bottom of the post.
So you get the call from your realtor. Hooray! Showing in the morning! So what now? Panic? No. Pop a bottle of wine? Maybe. Later. But, first…
So, how would I know how to do a fantastic showing anyway? When we sold our house two years ago we got top dollar and had multiple offers. Both times we were under contract in less than a week from the time the house was listed (our original buyers backed out when their co-signer changed their mind). I think that makes me an expert. Or a rockstar. Or possibly just experienced.
The Ultimate Pre-showing Checklist for Selling Your Home Fast!
I did a bunch of research and compiled a checklist to use so I wouldn’t stress out on showing days. The second time around we had multiple showings per day. Was I under pressure? Yes. But, cool as a cucumber. I had my list. And I really, actually used it.
Our feedback from the showing agents was overwhelmingly positive. It got a little ridiculous to be perfectly honest. Realtors started showing up with buyers that couldn’t afford it but just wanted to see it. Cause it was really cool inside. So, we became a temporary tourist attraction. Sigh. It’s hard to be so popular sometimes.
The point is, my list worked. And lucky for you, I’m willing to share with you so you can be a calm, popular seller, too. Sit back and wait for the offers to start pouring in.
So here’s the bottom line: You’re selling a lifestyle, not just a house. The buyers are looking at a house, but they’re really taking a peek at your lives. If they want your life, they’ll want your house. Your job is to seduce them into picturing themselves living there, and living your groovy life. You can do it.
The Ultimate Pre-showing Checklist for Selling Your Home Fast!
Decide what the coolest parts of your house are and tell a story about them. Control the flow of the house by luring buyers from space to space. If you have great entertaining spaces, set up a party scene. If you have an art studio, make it immaculate and inviting with a blank canvas set up. If you have an awesome movie/media room cue up a Nat Geo HD film that show off the awesomeness of the room and equipment. Here are the basics:
So some of the items on my list are not original. They’re common sense. I’m assuming things are basically clean (I hired maids to come weekly while we were on the market, and I whole-heartedly recommend it). Clean:
Make beds. I took the opportunity to get new sets during staging. Overstock usually has some nice, reasonable ones. It’s a lot of bang for the buck. If you really want to outdo yourself, shop (or just look at) the Pottery Barn bedding to get ideas for a well staged bed. Especially in the master bedroom, the retreat feel is important. (I am astounded by the number of beds I see in real estate photos with straightened-ish blankets and not so much as a bed skirt to cover the metal legs. Apparently these people are in no rush to sell the place.) The cool thing is… you can take new bedding with you, so go for it.
The Ultimate Pre-showing Checklist for Selling Your Home Fast!
Pick up. Nothing screams stress to most people more than an untidy house that looks like there isn’t enough organization/storage space. And remember, you’re selling a relaxing, organized, and clean house.
Do the dishes. It’s okay if they’re sitting in the dishwasher.
Sweep & vacuum. Seriously, leave the lines in the carpet. It screams, “we keep this place clean and well cared for.”
Wipe and clear the kitchen counters. Make them shine.
Check bathrooms. The smell of cleaner is okay.
Mow lawn. Pull weeds. (Never leave anything that says, “I’m work waiting for you to do when you move in here.”)
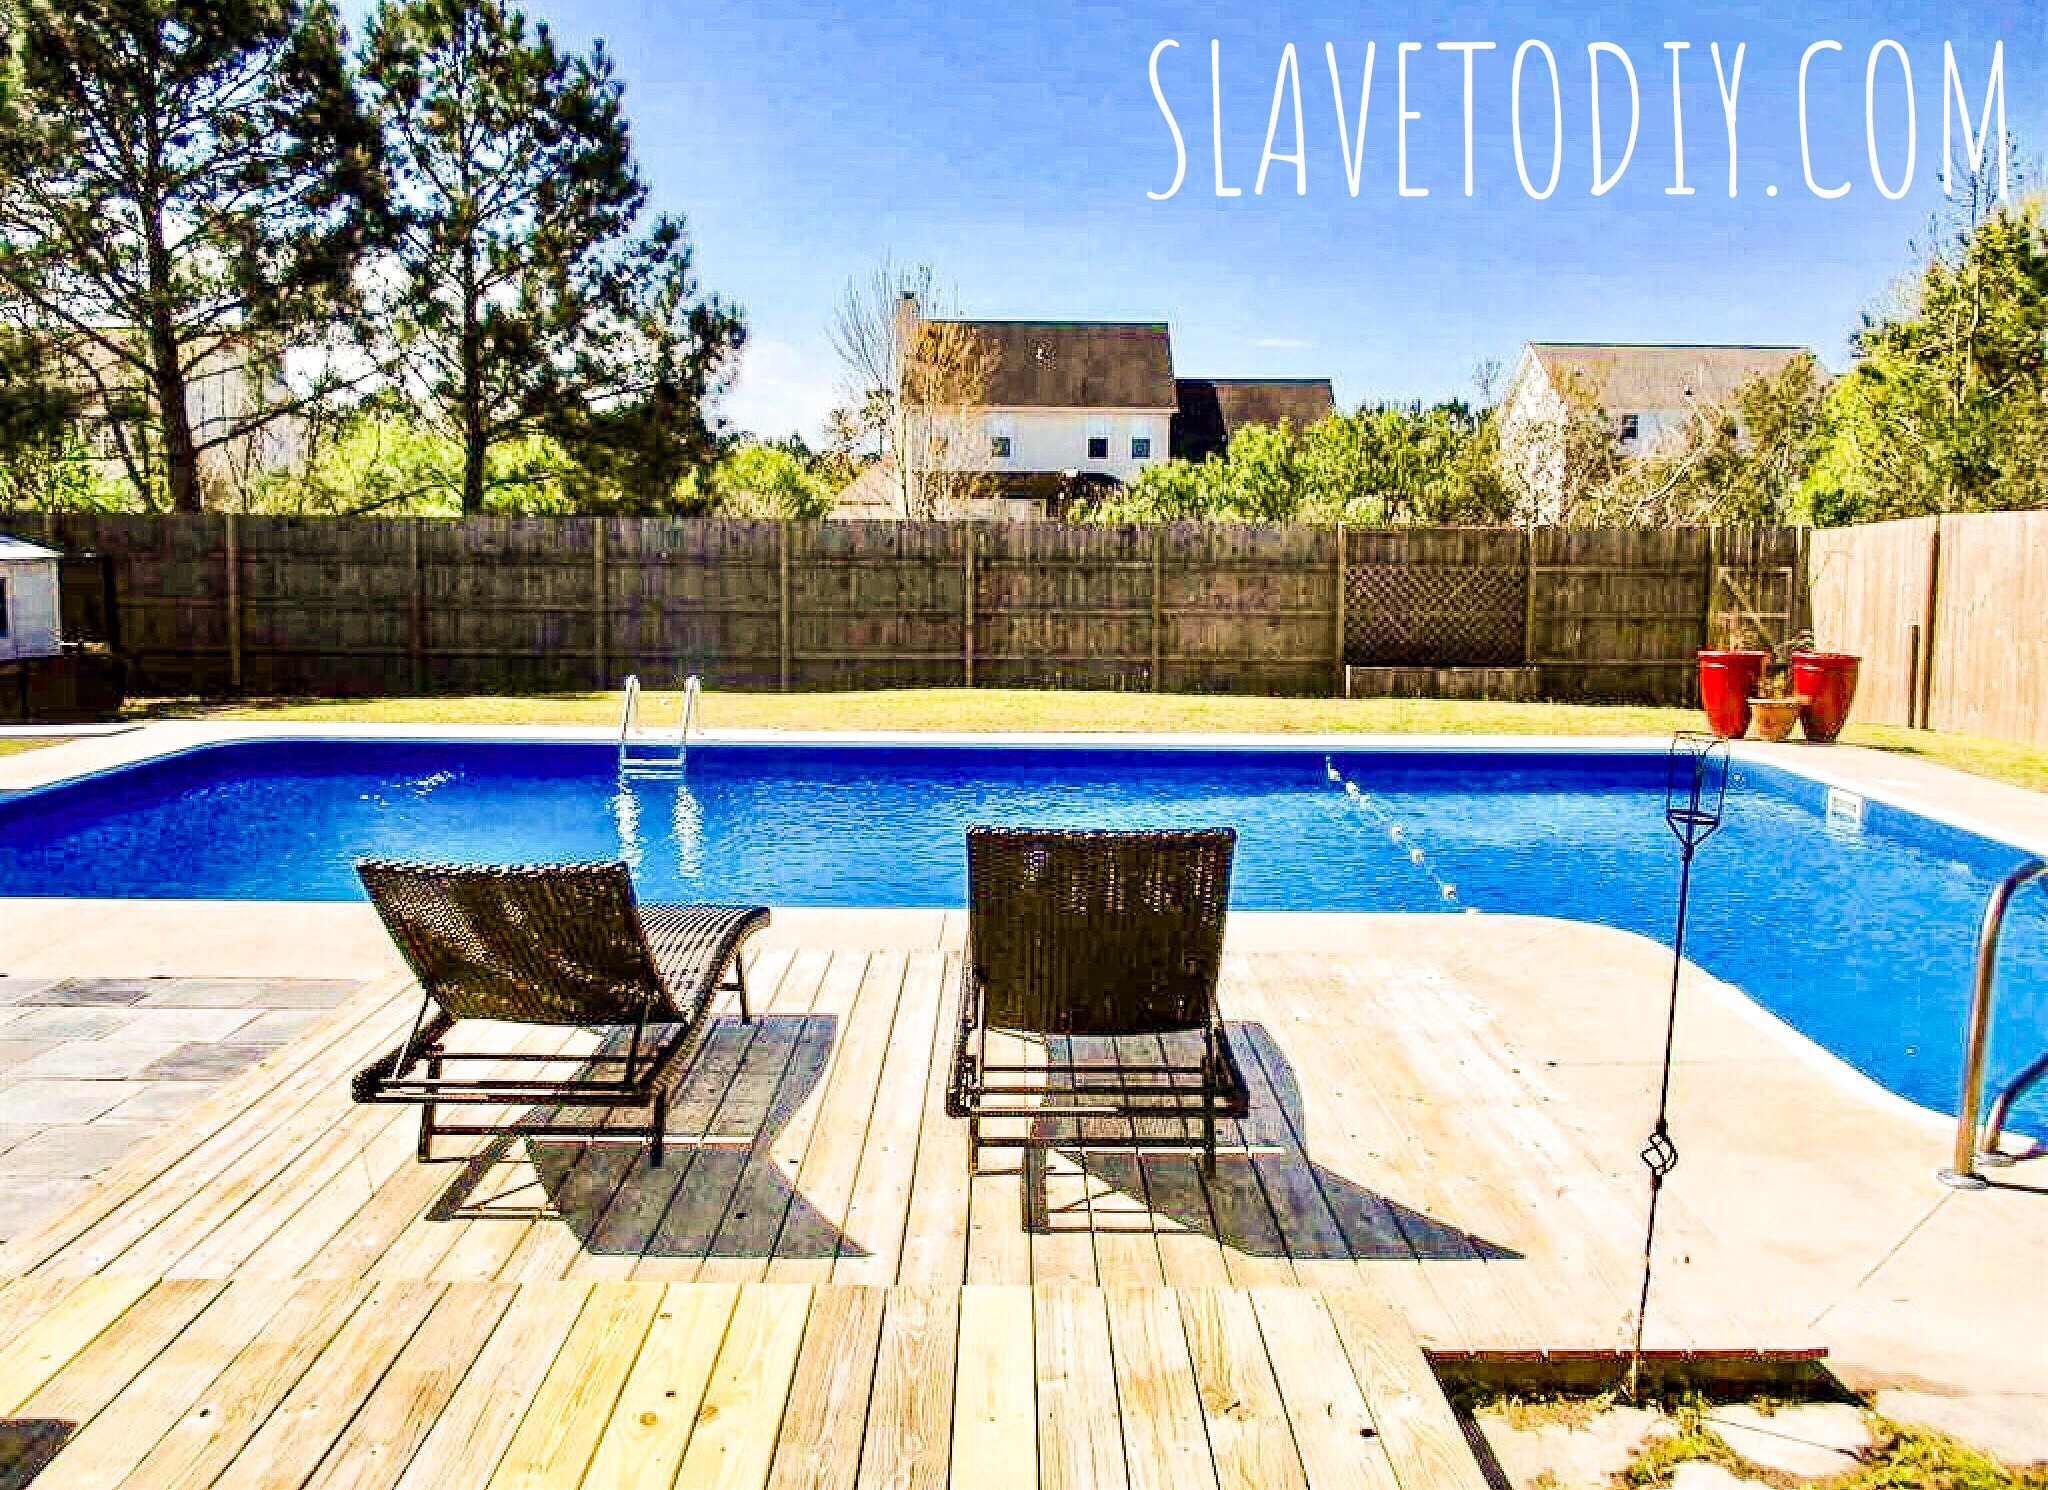
The Ultimate Pre-showing Checklist for Selling Your Home Fast! Pool is clean, ready for beach towels rolled on the chairs.
Specialty items:
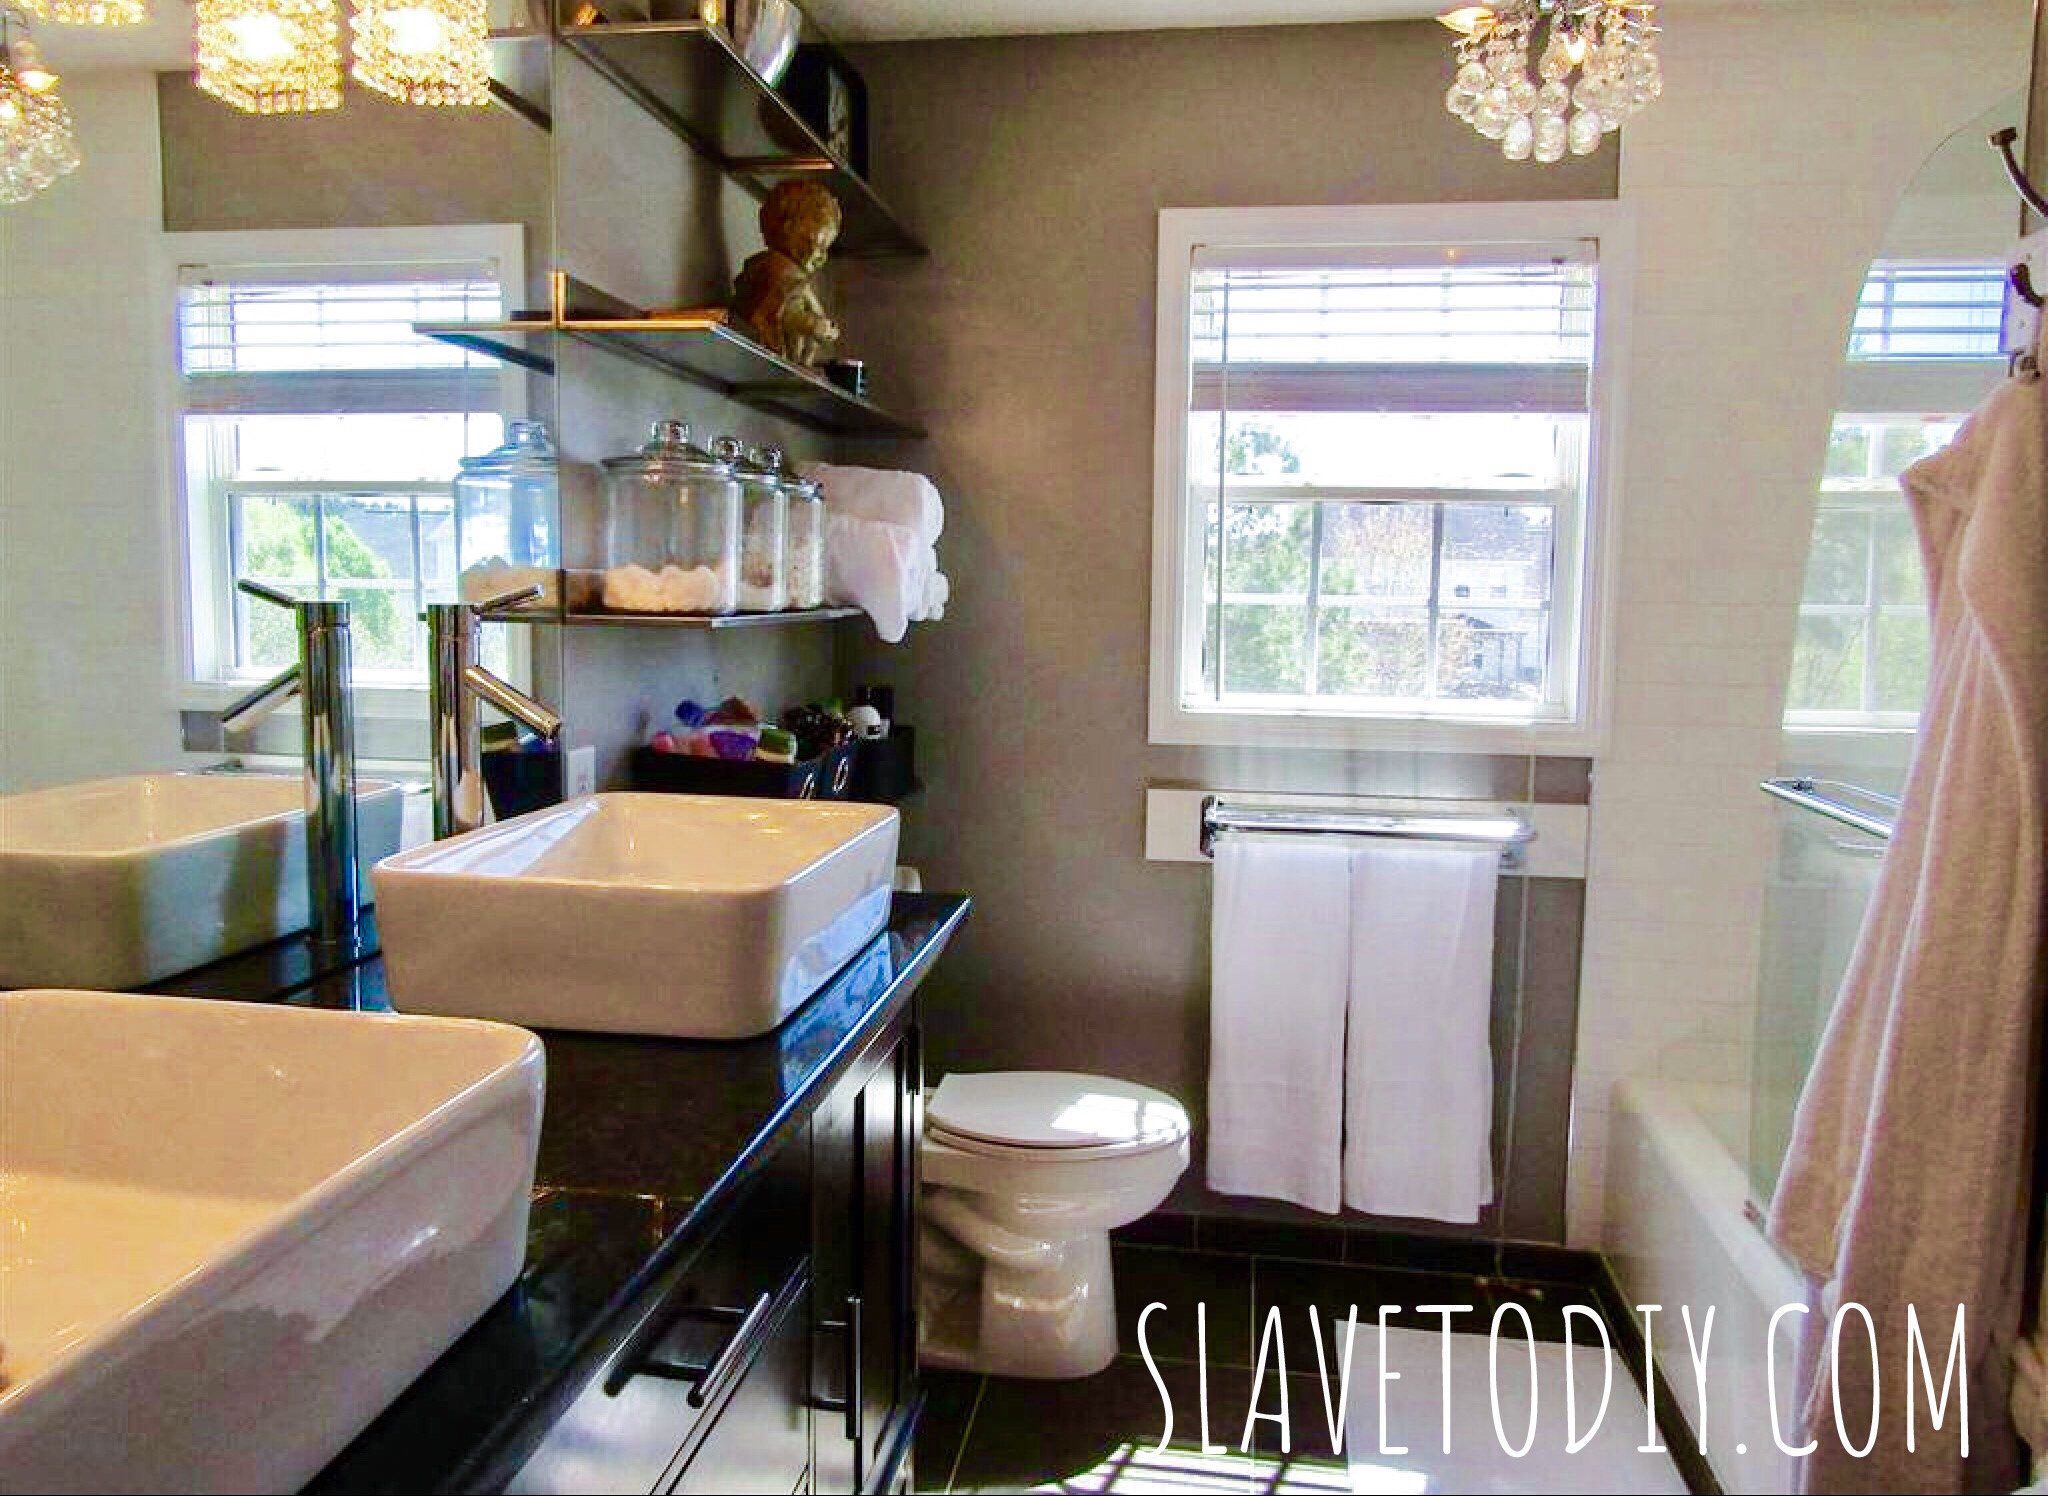
Hang fresh towels in the bathrooms. Get bright white, new towels. White towels make your baths feel like a Spa. I got new towels for staging/showings and threatened everyone in the family about not using them until after the house was sold. They don’t have to be soft, just new and white. I bought some reasonable ones here.
The Ultimate Pre-showing Checklist for Selling Your Home Fast! Rolled towels on shelves add to that luxury feel (see up to the left there?) and fresh, clean (unused!) white towels make it feel like a spa-retreat.
Temperature: 70. Crank that AC in the summer. Make it toasty in the winter. It should feel refreshing. It gives buyers a sense that the heat/cooling systems are in good working order. This is a great time to check your air filters to make sure it doesn’t sound like the system is struggling when it cycles. I use 3m filtrete filters that last three months. Yes, you can buy them on Amazon, but they’re cheaper from Lowe’s.
Fireplace. Turn it on low. Even in the summer. It creates a nice ambiance and it shows the buyers the fireplace works.
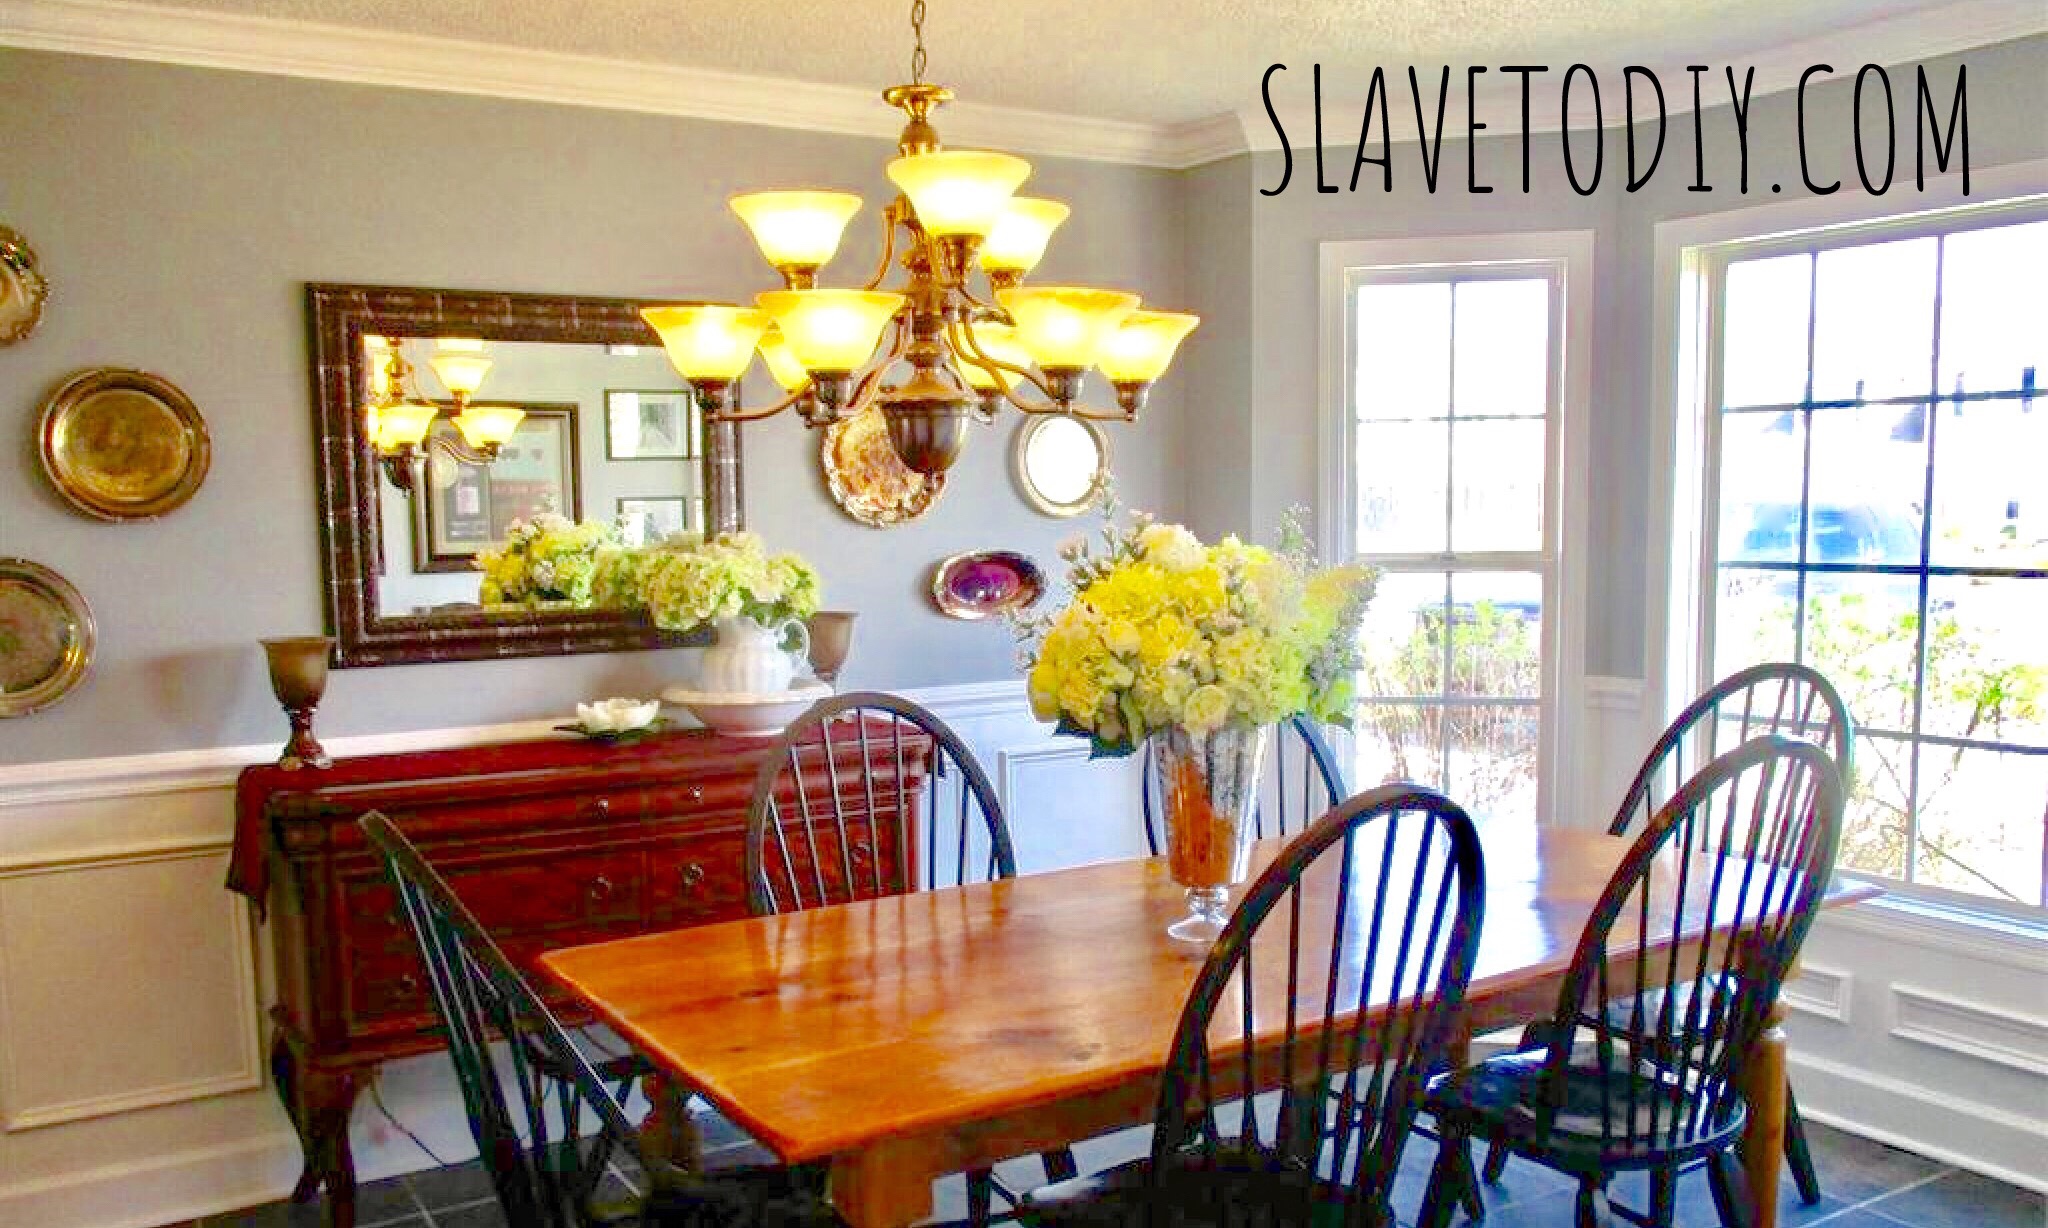
Set the table (Pinterest some cool table scapes and copy them). Even if the dining room isn’t great, people remember it being “inviting” because the table is set. It looks like the house is ready to do some entertaining. Once again, you can take this stuff with you. World Market always carries some reasonable, stylish sets.
The Ultimate Pre-showing Checklist for Selling Your Home Fast! Photo by Pixabay on Pexels.com
Open the drapes. All the way. Open the blinds flat and pull them halfway up the window. Make sure they’re straight and not lopsided.
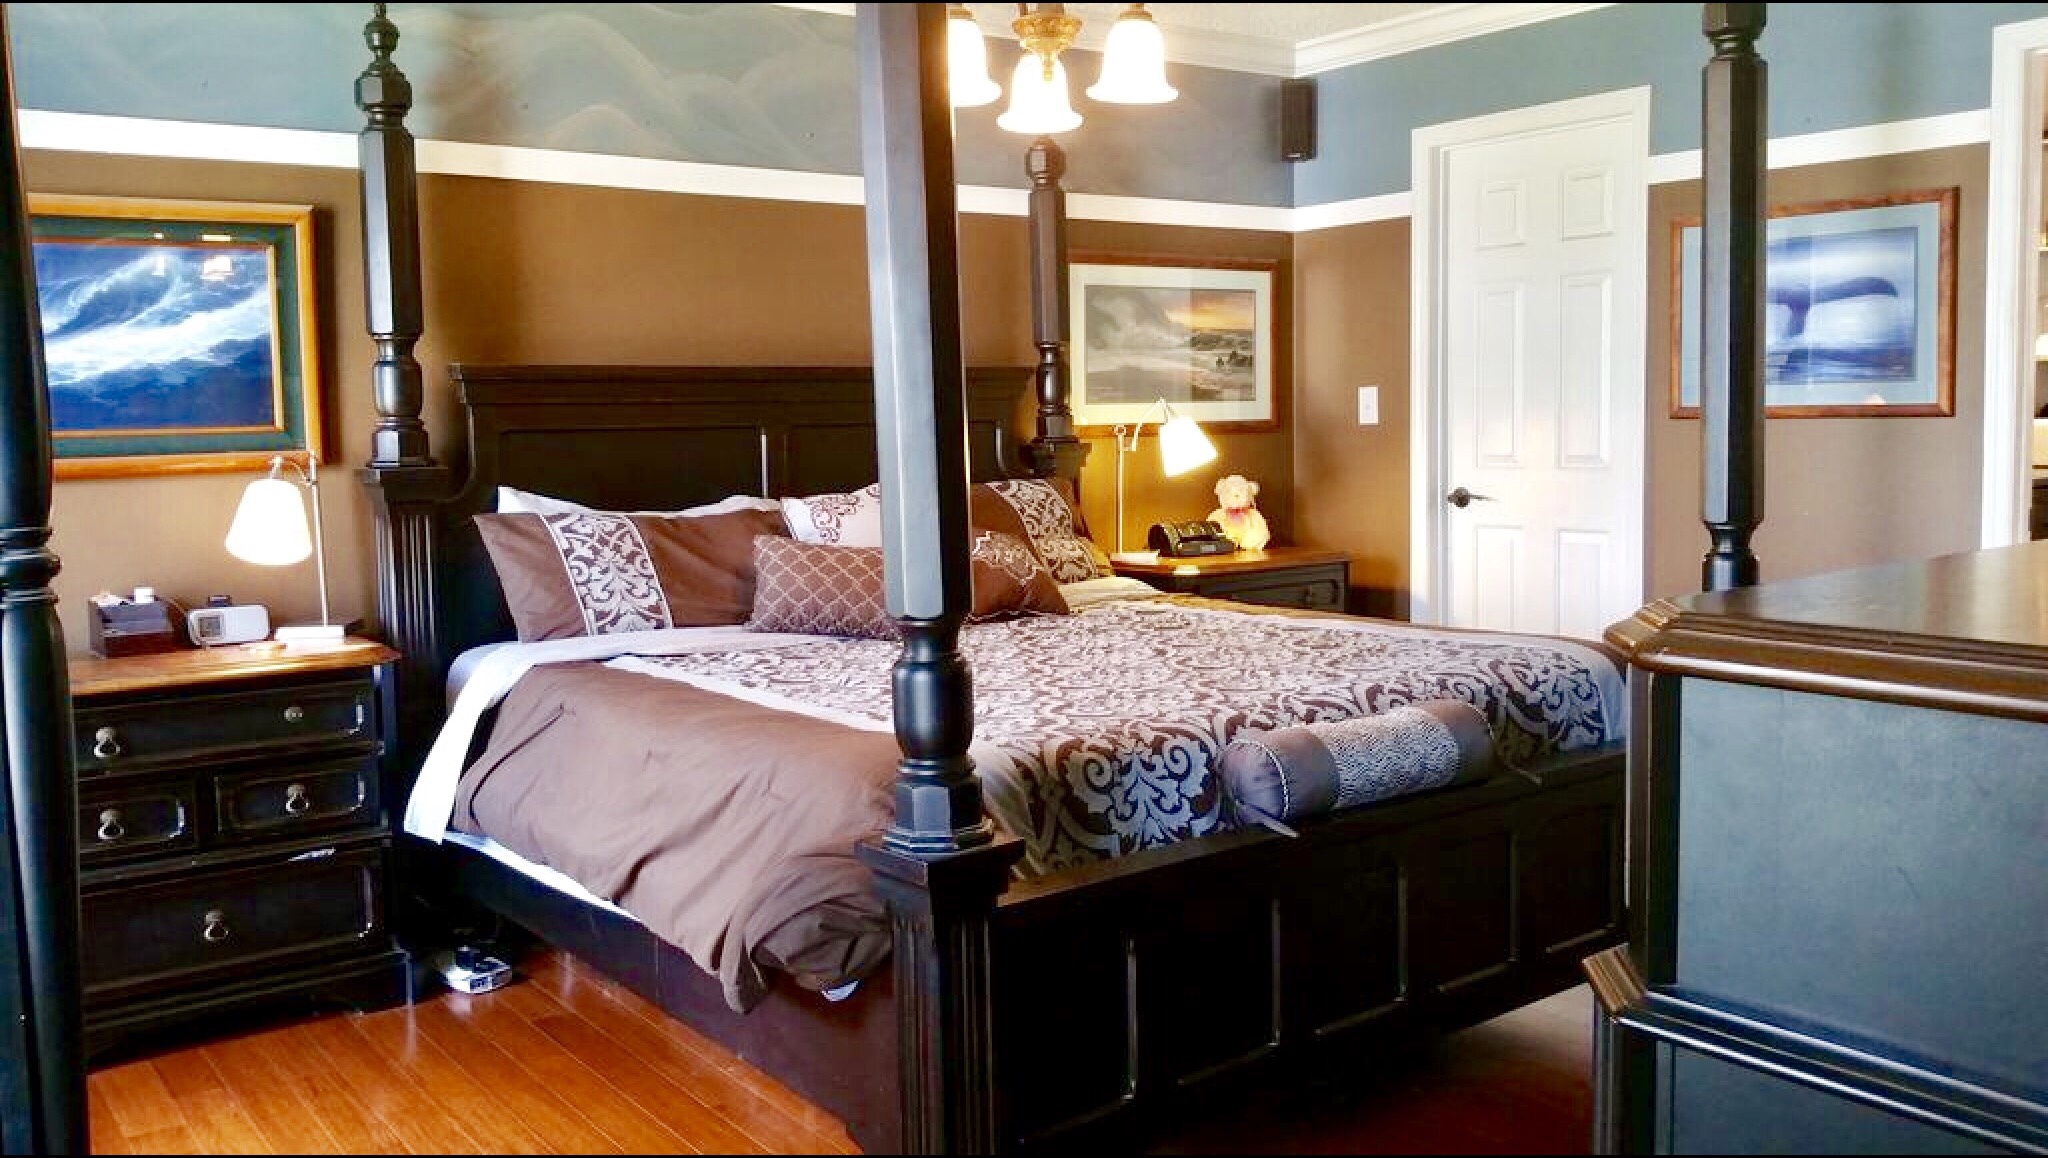
Lights. Blazing. Turn them all on and open all of the interior doors. Don’t let potential buyers fumble for light switches or door handles. They should be able to walk through and simply enjoy. (I left a note for the realtors telling them we’d turn the lights off when we got home). This is not the time to be stingy about the light bill.
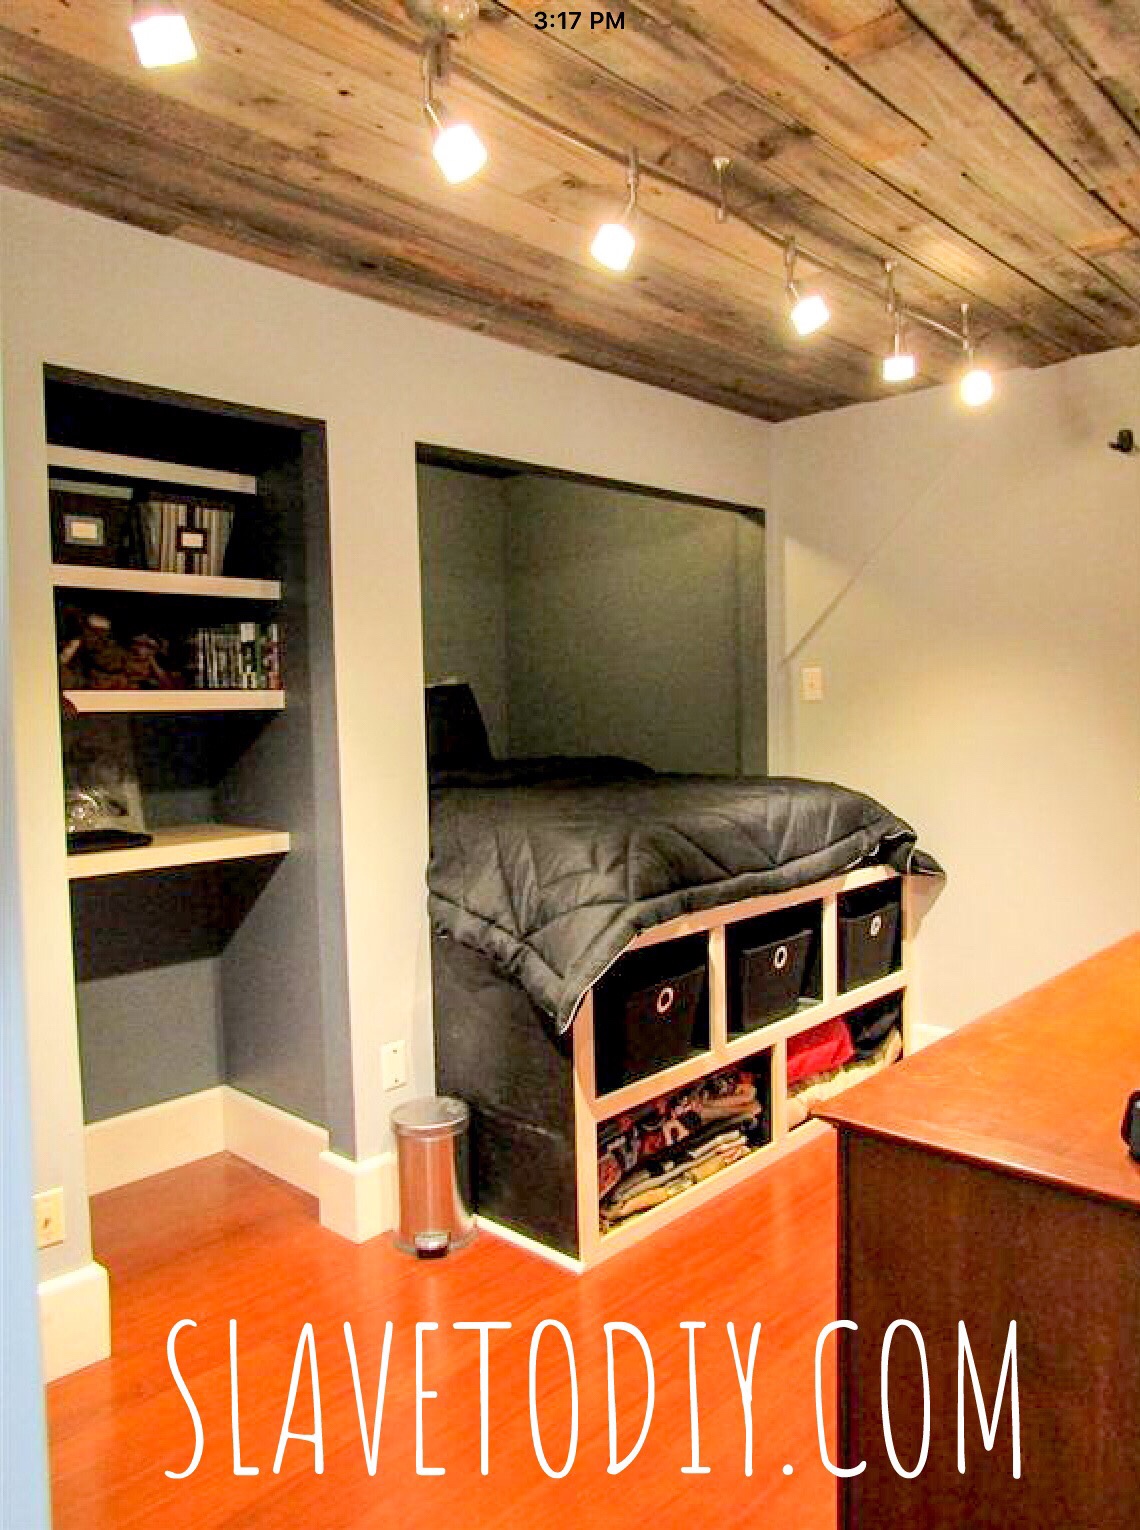
The Ultimate Pre-showing Checklist for Selling Your Home Fast! Turn All Of The Lights On Before The Showing.
Case in point, there are three different lights in this room and no windows. It is a cave with no lights on- pitch black. There is a lightswitch for the built in bed over by the bed. There is a lamp on the dresser. With the door open and all the lights on this is a showcase. Every kid in the world wants this room. Fumbling for the lights and trying to see it in the dark would leave the proper “showing” of this room to chance. Turning the lights on in advance let’s you control the showing.
The Ultimate Pre-showing Checklist for Selling Your Home Fast!
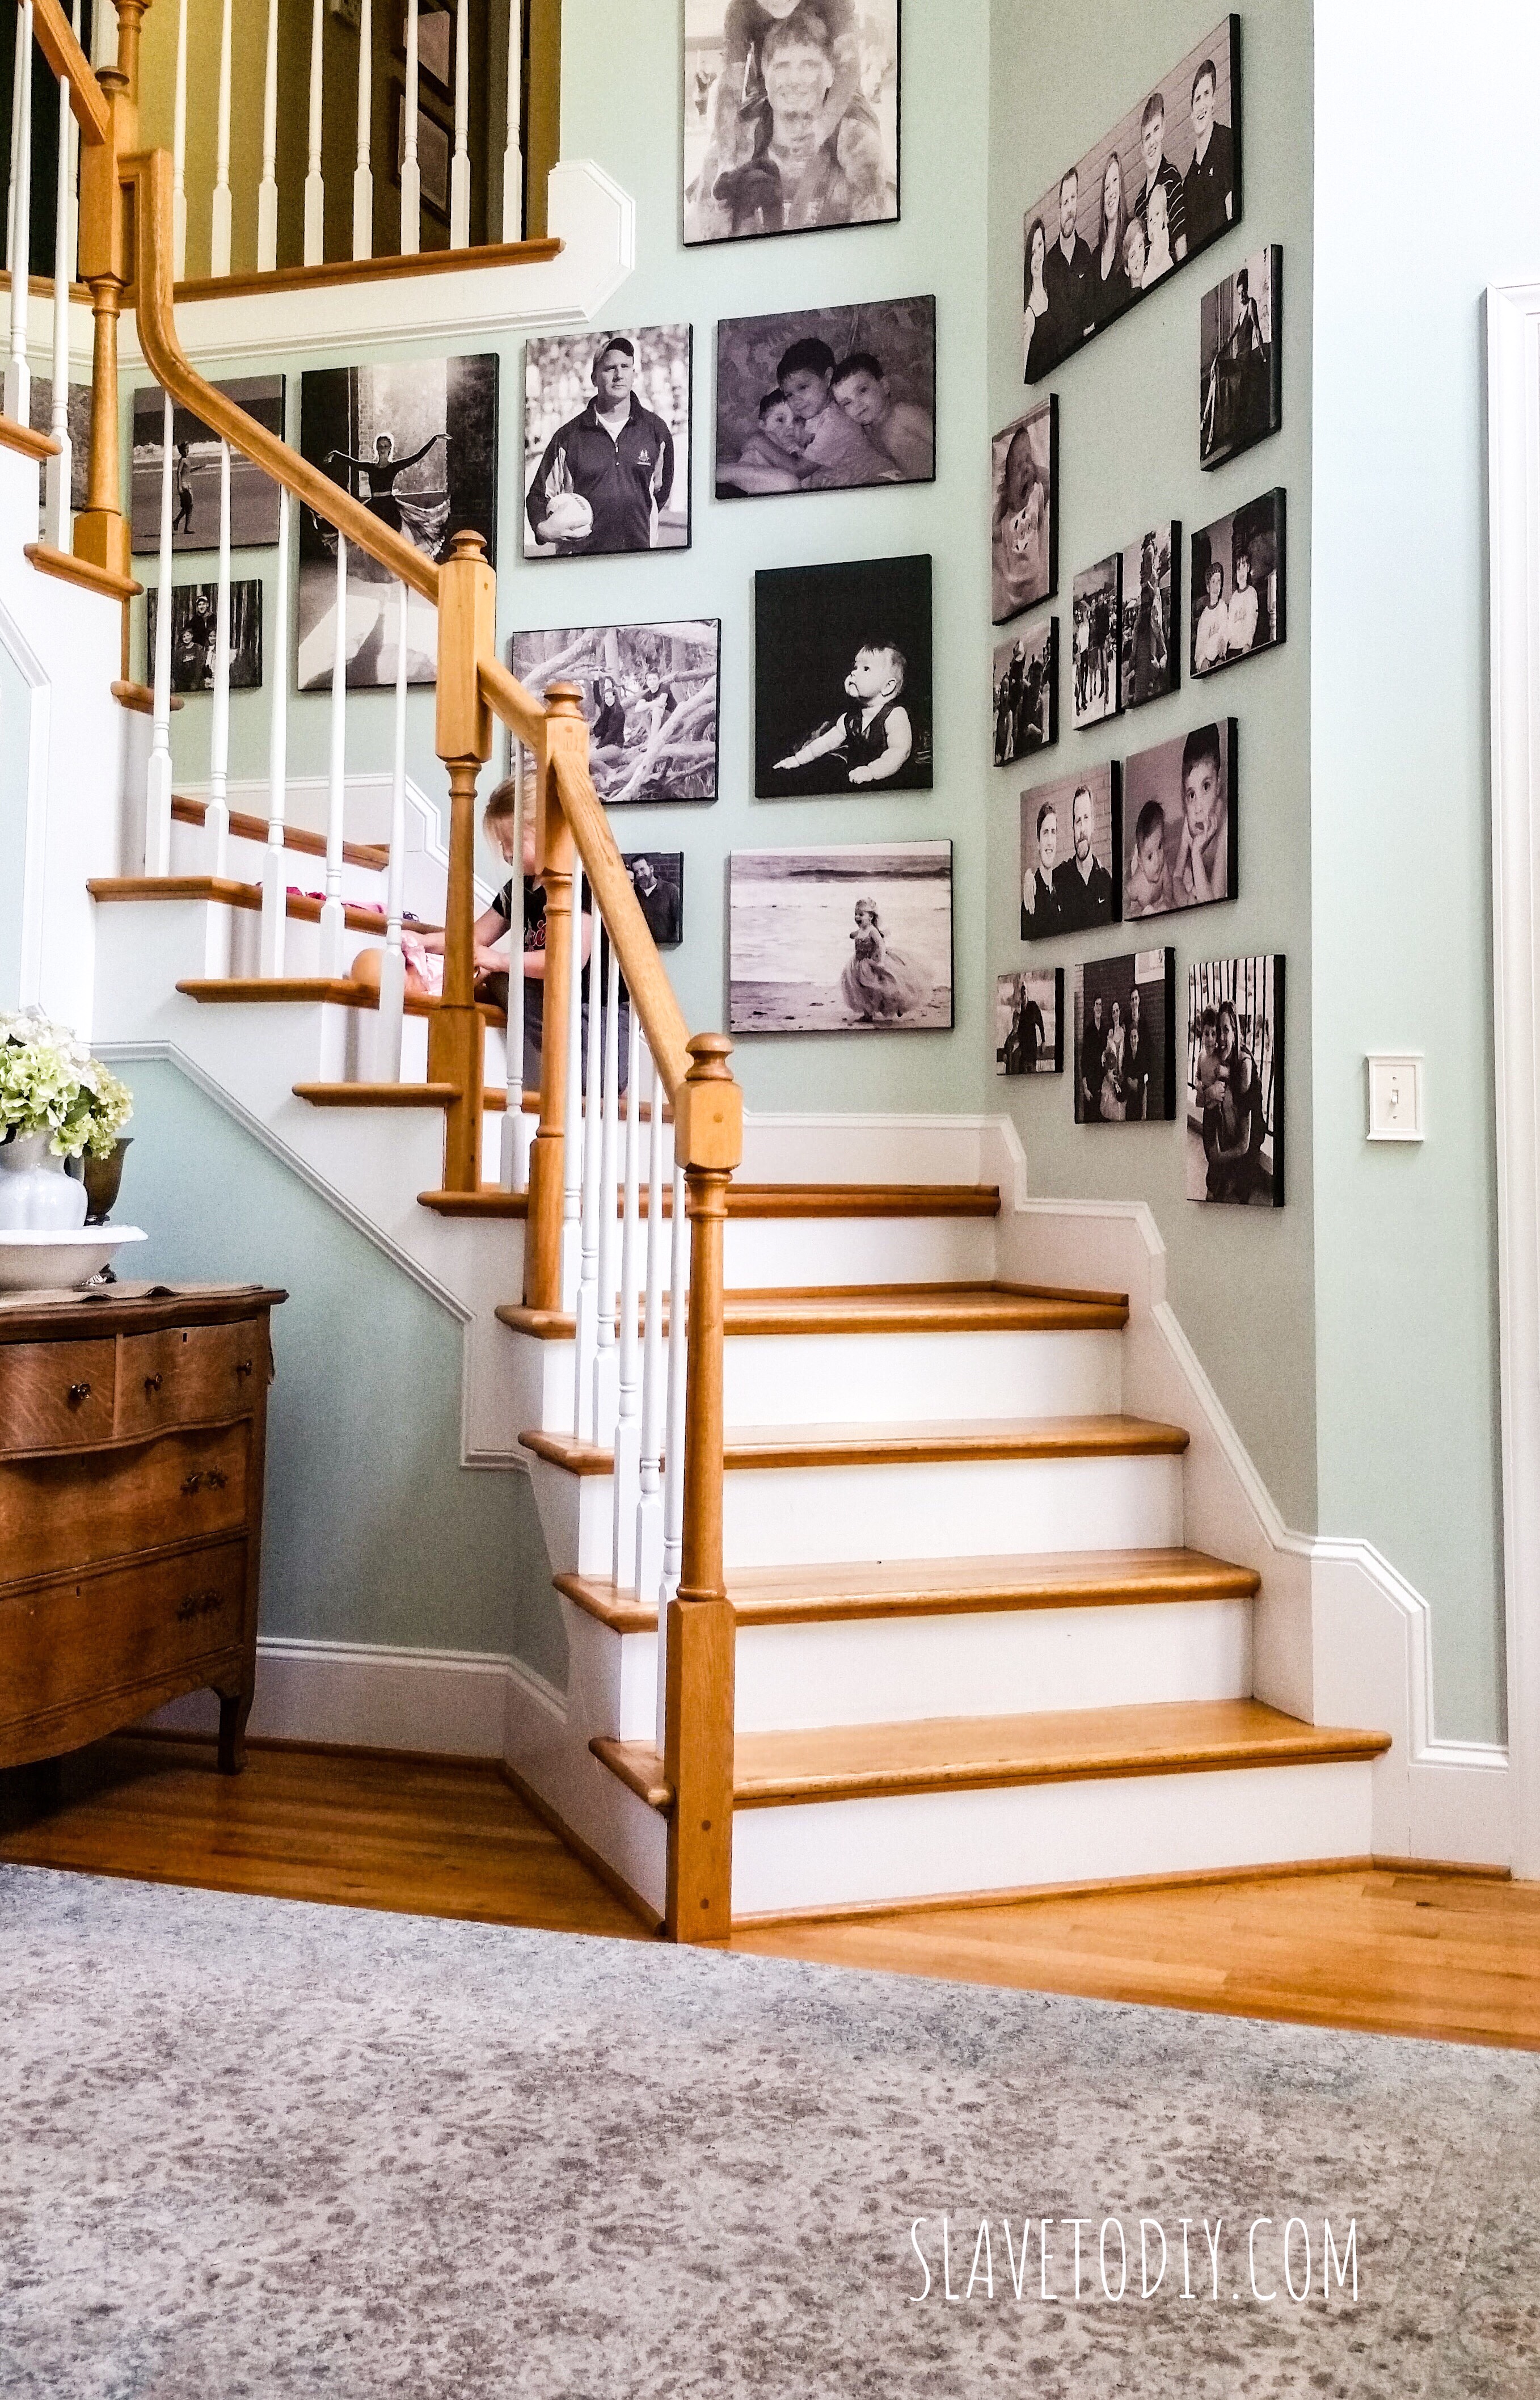
Pictures (okay, this is a staging item, but I feel strongly about it. I also apparently disagree with every HGTV host, ever). Only take your family pictures down if they’re in lousy frames and/or you have ugly kids. Be honest with yourself here. People realize that someone lives in the house… isn’t that why companies use models to sell clothing? Think of your family photos as “happy family home” models. I had a cool wall with black and white canvasses full of family pictures. We left those pictures up. They just screamed “we’re one big happy family in our happy family home.” It’s also a wall-staging item. Without those our staircase would be empty.
Music. Low volume smooth jazz. If you have cable there are usually music channels included in your package so we had several TVs on with smooth jazz going. That is professional level ambiance.
Garbage disposal. Run a lemon or orange through it right before the showing. The citrus hides any lingering smells you might have missed. If you don’t keep citrus on-hand, you can get a bag of forty garbage disposal bombs from Bed, Bath & Beyond for about ten bucks.
Cinnamon apple glade. A can per showing in a 2000sf house. No kidding. I did a ton of research and apple pie or cinnamon apple apparently puts people in a “this is the one” mindset. I don’t question it. It worked. Buy it here.
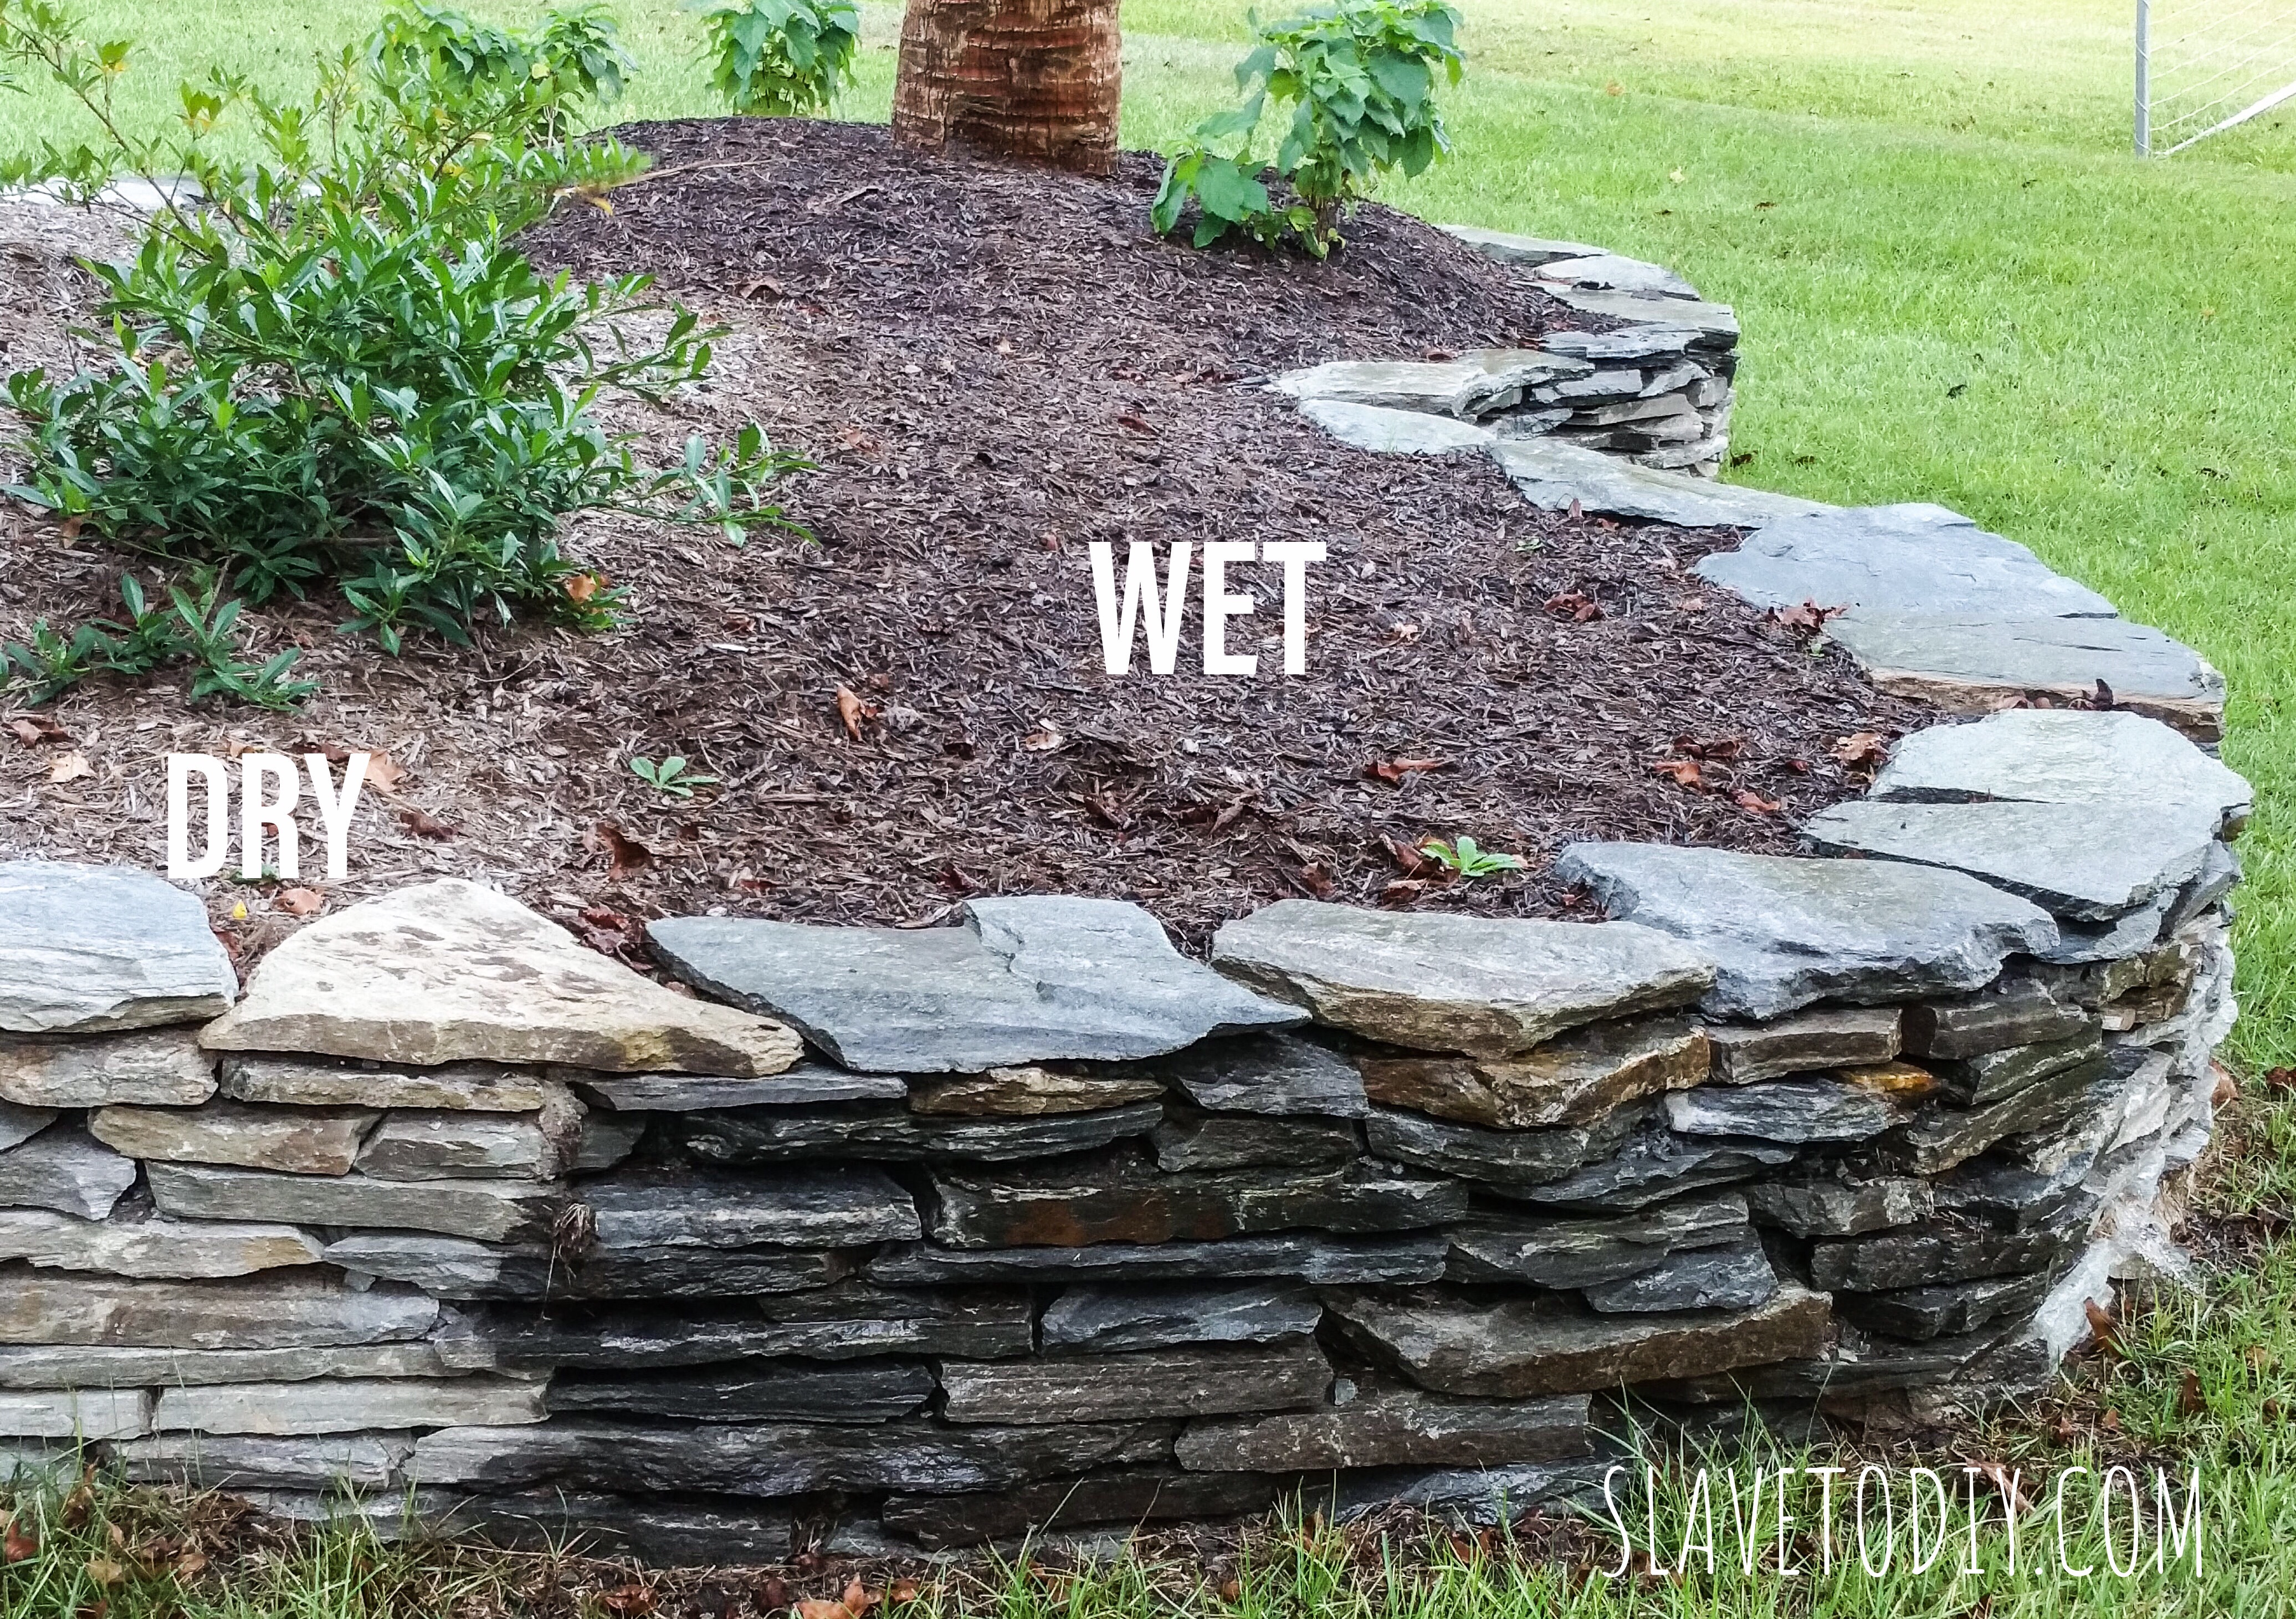
Pool, gardens, and specialty areas should be freshly staged. Wet your decks, exterior pavers, and mulch with a garden hose. They look nicer darker and like you’ve given them fresh attention. If you ever watch hgtv outdoor transformations shows, pay attention next time. Everything is soaked when they do “the reveal”. Get new pool towels and roll them up on your deck chairs/chaise lounges. Open your pool umbrella if you have one and put out the cushions. It needs to feel inviting.
The Ultimate Pre-showing Checklist for Selling Your Home Fast!
Take your animals with you. Hide evidence of them existing. Seriously. Cat litter boxes, beds… etc. Put them in your car when you leave. Nothing deters a buyer with cat allergies more than telltale signs of pets. I was bitten by a jack Russell once during a showing. You have no idea what your pets will do when you’re not there. Nothing like getting sued by someone you were hoping would buy your house because Snooki bit them trying to get into the master bedroom (and no, I didnt’ sue. I just gave them a heads up they might want to take the dog with them next time). Potential buyers may also let your indoor cats outside or your circus dog out.
Make sure evidence of animals is gone. Hit areas with telltale hair with tape or a lint roller.
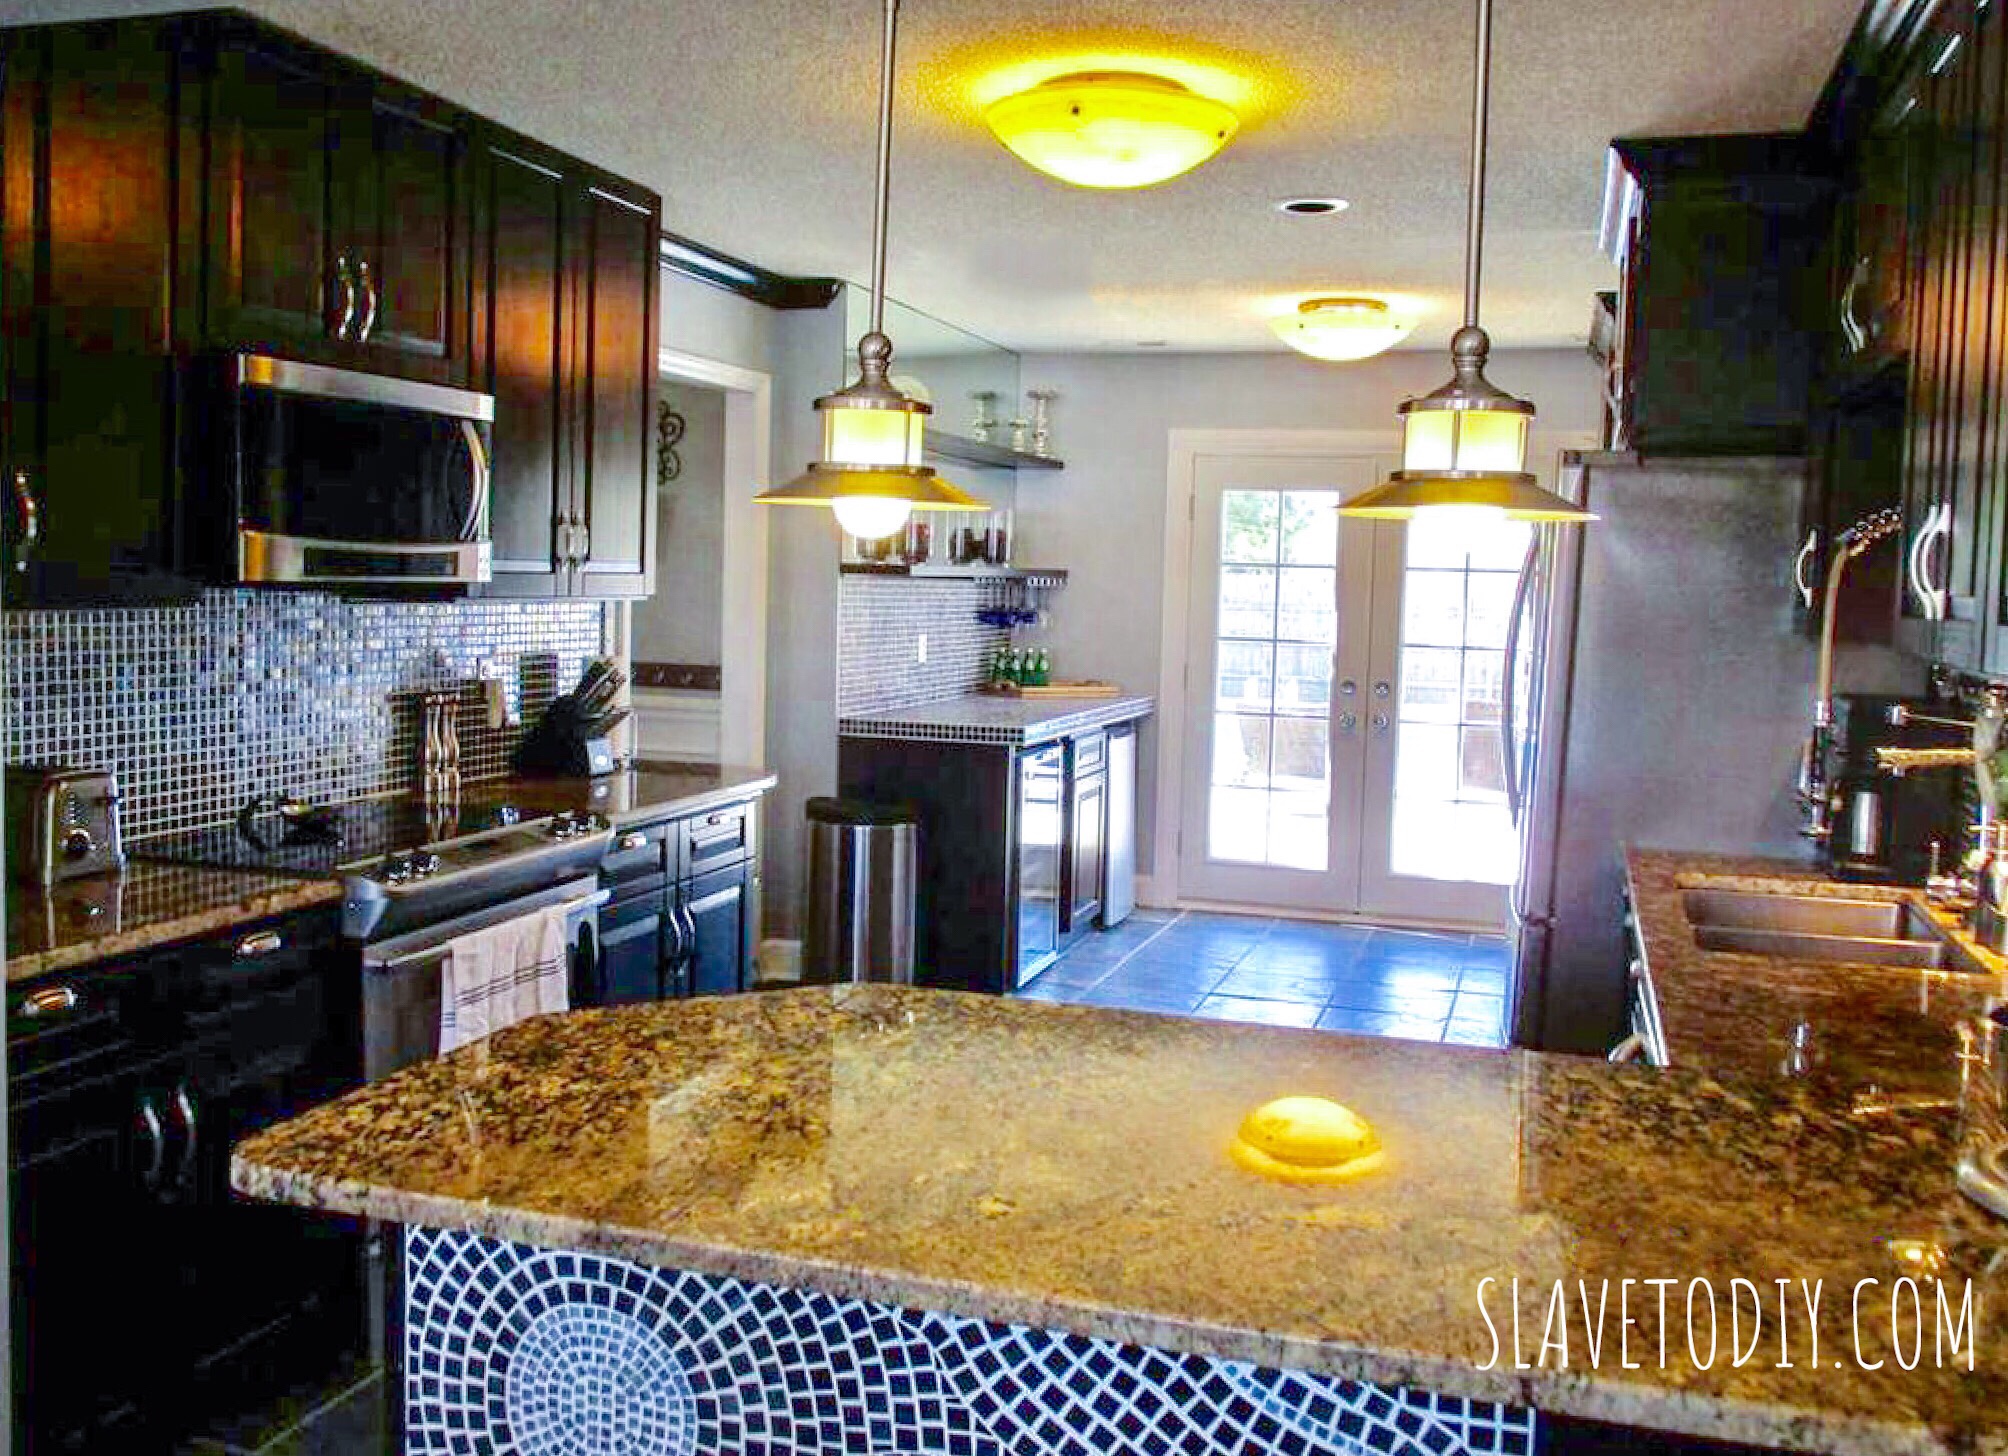
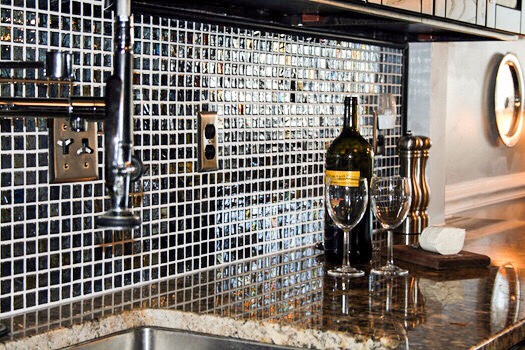
Kitchen. Clear counters except your nice knife block. A bottle of wine with a few glasses for later is a nice touch. (Who’s in the mood to celebrate buying a house???)
The Ultimate Pre-showing Checklist for Selling Your Home Fast!
Remember, you ultimately only need ONE buyer. It’s going to be the one that falls in love with your life. Prepare accordingly.
Do you have any niche showing tips that you recommend? I would love to see your tips and questions in the comments section! Thanks for reading and you can find more great DIY articles here.
Cheers and happy selling!
*Legal stuff:
I am honest about my experiences with different products and write because I enjoy it. I do however, have the opportunity to earn money for my writing, also.
Slavetodiy.com is a participant in the Amazon Services LLC Associates Program, an affiliate advertising program designed to provide a means for sites to earn advertising fees by advertising and linking to amazon.com. Amazon offers a small commission on products sold through their affiliate links. Each of your purchases via our Amazon affiliation links supports our cause at no additional cost to you.
If a blogger links to an Amazon product (with a special code for affiliates embedded in the link), and a reader places an item in their “shopping cart” through that link within 24 hours of clicking the link, the blogger gets a small percentage of the sale. Amazon links are not “pay per click.” If you click on the product link and stay around Amazon and purchase something else, however, I will get a commission on that sale.
Slavetodiy.com is also a VigLink affiliate advertiser which works similarly.