Tips and Tricks for Designing, Planning, and Installing the Pool of Your Dreams

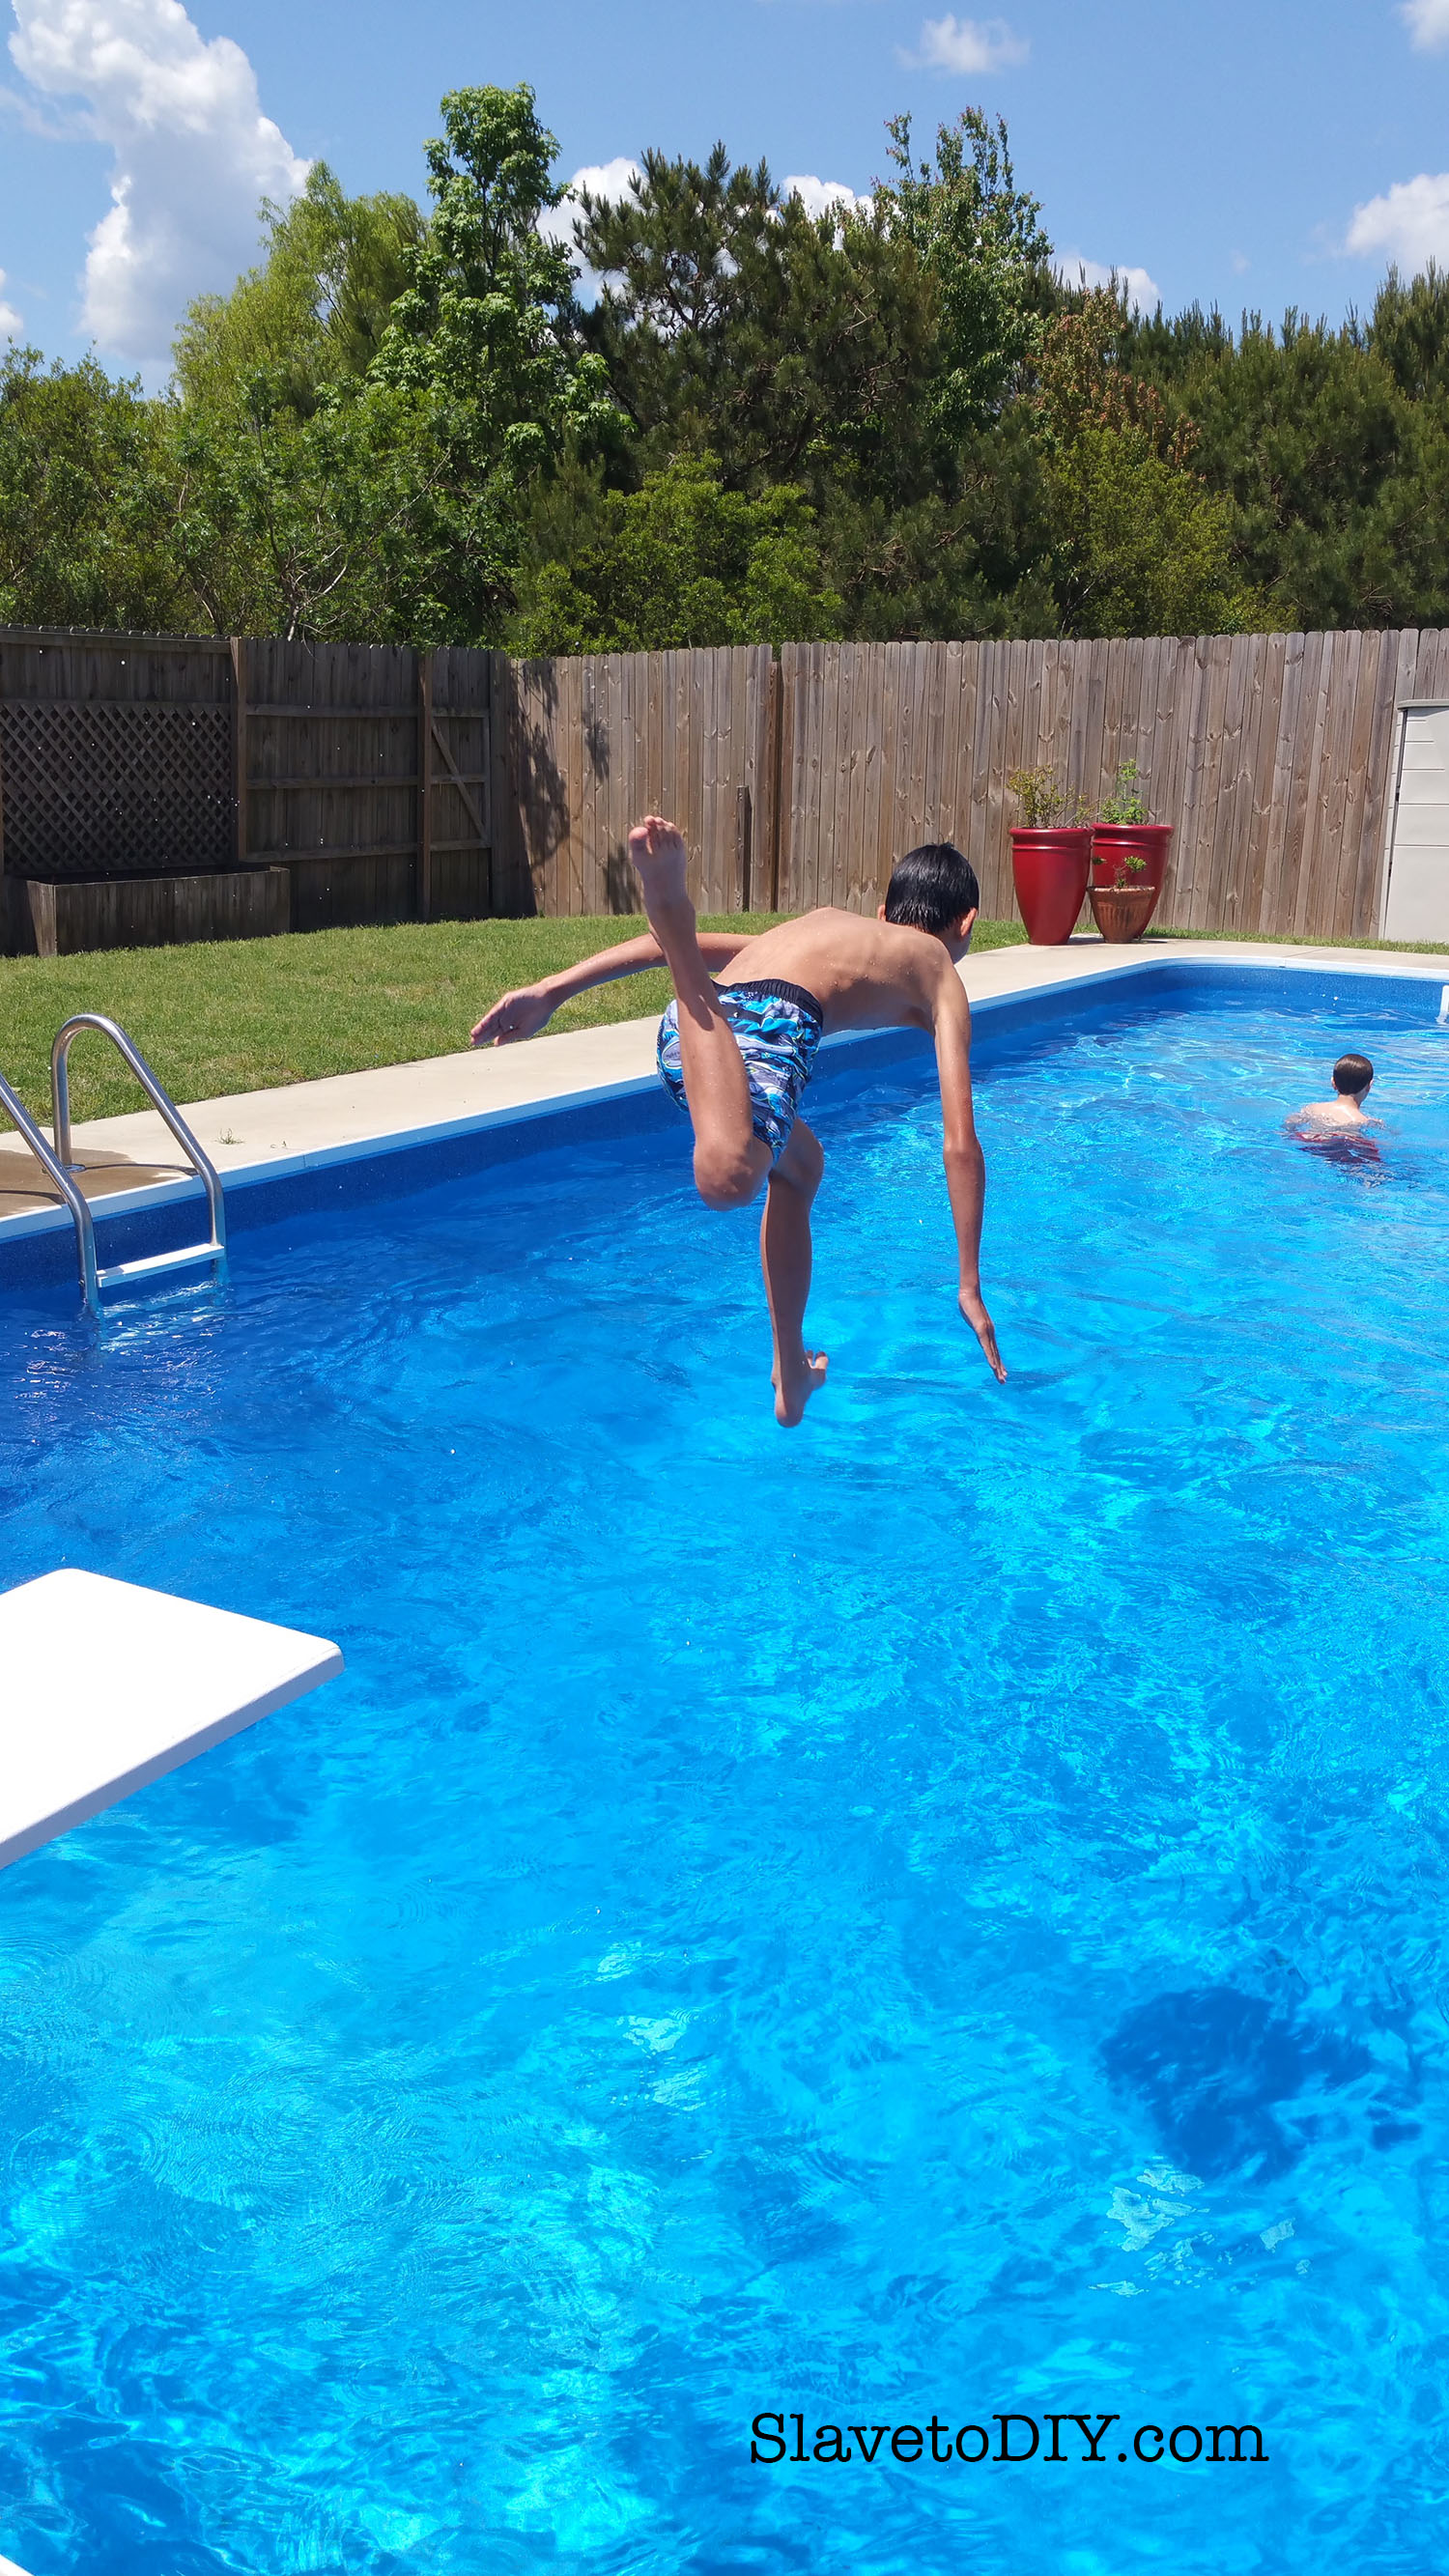
A few years ago we had a pool installed and had NO idea what we were doing.  You don’t know what you don’t know, right?  Never having had a pool before (other than the above ground one the previous owners put up and we were tearing down), I really had no idea. We did an okay job, but if I had it to over again there are a few adjustments I would make. As for the finished product, I was ultimately happy and here’s what we ended up with:

Pool Planning, Design, Tips and Considerations
Pool Planning, Design, Tips and Considerations: Our pool, after it was installed, finished, and very swimmable!

*This post may contain affiliate links. Please see full disclosure at the end of the post.


We loved the pool, so here are the basics of what we learned and some tips along the way of what to do, and of course, what NOT to do.

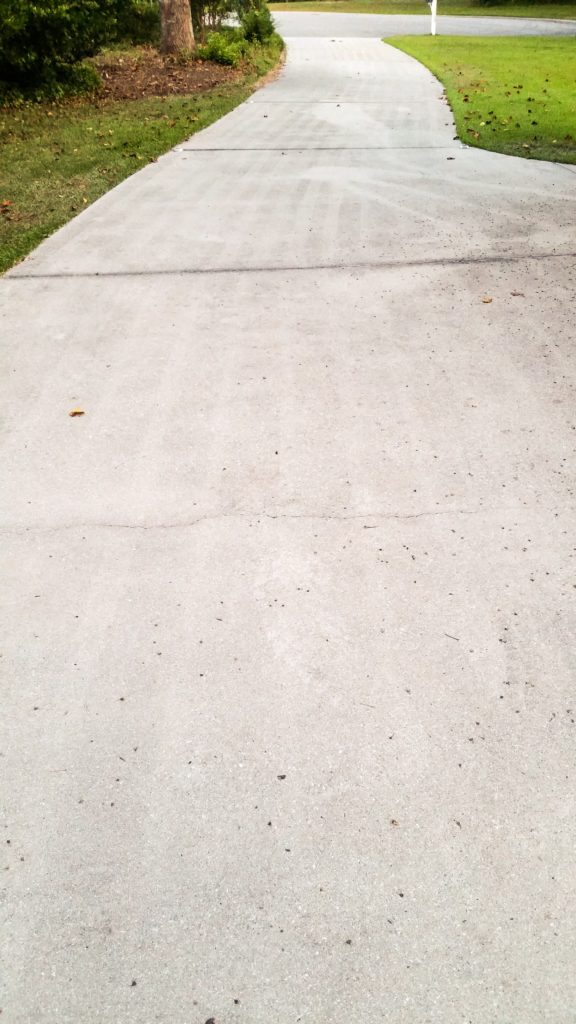
  1. Hardscaping: Hardscaping around the pool is your friend. The more, the better. You need more than a three foot apron.  Insist.

You know what happens when you trim your grass?  It all goes in the pool. I know you keep seeing all those super cool paver designs with the grass in between on Pinterest. Or the pool coping that runs right up to the edge of the grass. If you don’t have a landscaper and a pool guy, HARD PASS.

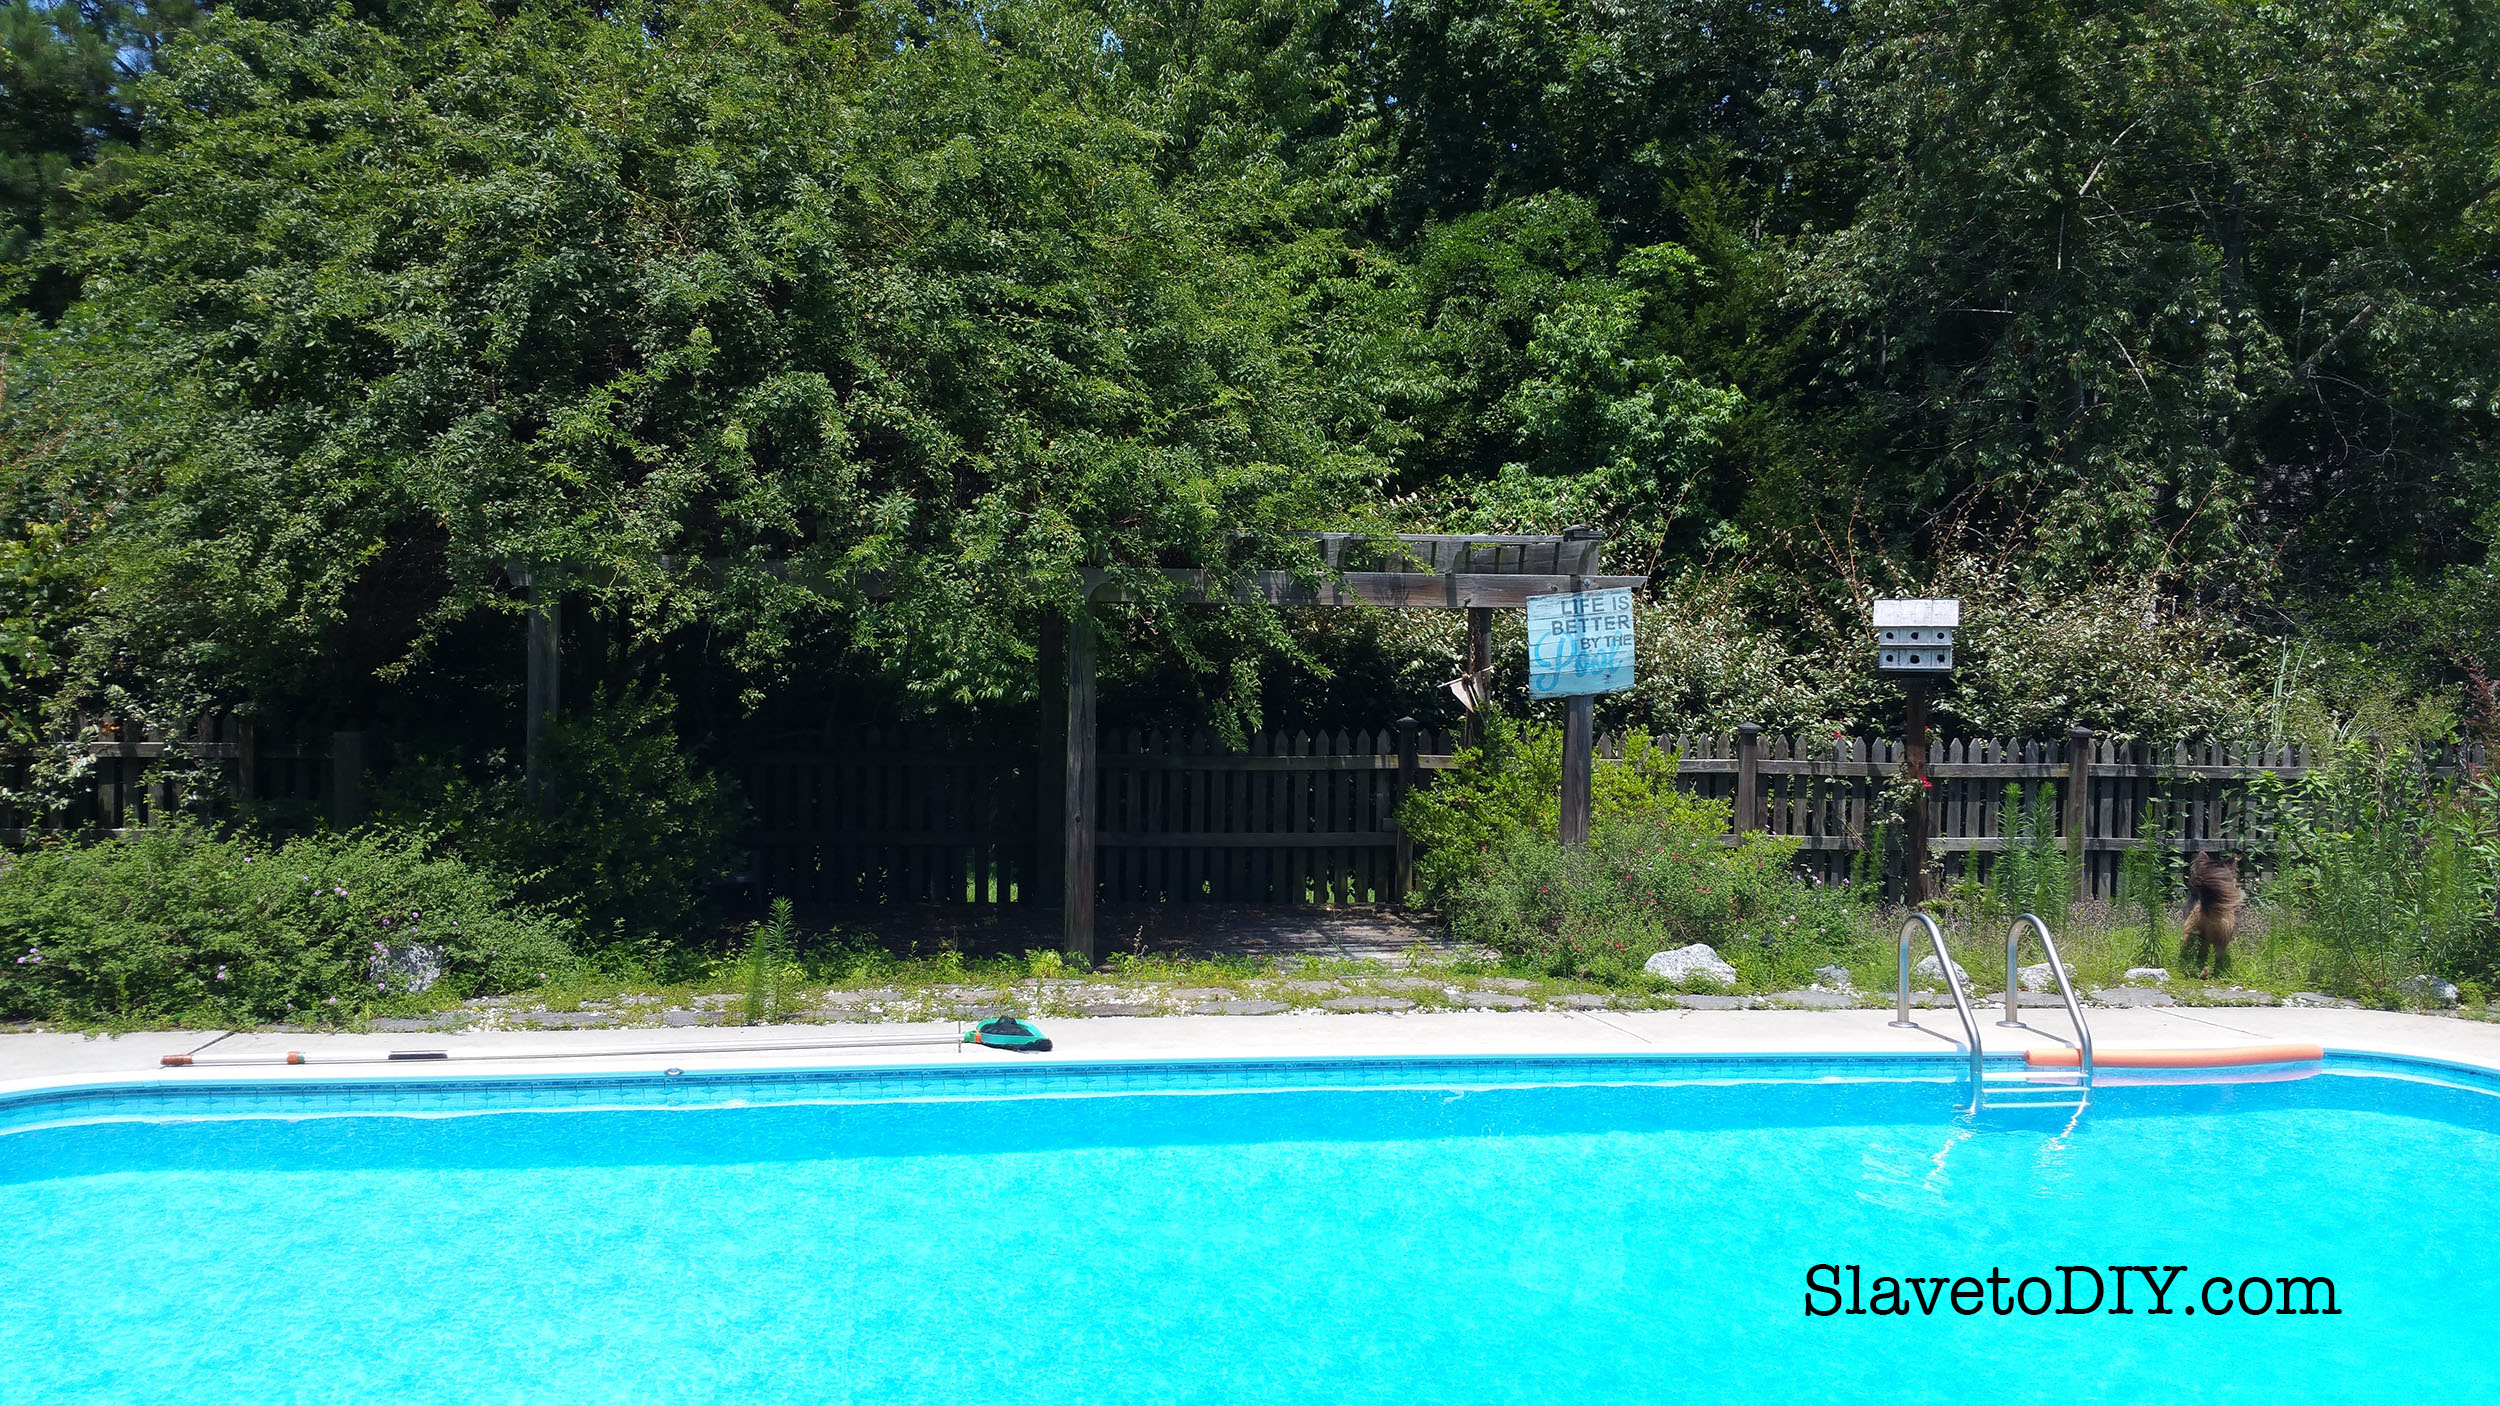
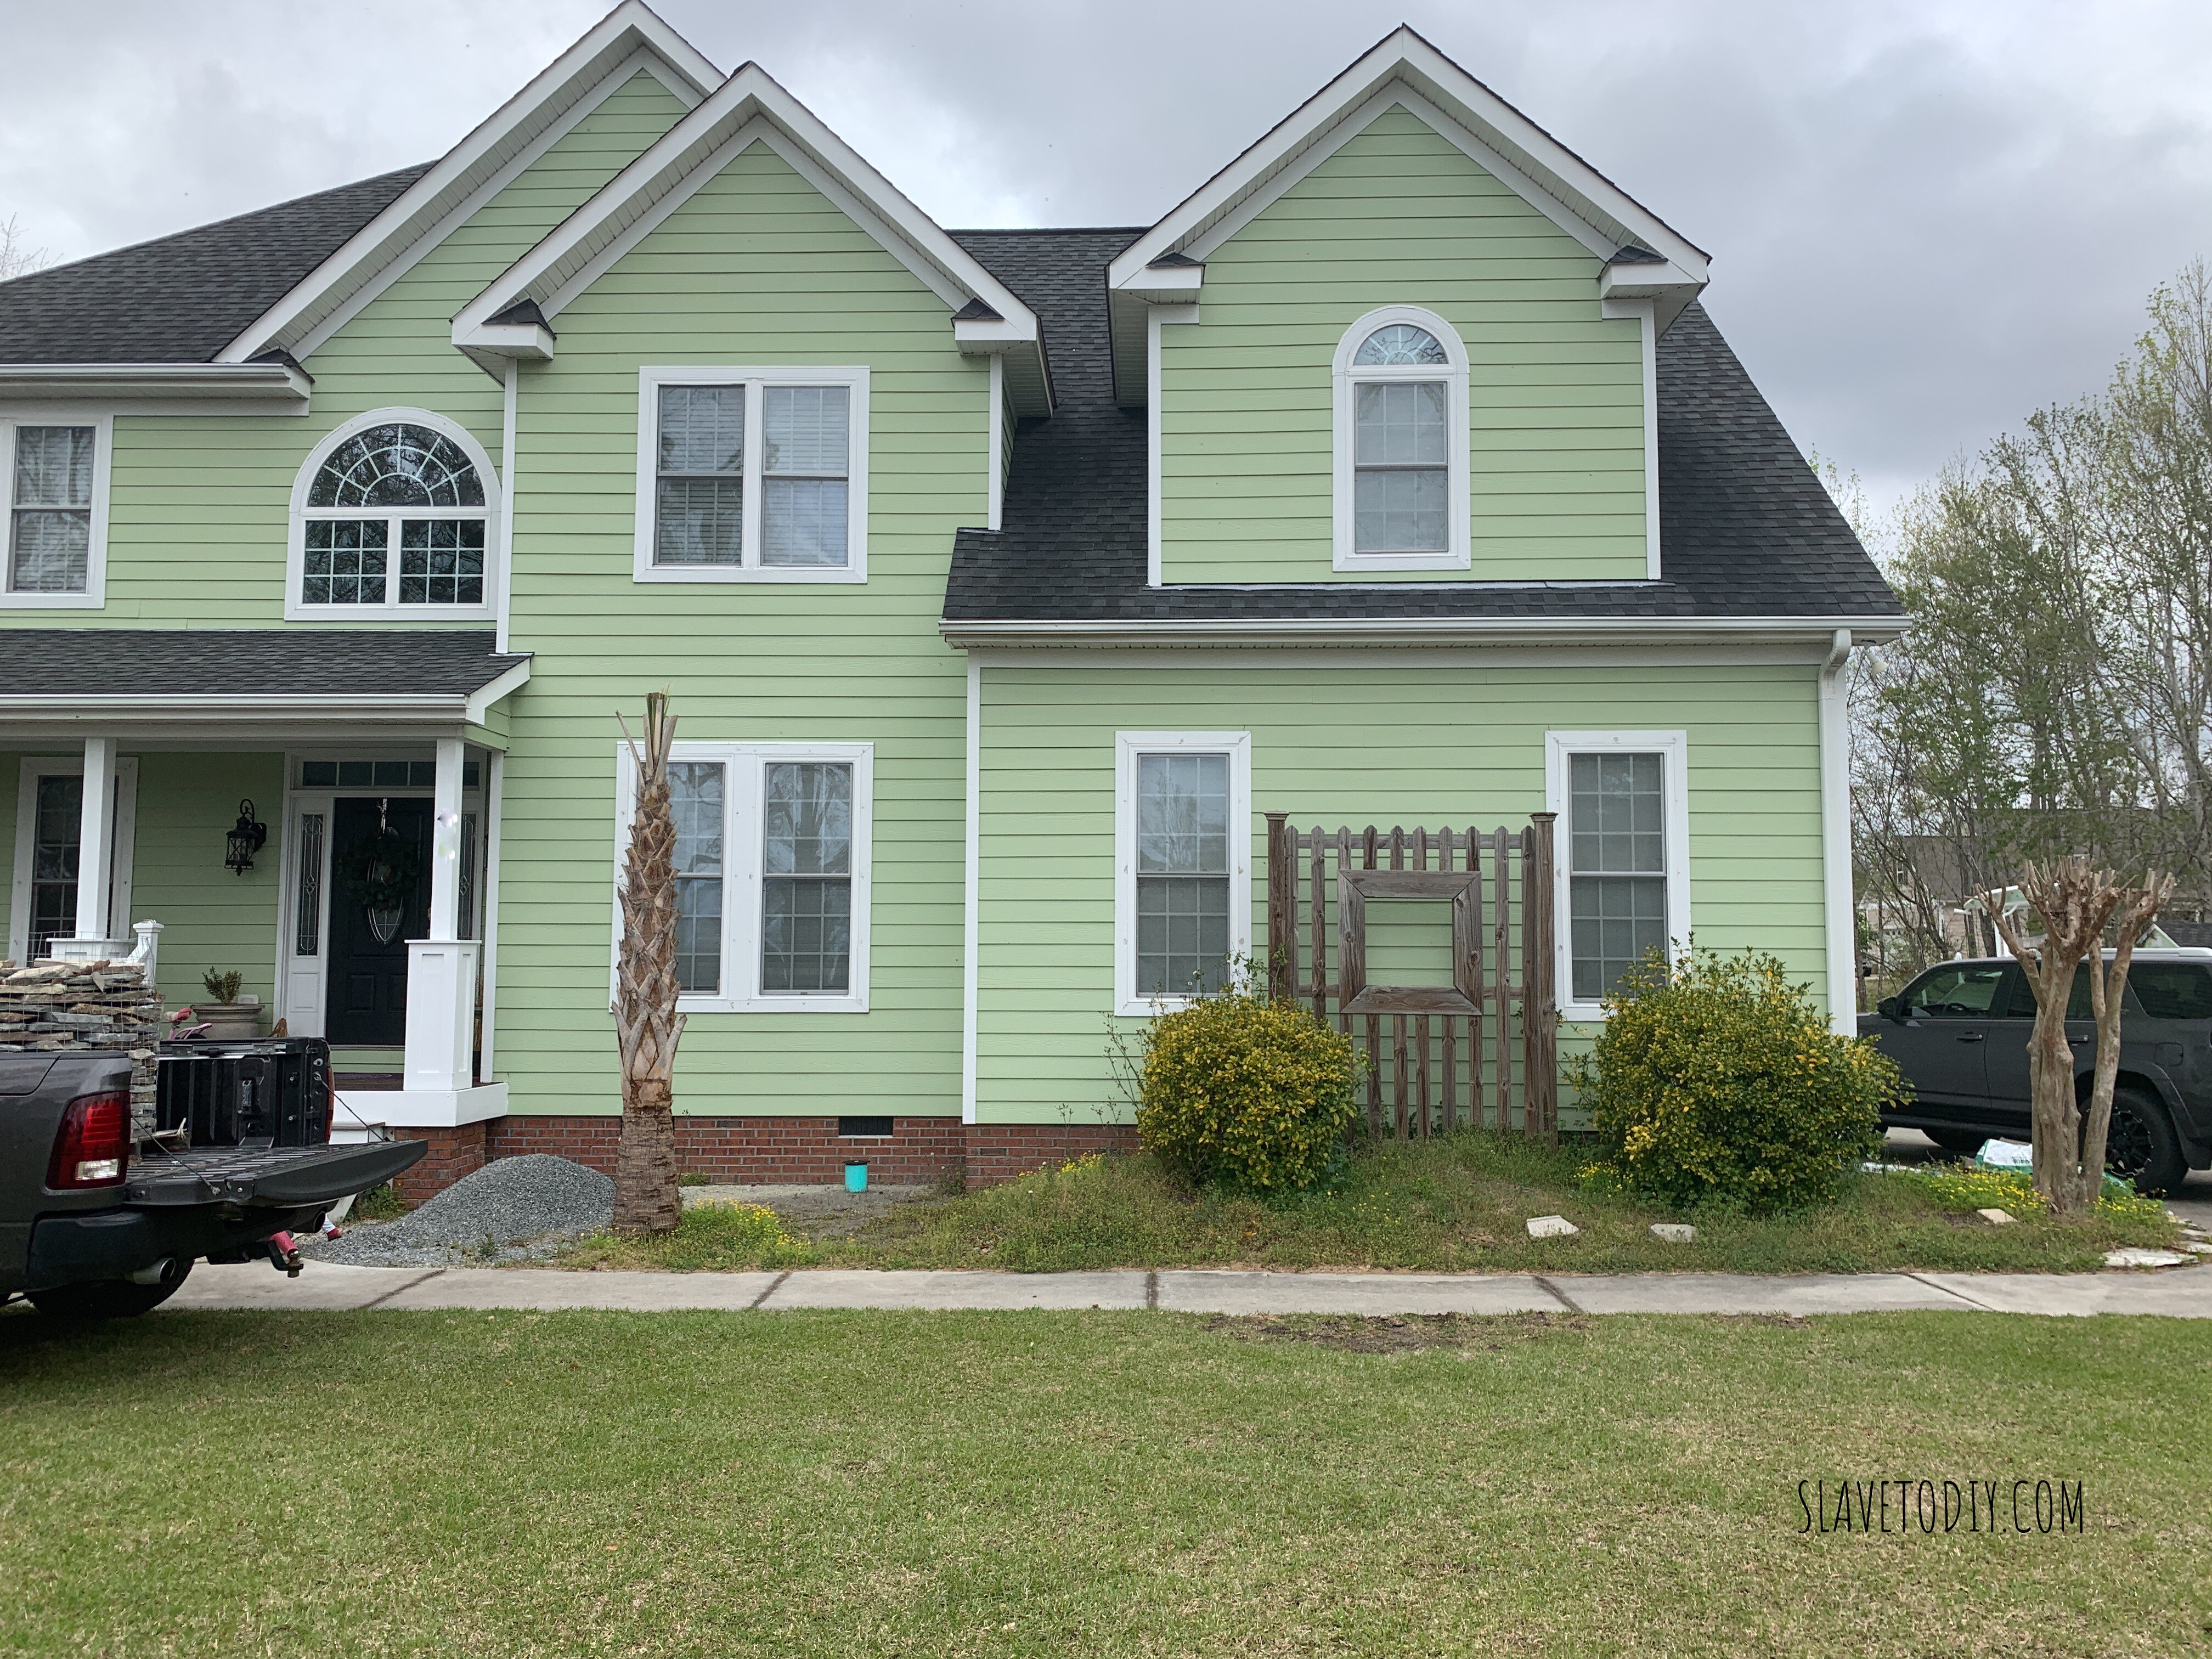
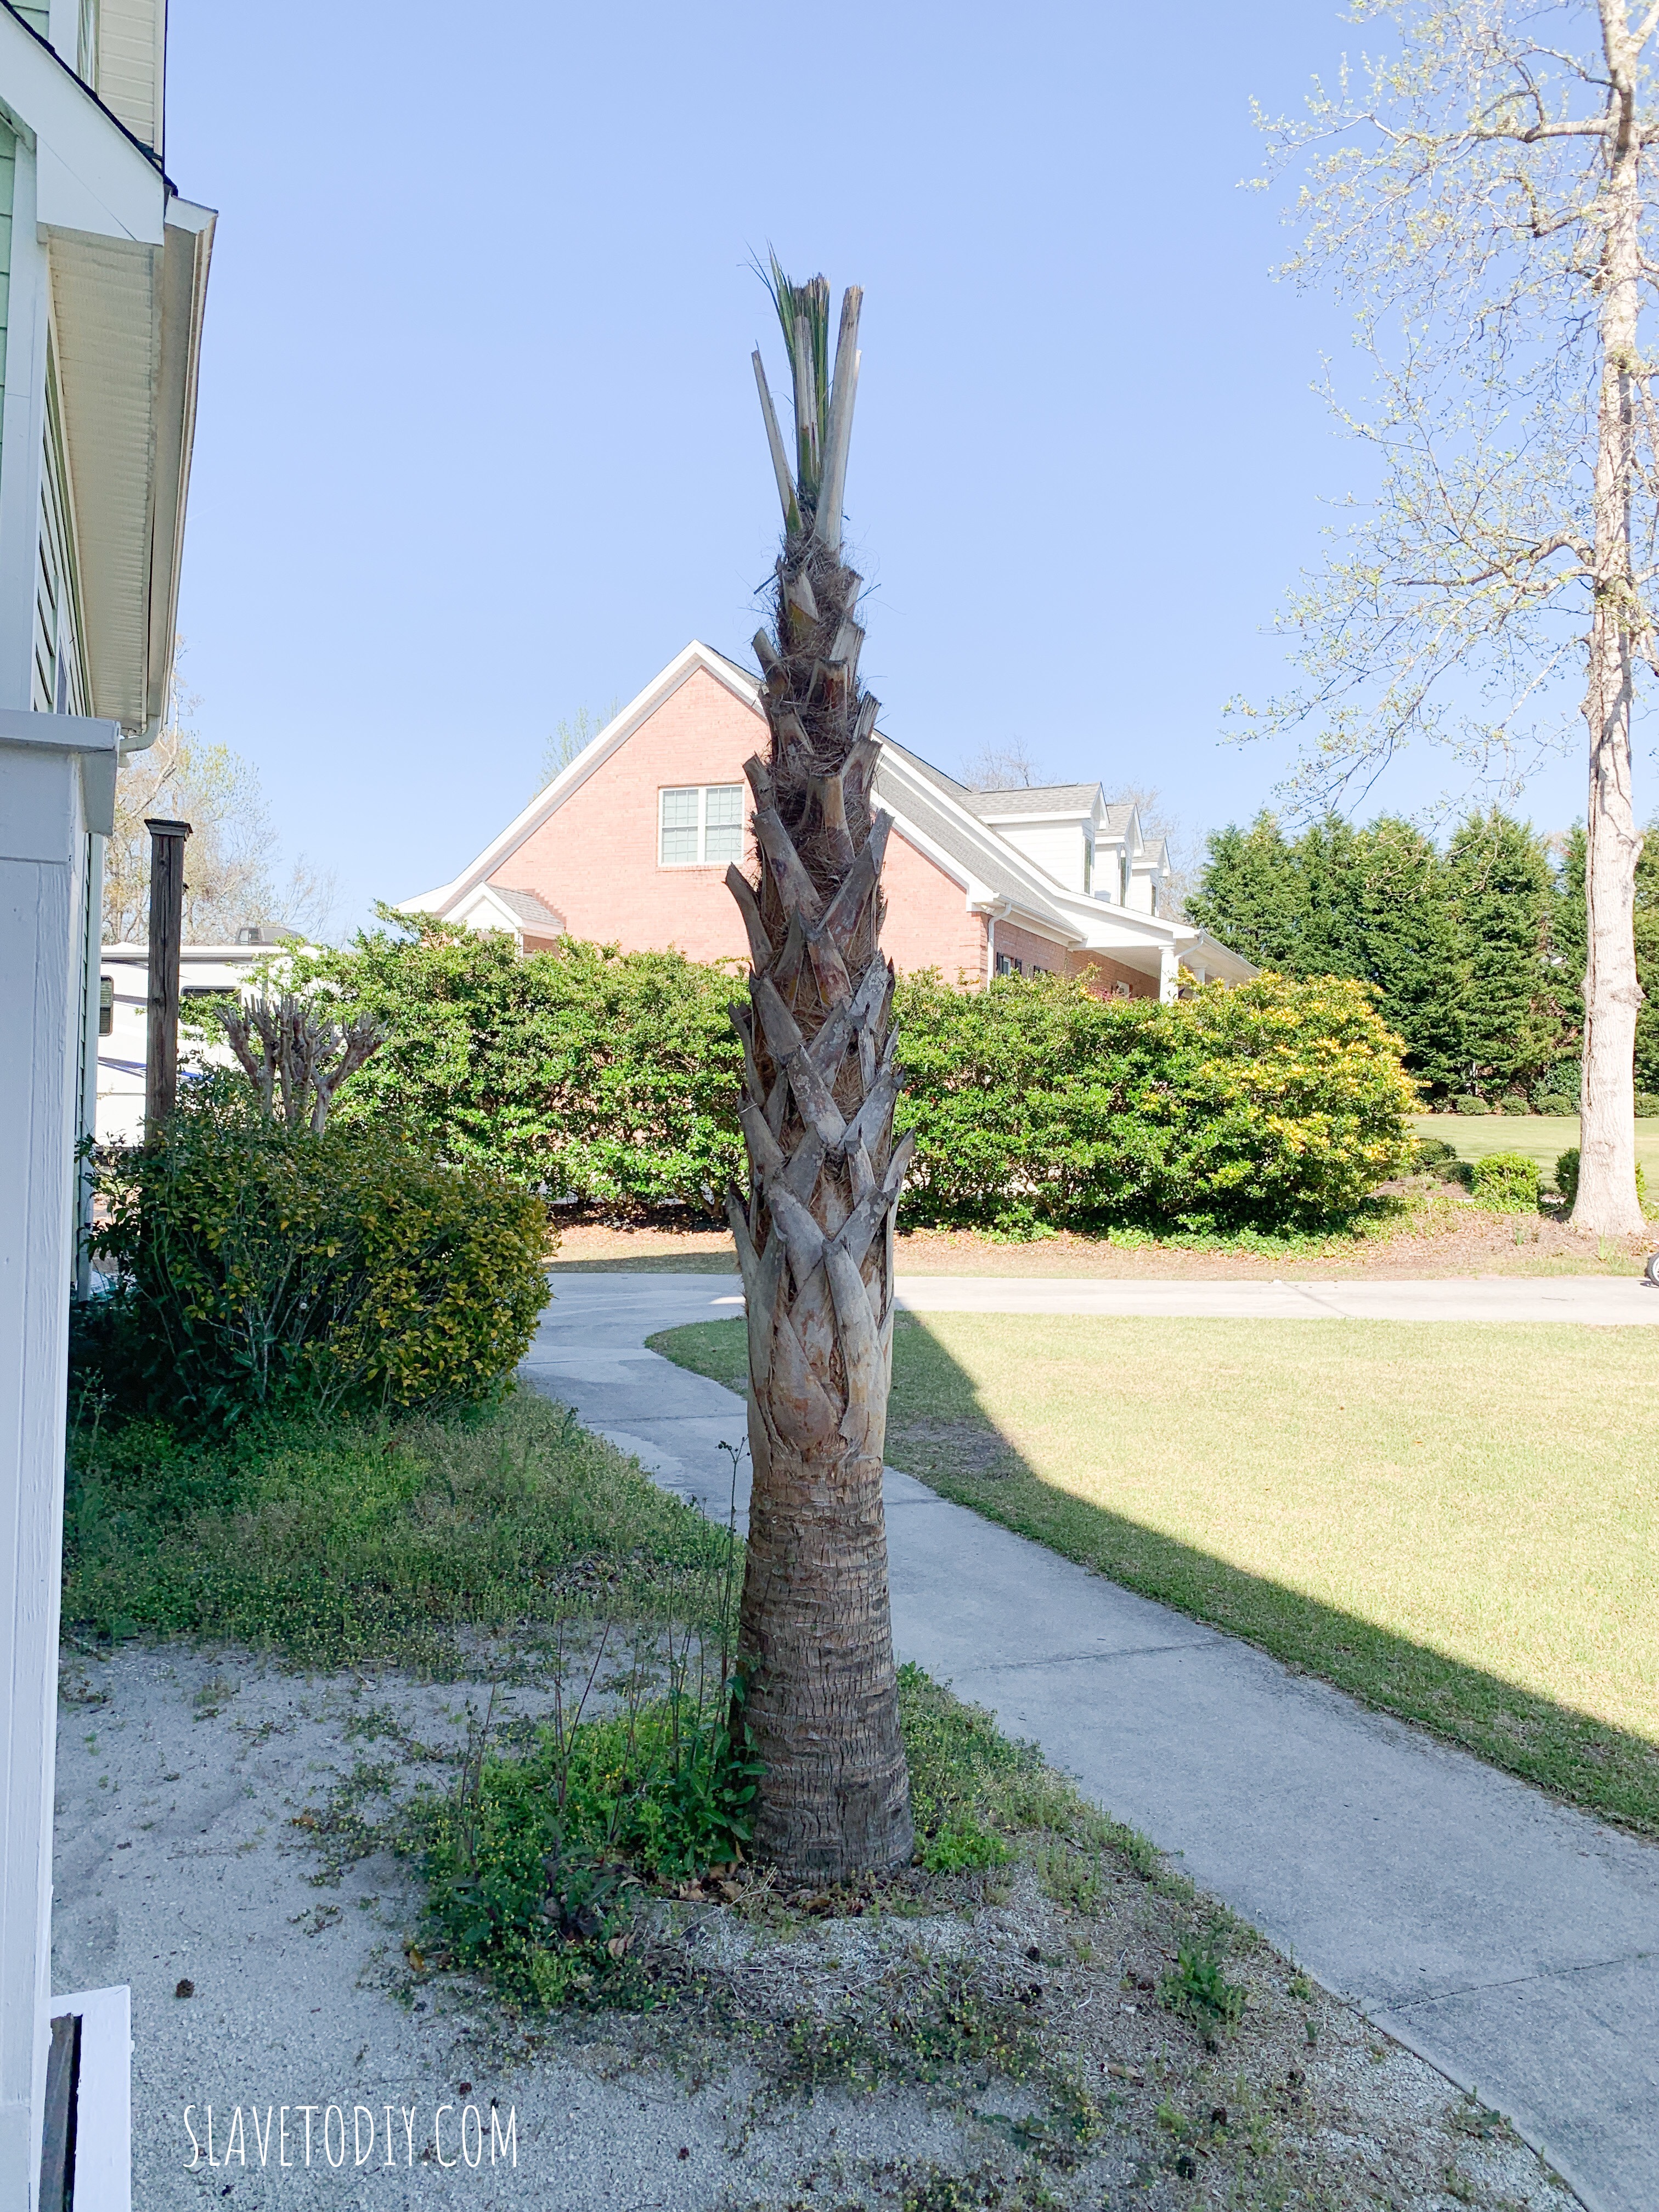
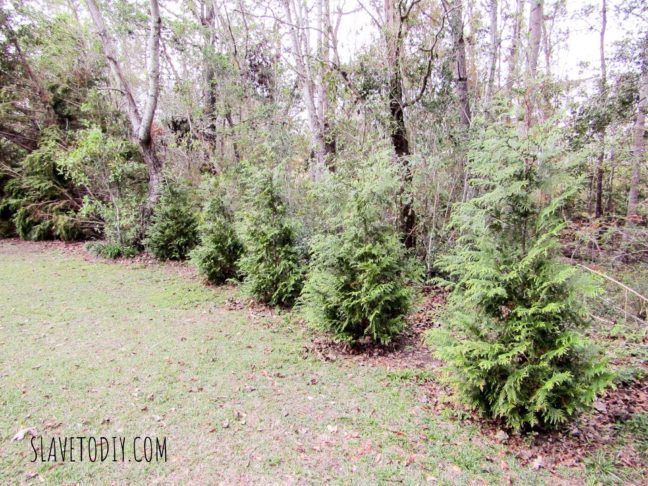
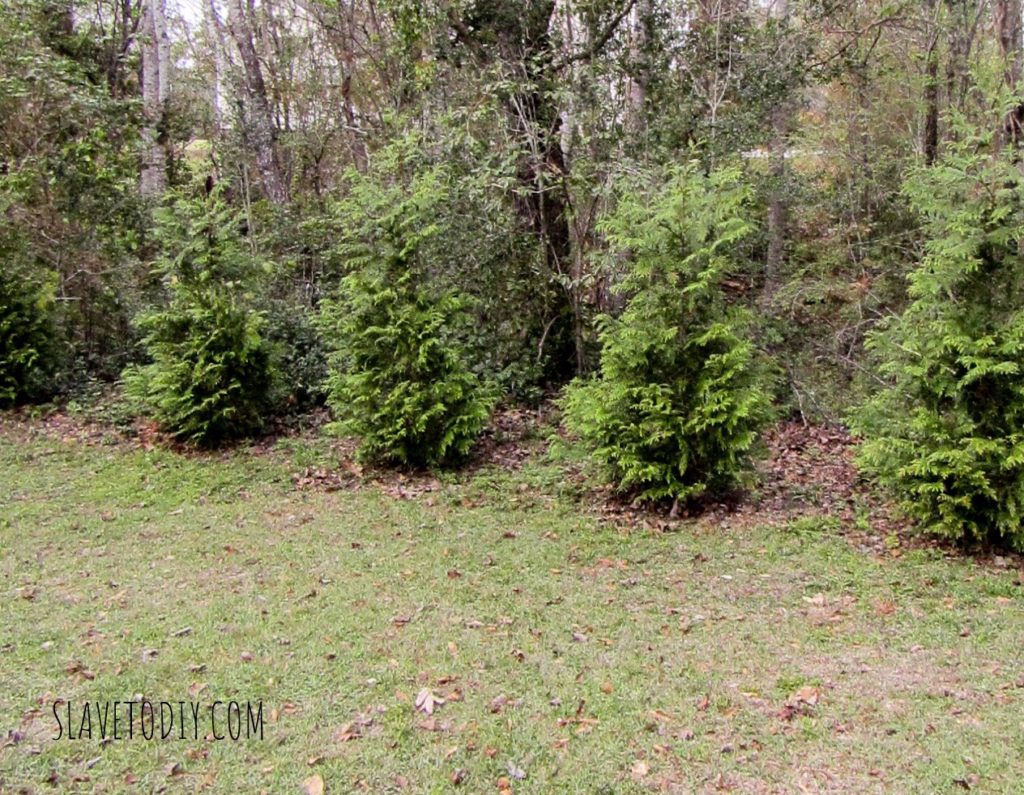
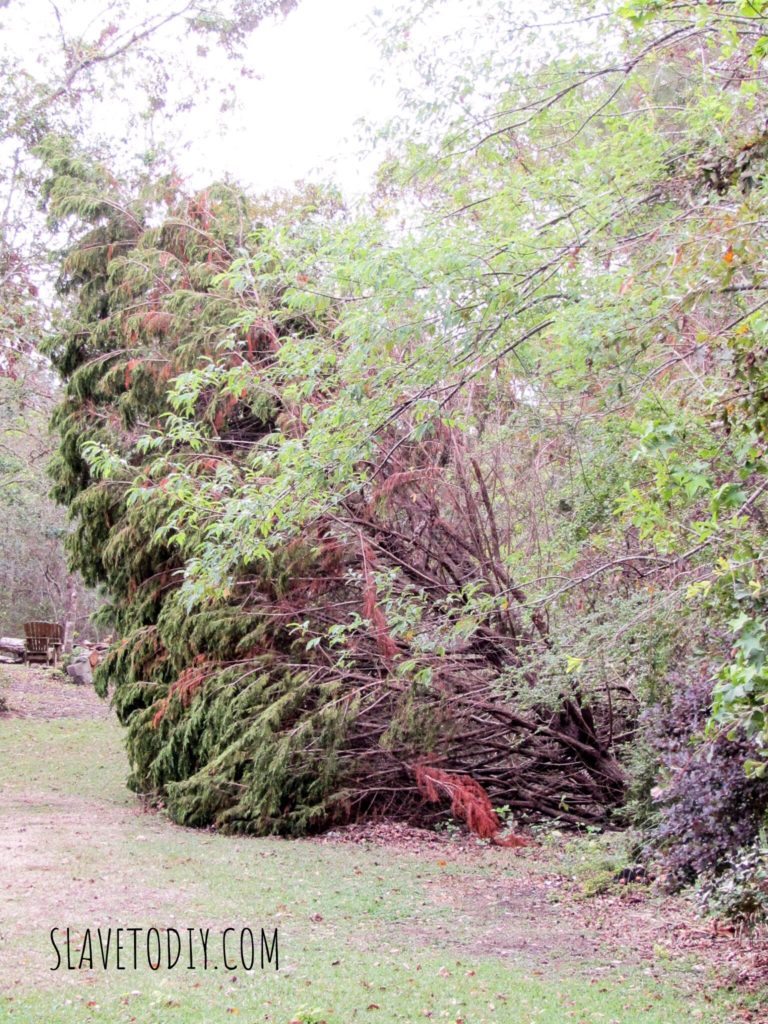
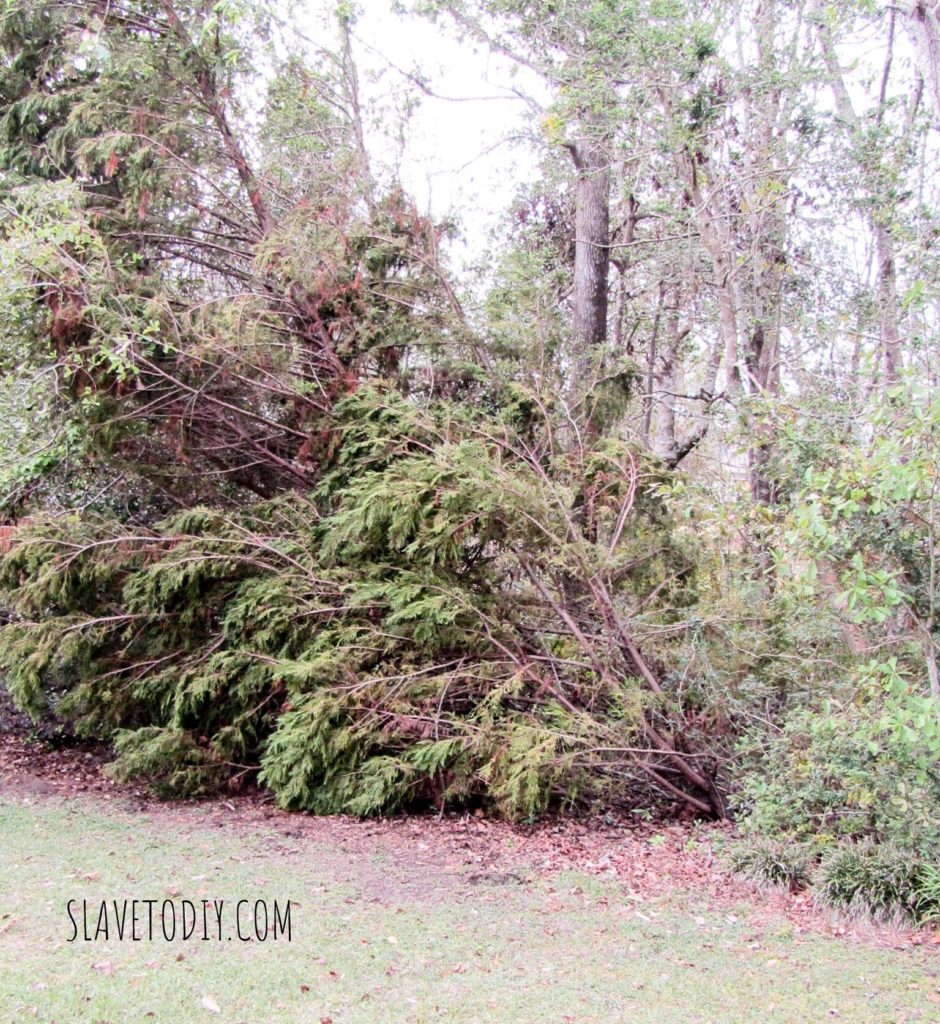
No matter what kind of hardscaping around the pool you do, do MORE. I know some people love the jungle, tropical look around the pool, but I don’t like it. Think: snakes and leaves in the pool. When we moved into our new place the pool was surrounded by gardens and bushes. I came face to face with a giant snake sunning itself on a branch by the pool without even realizing it. Then I asked Rainman, very nicely (and I’m sure very calmly), to get out the napalm and make the greenery go away.

Can you believe how overgrown this was??? NOT relaxing.

Pool Planning, Design, Tips and Considerations
Pool Planning, Design, Tips and Considerations: Overgrown areas around pools create habitats for snakes and the potential for more leaves and debris in the pool.

Also, think about where you live and how hot the surface will get. Concrete is okay where we are, even though it still gets VERY hot. If it’s in the budget: the best pool surface for hot climates is light travertine.  It’s beautiful and stays cooler.

Pool Planning, Design, Tips and Considerations
Pool Planning, Design, Tips and Considerations: Travertine Pavers from Poolpricer.com

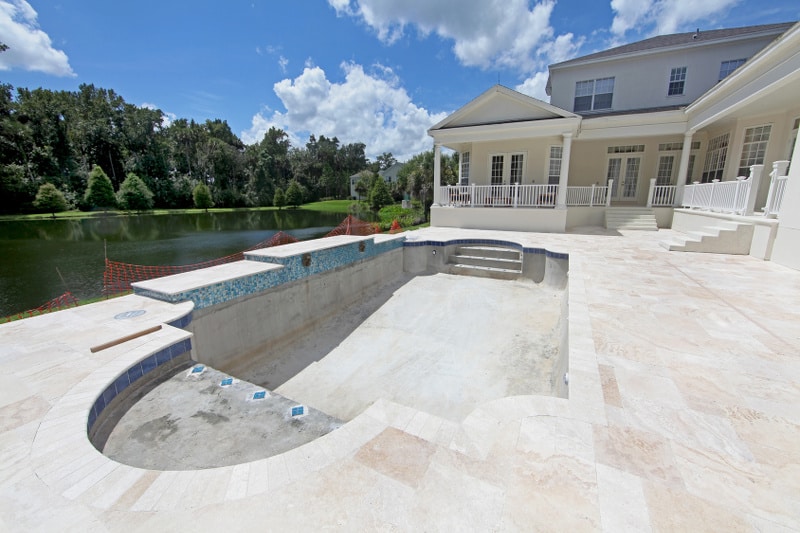
When we installed our pool one side had tiered decks and a slate patio, all connecting to the pool coping. With the exception of the grass running up to the pool on the outside, it was awesome!

Pool Planning, Design, Tips and Considerations
Pool Planning, Design, Tips and Considerations: Tiered decks, patios, and pool coping

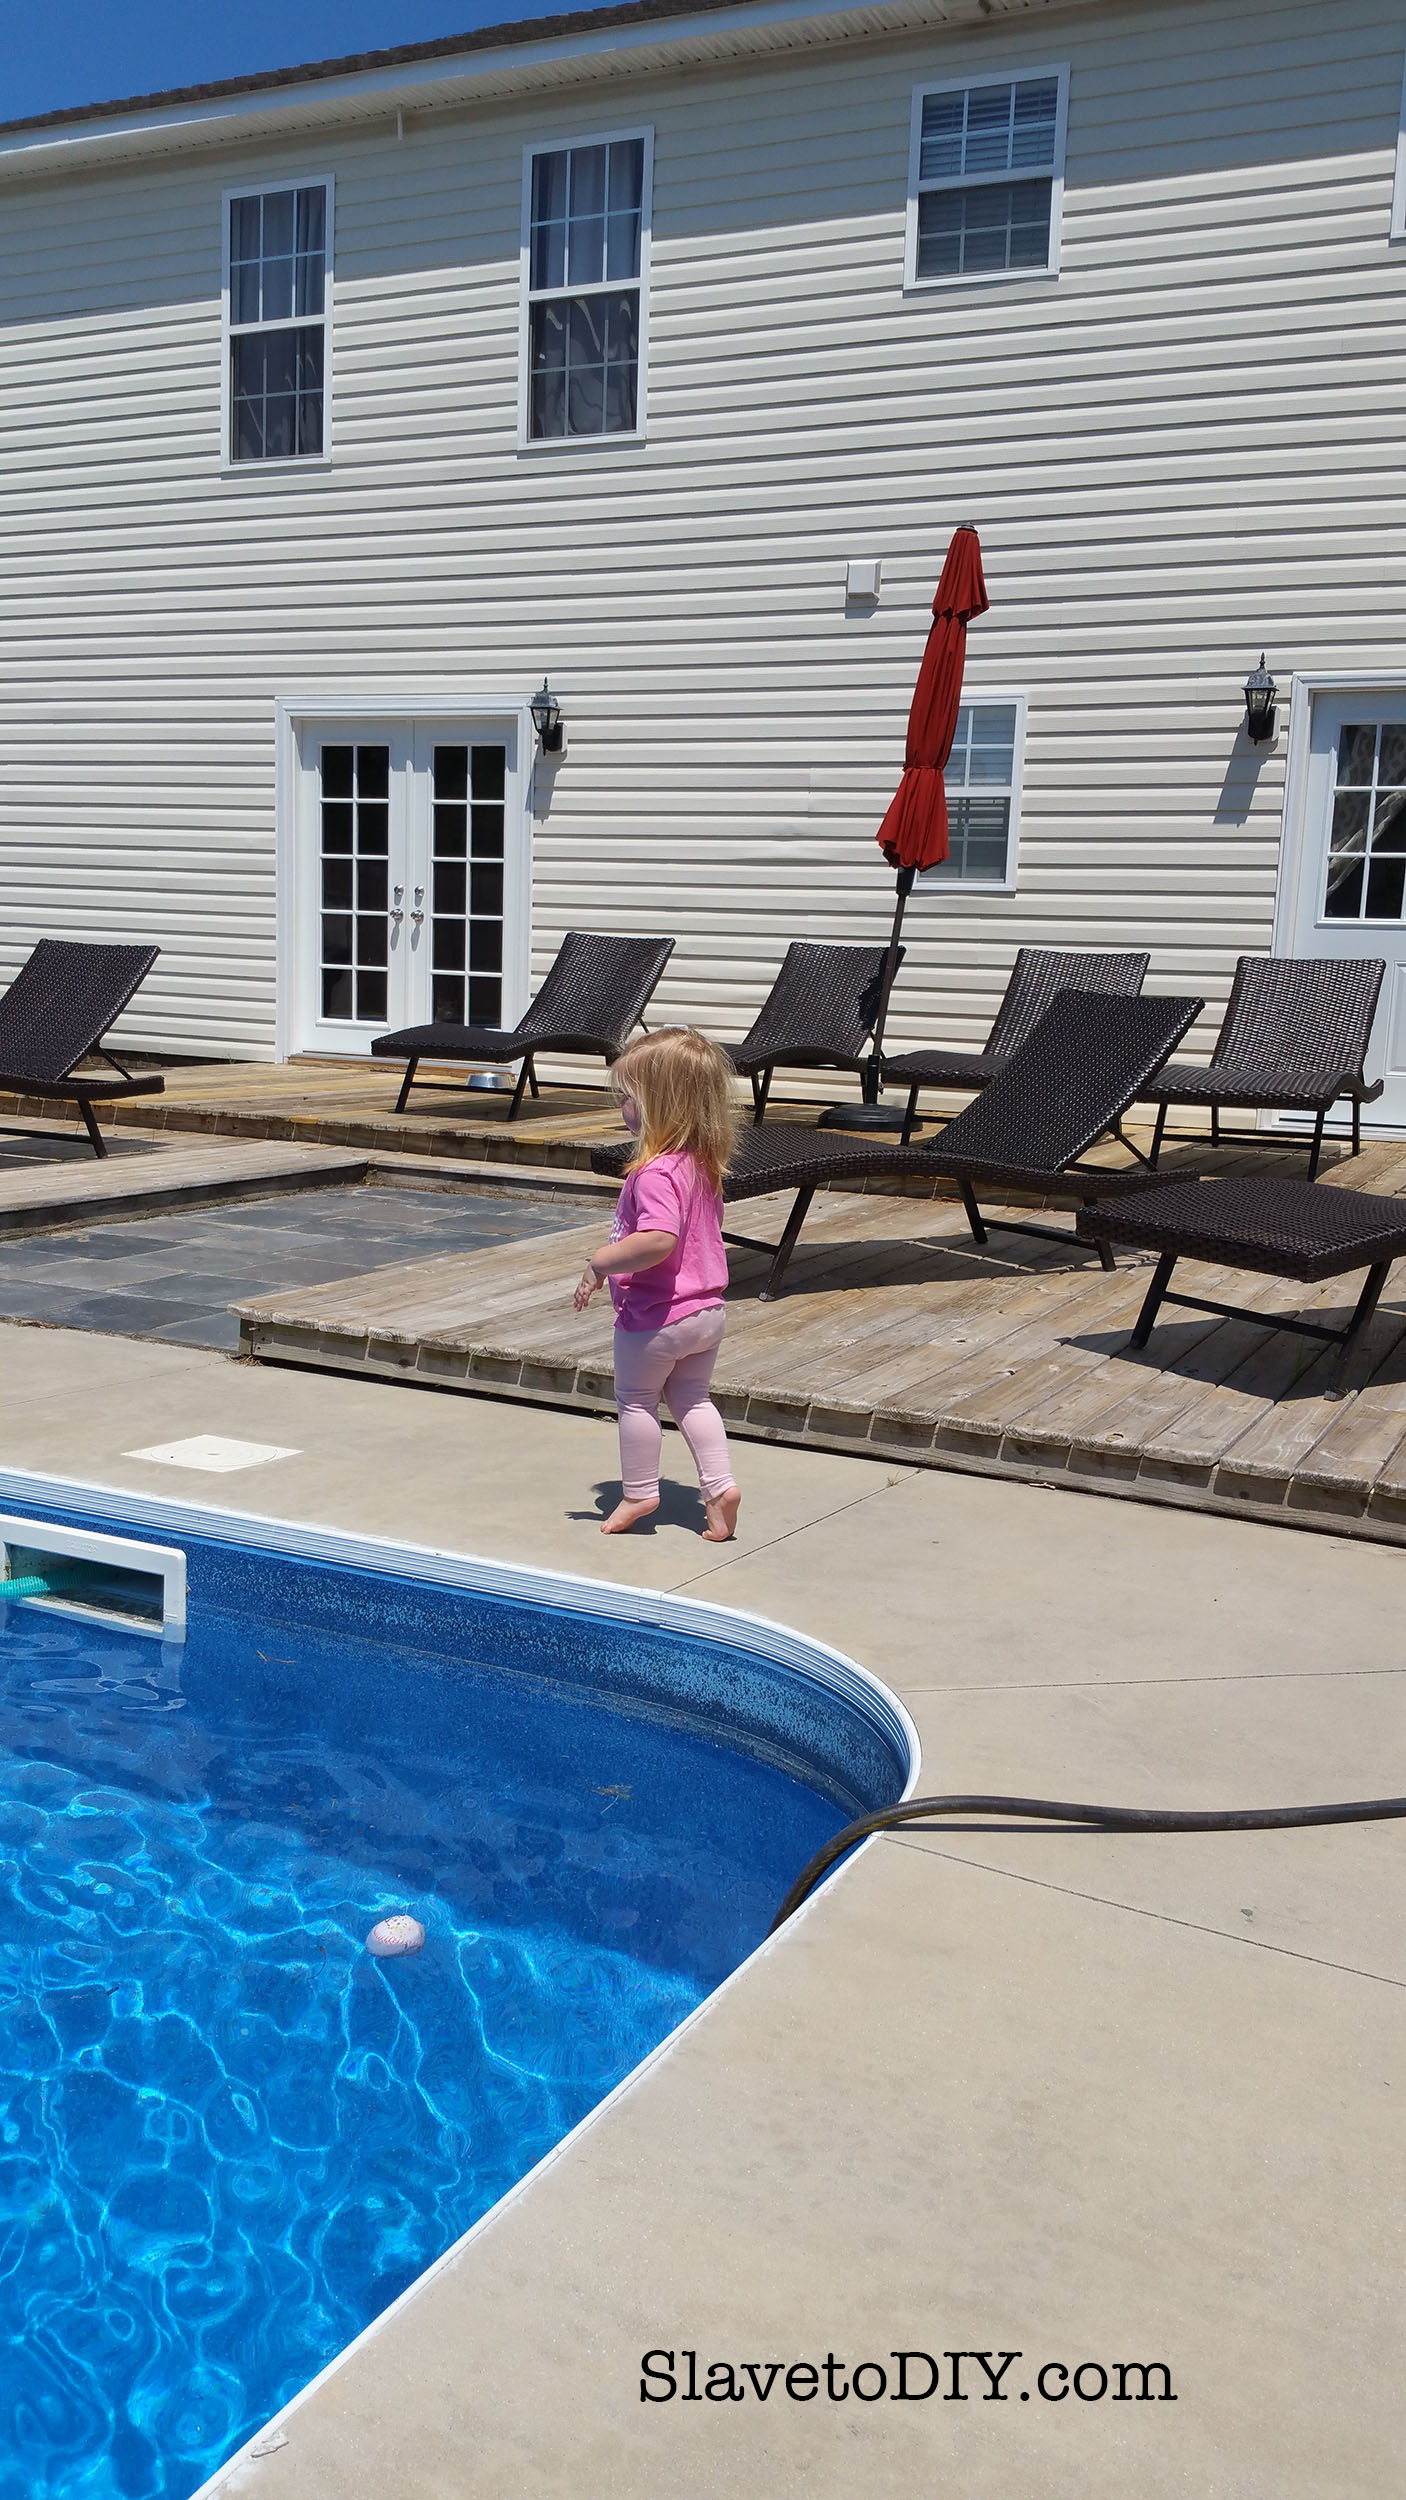
I’ve had so many questions about our awesome (and durable) deck chairs, shown above. You can buy them from Amazon with matching blue cushions.


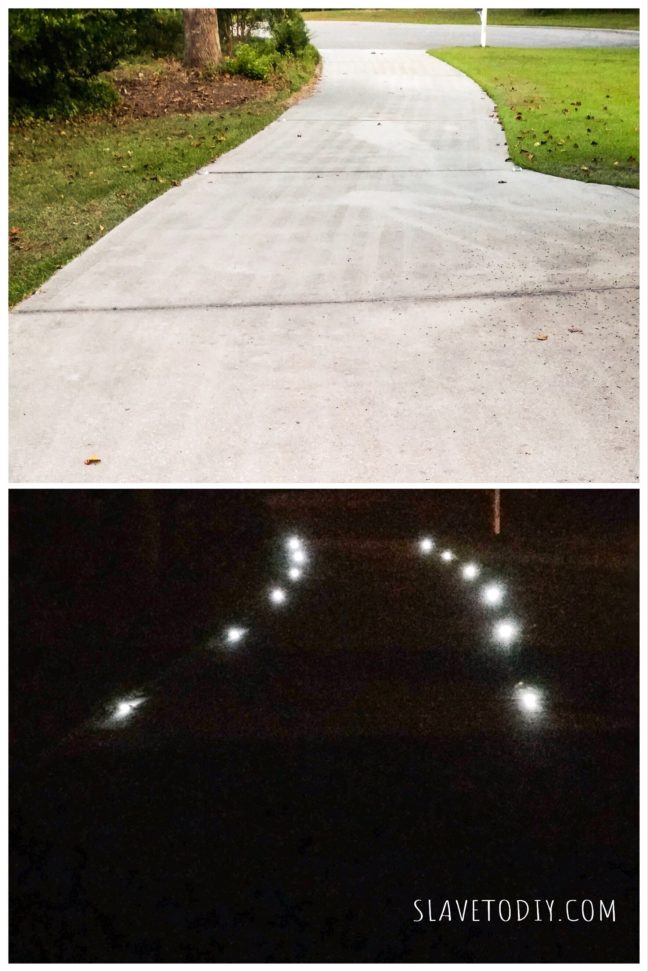
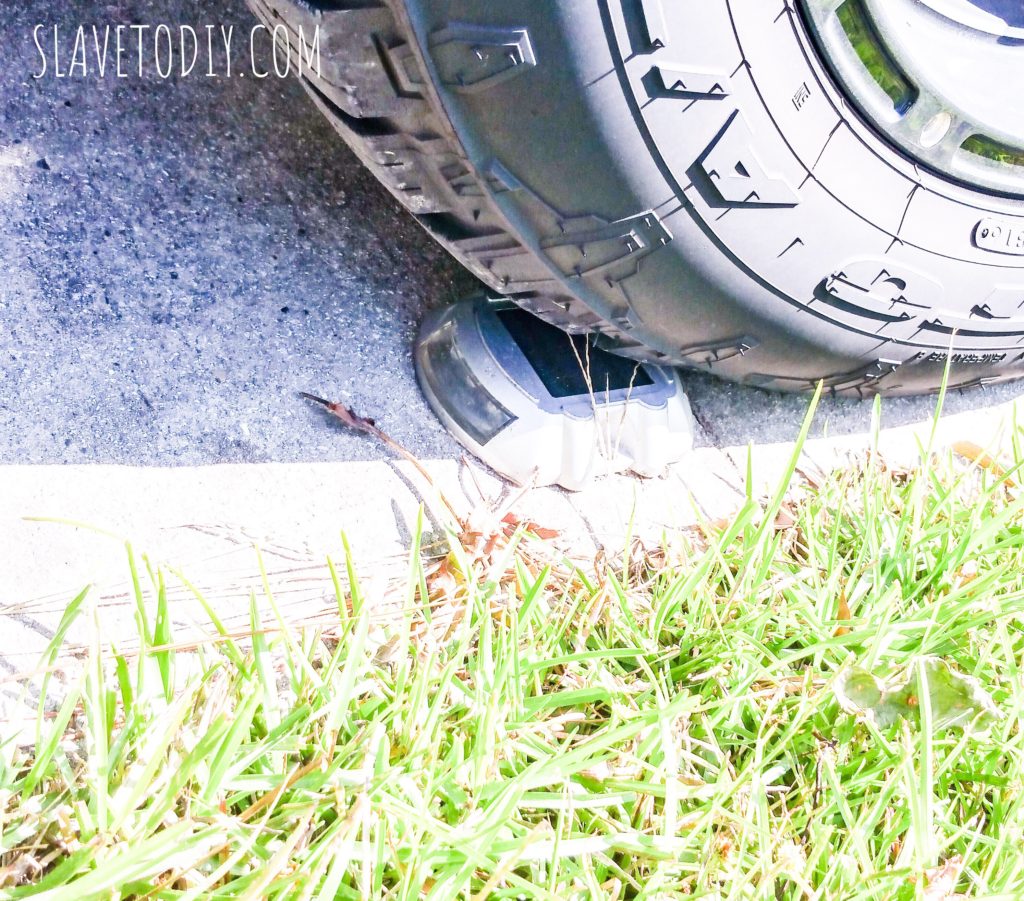
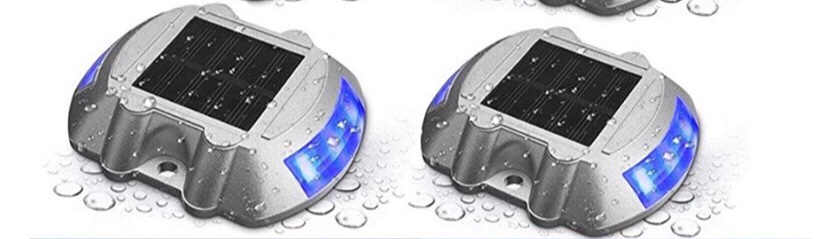
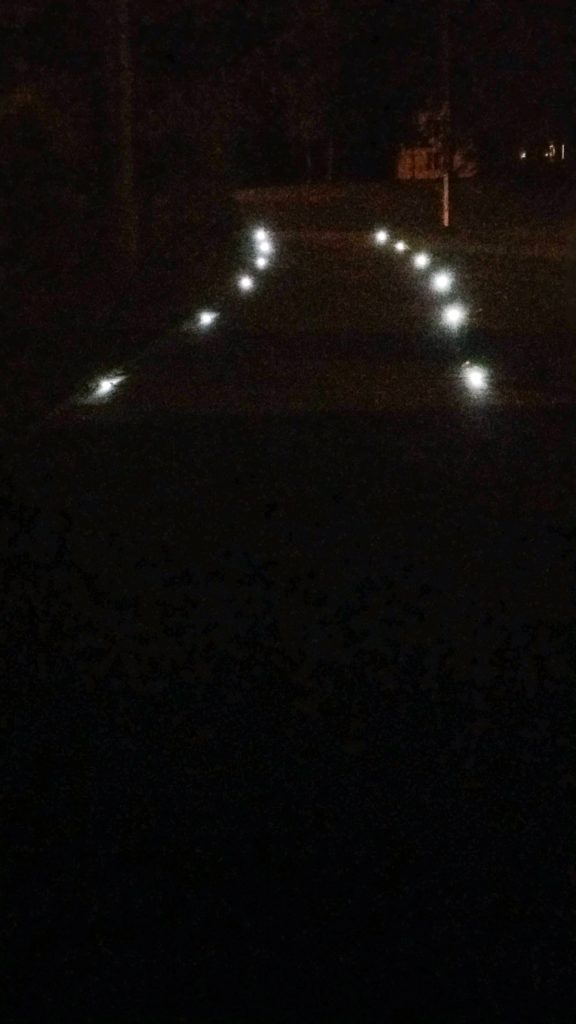
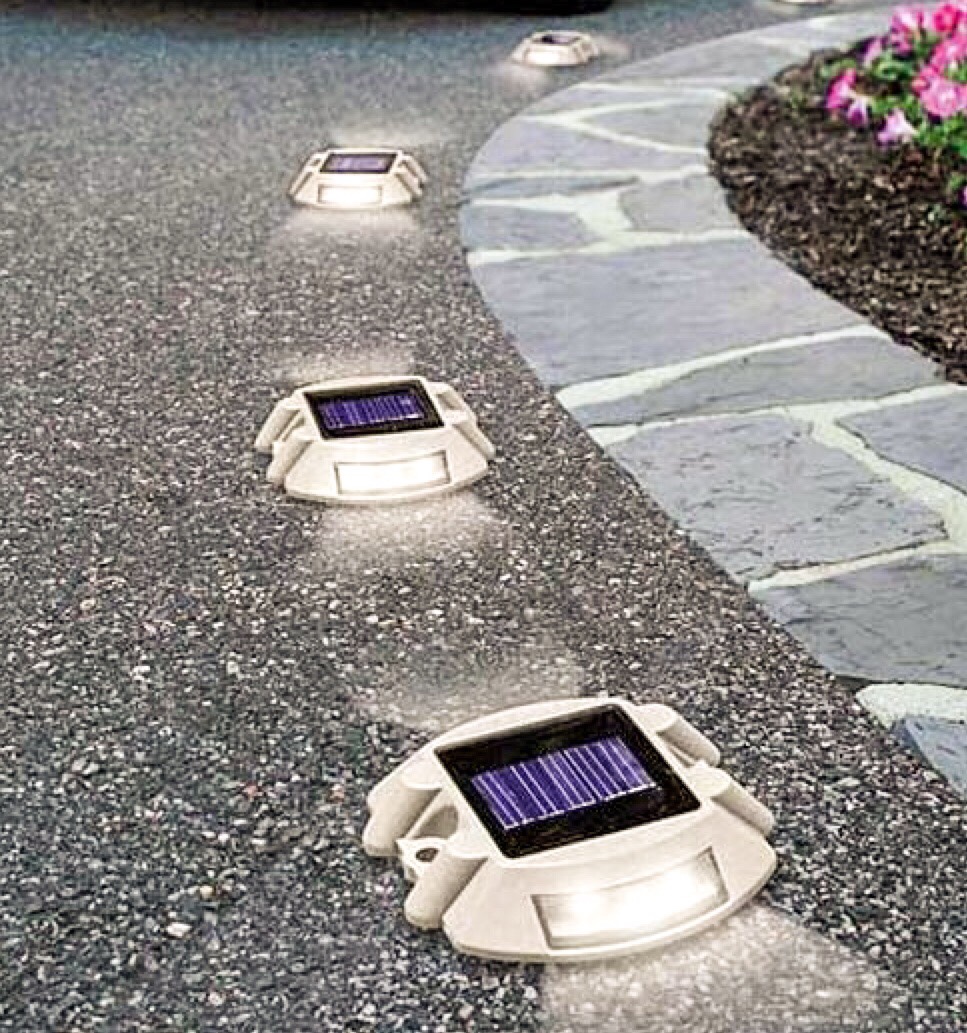
2.  Lighting: You need at least two in the pool. Period. Pathways around the pool should also be lit in the evening for safety.

Think about night swimming (with teenagers this definitely happens). You want well lit spaces where no one can get lost in the shadows.

If you can, get more than two. Think about the shadows that each light will cast. Shelves or tanning ledges create shadows, as do depth changes. If you plan on using your pool in the evening, get more lights.

We discovered after our pool was installed that there was an additional light we could’ve installed that came with the kit. If we’d have known that, we would’ve paid extra to have it put in. We only had one light and it was in the shallow end, so there was a shadow in the deep end, and I was a nervous wreck watching for drowning kids.

Pool Planning, Design, Tips and Considerations
Pool Planning, Design, Tips and Considerations: Pool lighting from Leisurepoolusa.com


3.  Depth: That depends.

What are you planning to do in it? If you’re planning on diving you need an eight foot deep end. Some areas (like our current home) won’t accommodate deep pools because of the water table. If you only wade, you really only need a 4-6 foot pool.

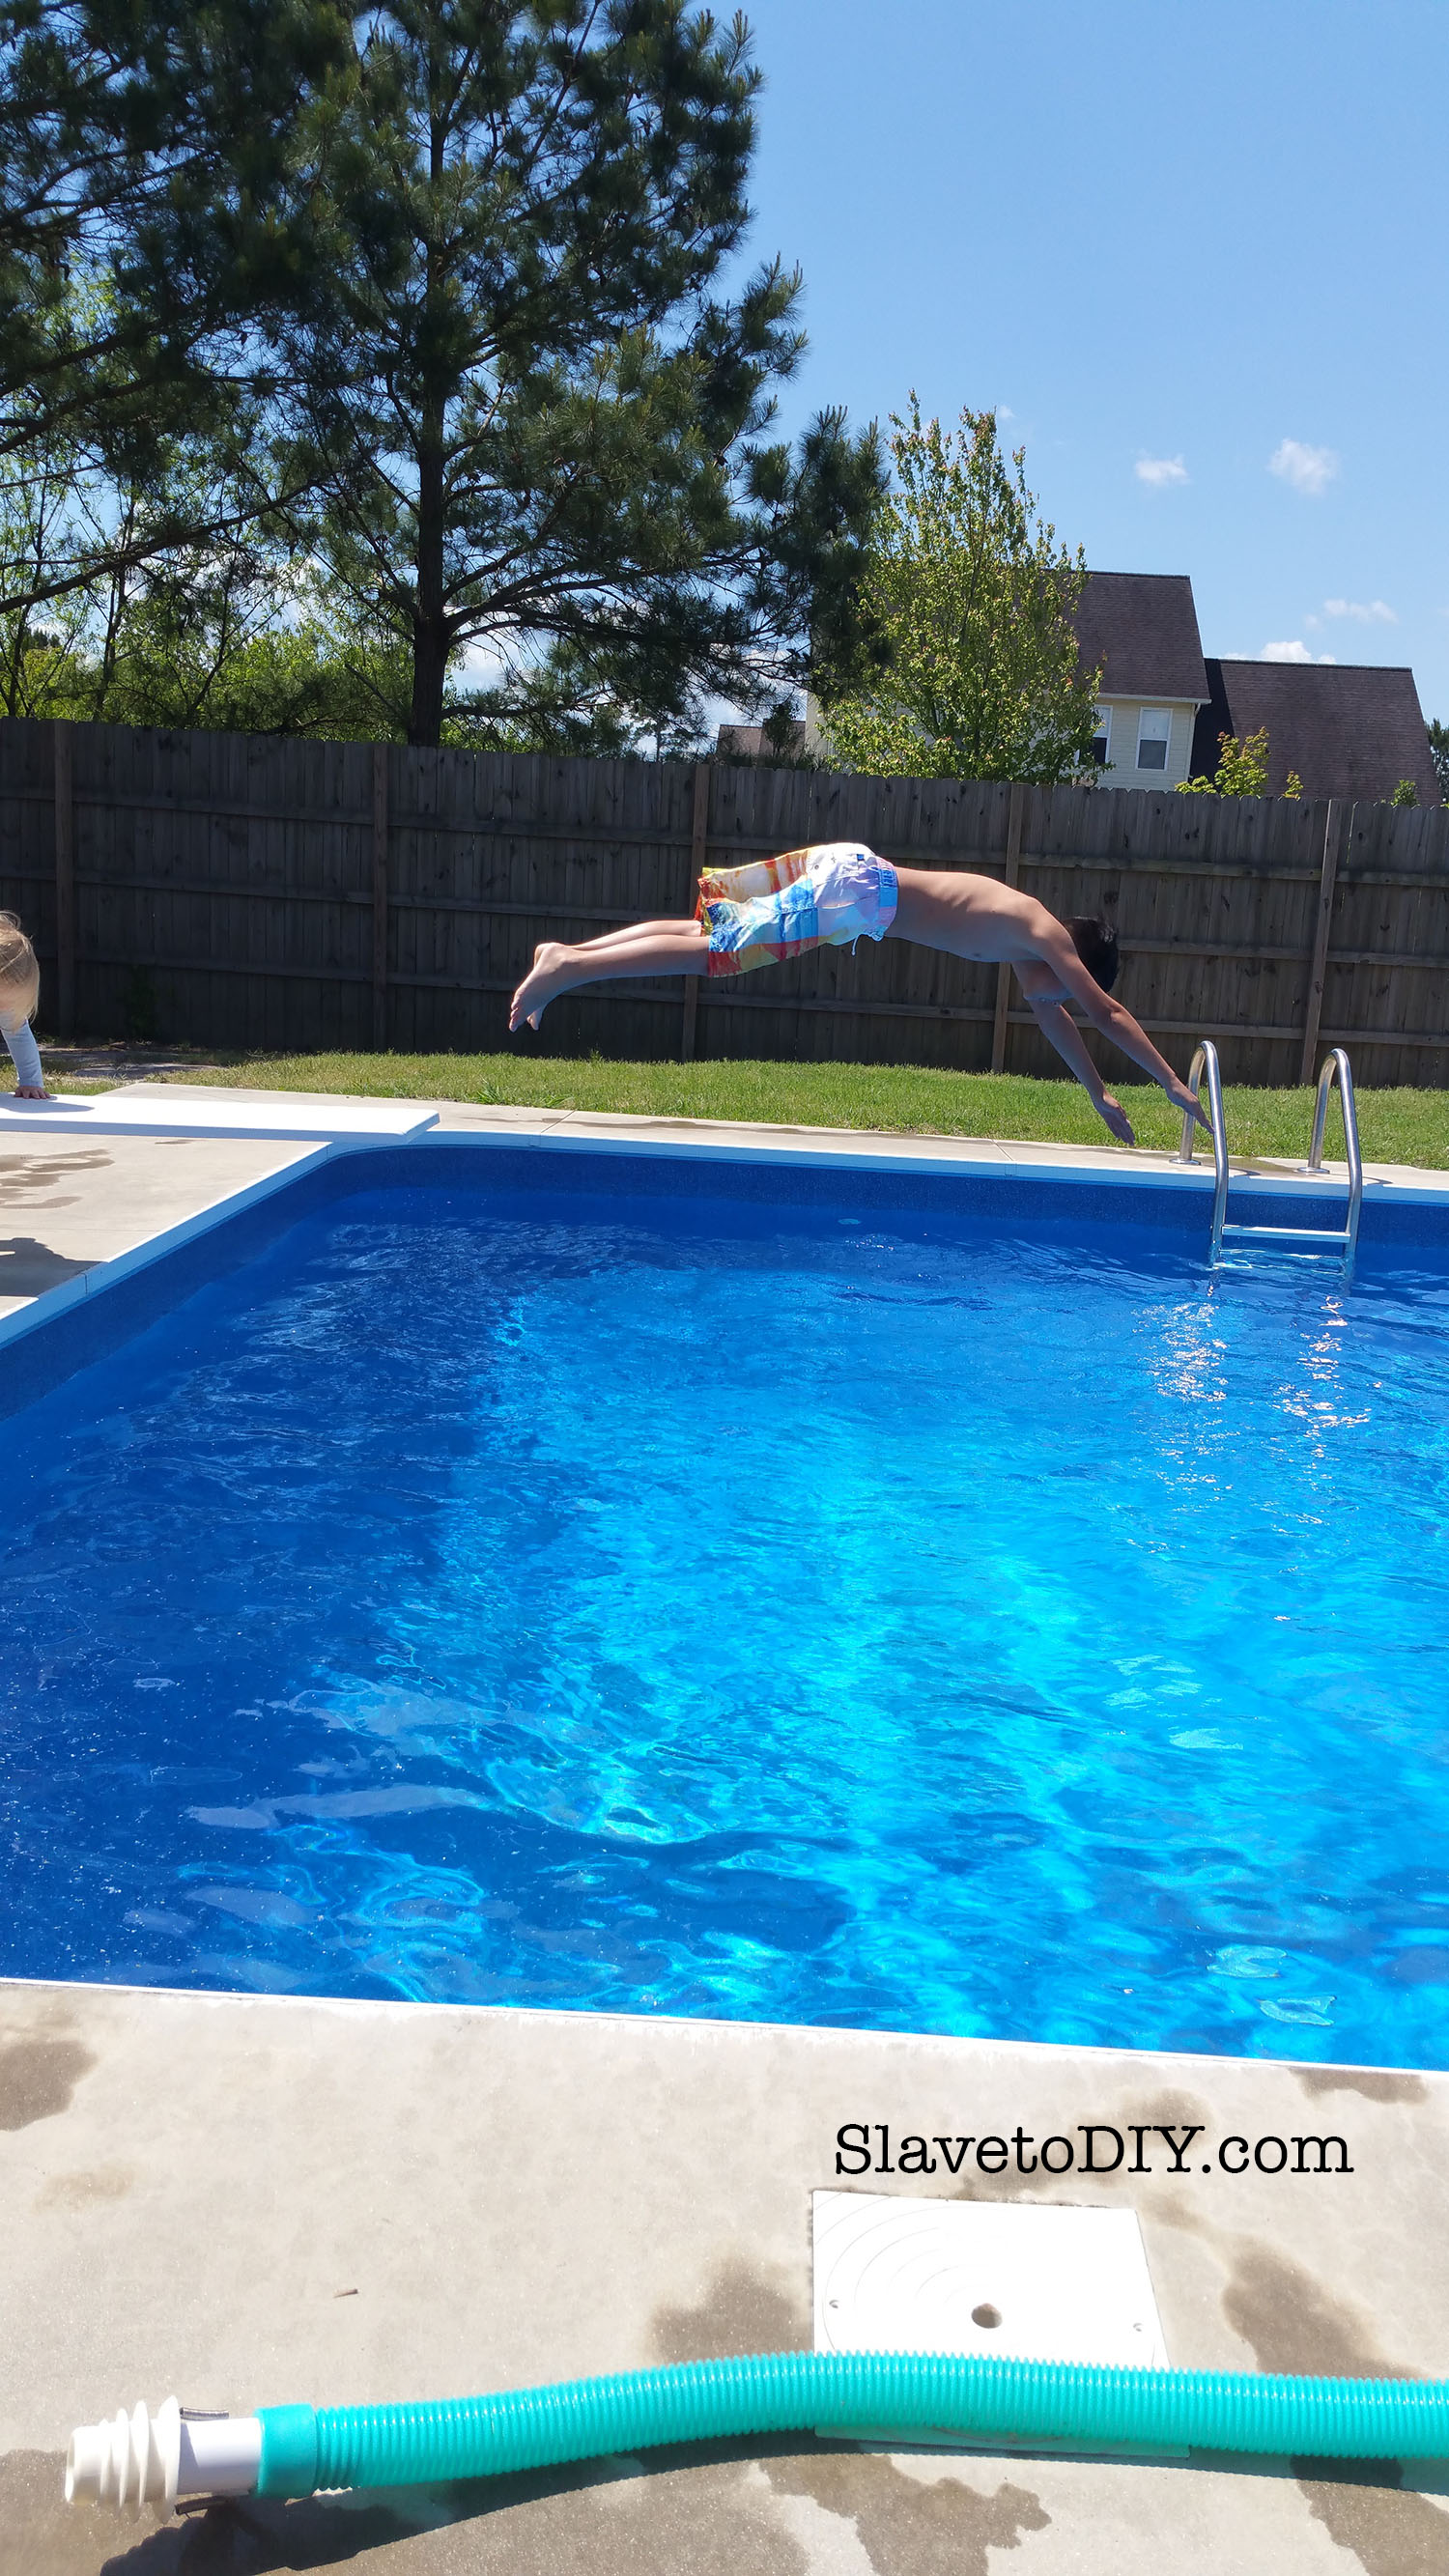
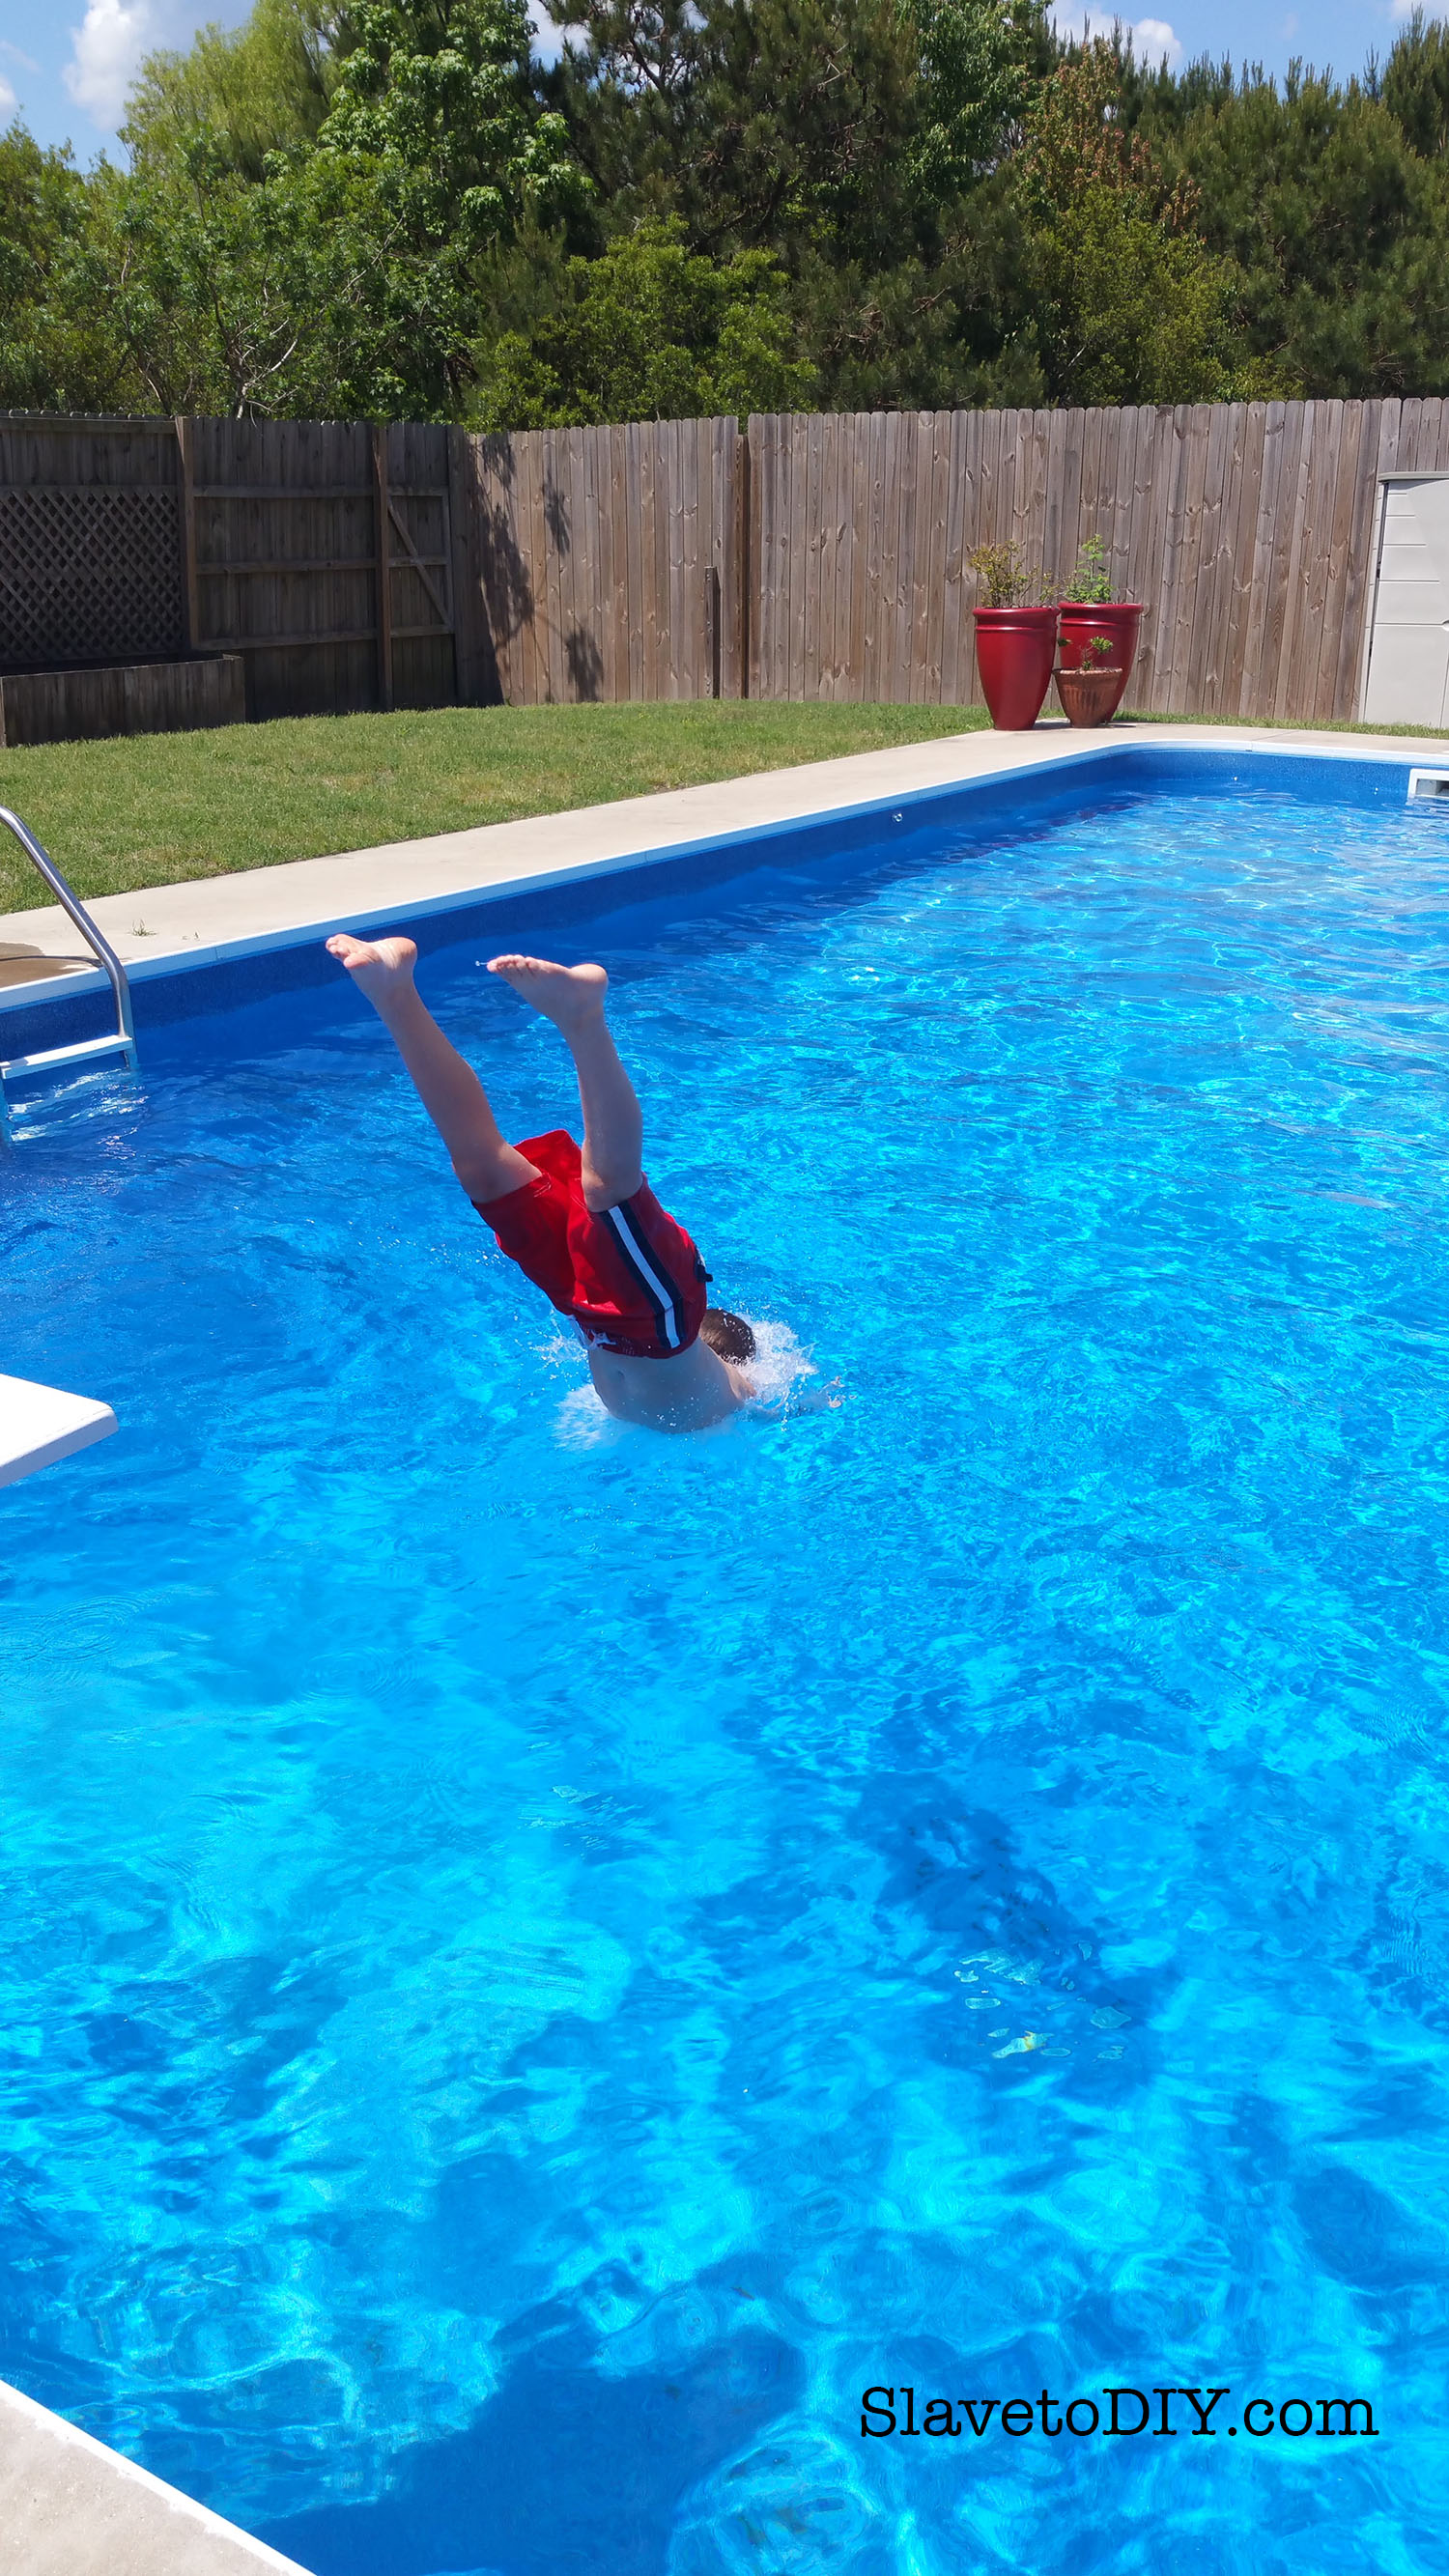
I’ll admit I miss our eight foot deep end (the new pool is only six feet deep). We used to watch the kids and their friends have diving and trick competitions off of the big diving board and it really was a fun time.

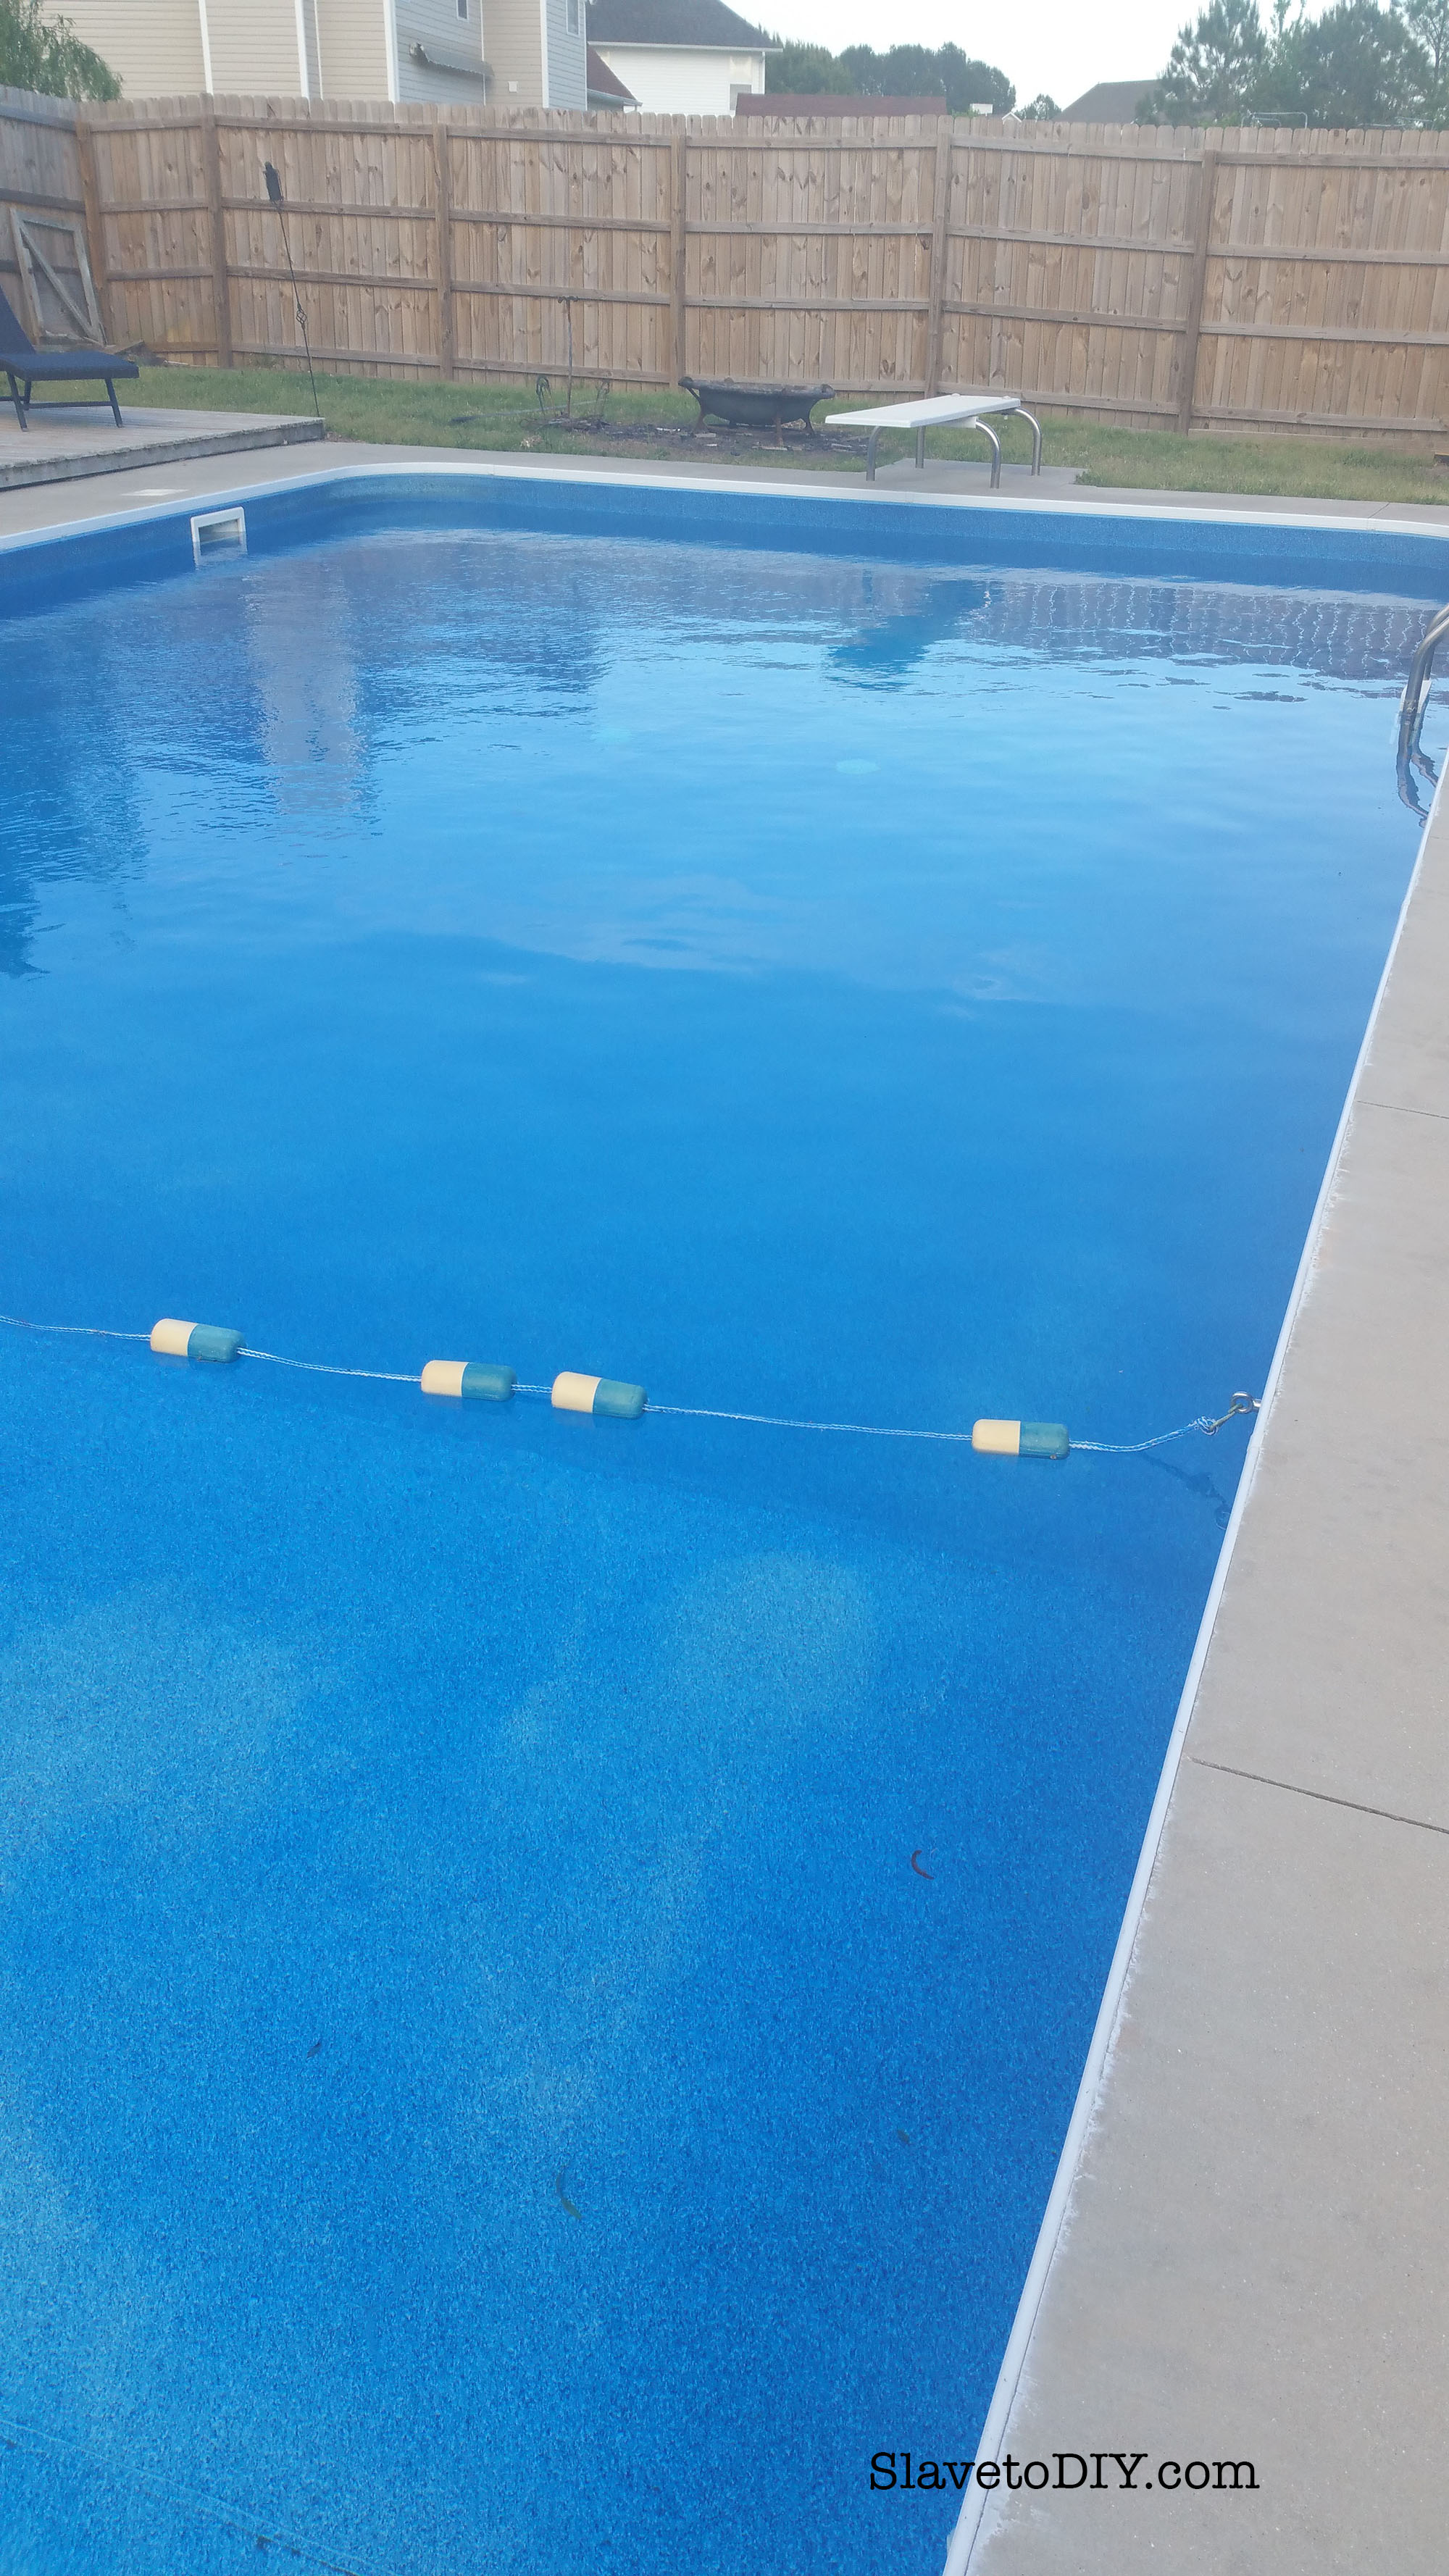
The pool we installed had a graduated deep end with the ability to rope off the shallow end (which was still sizable) for younger kids. It was a handy set up for kids of different ages.

Pool Planning, Design, Tips and Considerations
Pool Planning, Design, Tips and Considerations: Diving boards should have at least an eight foot deep end


4.  Do I need a dedicated vacuum port?

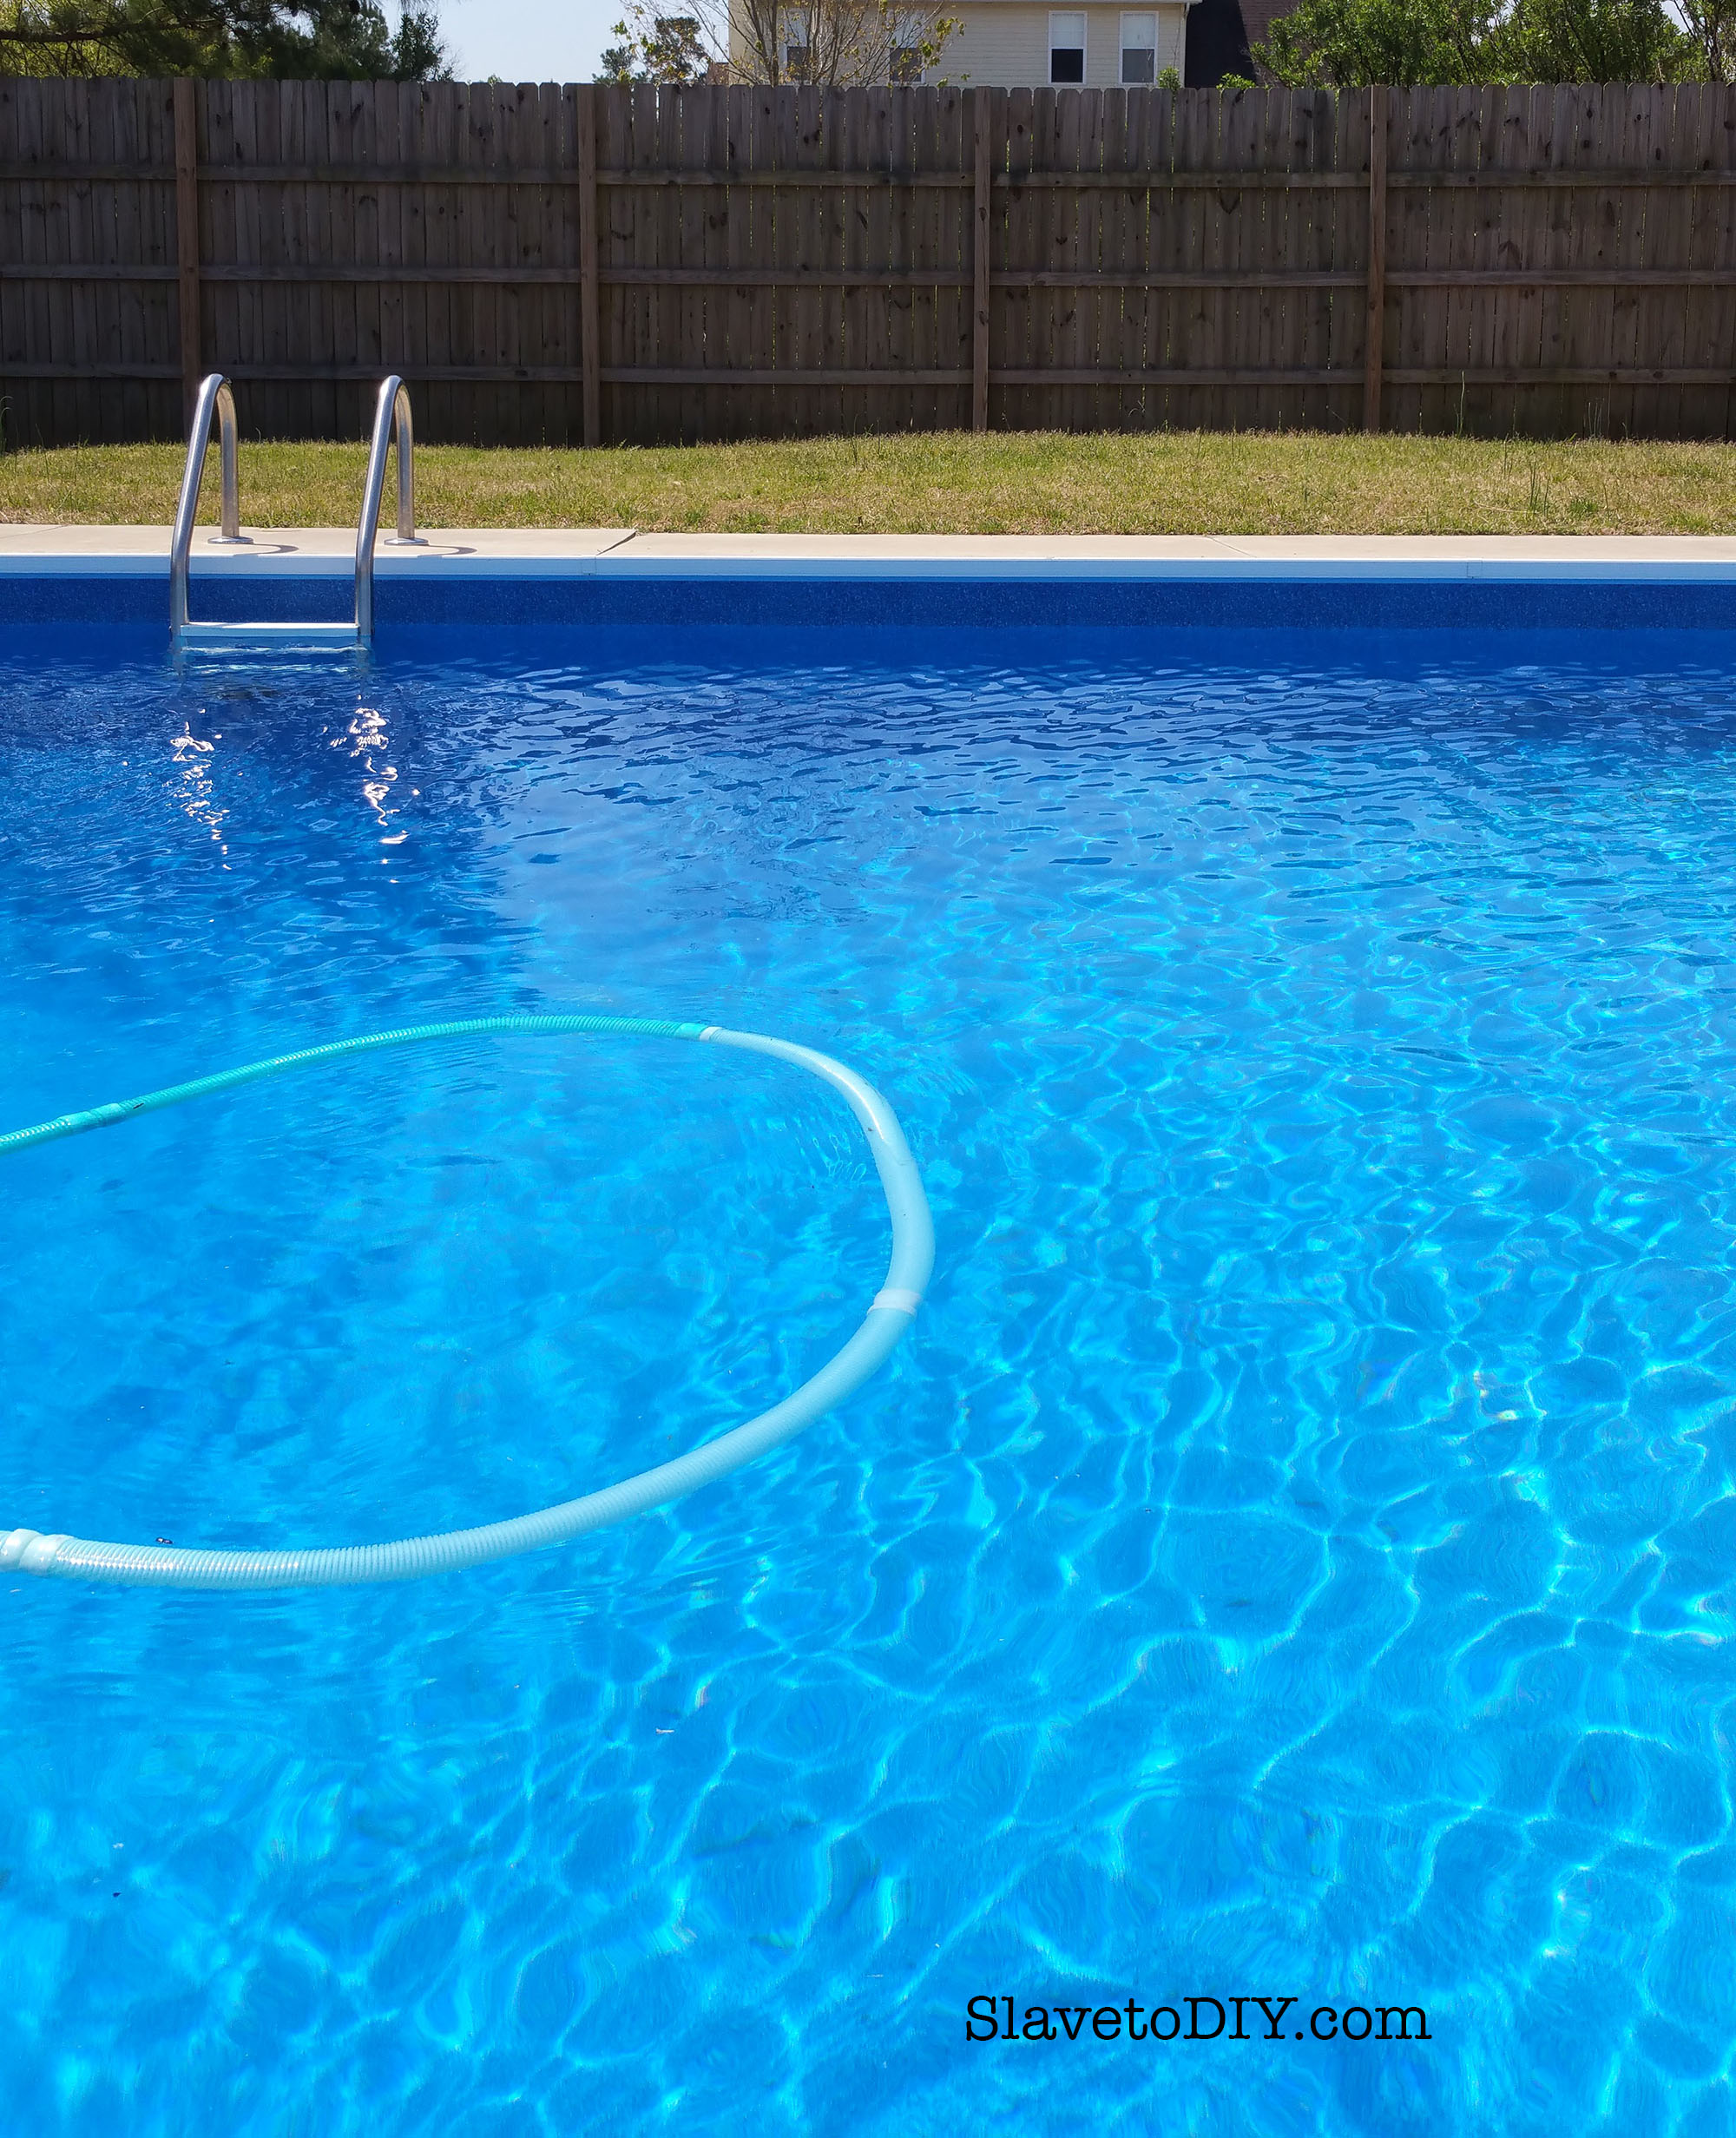
YES. So, if you’re unfamiliar, hoses for vacuums either run off of their own port, or theres a port inside the clean outs (the flapper windows on the side of the pool). It’s more work for the pool contractor, so if you don’t ask, they’re not going to offer the dedicated port.

Why the dedicated port? If you don’t have a separate port for the pool you can’t vacuum the bottom of the pool and run the skimmer at the same time. That means that you either have bugs on top of the pool, or debris on the bottom. We have gotten around this by unhooking the vacuum about 45 minutes before we want to swim. It sure would be handy to be able to use both though.

What kind of vacuum? Look, you need a vacuum unless you’d like to spend HOURS a day vacuuming your pool. I’m not exaggerating. We have tried several different kinds of vacuums, but my favorite by far are the suction vacuums. Generic types are available (comparable to the Kreepy Krauly), complete with hoses, for less than a hundred bucks and I bought a Complete New Generic Suction Vacuum Set annually to replace dry rotted hoses, etc. If the vacuum is still going strong, but your hoses are cracking, you can buy replacement hoses instead of a whole new set for less.

I know there are some slick and EXPENSIVE motorized vacuums out there, but I just can’t convince myself to trust the electrical cord sitting in the water. No thanks.

Pool Planning, Design, Tips and Considerations
Pool Planning, Design, Tips and Considerations: Suction vacuum hoses and a CLEAN pool!


5.  Yes, you want the salt pool.

If you’re having a new pool installed, it’s probably about the same cost as the regular chlorine pool, anyway. Did you know that the salt pools are not actually salty (like the ocean)? The salt runs a chlorinator. The water is silky smooth and doesn’t bleach out swimsuits or turn hair green.

I don’t know if it’s true of every salt pool in every climate, but we added salt A LOT. However, the chemicals seemed easier to balance in the pool, and I had teenagers to haul salt from Lowe’s about every two weeks.

Our current pool is chlorine and I hate it. We will probably convert it before next season to salt as I’ve spent a small fortune this year trying to get the green out of my daughter’s hair, and it would probably be cheaper (not to mention more enjoyable) to have the salt pool. I’ve also found the chemical balance in the chlorine pool to be much more finicky and I spend quite a bit more on pool maintenance (with a pool half the size!).

Pool Planning, Design, Tips and Considerations
Pool Planning, Design, Tips and Considerations: Silky smooth salt pool


6.  How big does your pool need to be?

Everyone’s needs are different, but we went with the biggest size the installer had available. With four growing kids (at the time) and half the neighborhood swimming in the summer, I was psyched we got a pool that big. At 20X40 feet, with a 10X10 side bump-out, and 36,000 gallons it was a whopper and I loved it.

Your contractor can offer guidance on the size and shape of the pool that’s right for your family. Consider lots of options: depth changes, deep ends for diving or slides, tanning ledges, extra long thin pools for lap swimming, etc.

Pool Planning, Design, Tips and Considerations
Pool Planning, Design, Tips and Considerations: Enjoying a neighborhood sized pool


7.  What kind of inground pool should you install?

Well, this is sort of the million dollar question! There are three basic options for in ground pools: vinyl, fiberglass, and gunite. You should research this before you contact pool companies because if you don’t know what you want, many pool contractors “specialize” in one type (read: they have experience or make more profit off of certain types) and they will talk you into that even if it’s NOT the best kind for you.

Considerations: Size matters with respect to cost.

Gunite is the Daddy Warbucks pool. If money is not a concern, this is usually the choice because it is generally quite a bit pricier than the other options. They are awesome because they are hand poured in special concrete you can literally configure them ANY way you want to. These are more expensive than either of the other options regardless of size.

For a very small pool, it may be slightly cheaper (and MUCH faster) to install a pre-molded fiberglass pool. These are handy, stay clean, are quite durable, and are easy to repair if something happens to the finish. If your dogs go into your pool, these are a better choice as they are less likely to tear than vinyl pools.

Once you start looking at very large pools (like the one we installed) fiberglass pools get way too expensive. We went with vinyl and we loved it. Remember, you do have to budget every decade or so for a new vinyl liner as they warp, tear, fade, or just wear out over time. At about 5K a pop in our area, it’s no small thing.

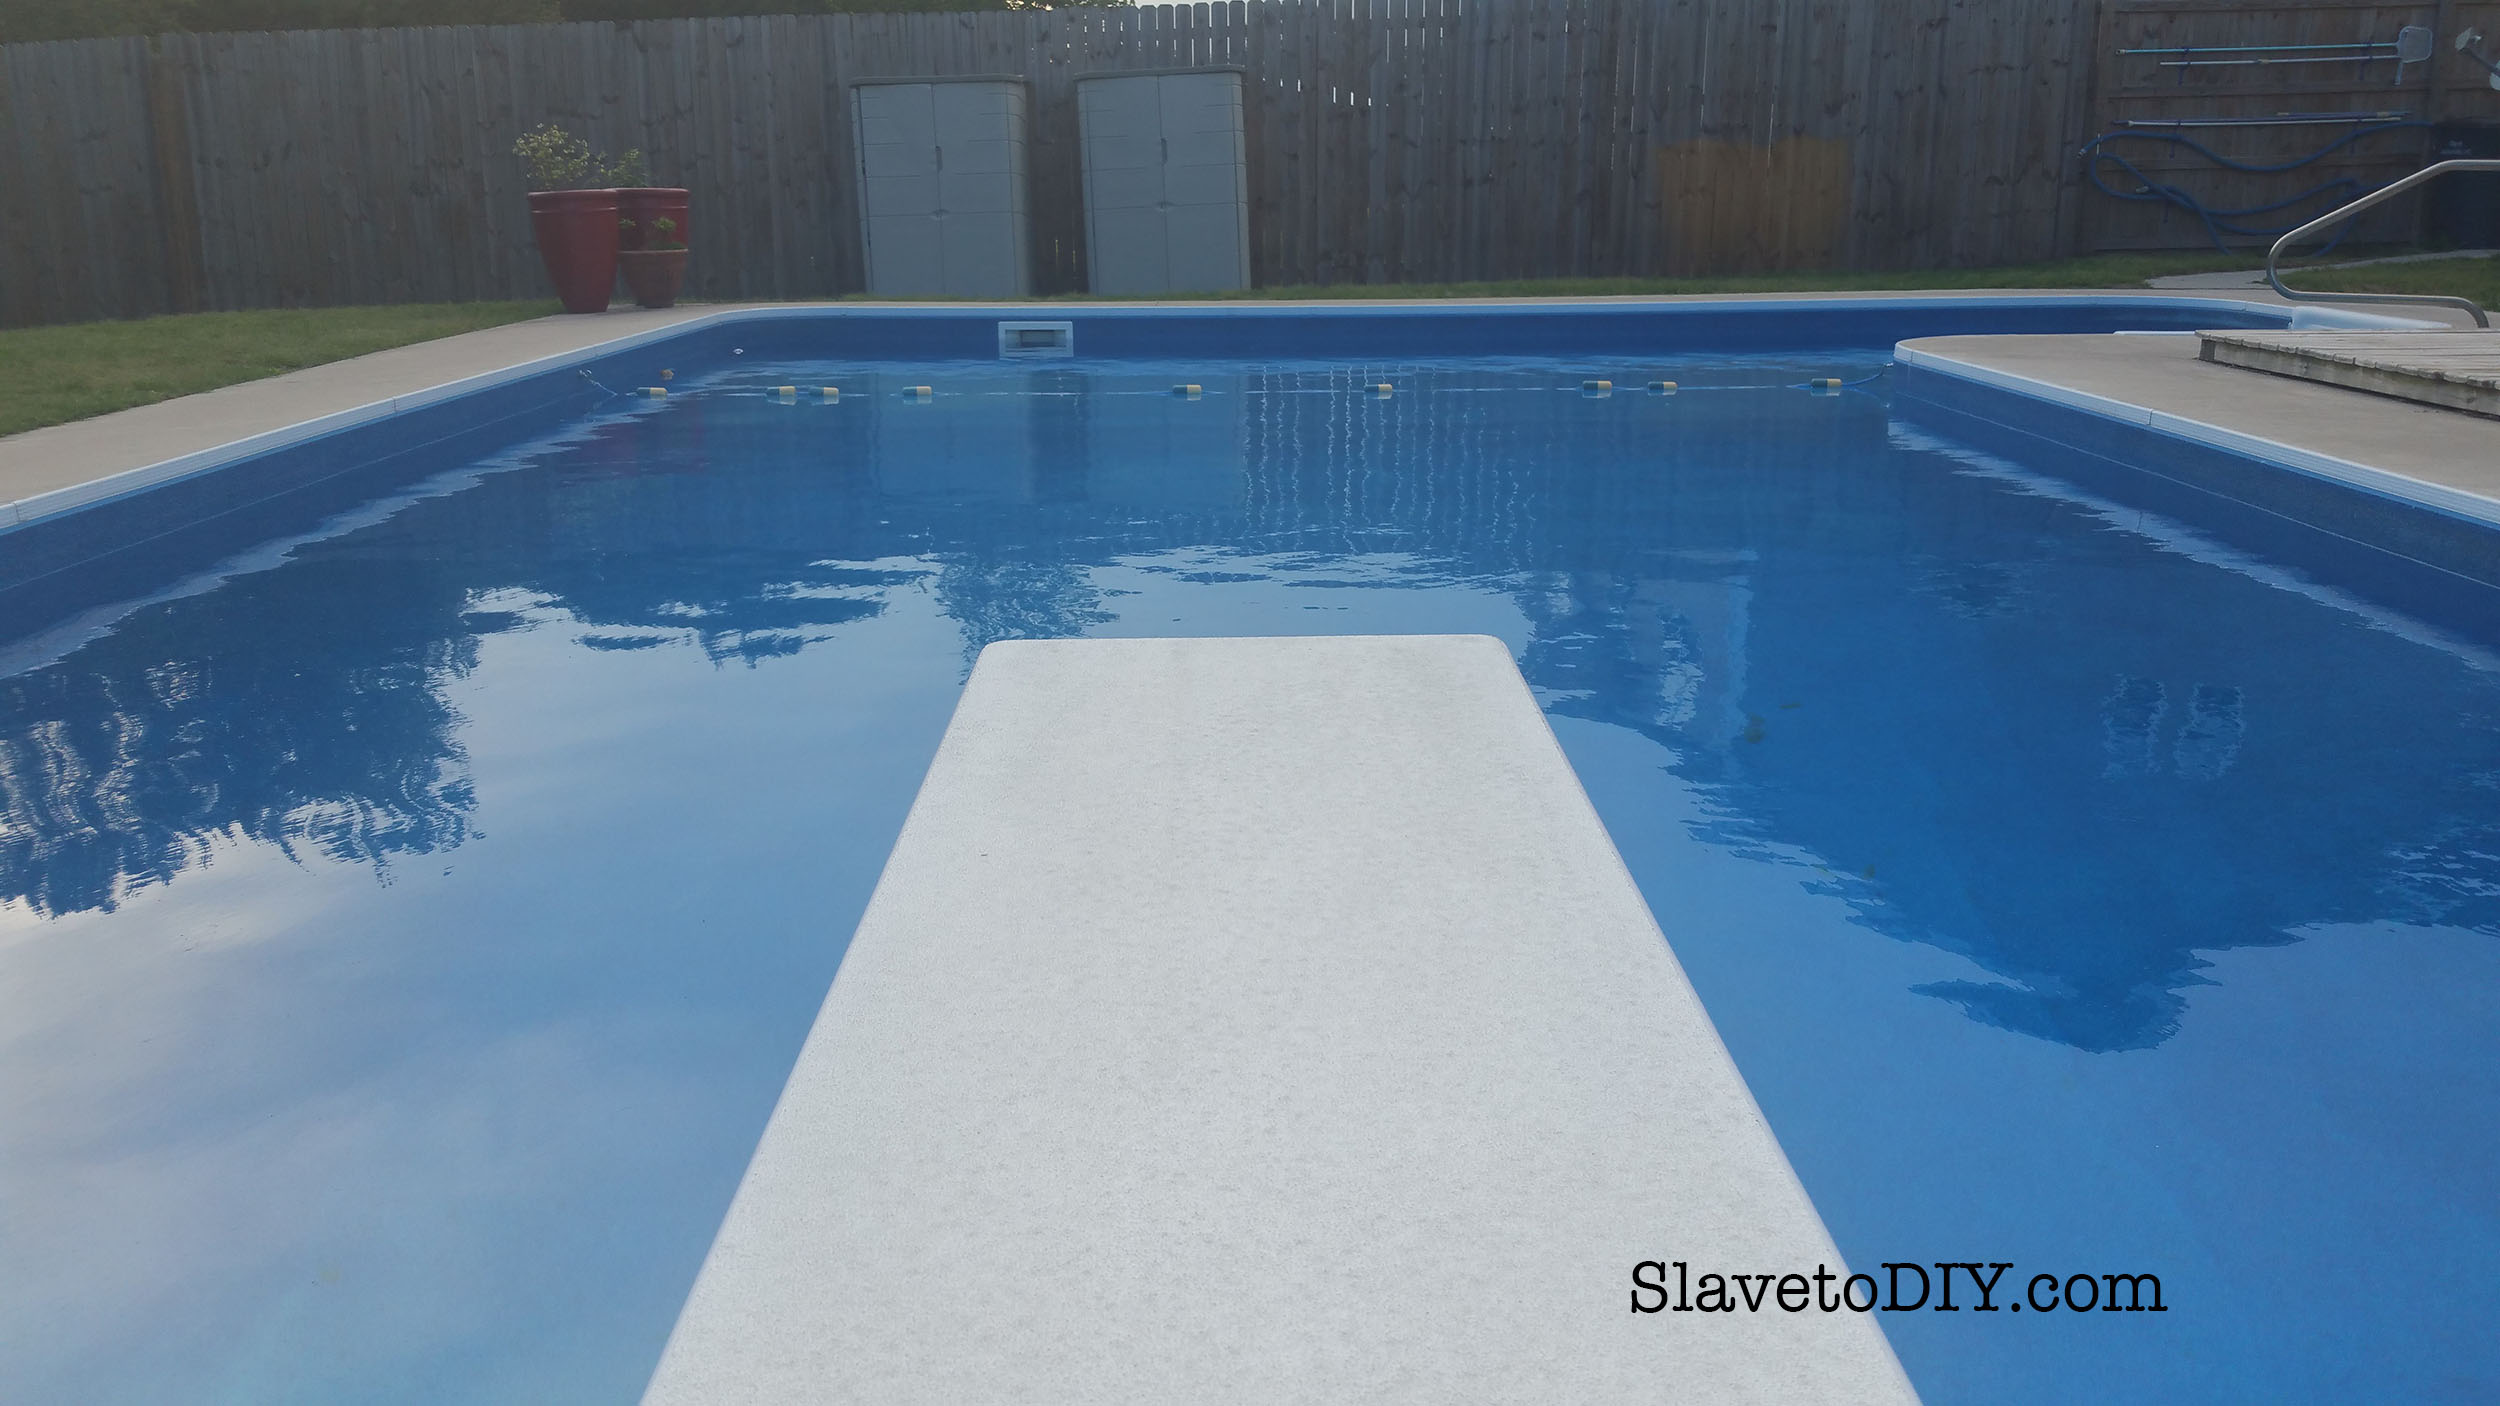
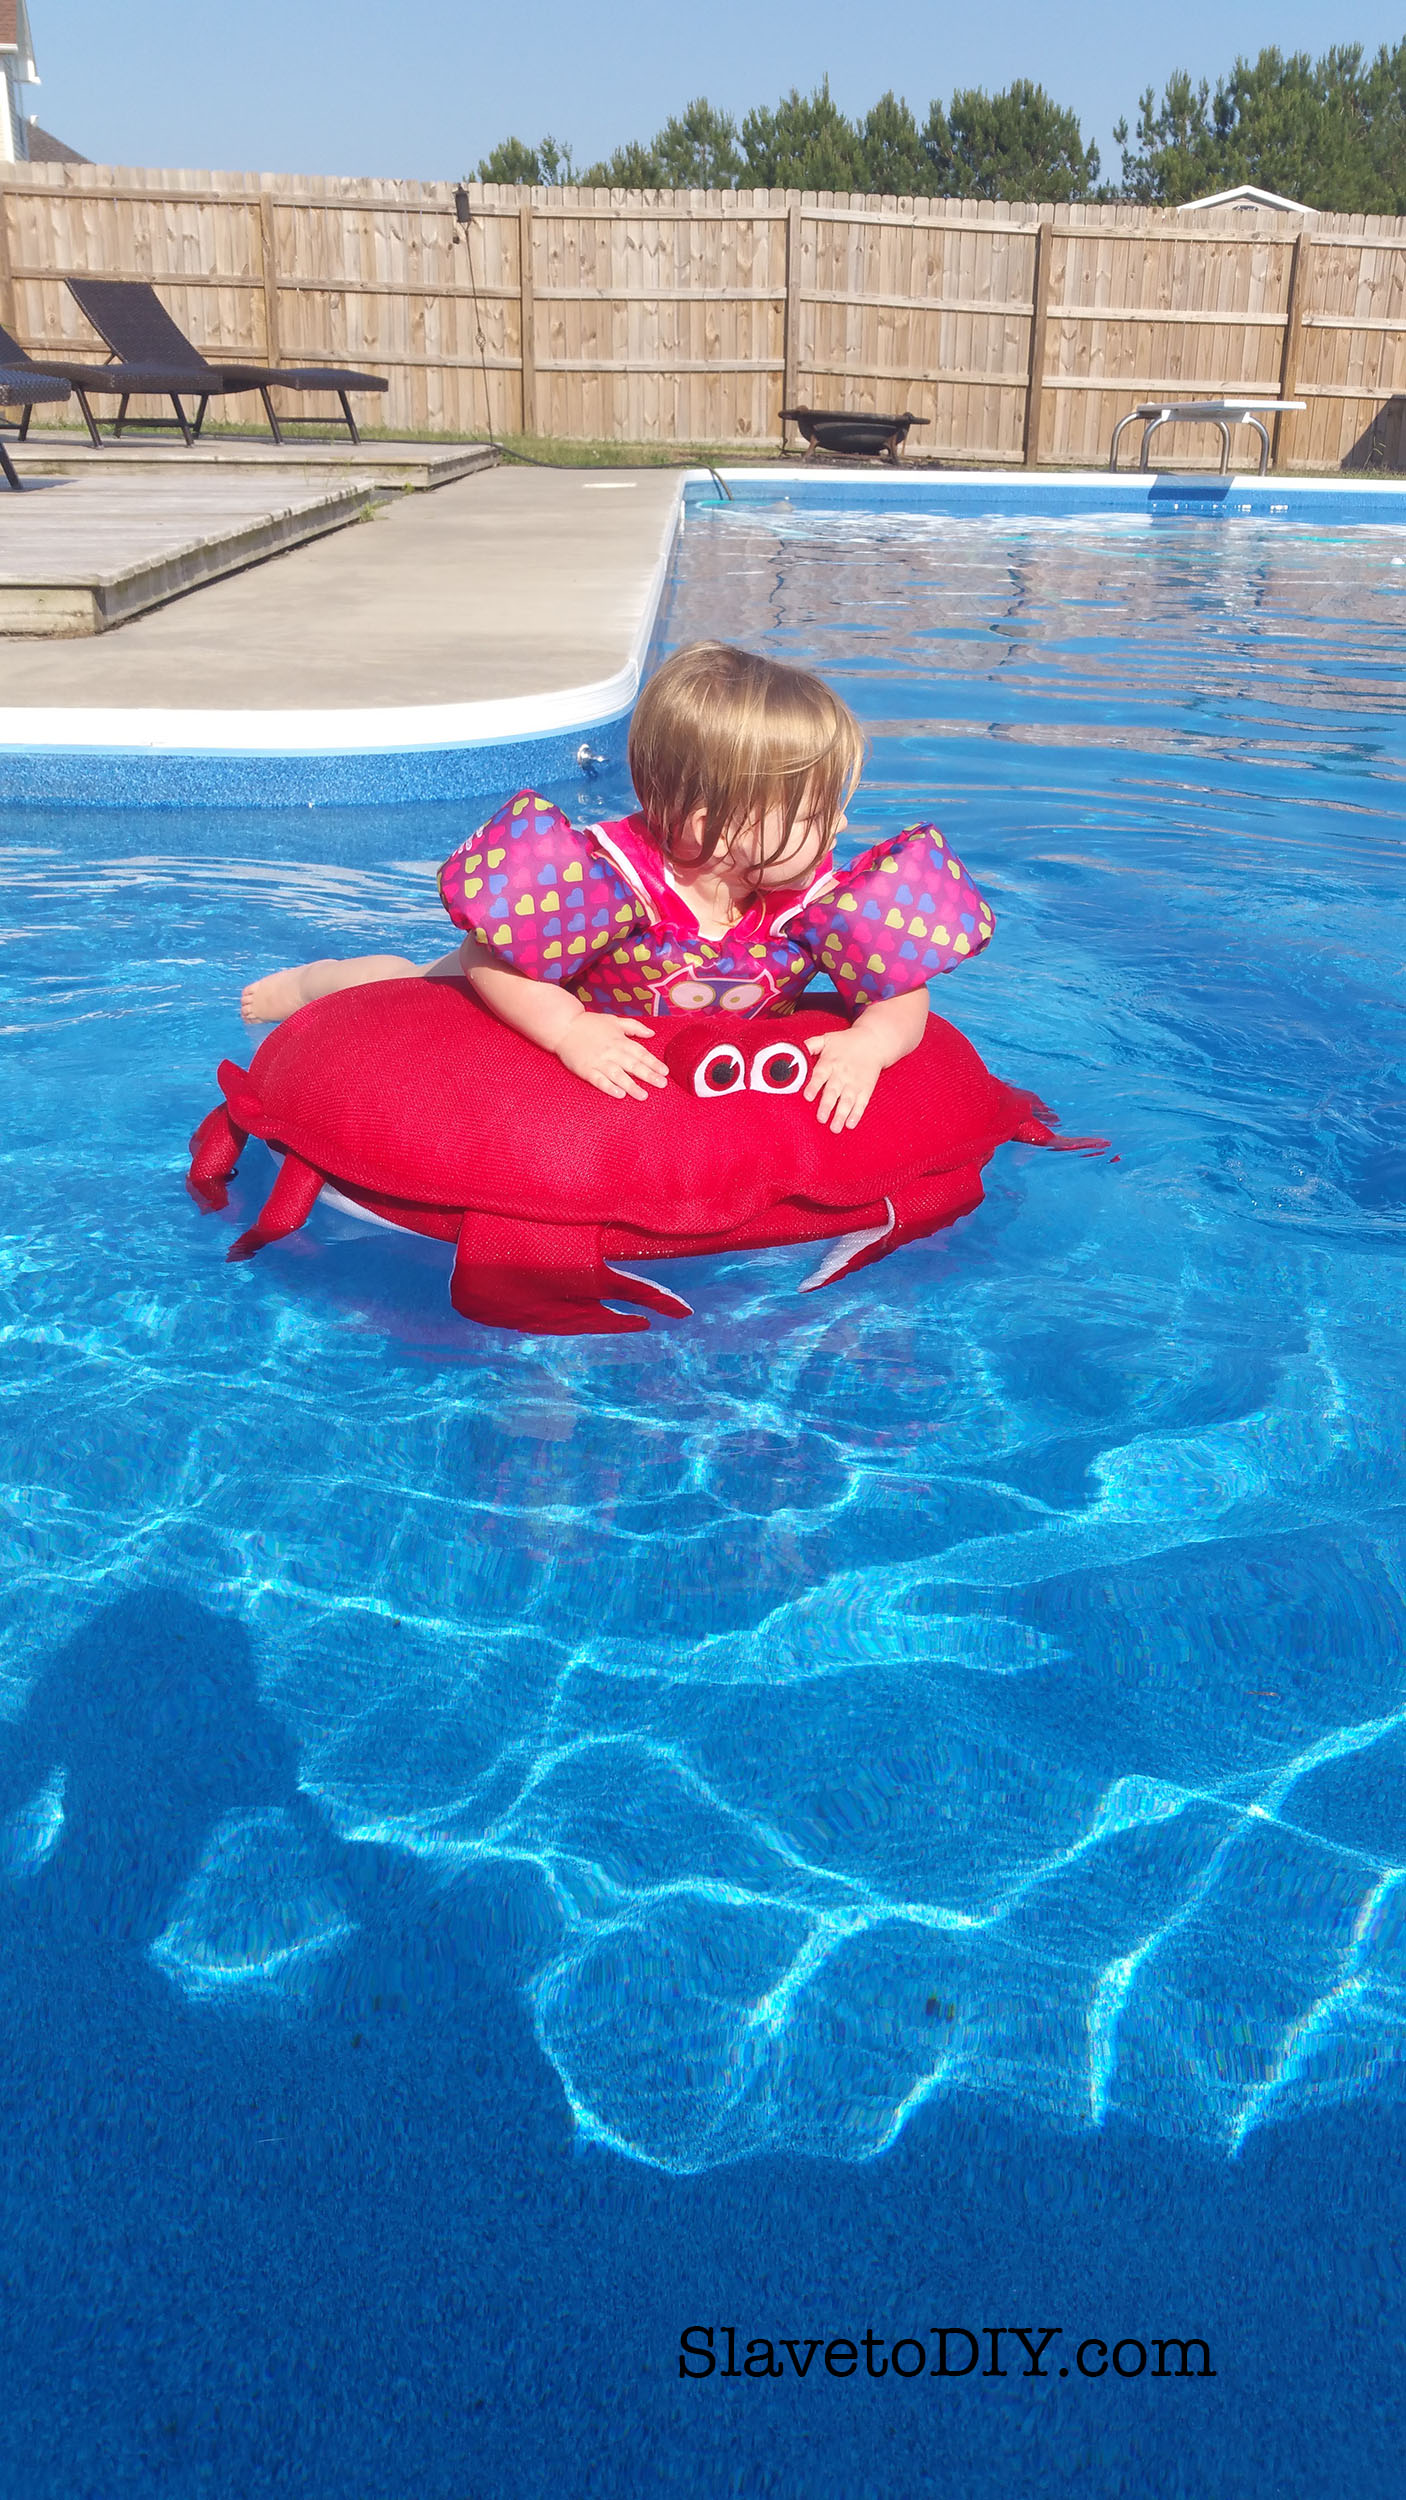
Tip: If you choose a vinyl liner, SKIP THE EDGE DESIGN. They’ll ask you what design you want around the edge and what color the rest of the pool should be. Make it all the blue you choose with NO EDGE DESIGN. Trust me. It was the first time our contractor had the request, but if your liner lasts a long time, the thing that dates it and makes it look old is the stupid design around the edge. I went with a deep blue and it looked awesome. No outdated edge design, just beautiful blue all the way. For a gunite pool and a fiberglass I’d do the same thing. Any kind of decorative trim at the top ends up looking dated.

Pool Planning, Design, Tips and Considerations
Pool Planning, Design, Tips and Considerations: Blue vinyl pool with no edge design


8.  How do you find a contractor?

You can look on the internet, but I recommend asking a friend. I don’t think I’ve ever met anyone with lukewarm feelings about their pool contractor. They either loved them, or hated them. So, if you ask, you’ll find out.

Beware of companies with prices that seem to good to be true. In the town where we had our pool installed, there was a contractor who quoted us 10K less than the contractor we ultimately chose. After doing more research we saw that there were no positive reviews because they never actually finished pools. They would be in and out of a property for months and sometimes YEARS (then when they were sued for not finishing the job they would open up under a different name and go straight back to work ripping people off).

The company we chose did ONE POOL AT A TIME.  We gave them a small deposit to secure our place in line and, once they started, they were at our property every day from start to finish of the project.

They’ve continued to be available for questions and troubleshooting every time I’ve contacted them since then for the last eight years (even at our new house with a pool they didn’t install!).

For those of you in Eastern NC I highly recommend Crystal Coast Pools at (910) 330-0969. I’m not a paid affiliate, but we think they’re great!

Pool Planning, Design, Tips and Considerations
Pool Planning, Design, Tips and Considerations: Great, well designed pool by Crystal Coast Pools in Eastern NC


9.  How much does it cost a month to run a pool?

Running a pool pump seems to cost about $200 a month in Eastern North Carolina. That doesn’t include the cost of chemicals, shock, chlorine tabs, or salt. In our salt pool (36,000 gallons) we usually spent about $150 a month on chemicals during the summer and about $200 to open it, balance chemicals, and buy shock for the summer.

Buying shock and chlorine: We kept having problems with the stuff from the big box stores and the nice lady at the pool store recommended Zappit Pool Shock. It works much better and is cheaper. I buy my own shock and chlorine tabs (I purchase big buckets once a season online) but also found a local pool store that does free water samples. Then I don’t have to mess with trying to guess what I need to add and how much (they sell me the chemicals). It’s way easier.

Pool Planning, Design, Tips and Considerations
Pool Planning, Design, Tips and Considerations: Diving in a salt pool


10. Is caring for a pool a lot of work?

Yes. But, if you actually use it, it’s well worth it. If you’re not up to it, consider that even in NC where costs are relatively cheap, pool maintenance contractors charge about $75 an hour to care for your pool for you, plus the cost of chemicals, etc. If you don’t take care of it, then you have an expensive frog pond to deal with in the back yard.

11. What kind of fence do you need and pool safety equipment?

When you are interviewing pool contractors, find one that knows the local codes and will include those items as part of the installation. Many municipalities have rules on pool fences, self closing gates around the pool, door chimes leading to the pool, etc. The pool contracter should be knowledgeable and willing to complete the process for you.

In addition to the required items we like to have a pool safety ring on hand and when smaller kids are swimming we use the float ropes that mark where the shallow end transitions to the deep end. If we are having any kind of an event where we have lots of kids swimming I post responsible teenagers at two corners to act as lifeguards. It’s important to have a healthy fear of swimming pools and to create a safe environment for your family and friends.

Pool Planning, Design, Tips and Considerations
Pool Planning, Design, Tips and Considerations: Diving boards and safety lines


12. Do you need a pool cover?

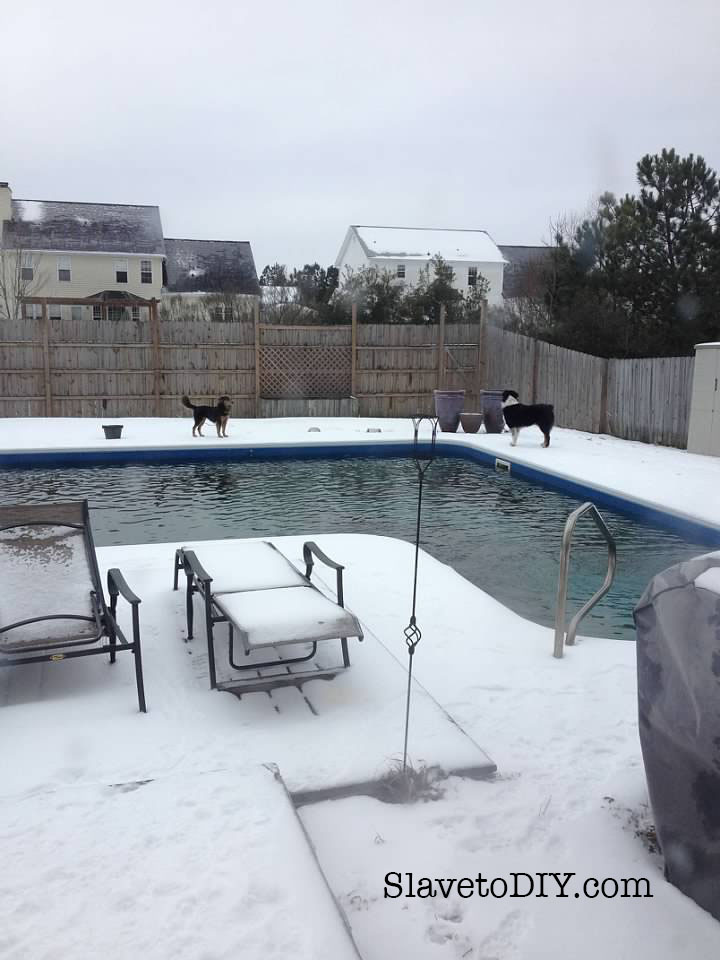
We never invested in a pool cover at our old house because we didn’t have big trees and there wasn’t much debris blowing into the pool. I just assumed that the grueling process of turning green swamp water into clear blue water was a necessary part of the Spring-pool opening process (which took no less than a month, several hours a day, sweeping algae and messing with chemicals). What a pain.

Then when we got to our new house, there was a cover for the pool in the shed. With lots of big trees we thought it would be a good idea to cover it. So, we covered it the first winter, winterized the pool with chemicals, and crossed our fingers (this isn’t a fancy cover, it’s basically just a gigantic tarp held in place by water bags and a layer of water on top of the tarp). When we uncovered the pool in the spring, after siphoning off the water on top of the tarp, we peeled it back to find: crystal clear water. Now, our current cover is the ugliest pool cover I’ve ever seen (it looks a lot like a giant, black trash bag), but until we budget in a new safety cover, it’s working fine and I’d never go back to spending a month opening the pool.

Pool Planning, Design, Tips and Considerations
Pool Planning, Design, Tips and Considerations: Pool cover during our deck renovation


Ugh, it’s so ugly. I have my eye on a safety cover because I have nightmares about someone falling onto the pool cover and getting trapped. Hopefully we’ll get that into the budget soon.

Pool Planning, Design, Tips and Considerations
Pool Planning, Design, Tips and Considerations: The old pool waiting to turn green in the spring


13. Do you need to bury your wastewater/backwash line?

For those of you who already have pools, you’re like, duh of course it needs to be buried. Well, no one offered to conveniently run a waste line out to the ditch behind our house, and every time we backwashed the pool we pissed the neighbors off. Yup. We’d turn it on and it would shoot out at the fence and eventually settle into a mud pit right by their gate. We tried using temporary attached hoses but they usually worked themselves loose and then created a bigger mess than before (while also soaking us in the process). I had to time backwashing the pool around their mowing schedule to keep the peace in the neighborhood.

So, bury your backwash line.

14. Should you add extra features like cooling systems (for very hot climates), heaters (to extend pool season), or integrated hot tubs?

Look, I know they cost more money, but if you’re already laying out the money to install a pool, you should get what you want. If you’re a lap swimmer and can extend your swimming season a few months a year, then get an insulating cover and a heater. If you live in the deep south, get a cooling system or you won’t want to be in your hot tub of a pool in August. The biggest thing to remember with all of this is that it’s WAY, WAY cheaper to do during the initial installation than to add it after the fact!


POOL TIME!!!

So, here’s the fun part! This is our pool installation process in pictures (and I’m stressed just looking at it).

Most pool contractors will require a current survey. We blew up the survey and made copies so we could draw the shape and size of the pool on the survey. Then we measured the size we wanted and spray painted the lines on the grass to see what it really looked like in the yard. The kids fake-swam across the pool and decided it was big enough.

You’ll need to call the dig people and make sure you aren’t running into any problems where you want to install it (those of you that have septic systems- do you know where your tank and drainage field are?- plan accordingly!).

Pool Planning, Design, Tips and Considerations
Pool Planning, Design, Tips and Considerations: Digging the pool


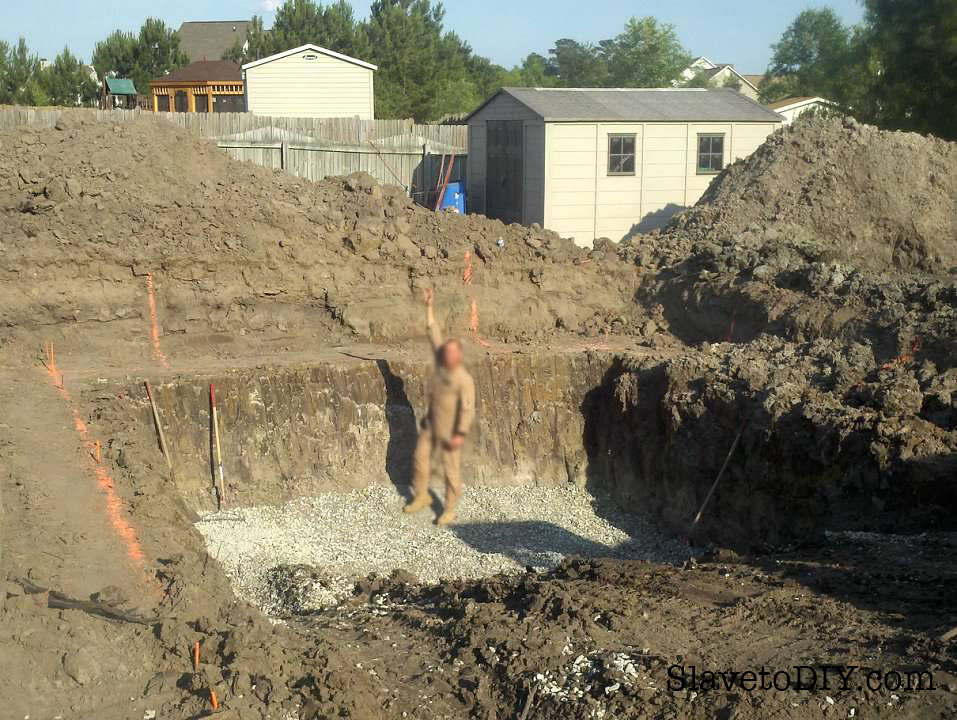
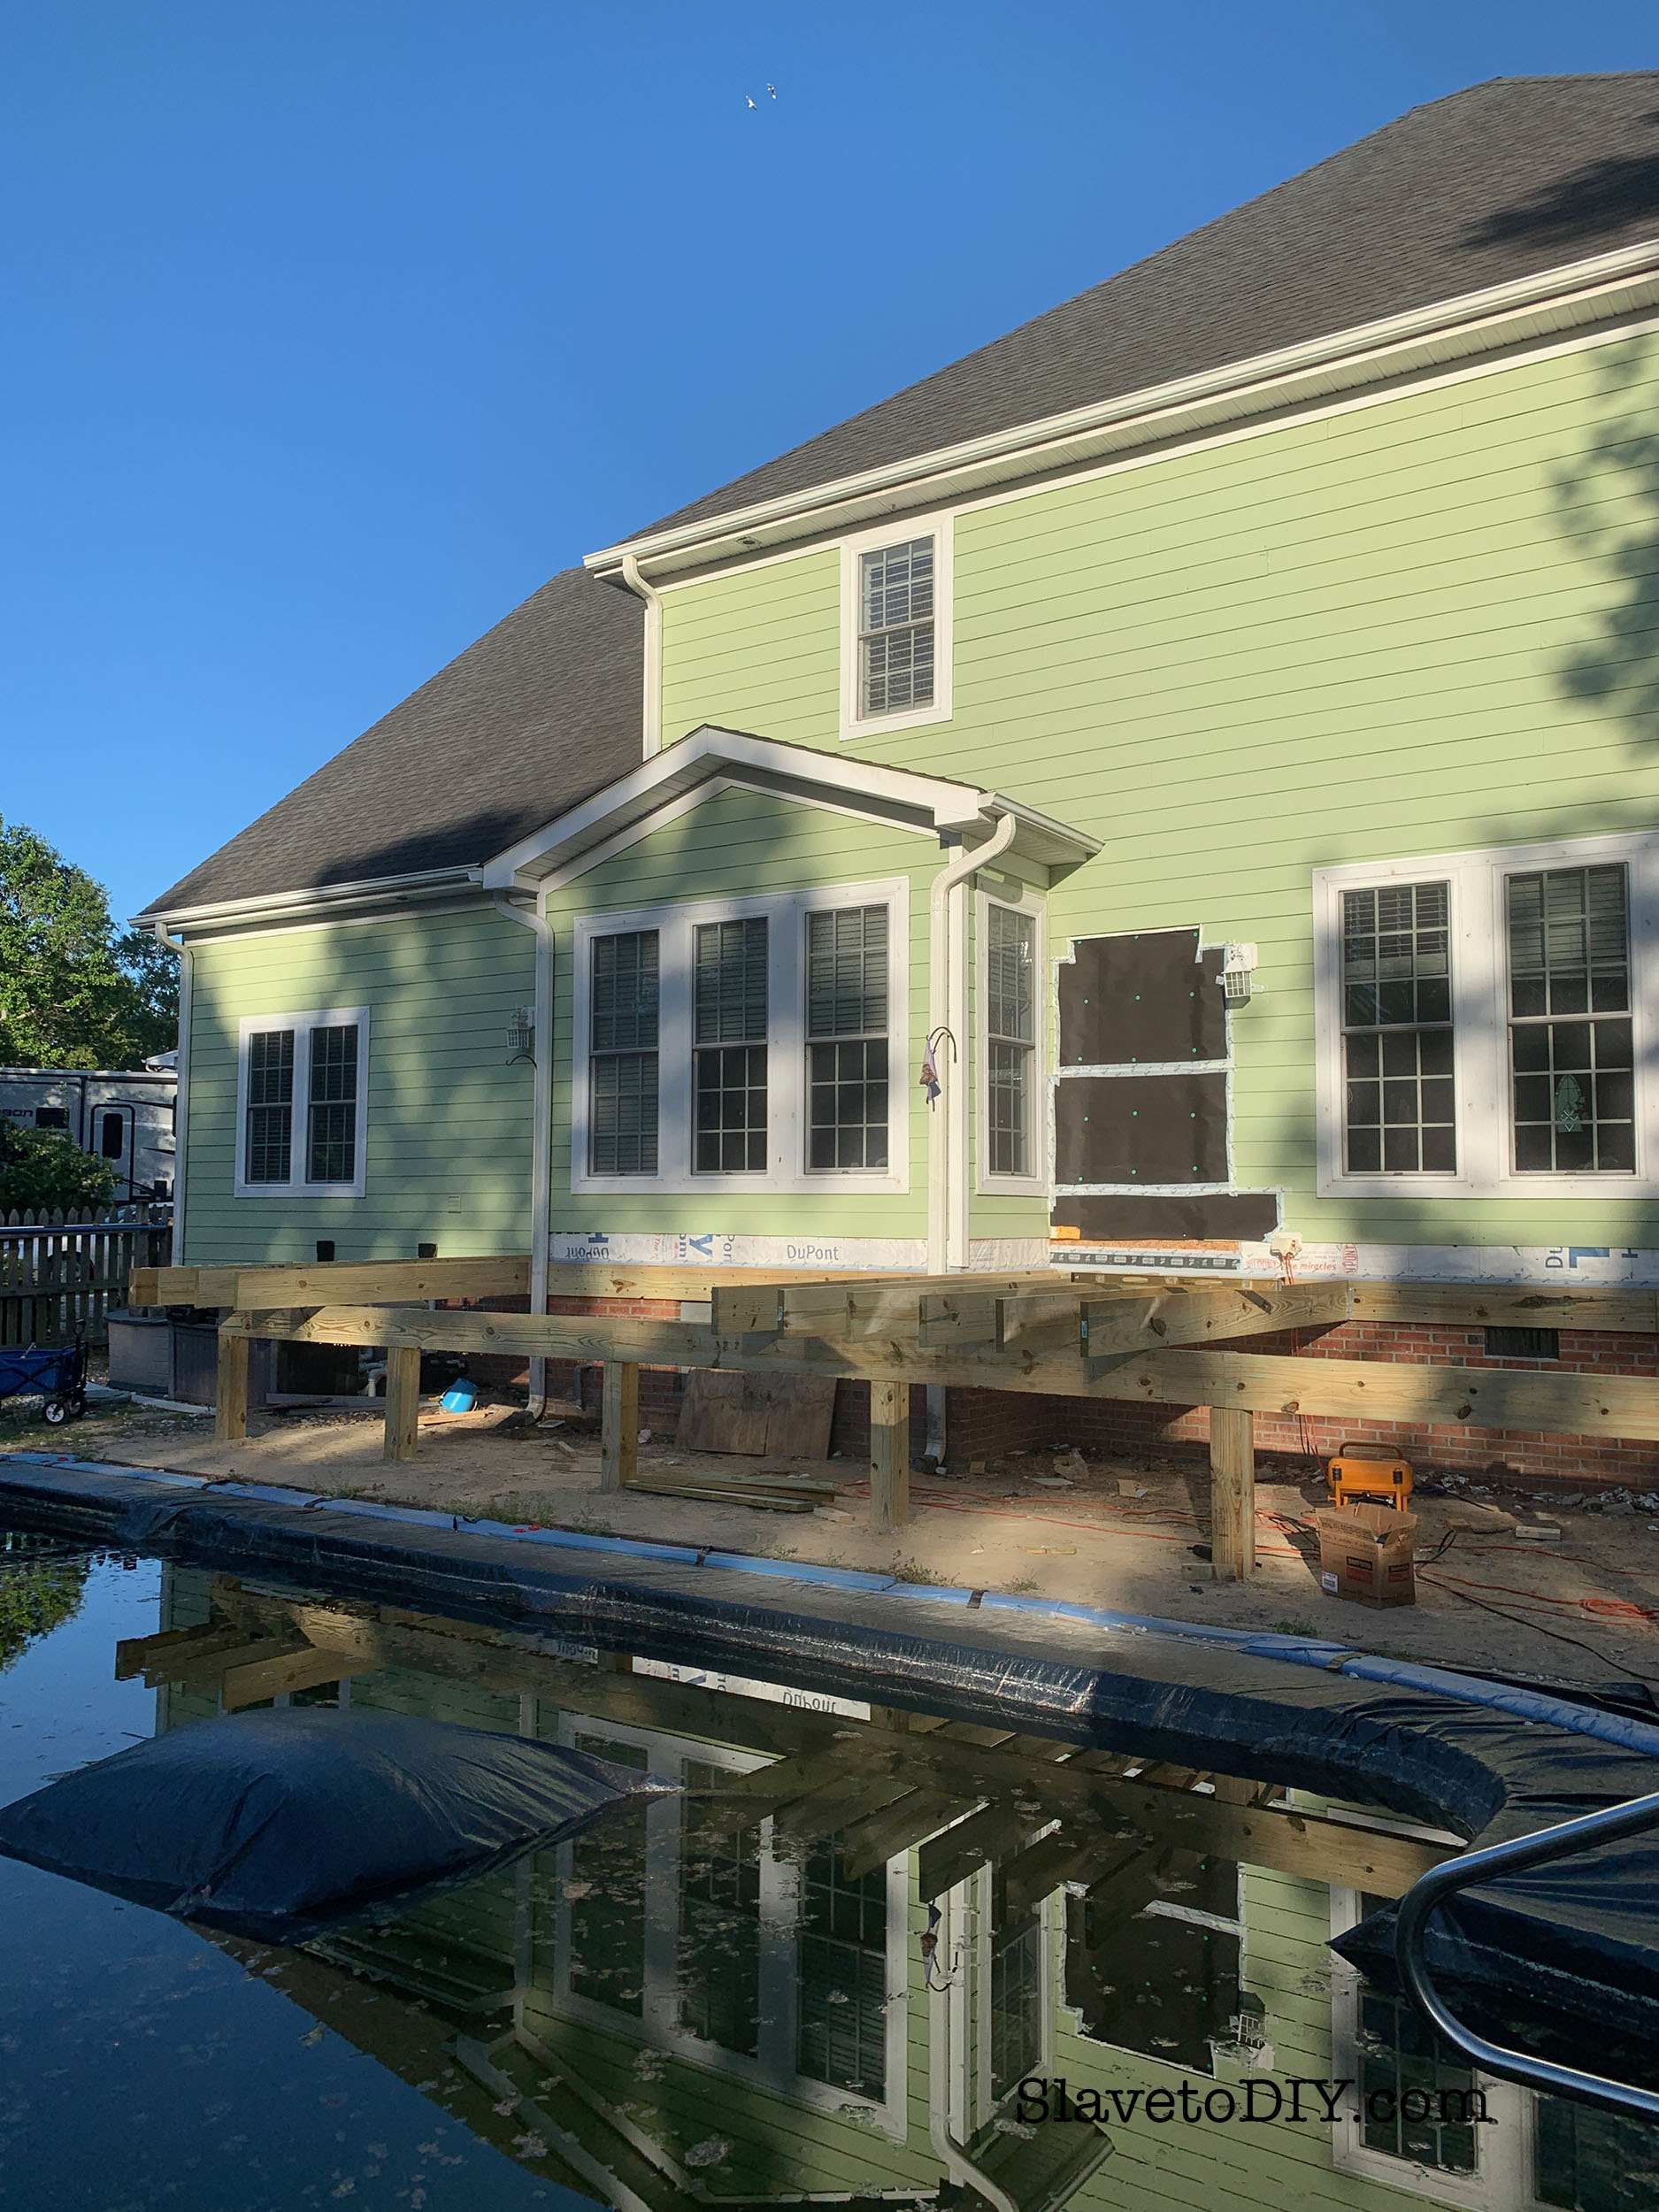
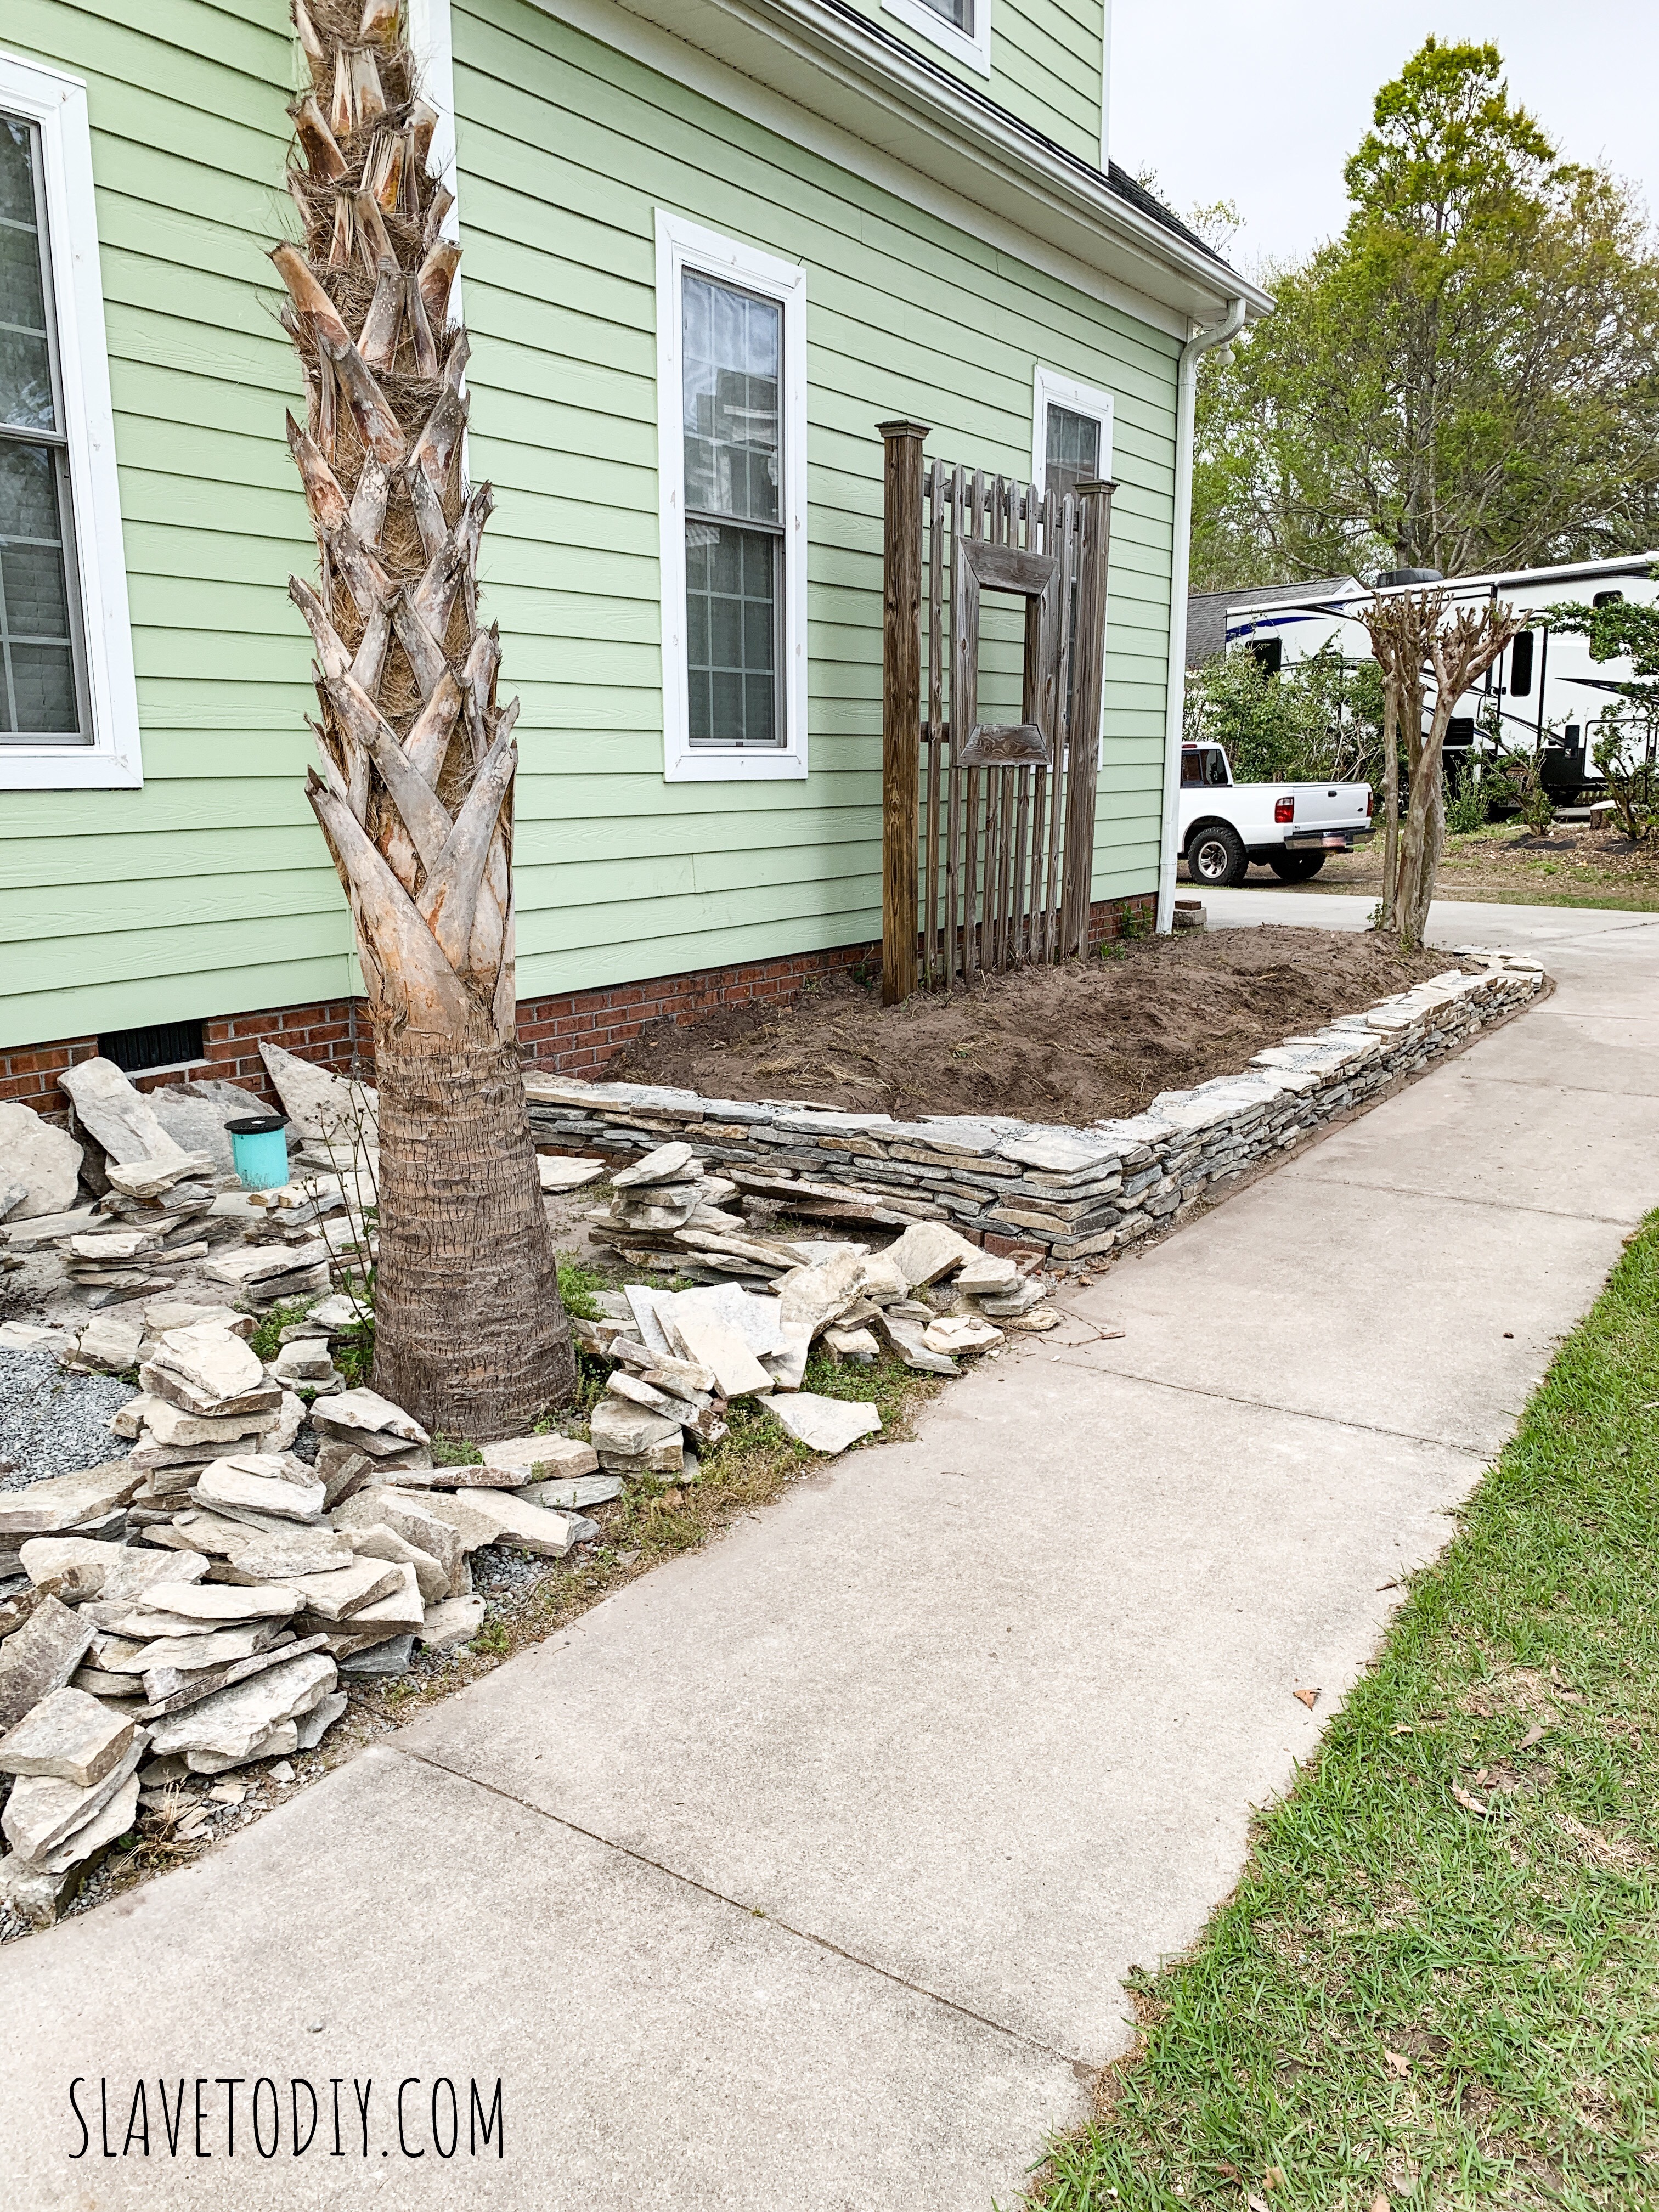
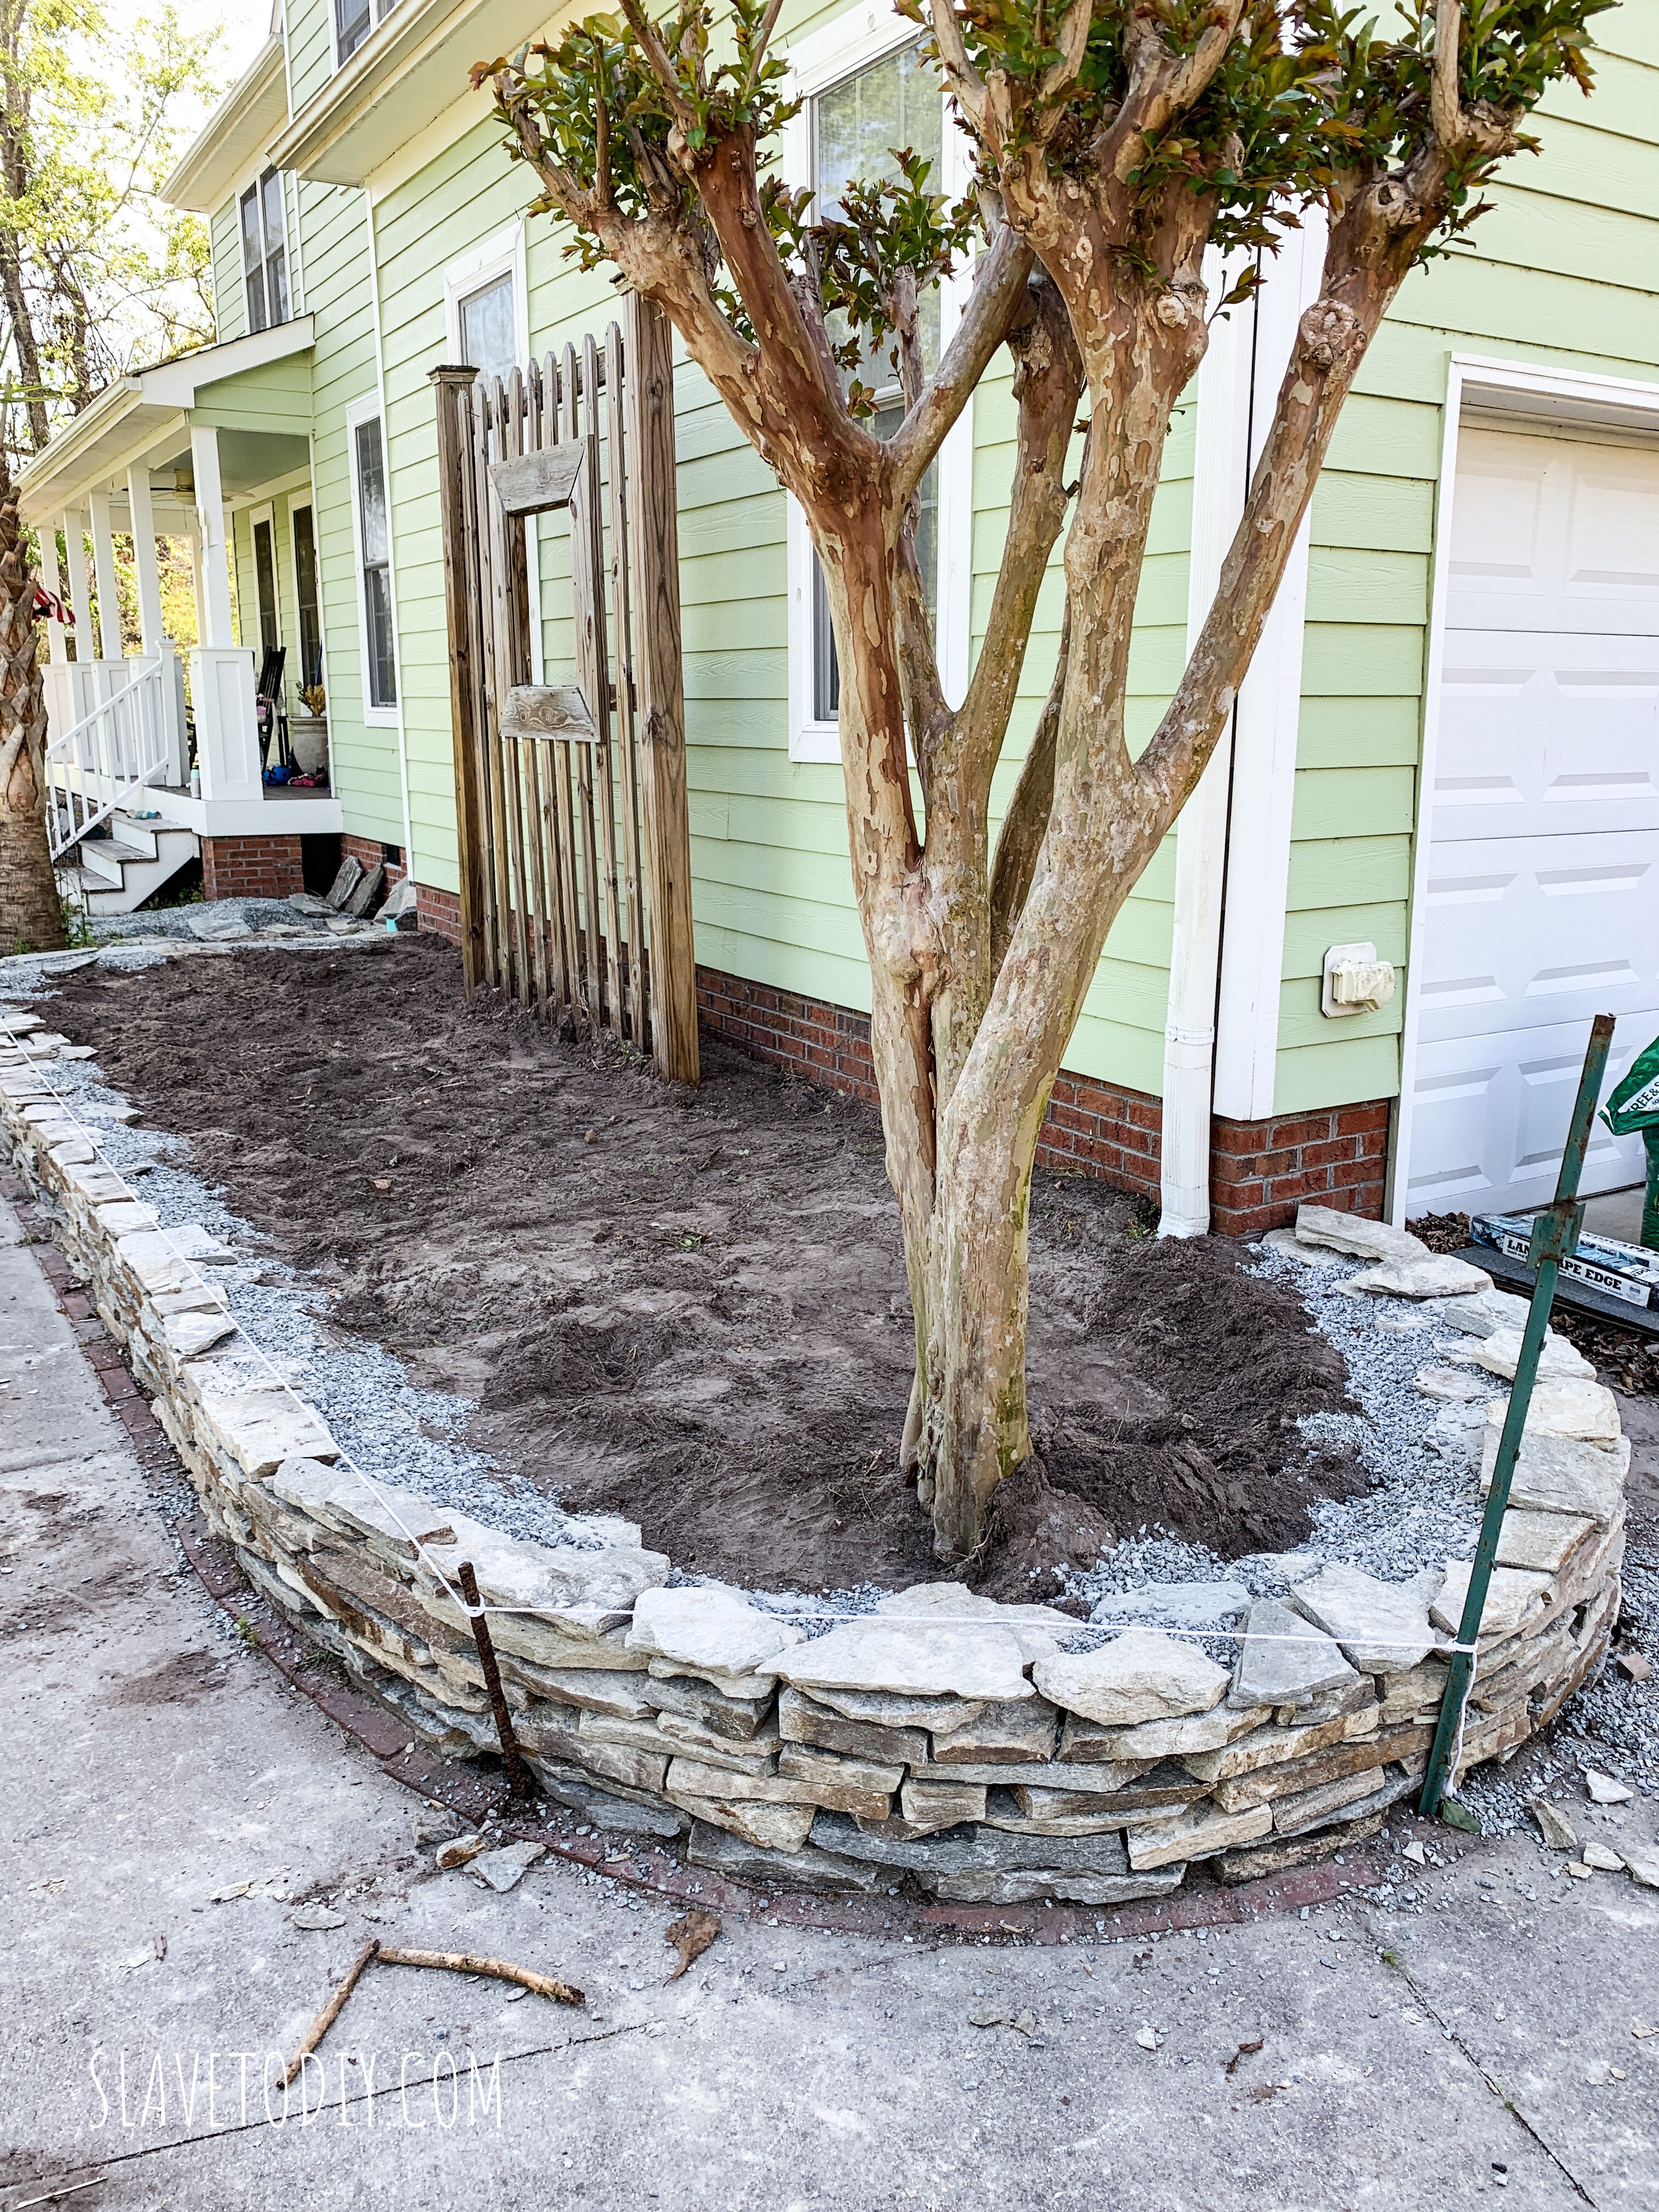
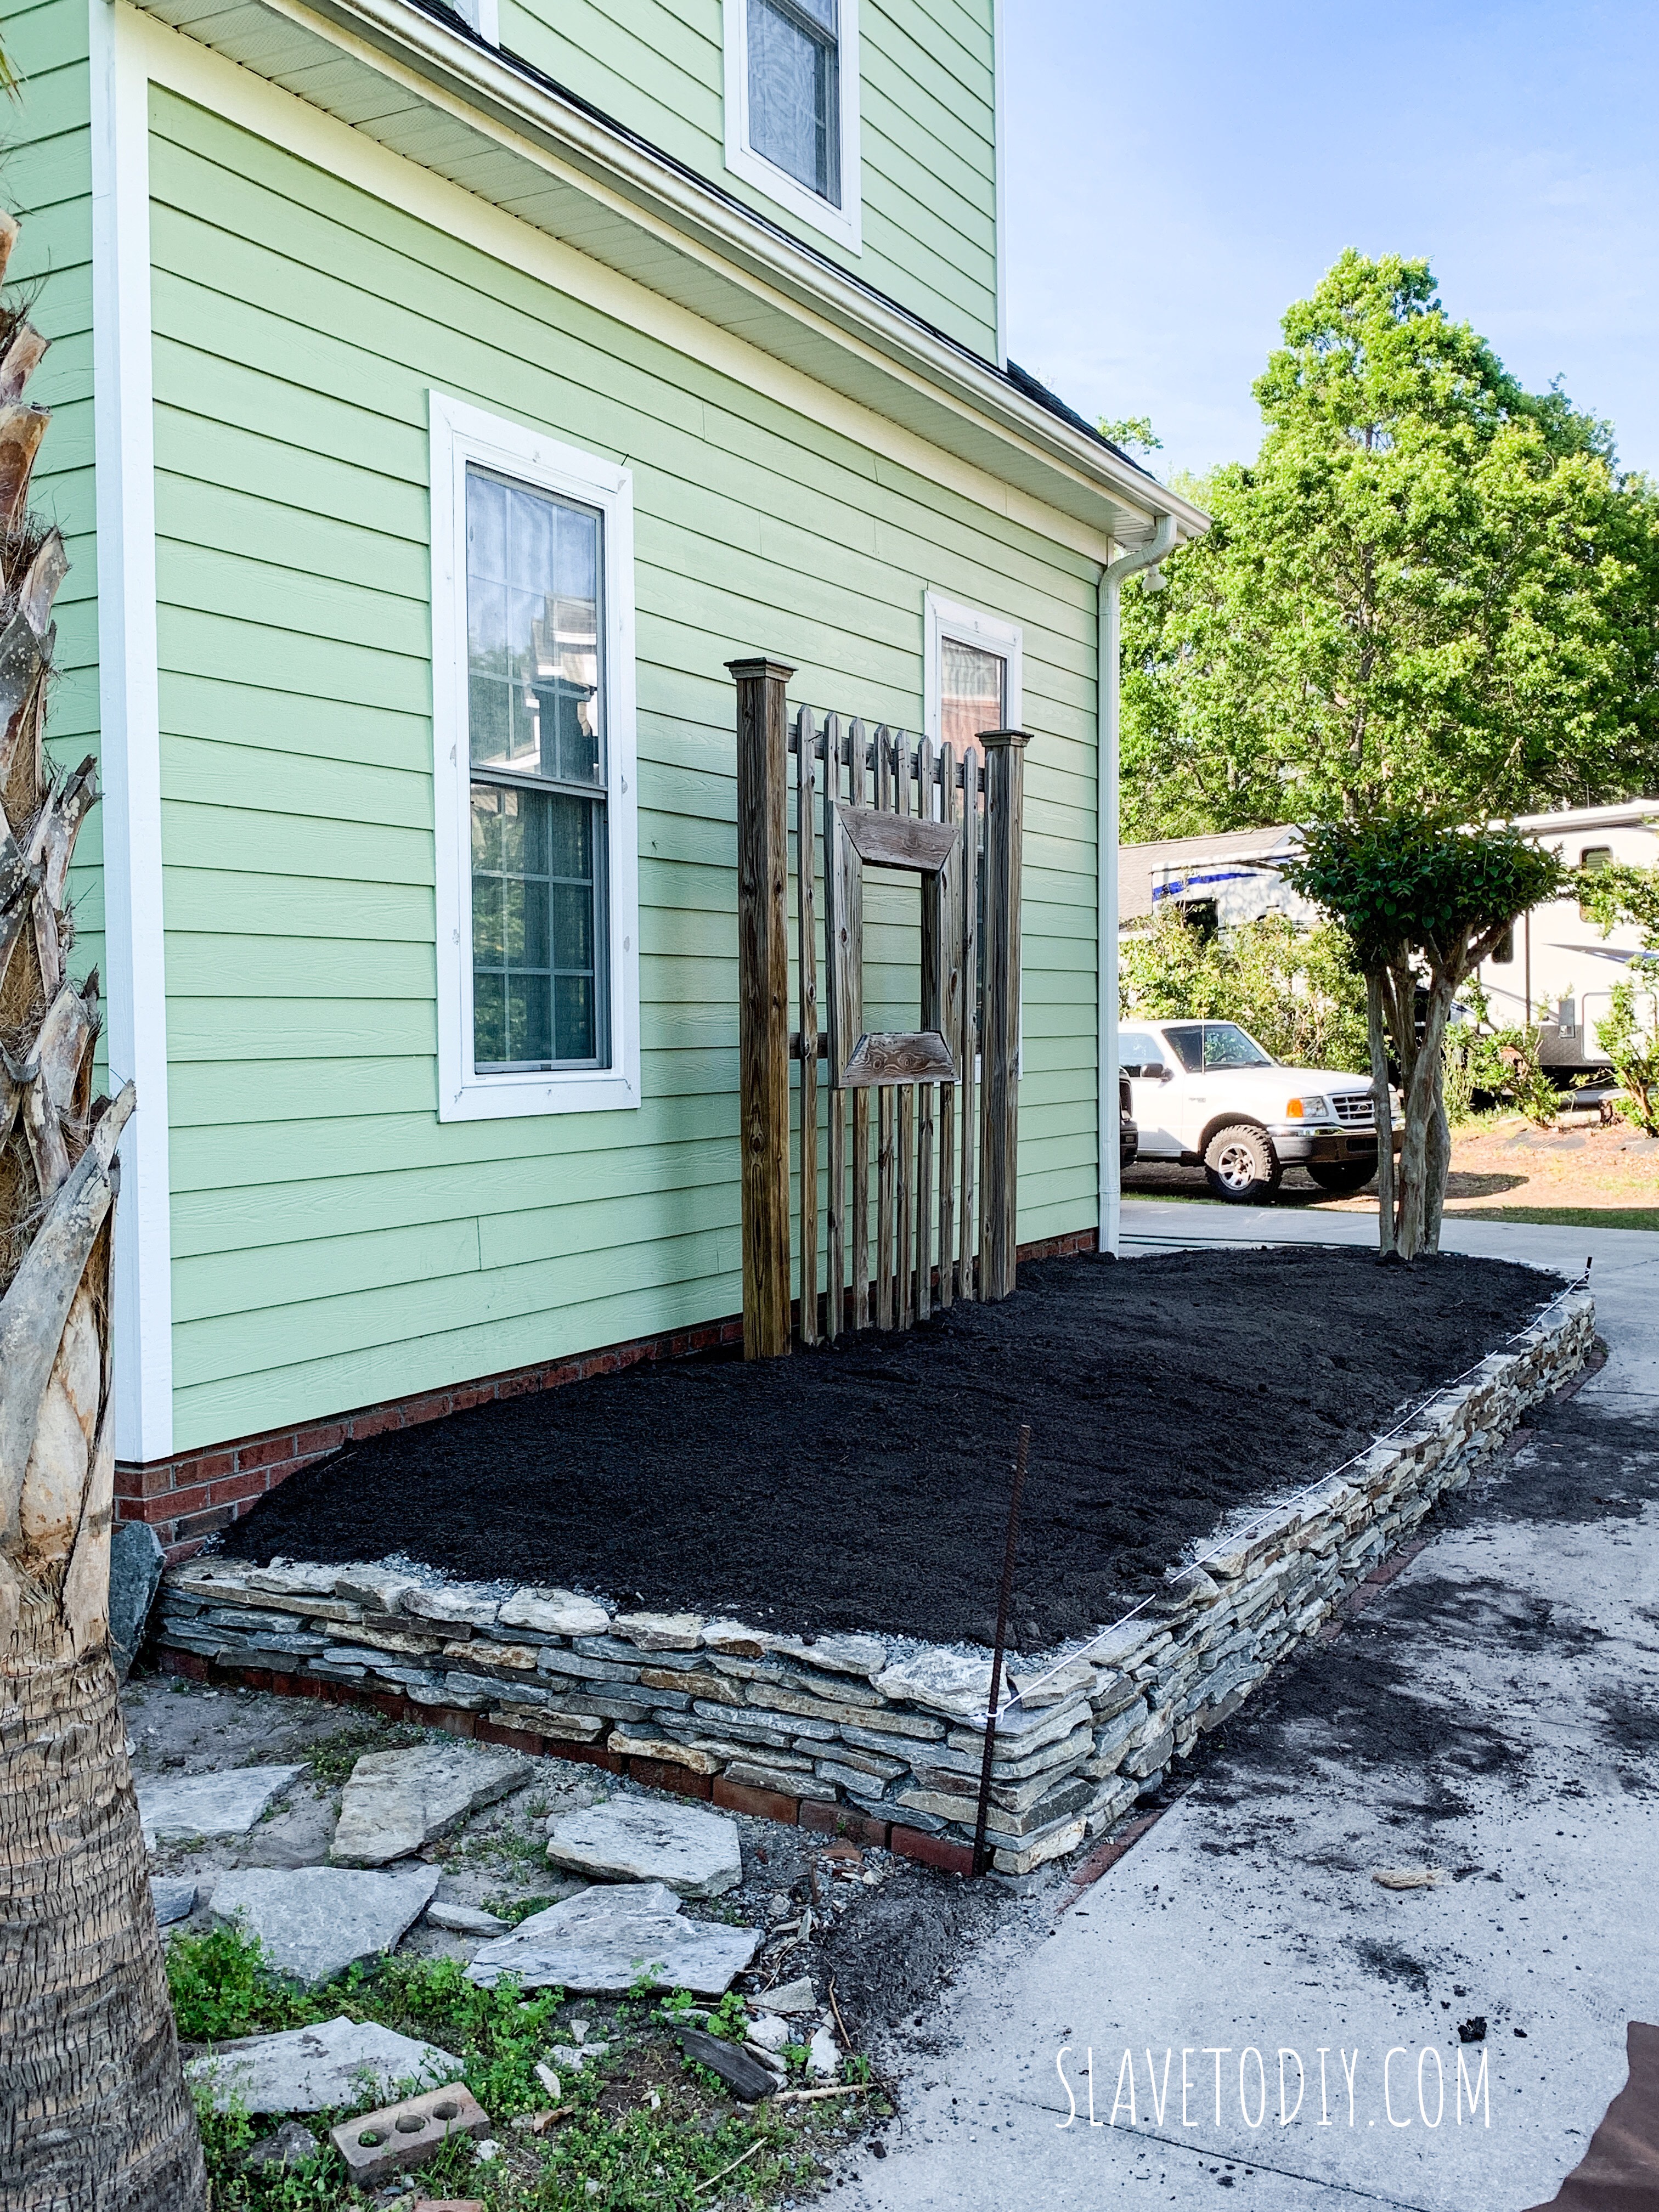
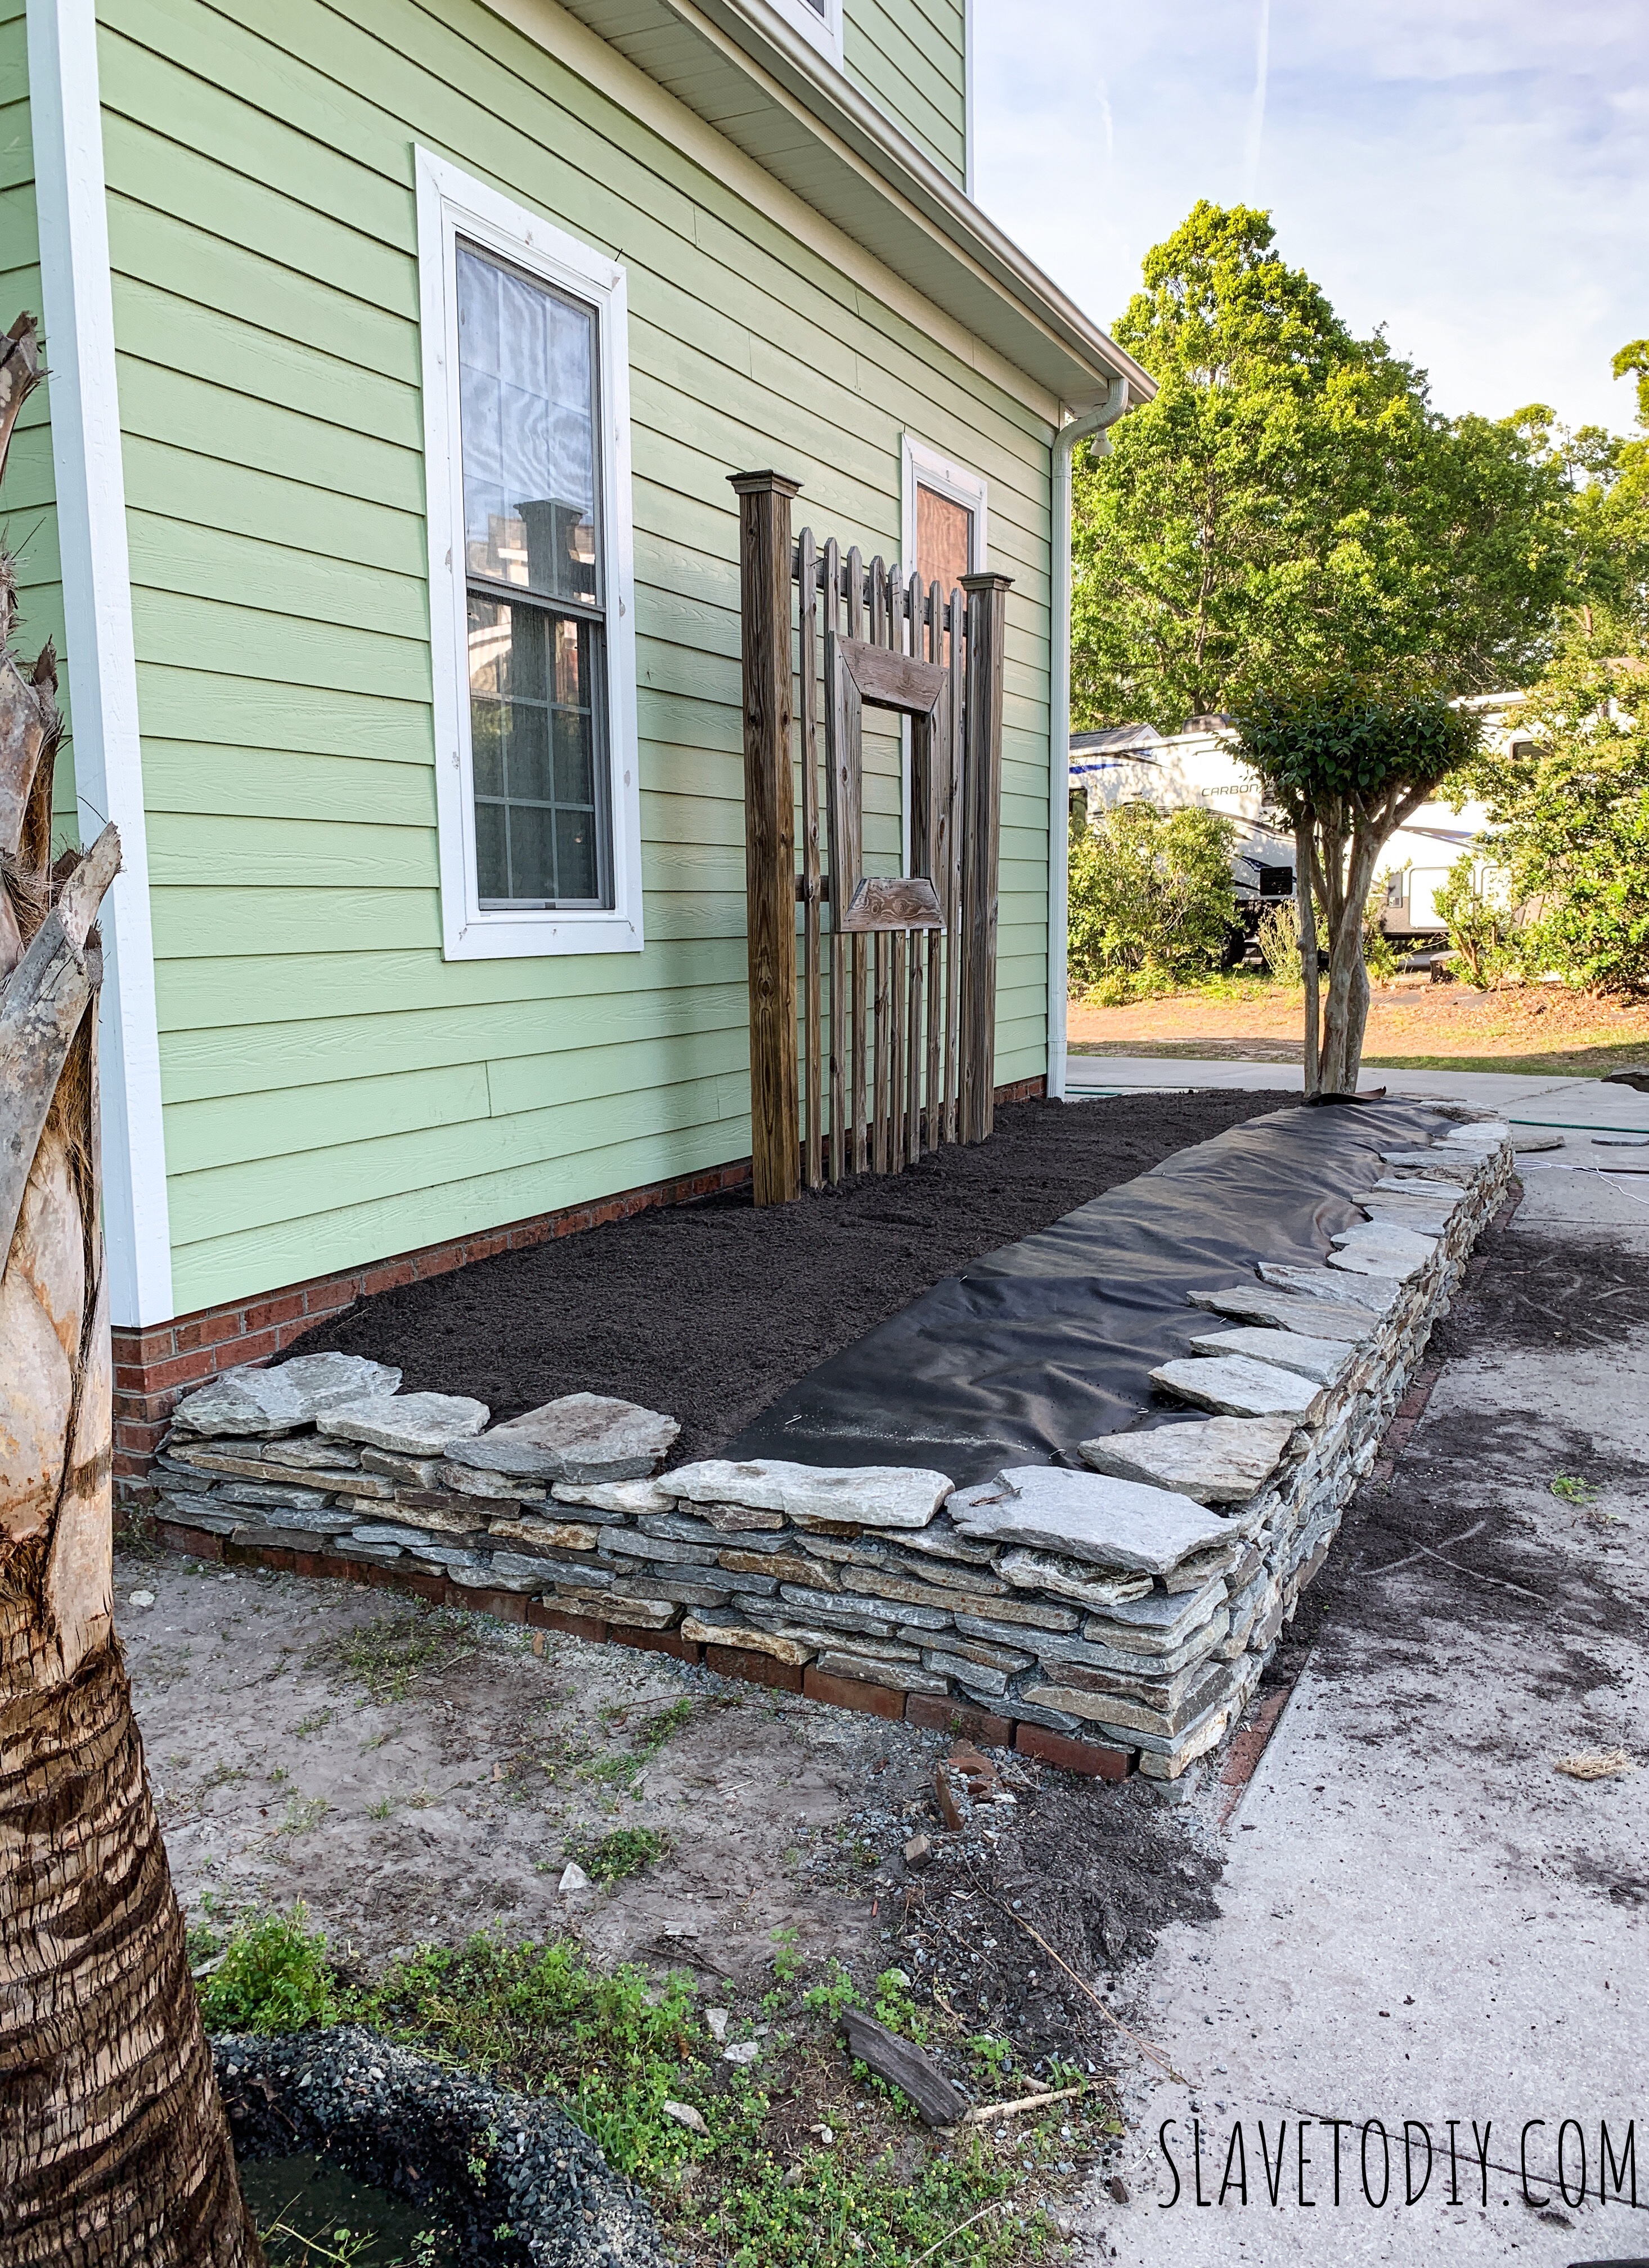
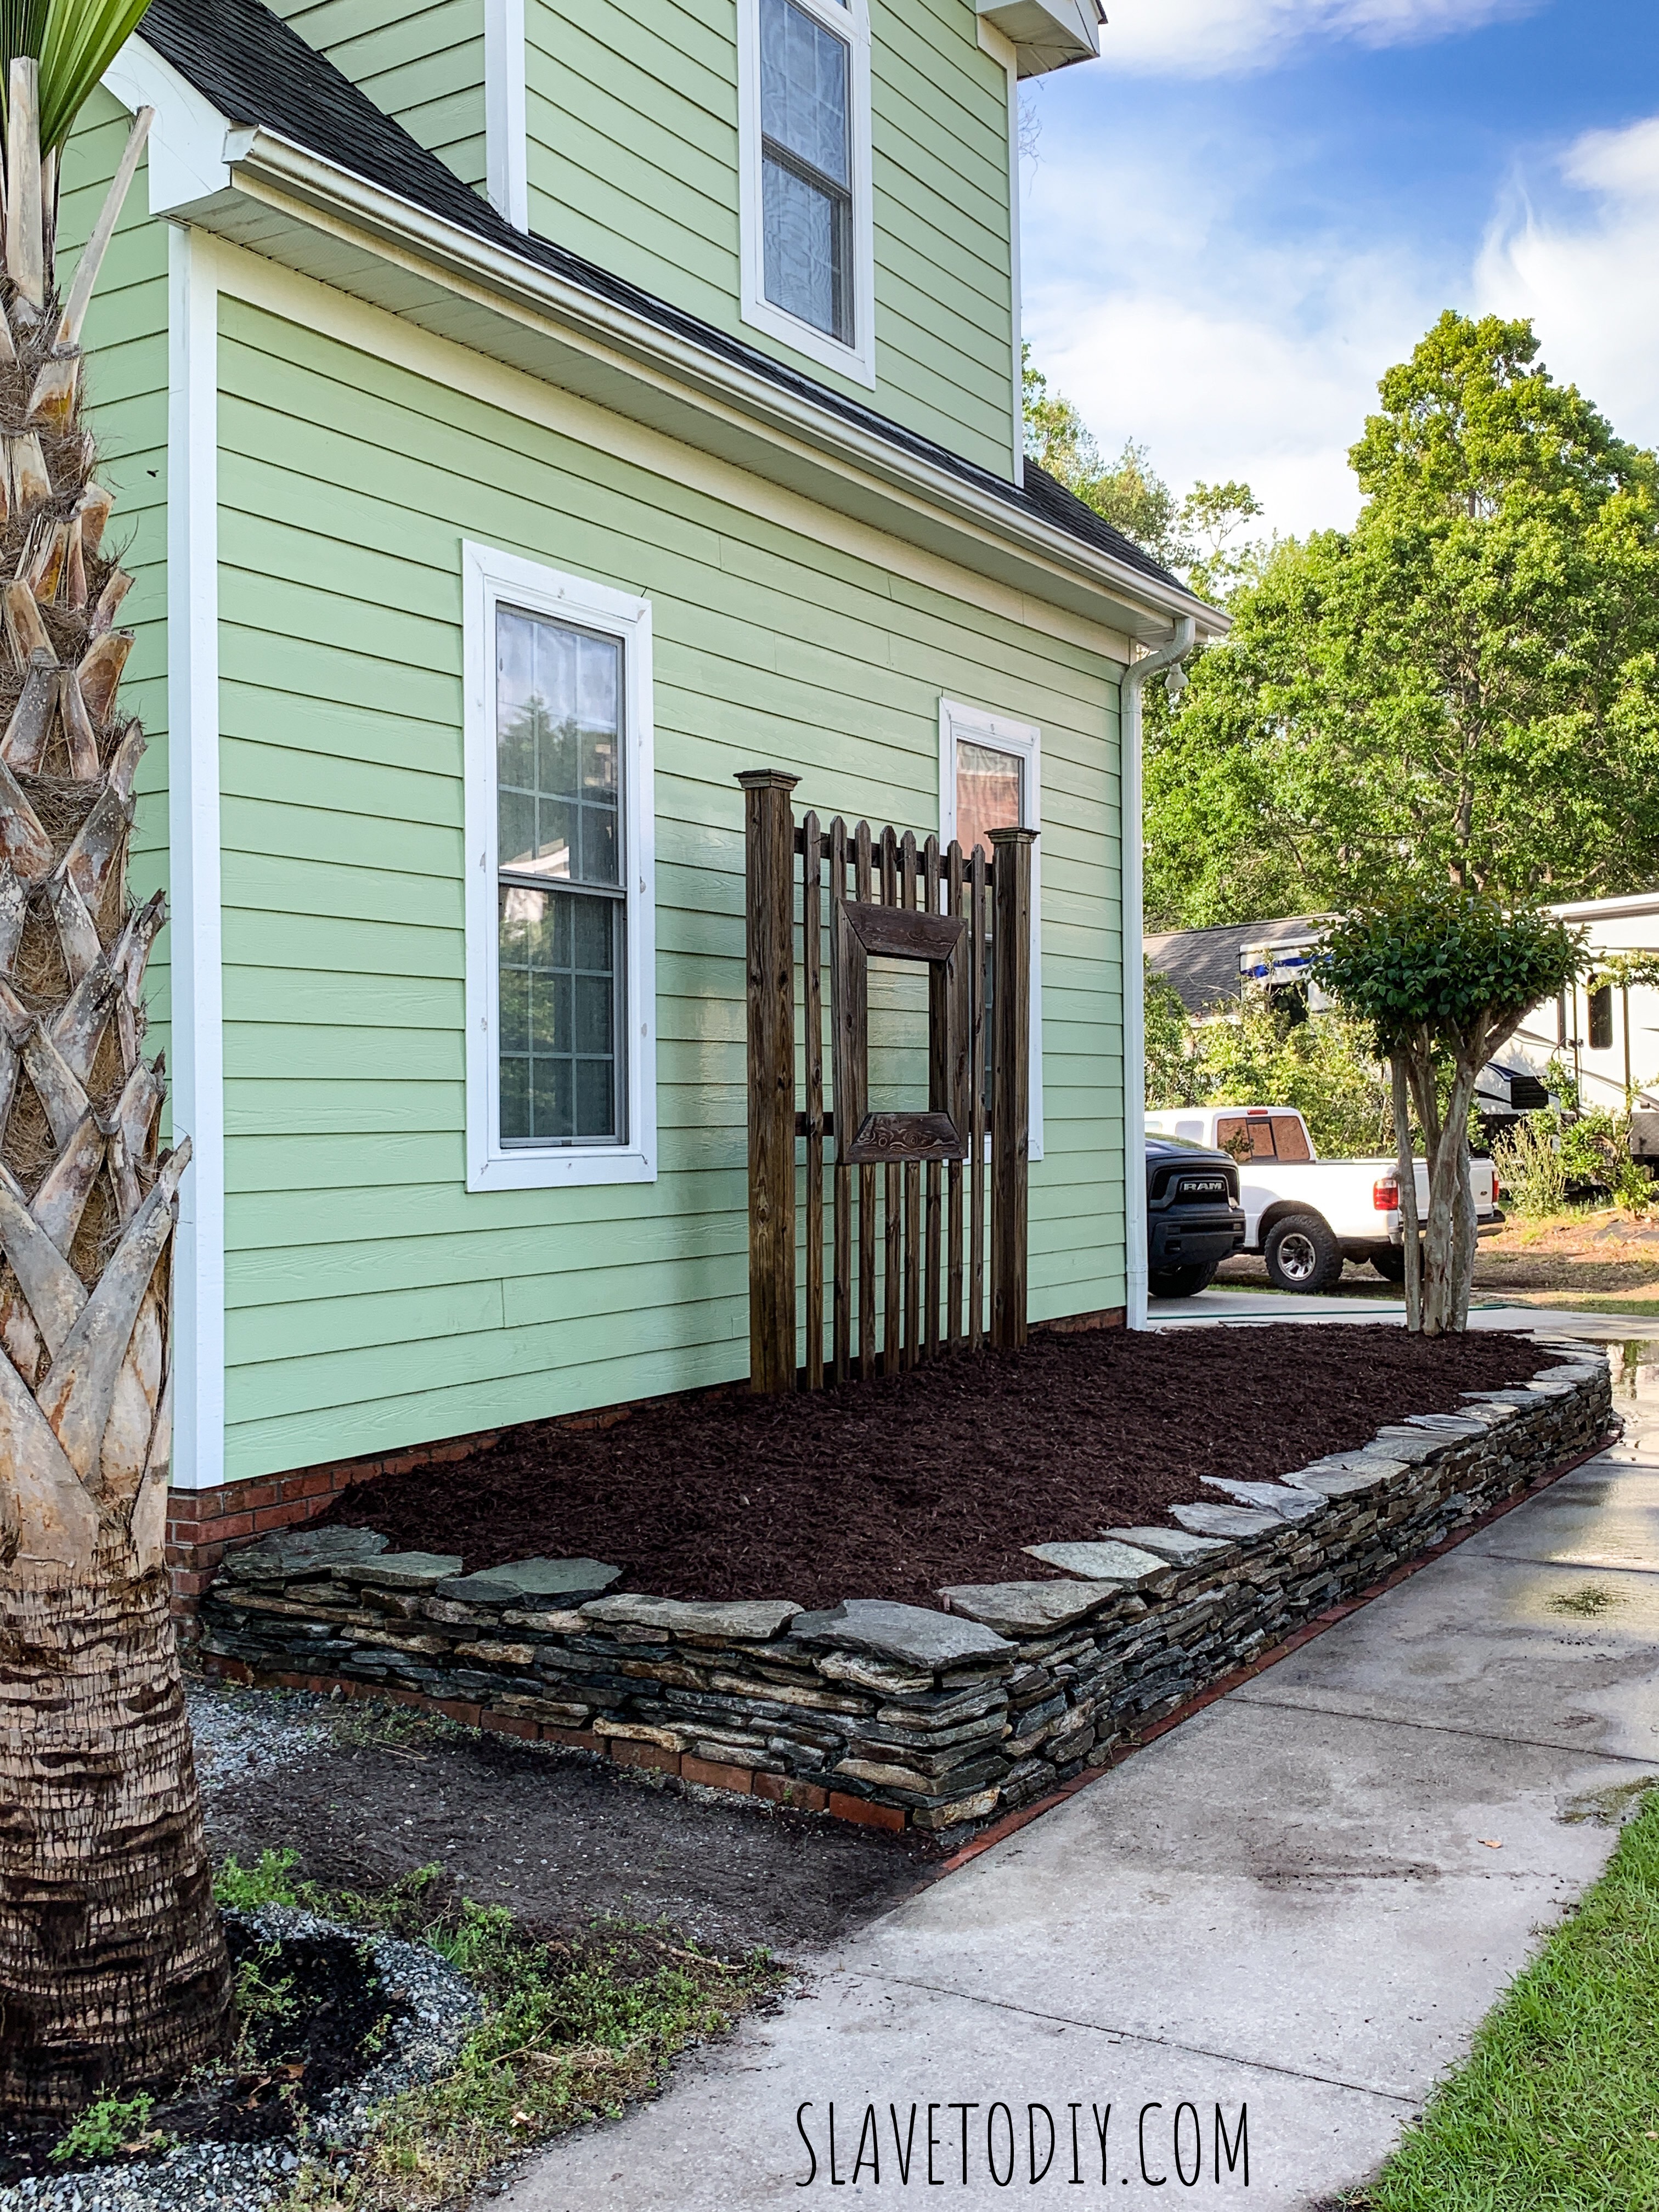
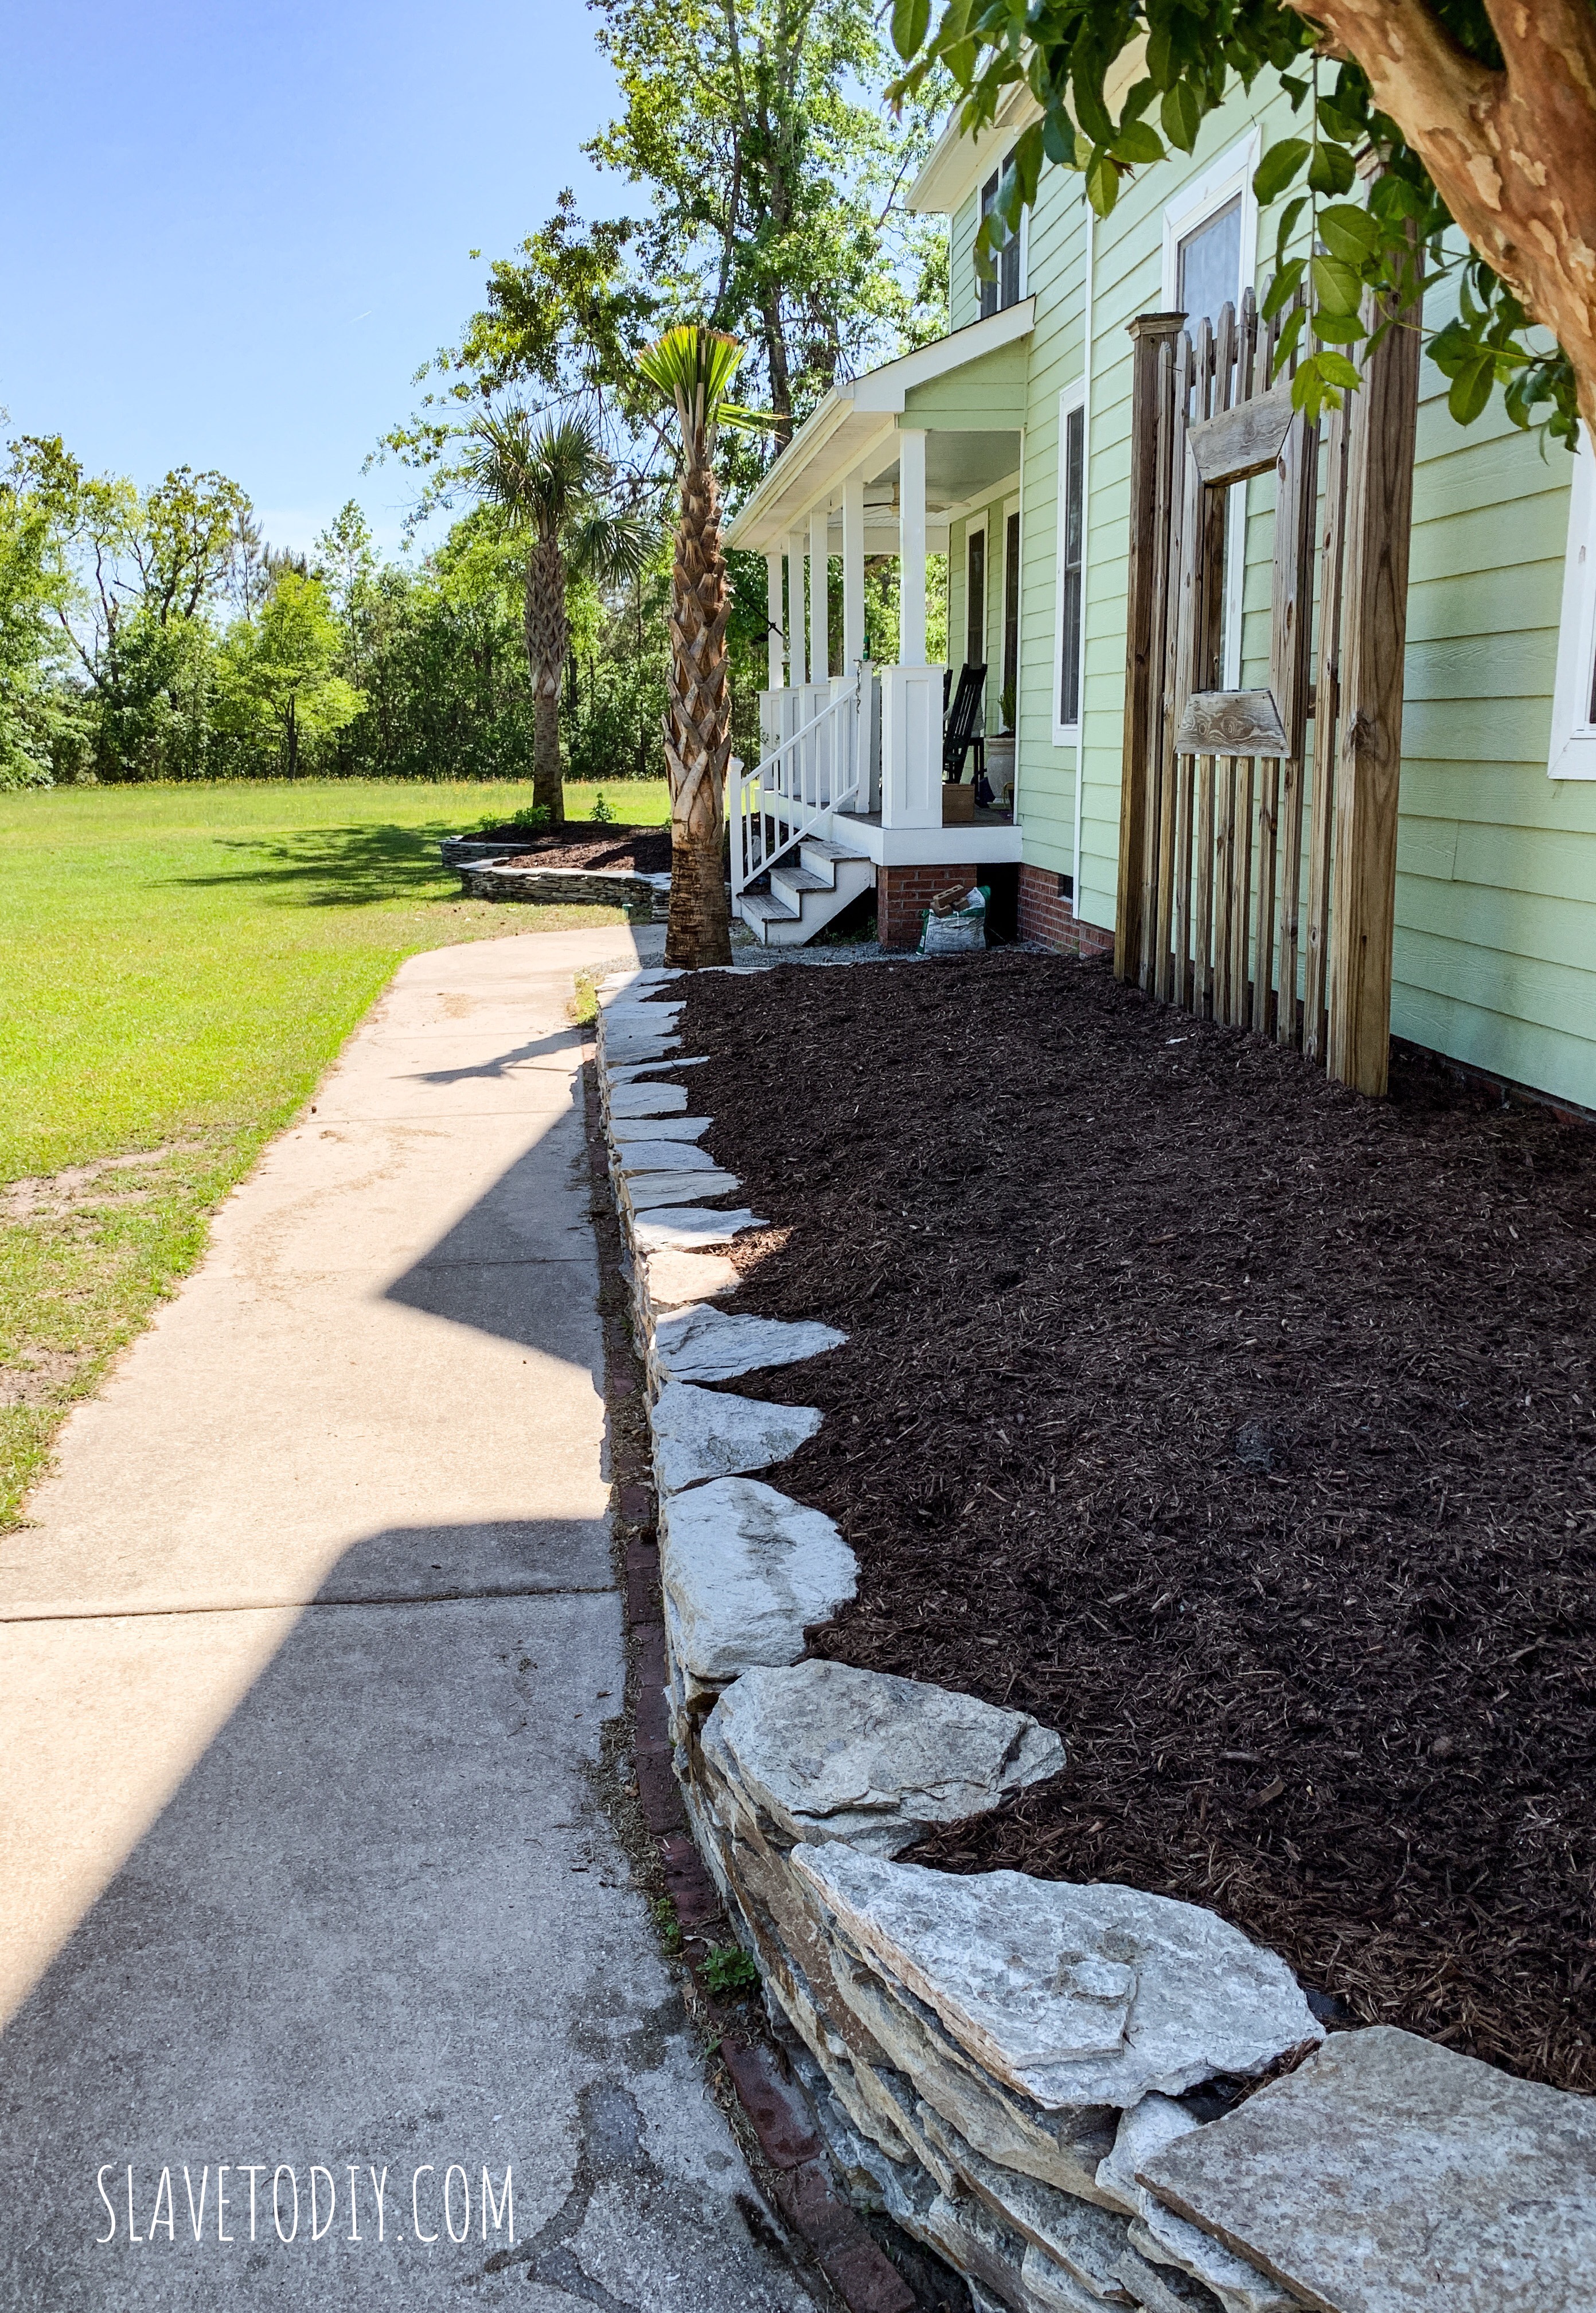
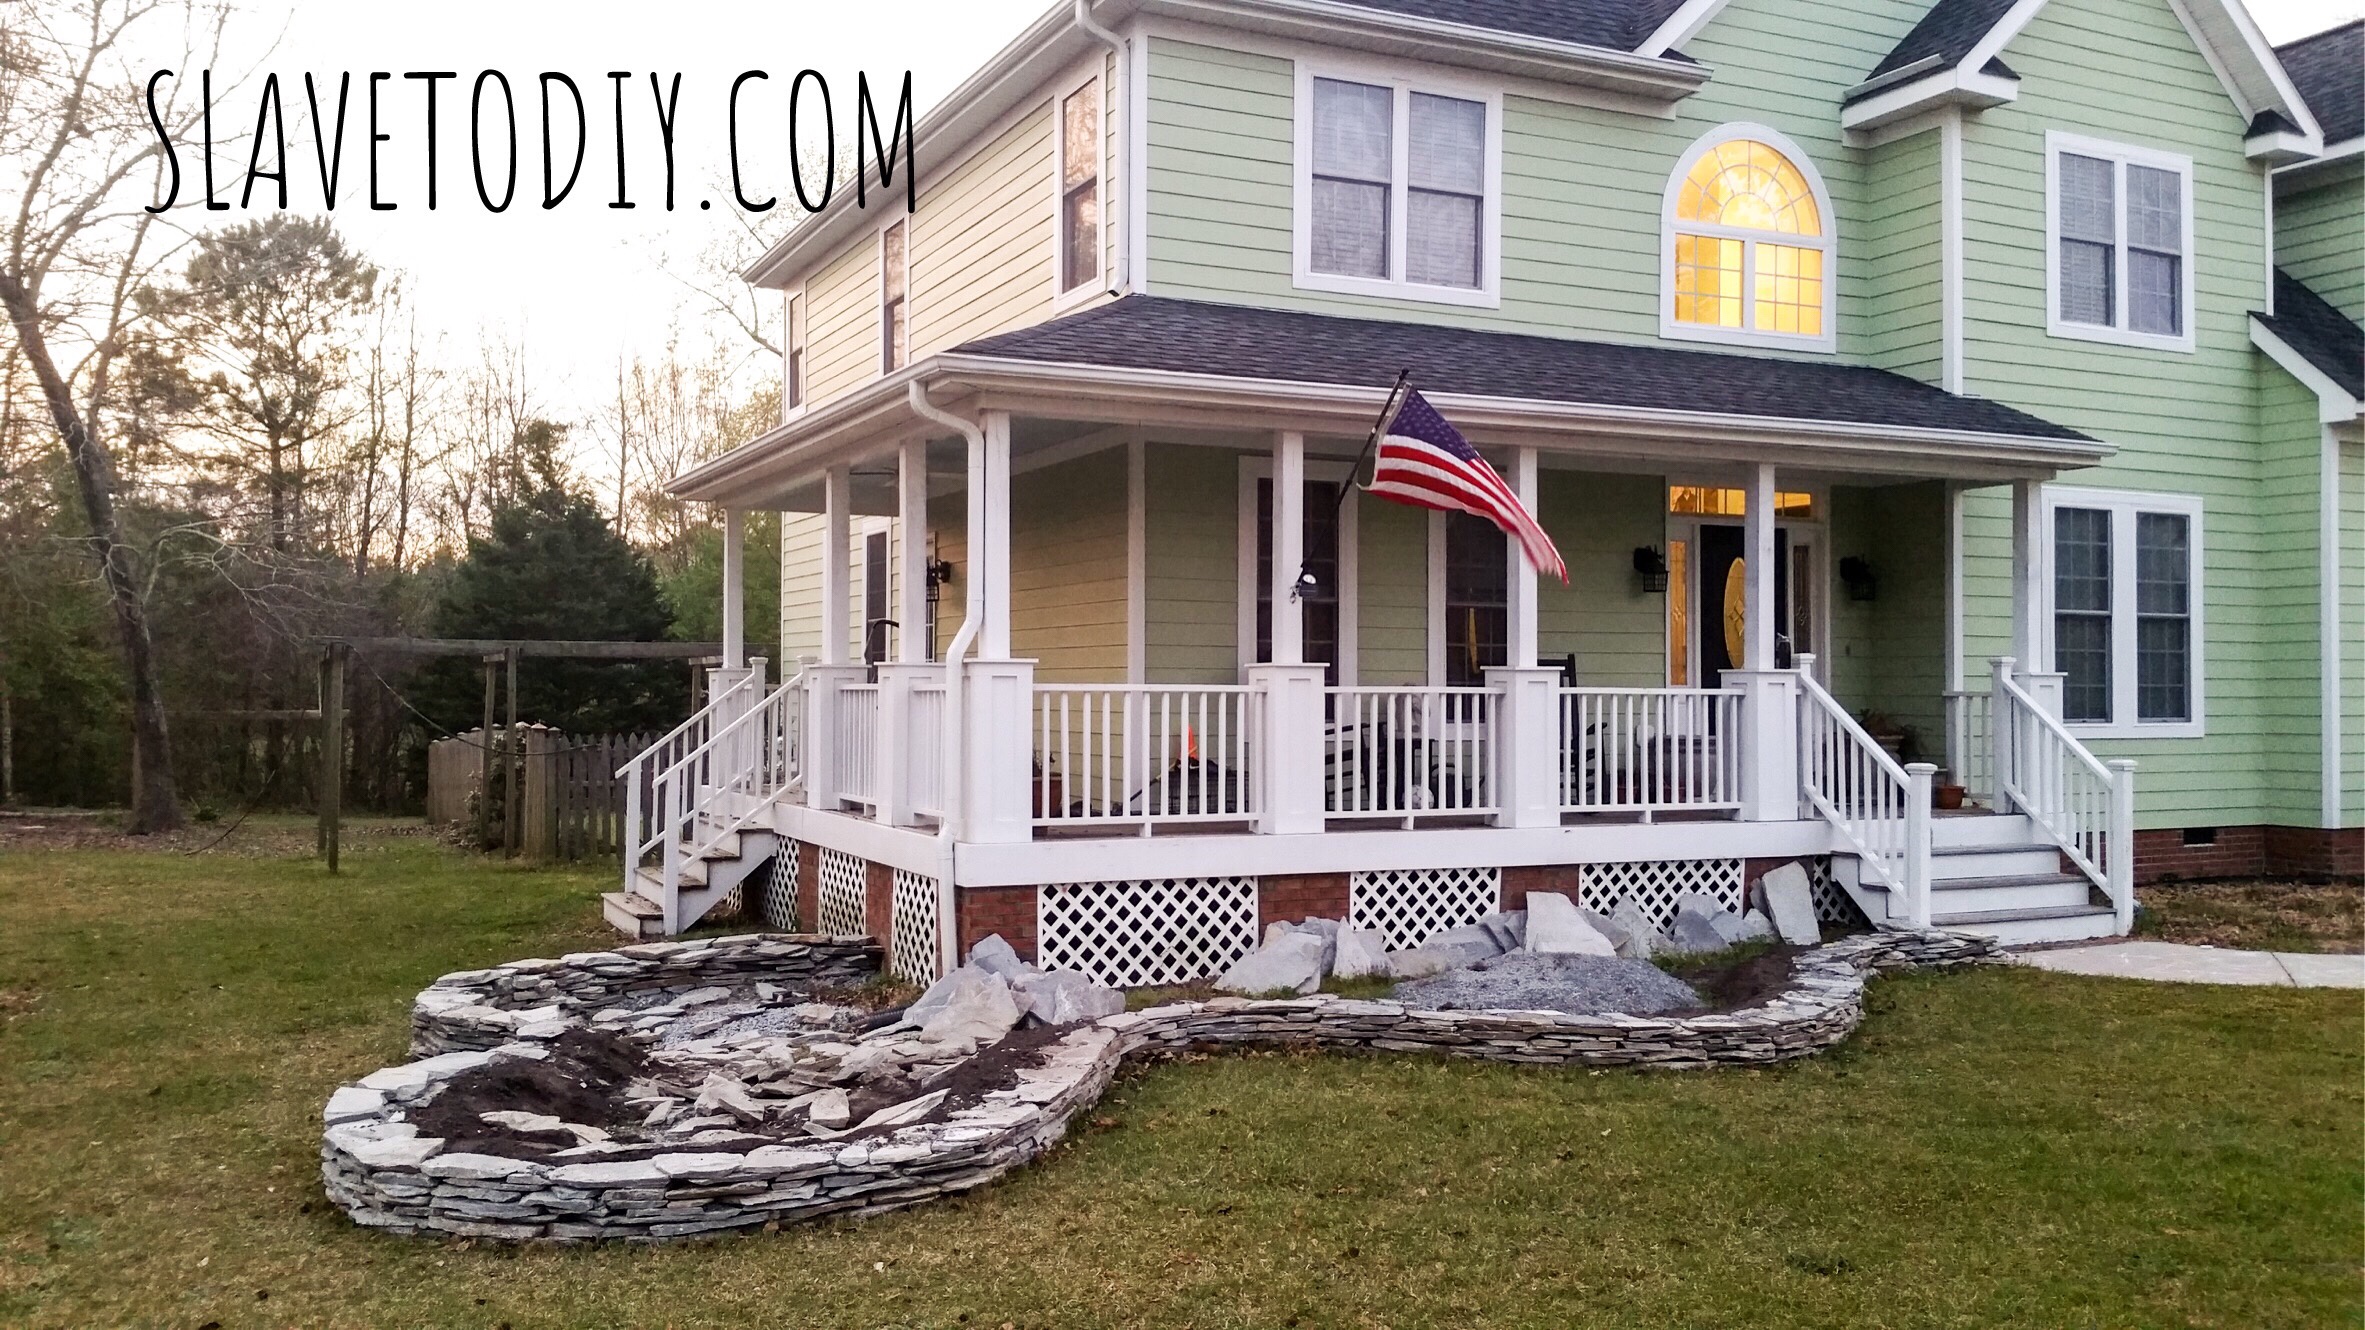
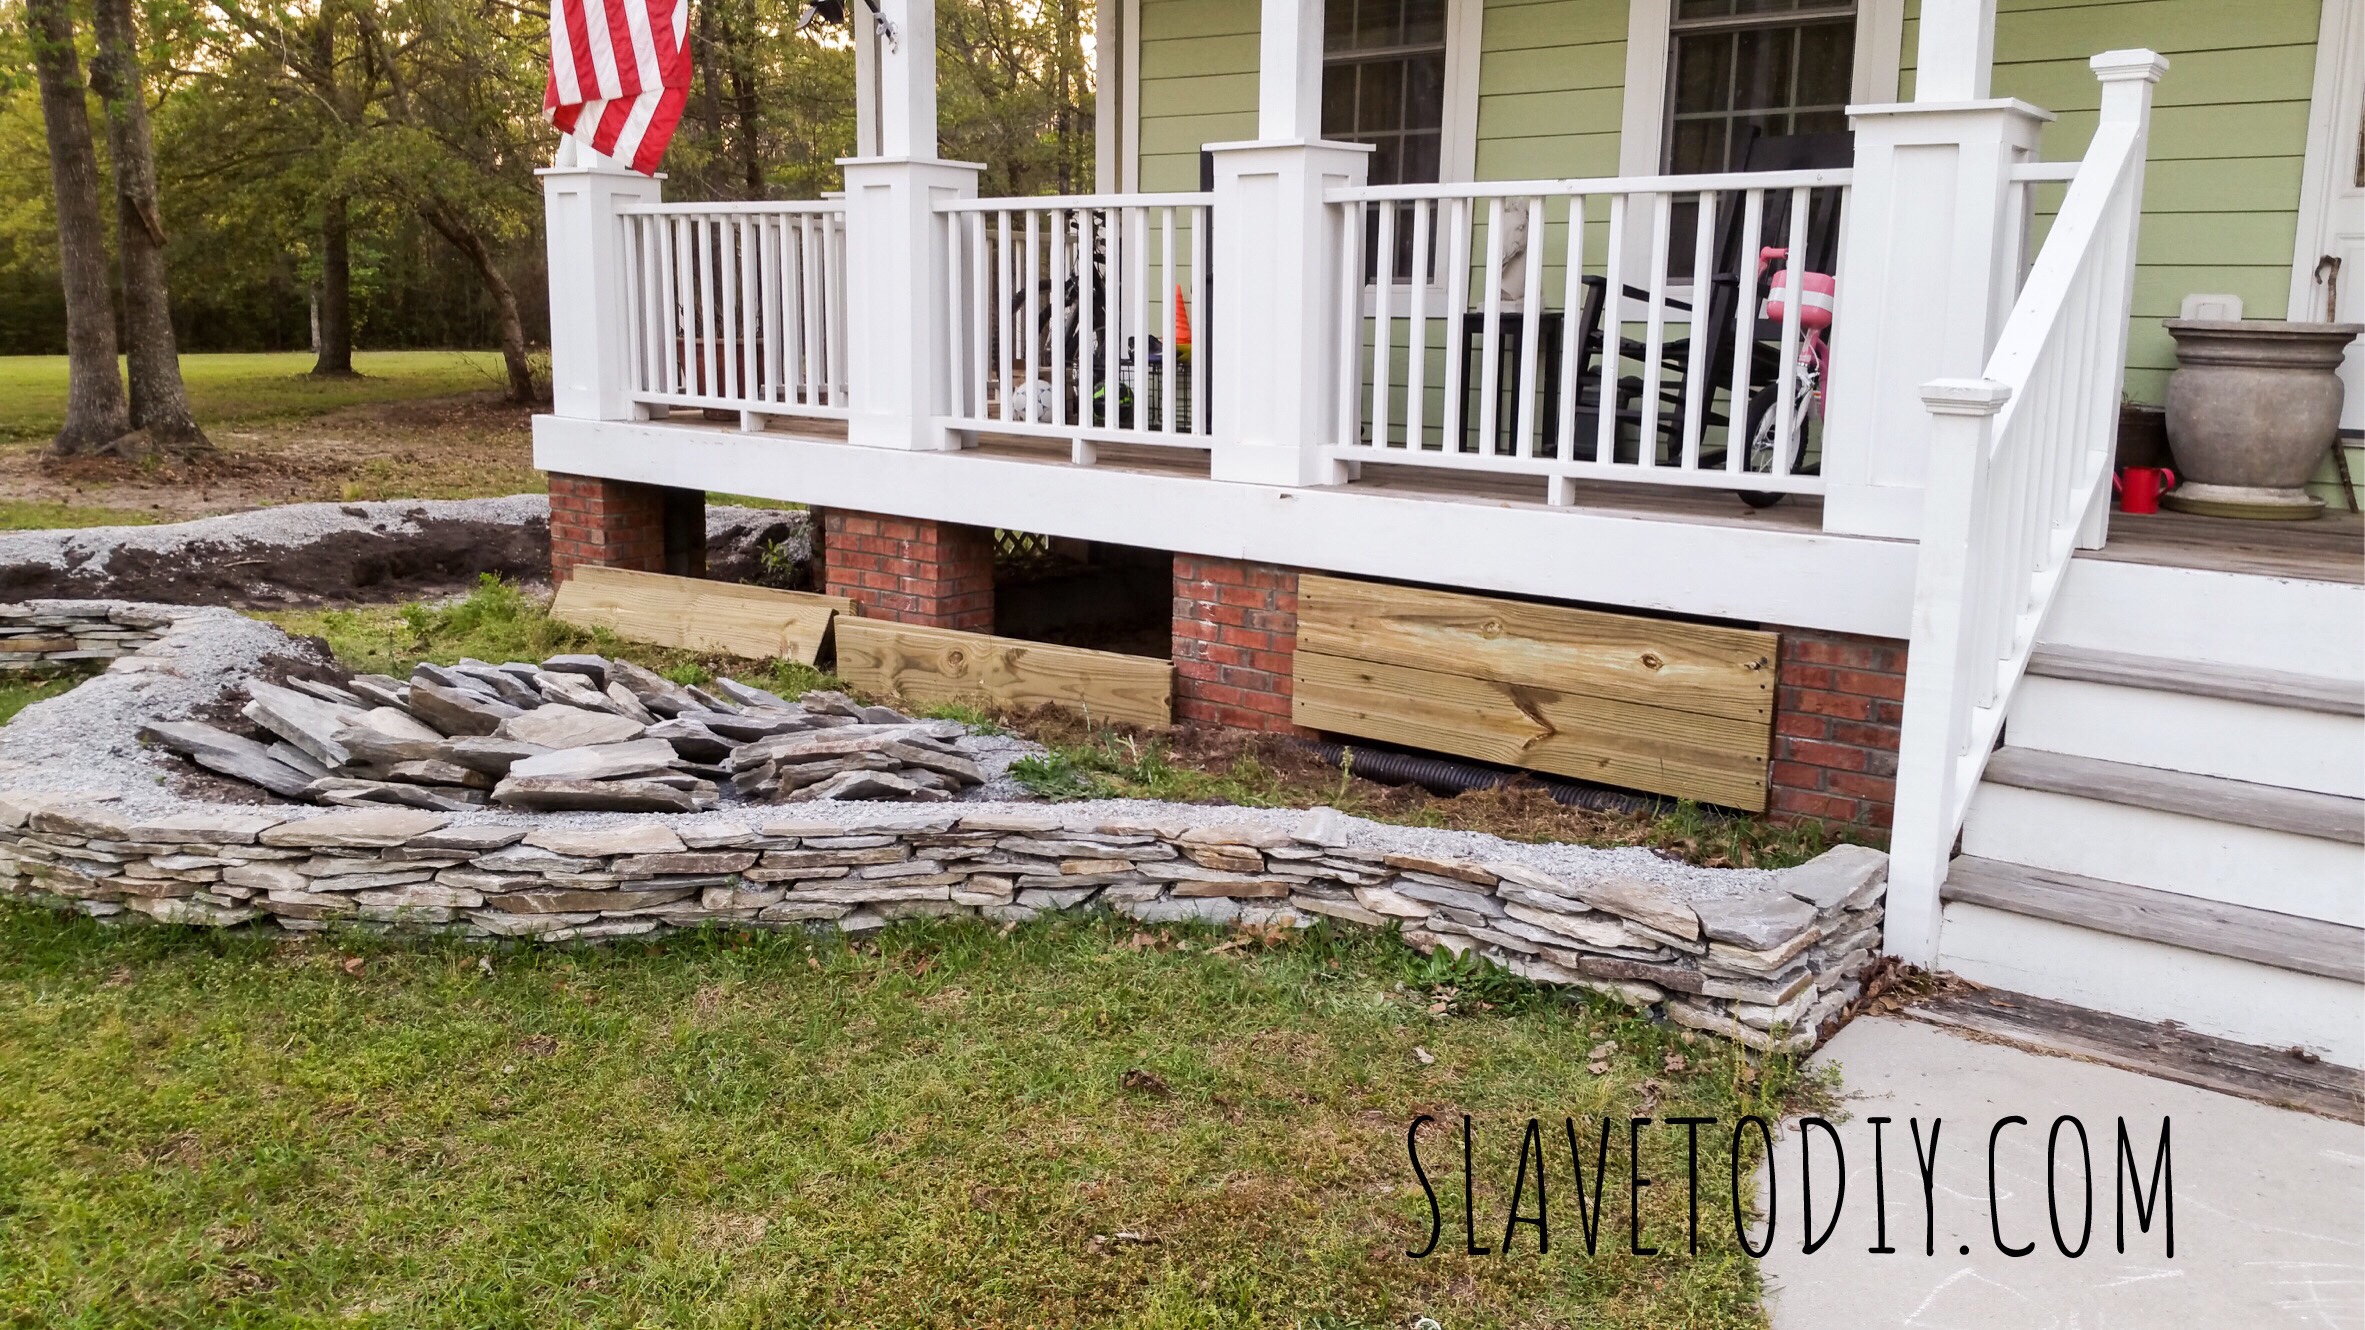
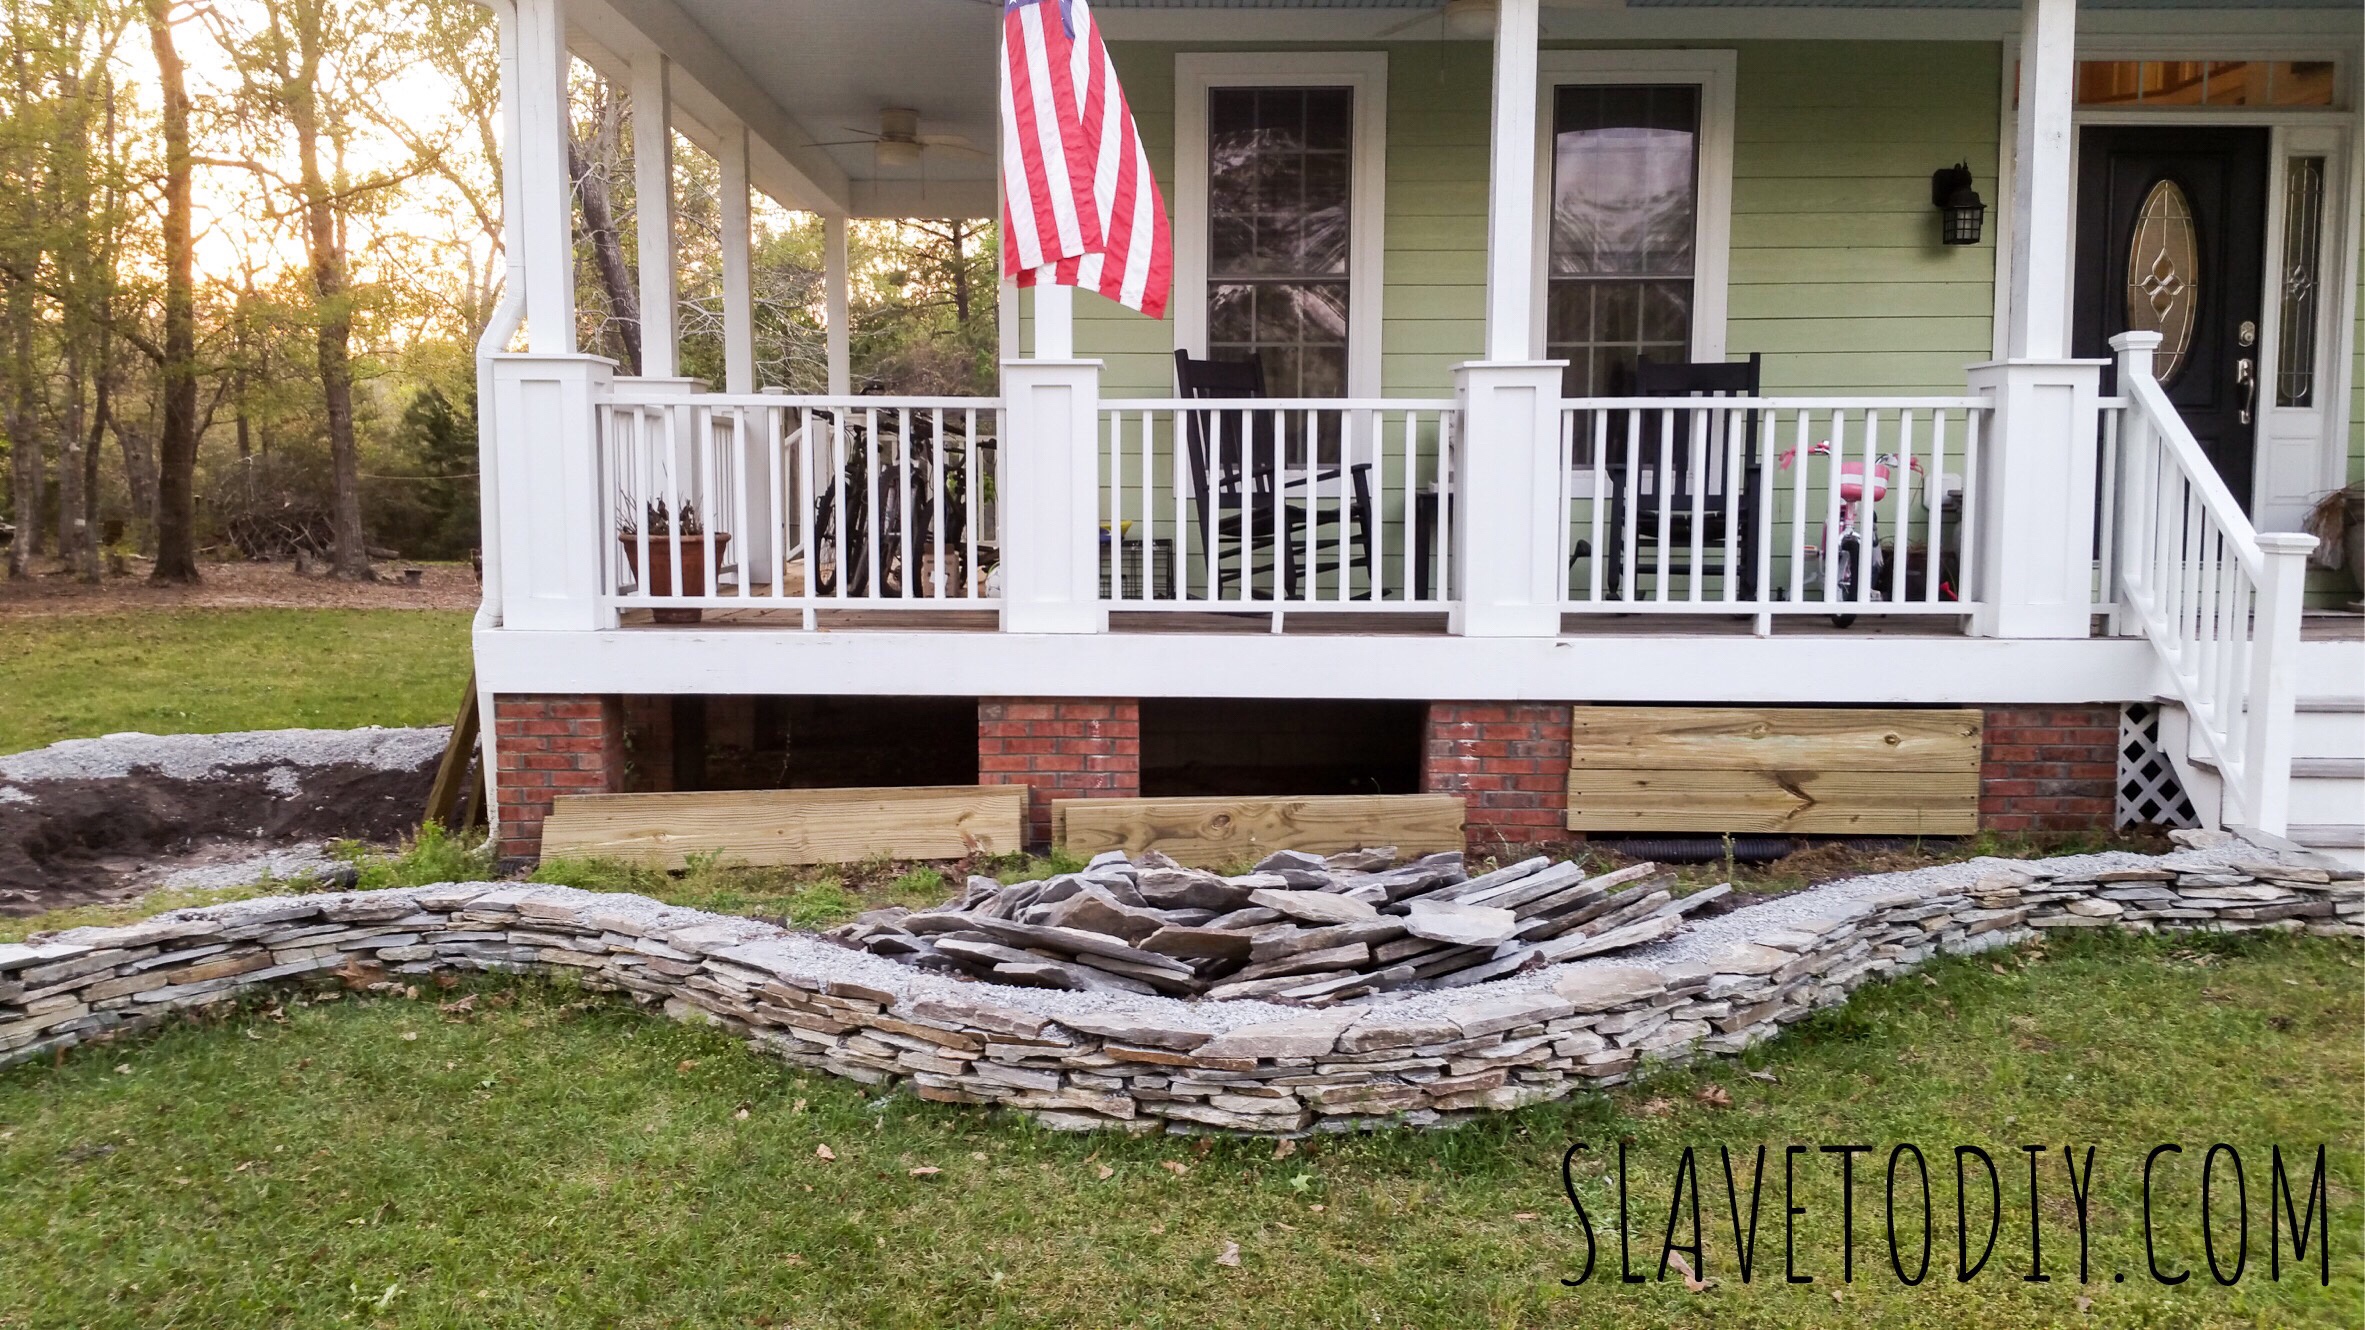
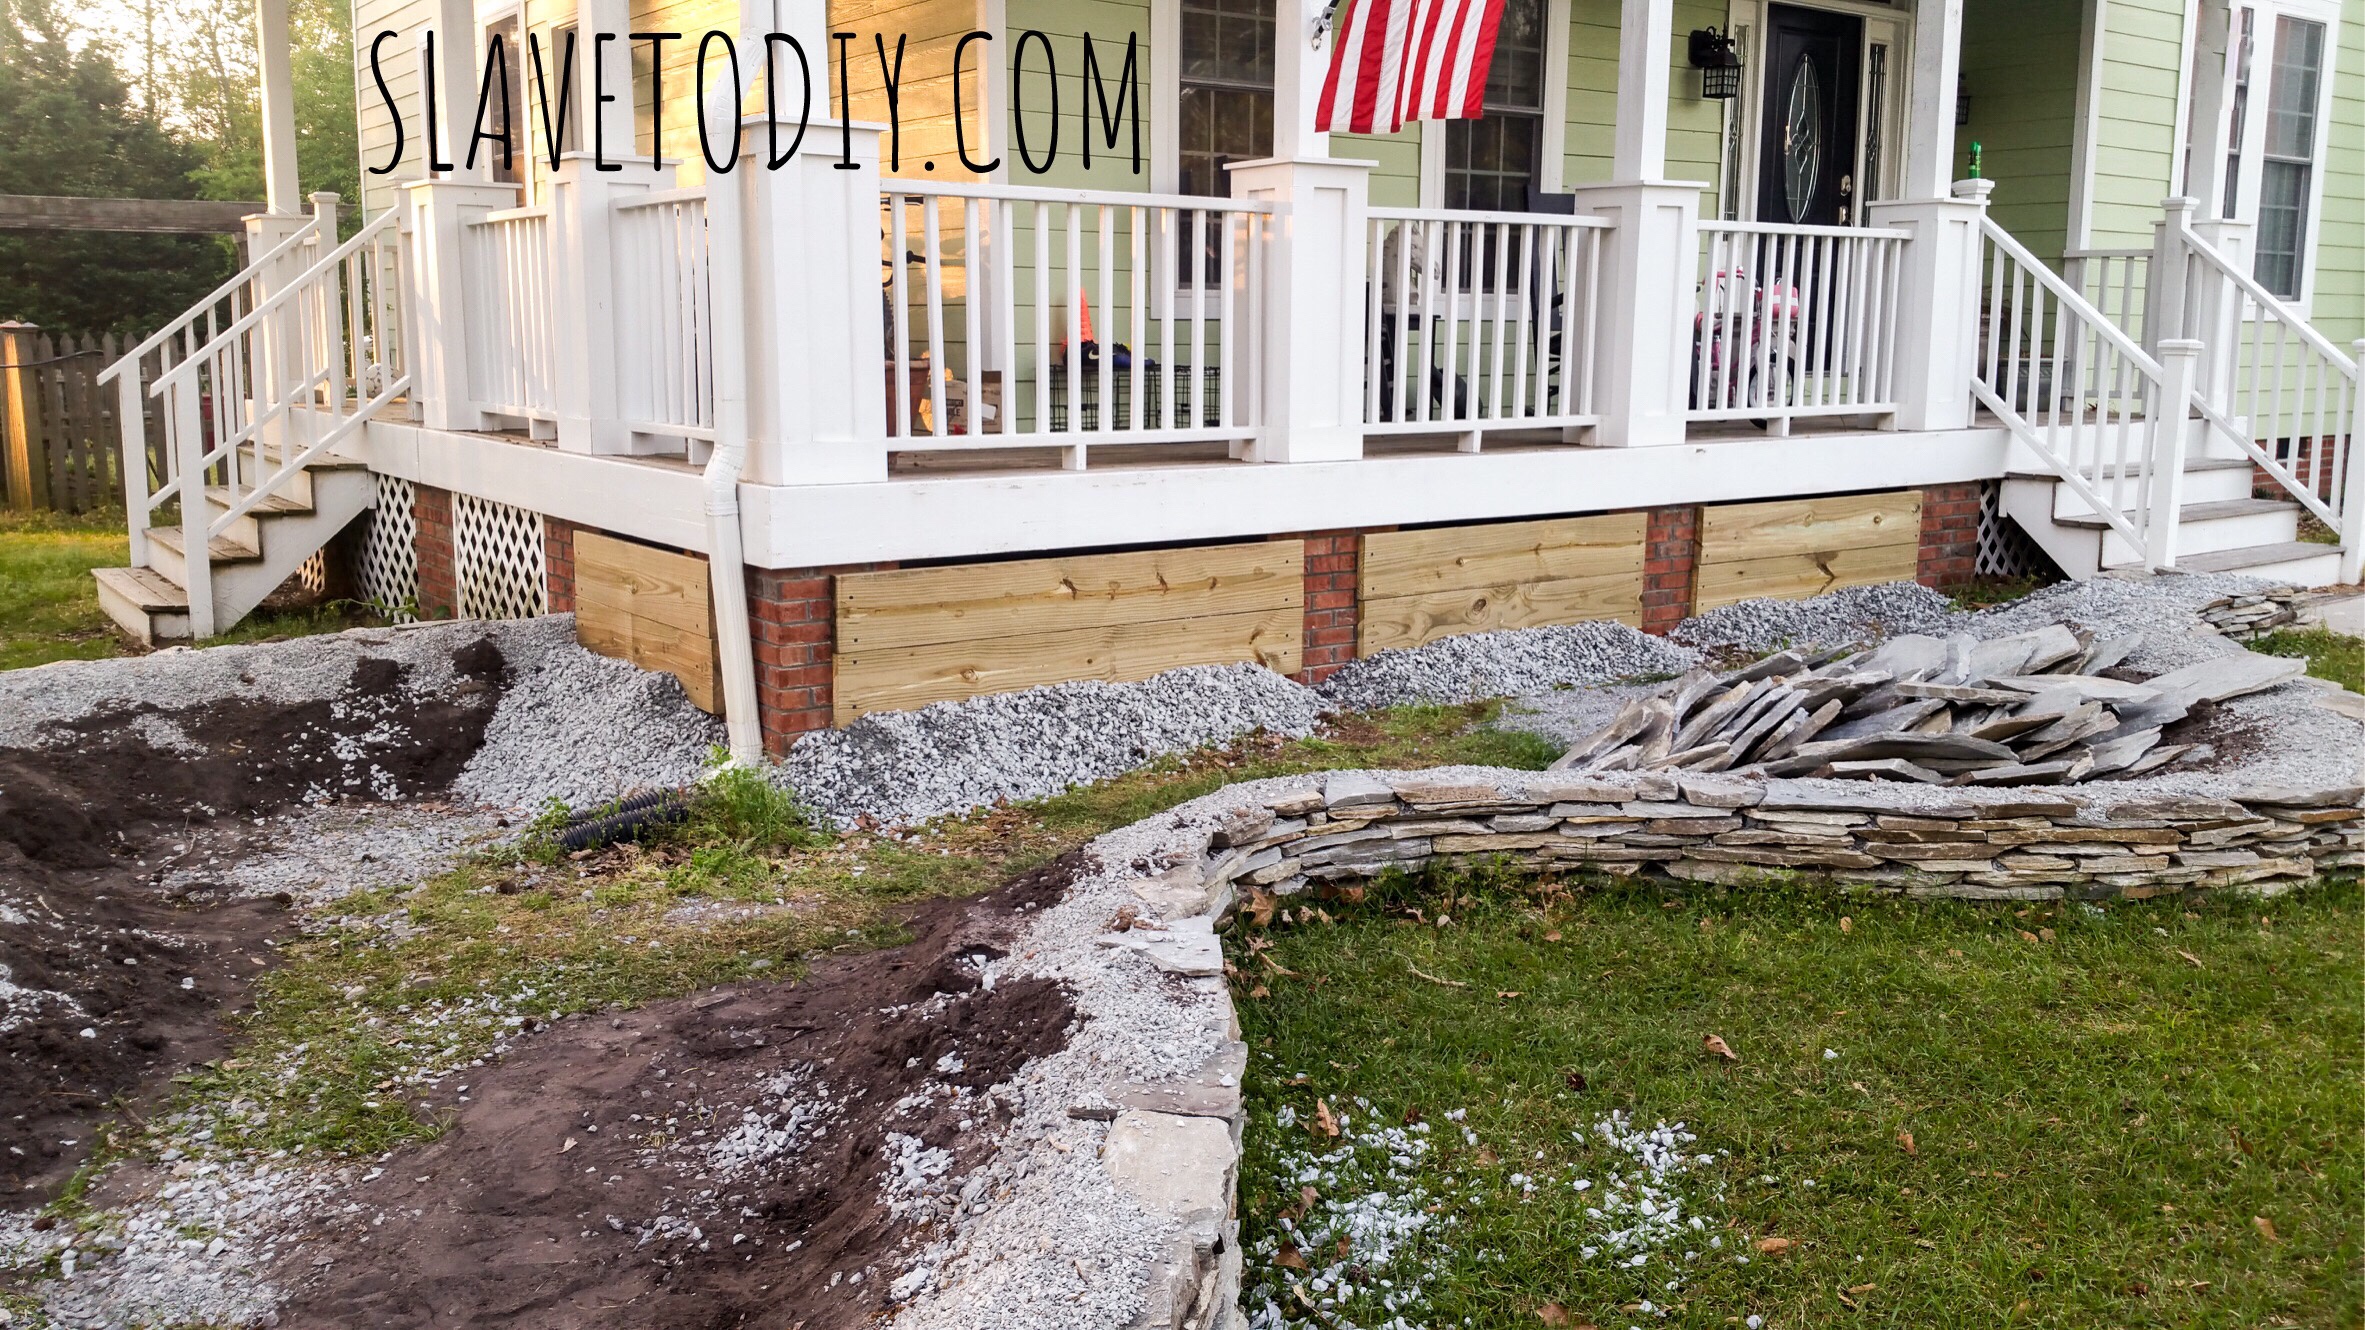
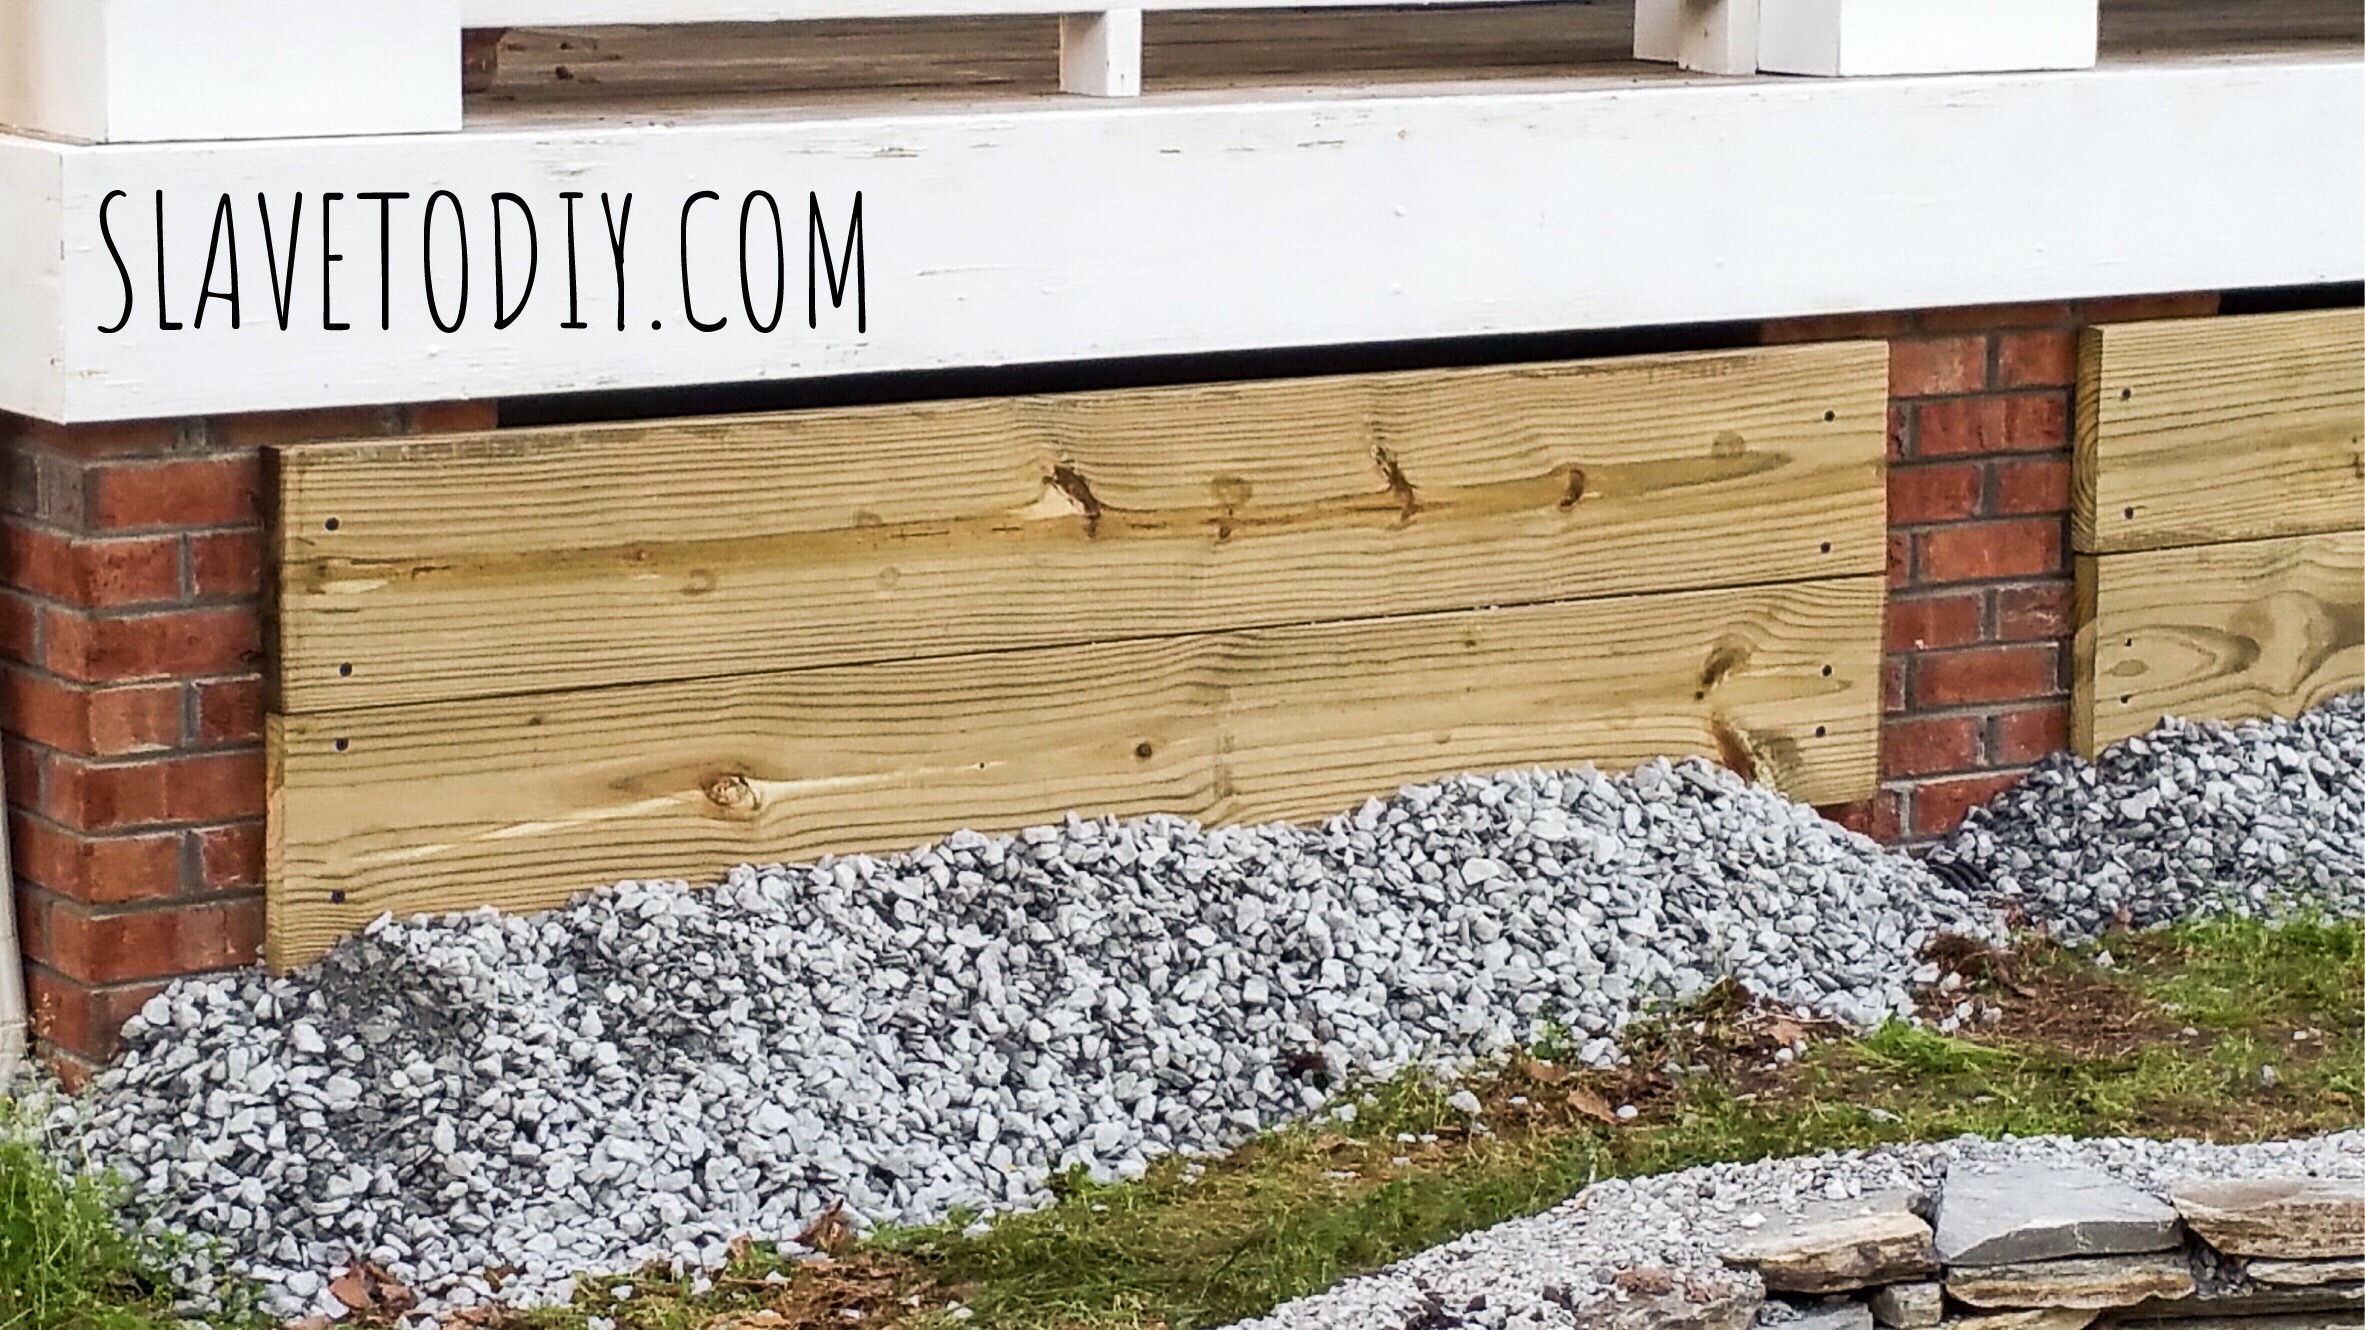
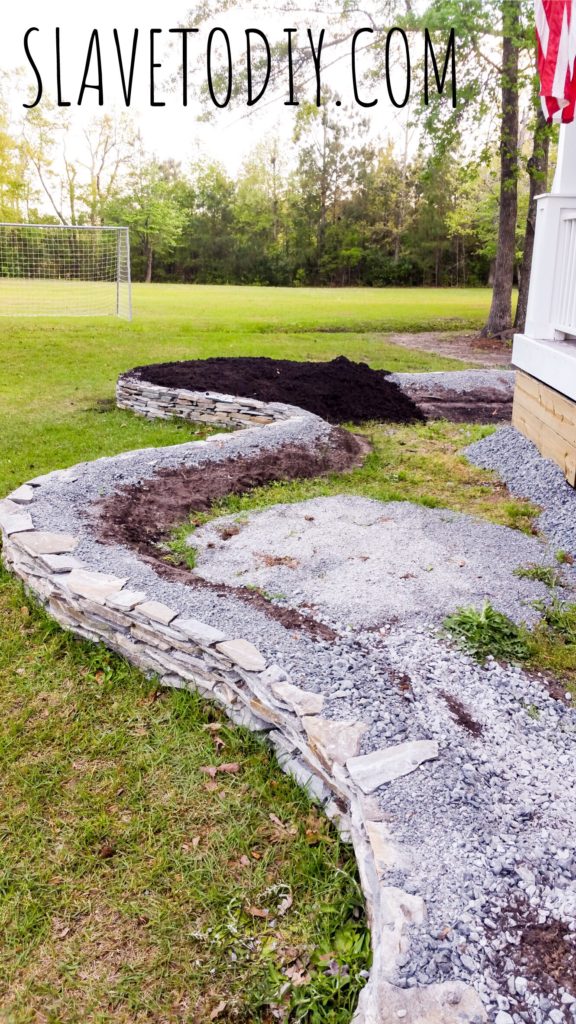
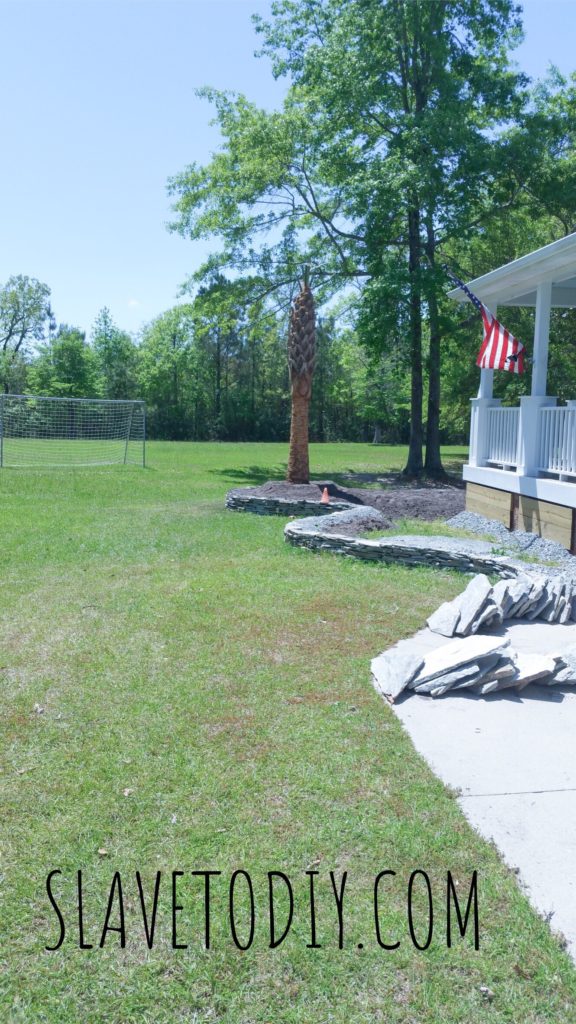
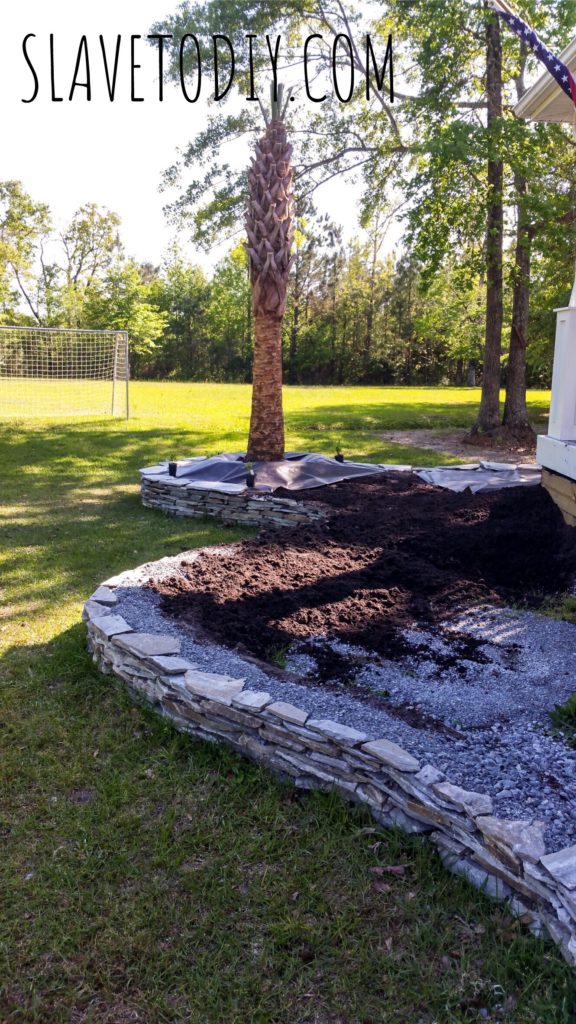
After the pool contractor dug out all that dirt, me and Rainman built a retaining wall at the back of the property so we could use some of the dirt to level the yard (that previously had a steep angle of bank). Of course, we did this to save money, and it was some of the most back-breaking work we’ve ever undertaken.

Pool Planning, Design, Tips and Considerations
Pool Planning, Design, Tips and Considerations: Installing the new retaining wall


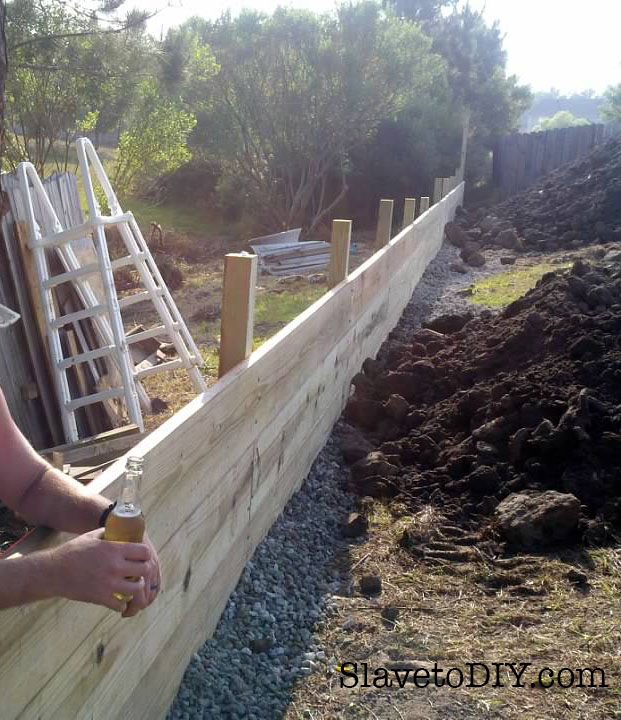
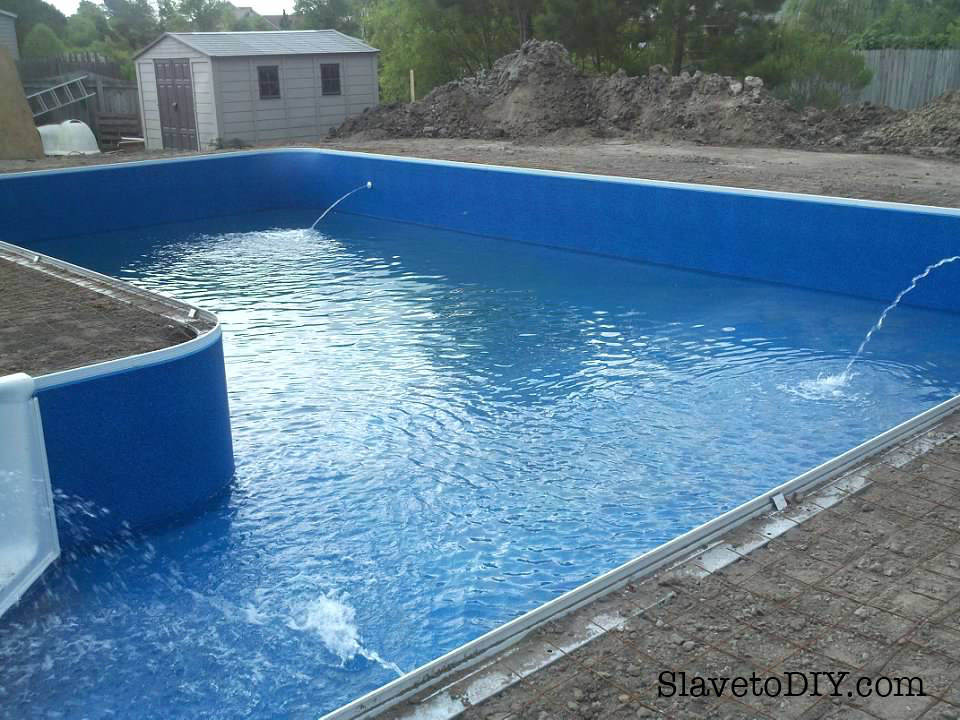
The retaining wall and dirt leveling took a while, and the contractor didn’t need to remove too much as we offered the excess dirt for fill to neighbors. Soon, the walls were framed with the metal band, plumbing and electricity installed, the floors smoothed with the concrete mix, the vinyl liner installed, and WATER!!!

Tip: If you call the local fire department, they will sometimes fill the pool cheaper than off of garden hoses (OOPS, our bill was $500 that month).

Pool Planning, Design, Tips and Considerations
Pool Planning, Design, Tips and Considerations: Filling the new pool


Once the dirt was all leveled out, and the pool filled, the concrete coping was poured around the pool.

Pool Planning, Design, Tips and Considerations
Pool Planning, Design, Tips and Considerations: Concrete coping installation


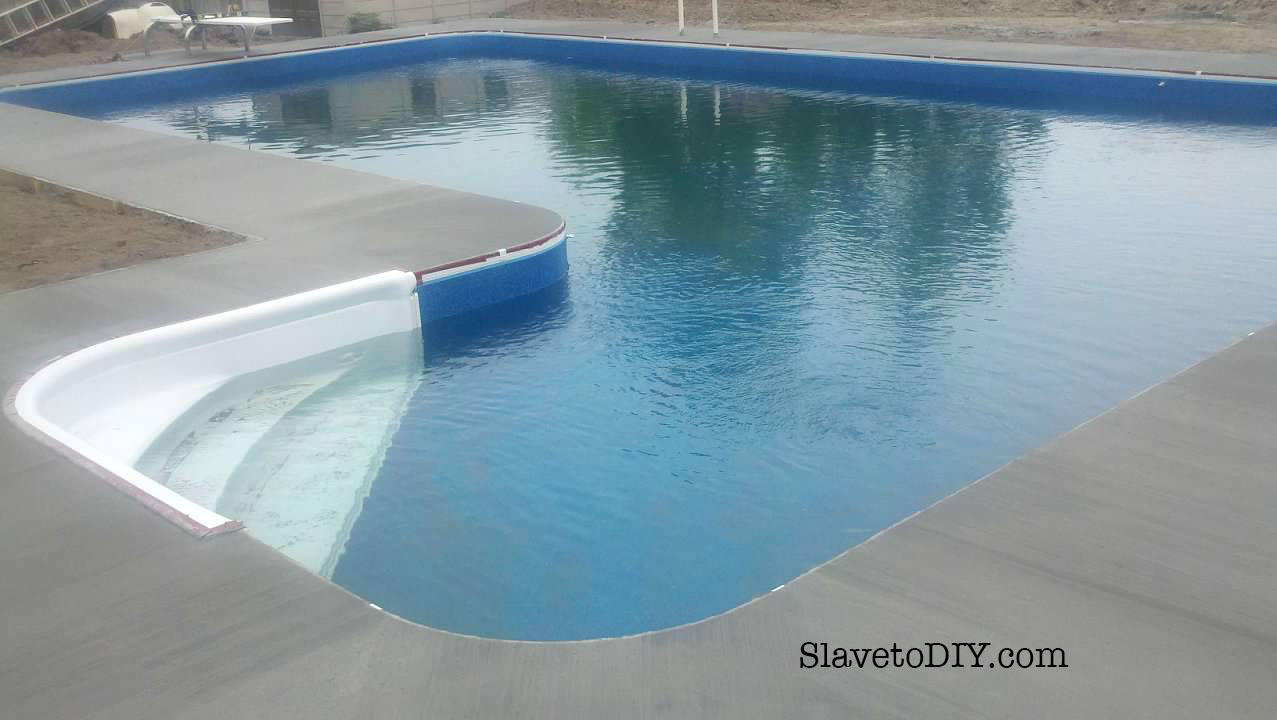
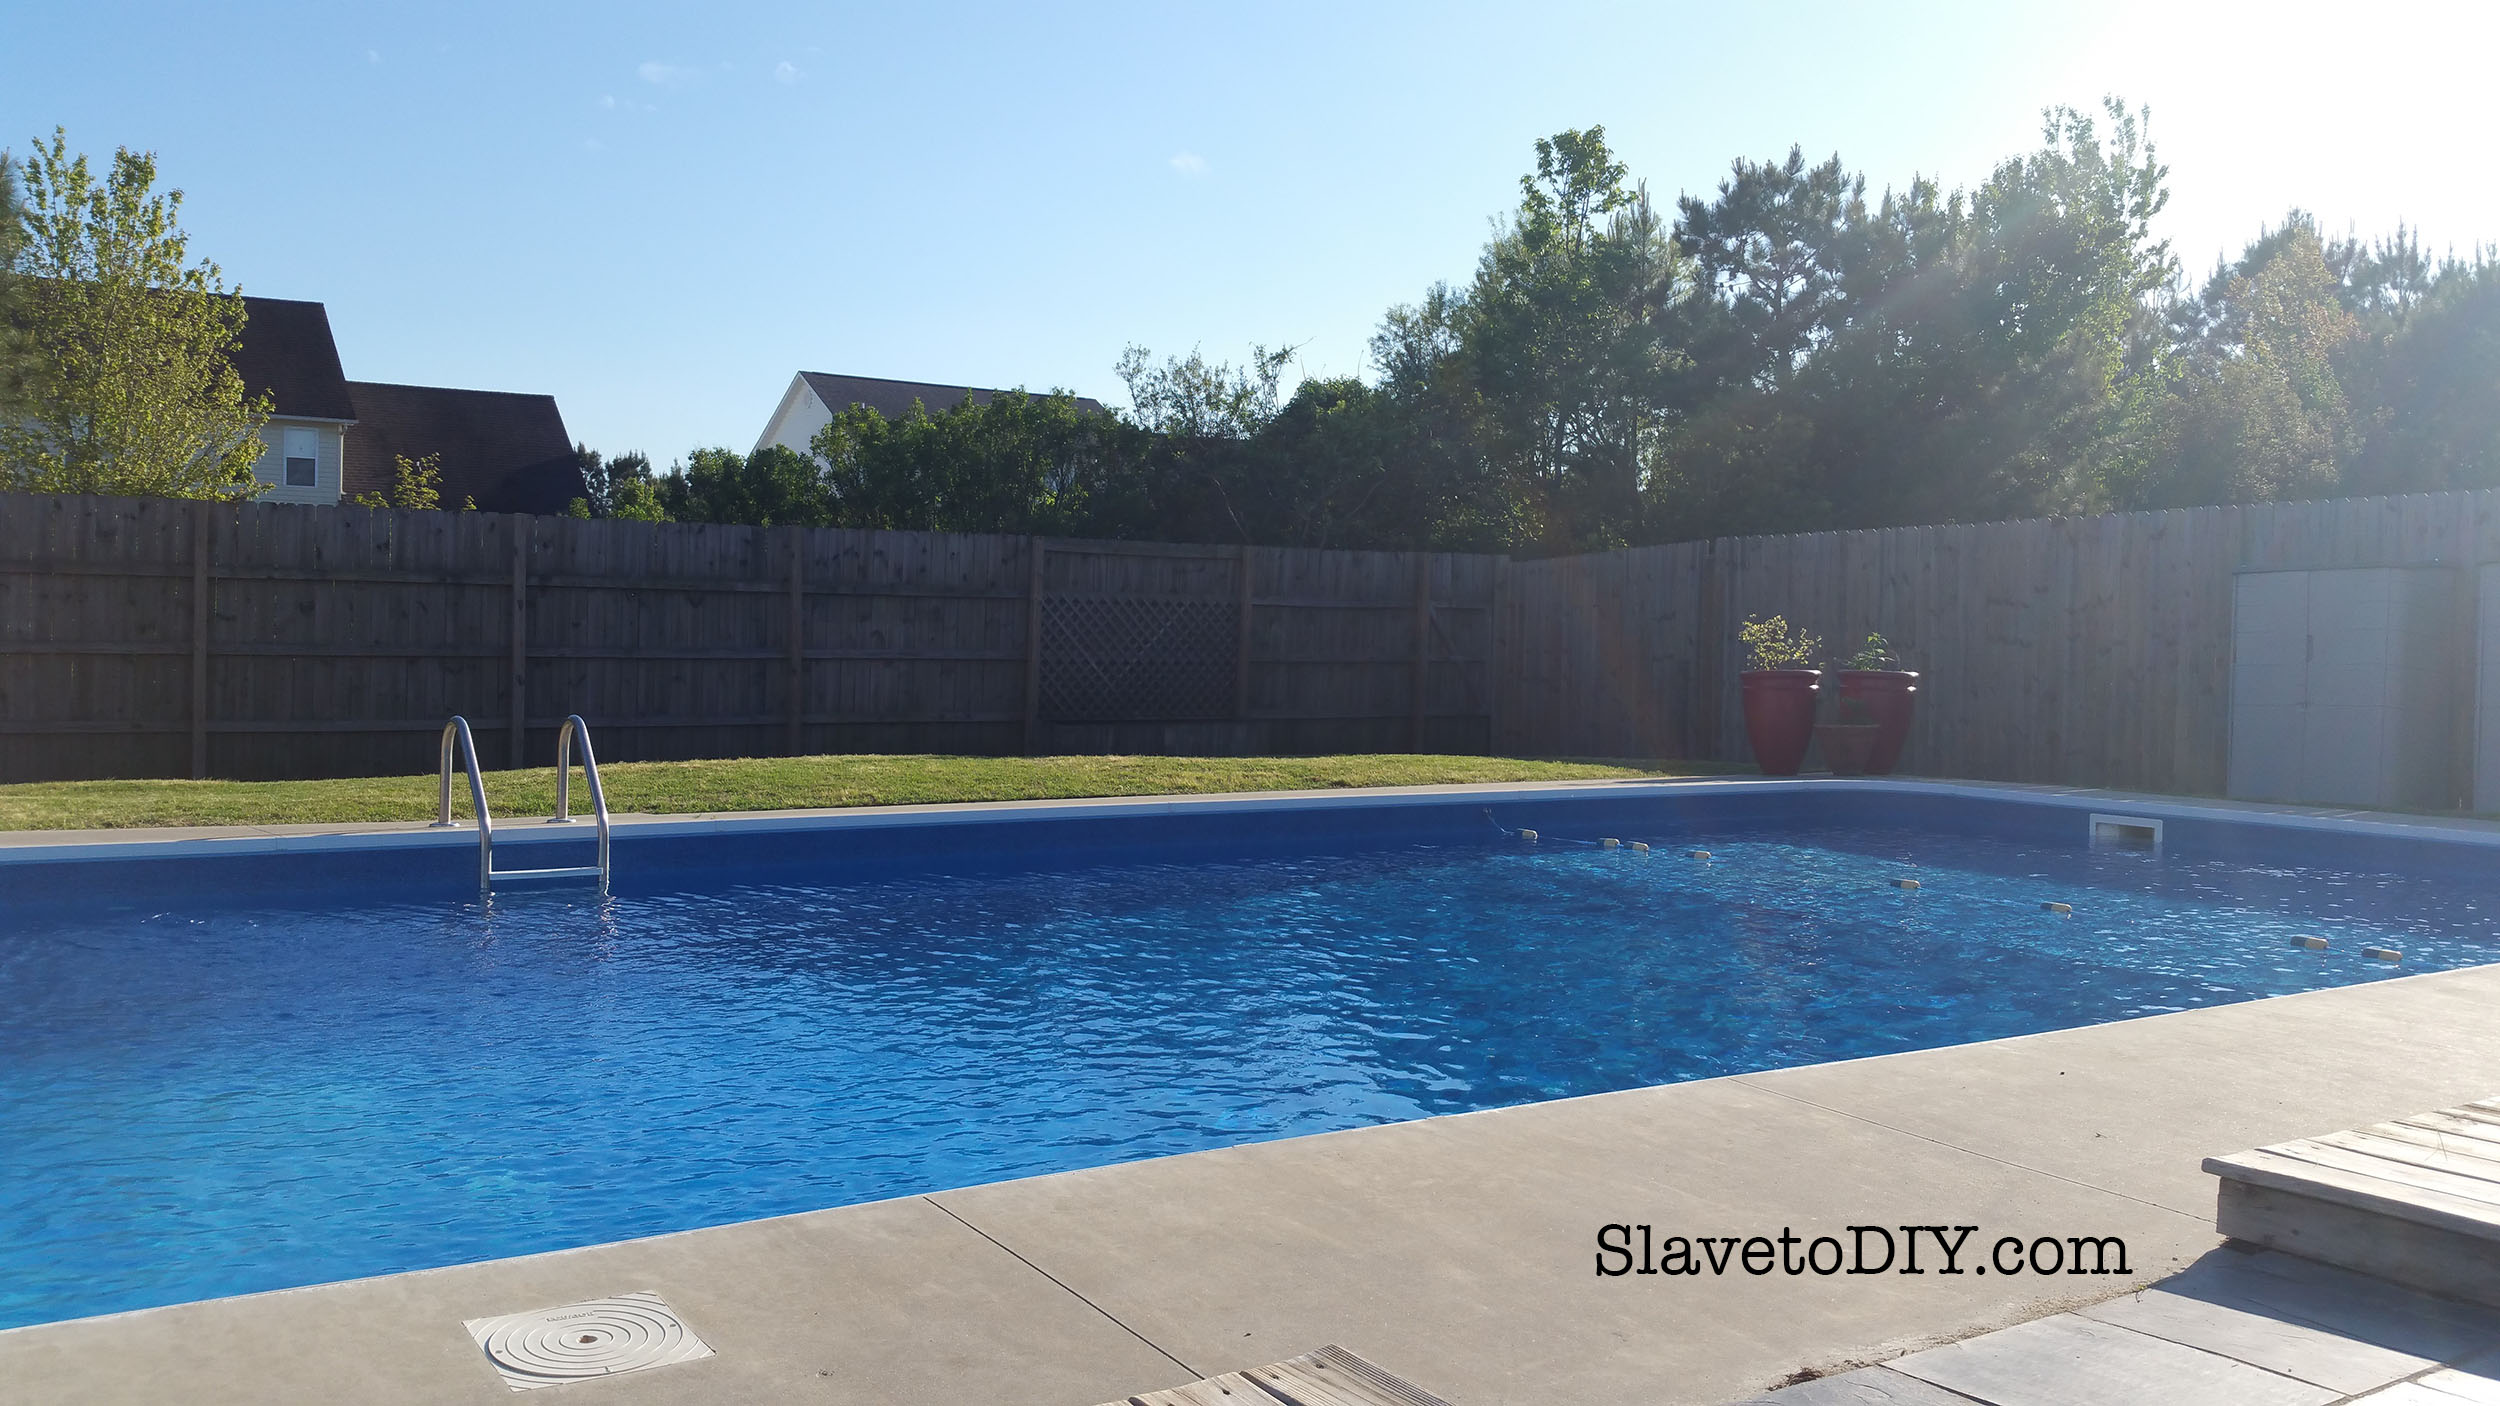
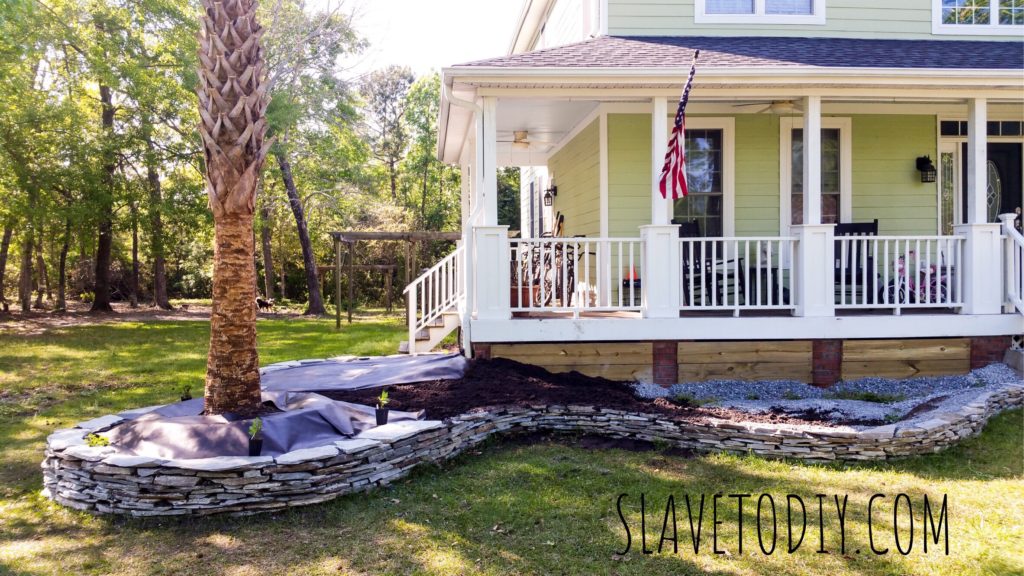
After the pool was finished, we added an eight foot privacy fence on top of the retaining wall for a secluded paradise in the back yard.

Pool Planning, Design, Tips and Considerations
Pool Planning, Design, Tips and Considerations: Adding a privacy fence


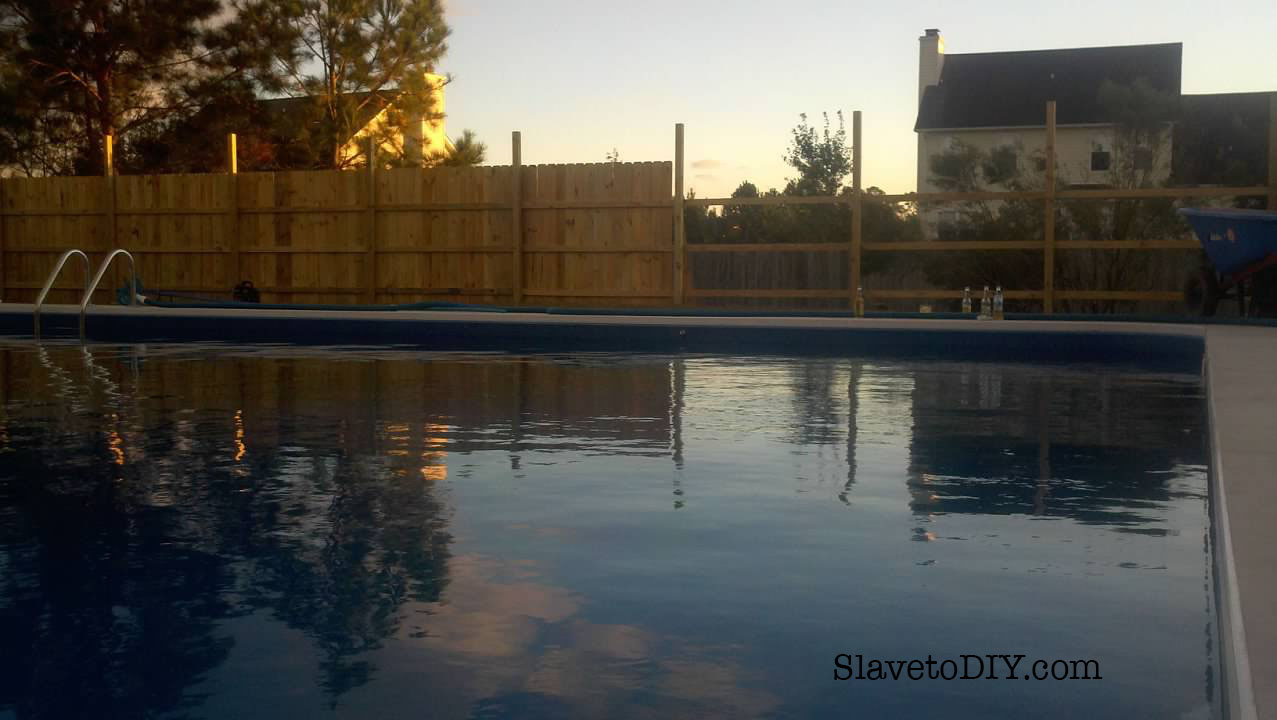
And finally, a finished pool the whole family can enjoy (complete with extended decks and hardscaping)!

Pool Planning, Design, Tips and Considerations
Pool Planning, Design, Tips and Considerations: A pool the whole family can enjoy!

Thanks for coming along and sharing our DIY journey!

Do you have things you wished you’d known before you installed a pool? Please share in the comments below!

Check out more of our great DIY, decor, and inspiration posts on our Blog.  Cheers!


*Legal stuff:

I am honest about my experiences with different products and write because I enjoy it.  I do however, have the opportunity to earn money for my writing, also.

Slavetodiy.com is a participant in the Amazon Services LLC Associates Program, an affiliate advertising program designed to provide a means for sites to earn advertising fees by advertising and linking to amazon.com.  Amazon offers a small commission on products sold through their affiliate links.  Each of your purchases via our Amazon affiliation links supports our cause at no additional cost to you.

If a blogger links to an Amazon product (with a special code for affiliates embedded in the link), and a reader places an item in their “shopping cart” through that link within 24 hours of clicking the link, the blogger gets a small percentage of the sale.  Amazon links are not “pay per click.”  If you click on the product link and stay around Amazon and purchase something else, however, I will get a commission on that sale.

Slavetodiy.com is also a VigLink affiliate advertiser which works similarly.

DIY Stonewall: Stacked Stone Fieldstone Hydrangea and Rose Garden

For those of you have been following our progress, you know I was mortified that we hadn’t completed the front garden project.  We did a massive, beautiful stacked stone garden around the front porch but the garden along the walk leading from the driveway to the front door was still sad, neglected, and downright awful.

*This post may contain affiliate links. Please see full disclosure at the end of the post.

This is the “after,” but it took a few weeks to get there, working a little bit each day:

c7d75b0b-7267-4a96-a7f7-bac089aee829


So, this is what that “garden” looked like before I finally insisted Rainman go buy me some rocks (like we didn’t already have enough on our plates).  We had already cleared for the future patio and had deposited excess dirt into it, piled up around the bushes, with the bonus of random pavers that braced Christmas lights.  Just beautiful.  Sigh.

638dbc3e-57ec-4285-91b0-fb9467c6cd9e
Before.  Awful, unfinished landscaping project.

Ugh.  It’s really bad.  Please look away.

View from the porch of the bad garden.

The sand-base is the home of the future brick patio.  This is another “before” photo.  So, I’m not going to go into the project as exhaustively as I did on the last one, this is sort of an abbreviated photo tutorial.  For detailed instructions (totally the same process!) check out A Classic Stacked Stone Garden Wall, Phase One and Classic Stacked Stone Garden, Phase Two.  As for this guy, here goes.

Base layer for dry stacked stone garden with gravel and stone.

First we did the base to make sure we had a stable foundation.  We mimicked the curve coming off the steps so the future patio will be the right shape.  We used the bricks since that side will be higher (a step up to the brick patio) and that way we didn’t waste any stone.

Another shot of the base layer in on the dry stacked stone garden.

It didn’t occur to me at this point what was really bothering me.  But, I’ll get to that.

The curve around the Crepe Myrtle with stacked stone garden base

I really love this gentle curve around the end of the garden.  It’s a great shape.

Another shot of the rock base for the dry stack stone garden wall.

This shows how the base took shape.

Dry Stacked Stone Garden wall going in.

So, I was standing there looking at it: this future garden and Rainman asks me a simple question.  “You don’t like those bushes do you?”  And, of course, that was exactly what was bothering me.  It would’ve been WAY more simple if I had asked him to remove them BEFORE I began the wall installation, but he didn’t even fuss at me.

Dry Stacked Stone Garden wall taking shape.

So, the deal with the garden wall installations is that Rainman can’t help.  It’s sort of like playing tetris, except that the pieces aren’t the same and you have to be a little creative.  It’s an art, really.  So, he did what he could: he broke up the weeds and filled in gravel where I needed it.  He also lugged rocks of various sizes over to where I was working so that I could build faster.  He’s really very awesome, this Rainman of mine.

Leveling the dry stacked stone garden

When we get to this stage of the game, where final leveling is happening, his help, and his eye are essential.  I still don’t let him touch any rocks, but he gets me a line so we can get the wall ready for capstones.

Topsoil going in on the dry stacked stone garden

In order to get the garden ready for capstones and landscaping fabric I needed the rest of the topsoil in so I put the teenagers on duty, running back and forth to the topsoil and mulch place.

Getting dry stacked stone garden levelled and ready for landscaping fabric and mulch.

So, we finally got it mounded where I wanted it, and let it rest overnight with a good soaking rain so we were sure it was good and settled and the levels were where I wanted them.

Dry stacked stone garden with landscaping fabric and capstones going in.

Once the soil was in and mounded the way I wanted, we added landscaping fabric and capstones.  Don’t EVER skip the landscaping fabric.  You’ll be sorry you did.

Dry stacked stone garden complete with mulch and ready to plant!

Once we had the landscaping fabric and capstones in, it only took two scoops of mulch to get a nice thick layer.  Now I could really look at my blank palette and make plant decisions.

Enter a caption

This little tree frog took up residence on one of the porch columns and kept us company almost the whole project.


Dry stacked stone garden from the driveway.

This is a shot of the garden from the driveway.

Both dry stacked field stone gardens together and finished!

For the tutorial on step-by-step stacked stone garden wall installation see our blog post here.

The total cost on this section of the garden was:

  • 2 pallets of stone: $610
  • Gravel base scoop: $37.36
  • 2 Sta Green Ultimate Weed Barrier: $70
  • Landscaping Fabric Pins (leftover from another project)
  • Two Scoops Mulch: $74.72
  • Four Incrediball Hydrangea and a Rose Bush from Spring Hill Nurseries: $147.55
  • Seven Scoops Topsoil: $134.54
  • Total: $1074.17

Can you imagine how much it would’ve cost to hire someone to do this?  I’m not saying it’s easy, but it IS a project you can do one afternoon at a time.  And it’s VERY, VERY satisfying and rewarding to see what a beautiful thing you created.

Thanks for reading along and check out more of our projects on our blog.  Cheers!


*Legal stuff:

I am honest about my experiences with different products and write because I enjoy it.  I do however, have the opportunity to earn money for my writing, also.

Slavetodiy.com is a participant in the Amazon Services LLC Associates Program, an affiliate advertising program designed to provide a means for sites to earn advertising fees by advertising and linking to amazon.com.  Amazon offers a small commission on products sold through their affiliate links.  Each of your purchases via our Amazon affiliation links supports our cause at no additional cost to you.

If a blogger links to an Amazon product (with a special code for affiliates embedded in the link), and a reader places an item in their “shopping cart” through that link within 24 hours of clicking the link, the blogger gets a small percentage of the sale.  Amazon links are not “pay per click.”  If you click on the product link and stay around Amazon and purchase something else, however, I will get a commission on that sale.

Slavetodiy.com is also a VigLink affiliate advertiser which works similarly.

DIY Black Builtins, Epic Hemnes IKEA Hack

I’m so excited the Hemnes IKEA builtins are finally finished!!! This has literally been a two-year process (of building custom-ish bookshelves) and life has been truly uncooperative. But, they are done and I am super psyched to be sharing our process and pictures with you!

Before I get started, I feel like a short discussion is warranted… a note on this new culture in which I find myself.

You know, when I was growing up, the word “hack” was a bad thing. Like, if someone called you a “no talent hack” or you were watching a movie about murderous chainsaw wielding “hacks”… or am I using that wrong? Anyway, so I’m old now, and apparently hacking is a positive thing. Unless, it’s computer related and you’re trying to pass high school by updating your math grade in the school by flashlight. But, suddenly life hacks are awesome, furniture hacks are even better, and IKEA hacks are the holy grail. So, now I’m hacking away, trying to fit in.

I’ve performed my very first IKEA hack (in my head I’m trying desperately to suppress the sound of a hair ball being coughed up every time I write the word “hack”).

This post may contain affiliate links.  Please see the full disclosure at the bottom of the post.

After much pinteresting and pinning and planning I finally bit the bullet and ordered the components for my long-awaited living room builtins (I challenge you to find hemnes hacks in black on Pinterest- they’re few and far between). The boxes of homeless decor were staring at me every time I walked by and rendering the media room, which was temporarily storing the wayward decor, unusable. Enough was enough. And this HAD to be easier than building from scratch with MDF and poplar/pine as we’ve done in the past. And, of course, that dreamy factory finish is just impossible to accomplish without, you know, buying it from the factory.

So, we’ve previously done four sets of built ins of slightly varying design, each time getting better and learning tricks along the way. However, when you’re working with afternoons and weekends, and your own personal OCD- Rainman husband, they take FOREVER. It was worth seeing whether these would look as nice (or better) and if the process would go any more quickly. Fingers crossed. This is in my living room. So, no pressure if I hate it, right?

Listing photo from before we purchased the house.

Before.

Our New House, getting unpacked!

Here’s how this went down. In case the cops ask.

So, I ordered the hemnes components after measuring, remeasuring and adding their weirdly sized measurements together (these are designed with metric measurements, so the conversion is generally some oddball number and 5/8s). So, I got my 6th grade math hat on, did my measurements, made a pretty drawing on graph paper, left PLENTY of wiggle room in the design, and ordered online. This is literally drawn on graph paper. And yes it’s still okay to use a paper and pencil. This is a big wall, and those of you that follow our journey, know I like to use the WHOLE wall when we do builtins. Go big or go home, right?

And now I can’t find my sketch, so I have no proof that ever happened.

A design note: I fell in love with white cabinets and built ins for years. We did white builtins in the last place and I adored them (so did the buyers apparently). But, is that dreamy white kitchen on Pinterest really timeless? Are the built ins? Or will they be the next victim of HGTV inspired design trend that date the home? I’m so glad I waited, because we went with black, and I feel like it’s way more US, and timeless. Dare I say classic? I would hate to be here in 15 years and think, “nice going, 15 years ago self. That looks like garbage.” So, time will tell. But, I feel like black is like that little black dress that will stand the test of time. (I’m not hating on your white builtins, they’re just boring me to tears lately and I’m way to moody for all that cheerfulness).

Total cost on the bookshelves and bridging shelves from IKEA (not final cost with support lumber and trim) was $1591.64. This was the general plan:

IKEA Hemnes Builtins Hack, in black, bridging shelves and bookshelves

Buying from IKEA, a few things to note:

I purchased when I did because they were offering 20% off. Once you add the shipping, it comes out to about what it would’ve otherwise cost. Shipping on furniture is almost never free at IKEA, so if you’re waiting on that it will be a long time. Furniture delivery took about two weeks and was delivered by a different delivery service (as in scheduled with an appointment time, not FedEx or UPS). There was one damaged box with a nicked shelf and one of the seven bridge shelves was missing completely (I did the math on weight and figured out that it never shipped from IKEA, not that it disappeared en route).

So, I immediately emailed with the discrepancy and, after not getting a reply, called IKEA. After 59 minutes on hold listening to the elevator version of “I love you, always forever” by Donna Lewis mixed in with Ikea advertisements, I was approaching homicidal, but got a human being in time that my phone didn’t become just another statistic. Well, it turns out they didn’t ship it on purpose because it wasn’t in stock (could I get a heads up???). Also, helpful-insider-info-Ikea-customer-service-guy shared with me that they never get to the emails, so just call next time… good to know. Back on hold with electronica Donna Lewis…. Yay! They shipped it via FedEx so I don’t even have to be there for delivery. But, wait! The shelf! Back on hold… sigh.

The missing bridging shelf arrived a few days later, not so much the other shelf. Let’s see if I ever get around to calling them on that.

Assembly:

Assemble components. Follow the directions. Leave the el-cheapo back covers off (this is the cardboard-ish thin backer board).

Bridging shelves. Well. Most of them. Stacked. Tempting cats to cause a mishap.


IKEA hemnes bookcase with drawers and cabinets. Partially assembled.


IKEA Hemnes Bookshelf in Black


Helpers assembling Hemnes IKEA with Rainman


Wall prep.

So, for installation the baseboard had to be removed, and not being totally sure where the shelves would cover to (due to the *cough *cough extreme precision of my design plan) I decided to spackle and sand the uneven spots. I hate mud. I hate sheetrock. I hate sanding. Shoot me.

Paint:

I kept seeing all of these great shelves with an accent color on the back wall. So, I chose a color at the paint store, and hated it. My pretty gray turned out purple and I waited a couple of months before admitting that I hated it, and got the wall painted black before the installation began. Yeah, I said months. This is why we don’t six-week challenges. Six MONTH challenges would be record-breaking for us.

Purple. Blech. It was supposed to be gray.

So, we survived the holidays and I dropped not so subtle hints about beginning the installation on our anniversary weekend when we were both coming down with colds. I mean, I painted (again) so now we were waiting on HIM. Not my best moment as me and grumple-stilt-skin headed to Lowe’s with Chatty-Cathy in tow. Thank the Good Lord the Lowe’s car shopping cart was available. About a hundred bucks later, with black cabinet screws and framing lumber, we escaped back to our nest where I decided we collectively needed a break and SEC football was more important than my built ins. Oddly, I didn’t get any protests.

The black looks good, though, right?

Two days later he built the base for the bridging shelves to sit on and we were back to waiting on…. ourselves. Because we were not sure what we wanted to do for a conduit to hide all the crap that goes behind the TV. Well. I’ll let you know.

It’s going to be a few days because it snowed in North Carolina and the state is shut down. My husband was doing donuts in the cul-de-sac in his truck with the kids, so that’s a better day, ANY day, than installing built ins. Snow man 1. Built-ins 0. Send help.

And the kids were out of school for a WEEK. No snowplows. (Did you happen to notice that we’re nowhere near done and these aren’t so much as attached to the wall, but I already started putting stuff in them?)

Cord hiding solution win. I pulled the surge protector out so you could see where it was all hiding.

Several installation sessions happened in the spring. I finally decided on a cord hiding solution (which is totally genius and I should definitely receive a prize for) so my tired Rainman got to work. The cord hiding solution ended up being three rectangles, one in each center shelf, hiding from view the two-inch diameter access holes through the horizontal panels. The cords thread through behind with super easy access.

To be fair… Looking back, I realize that the hesitation for Rainman on this project actually had to do with the odd shape of the hemnes components. And this is something to keep in mind during the design phase.

Front and Side View of Hemnes Bookshelves from IKEA, Dimensions

Basically, the back is not flush on any of them. Presumably this is to allow for the whole unit to sit flat against a wall with base molding, (with the top of the back sticking out further than the bottom) but makes installation as built ins maddening. Several times we had to pull pieces of trim out and reseat them because we lost track of which edges On the face were supposed to line up flush.

In hindsight, it would’ve been easier if we had trimmed the tops on each component so that the back sat completely flat against the wall and we didn’t have to shim each component to line them up. He suggested that after the initial component assembly and I shot it down because all I saw was an afternoon of wasted time disassembling, trimming, and reassembling components. I like the way it ended up because now I can install a light kit with existing gaps, but in hindsight this project would have been WAY faster without the bumped out tops. He was right. I was wrong. Don’t tell him I said that.

This is how ridiculous my life is. It was December when we ordered the IKEA components. It is now July, and wouldn’t ya know, that s&@# is still. Not. Finished. We’re agonizingly close. But, life and work just won’t step aside to allow us to finish the built ins.

Side note, I can blame an entire lost work day, last Sunday, on a collapsed shelf in the garage. Little shelf? No, huge shelf. Like shelf that runs along the entire back of the garage shelf. I went out to get a water out of the beverage fridge and the door was WIDE open. “Which one of you little $#&% left the damn door open and how long has it been that way?” I thought to myself. I pushed on it. Harder. Nothing. I looked up. Why was the beverage igloo pushed forward against it?

Then I saw it, the giant shelf collapsed on top of the fridge, on top of the filing cabinets and router table, BARELY missed the bottle on top of the hot water heater. I distinctly remember warning a certain someone that those were crappy shelves were going to collapse. We installed really strong, nice shelves, that are bolted into ceiling joists. UGH. I managed to only say I told you so once, and everything on the shelf fit up on the new shelves. I still want to find the jackass who built that shelf and have a short conversation with him.

So, here we are again, NOT finished. However, we’ve made some progress. I almost, in a moment of desperation, changed the design plan in favor of the version that would get us to the finish line faster, but I’m just not willing to throw in the towel, yet.

We began installing the components and securing them to the wall and to each other, which proved challenging. This is because of the aforementioned bumpouts which leaves only one section of each component actually touching the wall. We secured them to the studs with black cabinet screws. We used pine boards for the transition areas since they were going to be painted black.

And I have to say, the details are turning out BAD ASS. We ordered some brick veneer from Home Depot (after I price compared with a local brick distributor that needed six weeks lead time to create the veneer and only sold big pallets). It’s called Old Mill Brick, comes in neatly stacked cardboard boxes and is really nice. I looked at all the types first on their website and ended up choosing an antique style, “Colonial Collection Castle Gate”, 59.97 for a box of 50 bricks. Not cheap, but reasonable. Here’s the thing, the cost of the brick detail just on the outside shelves, cost about $120. The mortar and grout ran around $70. But, it’s the thing that makes them awesome. Don’t let the “veneer” part fool you.. It’s real brick. Just thinner.

Castlegate, Old Mill Brick
Castlegate, Old Mill Brick, Veneer

Tip: When measuring for your brick, include your anticipated grout lines in the height and width of your bricks and you won’t ordered $120 worth of extra brick. Yes, we literally ordered twice what we needed. We used half-inch grout lines so our measurements should have been 8.225 x 2.75 instead of 7.625 x 2.25. Luckily, we’re planning to use this same brick as an accent in the kitchen so no biggy.

Concrete Backer Board

We installed concrete backer board on the walls where the brick was going, but looking back, we probably didn’t really need it.


Old Mill Brick, Castlegate, on the accent walls flanking the buitins

We got the brick installed… (that is a much longer story). And I’m not going into it. Because it was misery.  Working in the tiny space was awful.  I look forward to doing this on an open wall.


Anyway, it looks awesome. Took three different tries and one of the biggest, messiest, most tedious installation processes ever. The brick installation process is coming soon.  Maybe.  If I have the strength.

 But, this is what it looks like when we finished the outside edges:

And as you can see we installed the awesome floating shelves on the outer edge. This, combined with the brick really makes this installation special. These little customizations are what make the IKEA hacks look super awesome and non-generic.

Oh, and I’m sure you noticed the pure awesomeness of that pretty hardware (hint: NOT IKEA). See the tutorial on updating the hardware.

So, here’s what they look like empty. Awesome. And most importantly, finished.

IKEA Hemnes Builtins in black

For those of you looking for stuff to buy to “dress your shelves”, I hate you. Built ins are for unpacking 10 boxes of stuff you already had, not arbitrarily purchasing junk so your built ins look good. That’s insane. Find stuff around the house. Arrange it. Never, never buy stuff to fill shelves. Also, never buy anything you don’t ABSOLUTELY have to have. I learned this from my mother who had to smuggle outdated decor out of the house when my dad was out-of-town.

Anyway, how cool is it that we went from THIS:

ec032231-9fac-436c-b2e9-43cb91c3eeb6

To THIS:

IKEA Hemnes Hack-in-black Builtins, dressed and finished.

I don’t know if you noticed the fantastic, gray velvet curtains, but you can find that tutorial here: DIY Restoration Hardware Knock Off Velvet Curtains.

I’m SO super excited we’re finished.  My SUPER EXACT recollection of how much this project cost was around $2500, including the hardware update. Using the brick veneer definitely added some cost but I think the effect is spectacular, and lends itself to the CUSTOM look we were going for.

Thanks for checking out our FINISHED project and we’d love for you to check out more on our Blog.  Cheers!


*Legal stuff:

I am honest about my experiences with different products and write because I enjoy it.  I do however, have the opportunity to earn money for my writing, also.

Slavetodiy.com is a participant in the Amazon Services LLC Associates Program, an affiliate advertising program designed to provide a means for sites to earn advertising fees by advertising and linking to amazon.com.  Amazon offers a small commission on products sold through their affiliate links.  Each of your purchases via our Amazon affiliation links supports our cause at no additional cost to you.

If a blogger links to an Amazon product (with a special code for affiliates embedded in the link), and a reader places an item in their “shopping cart” through that link within 24 hours of clicking the link, the blogger gets a small percentage of the sale.  Amazon links are not “pay-per-click.”  If you click on the product link and stay around Amazon and purchase something else, however, I will get a commission on that sale.

Slavetodiy.com is also a VigLink affiliate advertiser which works similarly.

DIY Restoration Hardware Knock Off Velvet Curtains

Restoration Hardware

Can you hear me laughing maniacally from there? I believe once I added in the shipping it was five hundred dollars from Restoration Hardware! For TWO luxuriously wonderful curtain panels. Yes, TWO. Not two sets. Two panels. ON SALE. I swallowed my insanity, put down my wine glass, closed the tab, and let reality sink in. Allow me a moment to get my blood pressure back down. Look, I admire Restoration Hardware’s whole seductive look they have going on, but I’m apparently in the wrong tax bracket to be shopping there. They’re CURTAINS. As in, fabric that adds privacy and style to windows. Not exactly life or death. So, I did what I do best: I found a way around their ridonculous pricing. But, first let’s bask in the sexy glory of Vintage Velvet Drapery for just a moment.

*This post may contain affiliate links. Please see full disclosure at the end of the post.

Restoration Hardware

Luckily for us, Restoration Hardware likes to brag about their designers and suppliers. Woot! It ALSO turns out their velvet supplier, J.B. Martin, is available on Fabric.com and Amazon (let’s hear it for non-exclusive suppliers). And (even better) I have a mother that is awesome with a sewing machine. WIN.

I almost purchased the J.B. Martin Banker’s Gray Velvet on Amazon, but decided I wanted a darker gray. So, I found 54″ wide fabric instead J.B. Martin’s Velvet in Graphite, to EXACTLY match the curtains I couldn’t afford from RH, shipped them directly to her… And here they are… (DRUM ROLL, PLEASE)…

RH knock off, DIY Velvet Curtains with Pottery Barn Chesterfield Grand Sofa

So, we made two 96″X50″ exact duplicate panels for the jaw dropping low price of:

$169.05

We saved $330.95 off of retail RHs SALE price.

So, not cheap, but CHEAPER. And gorgeous. And happy me.

Here are some shots with fewer distractions:

RH knock off, DIY Velvet Curtains with Pottery Barn Chesterfield Grand Sofa

Yaaaas!  I just love them!

Check out more of our awesomeness on our blog! Cheers!


*Legal stuff:

I am honest about my experiences with different products and write because I enjoy it.  I do however, have the opportunity to earn money for my writing, also.

Slavetodiy.com is a participant in the Amazon Services LLC Associates Program, an affiliate advertising program designed to provide a means for sites to earn advertising fees by advertising and linking to amazon.com.  Amazon offers a small commission on products sold through their affiliate links.  Each of your purchases via our Amazon affiliation links supports our cause at no additional cost to you.

If a blogger links to an Amazon product (with a special code for affiliates embedded in the link), and a reader places an item in their “shopping cart” through that link within 24 hours of clicking the link, the blogger gets a small percentage of the sale.  Amazon links are not “pay per click.”  If you click on the product link and stay around Amazon and purchase something else, however, I will get a commission on that sale.

Slavetodiy.com is also a VigLink affiliate advertiser which works similarly.

Customize Your IKEA Hack

IKEA hacks are all the rage, and with good reason. Pre-built, reasonably priced items that can be totally customized give me plenty of reasons to get on board. Can you say: factory finish?

*This post may contain affiliate links. Please see full disclosure at the end of the post.

So, when it comes to the Hemnes line (Hemnes is IKEA’s real wood, upgraded line)- the hardware is a dead give away that you’re using IKEA shelves. Updating the hardware creates a HUGE impact for not very much money.

IKEA Hemnes cabinets with stock hardware

On our giant living room wall builtins IKEA hack, we used two sets of black Hemnes cabinets, each with three drawers and glass doors (please excuse our tardiness- they’re not finished). They were totally snooze-fest level with the existing hardware.

IKEA Hemnes cabinets with stock hardware

You can completely change the look and feel of the whole thing by finding hardware that speaks to you. At first I really wanted long, brass handles. However, 16″ hole separations on the drawers really limit non-custom options (the quotes I got on custom bars were in the $100 each range, and I needed six). So, I went back to the two pulls per drawer option and found something in the same family as what I wanted before.

IKEA Hemnes stock drawer hardware

I found these Antique Brass Bin Pulls pretty reasonably and the two Cast Brass Cupboard Latches for a total of $142, both from House of Antique Hardware.

House of Antique Hardware, bin pulls and cabinet latches

They made such a difference. Aren’t they just gorgeous?

House of Antique Hardware, bin pulls and cabinet latches

A few notes on installation: the pulls came with screws instead of two sided hardware. No way were we risking that accident-waiting-to-happen with our fifty kids, so I sent Rainman with one of the pulls down to the hardware store to hunt for a screw, washer, and nut that would work and go all the way through inside the drawer. Since we purchased them at Lowe’s our color options were limited. I haven’t decided whether I want to paint the hardware heads to match the pulls yet.

House of Antique hardware bin pulls

I originally intended to use one pre-drilled hole on each side but after we looked at the spacing we decided to straddle the existing holes and drill all new holes for each bin pull. They just looked better balanced.

The cabinet latches were a little more difficult because the pre drilled holes were too far back (toward the glass).

There is not a whole lot of wiggle room when installing these latches. I moved them down to a place I liked better visually and filled the old holes with a basic brushed brass Chicago screw. They have to go to the very edge to latch and the drilling has to be done very precisely.

96606fe3-0c20-499e-971f-0664d3e50664

Here are the Chicago Screws we used to cover the existing hardware holes.

I would love to see different ways you customize your own IKEA hacks! Thanks for joining our adventures!

Check out more of our projects here.

*Legal stuff:

I am honest about my experiences with different products and write because I enjoy it.  I do however, have the opportunity to earn money for my writing, also.

Slavetodiy.com is a participant in the Amazon Services LLC Associates Program, an affiliate advertising program designed to provide a means for sites to earn advertising fees by advertising and linking to amazon.com.  Amazon offers a small commission on products sold through their affiliate links.  Each of your purchases via our Amazon affiliation links supports our cause at no additional cost to you.

If a blogger links to an Amazon product (with a special code for affiliates embedded in the link), and a reader places an item in their “shopping cart” through that link within 24 hours of clicking the link, the blogger gets a small percentage of the sale.  Amazon links are not “pay per click.”  If you click on the product link and stay around Amazon and purchase something else, however, I will get a commission on that sale.

Slavetodiy.com is also a VigLink affiliate advertiser which works similarly.

Privacy Hedge in the Southeast: Arborvitae or Leyland Cyprus?

Two years ago, when we moved into our new place in Eastern North Carolina, we found one area of our yard that wasn’t hiding the neighbors quite well enough. Friends of ours are landscapers, so I asked them to come take a look and give us their honest opinion. The two most popular for our zone were the Arborvitae and Leyland Cyprus, so we had to choose between the two.

*This post may contain affiliate links. Please see full disclosure at the end of the post.

I’m sure you’ve seen the Thuja Green Giant (Arborvitae) or Emerald Green (Arborvitae) in the nursery magazines you receive in the mail, as well as the Leyland Cypress. They’re all listed as “fast growing” trees and they’re fantastic as mature privacy hedges. They’re both relatively disease and drought tolerant and grow well in a variety of soils.

There were several mature Leyland Cypresses already, and they’re wider than the mature arborvitae, but I didn’t love the way they grow if they have neighboring trees encroaching. There were Leyland Cypresses EVERYWHERE in our neighborhood (sometimes, you can just look around and figure the neighbors might know what they’re doing, or at least the local landscapers). The Arborvitaes seemed to be more of what I had in mind.  Tall, slender, fast growing, and I liked the lighter green. But, the Cypresses seemed to be the PROVEN winner in the neighborhood.

So, which do you choose?

1b671983-9b73-417e-92c8-8108d26cc1ea
Arborvitae Hedge, Emerald Green

We chose the Arborvitae, and I’m about to show you why you should, too.

I have one word for you: HURRICANES.

Not long ago, a strong Category One hurricane came through our area and wreaked havoc on everything including the trees. We went from being able to see one neighbor vaguely in the winter, to being able to see at least five. EVERY LELAND CYPRESS HEDGE in the neighborhood was destroyed by the hurricane. We took down the hedge between us and the neighbors (the trees were essentially laying on our driveway).  This is what the trees look like that we haven’t taken down yet in the backyard:

6fd9ba8e-1f15-4709-8262-13fdd51af36f
Leyland Cyprus after the hurricane

Now, you might argue that the Leyland Cypresses were bigger and creating more drag (they are ABSOLUTELY wider and create more drag) but, neighbors with a mature Arborvitae hedge have the only hedge that survived the storm. I don’t know the mechanics, I just know that our young trees made it and so did the neighbors mature trees that were Arborvitaes.

cc791277-00e3-428a-8a69-47286e6de3ba
Arborvitae Hedge

I know that I haven’t yet seen an undamaged Leyland Cypress in our entire area.

a264d60b-28ed-4a96-acc2-10fac019cc7d
Damaged Leyland Cyprus after hurricane

Basically, if you live in a hurricane prone area, our experience has been that the Arborvitaes are more likely to survive than the Leyland Cypresses. We purchased some of them from the local landscaper and some from Brighter Blooms. The ones ordered in the mail always surprise me, because I’m initially disappointed, and then once they are planted they catch right back up.

Happy planting and thanks for joining us! Check out more of our adventures on our Blog!

*Legal stuff:

I am honest about my experiences with different products and write because I enjoy it.  I do however, have the opportunity to earn money for my writing, also.

Slavetodiy.com is a participant in the Amazon Services LLC Associates Program, an affiliate advertising program designed to provide a means for sites to earn advertising fees by advertising and linking to amazon.com.  Amazon offers a small commission on products sold through their affiliate links.  Each of your purchases via our Amazon affiliation links supports our cause at no additional cost to you.

If a blogger links to an Amazon product (with a special code for affiliates embedded in the link), and a reader places an item in their “shopping cart” through that link within 24 hours of clicking the link, the blogger gets a small percentage of the sale.  Amazon links are not “pay per click.”  If you click on the product link and stay around Amazon and purchase something else, however, I will get a commission on that sale.

Slavetodiy.com is also a VigLink affiliate advertiser which works similarly.

Transform Your Front Porch: Take Down the Railings!

So, here’s the deal.  Sometimes it’s super expensive to create a breathtaking transformation to your house, and sometimes it’s FREE.  Sometimes all you need is a little elbow grease (and maybe some basic supplies you already had on hand) to make a huge impact.

*This post may contain affiliate links.  Please see the full disclosure at the bottom of the post.

This is the second time I have taken down the railings at a home that we own.  The first time the porch was basically at ground level and it was a no-brainer.  The impact was immediate- INSTANT curb appeal.  I loved it.  See the complete “after” transformation on the old house we sold in 2016 here.

Okay, it’s a little hard to see the LACK of railing there because of the out of control hydrangea. Trust me. The railings were removed. Details on that crazy garden you can see here.

When we moved in to our current home it had those same railings, but they were serving an entirely different purpose- safety.  The porch is a few feet off the ground.  In the middle of our epic and back-breaking front garden project (which you can check out here) I decided to rip them out.  I knew that the dirt would end about a foot below the front porch/deck so it would be safe to take them down.  I feel the need to say, “I’m not telling you to take your front railings down.  I haven’t seen your house.  It could pose a safety hazard.” Please consider safety: toddlers, old people, clumsy people, etc. as you make the decision to keep your railings or not.  We may eventually put in black, wrought iron railings, but for now I like it just like it is.

Here’s a picture before my project A.D.D. took hold:

7de4a12e-4860-4a58-881f-760357210f4d

So, I seriously stopped mid project, stole one of Rainman’s hammers, and started swinging away.  As I suspected, the sellers had covered up rot with white paint (pretty typical) and the railings came down in about 30 minutes.  Of course, this made me realize the bicycles and miscellaneous crap all over the front porch would need to find a new home (not exactly HGTV ready).

Tip: Painting and caulking front porch columns and railings is an ANNUAL MAINTENANCE ITEM.  It should be on your list.  Otherwise they rot.  Case in point.

And here’s the front porch immediately after taking the railings down: Sigh. I’m in love.

3774c223-3c54-4294-81fe-d158964812fd

Above you can see the pile of railings (dry/rotted wood is excellent for starting bonfires) to the left there and the bare wood on the columns where the railings used to be.

5cd786aa-80db-4df0-9b5a-d2e04c05a272

While I was having A.D.D. and happened to have a nephew visiting (can I get an AMEN for cheap, available labor???) I decided to get some painting and staining done.

I had him sand the front deck and get any loose deck screws back in. If you don’t have a good sander, I have several of these. I have one I keep for just drywall finishing, then others for miscellaneous sanding projects. They’re cheap enough it doesn’t break my heart to burn them up or buy a new one, but they’re surprisingly hardy.

I also had him sand around where the railings had been on the posts so we could get a fresh FLAT coat of white and the seam would be invisible.

I splurged on some good deck stain and sealant and we did two coats.  For stain, I recommend throw away brushes, which you can get pretty cheap at Lowe’s. True story: in seventh grade my son did a science project on which of three deck stains offered the best moisture protection (based upon water absorption and weight).  I used that brand.  I love the color and it’s amazing the difference it makes. It ended up being a smaller splurge than I expected because that huge front deck took less than a gallon for two coats.

So here we were, working along and I noticed those damn builder grade lights. Project A.D.D. strikes again. Yeah, those definitely had to go. I hadn’t even noticed them delaminating until I fixed all the other stuff.

So, we took the opportunity to change out the porch lights and found a great deal on really nice looking lights.

While we were out there I handed Rainman black spray paint to put a fresh coat on our 10 year old rocking chairs and little black table. He hit the rough spots with sand paper, cleaned and dried them, tightened the hardware, then spray painted. TADA! Good as new.

We will be doing another update soon (cough* cough*) on working shutters for the windows.  We are currently doing price comparisons on shutters and hardware.  After the hurricane we realized we can’t spend two days putting up plywood every time we evacuate.  Also coming soon, the tutorial on how to put up plywood over your windows before you evacuate for a hurricane.

Anyway, drum roll please…

Doesn’t it look AWESOME??? Bear with me.  The right side over by the staircase is still in need of rework.  Here’s another view from the rocker:

Everything’s all nice and painted, stained, and ready to move on to the next thing! I just love how our mini-flip on the front porch turned out.  Big impact for minimal cost!

Check out our other projects and wins and fails here.  Thanks for stopping by!

*Legal stuff:

I am honest about my experiences with different products and write because I enjoy it.  I do however, have the opportunity to earn money for my writing, also.

Slavetodiy.com is a participant in the Amazon Services LLC Associates Program, an affiliate advertising program designed to provide a means for sites to earn advertising fees by advertising and linking to amazon.com.  Amazon offers a small commission on products sold through their affiliate links.  Each of your purchases via our Amazon affiliation links supports our cause at no additional cost to you.

If a blogger links to an Amazon product (with a special code for affiliates embedded in the link), and a reader places an item in their “shopping cart” through that link within 24 hours of clicking the link, the blogger gets a small percentage of the sale.  Amazon links are not “pay per click.”  If you click on the product link and stay around Amazon and purchase something else, however, I will get a commission on that sale.

Slavetodiy.com is also a VigLink affiliate advertiser which works similarly.

How to Install Driveway Lights You Can Run Over

We live in an awesome neighborhood, way at the back on a very private cul-de-sac.  We love having people over and they often stay until the sun has gone down.  One thing that comes with seclusion is DARKNESS.  It turns out, backing out of the driveway in the dark gets pretty sporty in our neck of the woods.  It amazes me how many people are lousy at backing out of a driveway even in the daylight, but without streetlights or yard floods, our driveway was ink black at night.  After a friend almost backed into a giant tree in the garden, I decided it was time for action.

8679ac4e-f97a-4fb2-9c36-403fc4931069

This post may contain affiliate links.  Please see our disclosure at the end of the post.

We came up with the idea to do solar LED road pucks.  They are rated up to 20 tons, so it doesn’t matter if you back over them on a daily basis.  They were $25 each at Lowe’s but we found them for about half online.  The road pucks are available on Amazon (which gets me 5% back on my card!!).

Close Up of the Lights. Pretty cool, huh?

So, here’s the easiest installation you’ll ever do:

We let them charge for a day and laid them out at night to make sure:

  1. they were all working
  2. we liked the direction the light was shining
  3. and we were happy with the spacing.
  • We bought two tubes of Liquid Nails Heavy Duty Construction Adhesive (for use with a caulk gun), precleaned the spots where we wanted them on the drive, applied liberally, set in place, and let them dry.  I recommend wearing rubber gloves because it’s easiest to smear the liquid nails around with your finger (unless you just like picking glue out of your nail beds).

6d61a906-5f51-45bd-a8e9-69149d1dd144

d6beaa05-115b-4b83-9d18-d0c77db82c09

It was a super easy and fast project, and our new runway lights really help people stay on the driveway when they’re backing out in the early morning or late at night.  There’s nothing I love more than a project you can knock out in under two hours and for under a hundred bucks.  Instant gratification.

Now I’m just worried about aircraft mistaking it for a runway.

Bing Images, Solar LED Road Pucks

Thanks for hanging with us and good luck with the lights!

Check out some of our other simple projects here. Cheers!

*Legal stuff:

I am honest about my experiences with different products and write because I enjoy it.  I do however, have the opportunity to earn money for my writing, also.

Slavetodiy.com is a participant in the Amazon Services LLC Associates Program, an affiliate advertising program designed to provide a means for sites to earn advertising fees by advertising and linking to amazon.com.  Amazon offers a small commission on products sold through their affiliate links.  Each of your purchases via our Amazon affiliation links supports our cause at no additional cost to you.

If a blogger links to an Amazon product (with a special code for affiliates embedded in the link), and a reader places an item in their “shopping cart” through that link within 24 hours of clicking the link, the blogger gets a small percentage of the sale.  Amazon links are not “pay per click.”  If you click on the product link and stay around Amazon and purchase something else, however, I will get a commission on that sale.

Slavetodiy.com is also a VigLink affiliate advertiser which works similarly.

Classic Stacked Stone Garden, Phase Two

Dry stacked stone gardens are so beautiful.  We’ve done this style several times and this is phase two of this particular project.  If you missed it, you can read the directions for the how-to for phase one here.  This is a HUGE project labor wise, so if you’re doing it yourself, pace yourself.  Where we left off from the last post, this is what the garden looked like after Rainman helped me level it.

This post may contain affiliate links.  Please see our disclosure at the end of the post.

b5491c5e-e353-4d2f-88c8-4819635205fd

The next step now that the wall was all beautifully level was to block off under the front porch so the topsoil doesn’t go underneath.  This is fairly simple, but requires some strength.  First, I had to remove the white vinyl lattice that enclosed the crawl space under the porch.  It was a matter of grabbing and pulling.  With a little wiggling and yanking it came right out.  I’m sure my aggression (I sort of despise the white vinyl lattice) helped the process go more smoothly.

By the time I got to installing the boards, I was huffing and puffing trying to get the anchors in.  You’ll need treated lumber and masonry screws.  I like the beefy two inch boards.  Measure the depth on your boards and get your screws 3/4 inch longer than that.  It’s not terribly important for the boards to be the same length or exactly the same as you’ll only see the top line.  It’s really only important that they be level or match the board above them, because they’ll look awful if they’re crooked.  Here it was most important visually for them to match the white trim board above them, so that’s where I leveled off of.

Most of these masonry packets come with a drill bit, which you’ll need. I had my helper hold the boards up once they were cut (I allowed about four inches per side to anchor the brick bases).  Then I lined up the drill bit on the wood where it will go through to the GROUT line.  Don’t drill into the brick, just into the grout.  After drilling each hole, I managed to get two screws per side into the bases and that held them.  Once the dirt is in place these things won’t move anyway, but I like everything being really solid.

Once the boards were up, we piled the medium gravel (from phase one) under each opening to prevent the dirt from making it’s way under the porch.

Close up of boards under porch with drainage rocks.

So, we moved the base caps off to the side and began the process of bringing in topsoil.  I had 8 yards of topsoil delivered and had to wheelbarrow it in because the truck dumping it would have collapsed the walls.  I think on top of the dump truck we probably had another ten scoops we added to top it off.

ddb95c40-1d80-4fa0-90c4-4348309f9745

Meanwhile, I had ordered the palm tree that was going in, but wasn’t quite ready to receive it.  You know, like we weren’t done putting in the dirt.  It arrived two weeks early so I had to scramble to get the dirt at least in that part of the garden. By the way, these are my garden gloves and really helped save my hands moving rocks, dirt, and using shovels, etc.

45899d3a-0535-4e8f-9b5d-90f6d75470d6

The installers showed up a day late and I ended up having to leave a soccer cone in place (PUT IT HERE, PLEASE) and leave for a soccer game.  That’s a lot of trust to make sure it’s level and plumb without being there.  Trusting other people to do something correctly is not really my strong suit.  But, they did a good job and it’s mostly straight.

e1796d55-769b-4764-bdec-527c43135656

So, we continued lugging dirt and I started putting landscaping fabric on the “finished” areas.

22b331ee-9b68-4515-ad56-624181036fc86daee001-2b39-40d5-8536-db66146106ff7de4a12e-4860-4a58-881f-760357210f4d
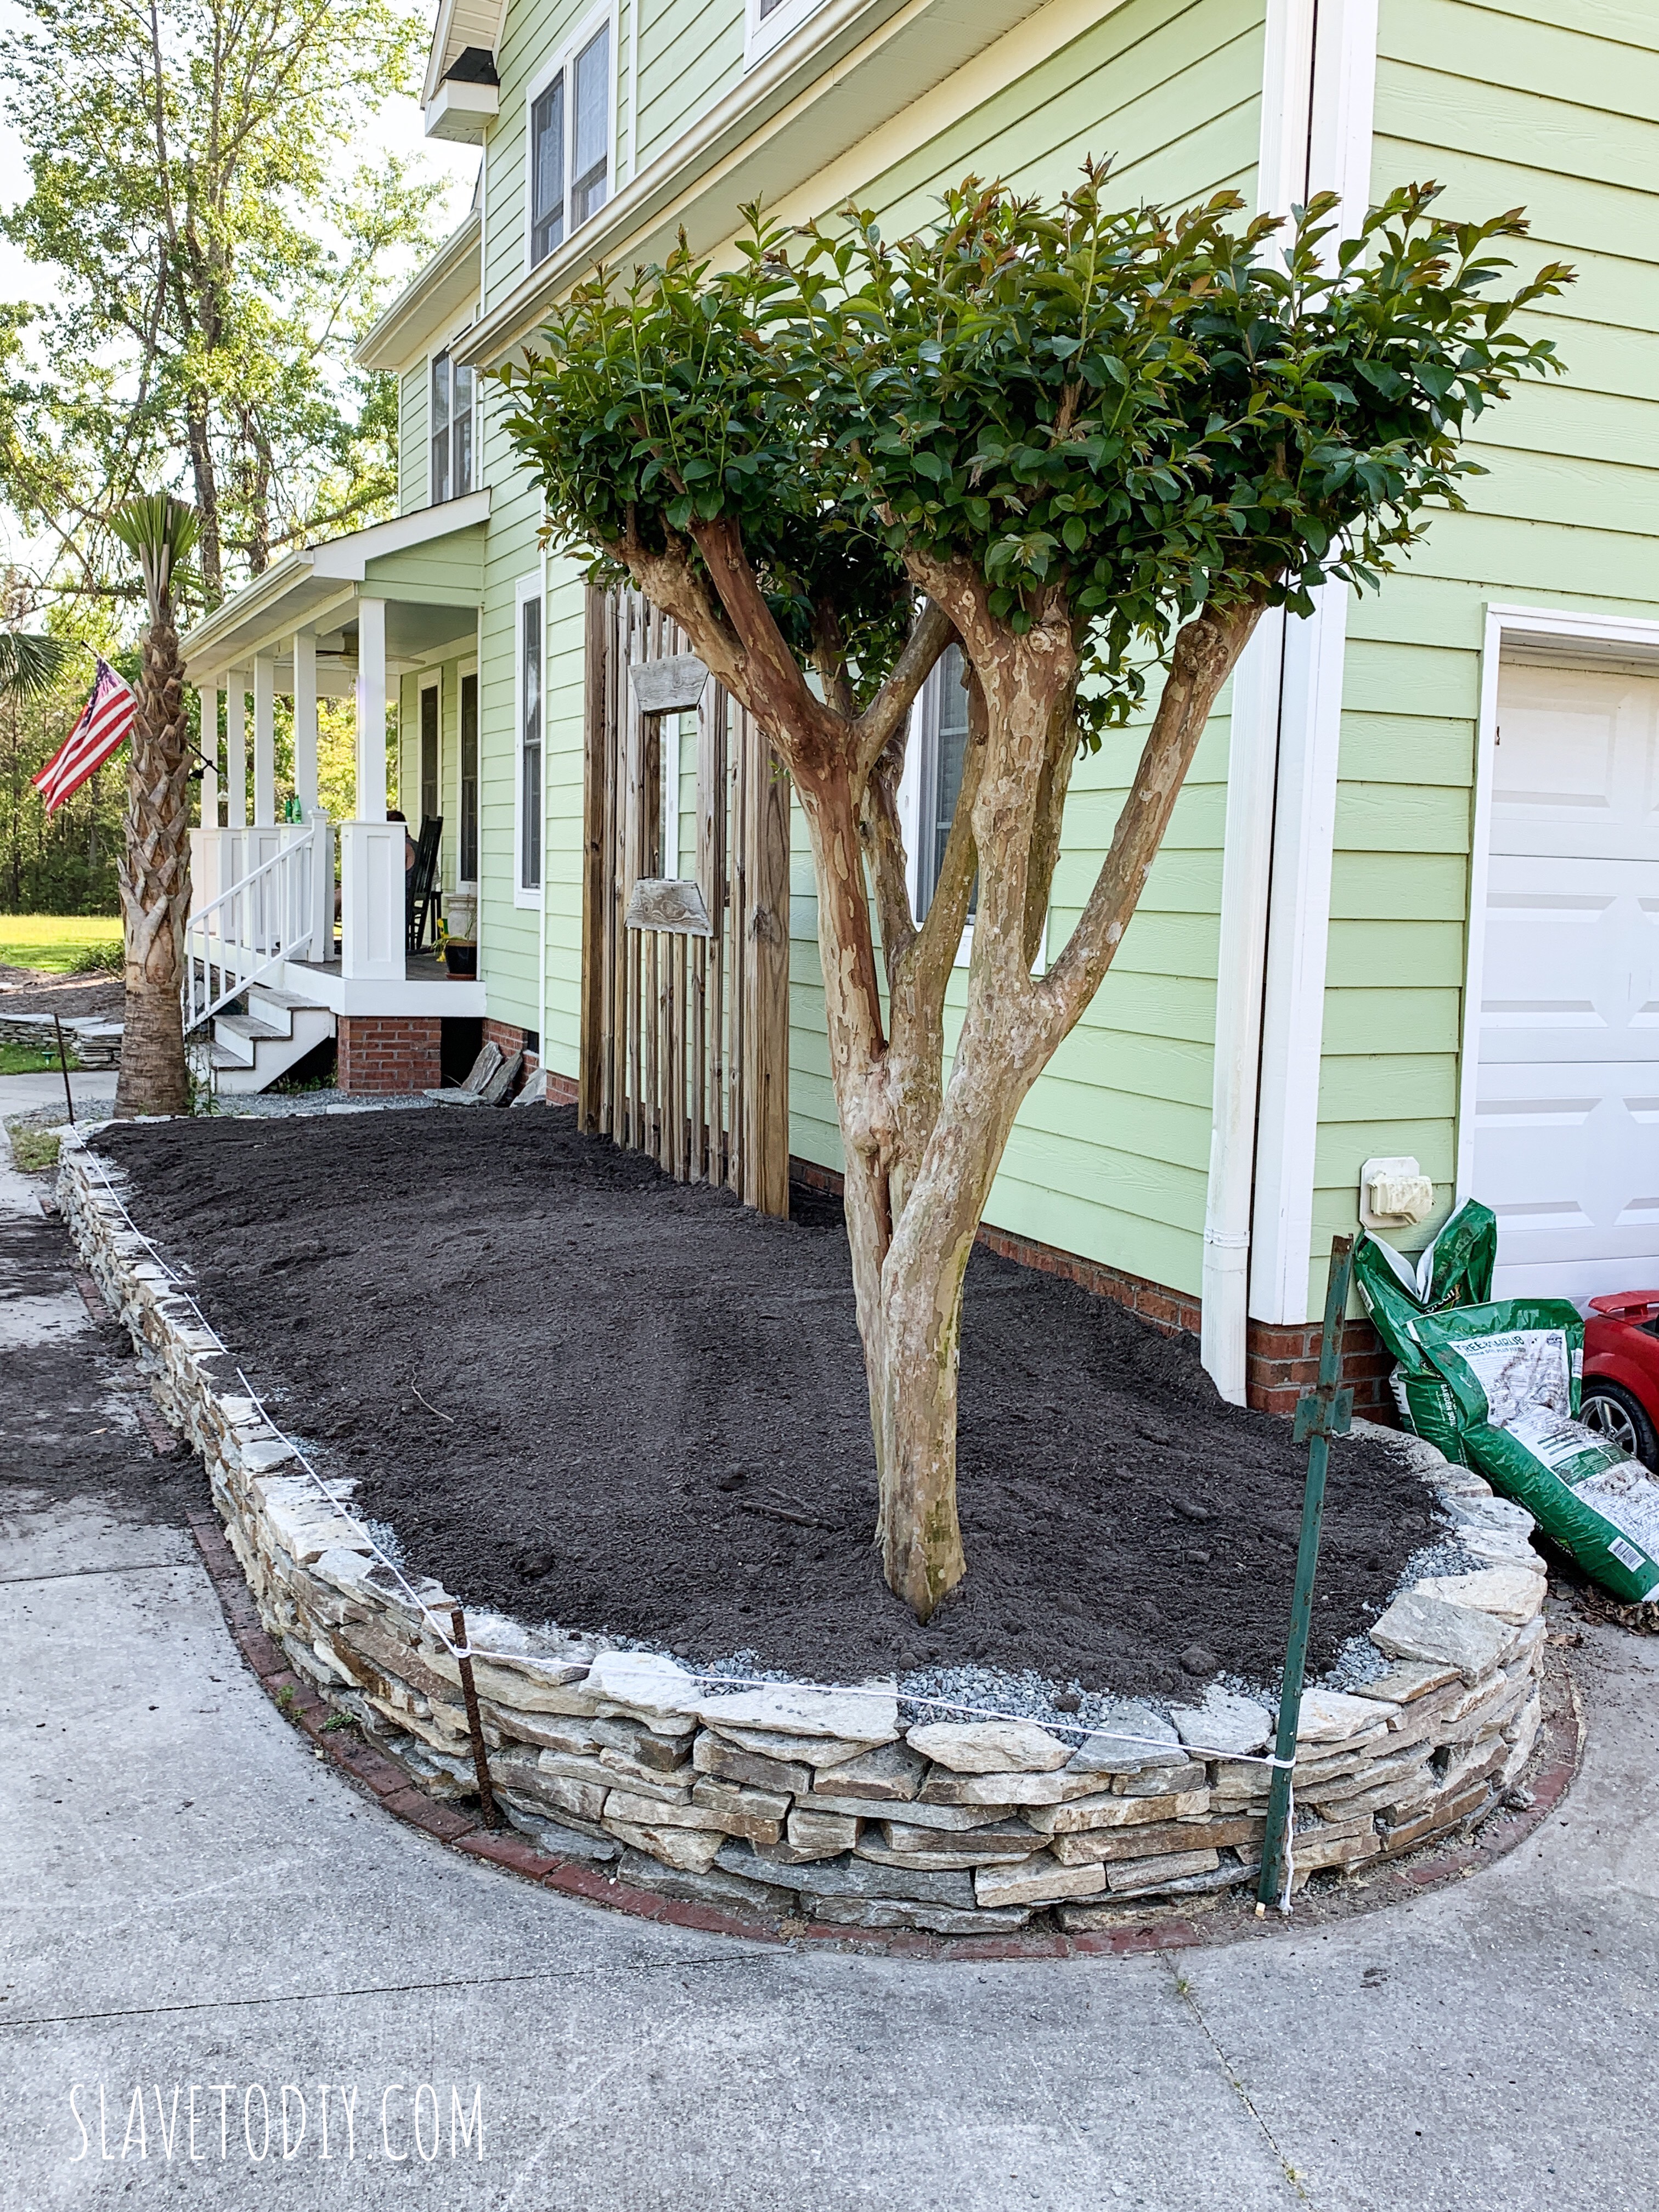
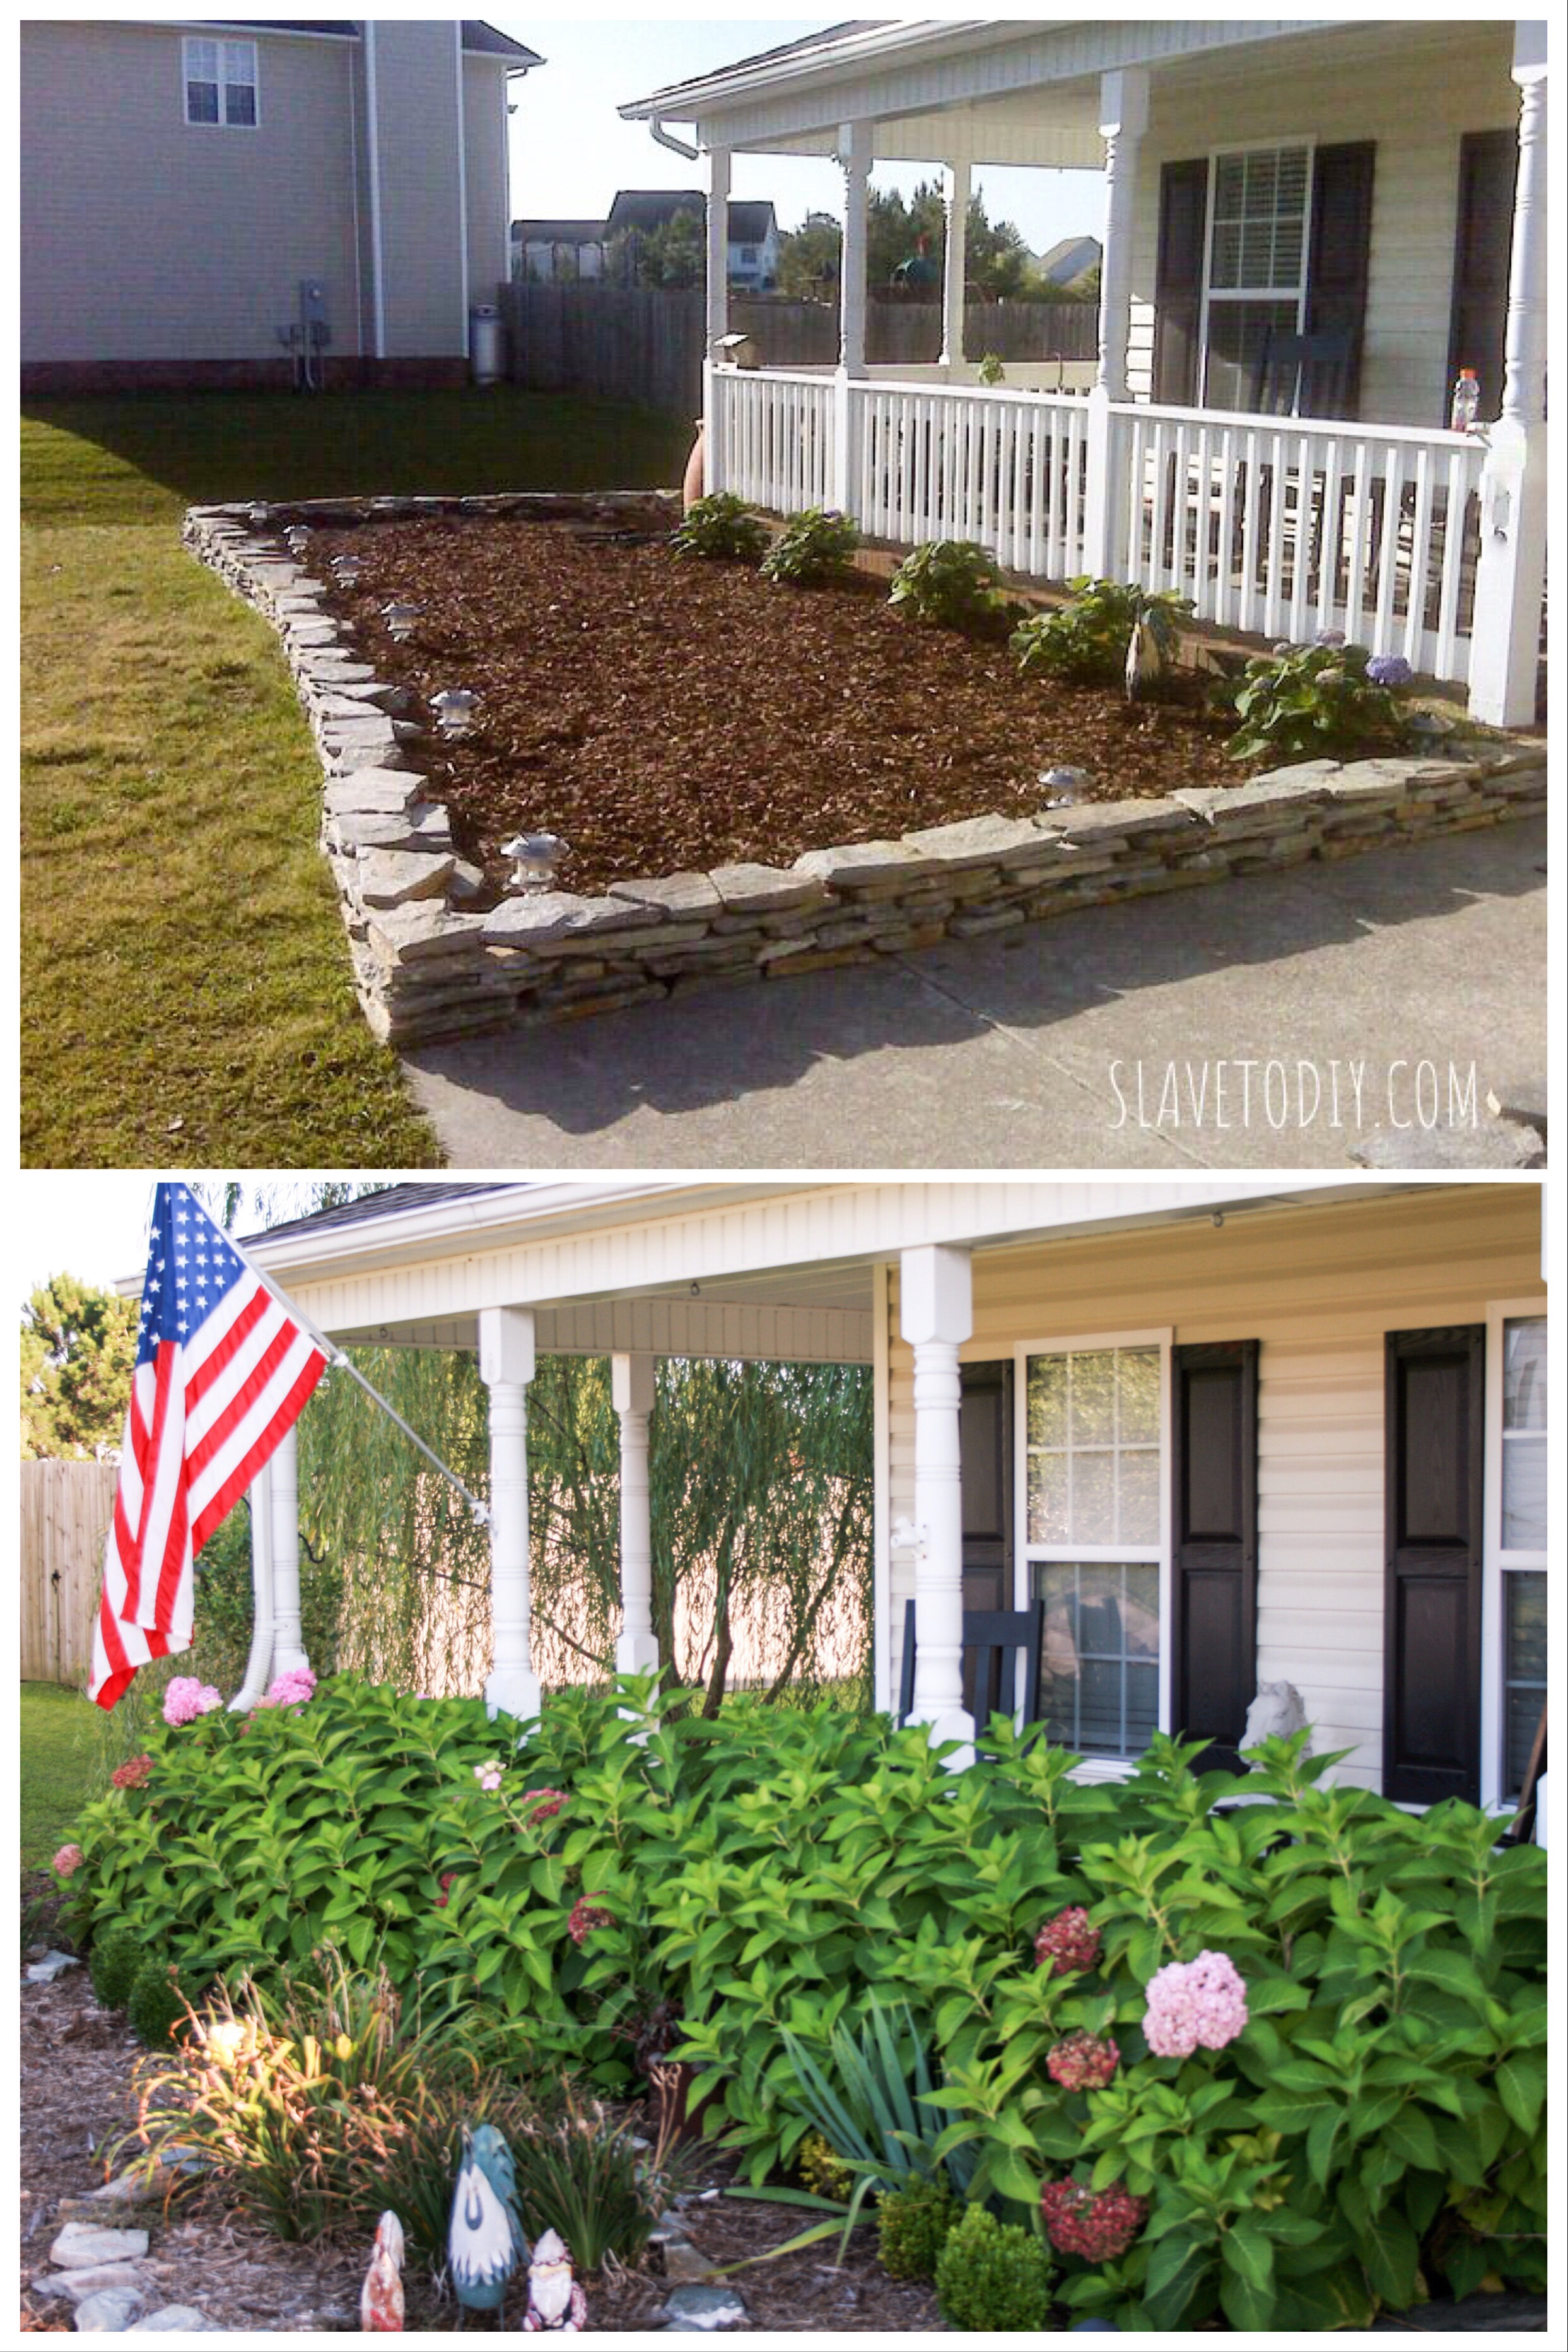
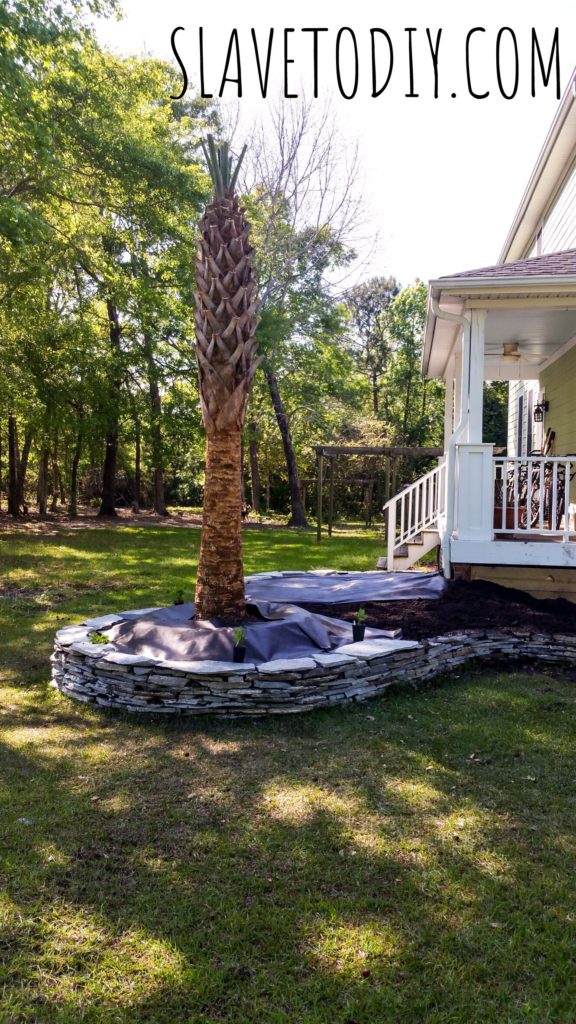
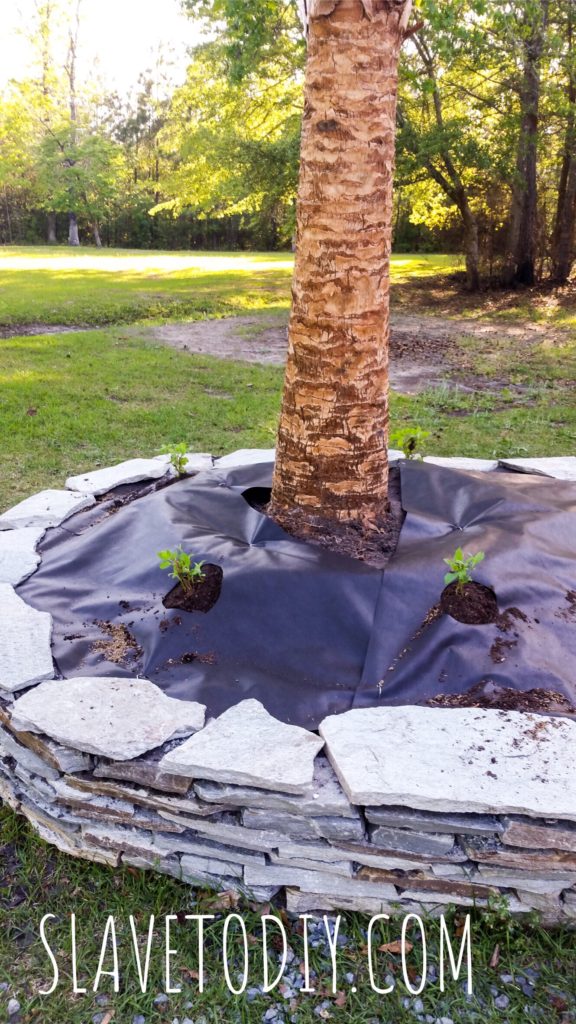
The hydrangea I ordered also arrived ahead of schedule so I needed a place to put them so they would be happy.  I was unable to find the Annabelle hydrangea I wanted at our local nursery or lowes but I found them at Brighterblooms.com.  They came super fast so, I cut out little homes for them around the palm.  I generally use Miracle Grow Garden Soil in the holes when I plant them so they get a little head start.

2f9c5b24-abe8-4318-8fc3-a2d8543fc411

Once the topsoil was in (FINALLY) the rest of the project went really fast.  I completed the landscaping fabric install and went back to my big capstones.  They were super easy to put in because the walls were already level and there is an upslope in the garden up to the porch.  Once the capstones were in we got about three loads of mulch from the local mulch place and put in a row of Dwarf Radicans Gardenia, also from Brighter Blooms.  I’ve had great luck with them over the years, long before I started blogging.

Did you happen to notice that we ripped out the porch railings?  Yeah, that wasn’t planned.  I was sitting back and looking at the garden and thought, “wow, those have got to go.”  A half hour and a swinging hammer later the railings were down (read all about our fabulous front porch update here).

The install has been complete for three months and I’ve only pulled out three weeds, superficially clinging to the surface of the mulch.  The plants are doing well and the palm is opening.

This is what it looks like at the end of the summer.

IMG_0592IMG_0594IMG_0593

IMG_0591

Cost for this phase:

  • 8 Yards topsoil, delivered $347
  • Sabal Palm, installed $365
  • Base garden plants $299
  • Wood and masonry screws $211

So, the cost of the entire project from beginning to end totalled $2822.  Certainly not cheap, but REALLY beautiful and absolutely worth every hour of labor.

A note on plants…  In my last several gardens I chose plants that quickly got completely out of hand and required a lot of pruning and maintenance.  I do NOT have time for all of that nor do I want to create full gardens where snakes can hide.  By installing the garden correctly (i.e. using landscaping fabric) the only maintenance this garden should need is occasional dry season watering, fall hydrangea pruning, and annual mulching refresh.  I intentionally chose dwarf species for both the hydrangea and gardenia to minimize the chances of creating an overgrown, high maintenance garden.

Thanks for sharing our adventure!  Check out more of our projects Here.

*Update: it’s now October and we’ve been through a major hurricane and a tropical storm. My garden wall survived without so much as a shift. Some of the plants took a beating, but my palms are still standing. I’ll update with pictures in the spring!

*Legal stuff:

I am honest about my experiences with different products and write because I enjoy it.  I do however, have the opportunity to earn money for my writing, also.

Slavetodiy.com is a participant in the Amazon Services LLC Associates Program, an affiliate advertising program designed to provide a means for sites to earn advertising fees by advertising and linking to amazon.com.  Amazon offers a small commission on products sold through their affiliate links.  Each of your purchases via our Amazon affiliation links supports our cause at no additional cost to you.

If a blogger links to an Amazon product (with a special code for affiliates embedded in the link), and a reader places an item in their “shopping cart” through that link within 24 hours of clicking the link, the blogger gets a small percentage of the sale.  Amazon links are not “pay per click.”  If you click on the product link and stay around Amazon and purchase something else, however, I will get a commission on that sale.

Slavetodiy.com is also a VigLink affiliate advertiser which works similarly.

Easy DIY Shelves from Plumbing Supplies

Every idea starts somewhere. I like to pin ideas obsessively until I
1) have the money and time to actually do the project or
2) grow out of it and decide I don’t like it anymore.
But, inevitably, every project starts with an inspiration/planning board.
This post may contain affiliate links.  Please see our disclosure at the end of the post.
This project was part of a bigger project to customize and teenagerize a 16 year old boy’s room. One of the things I really wanted for his room were some cool shelves. This particular kid used to be my “LEGO man” (also possibly Rainman in training). Aside from the three bins of legos under his bed, there were a bunch of assembled, very detailed, prized LEGO creations that desperately needed homes. But, cool, big kid homes to match the six foot teenager to whom they belonged. I offered several options and he agreed that these shelves fit the bill. It sounded a lot like, “yeah, they’re fine.” Very exciting.
I’ve seen many versions of the shelf style I was going for, but my favorite came from Seventh House on the Left. Inspiration pin : Restoration Hardware inspired shelves. They were well done and well photographed. Here’s our slightly different version, for a different application:
What you’ll need:
  • Spray paint. Rustoleum has some cool faux metal products, so go with the one you like. I used one I thought looked like wrought iron. For purchasing online Buy it here.
20180803_160259
  • Stain and poly combo for the shelves. For purchasing online Buy it here.
685d4cde-5f96-4b6b-be6a-88a5fa6e0269
  • Assorted plumbing fittings (go into the hardware store, plumbing aisle, and look for a base, shaft, and cap. Make sure they are all the same width and fit together). If you prefer to buy online Buy the bases here. Amazon has them cheaper than the hardware store, and already matched and stacked:
cee802d7-0760-48ef-9214-99fb9e87af33
  • Length of shelves you want in raw lumber. We used 2X8s.
So, yes, before we get started I feel it necessary to mention that I have the maturity level of a 12 year old boy. I giggled every time I passed these while they were in work due to their phallic form. EVERY TIME. My immaturity is part of my charm, I’m sure.
Also worth mentioning: depending on how many of these you do, they’re not actually cheap. I was thinking I was going to get a bargain on the shelves, but the metal penises ended up costing about $144. For those of you that are math-challenged, that’s $12 per bracket (the Amazon ones are $7.50 per bracket). Not exactly cheap for plumbing parts. You can certainly pick up pairs of brackets way cheaper, but not fun, awesome, phallic brackets as cool as these.
Step one: assemble the brackets. Display them proudly on the kitchen counter. Procrastinate a month. Giggle when you walk by them.
Have a dinner party.  Berate your friends for pointing out the obvious.  Tell them they’re all children.
Step two: spray paint them. They may need several coats. Allow them to dry completely.  I’d do this outdoors in a well ventilated area,  unless you like spray paint in your house.  In which case, feel free.

Step three: mount the brackets to the wall. Aim for studs whenever possible. You really only need two screws per bracket, but I liked four so it looks cooler.  We did use Sheetrock mounts in a few places, but I’m confident they’re solid.  (If you’re planning to use these for bowling ball storage you’re on the wrong tutorial).
Step three: cut your shelf lumber to size.
Somewhere during this step, Rainman very helpfully and without supervision went in and cut beautiful shelves. He dry fitted them and TA DA, showed them to me in the room on the beautifully mounted metal penises. And here I was torn. Because he had used standard one inch boards instead of the two inch boards I had purchased for these particular shelves. He was so proud. His happy, smiling, “look how good I did, Ma” face just Rainmanning from here to Never Never Land.  And these were so ready, and cut, and fit. Ready to stain. Never again will I assume that he noticed the big, beefy board used in the picture I showed him (or anything in any picture I showed him ever).
A few hours later, he finally got it out of me that my palpable and poorly disguised misery was due to the width of the board and that in my desperation to NOT be an ungrateful turd I was willing to sacrifice the perfection of my design plan.
He re-cut the correct boards and I went happily to staining them.
Step four: dry fit your boards.  (The ones you bought for the project, not the ones you cut out of the wrong sized boards).
Step five: sand and stain your shelves.
Tip: For the love of all that is holy, please, please stain these in an outdoor covered area or the garage. The stain was beautiful, but we could smell it for WEEKS. Did I say smell? I meant TASTE. It really needs time to cure before it is ready to be moved into a living space.
Step six: hang your shelves. Ours are not fastened to the brackets. Depending on your application you may want sleeves that screw onto the wood, but we love ours as is.  They are just sitting on the brackets.
Step seven: dress your shelves and enjoy.
Total cost for the supplies was right around $200 for super awesome, one of a kind shelves.
Thanks for tuning in and feel free to ask questions in the comments section!

*Legal stuff:

I am honest about my experiences with different products and write because I enjoy it.  I do however, have the opportunity to earn money for my writing, also.

Slavetodiy.com is a participant in the Amazon Services LLC Associates Program, an affiliate advertising program designed to provide a means for sites to earn advertising fees by advertising and linking to amazon.com.  Amazon offers a small commission on products sold through their affiliate links.  Each of your purchases via our Amazon affiliation links supports our cause at no additional cost to you.

If a blogger links to an Amazon product (with a special code for affiliates embedded in the link), and a reader places an item in their “shopping cart” through that link within 24 hours of clicking the link, the blogger gets a small percentage of the sale.  Amazon links are not “pay per click.”  If you click on the product link and stay around Amazon and purchase something else, however, I will get a commission on that sale.

Slavetodiy.com is also a VigLink affiliate advertiser which works similarly.