I’m so excited. I got BEAUTIFUL roses for my birthday. I know we’ve all lied to our significant others at some point, and told them we didn’t like flowers, but if they were smart, they knew it was a lie and bought flowers anyway. Because there are significantly fewer tears that way.
This post may contain affiliate links. Please see the full disclosure at the bottom of the post.
We won’t talk about that time that I cried like a little girl because, even though I had dropped copious hints, I didn’t get flowers for my birthday. We’re complicated creatures, women. Poor Rainman.
Yeah, I’m that girl. (If you are in the dog house, and need to buy flowers, this is a great service).
How To Preserve Roses, Roses on the Sewing Machine Table
Ugh, they’re just gorgeous from every angle. But, I have a secret. These are in the process of “preserving”. Did you know that you can prevent those gorgeous roses from keeling over on you?
There are two really good methods for doing this and I’ll go through both!
Method One (best for roses that you want to use in arrangements later… more finicky than method two):
How To Preserve Roses, Beautiful Roses for My Birthday
This is pre-preservation. I always love the arrangement from our local florist, although I don’t love their choice of cheapo vases. Even the “budget” line shouldn’t be a throw away. Anyhoo, when I get to the preserving phase, I’m really only interested in the roses. I love them at Christmas for their deep red and am looking forward to bringing them back out.
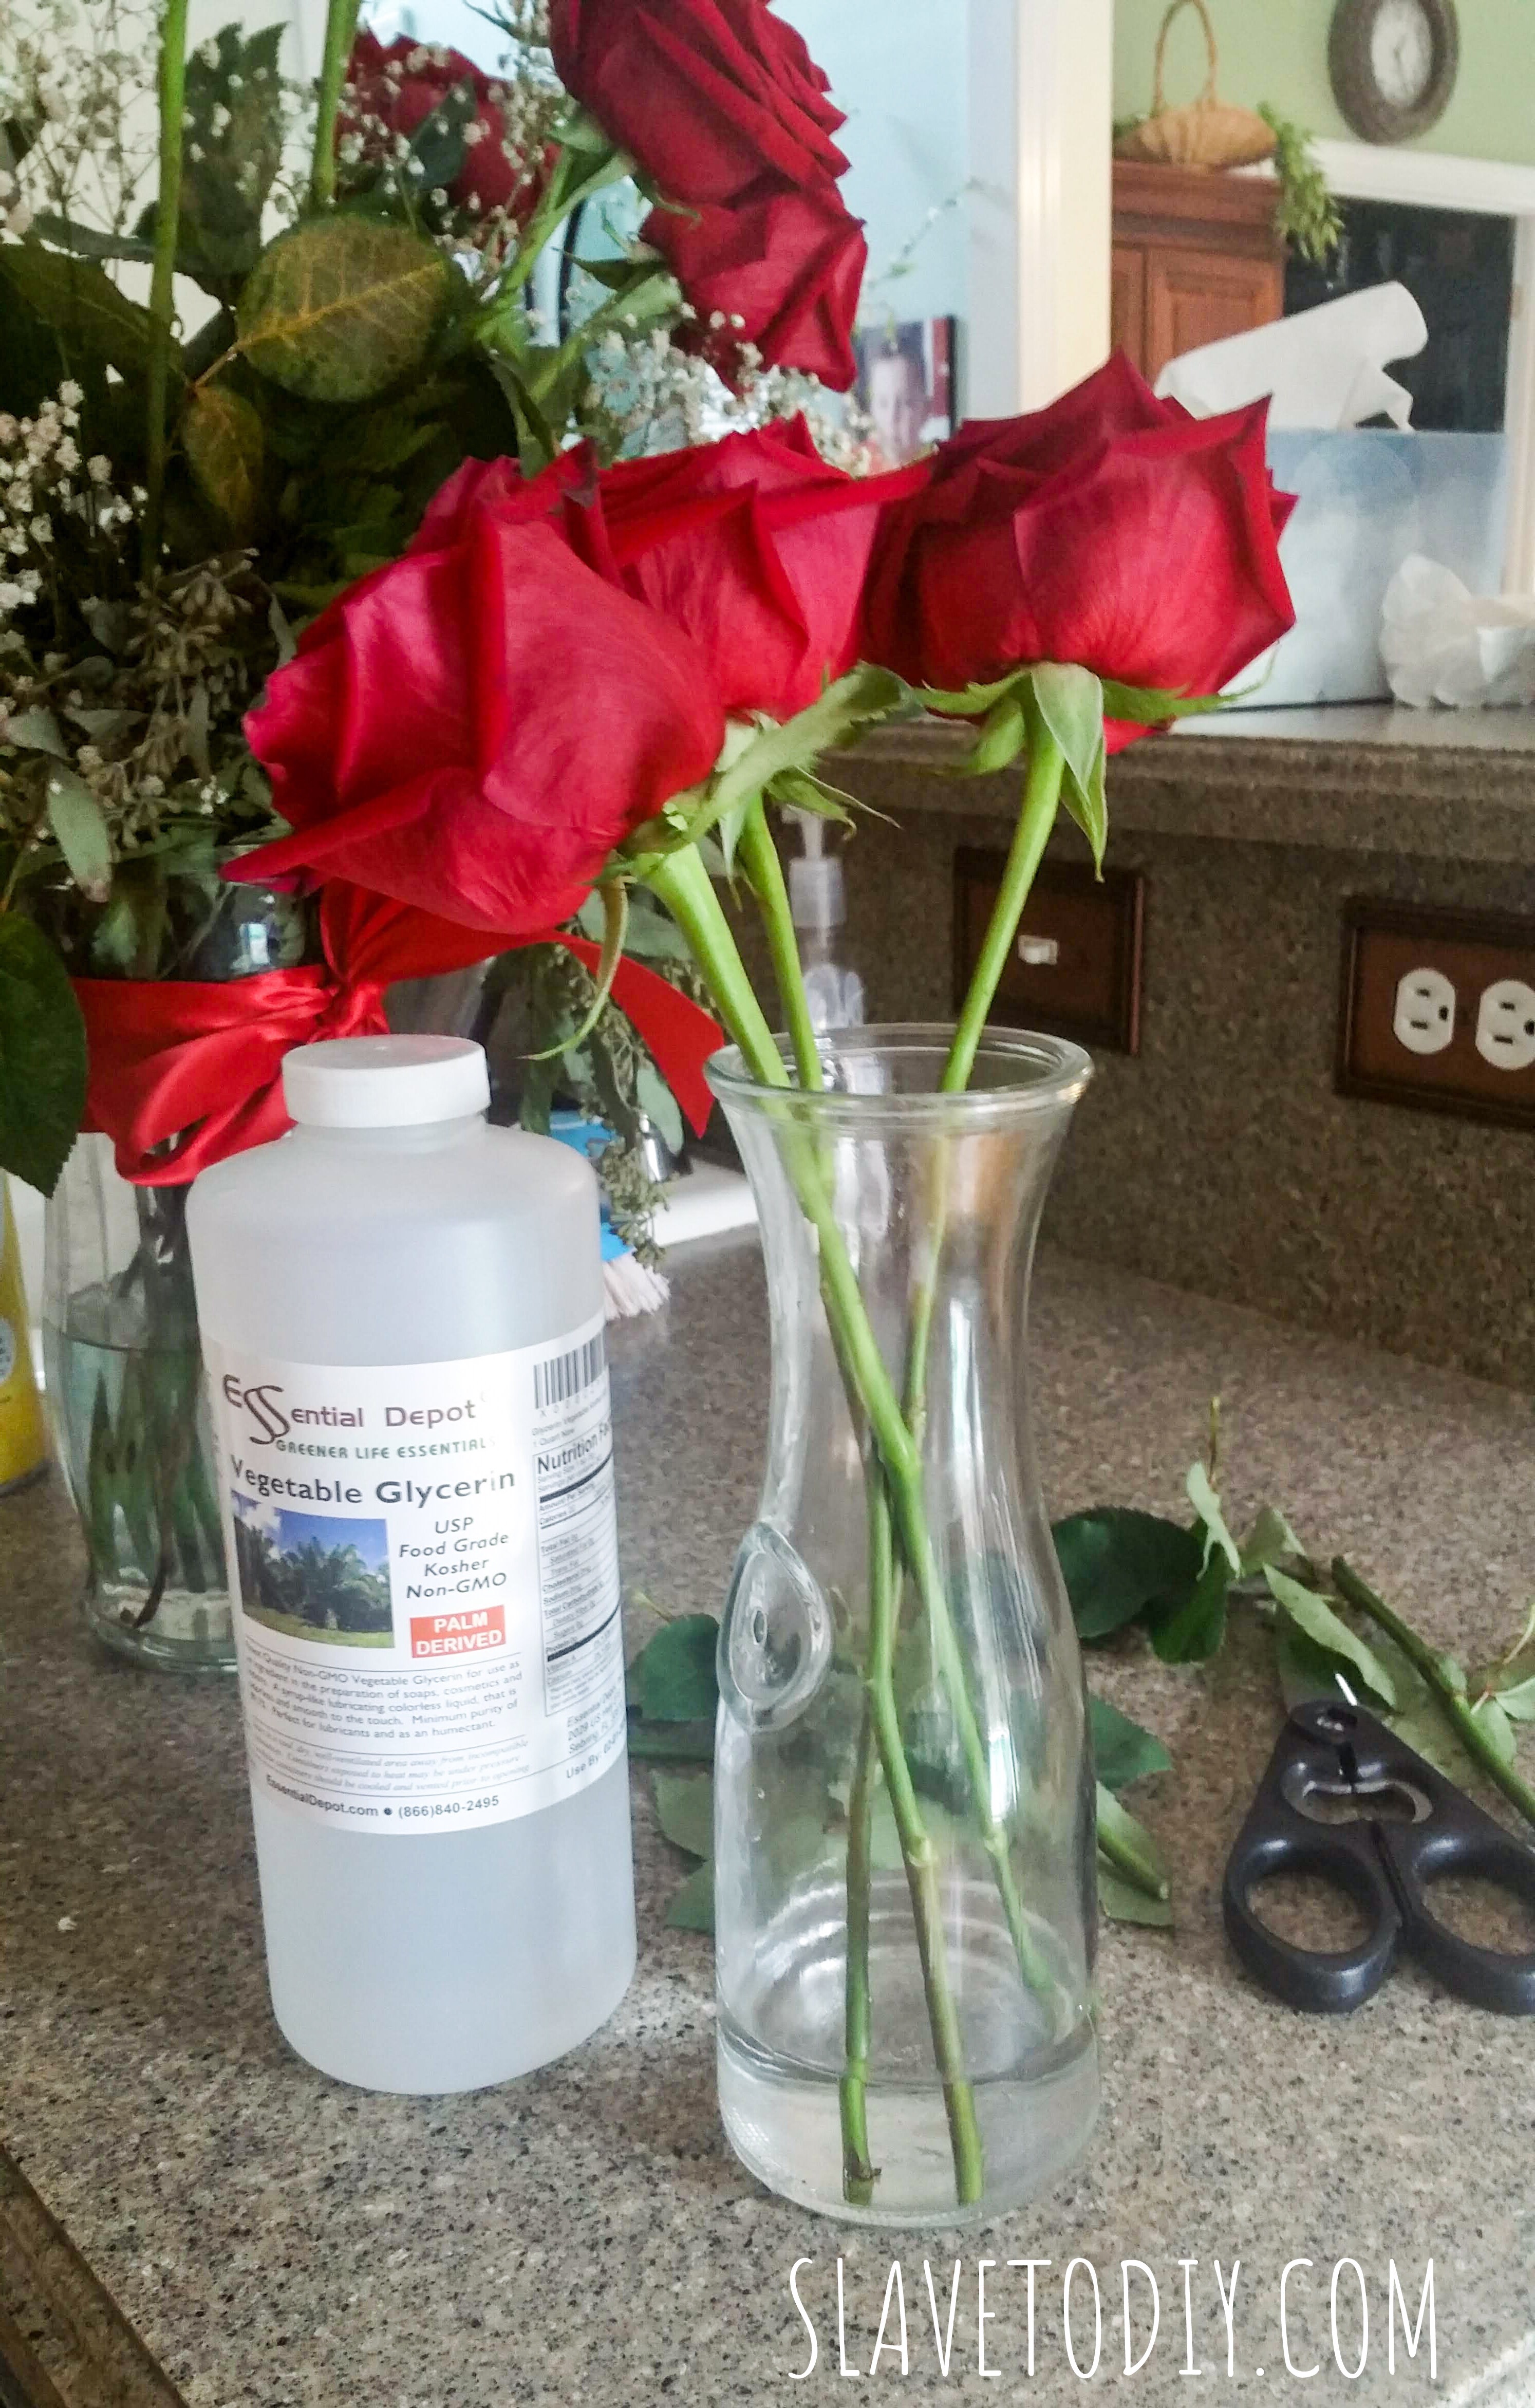
How to Preserve Roses: Red rose bouquet with preserving supplies: scissors, vegetable glycerin, and a hammer.
You really only need a couple of things to do this:
Your preserving vase (mine is an antique but I have these also, which are super cute and very reasonable)
Florist shears/ scissors (as you can see, I was using the poultry shears instead of going to get my nice florist shears which drives Rainman totally NUTS)
Fill your vase with about 1.5 – 2 inches of glycerin.
I start with the longer roses in the arrangement. Holding the vase next to the edge of the counter and the rose stem next to it, I eyeball where I want the cut. Snip! Take your little hammer and flatten the end of the stem. Roll it and flatten again. Mash it up so it opens up (this helps the glycerin get into the stem).
I do the center (long pieces) first, then fill in around the edge with the shorter stems. For mine, I remove all of the leaves and toss everything other than the roses.
Move them to a location out of the sun to start the preserving process.
Preserving Roses: Red rose bouquet, beginning preservation.
I have to be honest: I adore how these are turning out. They will be gorgeous for my Christmas scenes. These can possibly last years if handled carefully and are such a better option than silk!
Tip: Make sure to add glycerin over several weeks until the stems stop absorbing, then dump out any excess (the glycerin will start gelling on the petals and getting goopy if you leave it).
Preserving Roses: Preserved red rose bouquet ready to WOW.
Method 2 (My Favorite):
How To Preserve Roses
This is the PERFECT preserved roses in a hatbox method!
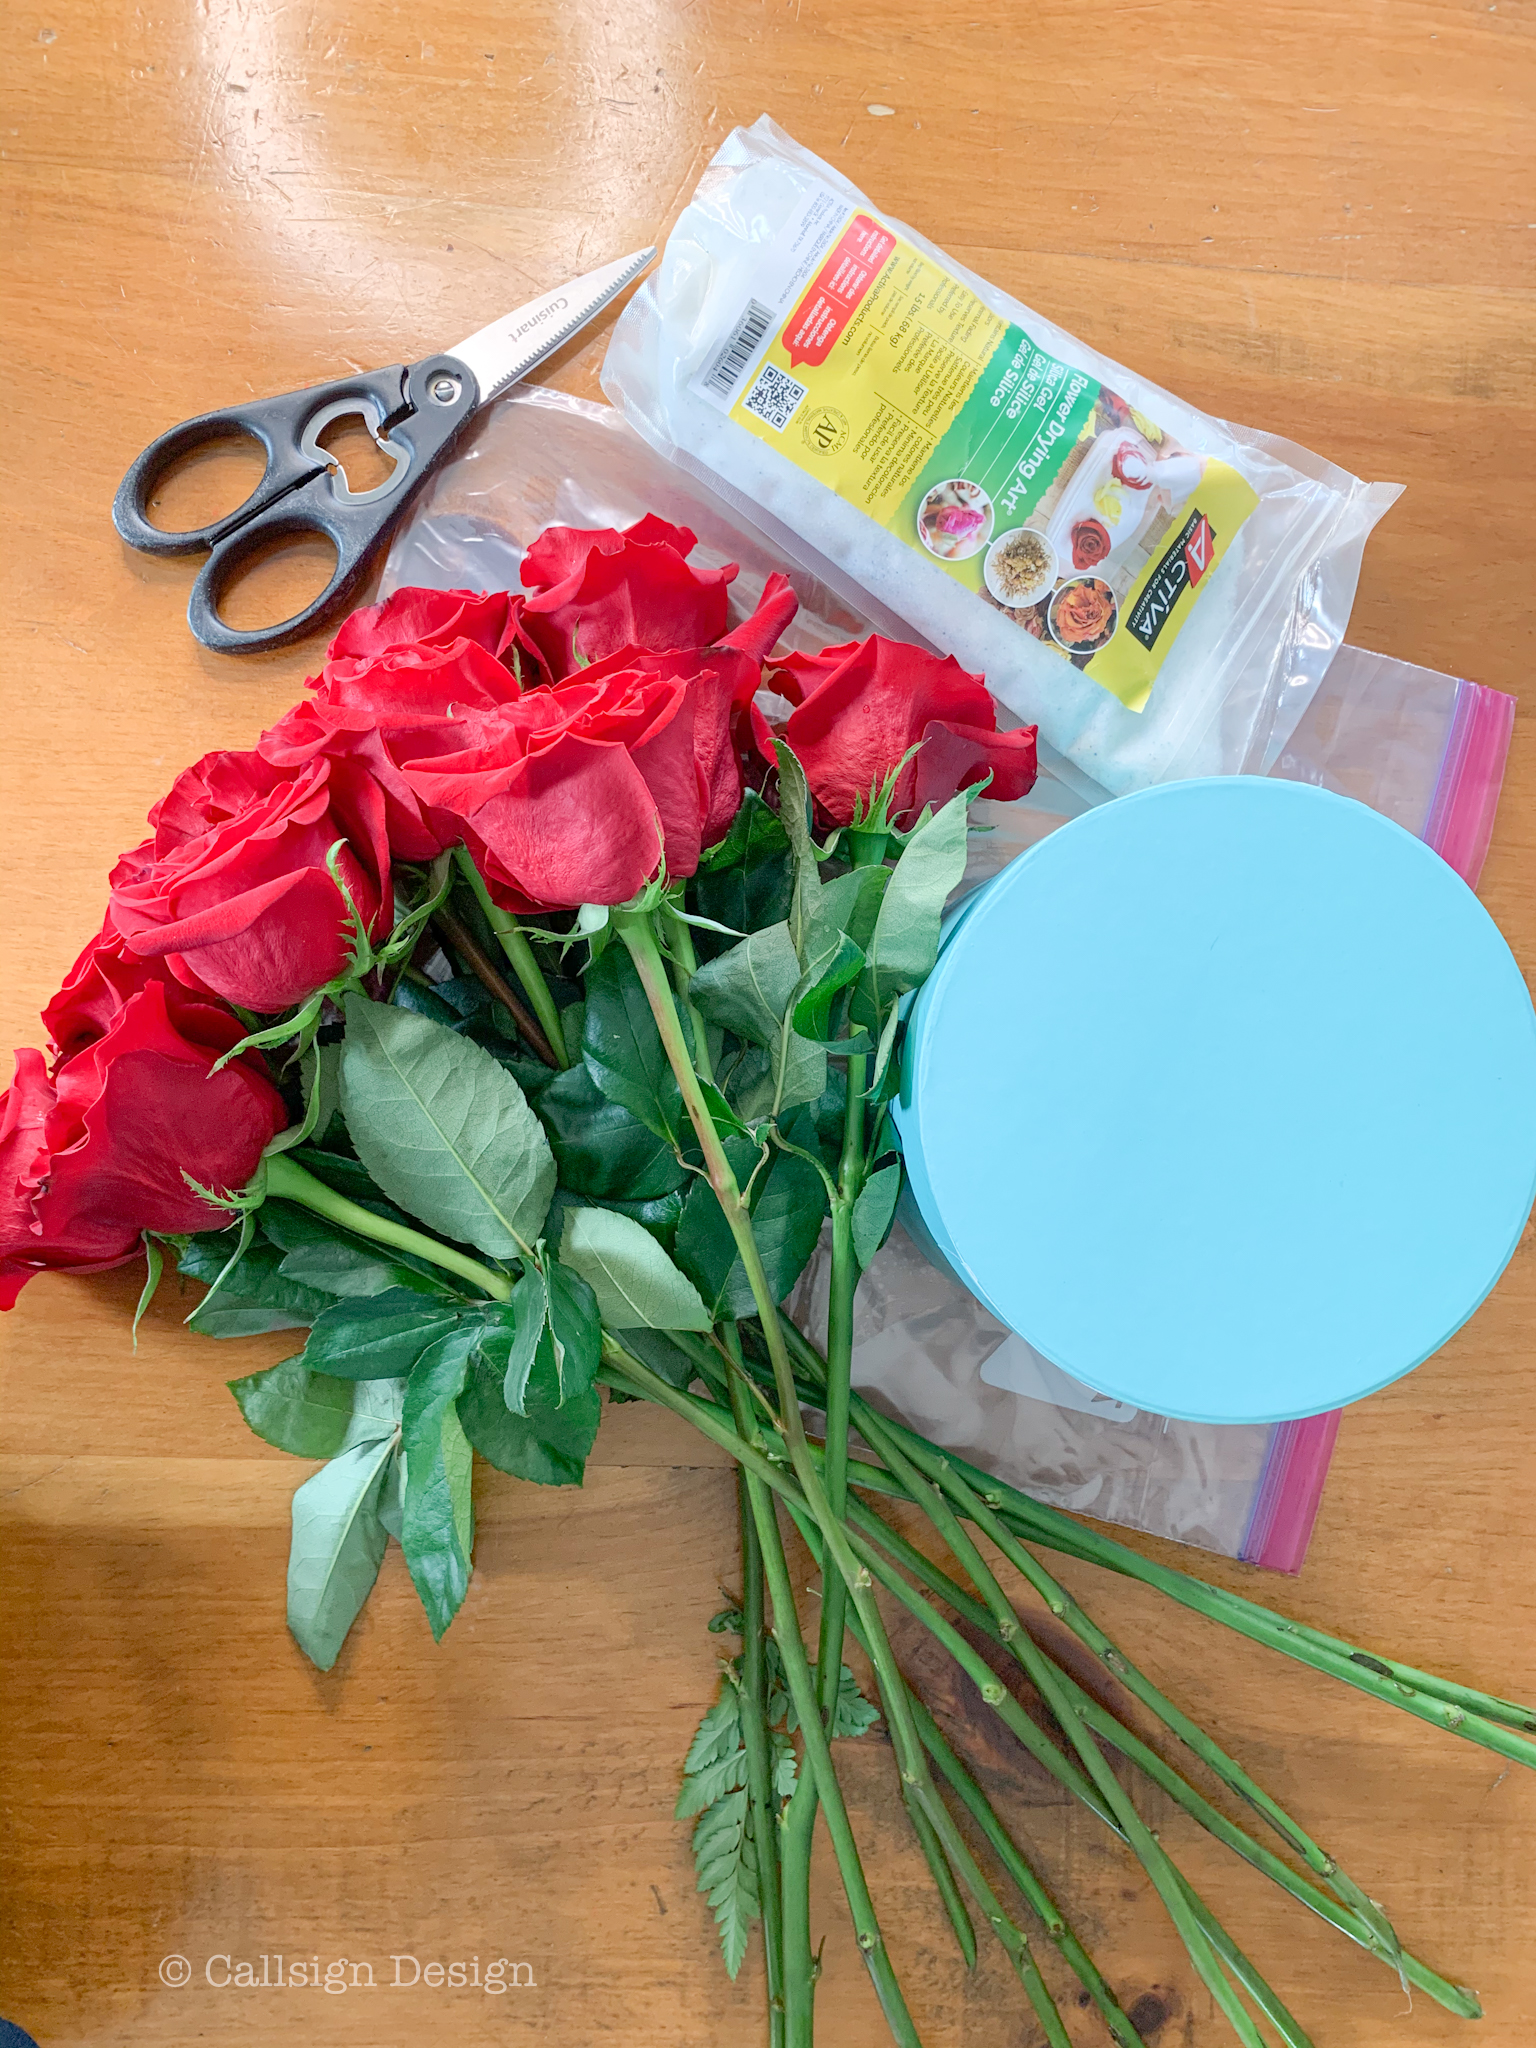
Gallon/2 gallon ziploc (depending on your number of flowers)
Roses
How To Preserve RosesHow To Preserve Roses
How To Preserve Roses
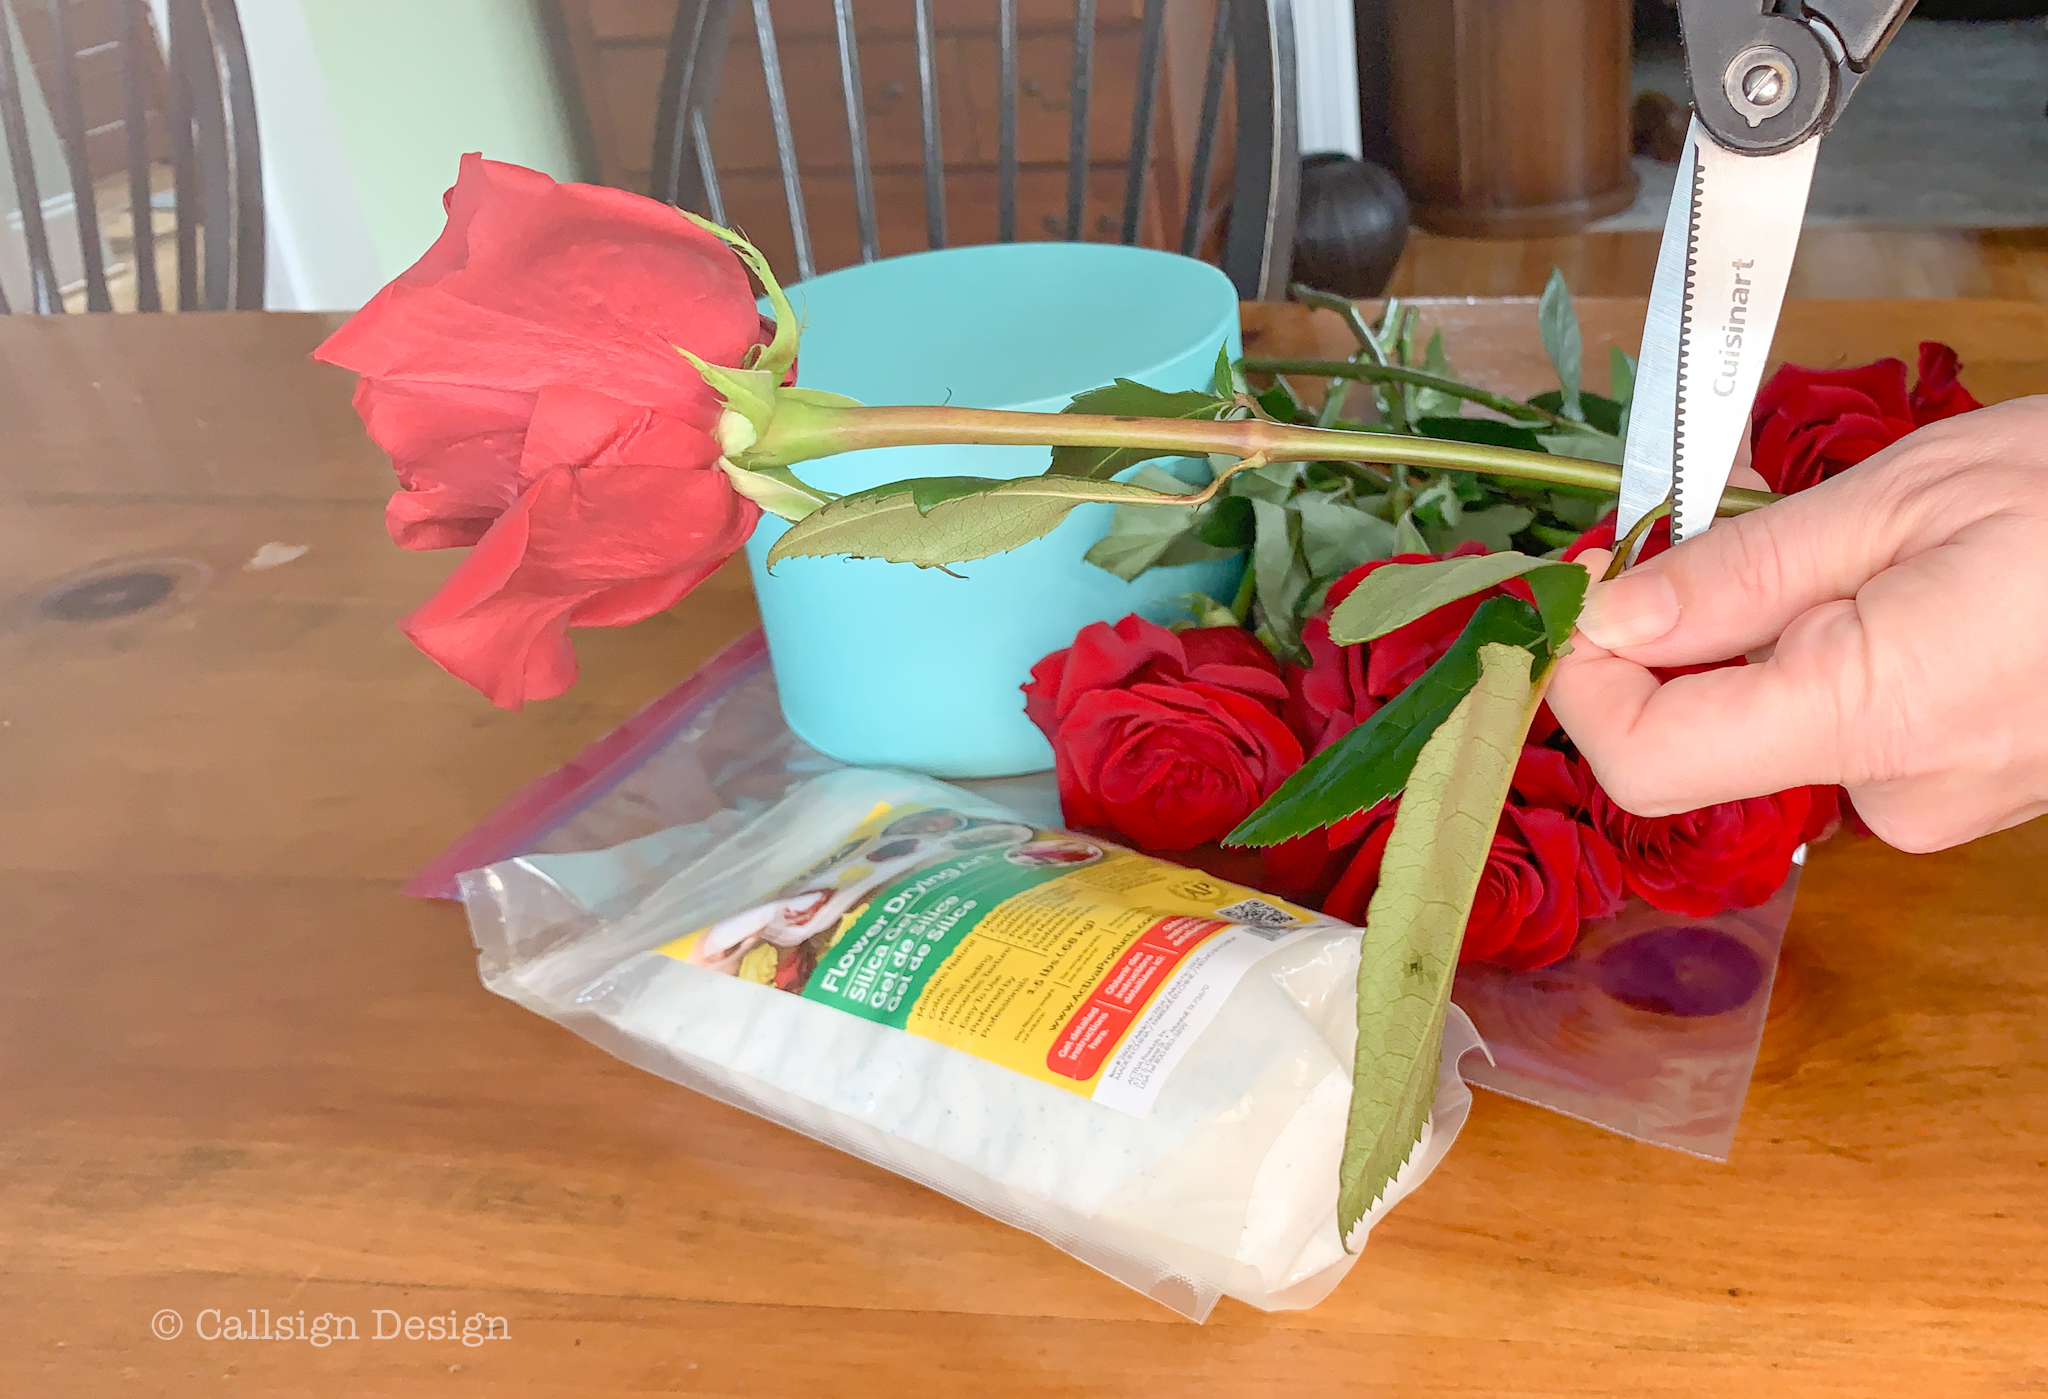
Step One: Snip off the leaves
How To Preserve Roses
How To Preserve Roses
How To Preserve Roses
How To Preserve Roses
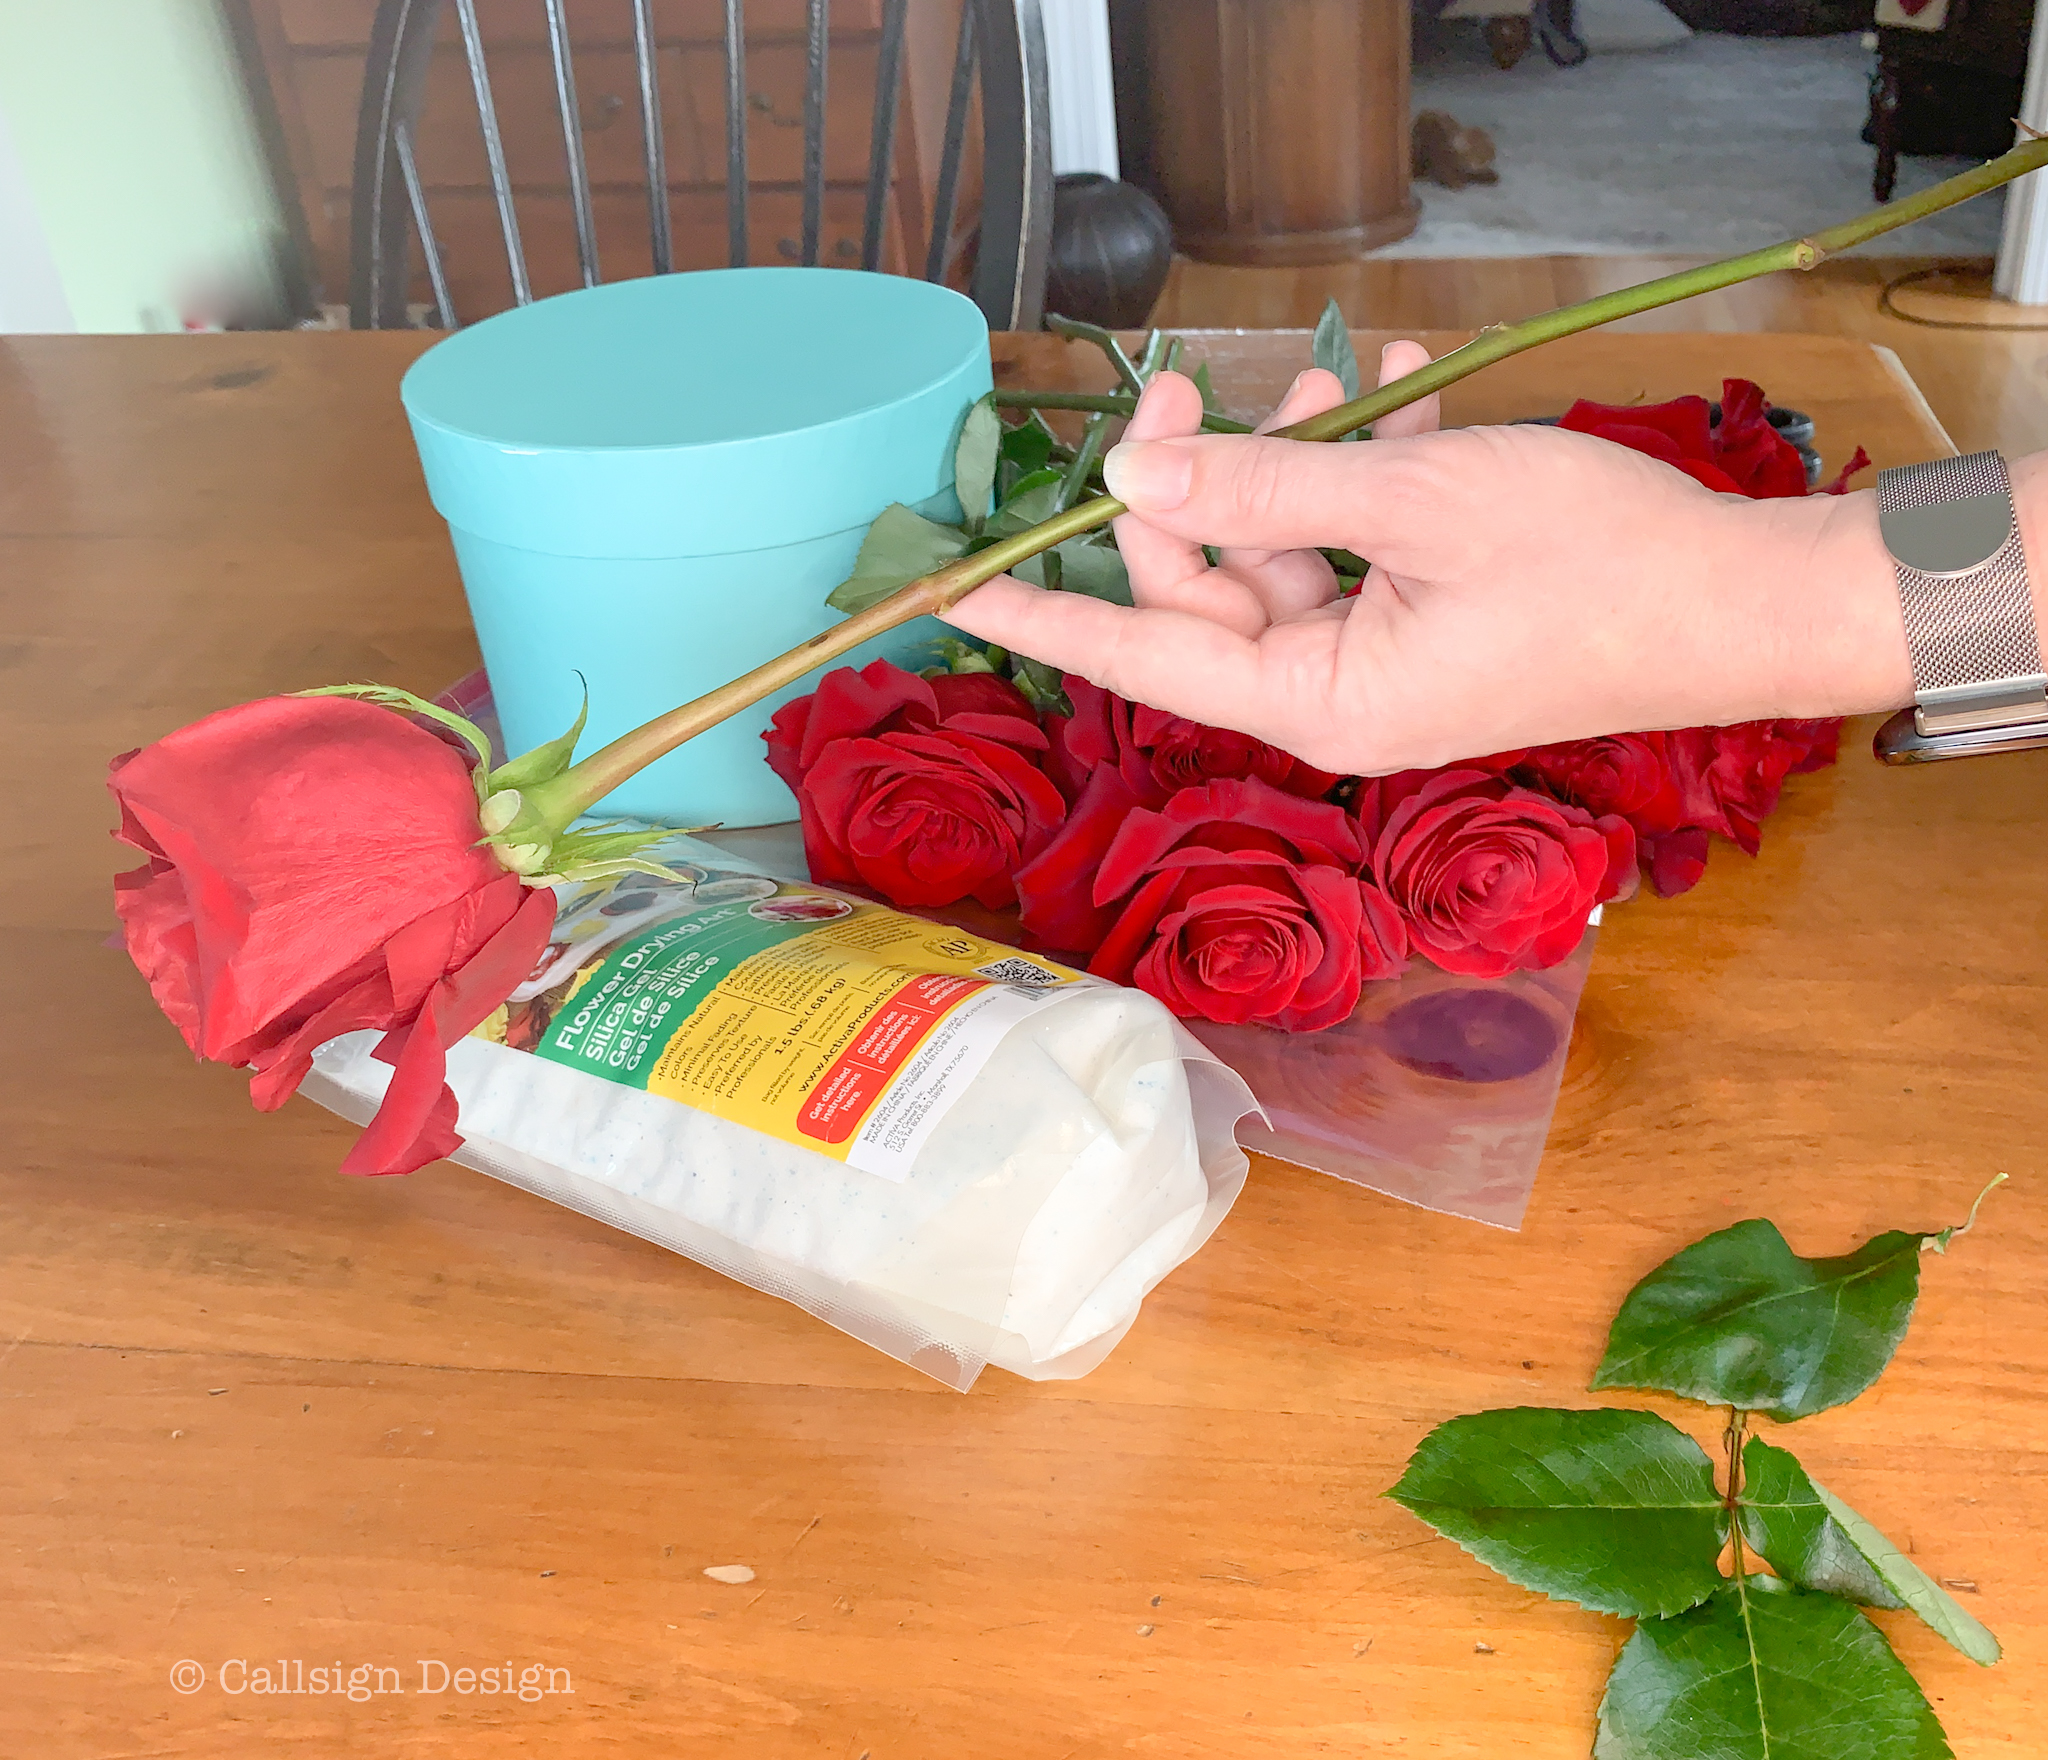
Step Two: measure how long to cut your roses! Then cut them at that height at an angle (check your height by putting it in the box).
How To Preserve Roses
How To Preserve Roses
Step three: Remove the three outermost petals on your roses.
How To Preserve Roses
How To Preserve Roses
Step four: Put your roses into the bag and pour the silica beads over it. Gently shake it to completely cover and get it inside the petals. Once they are covered, put them into a cool dark place for about a week. (Don’t worry about using all of your silica, you can re-use it!)
How To Preserve Roses
How To Preserve Roses
Step Five: Once all of the petals are preserved, shake the silica off carefully, and place them gently into your hatbox. These can last more than a year if you preserve them correctly!
How To Preserve Roses
How To Preserve Roses
Thanks for checking out our little tutorial! Feel free to comment and ask questions below and check out more of our great projects here! Cheers!
*Affiliate Disclosure:
I am honest about my experiences with different products and write because I enjoy it. I do however, have the opportunity to earn money for my writing, also.
Slavetodiy.com is a participant in the Amazon Services LLC Associates Program, an affiliate advertising program designed to provide a means for sites to earn advertising fees by advertising and linking to amazon.com. Amazon offers a small commission on products sold through their affiliate links. Each of your purchases via our Amazon affiliation links supports our cause at no additional cost to you.
If a blogger links to an Amazon product (with a special code for affiliates embedded in the link), and a reader places an item in their “shopping cart” through that link within 24 hours of clicking the link, the blogger gets a small percentage of the sale. Amazon links are not “pay per click.” If you click on the product link and stay around Amazon and purchase something else, however, I will get a commission on that sale.
Slavetodiy.com is also a VigLink affiliate advertiser which works similarly.
The beautiful thing about this particular renovation, is that our house flooded. Yes, I said the GOOD thing. Bear with me. Hang on. I’ll explain.
This post may contain affiliate links. Please see the full disclosure at the bottom of the post.
Before
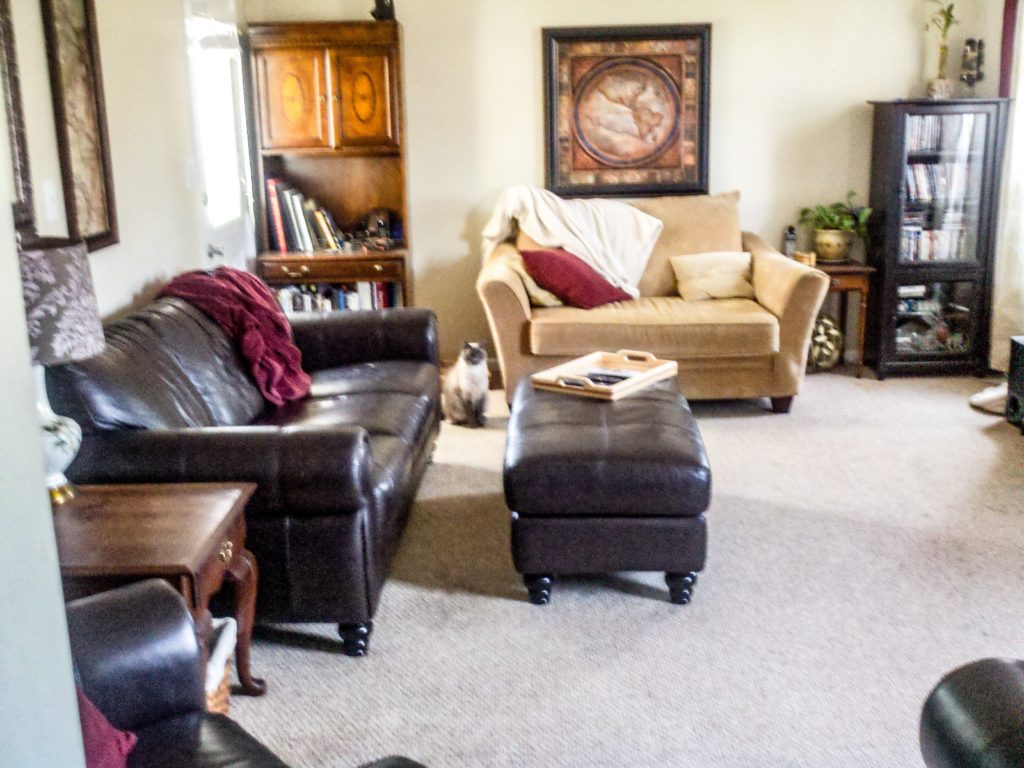
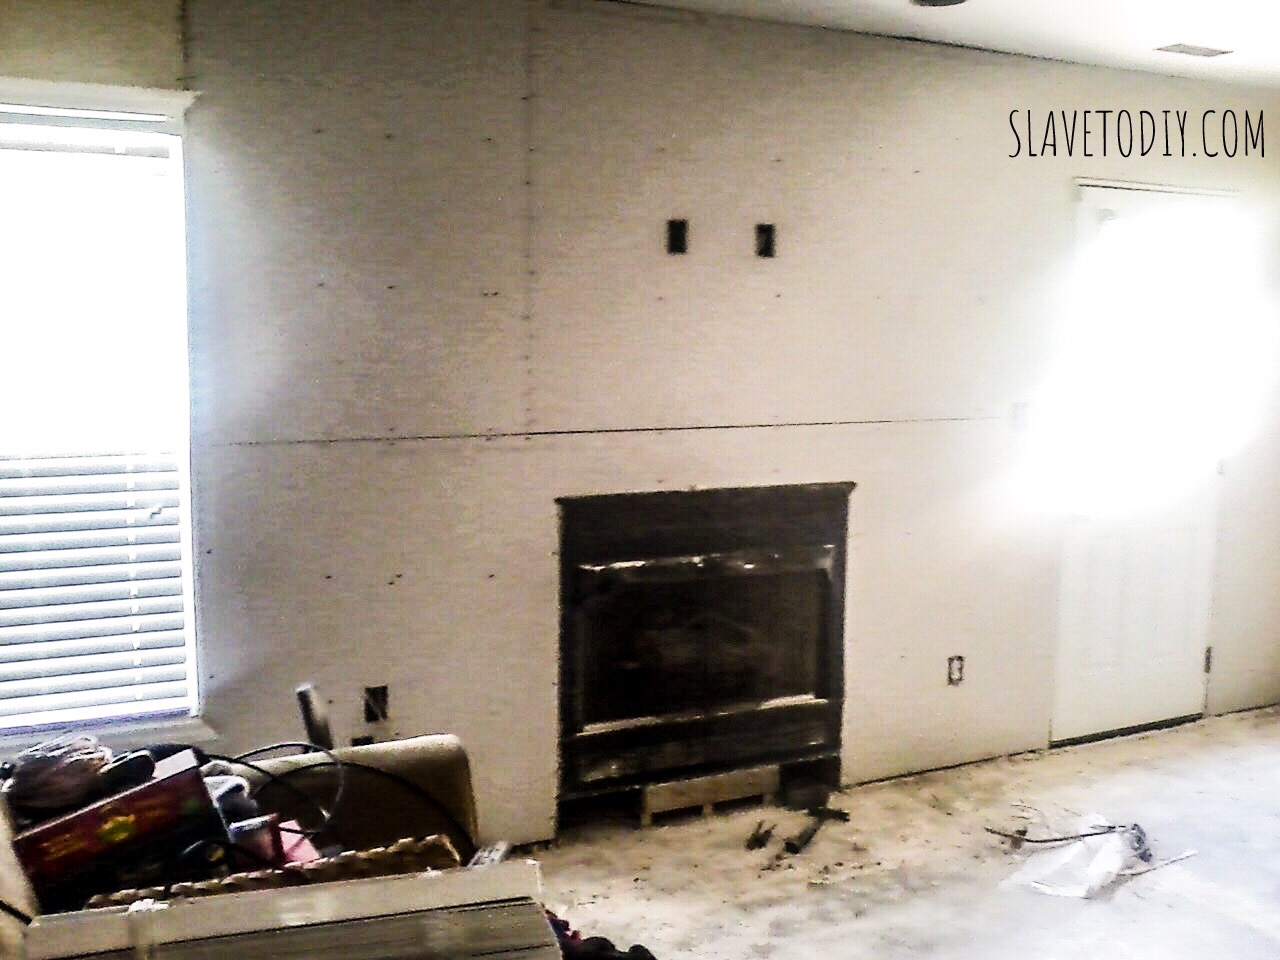
I’m so embarrassed. This is the living room before the flood:
The poor living room in need of help (and at the bottom of the honey-do-list) before the flood.
We had lived in our old house for several years and, aside from the fact that we were packed in there like sardines, we didn’t have the time or energy to get to some of the upgrades on our ever-growing-wish-list. We have a STUFF problem. As in, we have too much of it. Without builtins, there was stuff everywhere, with no rhyme or reason, just looking cluttered and awful. For me, this creates stress, and no matter how clean the house was, I never felt settled.
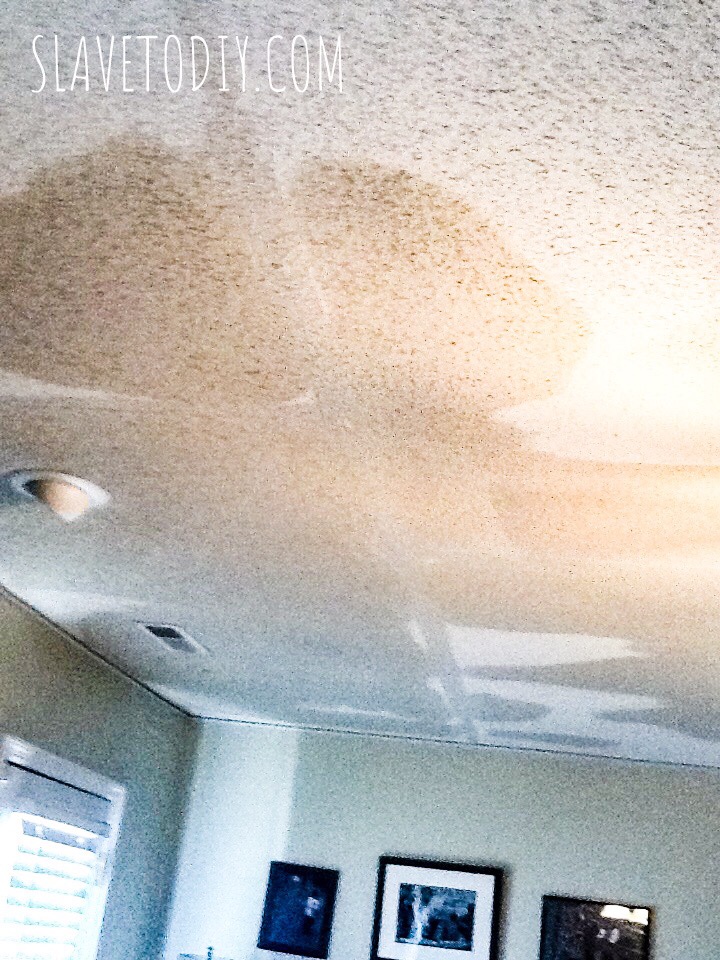
So, then the clouds parted, and the rain came. Well, not actual rain. The hot water supply line under the master bedroom sink broke in the middle of the night (directly above the living room) and completely destroyed the living room and most of the contents.
The Flood
Imagine waking up in the middle of the night to a hot, steamy room. “Is the shower on?” Nope. No shower. But, I stepped down into ankle deep water to investigate, UPSTAIRS. Not good.
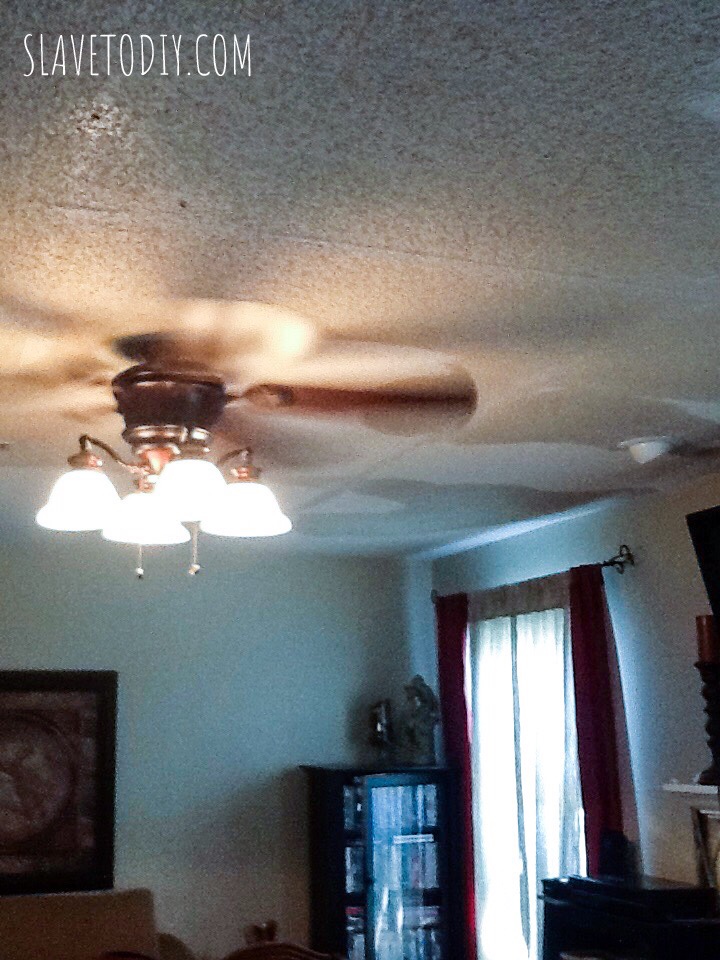
Wet living room ceiling from bathroom flood upstairs.
Wet living room ceiling from bathroom flood upstairs.
This offered up an opportunity for a few things, since we have fantastic homeowners insurance. I’d like to take a moment to give a shout out to my homies at USAA who made the insurance claims process painless. The contractors were so relieved when we said we had USAA. That was enough to solidify my belief in their awesomeness.
Demolition
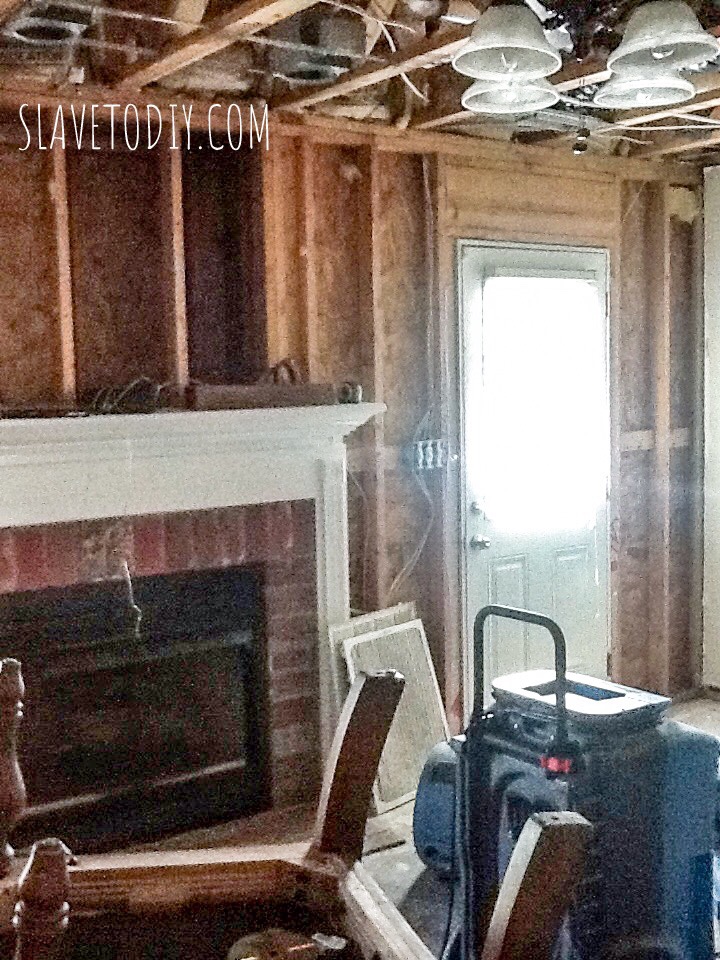
The first thing that happened was the ripping out of the all of the sheetrock and flooring in the living room. Which made it look really weird. But, also awesome. Why? Two words: Popcorn ceilings. Even one room without those would be amazing and it was on my list of stuff to make happen.
Ceiling Sheetrock removed from living room ceiling.
A week and a half of industrial blowers and dehumidifiers later, the living room was dry and ready for REconstruction.
Wet Sheetrock removed.
Reconstruction
So, honestly, the hardest part of a renovation is getting started. My favorite way to kickstart the process is to walk into a room with a crowbar or a sledgehammer and start swinging. Then Rainman sighs, and says, “so, that’s the next project, then?” But, in this case, we HAD to do the renovation, because it flooded. YAY!
So, demolition complete, the living room was ready to start rebuilding. Keep in mind, I knew this was not our forever home, so I took some design chances I probably wouldn’t duplicate now.
Sheetrock
The crew came in and put in sheetrock (we paid an additional $250 to have the ceiling flat finished instead of popcorn which felt a lot like extortion, but it was worth it).
Roughed in Sheetrock, ready to be finished.
Tips: When we were “interviewing” contractors we asked if we could make changes to the insurance-approved punchlist after the fact to make sure they were on board. Many contractors will work with you, using the existing insurance payout, plus your add ons, to do upgrades. They will also give you credit for things you do yourself to help pay for some of the upgrades. Why not do upgrades when you have free labor? For instance, in order to put up the sheetrock the fan had to come down first. After the sheetrock was installed, the fan had to go back up. There was a $150 charge approved by the insurance company for an electrician to take it down, and another $150 to put it back up. Rainman installed the damn fan in the first place. We arranged to do that (and several other things) and applied the credit to the upgrades we were having done elsewhere.
This inspiration post is JUST for the wainscoting and molding, although we did install builtins, completely redo the fireplace and surround, and install beautiful flooring. I’ll cover the others separately.
Customizing
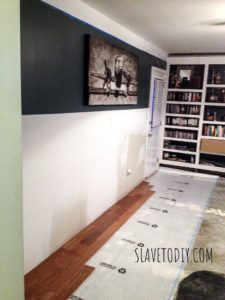
I painted my accent color first after Rainman drew me straight lines based upon where I pointed. That way I was sure I liked the height. I also wanted to make sure my awesome industrial airplane canvas fit where I wanted it mounted (I am notorious for prematurely hanging things on walls still under construction and dressing un-finished builtins).
Roughing in paint before wainscoting and hanging the airplane art.
Designing the Board and Batten Layout
The artwork fit perfectly, so I was able to give him the go-ahead to draw out the grid for the boards. Now, here’s the customization part: depending on the scale of your space (we were dealing with standard eight foot ceiling height) you may want a tighter grid, or something more spaced out. You may want wider or thinner boards. We drew out our boards and I liked the look. We used 1″x6″ pine boards for a majority of the grid.
Crown molding going up on one wall to make sure we like the width of the crown “stripe.” If you look closely, you can see the grid for the board and batten penciled in.
We tried really hard to avoid going over light switches or outlets, but we did hit a few. Because the outlet was in an area that would be covered, we just did a cut out for it. Ditto for the dual light switch.
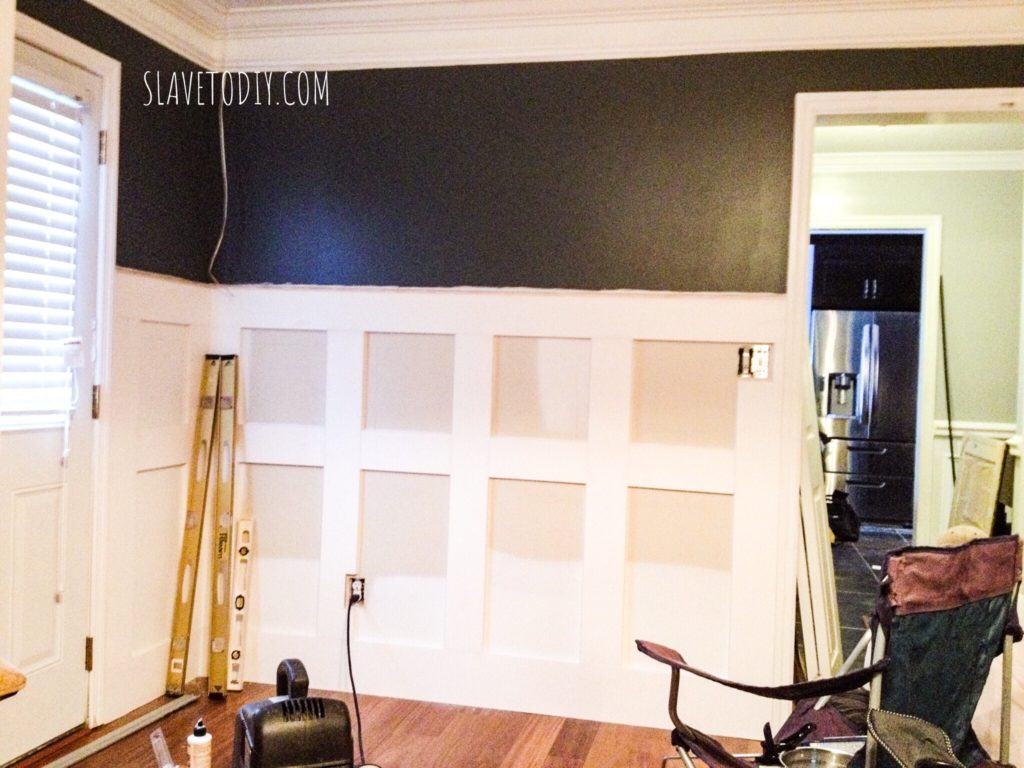
Board and batten grid going in. Before paint and finish work.
The grids were installed using finish nails, via a finish nailer and compressor. My husband got these Bostich nailers and compressor as a gift from his father like 15 years ago and they all still work great. We ran the vertical boards against the door frames and in the corners first, then the top and bottom horizontal boards (we used a wider baseboard), then the verticals (between the top and bottom), then the boards in between the verticals.
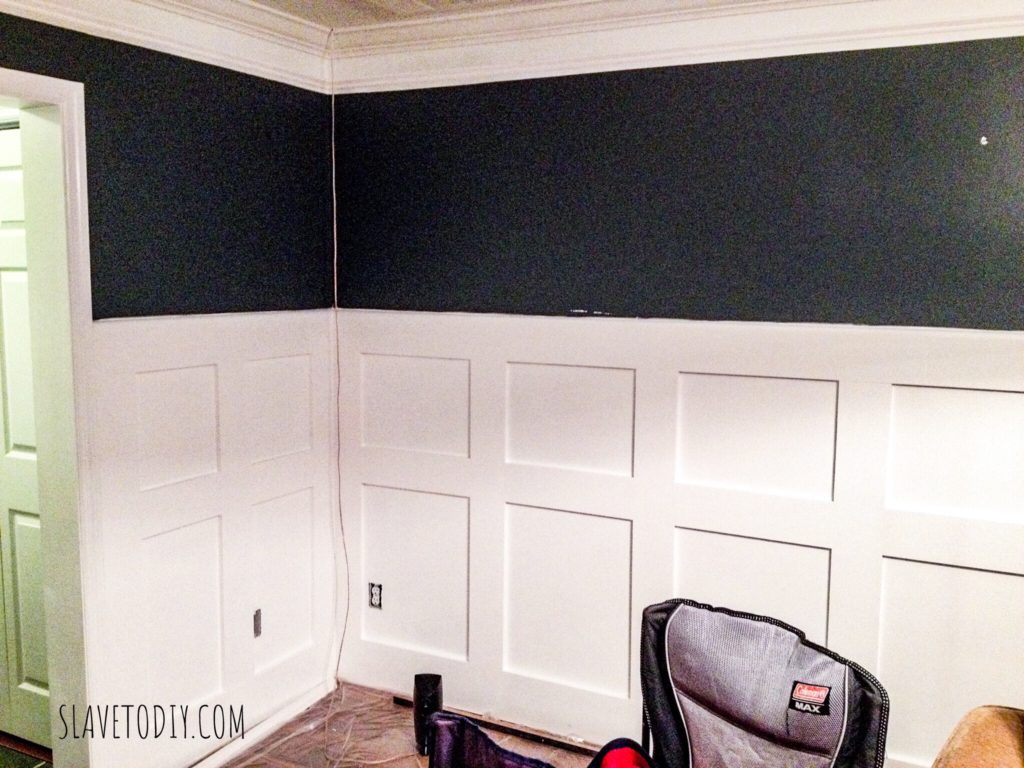
First round of caulk and paint.
We did quarter round to cap the wainscoting and a white quarterround to finish it out against the flooring, also.
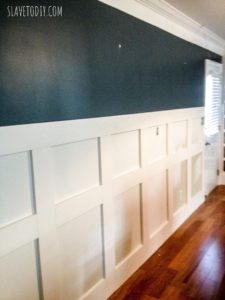
Board and batten grid on the long wall.
I apologize for the grainy photos (these are pre-blogging days and were on my phone). You can see the grid before we started the finish work. Above, the first layer of crown molding has gone up.
Finishing Touches, Crown Molding, and Engineered Brazilian Hardwood Flooring
The additional white quarter round against the flooring really set off the deep color in the gorgeous engineered Brazilian Cherry Hardwood. I absolutely love the contrast of white against wood.
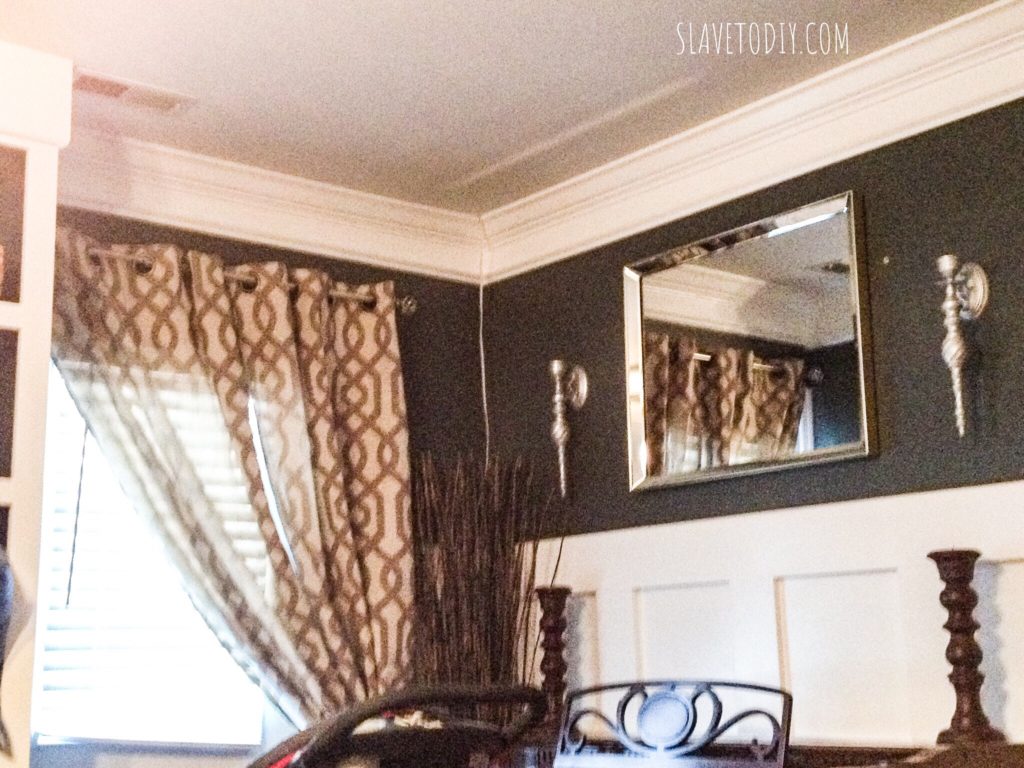
This shot shows the second detail layer below the crown and how the wainscoting looked. This is not a crown molding installation how-to. There’s a fantastic tutorial available from the Familyhandyman.com if you’re new at this. Rainman’s tool of choice on this (that we’ve used over and over) is The Dewalt Compound Sliding Miter Saw. We’ve used it to do an entire house of molding (at the old house) and it still does EVERYTHING we need at the new house.
So, this is an awful, grainy photo again. But, it shows how we continued the trim against the builtins. The top of the builtins was open. We capped the builtins with crown (so it continued around the room) and the detail piece tied it in beautifully.
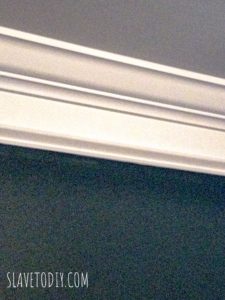
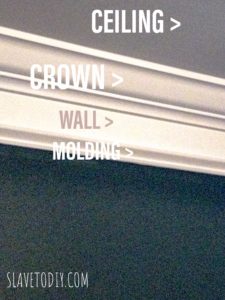
Two pieces of molding really add depth to the ceiling.
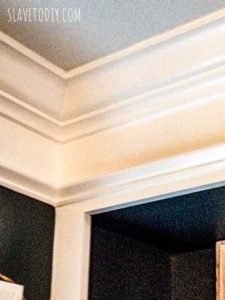
Here’s the final crown stack up, with only two pieces.
Crown molding stack-up.
And them labelled, for guidance.
The finish work was time intensive once all of the crown and wainscoting was up. All of the molding took two layers of caulk (around every edge of the grid and to fill nail holes) to really be finished and THREE layers of gloss white paint. But, it turned out beautifully.
The Finished Product
Beautiful new ceiling, builtins, fireplace, tile surround, new brazilian cherry engineered wood, wainscoting, and crown molding.
This was one of the listing photos of the living room. The white wainscoting and molding REALLY punch up the color contrast and finish the room beautifully. See the finished Old House Tour for more great makeovers.
Check out more of our DIY projects here. Thanks for stopping by!
*Legal stuff:
I am honest about my experiences with different products and write because I enjoy it. I do however, have the opportunity to earn money for my writing, also.
Slavetodiy.com is a participant in the Amazon Services LLC Associates Program, an affiliate advertising program designed to provide a means for sites to earn advertising fees by advertising and linking to amazon.com. Amazon offers a small commission on products sold through their affiliate links. Each of your purchases via our Amazon affiliation links supports our cause at no additional cost to you.
If a blogger links to an Amazon product (with a special code for affiliates embedded in the link), and a reader places an item in their “shopping cart” through that link within 24 hours of clicking the link, the blogger gets a small percentage of the sale. Amazon links are not “pay per click.” If you click on the product link and stay around Amazon and purchase something else, however, I will get a commission on that sale.
Slavetodiy.com is also a VigLink affiliate advertiser which works similarly.
Have you ever had guests ask, “what kind of bed is that?” after they stay at your house? That happens to us every time someone stays here. EVERY TIME. The funny thing is, since we moved here I’m starting to figure out that the luxury mattress market is a racket. I just saw another brick and mortar store is closing hundreds of locations. This has to be why.
*This post may contain affiliate links. Please see full disclosure at the end of the post.
When we moved in here two and half years ago we had a kid in college, two in high school, one in middle school, and one in diapers. We had one queen sized bed and the rest were twins. Knowing that it won’t be long before the kids start leaving and getting places of their own (and possibly returning with significant others- EEK), I decided to set everyone up with a queen mattress (other than the little one).
We live close to a vacation area and I figured it made sense to be able to host couples/visitors in each one of those four bedrooms (with queen mattresses) and kick the kids out to camp in the common areas. But, here’s the thing, I only had one and I needed three more (and didn’t want to spend a fortune on mattresses). So, I started looking around and reading reviews. There are a TON of mattresses for sale online. I found one for under three hundred dollars and, still feeling skeptical, hit play on an order for ONE to test it out.
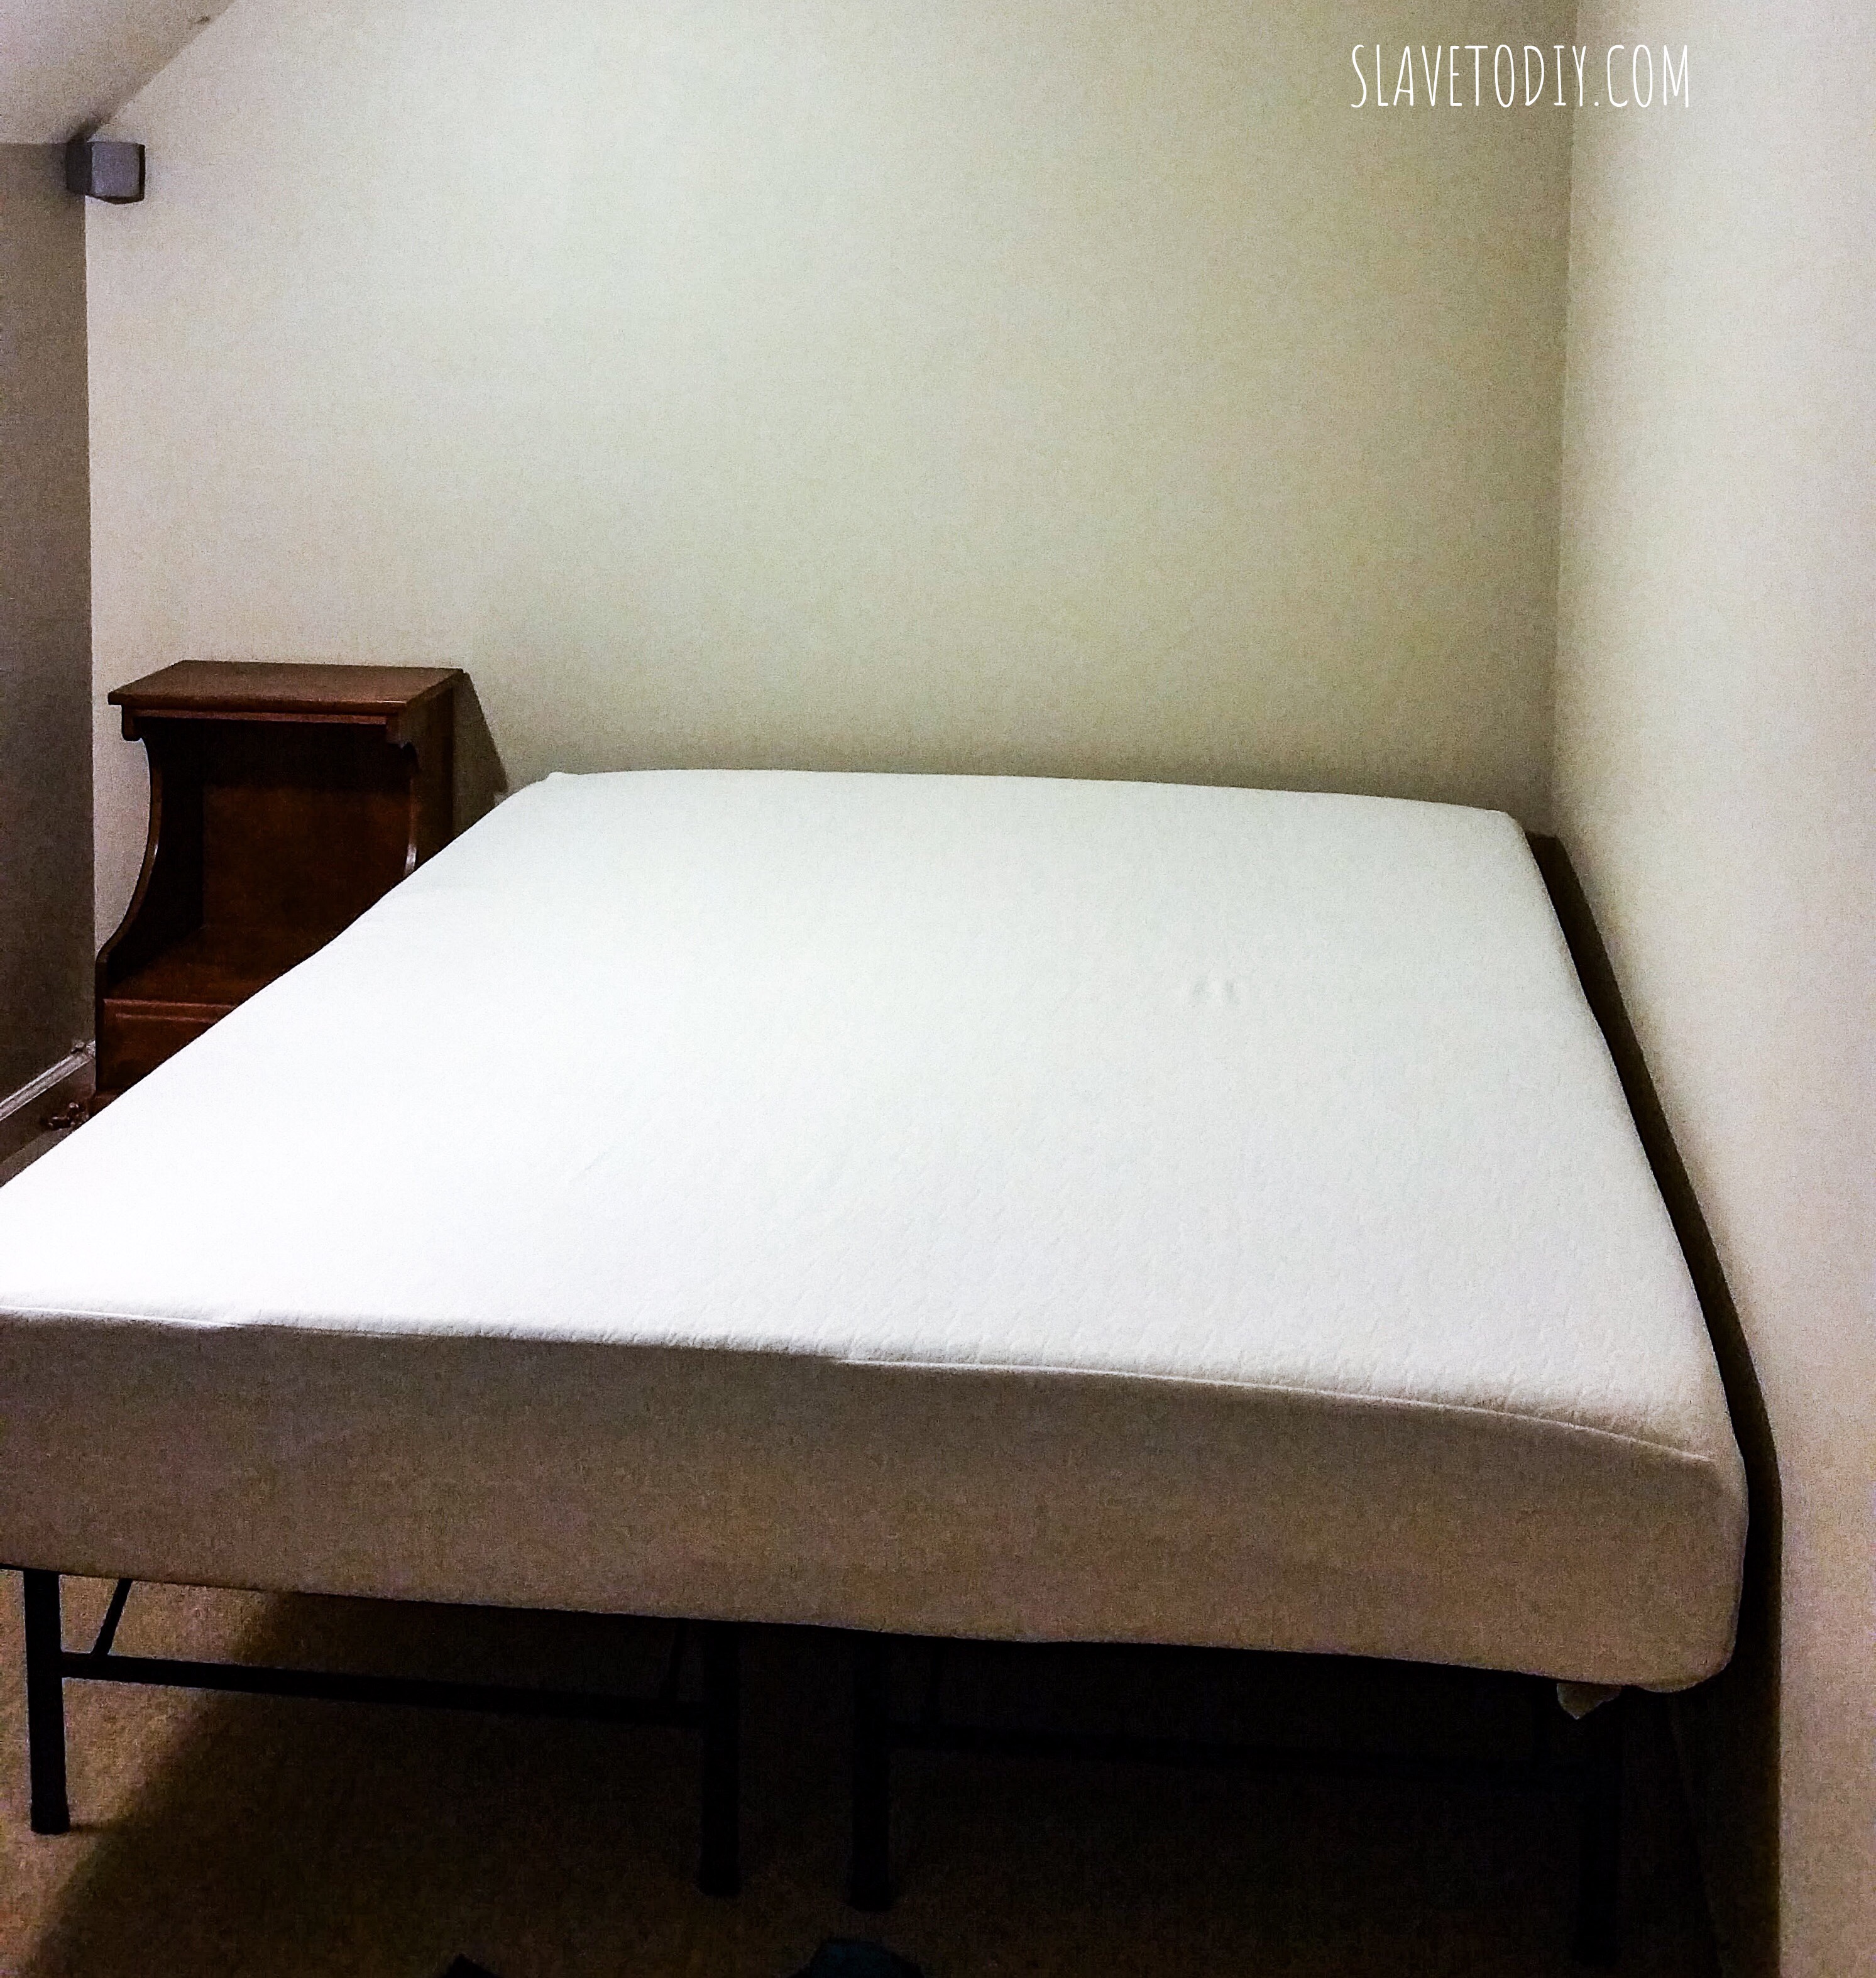
Zinus platform base with storage, Ultima Comfort Bed immediately after “inflating”
Here’s the funny part. This was an all hands on deck fun thing for the whole family as the mattresses came in (after one test night, I ordered the other two, while still in disbelief). The mattress comes in a big bag, like an oversized sleeping bag, and when you puncture the bag seal the mattress starts to “inflate”. I recommend you have it where you want it when you start the process. It’s memory foam so I guess they just suck all the air out before they ship and it inflates in minutes (when my nephew ordered his in cold weather it took about 12 hours to fully inflate).
Zinus platform base with storage with Zinus Ultima Comfort
Just to clarify, I started blogging in September of 2018. We purchased three of these in June of 2016, well before that. My mother in law ordered one to replace their old (and WAY more expensive) memory foam mattress. My sister ordered one. My husband’s aunt ordered one. And my nephew ordered one. All before I ever started blogging. I didn’t get a free mattress. I didn’t even get a discounted mattress. I just got a good deal on a great product, as did my relatives, who got to test out the mattress at my house.
Zinus platform base with storage underneath for existing queen mattress
The price has DROPPED since I purchased three (which is always SLIGHTLY irritating). It’s sort of unreal, but I guess they’re wildly popular and they can do that.
I also ordered four of the bases they sell because it acts as a box spring, but I can store bins underneath (with five kids you’d better believe we need the space). We didn’t even have one for the existing queen mattress we already had because it was on a platform bed at the old house (check it out in our Old House Tour).
Storage space underneath Zinus box spring frame and Zinus Ultima Comfort mattress
The downsides with the frame: You’ll have to buy bedskirts because they’re ugly. The foot and head of the bed are rounded at the edges and were compatible with NONE of the headboards we had. So, currently the headboards are wedged against the wall and not attached to the frame. If you plan on lots of athletic activity in bed and are concerned for your safety, I recommend bolting the headboard to the wall. Otherwise, I have no complaints.
You’ll notice that I only posted three bed pictures, and not four. That’s because my fourteen year old is the embodiment of Pig Pen and is going to be grounded if he doesn’t fix his room. Maybe once he cleans it so I won’t be embarrassed I’ll take a picture of bed number four on the platform base. But, anyhoo.
So, here’s the deal. These weren’t free to me. I paid full price for them. If you buy one I will get a commission, but I promise if they suck I would tell you. We love them.
I feel like this is a public service announcement to tell you that you don’t have to pay thousands of dollars on a mattress when you can get a really good one for a couple hundred bucks. We’ve had them for 2+ years and there is no evidence of sagging or compressed sleeping spots. I’m impressed.
We paid $2000 for a mattress in 2010 and need a new one. We’ll be getting one of these and saving a whole bunch of money. I can think of plenty of things I’d rather spend the other $1700 on. By the way, since we purchased these, Zinus has come out with like fifteen different versions of their mattress. I can’t vouch for any of these, just the Ultima Comfort. But, I think it’s a solid company, so let me know if you try one of the other versions!
Thanks for stopping by! To see more of our DIY projects wins and fails and decor check out our Blog.
*Legal stuff:
I am honest about my experiences with different products and write because I enjoy it. I do however, have the opportunity to earn money for my writing, also.
Slavetodiy.com is a participant in the Amazon Services LLC Associates Program, an affiliate advertising program designed to provide a means for sites to earn advertising fees by advertising and linking to amazon.com. Amazon offers a small commission on products sold through their affiliate links. Each of your purchases via our Amazon affiliation links supports our cause at no additional cost to you.
If a blogger links to an Amazon product (with a special code for affiliates embedded in the link), and a reader places an item in their “shopping cart” through that link within 24 hours of clicking the link, the blogger gets a small percentage of the sale. Amazon links are not “pay per click.” If you click on the product link and stay around Amazon and purchase something else, however, I will get a commission on that sale.
Slavetodiy.com is also a VigLink affiliate advertiser which works similarly.
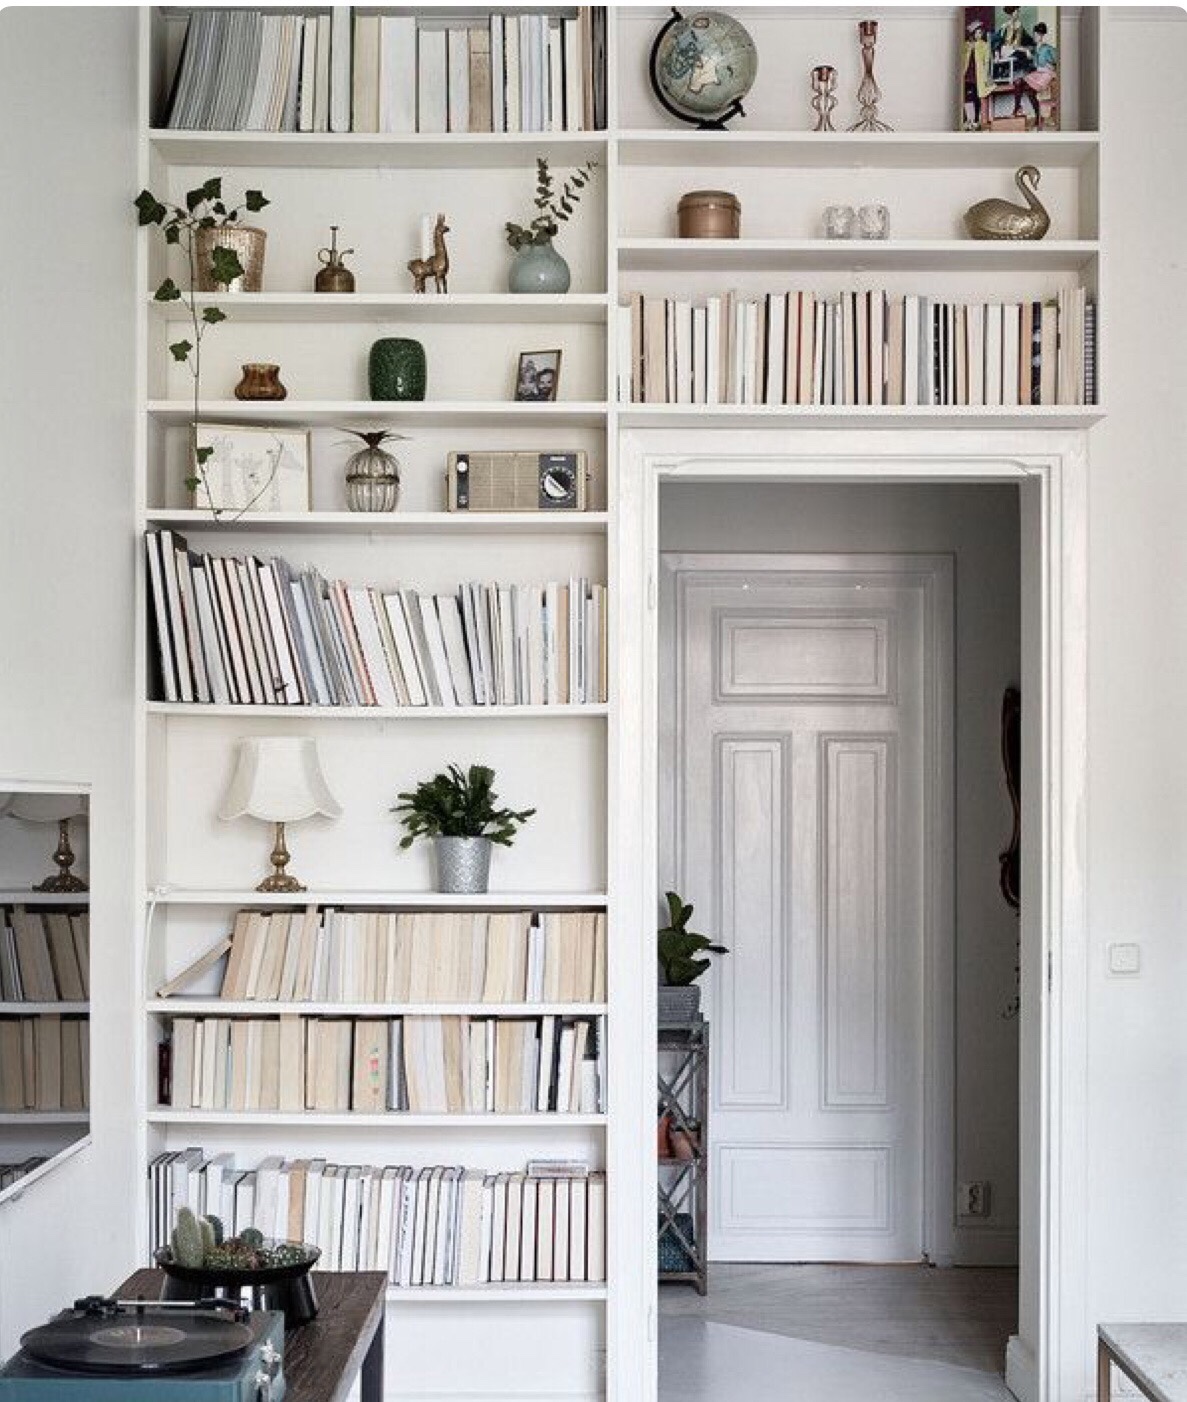
Okay. I briefly considered titling this blog post, “the death of all that is good and Holy,” or “things that make you want to start drinking before 5 PM.” But, I thought it might isolate some readers. This isn’t something I would normally do, but I feel the need to take a stand AGAINST a trend. I started seeing things pop up on my Pinterest feed with books in bookcases BACKWARD. “What in the world?” I thought to myself. So, I looked it up.
Books turned around backward for preferable “style” in Atlanta Homes Magazine
*This post may contain affiliate links. Please see the full disclosure at the bottom of the post.
It turns out, if people’s books don’t match their decor, or the book jackets are too colorful, PEOPLE ARE TURNING THEM AROUND TO MAKE THEM LOOK NICER. And people are like, “yeah, that’s so AWESOME, what a great idea.” I’m going to stop right now. I’m taking a deep breath. I’m going to my happy place.
From Domino.com
I’m finding tutorials on how to turn YOUR books around and tales of designers conquering their client’s ugly book collections by doing so.
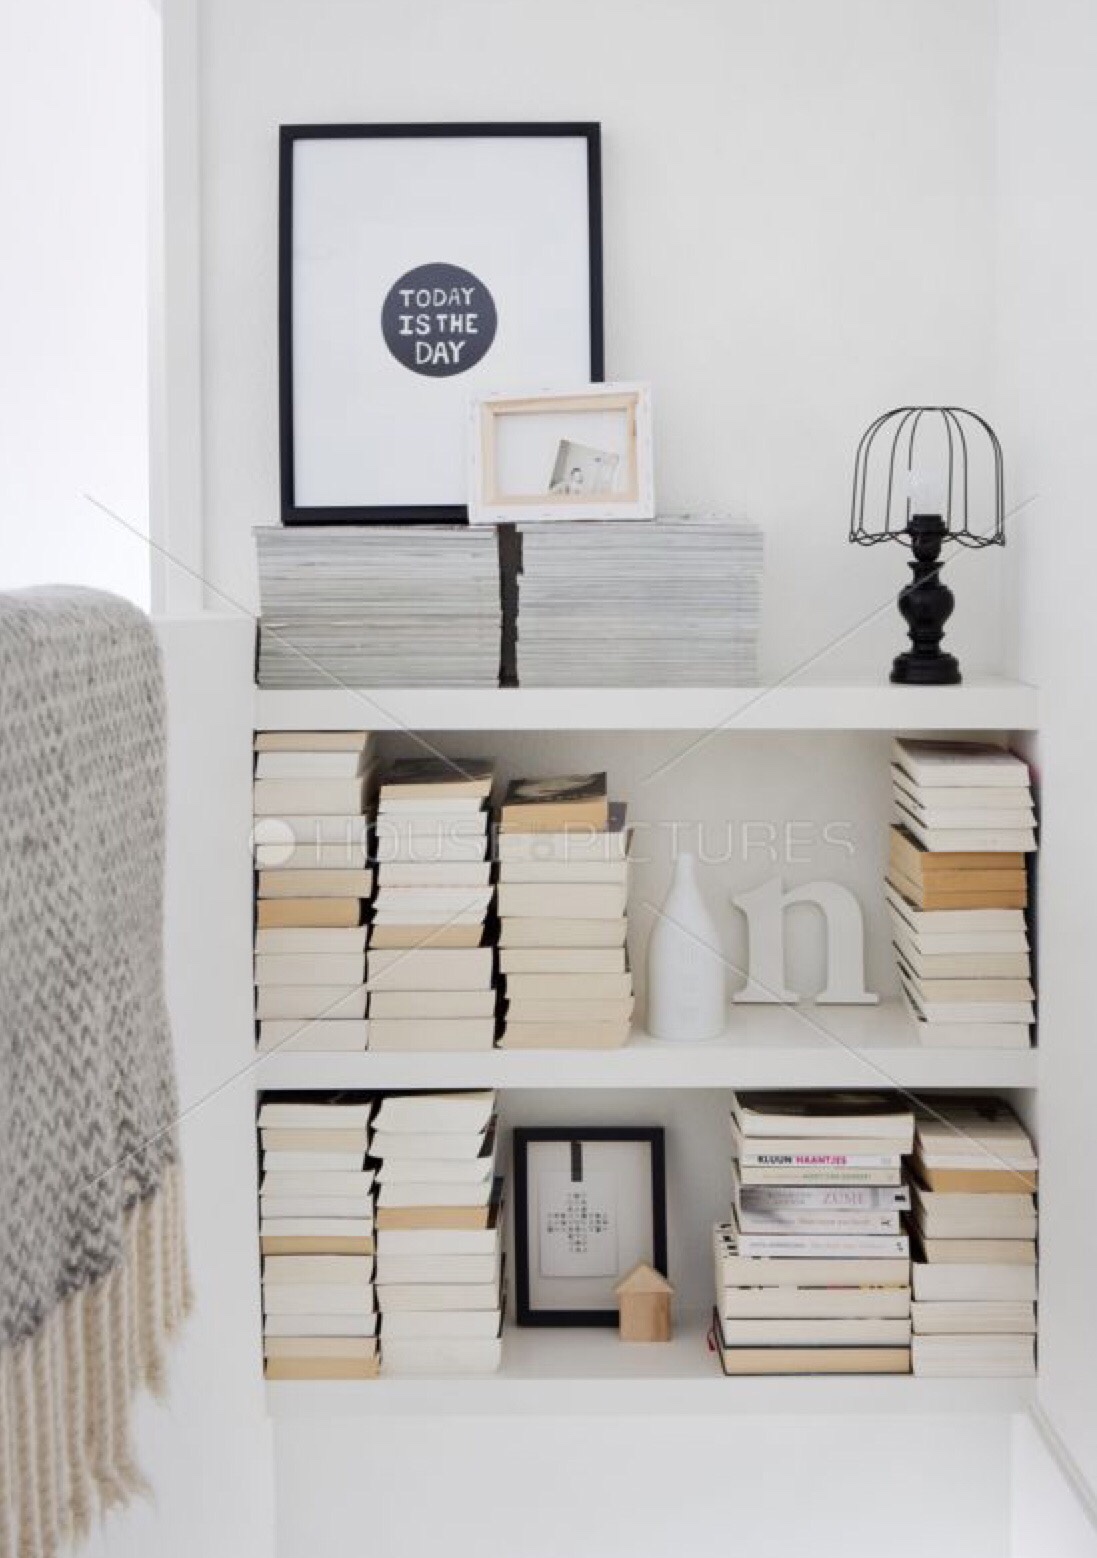
This one from houseofpictures.com is especially stark.
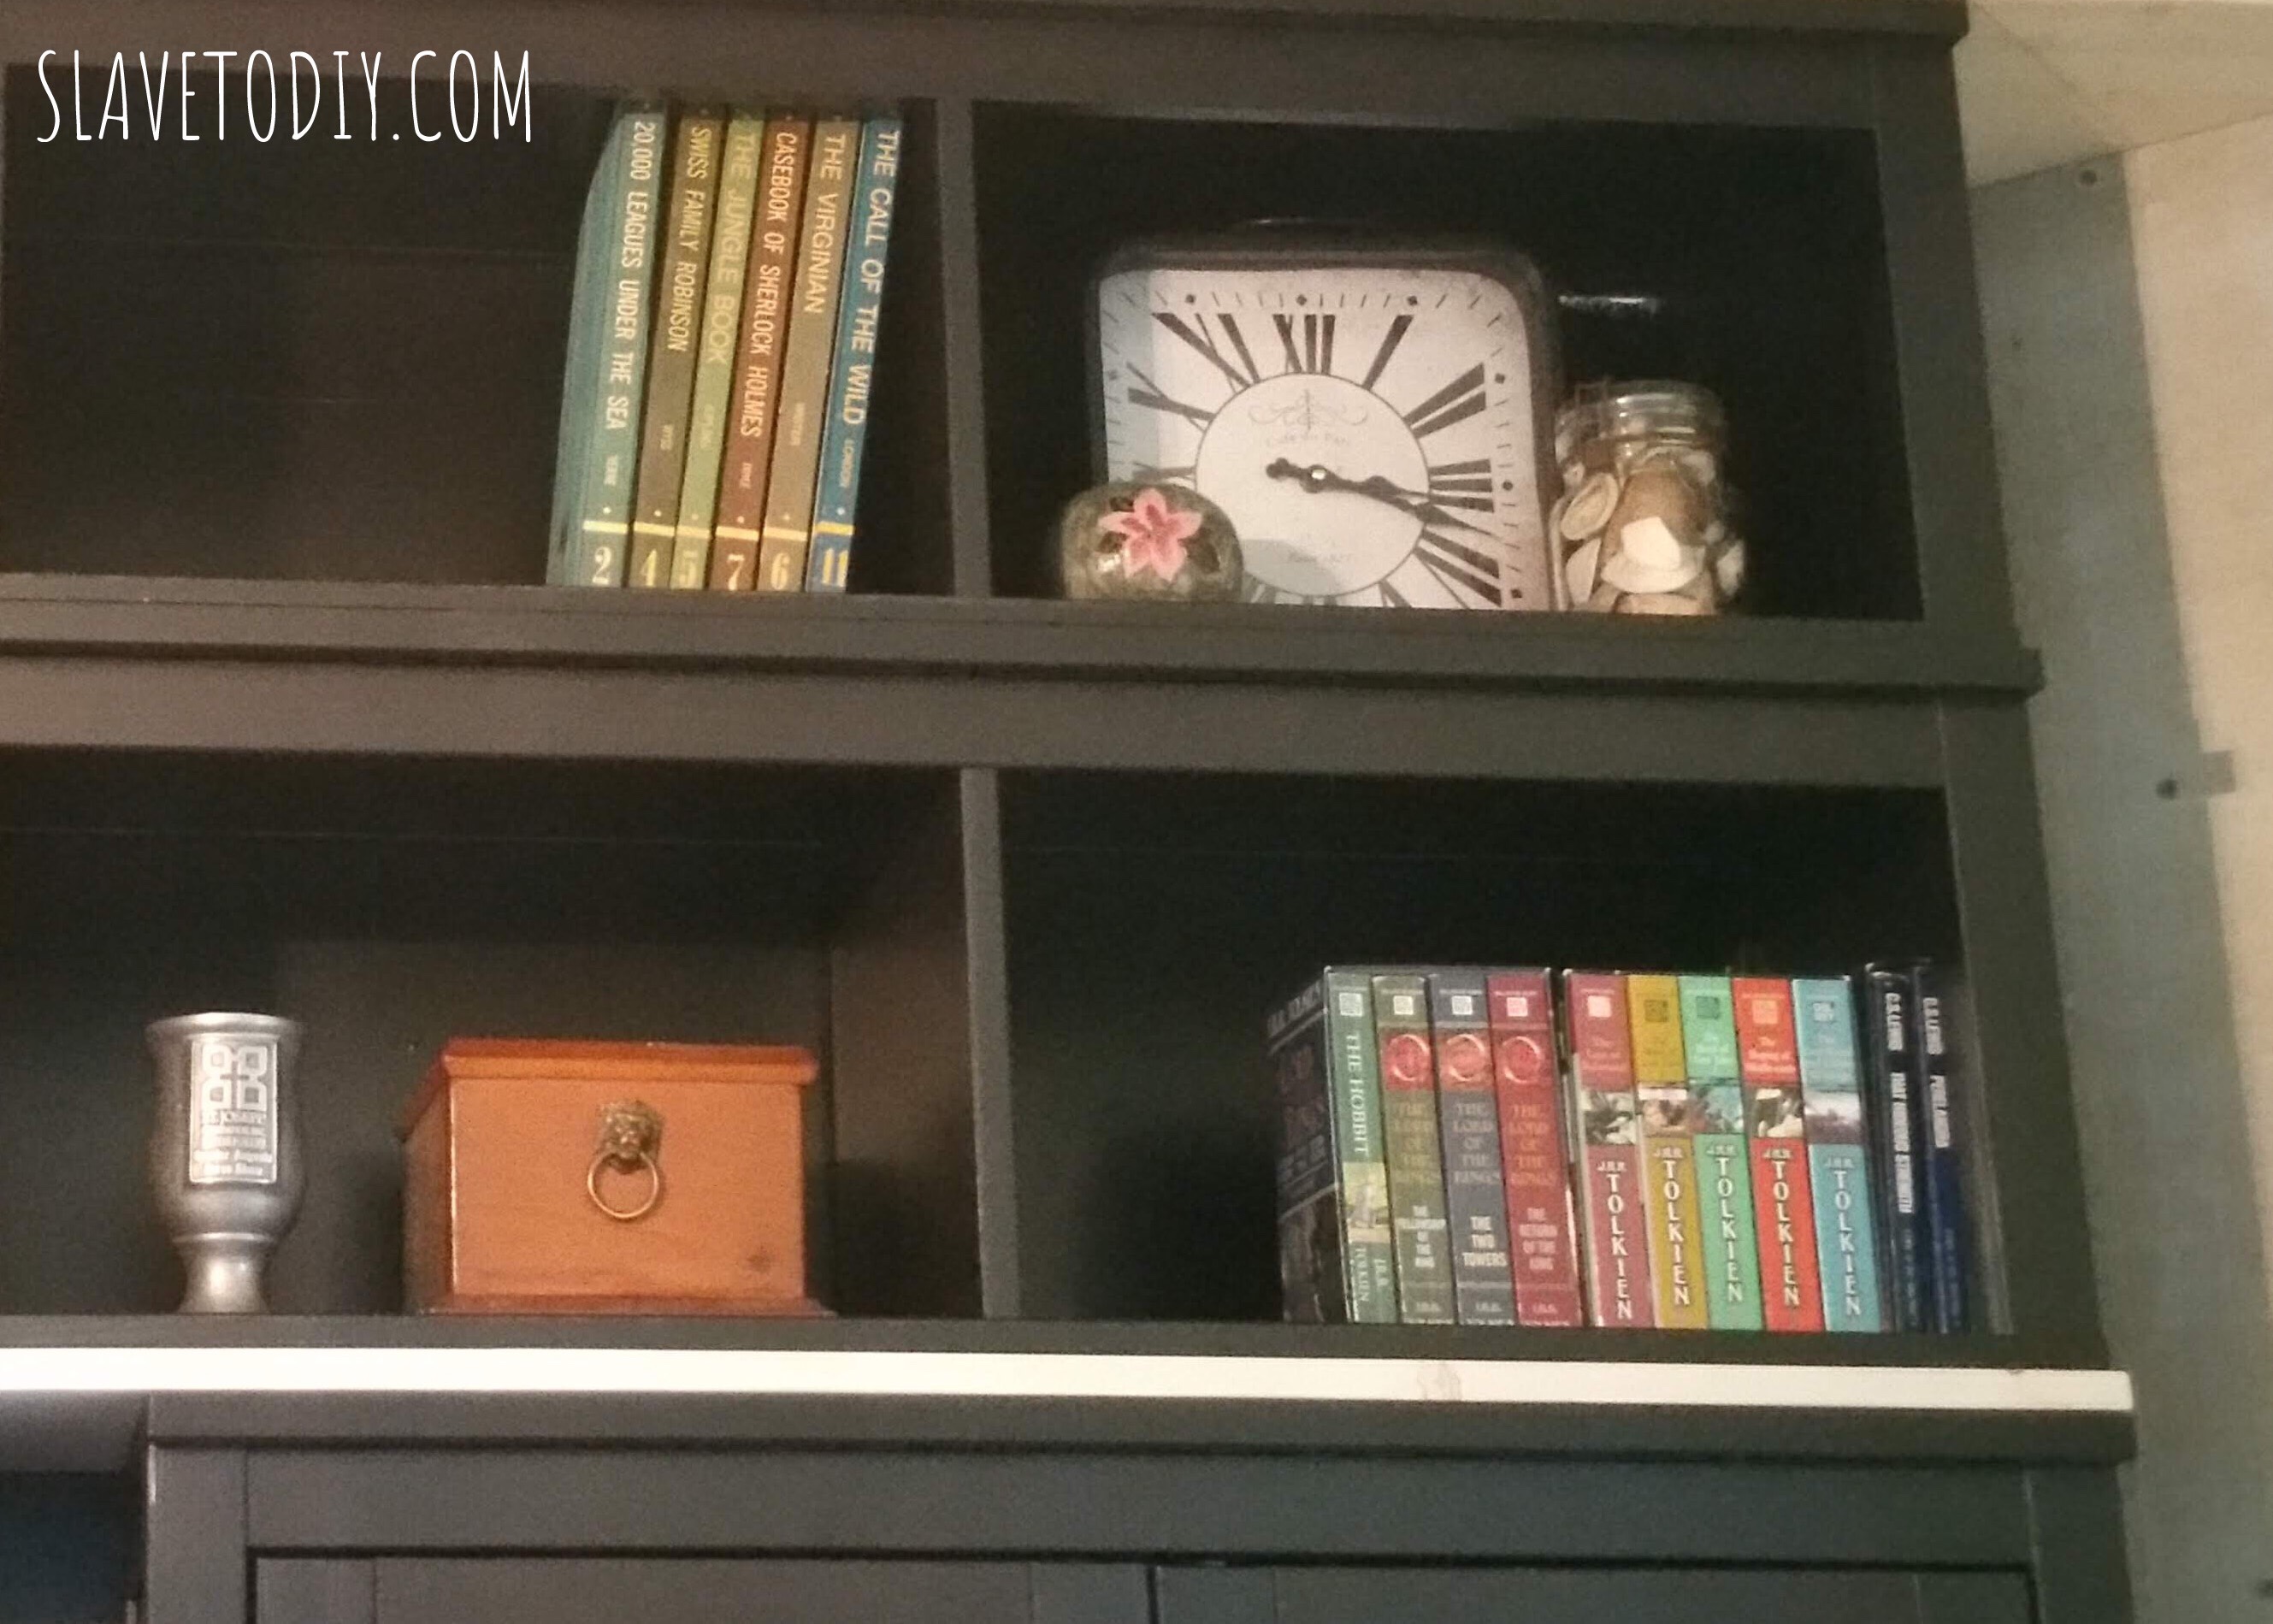
Let me take a step back. I understand the need to have a nicely styled bookcase. I GET IT. My bookshelves in common areas are grouped in muted color families and they look fantastic (if I do say so myself). I have some really NEAT books. I have collected them over the years. I have a true vintage/antique book collection. I love it when people ask me about them or where I picked them up. I’m proud of my collection. We might be the only freaks left in the country with bookcases that hold real, actual books.
Please excuse the unfinished bookshelves.
But, I have to be honest: it actually makes me ANGRY to see books reduced to shelf decor. I see ads everywhere all of the sudden for FAKE BOOK SETS. Yes, I said FAKE BOOK SETS. Restoration Hardware (which I normally love) has entire collections of blank-paged books which you can get for the bargain price of hundreds of dollars. Are you freaking kidding me? Books filled with blank pages. That people buy. To look like they have real books. This feels really, really fraudulent. WHO ARE THESE PEOPLE? ARE THEY WALKING AMONG US?
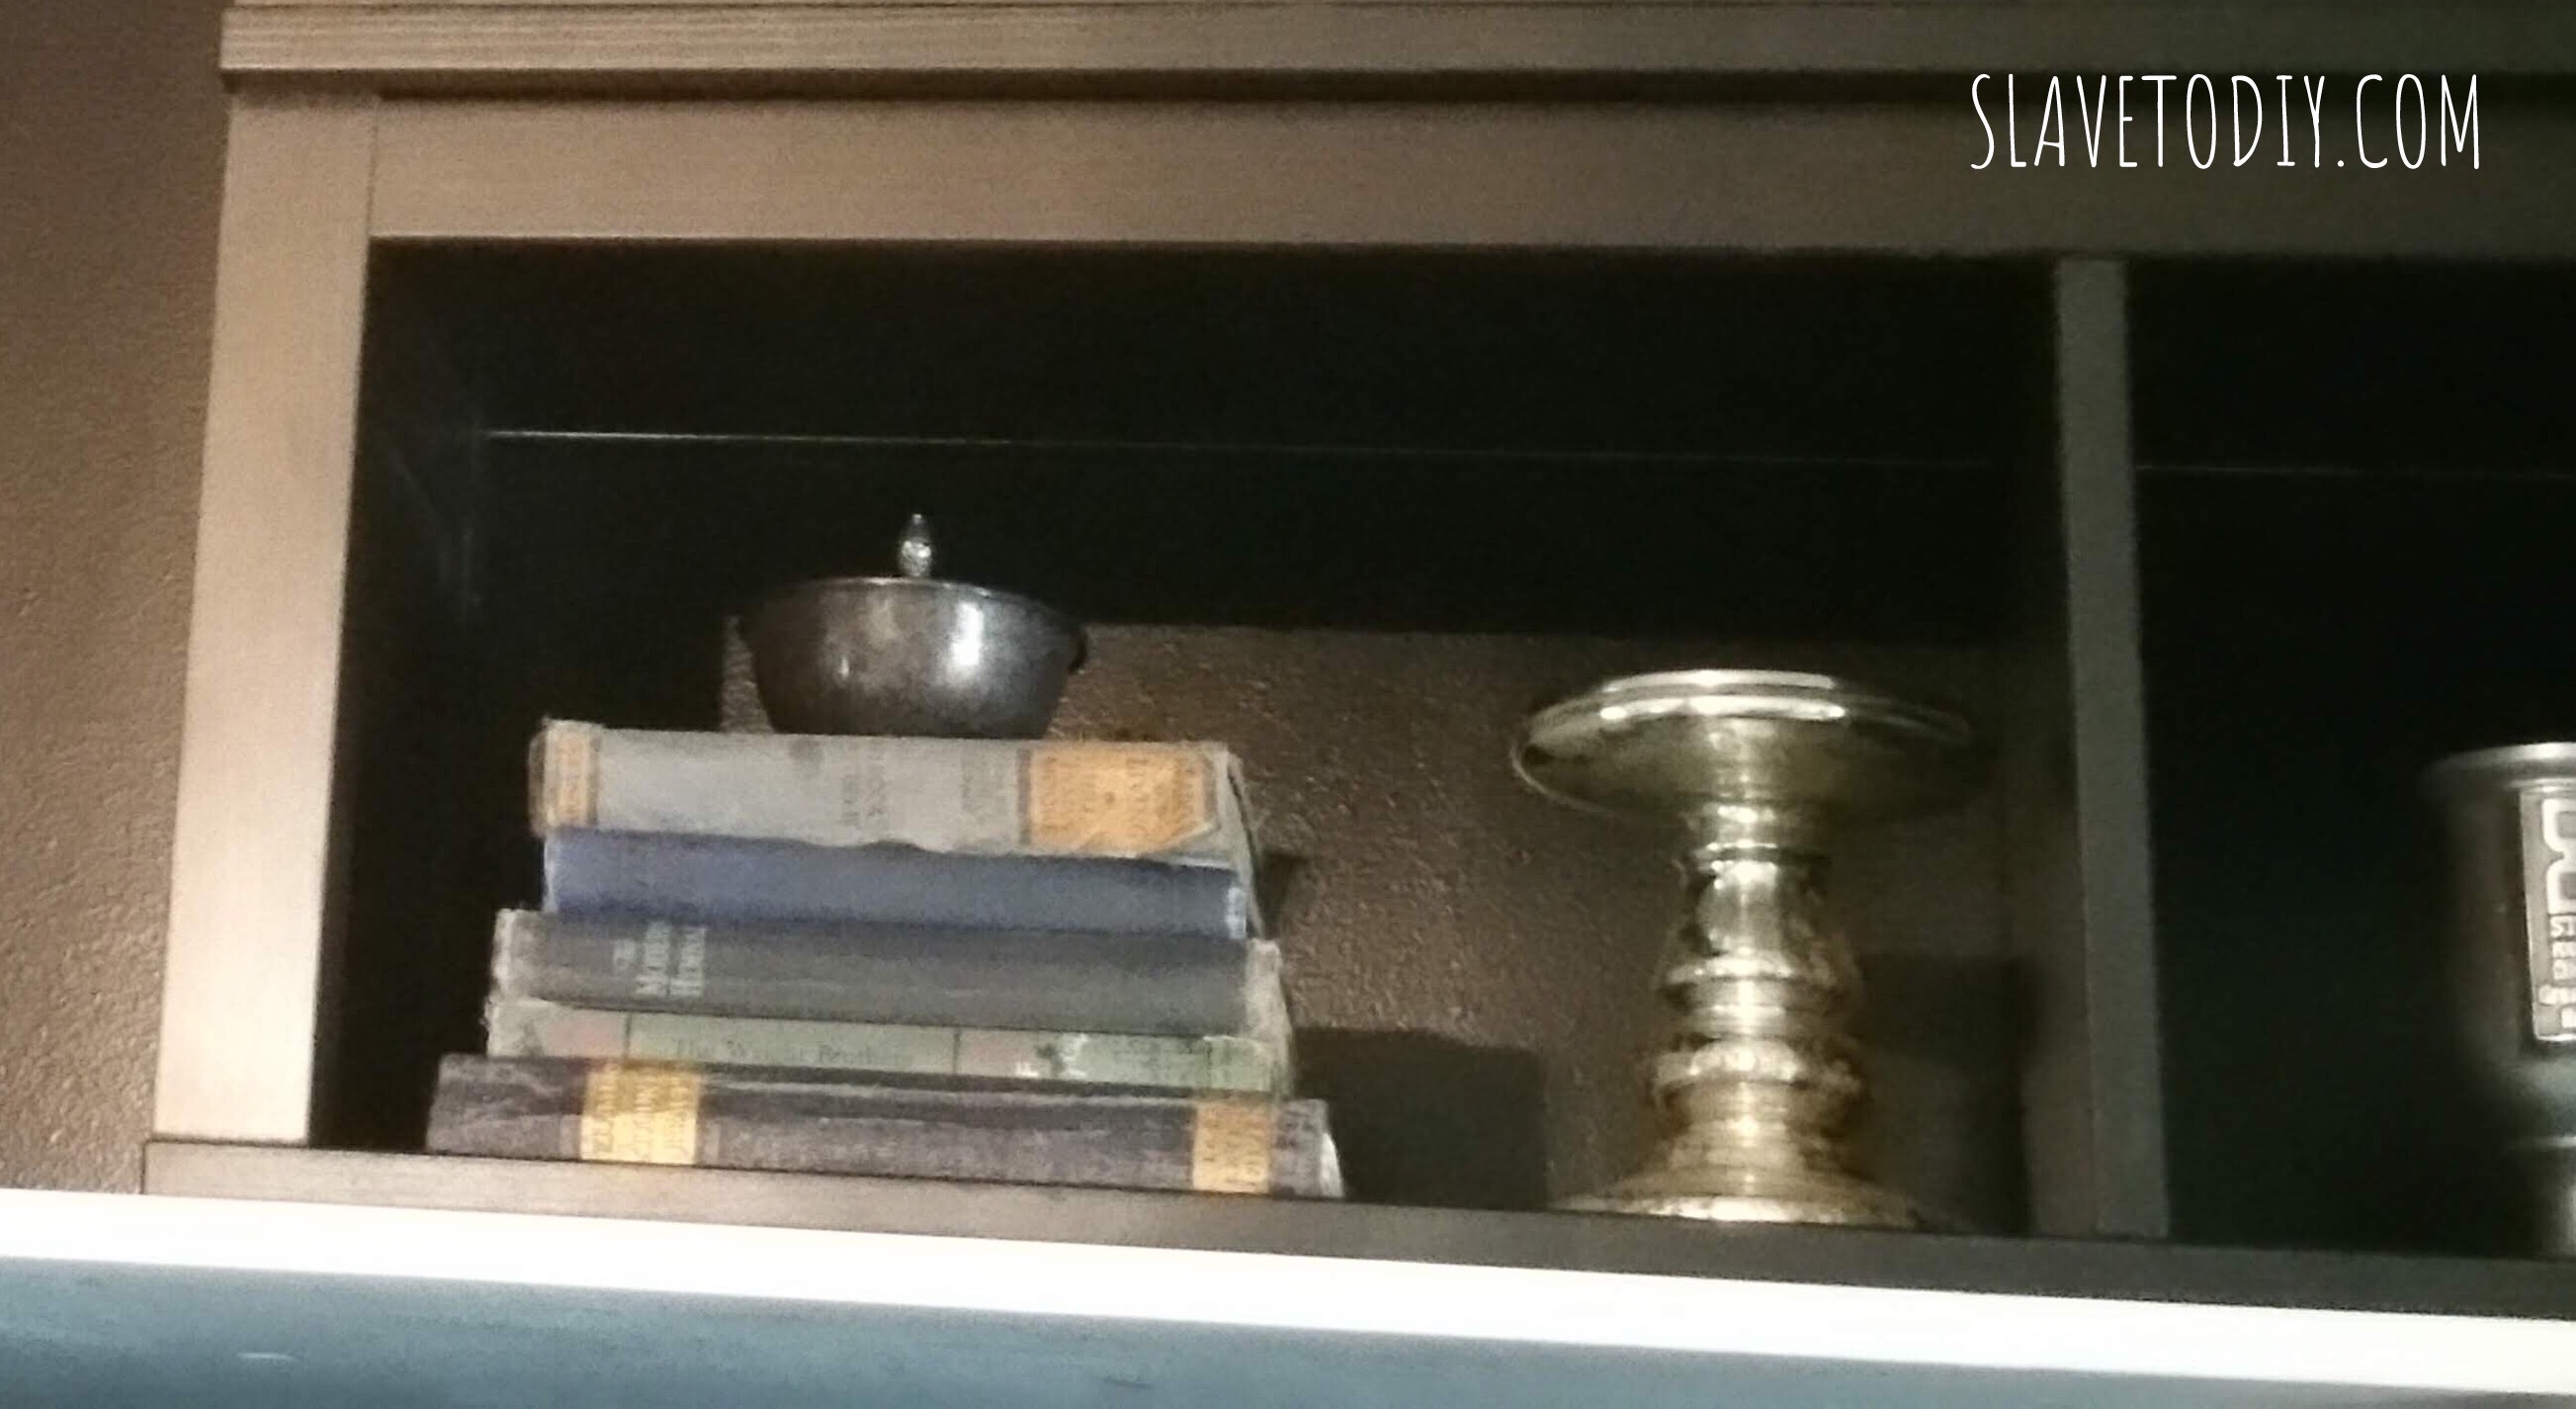
Hello, pretty, muted blue collection.
Can you imagine going to a friend’s house and seeing your favorite book on a shelf only to find it’s empty? As you pick it up and open it, you exclaim, “I had no idea you were a Jane Austen fan! I just love her, don’t you?… What the…” The pensive, confused, awkward silence that followed would be embarrassing for everyone involved.
Look, in the event you absolutely have to have some “book decor,” I have an idea: Go to a damn used bookstore and pick out some books! You don’t even have to read them, just pick out titles that seem interesting to you. That way, in case of apocalypse, or GOD FORBID the wi-fi goes down, you can leaf through something interesting. Used books are WAY cheaper than buying these ridiculous blank page book sets and they inspire far less anger in people like me. I know I’m responsible for my own emotional stability, but for the love of all that is holy, have a heart.
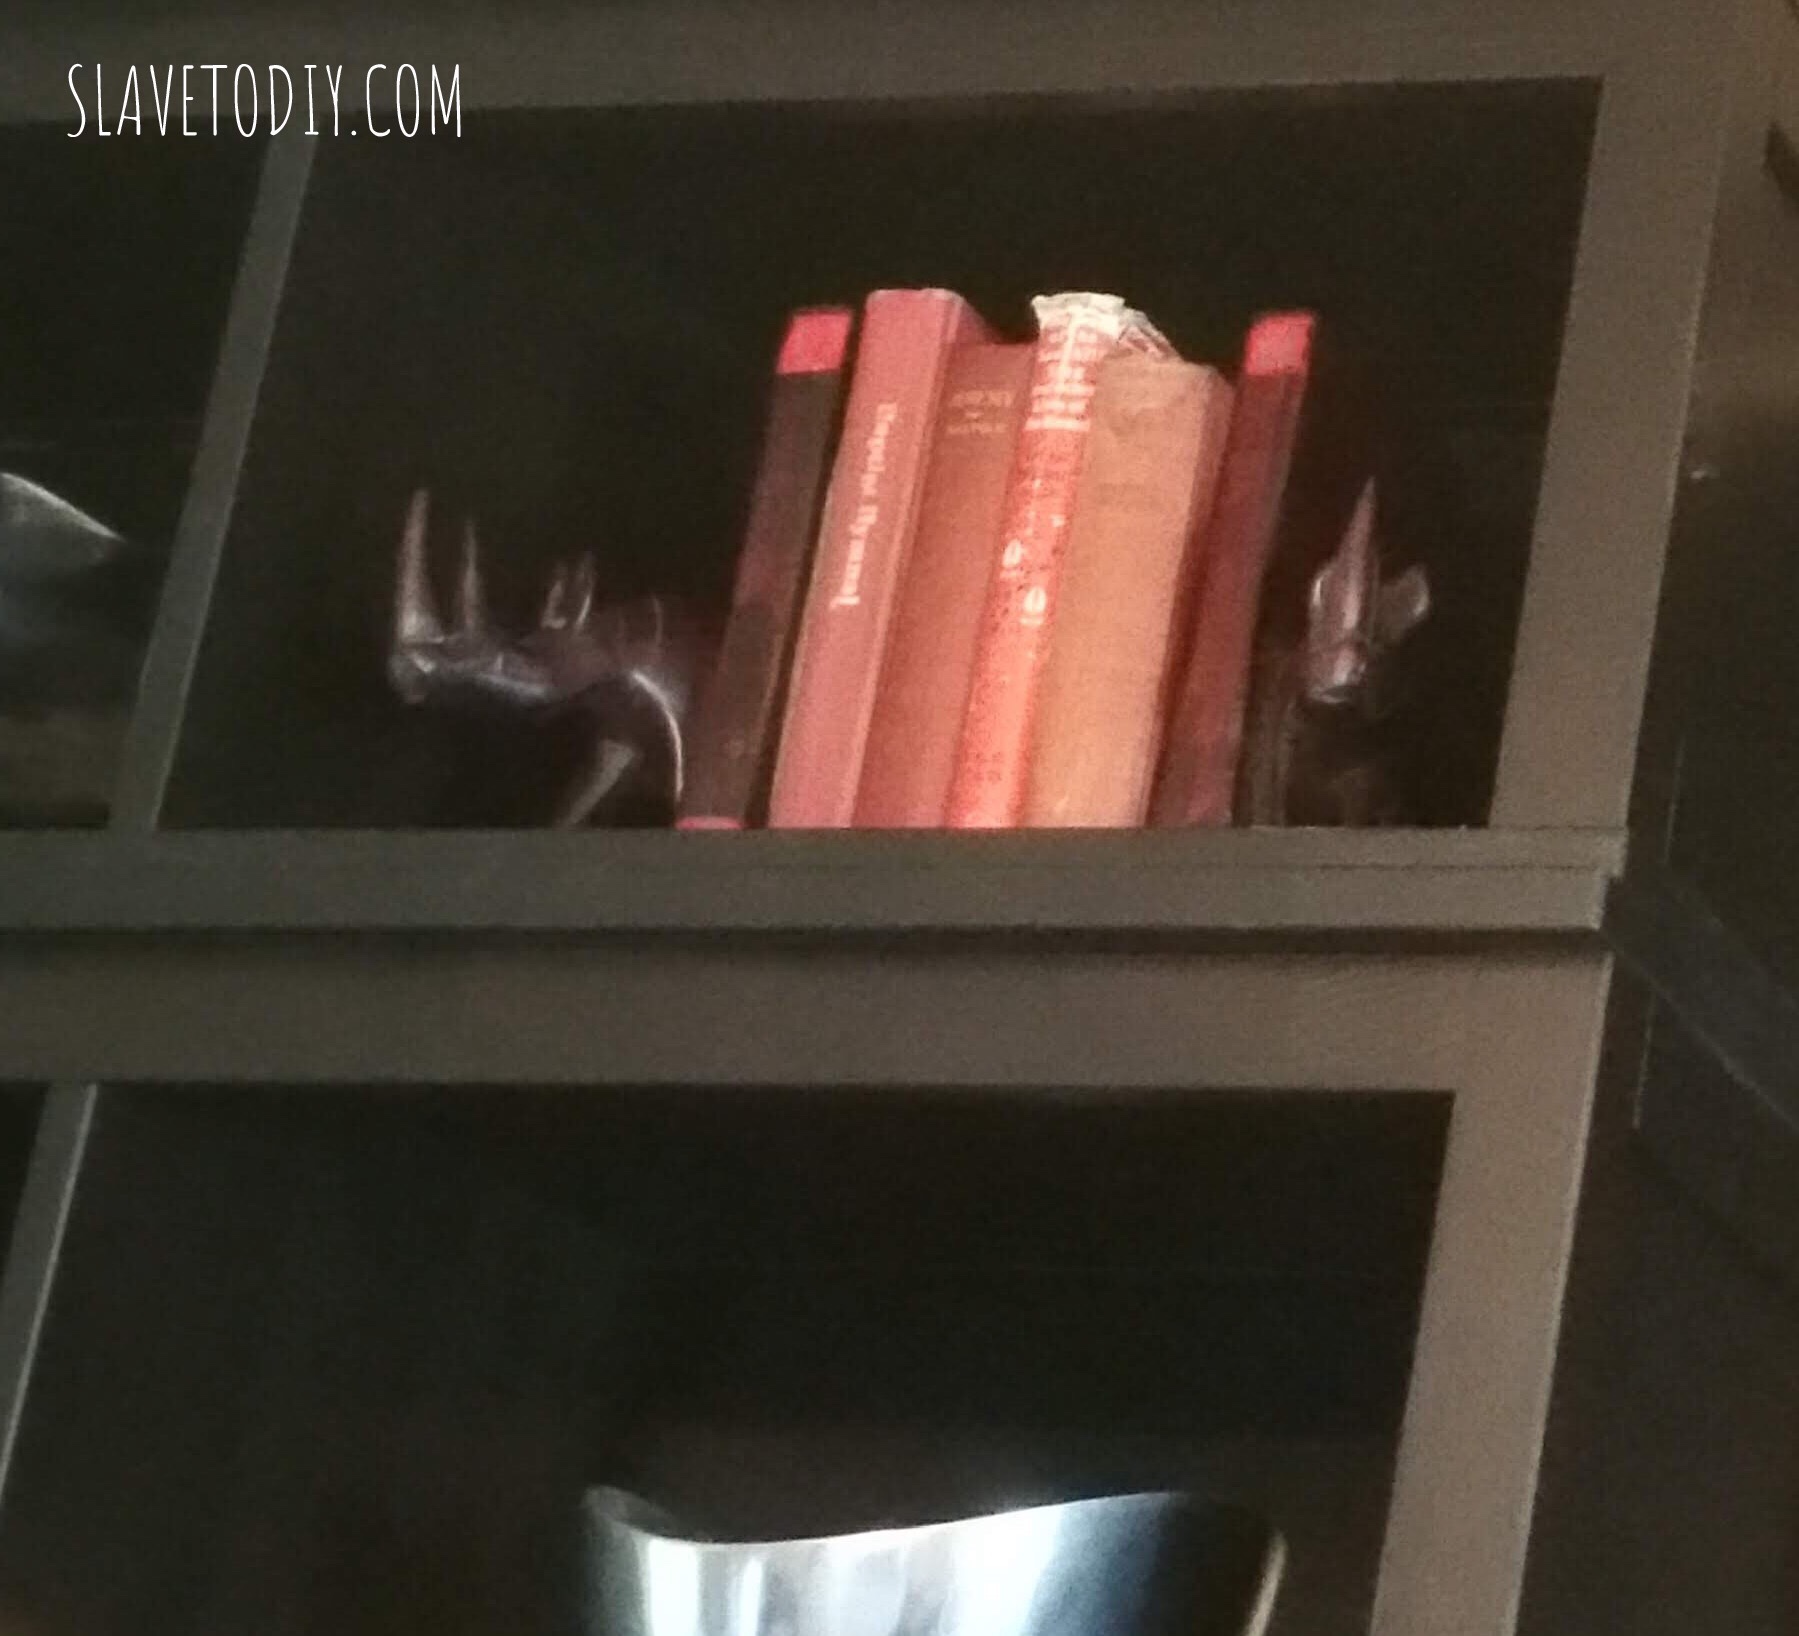
Carefully selected titles, in a warm rhinoceros sandwich.
How in the world are people supposed to judge you by your books if they’re backward in your bookcase? How are they supposed to know what kind of person you are if they can’t see your carefully selected and displayed titles?
What if they opened one of your books and found the pages blank?
Don’t let your visitors find out that you’re 1) Intellectually void or 2) As empty and soul-less as the blank books masquerading on your shelves.
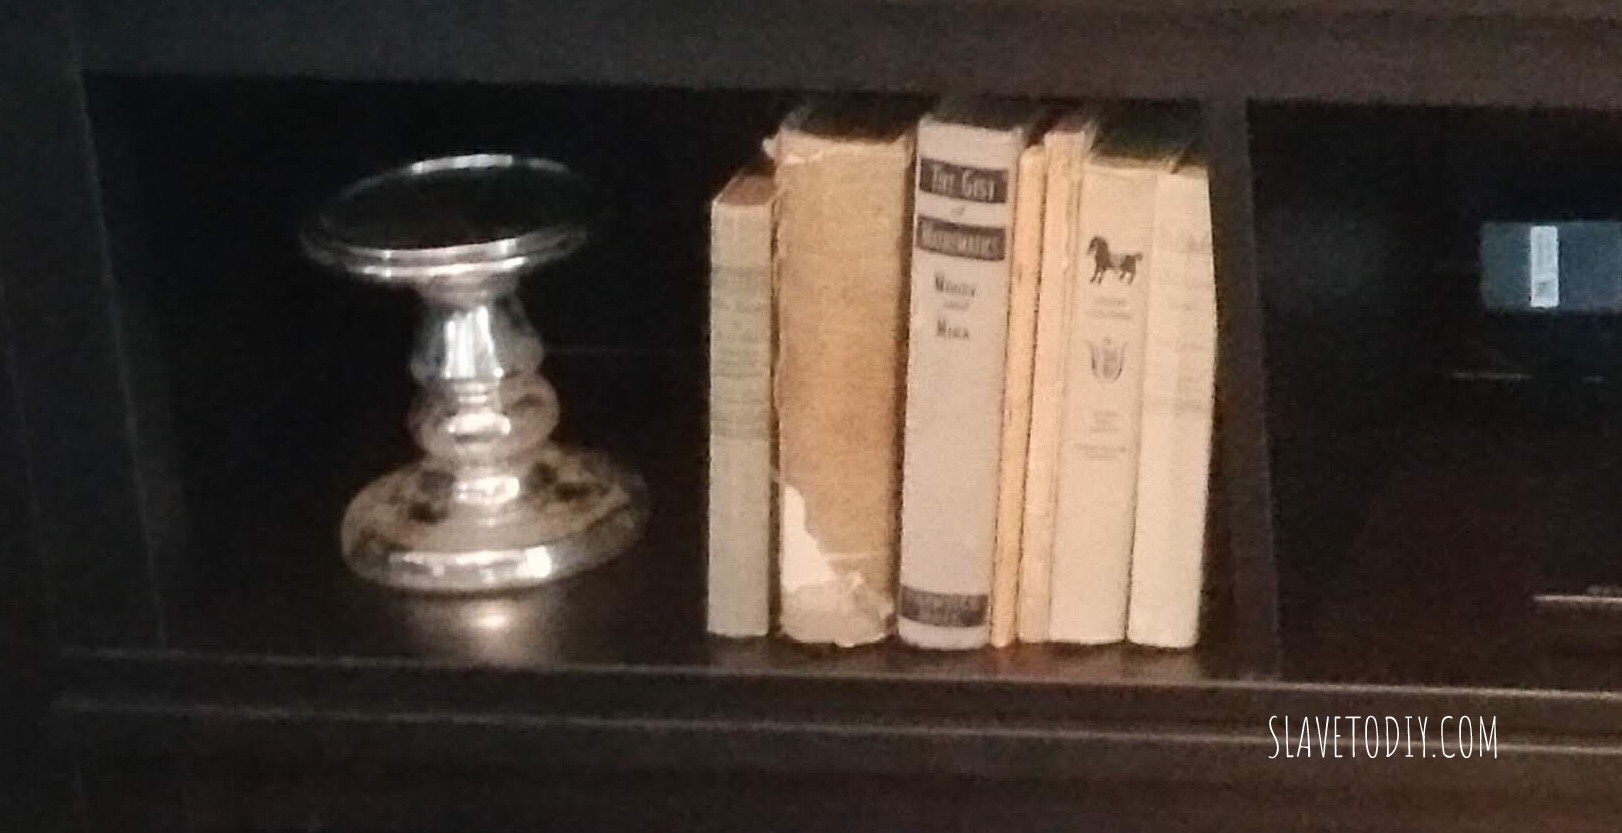
Real, actual books.
I’m being a little cheeky here, but, seriously… It makes me sad. I was a bookworm as a kid and I’ll admit I’d probably be bingewatching netflix on my smartphone like every other teenager if I were young today. But, it makes me sad. It makes me scared for our future as a society if books are just something we dress builtins with and dust once a week.
Please, please don’t do it.
Isn’t this the coolest? Also, real, actual books.
If I may, and you’re feeling REALLY uncreative, here are some options that won’t make your Academic-Snob friends cringe quite so much:
Book sets for built ins that look like antique books but actually have hidden storage inside. There are a gazillion options on Amazon and Hobby Lobby to name a few.
Actual vintage book sets, such as Harvard Classics in monochrome sets.
But seriously, you really should take an afternoon, find a book shop and pick out some neat books. Smell the dust. Take your kids’ smartphones away and drag them with you! Experience the thrill of the hunt! The satisfaction of the kill! Get out. Discover. Explore. Read. I highly recommend it.
Aaaaaaaand, I’m off my soapbox.
Thanks for stopping by! Feel free to leave comments below and check out more of our fun blog posts here.
*Legal stuff:
I am honest about my experiences with different products and write because I enjoy it. I do however, have the opportunity to earn money for my writing, also.
Slavetodiy.com is a participant in the Amazon Services LLC Associates Program, an affiliate advertising program designed to provide a means for sites to earn advertising fees by advertising and linking to amazon.com. Amazon offers a small commission on products sold through their affiliate links. Each of your purchases via our Amazon affiliation links supports our cause at no additional cost to you.
If a blogger links to an Amazon product (with a special code for affiliates embedded in the link), and a reader places an item in their “shopping cart” through that link within 24 hours of clicking the link, the blogger gets a small percentage of the sale. Amazon links are not “pay per click.” If you click on the product link and stay around Amazon and purchase something else, however, I will get a commission on that sale.
Slavetodiy.com is also a VigLink affiliate advertiser which works similarly.
So, here’s the deal. Sometimes it’s super expensive to create a breathtaking transformation to your house, and sometimes it’s FREE. Sometimes all you need is a little elbow grease (and maybe some basic supplies you already had on hand) to make a huge impact.
*This post may contain affiliate links. Please see the full disclosure at the bottom of the post.
This is the second time I have taken down the railings at a home that we own. The first time the porch was basically at ground level and it was a no-brainer. The impact was immediate- INSTANT curb appeal. I loved it. See the complete “after” transformation on the old house we sold in 2016 here.
Okay, it’s a little hard to see the LACK of railing there because of the out of control hydrangea. Trust me. The railings were removed. Details on that crazy garden you can see here.
When we moved in to our current home it had those same railings, but they were serving an entirely different purpose- safety. The porch is a few feet off the ground. In the middle of our epic and back-breaking front garden project (which you can check out here) I decided to rip them out. I knew that the dirt would end about a foot below the front porch/deck so it would be safe to take them down. I feel the need to say, “I’m not telling you to take your front railings down. I haven’t seen your house. It could pose a safety hazard.” Please consider safety: toddlers, old people, clumsy people, etc. as you make the decision to keep your railings or not. We may eventually put in black, wrought iron railings, but for now I like it just like it is.
Here’s a picture before my project A.D.D. took hold:
So, I seriously stopped mid project, stole one of Rainman’s hammers, and started swinging away. As I suspected, the sellers had covered up rot with white paint (pretty typical) and the railings came down in about 30 minutes. Of course, this made me realize the bicycles and miscellaneous crap all over the front porch would need to find a new home (not exactly HGTV ready).
Tip: Painting and caulking front porch columns and railings is an ANNUAL MAINTENANCE ITEM. It should be on your list. Otherwise they rot. Case in point.
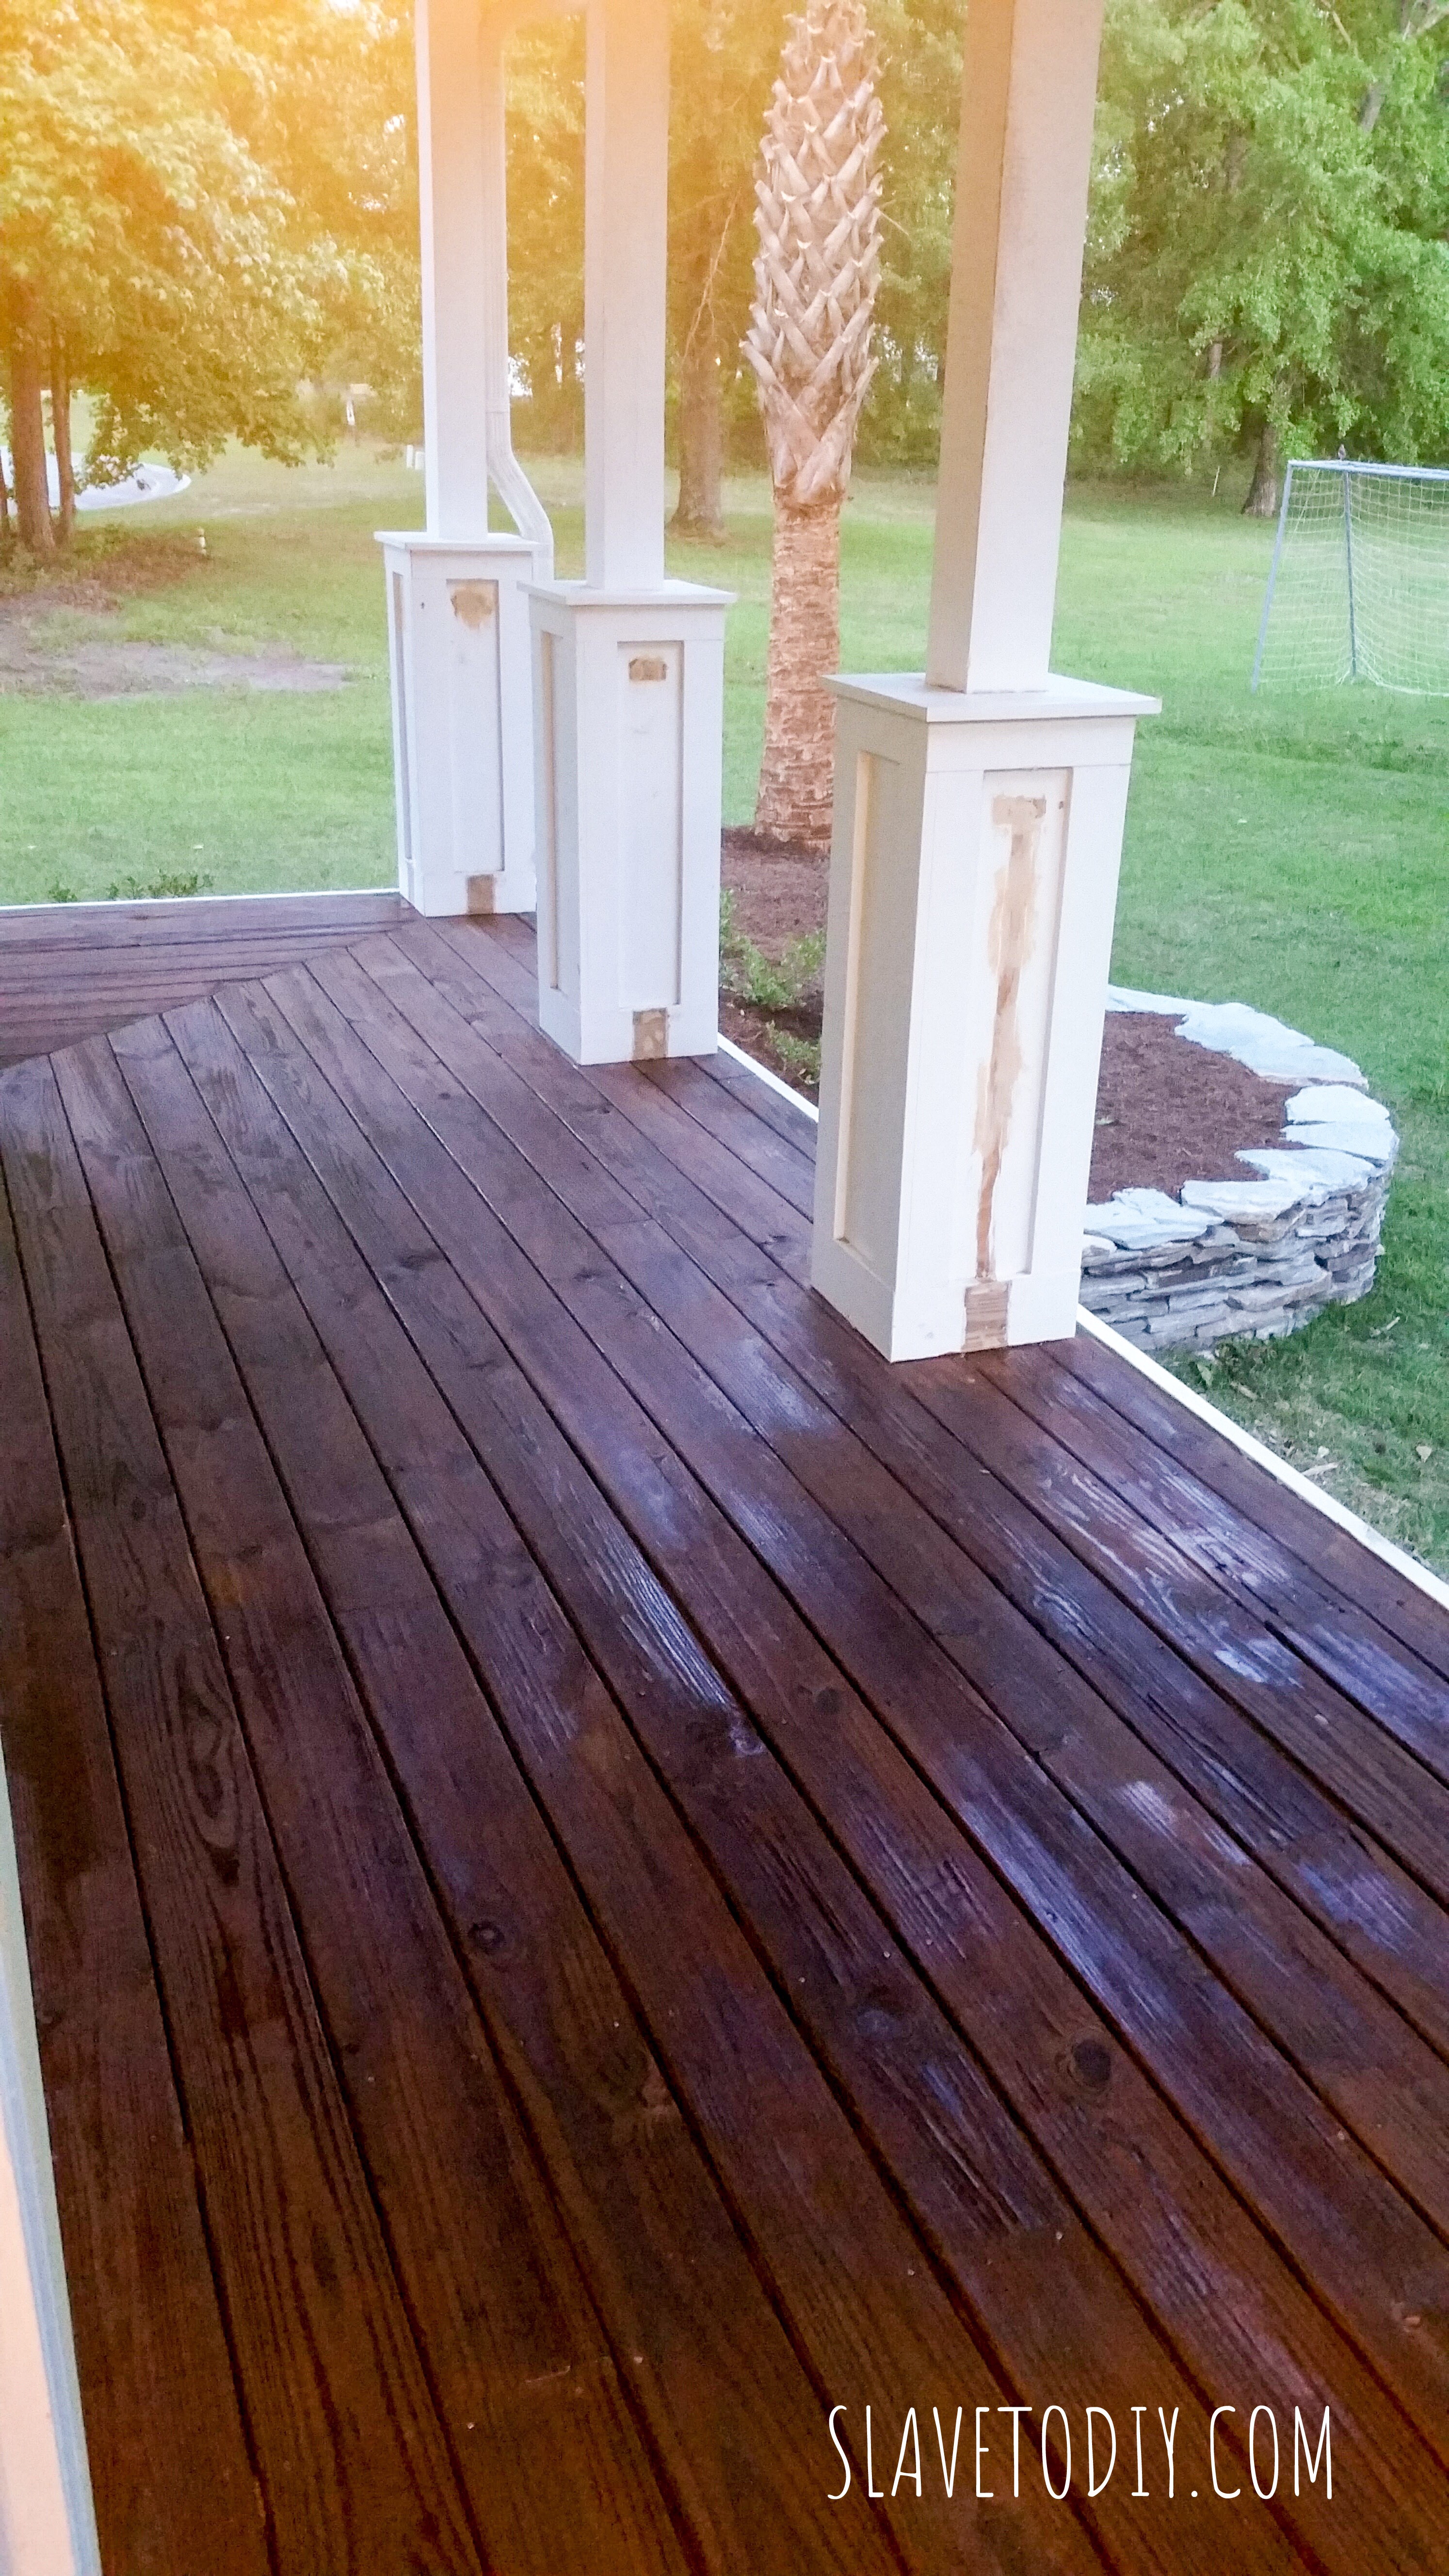
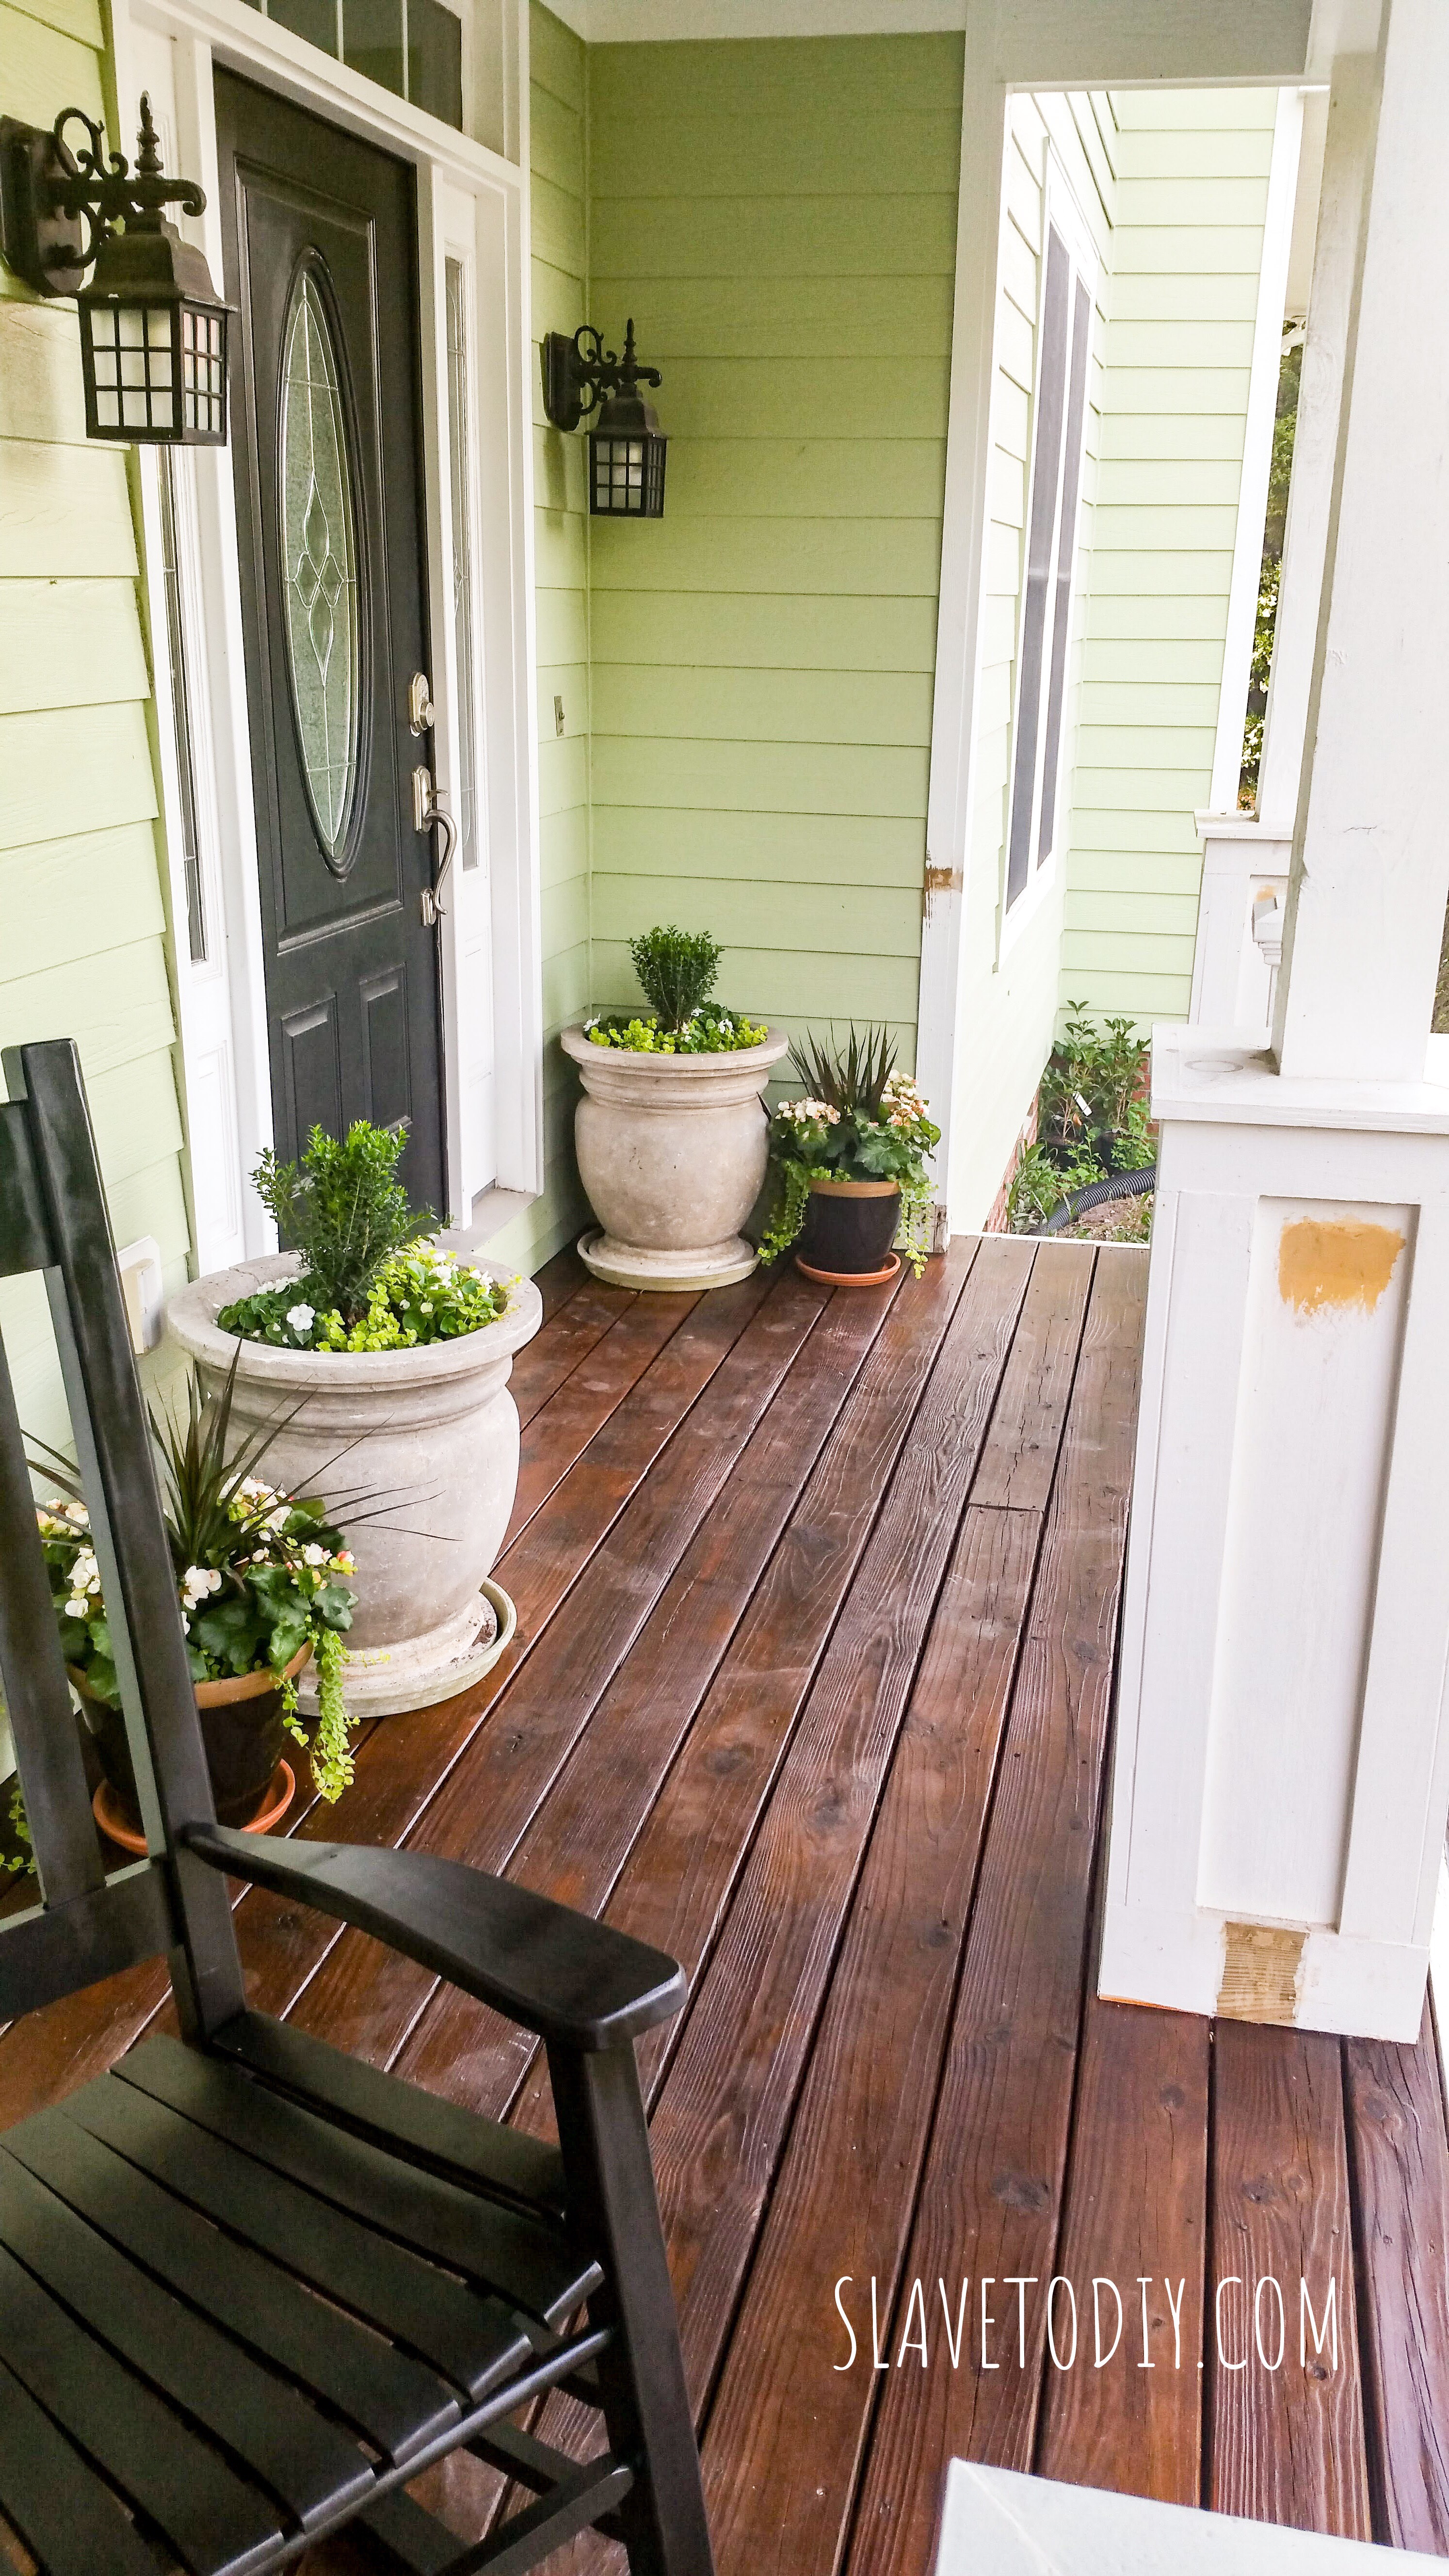
And here’s the front porch immediately after taking the railings down: Sigh. I’m in love.
Above you can see the pile of railings (dry/rotted wood is excellent for starting bonfires) to the left there and the bare wood on the columns where the railings used to be.
While I was having A.D.D. and happened to have a nephew visiting (can I get an AMEN for cheap, available labor???) I decided to get some painting and staining done.
I had him sand the front deck and get any loose deck screws back in. If you don’t have a good sander, I have several of these. I have one I keep for just drywall finishing, then others for miscellaneous sanding projects. They’re cheap enough it doesn’t break my heart to burn them up or buy a new one, but they’re surprisingly hardy.
I also had him sand around where the railings had been on the posts so we could get a fresh FLAT coat of white and the seam would be invisible.
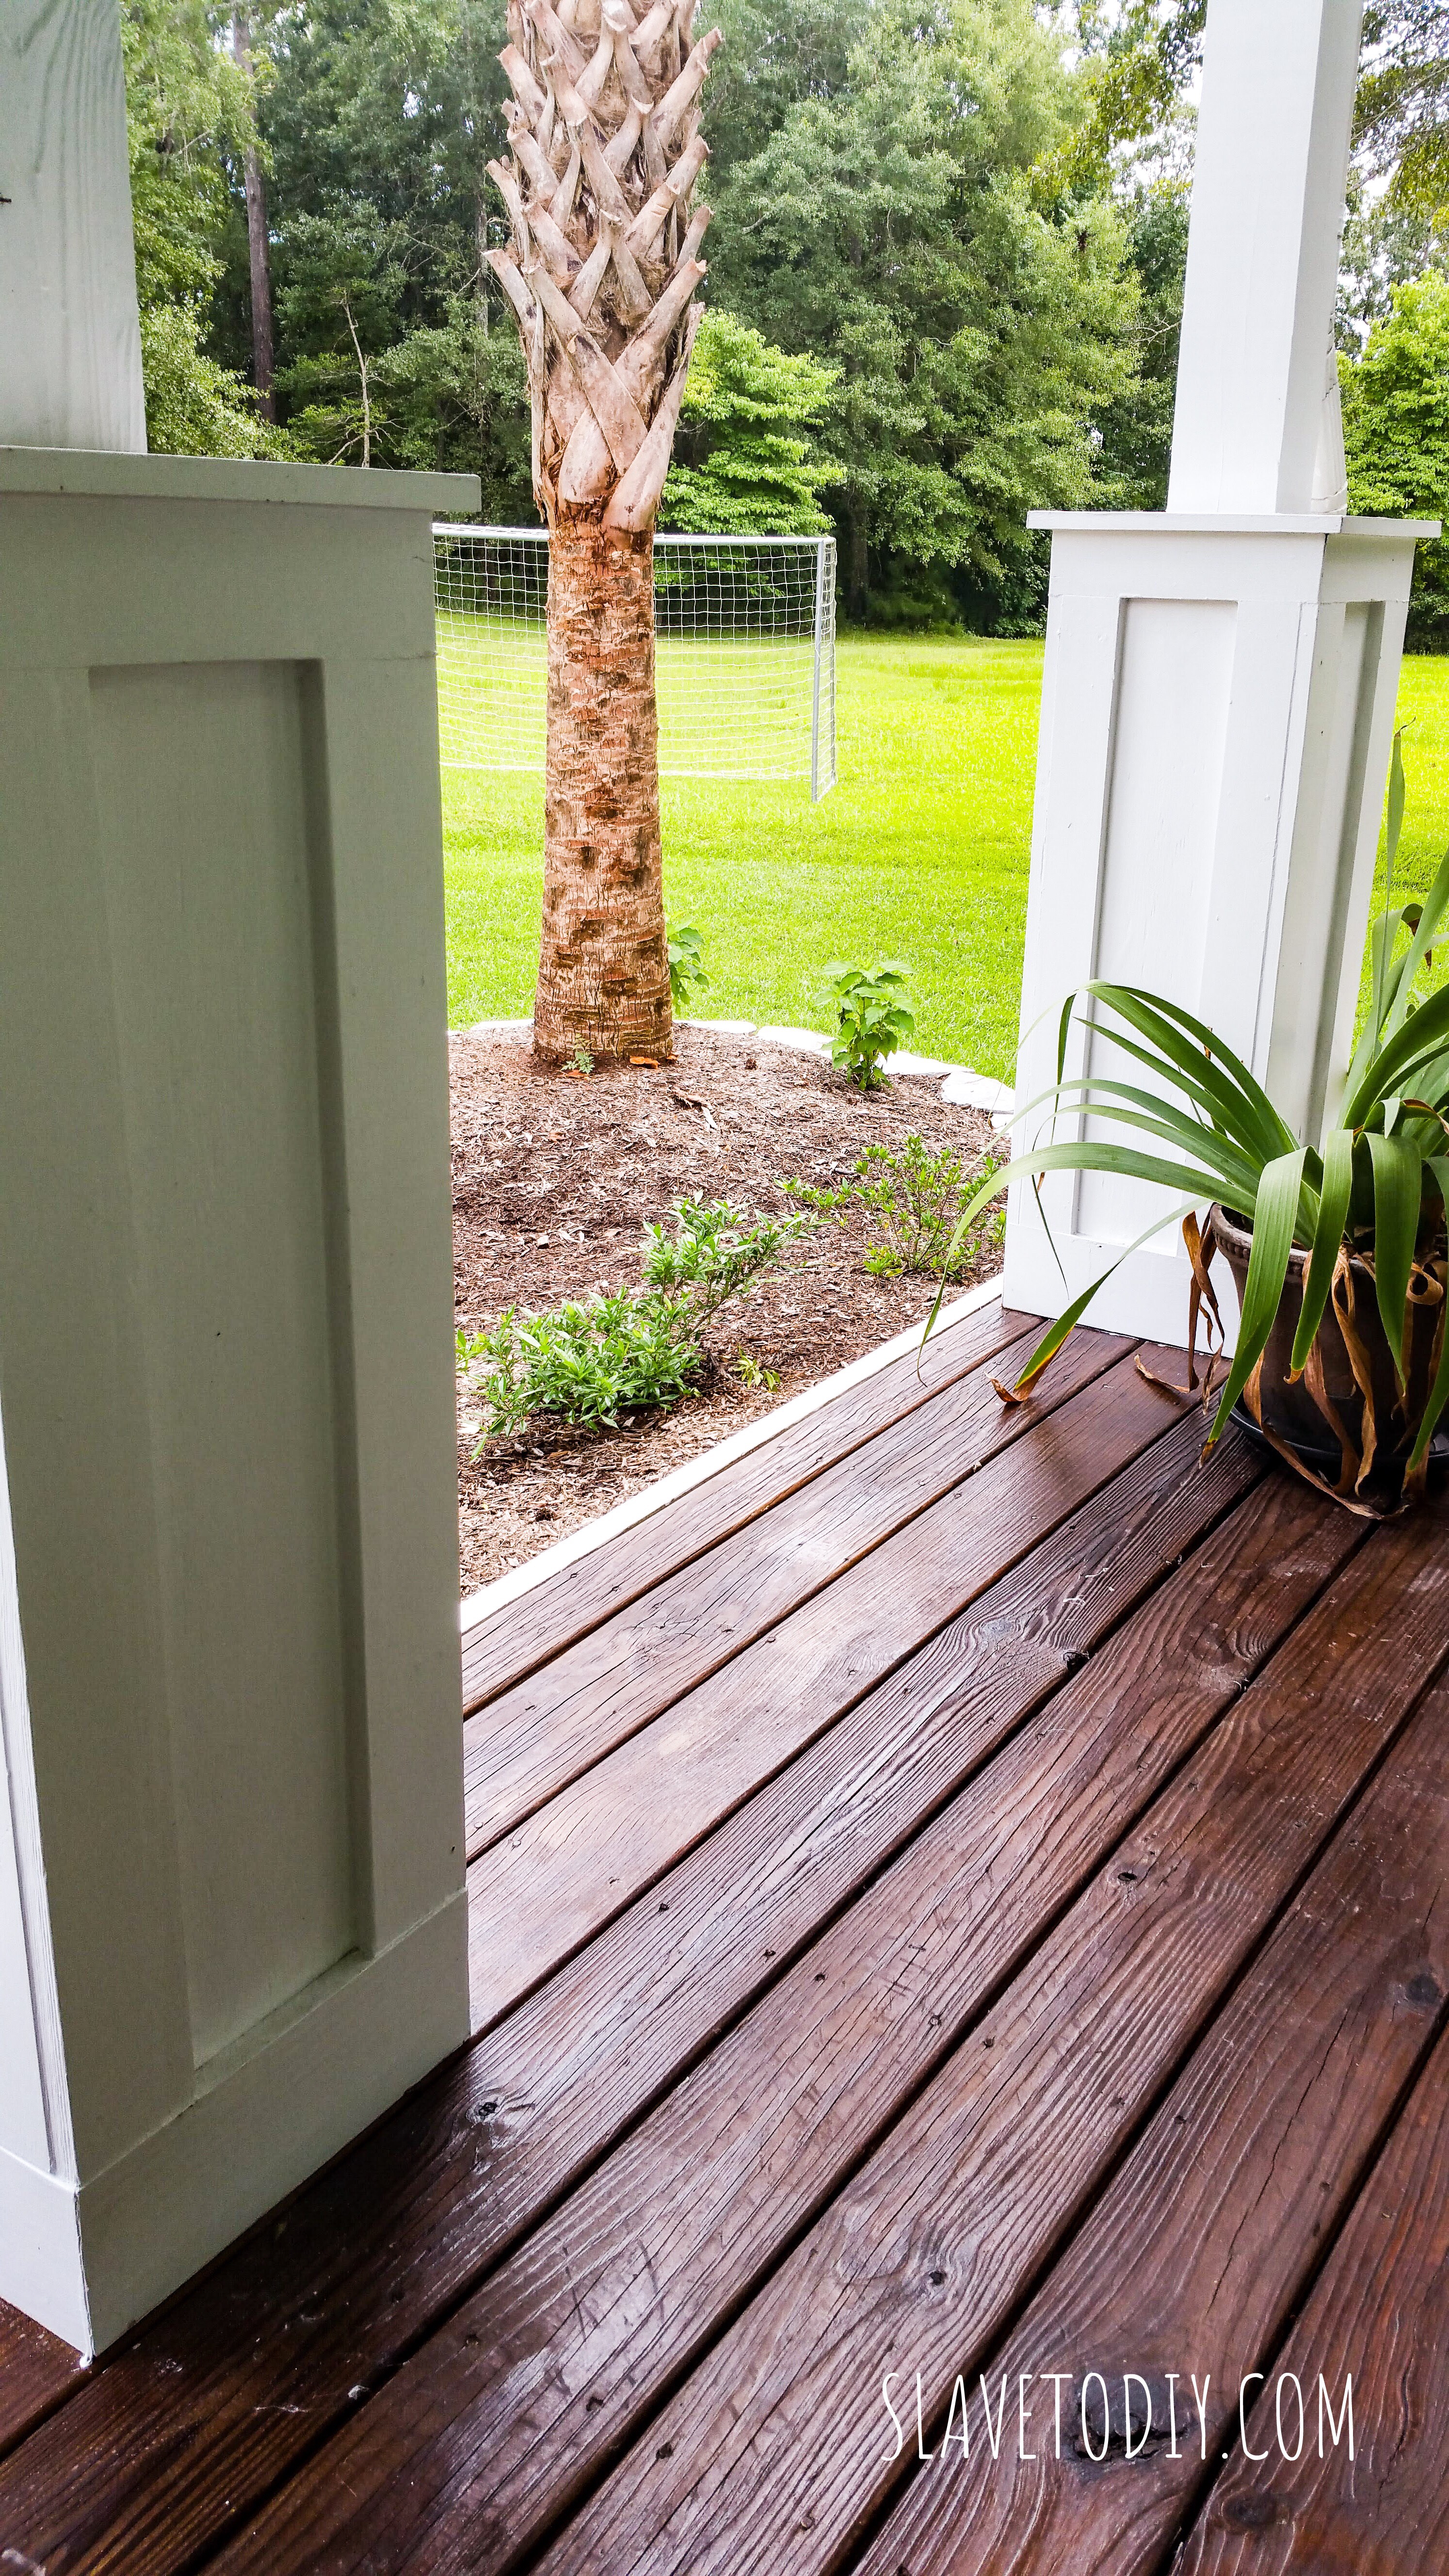
I splurged on some good deck stain and sealant and we did two coats. For stain, I recommend throw away brushes, which you can get pretty cheap at Lowe’s. True story: in seventh grade my son did a science project on which of three deck stains offered the best moisture protection (based upon water absorption and weight). I used that brand. I love the color and it’s amazing the difference it makes. It ended up being a smaller splurge than I expected because that huge front deck took less than a gallon for two coats.
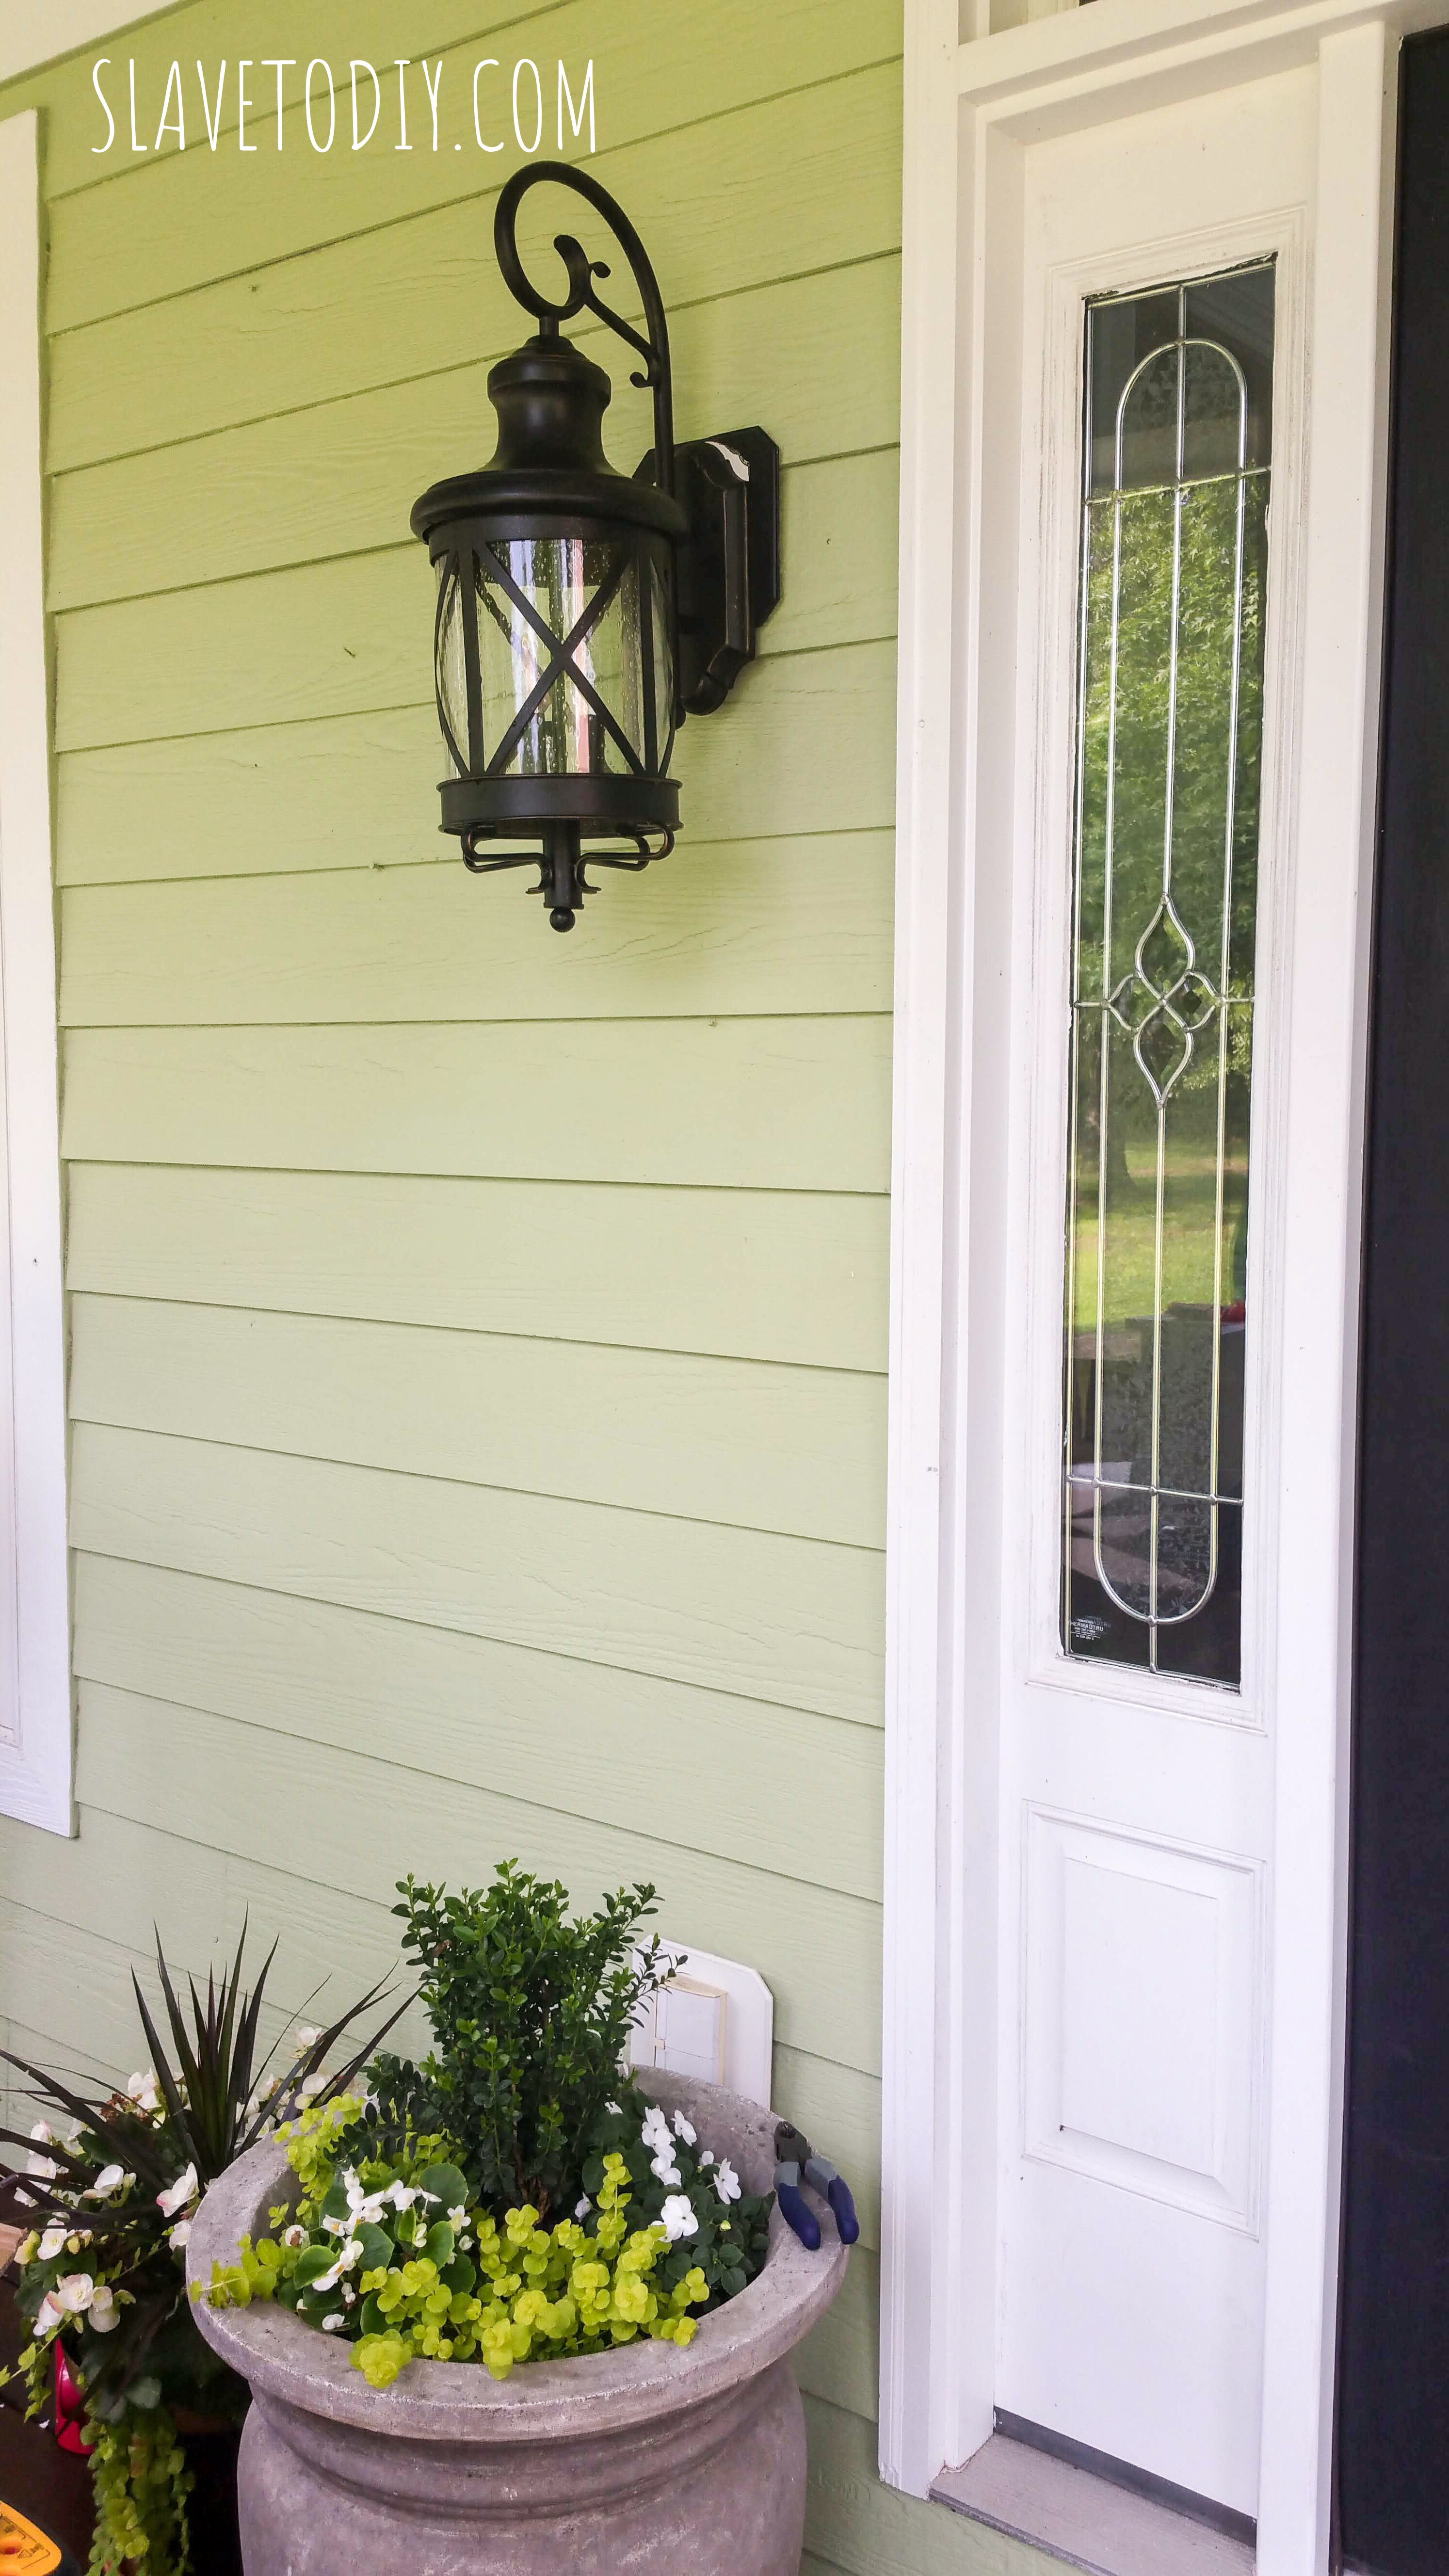
So here we were, working along and I noticed those damn builder grade lights. Project A.D.D. strikes again. Yeah, those definitely had to go. I hadn’t even noticed them delaminating until I fixed all the other stuff.
So, we took the opportunity to change out the porch lights and found a great deal on really nice looking lights.
While we were out there I handed Rainman black spray paint to put a fresh coat on our 10 year old rocking chairs and little black table. He hit the rough spots with sand paper, cleaned and dried them, tightened the hardware, then spray painted. TADA! Good as new.
We will be doing another update soon (cough* cough*) on working shutters for the windows. We are currently doing price comparisons on shutters and hardware. After the hurricane we realized we can’t spend two days putting up plywood every time we evacuate. Also coming soon, the tutorial on how to put up plywood over your windows before you evacuate for a hurricane.
Anyway, drum roll please…
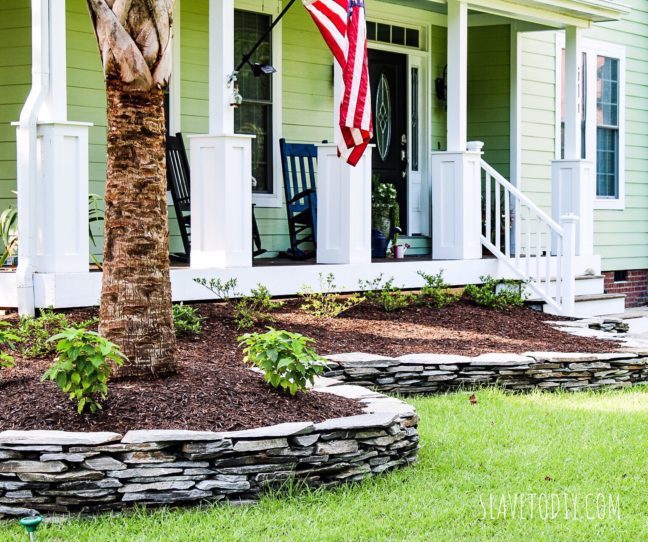
Doesn’t it look AWESOME??? Bear with me. The right side over by the staircase is still in need of rework. Here’s another view from the rocker:
Everything’s all nice and painted, stained, and ready to move on to the next thing! I just love how our mini-flip on the front porch turned out. Big impact for minimal cost!
Check out our other projects and wins and fails here. Thanks for stopping by!
*Legal stuff:
I am honest about my experiences with different products and write because I enjoy it. I do however, have the opportunity to earn money for my writing, also.
Slavetodiy.com is a participant in the Amazon Services LLC Associates Program, an affiliate advertising program designed to provide a means for sites to earn advertising fees by advertising and linking to amazon.com. Amazon offers a small commission on products sold through their affiliate links. Each of your purchases via our Amazon affiliation links supports our cause at no additional cost to you.
If a blogger links to an Amazon product (with a special code for affiliates embedded in the link), and a reader places an item in their “shopping cart” through that link within 24 hours of clicking the link, the blogger gets a small percentage of the sale. Amazon links are not “pay per click.” If you click on the product link and stay around Amazon and purchase something else, however, I will get a commission on that sale.
Slavetodiy.com is also a VigLink affiliate advertiser which works similarly.
This is not a staging checklist. It’s a showing checklist. So if your house isn’t staged yet, this article isn’t for you. There are a bazillion staging tutorials out there, but once you’re staged you’re ready for your first showing, and that’s where I come in.
This post may contain affiliate links. Please see the full disclosure at the bottom of the post.
So you get the call from your realtor. Hooray! Showing in the morning! So what now? Panic? No. Pop a bottle of wine? Maybe. Later. But, first…
So, how would I know how to do a fantastic showing anyway? When we sold our house two years ago we got top dollar and had multiple offers. Both times we were under contract in less than a week from the time the house was listed (our original buyers backed out when their co-signer changed their mind). I think that makes me an expert. Or a rockstar. Or possibly just experienced.
The Ultimate Pre-showing Checklist for Selling Your Home Fast!
I did a bunch of research and compiled a checklist to use so I wouldn’t stress out on showing days. The second time around we had multiple showings per day. Was I under pressure? Yes. But, cool as a cucumber. I had my list. And I really, actually used it.
Our feedback from the showing agents was overwhelmingly positive. It got a little ridiculous to be perfectly honest. Realtors started showing up with buyers that couldn’t afford it but just wanted to see it. Cause it was really cool inside. So, we became a temporary tourist attraction. Sigh. It’s hard to be so popular sometimes.
The point is, my list worked. And lucky for you, I’m willing to share with you so you can be a calm, popular seller, too. Sit back and wait for the offers to start pouring in.
So here’s the bottom line: You’re selling a lifestyle, not just a house. The buyers are looking at a house, but they’re really taking a peek at your lives. If they want your life, they’ll want your house. Your job is to seduce them into picturing themselves living there, and living your groovy life. You can do it.
The Ultimate Pre-showing Checklist for Selling Your Home Fast!
Decide what the coolest parts of your house are and tell a story about them. Control the flow of the house by luring buyers from space to space. If you have great entertaining spaces, set up a party scene. If you have an art studio, make it immaculate and inviting with a blank canvas set up. If you have an awesome movie/media room cue up a Nat Geo HD film that show off the awesomeness of the room and equipment. Here are the basics:
So some of the items on my list are not original. They’re common sense. I’m assuming things are basically clean (I hired maids to come weekly while we were on the market, and I whole-heartedly recommend it). Clean:
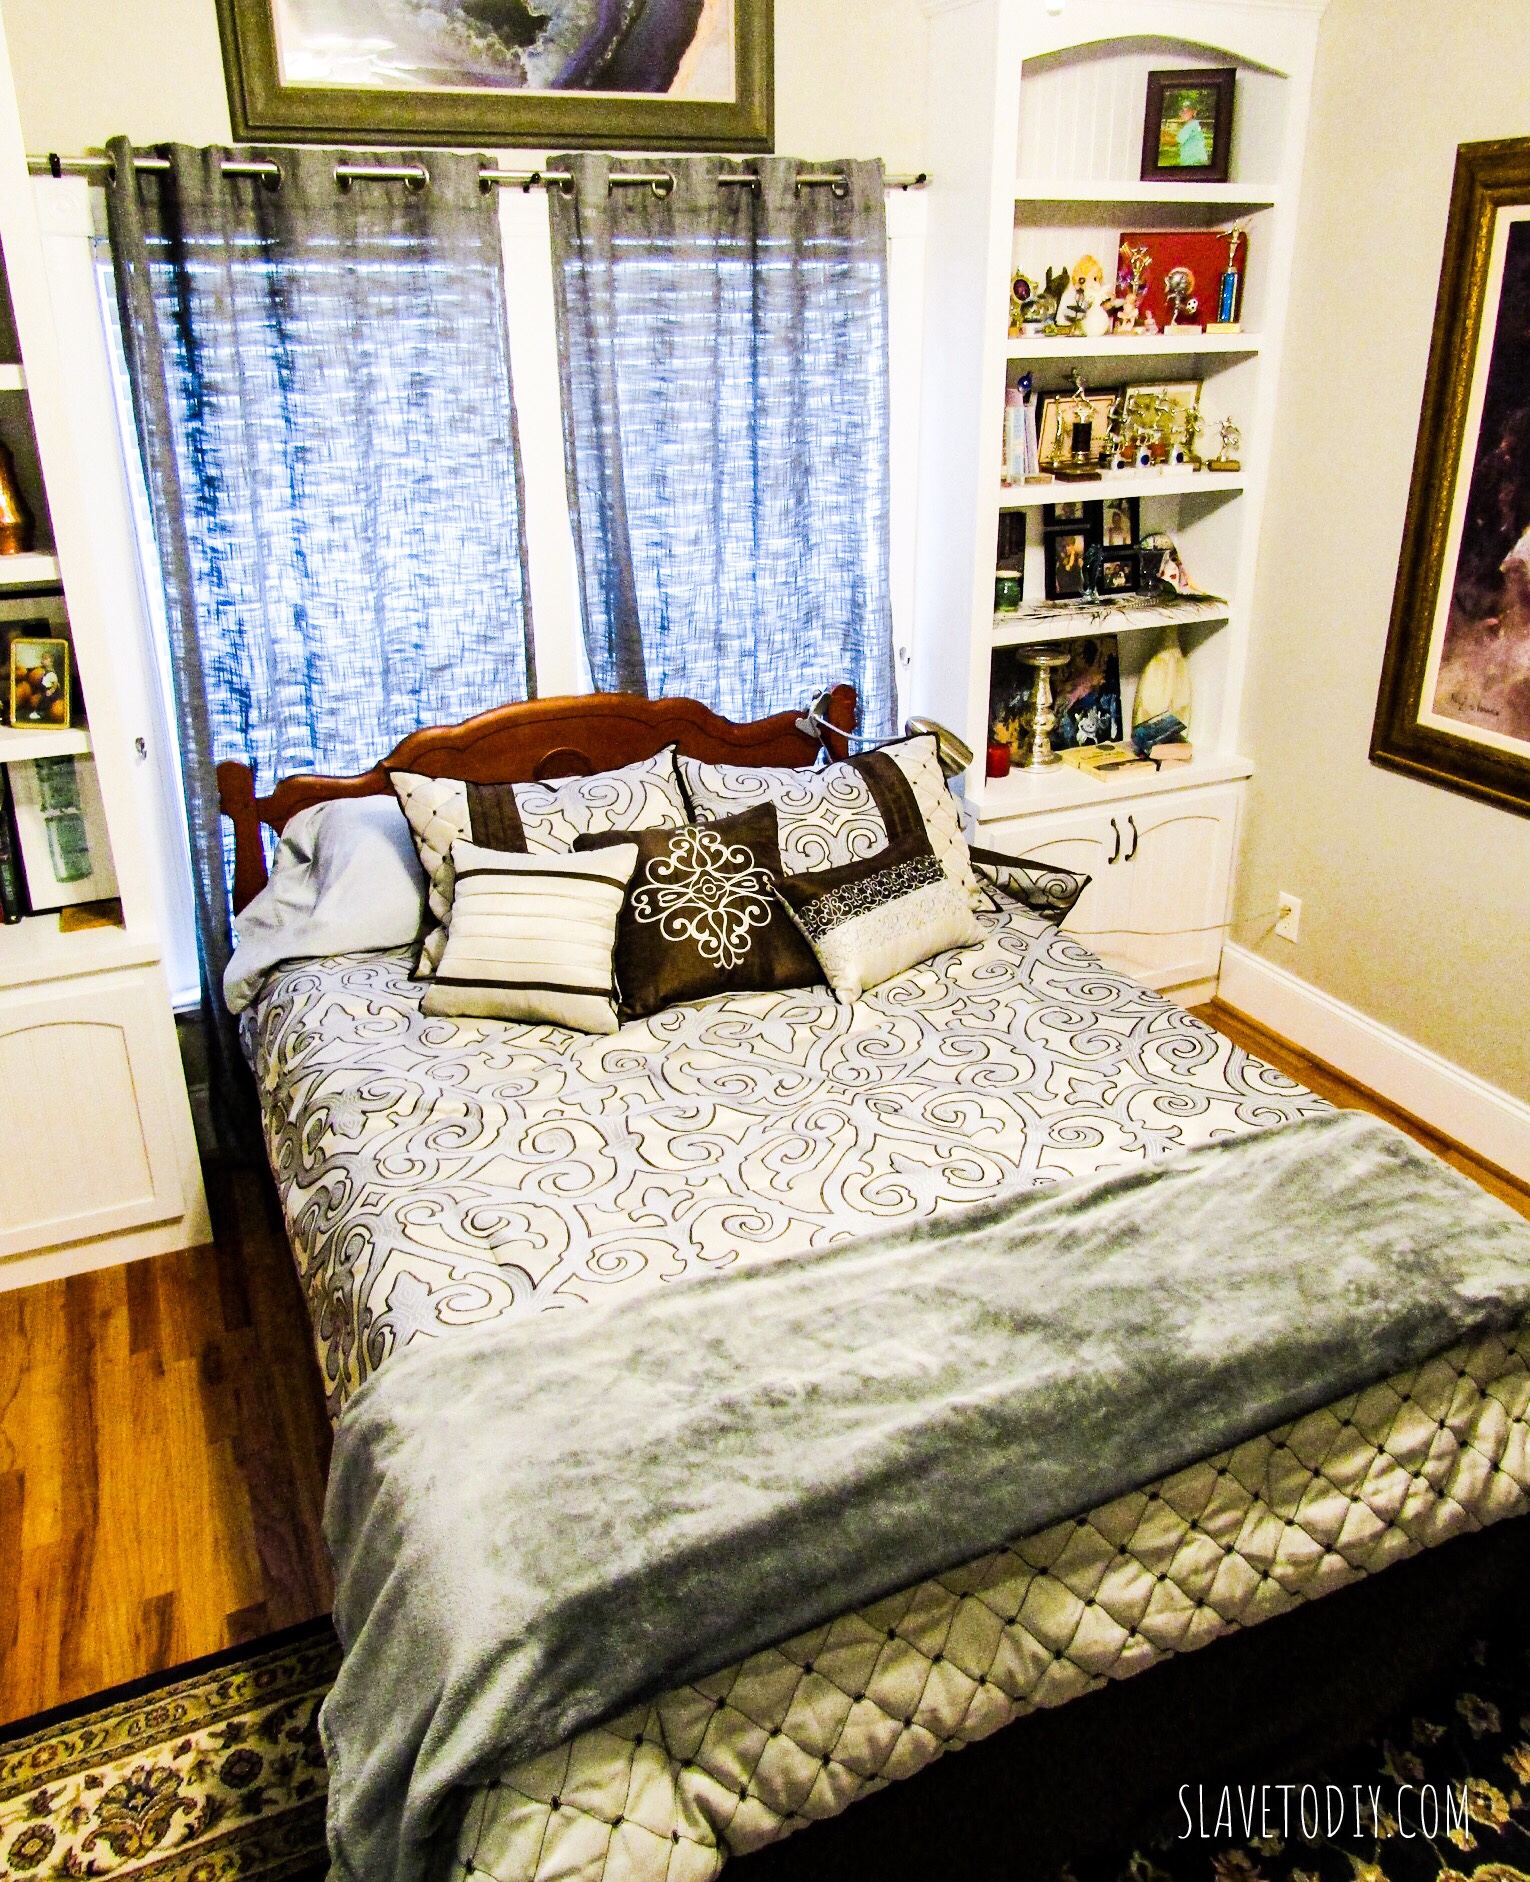
Make beds. I took the opportunity to get new sets during staging. Overstock usually has some nice, reasonable ones. It’s a lot of bang for the buck. If you really want to outdo yourself, shop (or just look at) the Pottery Barn bedding to get ideas for a well staged bed. Especially in the master bedroom, the retreat feel is important. (I am astounded by the number of beds I see in real estate photos with straightened-ish blankets and not so much as a bed skirt to cover the metal legs. Apparently these people are in no rush to sell the place.) The cool thing is… you can take new bedding with you, so go for it.
The Ultimate Pre-showing Checklist for Selling Your Home Fast!
Pick up. Nothing screams stress to most people more than an untidy house that looks like there isn’t enough organization/storage space. And remember, you’re selling a relaxing, organized, and clean house.
Do the dishes. It’s okay if they’re sitting in the dishwasher.
Sweep & vacuum. Seriously, leave the lines in the carpet. It screams, “we keep this place clean and well cared for.”
Wipe and clear the kitchen counters. Make them shine.
Check bathrooms. The smell of cleaner is okay.
Mow lawn. Pull weeds. (Never leave anything that says, “I’m work waiting for you to do when you move in here.”)
The Ultimate Pre-showing Checklist for Selling Your Home Fast! Pool is clean, ready for beach towels rolled on the chairs.
Specialty items:
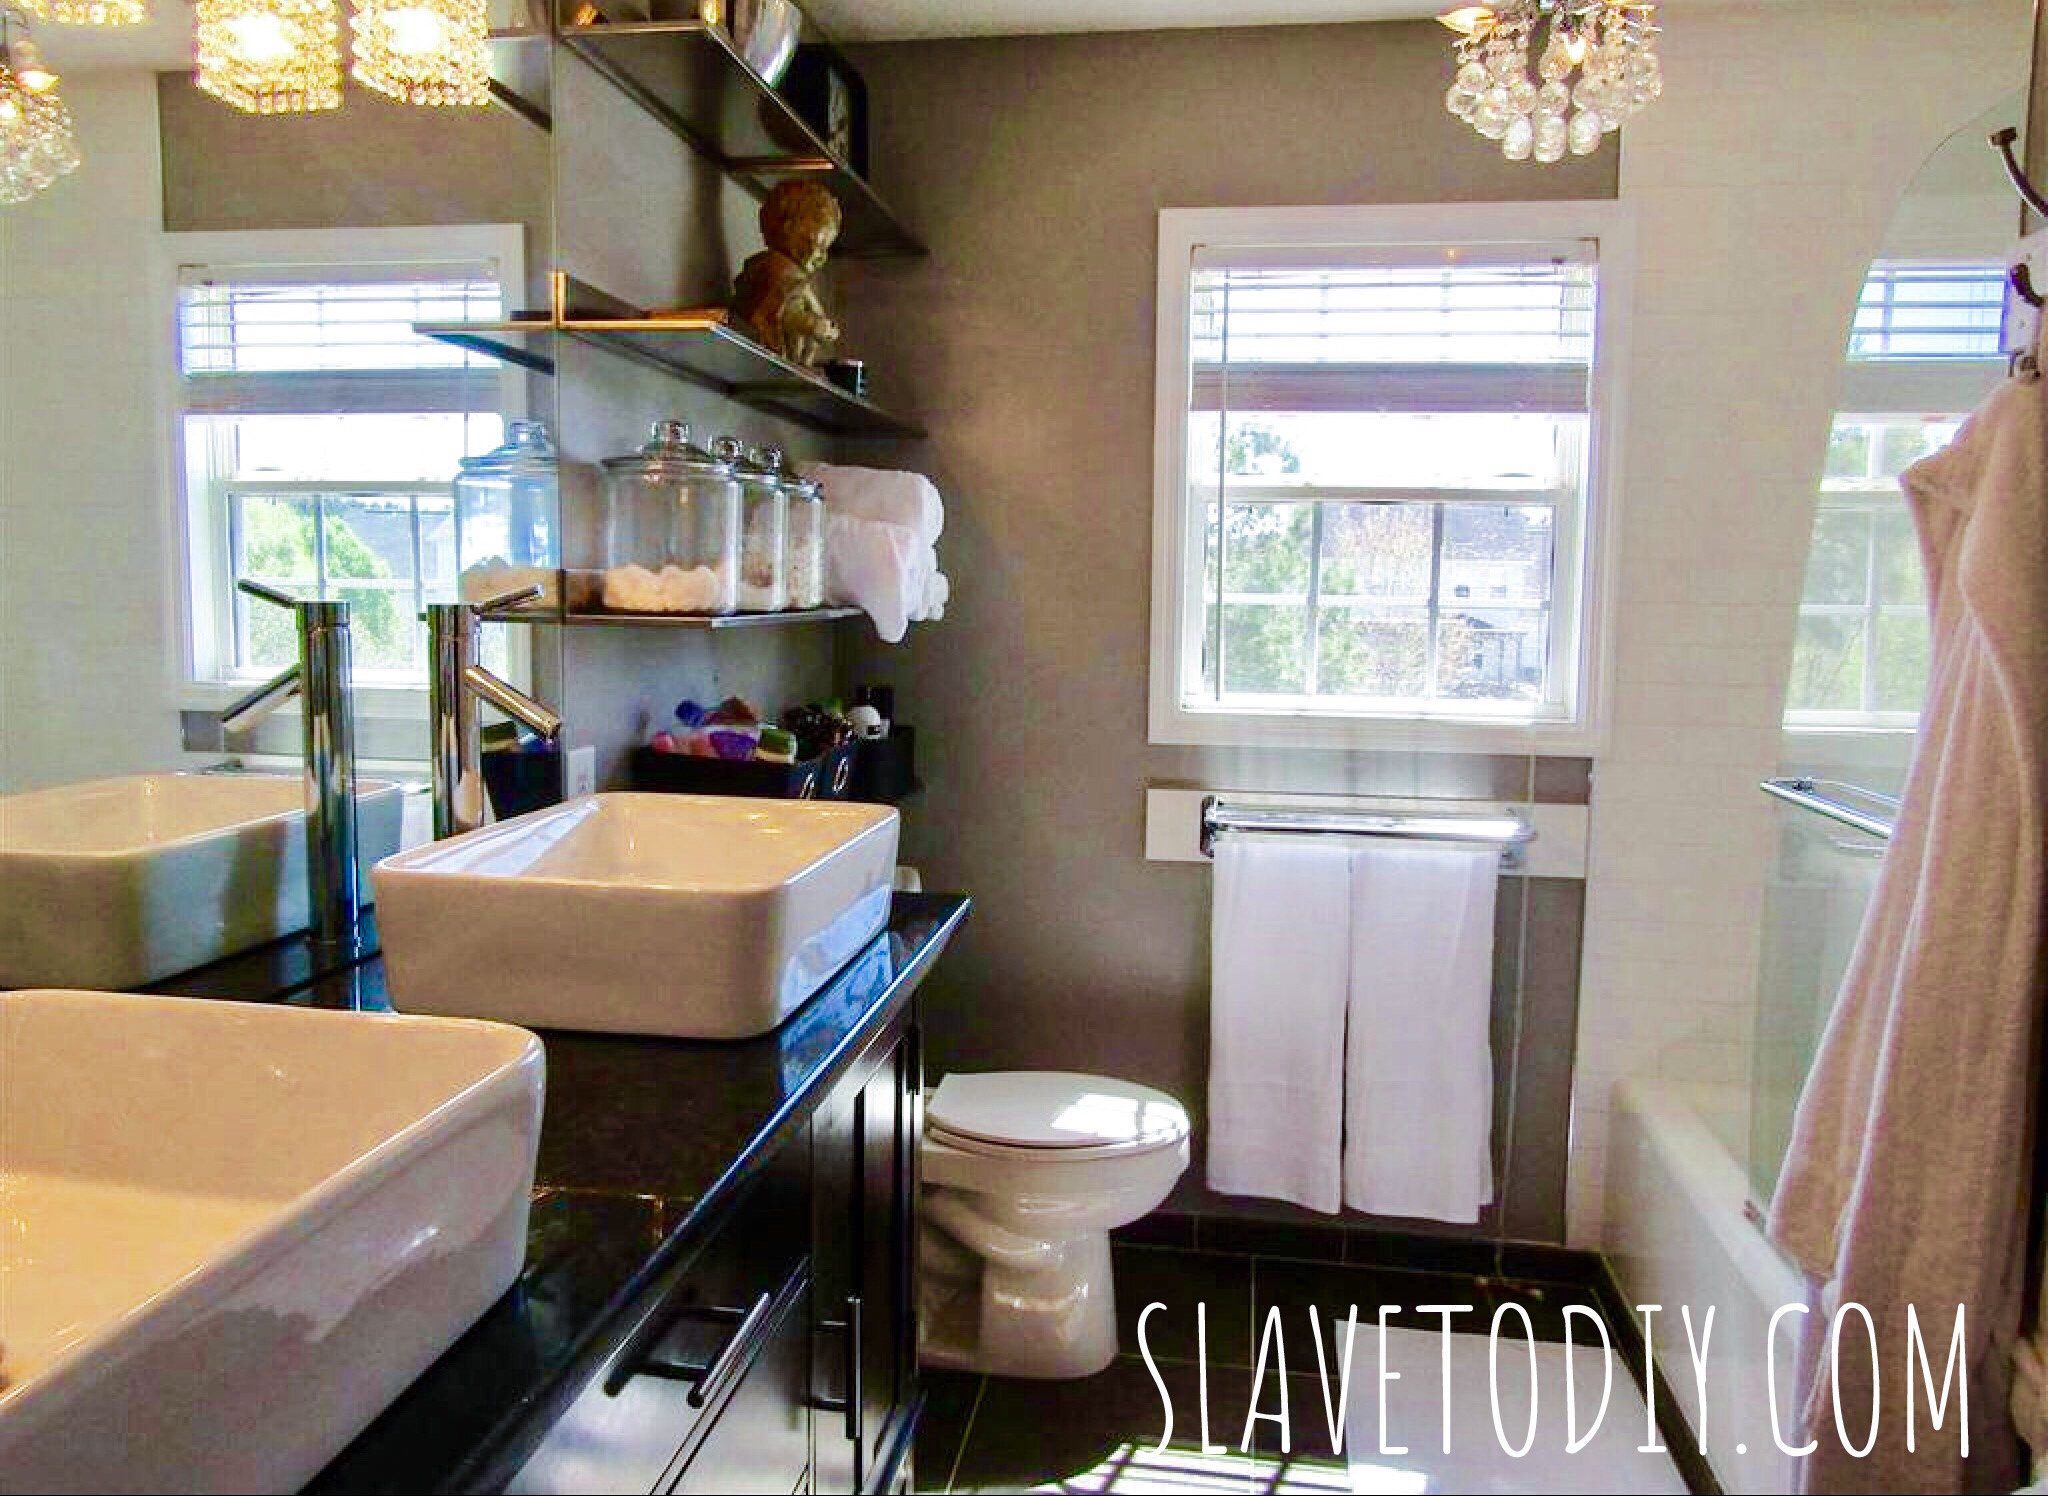
Hang fresh towels in the bathrooms. Get bright white, new towels. White towels make your baths feel like a Spa. I got new towels for staging/showings and threatened everyone in the family about not using them until after the house was sold. They don’t have to be soft, just new and white. I bought some reasonable ones here.
The Ultimate Pre-showing Checklist for Selling Your Home Fast! Rolled towels on shelves add to that luxury feel (see up to the left there?) and fresh, clean (unused!) white towels make it feel like a spa-retreat.
Temperature: 70. Crank that AC in the summer. Make it toasty in the winter. It should feel refreshing. It gives buyers a sense that the heat/cooling systems are in good working order. This is a great time to check your air filters to make sure it doesn’t sound like the system is struggling when it cycles. I use 3m filtrete filters that last three months. Yes, you can buy them on Amazon, but they’re cheaper from Lowe’s.
Fireplace. Turn it on low. Even in the summer. It creates a nice ambiance and it shows the buyers the fireplace works.
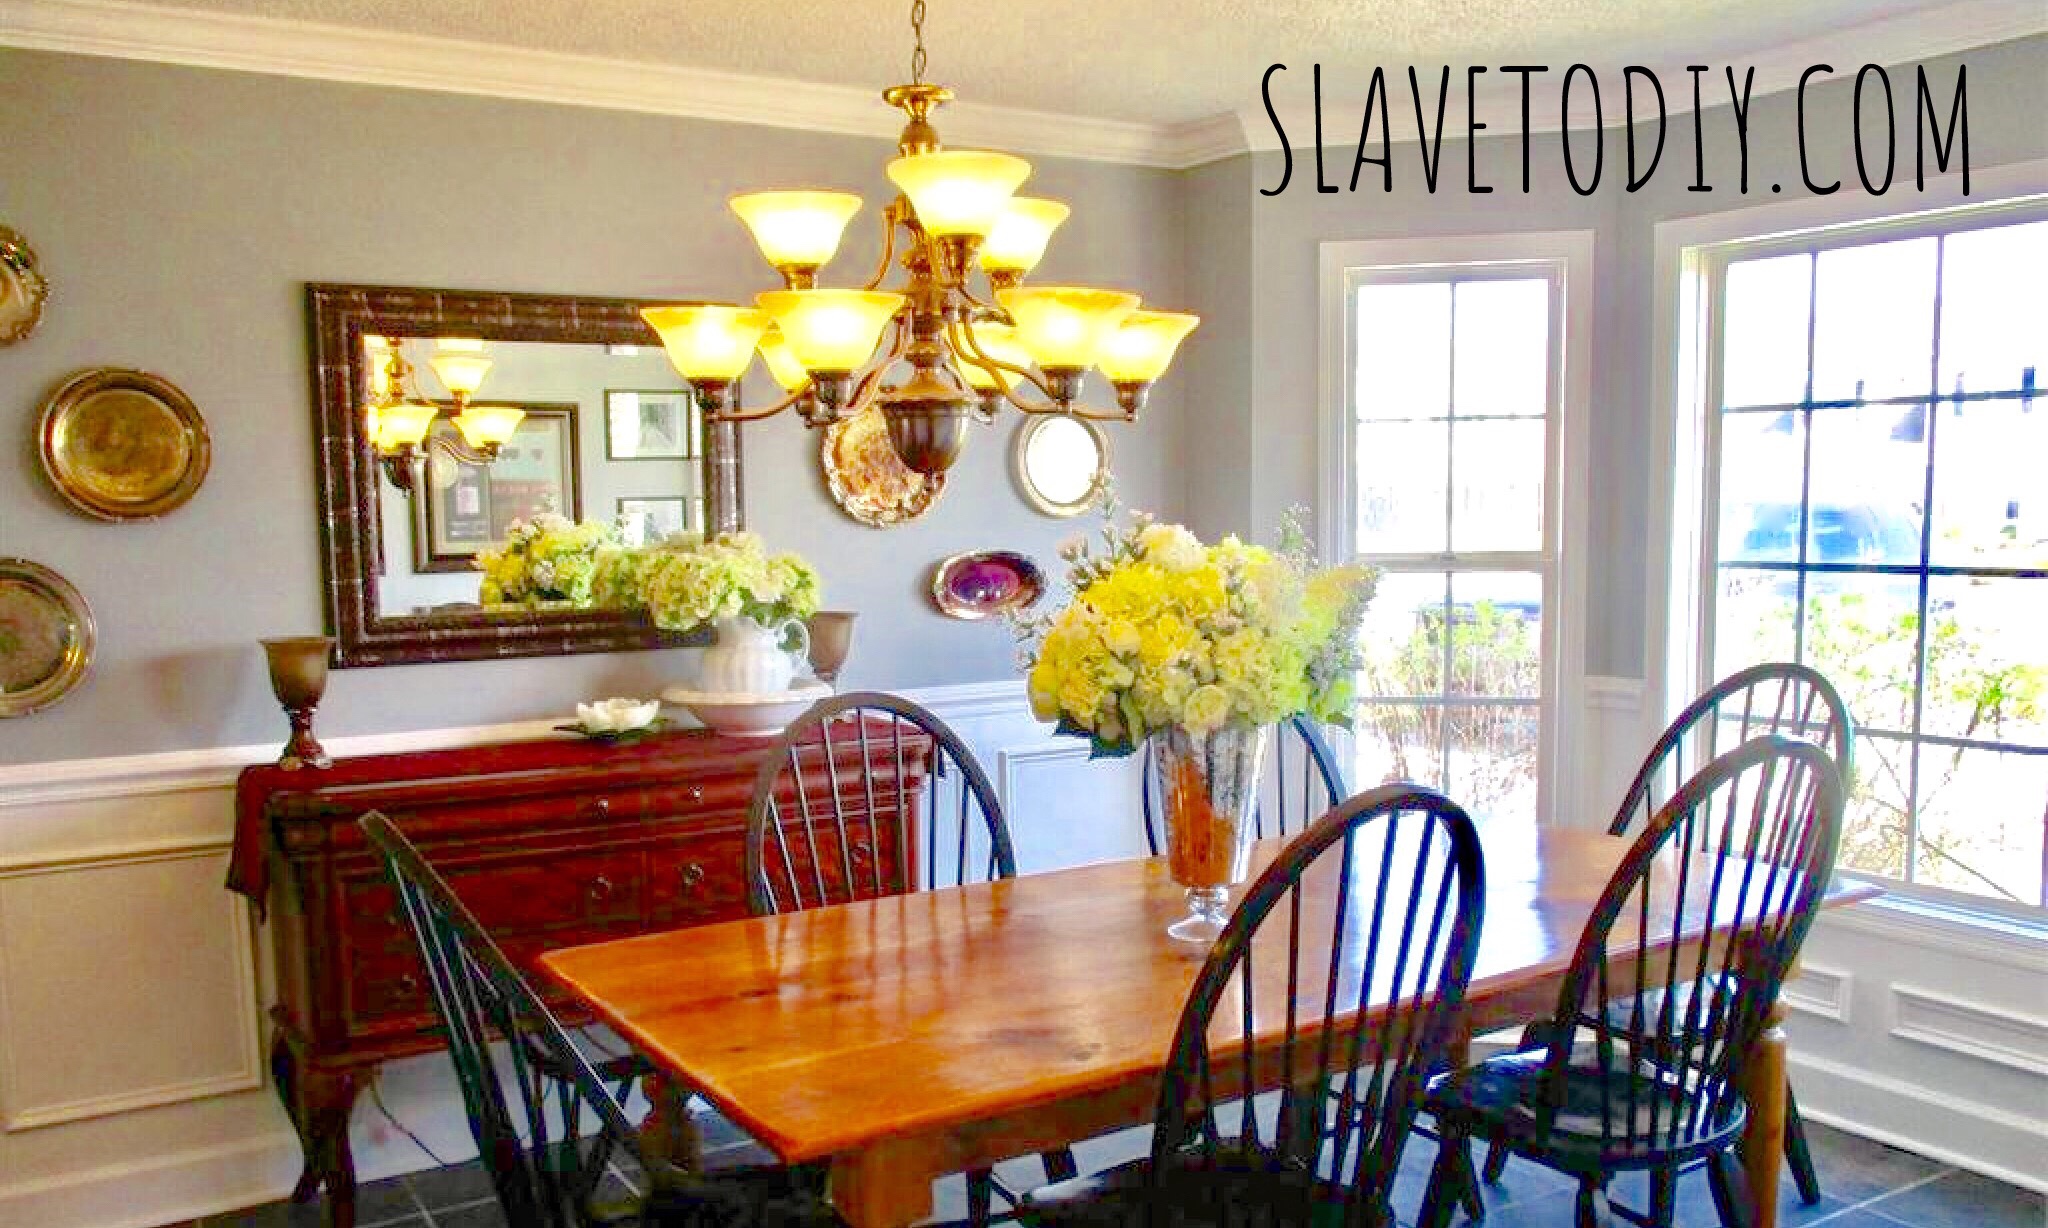
Set the table (Pinterest some cool table scapes and copy them). Even if the dining room isn’t great, people remember it being “inviting” because the table is set. It looks like the house is ready to do some entertaining. Once again, you can take this stuff with you. World Market always carries some reasonable, stylish sets.
The Ultimate Pre-showing Checklist for Selling Your Home Fast! Photo by Pixabay on Pexels.com
Open the drapes. All the way. Open the blinds flat and pull them halfway up the window. Make sure they’re straight and not lopsided.
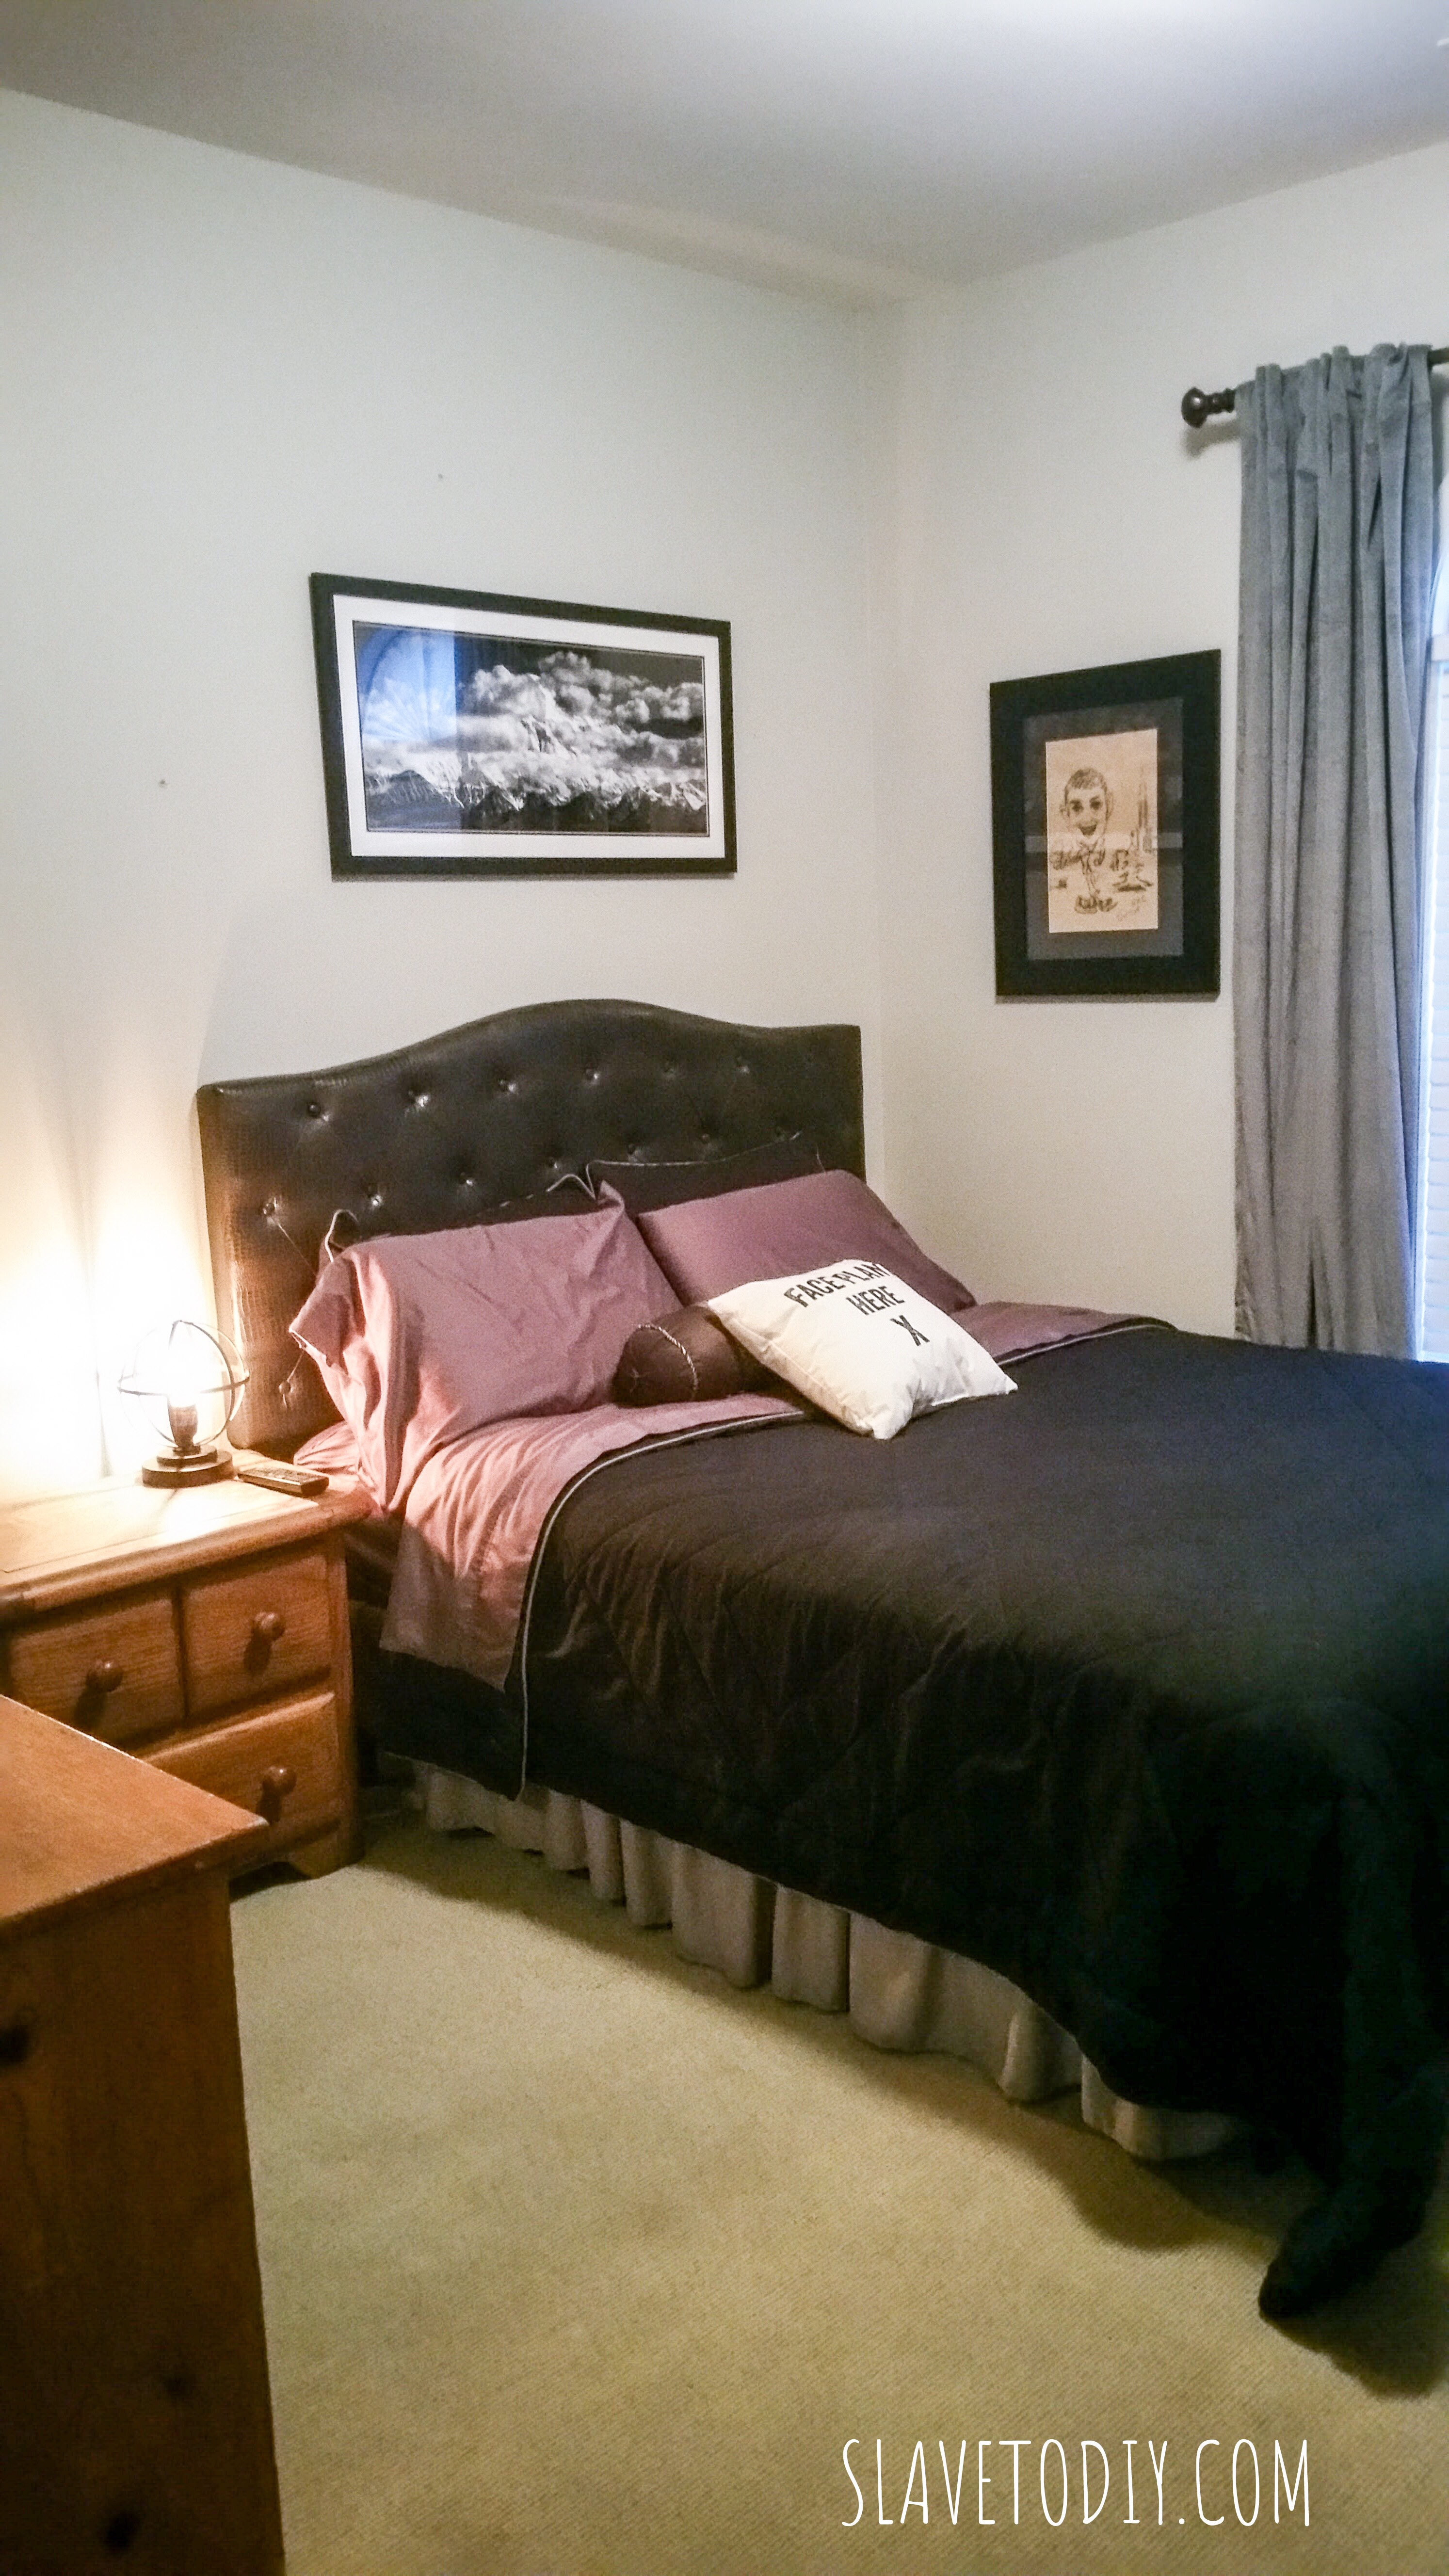
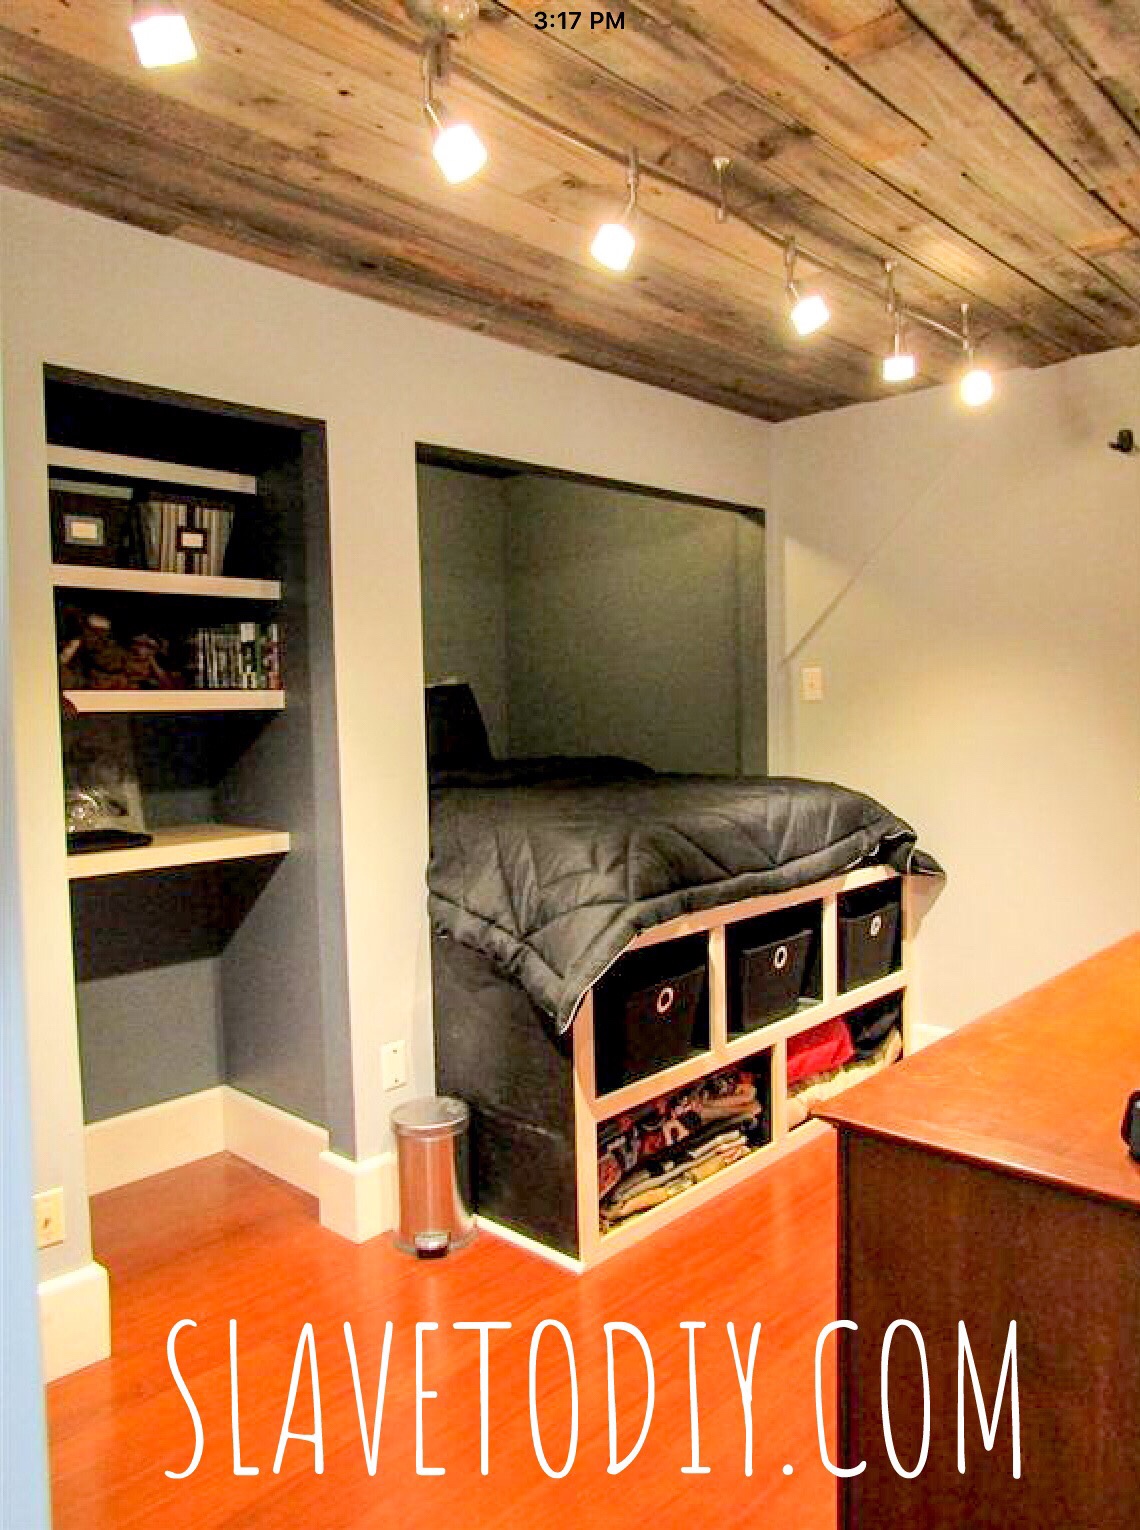
Lights. Blazing. Turn them all on and open all of the interior doors. Don’t let potential buyers fumble for light switches or door handles. They should be able to walk through and simply enjoy. (I left a note for the realtors telling them we’d turn the lights off when we got home). This is not the time to be stingy about the light bill.
The Ultimate Pre-showing Checklist for Selling Your Home Fast! Turn All Of The Lights On Before The Showing.
Case in point, there are three different lights in this room and no windows. It is a cave with no lights on- pitch black. There is a lightswitch for the built in bed over by the bed. There is a lamp on the dresser. With the door open and all the lights on this is a showcase. Every kid in the world wants this room. Fumbling for the lights and trying to see it in the dark would leave the proper “showing” of this room to chance. Turning the lights on in advance let’s you control the showing.
The Ultimate Pre-showing Checklist for Selling Your Home Fast!
Pictures (okay, this is a staging item, but I feel strongly about it. I also apparently disagree with every HGTV host, ever). Only take your family pictures down if they’re in lousy frames and/or you have ugly kids. Be honest with yourself here. People realize that someone lives in the house… isn’t that why companies use models to sell clothing? Think of your family photos as “happy family home” models. I had a cool wall with black and white canvasses full of family pictures. We left those pictures up. They just screamed “we’re one big happy family in our happy family home.” It’s also a wall-staging item. Without those our staircase would be empty.
Music. Low volume smooth jazz. If you have cable there are usually music channels included in your package so we had several TVs on with smooth jazz going. That is professional level ambiance.
Garbage disposal. Run a lemon or orange through it right before the showing. The citrus hides any lingering smells you might have missed. If you don’t keep citrus on-hand, you can get a bag of forty garbage disposal bombs from Bed, Bath & Beyond for about ten bucks.
Cinnamon apple glade. A can per showing in a 2000sf house. No kidding. I did a ton of research and apple pie or cinnamon apple apparently puts people in a “this is the one” mindset. I don’t question it. It worked. Buy it here.
Pool, gardens, and specialty areas should be freshly staged. Wet your decks, exterior pavers, and mulch with a garden hose. They look nicer darker and like you’ve given them fresh attention. If you ever watch hgtv outdoor transformations shows, pay attention next time. Everything is soaked when they do “the reveal”. Get new pool towels and roll them up on your deck chairs/chaise lounges. Open your pool umbrella if you have one and put out the cushions. It needs to feel inviting.
The Ultimate Pre-showing Checklist for Selling Your Home Fast!
Take your animals with you. Hide evidence of them existing. Seriously. Cat litter boxes, beds… etc. Put them in your car when you leave. Nothing deters a buyer with cat allergies more than telltale signs of pets. I was bitten by a jack Russell once during a showing. You have no idea what your pets will do when you’re not there. Nothing like getting sued by someone you were hoping would buy your house because Snooki bit them trying to get into the master bedroom (and no, I didnt’ sue. I just gave them a heads up they might want to take the dog with them next time). Potential buyers may also let your indoor cats outside or your circus dog out.
Make sure evidence of animals is gone. Hit areas with telltale hair with tape or a lint roller.
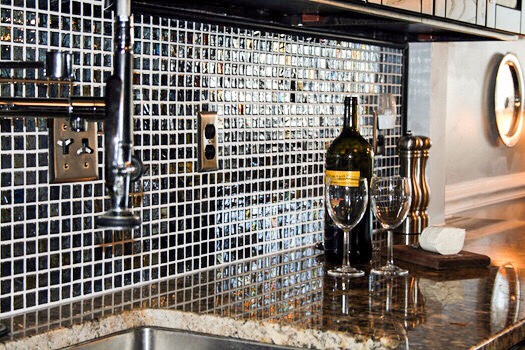
Kitchen. Clear counters except your nice knife block. A bottle of wine with a few glasses for later is a nice touch. (Who’s in the mood to celebrate buying a house???)
The Ultimate Pre-showing Checklist for Selling Your Home Fast!
Remember, you ultimately only need ONE buyer. It’s going to be the one that falls in love with your life. Prepare accordingly.
Do you have any niche showing tips that you recommend? I would love to see your tips and questions in the comments section! Thanks for reading and you can find more great DIY articles here.
Cheers and happy selling!
*Legal stuff:
I am honest about my experiences with different products and write because I enjoy it. I do however, have the opportunity to earn money for my writing, also.
Slavetodiy.com is a participant in the Amazon Services LLC Associates Program, an affiliate advertising program designed to provide a means for sites to earn advertising fees by advertising and linking to amazon.com. Amazon offers a small commission on products sold through their affiliate links. Each of your purchases via our Amazon affiliation links supports our cause at no additional cost to you.
If a blogger links to an Amazon product (with a special code for affiliates embedded in the link), and a reader places an item in their “shopping cart” through that link within 24 hours of clicking the link, the blogger gets a small percentage of the sale. Amazon links are not “pay per click.” If you click on the product link and stay around Amazon and purchase something else, however, I will get a commission on that sale.
Slavetodiy.com is also a VigLink affiliate advertiser which works similarly.