
I’m so excited the Hemnes IKEA builtins are finally finished!!! This has literally been a two-year process (of building custom-ish bookshelves) and life has been truly uncooperative. But, they are done and I am super psyched to be sharing our process and pictures with you!
Before I get started, I feel like a short discussion is warranted… a note on this new culture in which I find myself.
You know, when I was growing up, the word “hack” was a bad thing. Like, if someone called you a “no talent hack” or you were watching a movie about murderous chainsaw wielding “hacks”… or am I using that wrong? Anyway, so I’m old now, and apparently hacking is a positive thing. Unless, it’s computer related and you’re trying to pass high school by updating your math grade in the school by flashlight. But, suddenly life hacks are awesome, furniture hacks are even better, and IKEA hacks are the holy grail. So, now I’m hacking away, trying to fit in.
I’ve performed my very first IKEA hack (in my head I’m trying desperately to suppress the sound of a hair ball being coughed up every time I write the word “hack”).
This post may contain affiliate links. Please see the full disclosure at the bottom of the post.
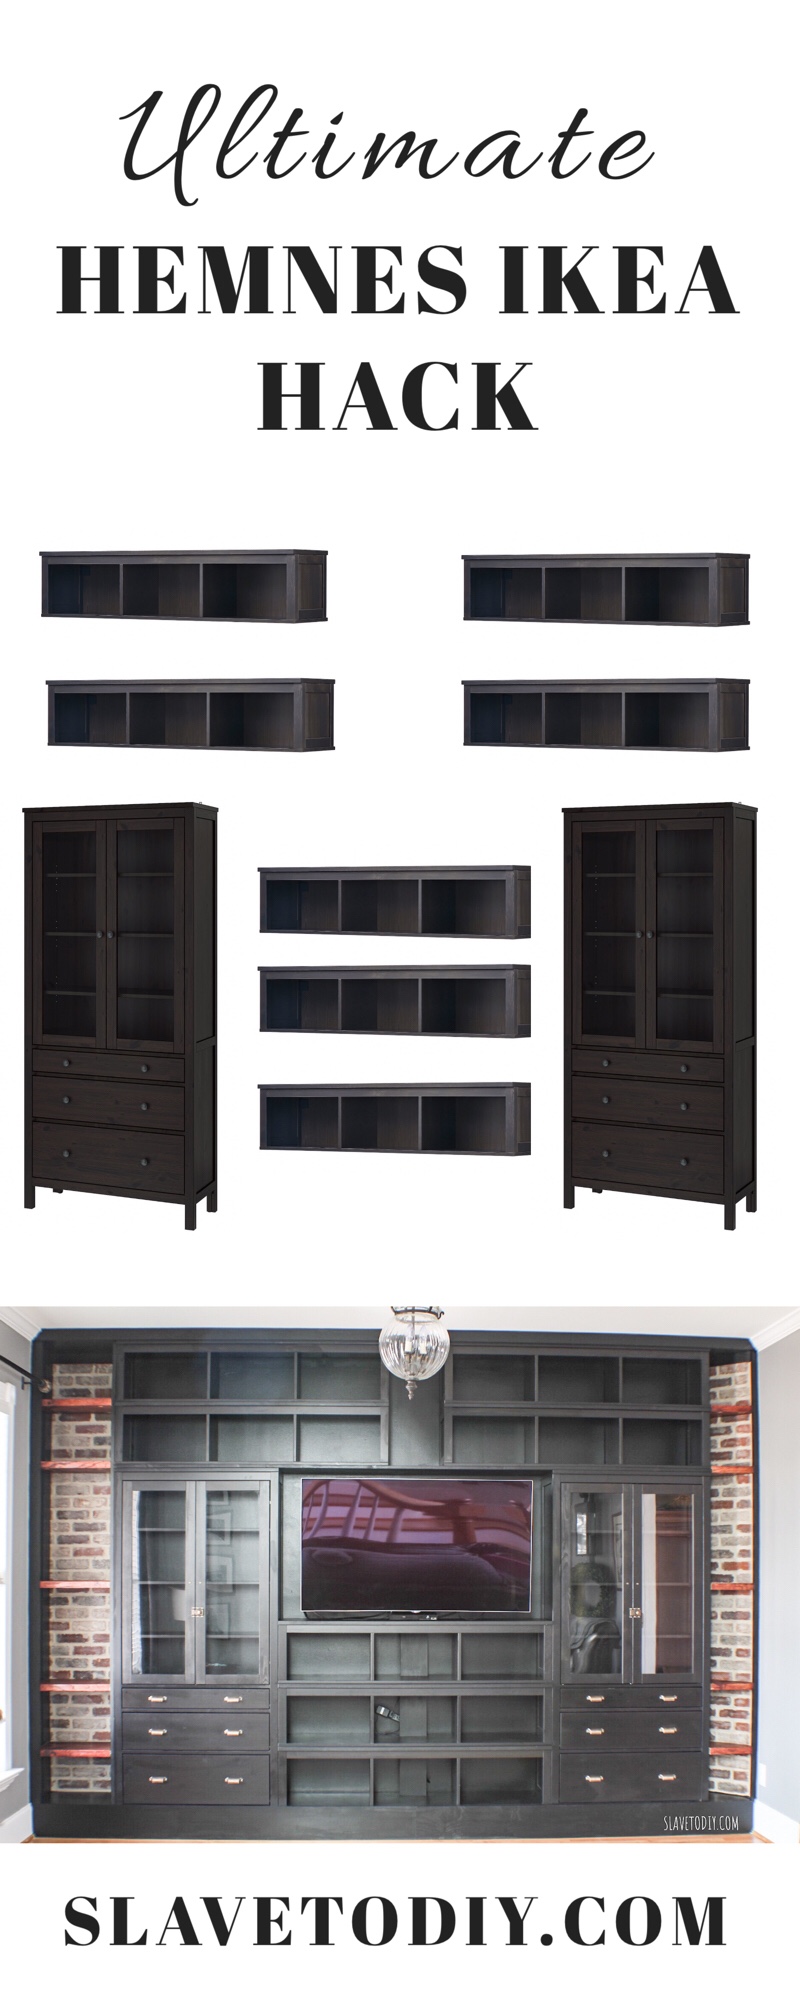
After much pinteresting and pinning and planning I finally bit the bullet and ordered the components for my long-awaited living room builtins (I challenge you to find hemnes hacks in black on Pinterest- they’re few and far between). The boxes of homeless decor were staring at me every time I walked by and rendering the media room, which was temporarily storing the wayward decor, unusable. Enough was enough. And this HAD to be easier than building from scratch with MDF and poplar/pine as we’ve done in the past. And, of course, that dreamy factory finish is just impossible to accomplish without, you know, buying it from the factory.
So, we’ve previously done four sets of built ins of slightly varying design, each time getting better and learning tricks along the way. However, when you’re working with afternoons and weekends, and your own personal OCD- Rainman husband, they take FOREVER. It was worth seeing whether these would look as nice (or better) and if the process would go any more quickly. Fingers crossed. This is in my living room. So, no pressure if I hate it, right?
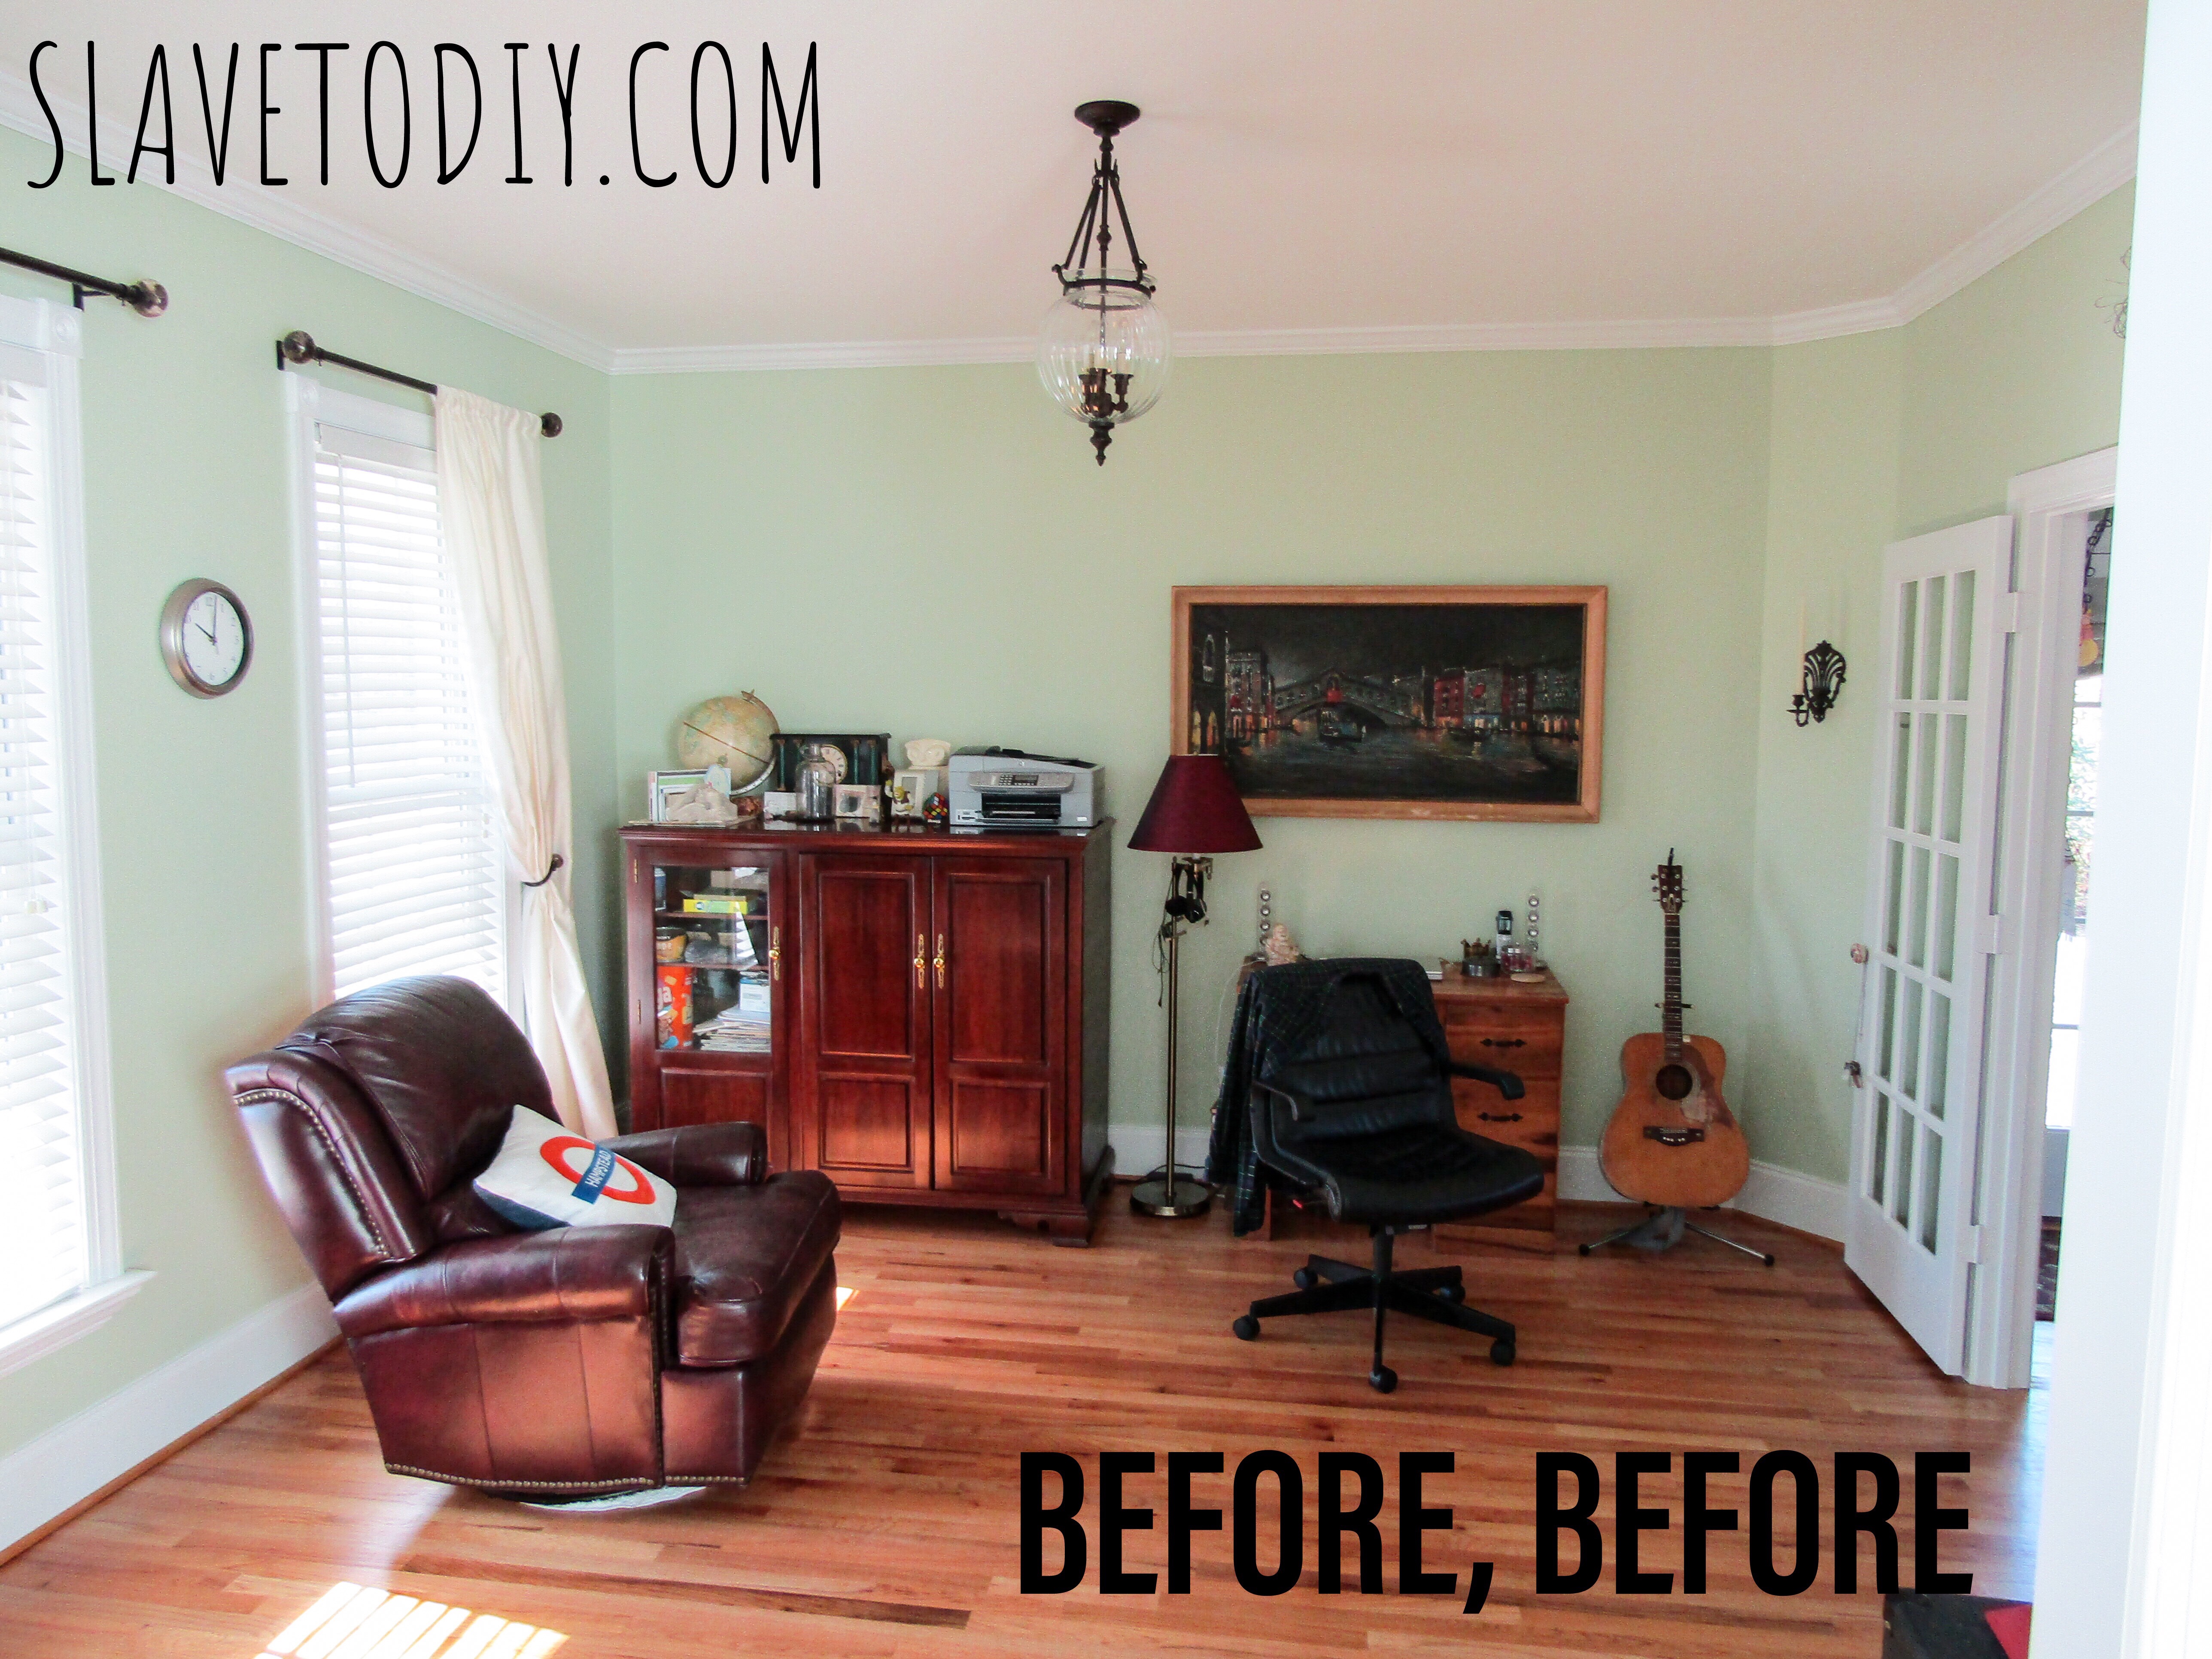
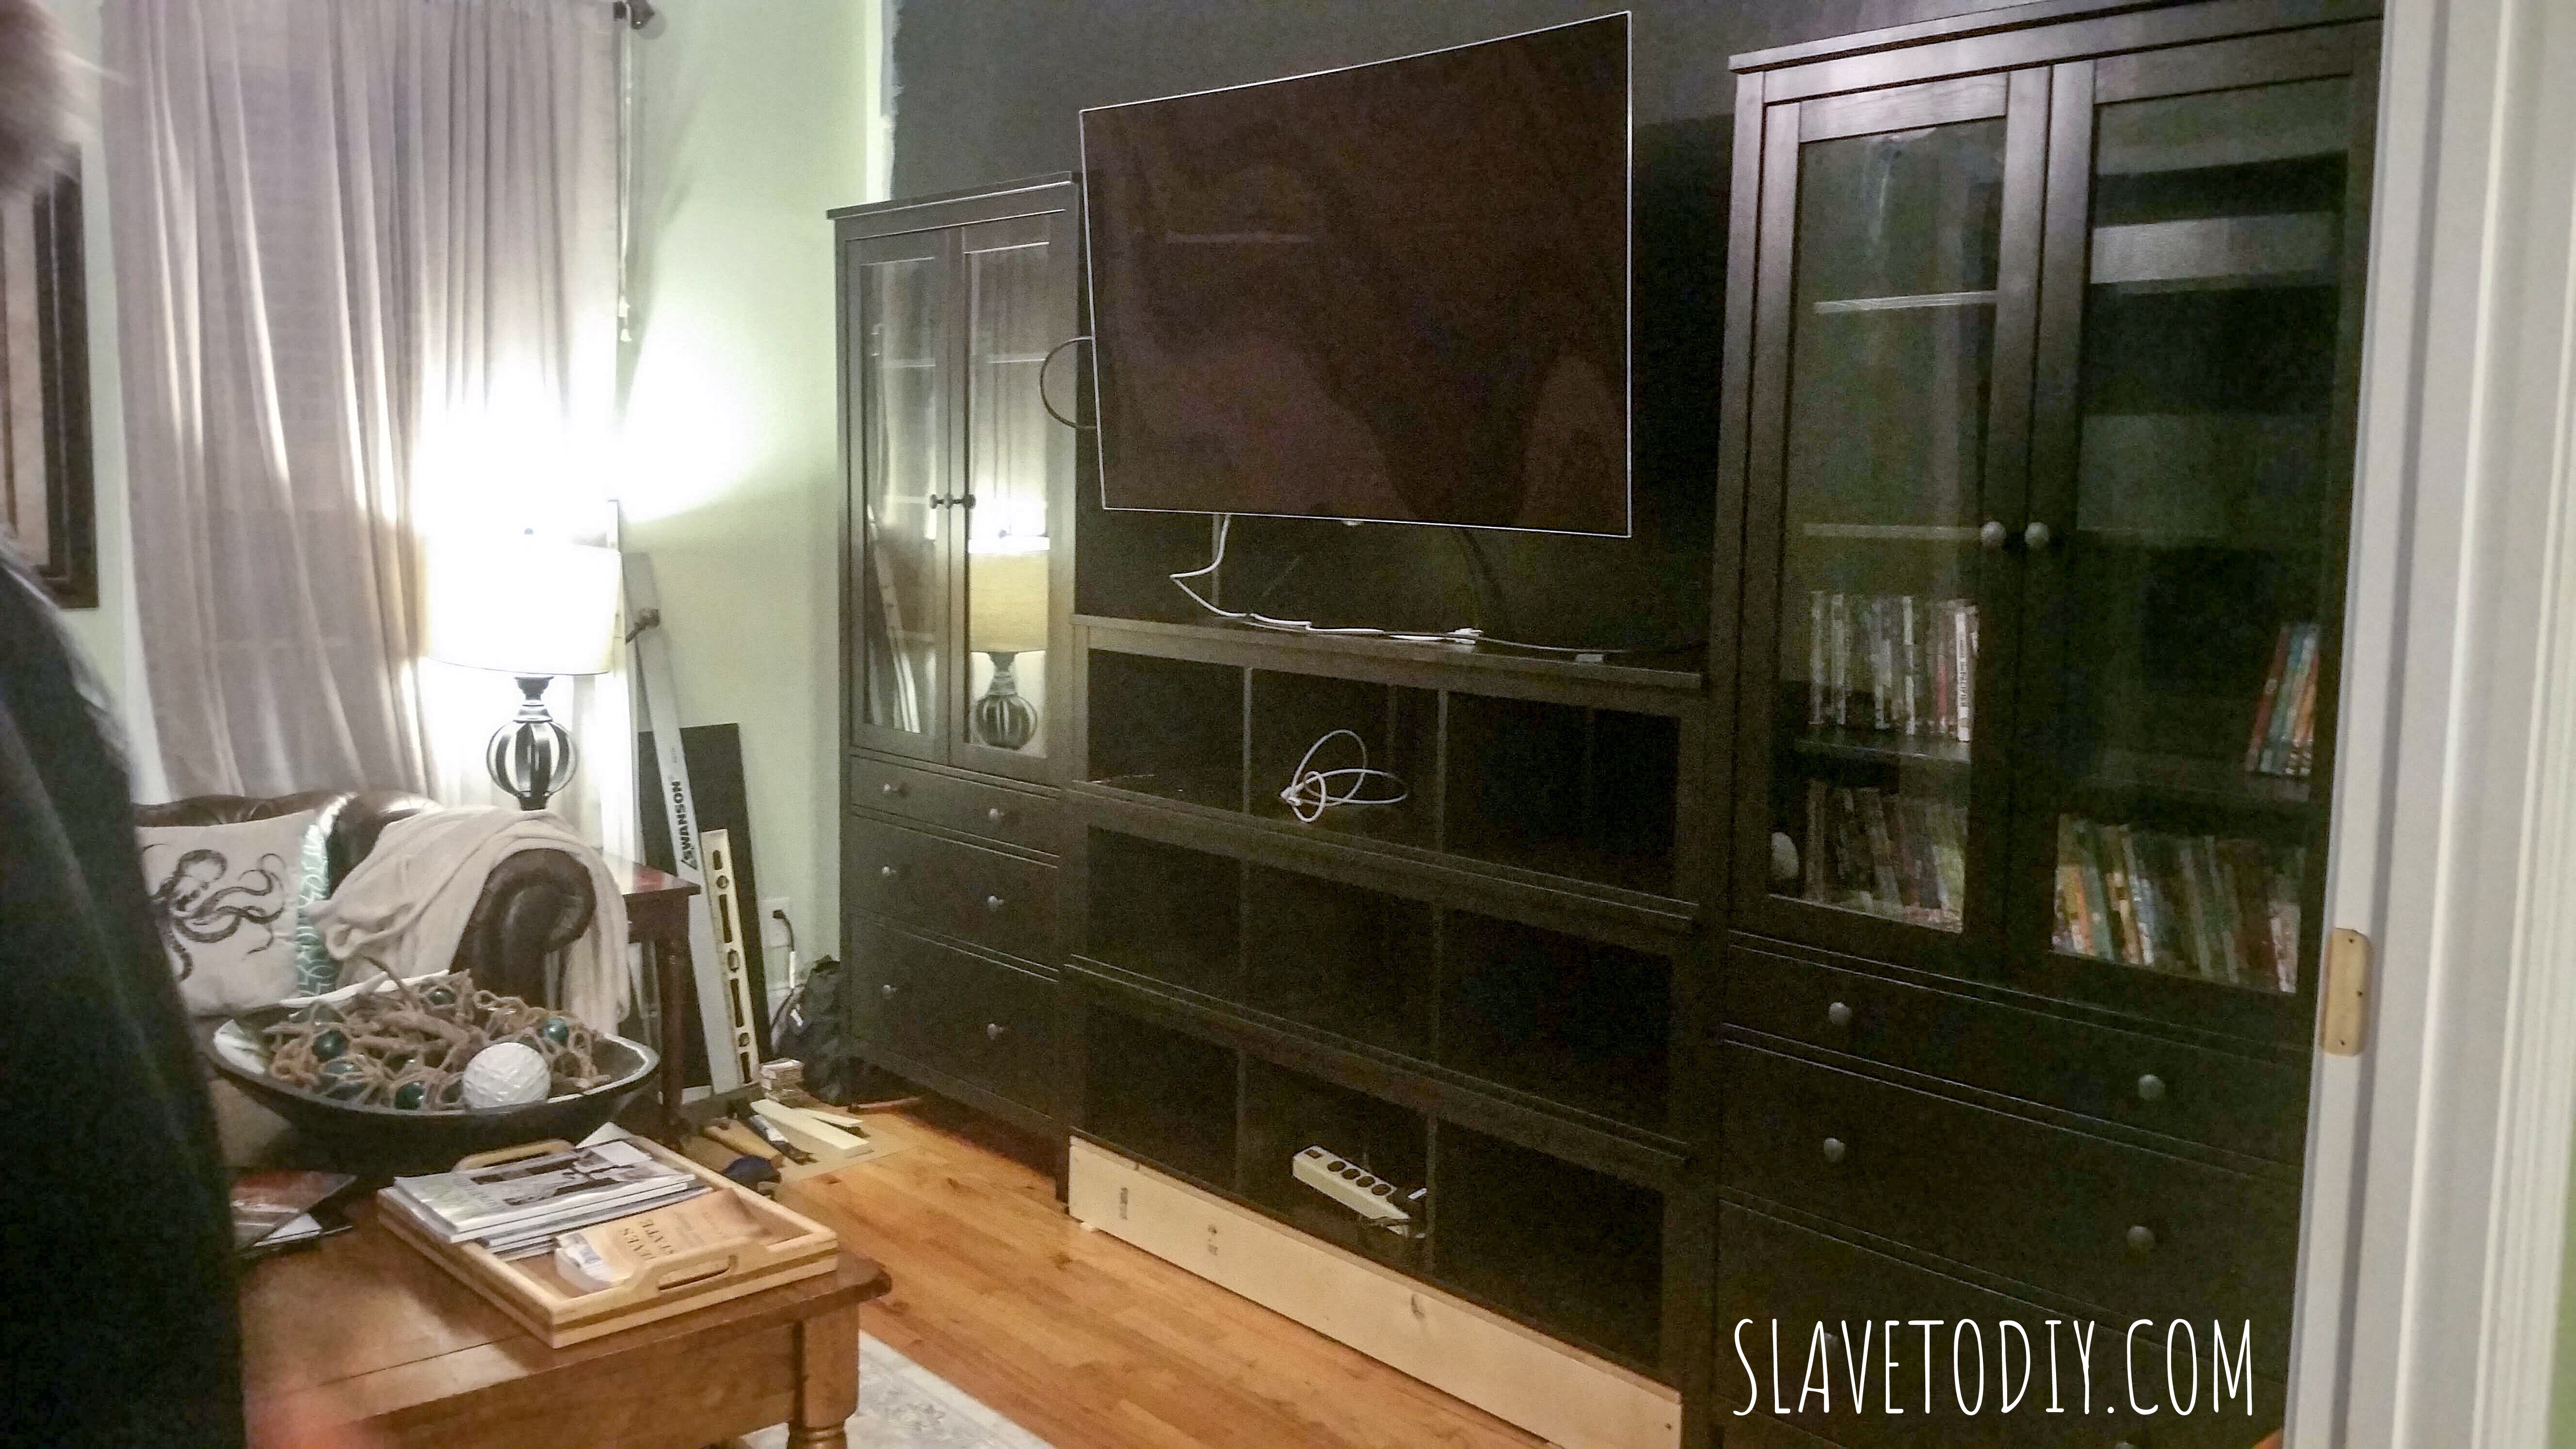
Before.
Here’s how this went down. In case the cops ask.
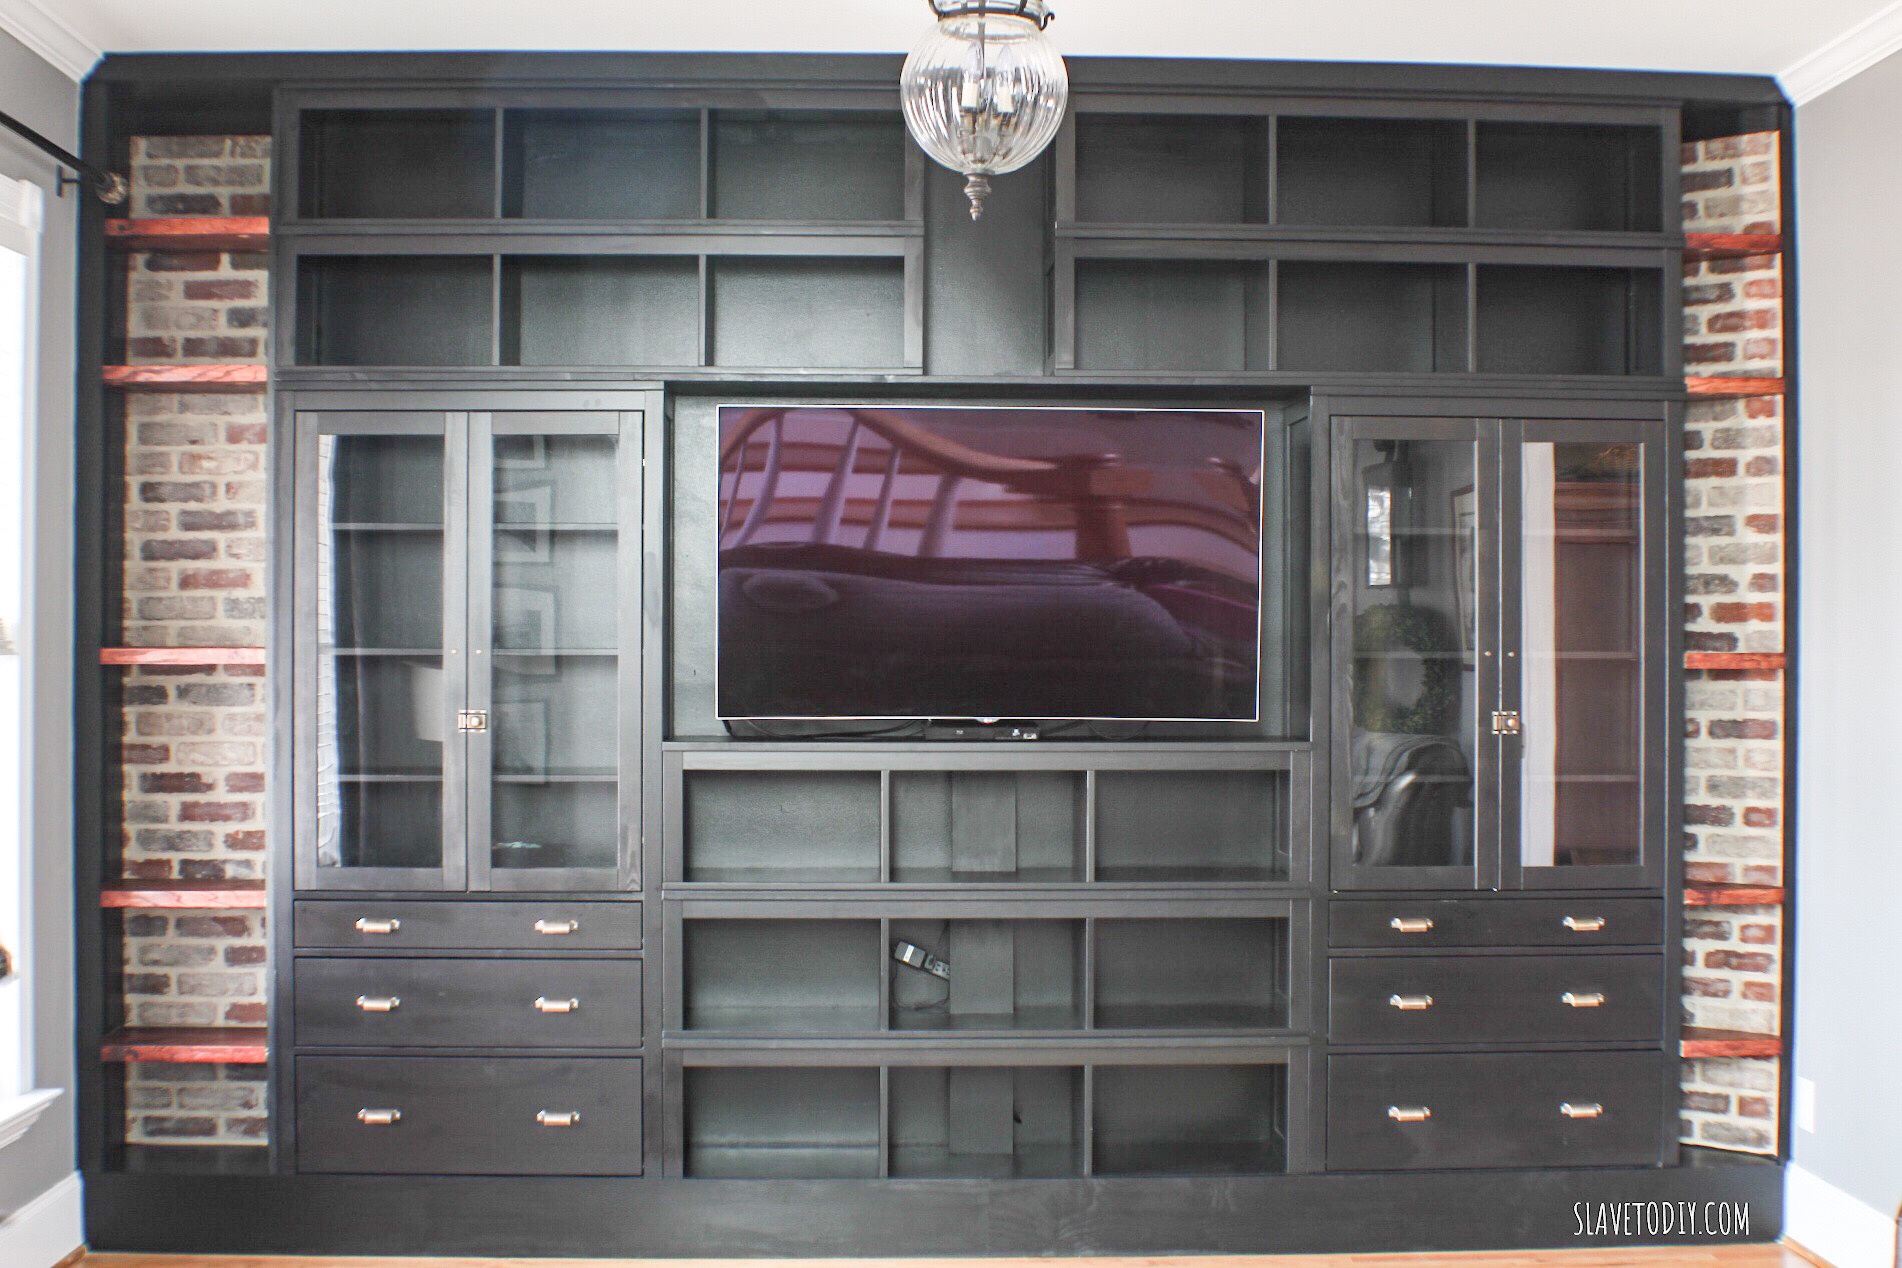
So, I ordered the hemnes components after measuring, remeasuring and adding their weirdly sized measurements together (these are designed with metric measurements, so the conversion is generally some oddball number and 5/8s). So, I got my 6th grade math hat on, did my measurements, made a pretty drawing on graph paper, left PLENTY of wiggle room in the design, and ordered online. This is literally drawn on graph paper. And yes it’s still okay to use a paper and pencil. This is a big wall, and those of you that follow our journey, know I like to use the WHOLE wall when we do builtins. Go big or go home, right?
And now I can’t find my sketch, so I have no proof that ever happened.
A design note: I fell in love with white cabinets and built ins for years. We did white builtins in the last place and I adored them (so did the buyers apparently). But, is that dreamy white kitchen on Pinterest really timeless? Are the built ins? Or will they be the next victim of HGTV inspired design trend that date the home? I’m so glad I waited, because we went with black, and I feel like it’s way more US, and timeless. Dare I say classic? I would hate to be here in 15 years and think, “nice going, 15 years ago self. That looks like garbage.” So, time will tell. But, I feel like black is like that little black dress that will stand the test of time. (I’m not hating on your white builtins, they’re just boring me to tears lately and I’m way to moody for all that cheerfulness).
Total cost on the bookshelves and bridging shelves from IKEA (not final cost with support lumber and trim) was $1591.64. This was the general plan:
Buying from IKEA, a few things to note:
I purchased when I did because they were offering 20% off. Once you add the shipping, it comes out to about what it would’ve otherwise cost. Shipping on furniture is almost never free at IKEA, so if you’re waiting on that it will be a long time. Furniture delivery took about two weeks and was delivered by a different delivery service (as in scheduled with an appointment time, not FedEx or UPS). There was one damaged box with a nicked shelf and one of the seven bridge shelves was missing completely (I did the math on weight and figured out that it never shipped from IKEA, not that it disappeared en route).
So, I immediately emailed with the discrepancy and, after not getting a reply, called IKEA. After 59 minutes on hold listening to the elevator version of “I love you, always forever” by Donna Lewis mixed in with Ikea advertisements, I was approaching homicidal, but got a human being in time that my phone didn’t become just another statistic. Well, it turns out they didn’t ship it on purpose because it wasn’t in stock (could I get a heads up???). Also, helpful-insider-info-Ikea-customer-service-guy shared with me that they never get to the emails, so just call next time… good to know. Back on hold with electronica Donna Lewis…. Yay! They shipped it via FedEx so I don’t even have to be there for delivery. But, wait! The shelf! Back on hold… sigh.
The missing bridging shelf arrived a few days later, not so much the other shelf. Let’s see if I ever get around to calling them on that.
Assembly:
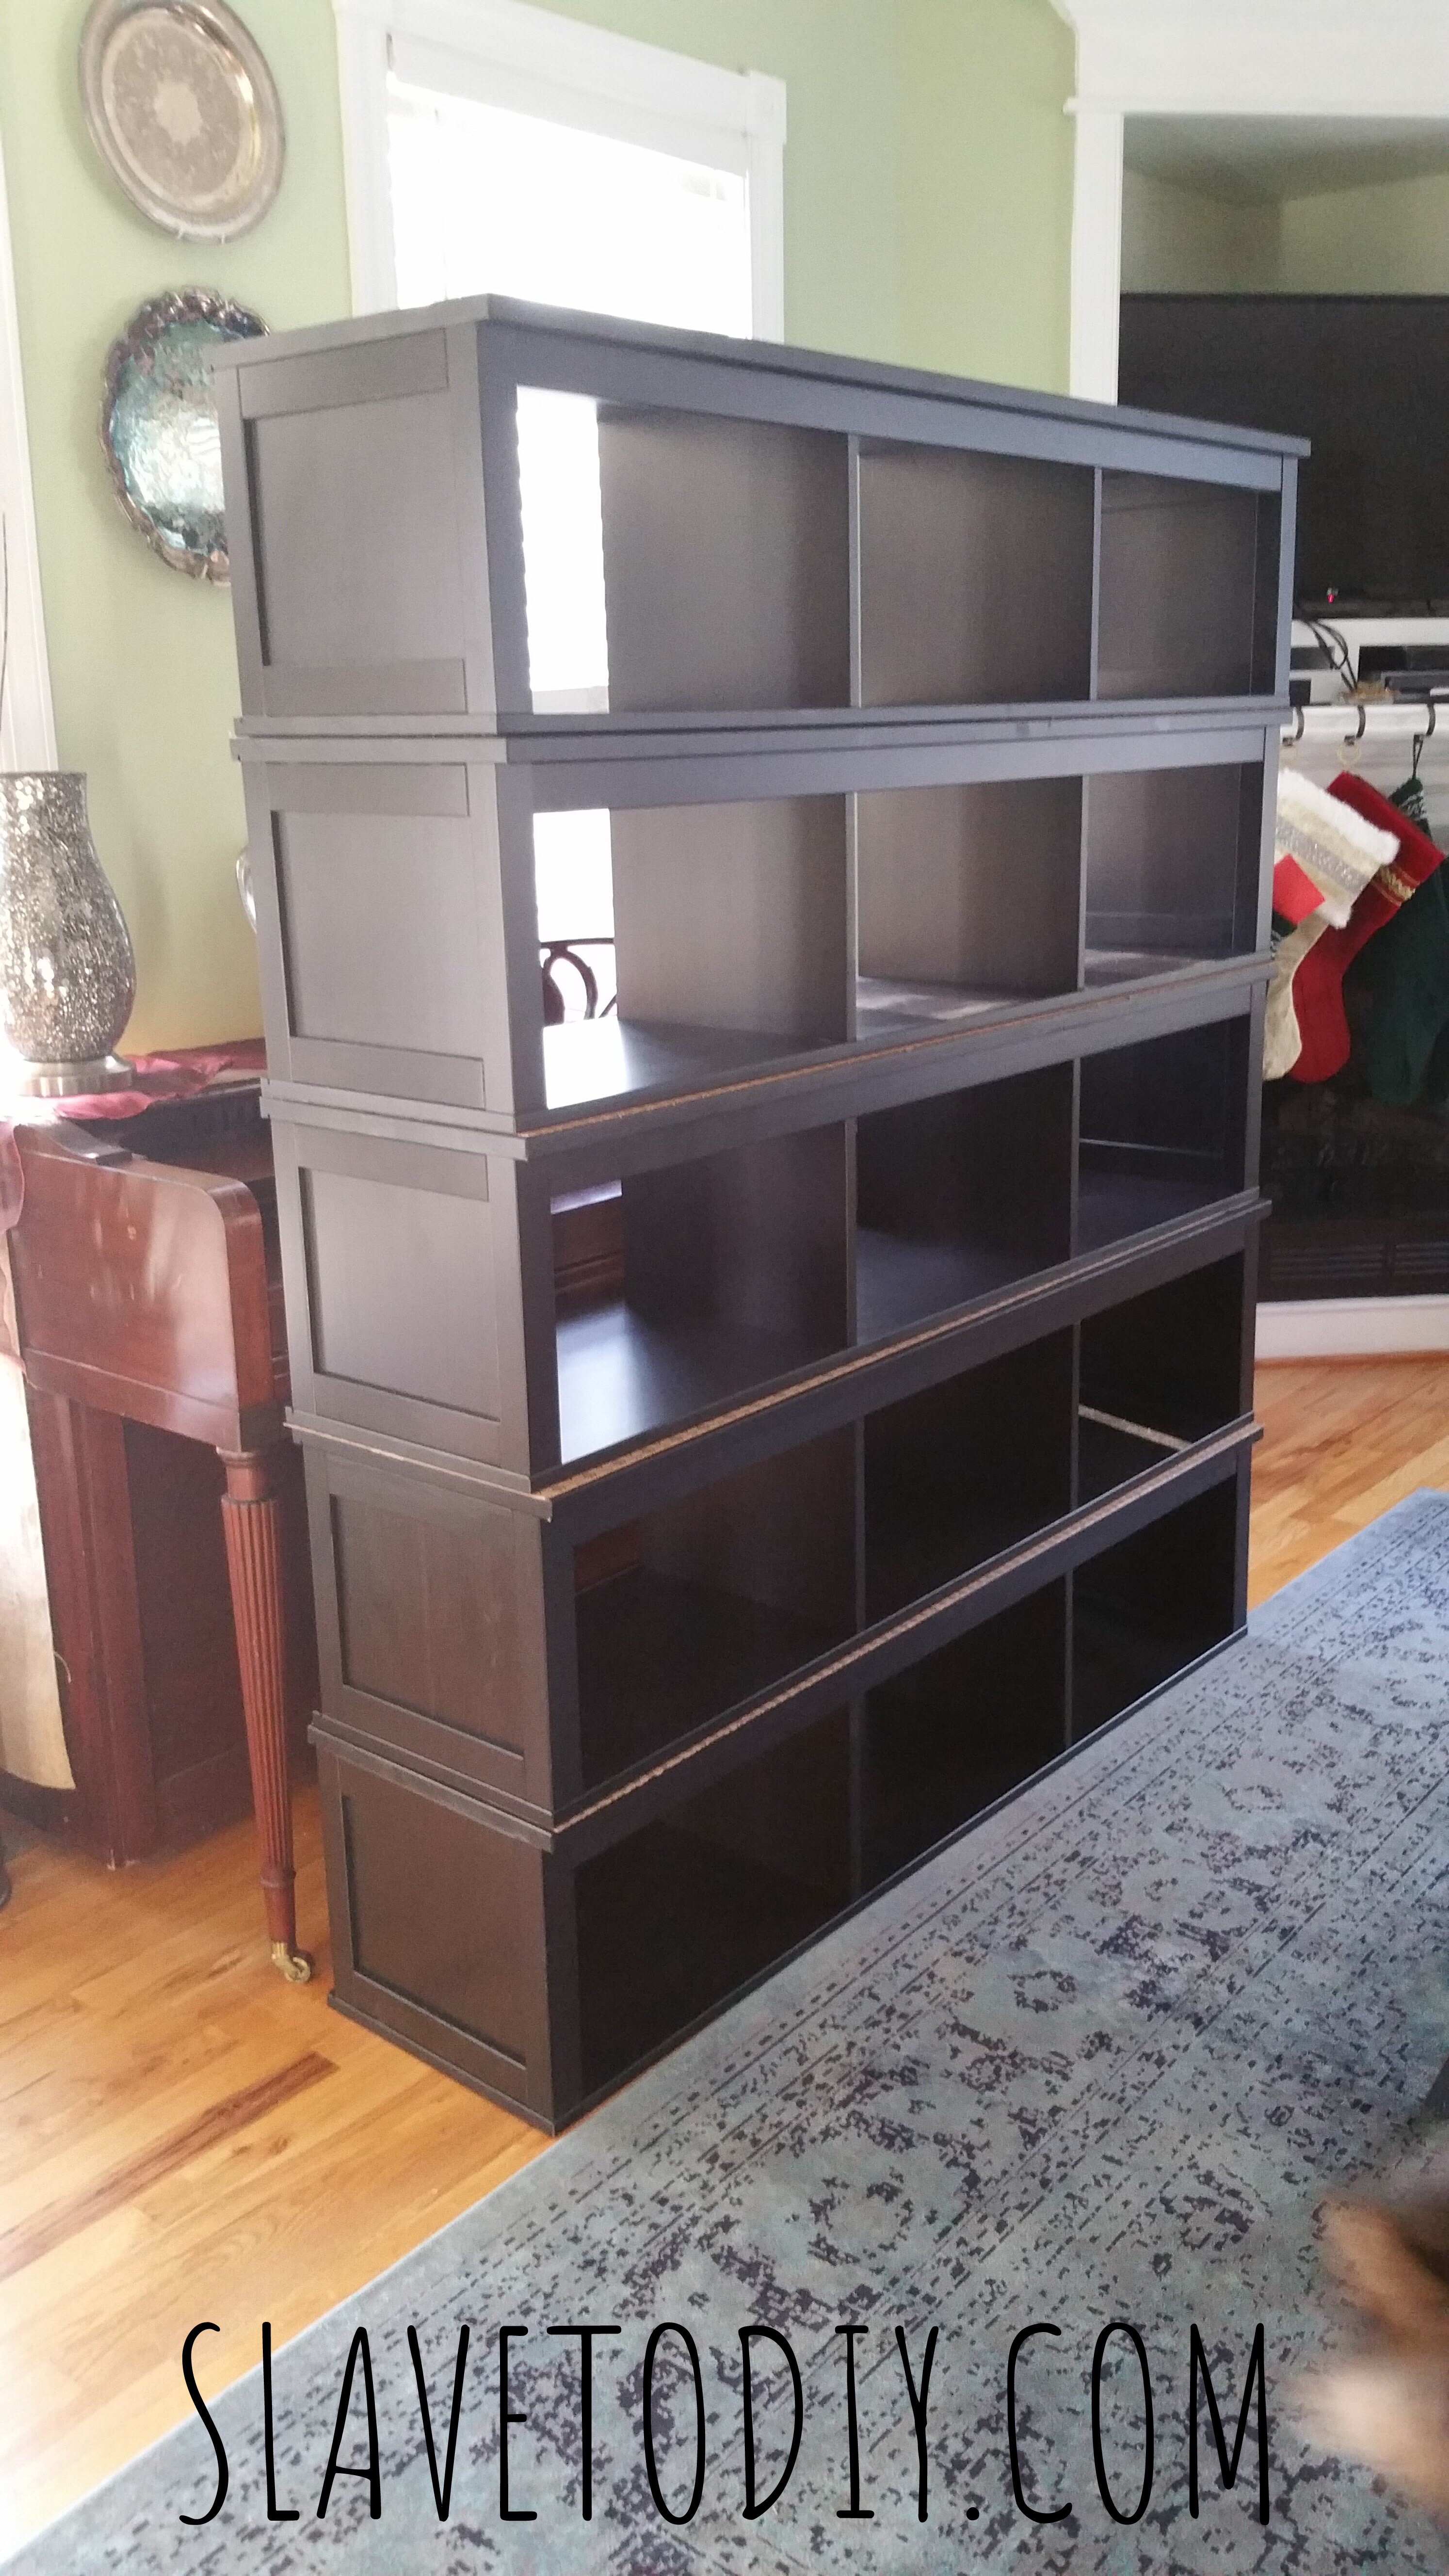
Assemble components. Follow the directions. Leave the el-cheapo back covers off (this is the cardboard-ish thin backer board).
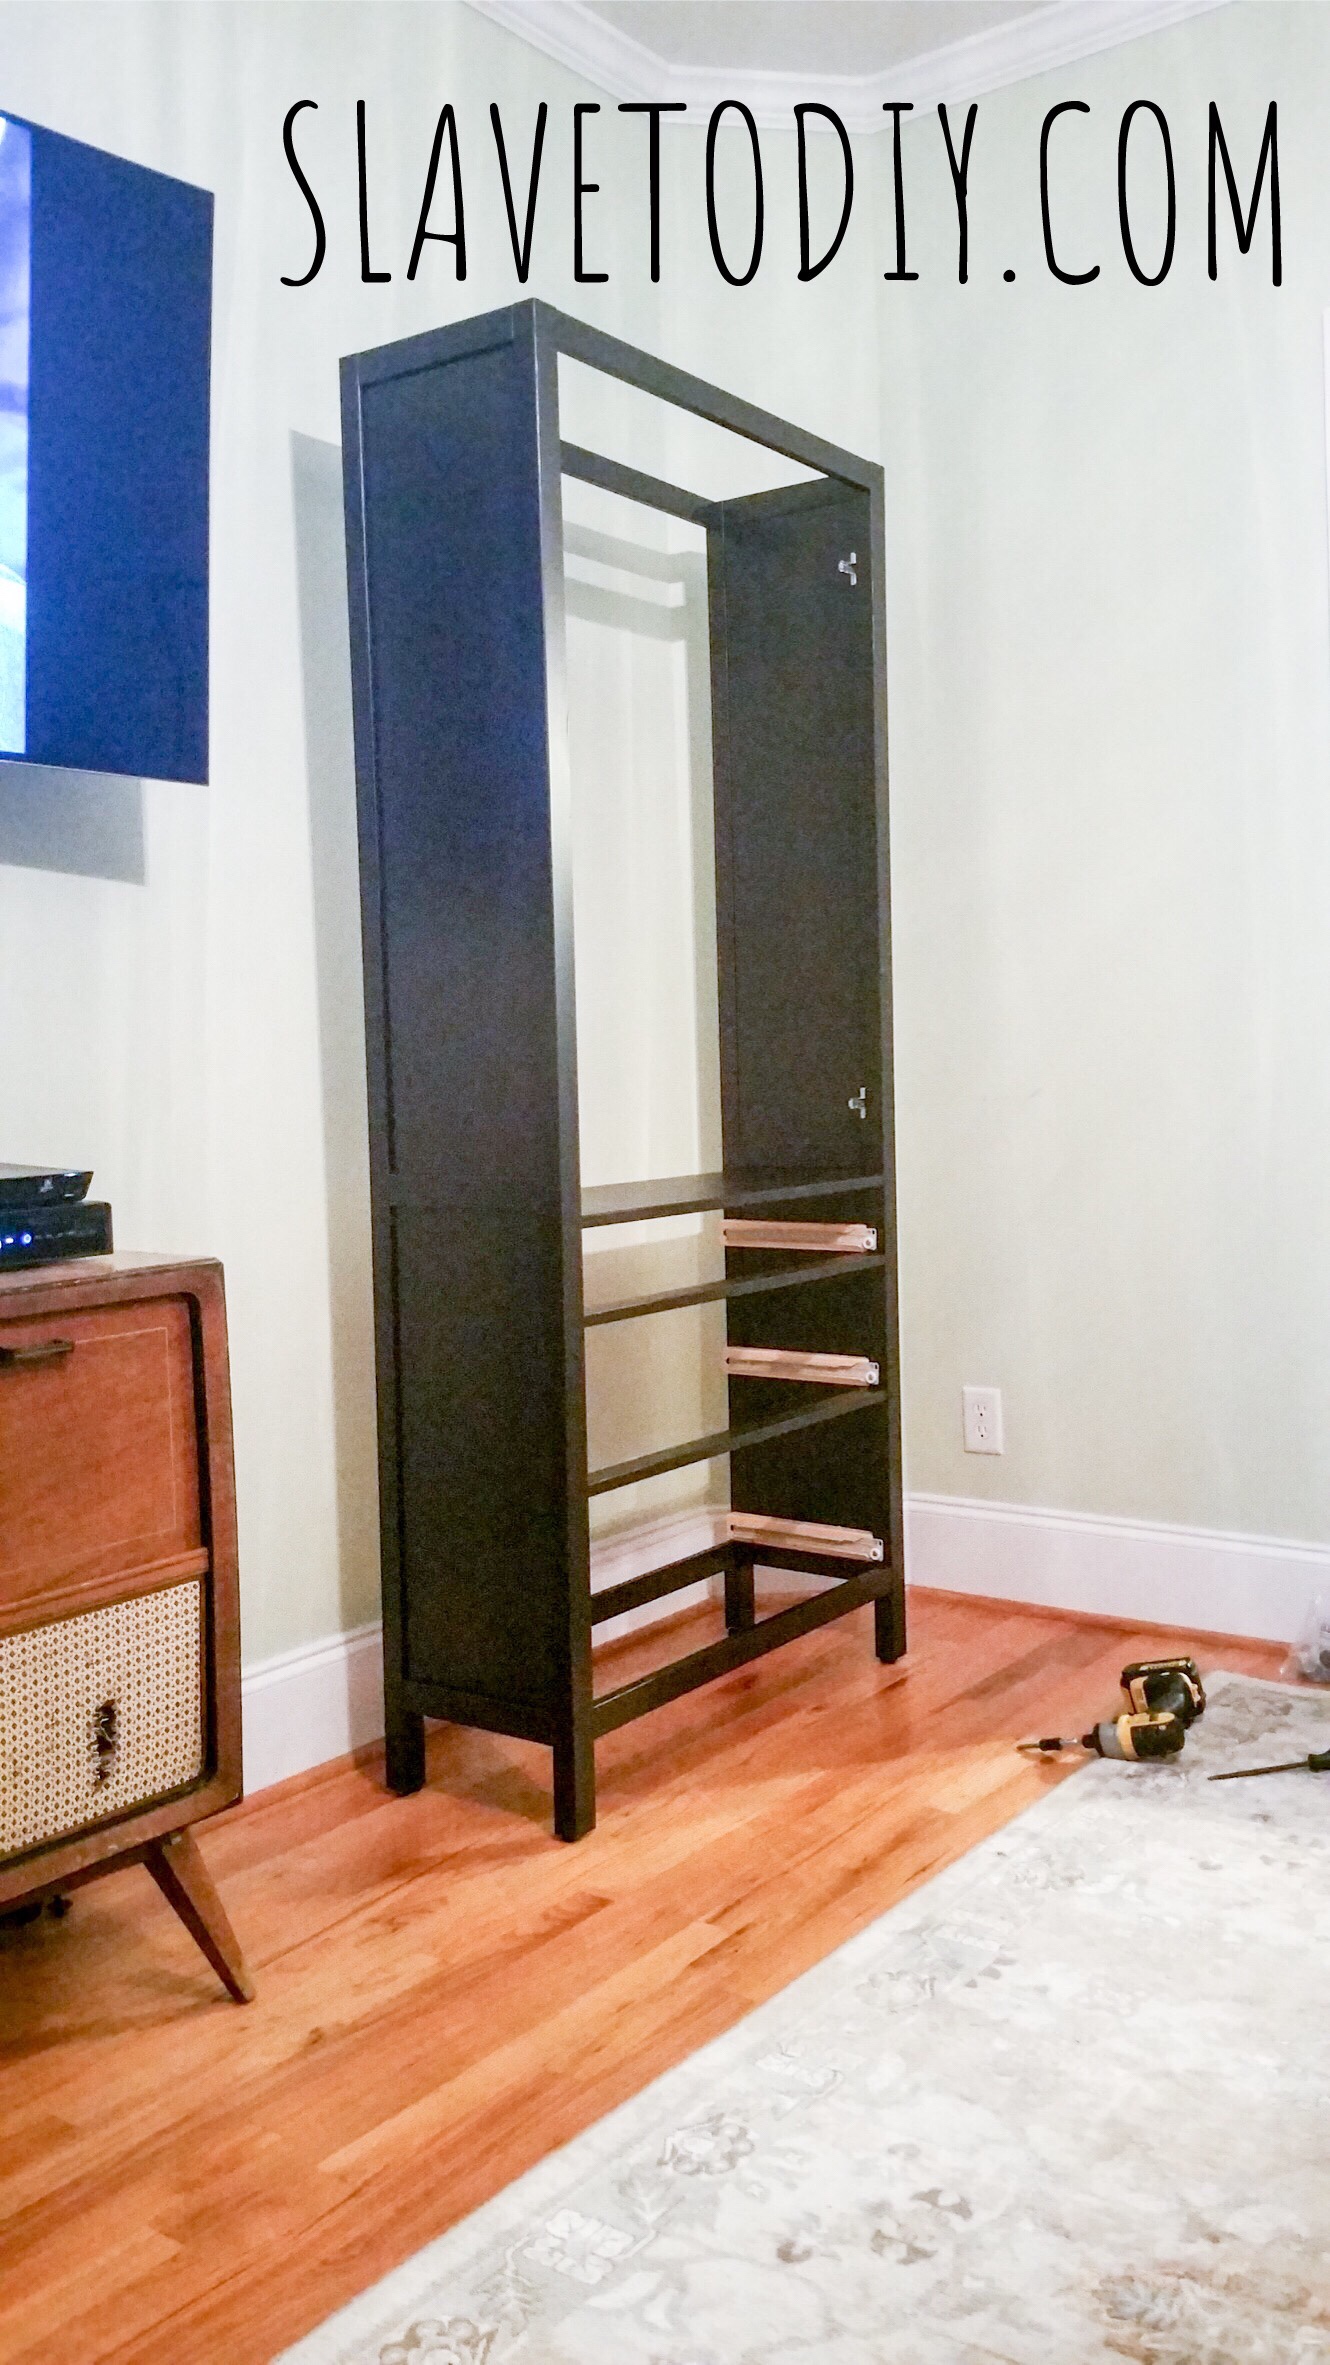
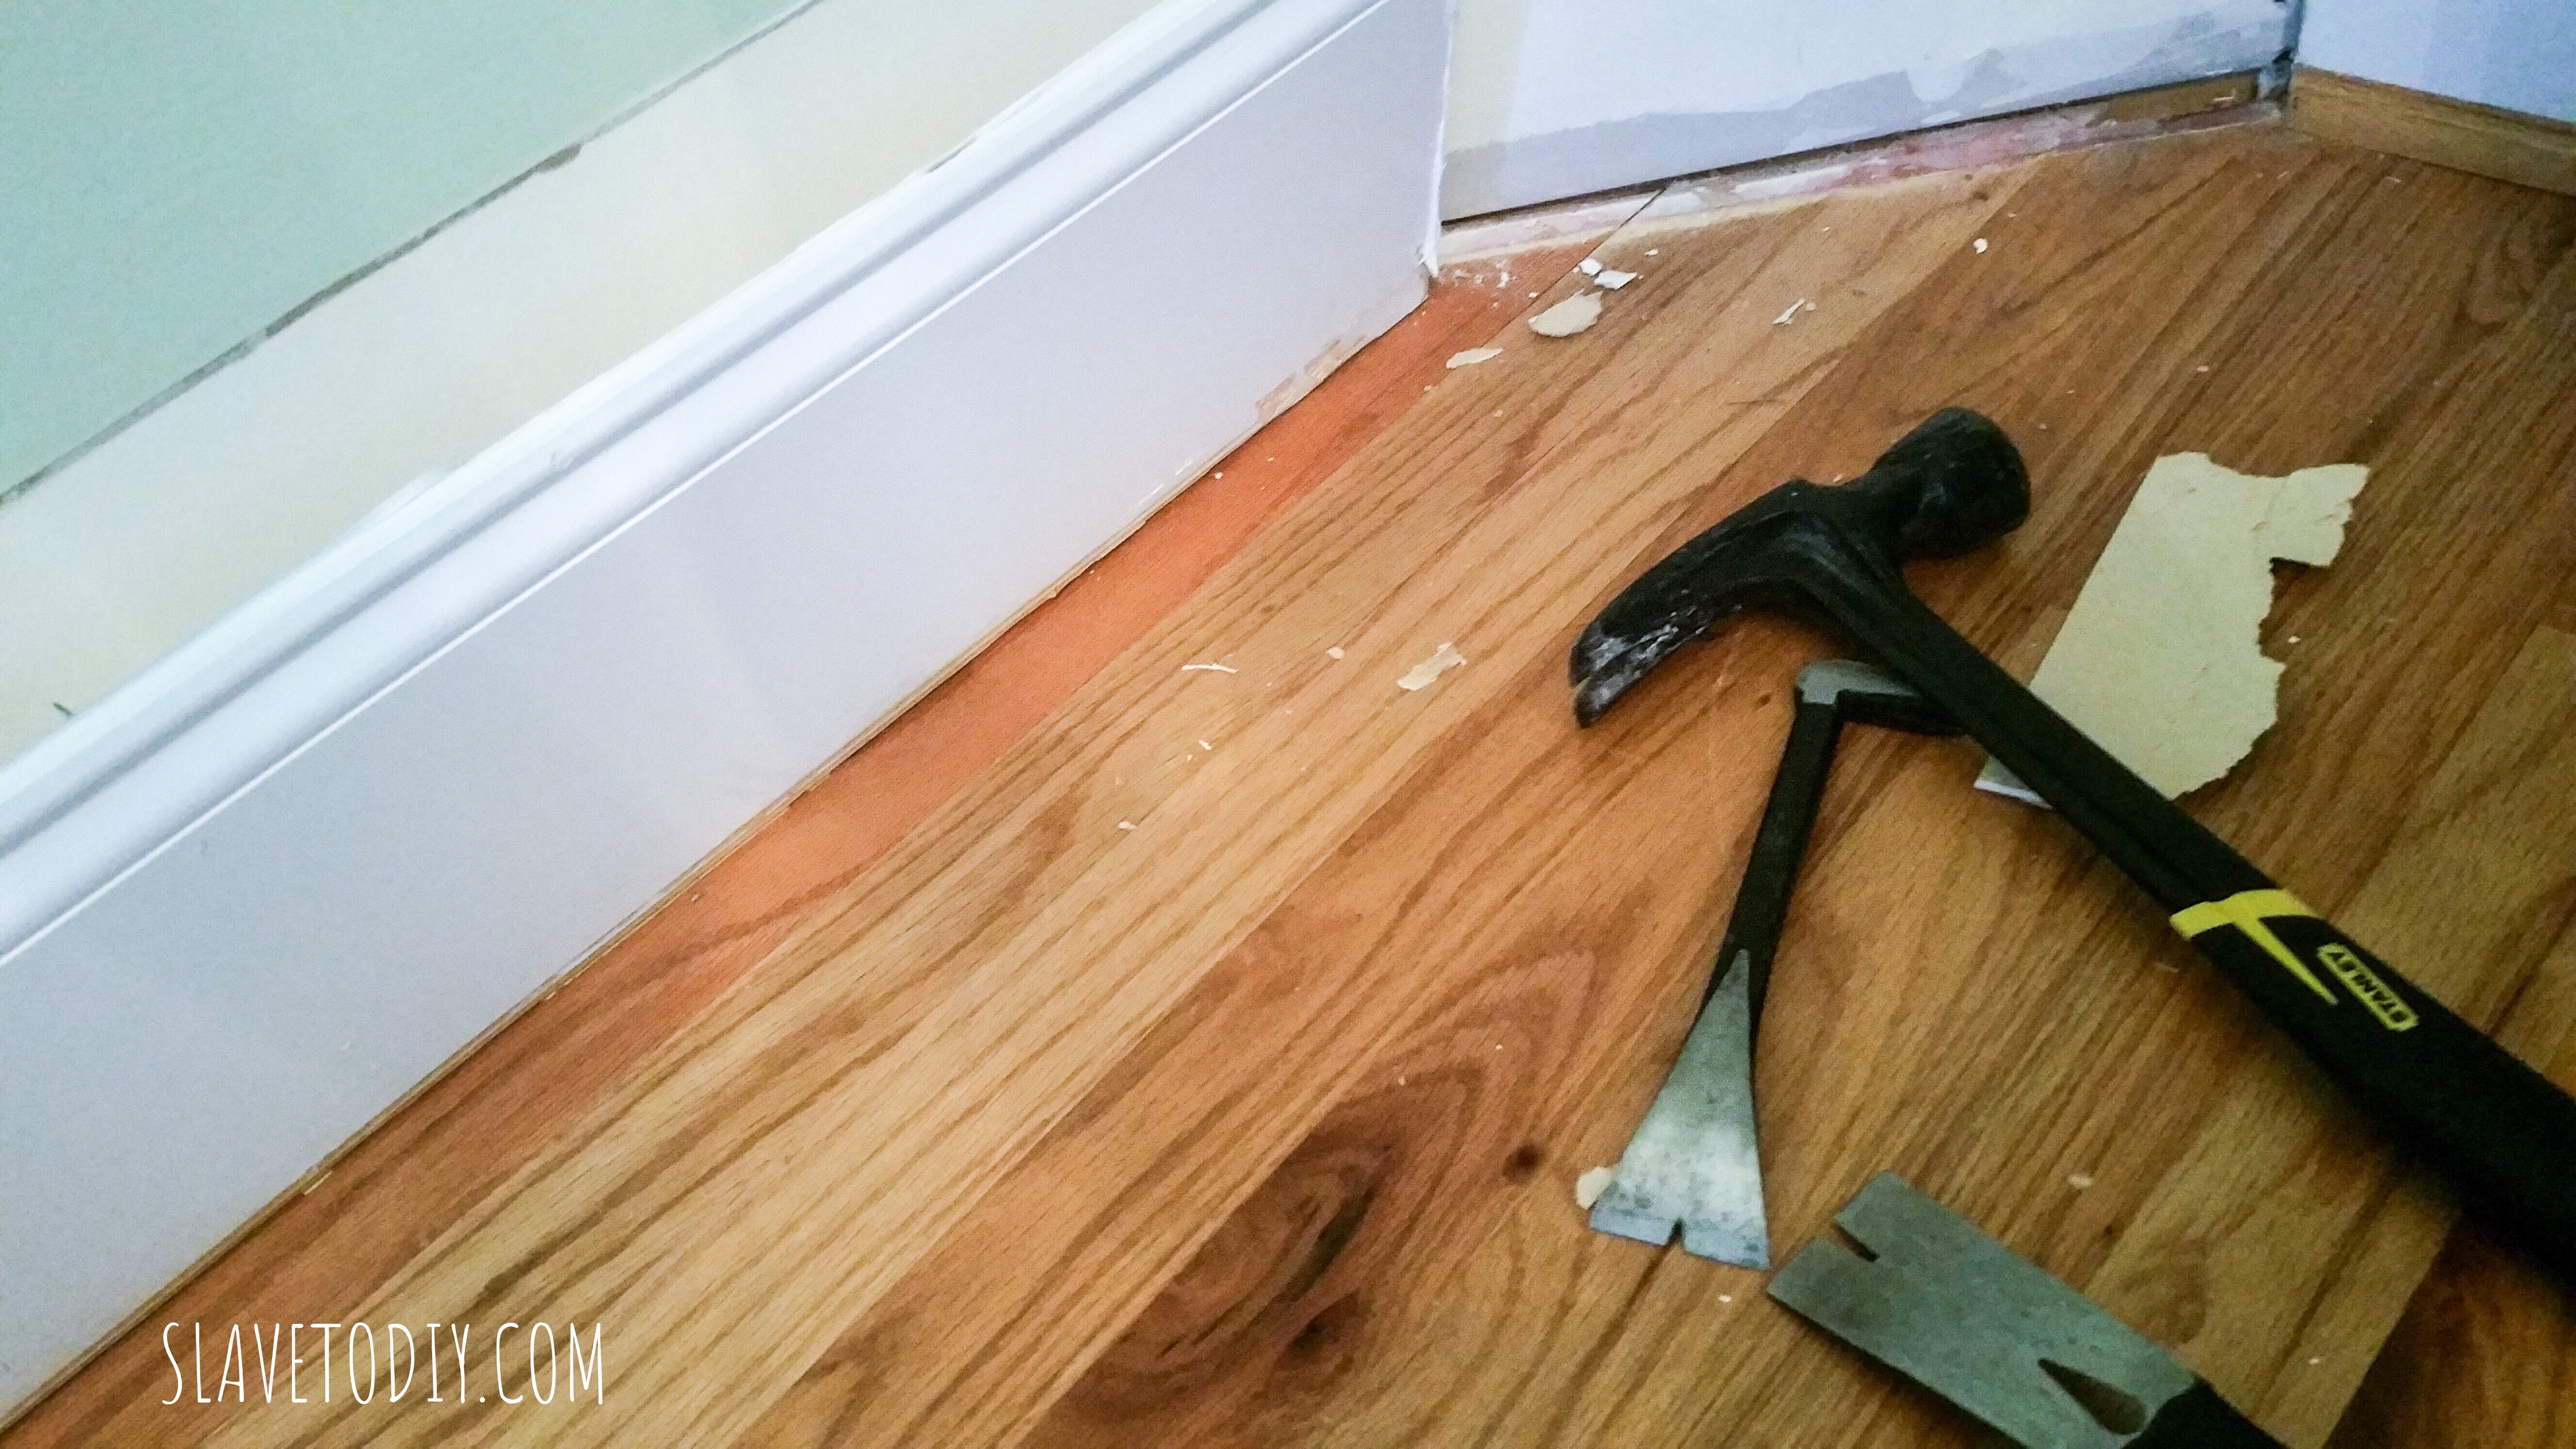
Wall prep.
So, for installation the baseboard had to be removed, and not being totally sure where the shelves would cover to (due to the *cough *cough extreme precision of my design plan) I decided to spackle and sand the uneven spots. I hate mud. I hate sheetrock. I hate sanding. Shoot me.


Paint:
I kept seeing all of these great shelves with an accent color on the back wall. So, I chose a color at the paint store, and hated it. My pretty gray turned out purple and I waited a couple of months before admitting that I hated it, and got the wall painted black before the installation began. Yeah, I said months. This is why we don’t six-week challenges. Six MONTH challenges would be record-breaking for us.
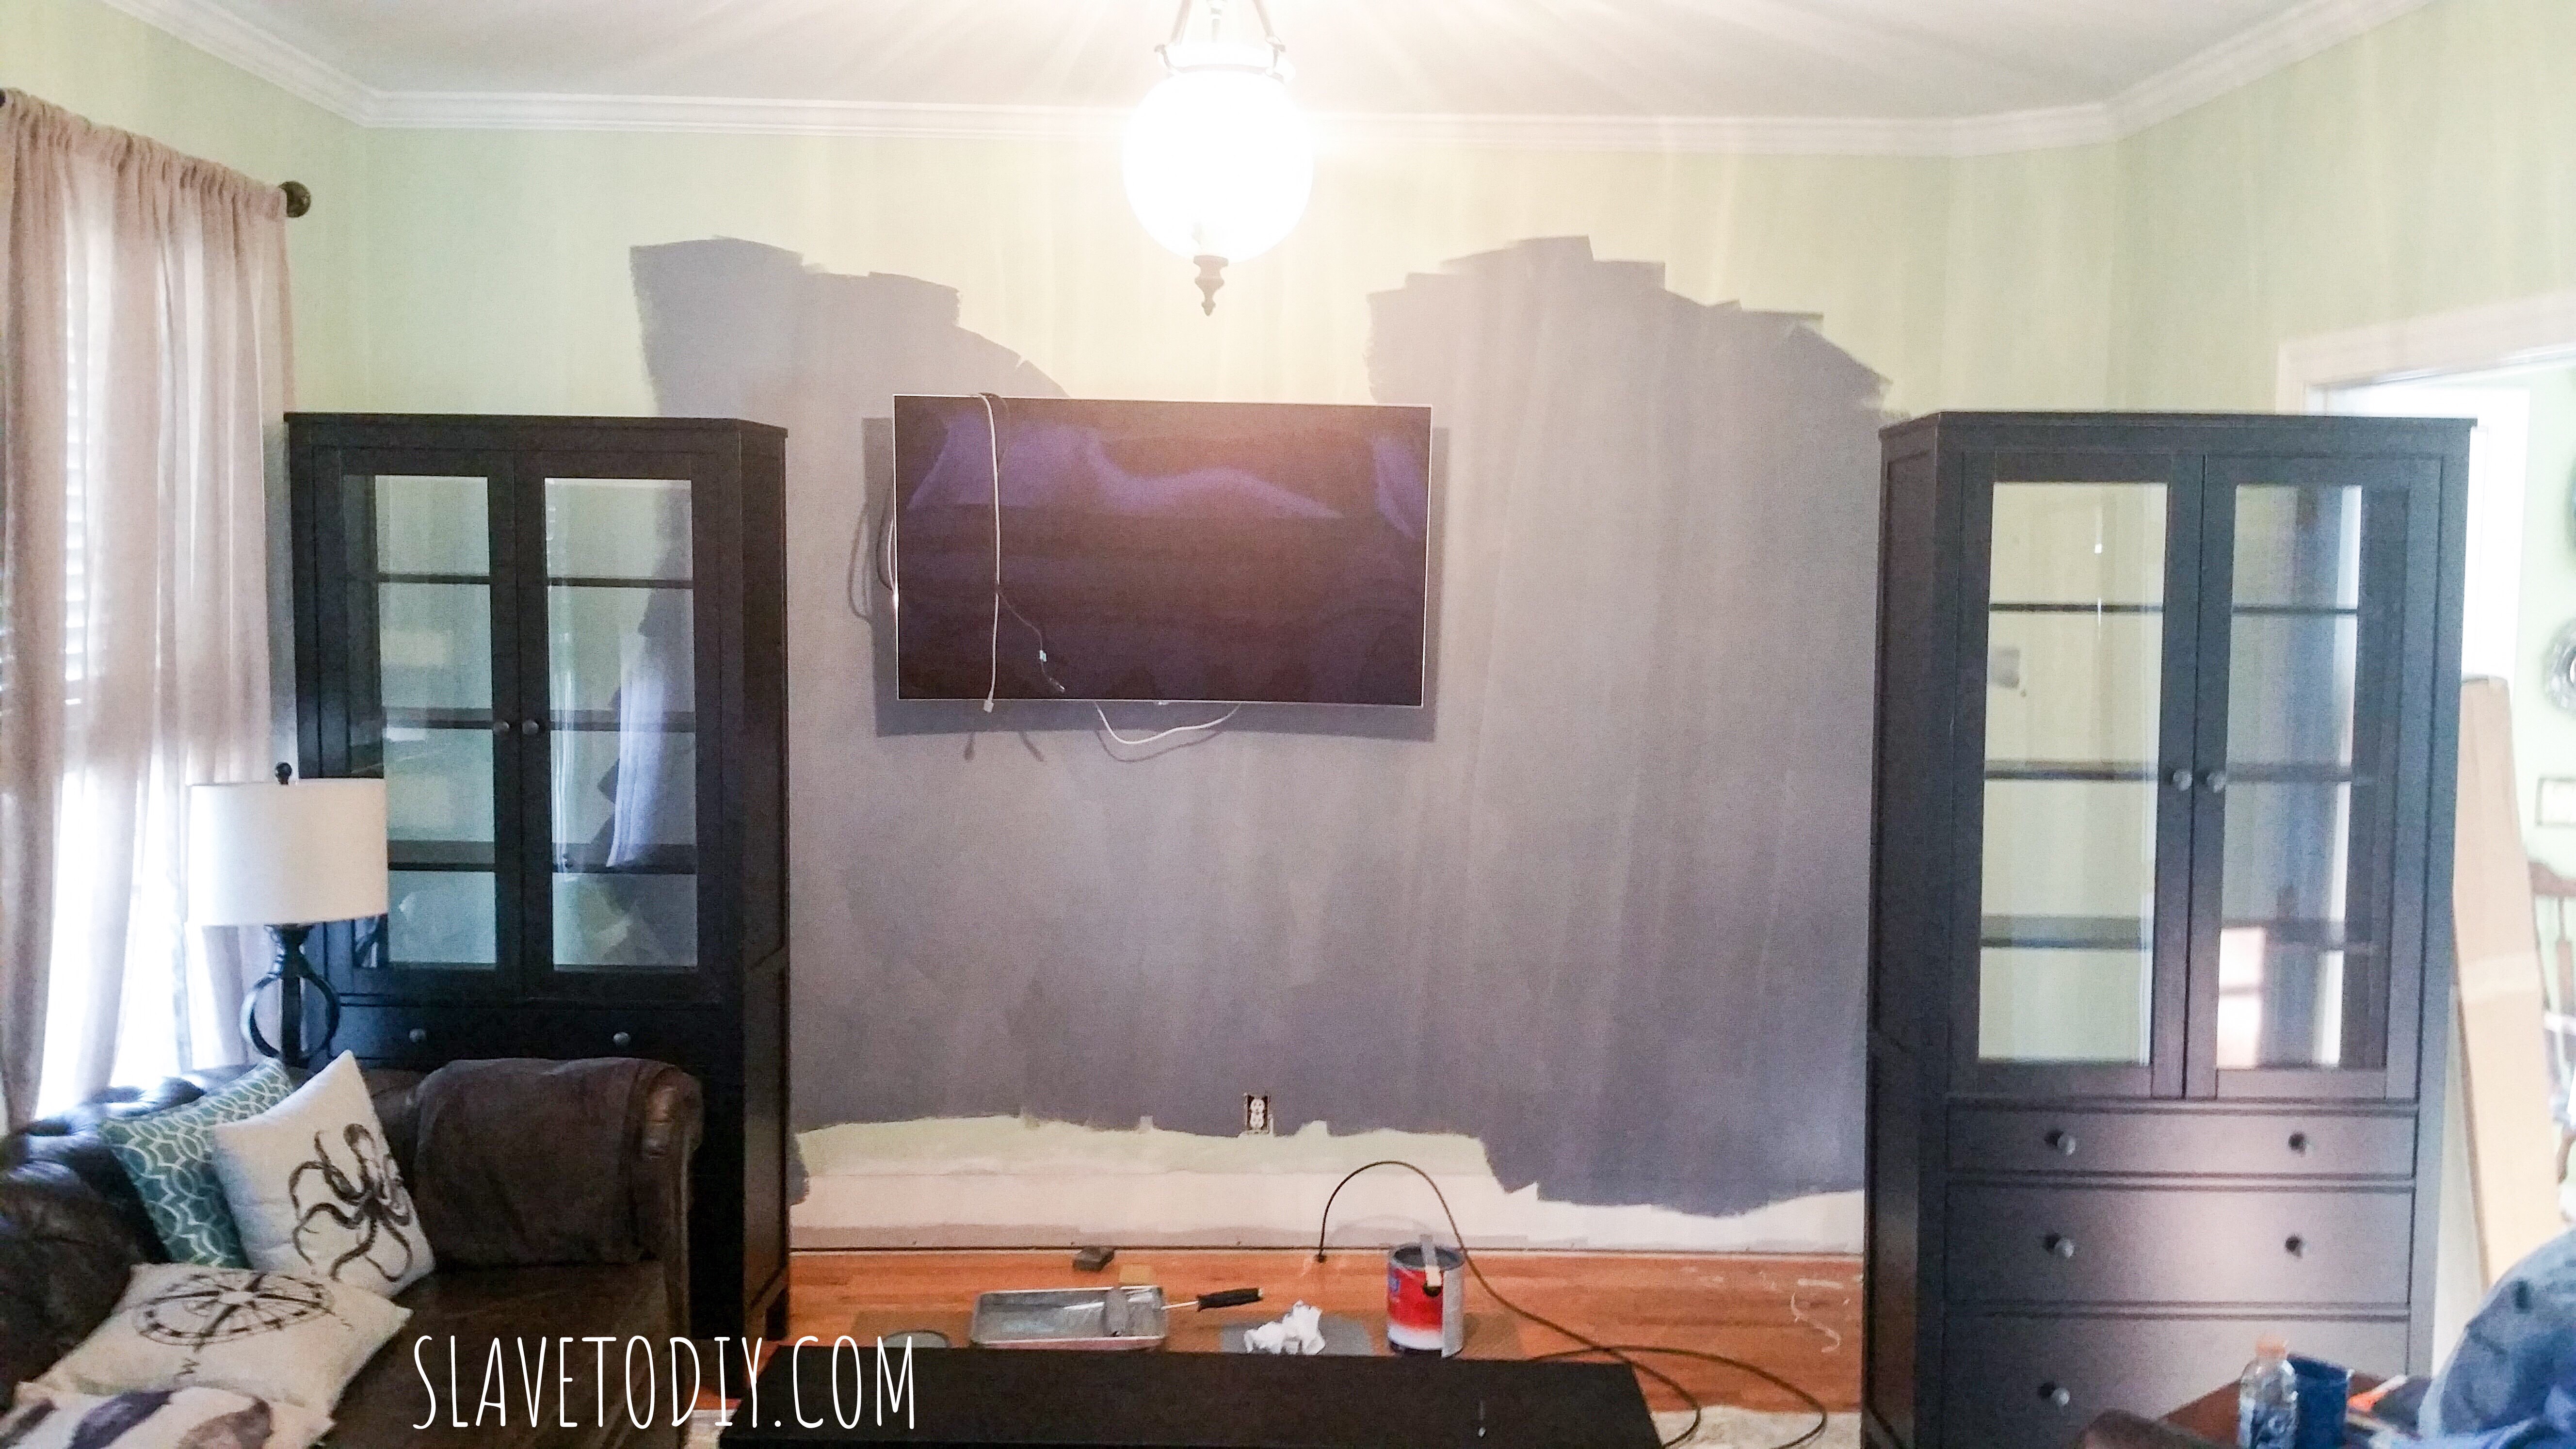
Purple. Blech. It was supposed to be gray.
So, we survived the holidays and I dropped not so subtle hints about beginning the installation on our anniversary weekend when we were both coming down with colds. I mean, I painted (again) so now we were waiting on HIM. Not my best moment as me and grumple-stilt-skin headed to Lowe’s with Chatty-Cathy in tow. Thank the Good Lord the Lowe’s car shopping cart was available. About a hundred bucks later, with black cabinet screws and framing lumber, we escaped back to our nest where I decided we collectively needed a break and SEC football was more important than my built ins. Oddly, I didn’t get any protests.

Two days later he built the base for the bridging shelves to sit on and we were back to waiting on…. ourselves. Because we were not sure what we wanted to do for a conduit to hide all the crap that goes behind the TV. Well. I’ll let you know.
It’s going to be a few days because it snowed in North Carolina and the state is shut down. My husband was doing donuts in the cul-de-sac in his truck with the kids, so that’s a better day, ANY day, than installing built ins. Snow man 1. Built-ins 0. Send help.
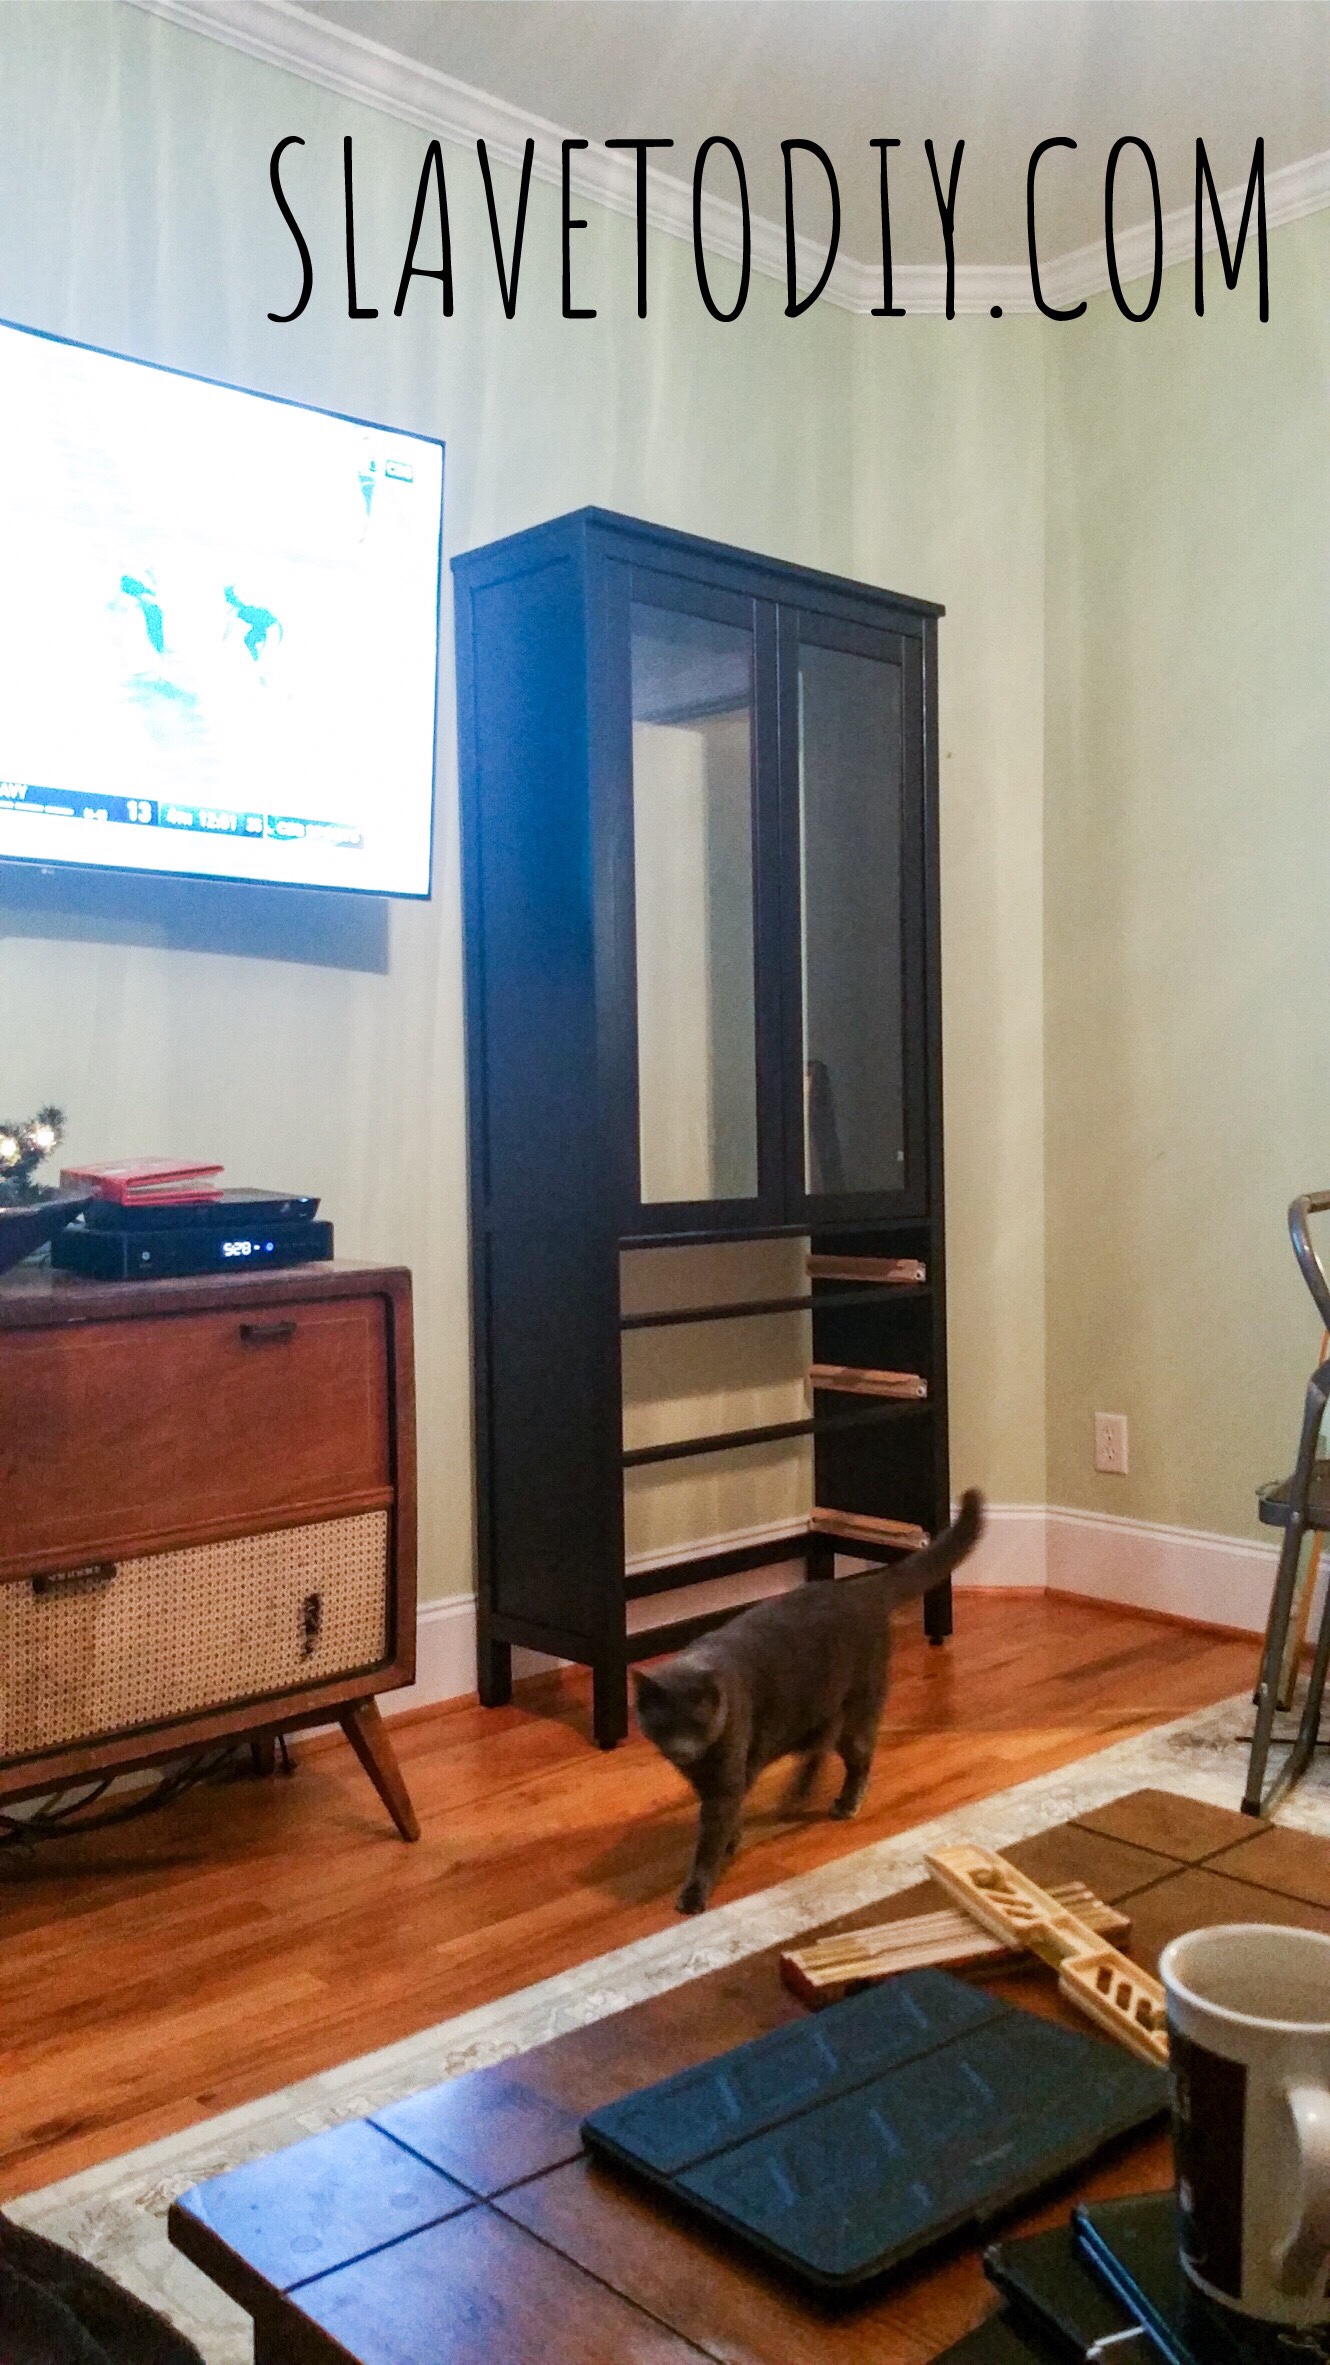
And the kids were out of school for a WEEK. No snowplows. (Did you happen to notice that we’re nowhere near done and these aren’t so much as attached to the wall, but I already started putting stuff in them?)
Several installation sessions happened in the spring. I finally decided on a cord hiding solution (which is totally genius and I should definitely receive a prize for) so my tired Rainman got to work. The cord hiding solution ended up being three rectangles, one in each center shelf, hiding from view the two-inch diameter access holes through the horizontal panels. The cords thread through behind with super easy access.
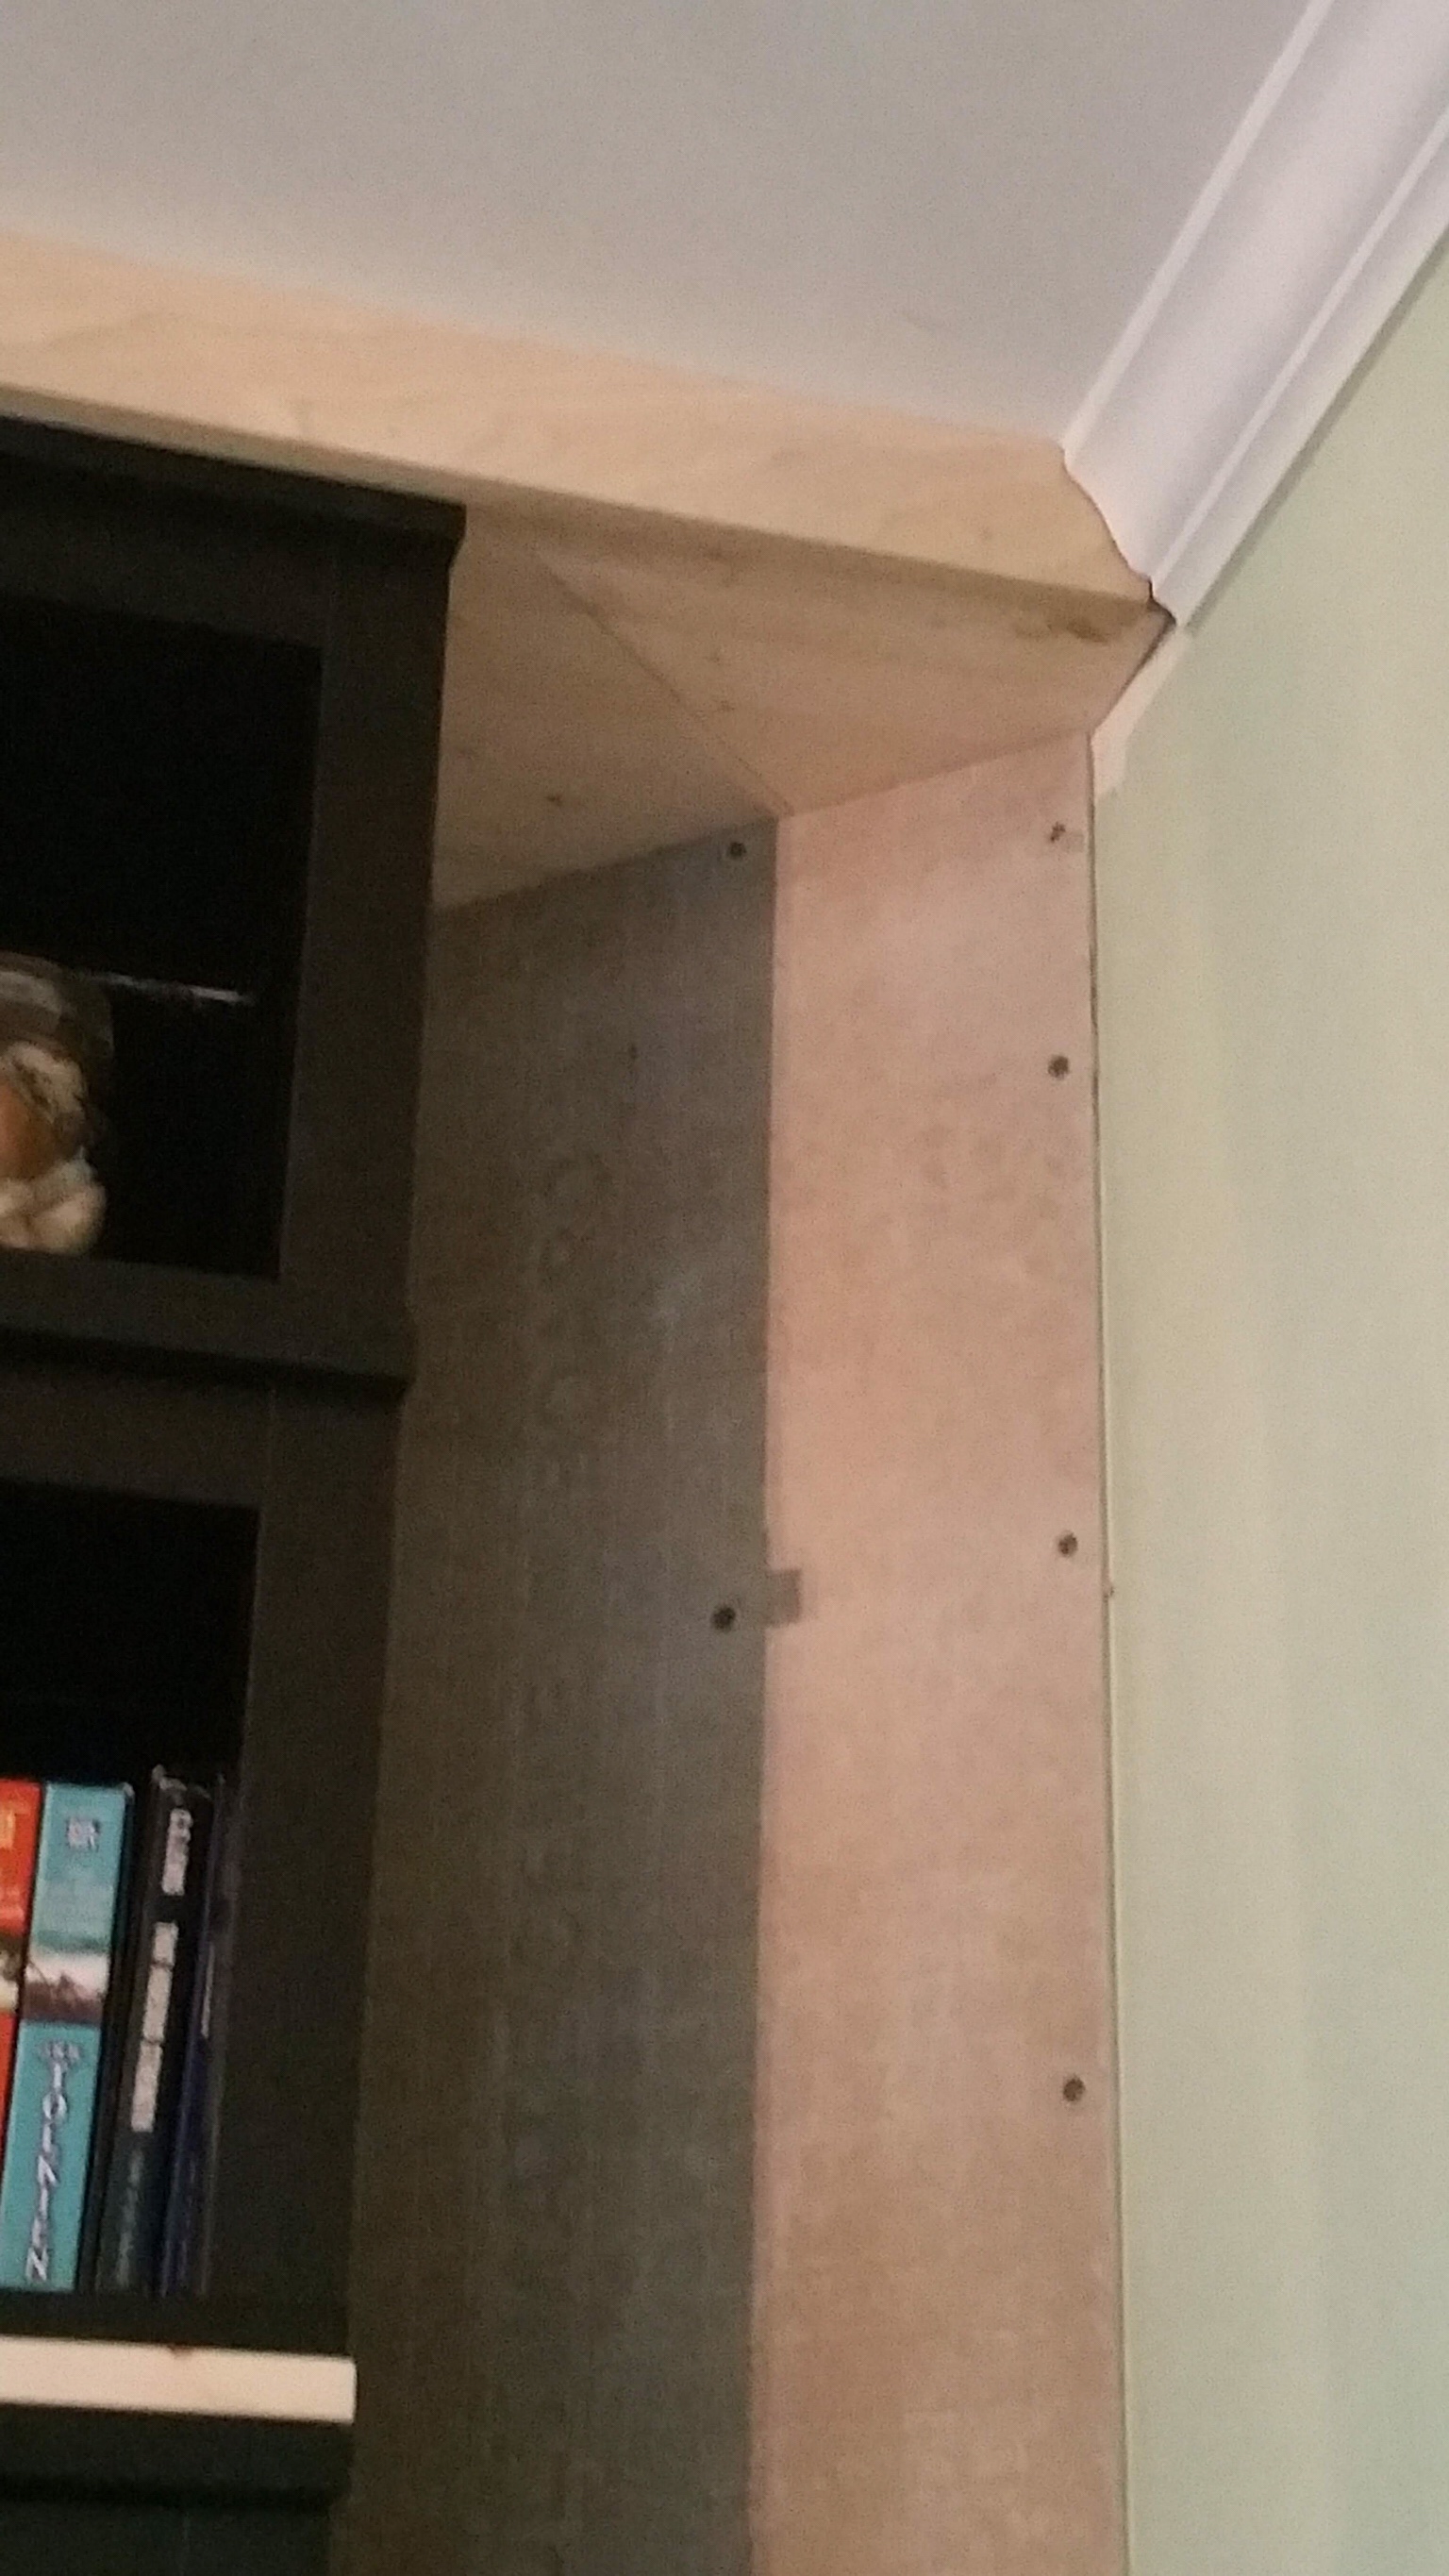
To be fair… Looking back, I realize that the hesitation for Rainman on this project actually had to do with the odd shape of the hemnes components. And this is something to keep in mind during the design phase.

Basically, the back is not flush on any of them. Presumably this is to allow for the whole unit to sit flat against a wall with base molding, (with the top of the back sticking out further than the bottom) but makes installation as built ins maddening. Several times we had to pull pieces of trim out and reseat them because we lost track of which edges On the face were supposed to line up flush.
In hindsight, it would’ve been easier if we had trimmed the tops on each component so that the back sat completely flat against the wall and we didn’t have to shim each component to line them up. He suggested that after the initial component assembly and I shot it down because all I saw was an afternoon of wasted time disassembling, trimming, and reassembling components. I like the way it ended up because now I can install a light kit with existing gaps, but in hindsight this project would have been WAY faster without the bumped out tops. He was right. I was wrong. Don’t tell him I said that.
This is how ridiculous my life is. It was December when we ordered the IKEA components. It is now July, and wouldn’t ya know, that s&@# is still. Not. Finished. We’re agonizingly close. But, life and work just won’t step aside to allow us to finish the built ins.
Side note, I can blame an entire lost work day, last Sunday, on a collapsed shelf in the garage. Little shelf? No, huge shelf. Like shelf that runs along the entire back of the garage shelf. I went out to get a water out of the beverage fridge and the door was WIDE open. “Which one of you little $#&% left the damn door open and how long has it been that way?” I thought to myself. I pushed on it. Harder. Nothing. I looked up. Why was the beverage igloo pushed forward against it?
Then I saw it, the giant shelf collapsed on top of the fridge, on top of the filing cabinets and router table, BARELY missed the bottle on top of the hot water heater. I distinctly remember warning a certain someone that those were crappy shelves were going to collapse. We installed really strong, nice shelves, that are bolted into ceiling joists. UGH. I managed to only say I told you so once, and everything on the shelf fit up on the new shelves. I still want to find the jackass who built that shelf and have a short conversation with him.
So, here we are again, NOT finished. However, we’ve made some progress. I almost, in a moment of desperation, changed the design plan in favor of the version that would get us to the finish line faster, but I’m just not willing to throw in the towel, yet.
We began installing the components and securing them to the wall and to each other, which proved challenging. This is because of the aforementioned bumpouts which leaves only one section of each component actually touching the wall. We secured them to the studs with black cabinet screws. We used pine boards for the transition areas since they were going to be painted black.
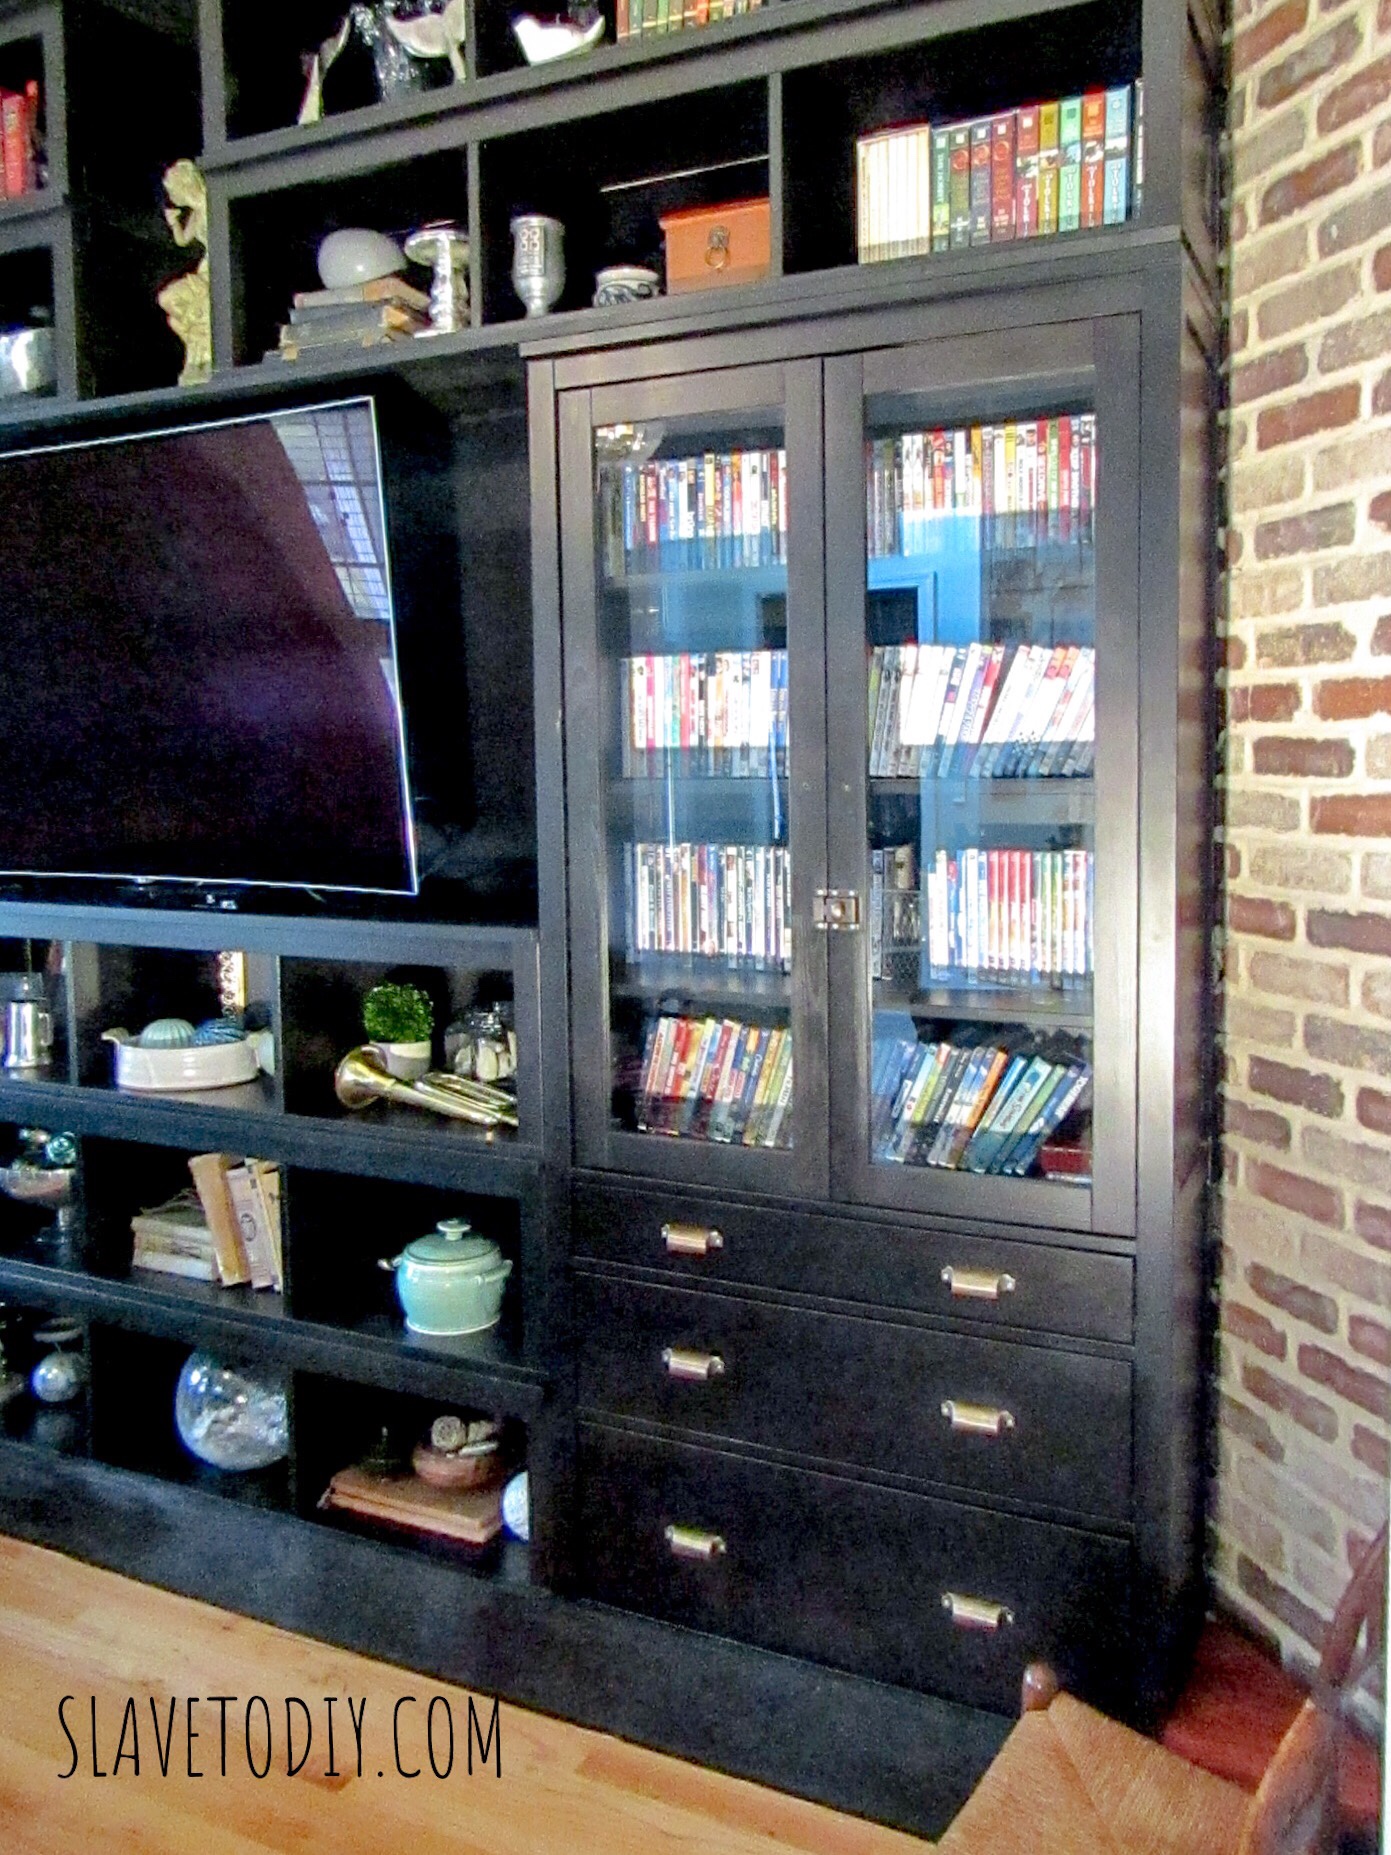
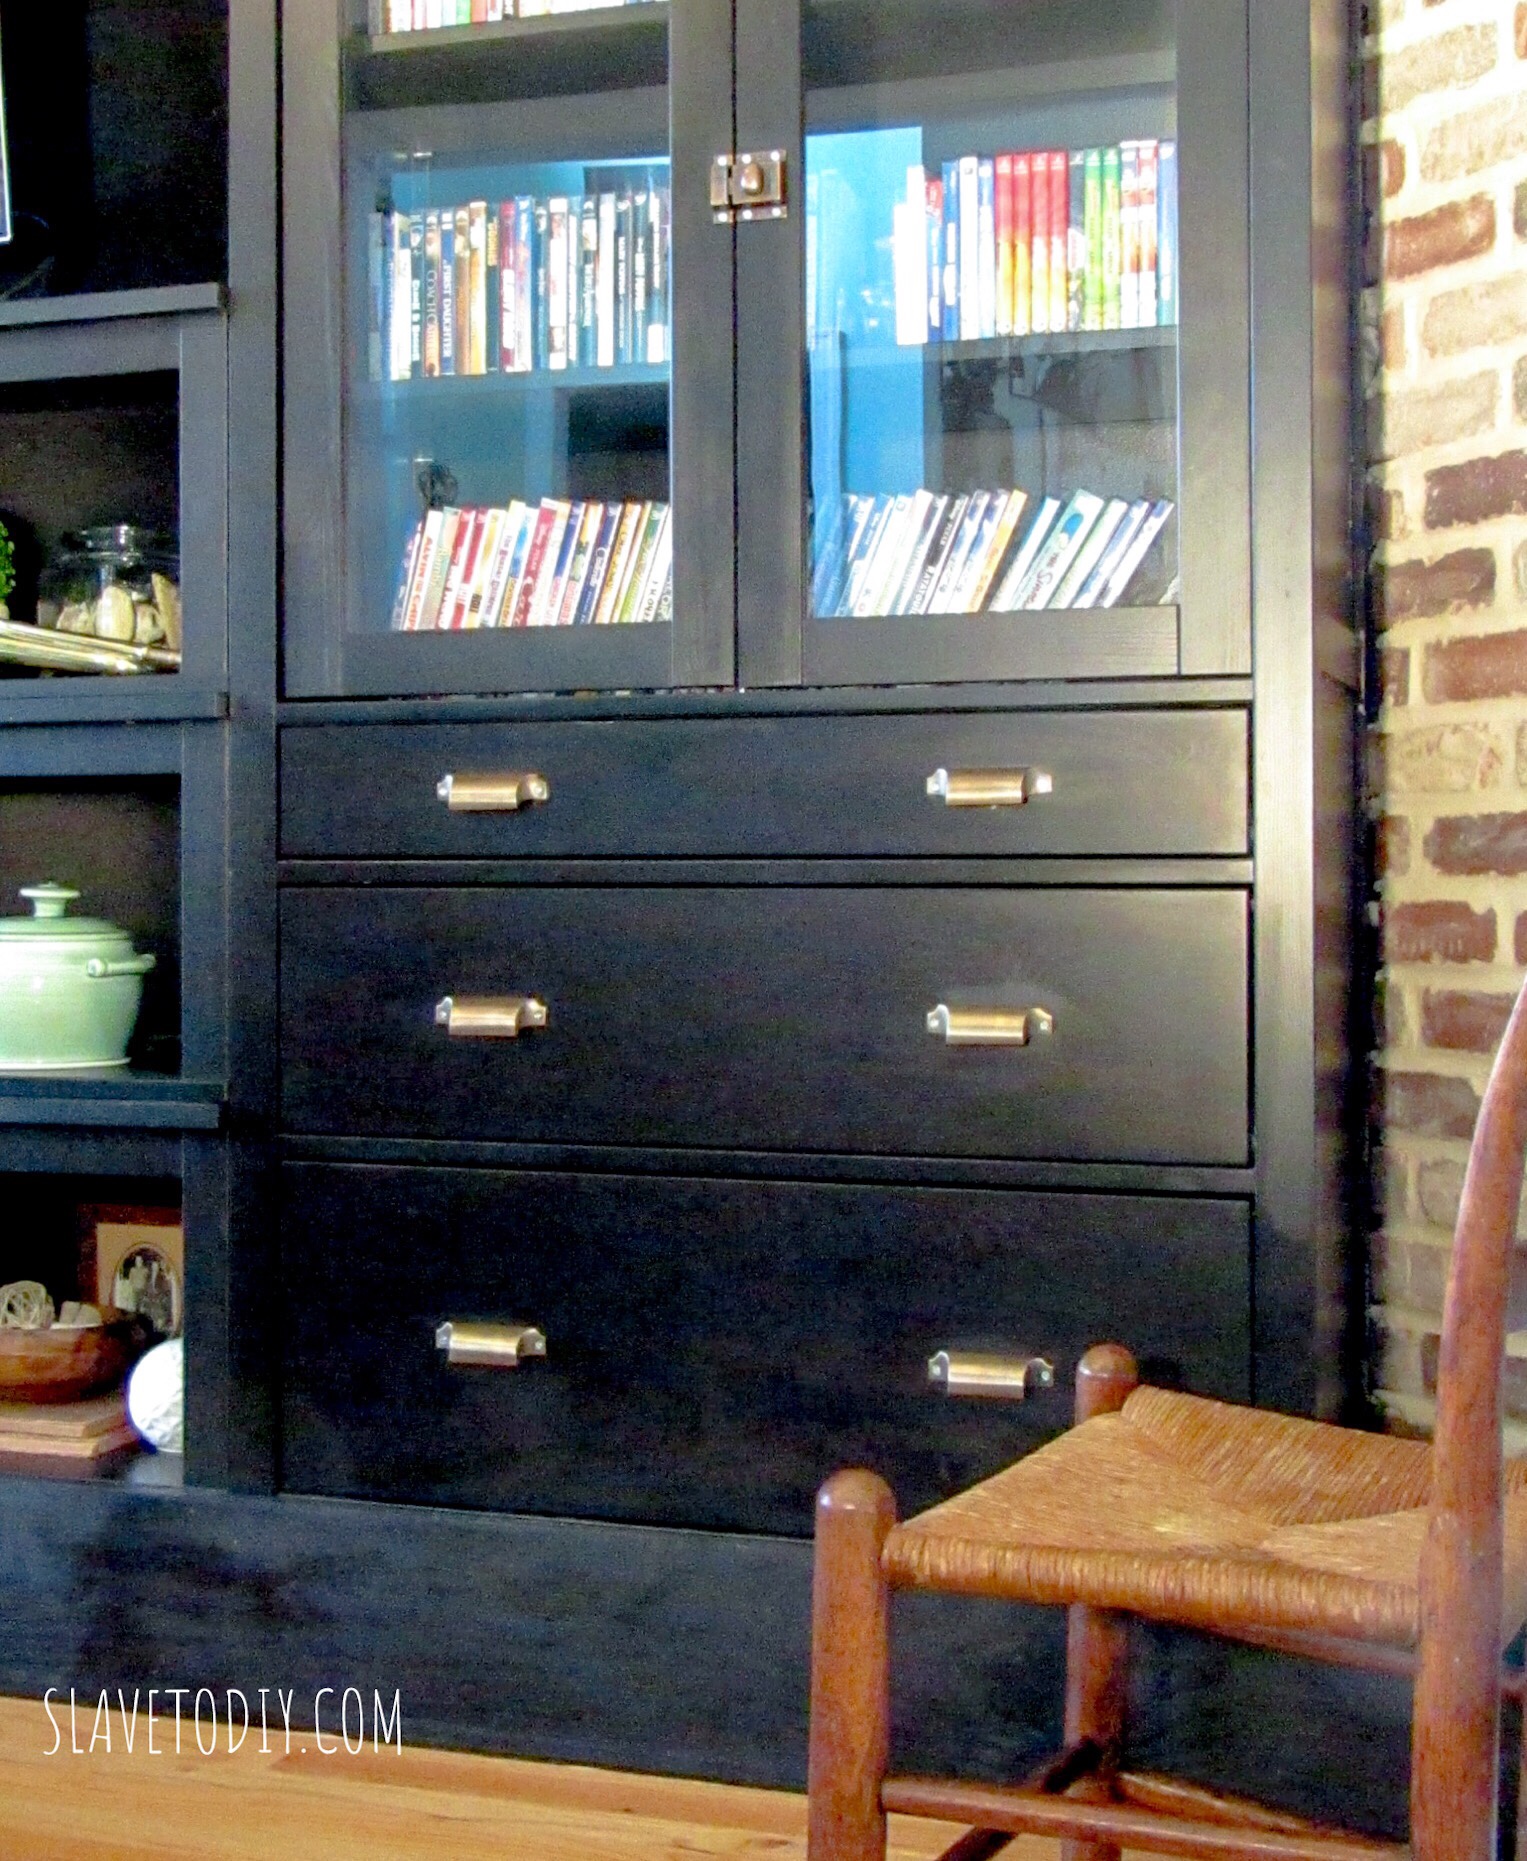
And I have to say, the details are turning out BAD ASS. We ordered some brick veneer from Home Depot (after I price compared with a local brick distributor that needed six weeks lead time to create the veneer and only sold big pallets). It’s called Old Mill Brick, comes in neatly stacked cardboard boxes and is really nice. I looked at all the types first on their website and ended up choosing an antique style, “Colonial Collection Castle Gate”, 59.97 for a box of 50 bricks. Not cheap, but reasonable. Here’s the thing, the cost of the brick detail just on the outside shelves, cost about $120. The mortar and grout ran around $70. But, it’s the thing that makes them awesome. Don’t let the “veneer” part fool you.. It’s real brick. Just thinner.


Tip: When measuring for your brick, include your anticipated grout lines in the height and width of your bricks and you won’t ordered $120 worth of extra brick. Yes, we literally ordered twice what we needed. We used half-inch grout lines so our measurements should have been 8.225 x 2.75 instead of 7.625 x 2.25. Luckily, we’re planning to use this same brick as an accent in the kitchen so no biggy.
We installed concrete backer board on the walls where the brick was going, but looking back, we probably didn’t really need it.
We got the brick installed… (that is a much longer story). And I’m not going into it. Because it was misery. Working in the tiny space was awful. I look forward to doing this on an open wall.
Anyway, it looks awesome. Took three different tries and one of the biggest, messiest, most tedious installation processes ever. The brick installation process is coming soon. Maybe. If I have the strength.
But, this is what it looks like when we finished the outside edges:
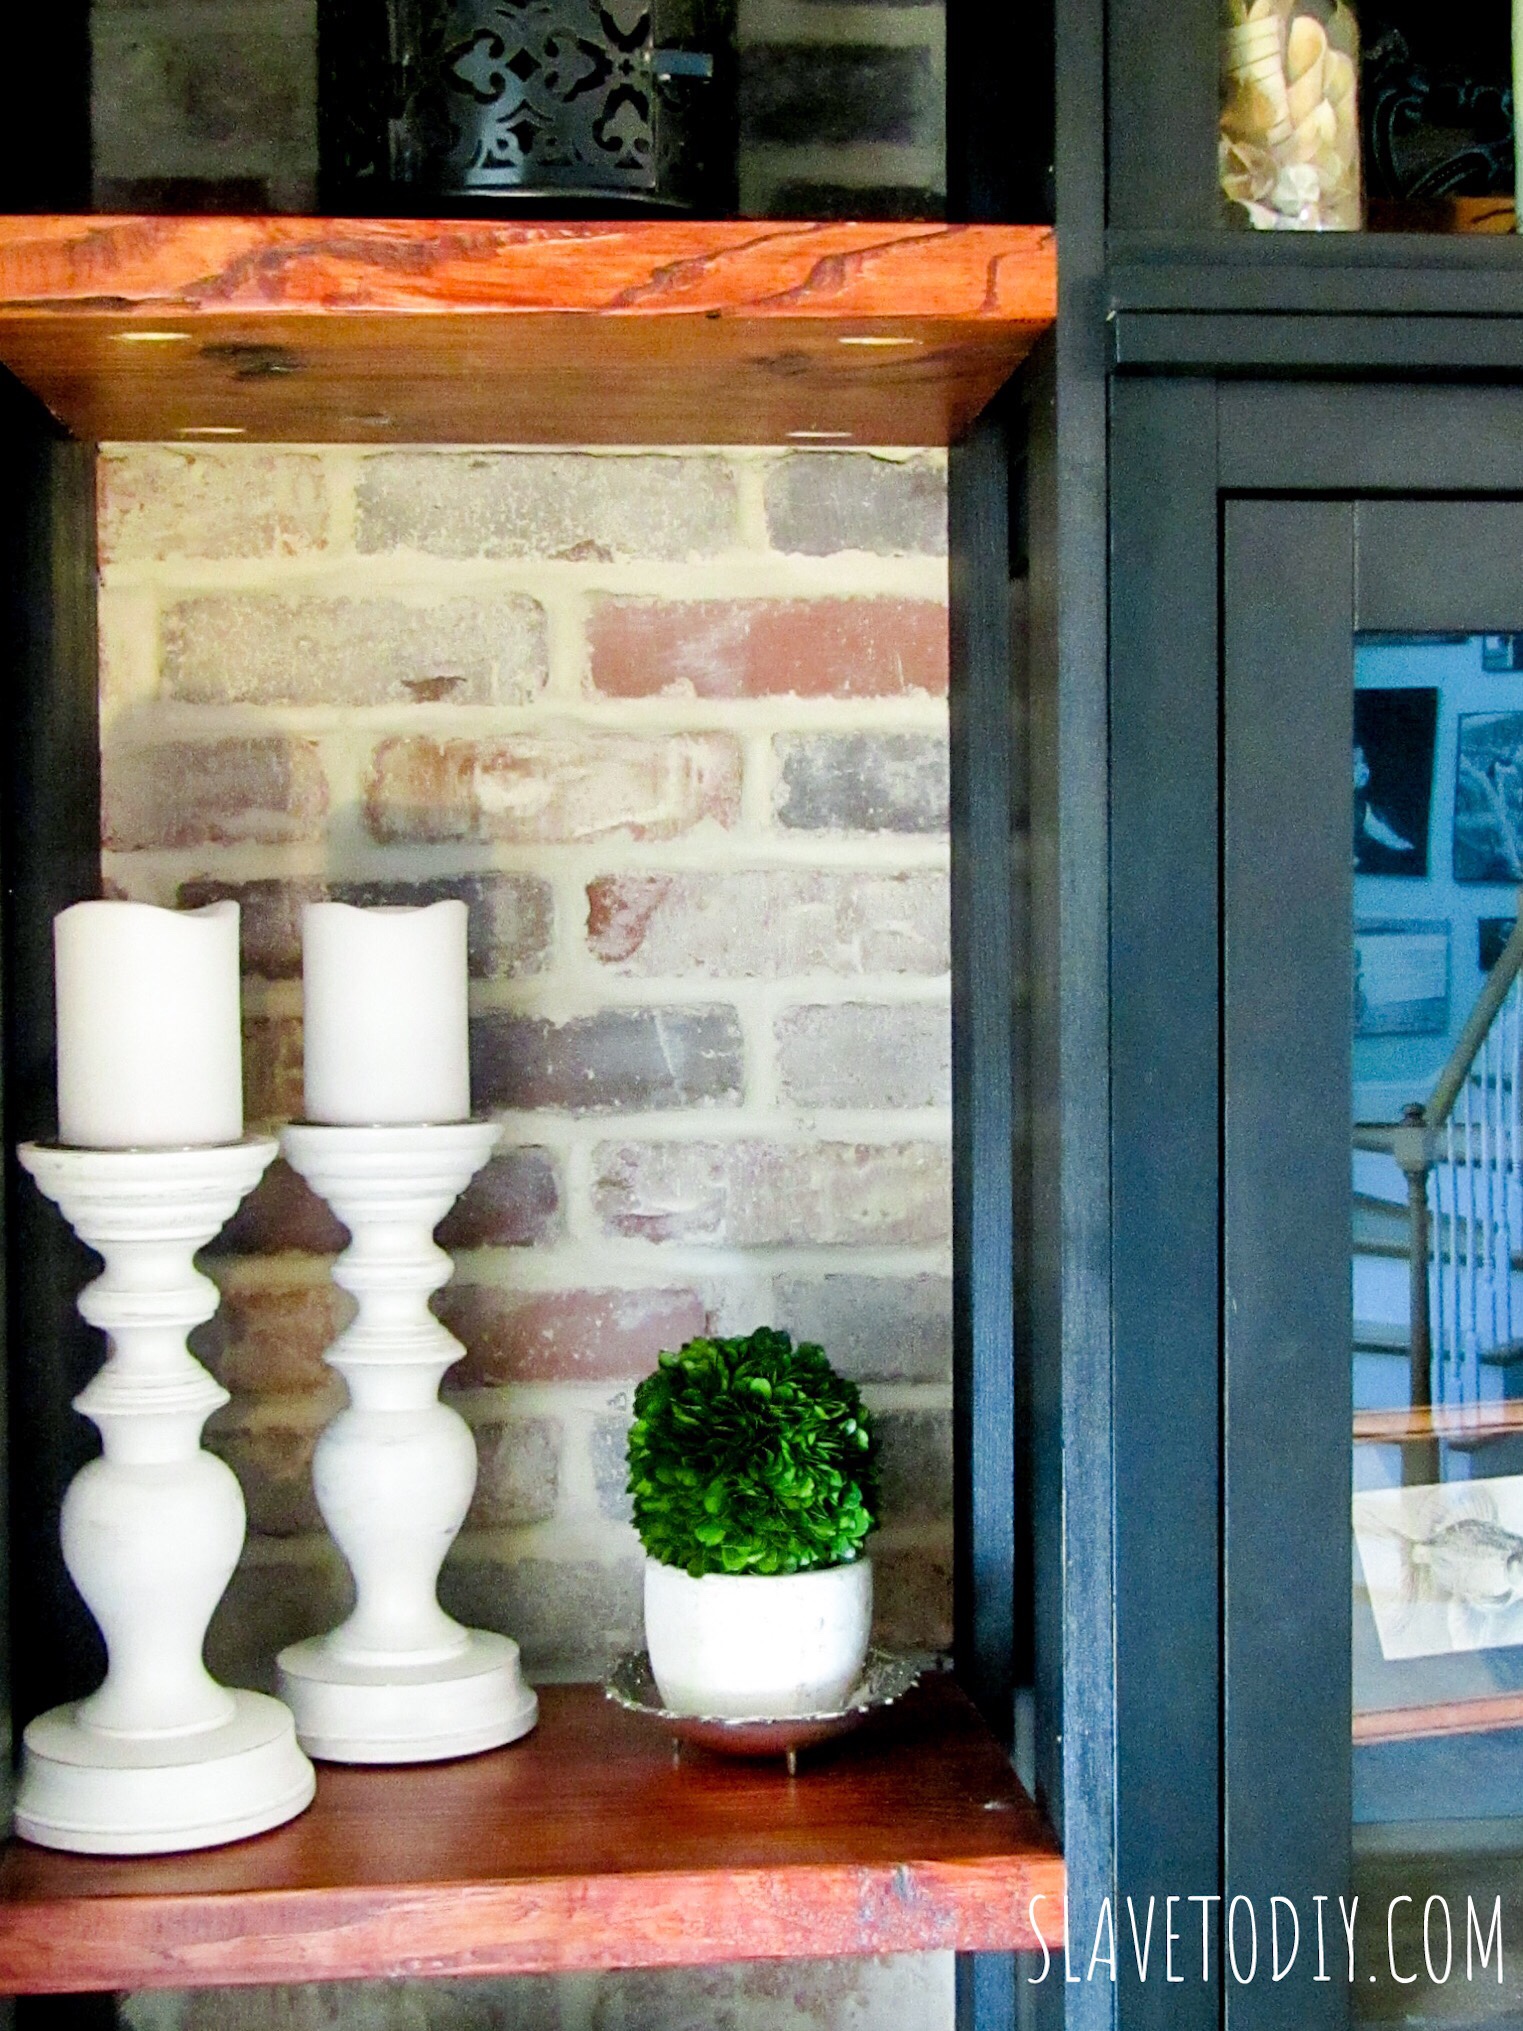
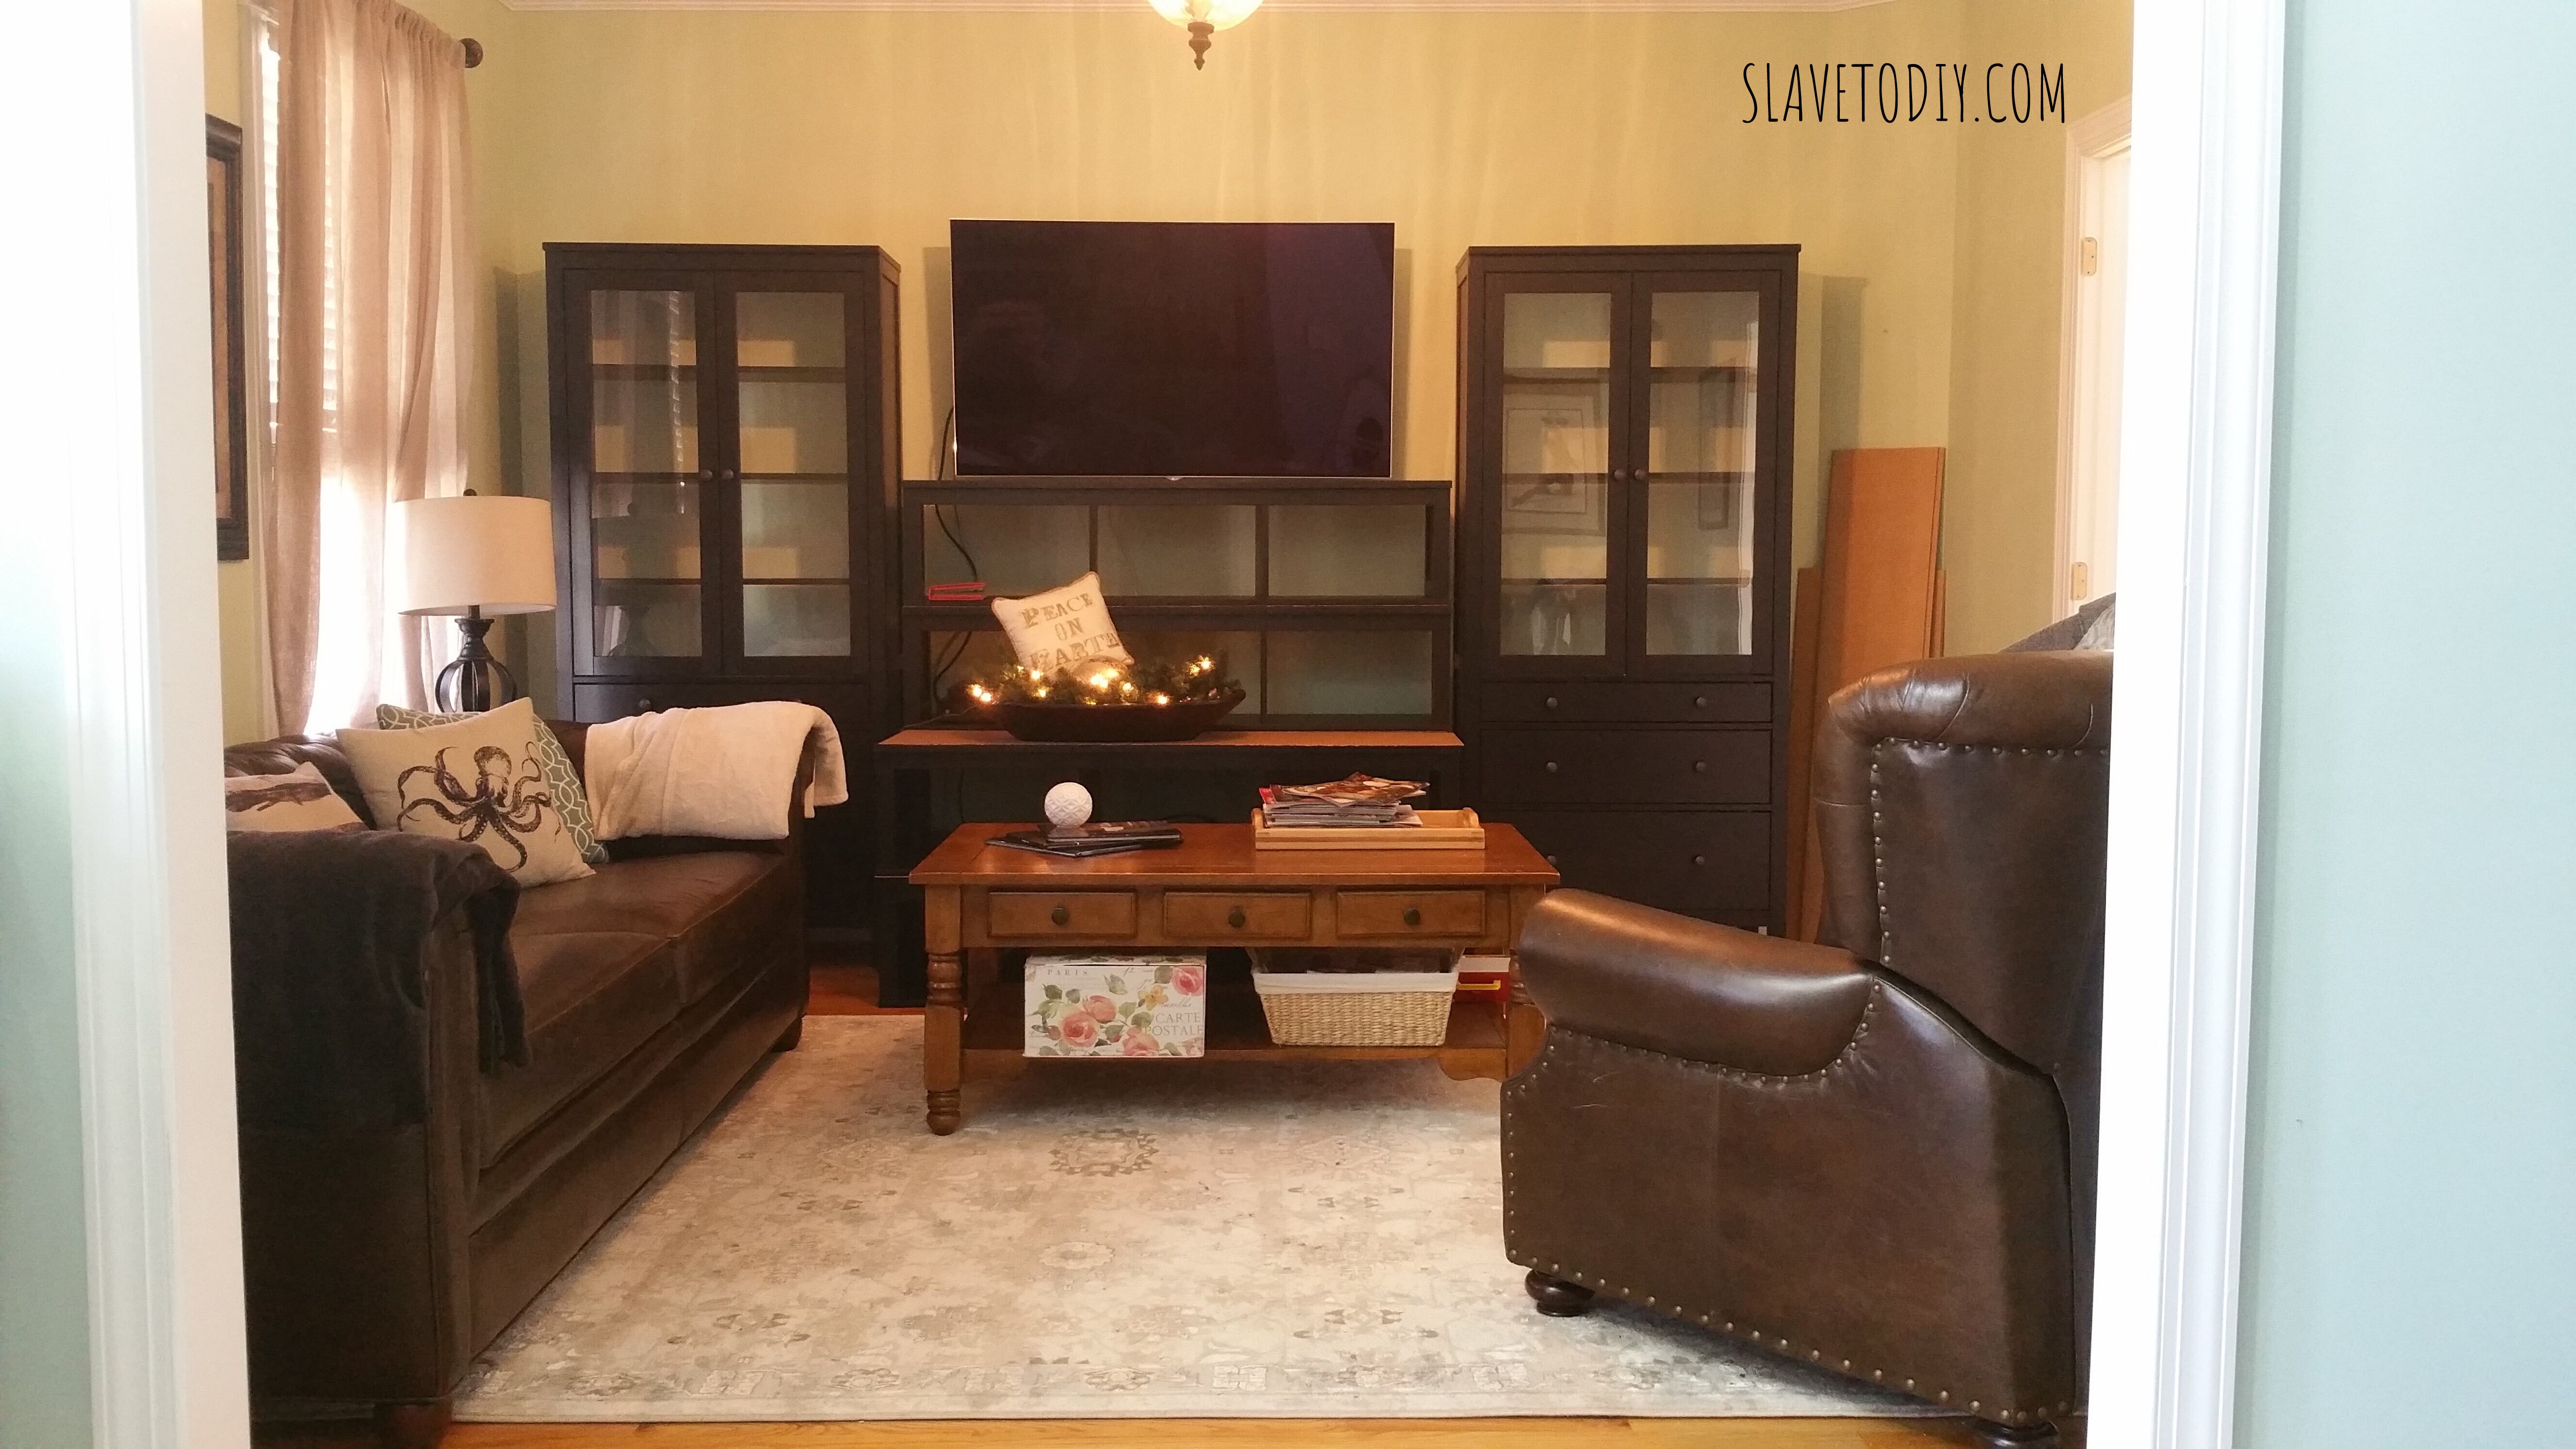
And as you can see we installed the awesome floating shelves on the outer edge. This, combined with the brick really makes this installation special. These little customizations are what make the IKEA hacks look super awesome and non-generic.
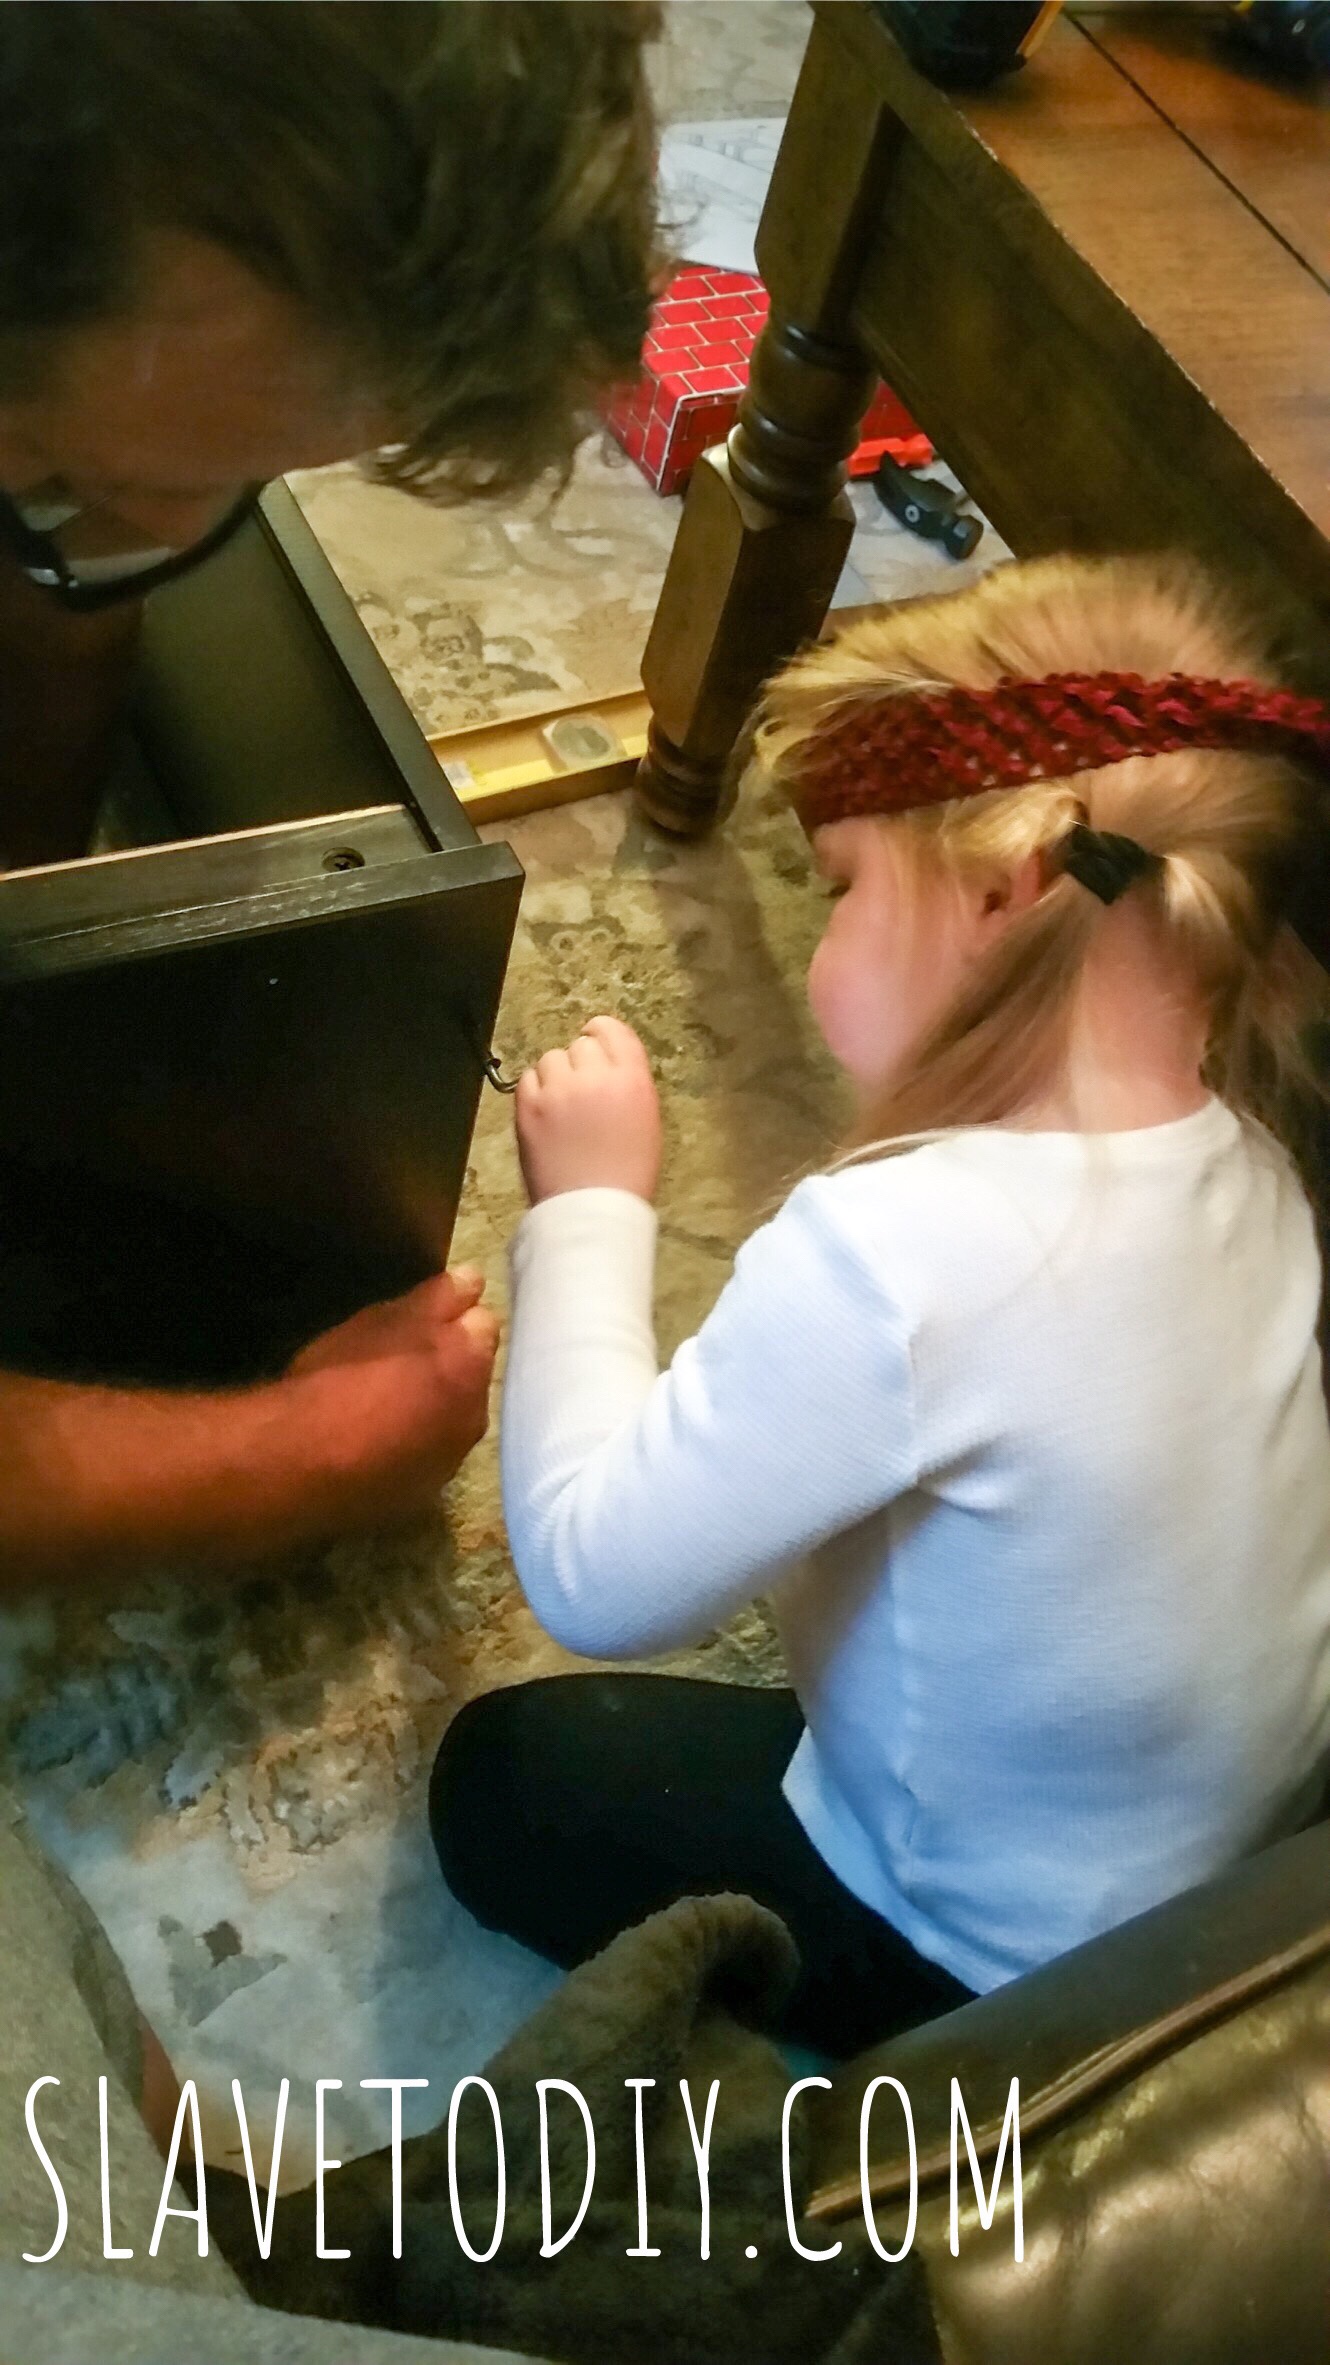
Oh, and I’m sure you noticed the pure awesomeness of that pretty hardware (hint: NOT IKEA). See the tutorial on updating the hardware.
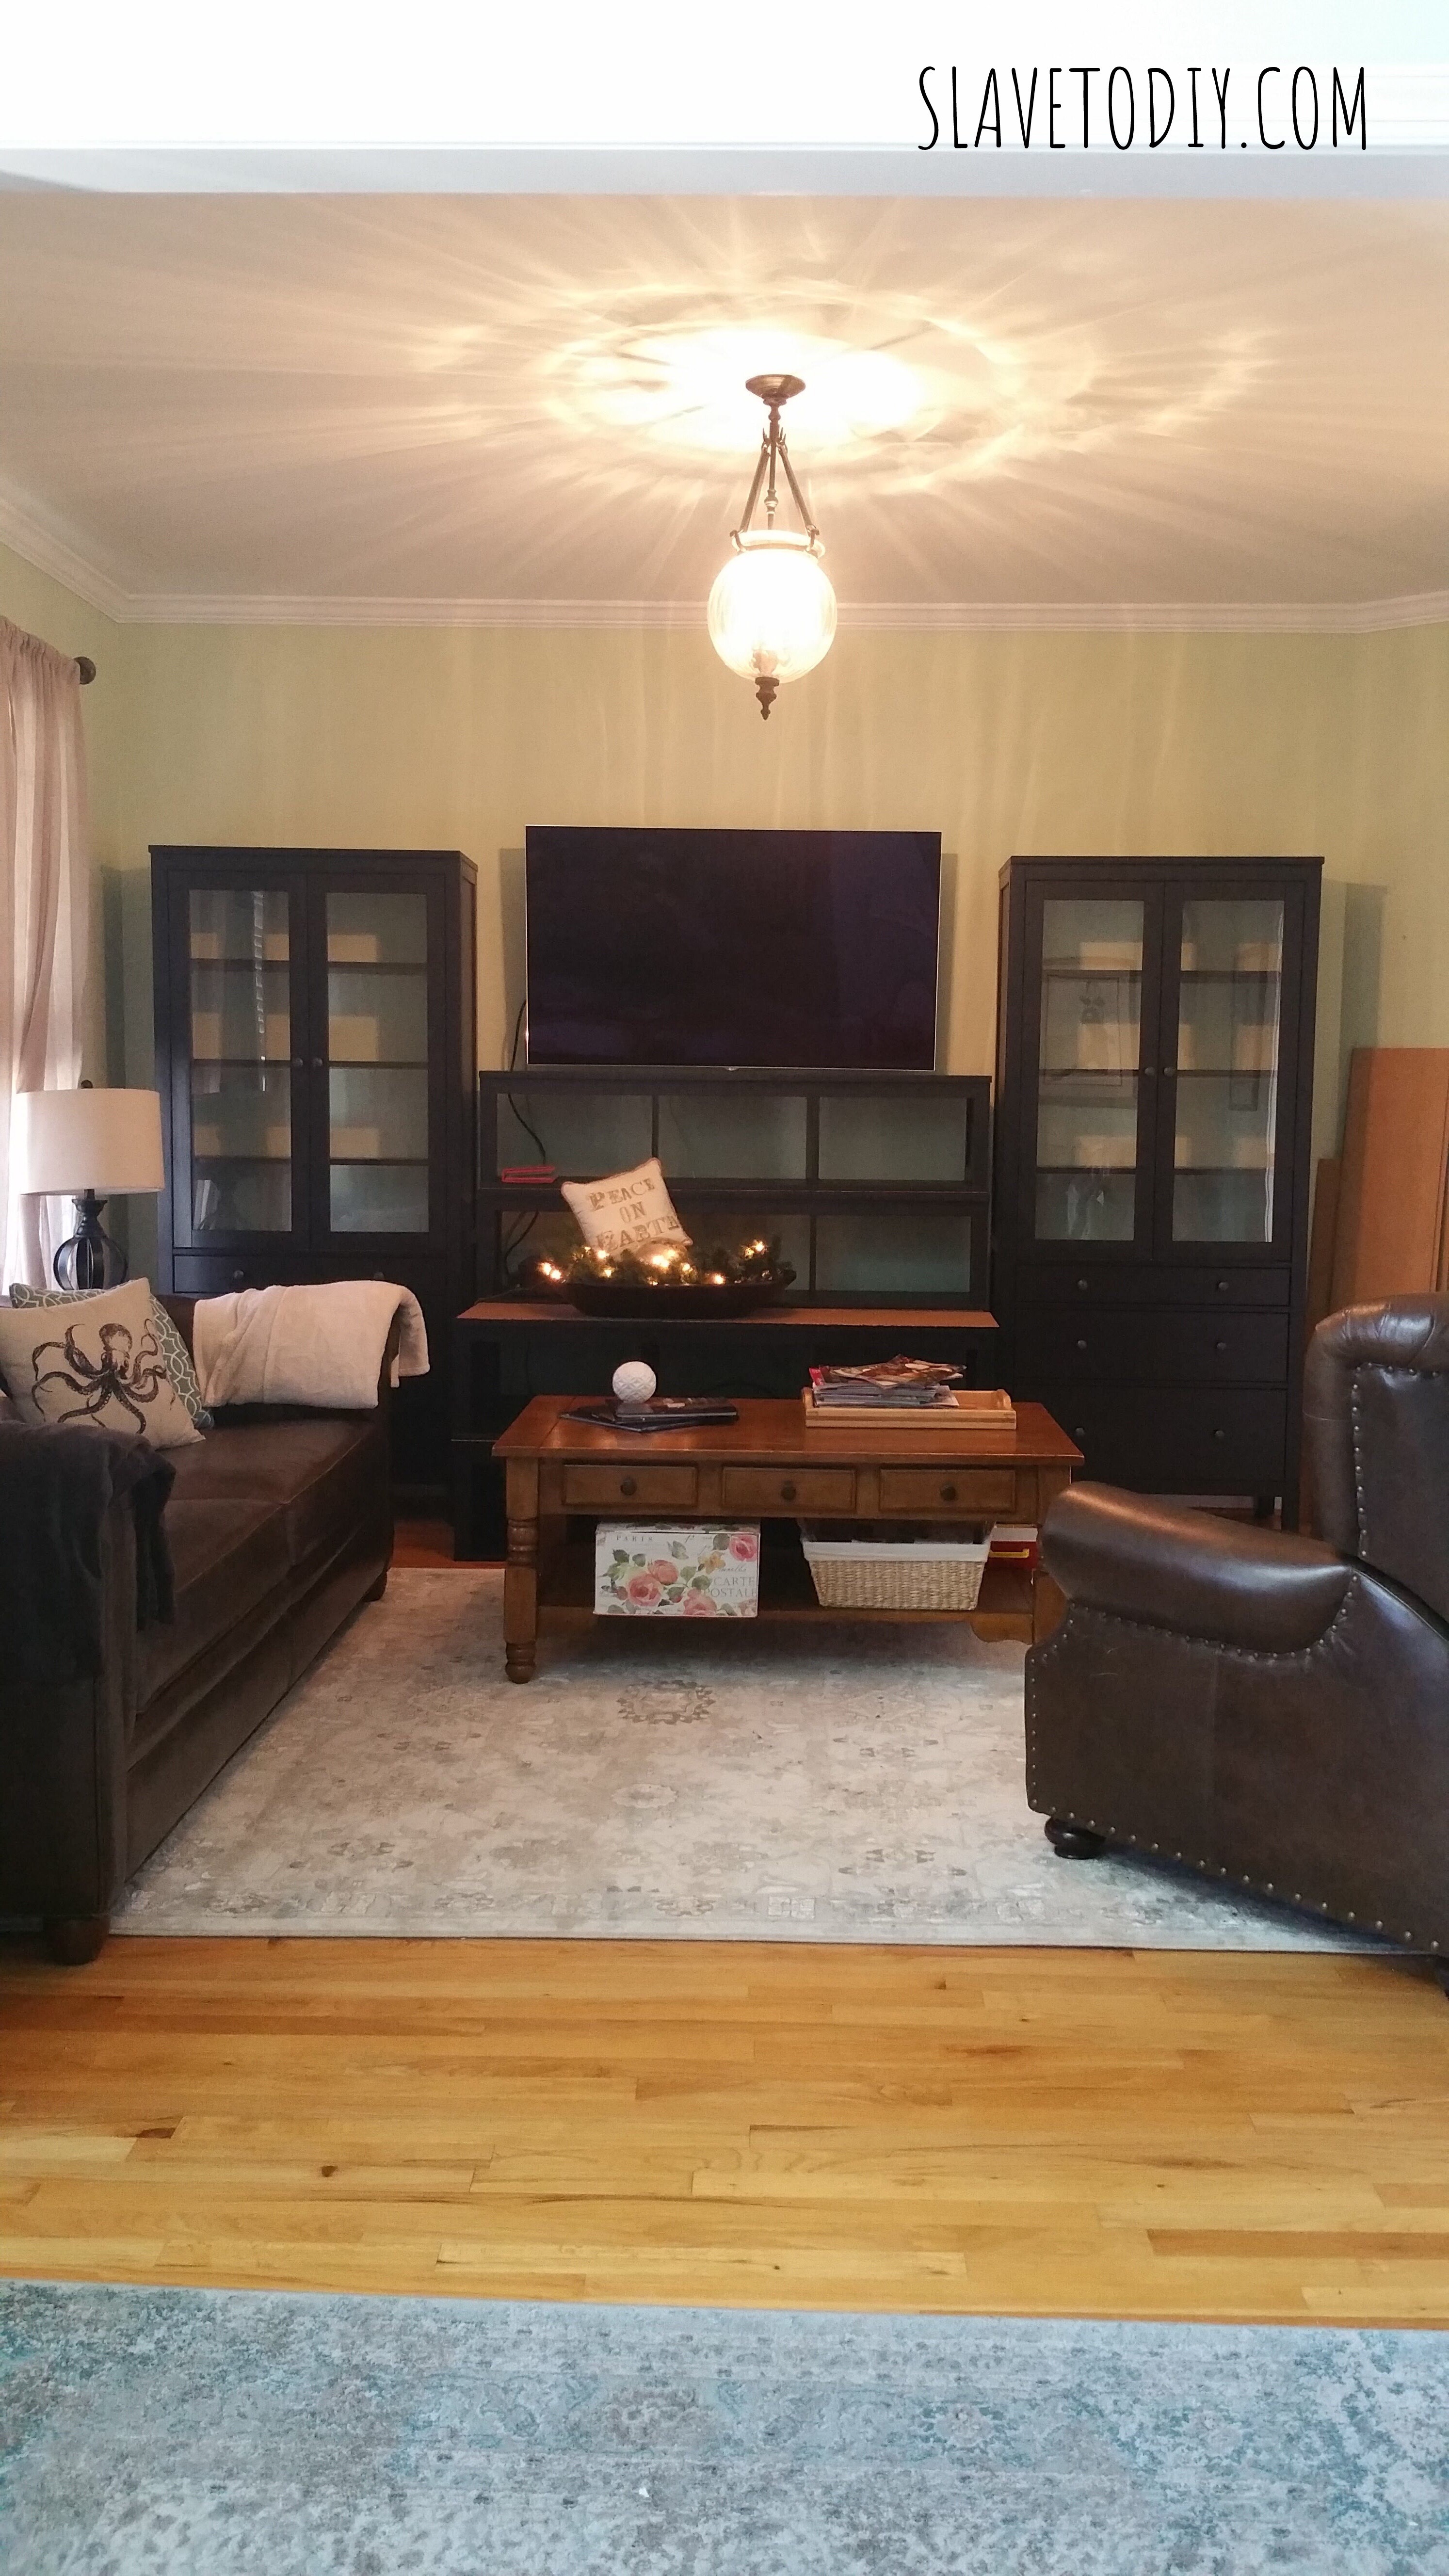
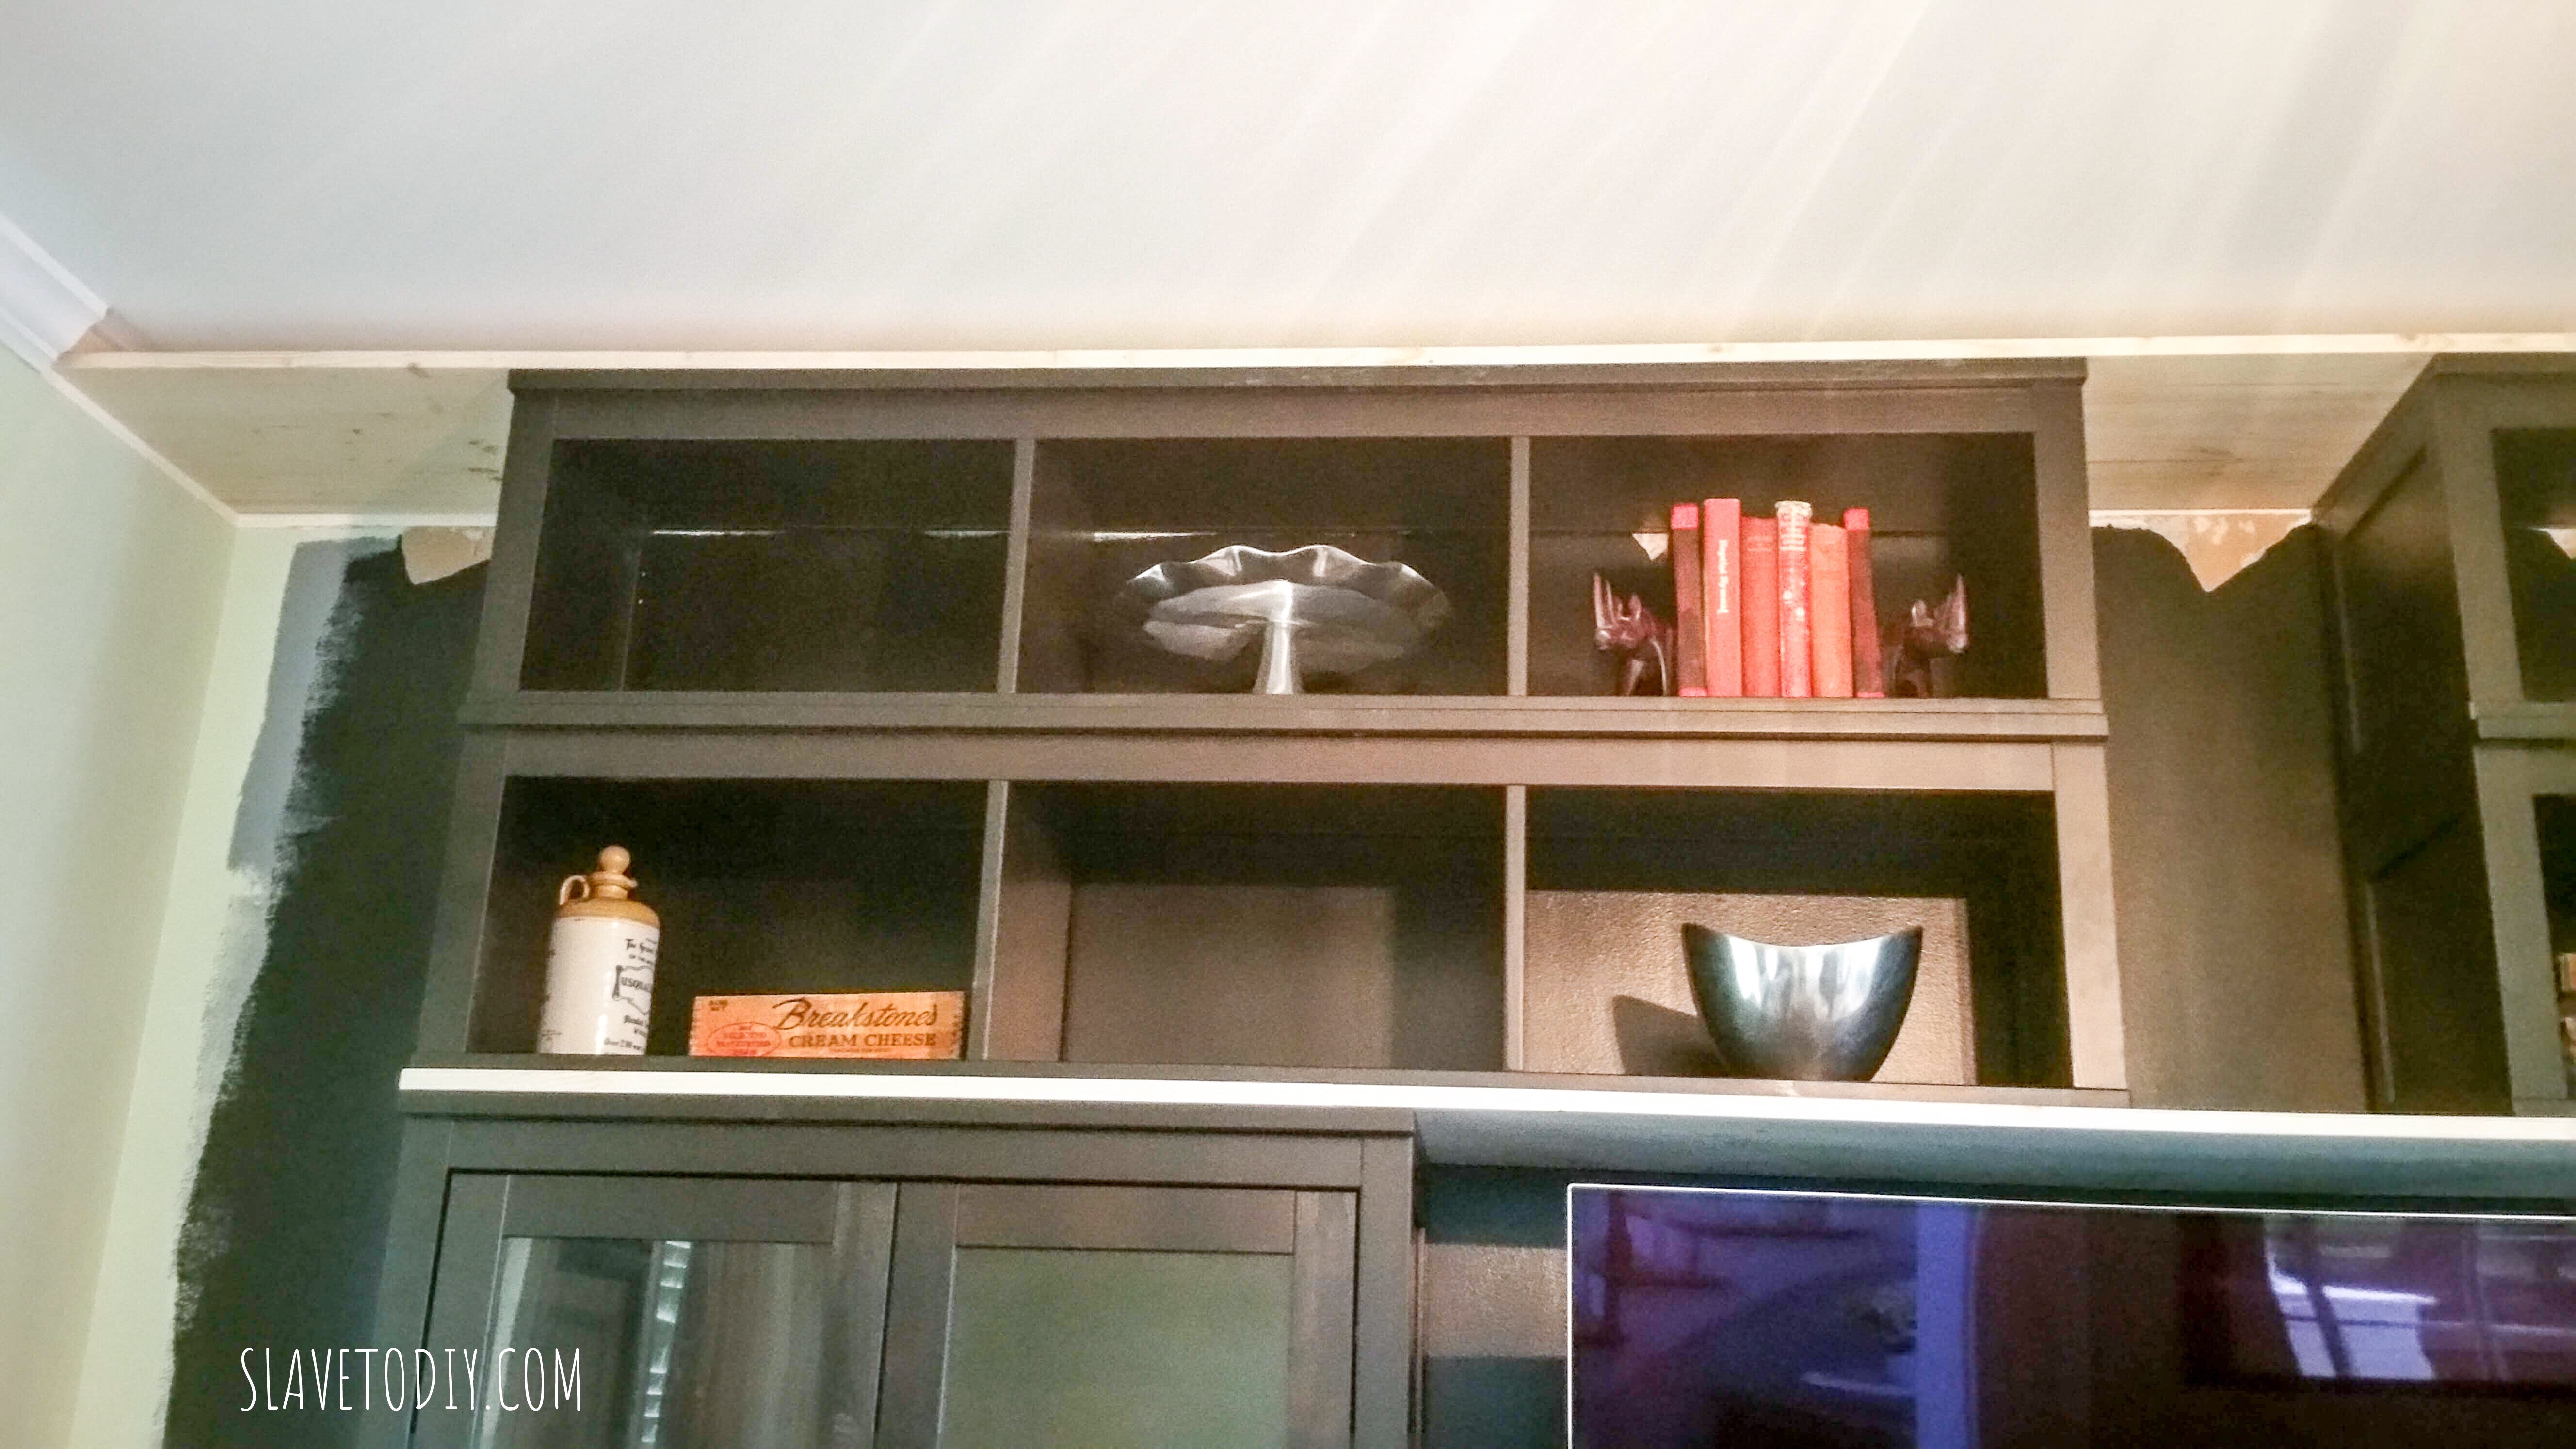
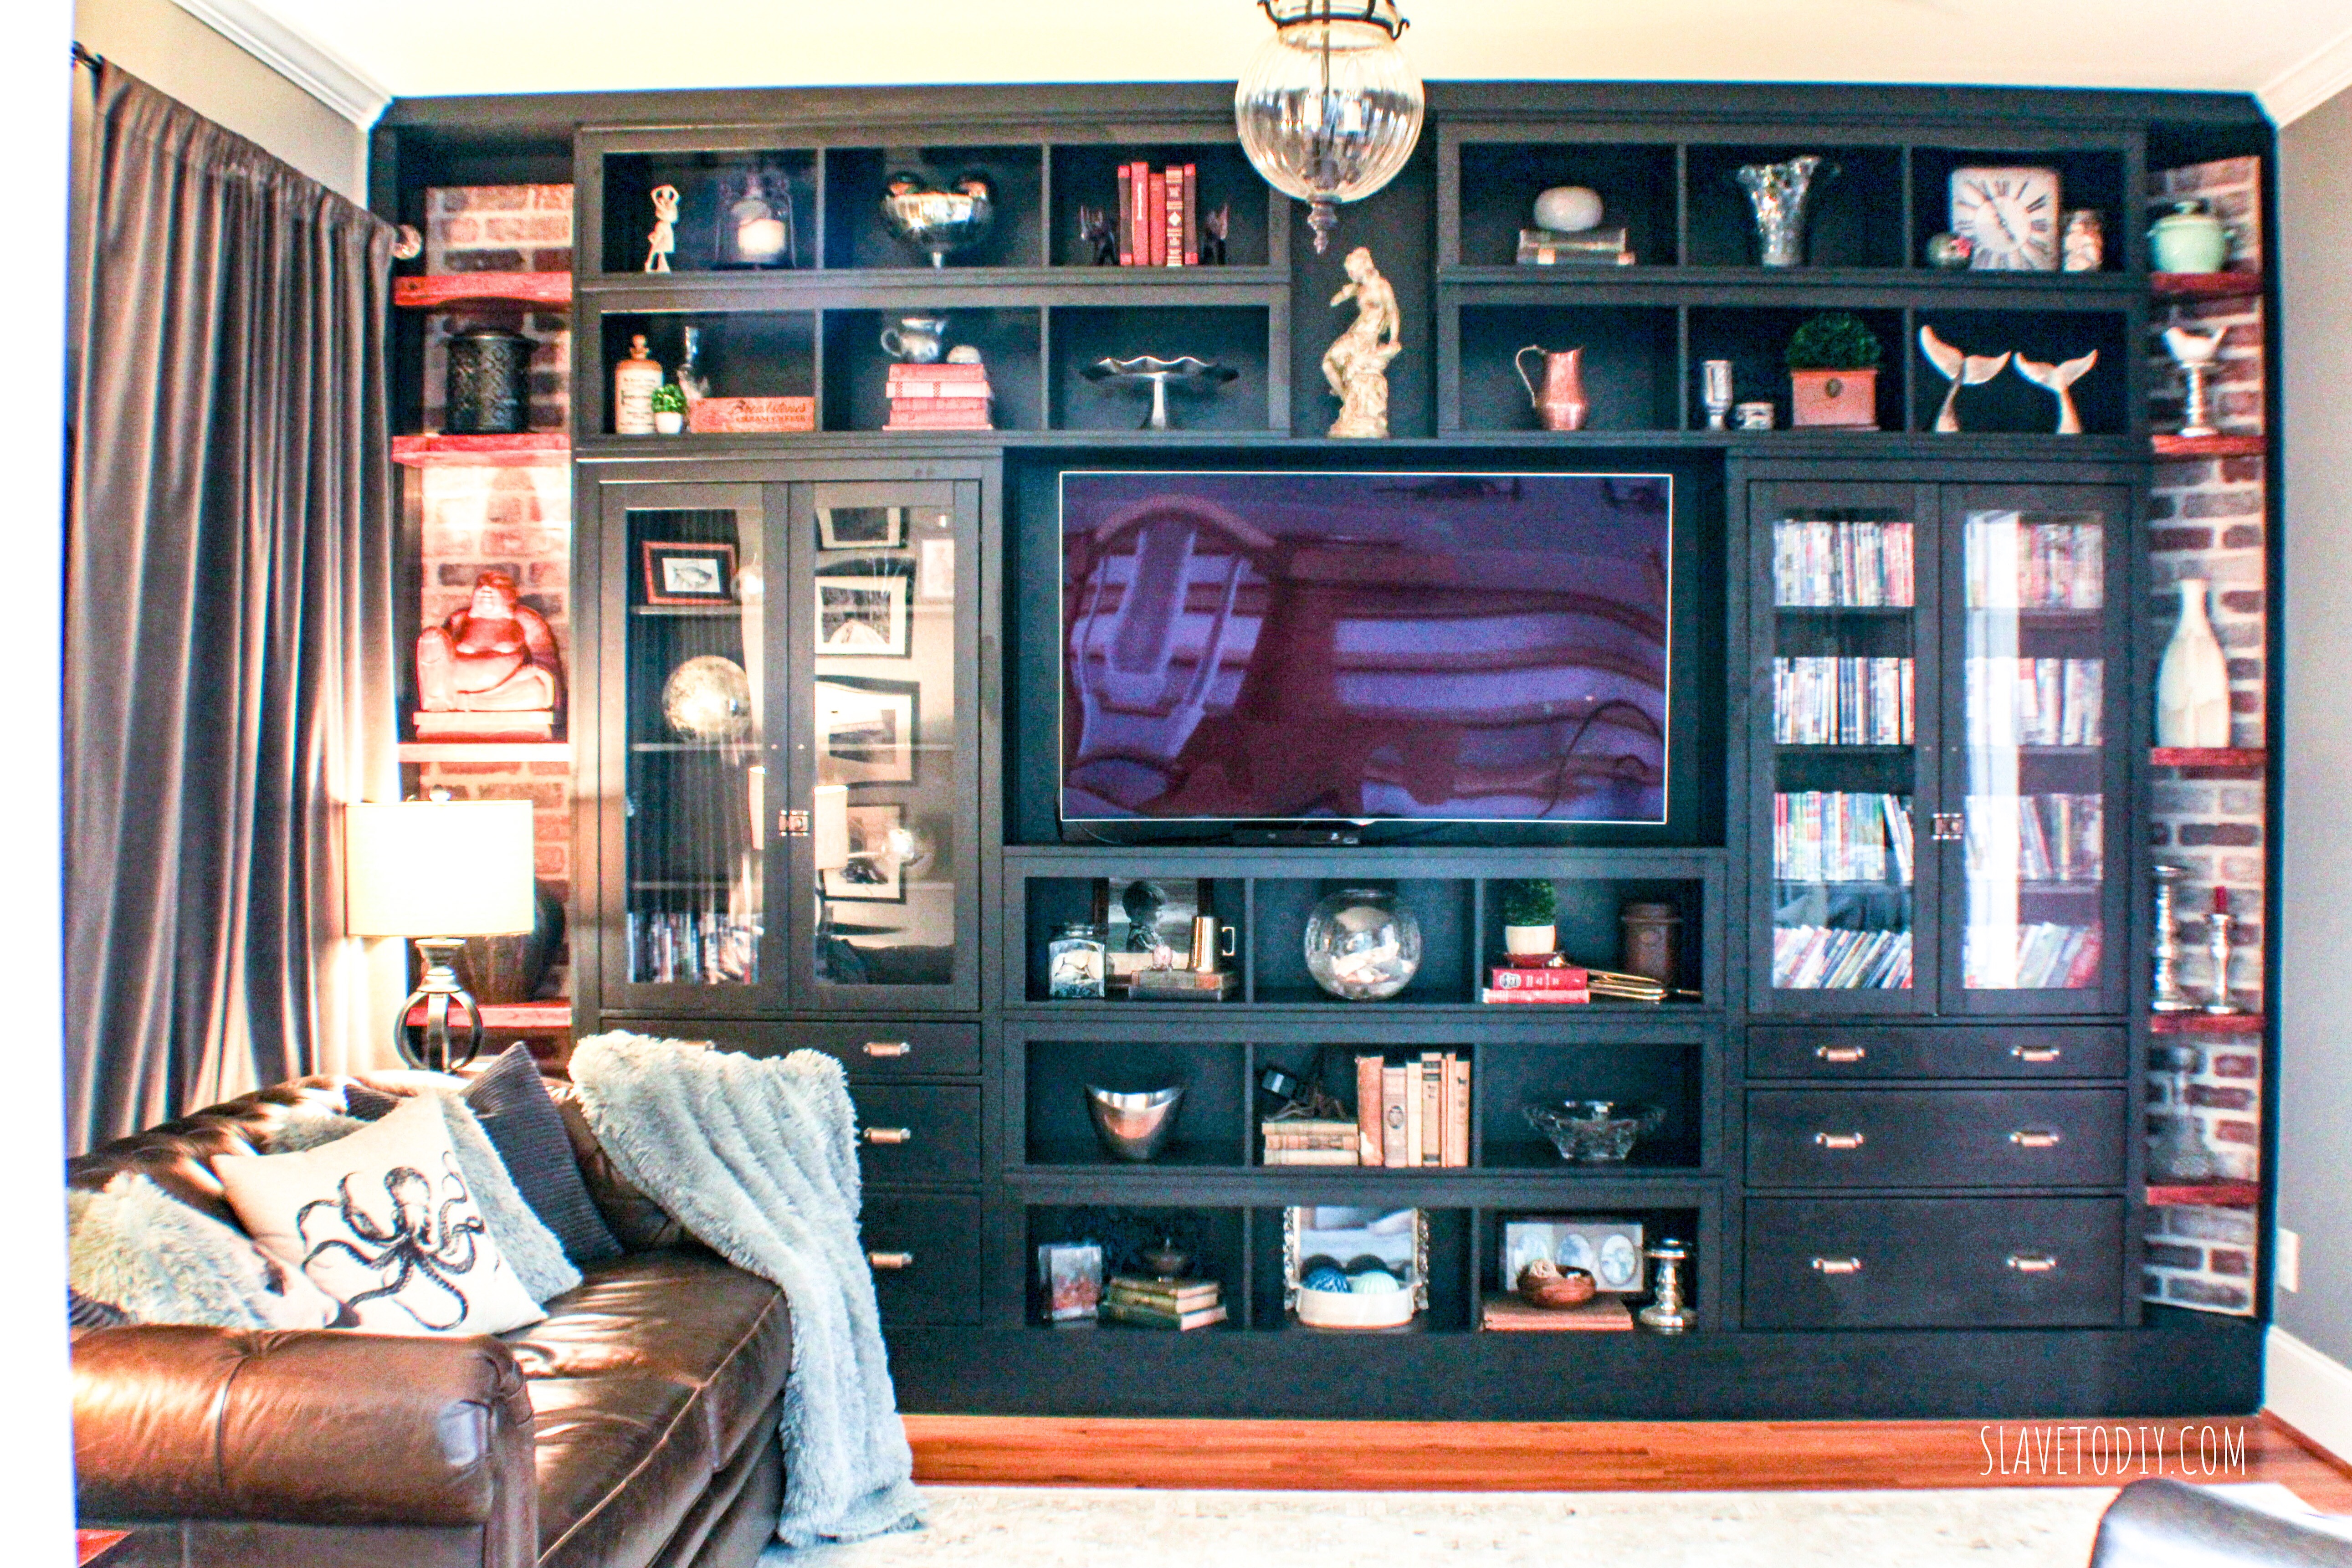
So, here’s what they look like empty. Awesome. And most importantly, finished.
For those of you looking for stuff to buy to “dress your shelves”, I hate you. Built ins are for unpacking 10 boxes of stuff you already had, not arbitrarily purchasing junk so your built ins look good. That’s insane. Find stuff around the house. Arrange it. Never, never buy stuff to fill shelves. Also, never buy anything you don’t ABSOLUTELY have to have. I learned this from my mother who had to smuggle outdated decor out of the house when my dad was out-of-town.
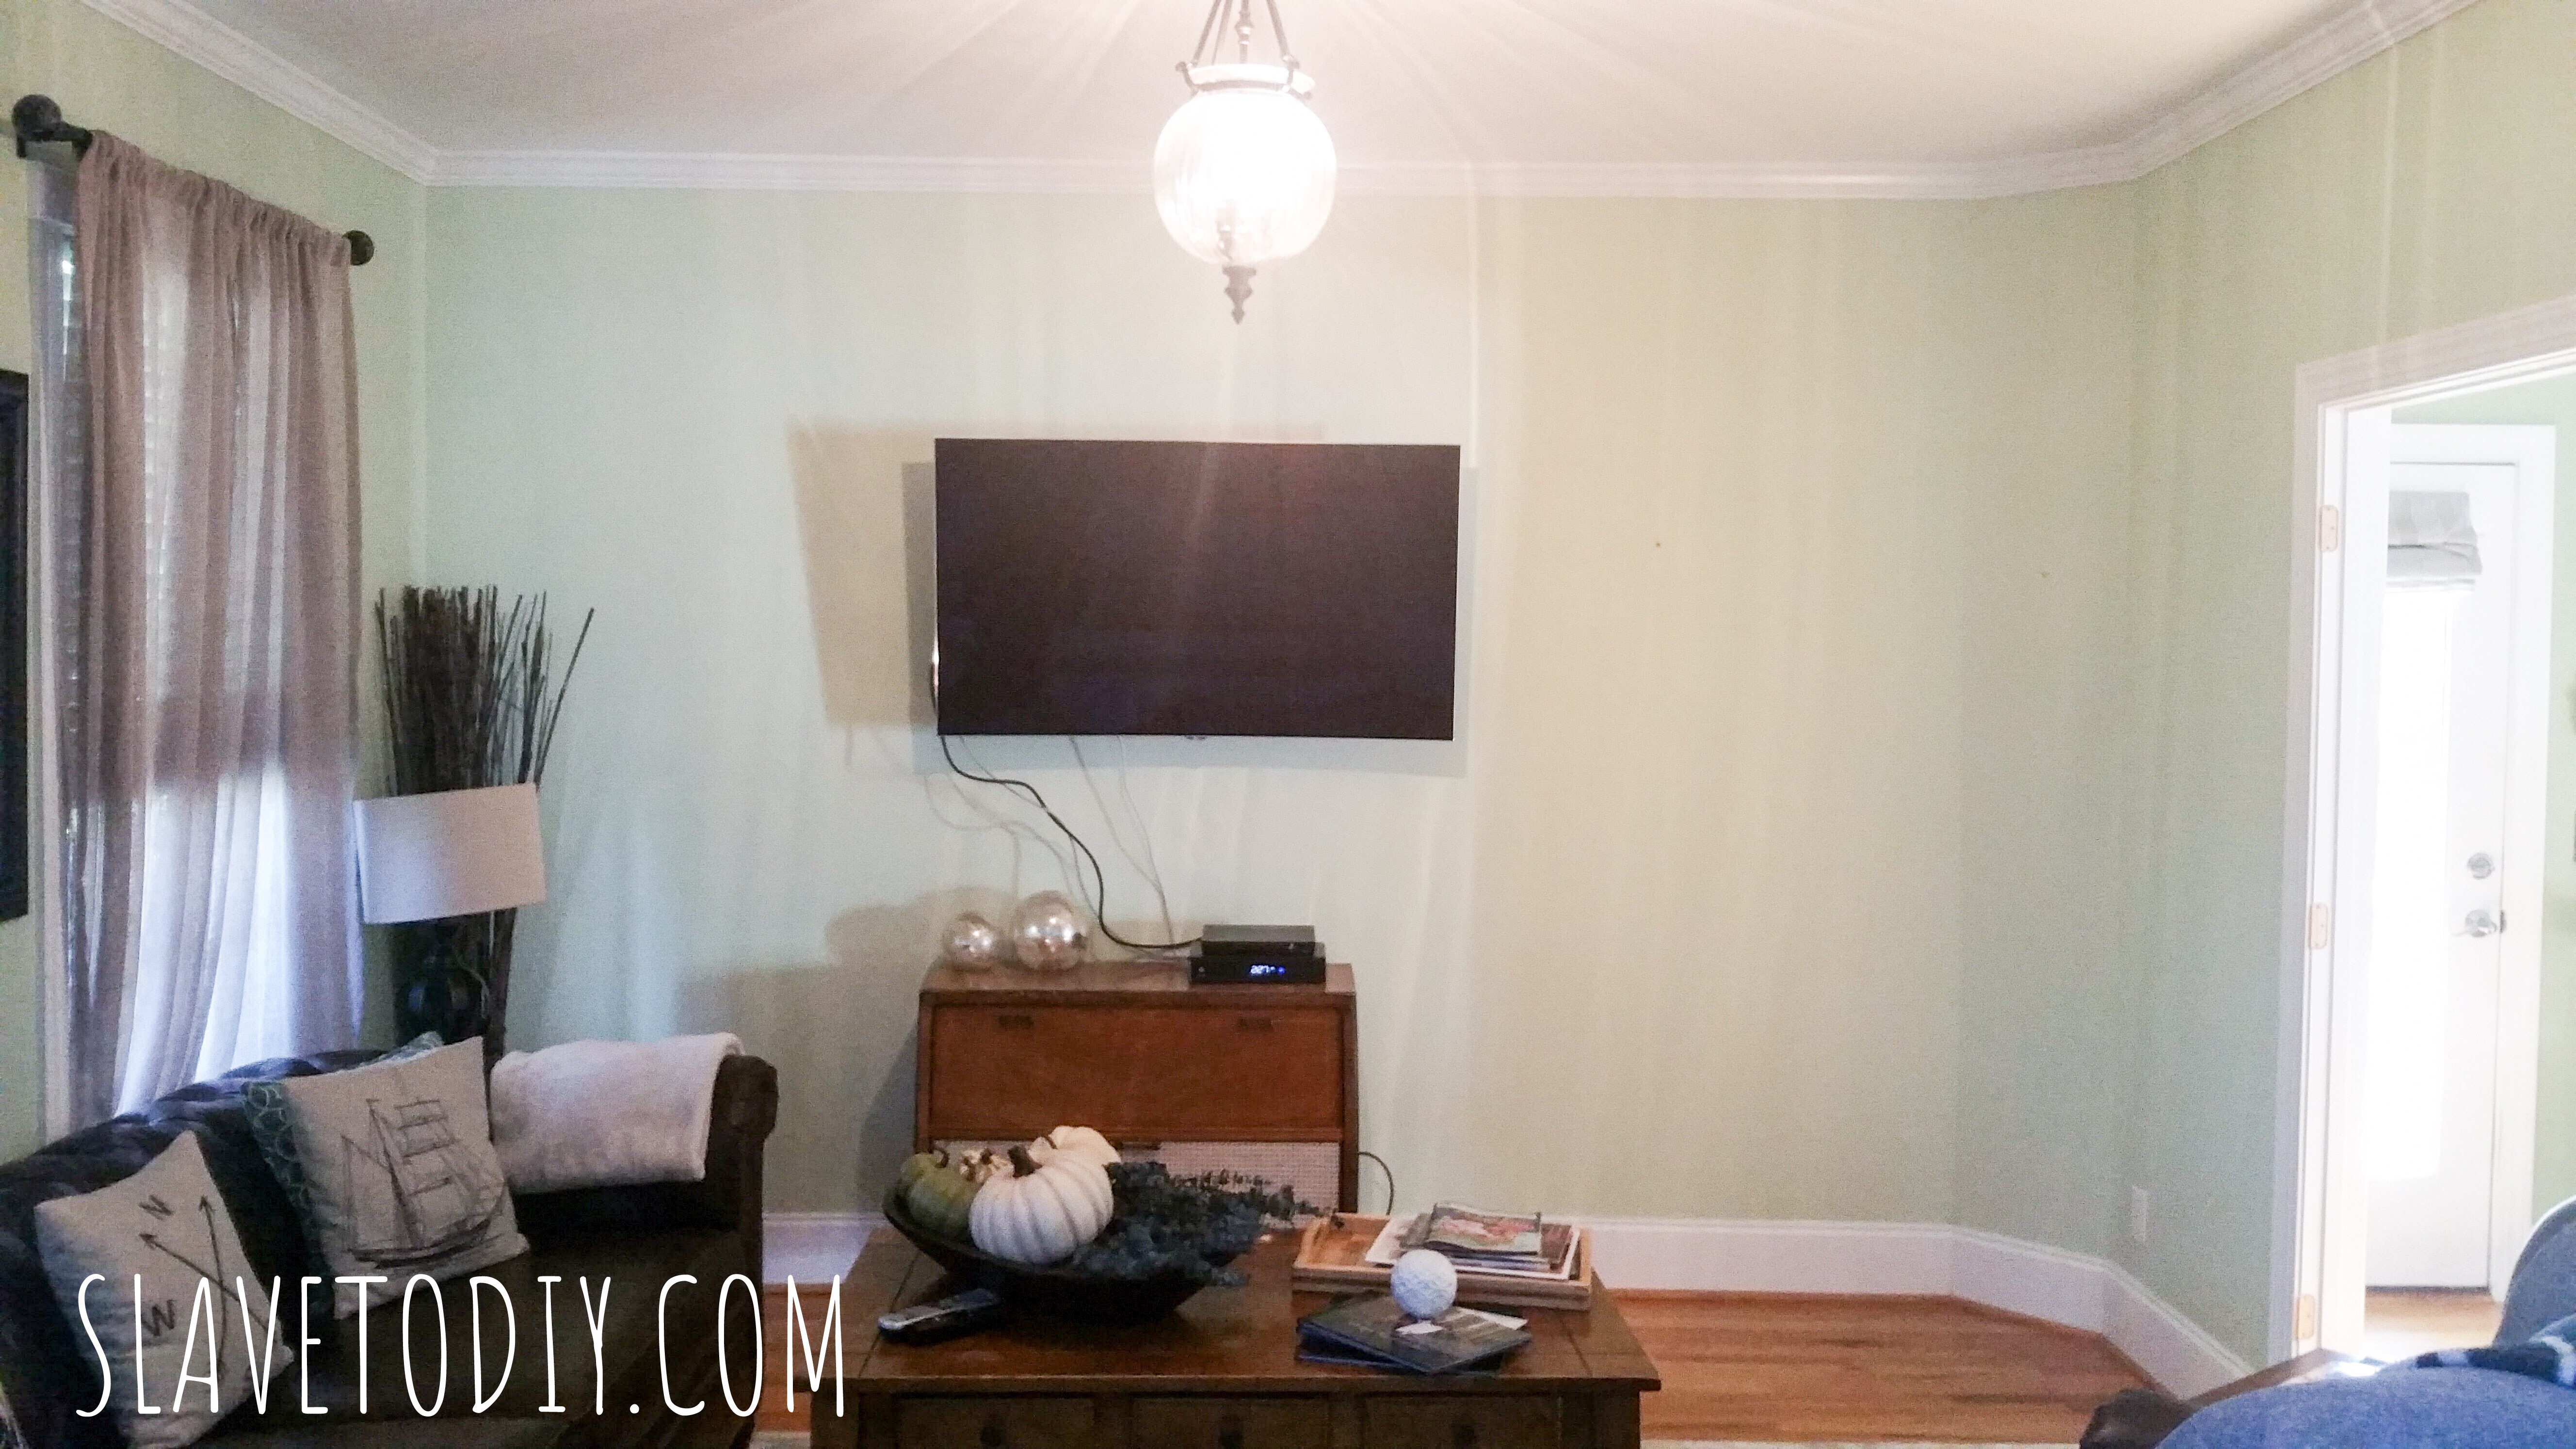
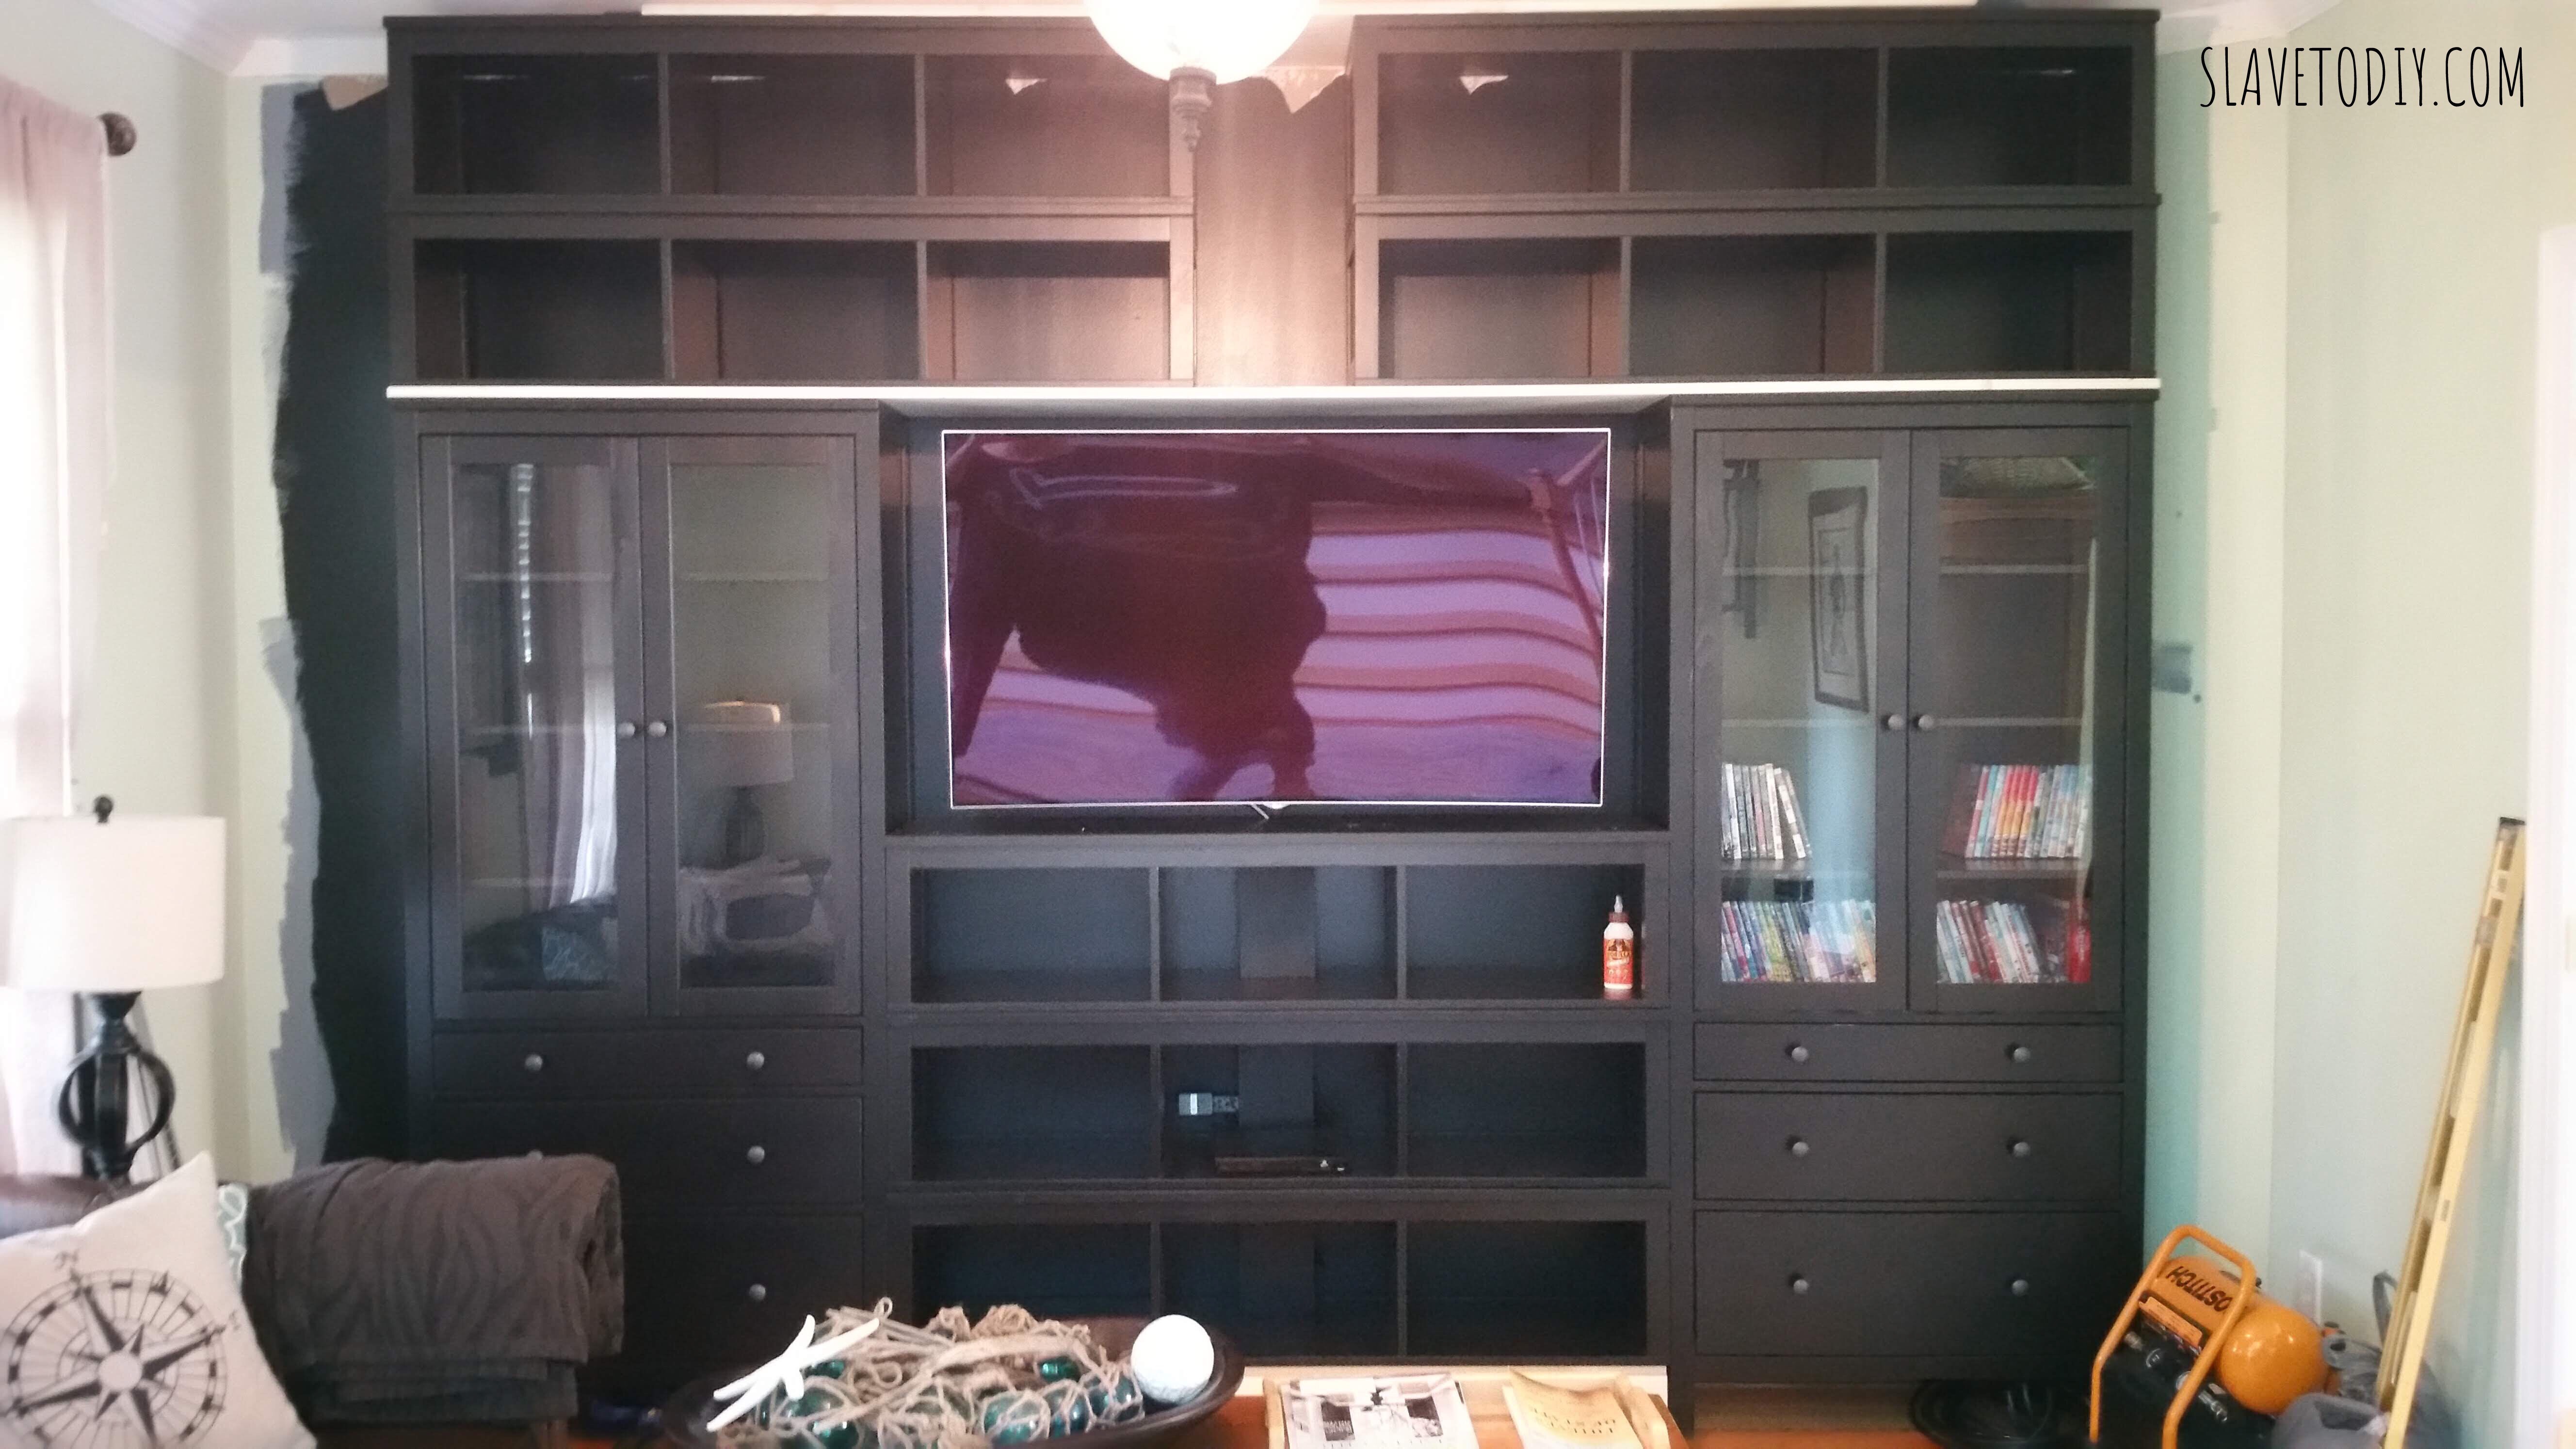
Anyway, how cool is it that we went from THIS:
To THIS:
I don’t know if you noticed the fantastic, gray velvet curtains, but you can find that tutorial here: DIY Restoration Hardware Knock Off Velvet Curtains.
I’m SO super excited we’re finished. My SUPER EXACT recollection of how much this project cost was around $2500, including the hardware update. Using the brick veneer definitely added some cost but I think the effect is spectacular, and lends itself to the CUSTOM look we were going for.
Thanks for checking out our FINISHED project and we’d love for you to check out more on our Blog. Cheers!
*Legal stuff:
I am honest about my experiences with different products and write because I enjoy it. I do however, have the opportunity to earn money for my writing, also.
Slavetodiy.com is a participant in the Amazon Services LLC Associates Program, an affiliate advertising program designed to provide a means for sites to earn advertising fees by advertising and linking to amazon.com. Amazon offers a small commission on products sold through their affiliate links. Each of your purchases via our Amazon affiliation links supports our cause at no additional cost to you.
If a blogger links to an Amazon product (with a special code for affiliates embedded in the link), and a reader places an item in their “shopping cart” through that link within 24 hours of clicking the link, the blogger gets a small percentage of the sale. Amazon links are not “pay-per-click.” If you click on the product link and stay around Amazon and purchase something else, however, I will get a commission on that sale.
Slavetodiy.com is also a VigLink affiliate advertiser which works similarly.