I’ve been getting some questions from concerned readers: “Where have we been???” They’re assuming we’ve been eaten by the half-finished kitchen. Well…. I’ve been sketching kitchen projects and my adorable Rainman has been fishing. It’s my fault that I approved the purchase of a small boat fixer upper (in addition to the larger boat we already have) and that all equates to FISHING and NOT WORKING INSIDE ON MY KITCHEN. But the Dewalt miter saw on the front porch makes it LOOK like we’re working, so that’s cool. “Sips wine.” (Supply links at the end of the post!)
*This post may contain affiliate links. Please see full disclosure at the end of the post.
Anyway, that’s not preventing me from forging ahead and obsessively planning every detail, and occasionally threatening to hire a carpenter if he doesn’t get his rumpus back in the house and start throwing some kitchen together. It’s getting to the point where I may ACTUALLY consider a carpenter… or start wielding tools at opportune moments so he will catch me and feel compelled to intervene. So… the current project (that I have ordered materials for and am just WAITING FOR SOMEONE TO INSTALL): A shelf nook for the range surround.
A shelf nook? Yes, it’s absolutely a thing. Think: incredible use of wall space for storing daily use items like olive oils and favorite spices within EASY REACH of your cooking space. We are in the middle beginning of a kitchen renovation and the focal point of the room is a large hood with a surround that encapsulates the entire space (range, hood, and cabinetry). Having looked at ALL of the kitchens on Pinterest and Instagram, I feel well informed and confident that I have planned all of the details well.
Not sure what I’m talking about? Here are two EXCELLENT representations of my idea by professional designers (and let me give a SHOUT OUT to these ladies/gents, because the amount of nit-noid planning that goes into designing these spaces is really next-level):
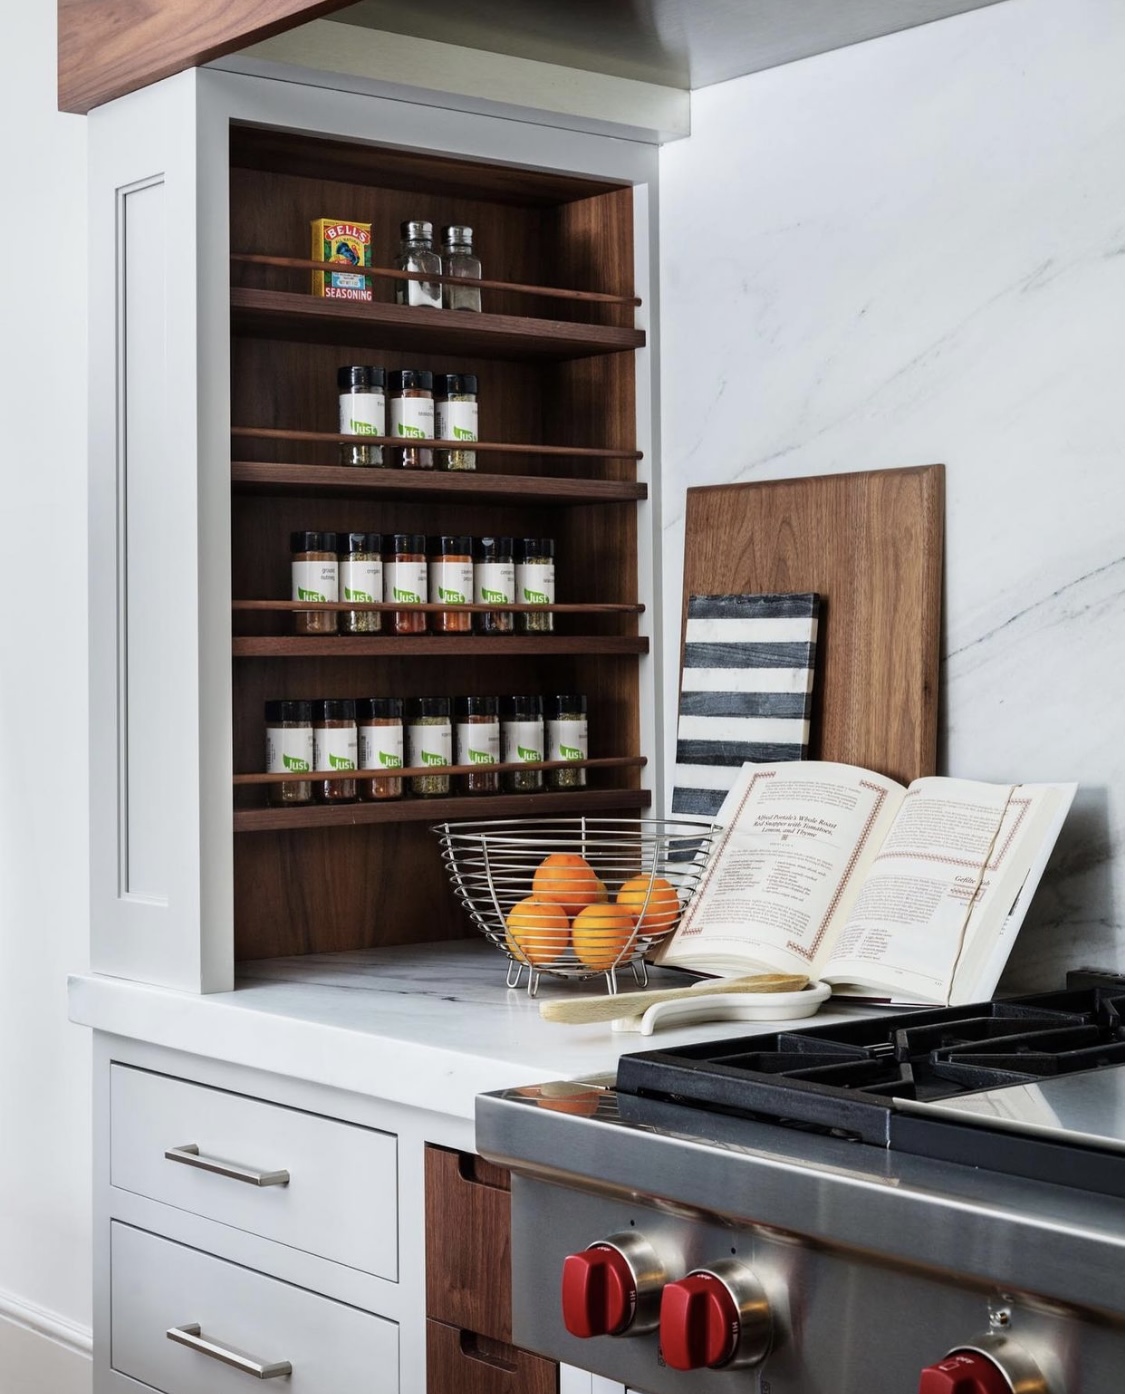
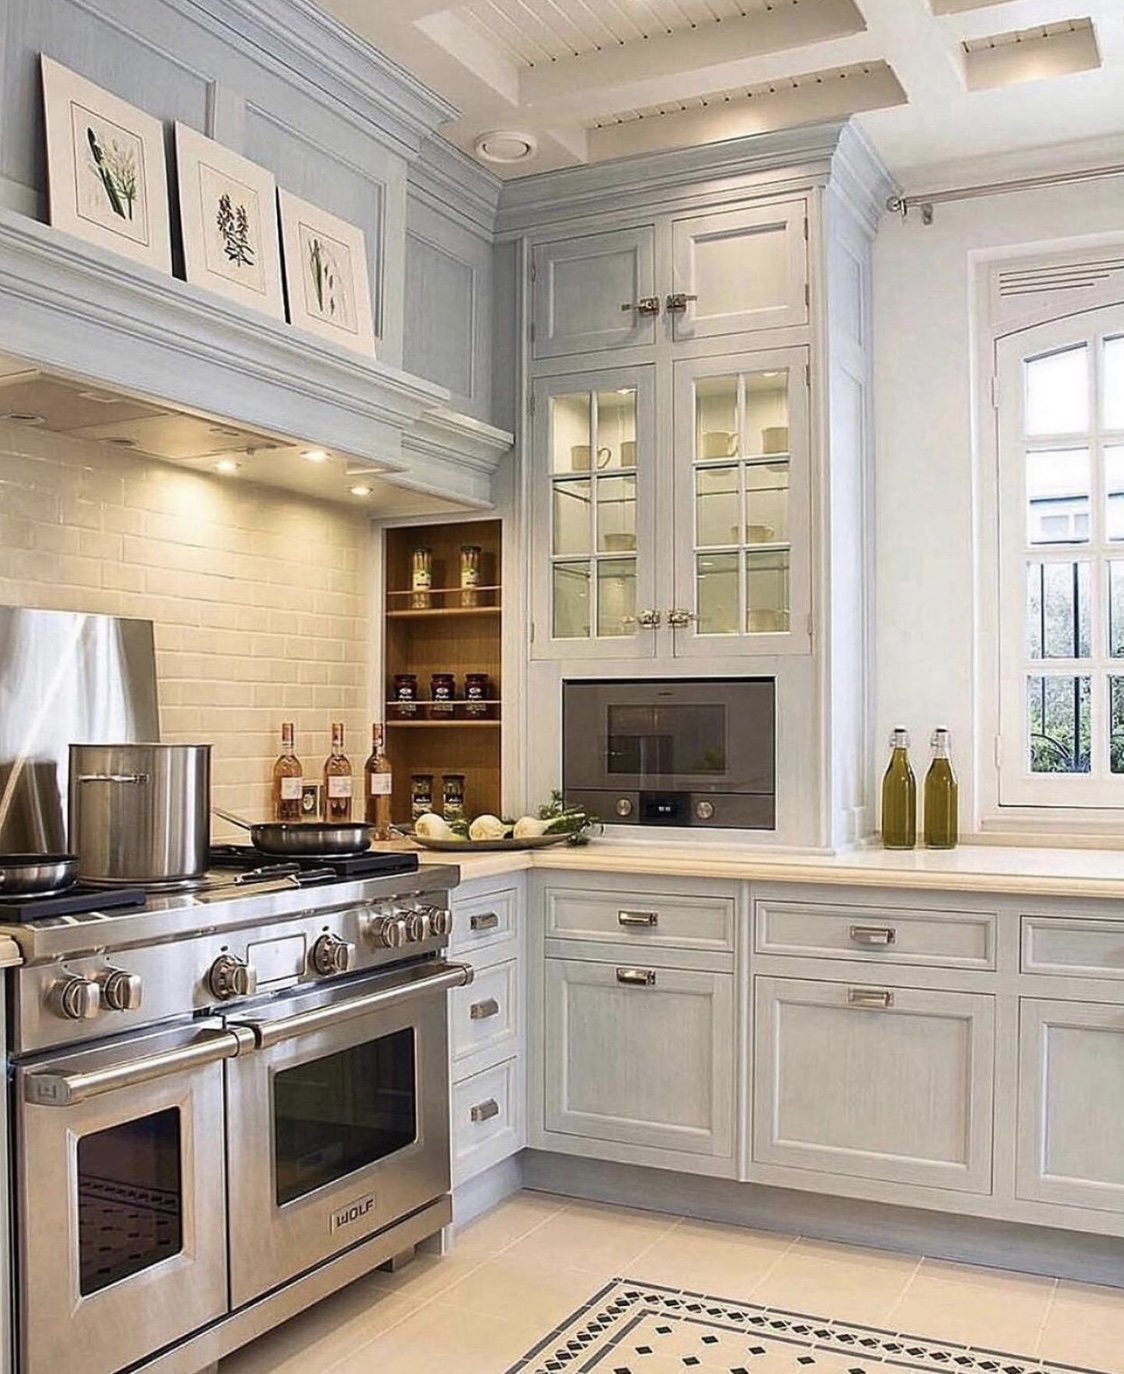
Are you IN??? Yeah, me too! Imagine wasting all of that space when you could have usable, adorable shelves (and trust me, you need the storage)!
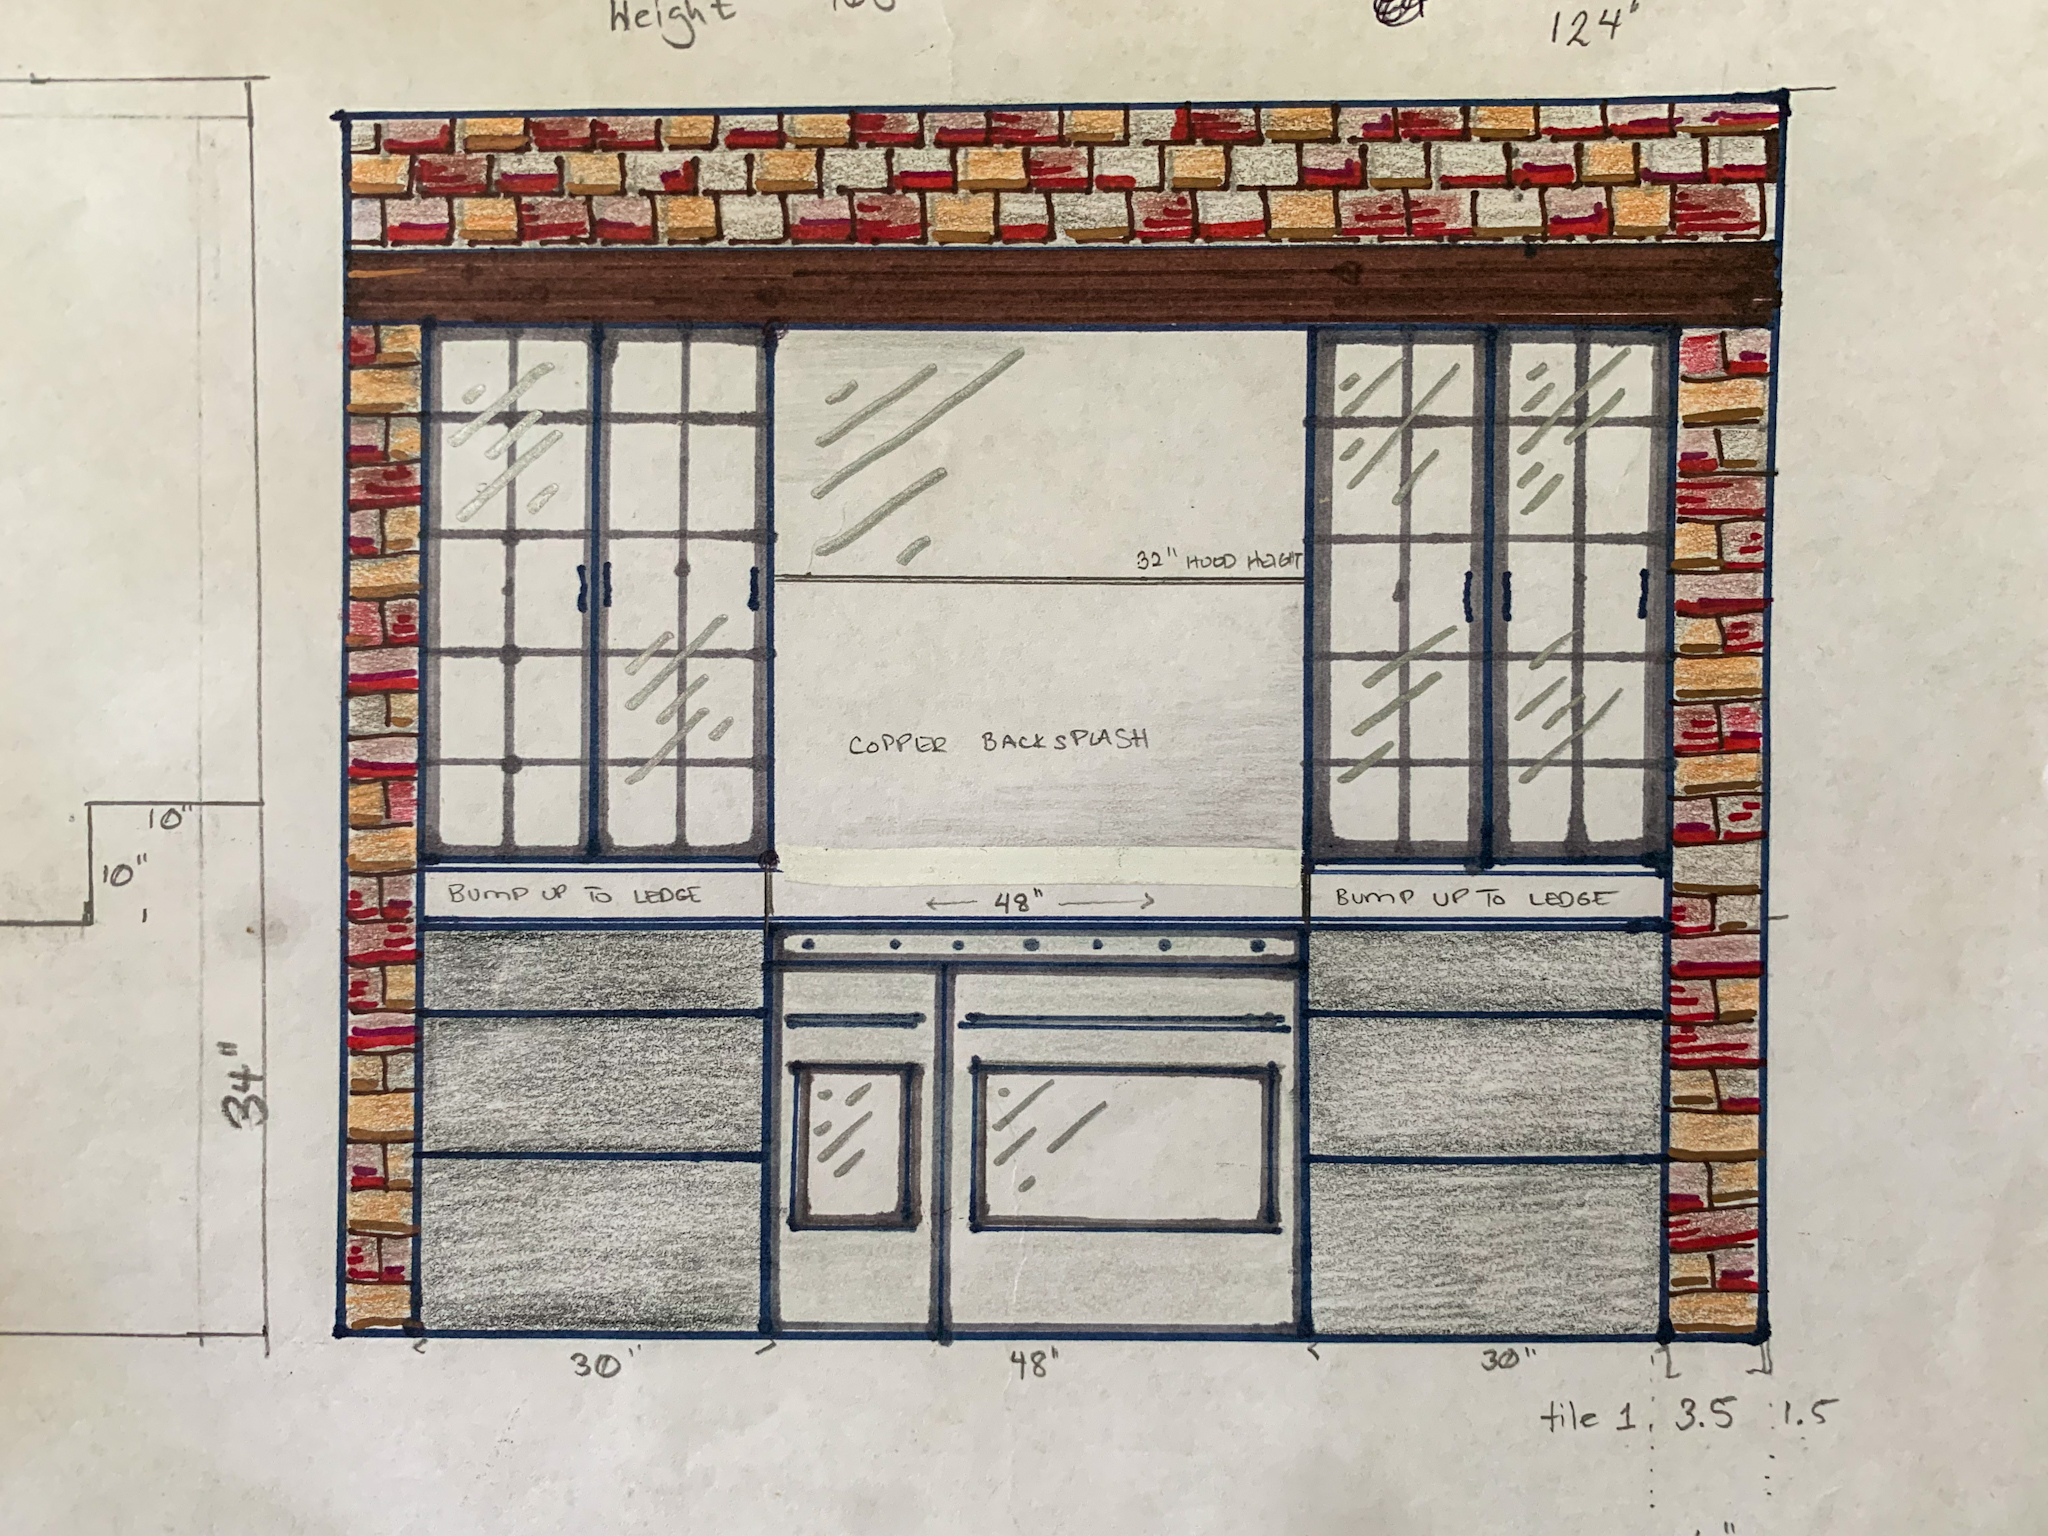
So, here’s my sketch of the front of our range wall:
And here is the sketch of the inside of the right-hand wall:
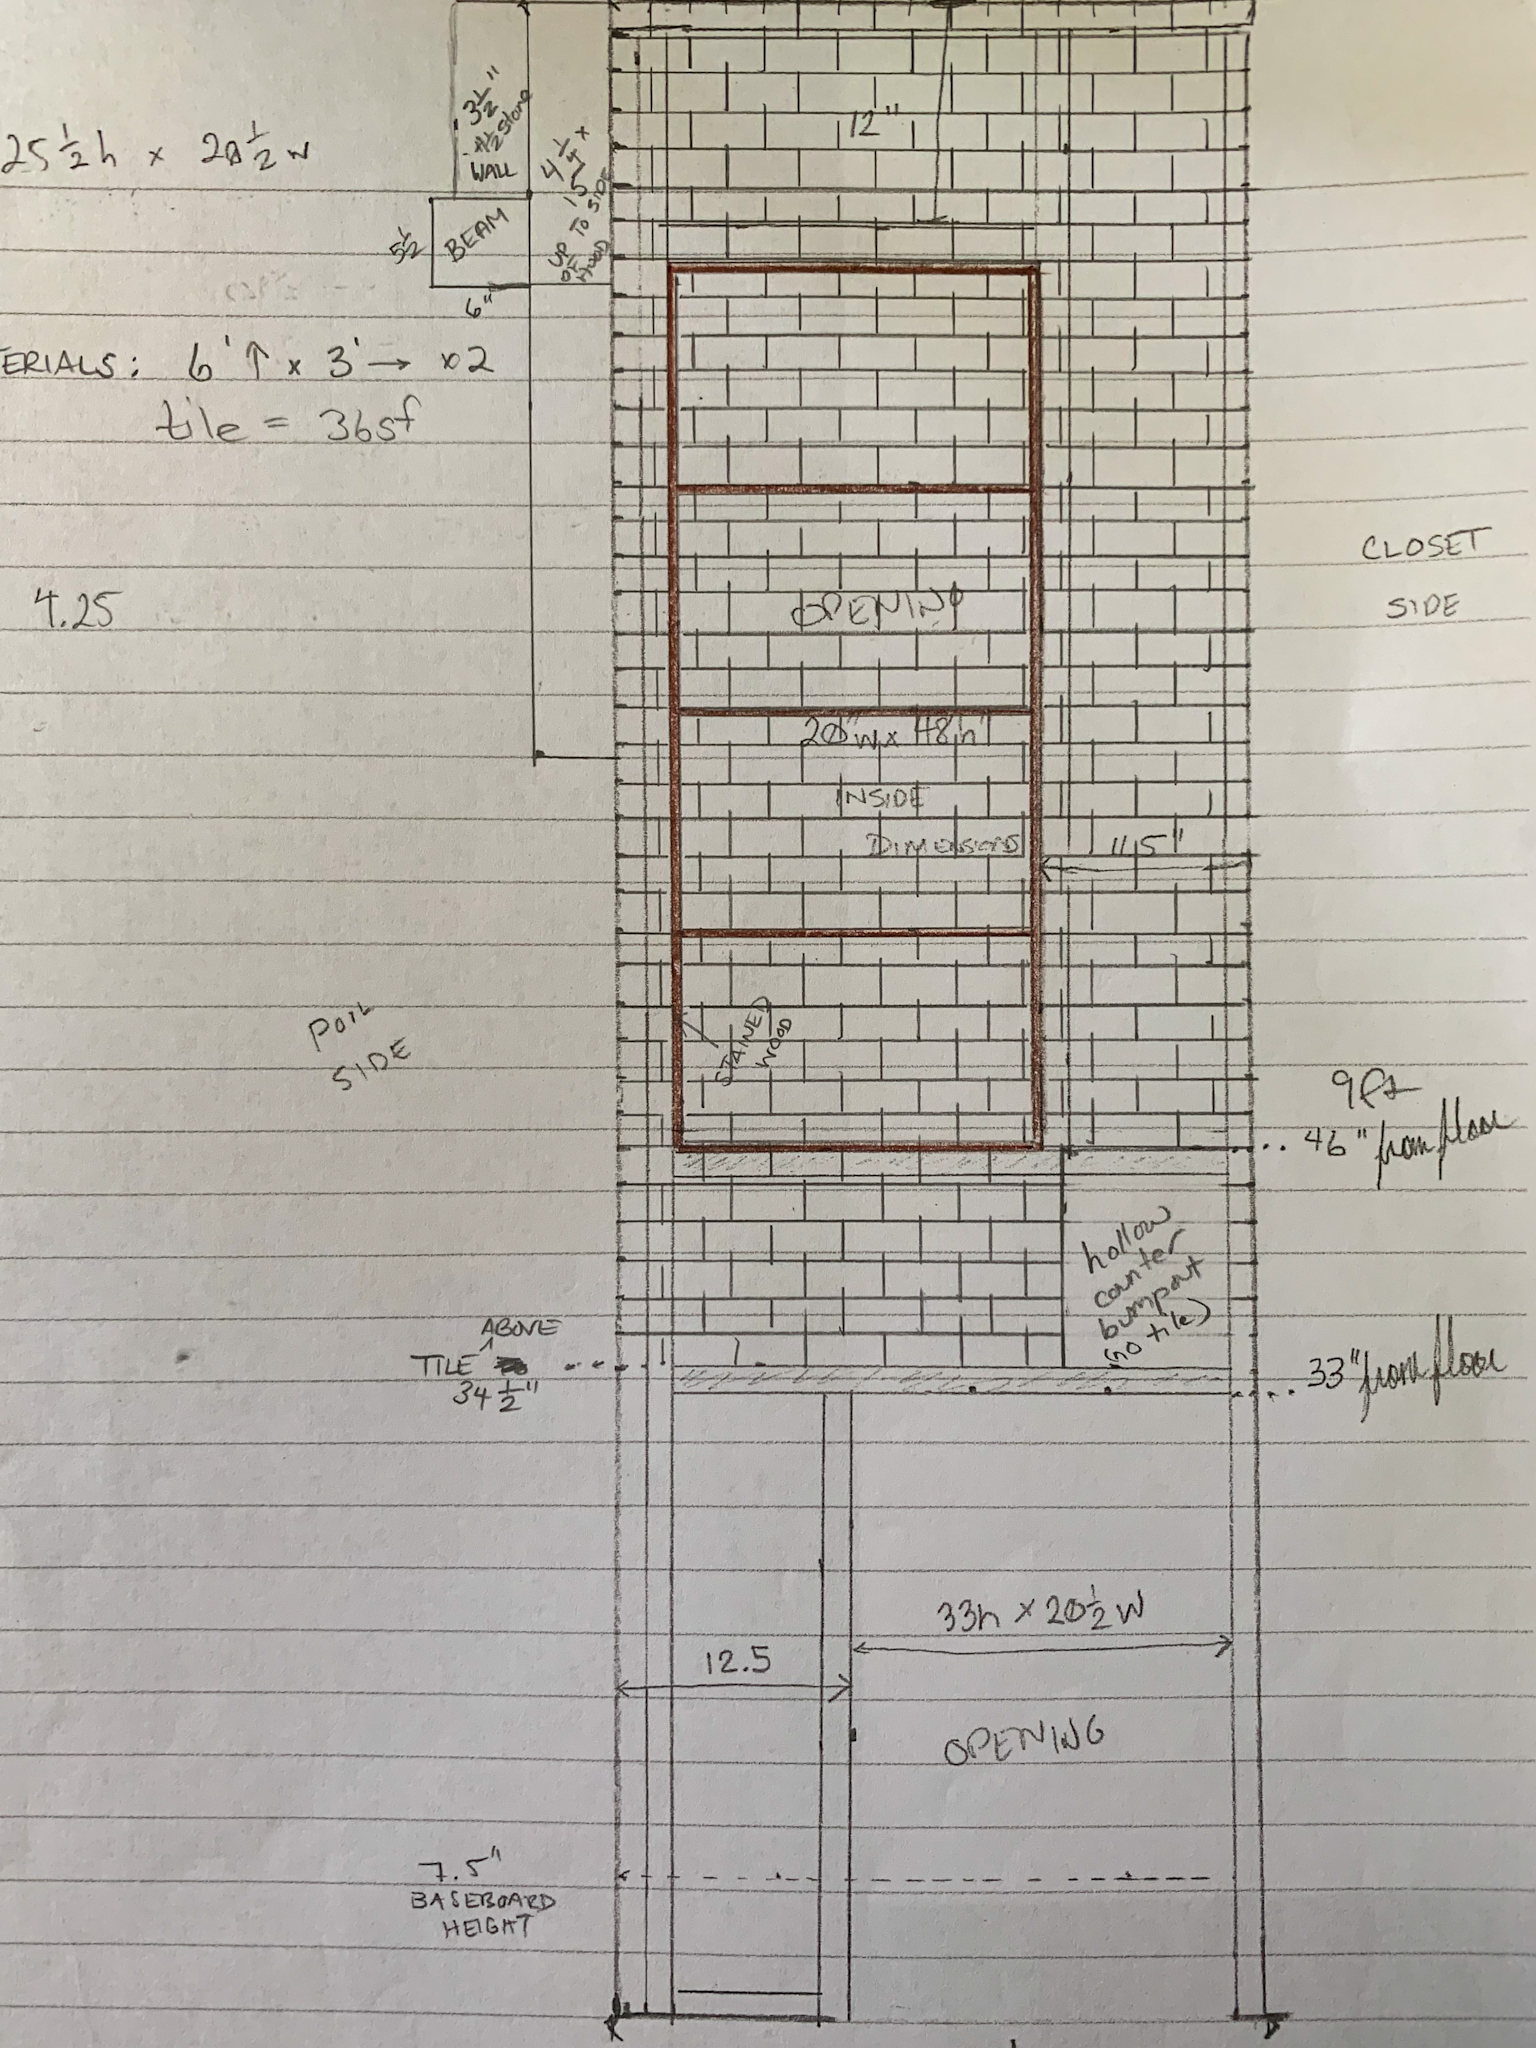
No fancy design software here! It’s so much easier for me to visualize when I sketch.
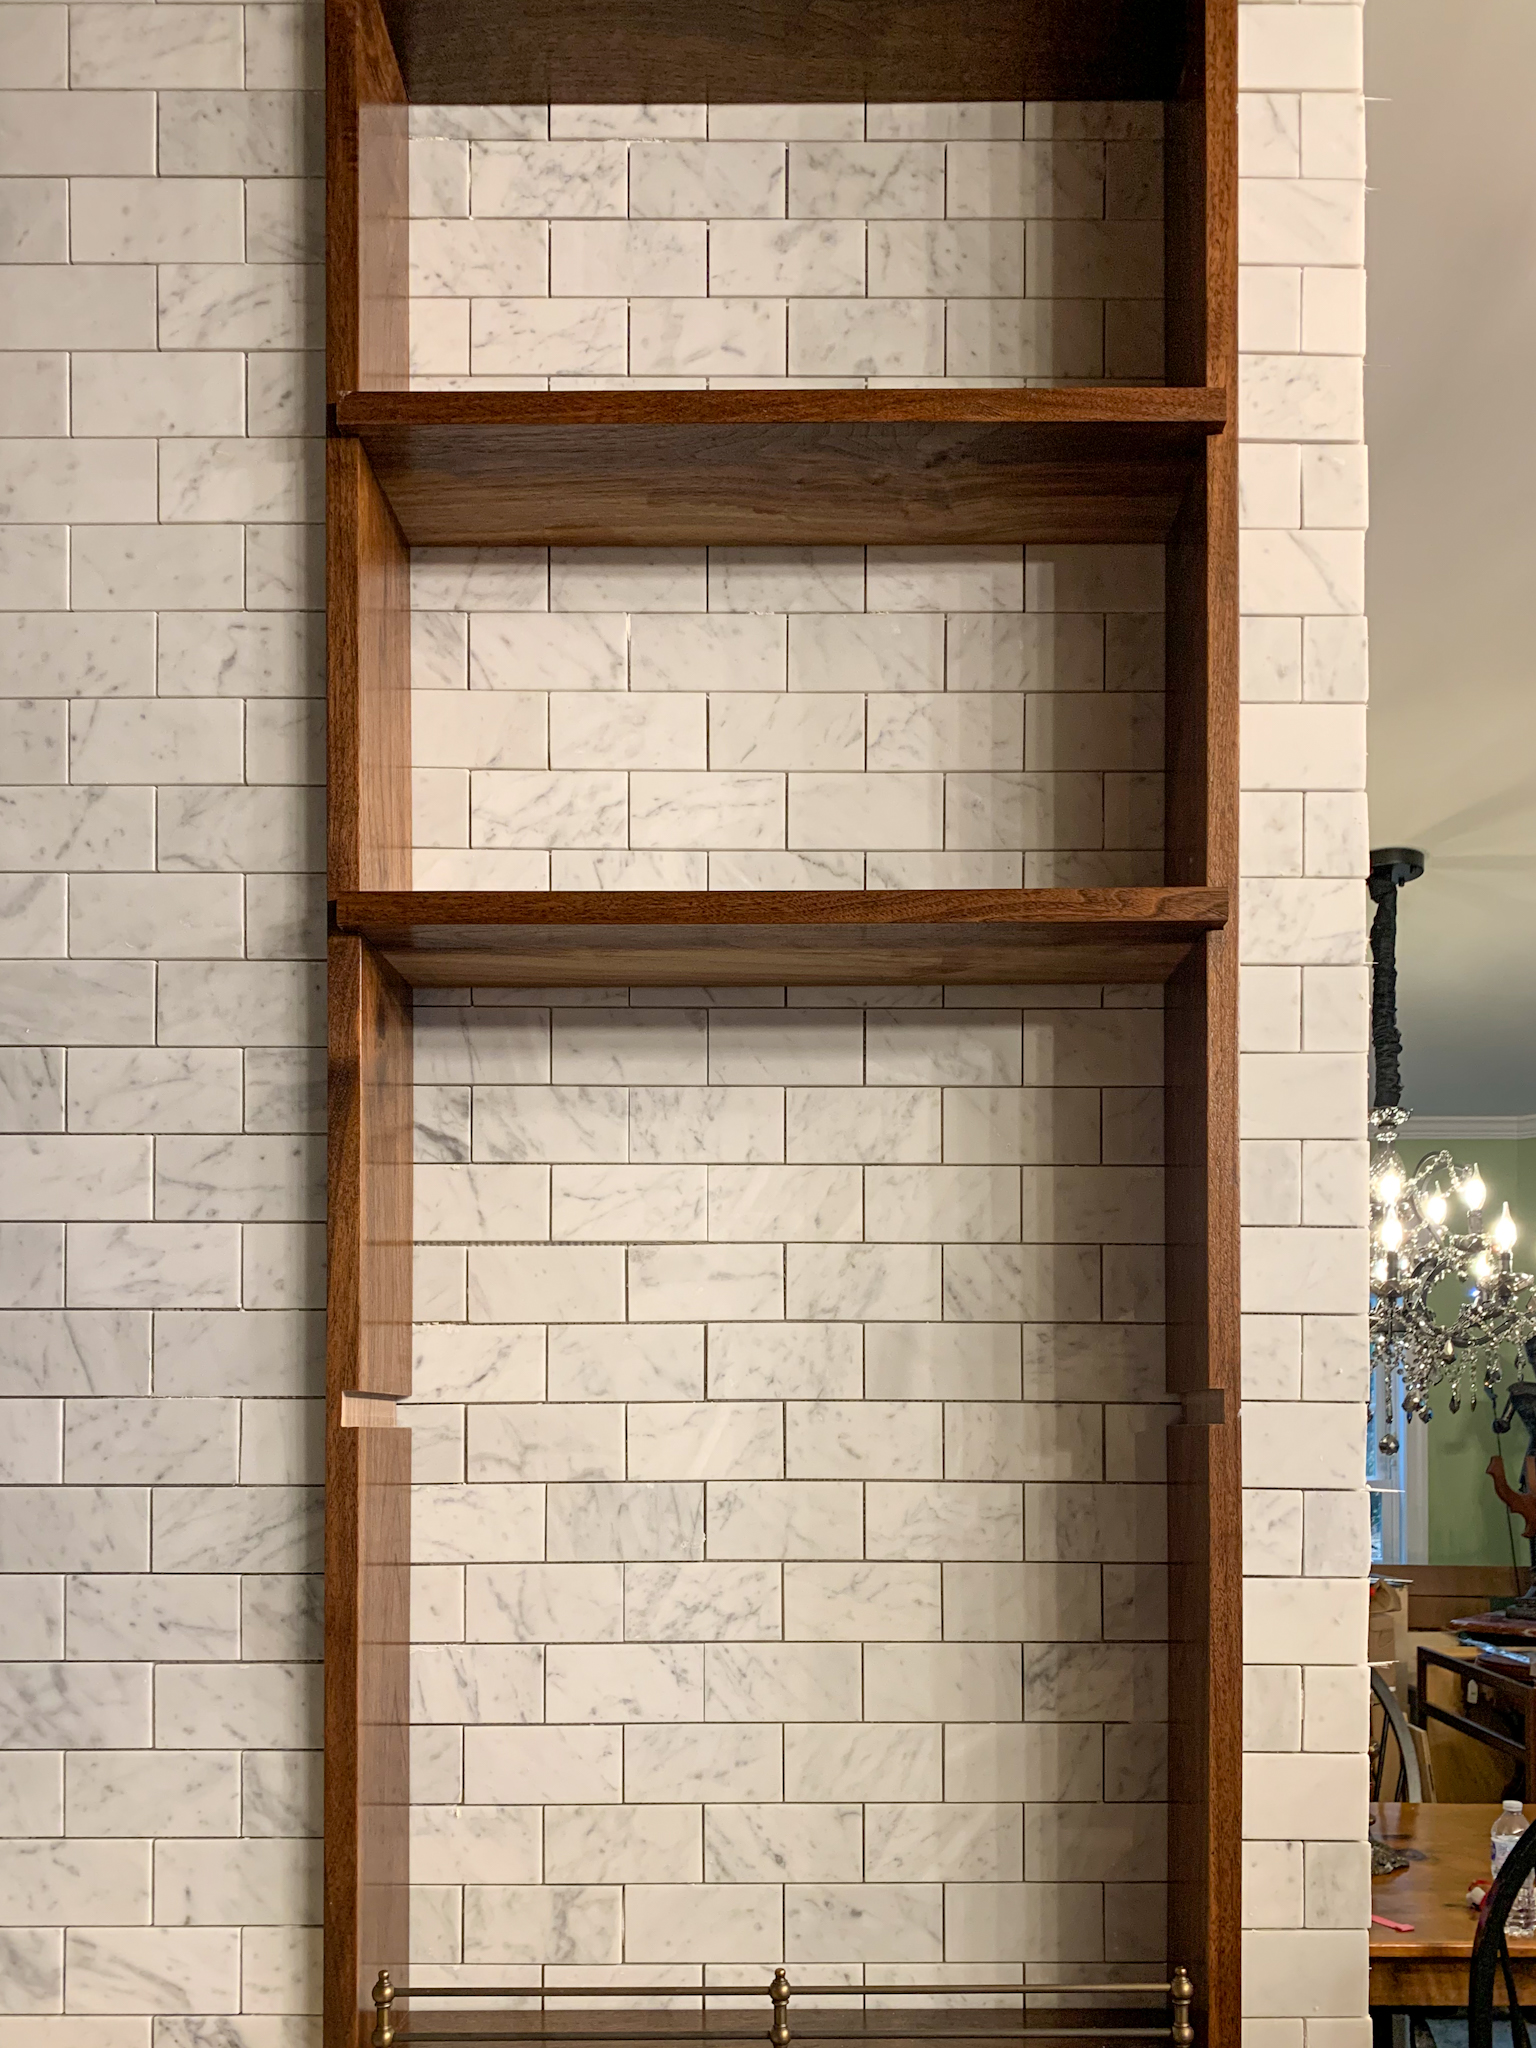
One of the most important design elements of this space was functionality: an excellent space to cook where all of the cook’s tools are within easy reach. It’s also important that the space be very easy to clean and hardy. Everything near the stove is a solid surface and non-scorch-able (including the metal upper cabinets). I allowed myself a little leniency with the shelf materials because they are 33 inches from the side of the range and the back of the shelves are still tiled. I briefly considered a shelf OVER the stove (it looks so pretty with the copper pots hanging there) but remembered that I don’t want to clean grease spatter off utensils, pots, and spices every time I cook.
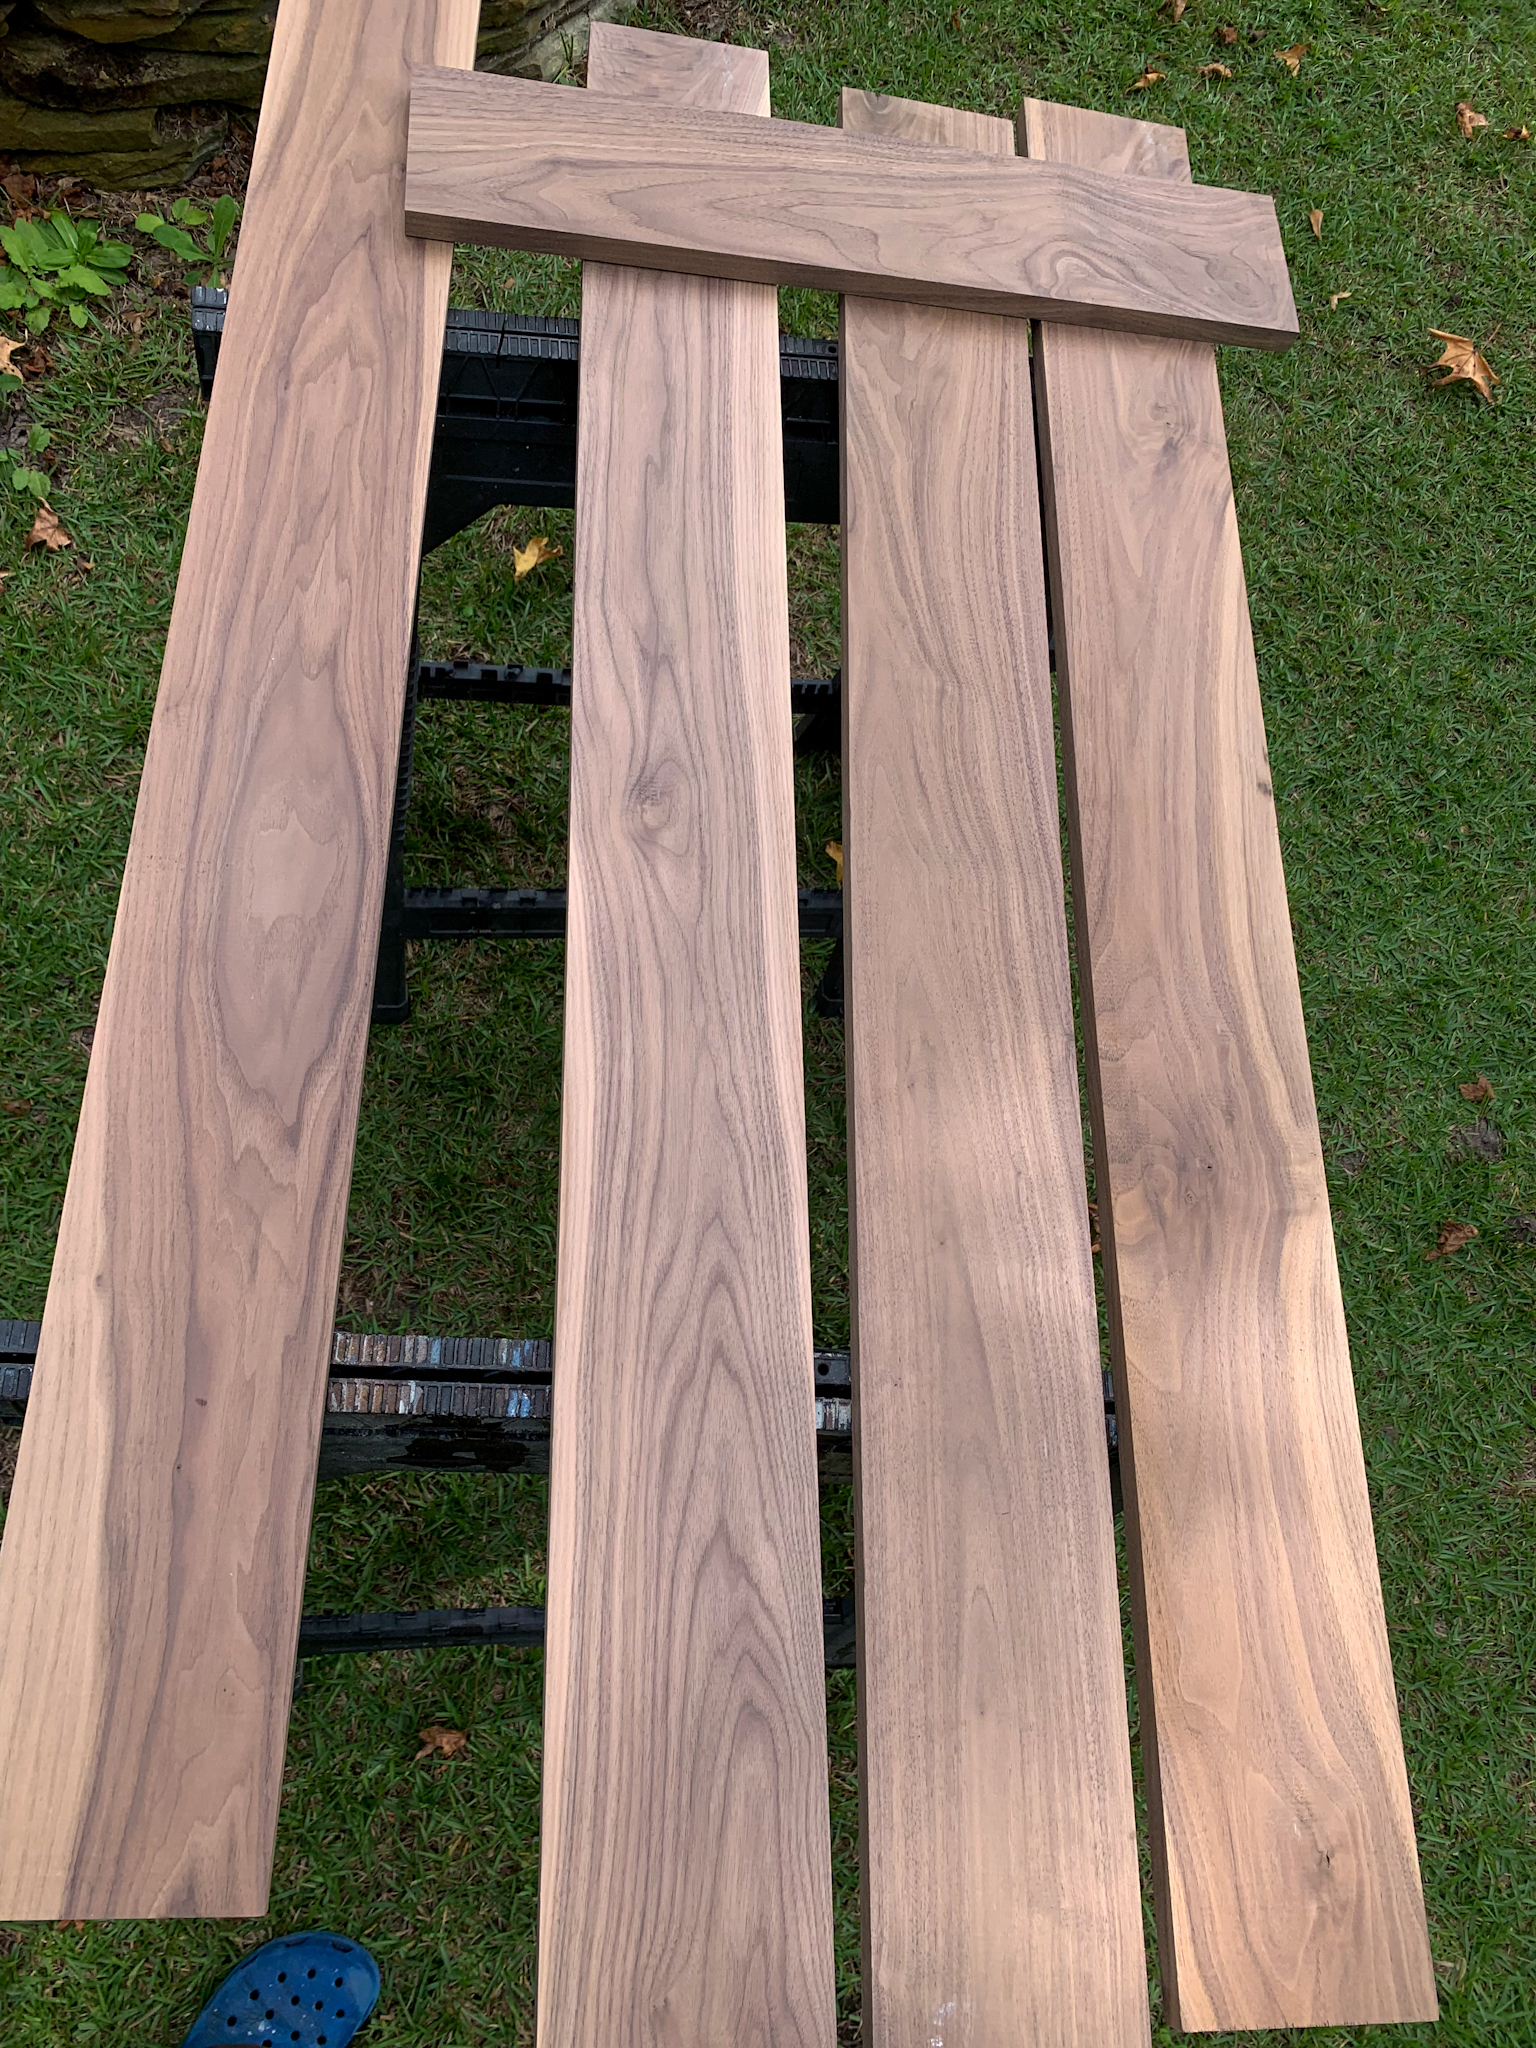
Anyhoo, after I actually threatened my husband with bodily harm for the lack of progress on the kitchen (i.e. fishing/casting on the boat instead of doing interior construction), this is the next project we came to in the build. One of the challenges was that walnut is really hard to find (read: expensive) right now, but since it wasn’t a lot square footage wise, I thought it would be fairly affordable. It was not. Not, to say that little detail changed my mind: I still got my walnut shelves. Just know that the species of wood you choose very much impacts the final cost.
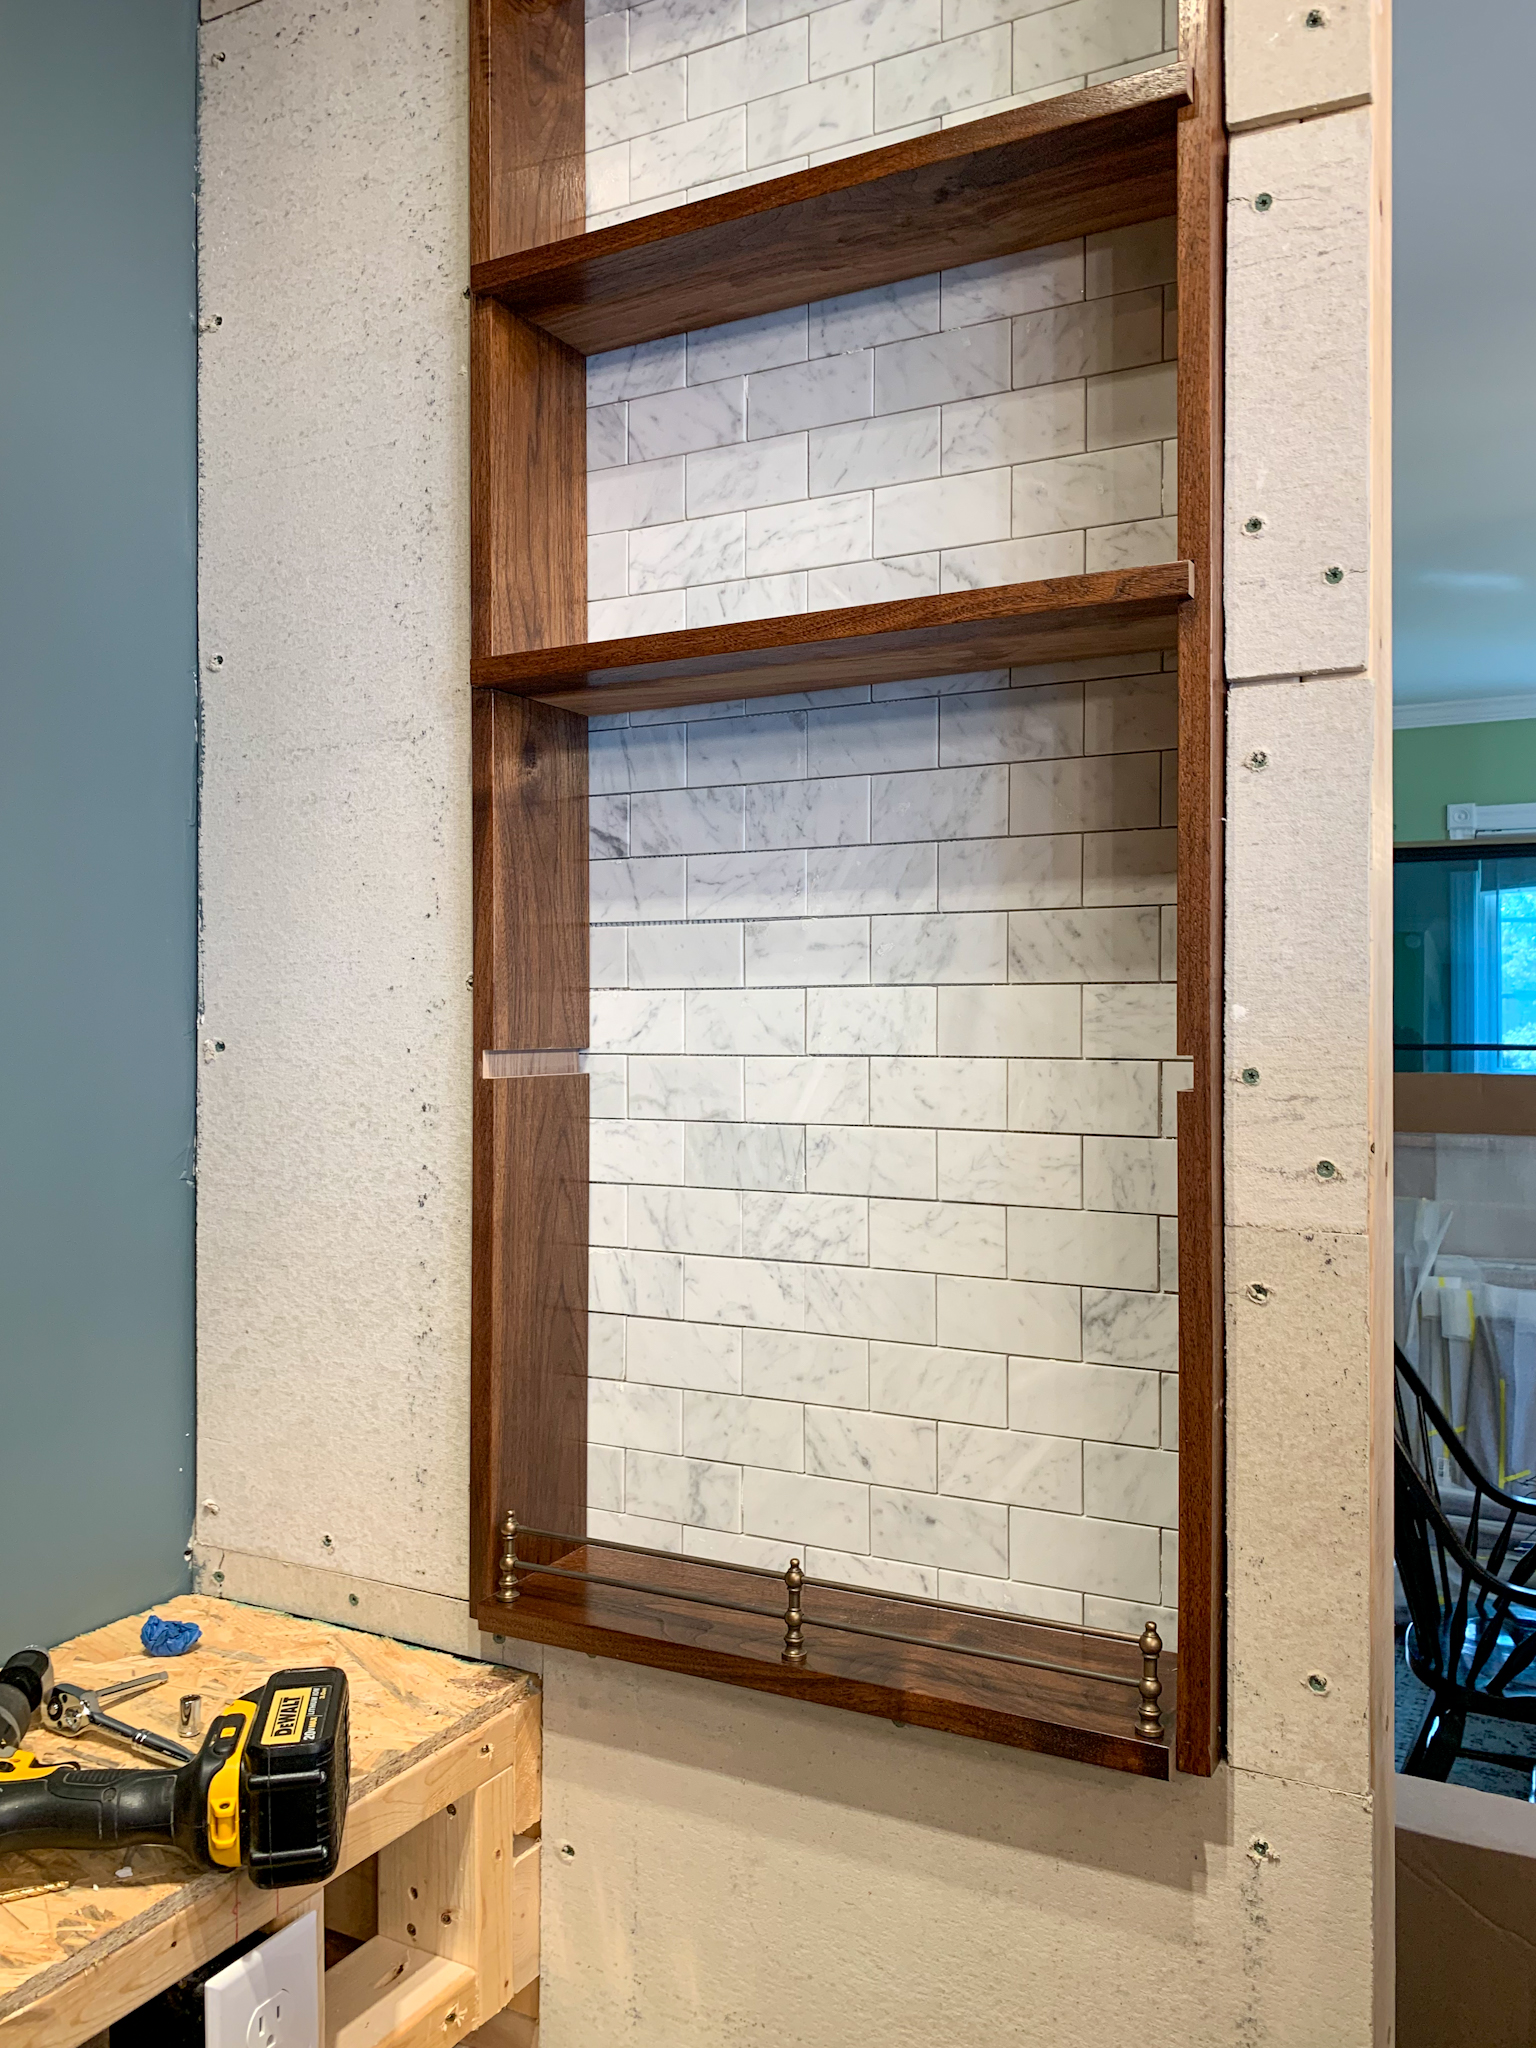
I also wanted some pretty gallery rails to prevent oil bottles from being knocked off and smashing into tiny pieces. Those were also not cheap, but they were necessary both from an aesthetic and functional standpoint. I had already purchased the Carrara marble subway tile for the interior range walls, and I have broken out the relative cost below.
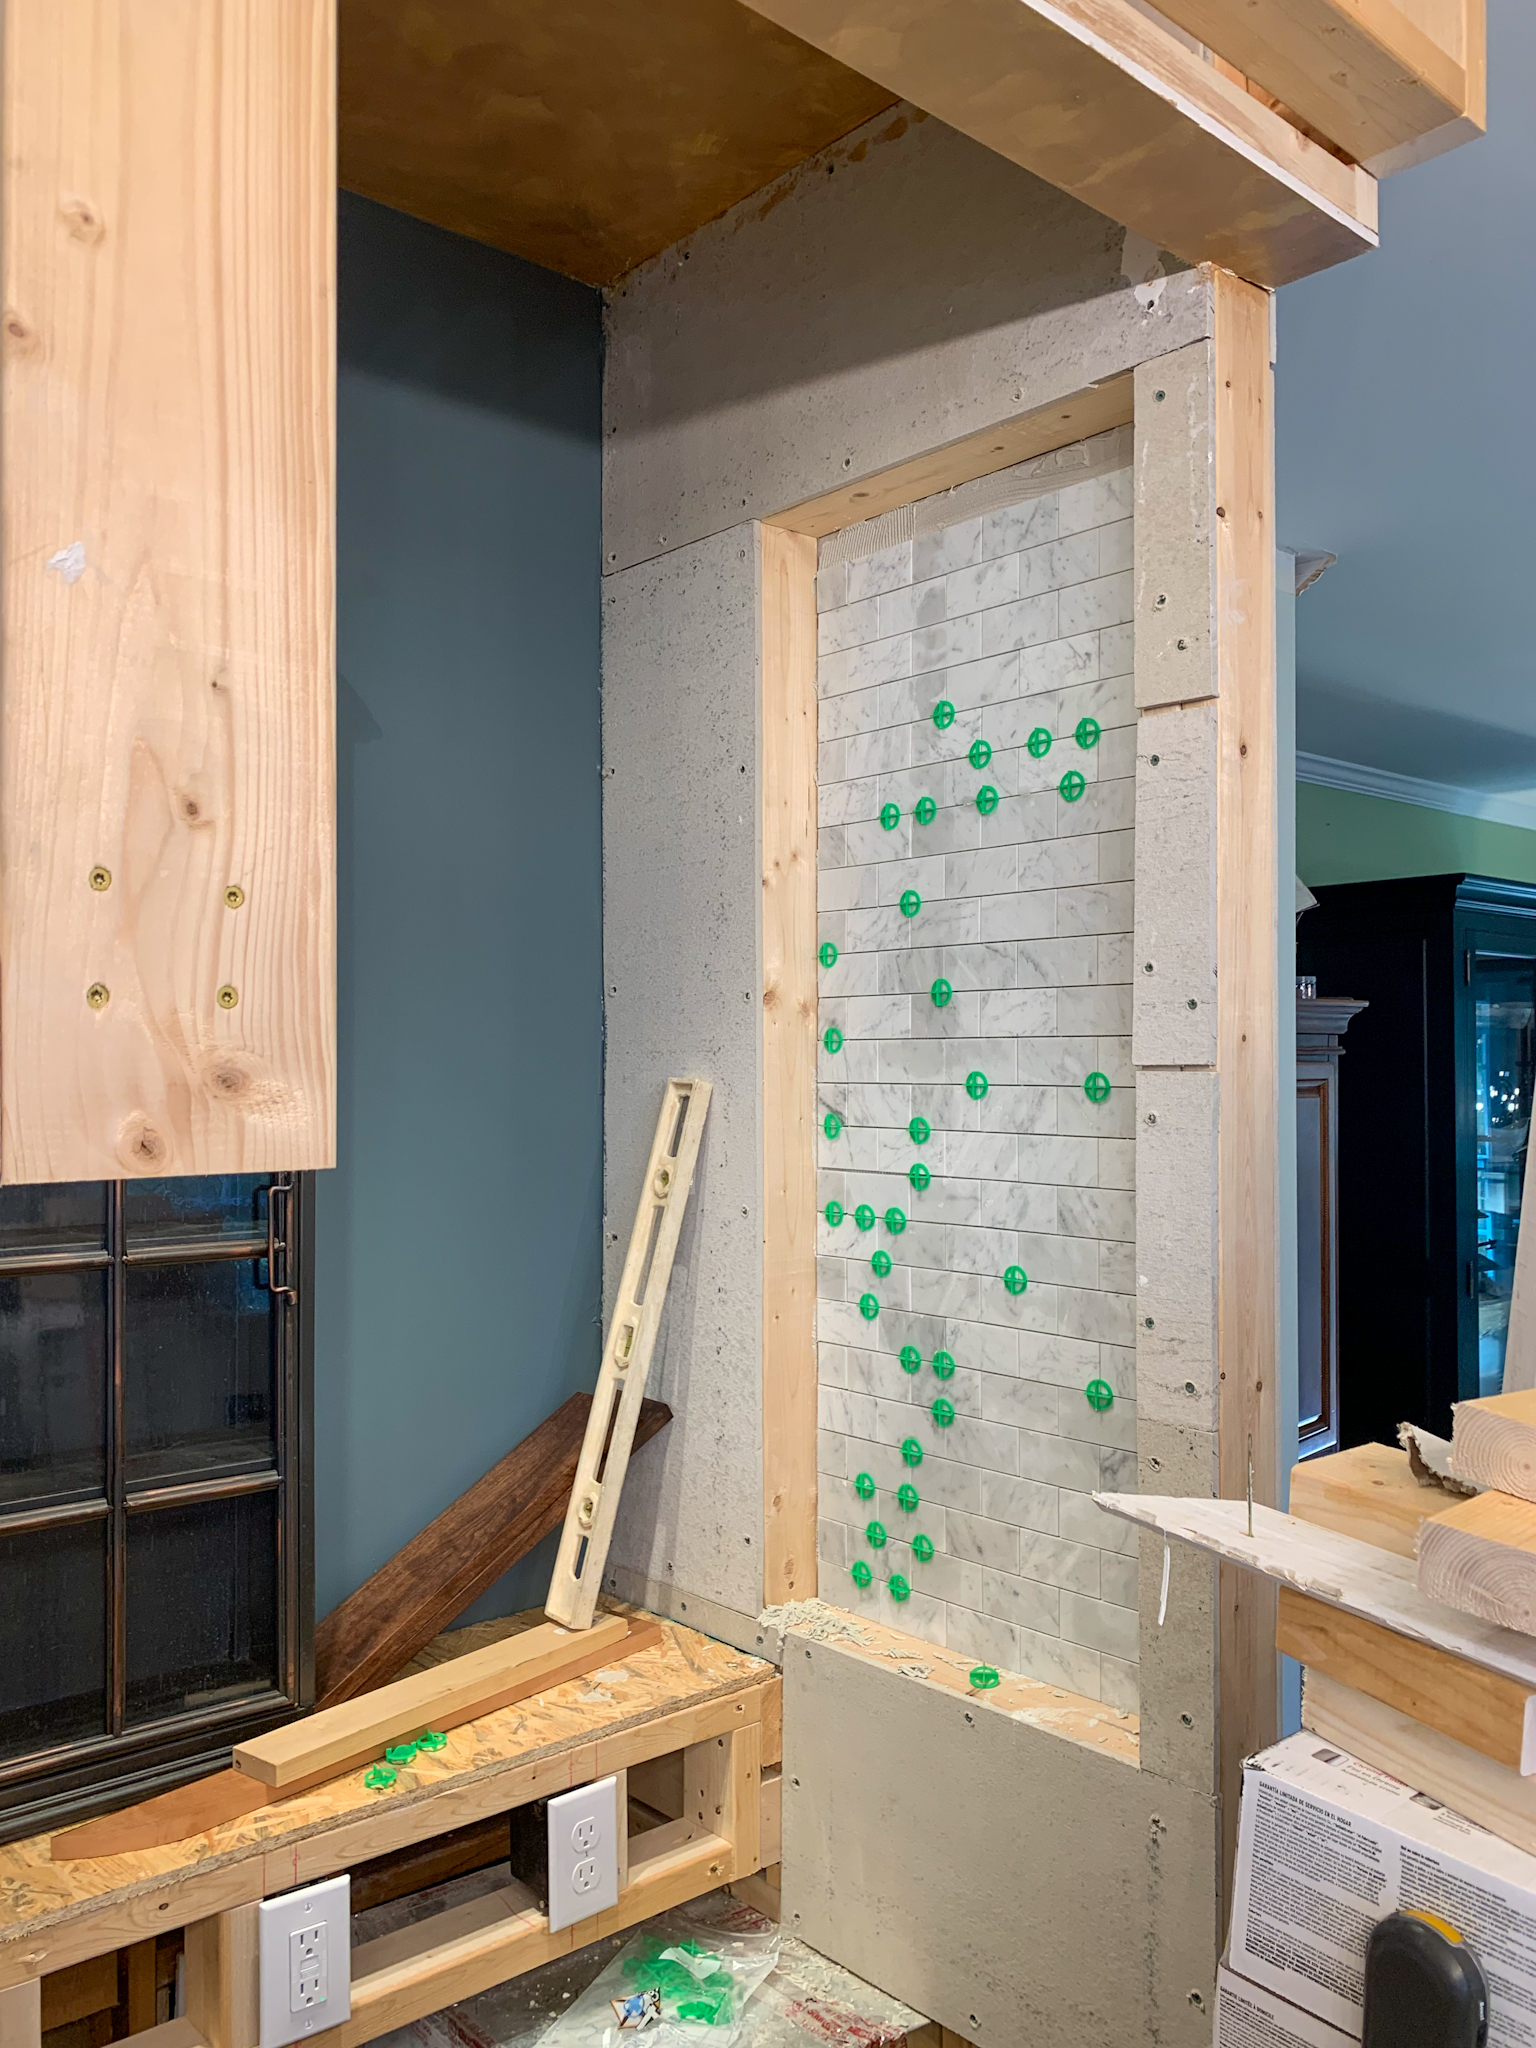
Step one was framing the wall with the size I wanted and thinking about all the 3D things that could affect the functionality of the design.
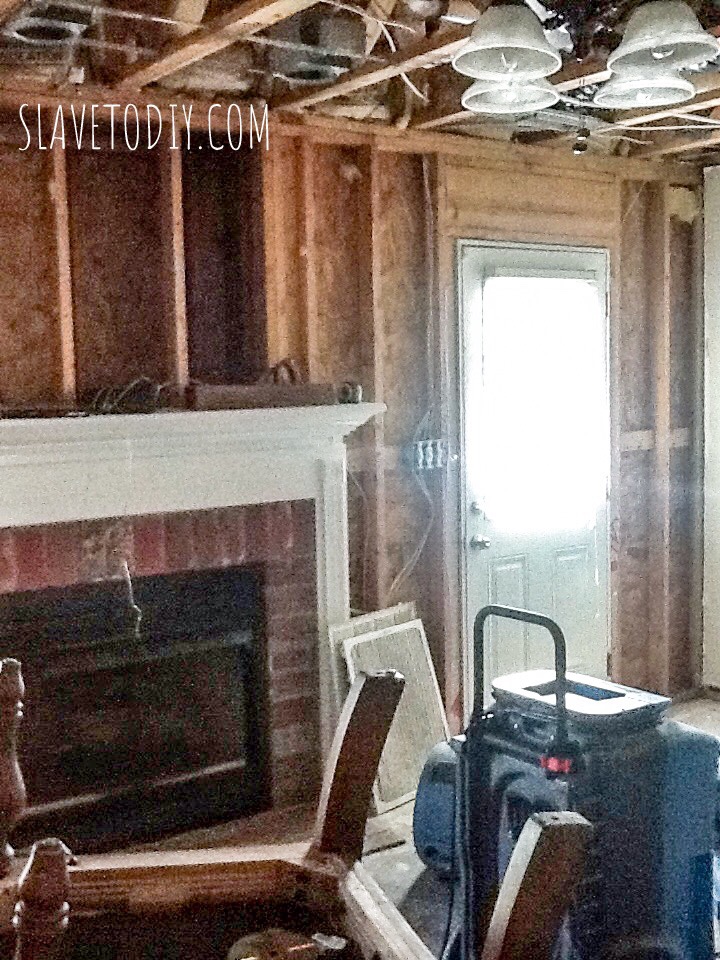
Since we are doing one wall at a time… it is more difficult. I want to have a functional kitchen for as long as possible through the renovation, so there was an old peninsula with electrical and plumbing in the way on one side.
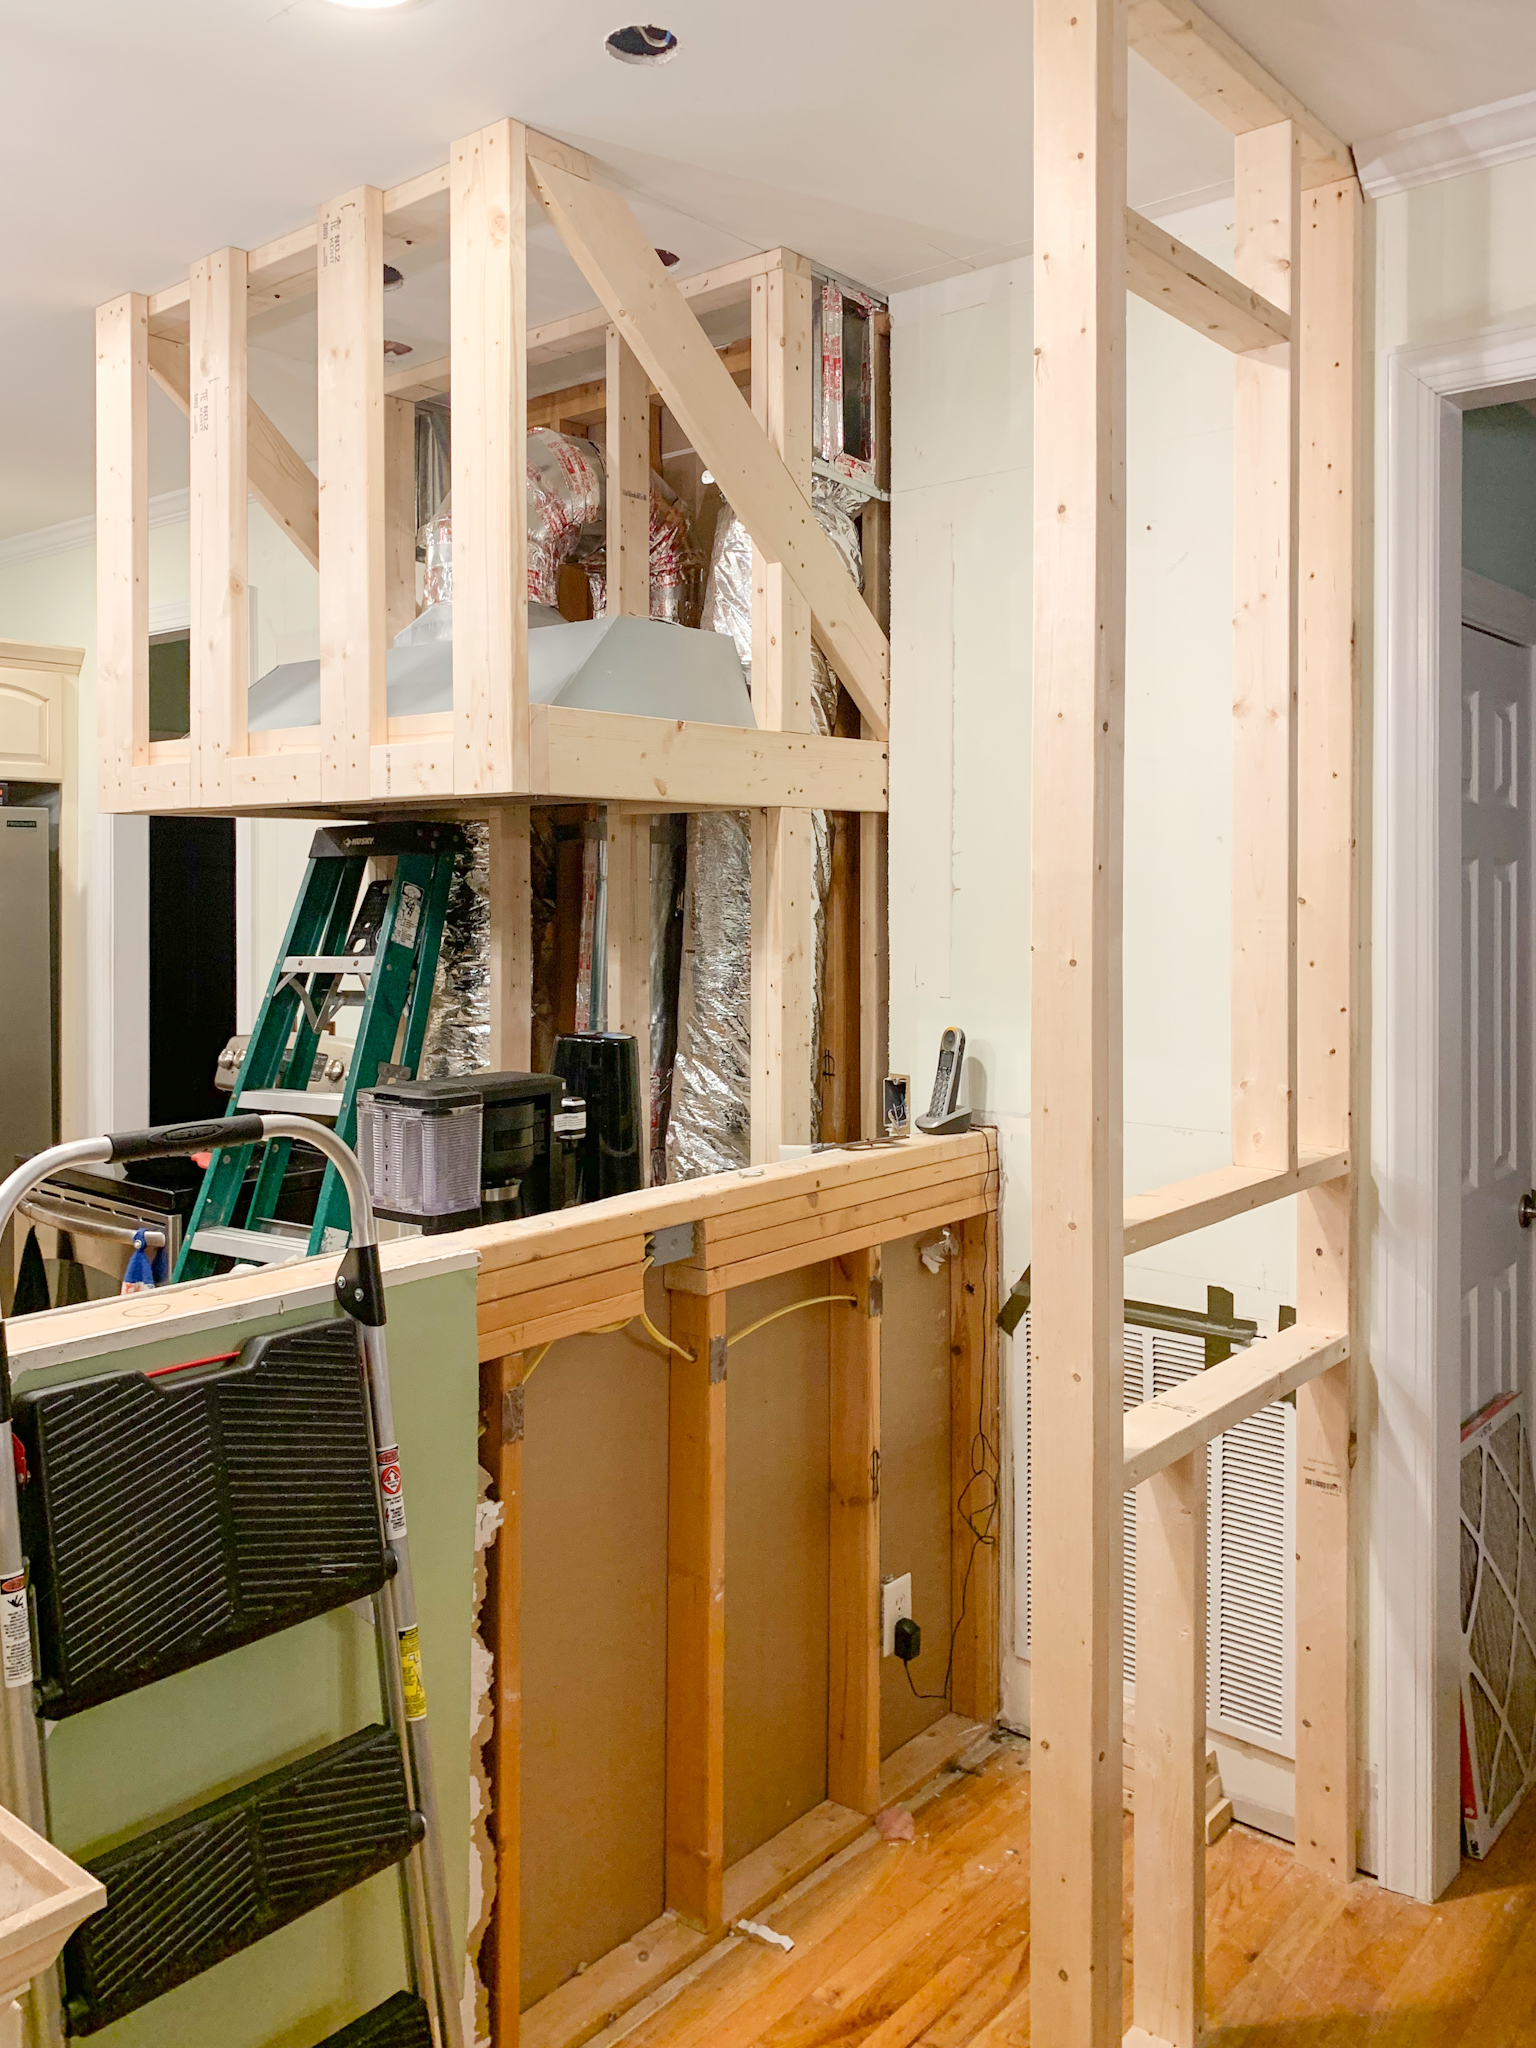
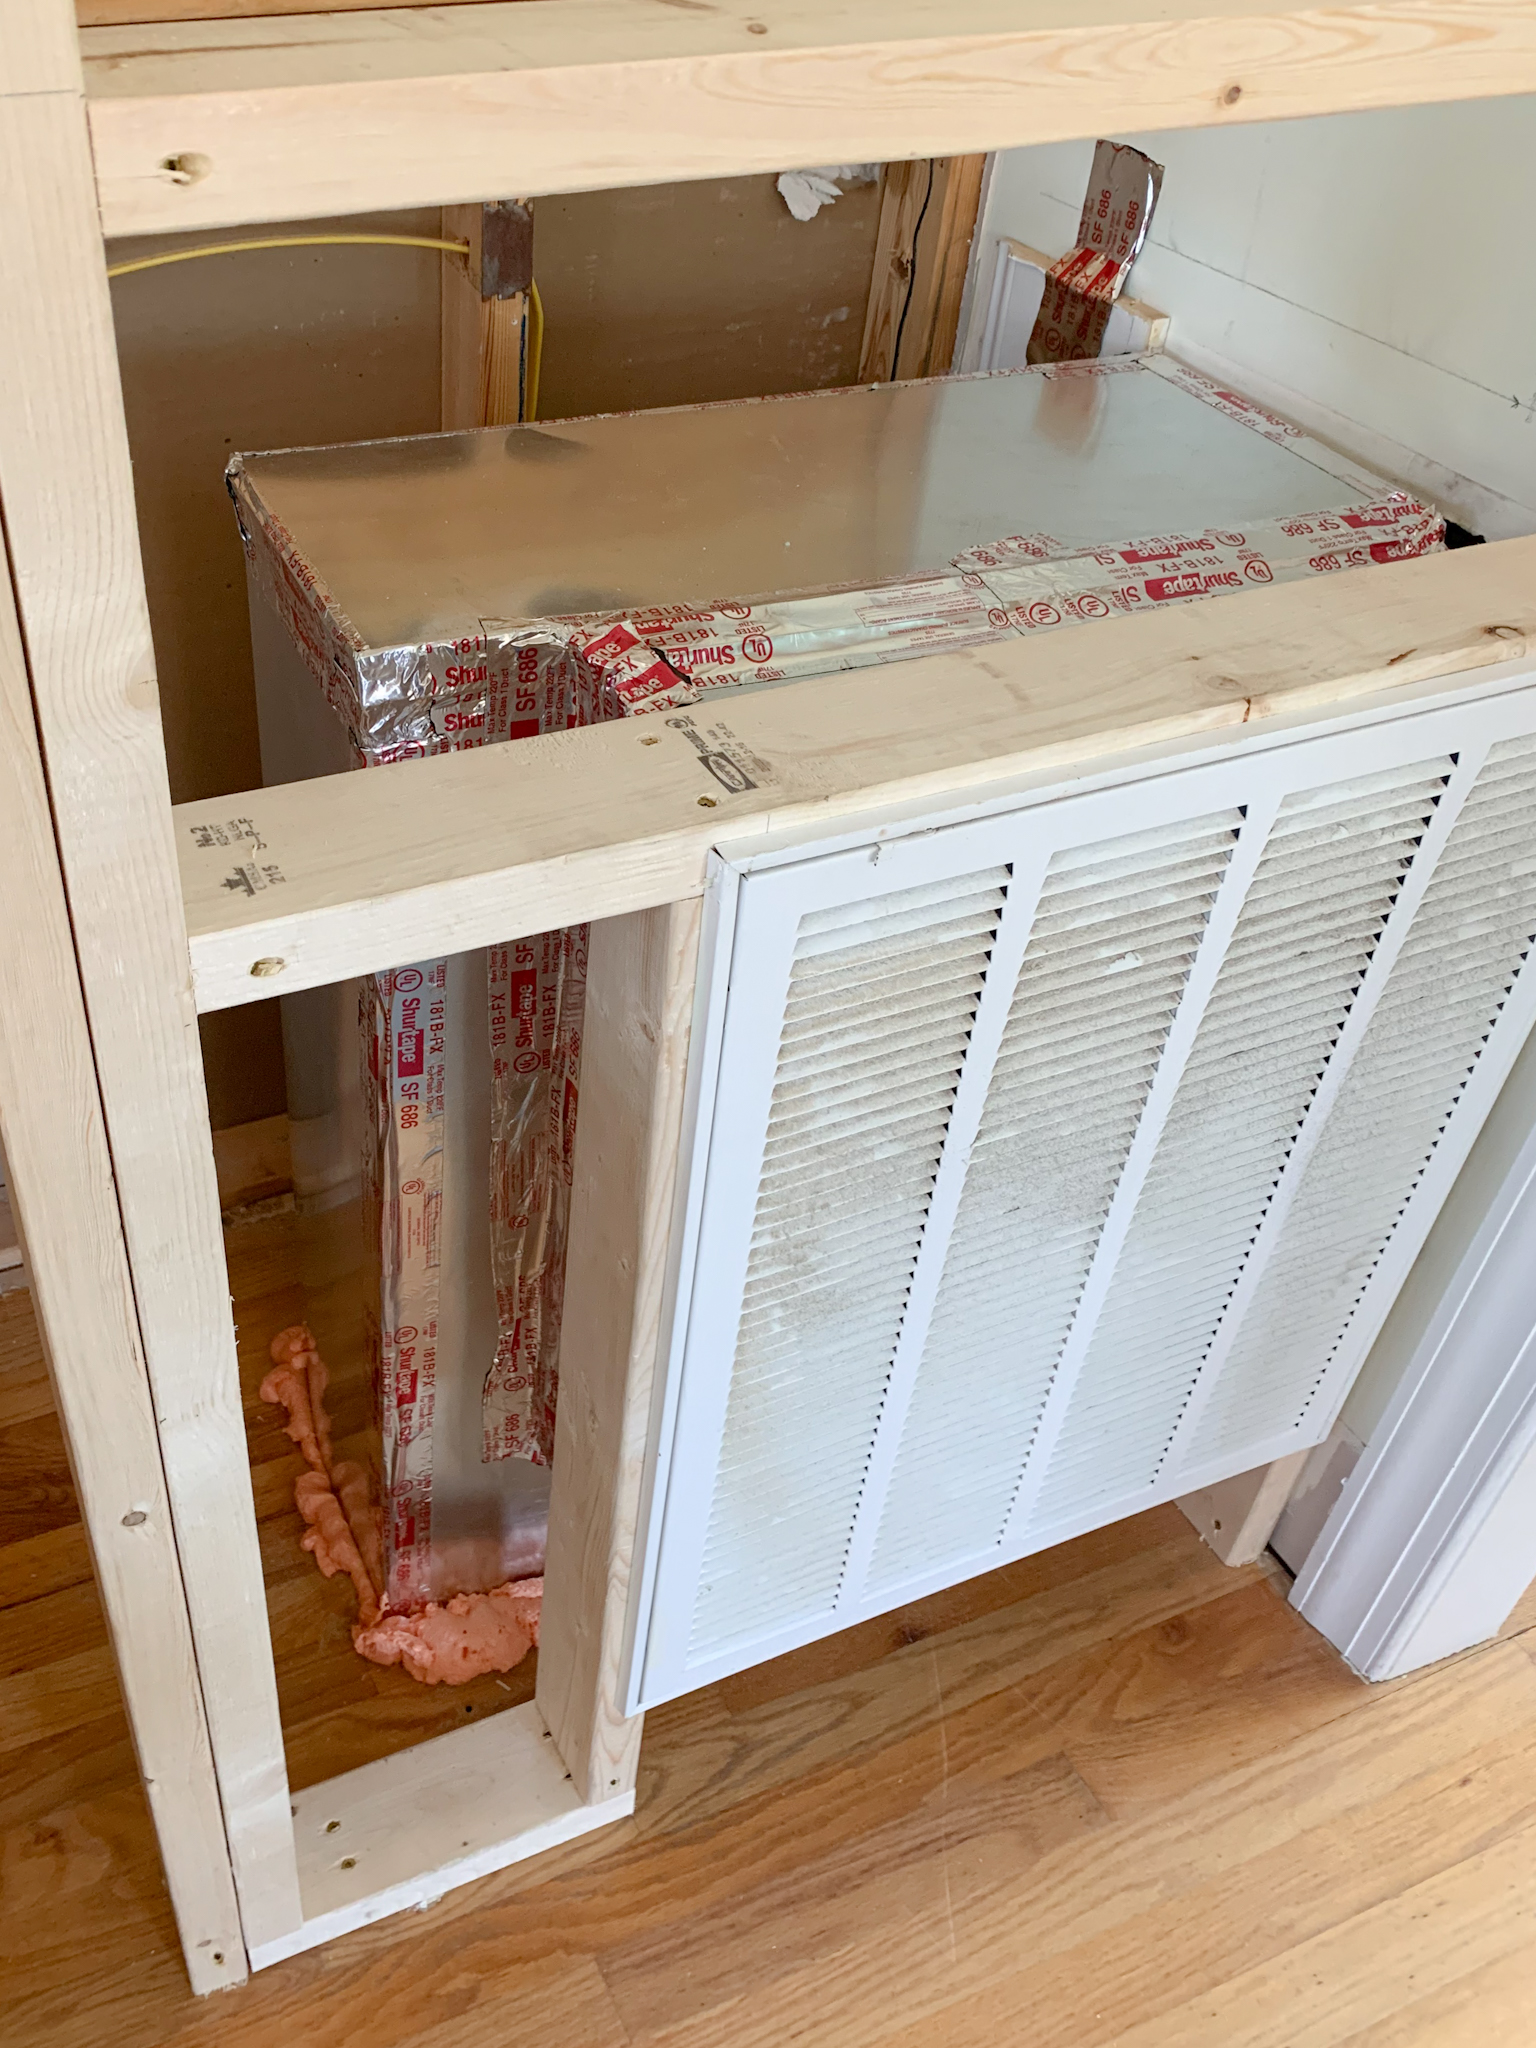
And then, of course, this little design treasure that I was feeling borderline homicidal about. Don’t worry, I fixed the look, but I’m still pretty torqued the HVAC crew couldn’t reroute the intake anywhere else. The worst part is it robbed me of half of my cabinet space on one side of the stove. NOT COOL. (It currently has a really pretty cover on it, and I ordered a false front for the cabinet so it will be invisible to anyone who doesn’t know).
Step one: Install cement board for all tiled areas.
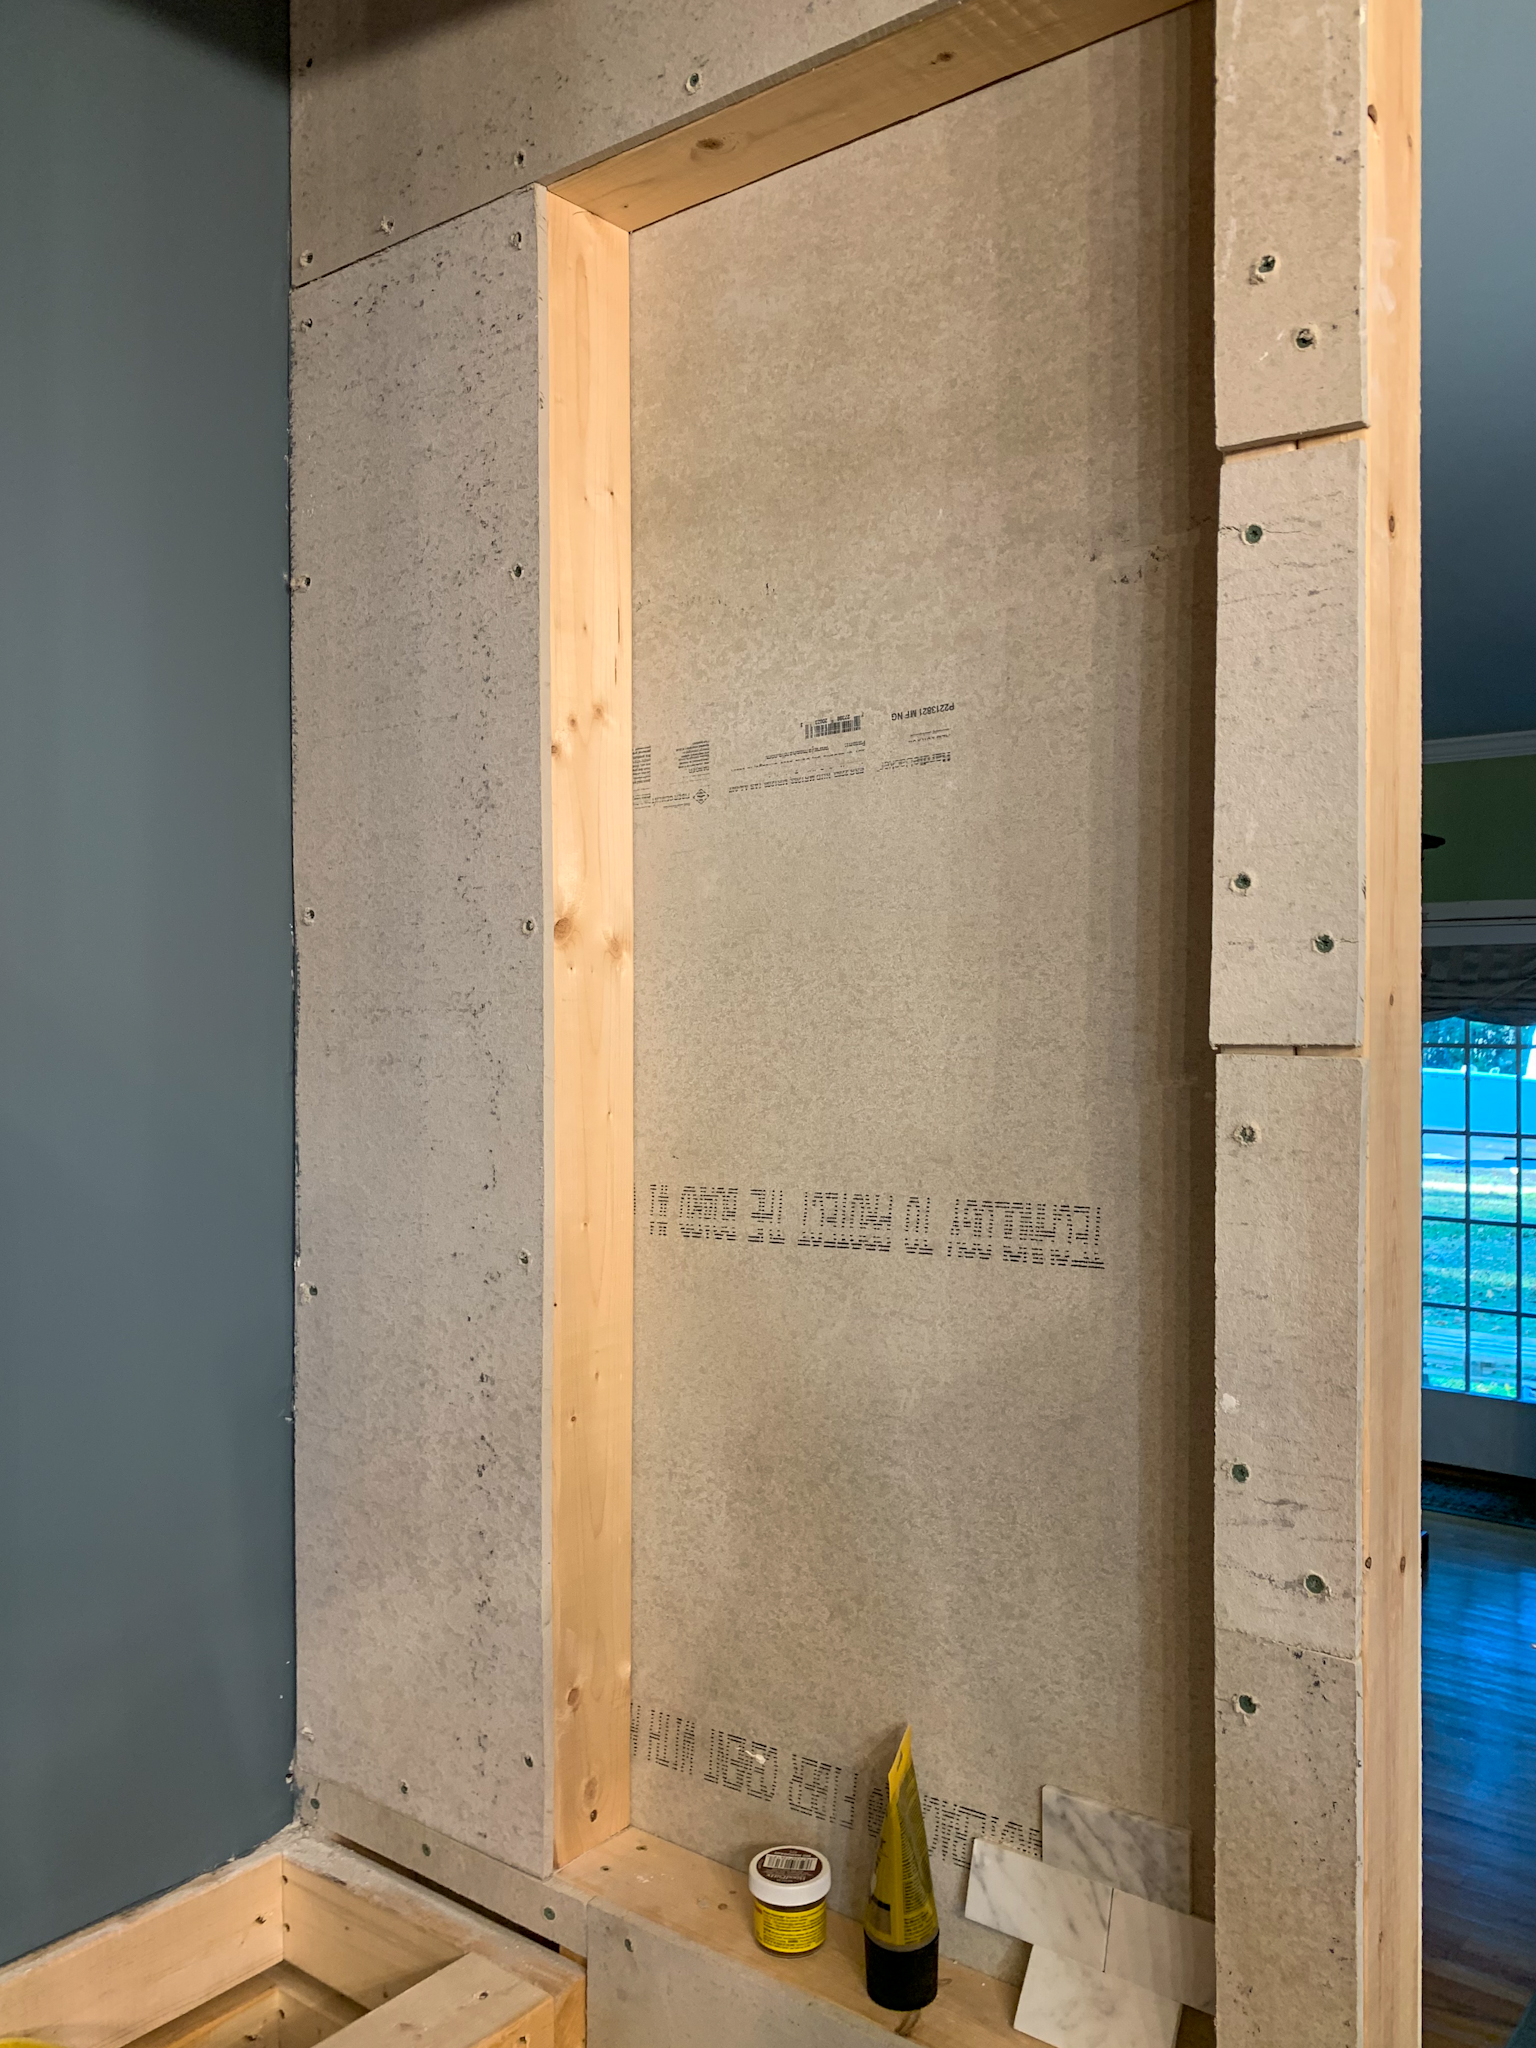
Step 2: Mortar.
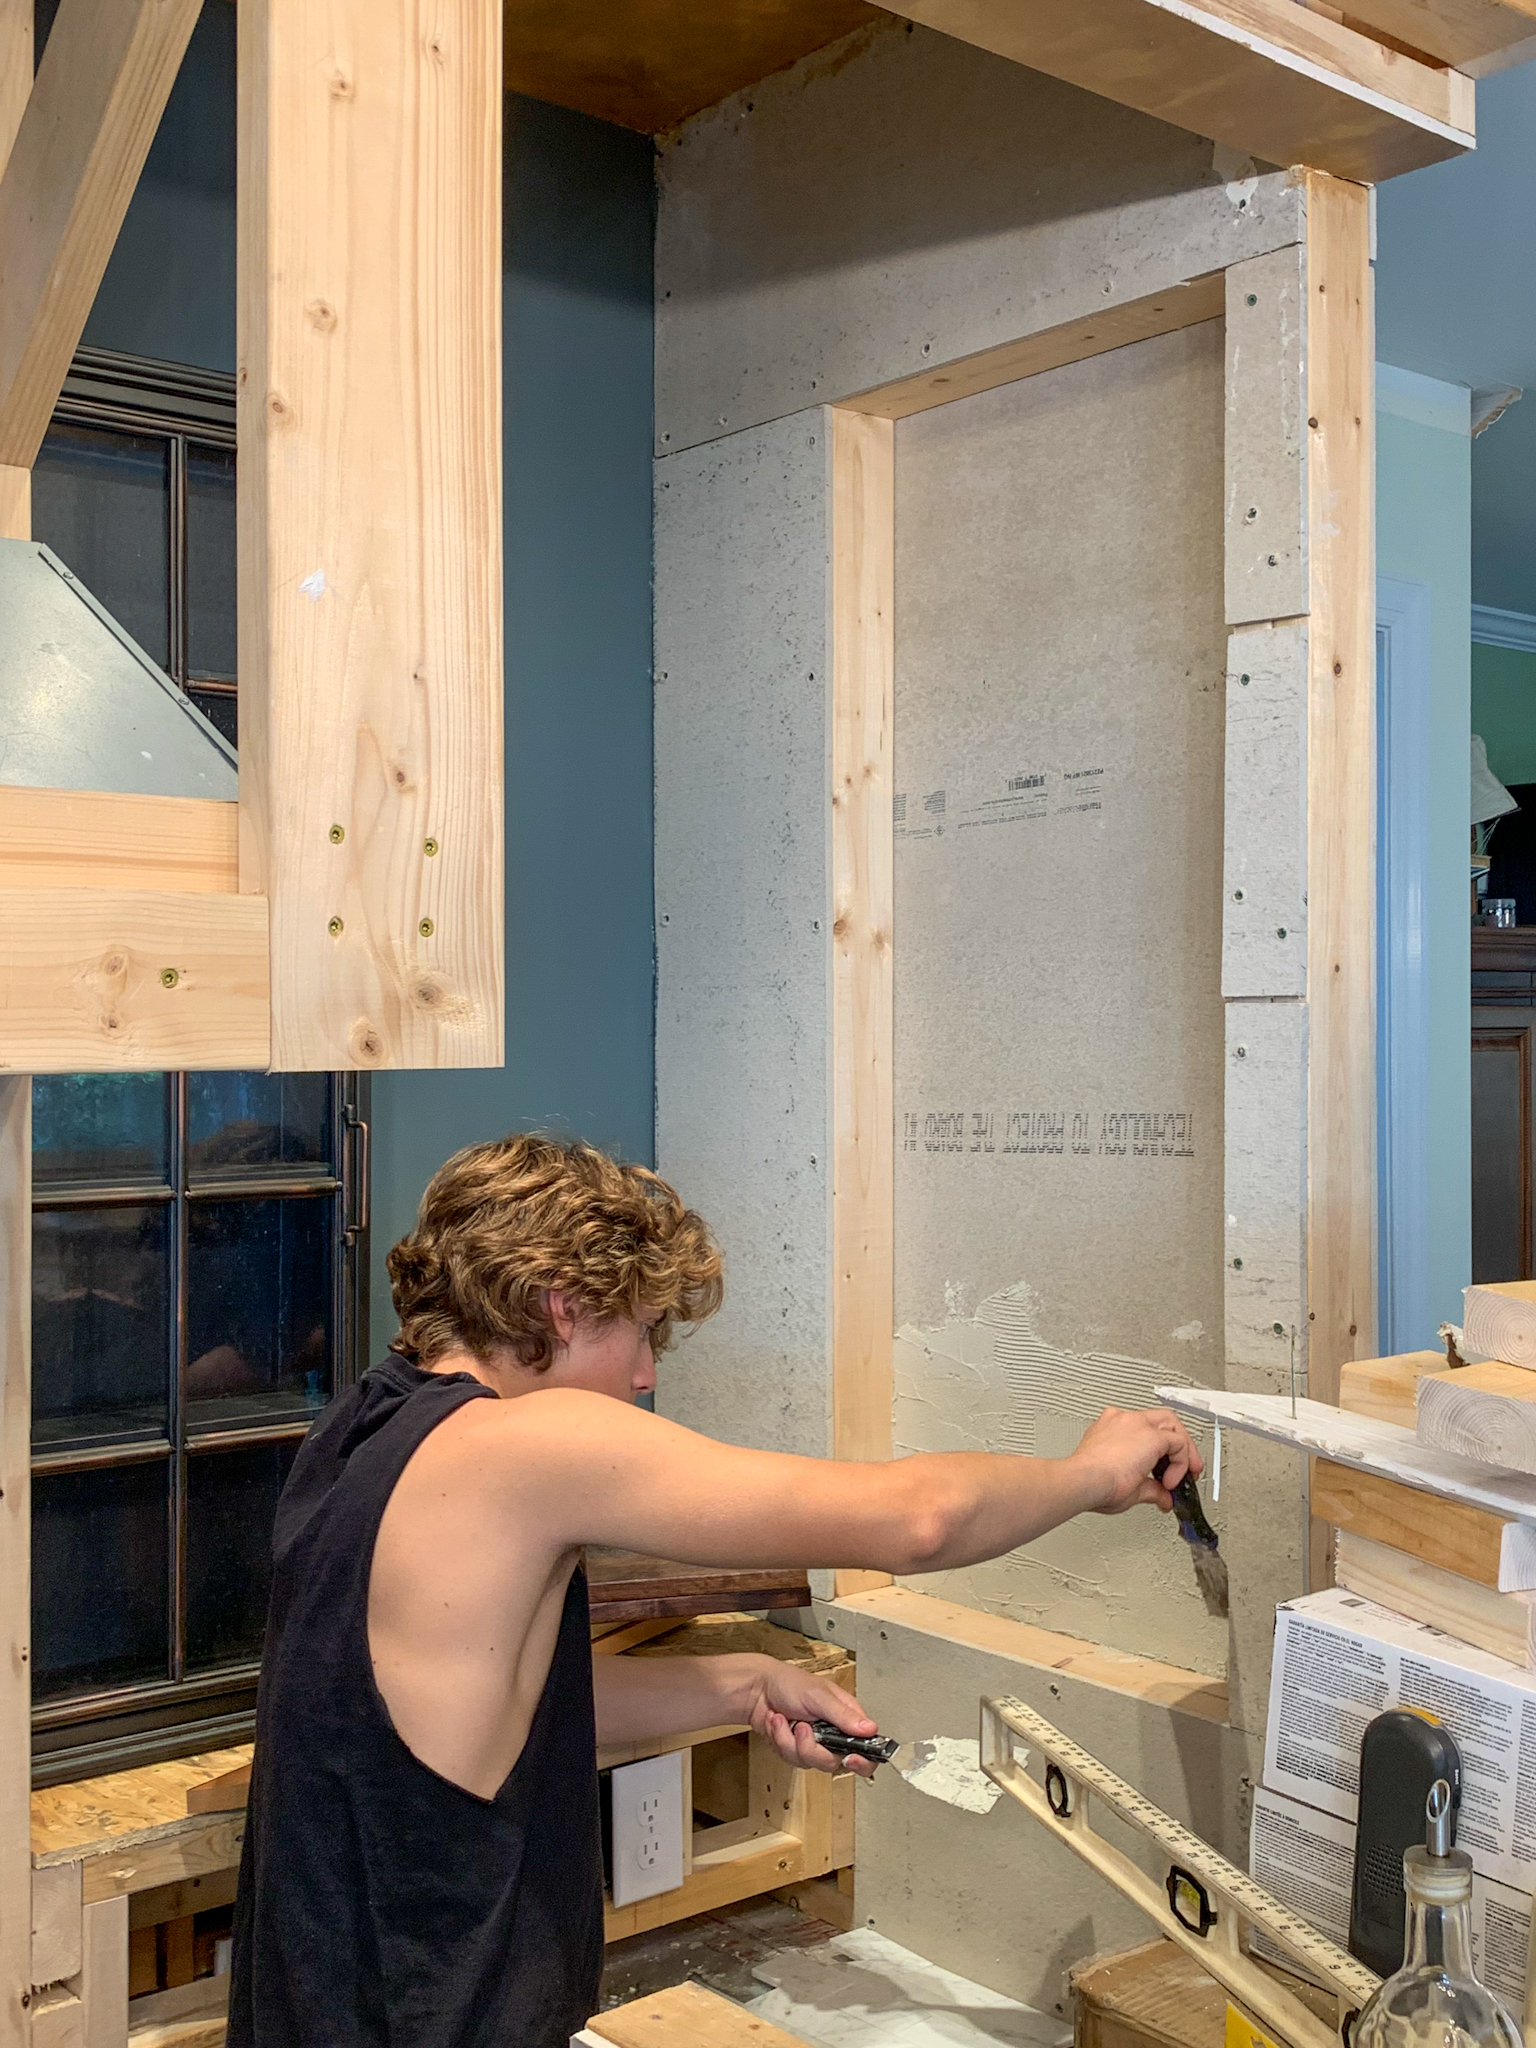
Step 3: Tile.
Step 4: Prefinish the walnut shelves prior to installation. I highly recommend lots of lacquer to prevent warping/staining from spills or drips.
Step 5: Install wooden shelf surround (if you’re using gallery rails, I highly recommend attaching them to the shelves prior to installation). I recommend leaving the shelves unattached until you have completed the grouting process (it’s much easier to grout without the shelves in).
Step 6: Install remaining tile surrounding shelves.
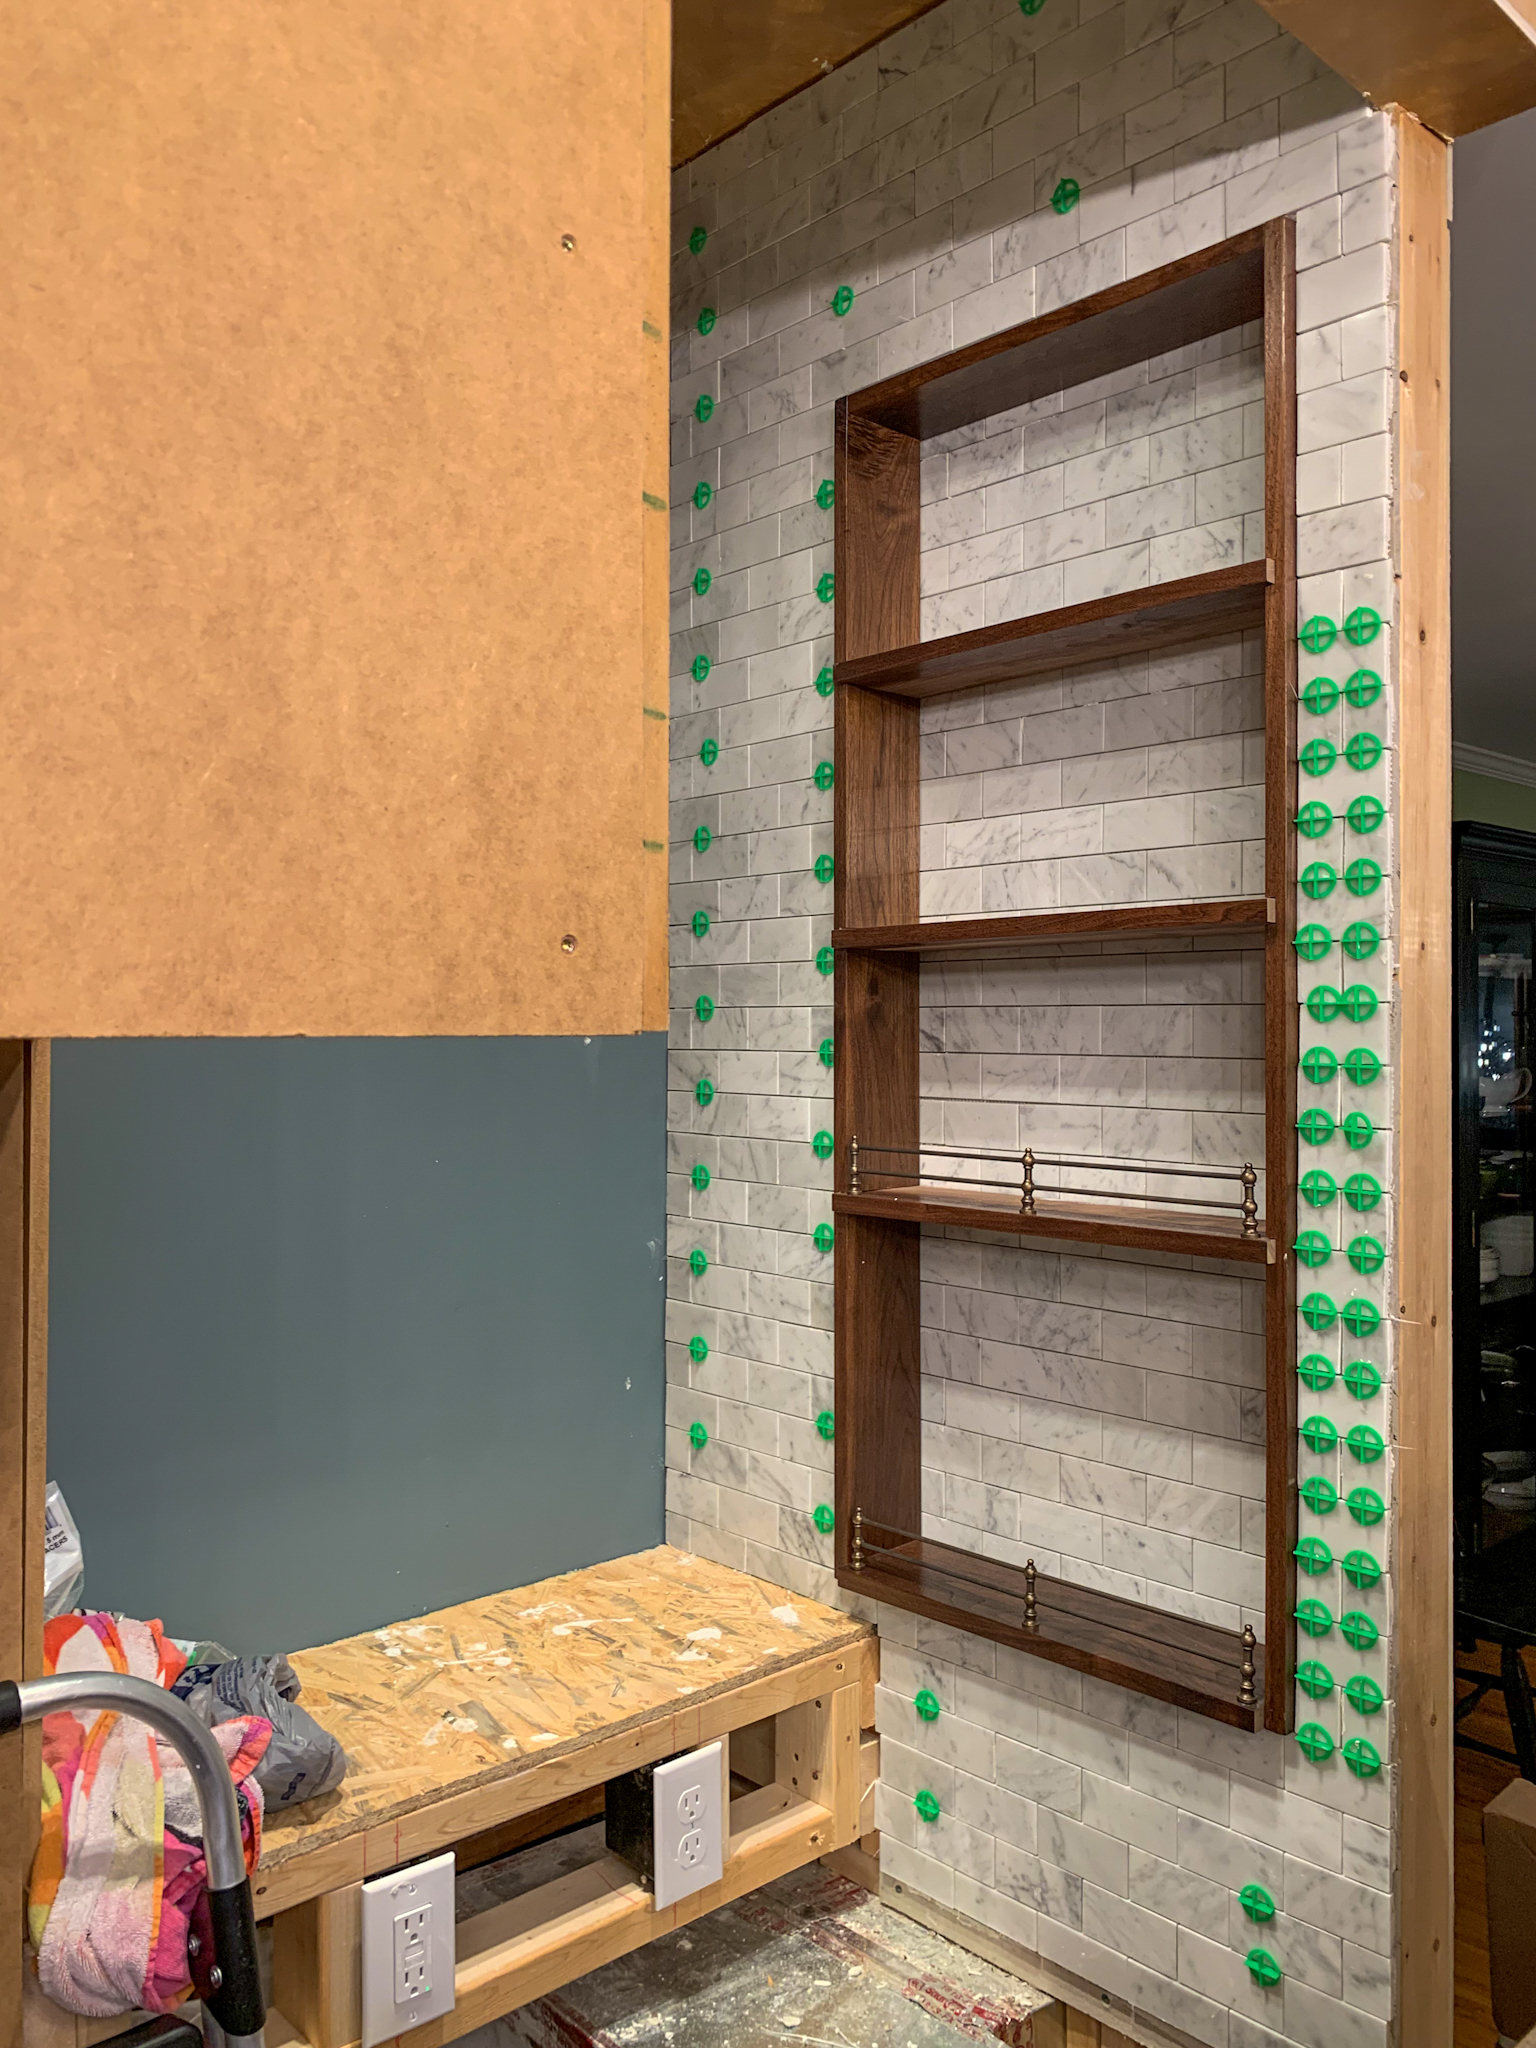
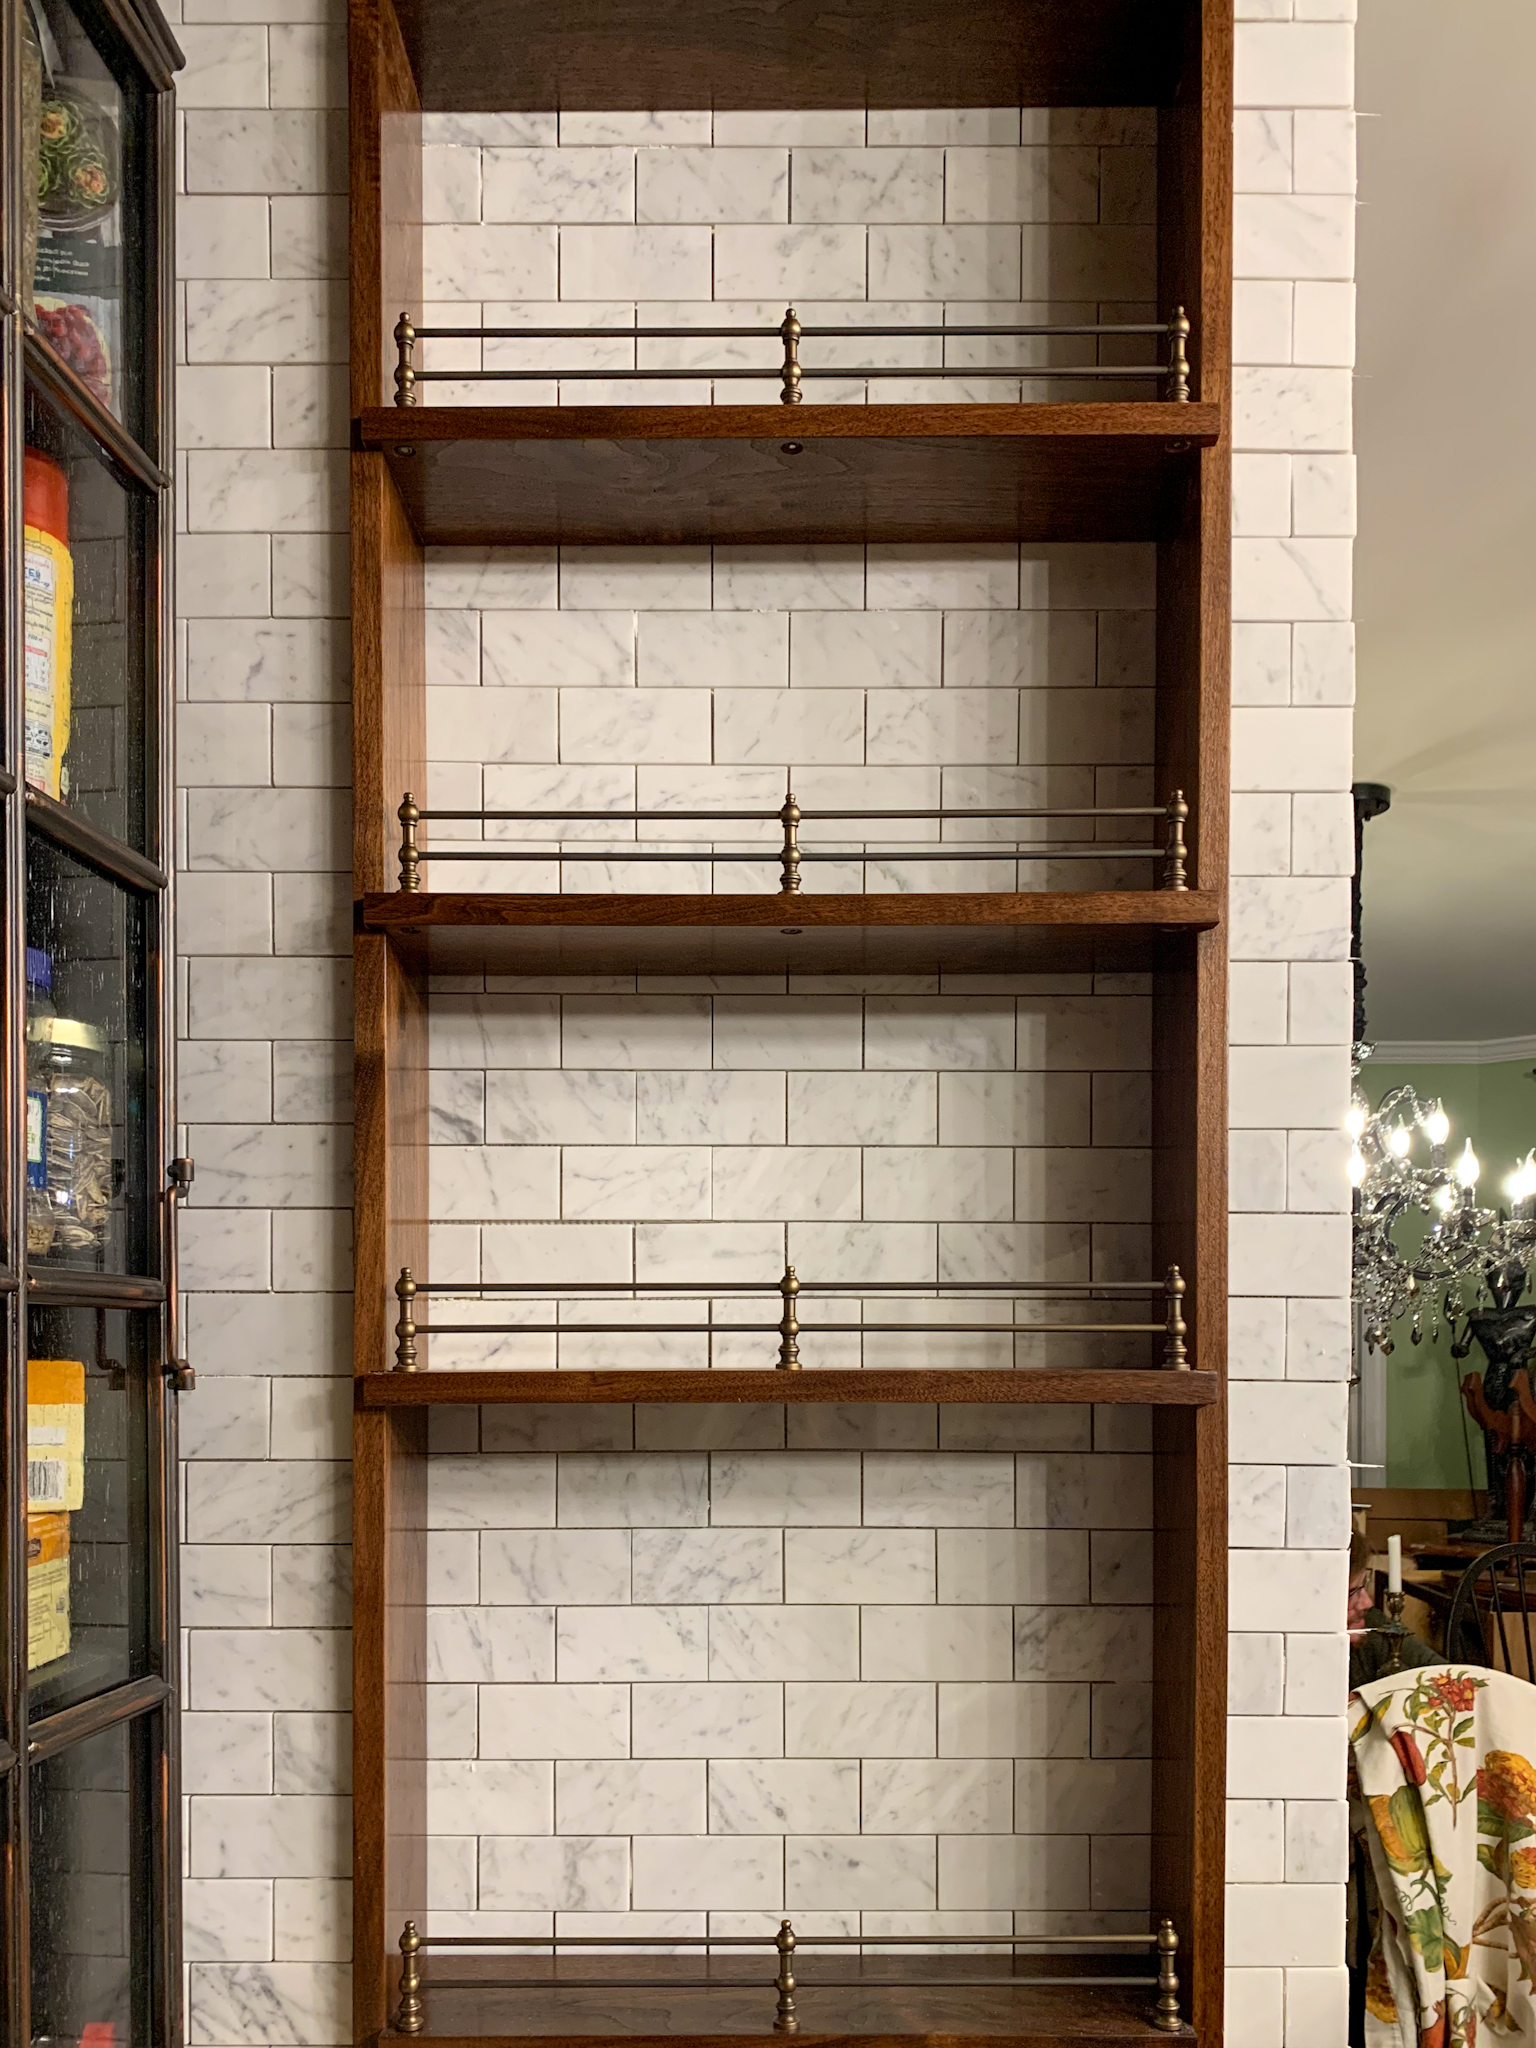
Step 7: Grout and caulk (don’t skip the caulk, it prevents fluids from getting behind the shelves and warping them).
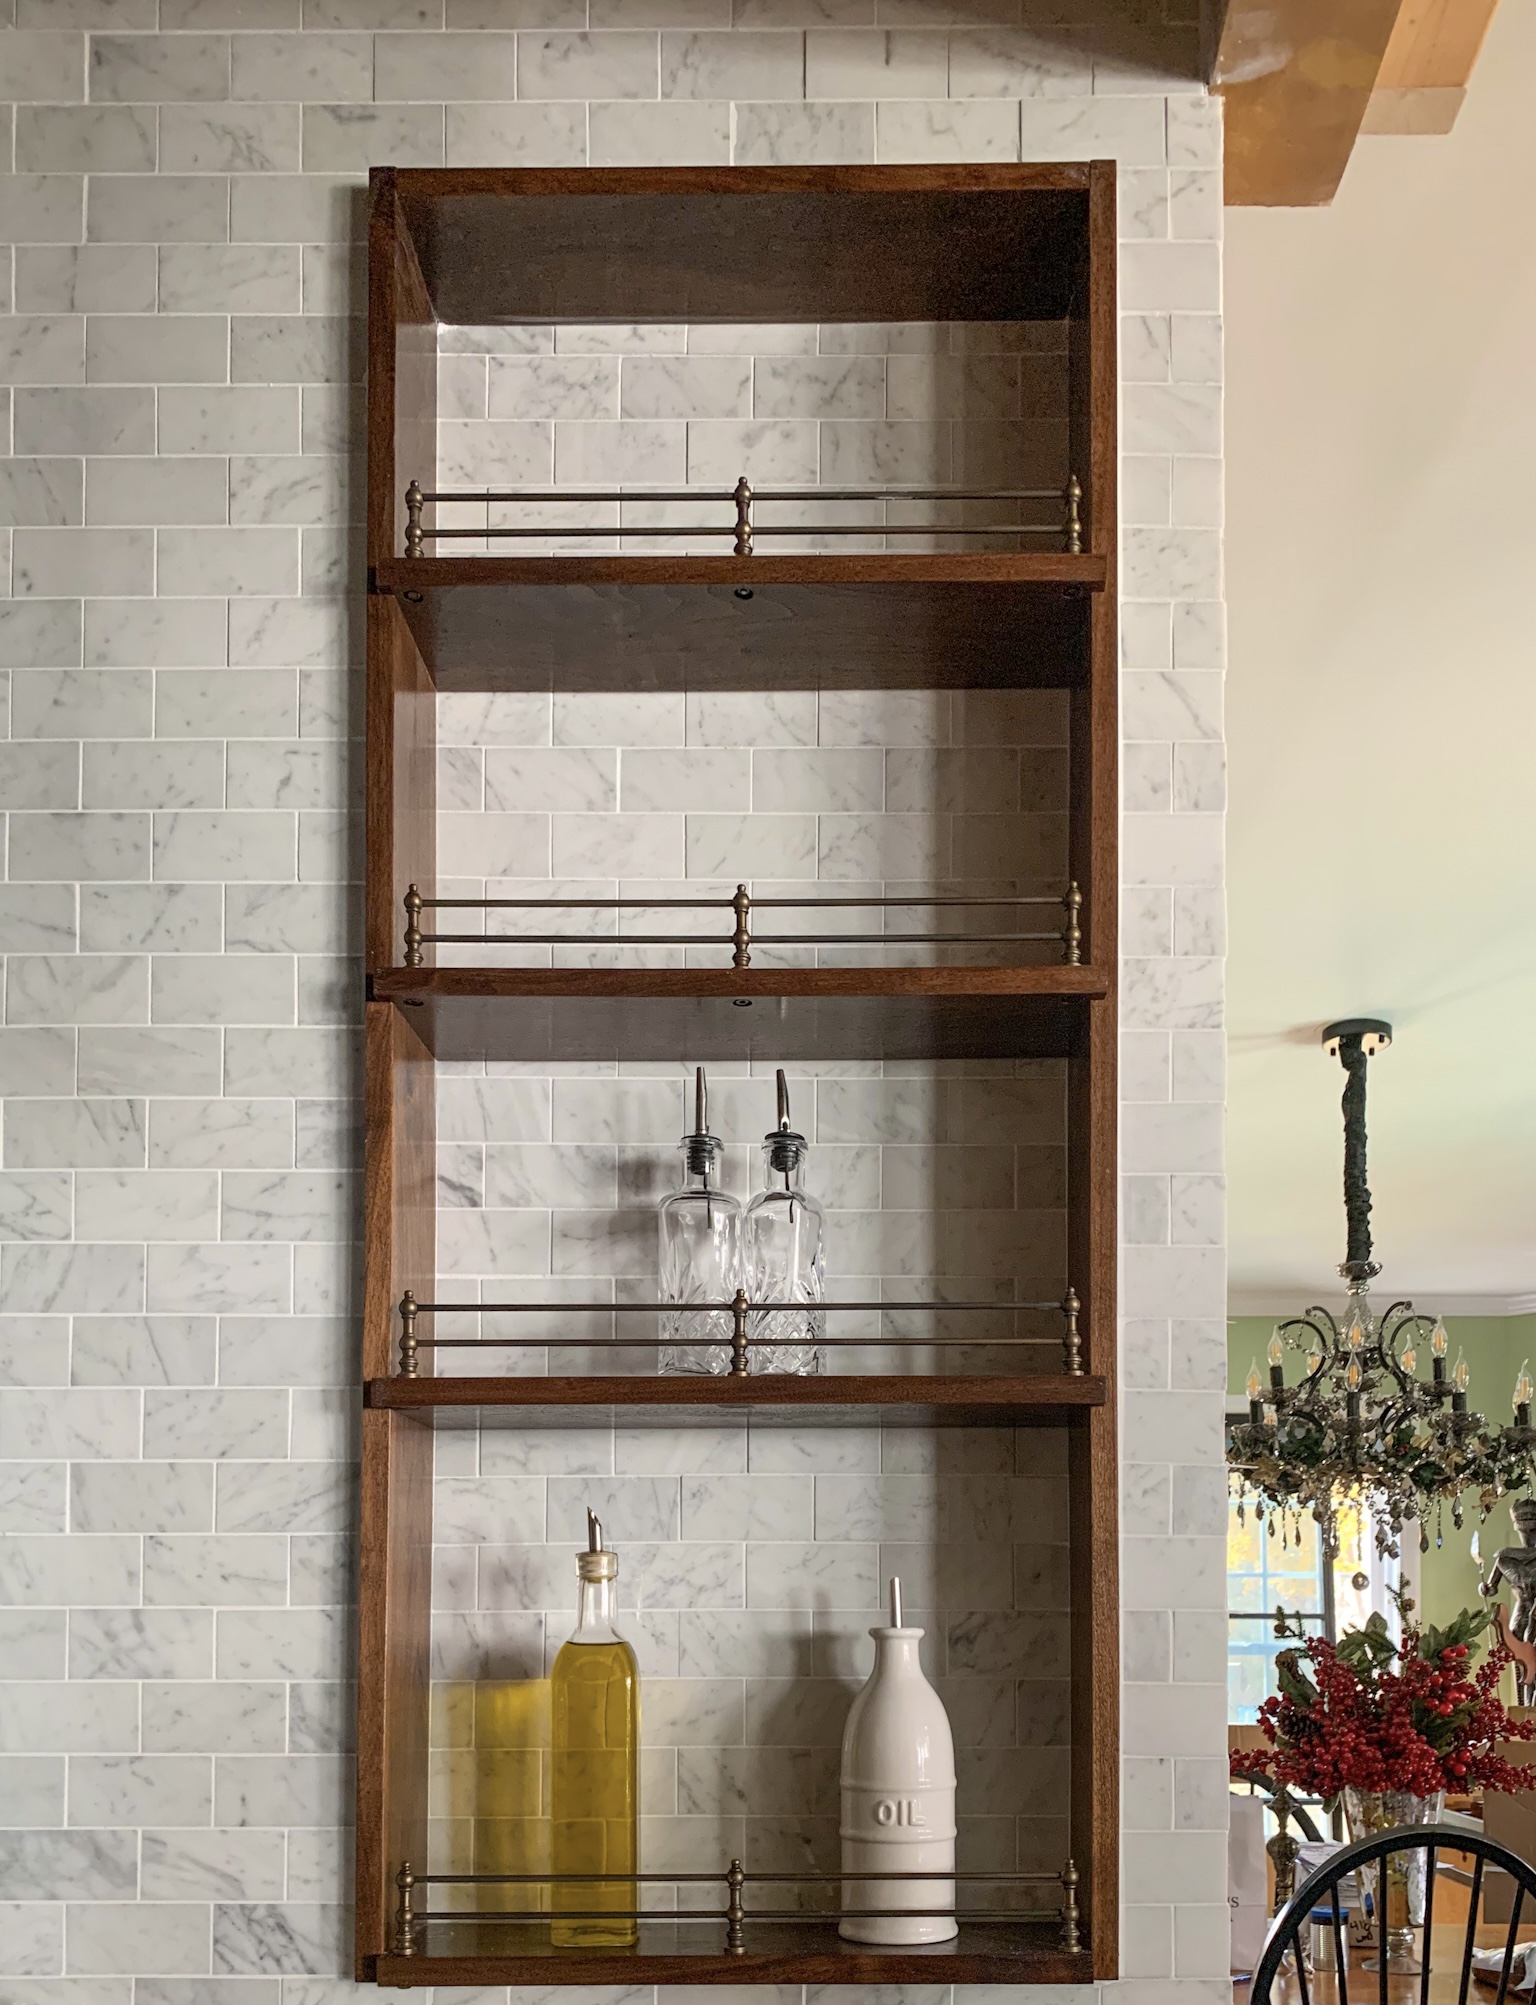
Step 8: Style: Like everything else in the kitchen, this shelf should be both beautiful and functional. Keep your favorite oils, vinegars, Worcestershire sauce, etc. within reach.
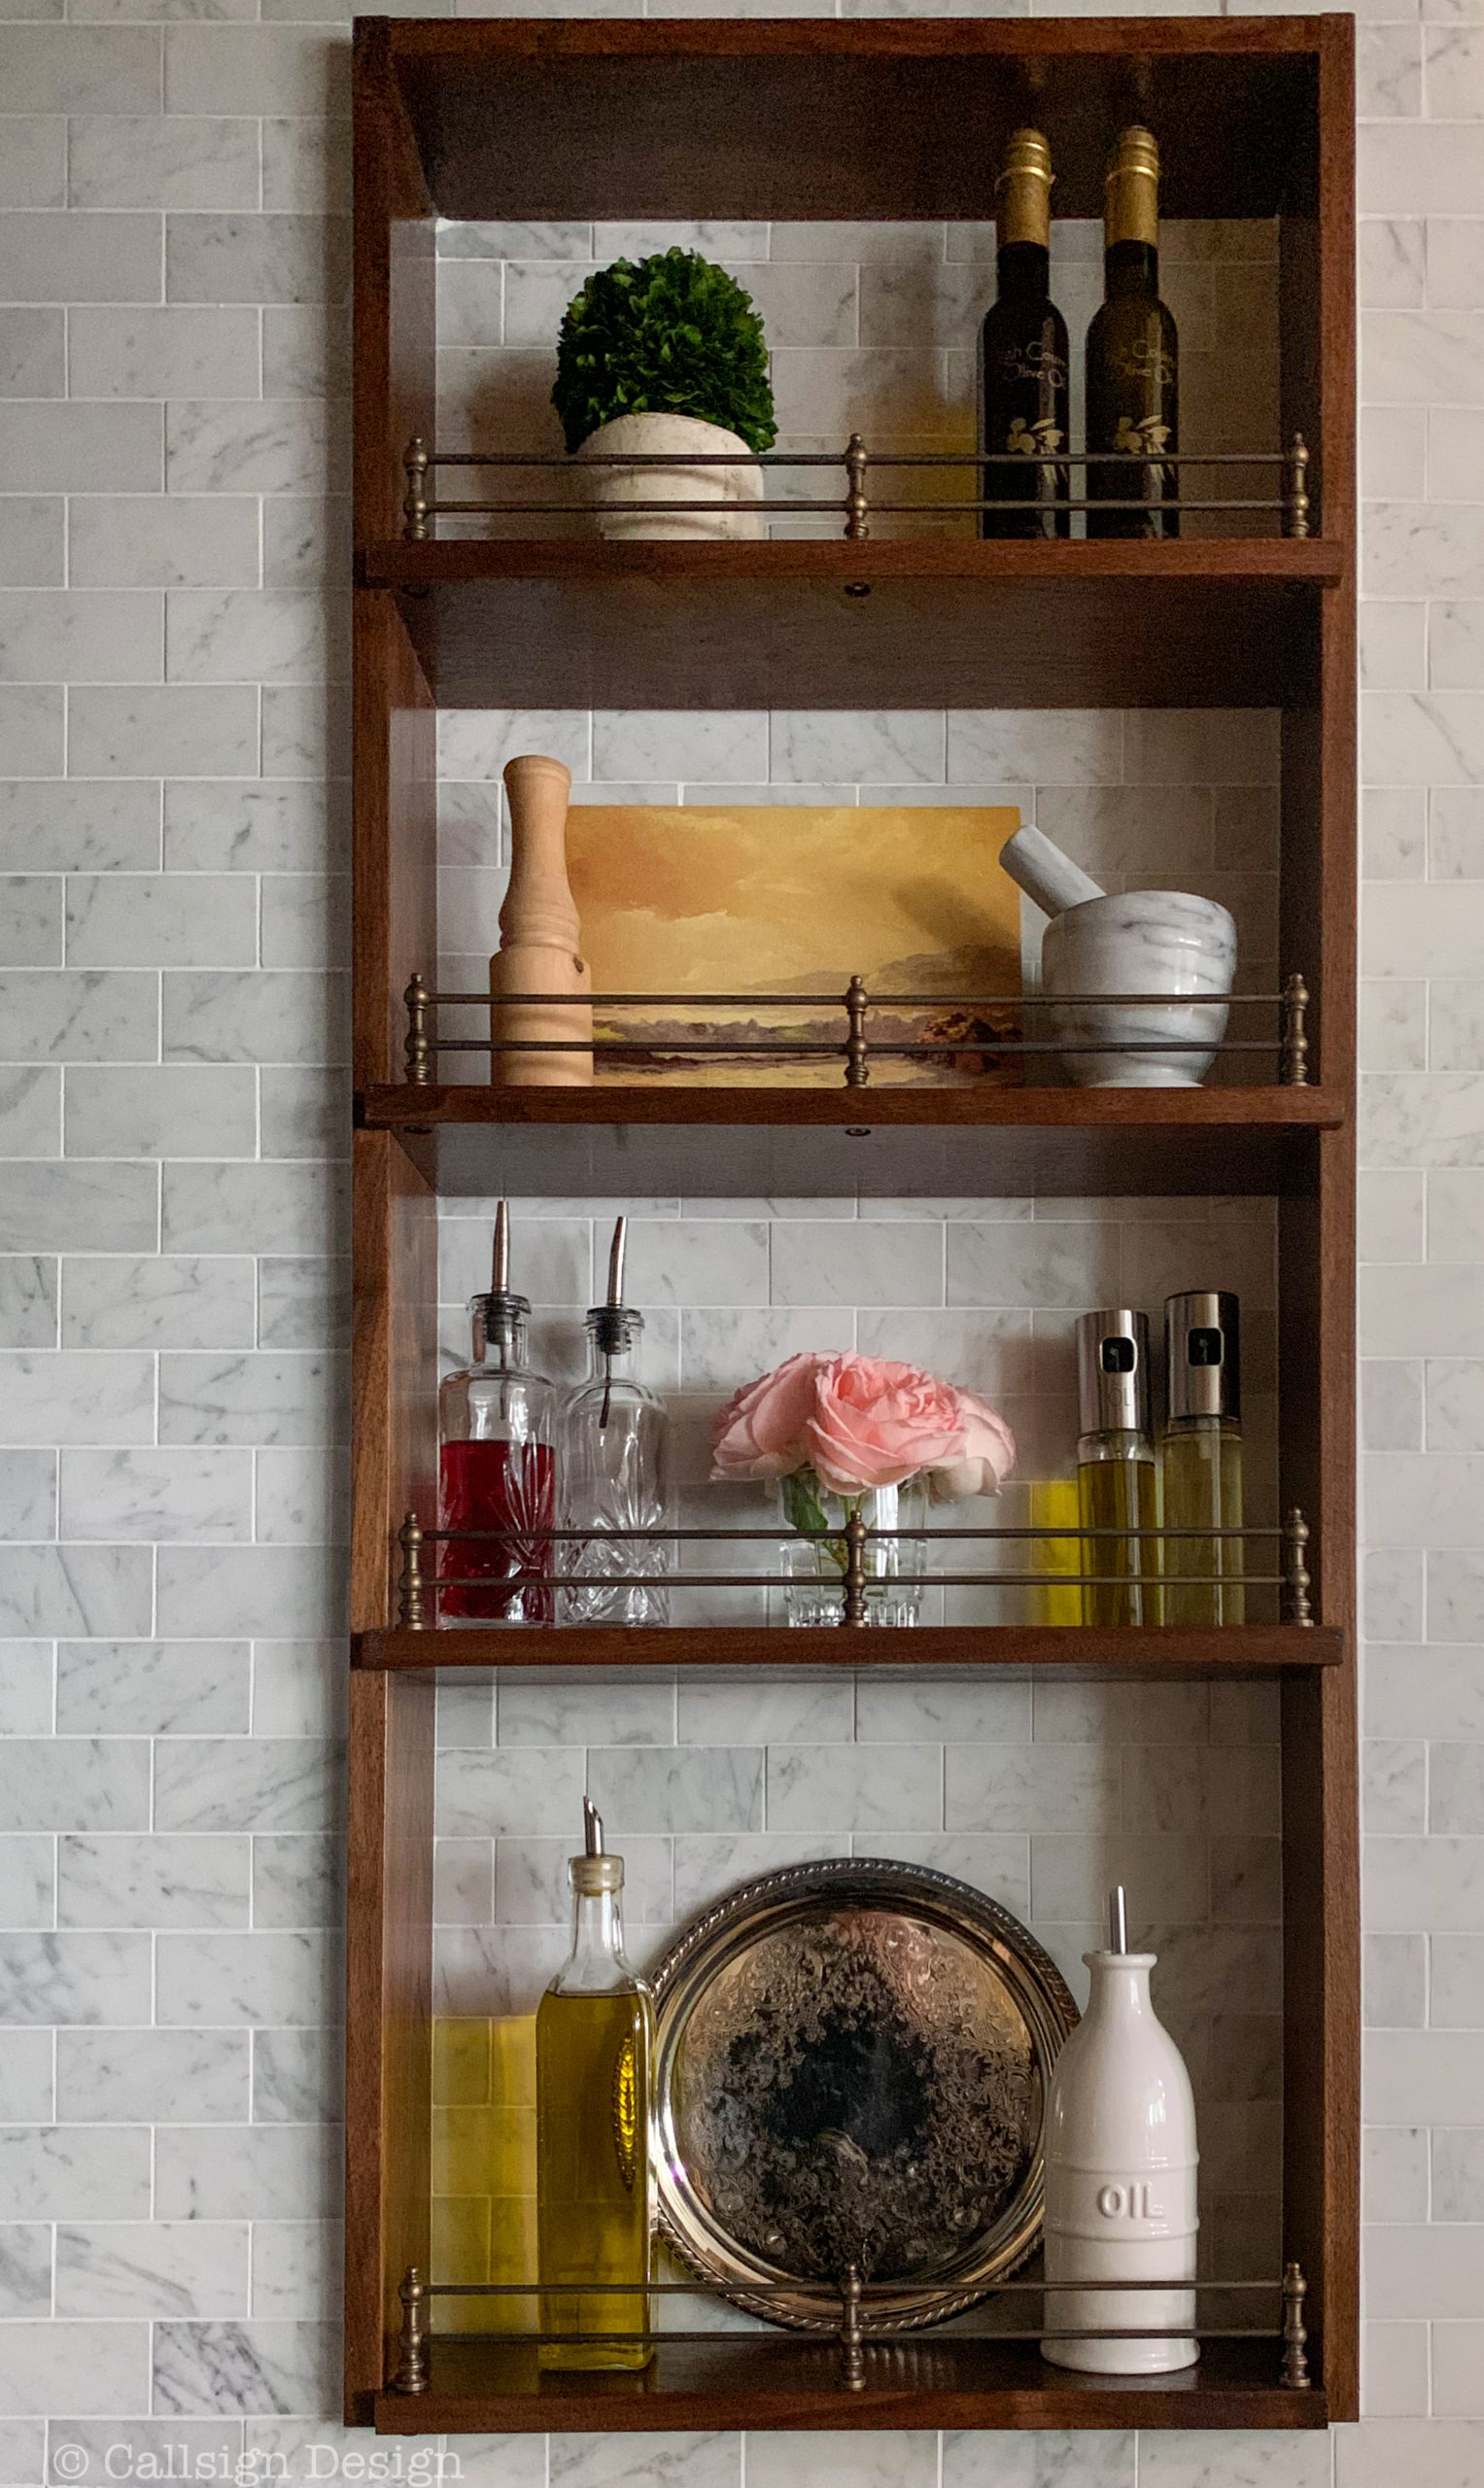
I don’t know if I mentioned this… but I LOVE my shelves!
Price breakdown: Shop This Project On Our LTK Store
Walnut shelves and lining $199.43
Double brass gallery rails: Vintage Hardware: $250.70
Carrara marble subway tiles behind shelves: Stone Center Online: About $100
Supplies for installing tile and shelves (mortar, grout, nails, stain, and lacquer): About $100
Total: $650.13
If you’re planning your dream kitchen, I highly recommend these!
*Legal stuff:
I am honest about my experiences with different products and write because I enjoy it. I do however, have the opportunity to earn money for my writing, also.
Slavetodiy.com is a participant in the Amazon Services LLC Associates Program, LTK, and other affiliate programs: affiliate advertising programs designed to provide a means for sites to earn advertising fees by advertising and linking to amazon.com and other sites. These programs offer a small commission on products sold through their affiliate links. Each of your purchases via our affiliation links supports our cause at no additional cost to you.
If a blogger links to a product (with a special code for affiliates embedded in the link), and a reader places an item in their “shopping cart” through that link within 24 hours of clicking the link, the blogger gets a small percentage of the sale. These links are not “pay per click.” If you click on the product link and stay around and purchase something else, however, I will get a commission on that sale.