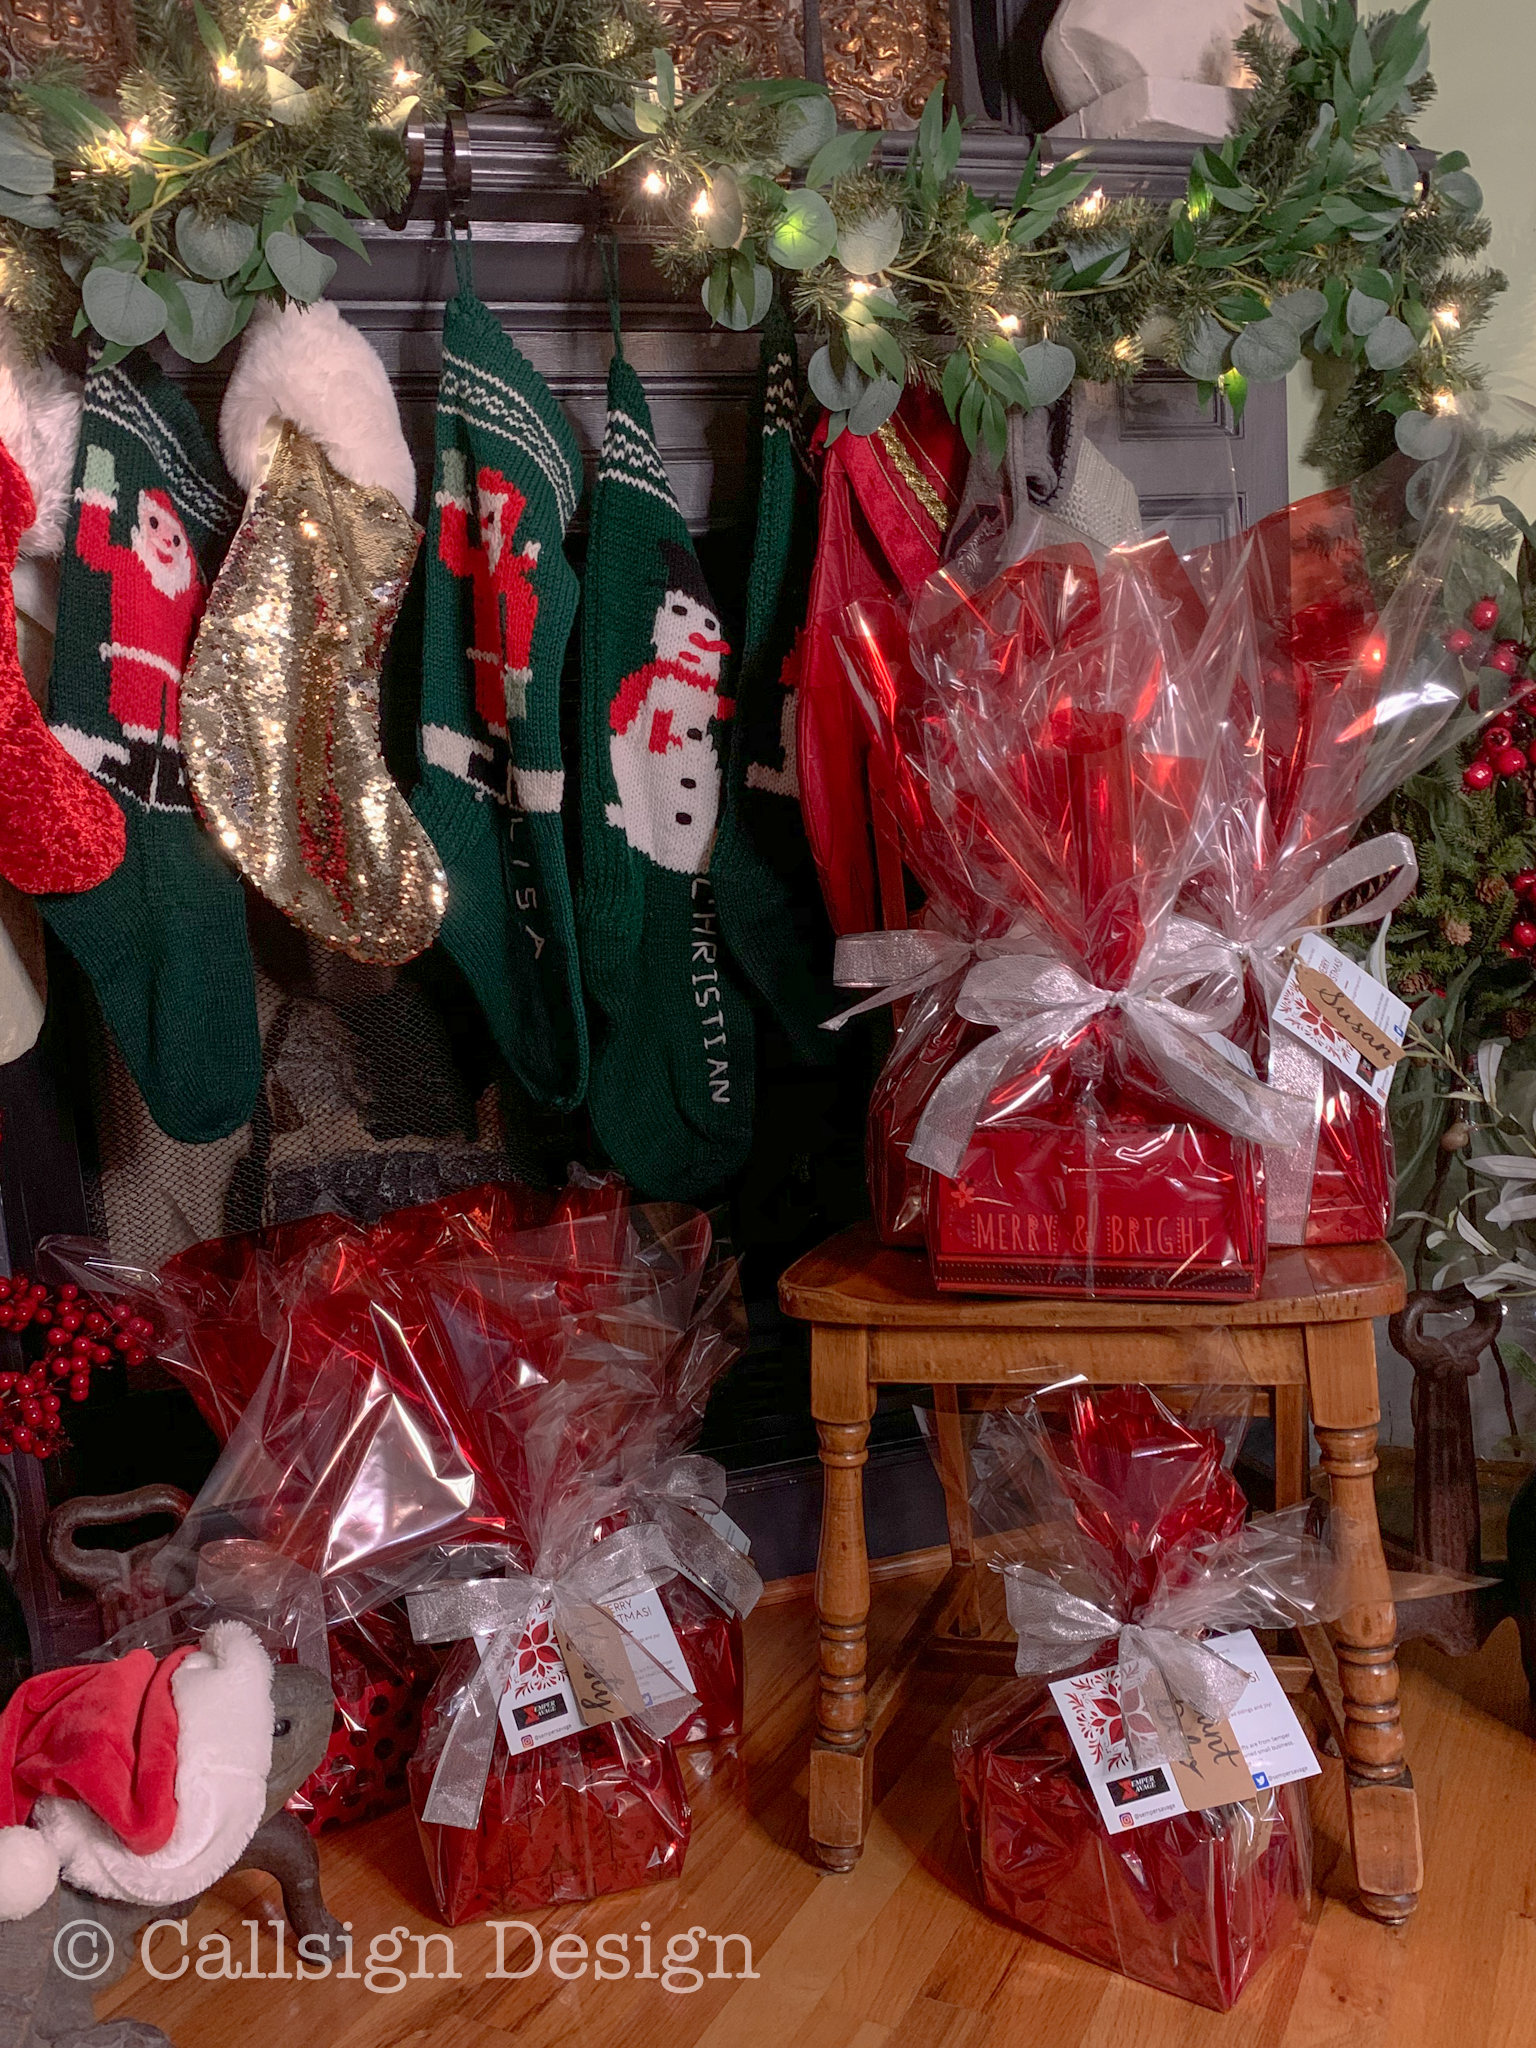
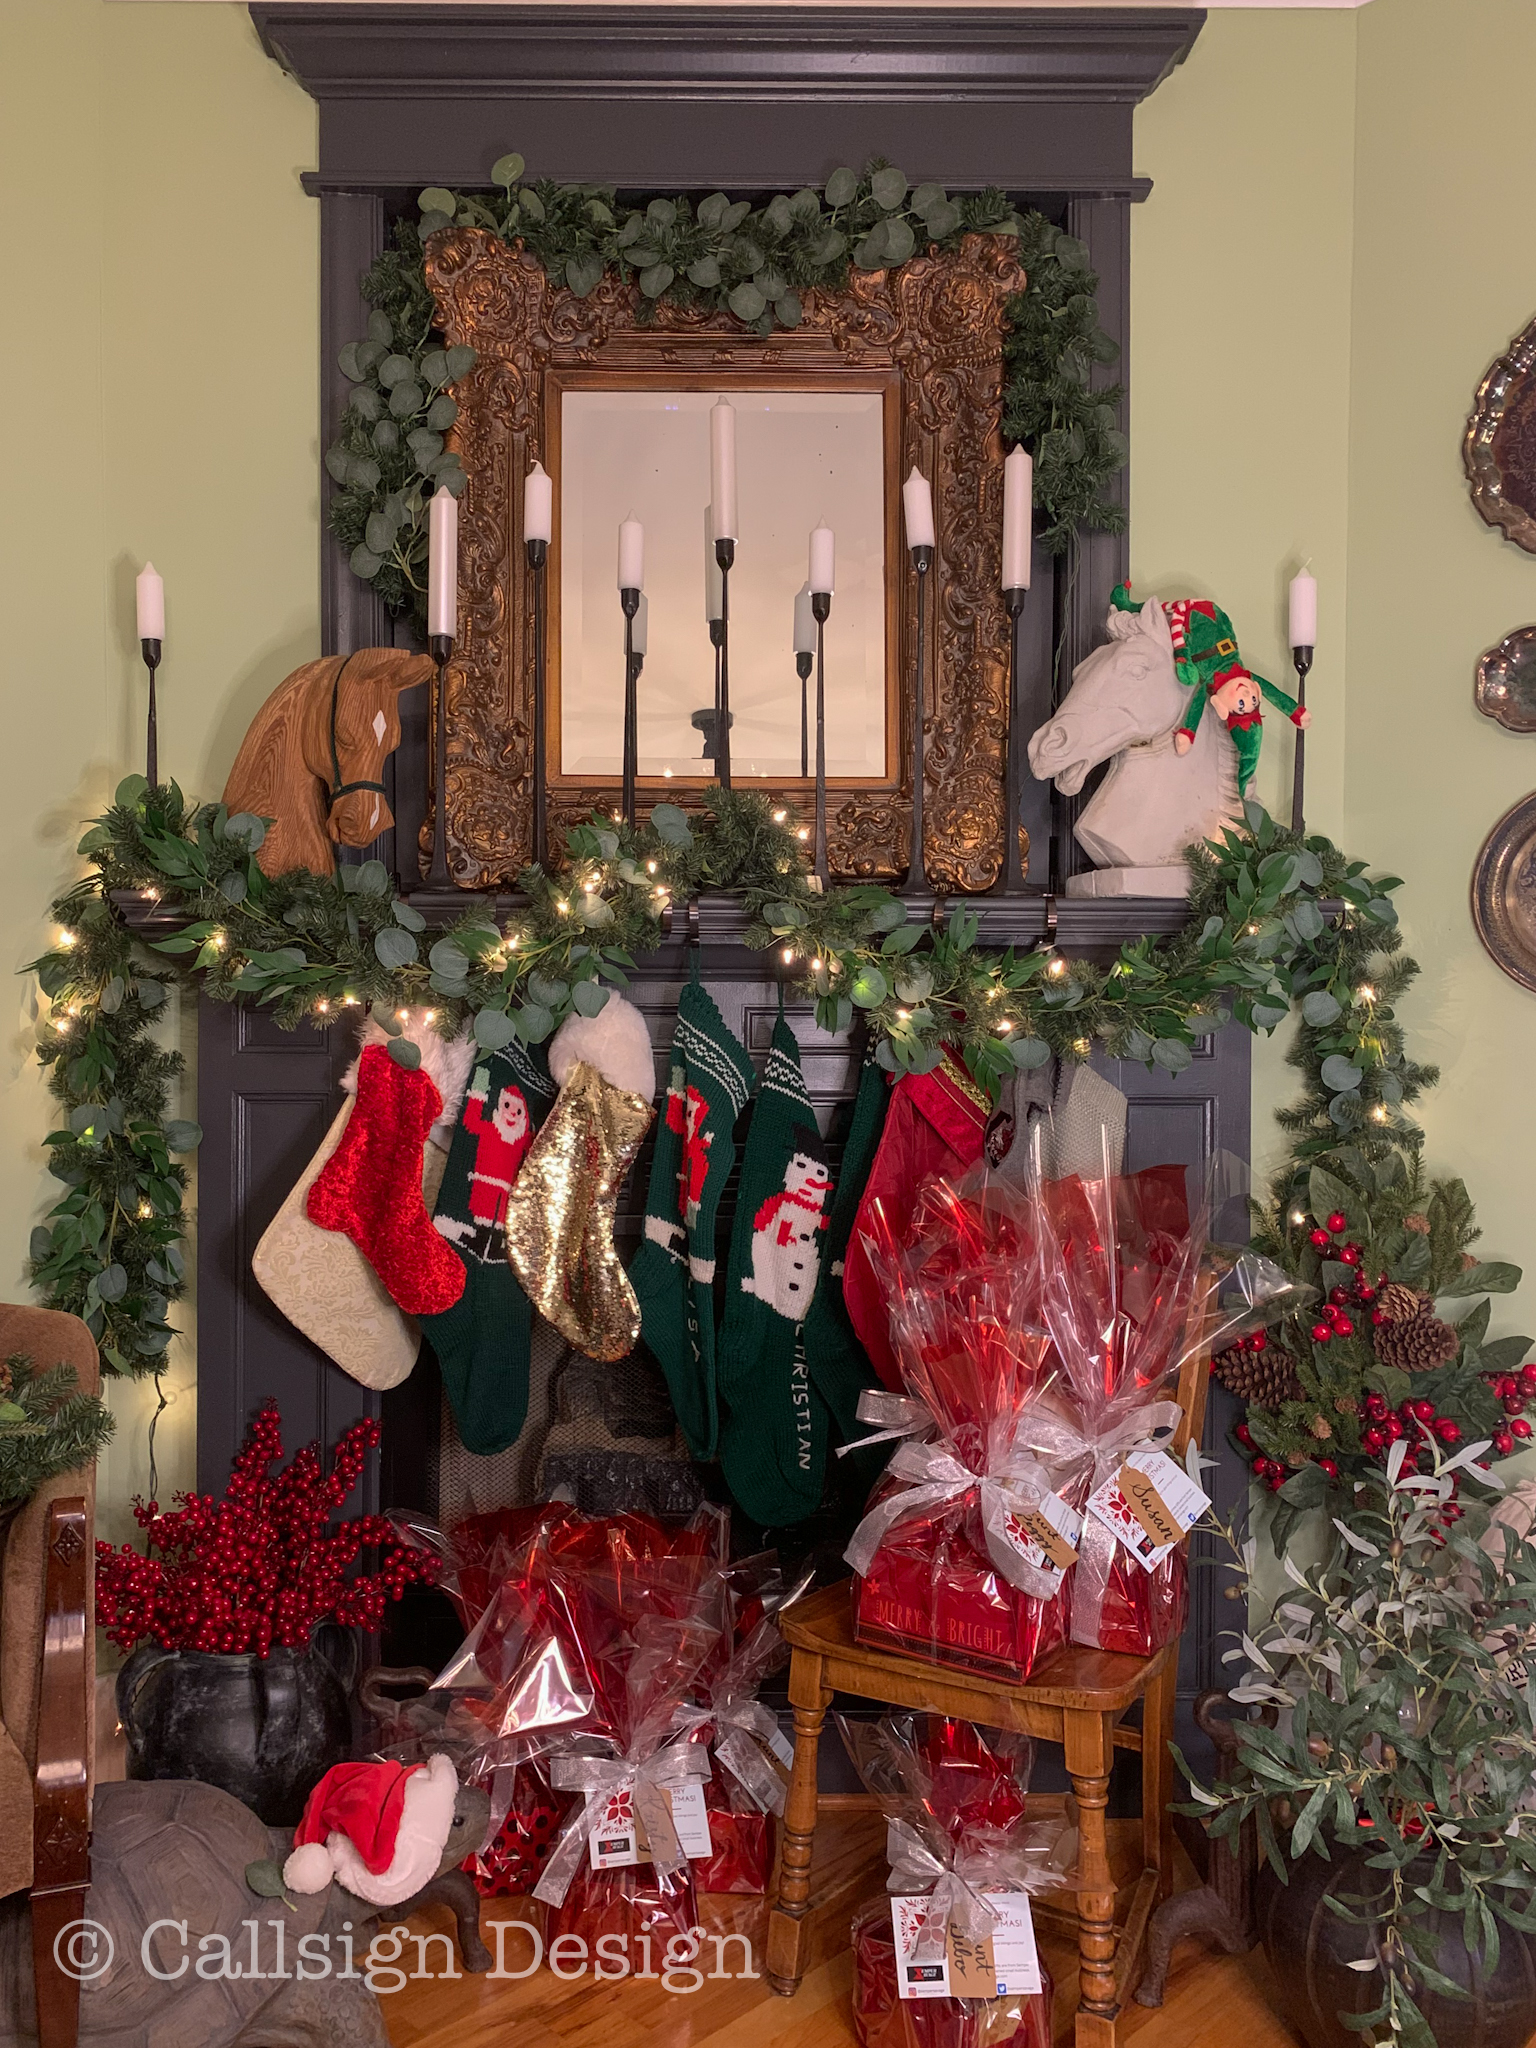
Every year we do gift baskets for friends and neighbors and we do our very best to feature a small business that we love. We figure we are spending the money anyway… we might as well pay it forward with small businesses and make an even bigger impact. This year for our “small business gifts” we chose Semper Savage, a truly kick-ass salad dressing and marinades company.
*This post may contain affiliate links. Please see full disclosure at the end of the post.
Christmas Hostess Gifts From Veteran Owned Small Businesses, Semper Savage
Why them? I don’t know if you knew this, but in Rainman’s previous life he was a helicopter pilot in the Marines. I know. He wins the “my dad has a cooler job than yours” competition with some regularity.
I sometimes picture him in those Vietnam Era films with a Huey zooming along rice patty fields… because he’s pretty much my hero (please insert theme music: Fortunate Son by Creedence Clearwater Revival).
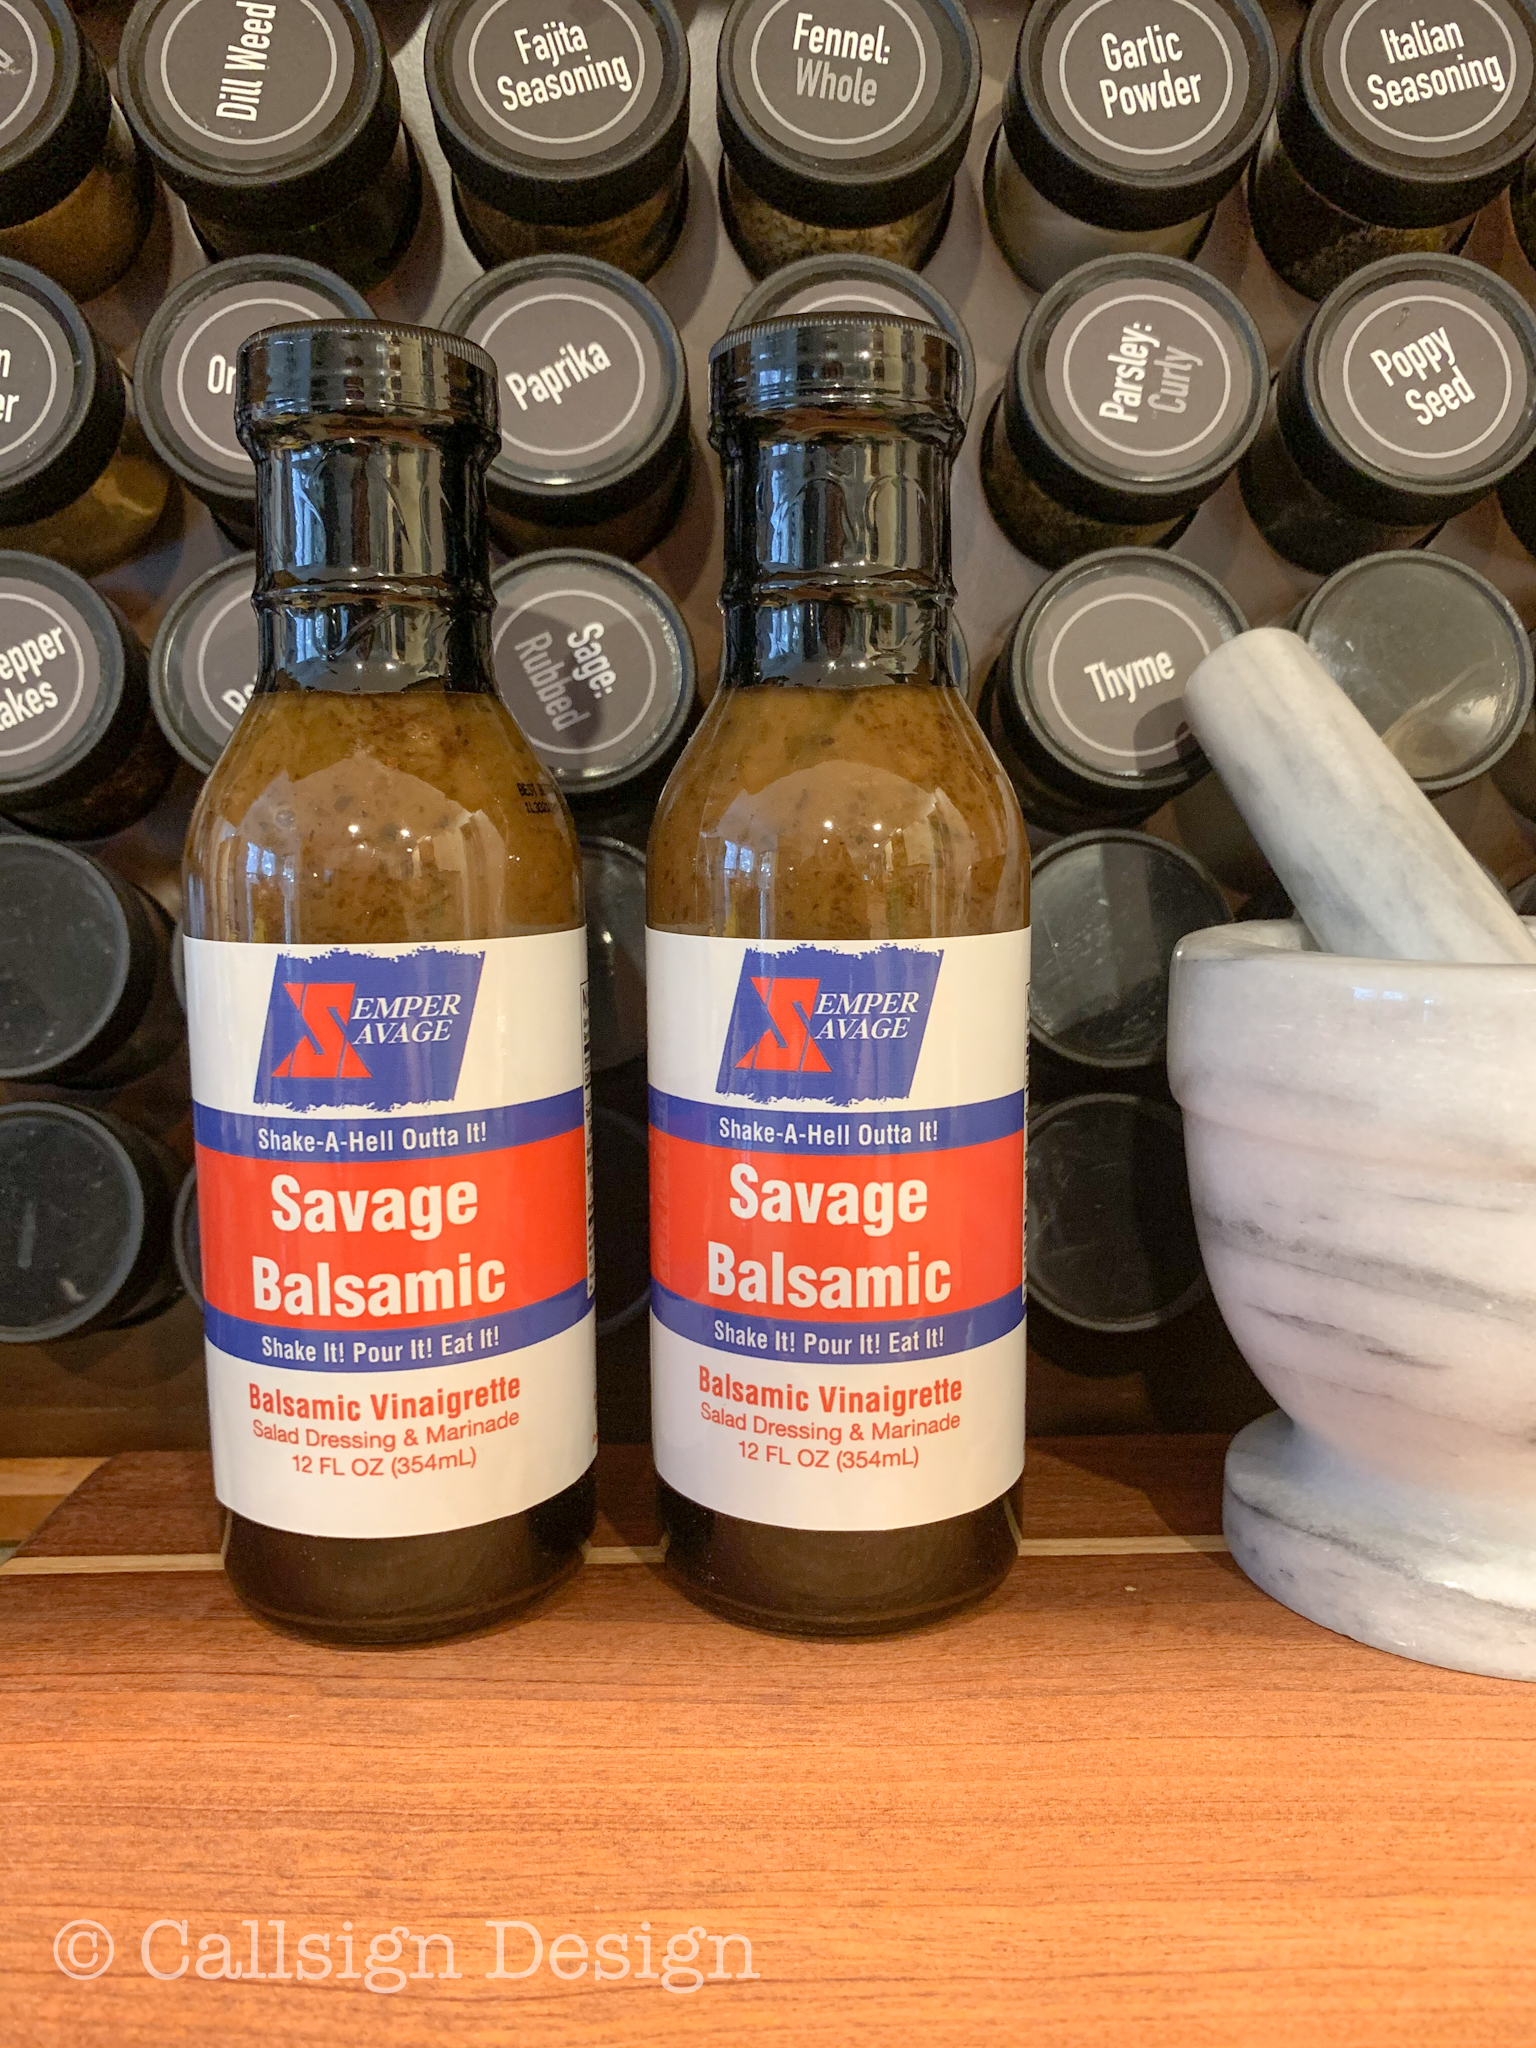
It was a no-brainer figuring out what we were getting for our small-business gifts this year when we discovered that a fellow-cool-guy-helicopter-pilot-friend of David’s owns a small business selling om-nom-nom salad dressings and marinades.
Christmas Hostess Gifts From Veteran Owned Small Businesses, Semper Savage
Want to try these for yourself or for Christmas gifting? Use code callsign at checkout for great product discounts!
Christmas Hostess Gifts From Veteran Owned Small Businesses
The dressings, that are homemade and made with authentic, actual natural ingredients, are getting rave reviews and we think you’ll love them!
Christmas Hostess Gifts From Veteran Owned Small Businesses, Semper Savage
Have you purchased any Christmas gifts from small businesses this year? We love Semper Savage’s fast, free shipping and cannot wait to get these cute dressing sets out to our friends and family.
Semper Fi friends and Merry Christmas!
*Legal stuff:
I am honest about my experiences with different products and write because I enjoy it. I do however, have the opportunity to earn money for my writing, also.
Slavetodiy.com is a participant in the Amazon Services LLC Associates Program, an affiliate advertising program designed to provide a means for sites to earn advertising fees by advertising and linking to amazon.com. Amazon offers a small commission on products sold through their affiliate links. Each of your purchases via our Amazon affiliation links supports our cause at no additional cost to you.
If a blogger links to an Amazon product (with a special code for affiliates embedded in the link), and a reader places an item in their “shopping cart” through that link within 24 hours of clicking the link, the blogger gets a small percentage of the sale. Amazon links are not “pay per click.” If you click on the product link and stay around Amazon and purchase something else, however, I will get a commission on that sale.
This site also contains affiliate links through //Commerce/Sovrn. //Commerce or our Publishers may be compensated when you click through links on our site.
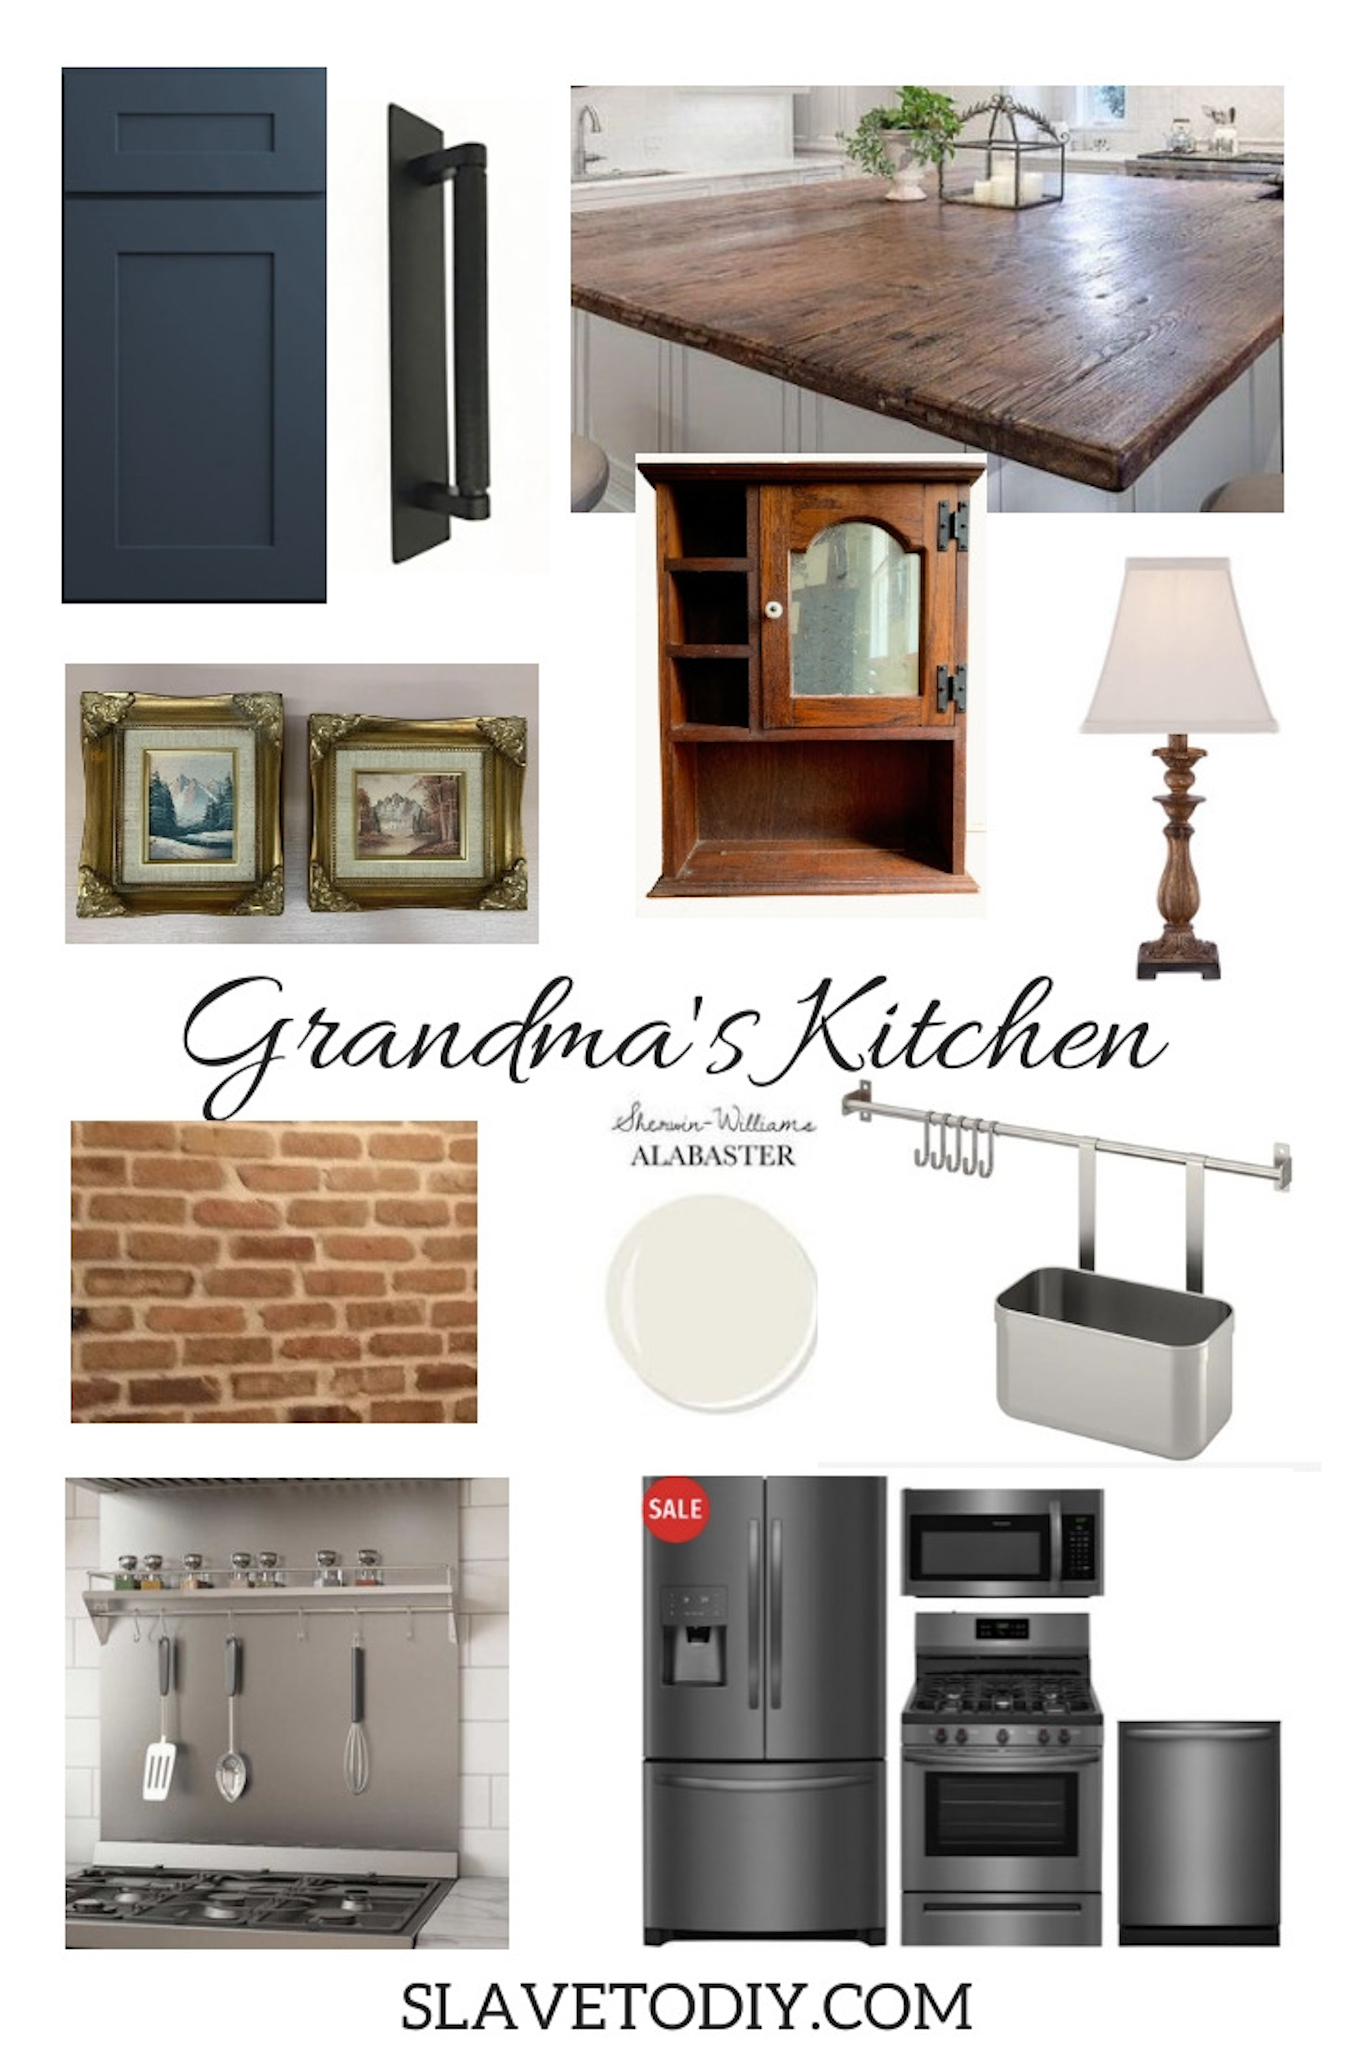
Who doesn’t love a good before and after reveal??? We teamed up with Lily Ann Cabinets to do this awesome project for my mother’s forever home and I’m super happy with how it turned out. We used their RTA Cabinets, Lily Ann’s Grey Shaker Elite (and you’re going to love them!).
*This post may contain affiliate links. Please see full disclosure at the end of the post.
The kitchen turned out beautifully and the carpenter was super impressed by the quality of the RTA cabinets. That helps a LOT when the carpenter happens to be your brother AND he’s a meticulous and dyed-in-the-wool wood snob.
Quick story:
My family has been playing musical houses for almost my whole life (I’m an army brat). So, when my mom finally decided to pick a house and stay in it, my sister reached out to me to help with the kitchen design (they were really busy renovating the whole rest of the house). The place had great bones, but was really ugly. One little problem: I am in North Carolina and they are in Vermont. To any lesser team this would’ve been a problem (working with family and from a different state… what could go wrong???).
I sent my initial design which was nixed by my incredible carpenter brother who wanted to knock down walls and move stairs (who am I to argue with that?). So, I worked up a moodboard and completely new design and sent it to my sister and brother.
Before and After Pictures of Grandma’s New Vermont Cottage Kitchen: Sponsored by Lily Ann Cabinets and designed by @callsigndesign on Instagram and @slavetodiy on Pinterest.
Then there was the issue of finding a cabinet company that wasn’t going to break the bank. I looked and looked, but everything I liked was super expensive! And since I had added a huge island, the cabinet total had about doubled. Then I stumbled across RTA (ready to assemble) cabinets. I found them on sale (even though they were already significantly cheaper than the other cabinets I had found before the sale), and I sent the company my design. My brother said, “that’s fine, but you guys are putting those cabinets together.”
Almost ALL of this was carried out without me physically at the property because suddenly there was a pandemic. Yup. Perfect timing. I corresponded with a Lily Ann kitchen designer in Michigan that was working from home and had the details and 3d renderings in just a few weeks. A skeleton warehouse crew got our order out and it was delivered about a month and a half after we first contacted them.
Back to the house: imagine my delight when my brother (who had said NO WAY was he assembling RTA cabinets) called me to say he had assembled and installed them and the quality was amazing. Oh, and they went together super fast. I was in shock. I will save the rest of that story for another post. This is a simple before and after, remember?
If you love this look, you can find these cabinets from Lily Ann Cabinets. My readers can get a 5% discount by using the offer code: SDIY2018 at checkout!
Grandma got to see her almost finished kitchen on her birthday in July and I think you’ll appreciate the video (it still makes me cry every time):
All that was left (after the first reveal) for install when we arrived in Vermont (two months later and on re-scheduled trip number three) was hardware, the backsplash, the shelves, and crown molding. Still, five full days of install while trying to persuade my six year old to do her virtual school independently was a bit challenging. And, to be perfectly honest, my brother had told me the quality was good, but the cabinets were even better in person. The finish was beautiful and I quickly realized there was nothing “discount” about these cabinets other than the price.
The after photos were all taken by @loganbspring on Instagram, so give him a follow! I think you’ll love his work as much as we do!
Drumroll please!!!!
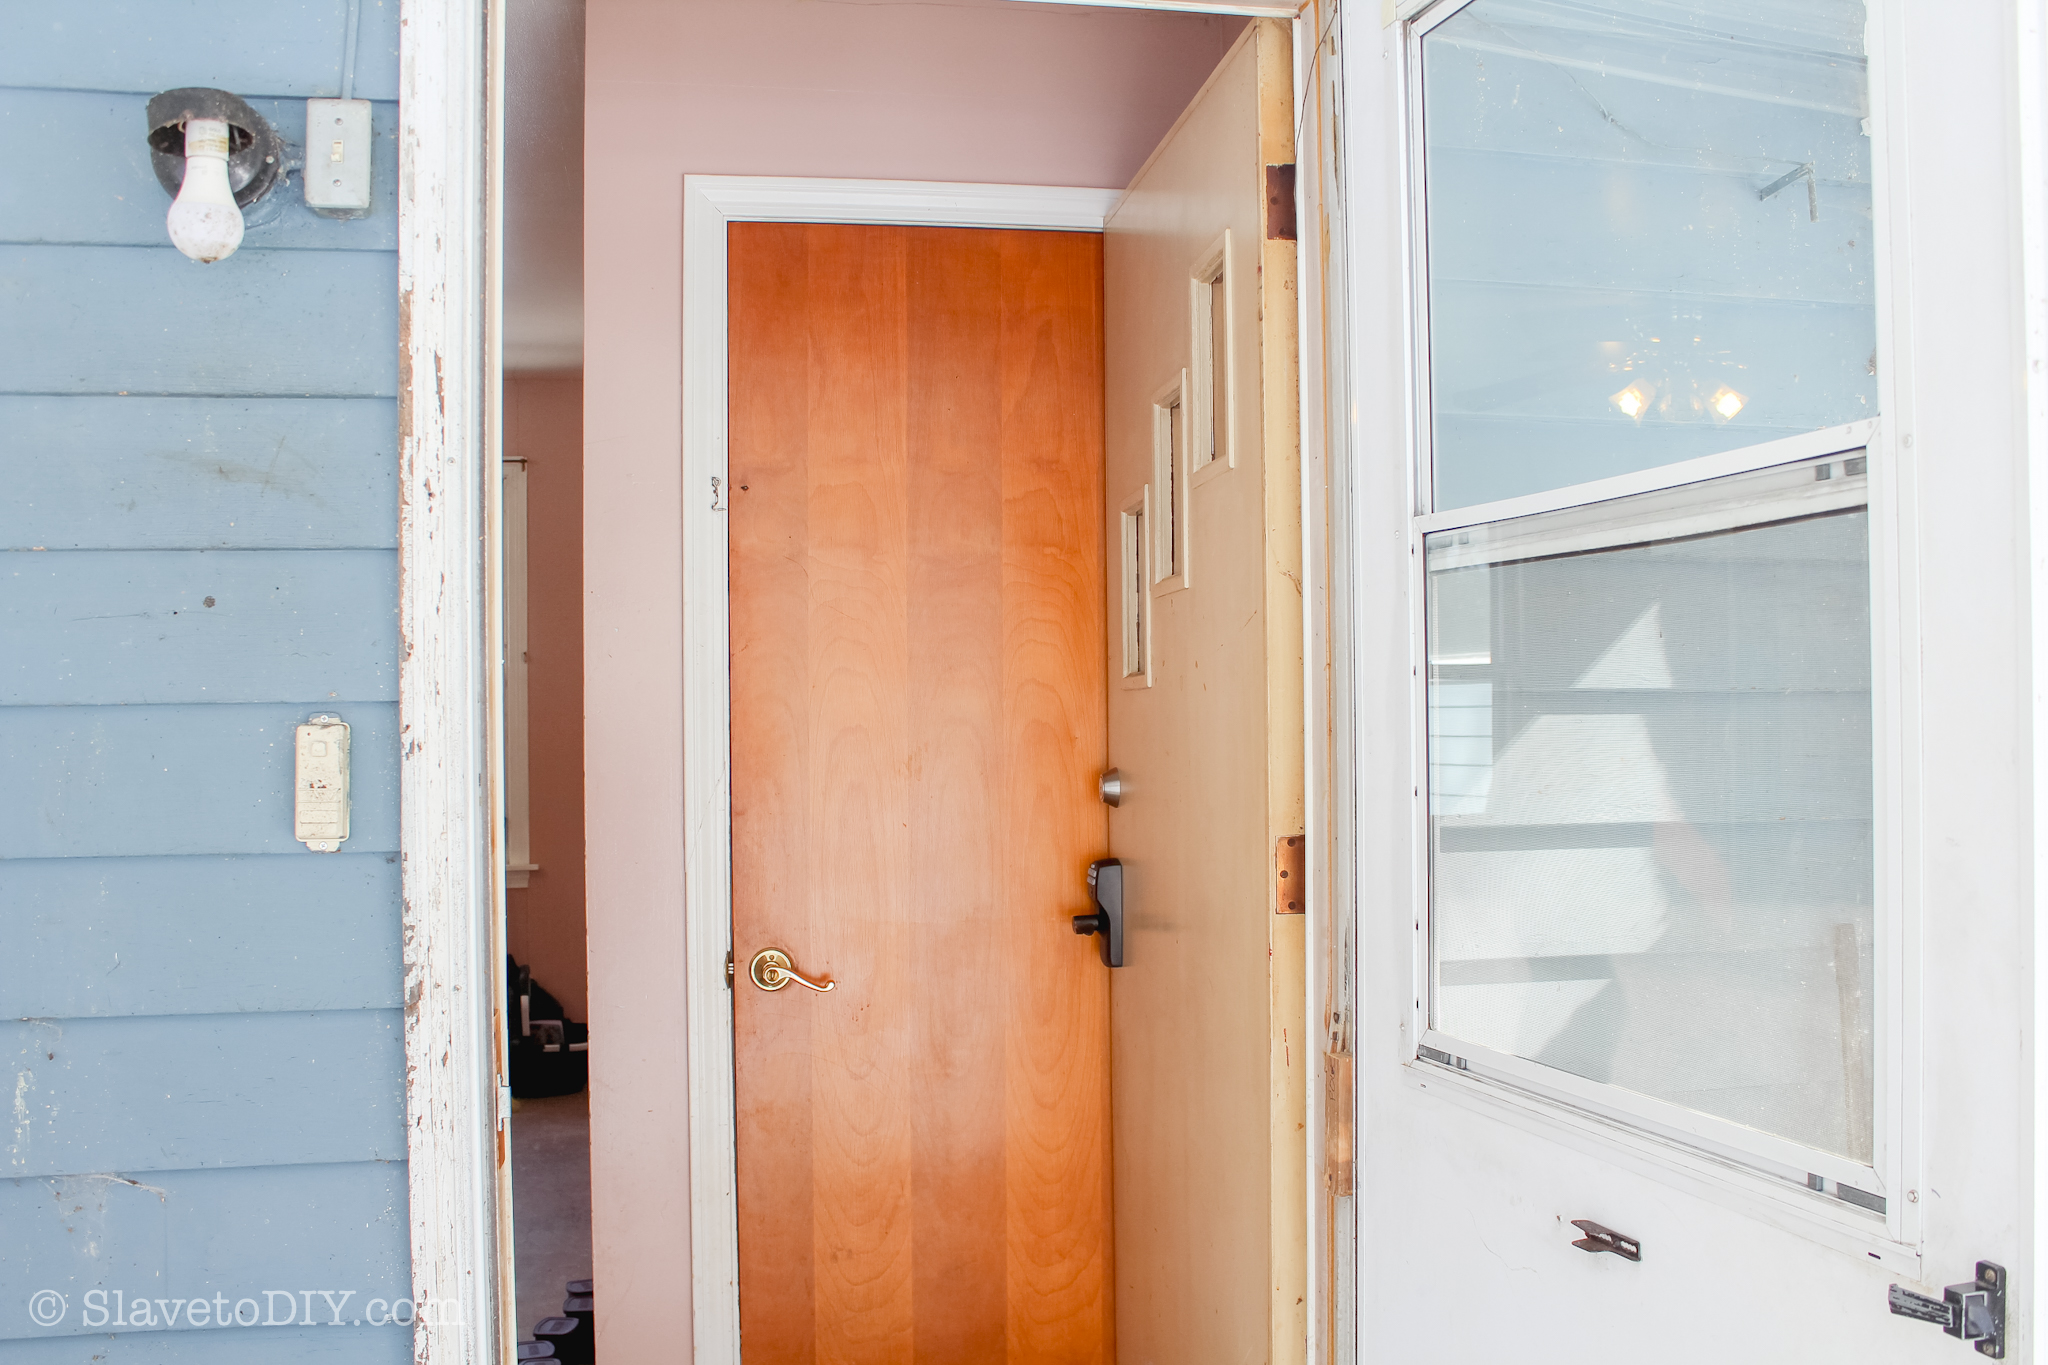
This is looking through the front door at the door that went down to the basement:
Before and After Pictures of Grandma’s New Vermont Cottage Kitchen: Sponsored by Lily Ann Cabinets and designed by @callsigndesign on Instagram and @slavetodiy on Pinterest.
Here is the front door now:
Before and After Pictures of Grandma’s New Vermont Cottage Kitchen: Sponsored by Lily Ann Cabinets and designed by @callsigndesign on Instagram and @slavetodiy on Pinterest.
This is looking from the corner of the kitchen back at the front door:
Before and After Pictures of Grandma’s New Vermont Cottage Kitchen: Sponsored by Lily Ann Cabinets and designed by @callsigndesign on Instagram and @slavetodiy on Pinterest.
We couldn’t REALLY get this “before” shot because of the wall, but you can see where the new front door is now (the wall started roughly where the island begins):
Before and After Pictures of Grandma’s New Vermont Cottage Kitchen: Sponsored by Lily Ann Cabinets and designed by @callsigndesign on Instagram and @slavetodiy on Pinterest.
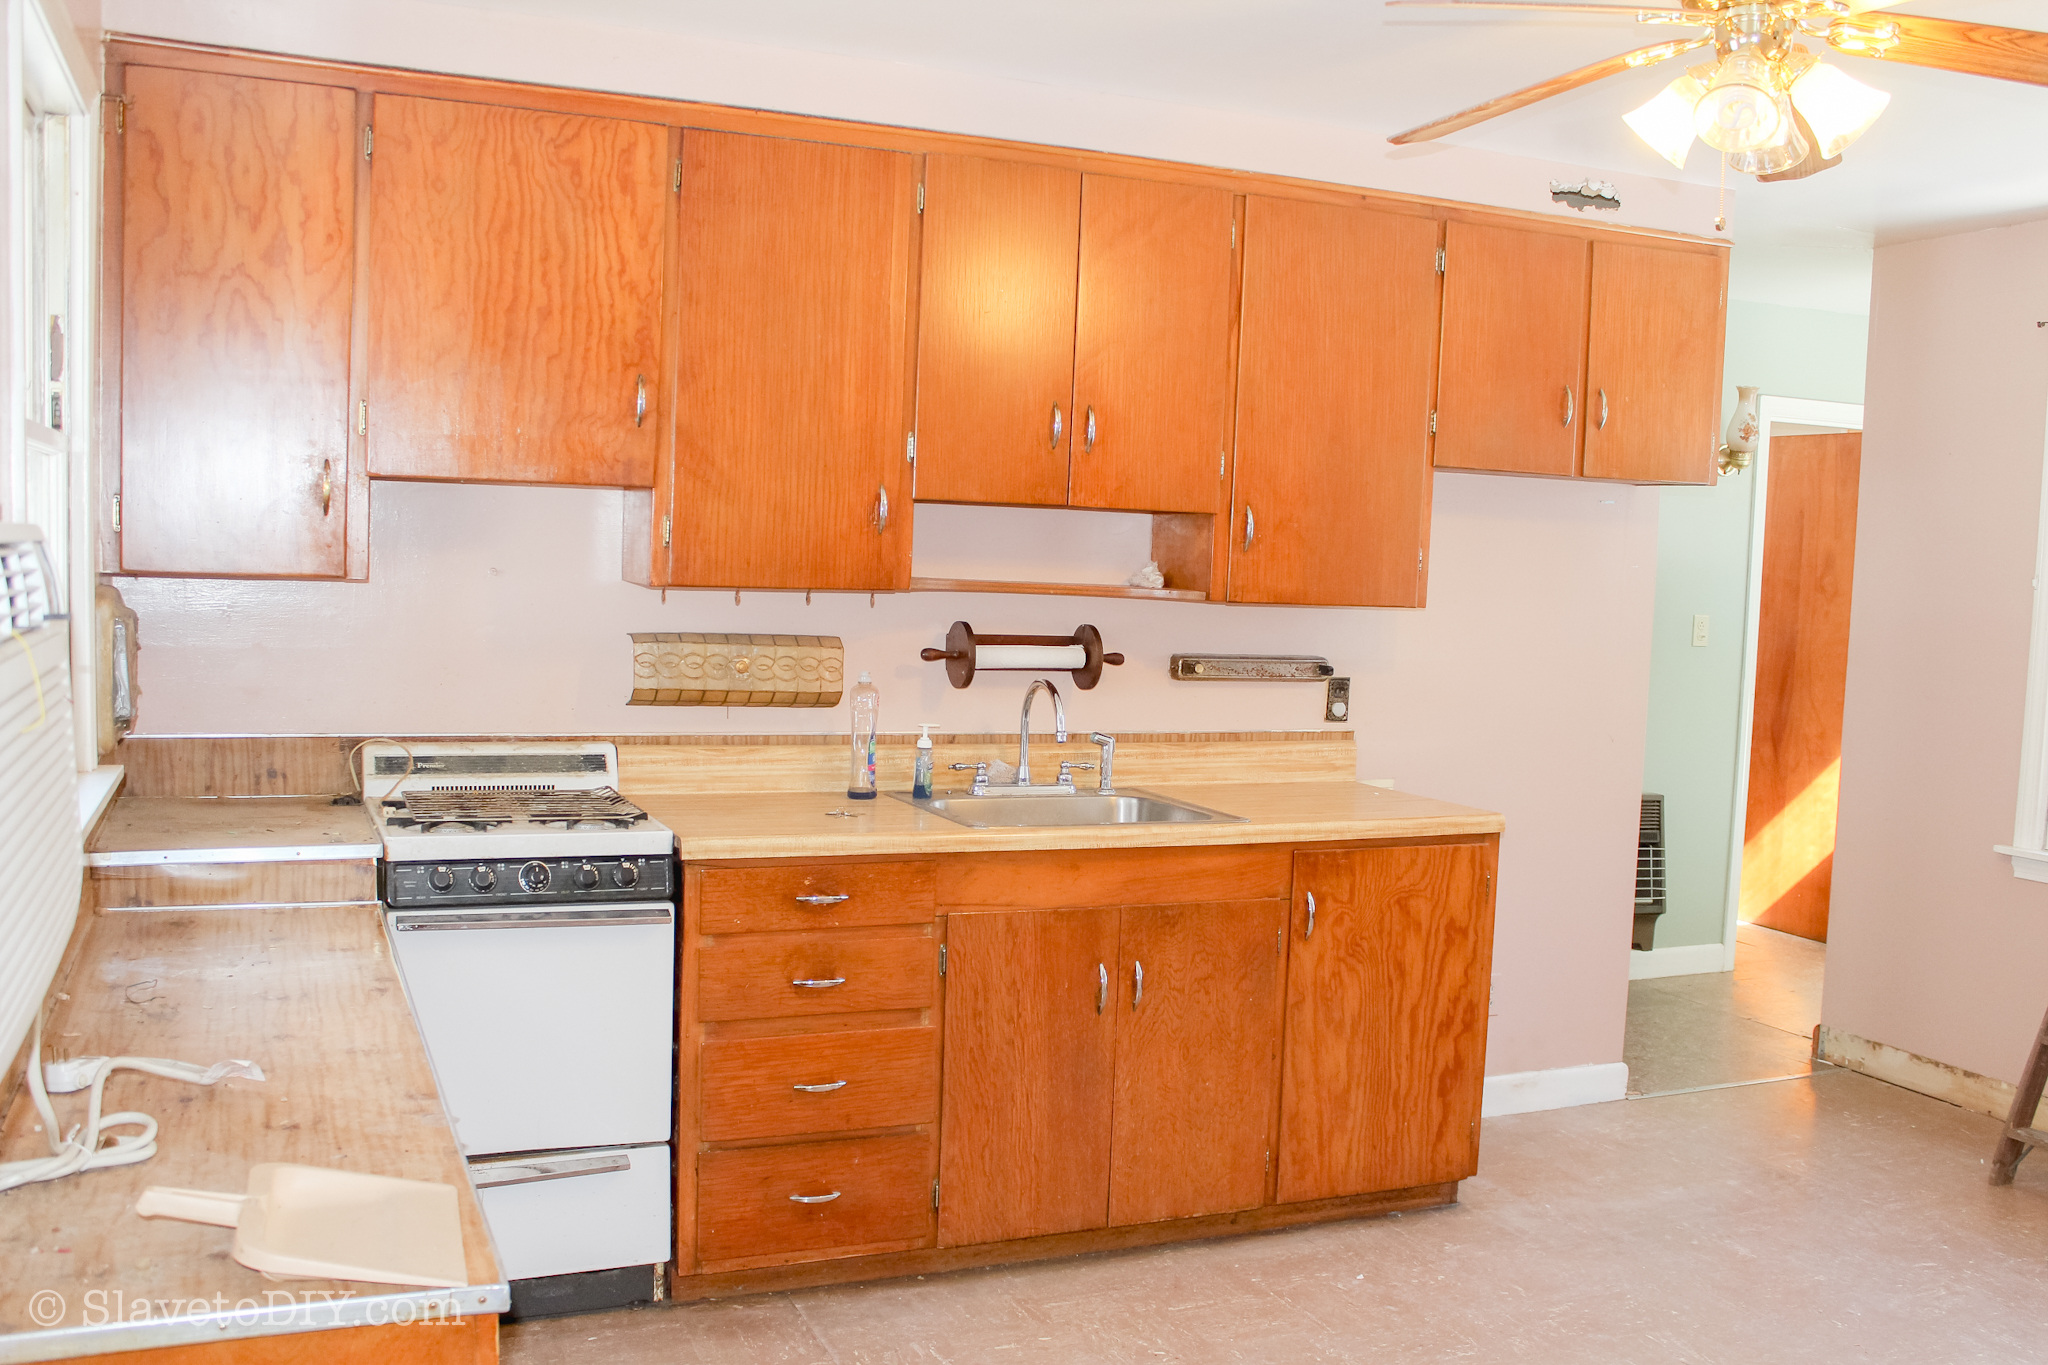
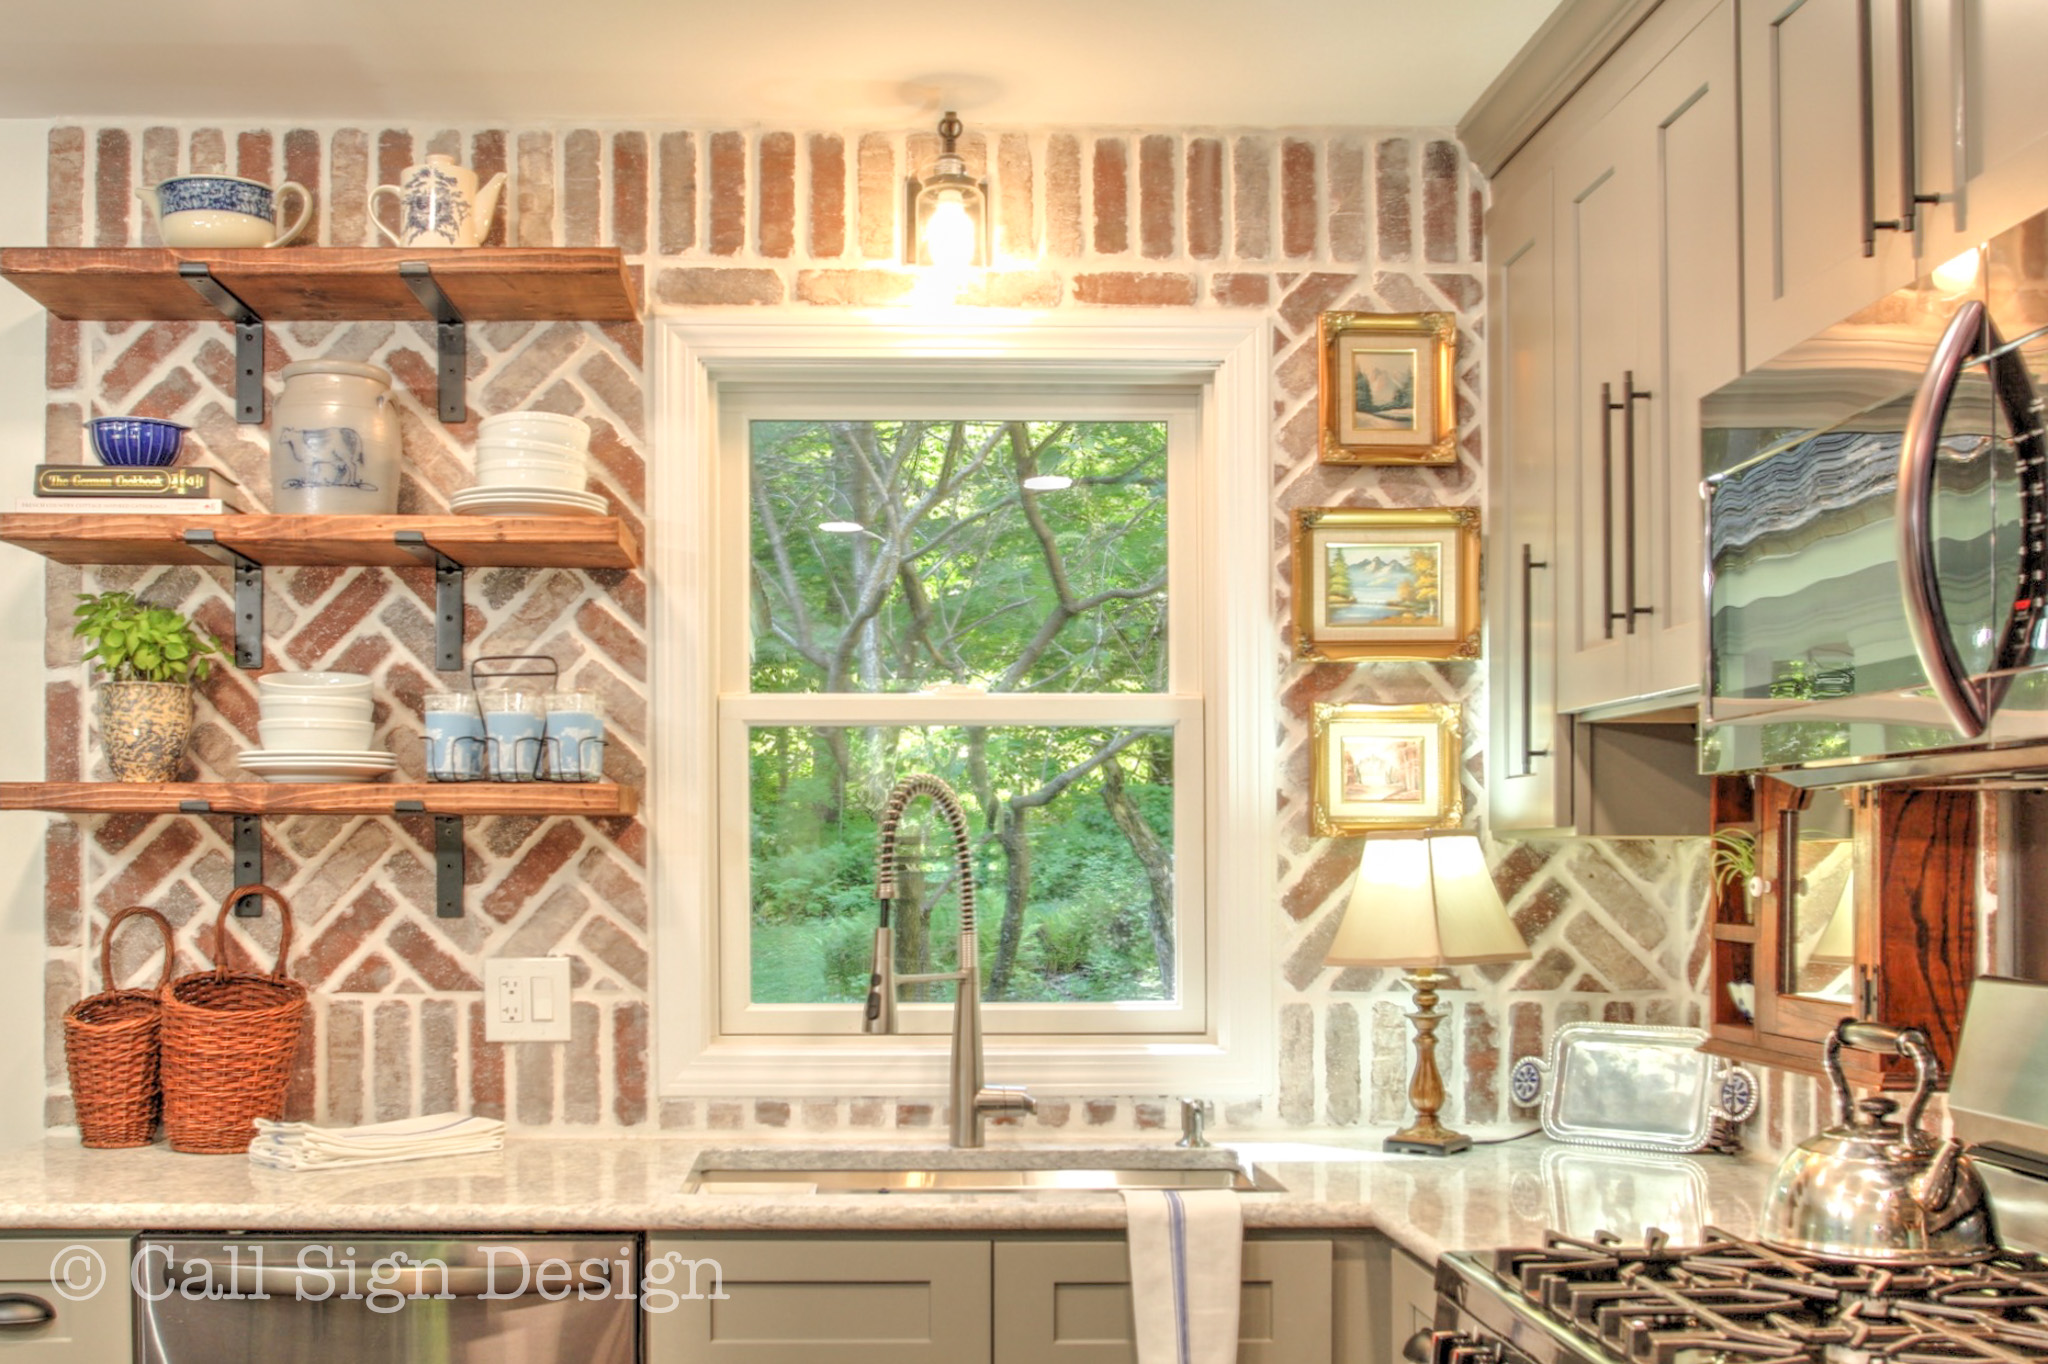
This is standing by the front door, looking at the kitchen.
Before and After Pictures of Grandma’s New Vermont Cottage Kitchen: Sponsored by Lily Ann Cabinets and designed by @callsigndesign on Instagram and @slavetodiy on Pinterest.
And here is the after:
Before and After Pictures of Grandma’s New Vermont Cottage Kitchen: Sponsored by Lily Ann Cabinets and designed by @callsigndesign on Instagram and @slavetodiy on Pinterest.
This is a shot of the space after the walls came down, but before the staircase was moved:
Before and After Pictures of Grandma’s New Vermont Cottage Kitchen: Sponsored by Lily Ann Cabinets and designed by @callsigndesign on Instagram and @slavetodiy on Pinterest.
And after:
Before and After Pictures of Grandma’s New Vermont Cottage Kitchen: Sponsored by Lily Ann Cabinets and designed by @callsigndesign on Instagram and @slavetodiy on Pinterest.
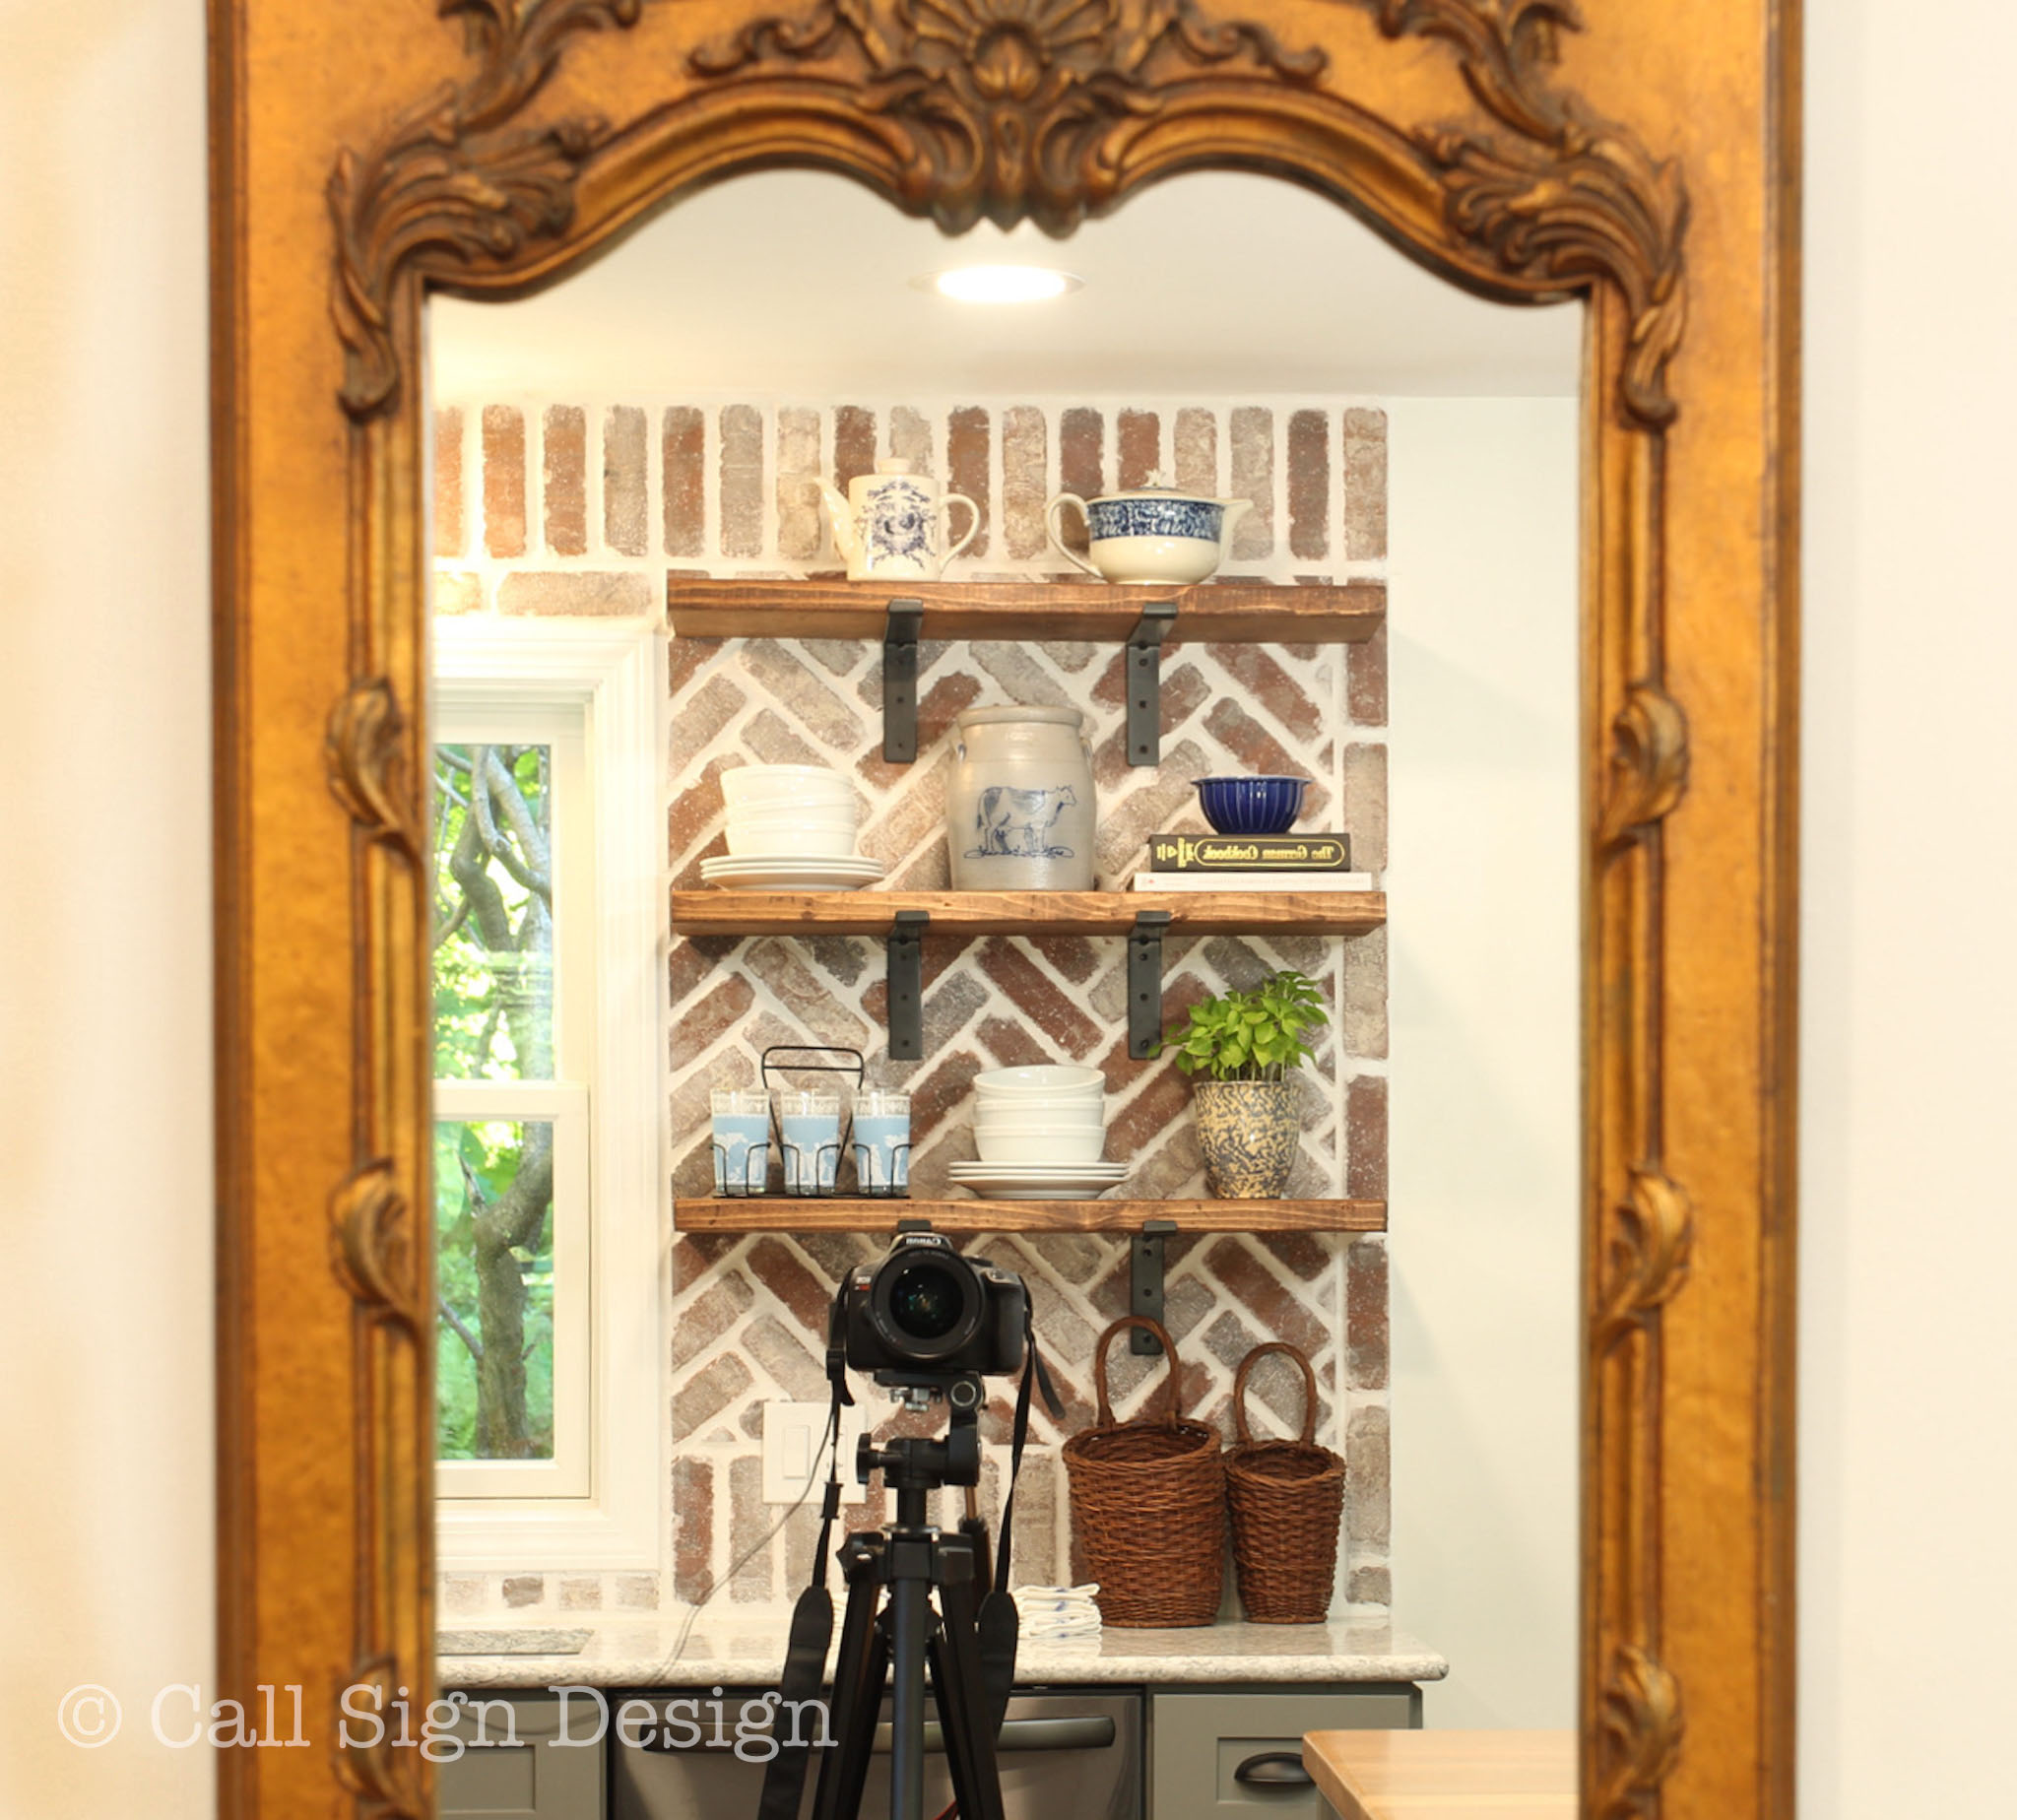
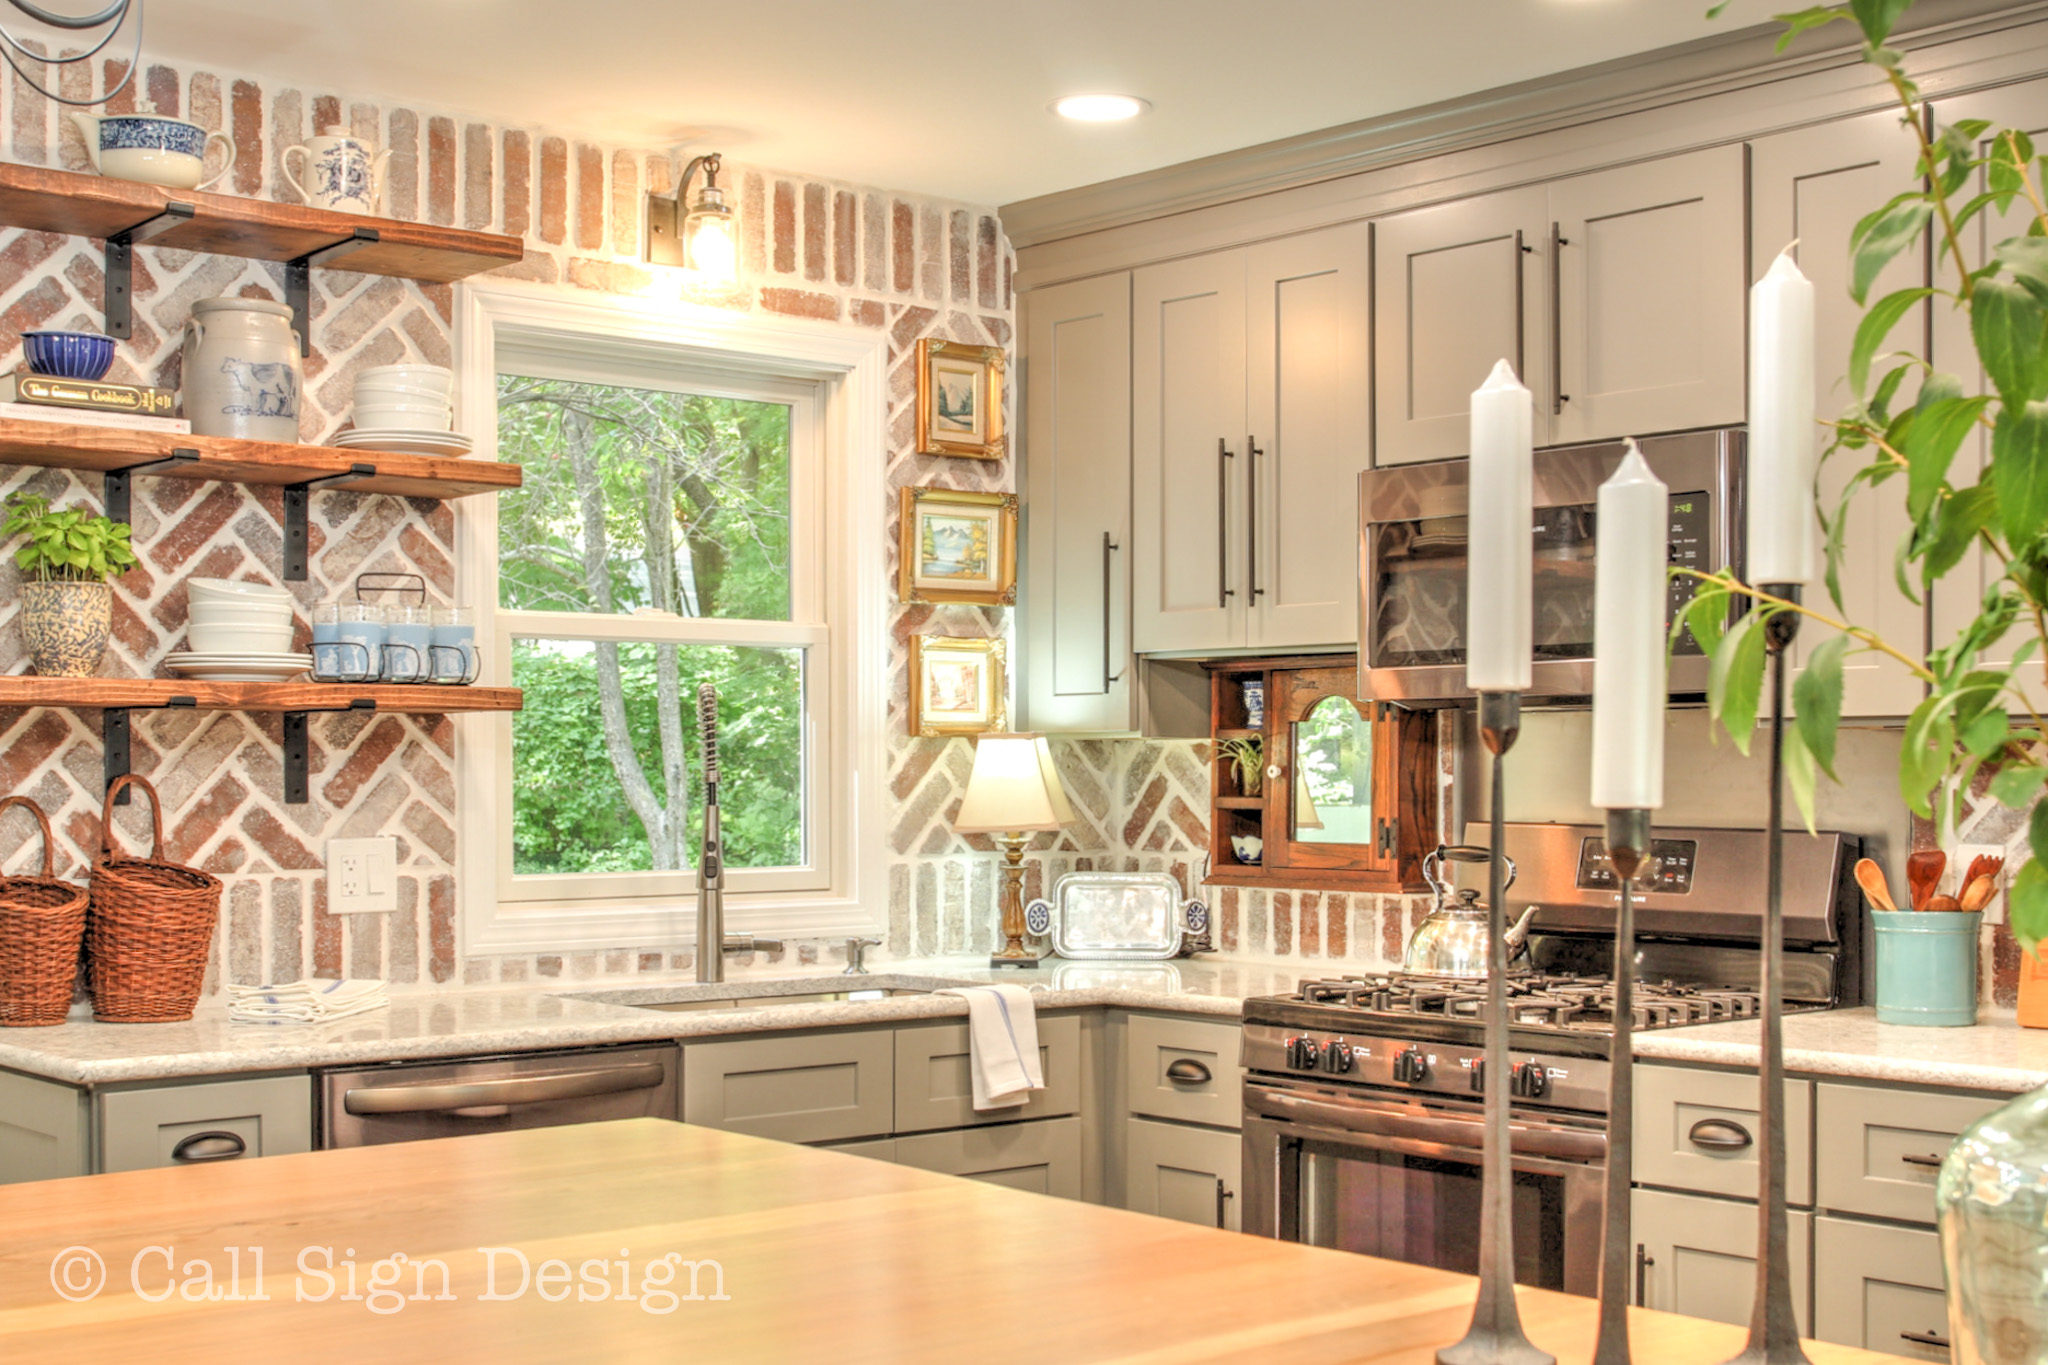
And just for fun, here are some more detailed shots of the kitchen we took during staging:
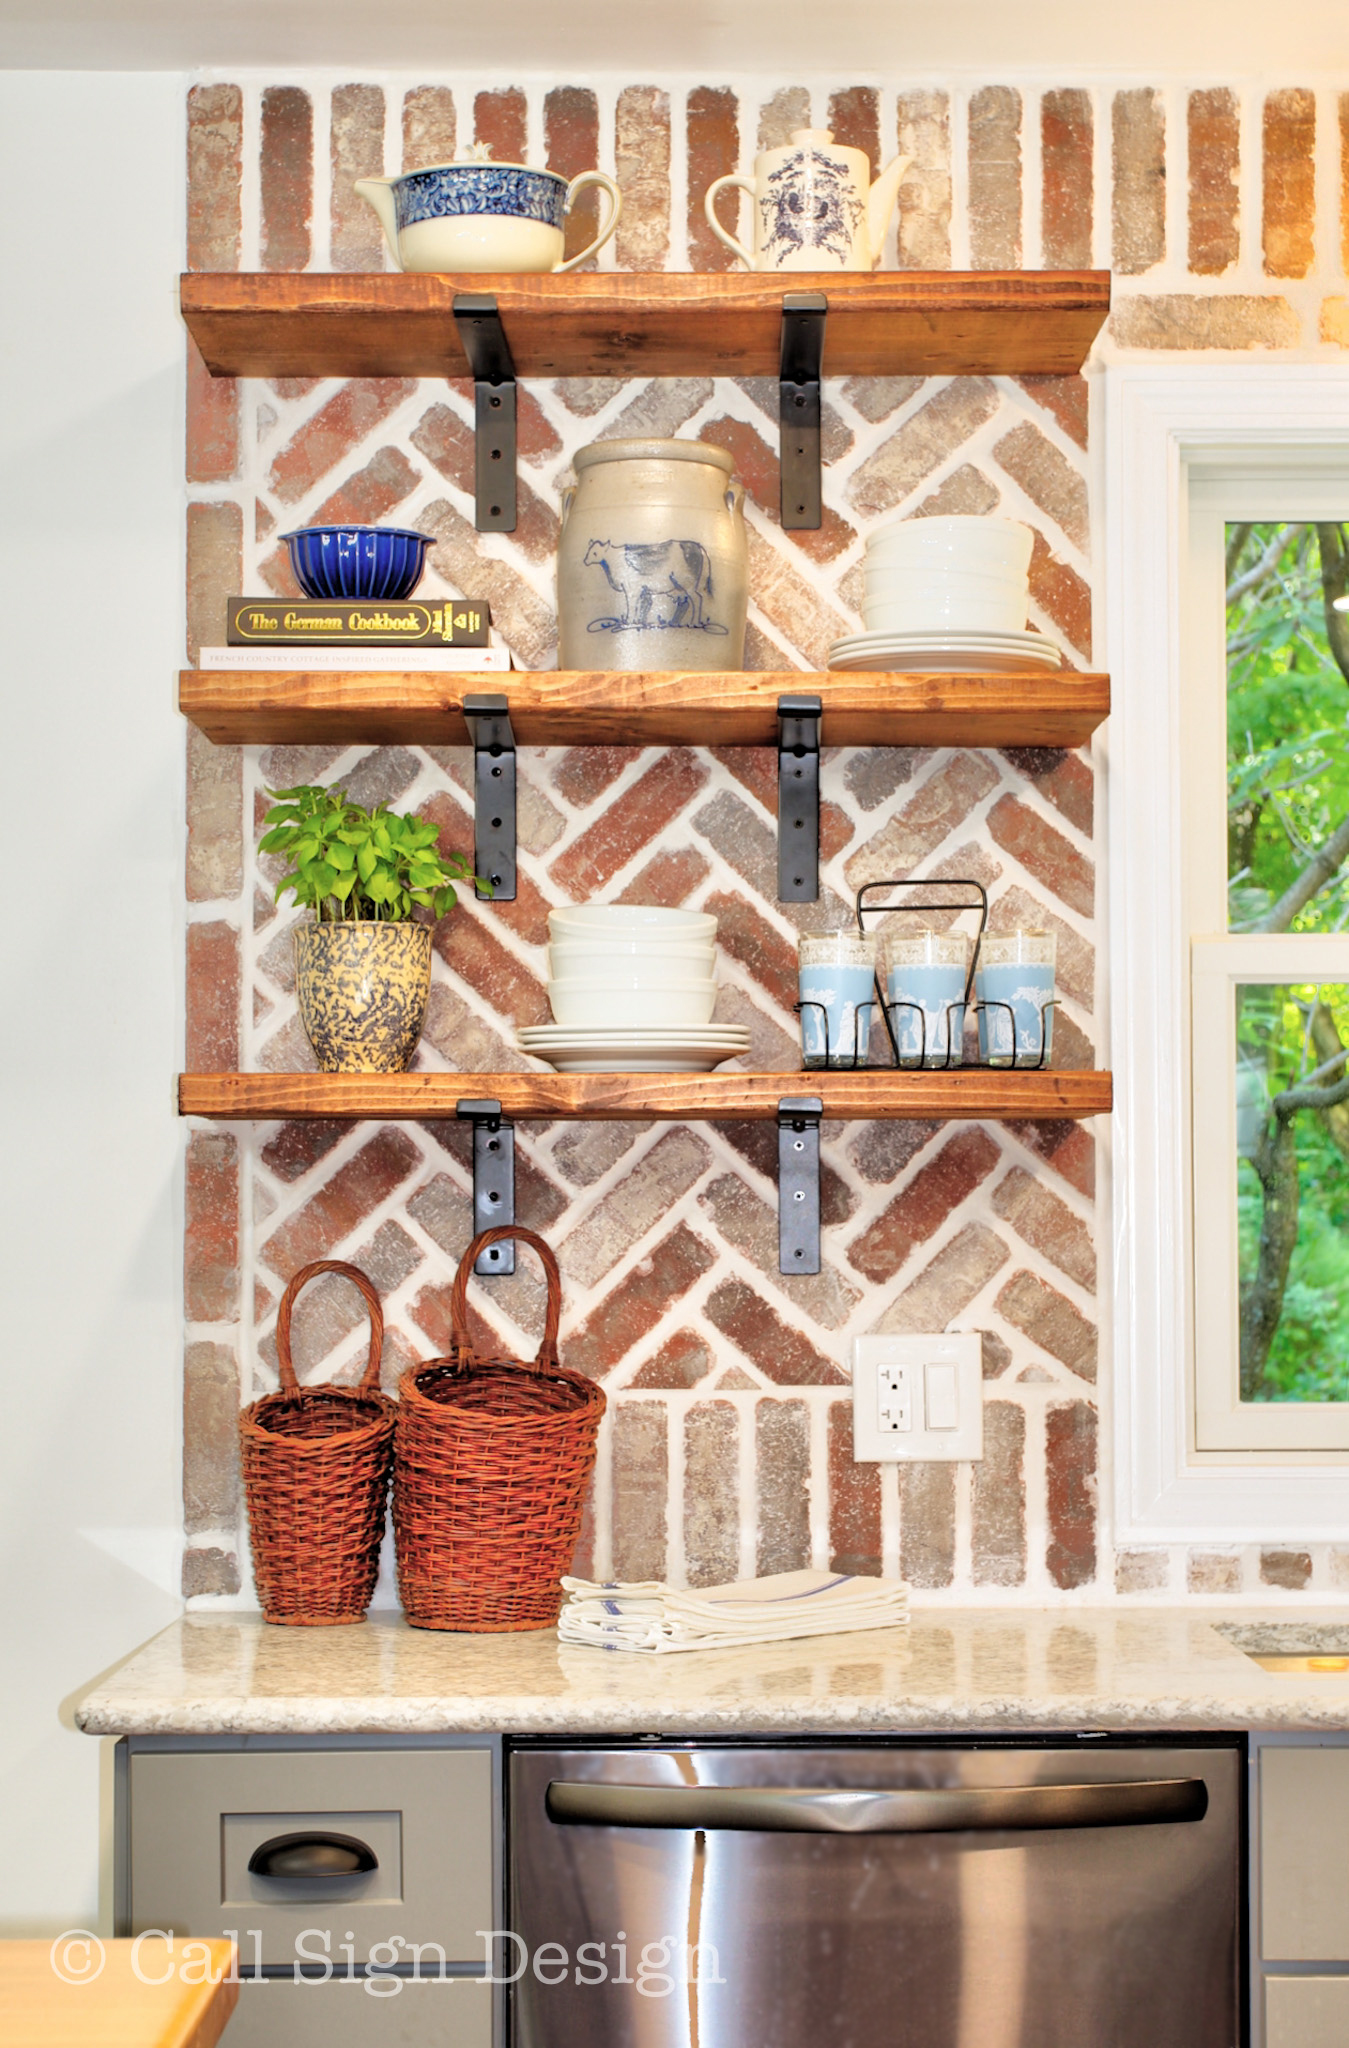
Reclaimed shelves with iron brackets, fully staged. Before and After Pictures of Grandma’s New Vermont Cottage Kitchen: Sponsored by Lily Ann Cabinets and designed by @callsigndesign on Instagram and @slavetodiy on Pinterest.
Before and After Pictures of Grandma’s New Vermont Cottage Kitchen: Sponsored by Lily Ann Cabinets and designed by @callsigndesign on Instagram and @slavetodiy on Pinterest.
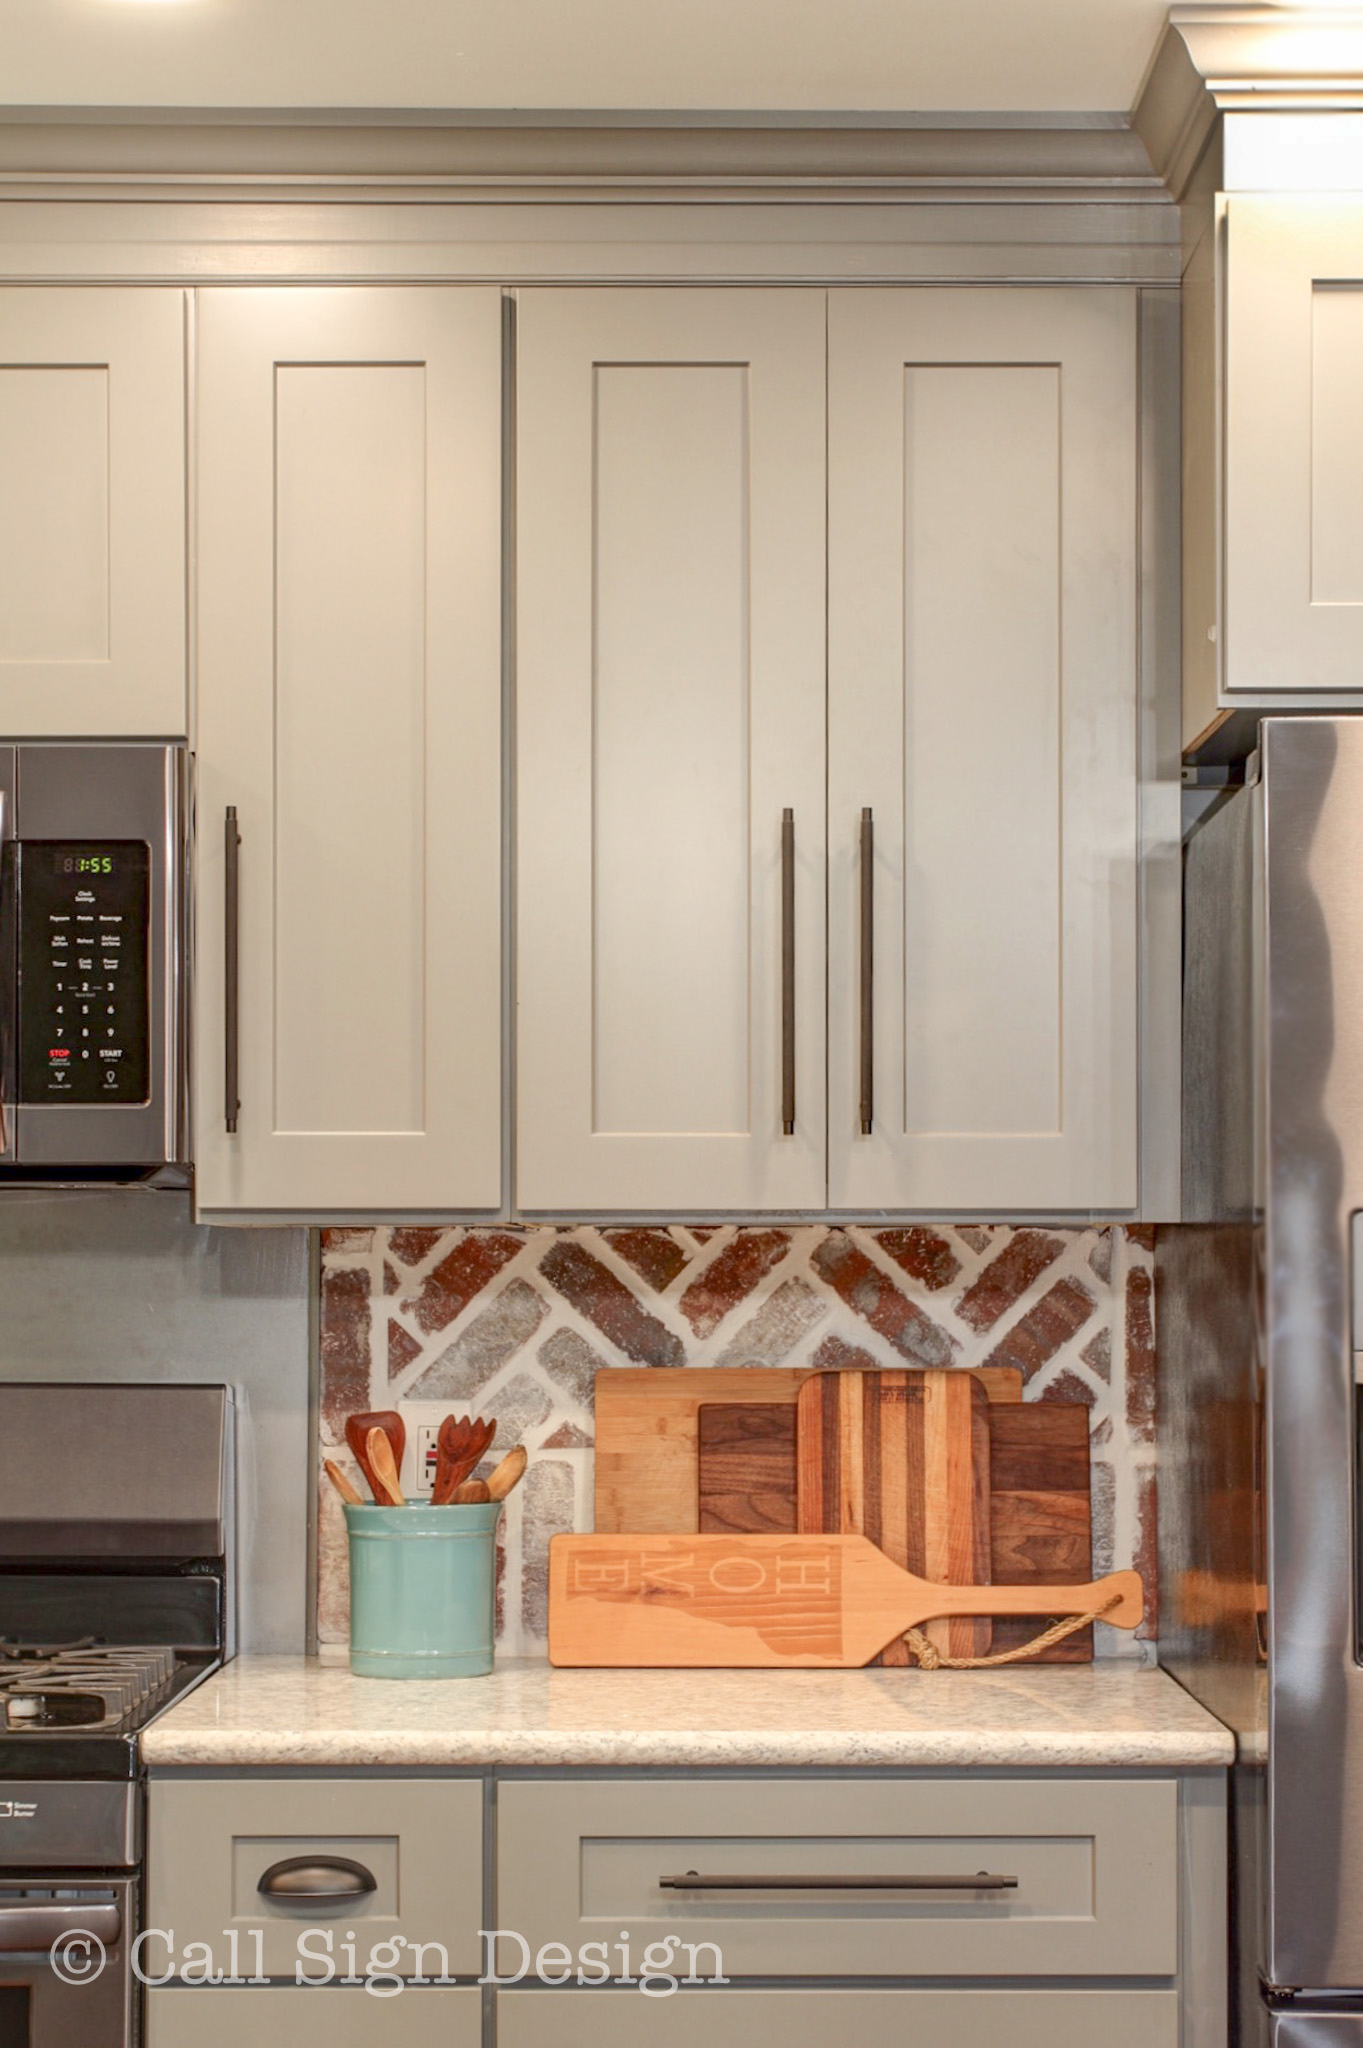
Grandma’s cutting board/charcuterie board collection next to her wooden spoon collection. Before and After Pictures of Grandma’s New Vermont Cottage Kitchen: Sponsored by Lily Ann Cabinets and designed by @callsigndesign on Instagram and @slavetodiy on Pinterest.
Before and After Pictures of Grandma’s New Vermont Cottage Kitchen: Sponsored by Lily Ann Cabinets and designed by @callsigndesign on Instagram and @slavetodiy on Pinterest.
Before and After Pictures of Grandma’s New Vermont Cottage Kitchen: Sponsored by Lily Ann Cabinets and designed by @callsigndesign on Instagram and @slavetodiy on Pinterest.
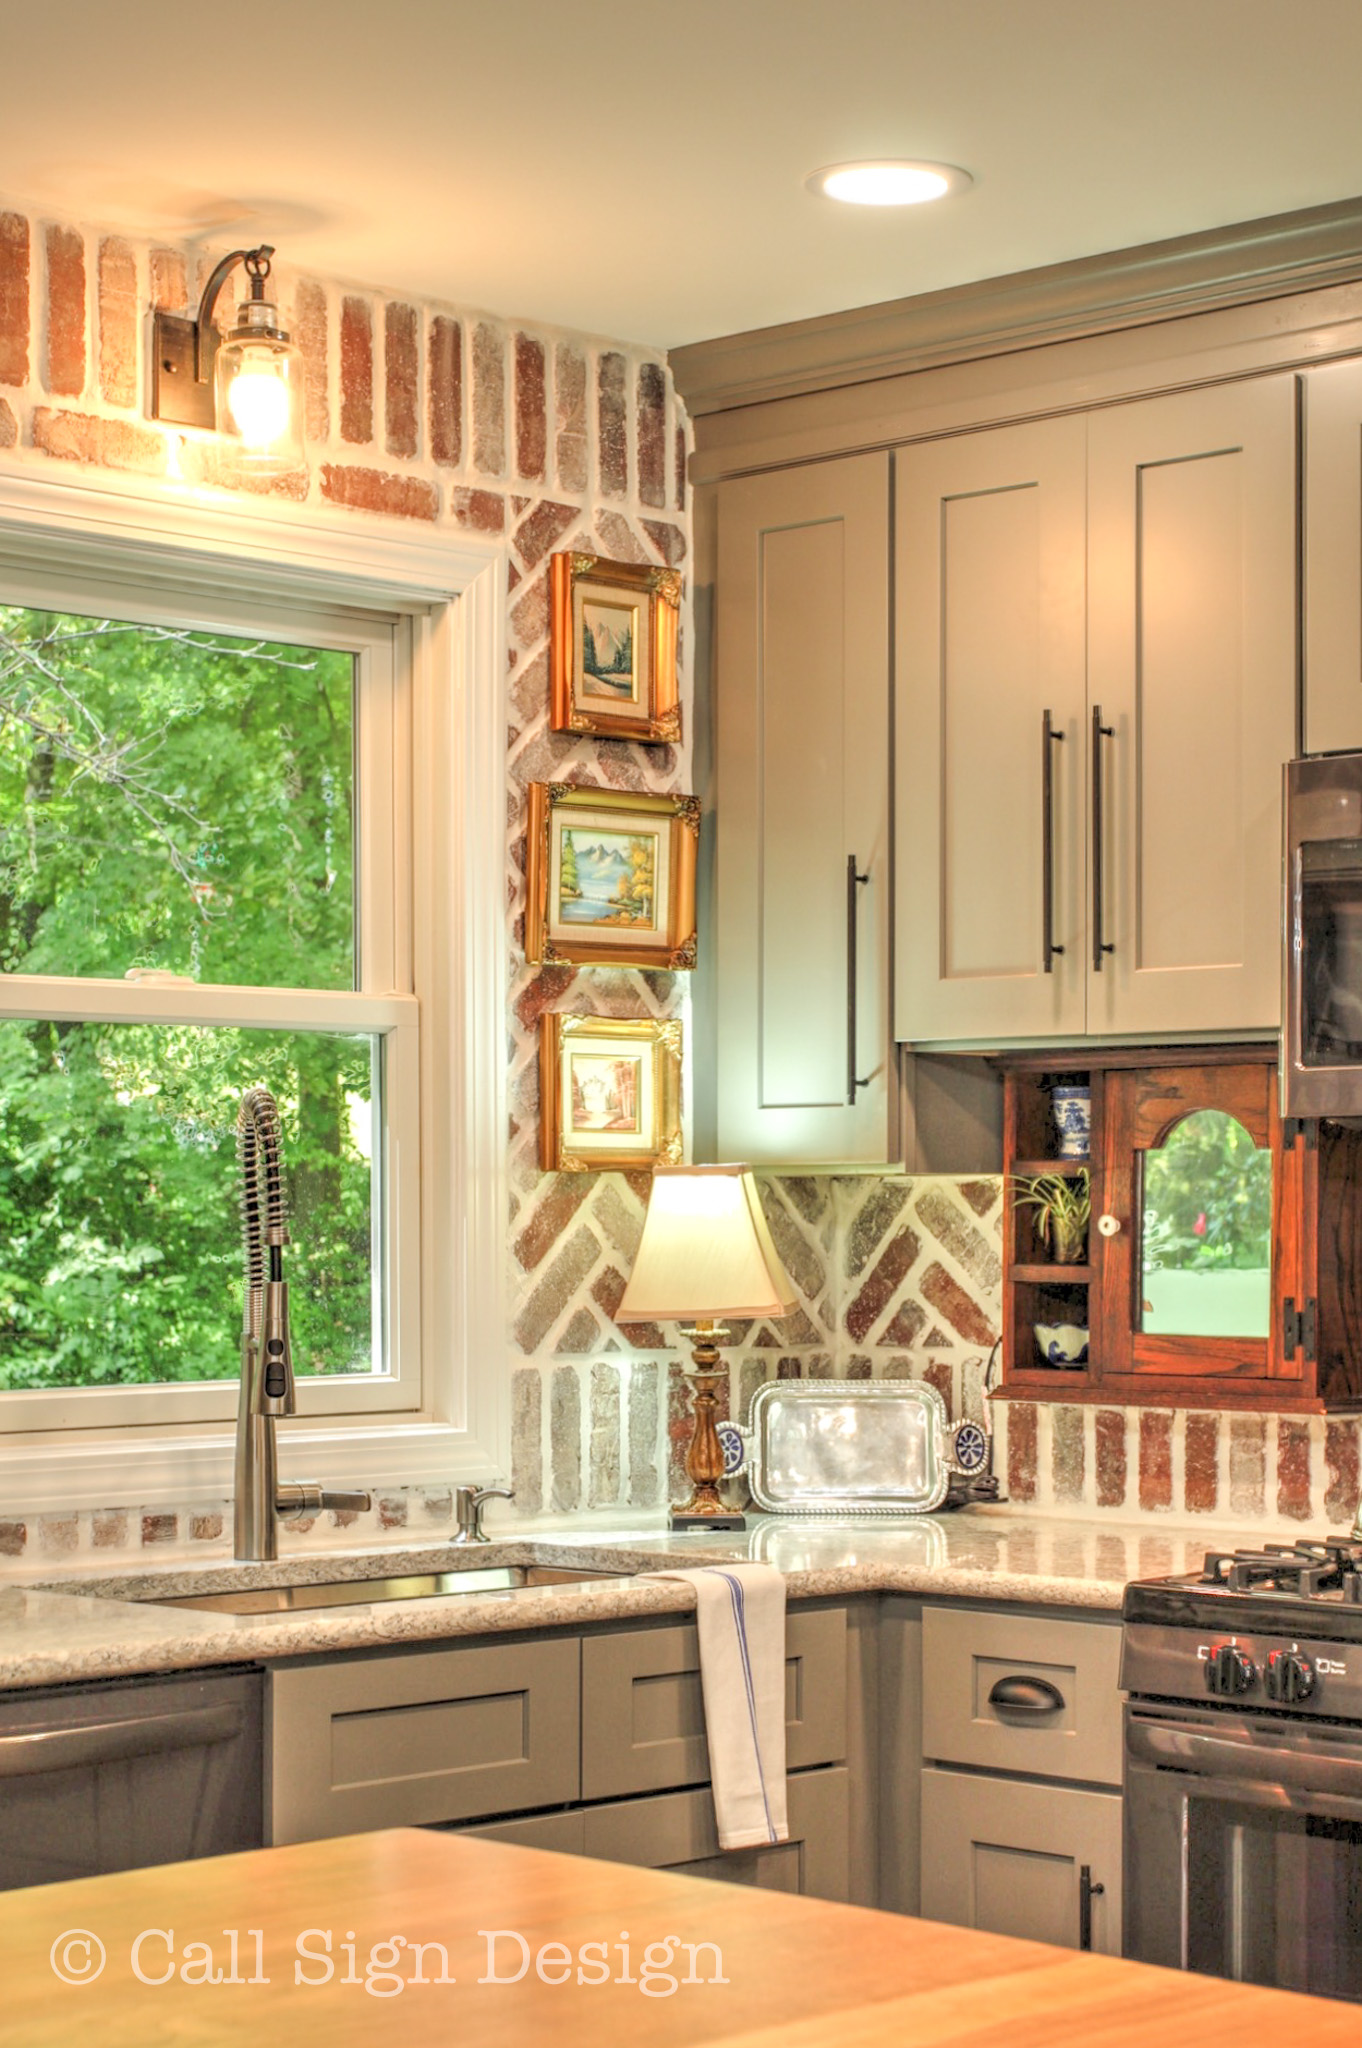
Kitchen staged with gold pictures and a french country style lamp. Before and After Pictures of Grandma’s New Vermont Cottage Kitchen: Sponsored by Lily Ann Cabinets and designed by @callsigndesign on Instagram and @slavetodiy on Pinterest.
Before and After Pictures of Grandma’s New Vermont Cottage Kitchen: Sponsored by Lily Ann Cabinets and designed by @callsigndesign on Instagram and @slavetodiy on Pinterest.
Reclaimed shelves against a herringbone backsplash. Before and After Pictures of Grandma’s New Vermont Cottage Kitchen: Sponsored by Lily Ann Cabinets and designed by @callsigndesign on Instagram and @slavetodiy on Pinterest.
This was quite the journey, but it was all worth it to see how happy my mom was at the end. What do you think of our design and renovation? What is your favorite part? Please let us know in the comments below!
Once again: If you love this look, and want to pay less for awesome cabinets, you can find these cabinets from Lily Ann Cabinets. My readers can get a 5% discount by using the offer code: SDIY2018 at checkout!
Special thanks to my brother and sister for all of the hard work and making it so easy for us to look good!
Thanks for joining us on our adventures! Cheers!
*Legal stuff:
I am honest about my experiences with different products and write because I enjoy it. I do however, have the opportunity to earn money for my writing, also.
Slavetodiy.com is a paid affiliate for Lily Ann Cabinets and received discounted products to provide this review. As always, our opinions are honest and we promote only quality products that we use ourselves.
Slavetodiy.com is a participant in the Amazon Services LLC Associates Program, an affiliate advertising program designed to provide a means for sites to earn advertising fees by advertising and linking to amazon.com. Amazon offers a small commission on products sold through their affiliate links. Each of your purchases via our Amazon affiliation links supports our cause at no additional cost to you.
If a blogger links to an Amazon product (with a special code for affiliates embedded in the link), and a reader places an item in their “shopping cart” through that link within 24 hours of clicking the link, the blogger gets a small percentage of the sale. Amazon links are not “pay per click.” If you click on the product link and stay around Amazon and purchase something else, however, I will get a commission on that sale.
Slavetodiy.com is also a VigLink affiliate advertiser which works similarly.
I have been wondering about using a paint sprayer for years now, because of course I see all these gorgeous finishes on people’s cabinets, furniture, and small paint projects. So, I did a little research, and finally settled on a small project paint gun that is inexpensive, works really well, and is very simple to set up and clean up. Here is the process and what we used to get outstanding results!
*This post may contain affiliate links. Please see full disclosure at the end of the post.
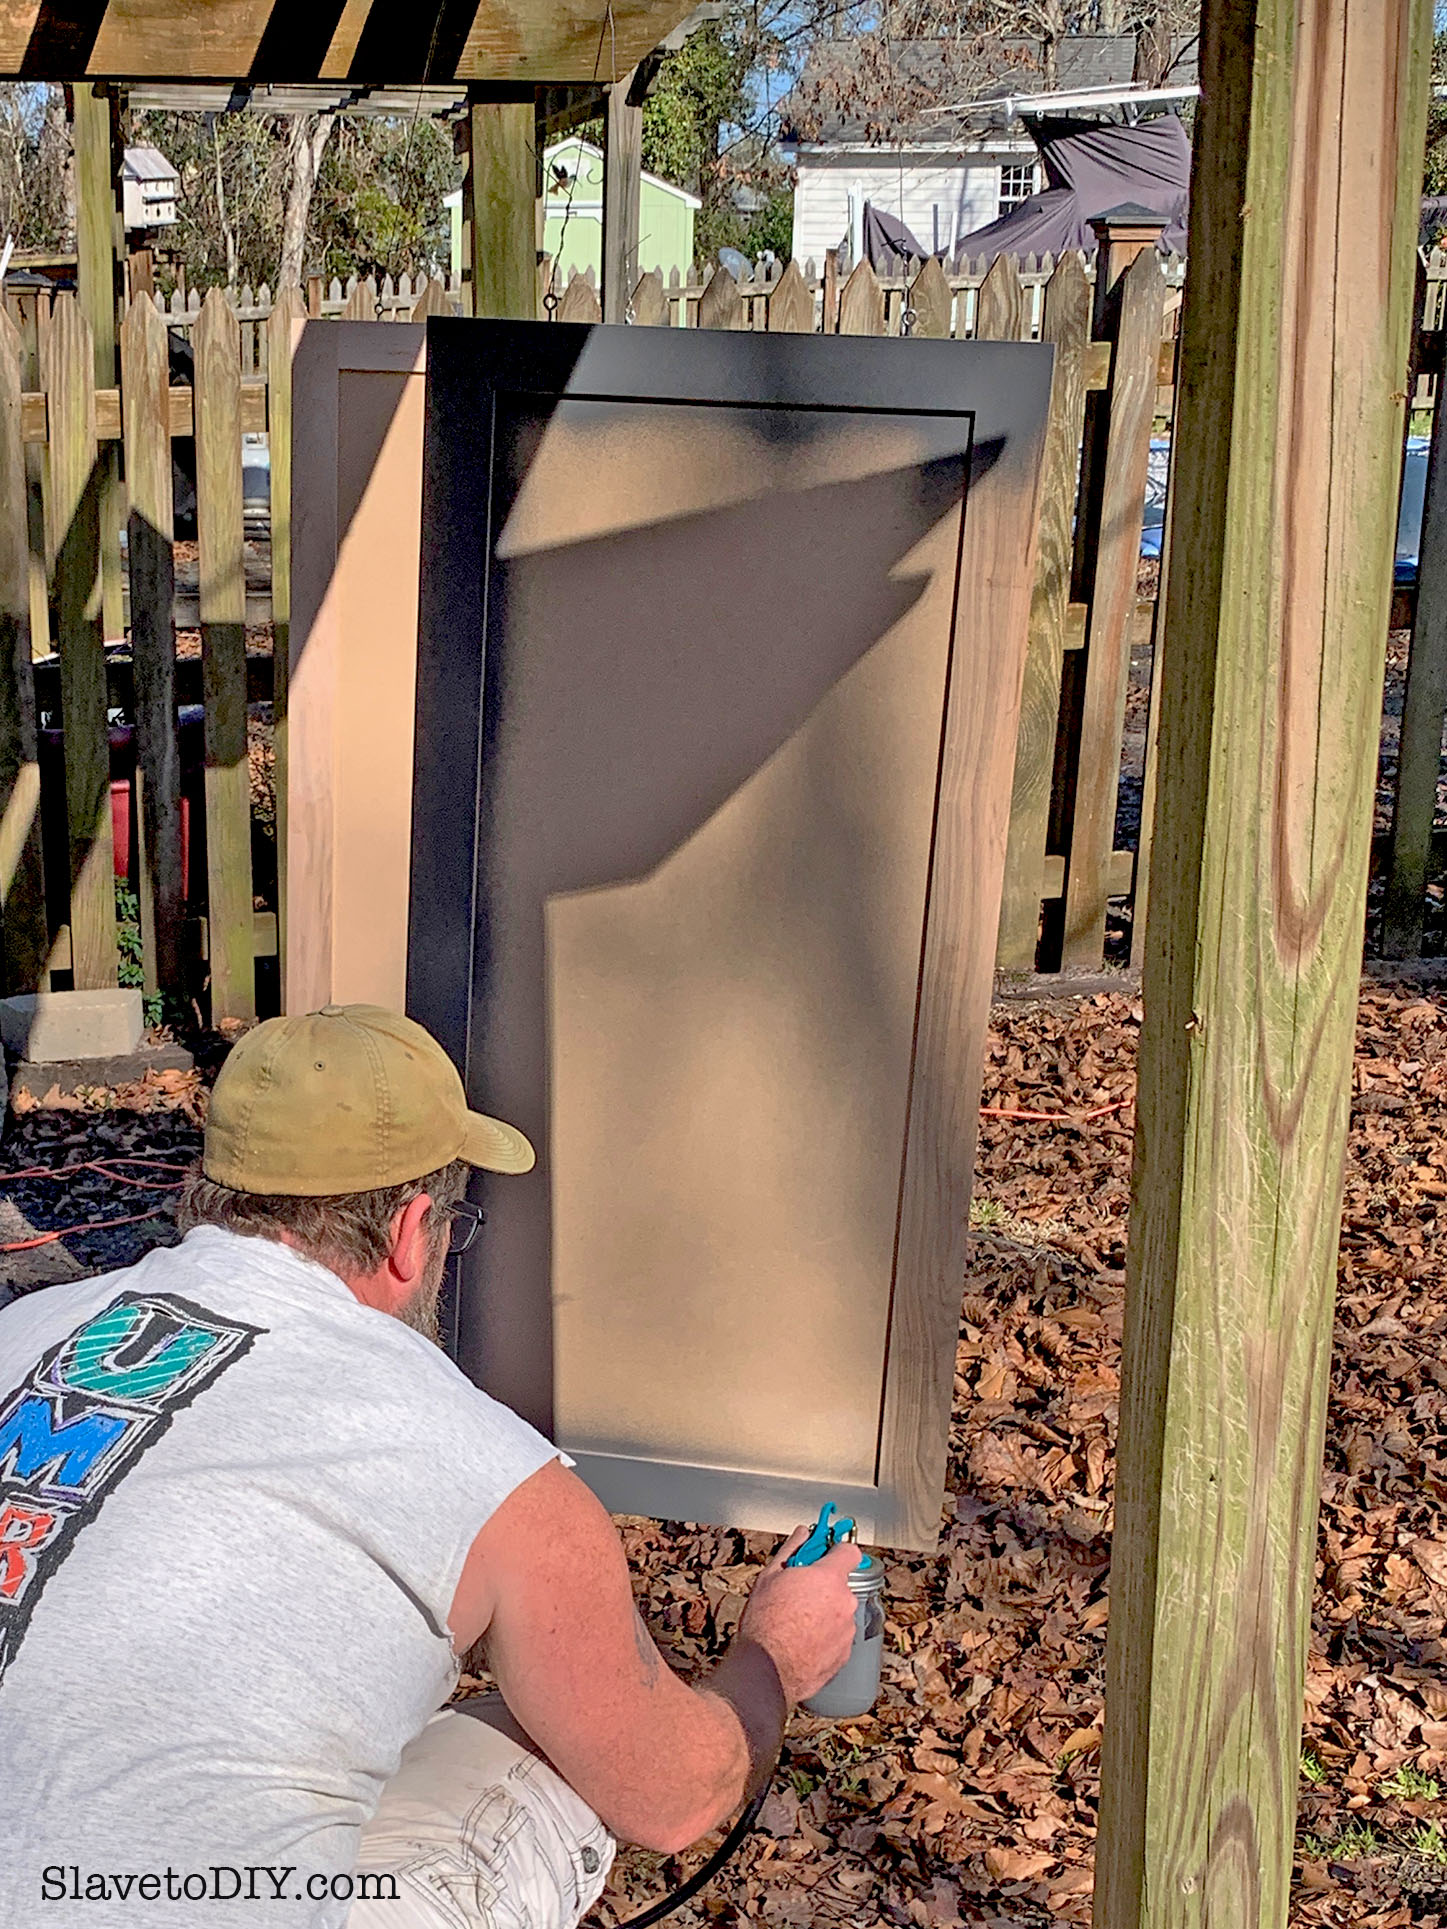
The first step is having a place to paint. Now these doors were unattached and I REALLY didn’t want to do prepwork inside to paint (especially because of the cats). So, we waited for a day when the wind was relatively still, and set up a clean work surface on the ground and screwed in eyelet screws into the top of the cabinet doors. Then we wired them to an outdoor arbor so they were suspended and accessible.
What you’ll need:
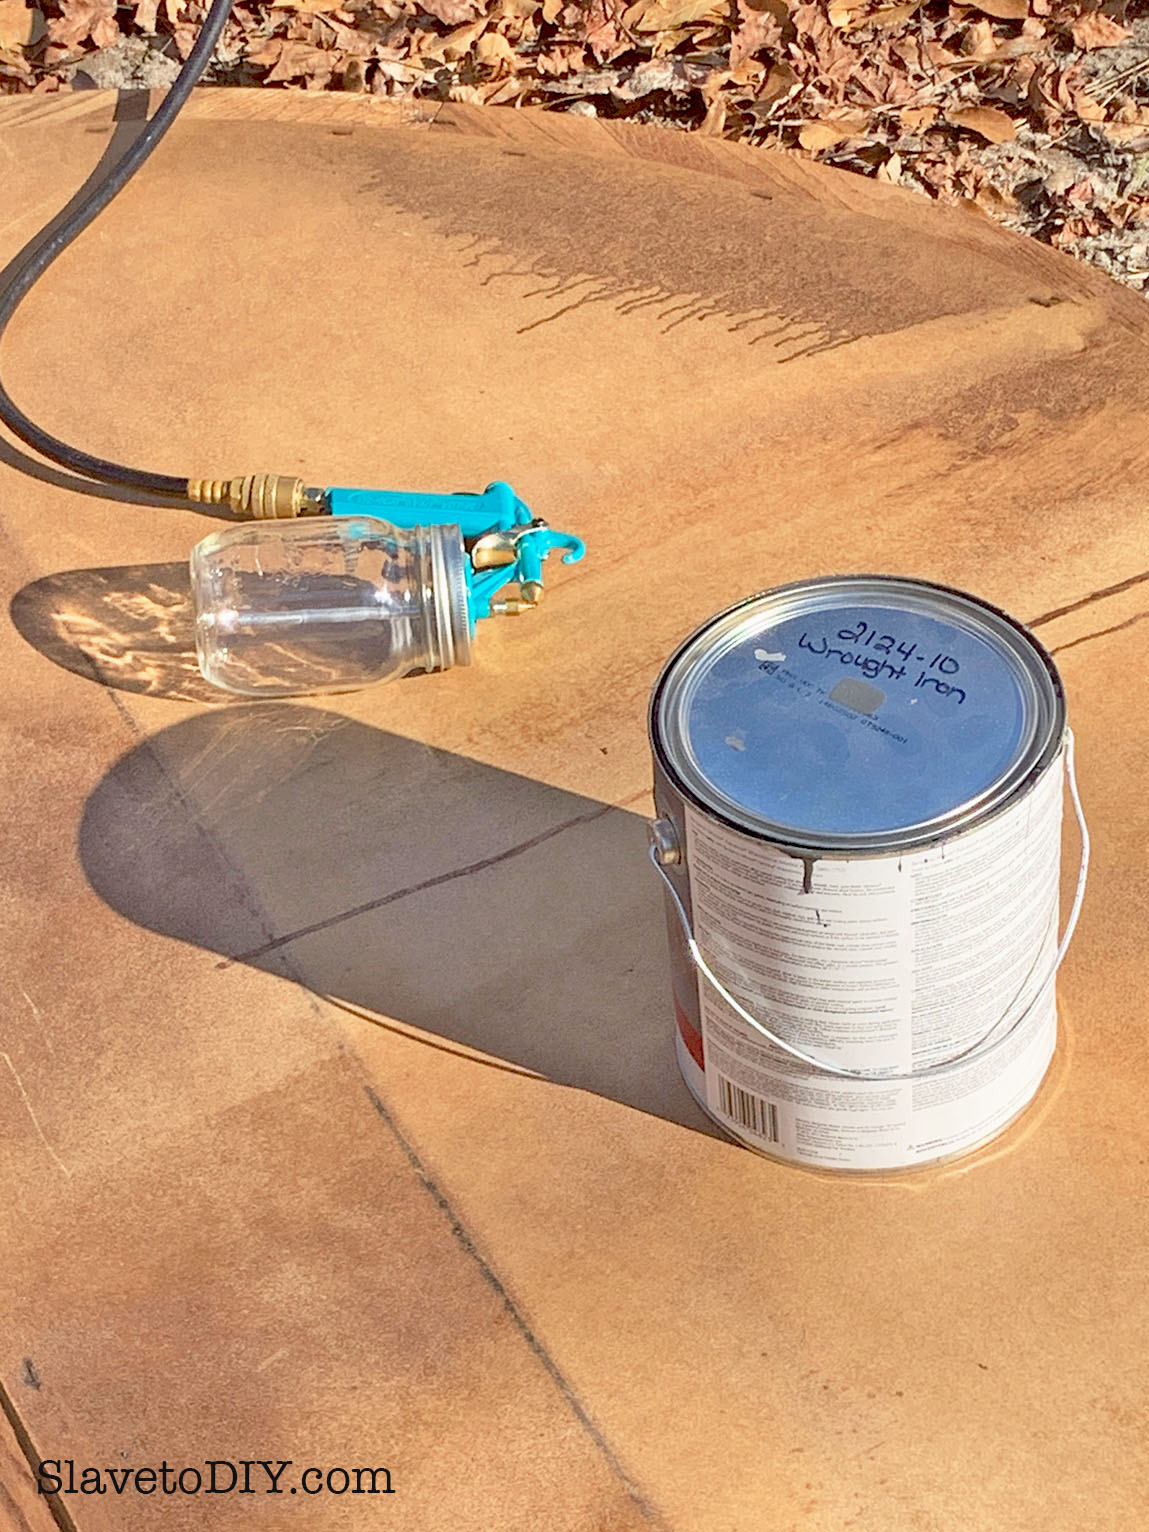
A paint gun: we used the Critter Paint Gun, (great design, very simple, and the best news: CHEAP!).
Paint straining bags: you can get these for a buck and change at hardware stores or buy them online: Paint Strainer Bags.
A compressor, hose, and basic attachments. We have a large Dewalt Compressor (which I bought apparently thinking we’d be framing walls and working in a commercial building environment) but we used the smaller and much more easy to wield Bostich Air Compressor for this project).
First we dry fitted everything on the gun to make sure it worked with the compressor hoses.
How To Use An Inexpensive Paint Sprayer and Get Outstanding Results
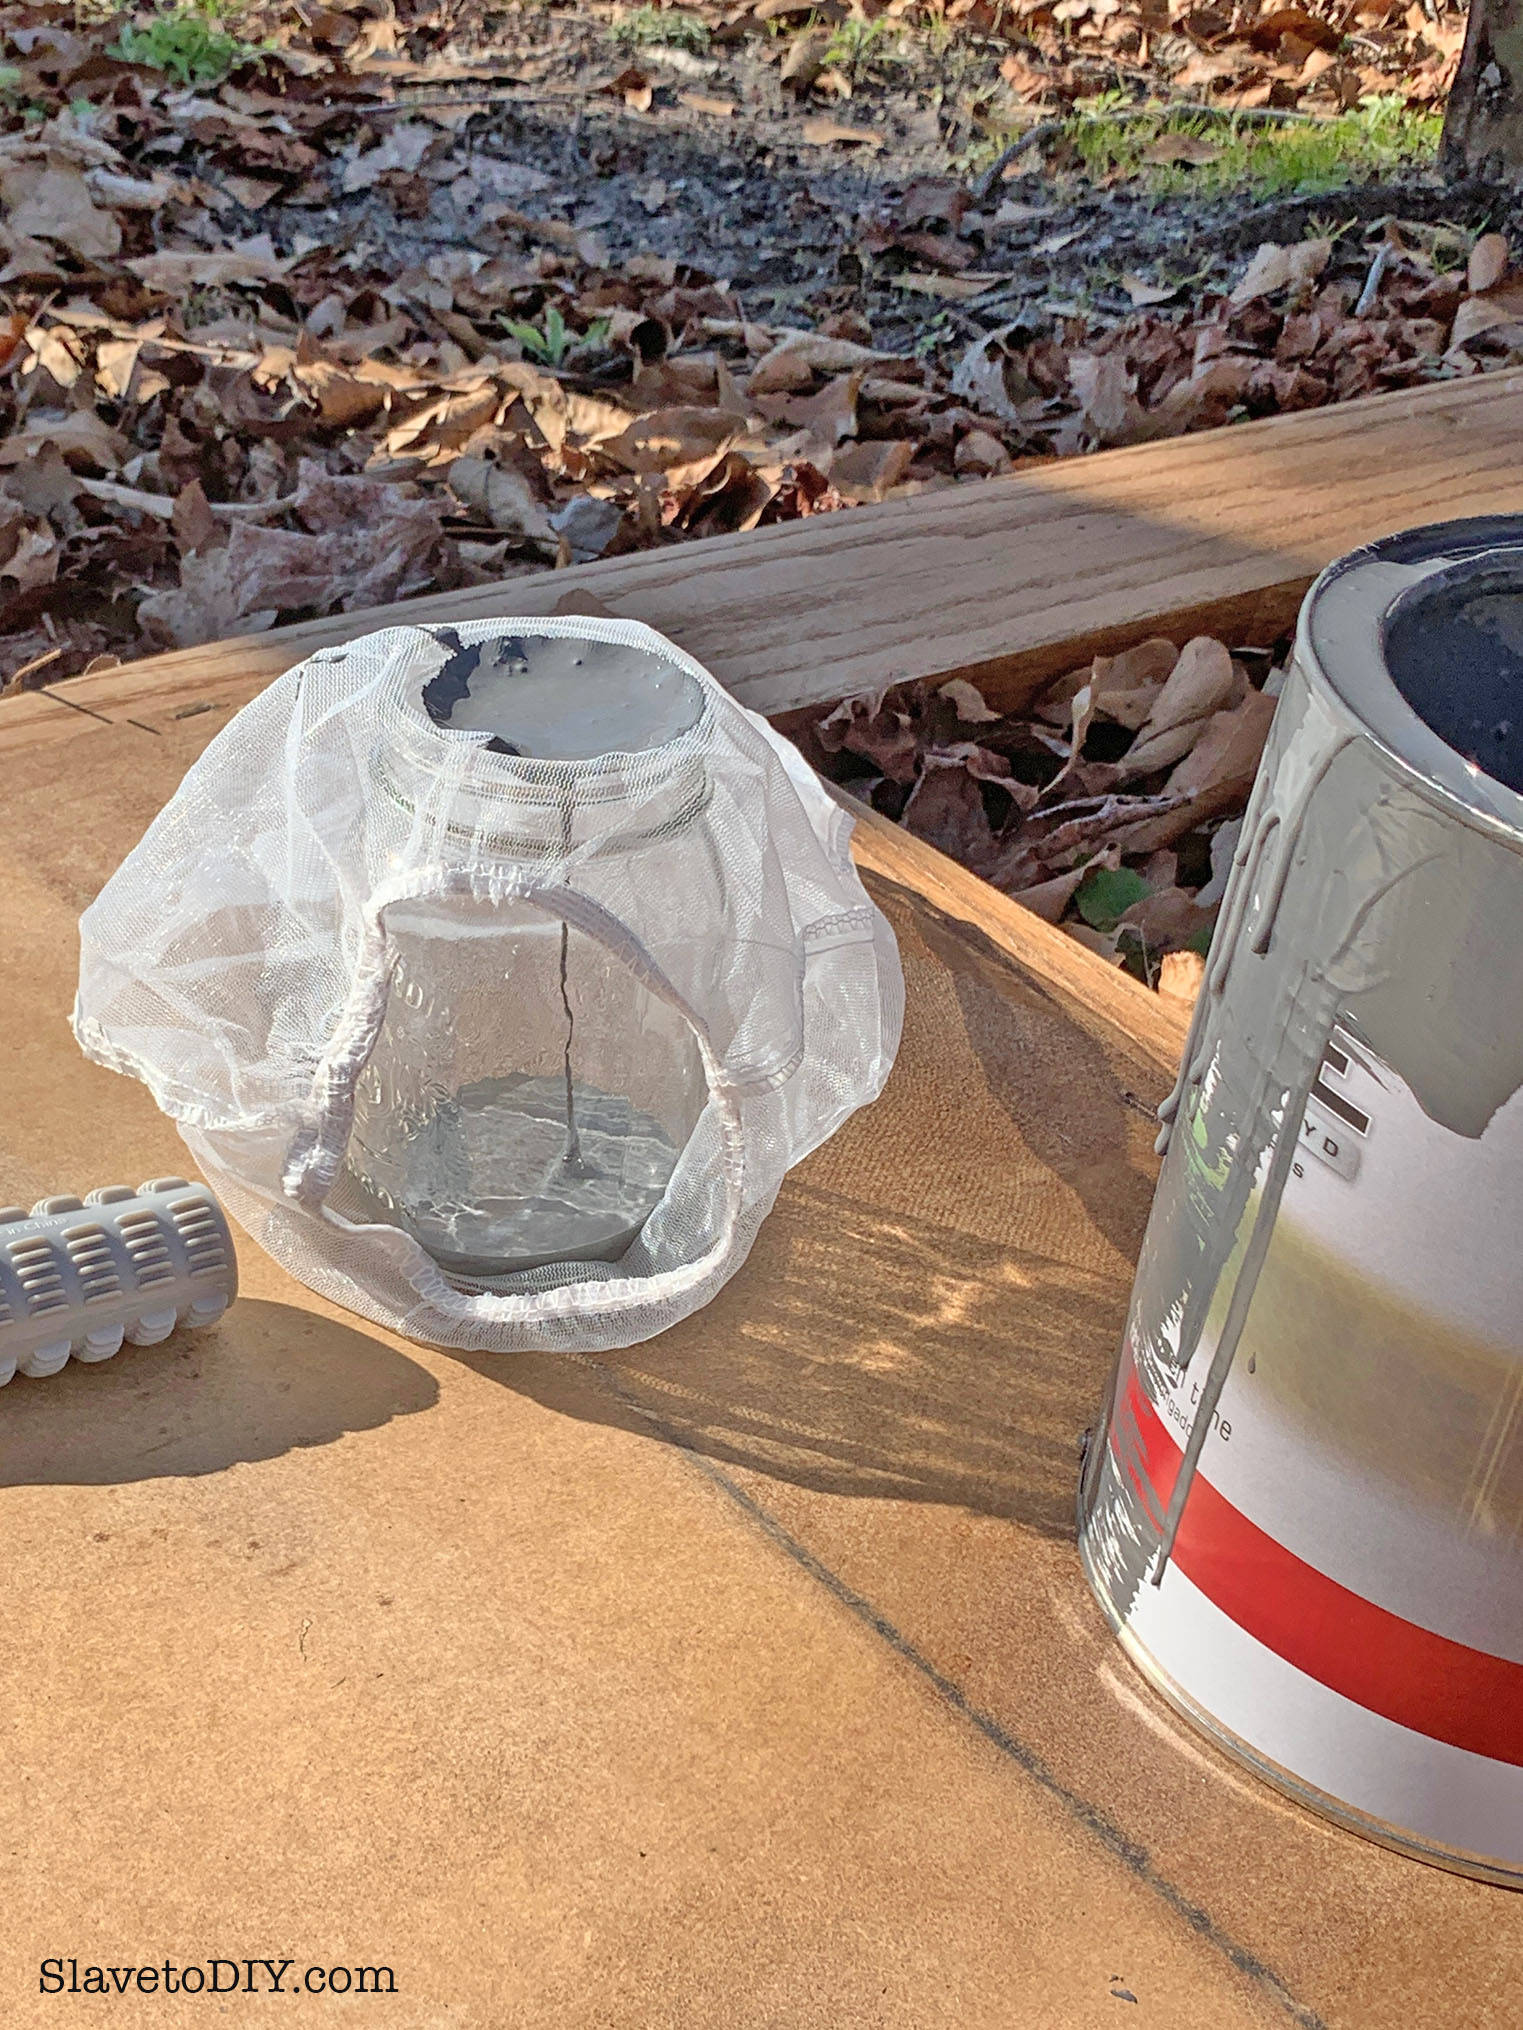
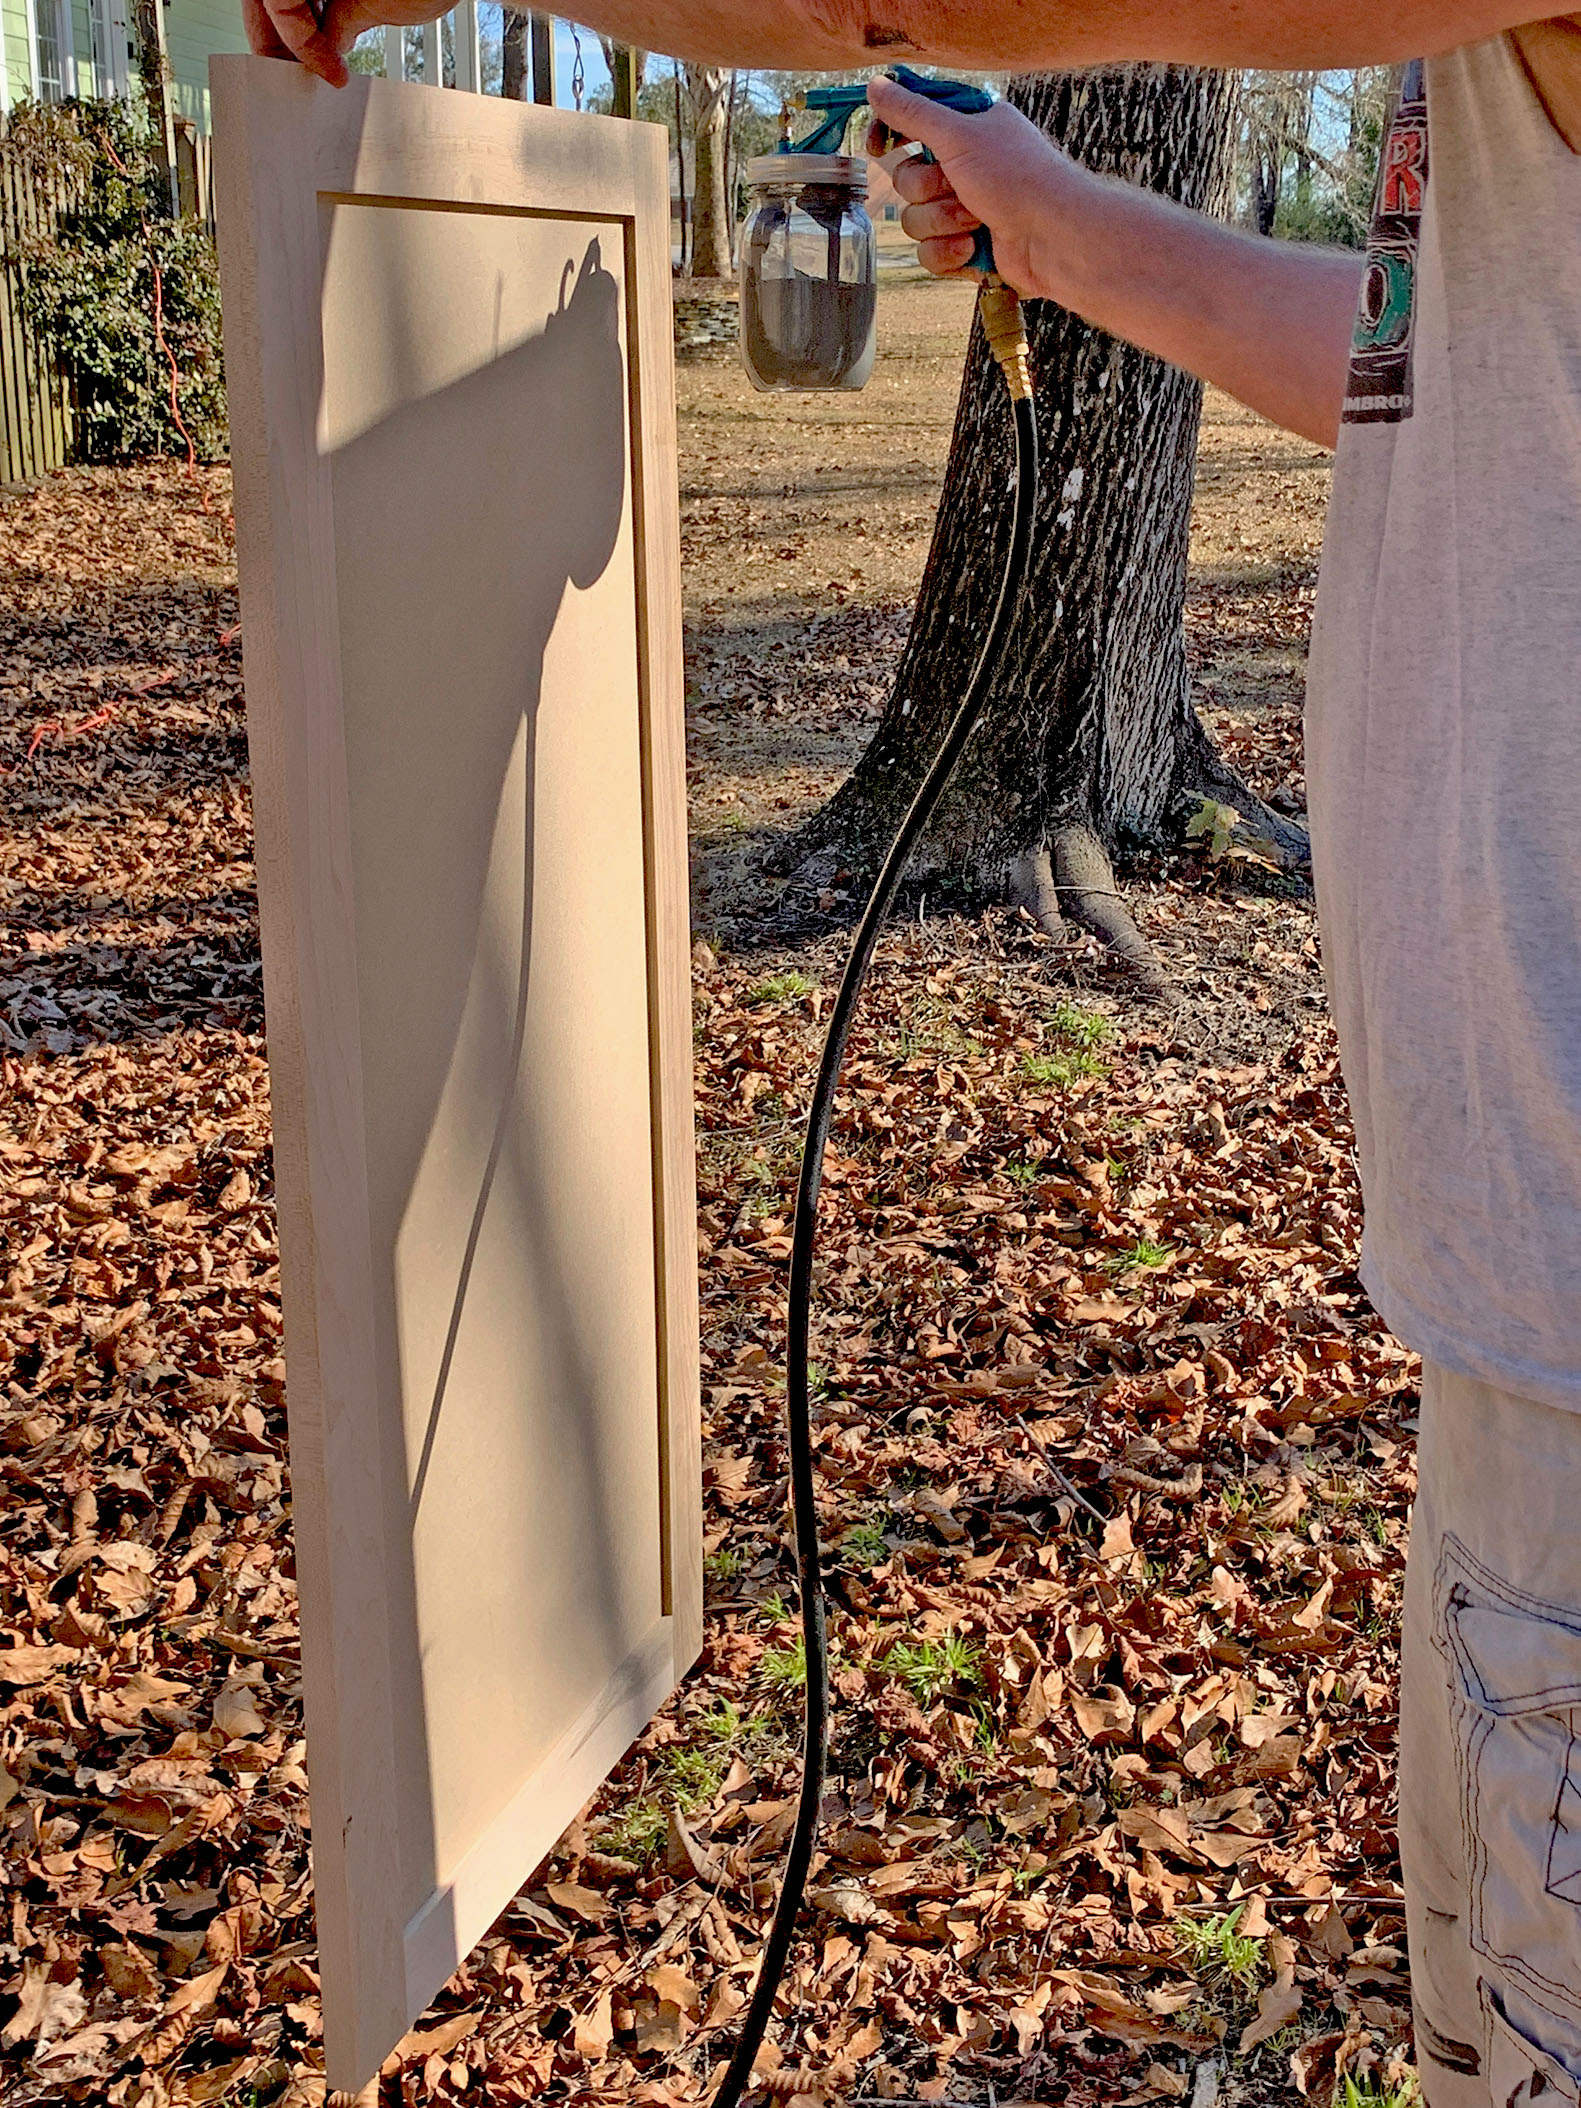
Then we used one of the paint strainers to strain the paint into the jar.
TIP FROM RAINMAN: THIS IS AN IMPORTANT STEP. If you don’t strain the paint, little chunks will clog up the tiny tube that feeds the sprayer.
How To Use An Inexpensive Paint Sprayer and Get Outstanding Results
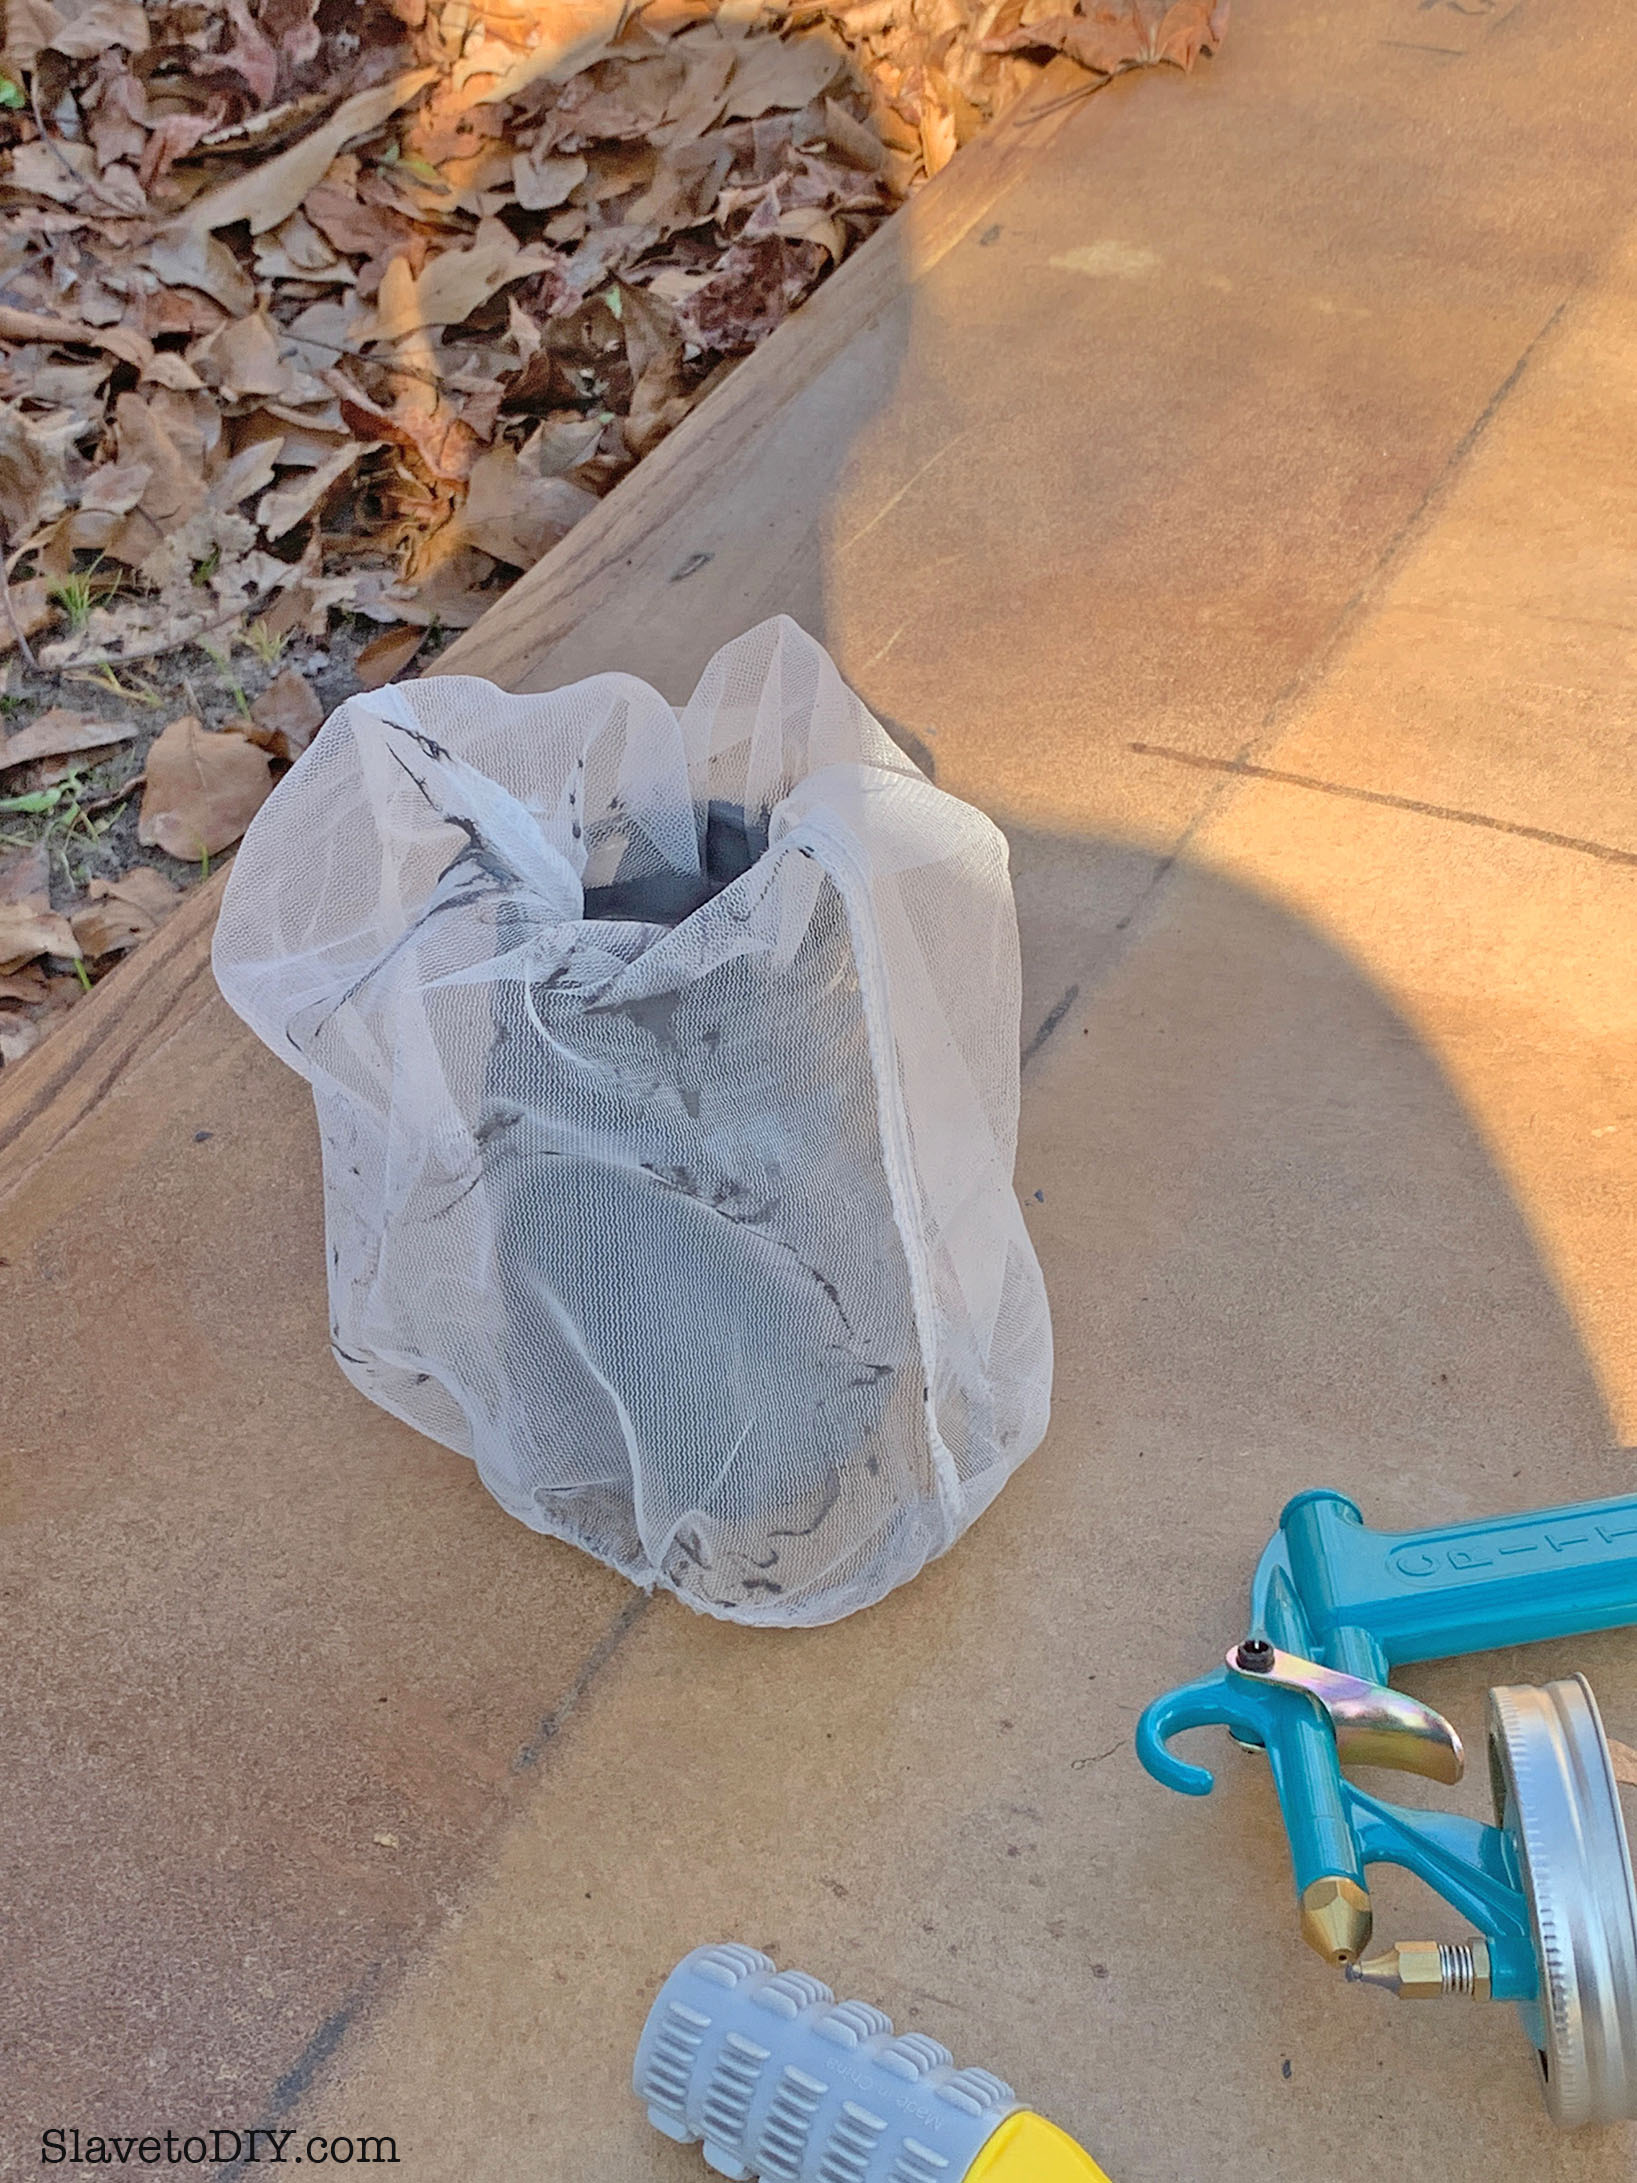
We realized after the first few minutes that the best method is to put the strainer all the way in and then pour the paint in. It lends some weight to the process and makes it strain MUCH faster.
How To Use An Inexpensive Paint Sprayer and Get Outstanding Results
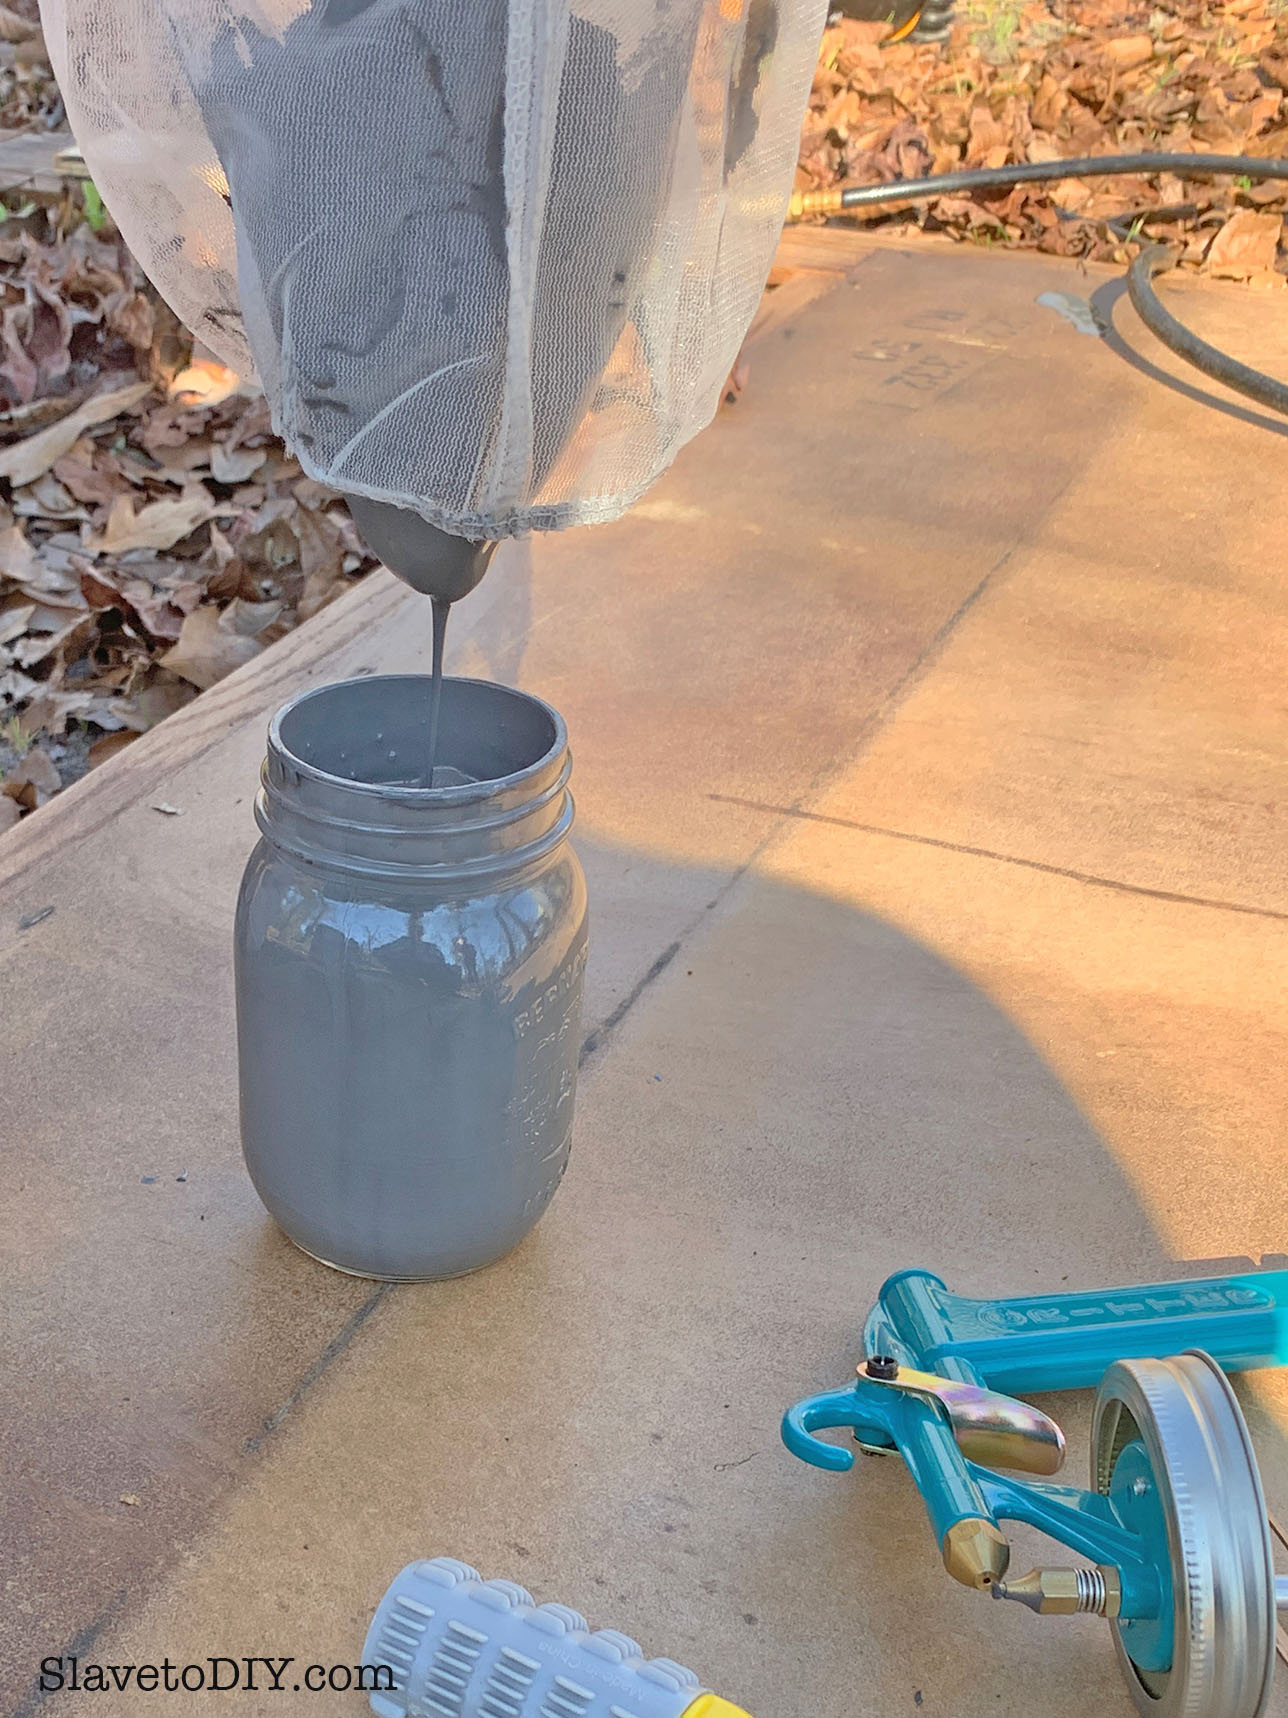
Once the paint is in, lift the strainer out until it has all drained into the mason jar. We layed the bag down on our clean surface, knowing we would use it again, but if you’re taking a long time, you might want to rinse it with a hose between uses (we have not found a non-messy way to do this).
How To Use An Inexpensive Paint Sprayer and Get Outstanding Results
Attach the mason jar back to the gun, and make sure your air compressor is set at 30 PSI.
TIP FROM RAINMAN: USE SCRAP WOOD TO GET PSI, LIQUID NOZZLE, AND DISTANCE SET (35 PSI WITH LIQUID NOZZLE CENTERED WORKED WELL WITH THIS PAINT AT AROUND 4 INCHES FROM SURFACE).
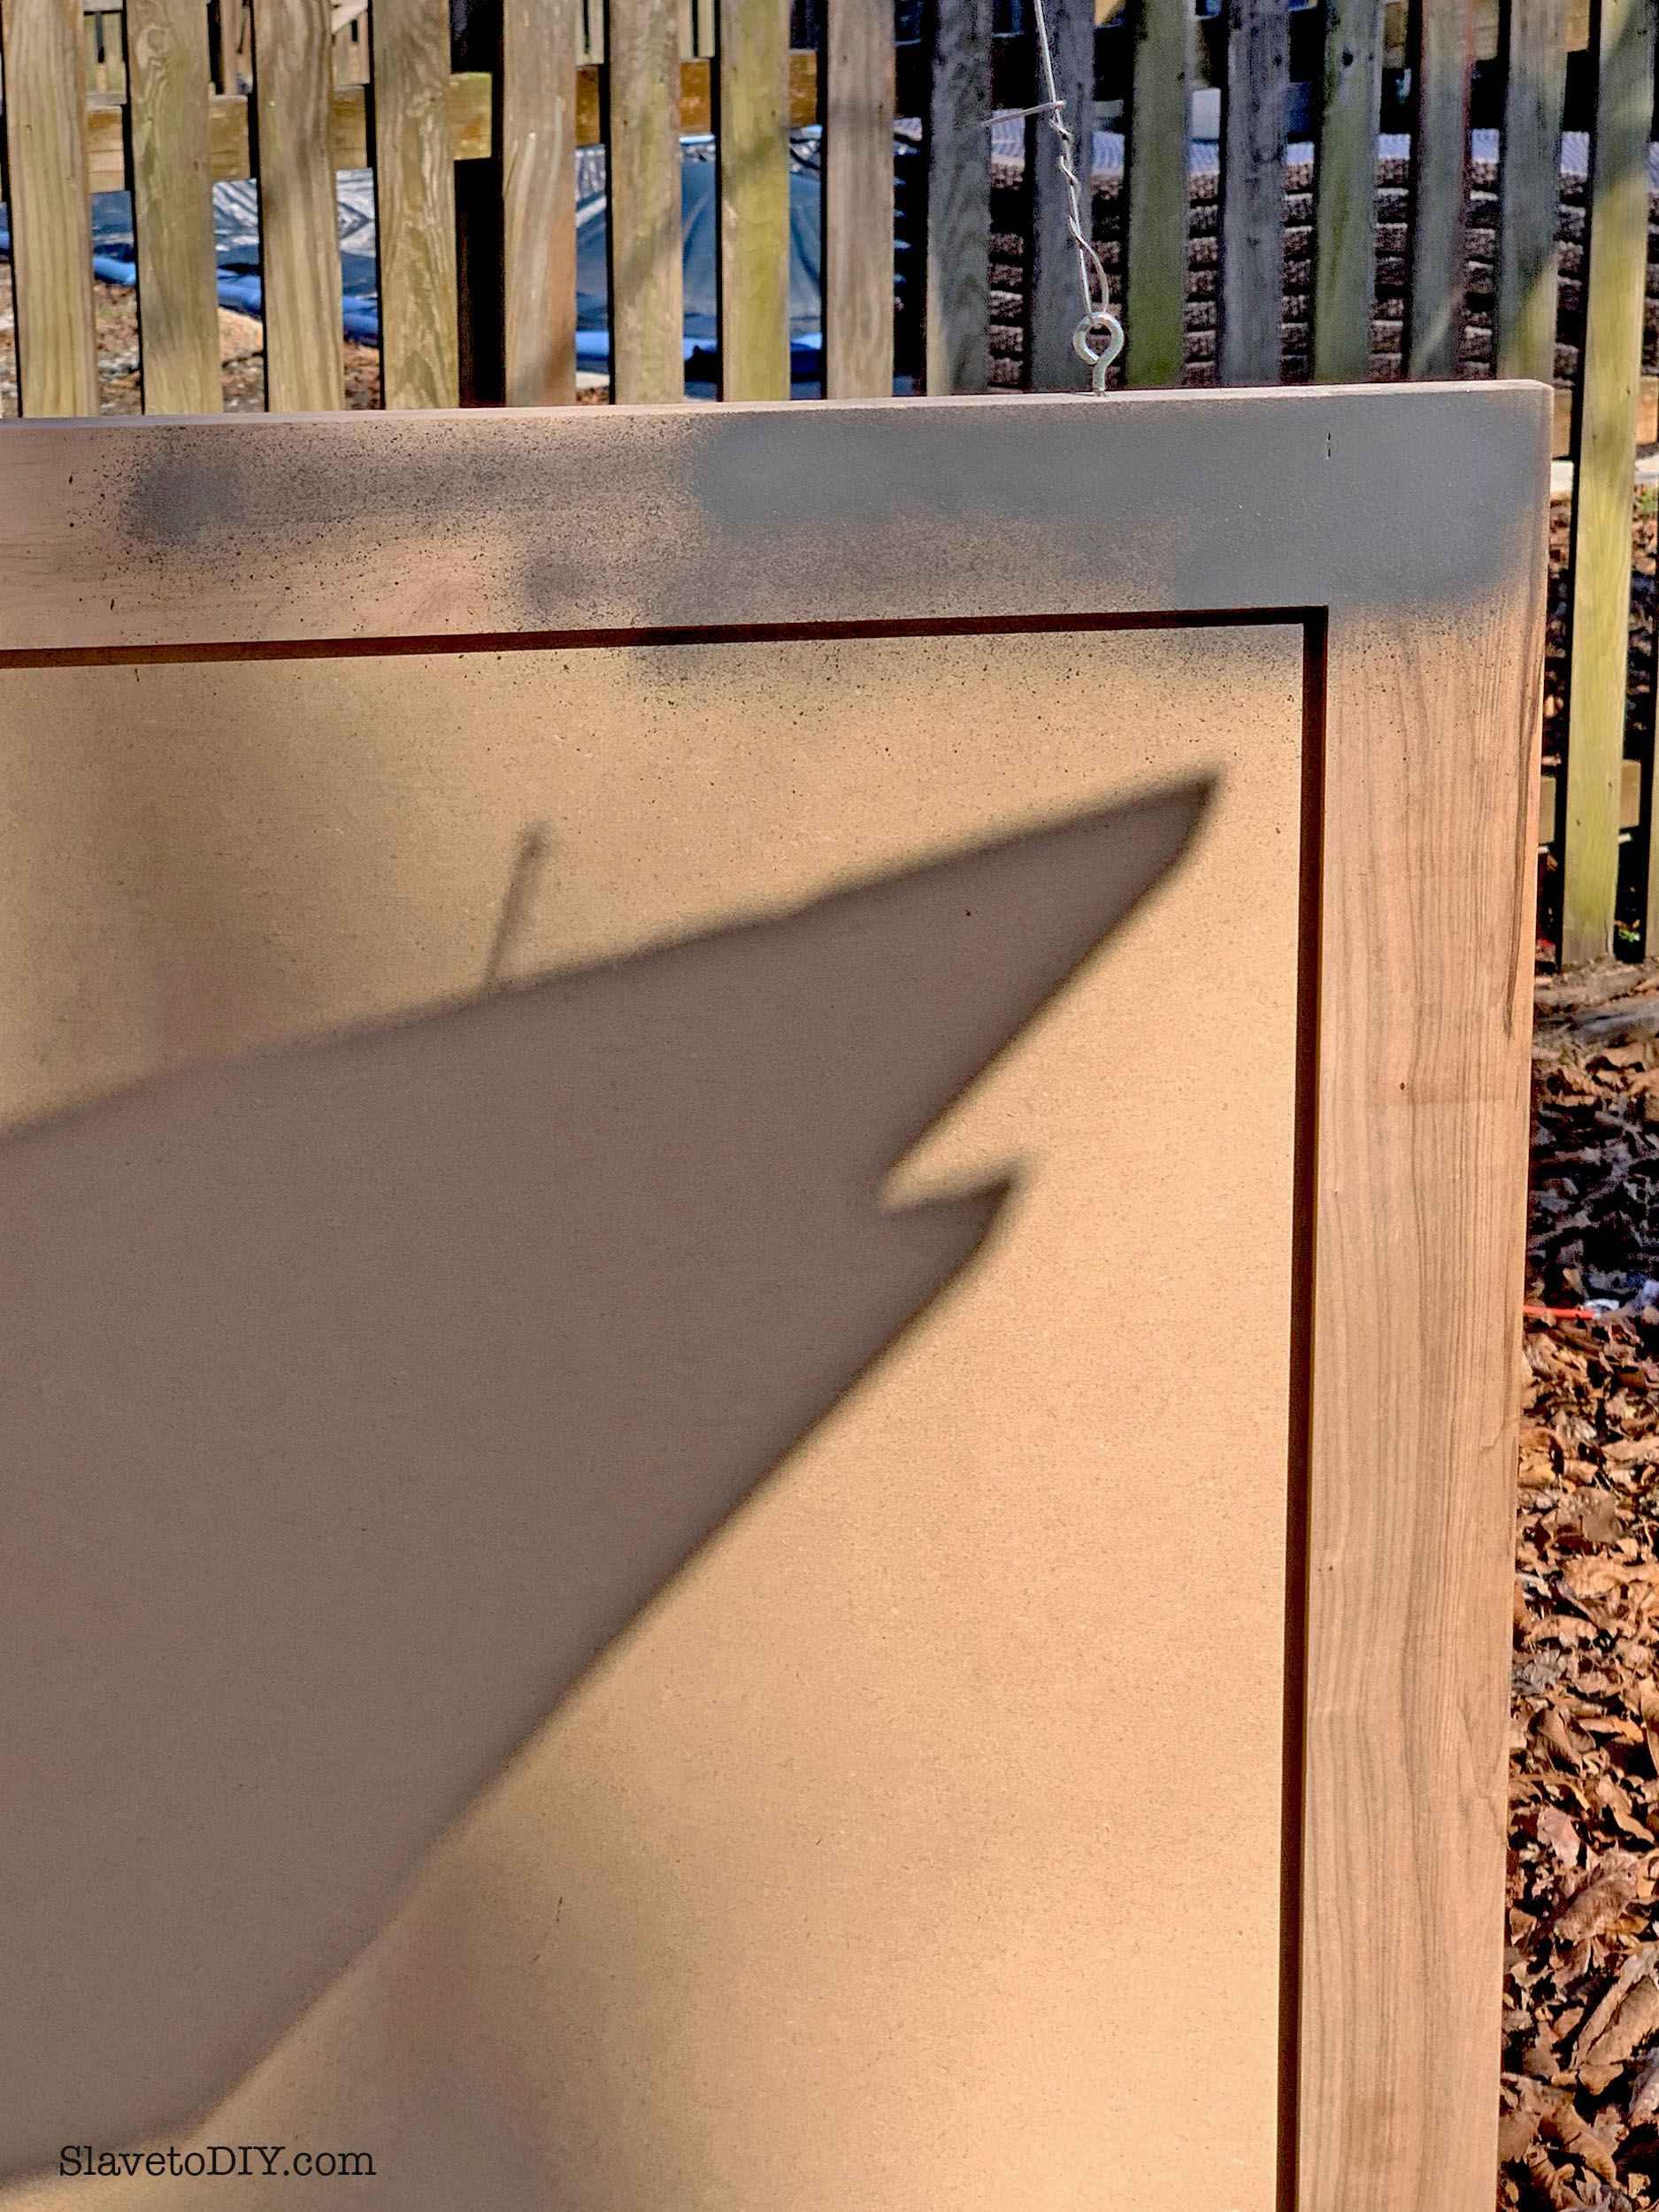
Rainman sprayed around the edges, then into the corners, then did a good layer, spraying back and forth across it.
How To Use An Inexpensive Paint Sprayer and Get Outstanding Results
Spraying around the outside:
How To Use An Inexpensive Paint Sprayer and Get Outstanding Results
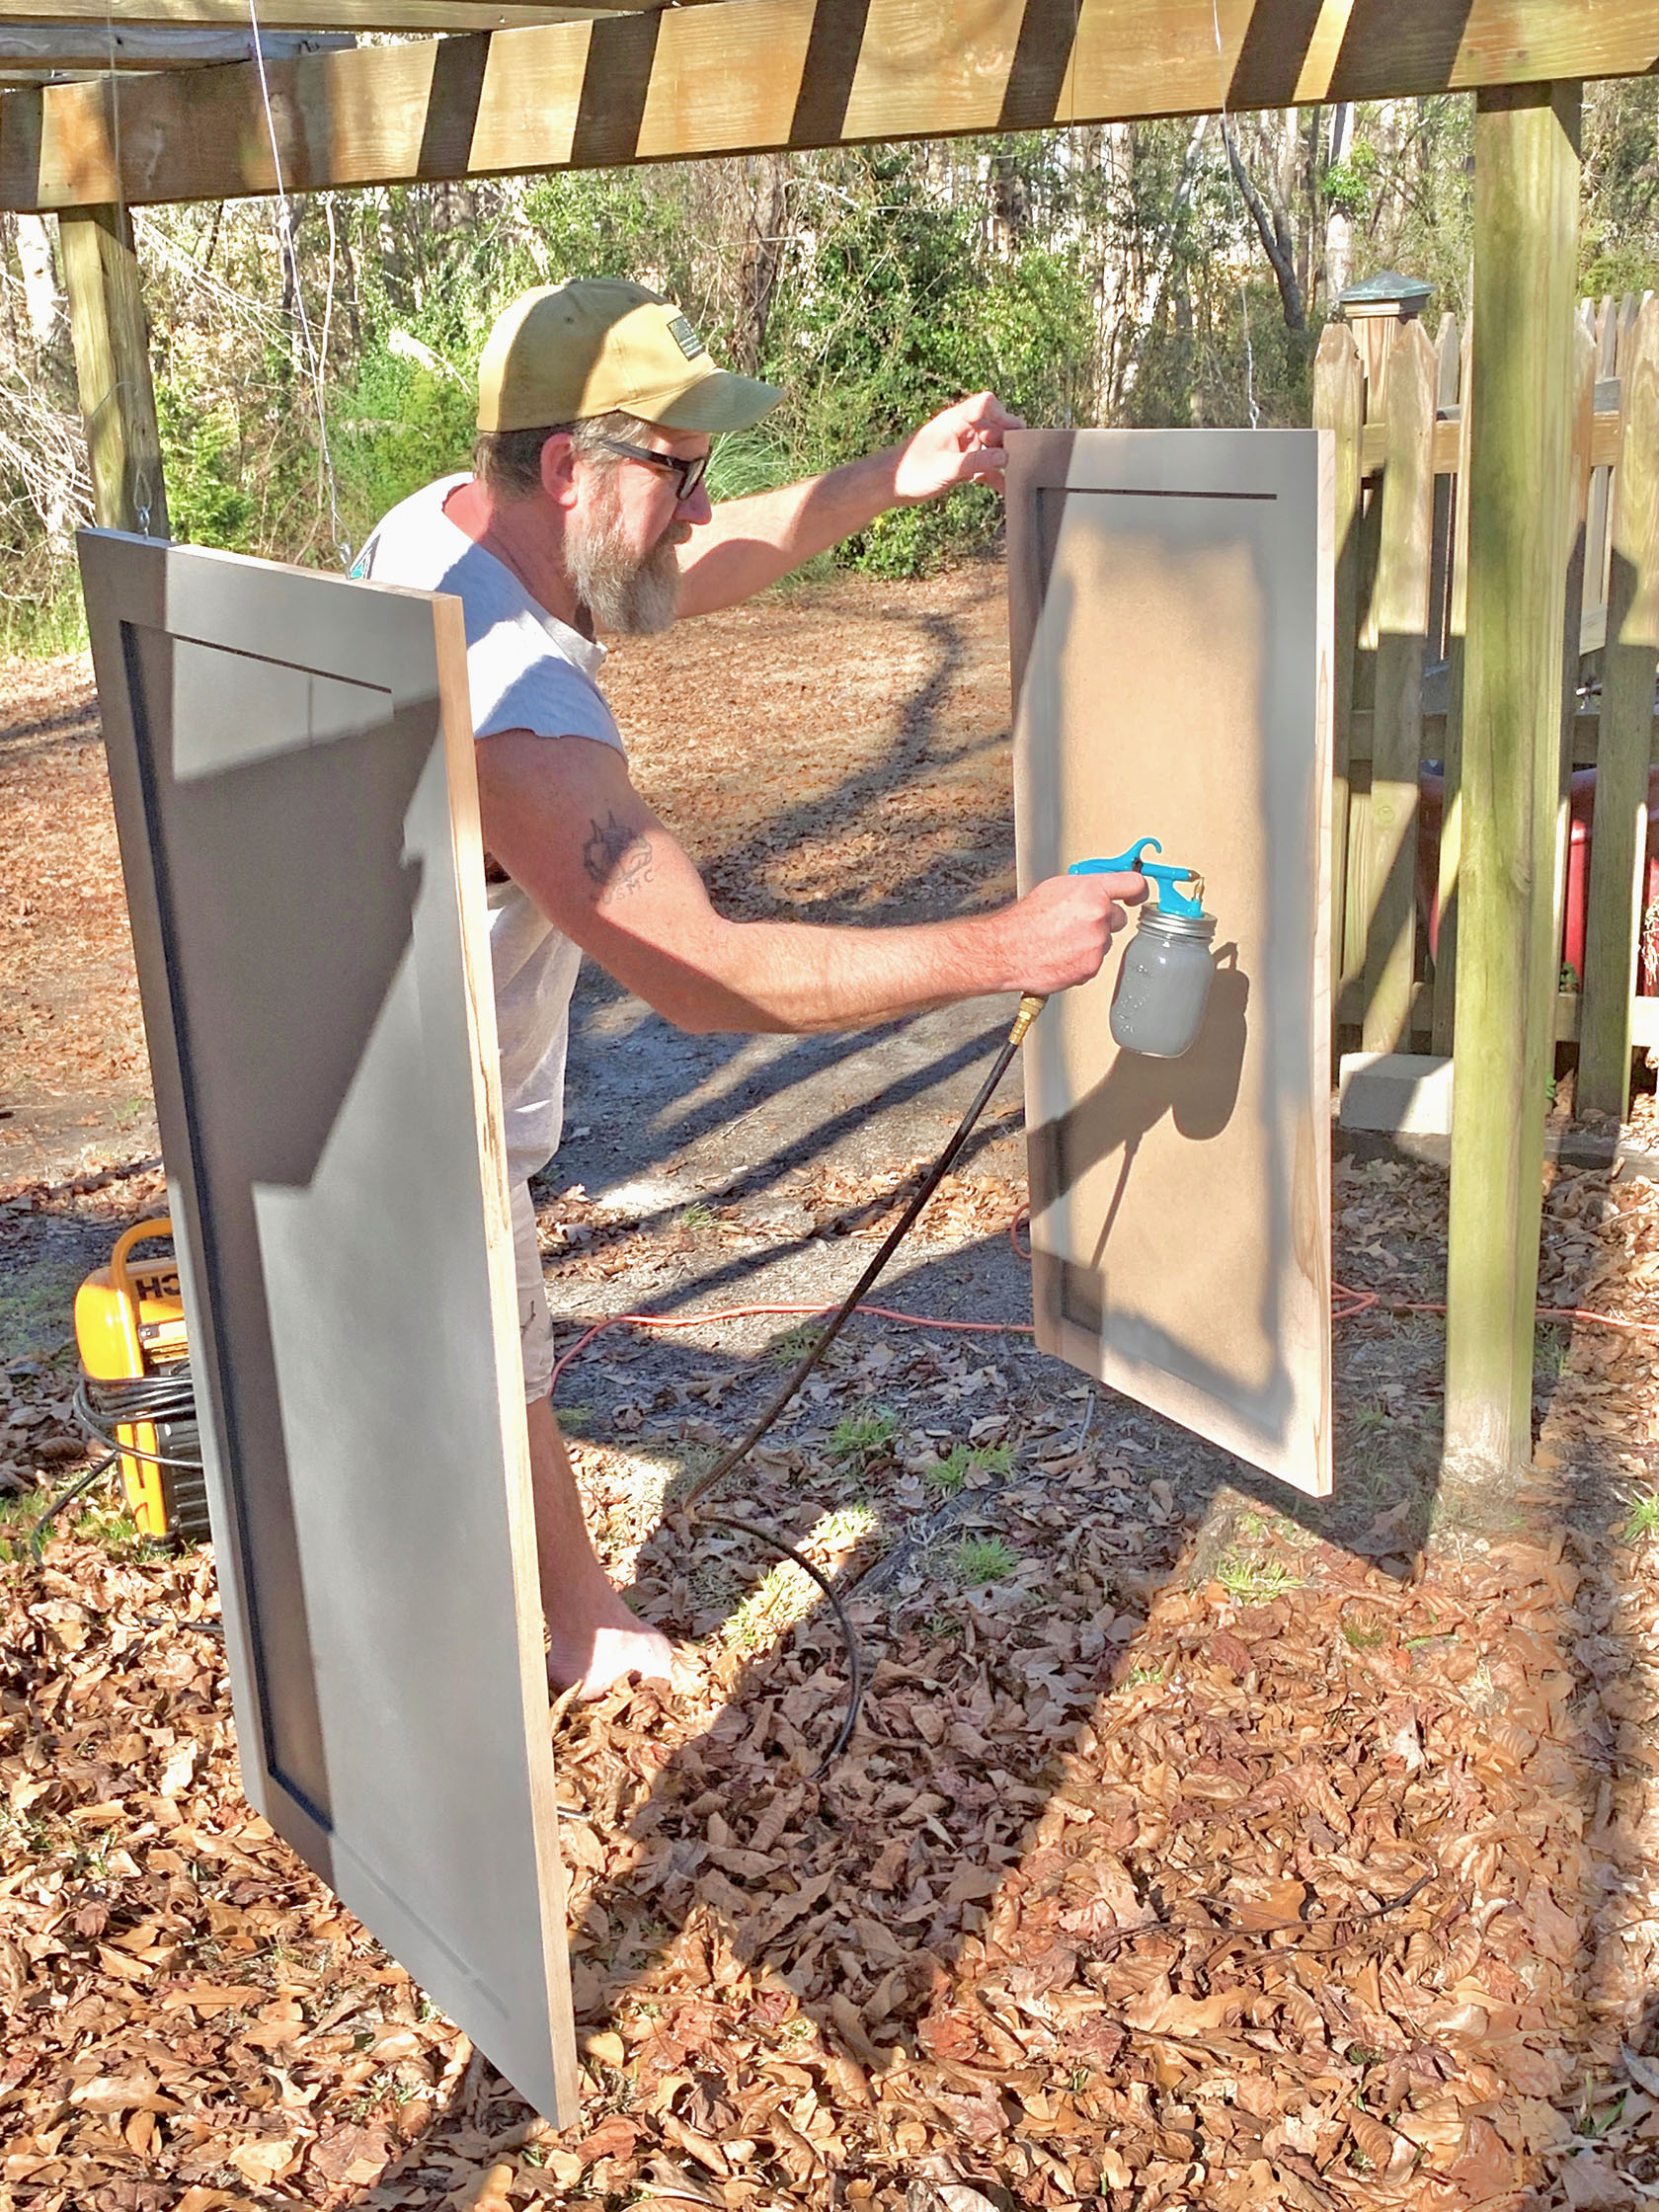
Door two: holding it steady to start spraying (this is where those eyelets and wire are handy).
How To Use An Inexpensive Paint Sprayer and Get Outstanding Results
Spray the front sides, then the back sides, and give it a little time to dry. Make sure you get any outside edges you will see.
The Dark and Moody Fireplace Update; Painting the doors with the Critter
Depending on the paint and color, you will need at least two coats. We did three for good measure and for even coverage.
TIP FROM RAINMAN: LIQUID NOZZLE MAY NEED TO BE CLEANED (PICK OFF ANY DRIED/DRYING PAINT), ESPECIALLY IF YOU LET THE GUN SIT BETWEEN APPLICATIONS.
Pose for a “finished painting” photo:
The Dark and Moody Fireplace Update; Finished Painted Doors
We took the doors into the downstairs shower (where there are no cats if we close the door) and where we had a rod across the middle and resecured them to the rod for three days to make sure they were really good and dry before we mounted them.
TIP FROM RAINMAN: CLEAN GUN WITH PAINT THINNER BEFORE PAINT DRIES ON GUN SURFACES.
Clean-up: Rainman rinsed out all of the paint from the mason jar, rinsed all of the tubing and the outside of the paint gun off, and then added mineral spirits to the jar. He sprayed that all out to clean the inside of the tubing and the inside of the gun. Then he dumped that out, added water, and did it again. Take the components apart and let them dry completely before you put it back together. We stored it back in the box and will definitely use it again!
TIP FROM RAINMAN: NOT SURE HOW LONG JAR GASKET WILL LAST; PROBABLY NEED TO ORDER SPARES.
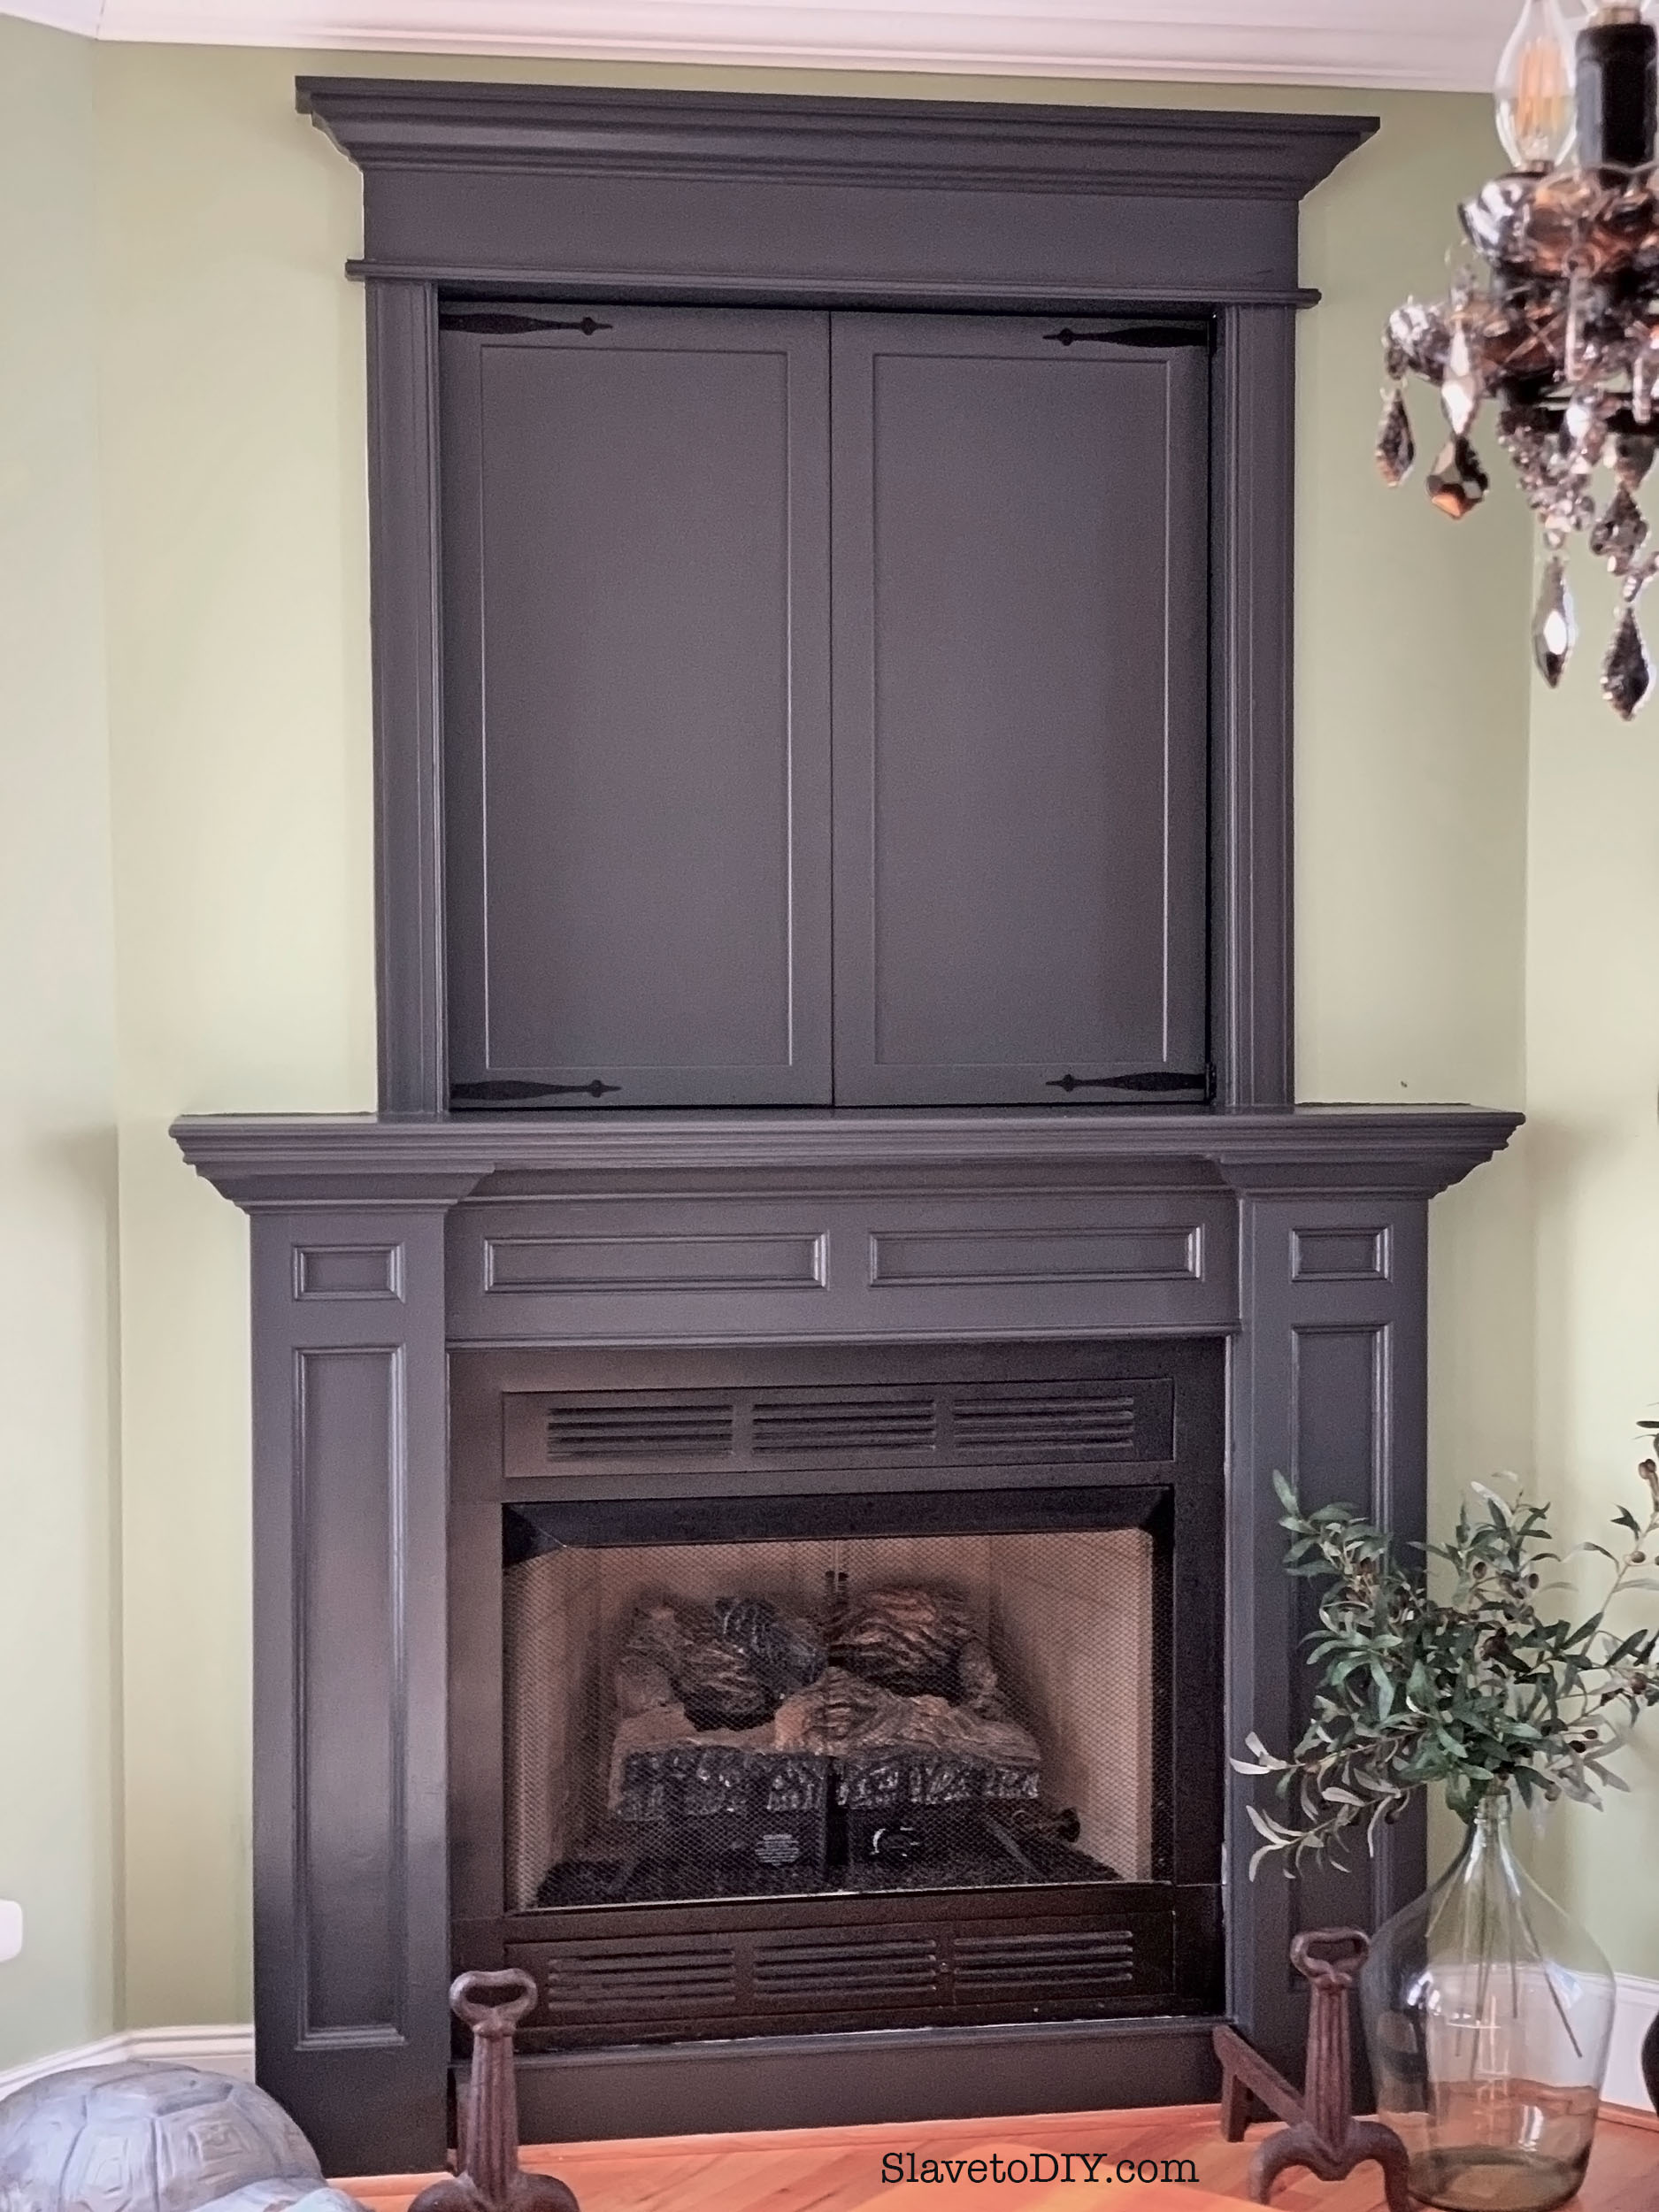
Here are the doors mounted on the fireplace:
How To Use An Inexpensive Paint Sprayer and Get Outstanding Results
Here they are mounted and COVERING THAT AWFUL GAPING HOLE!
How To Use An Inexpensive Paint Sprayer and Get Outstanding Results
We had already painted the rest of the fireplace with brushes and rollers. If I had realized how easy it was to use the sprayer and how little overspray there was, I would’ve used The Critter to paint that, as well. The finish looks VERY professional, and I’ll definitely be using it to do our cabinets once we get to that point.
I’d love to see your paint projects and hear about how this little paint gun worked for you! Please share in the comments below and check out more great project tutorials and inspiration over on our blog.
Cheers!
*Legal stuff:
I am honest about my experiences with different products and write because I enjoy it. I do however, have the opportunity to earn money for my writing, also.
Slavetodiy.com is a participant in the Amazon Services LLC Associates Program, an affiliate advertising program designed to provide a means for sites to earn advertising fees by advertising and linking to amazon.com. Amazon offers a small commission on products sold through their affiliate links. Each of your purchases via our Amazon affiliation links supports our cause at no additional cost to you.
If a blogger links to an Amazon product (with a special code for affiliates embedded in the link), and a reader places an item in their “shopping cart” through that link within 24 hours of clicking the link, the blogger gets a small percentage of the sale. Amazon links are not “pay per click.” If you click on the product link and stay around Amazon and purchase something else, however, I will get a commission on that sale.
Slavetodiy.com is also a VigLink affiliate advertiser which works similarly.
I used to do new gift wrap every year with different ribbons- but since we usually travel for Christmas all of my packages and pretty bows were smushed and the paper was torn by the time we arrived at our destination. So, I had an idea for something MUCH more forgiving and SIGNIFICANTLY cheaper. I’ve used this same set for several years now and I LOVE the effect. It’s simple, classic, and reminds me of years gone by! The great thing is, it is VERY inexpensive for those of us on a budget and comes in a large roll so you can use it for a long time! I’m including Amazon links so you can find everything quickly and easily!
*This post may contain affiliate links. Please see full disclosure at the end of the post.
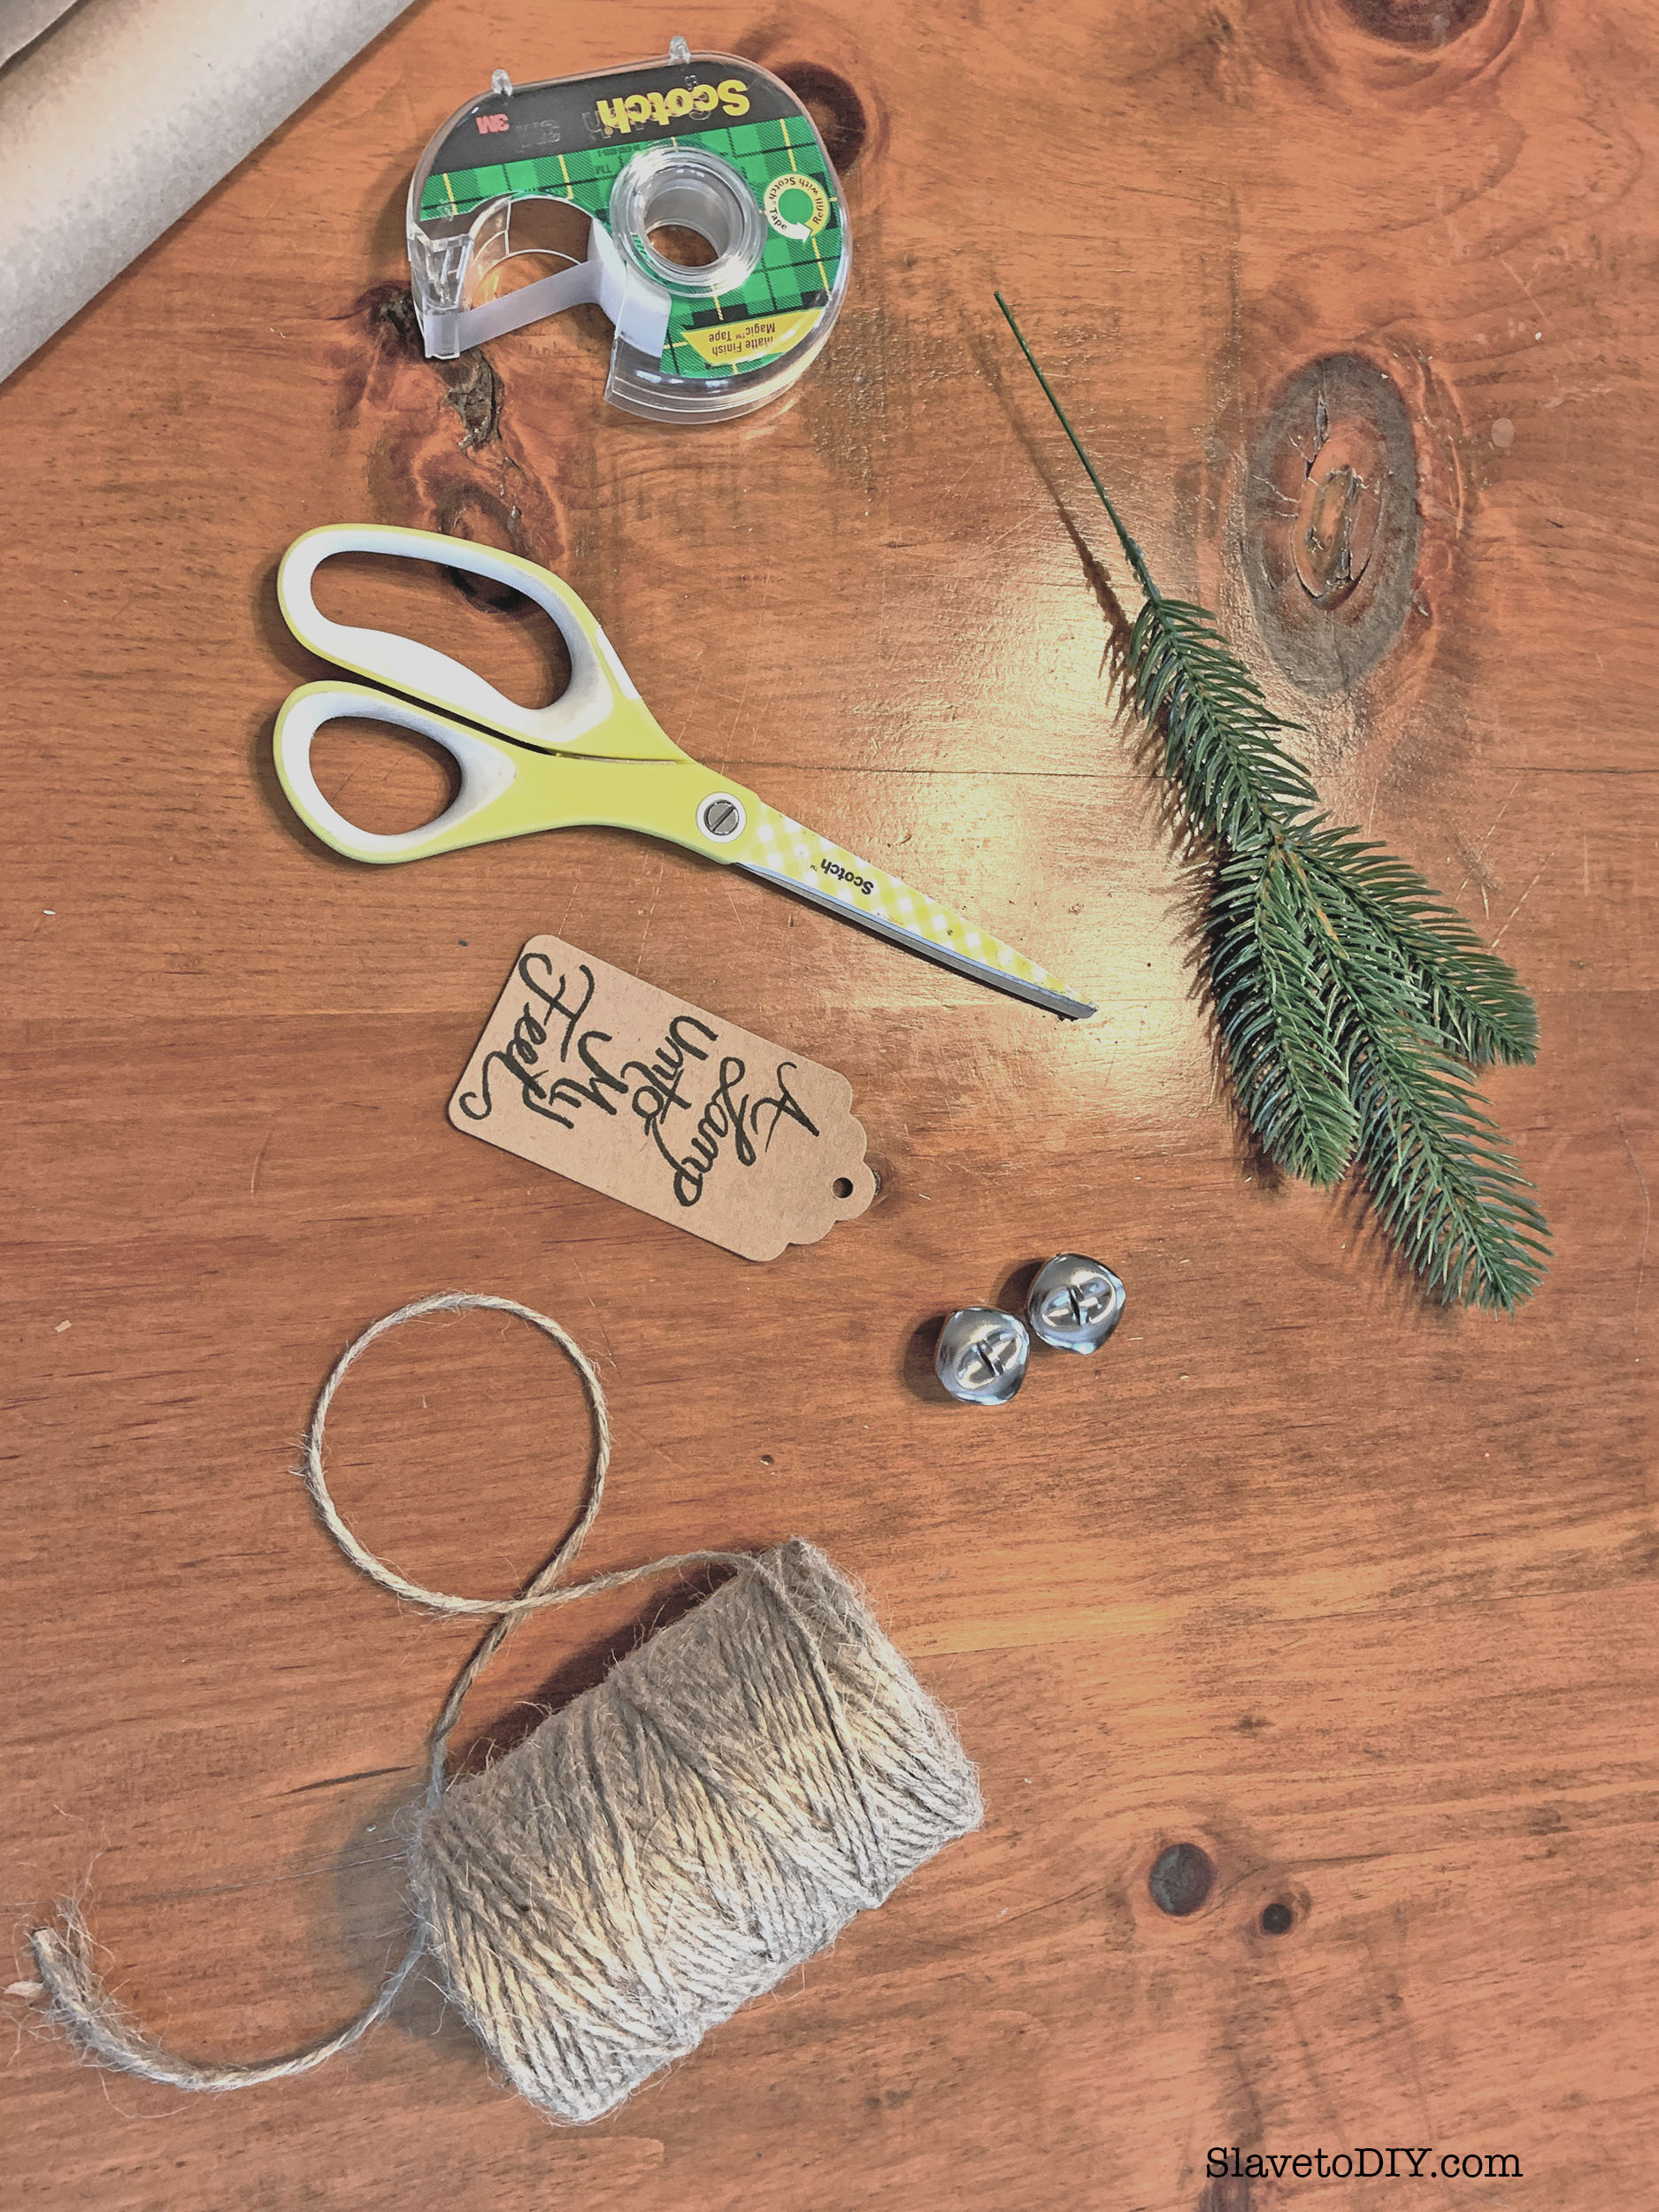
The cool thing is, with just a few accessories this gift wrap set is classic and also somehow very NOW (for all of you farmhouse fanatics!). And guess what, you can wrap a medium package for $1.10 each (as shown in the photo)! Even very large packages wrap for only pennies more. I purchased the paper and twine two years ago and still have plenty for this Christmas and have only had to repurchase the decorations.
How To Do Classic Christmas Gift Wrap For $1 Per Package
Artificial Pine Needles (30) – $.50 each (This is the most expensive piece, so if you have these in your yard, I’d use those- we just don’t have them where I live and these are VERY convincing)
As I write this, the entire kit costs about $50 to wrap ALL of your gifts. I can’t wait to see all of your beautiful presents!
How To Do Classic Christmas Gift Wrap For $1 Per Package
If you’re looking for a beginner calligraphy pen set to do that cool lettering, I found this one easy to use and inexpensive. This is literally (and obviously) my first attempt at calligraphy lettering and it’s cute even when it’s not great, so give it a shot!
For more great Christmas decor and DIY ideas check out our blog!
Cheers!
*Legal stuff:
I am honest about my experiences with different products and write because I enjoy it. I do however, have the opportunity to earn money for my writing, also.
Slavetodiy.com is a participant in the Amazon Services LLC Associates Program, an affiliate advertising program designed to provide a means for sites to earn advertising fees by advertising and linking to amazon.com. Amazon offers a small commission on products sold through their affiliate links. Each of your purchases via our Amazon affiliation links supports our cause at no additional cost to you.
If a blogger links to an Amazon product (with a special code for affiliates embedded in the link), and a reader places an item in their “shopping cart” through that link within 24 hours of clicking the link, the blogger gets a small percentage of the sale. Amazon links are not “pay per click.” If you click on the product link and stay around Amazon and purchase something else, however, I will get a commission on that sale.
Slavetodiy.com is also a VigLink affiliate advertiser which works similarly.
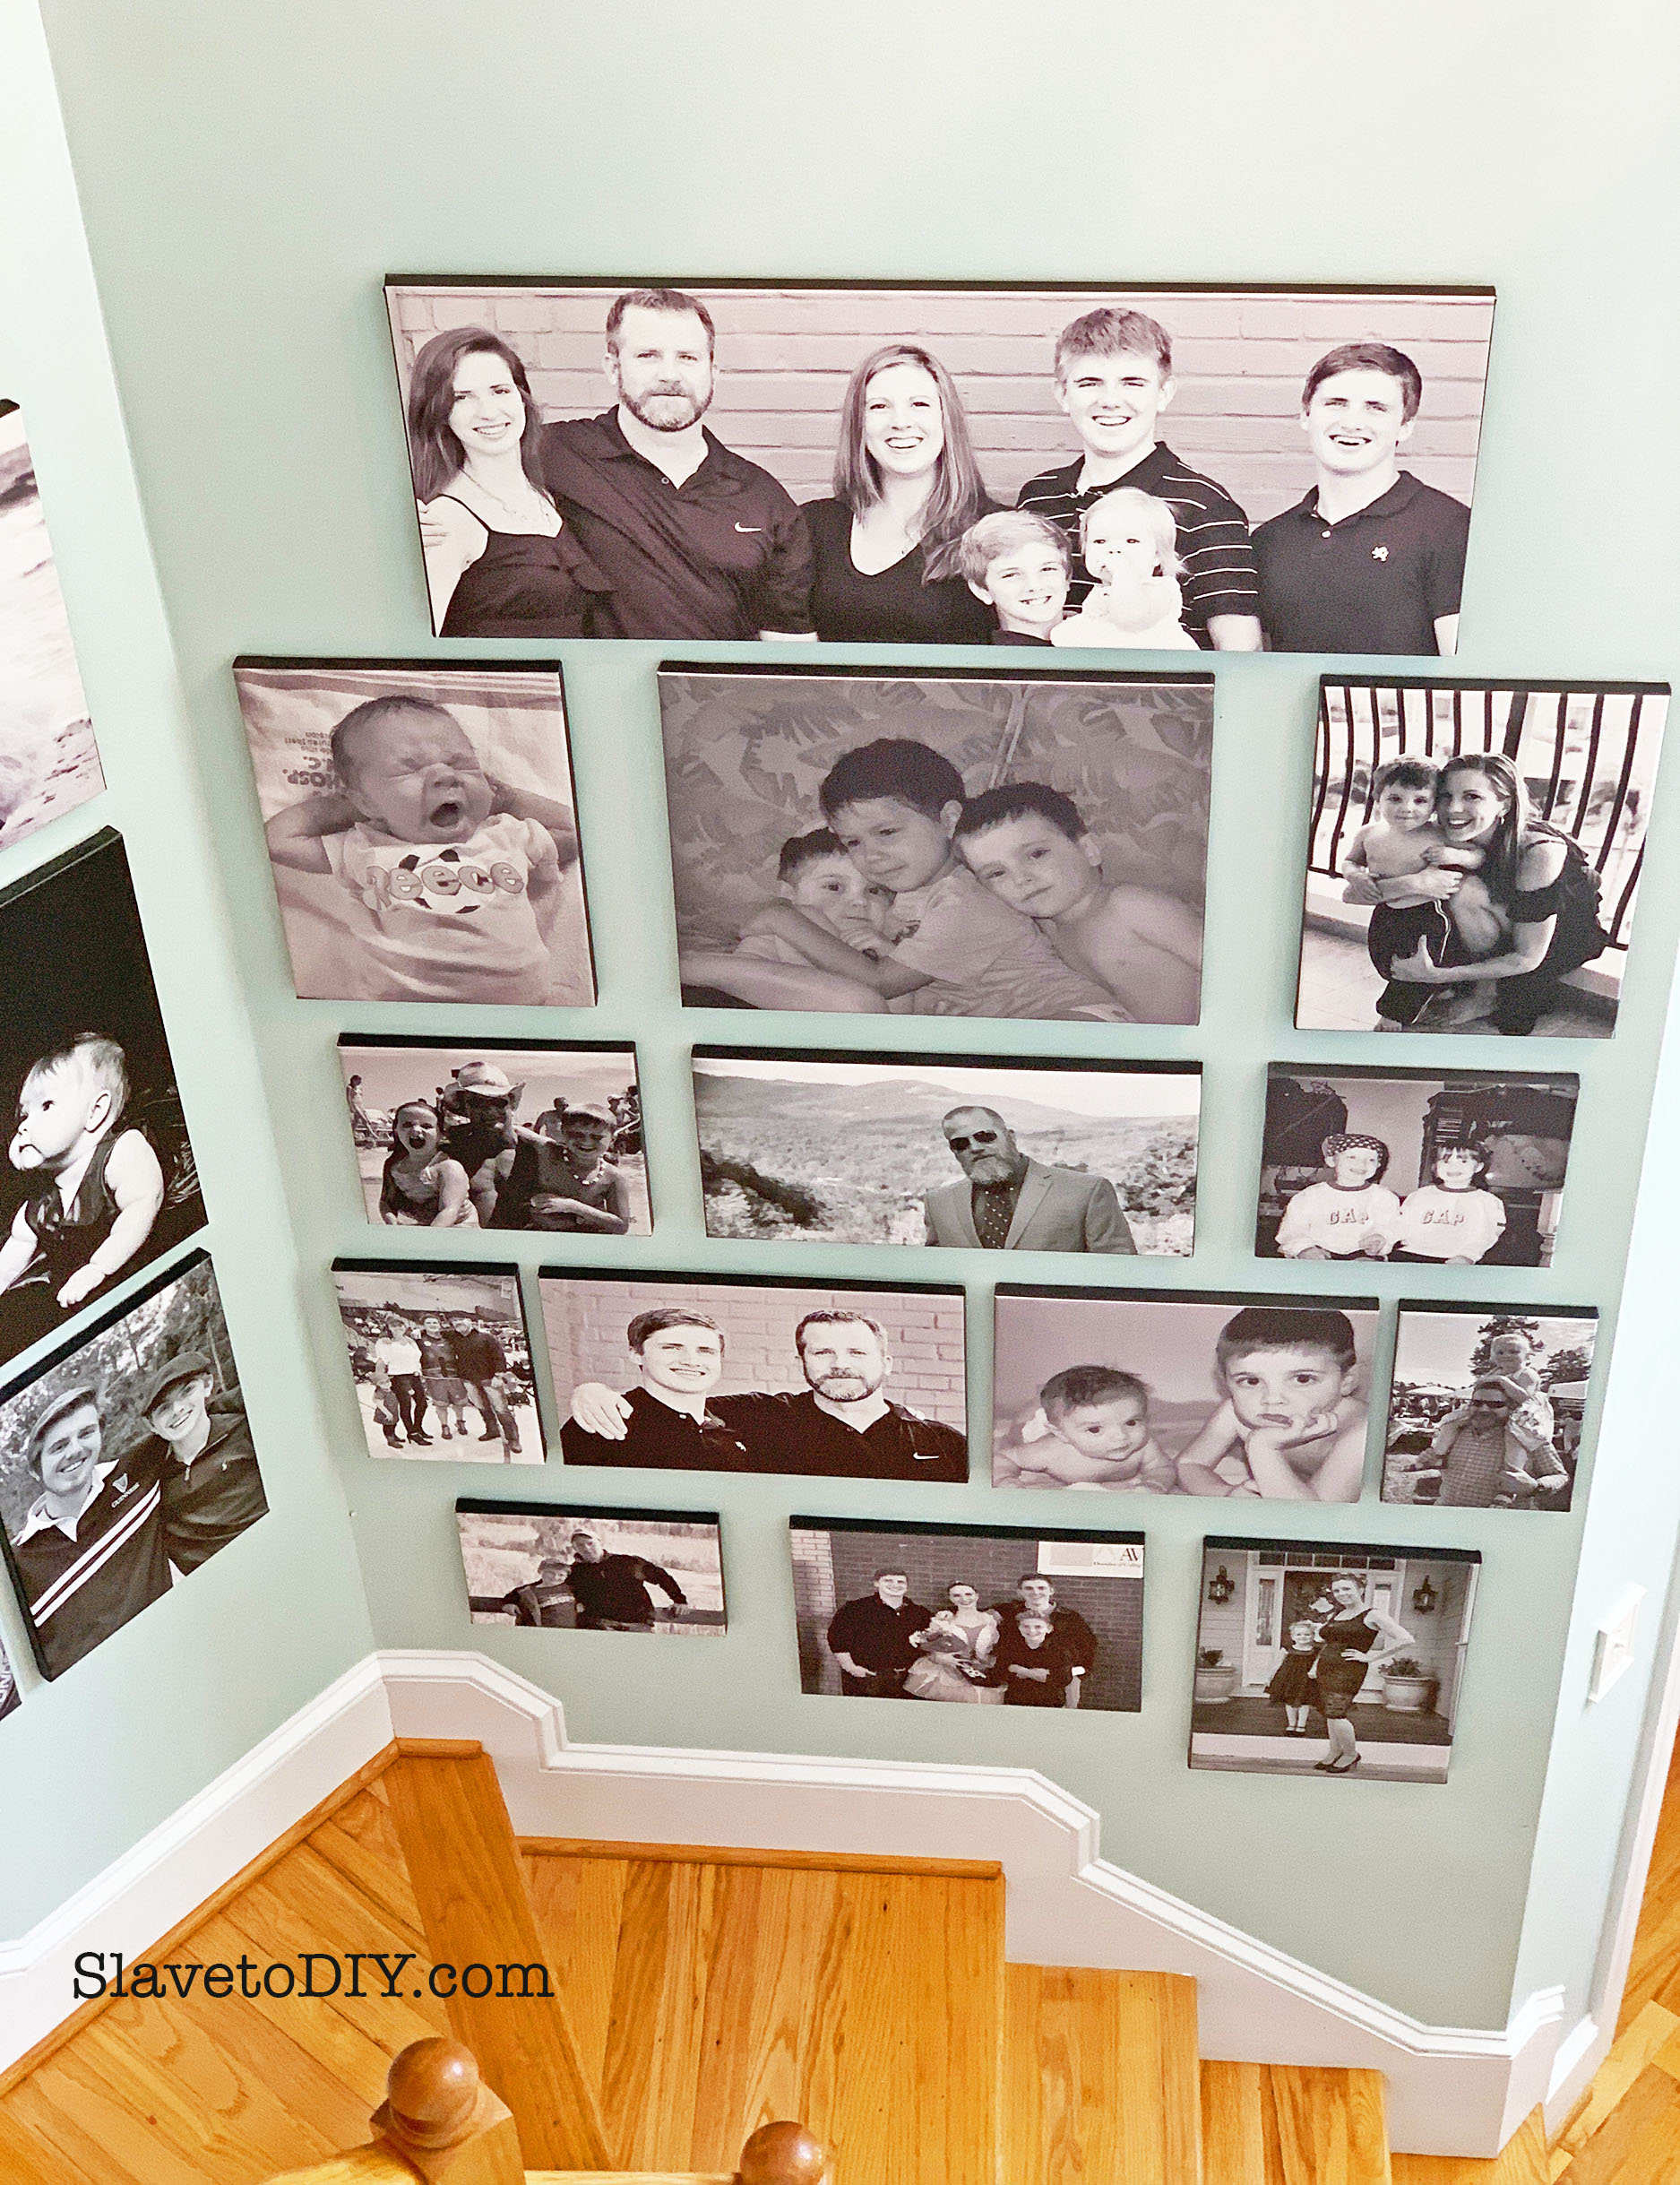
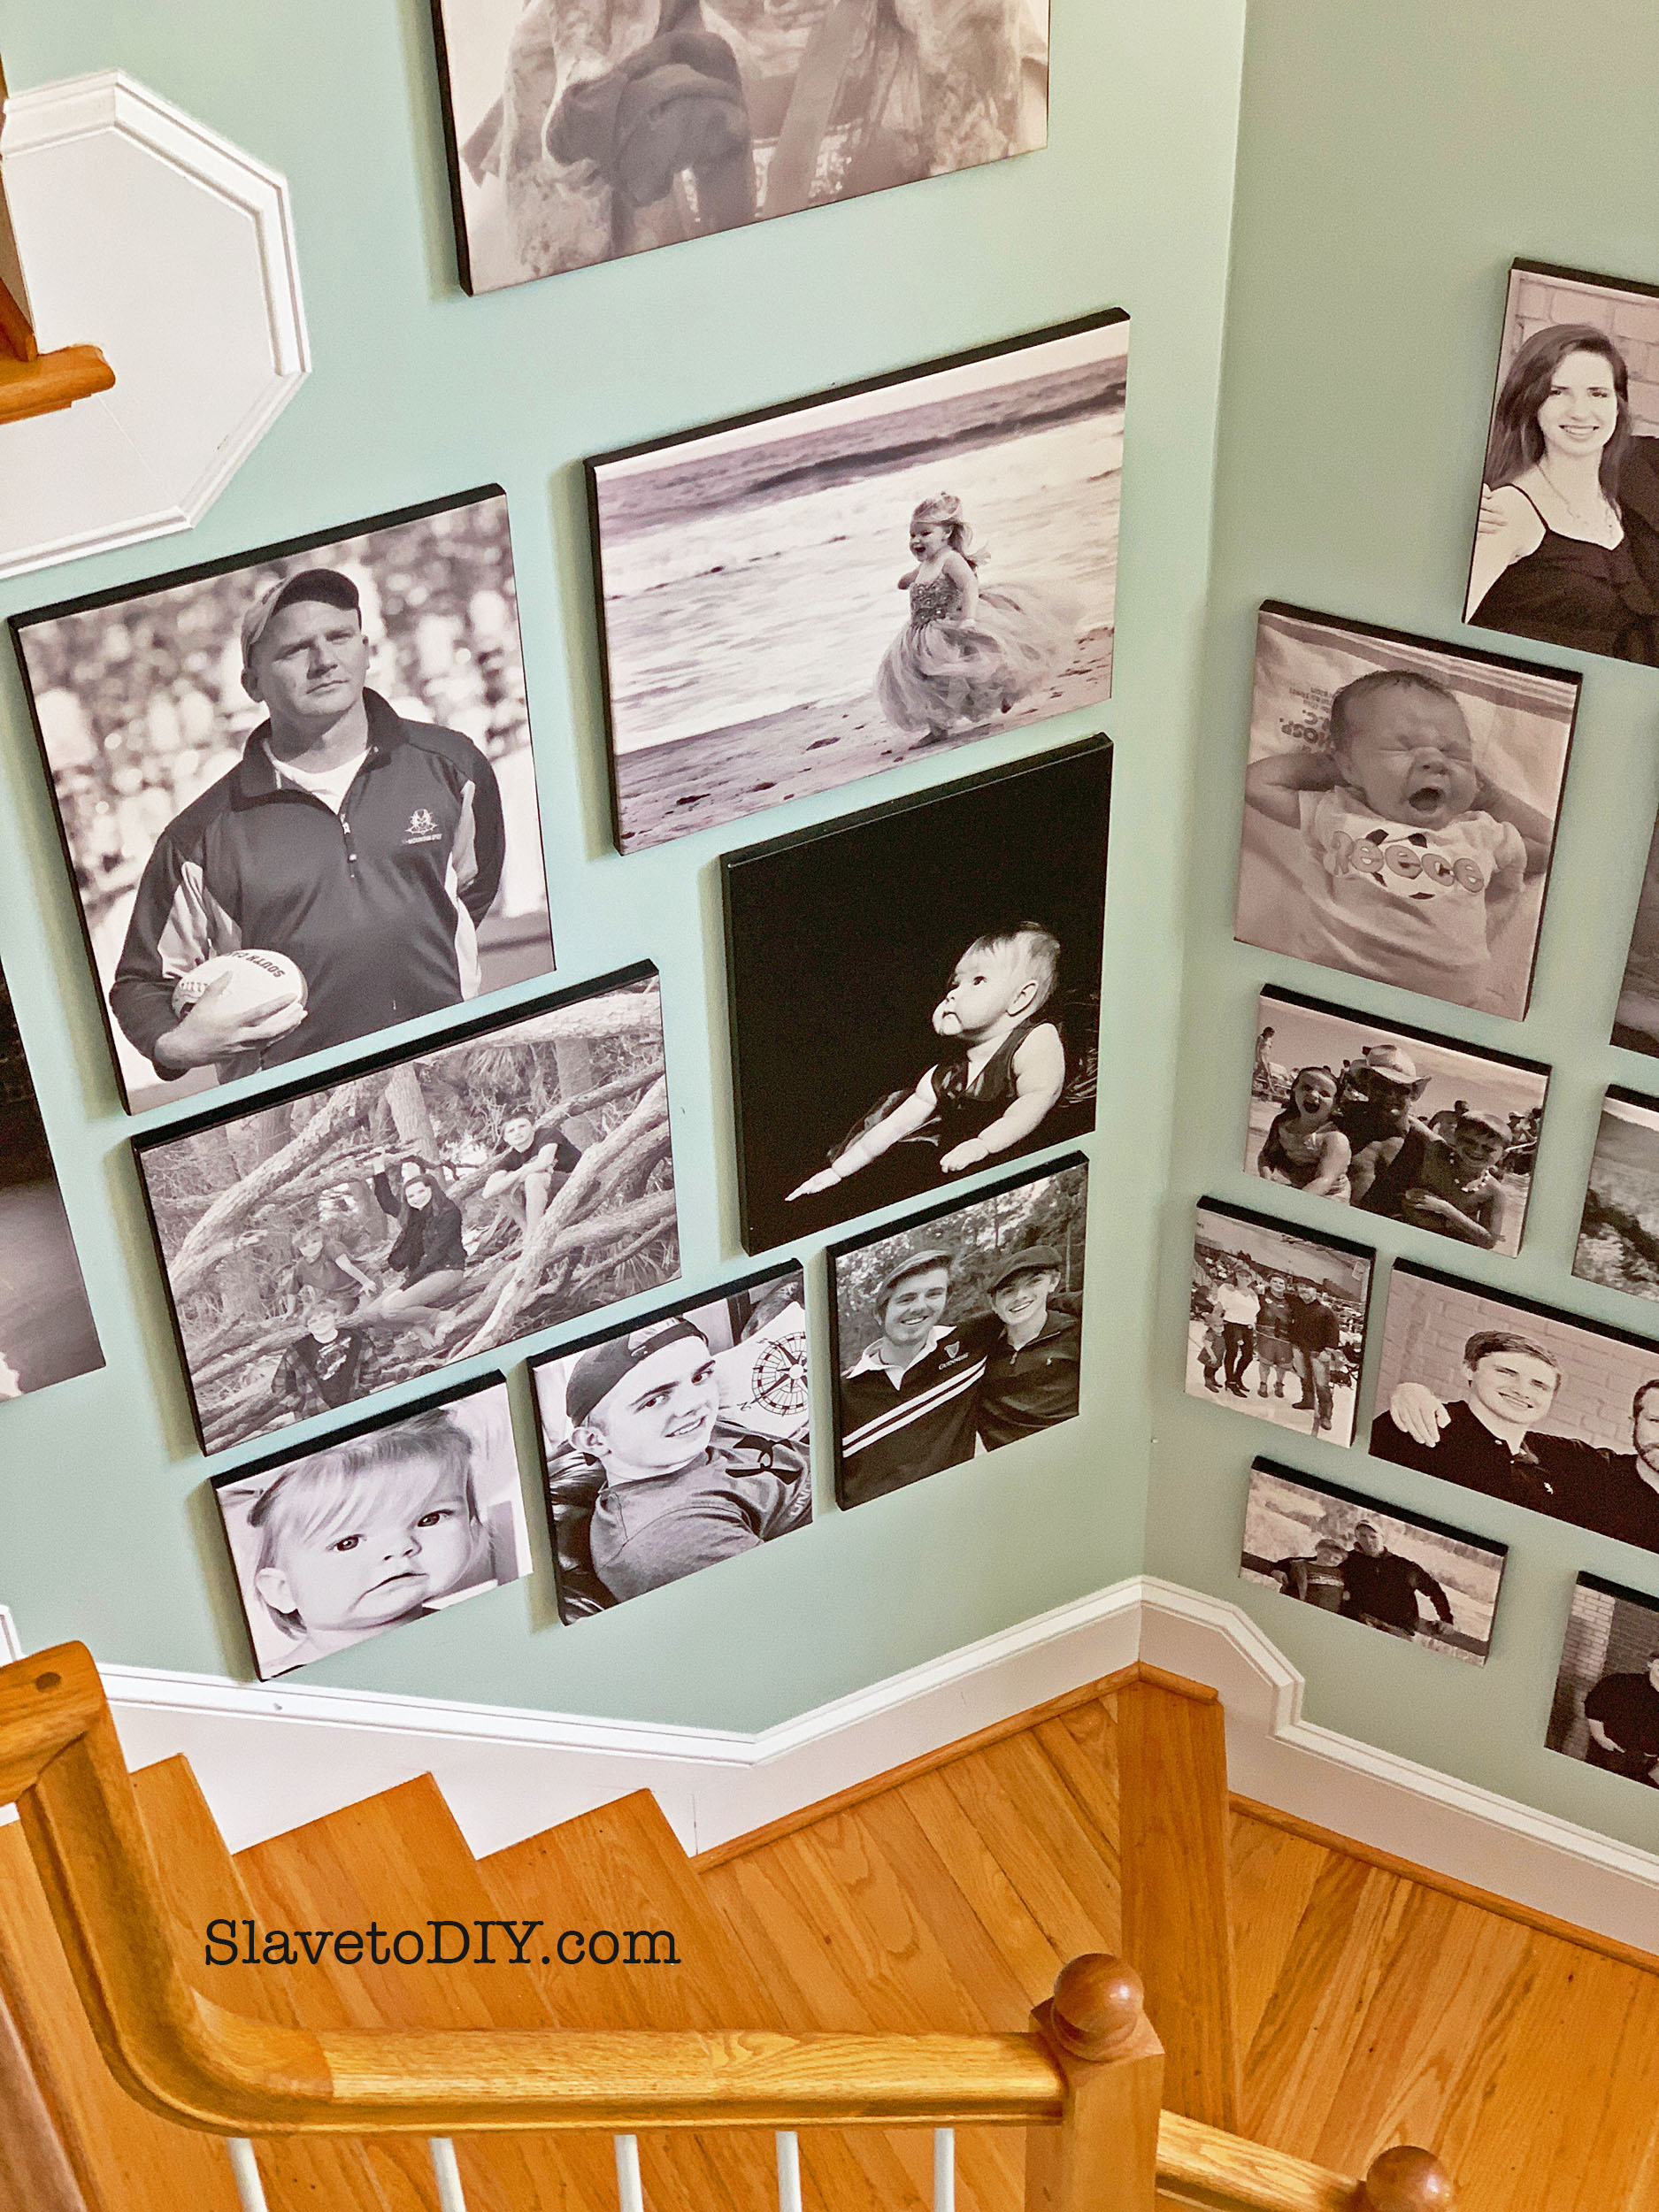
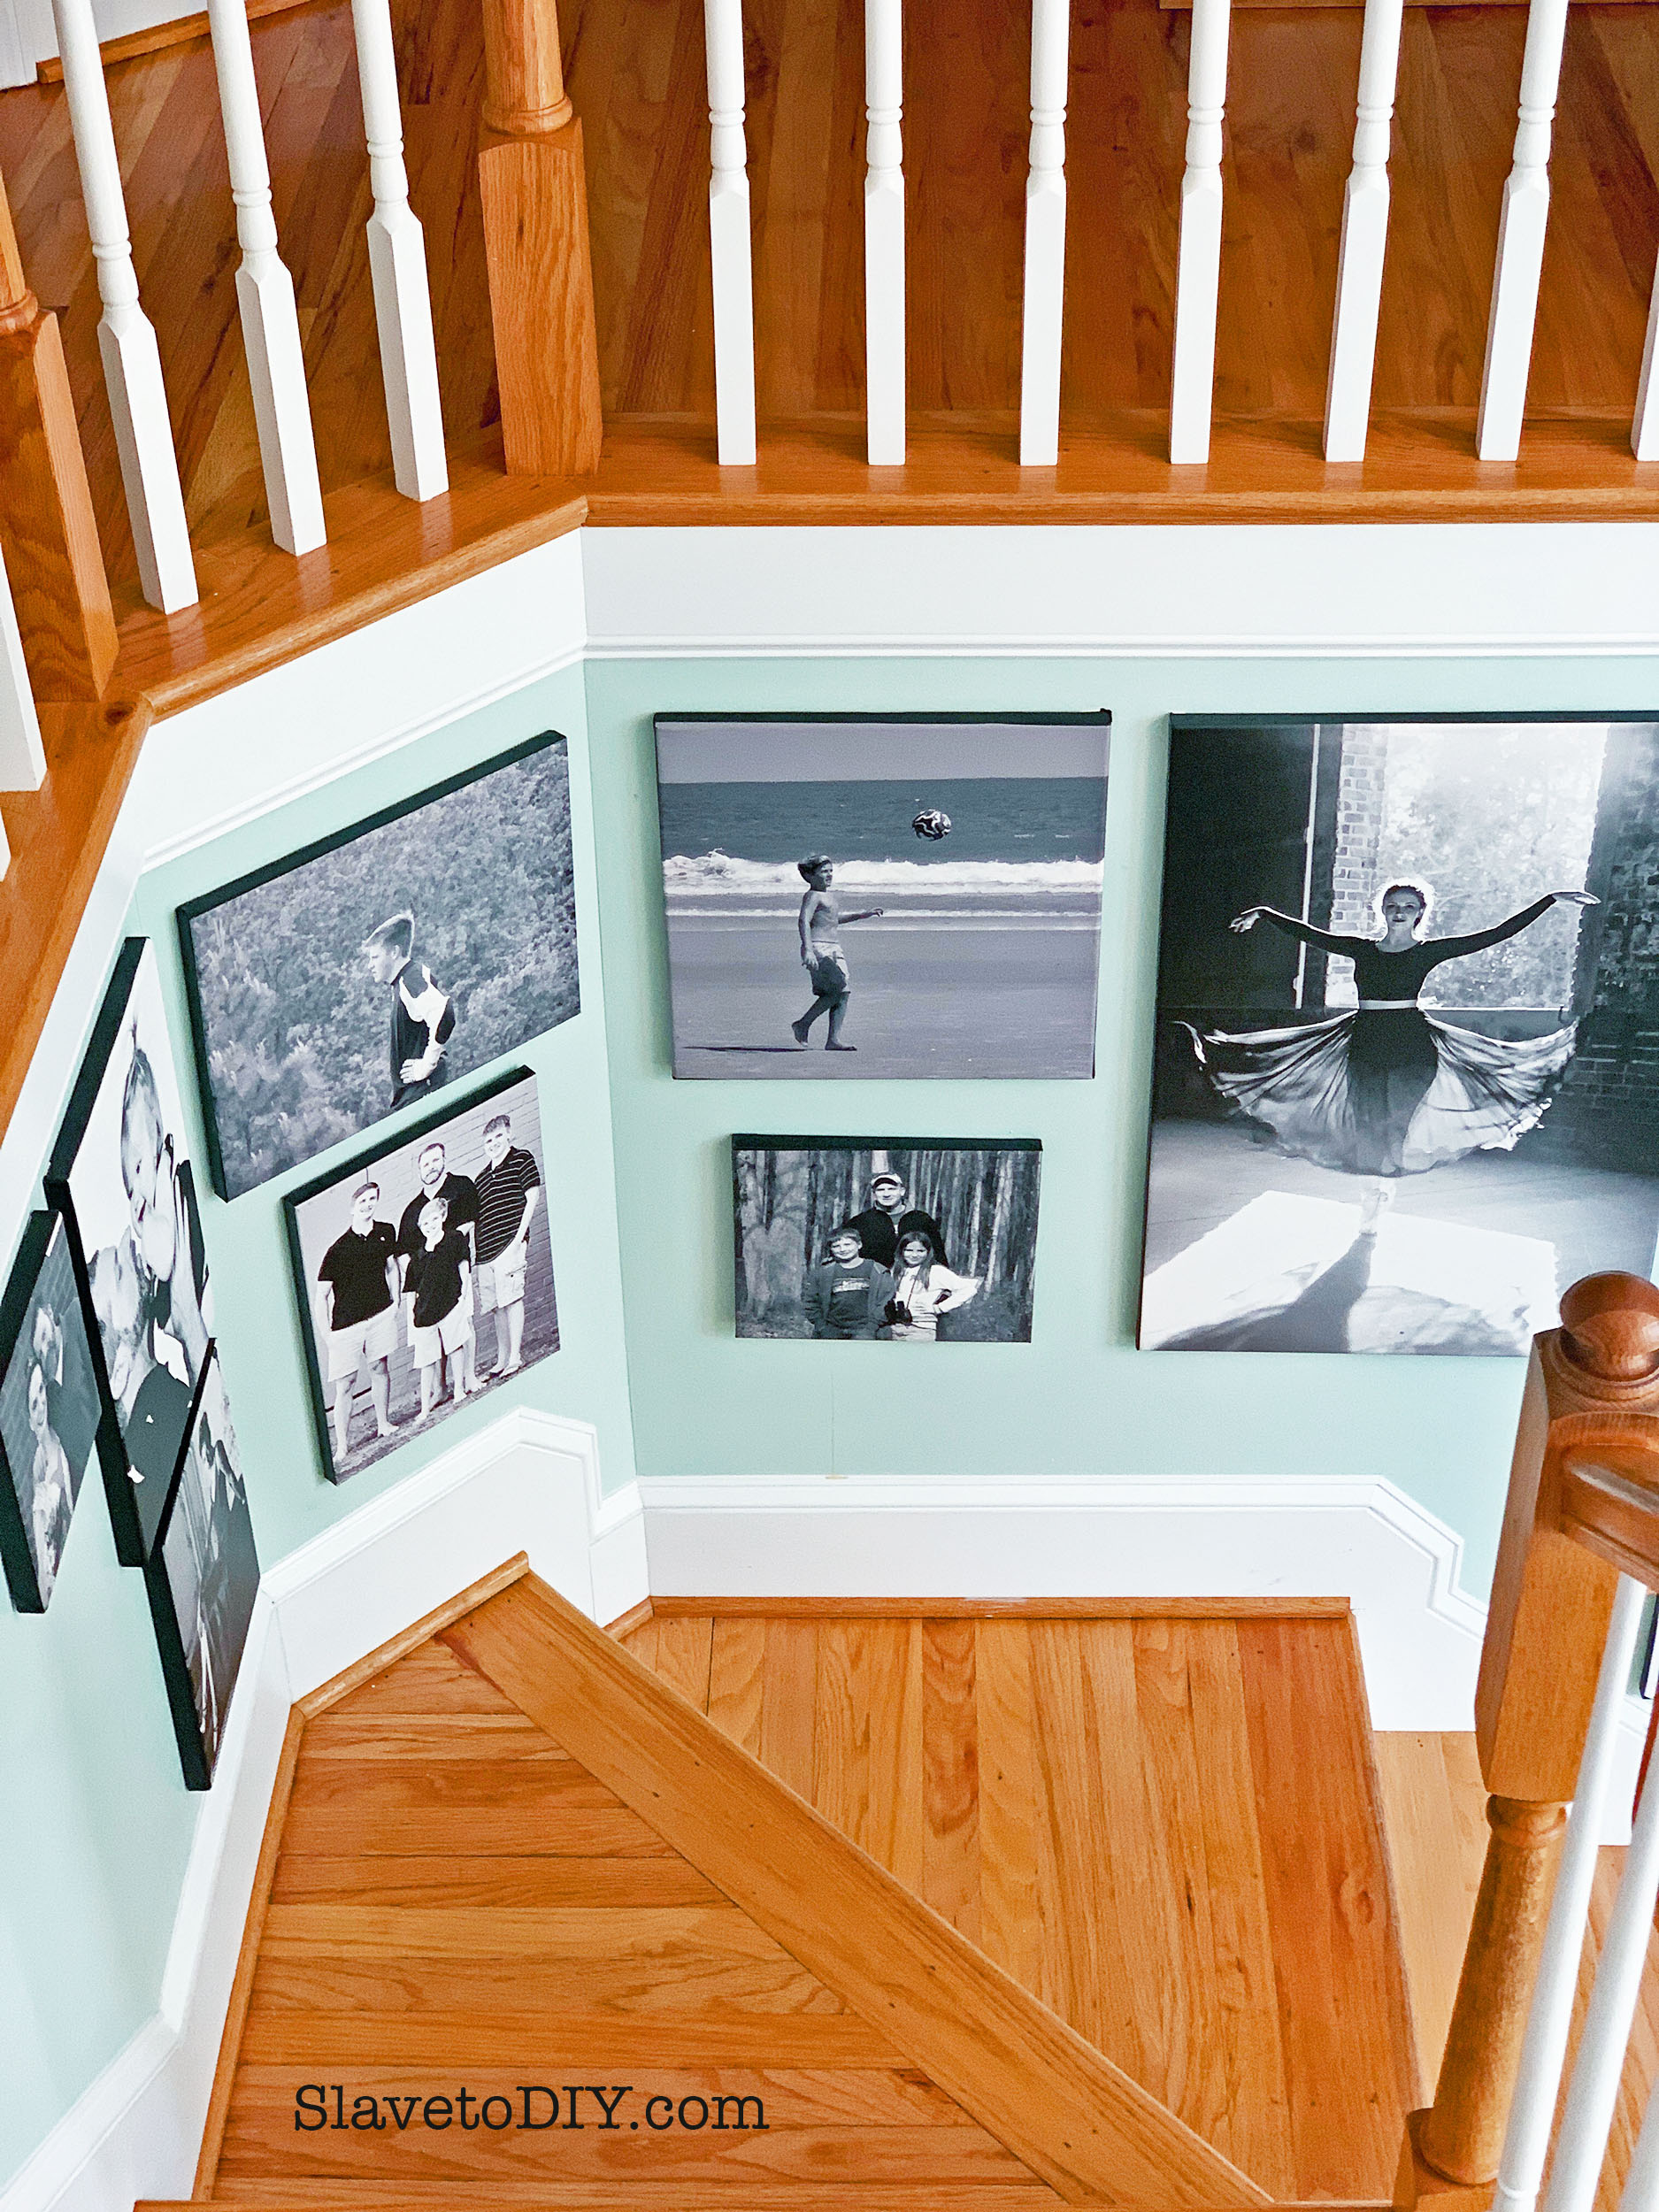
One of the things I get the most compliments on at our house is my giant, black and white canvas gallery wall. It is always a work in progress (sort of like arranging built ins) because I add to it on a regular basis. In fact, this wall has been in work for upwards of eight years!
We have five kids, and three of them are now grown: in college or graduated from college and newly in the work force. That definitely makes me feel old sometimes, but it helps me tremendously to have photos of the people that I love (AND MISS) in a place where I get to look at them on my way up and down the stairs, every day!
The problem with canvasses, obviously, is the cost. Regularly priced large, custom canvasses easily run into the hundreds of dollars. I can’t afford that, but I LOVE the look.
*This post may contain affiliate links. Please see full disclosure at the end of the post.
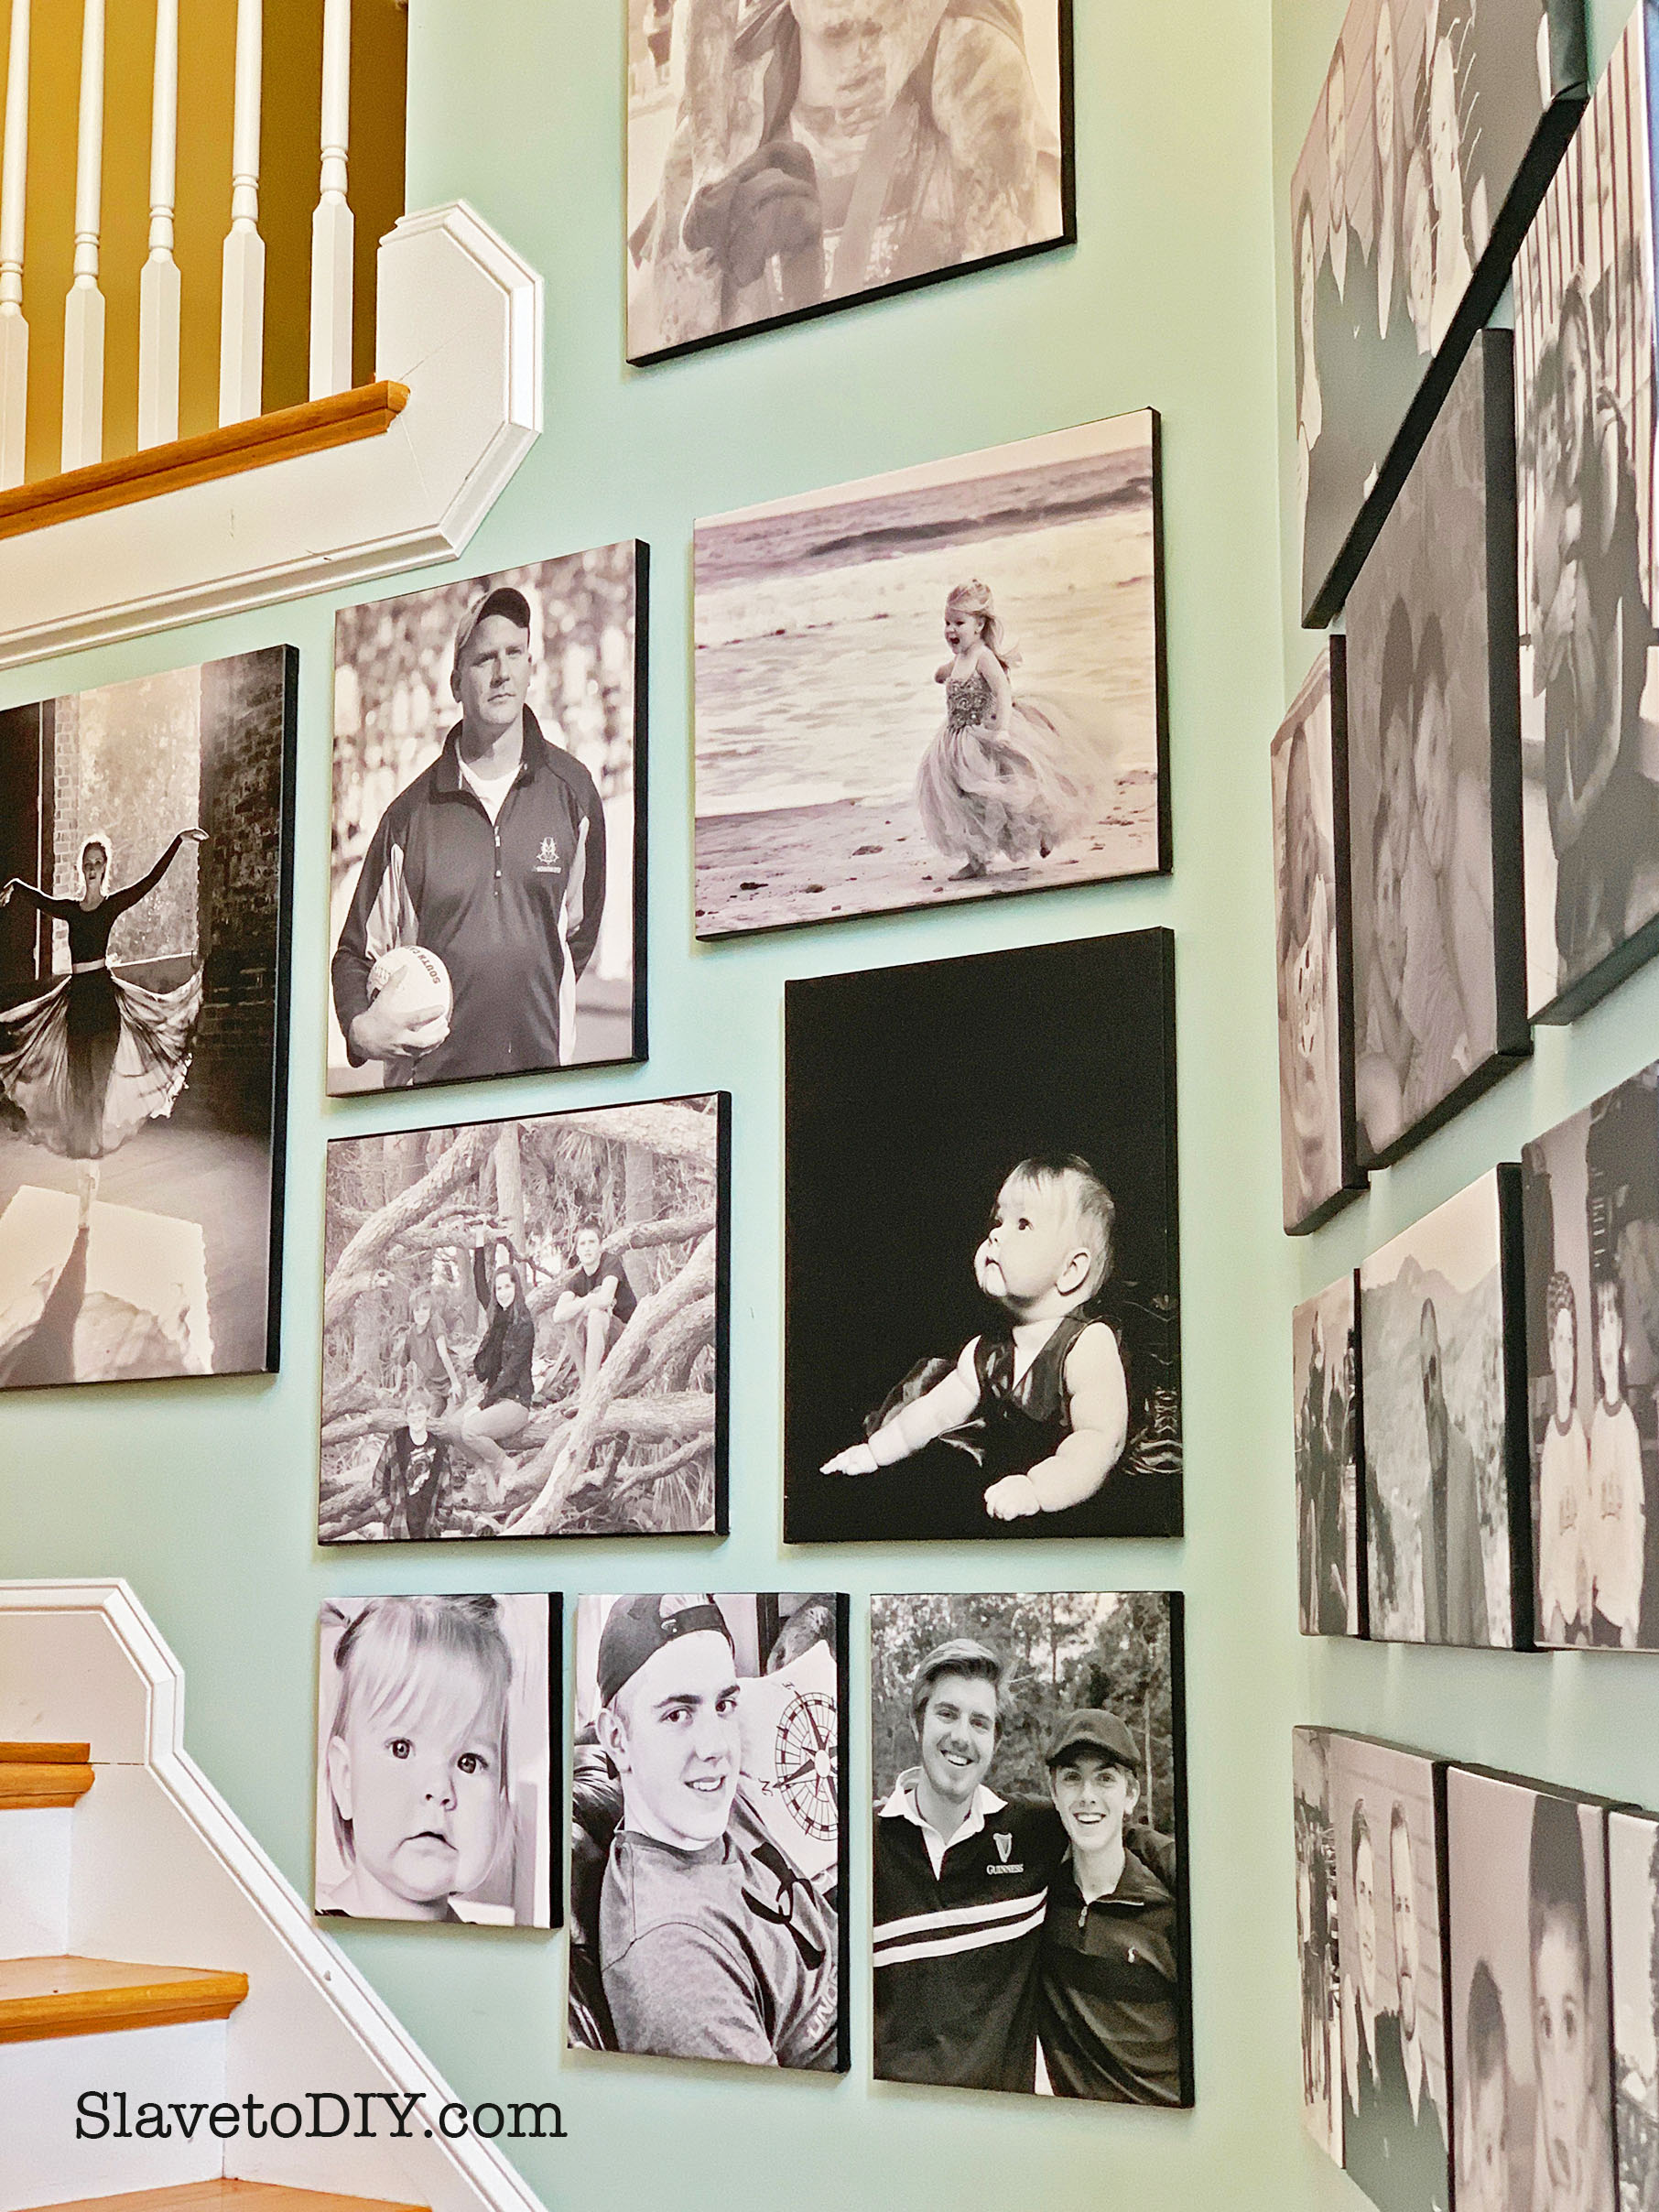
I can tell you that I’ve paid about $20 for each of my canvas prints and check out the awesome results:
Giant Family Canvas Gallery Wall On A Budget
Giant Family Canvas Gallery Wall On A Budget
Giant Family Canvas Gallery Wall On A Budget
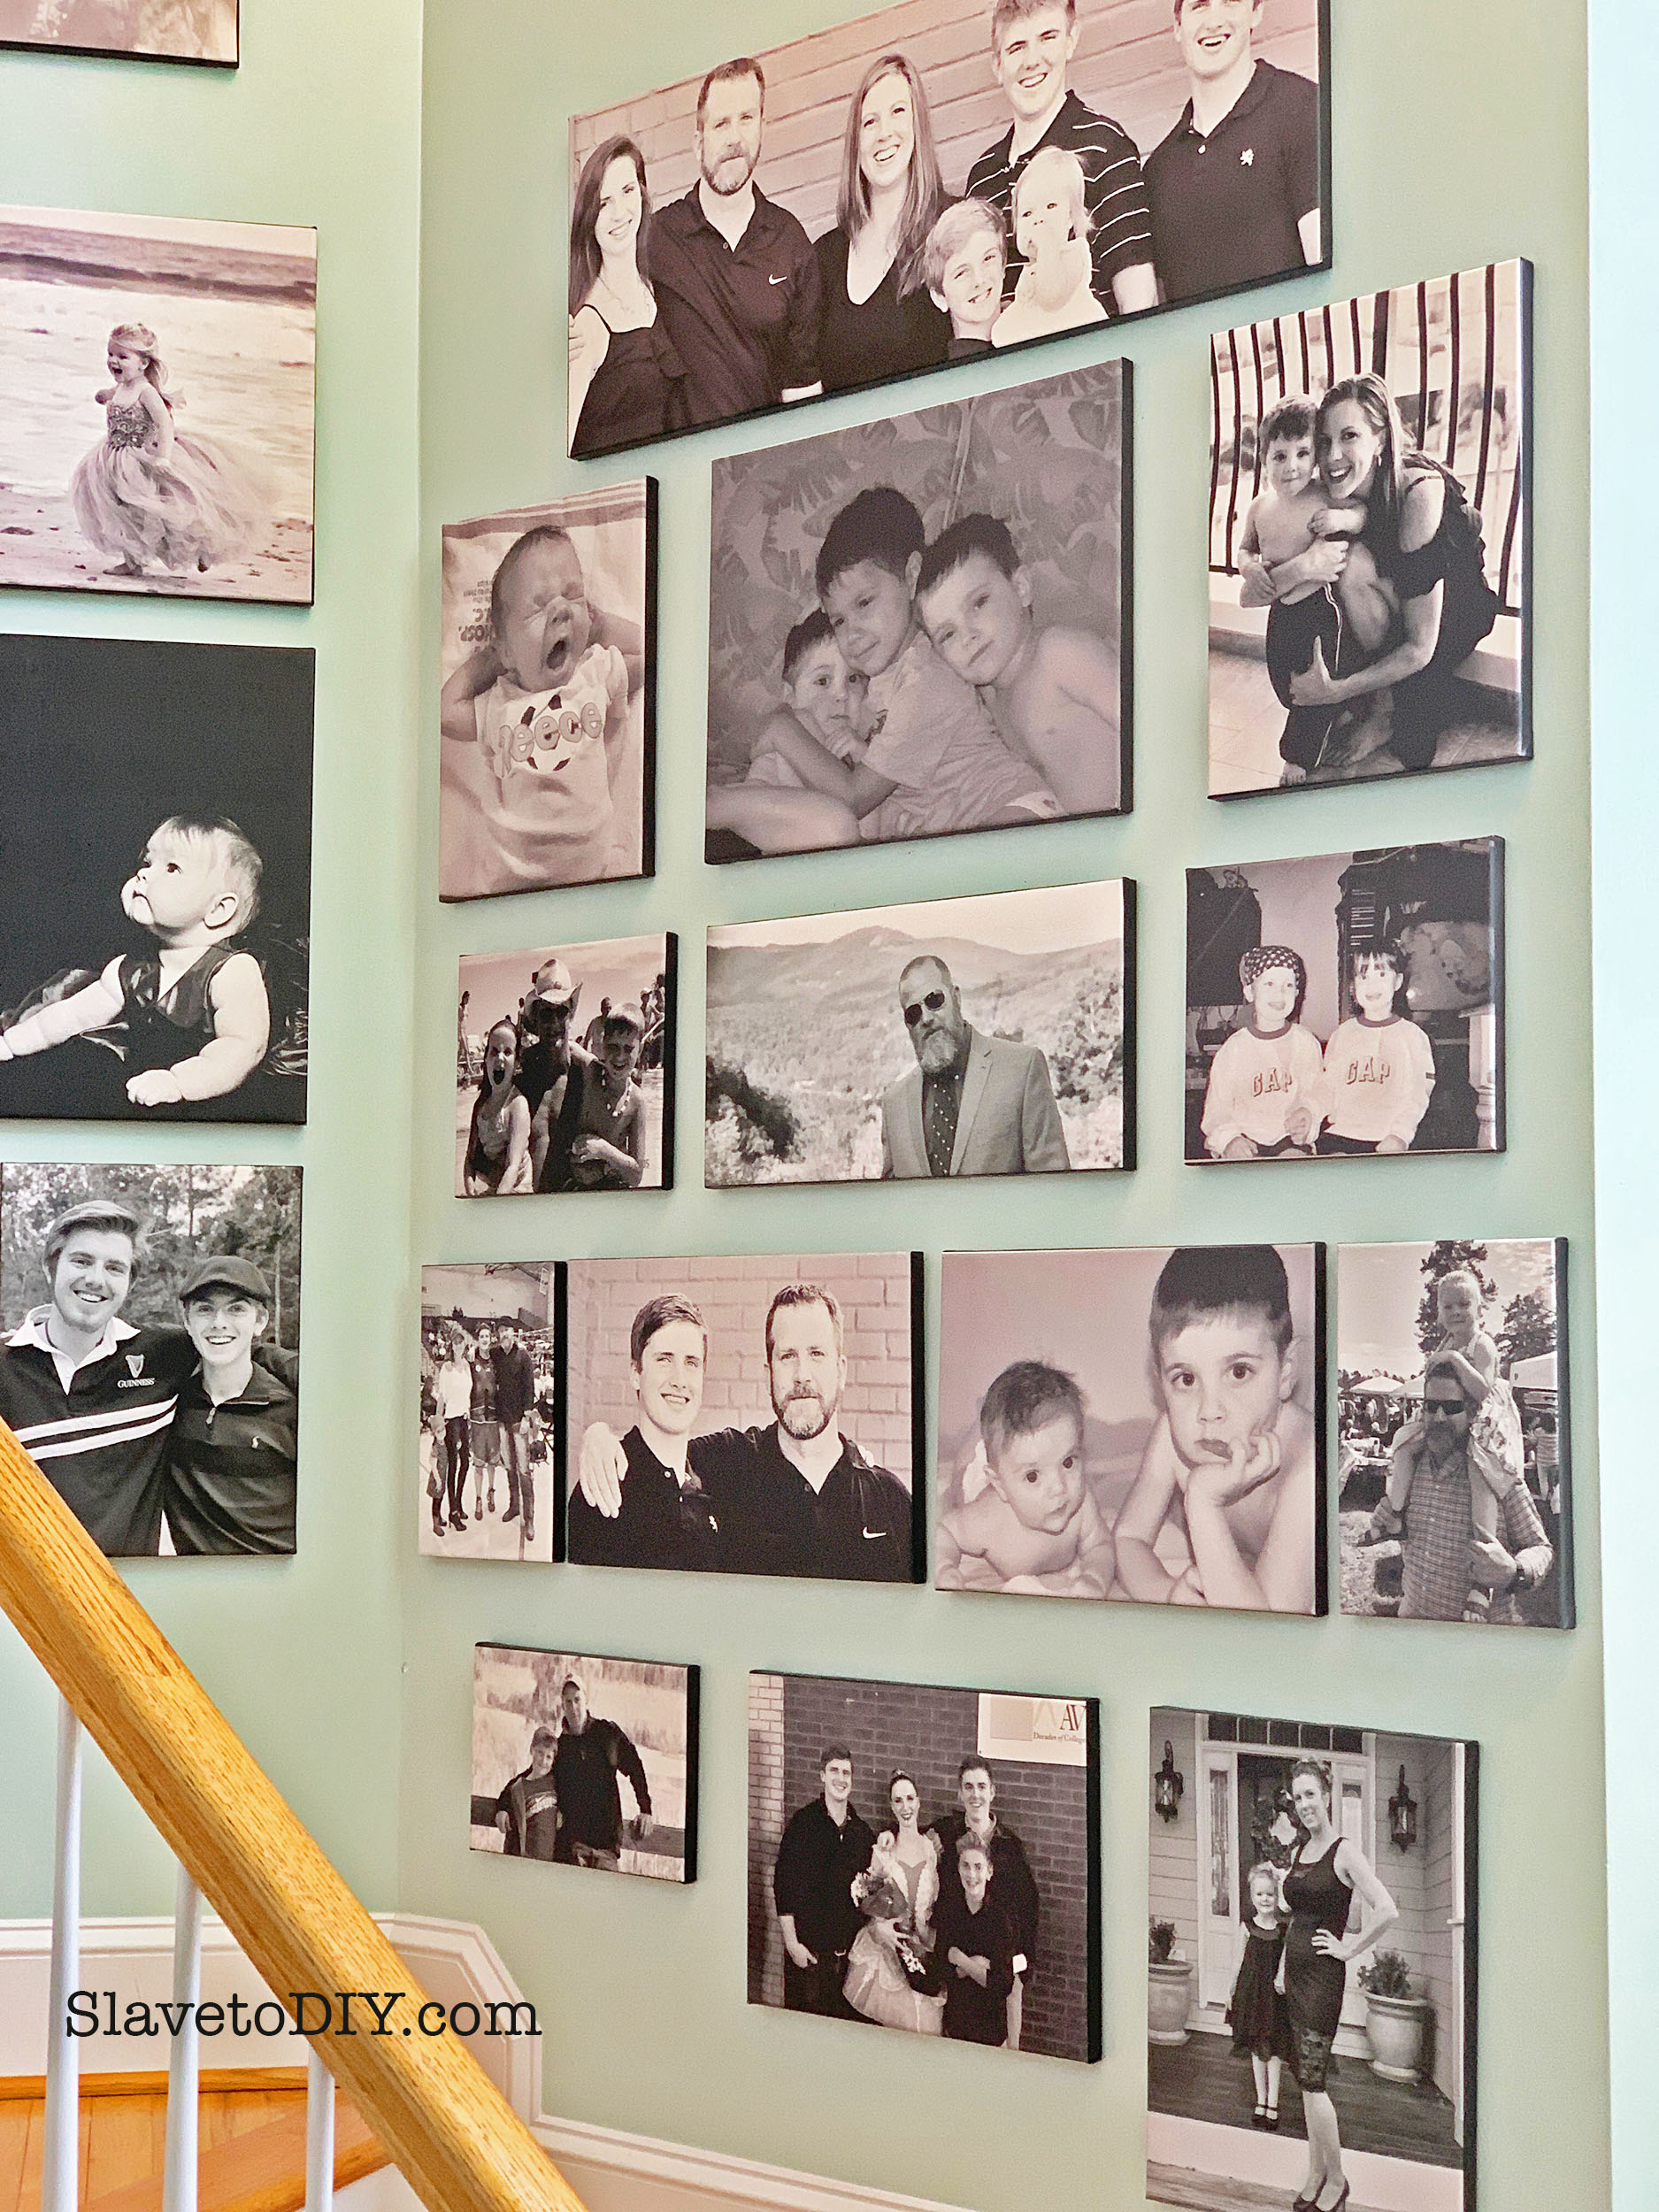
Giant Family Canvas Gallery Wall On A Budget
Giant Family Canvas Gallery Wall On A Budget
Giant Family Canvas Gallery Wall On A Budget
The trick is PATIENCE (and having downright adorable children): getting on the email list and waiting for sales. Easy Canvas Prints is awesome because it seems like they are “having huge sales” all the time. I’m not sure why it’s not just the price, but whatever. They also generally have free shipping if you purchase a few so I’ve done them in sets.
The other thing is… Once I had a huge order (a Christmas order for grandparents and parents) and one of the canvasses was damaged and one of the others looked as though it was smeared. I emailed them and they reprinted the ENTIRE ORDER free and set it right back out the next day. Their customer service is top notch and I’m always surprised how quickly they print and ship. I am a very happy and loyal customer!
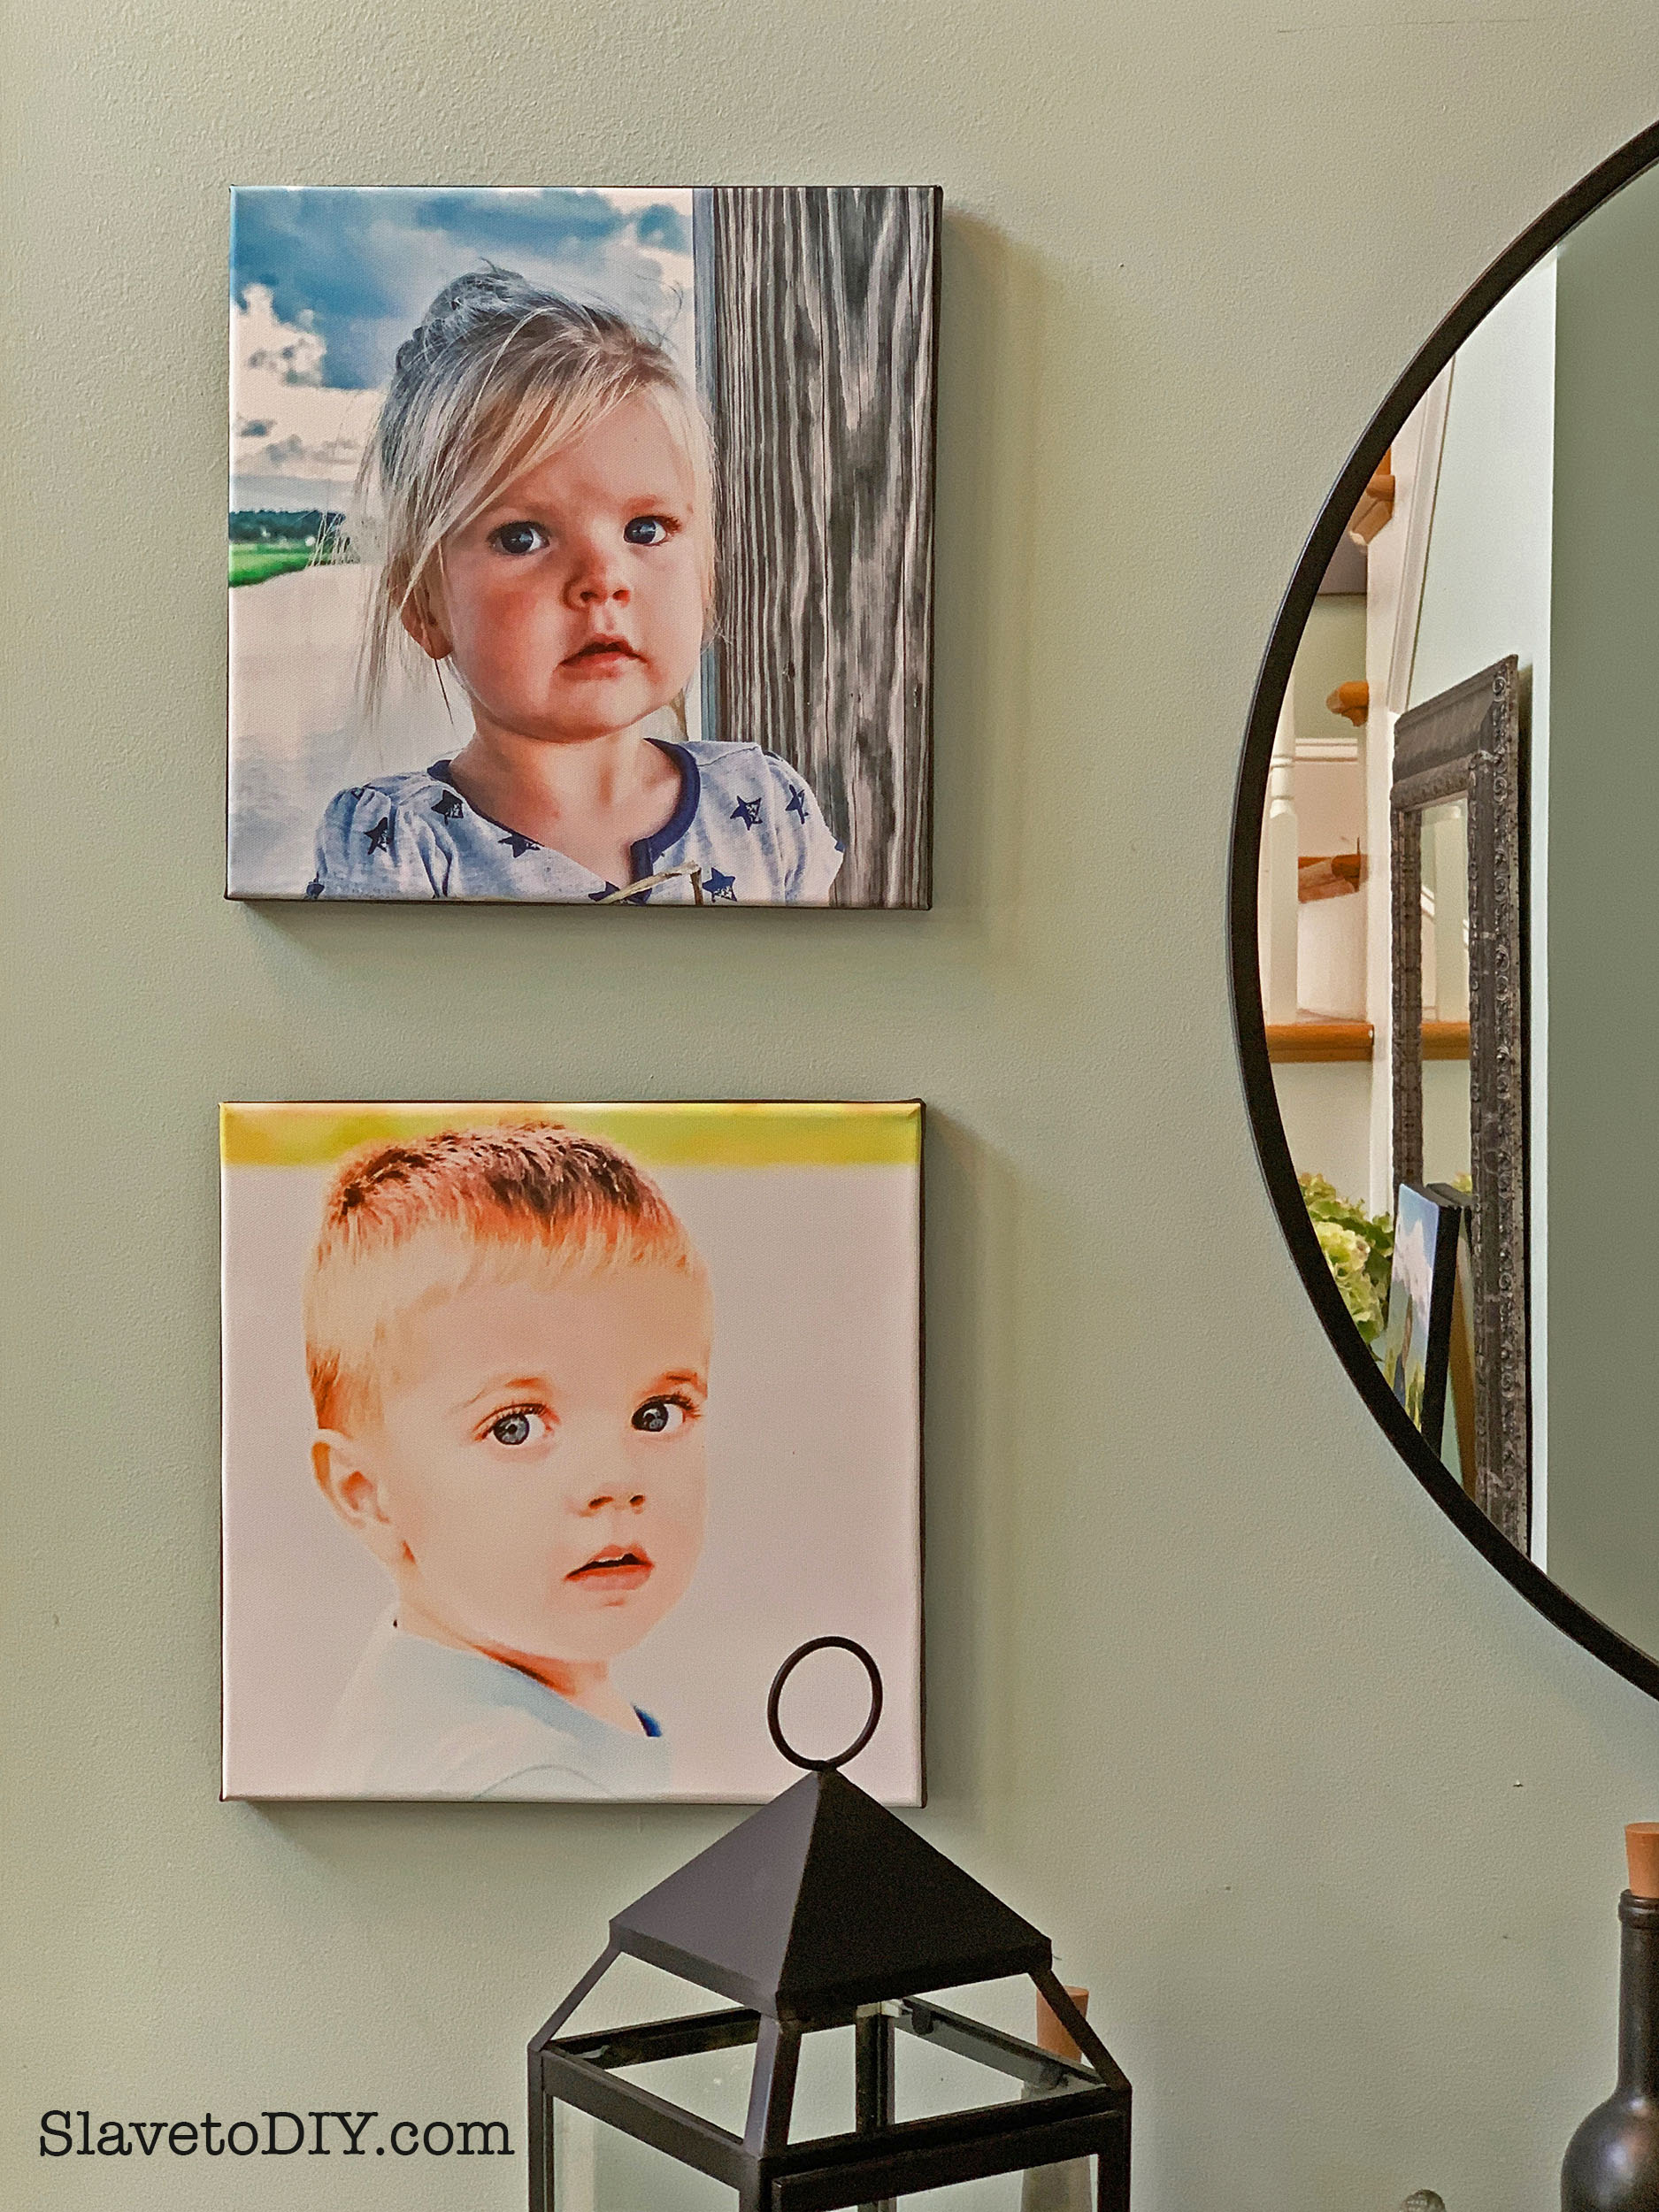
I’ve also had quite a few color prints done and the detail and colors are spectacular.
Giant Family Canvas Gallery Wall On A Budget
I have various color prints all over the house, too, but I’ll admit, the black and white wall is my favorite.
Tip: If you have them where you REALLY want them, use 3M double sided mounting tape on each corner so they won’t wiggle around when people walk by. But, that stuff stays, so make sure it’s really where you want them before you commit!
I use Easy Canvas Prints to print canvasses for grandparents and parents, because there’s nothing they’d rather receive then great photos of the people they love!
Do you like color or black and white canvasses better? Let me know in the comments below! Cheers!
*Legal stuff:
I am honest about my experiences with different products and write because I enjoy it. I do however, have the opportunity to earn money for my writing, also.
Slavetodiy.com is a participant in the Amazon Services LLC Associates Program, an affiliate advertising program designed to provide a means for sites to earn advertising fees by advertising and linking to amazon.com. Amazon offers a small commission on products sold through their affiliate links. Each of your purchases via our Amazon affiliation links supports our cause at no additional cost to you.
If a blogger links to an Amazon product (with a special code for affiliates embedded in the link), and a reader places an item in their “shopping cart” through that link within 24 hours of clicking the link, the blogger gets a small percentage of the sale. Amazon links are not “pay per click.” If you click on the product link and stay around Amazon and purchase something else, however, I will get a commission on that sale.
This site also contains affiliate links through //Commerce/Sovrn. //Commerce or our Publishers may be compensated when you click through links on our site.
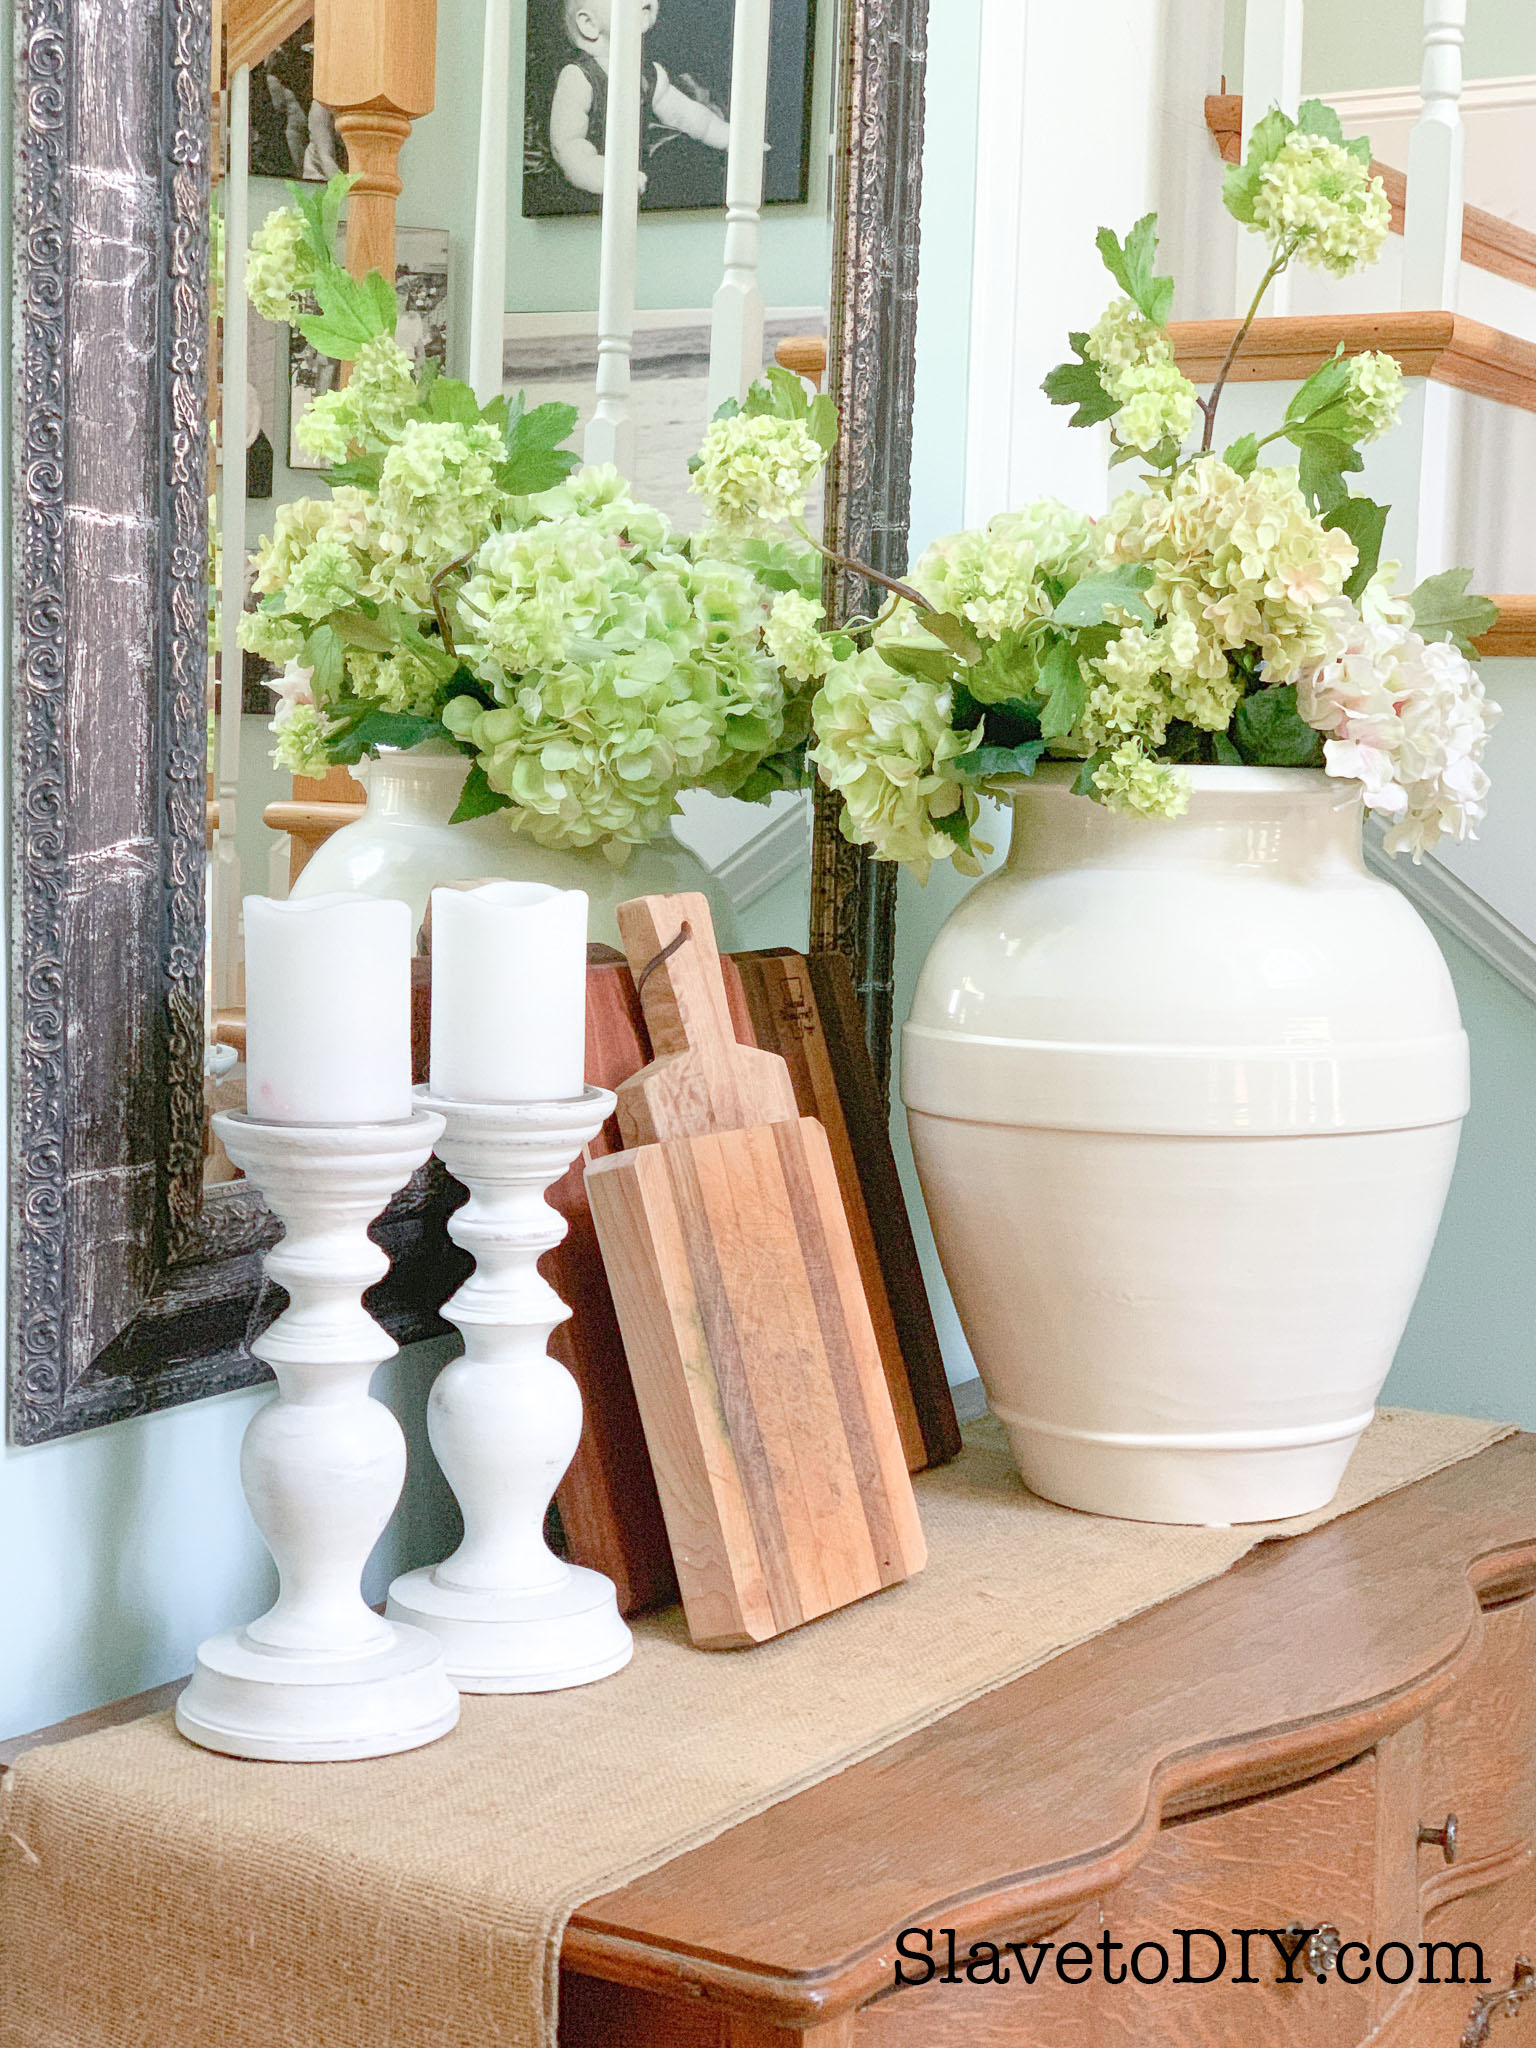
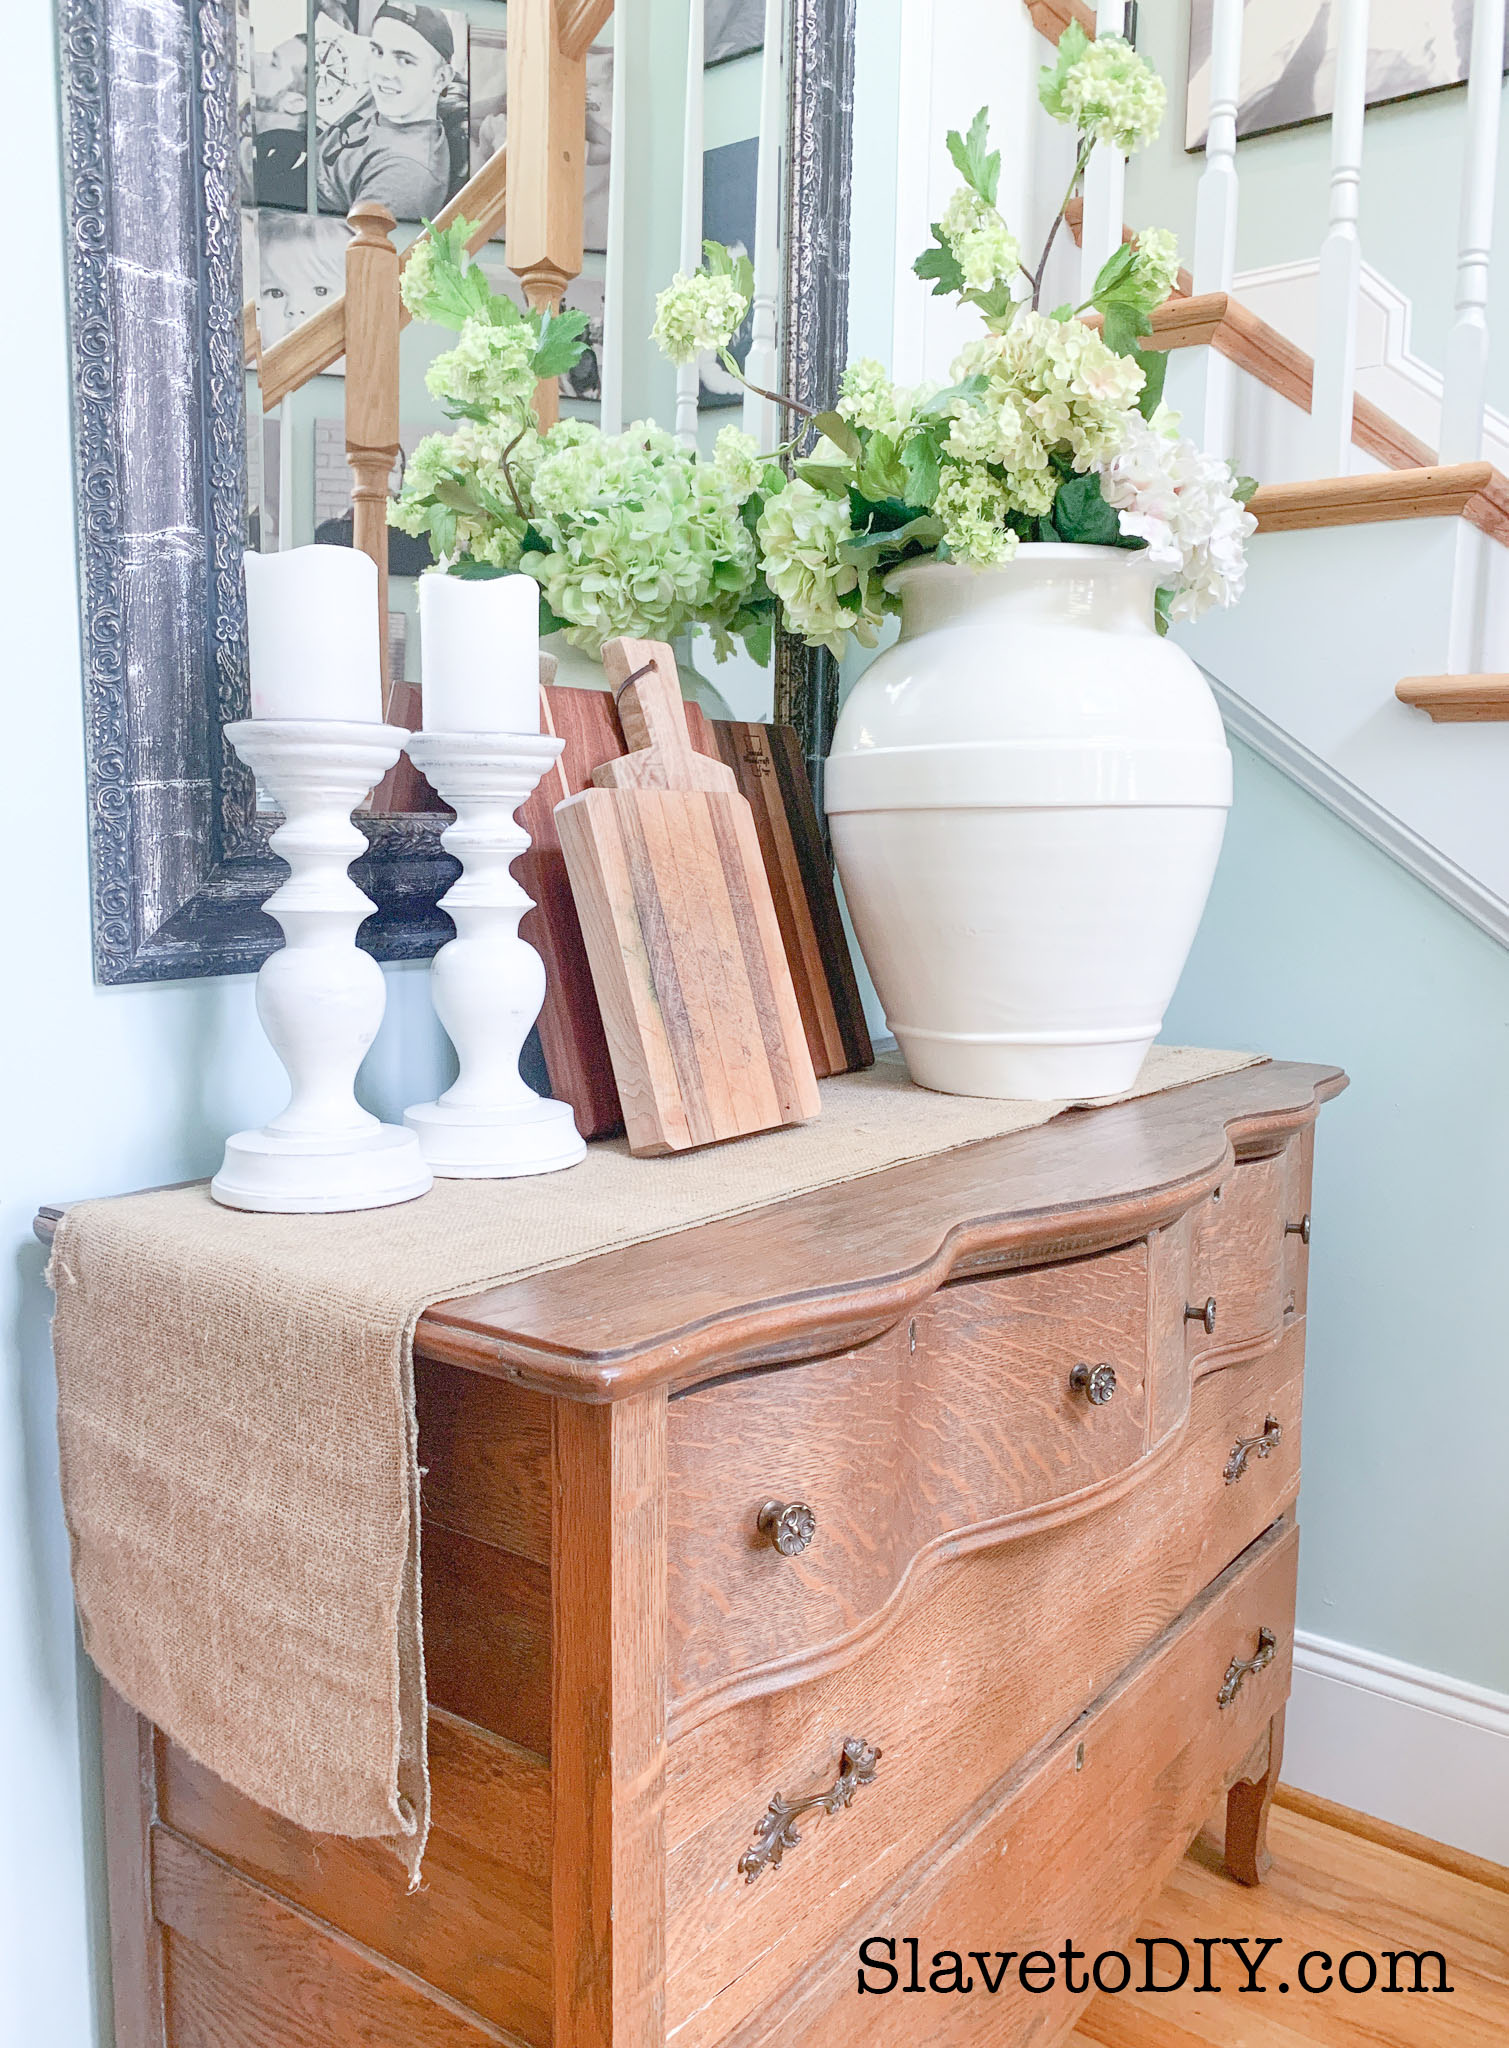
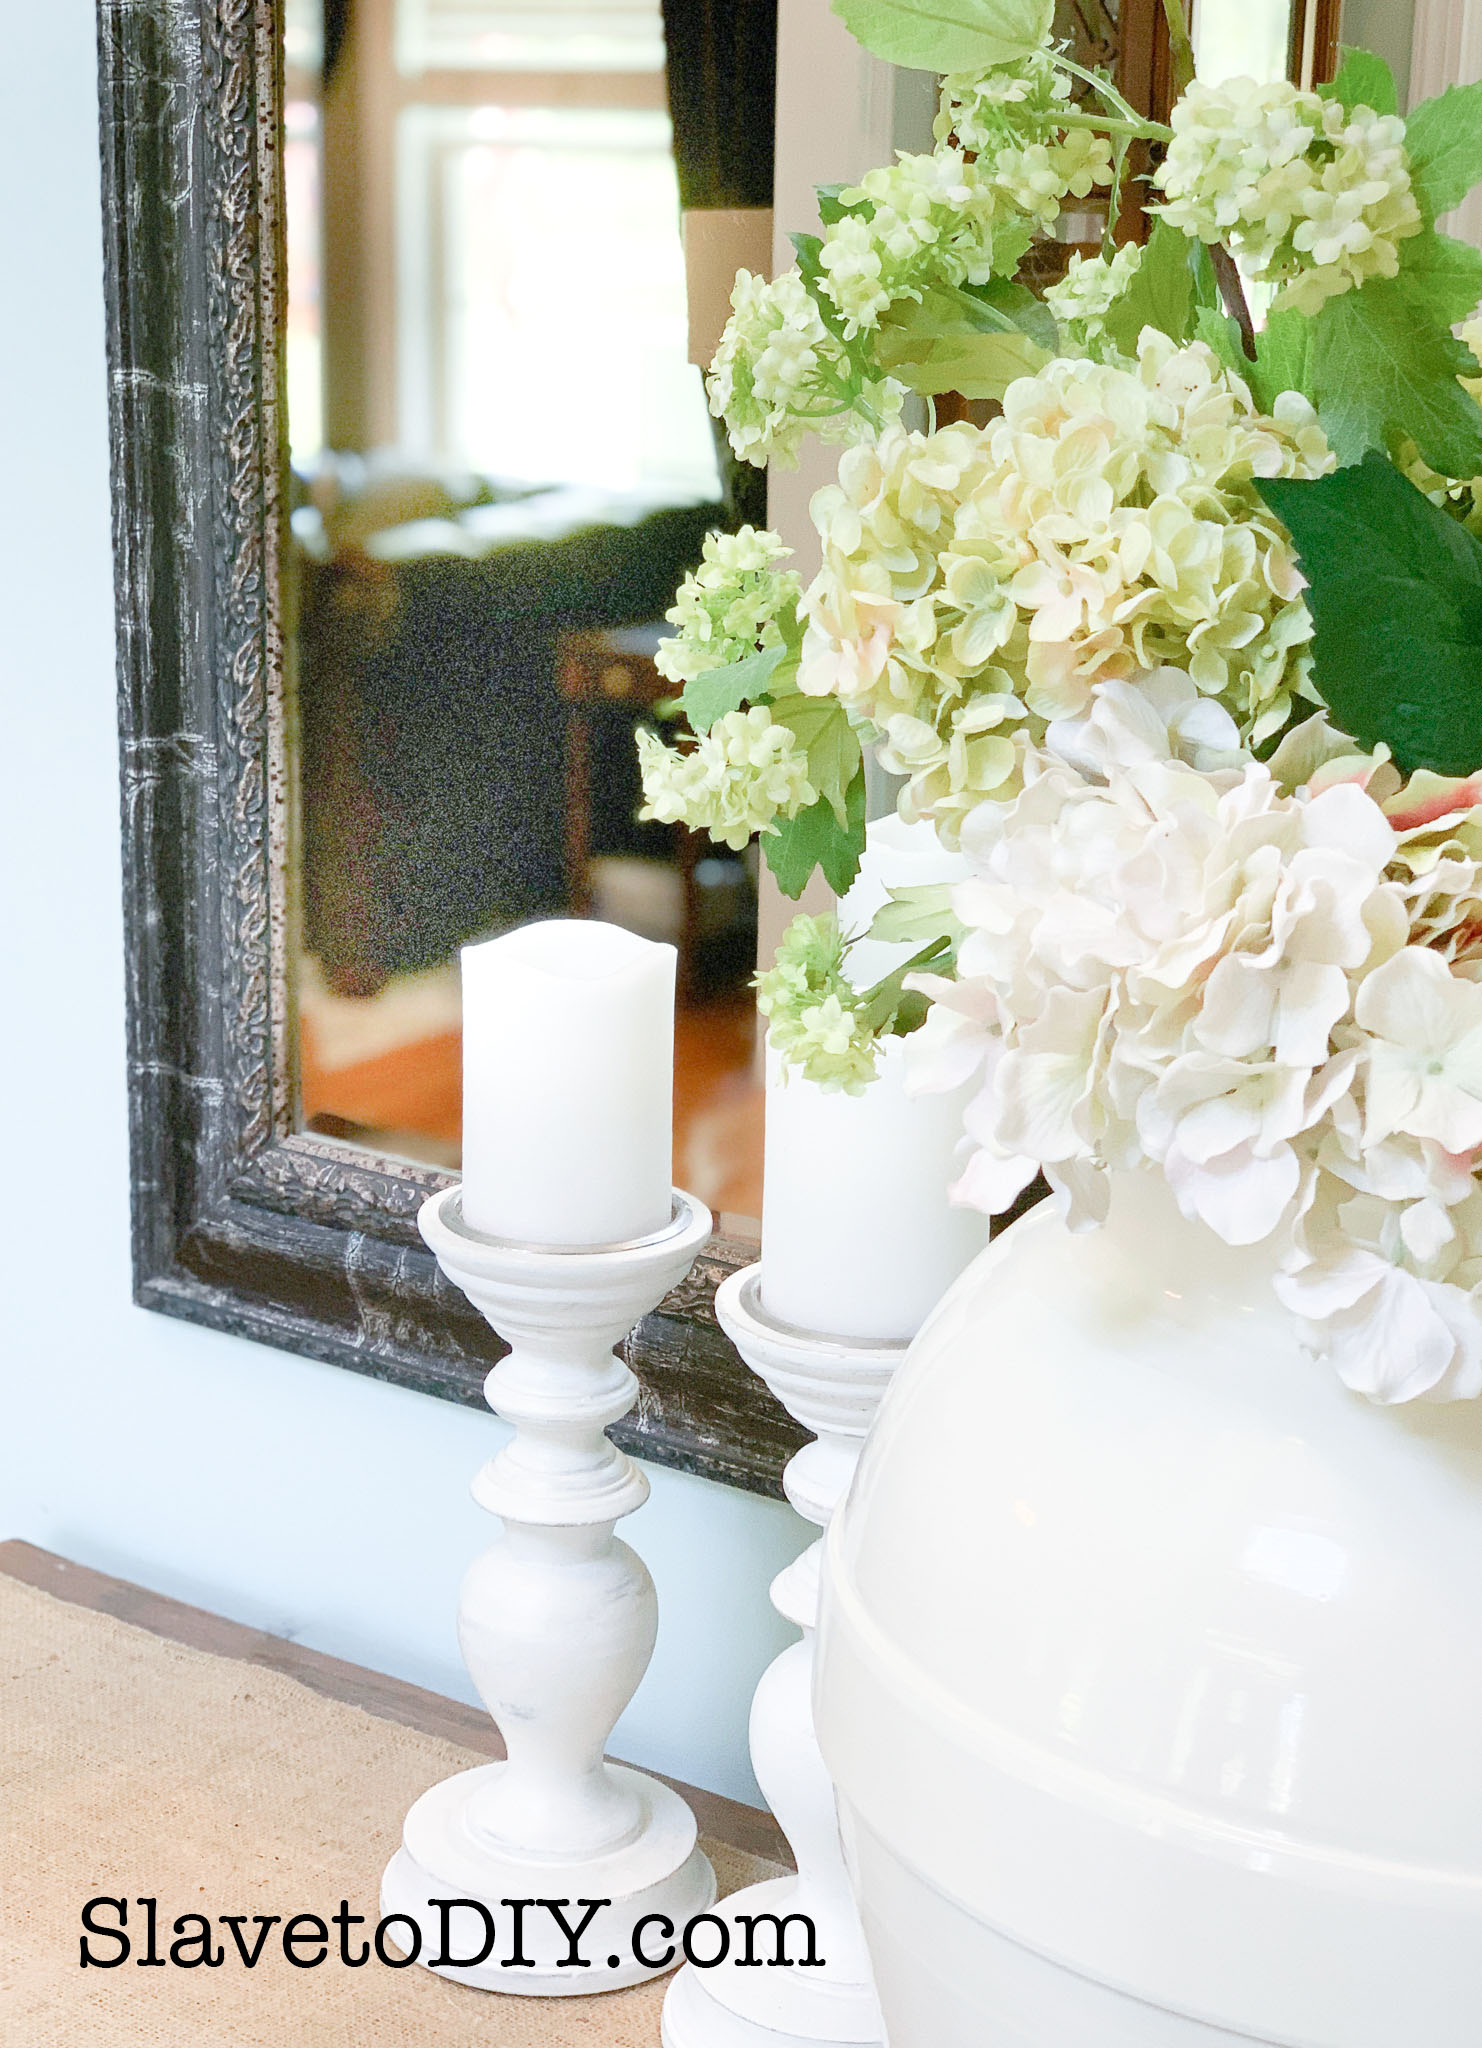
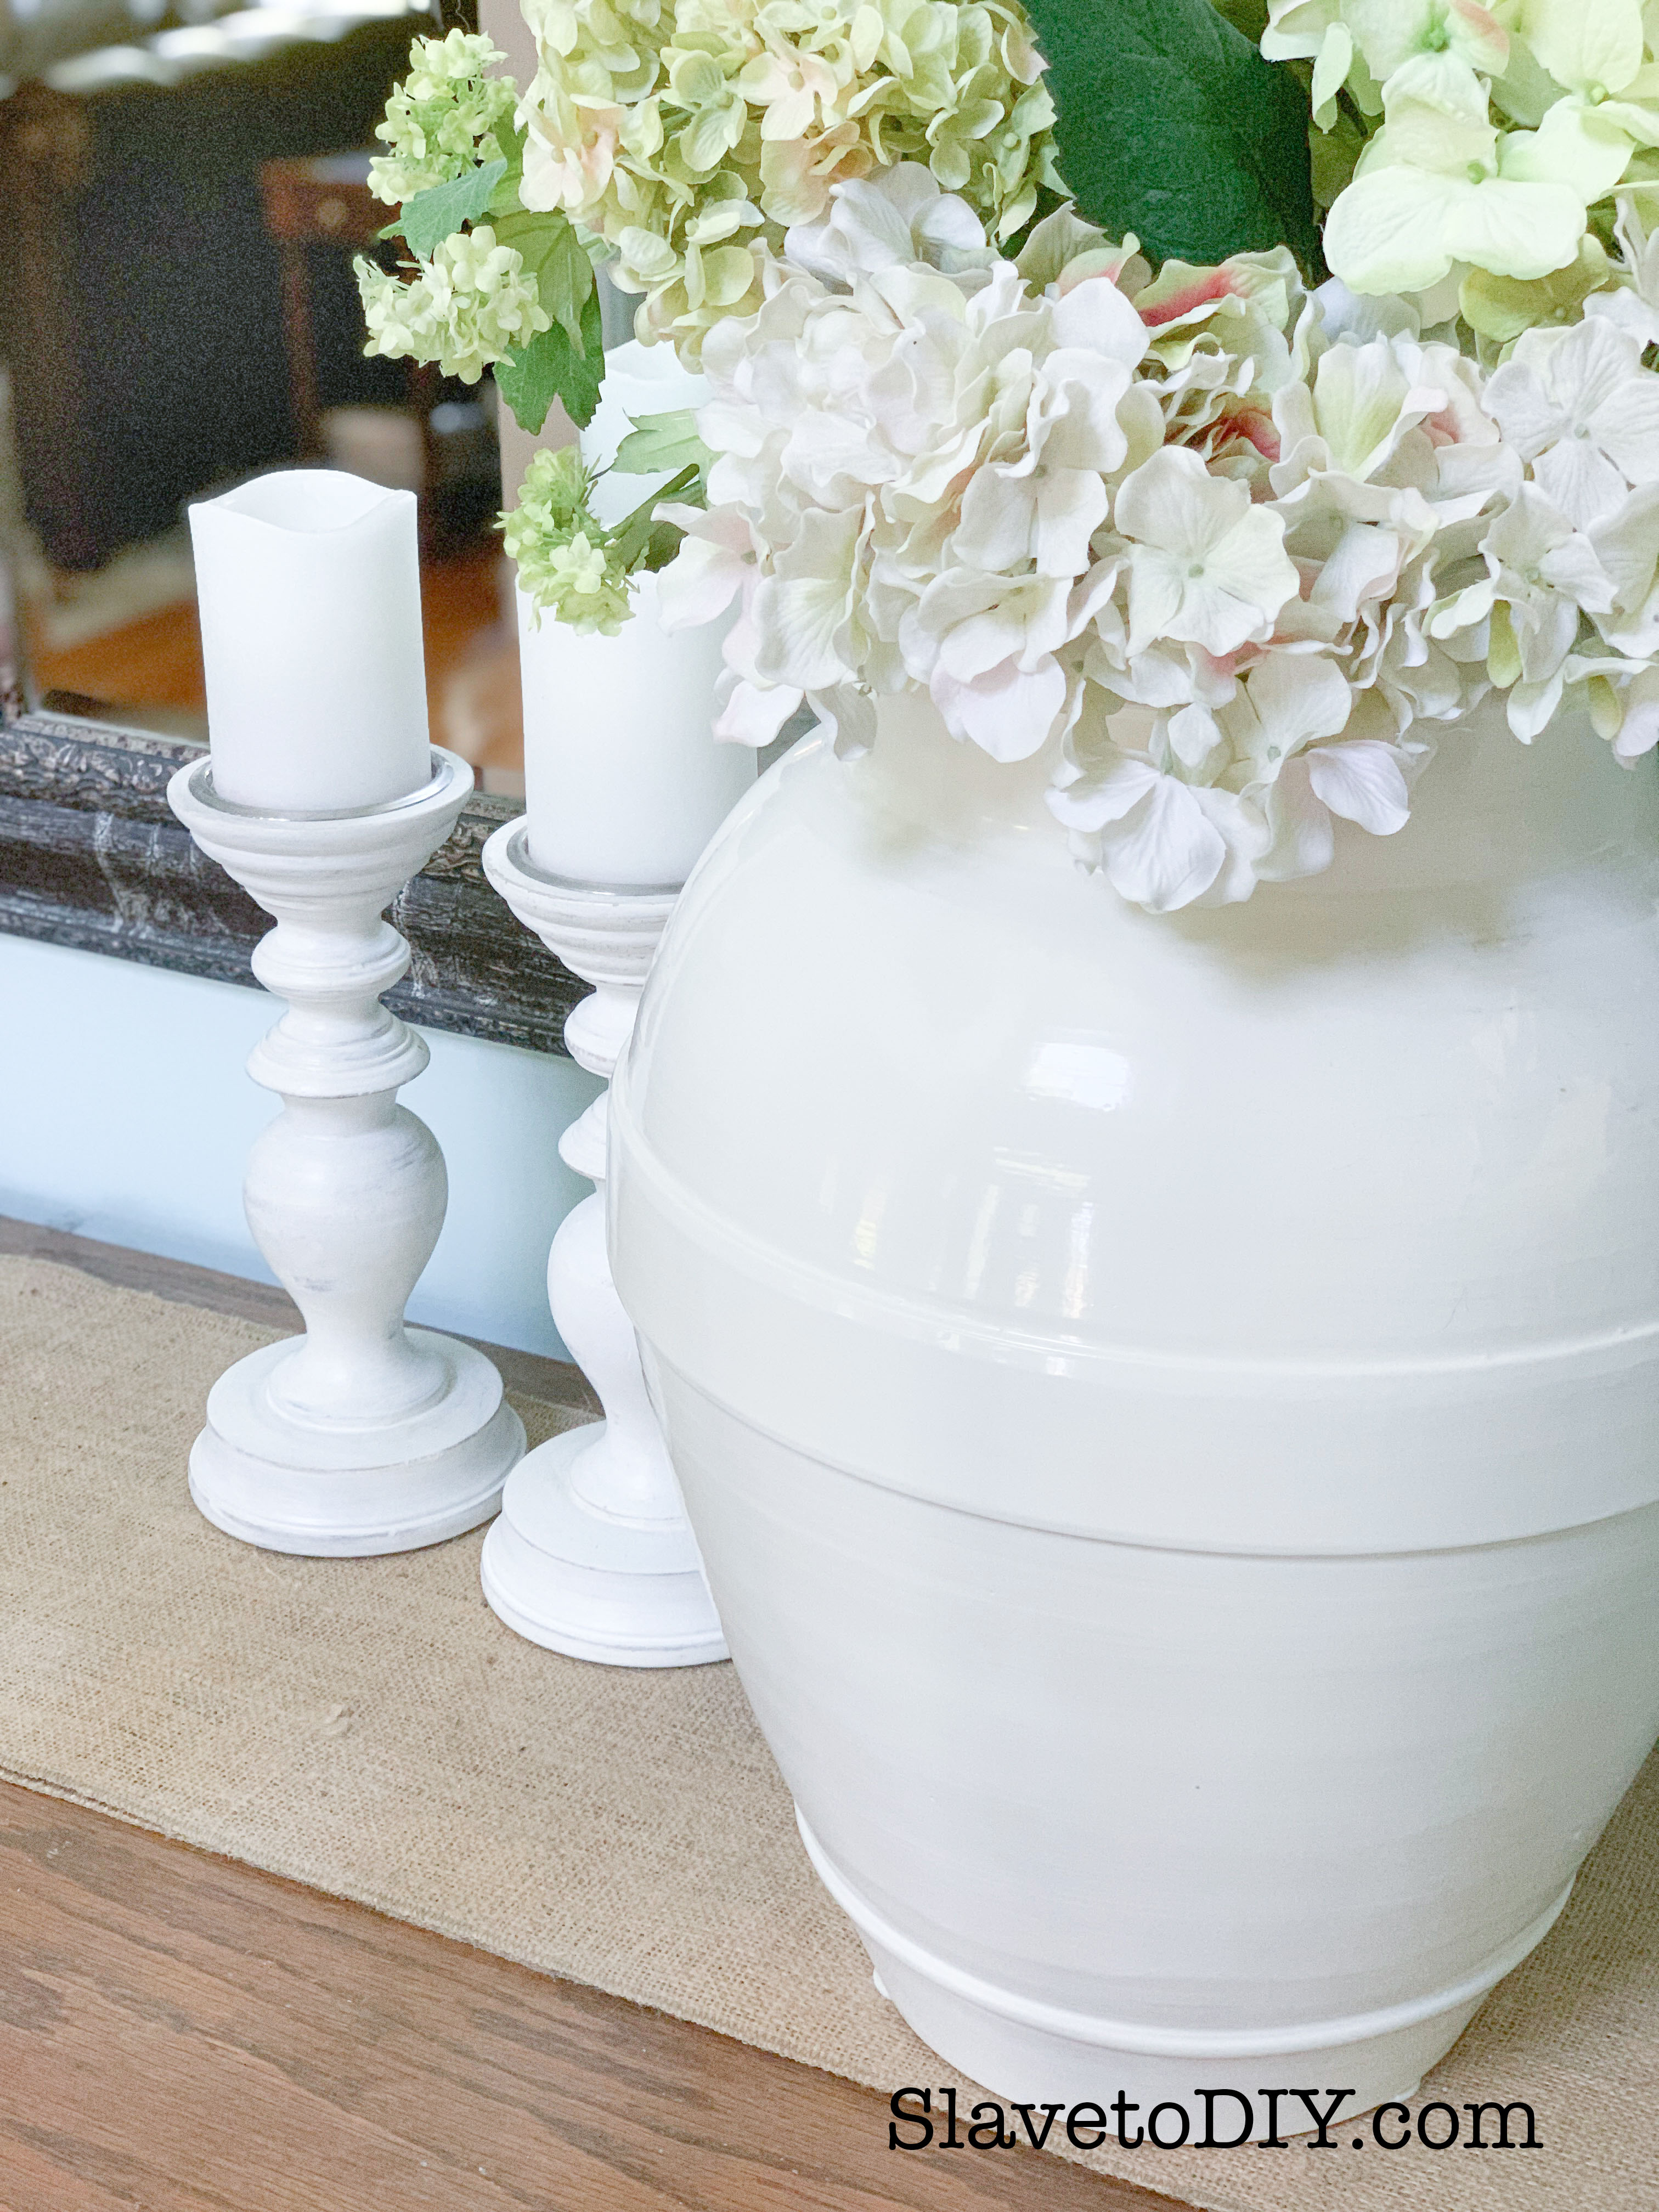
Here’s my secret: I don’t spend money on any of my home decor anymore. I use my Amazon points to decorate and I was dying to get this Ethan Allen vase. The “small” size that I got is 14″ dia x 18″ high, and is handmade in ceramic and ivory glazed in Italy. I just LOVE it. It replaced the antique bowl and pitcher in the entryway and is a MUCH better scale. I rehomed the others in the guest room and they’re just perfect in their new spot. My understanding is Ethan Allen sells directly on Amazon and from it’s own site, so I chose the free shipping on Amazon.
*This post may contain affiliate links. Please see full disclosure at the end of the post.
Treasure Hunt Tuesday: Ethan Allen Ringed Ivory Vase With Green and White Hydrangea
Treasure Hunt Tuesday: Ethan Allen Ringed Ivory Vase With Green and White Hydrangea, White Candlesticks, and Assorted Chopping Blocks on Antique Dresser
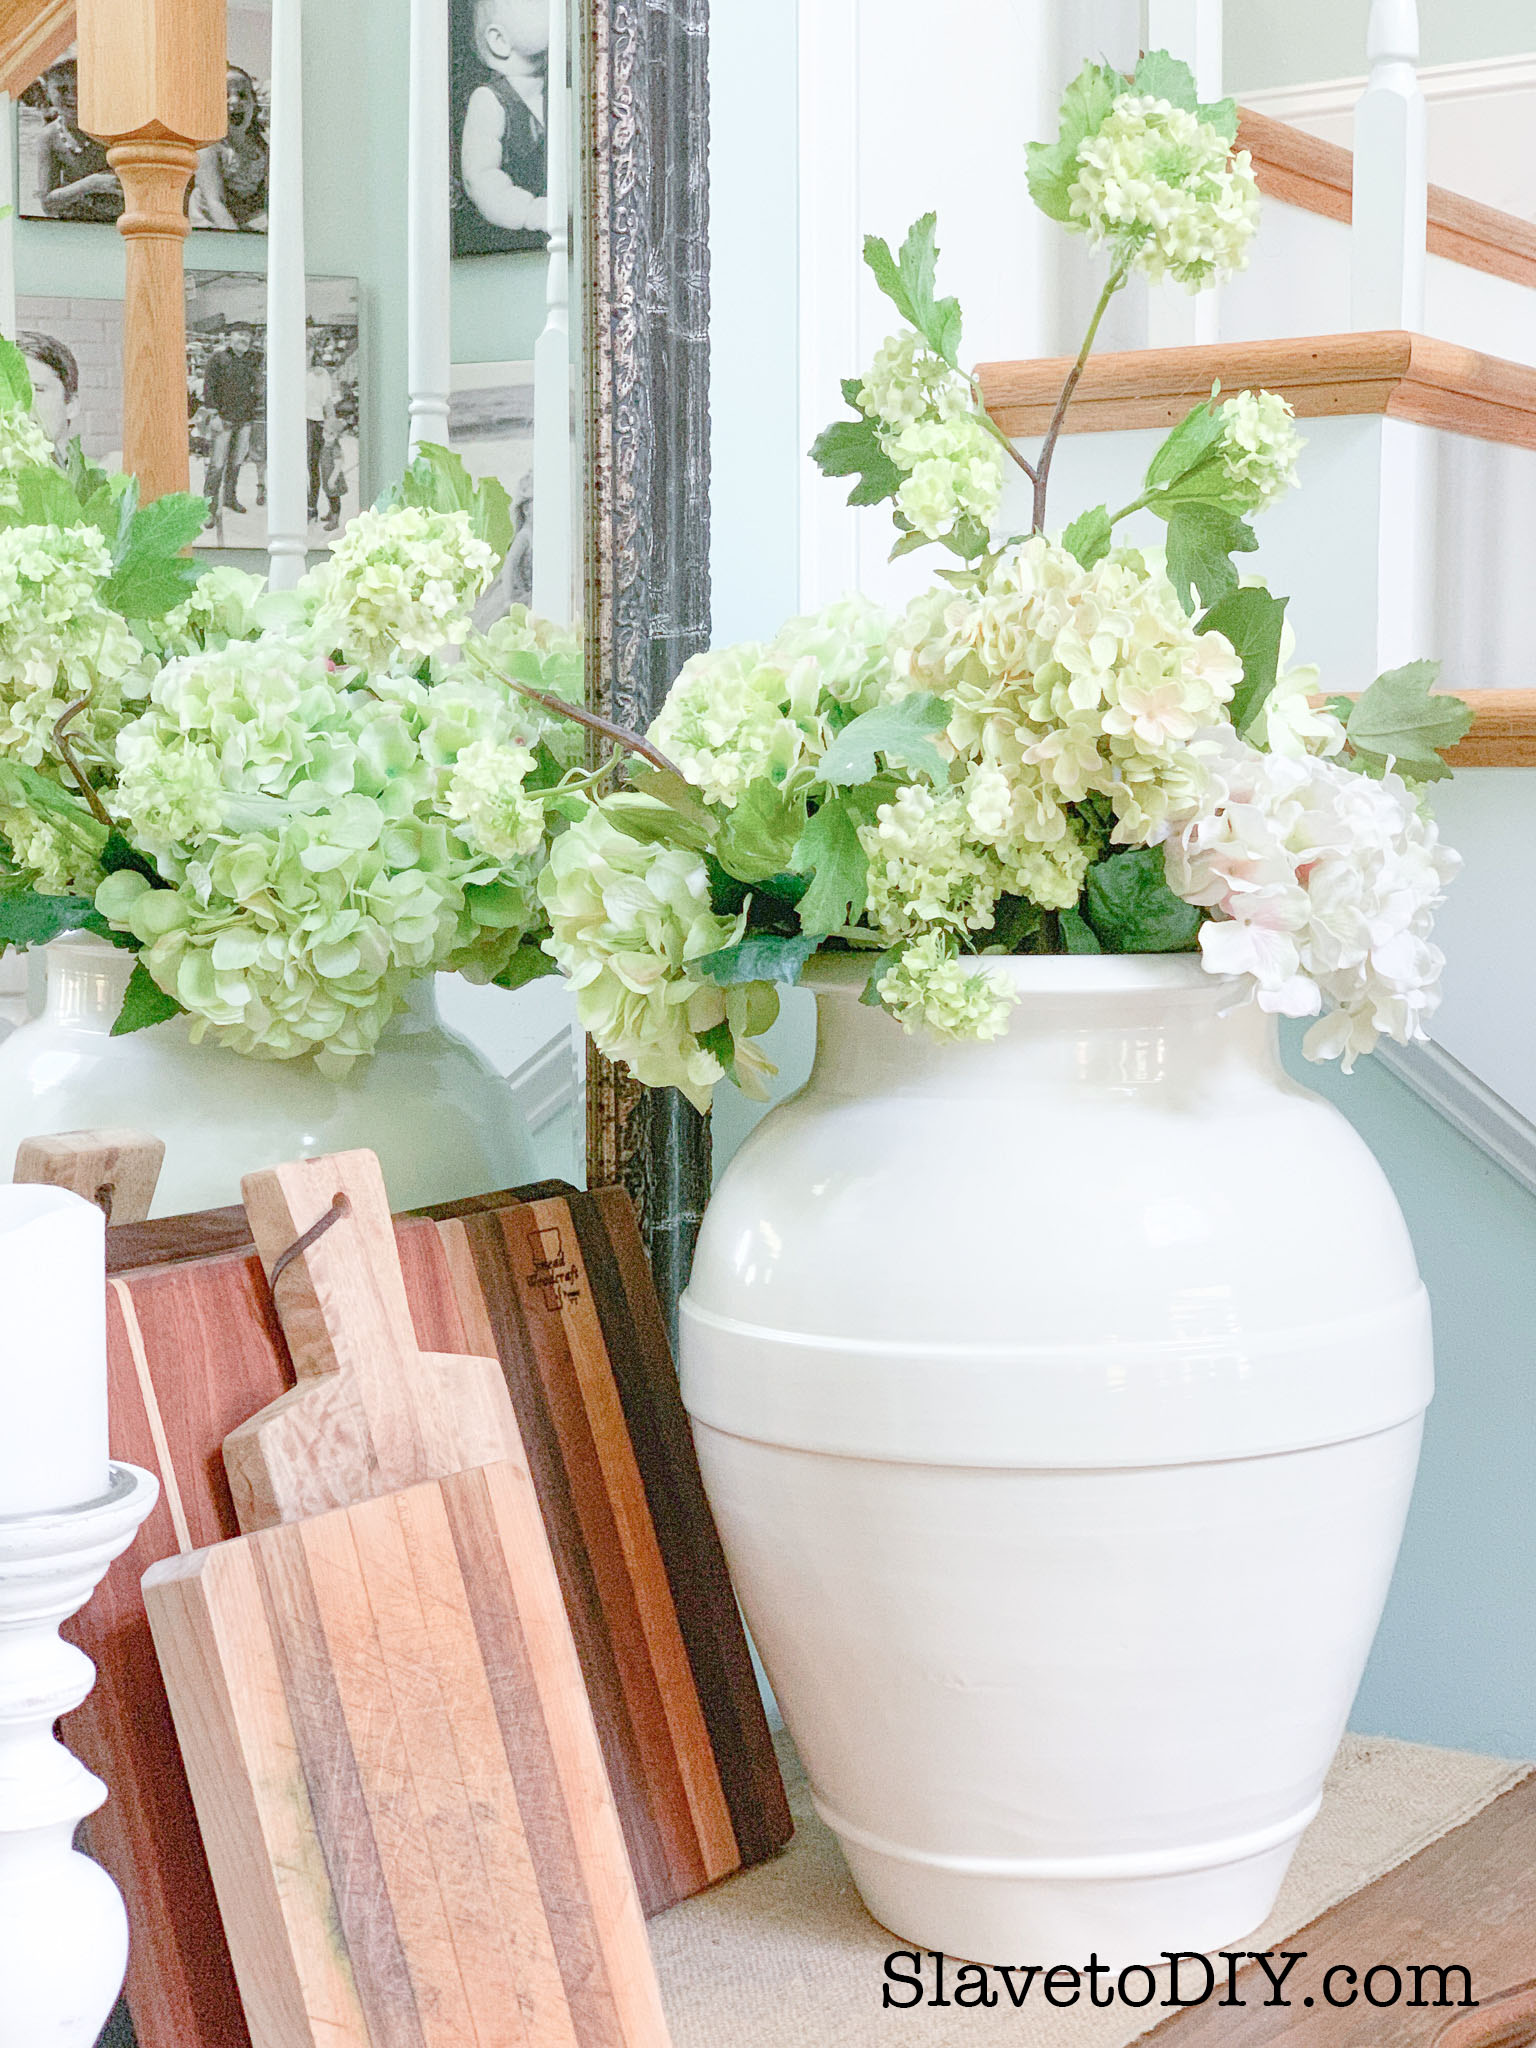
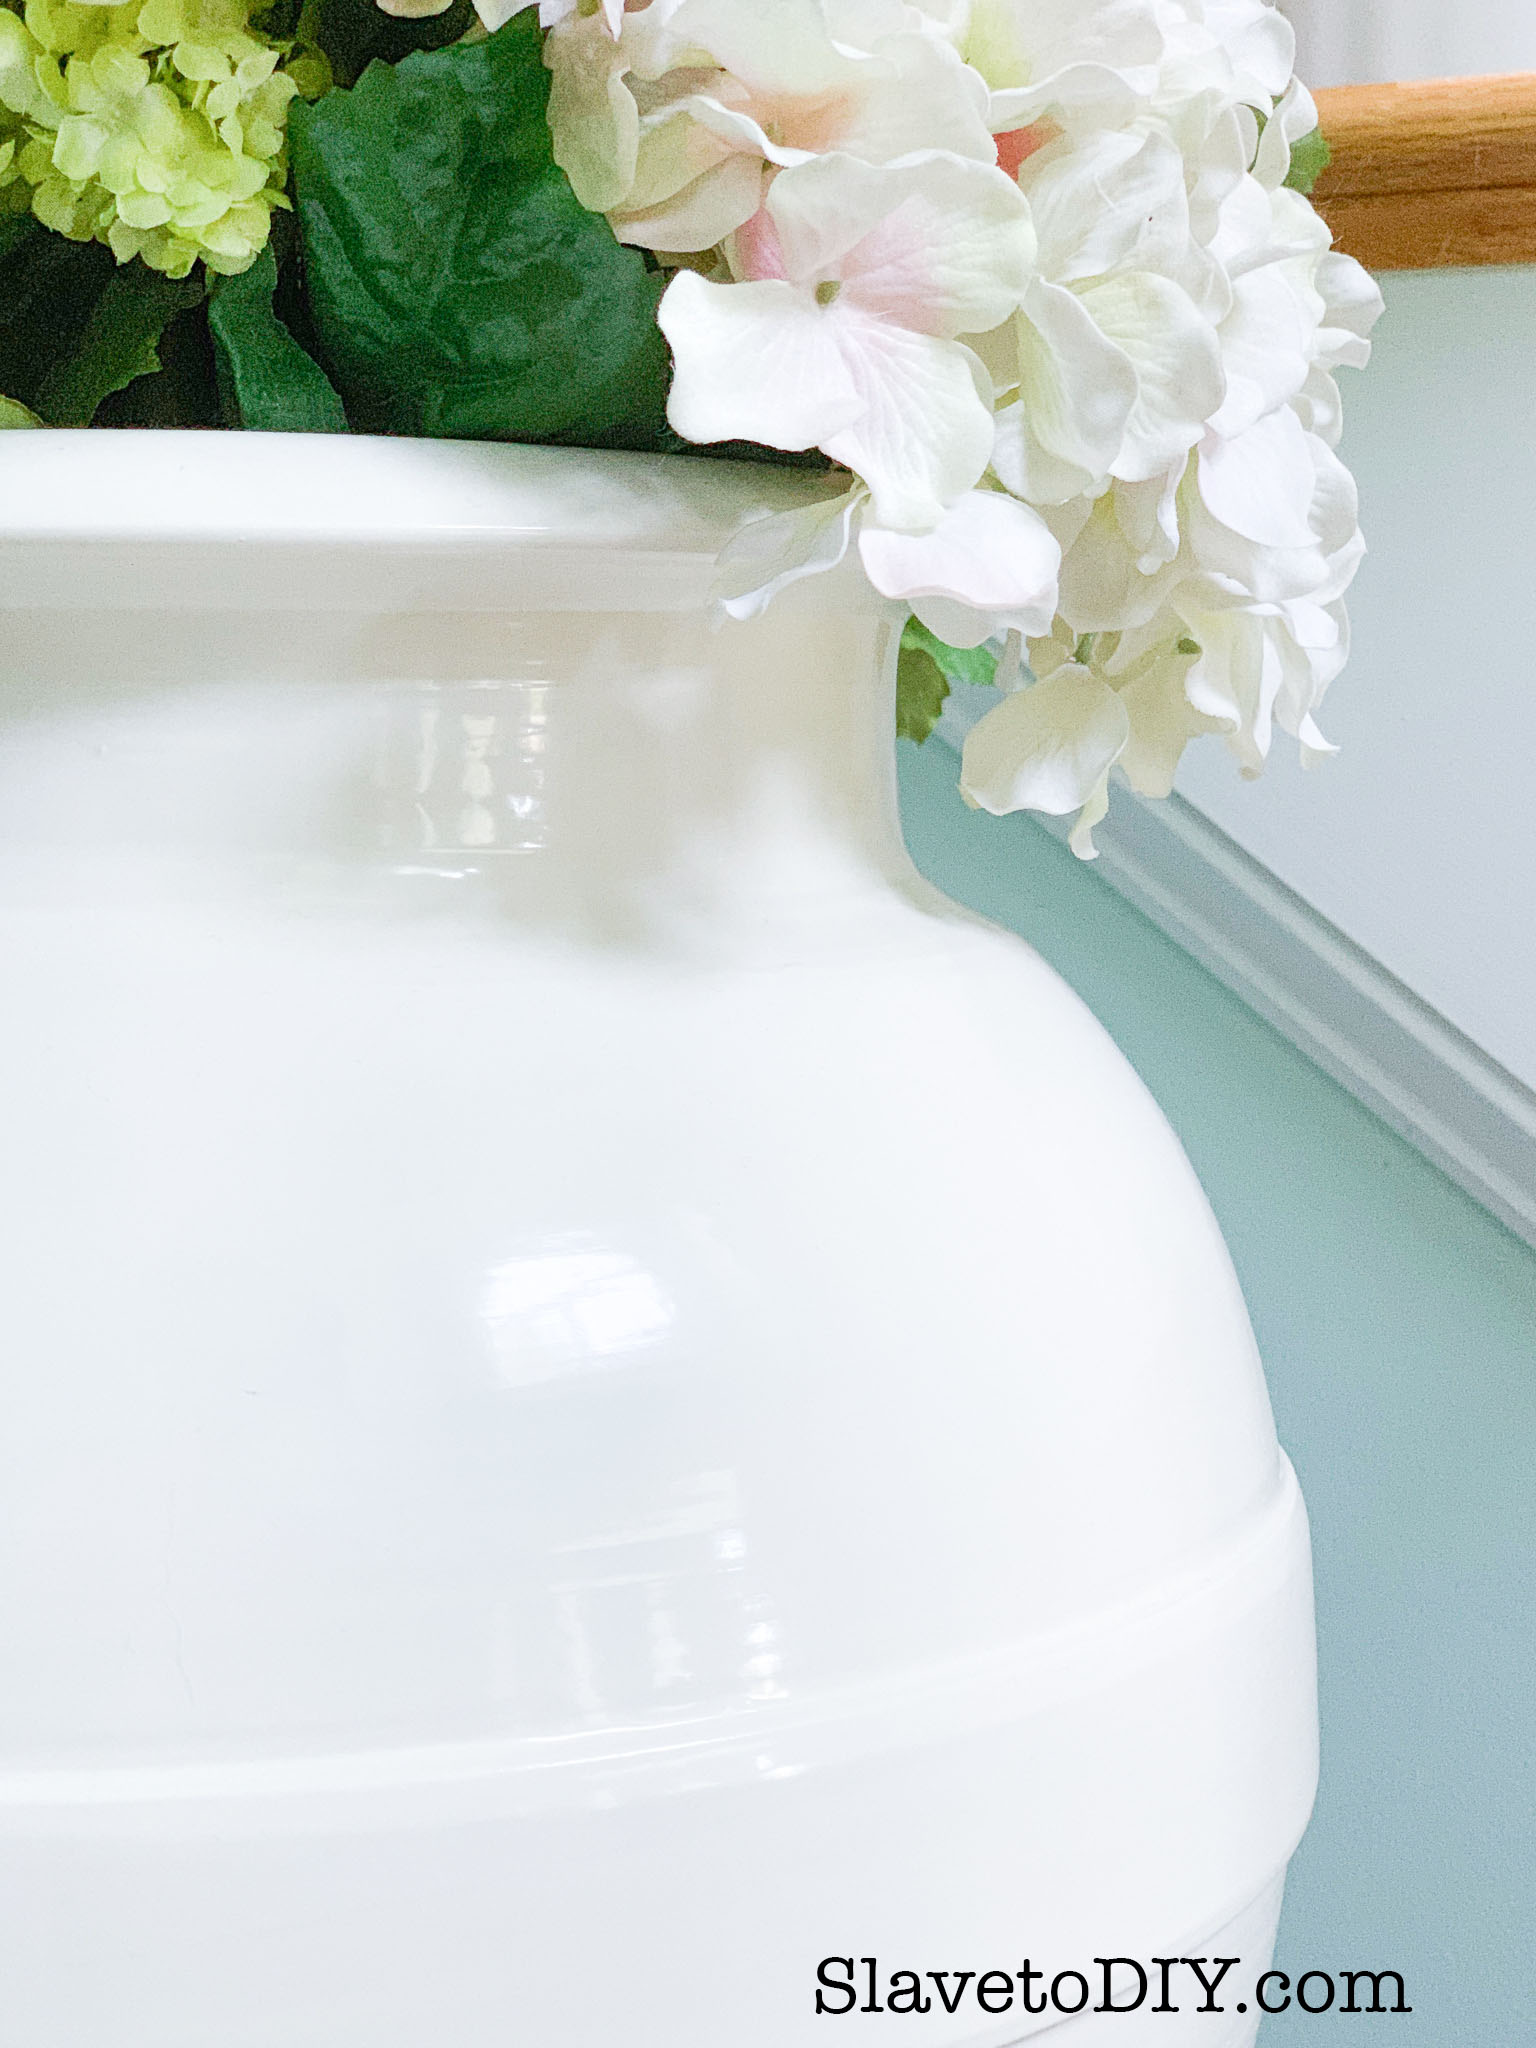
Treasure Hunt Tuesday: Ethan Allen Ringed Ivory Vase
Treasure Hunt Tuesday: Ethan Allen Ringed Ivory Vase
Treasure Hunt Tuesday: Ethan Allen Ringed Ivory Vase
Treasure Hunt Tuesday: Ethan Allen Ringed Ivory Vase
Isn’t it just the BEST? I’m trying to decide what to find for a fall arrangement, although I’m not willing to admit summer is coming to a close.
What do you buy with your Amazon points? Let us know in the comments below!
Thanks for stopping by and check out more of our great home decor and DIY inspiration on our blog. Cheers!
*Legal stuff:
I am honest about my experiences with different products and write because I enjoy it. I do however, have the opportunity to earn money for my writing, also.
Slavetodiy.com is a participant in the Amazon Services LLC Associates Program, an affiliate advertising program designed to provide a means for sites to earn advertising fees by advertising and linking to amazon.com. Amazon offers a small commission on products sold through their affiliate links. Each of your purchases via our Amazon affiliation links supports our cause at no additional cost to you.
If a blogger links to an Amazon product (with a special code for affiliates embedded in the link), and a reader places an item in their “shopping cart” through that link within 24 hours of clicking the link, the blogger gets a small percentage of the sale. Amazon links are not “pay per click.” If you click on the product link and stay around Amazon and purchase something else, however, I will get a commission on that sale.
Slavetodiy.com is also a VigLink affiliate advertiser which works similarly.
Did you notice that it’s super hard to find reviews on RH light fixtures (or anything else Restoration Hardware sells)? I have to tell you, I was a little afraid… the shroud of secrecy surrounding the quality of the items, and lack of happy customer (or any) reviews, left me feeling a bit wary. So, I hope I can shed a little light on my RH “experience” and provide an honest review (I still have fear about a hypothetical RH strong arm guy coming to bust my knee caps, but here goes…): oh, by the way. I’m not an affiliate. I think their snobbery prevents affiliatery (dude, that’s not a word, I just made it up), so you can be sure of my unadulterated, completely honest opinion.
*This post may contain affiliate links. Please see full disclosure at the end of the post.
First, let’s be totally up front. Restoration Hardware’s marketing team and strategy are second to none. They are selling class. Period. It’s unbelievably brilliant and diabolically well executed. Every purchase says: welcome to the champagne life. But, is it true? Are their products that much better?
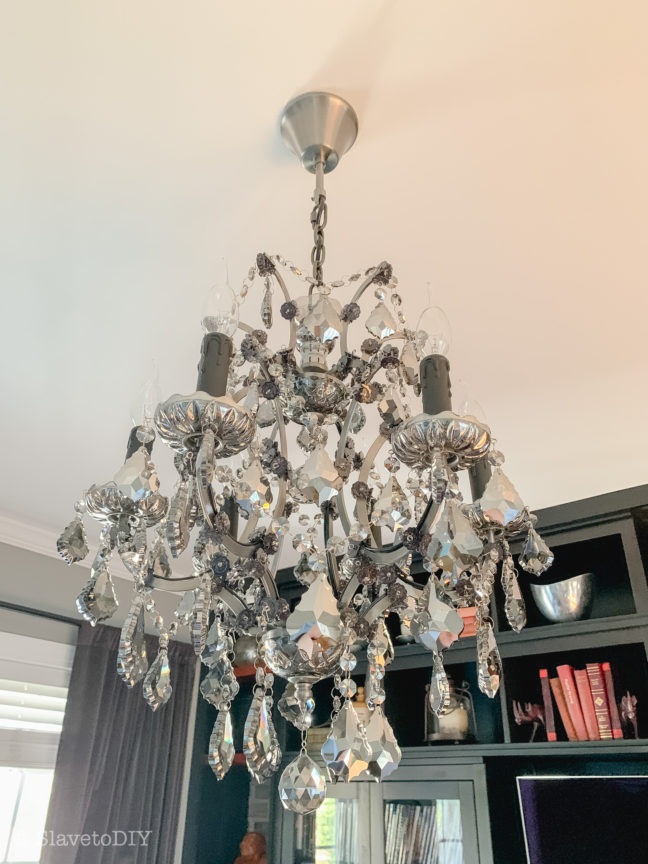
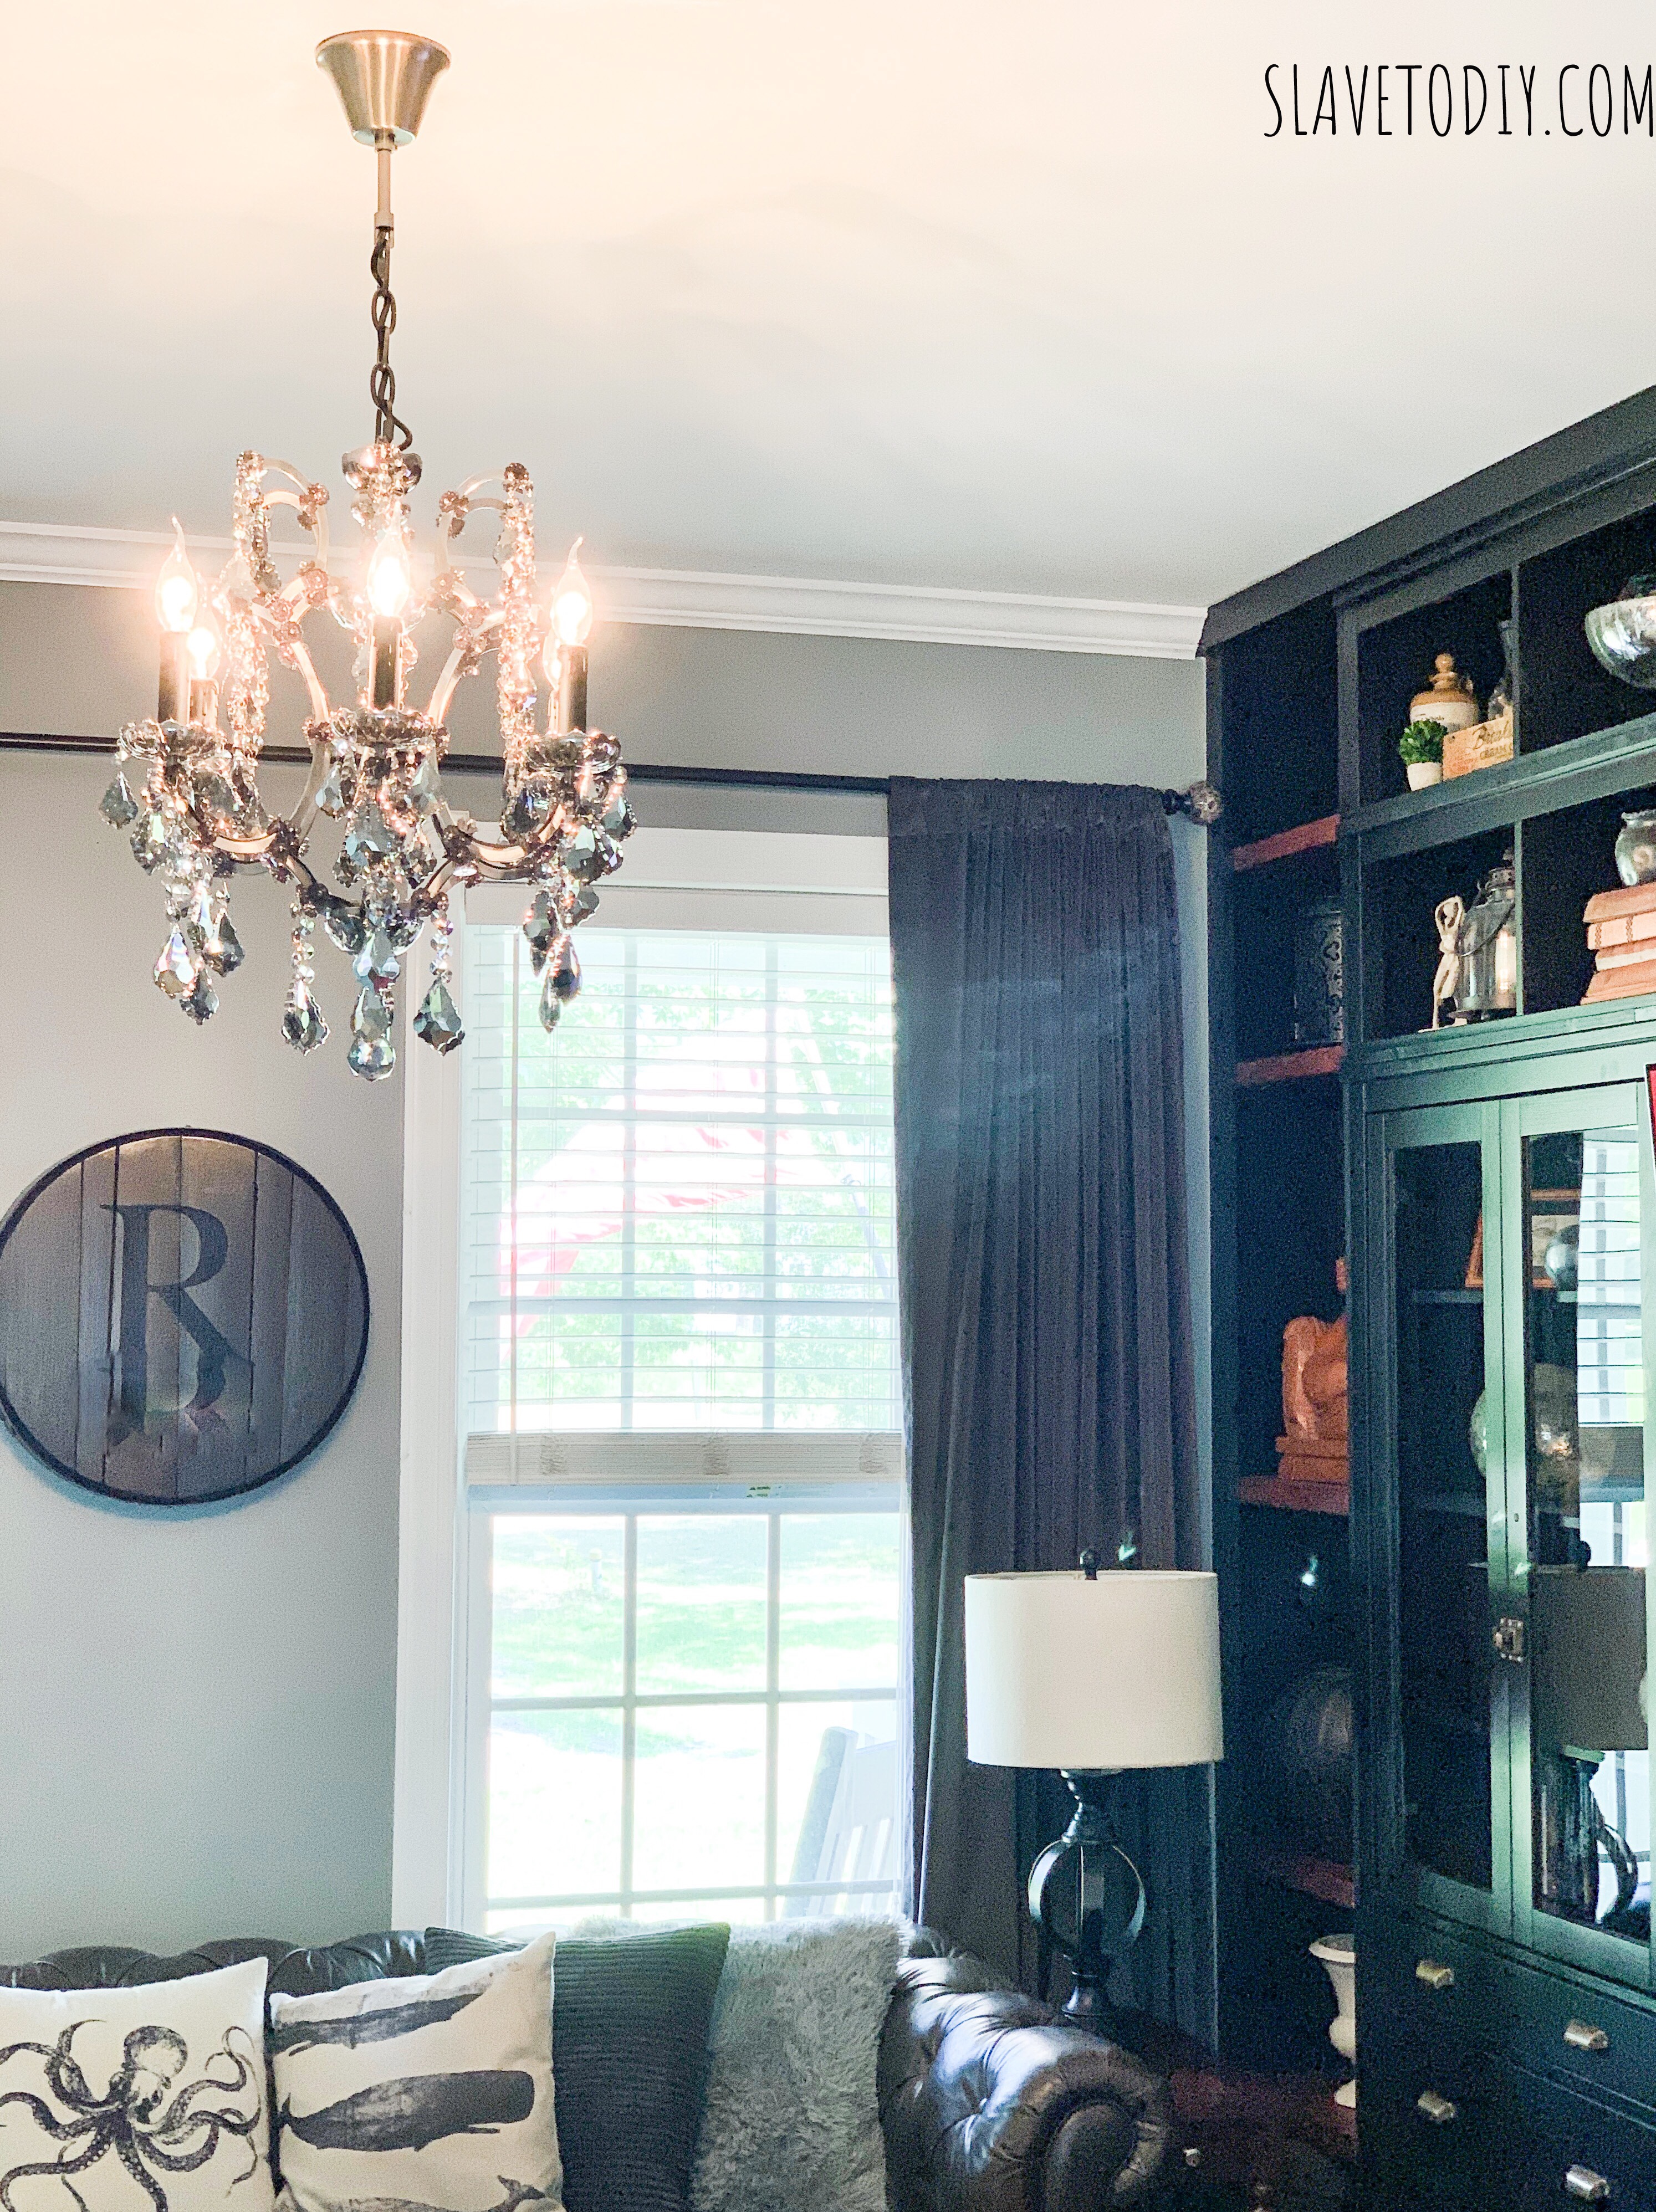
I’ve had my eye on a light fixture at RH for a while. I visited it at night on their website, shielding my iPad just in case Rainman was just pretending to be asleep and really wanted to know what I was cyber stalking. Several times I almost caved and bought a knock off (everything that was similar had a lot of chrome, which was too glammy), but I stayed strong and finally bit the bullet. Enter the 19th century rococo chandelier in smoke into my life. It was the perfect piece to complete a recent adult living renovation and I just couldn’t say no.
RH Restoration Hardware 19th C. Rococo Iron & Crystal Round Chandelier Product Review
As we have been busy on a MAJOR DIY deck addition, the box sat unattended for several weeks before my Rainman discovered me looking sad one night and rolled up his sleeves. What we thought would be a simple installation was not quite, but I’ll tell you all about it.
RH Restoration Hardware 19th C. Rococo Iron & Crystal Round Chandelier Product Review
But, first, back to that deck renovation. So, the deck needed to go in before child-next graduated from high school so there was an appropriately awesome place for his friends to hang out, not inside with all of the boring adults (and no one sued us when they fell through the old, rotting deck). Surprise, surprise, as we were peeling back siding to install the ledger board, Rainman and my father in law discovered rot. It went halfway up the back wall and surrounded the door.
RH Restoration Hardware 19th C. Rococo Iron & Crystal Round Chandelier Product Review
This was the same door that eventually I wanted to close in anyway, and was going to have a kitchen cabinet behind it, because we would also rip out windows and install custom steel doors instead. Nevermind that this other renovation was nowhere near ready to start, financially or otherwise, I was like, “fill it in.” We’re already doing this, and I’d rather not install a new door that we’re going to take out and close in later. And, as anyone knows who has DIYed a kitchen reno, there’s no time like the present to start it, and no time like right before you sell the house to finish it! Needless to say, I was a bully, and Rainman was not happy.
RH Restoration Hardware 19th C. Rococo Iron & Crystal Round Chandelier Product Review
Well, I couldn’t leave the blank wall without a cabinet. And if you’re going to get the cabinet you might as well get the matching one for the base of the banquette island you planned. And if you’re already paying the unlimited furniture delivery fee (which is unfortunately $399 in my area because I live out in the sticks), you might as well buy that fixture you’ve had your eye on. It’s like I was saving us money already. (I feel like I’ve maybe been reading those “If You Give A Mouse A Cookie” books to the little one too much lately).
RH Restoration Hardware 19th C. Rococo Iron & Crystal Round Chandelier Product Review
So, I had my fixture.
RH Restoration Hardware 19th C. Rococo Iron & Crystal Round Chandelier Product Review
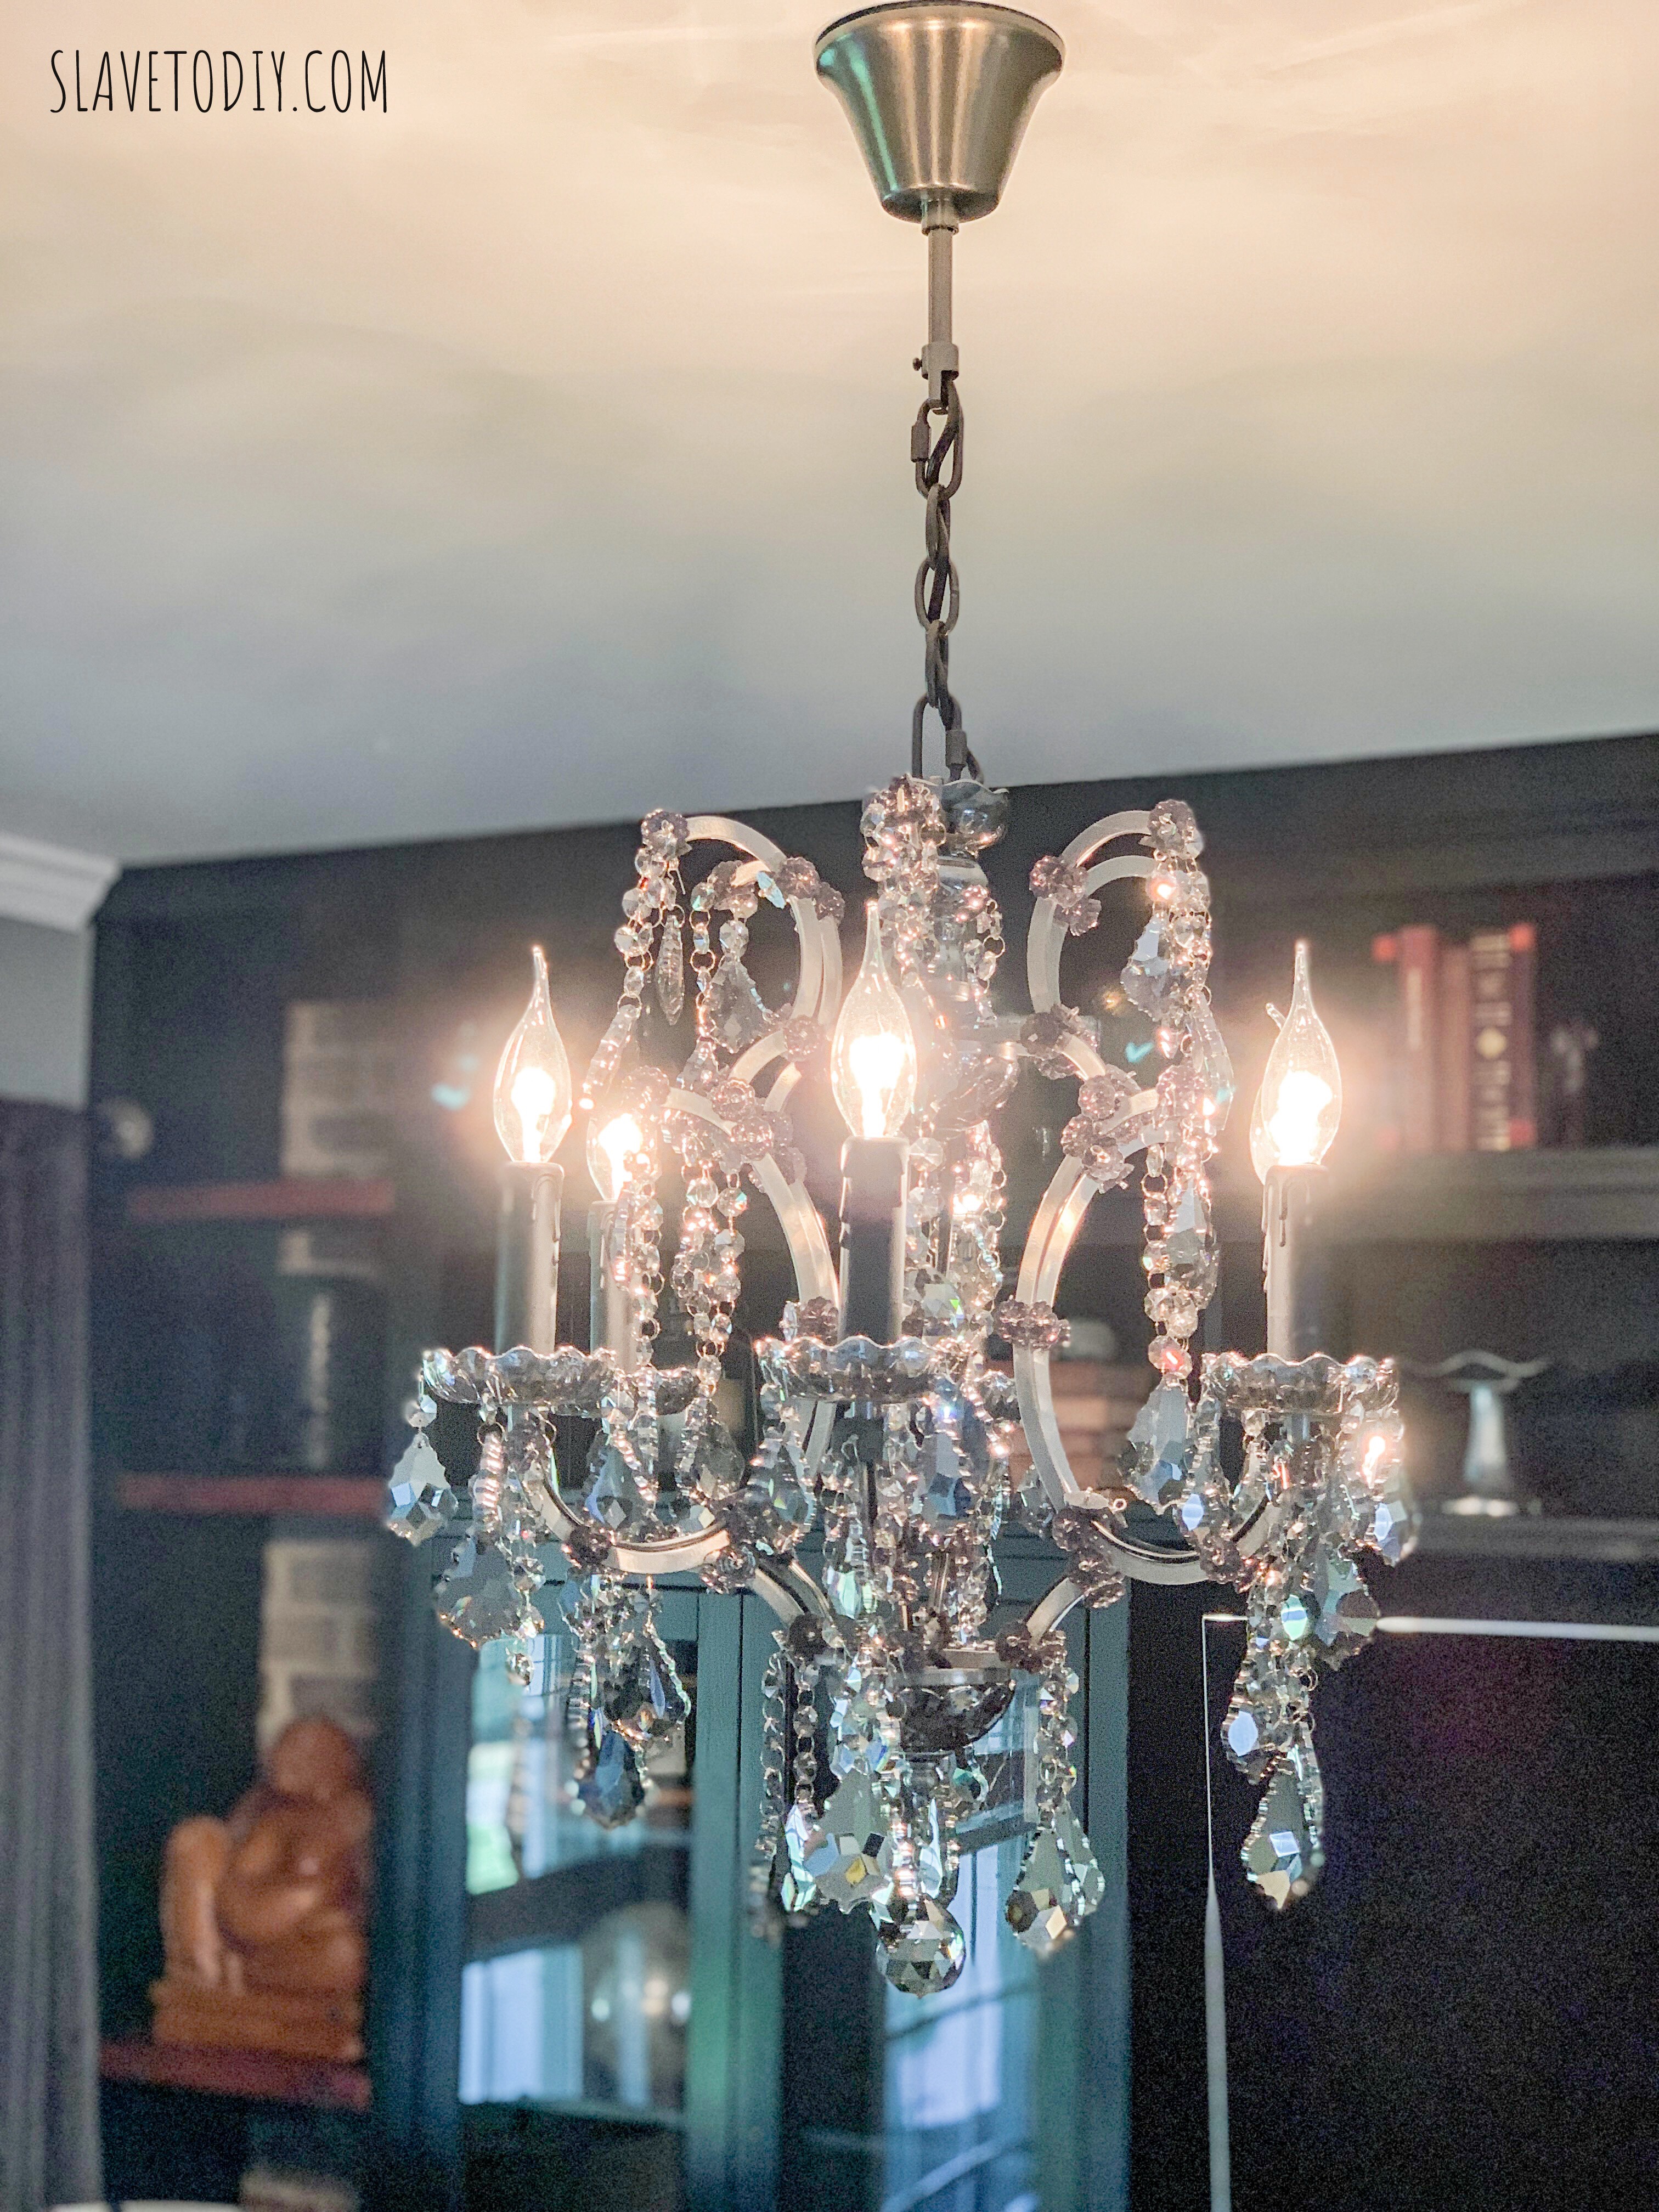
Rainman just wanted to make me happy, and generally, fixture hanging is a weekday evening type of deal. Straightforward and satisfying. Unless there are like 200 crystals that have to be individually attached. But, it’s fine… it would be better if there were gloves but they’re not included (I still need to go back and get all of the fingerprints off the crystals). I ordered white cotton gloves from Amazon and they’re ready for me whenever I get to it (there was no way I was stopping progress to wait on gloves).
RH Restoration Hardware 19th C. Rococo Iron & Crystal Round Chandelier Product Review
So, the actual fixture installation was pretty straightforward (although the directions are a bit lacking). I believe the prevailing assumption is that anyone buying this is going to have a pro install it and not their own personal slave Rainman after work one evening, so I guess I get that the wiring diagrams weren’t totally great. The real kicker was that the number of crystals doesn’t actually match the installation guide and you basically can’t get there from here. But, it may be that it’s a matter of personal preference how you’d like the crystals to hang, I’m not totally sure.
RH Restoration Hardware 19th C. Rococo Iron & Crystal Round Chandelier Product Review
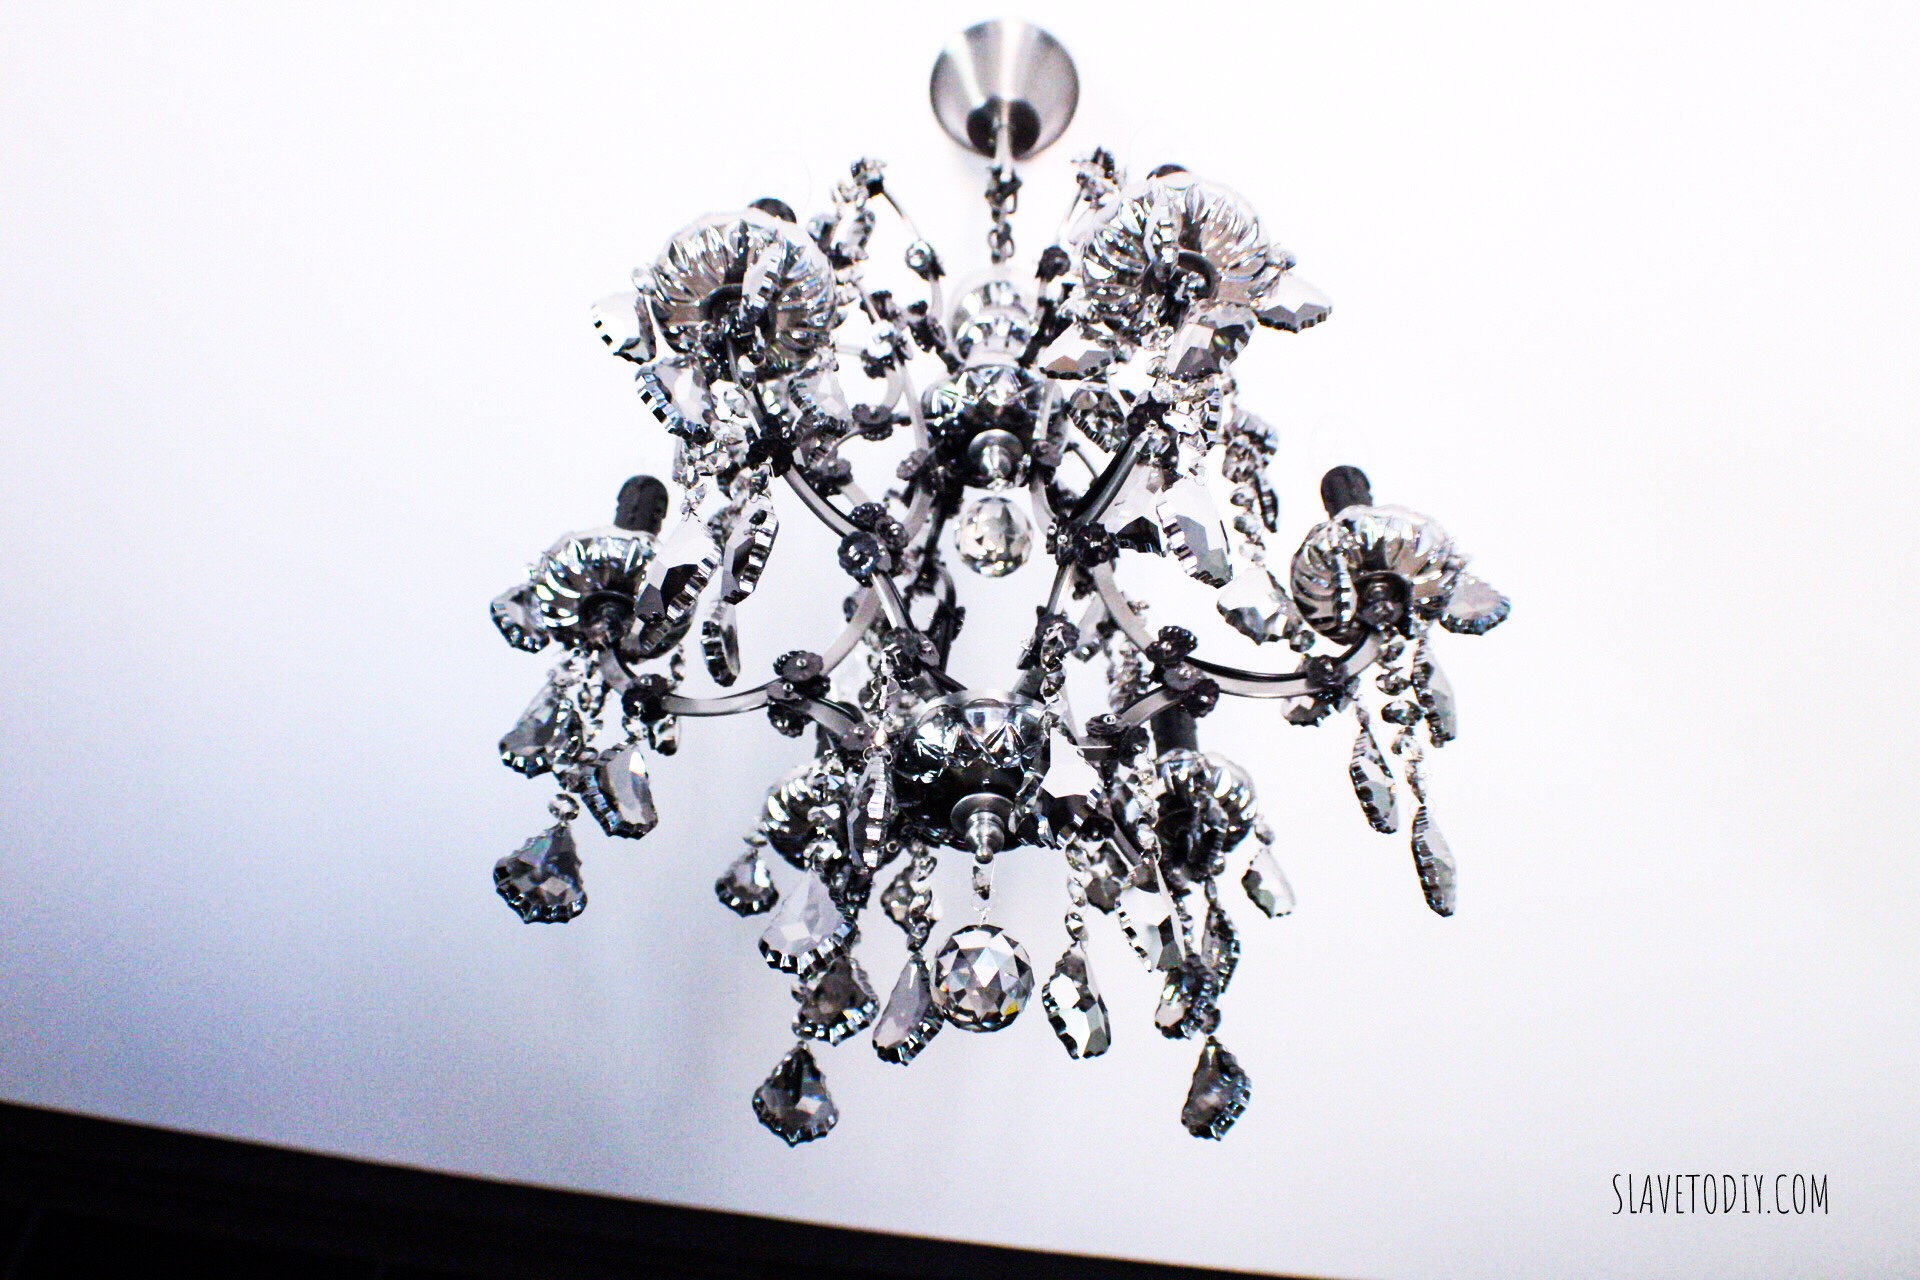
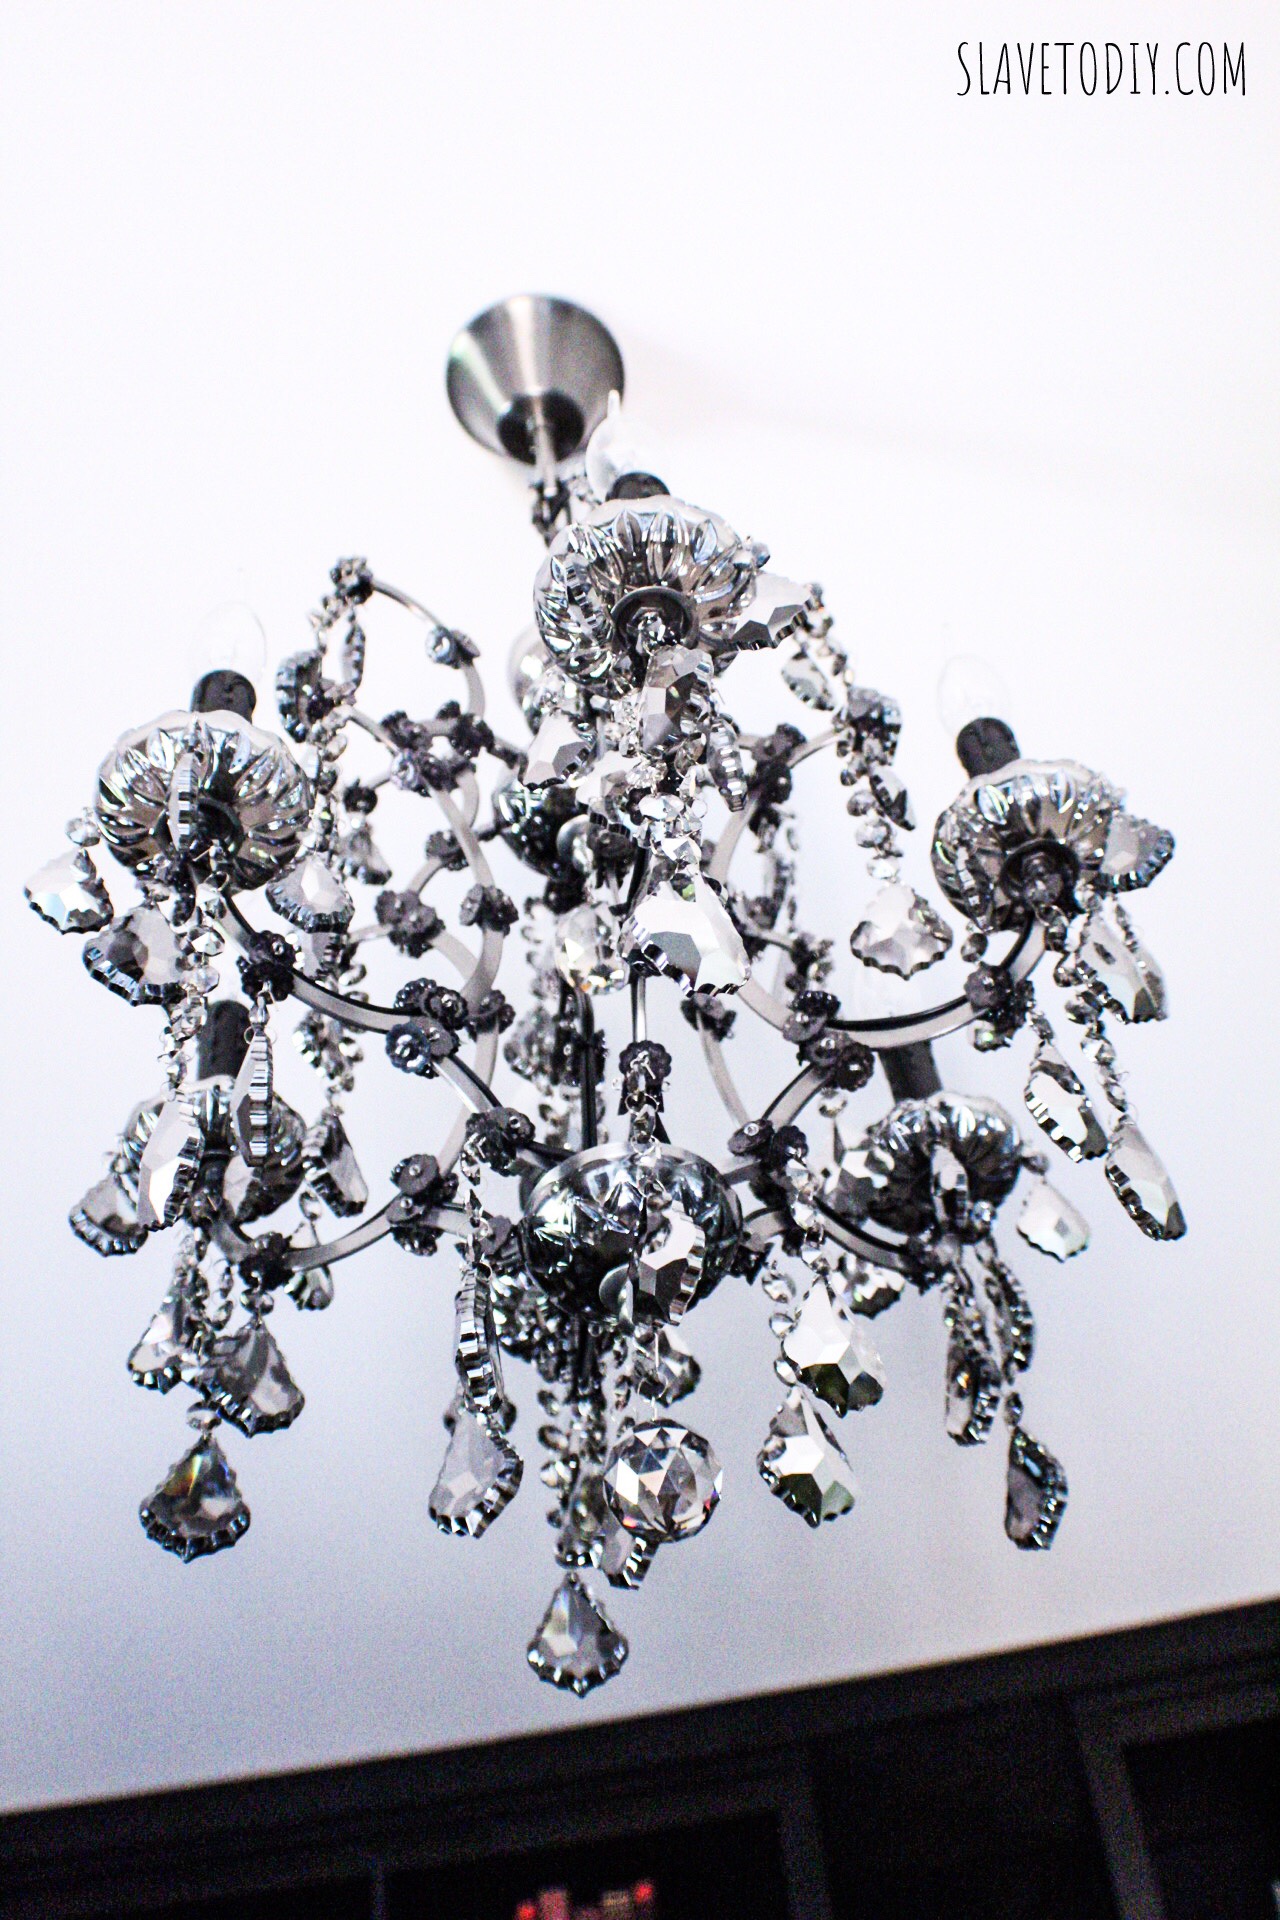
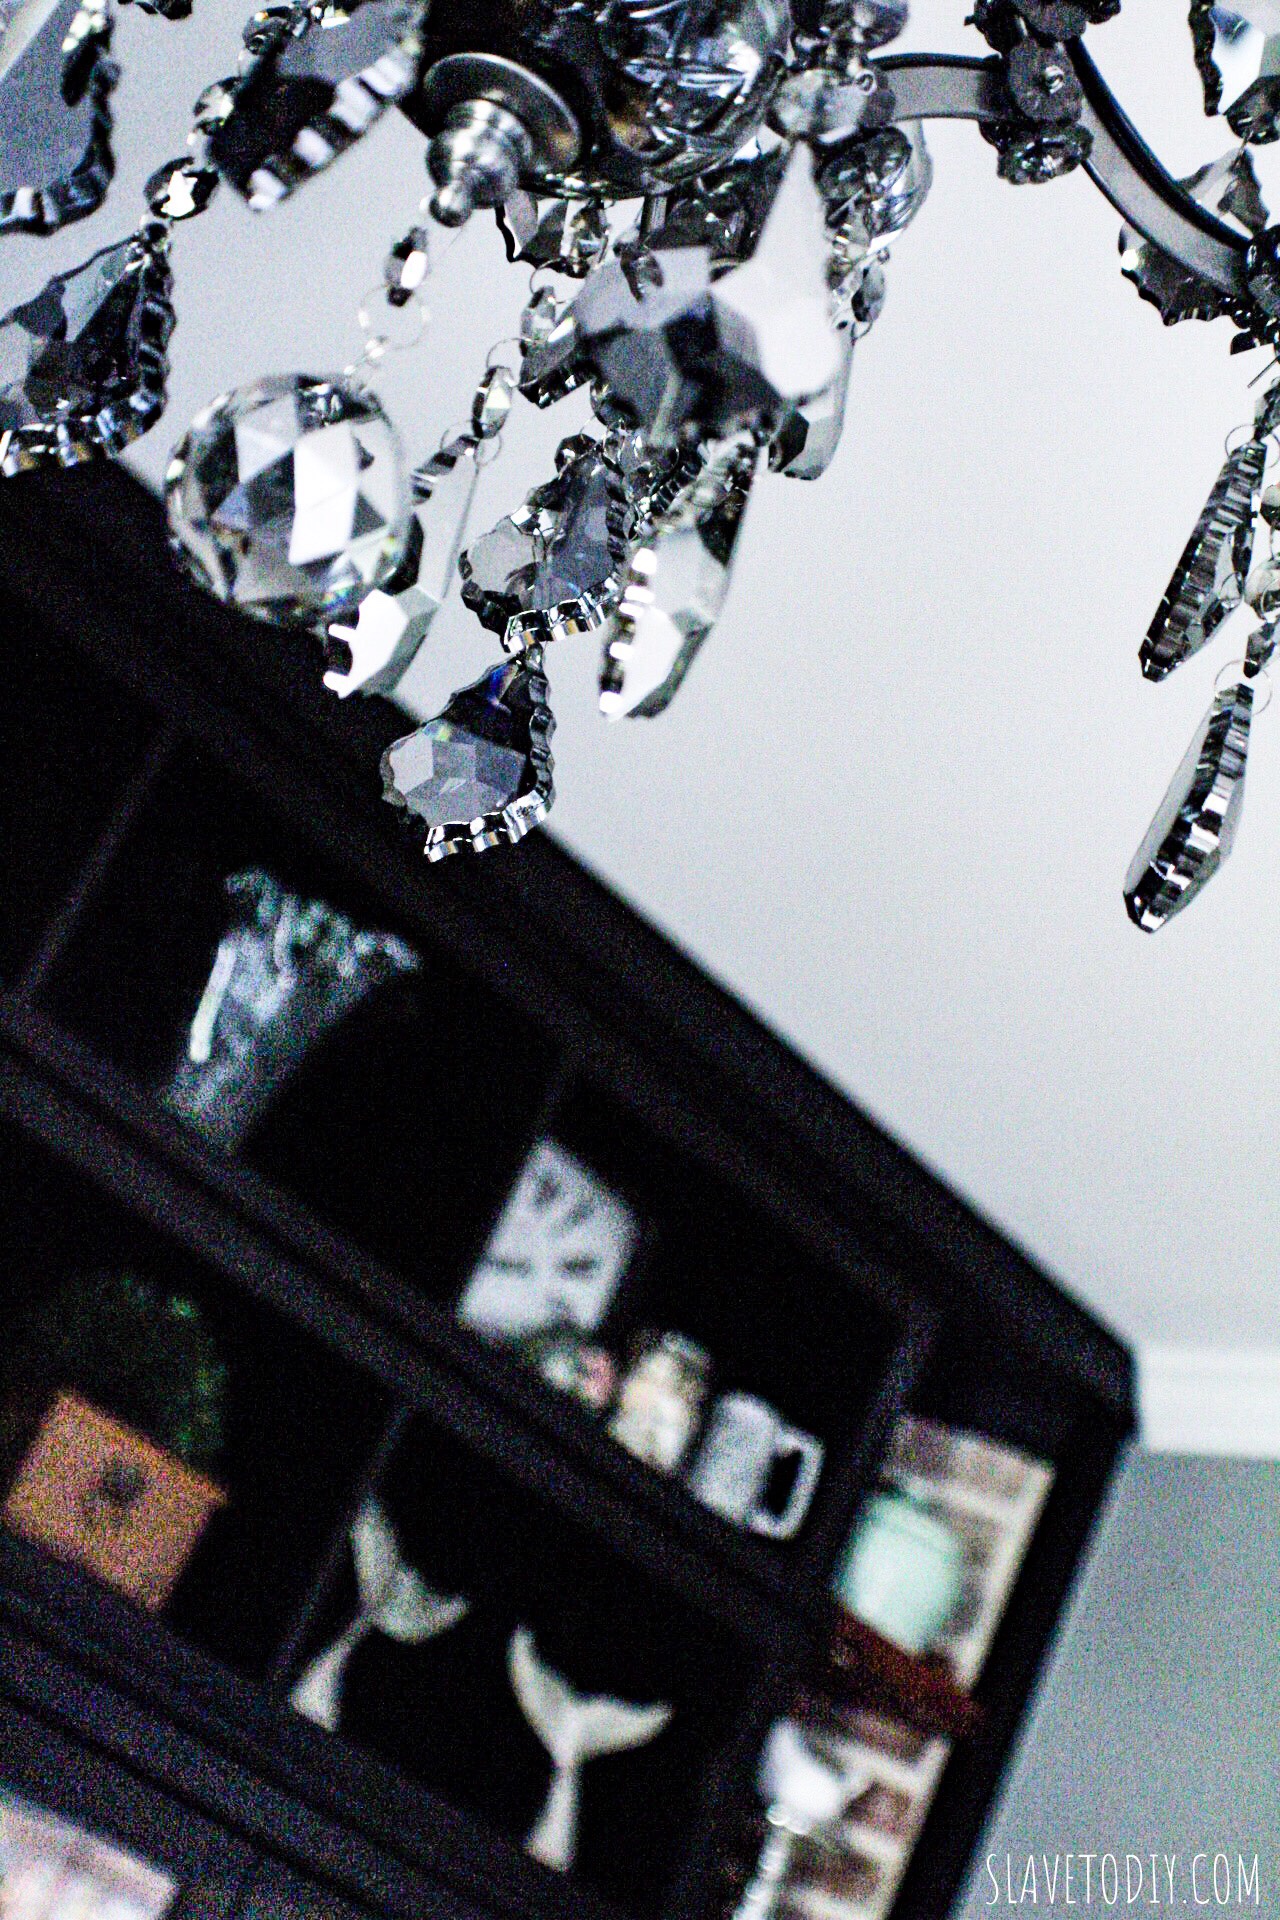
What I didn’t get from the product info before I received it (and you can’t see in their pictures) is that the body of the fixture is in matte iron – which sort of reminds me of industrial steel beams before they start rusting. It’s beautiful, just not what I expected. The black wrought iron seen in some of the pictures is only on the clear crystal option. I love it just as much, I just figured it was worth noting since it wasn’t entirely apparent to me upfront.
RH Restoration Hardware 19th C. Rococo Iron & Crystal Round Chandelier Product Review
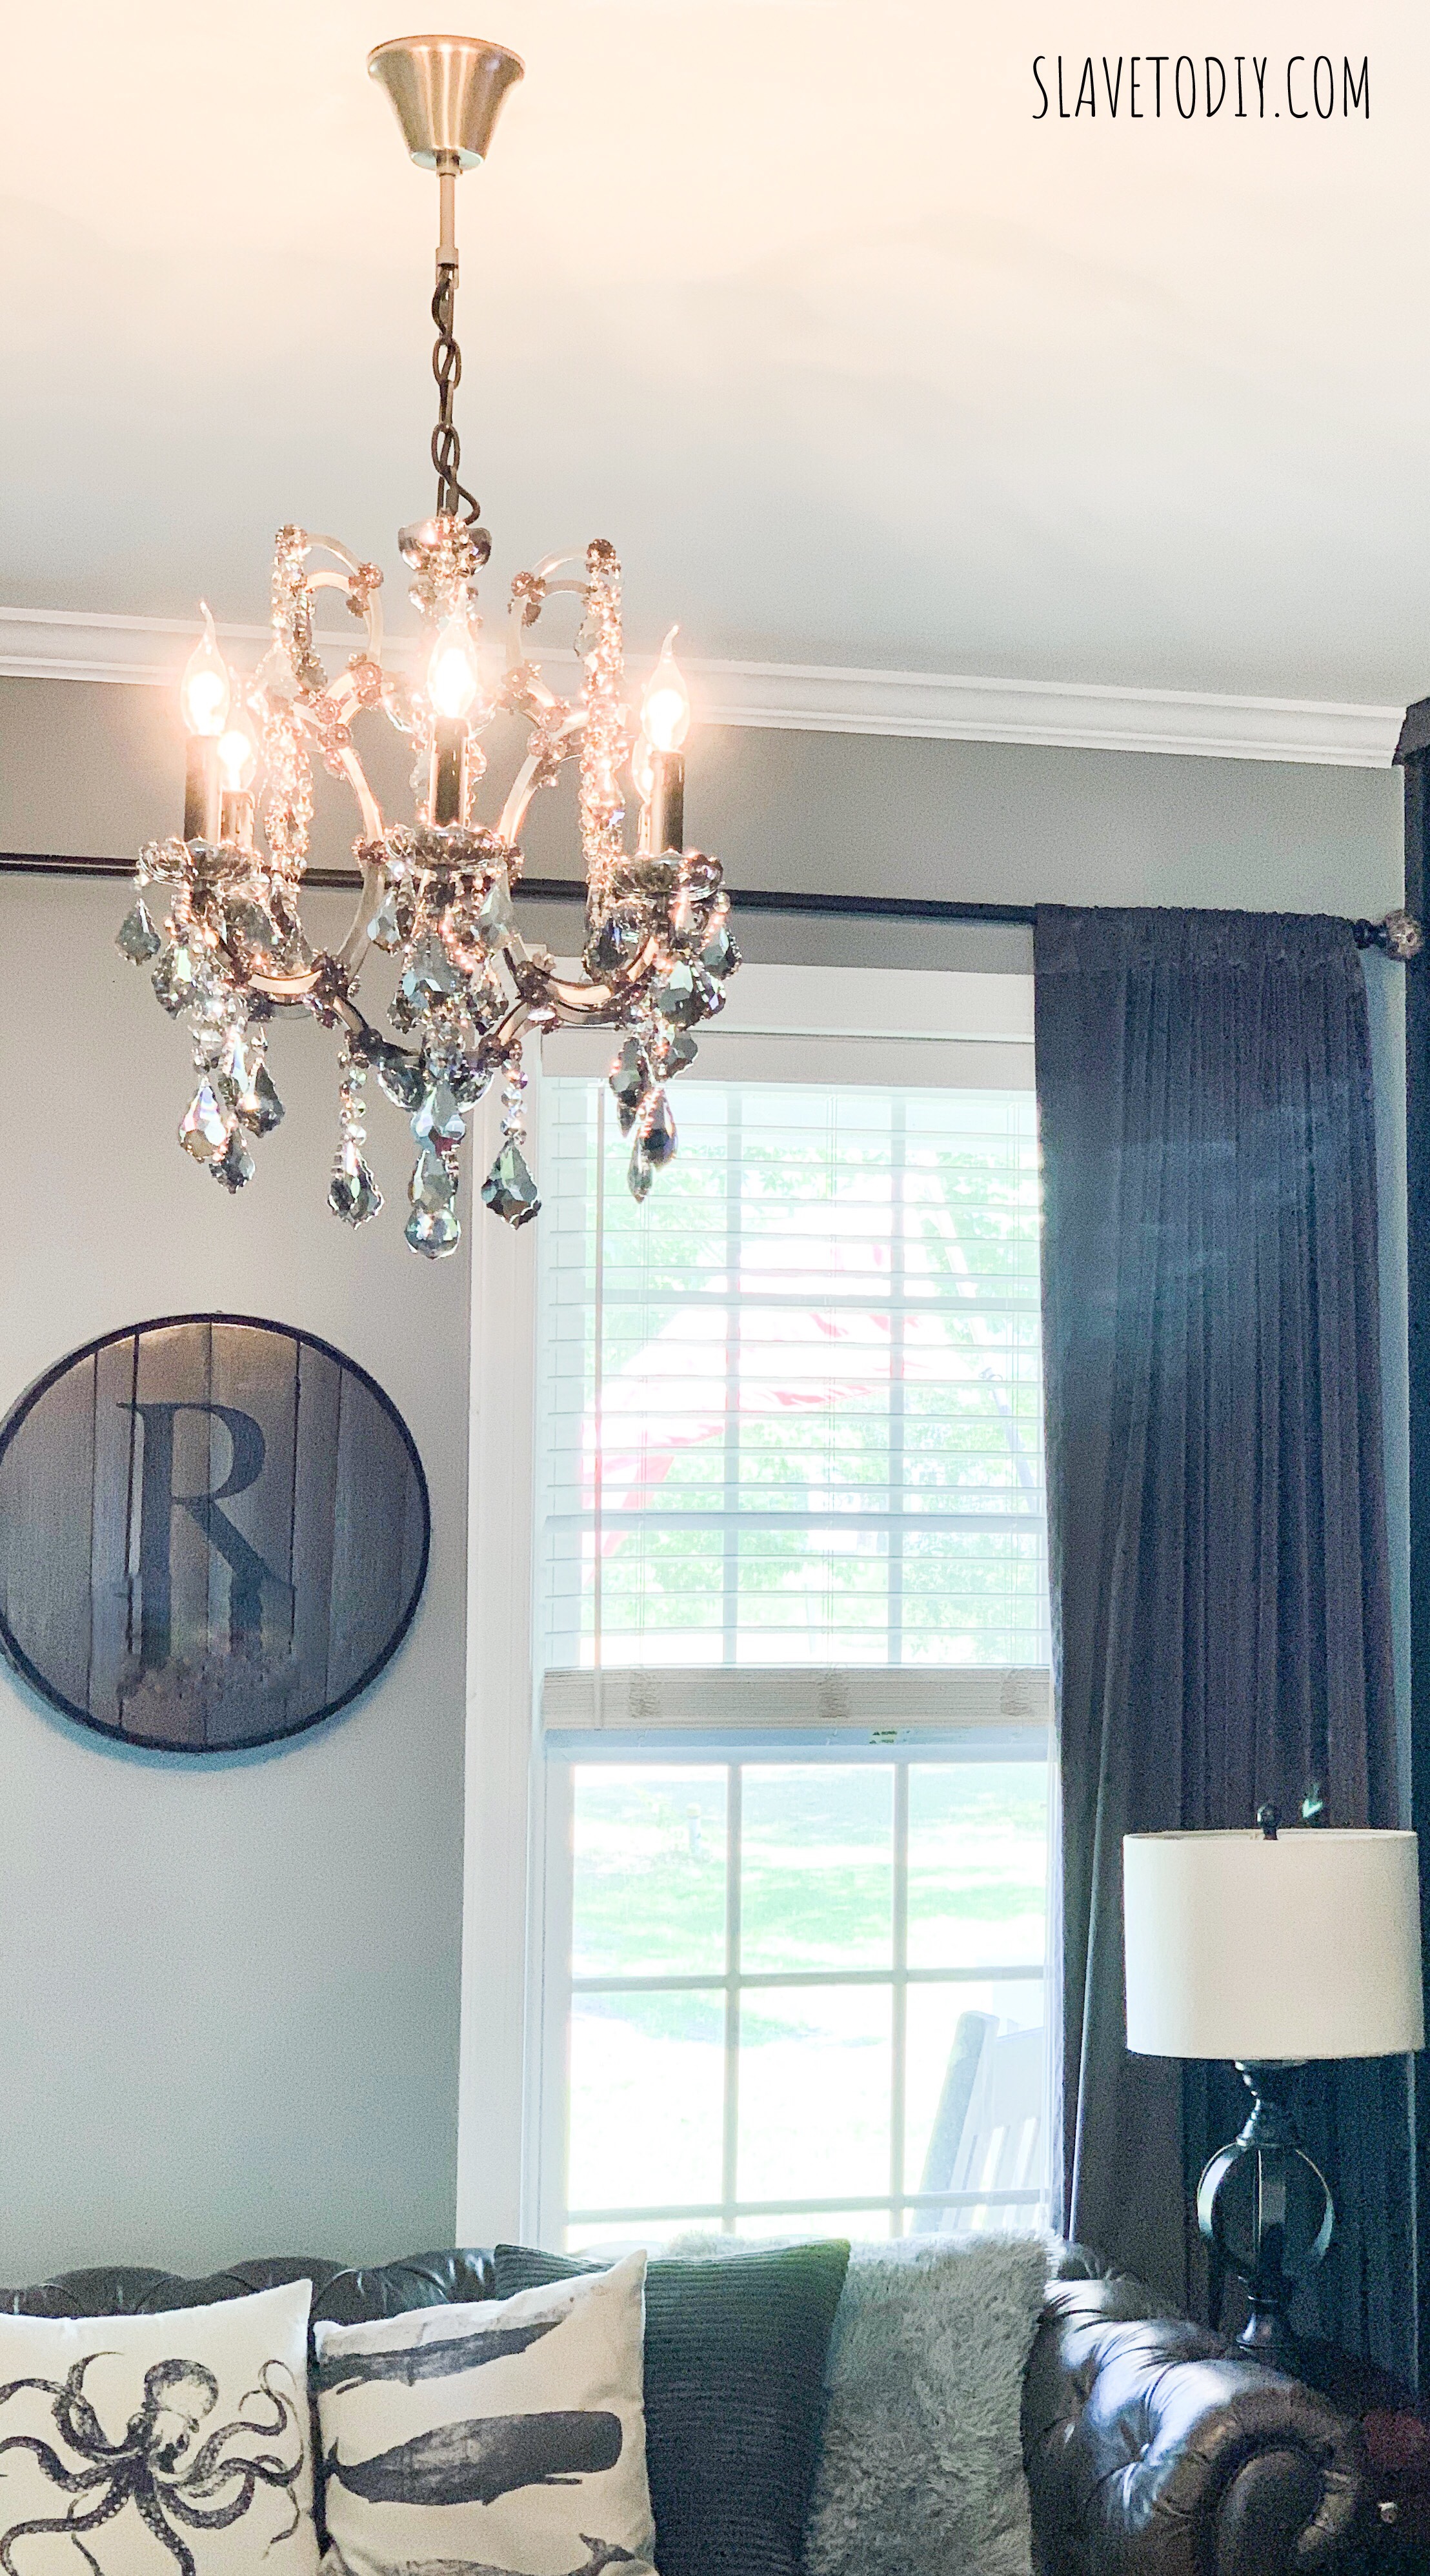
The verdict: (drumroll please) I would ABSOLUTELY recommend the fixture. It’s gorgeous and dazzling (like, going to need a dimmer), it is the crown jewel in the living room that took it from nice to, OMG-where’d-you-get-that? I love watching the light dance off of the beautiful smoke crystals in different patterns as the sun moves around the house during the day and the shadows it creates when the sun goes down. It’s breathtaking.
Although we didn’t have any issues with this particular fixture, there were some blemishes on one of the cabinets. I offered to have them send me replacement hardware, but as that was out of stock, they send a team to pick up the cabinet and bring me a whole new one. No trouble, no fuss, no problem. The customer service is fantastic, and their dedicated delivery teams are super professional and friendly.
Apparently they have some ludicrously good warranty on all of their stuff (which I honestly didn’t know when I hit “play” on the purchase), so even though the products are a bit *cough *cough on the pricey side, we’ll be buying from them again. It’s well worth the extra money to have heirloom quality pieces.
Thanks for hanging out with us today and check out more of our DIY, projects, and decor on our blog.
Cheers!
*Legal stuff:
I am honest about my experiences with different products and write because I enjoy it. I do however, have the opportunity to earn money for my writing, also.
Slavetodiy.com is a participant in the Amazon Services LLC Associates Program, an affiliate advertising program designed to provide a means for sites to earn advertising fees by advertising and linking to amazon.com. Amazon offers a small commission on products sold through their affiliate links. Each of your purchases via our Amazon affiliation links supports our cause at no additional cost to you.
If a blogger links to an Amazon product (with a special code for affiliates embedded in the link), and a reader places an item in their “shopping cart” through that link within 24 hours of clicking the link, the blogger gets a small percentage of the sale. Amazon links are not “pay per click.” If you click on the product link and stay around Amazon and purchase something else, however, I will get a commission on that sale.
Slavetodiy.com is also a VigLink affiliate advertiser which works similarly.