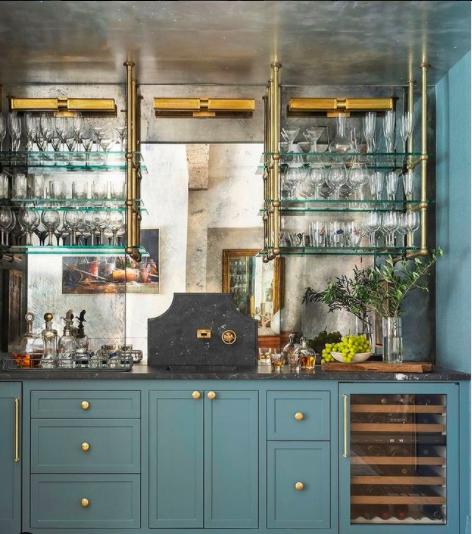
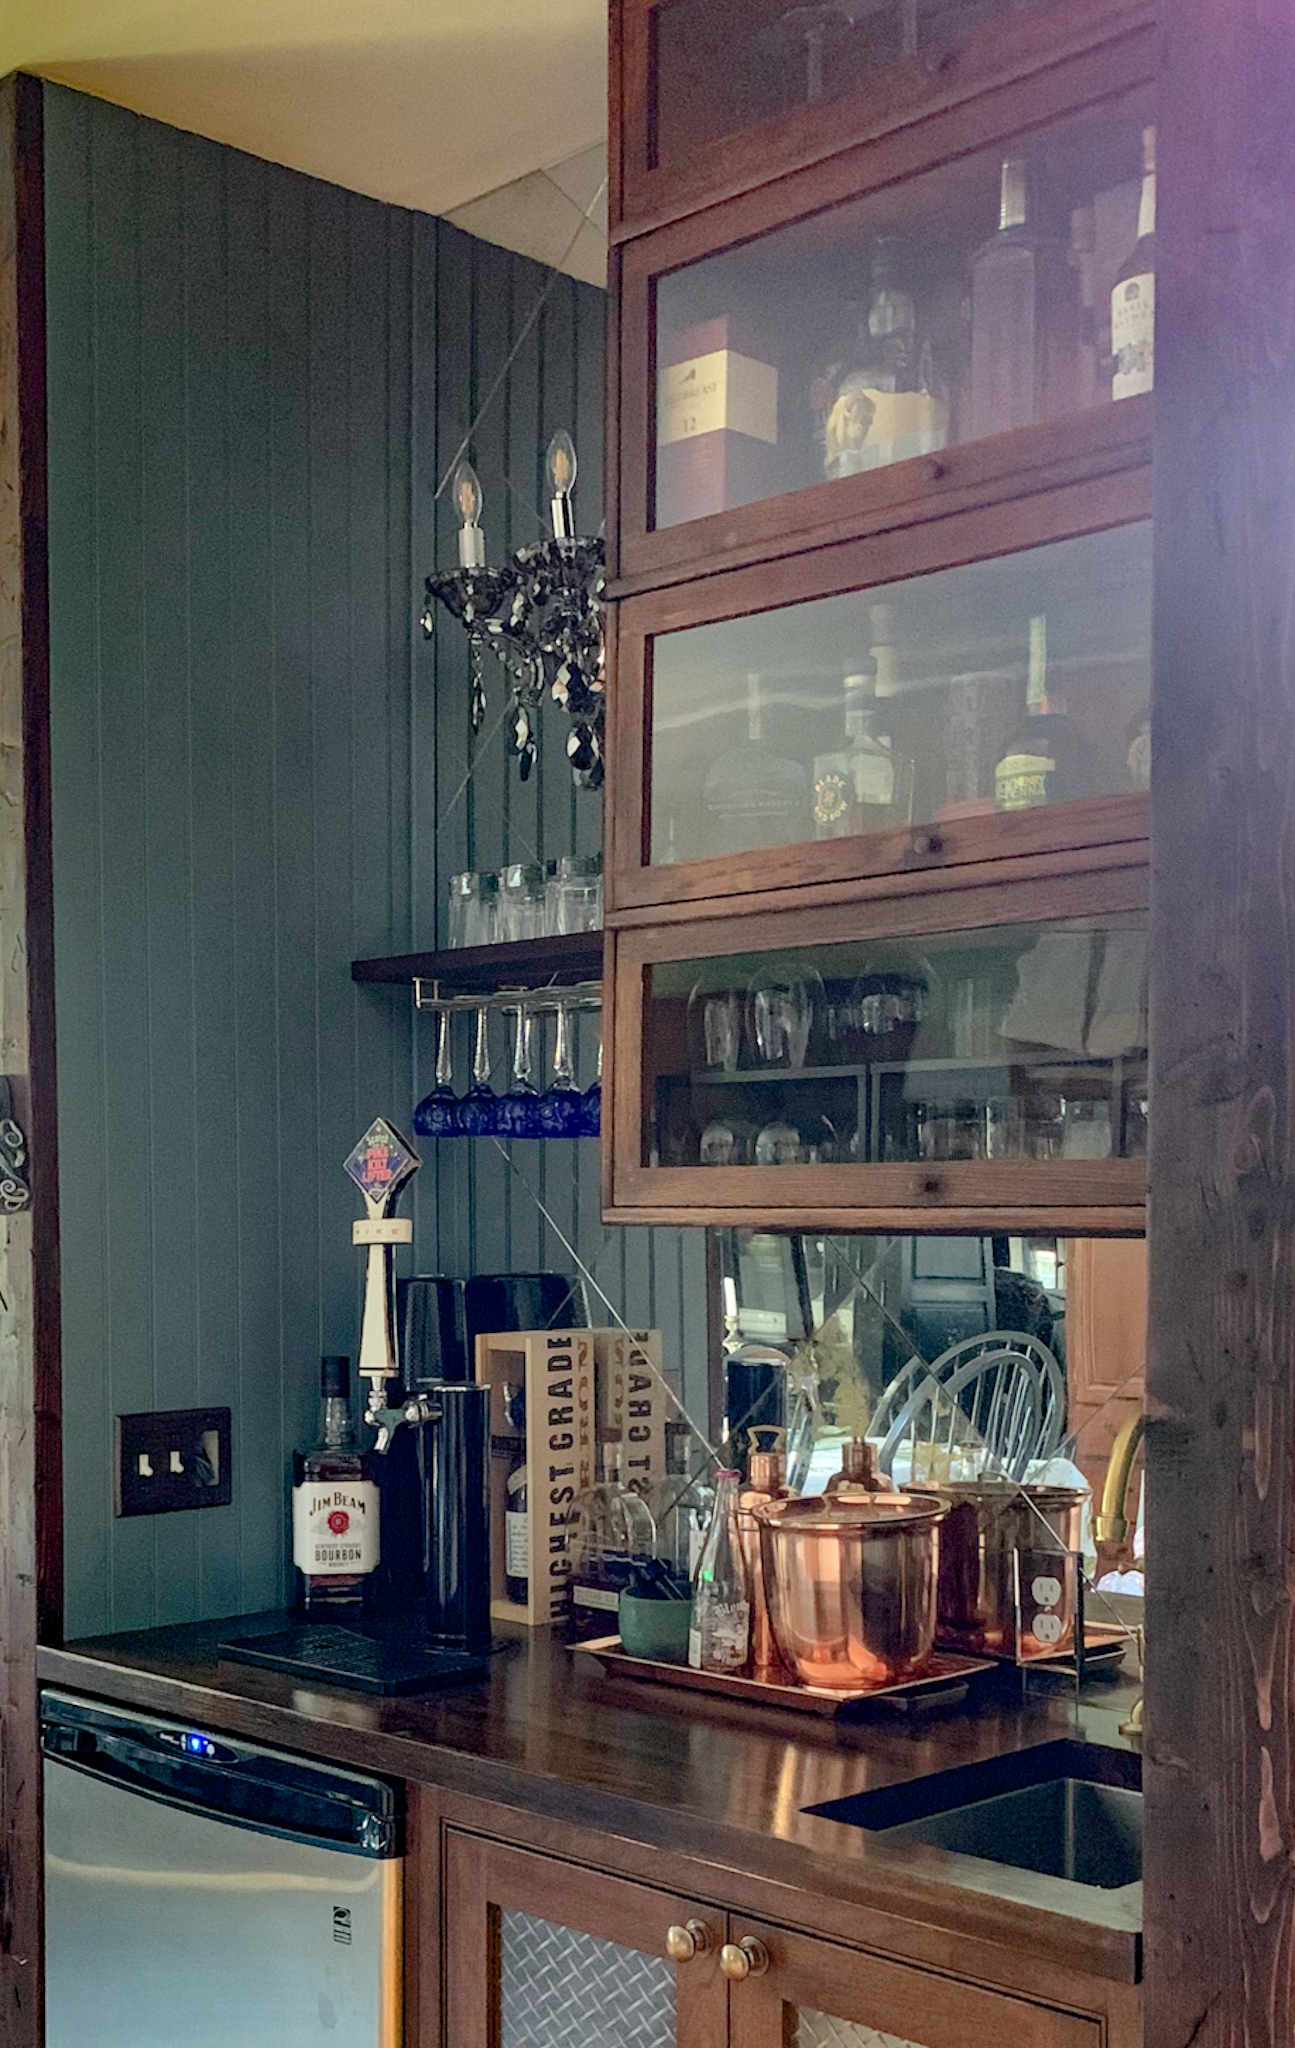
I’ve been dreaming of an antique mirrored backsplash since I first saw it on a simple home bar. The mirrored tiles are everything from one solid sheet, to tiles with beveled edges, to larger flat tiles. When I started researching where to buy the tiles for our own home bar backsplash (because of course I just HAD to have one) I was mortified. Those suckers are expensive. There are some sellers on ETSY selling these for $60 a square foot… which is well out of any budget I’m willing to spend on a backsplash. But look how beautiful they are!
*This post may contain affiliate links. Please see full disclosure at the end of the post.

So, what did we do? We DIYed it (of course). And it came out JUST as dreamy as those designer looks.
Before I start the tutorial, please know that this process is quite labor intensive and makes a huge mess. I recommend doing this with a buddy, a spouse, or a helper (my body was screaming at me for two days after the paint-stripping process because I had underestimated the amount of up and down and crouching). But, what do you get out of it? An awesome, one of a kind backsplash!
I did quite a bit of research and looked at a LOT of pictures before I got out the plastic dropcloth and laid out the mirrors. I encourage you to look at the finished photos of ours and adjust your plan accordingly. I wanted a lighter antiqued look with a glow… but if you want more antiquing, or a different color underneath, it will still look great!
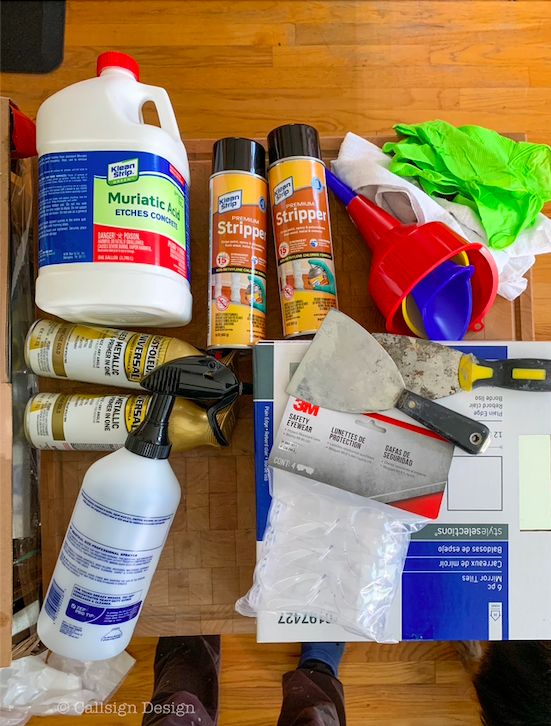
So, this is what our materials looked like before we began, but I can tell you up front that we made at least one MAJOR adjustment. Unless you’re doing a VERY small project, the stripper shown is not going to do the trick. I ended up using a bucket of stripper we had previously used on an antique mirror someone had painted, and slopping that on really did the trick (a full materials list is at the end of the post).
What you’ll need: two plastic drop cloths, muriatic acid, stripper, disposable gloves, eye protection, funnels, gold or gray spray paint, a spray bottle, 12×12″ mirror panels (you can cut these down later if you’d like smaller tiles), and a good putty or mudding knife. I apologize for some of the progress photos being missing: once I got into the middle of the stripping process I couldn’t stop and I had goop and acid on my gloves.
1 Put down your plastic sheet somewhere you can work and where you can get messy (we did this project on a deck we’ll be tearing out later).
2. Lay out your tiles so you can walk between them.
3. Put on your gloves and eye protection and slather the back of each tile (there is a thick layer of paint) with a good coat of stripper. To clarify, every step of this process, the “front” or glass face is down… you are only manipulating the backside finish.
Pro tip: Mirrored tiles are made up of three layers: Glass, silver reflective material, and a thick painted backing that protects the silver. This step removes the painted backing. It will lift EASILY when it is ready: don’t scrape at the mirrors or it will scratch through all of the layers and be visible later (ask me how I know).
4. When the backing is lifted (set it aside next to the tiles on the plastic drop cloth), spray off the back of each tile with water.
5. Move the tiles to a safe place, face down, where the front glass will not get scratched (we moved them to a smooth concrete slab and had individual paper towels down to protect the glass surface of each tile.
6. Put some dawn dishsoap on the back of each tile, wipe it down thoroughly (keep the hose running next to you here) rinse and dry it (it helps to have two people working on this step, one cleaning one drying). What you should have left at this point is just the silver backing. If there is leftover paint, that’s okay, it’s not going to show through, that area just will not be antiqued.
7. The next step it is VERY CRITICAL you are wearing protective eyewear, gloves, and clothing as you’ll be dealing with muriatic acid. Carefully use the funnel to pour muriatic acid into the spray bottle (I would use a NEW spray bottle to ensure you’re not mixing any other chemicals with the acid).
8. Gather up your used drop cloth (that should be very wet and filled with used goop) and put a new plastic dropcloth down so you don’t have any chemical reactions with the acid step. Lay your mirrored tiles glass side down again, spaced out.
9. This is sort of the fun part: now you’re antiquing! If you want heavy pieces of the silver gone you can spray it on more liberally. Mist the acid around the edges of the panels for a natural antiqued look, spraying some tiles more heavily and some less. Then you just let the acid do it’s work. Keep some clean rags on hand to blot excess acid in case you spray too much. You’ll be able to see when the acid is finished doing it’s work: you’ll be able to see through the clear glass to what’s beneath.
10. Get your hose out and spray off the panels to clear the acid.
11. Move the panels back to your washing and drying area and repeat the process of washing and drying (don’t forget to protect the face of the glass!). Your panels are now ready for paint!
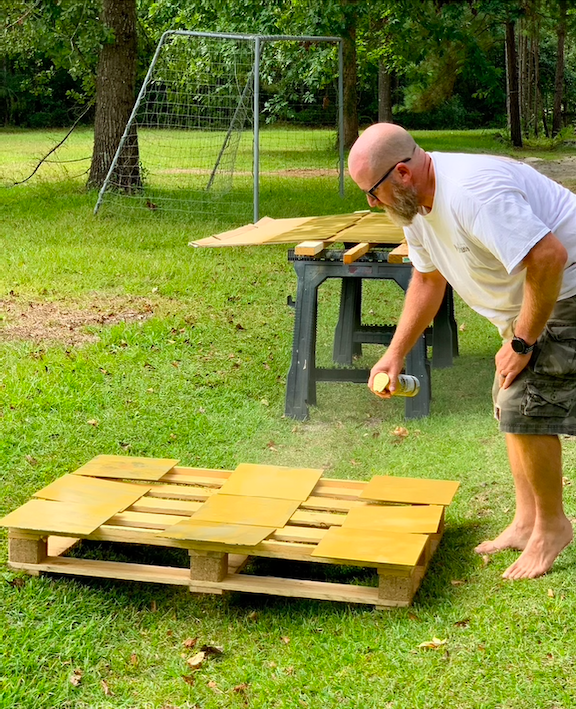
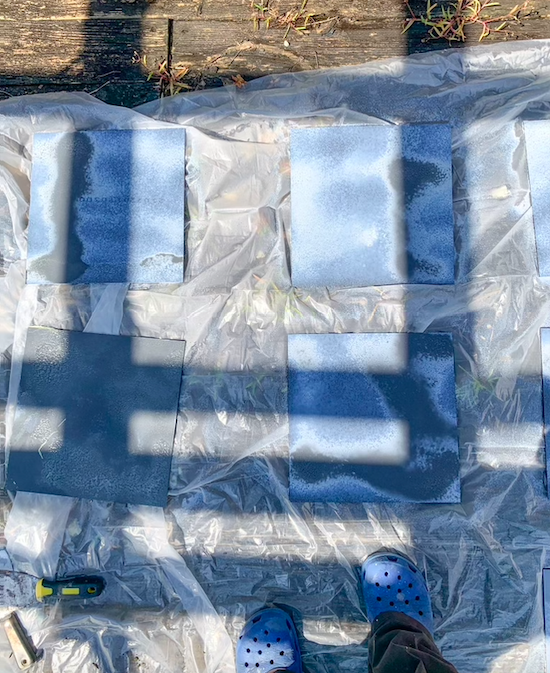
12. We chose an antiqued gold spray paint instead of gray to give our panels a lighter, gilded feel, but gray works also if you’re into a moodier look.
13. Lay out the panels in a place where you’ll have plenty of time to let them dry, glass side down. Rainman did two good layers of gold spraypaint with the panels laid out on cardboard, allowing the layers to dry inbetween.
14. When they are completely dry, you can store them stacked with cardboard between the panels to prevent scratching.
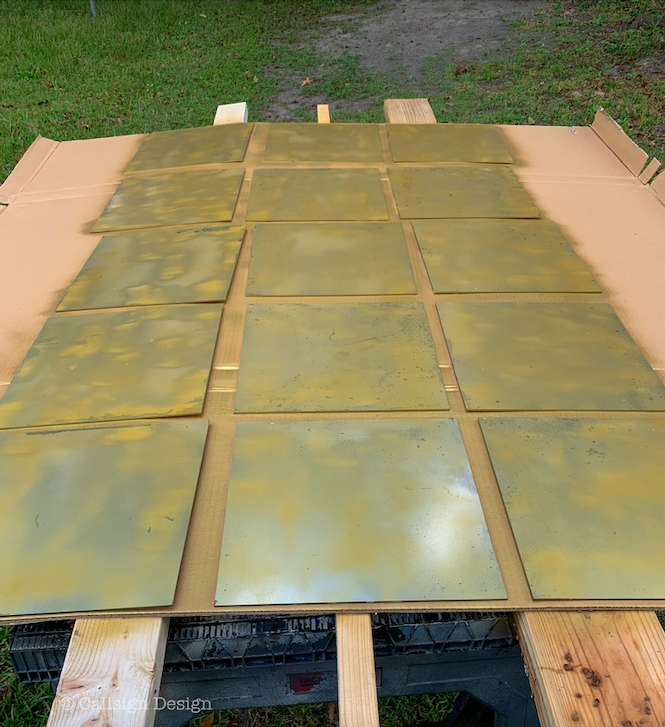
In the photo above, you can see the dark spots through the first layer of paint: those are the spots the acid etched into the panels, and where you will see through to the paint.
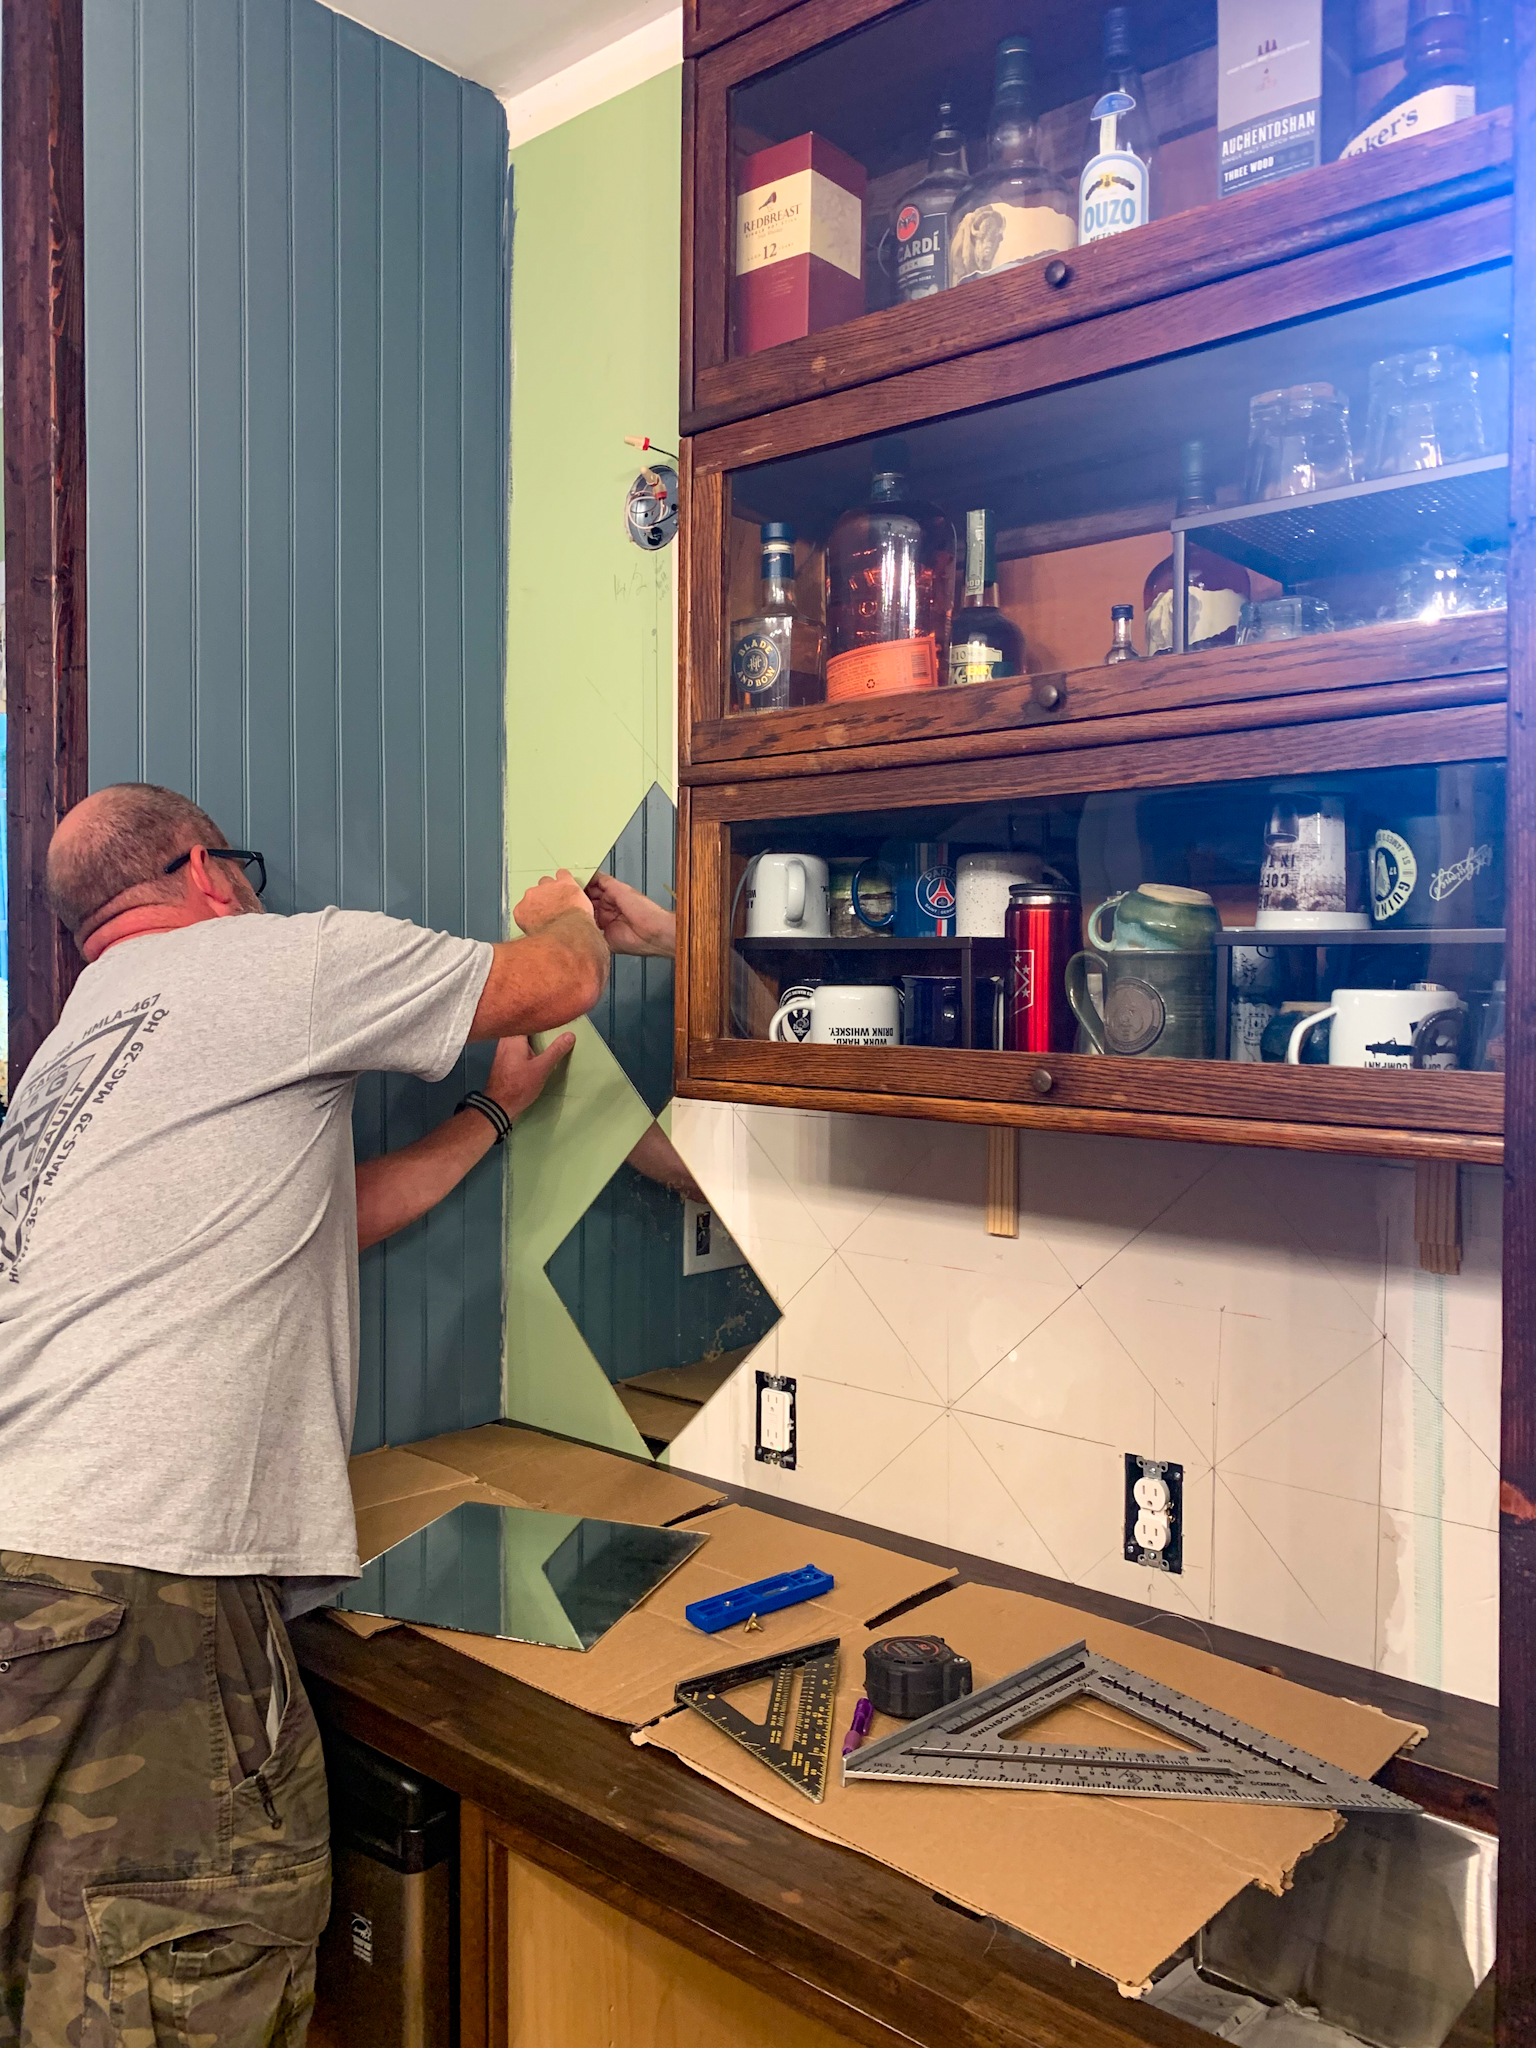
Now to the really fun part: cutting glass/mirrors isn’t difficult, but I recommend planning ahead for getting around outlets, light fixtures, or plumbing fixtures. There are one million tutorials on Youtube on how to cut glass or mirrors… so I recommend you look those up (the glass cutting tools I linked below are all that we needed to do cuts).
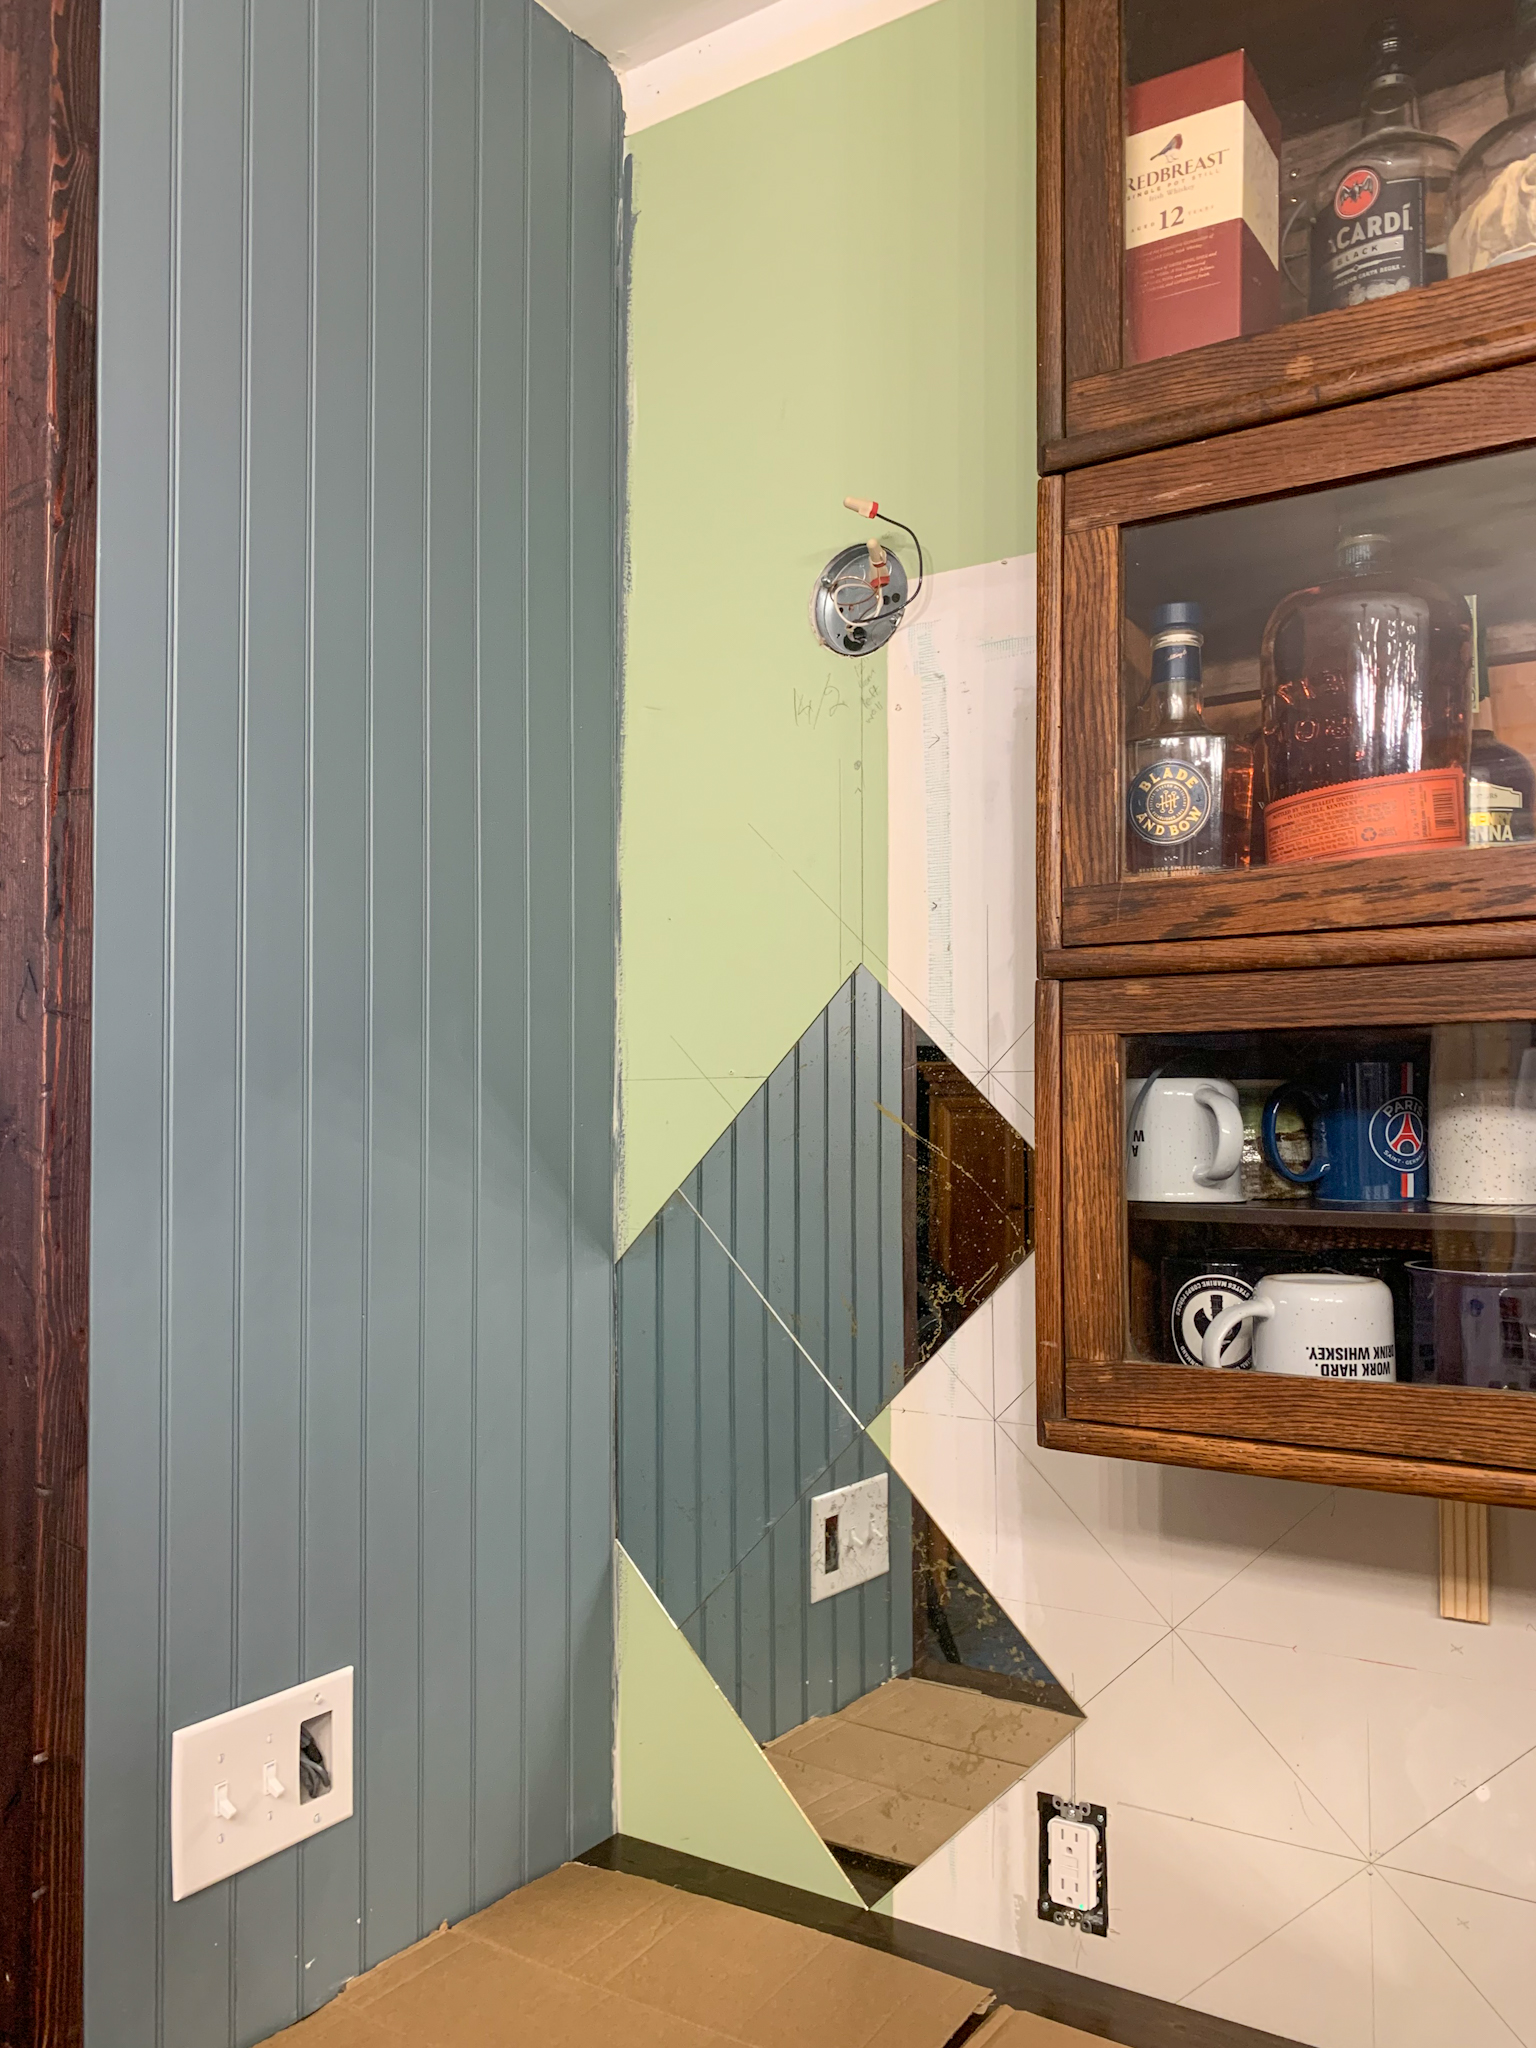
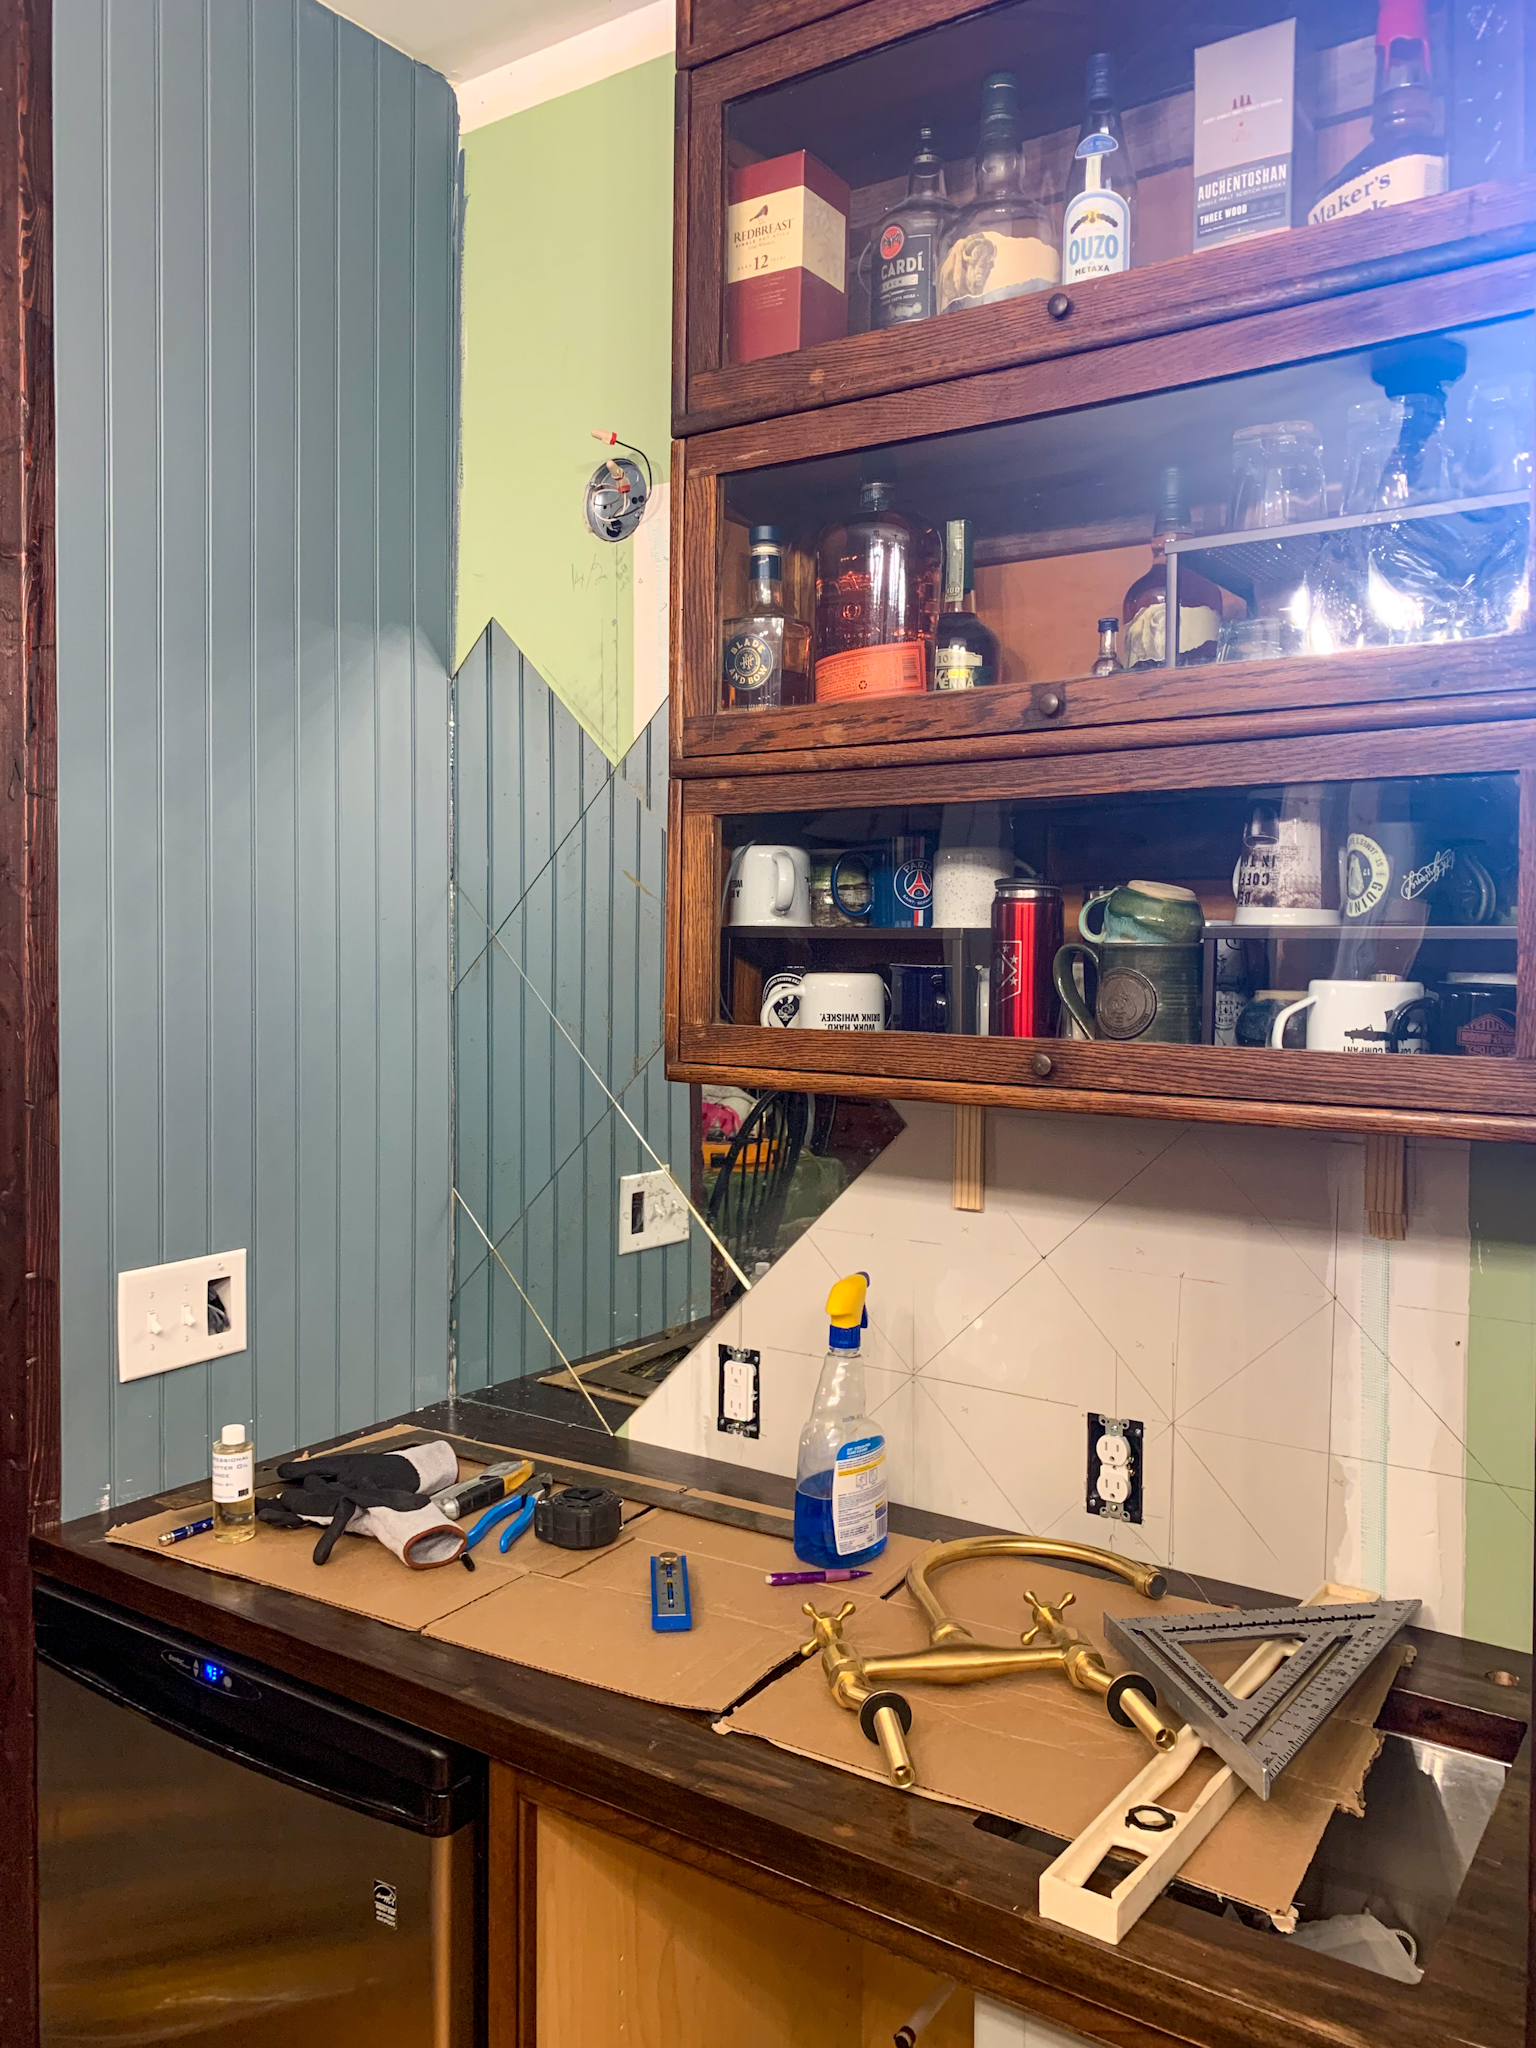
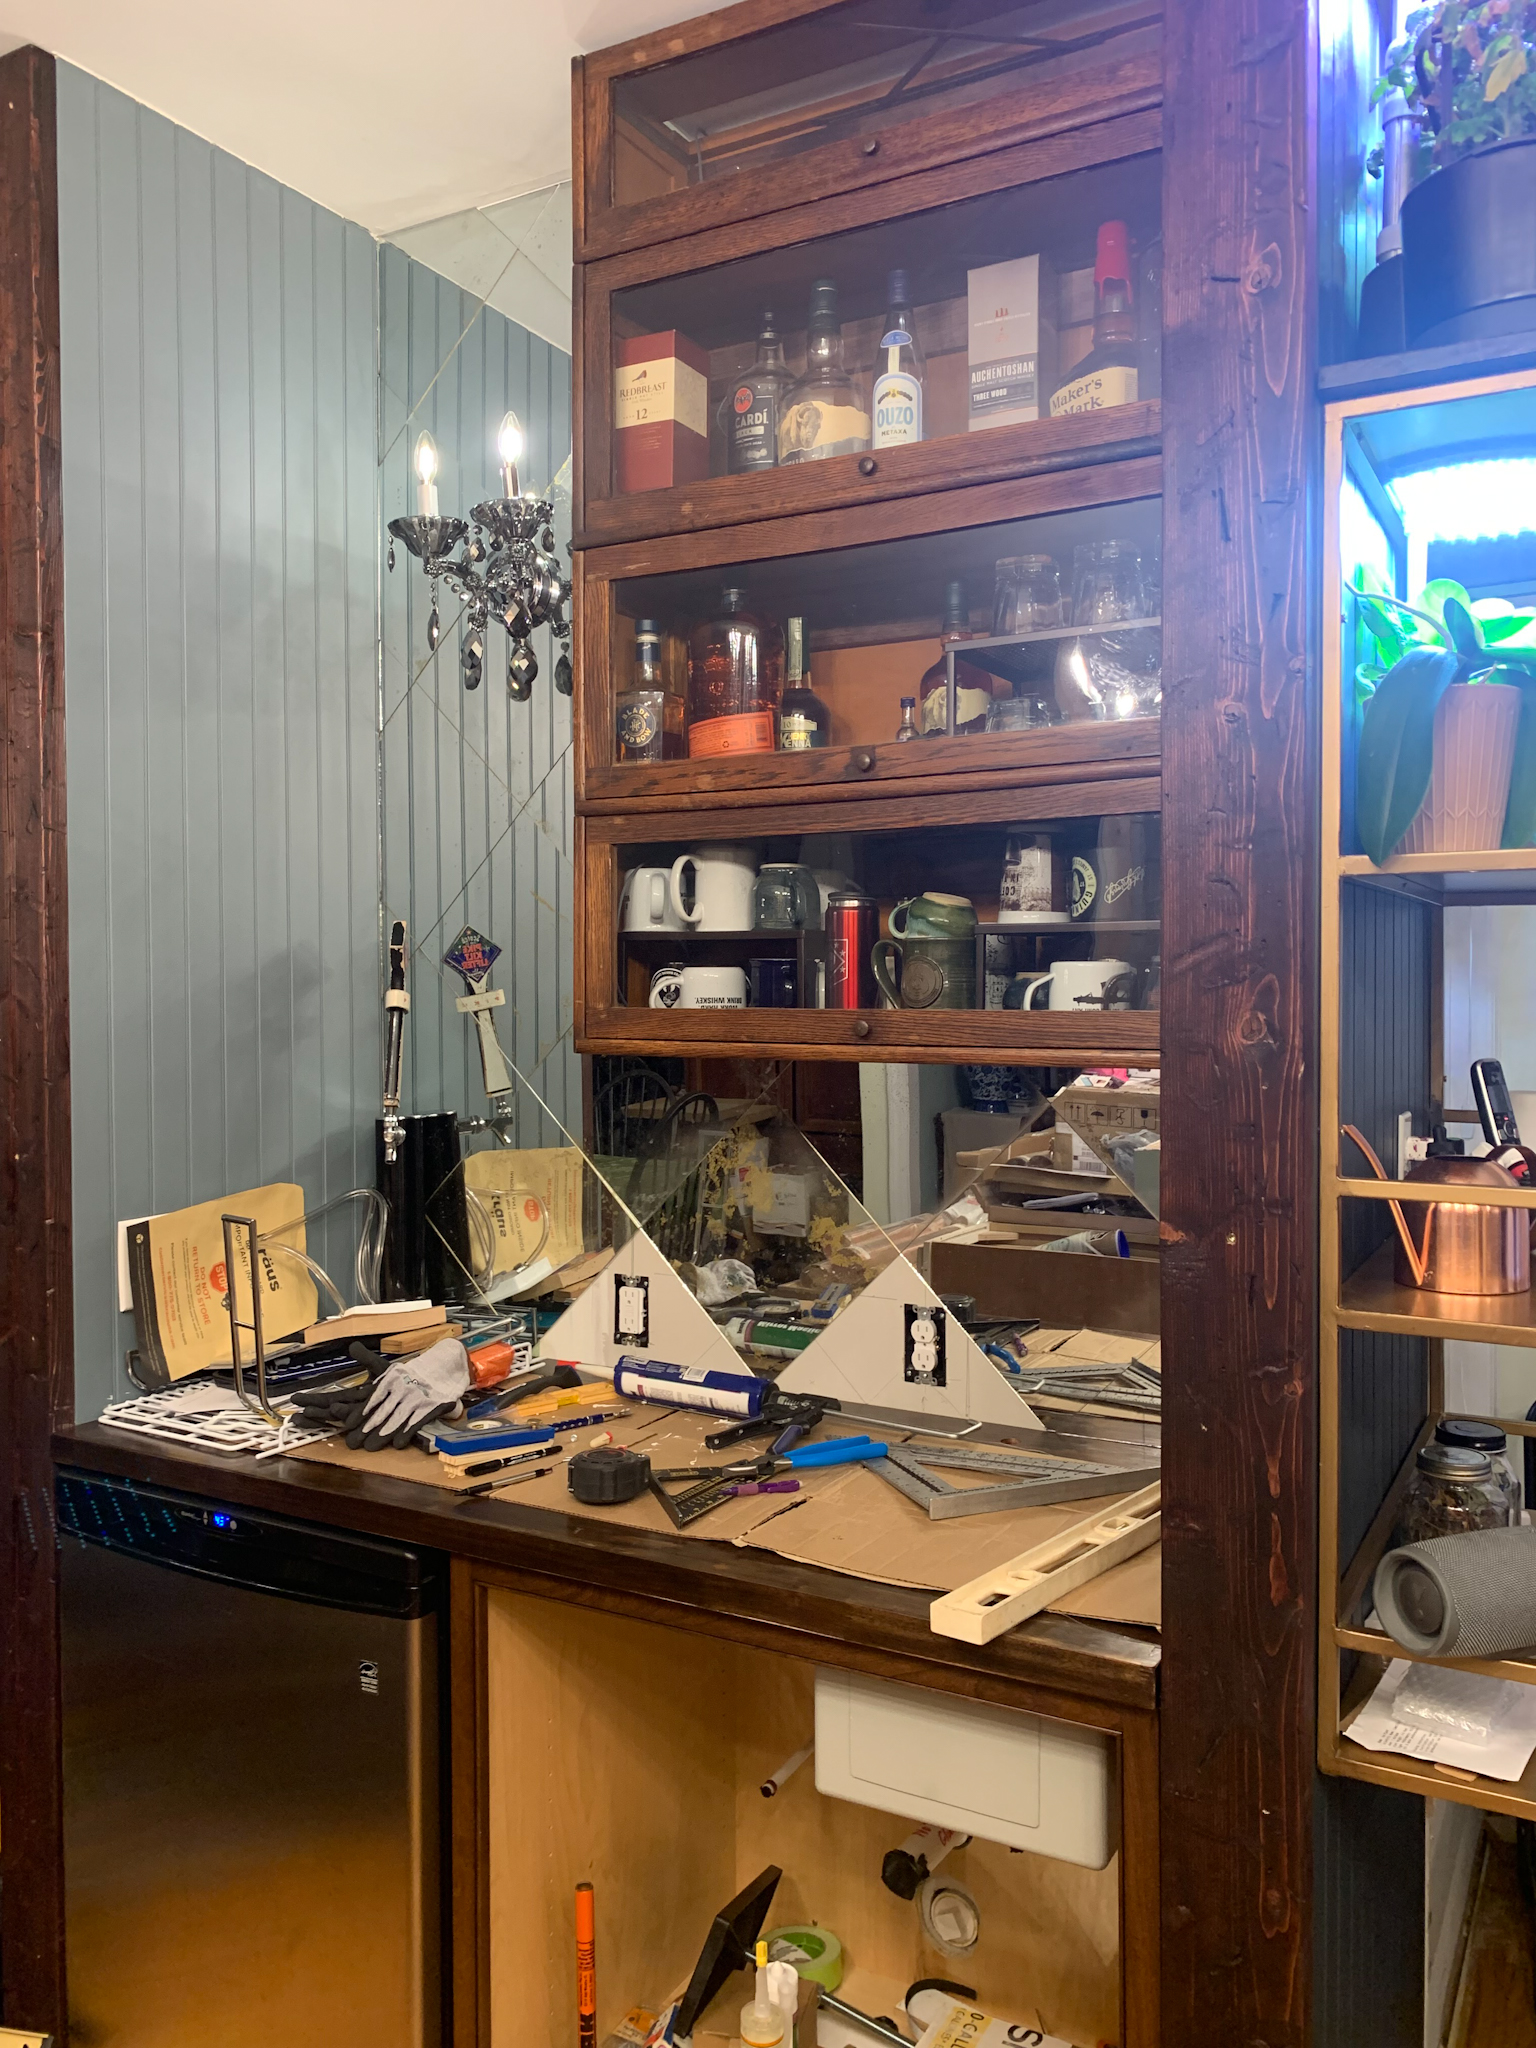
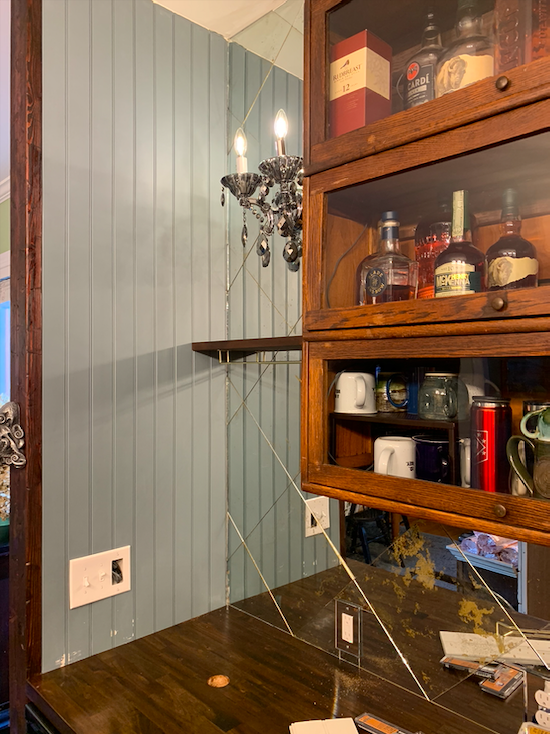
15. I recommend drawing out the tiles on the wall to make sure your cuts will be do-able. I also recommend doing test cuts on scrap before you start cutting your antiqued tiles (these tiles are only $3.50 apiece so don’t forget to grab some extra at the store). If you have cut outs to do for outlets or light fixtures, getting these on an edge or a corner is CRUCIAL. Otherwise, you will end up with cuts that show (we only had a couple and it still looks great, but if we did it again I would plan around that).
Pro tip: Make sure your wall is flat. If you have bumps, imperfections, or mounds the tiles will not lie flat.
16. Put mirror mastic on the back of the mirror as directed. If you start at the bottom, the mirrors hold each other up until the mastic dries.
$22.99 Set of 10 Plastic Drop Cloths
2 x $41.98 Box of 12 mirrors (12″ sq each)
$19.97 12 pack of safety goggles
$24.07 2 x Rust-Oleum Vintage Gold Spray Paint (get these at Lowe’s, they’re cheaper)
$11.97 Heavy duty spray bottles for muriatic acid
$4.98 Plastic Funnel Set (to get muriatic acid into the spray bottle without spills)
$44.41 Low VOC Stripper
3 x $11.99 Mirror Adhesive
$8.00 Glass Cutter Oil
$21.69 Glass cutter tool set
$289 (Compare this at $60 per 12″ panel on Etsy)
Accessories:
$161.99 Chrome Wall Sconce With Smoke Crystal
$8.02 GFI Mirrored Outlet Cover
$8.23 Duplex Mirrored Outlet Cover
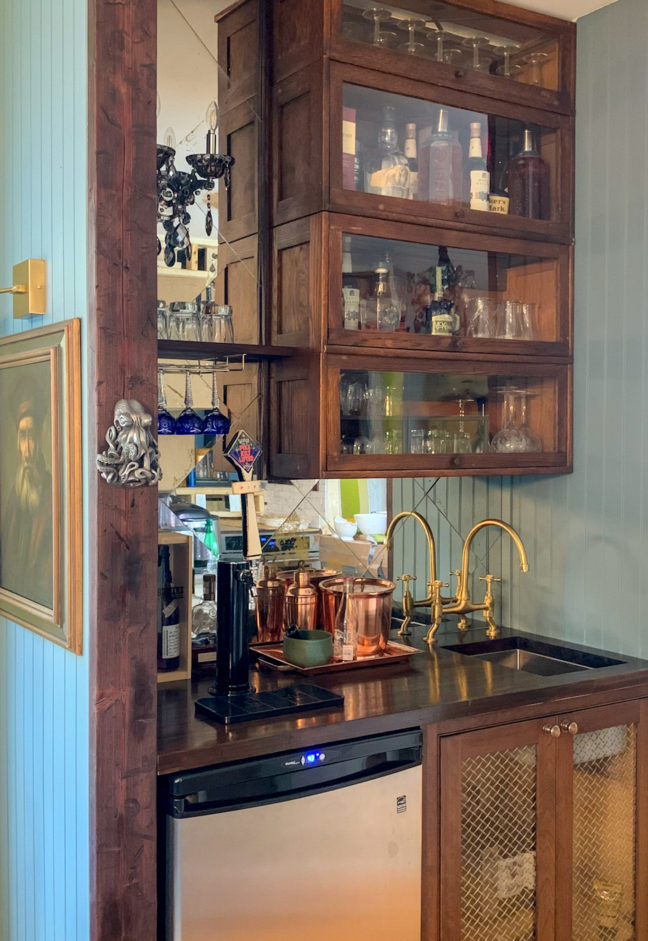
Want to see the finished product??? We’re pretty proud of how this bar came out, and the antique mirrored backsplash is a big part of it. You’ll have to forgive the reflection in the mirror showing our unfinished kitchen… but, you get the idea! Cheers!

*Legal stuff:
I am honest about my experiences with different products and write because I enjoy it. I do however, have the opportunity to earn money for my writing, also.
Slavetodiy.com is a participant in the Amazon Services LLC Associates Program, LTK, and other affiliate programs: affiliate advertising programs designed to provide a means for sites to earn advertising fees by advertising and linking to amazon.com and other sites. These programs offer a small commission on products sold through their affiliate links. Each of your purchases via our affiliation links supports our cause at no additional cost to you.
If a blogger links to a product (with a special code for affiliates embedded in the link), and a reader places an item in their “shopping cart” through that link within 24 hours of clicking the link, the blogger gets a small percentage of the sale. These links are not “pay per click.” If you click on the product link and stay around and purchase something else, however, I will get a commission on that sale.