This is a multi-phase project… and turned out being one of the many I decided to “surprise” Rainman with when he got back from a trip.
This post may contain affiliate links. Please see our disclosure at the end of the post.
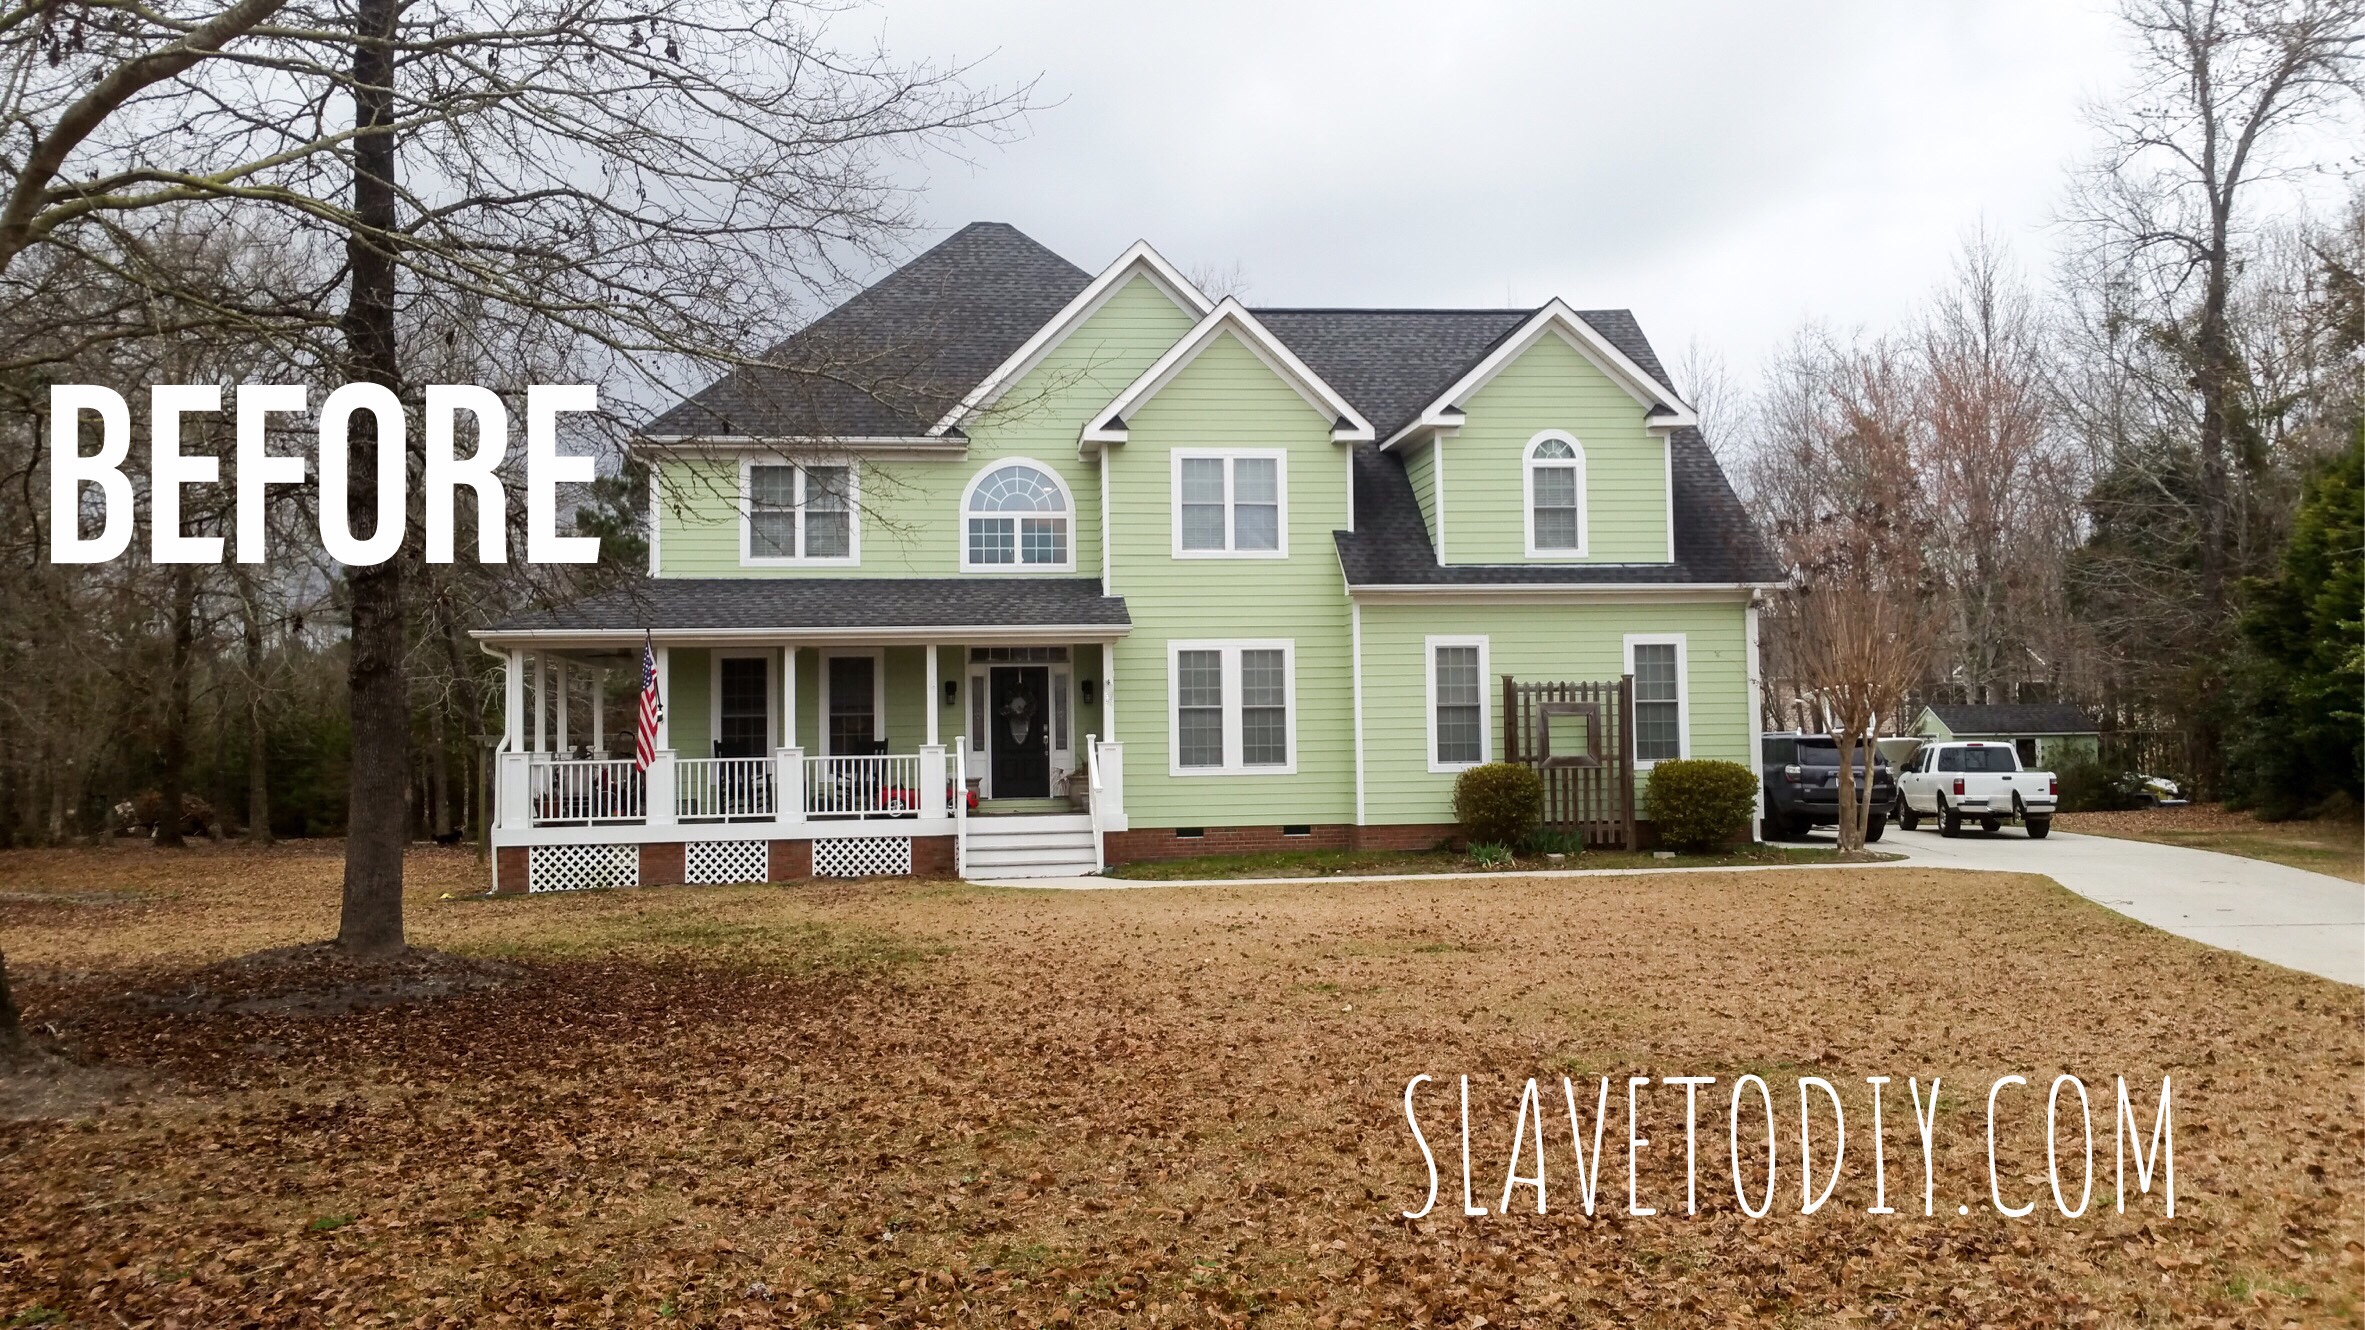
Here’s the deal, I love this house. However, one of the reasons we chose this place is because it has beautiful bones and is ripe for updating. The front yard was no exception. The exterior of the house has the potential to be spectacular, the landscaping on the other hand is at best generic. Someone planted a whole bunch of stuff when this place was built. The next person let it go. Like the amazon, it took over. There may be undiscovered species living by the pool.
We ripped it out. And are still in the process of ripping out more. Baby steps. Here’s what this project started with (after a lot of wild bush removal had already happened). This was my blank pallet:
 From overgrown to a big, stark, boring looking thing. Now that I’m looking at it, it almost looks like new construction. We just can’t have that, now can we?
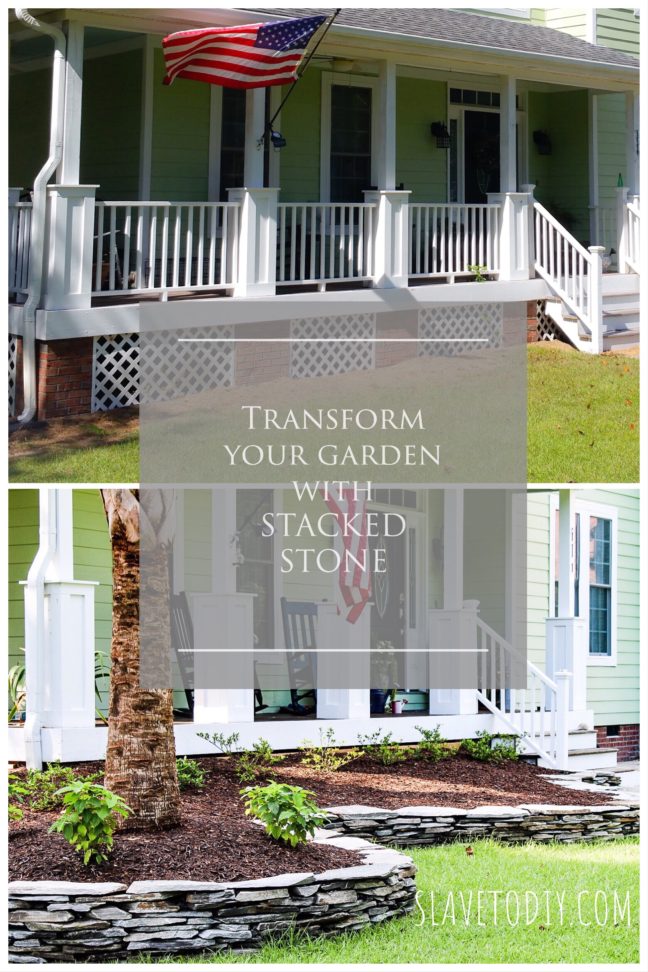
Here’s my vision: I love stacked stone walls. I love the look of them in my native New England, like they’ve been there forever, meandering along the hillside, fallen autumn leaves contrasting their mossy patina. Sigh.
I’ve built them at two previous homes and helped friends with them, so I’m getting pretty damn good at them. I STILL love them and haven’t outgrown them, so they must be CLASSIC. The first time I did this, I did it without google. I did it without *GASP* Pinterest. I did it without the internet. I was trying to dig rocks out of my new construction home in the PA Poconos to create space for a lawn. My idea was to bring in soil and grow grass myself. A great place for my two little boys to play. I KEPT HITTING ROCKS. As the pile grew, my new plan began to take shape. I had more than enough for a garden and by maybe cutting into the empty lot next door just a smidge I uncovered enough for a gorgeous garden that ran the length of the whole house. I had no idea at the time how many thousands of dollars I had saved, but I had uncovered the beginnings of my lust for constant improvement.
This newest project, I didn’t realize initially, was going to be varsity level and my estimate on materials (as usual) was waaaay low.
Tip: Whatever your guesstimate is on materials, double it.
What you’ll need:
-
Long hose or stiff rope for laying out the garden line
-
Light colored spray paint
-
Shovel
- Gloves
-
Wheel barrel
-
Medium drainage rock
-
Pea gravel
-
Topsoil
-
Flatstones
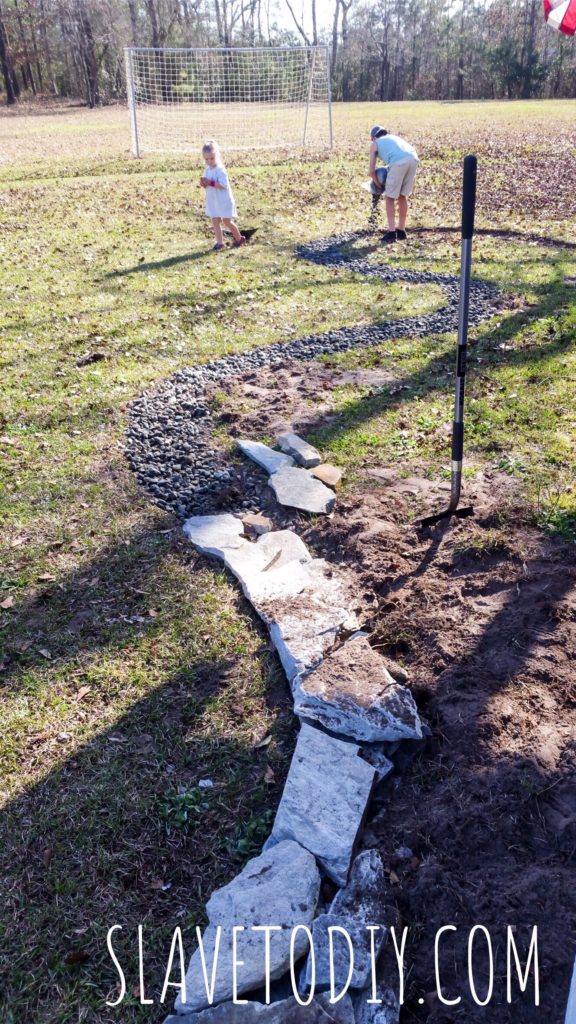
I really wanted to get started before the SNAKES woke up (shudder), so I think we started in February. We started by laying out a long hose and moving it around to try to visualize where I wanted the wall. Now, this takes some imagination and time. It’s very difficult to try to imagine the wall at its full height.
Tip: Get the line where you think you love it. Walk away. Come back. Adjust it. Leave it overnight. Have coffee with your pretend wall in the morning. Adjust it again. Have wine with it in the evening. Adjust it again. Ask a friend for her opinion of the line. Ignore her opinion. Adjust it again. You get the idea.
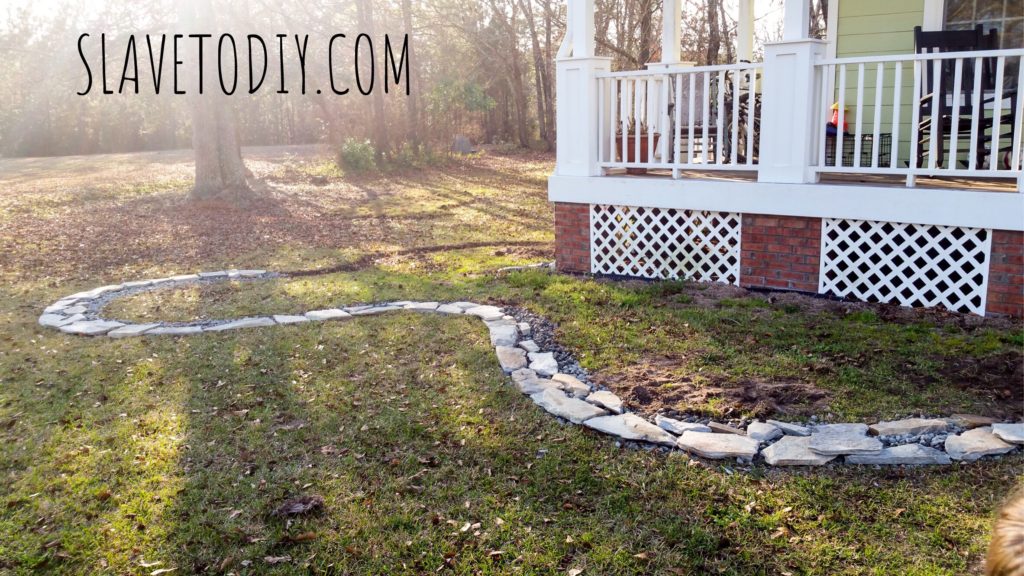
Once I was in love with my curvy line I used white spray paint along the line to mark my garden edge. I also spray painted the black hose. Whoops. If Rainman noticed, he didn’t fuss about it.
My son helped me dig out a trench from the line toward the house a few inches deep and about a foot and a half wide. We essentially removed a layer of sod and replanted it in a bare spot the idiot dog dug up. This is a process. If you want to rent a sod cutter (for larger sized walls) they are available from rental companies and home depot pretty reasonably. For me, I have free teenager labor, so I skipped it.
I noticed in previous projects that a solid base for the wall, especially a heavy one, is pretty important for its stability. I’ve seen walls sink, slide, and tip when done improperly. Depending on your soil, you may want to do a true paver base (4-6 inches of tamped sand over a layer of medium rocks). Our soil is very stable. We put a layer of drainage rock down to put the first layer of stones on, supplemented by pea gravel to balance the rocks.
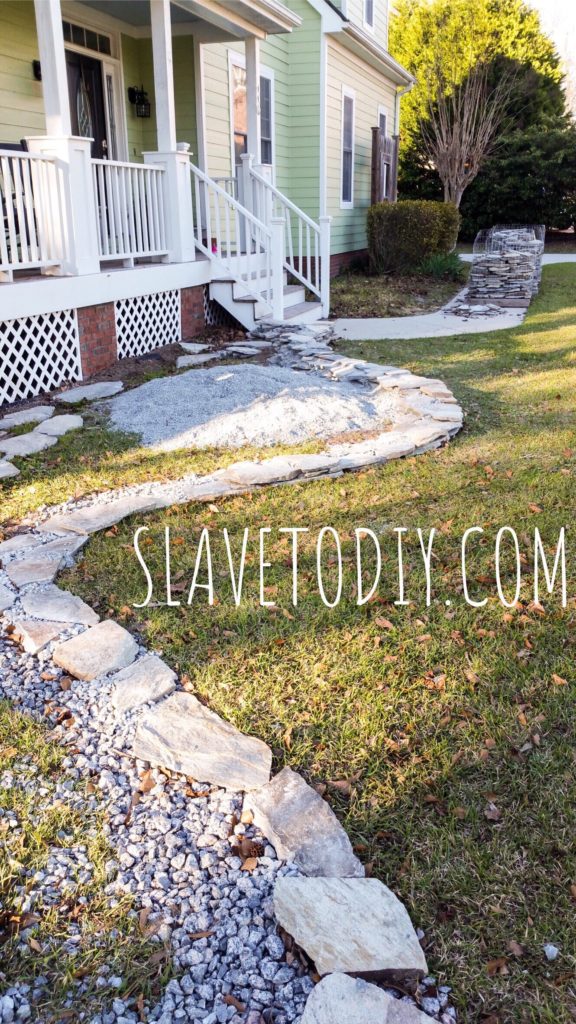
Design tip: Go bigger. Extend the line of your garden past where the traditional “base plantings” go. Use curves. Curves are sexy. We like sexy.
Once that good layer of drainage rock is down, it’s much easier to settle and balance the first layer of flat stones. It’s really difficult to explain the balancing and the building… but a lot of it is common sense. The other part is pure finesse and artistic ability. You’ve either got it, or you don’t. Rainman doesn’t participate in this process until we get to final leveling. He would lose his mind.
Tip: If you have a Rainman helping, employ him by having him unload pallets and separate the stones into similarly sized piles. Set aside unusually large and straight edged stones to be used later as capstones. It’s helpful to you, and prevents any freak-outs because of the un-squareness of the building materials.
Keep the seams away from each other, use drainage rocks or splintered stones from your pallet to shim, backfill with topsoil and smaller drainage rocks or gravel.
Here’s the deal, these are dry stacked, but they’re not going anywhere. There are two different stone sizes used to balance and I kept them packed from behind with topsoil. Plus the very subtle lean toward the garden itself keeps it naturally balanced.
And thus began the game of Tetris.
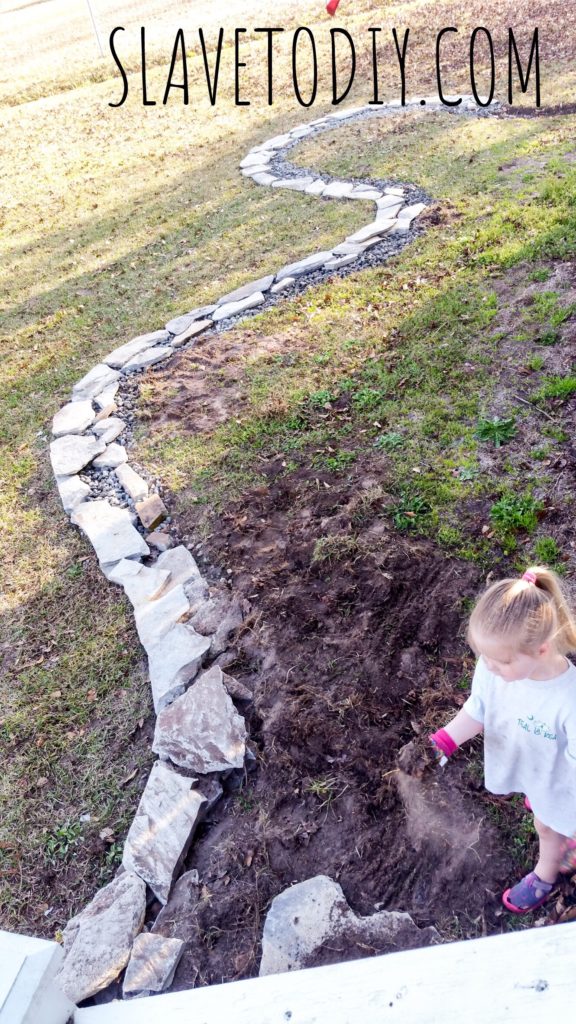
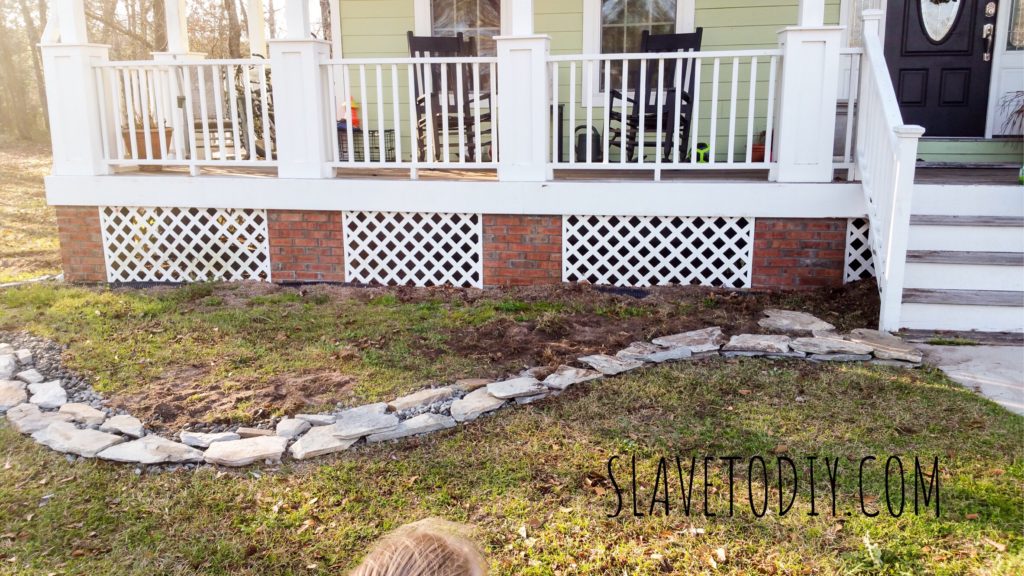
You’ll notice that in some areas there is a double layer of skinny rocks and some areas of the trench are covered by larger rocks. It doesn’t matter as long as you keep them balanced. Start wide at the base and keep irregular stones to build up/balance the back. You won’t see this part as it will be buried, so the balance is the only part that matters on the back of the wall. The front on the other hand is important. I tried really hard to keep the front edge relatively flush so nobody slices a leg open walking by. Obviously, the front is the side that will be visible and the aesthetic matters.
Once that first layer is down, fill the middle with medium rocks. Use the gravel to help balance the next level of rocks.
It helps to work from one side and work around the garden to the other side. Some people work one layer at a time but that doesn’t work for me. I end up laying out half a pallet of stones and looking for specific shapes as I go. Think: giant jigsaw puzzle.
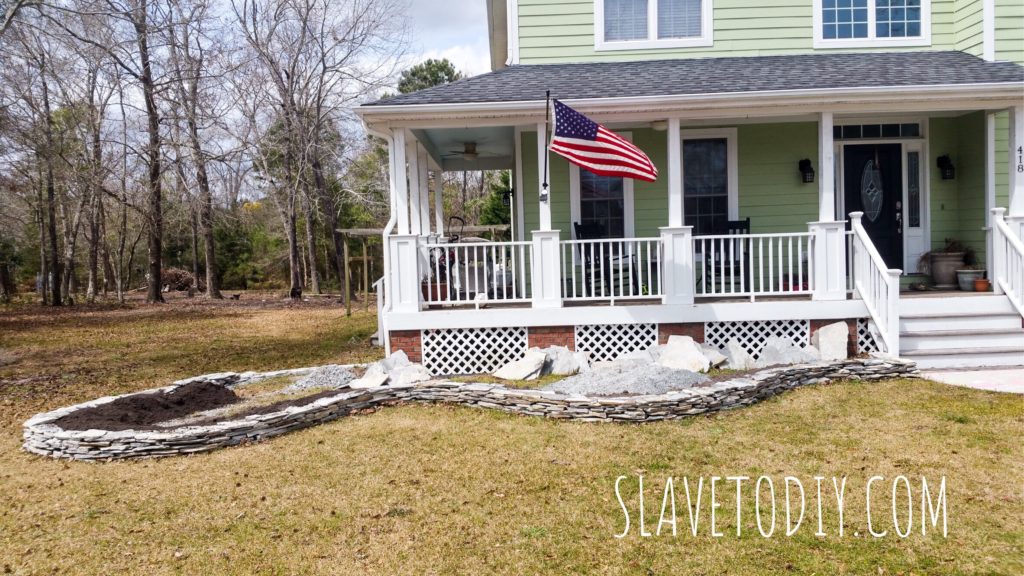
You can see in the next picture, the wall is much higher by the steps then tapers off because I was working in that direction.
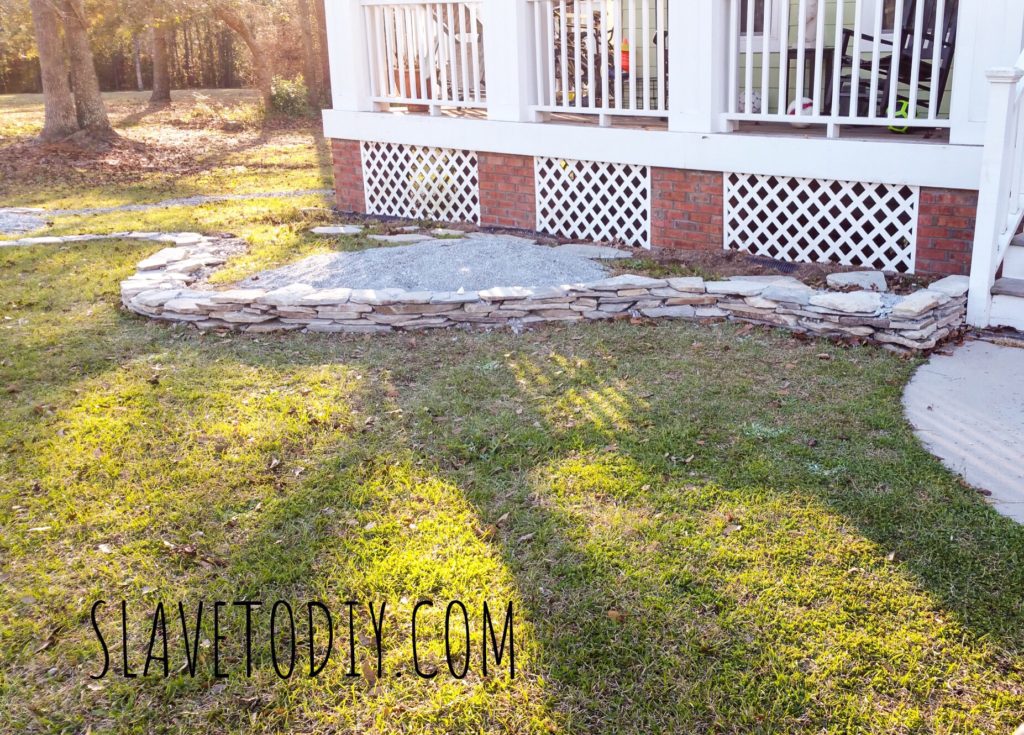
Notice the two piles of rock, one medium rock, one pea gravel. I worked from these piles during the whole, very long process. Also notice the large rocks back by the lattice work. As I found large, flat stones in the pallets, I set them aside for the end to be used as capstones. It gives the finished product a very polished look.
Tip: If you have a truck, it is MUCH, MUCH cheaper to get scoops of topsoil and different fill rock from the local mulch store than getting bags from Lowe’s or Home Depot. It’s also MUCH, MUCH easier to back the truck up and unload it with a shovel than to drag individual bags out of your car.
Once the wall started getting high enough to be concerned about it slipping, I began adding topsoil. My son was not happy about the daily order of dirt from the mulch place on his way home from school, but I have to abuse him as much as possible before he leaves to go to college, right?
Each load was two scoops of topsoil in his little truck. Pack the soil in on the backside of the wall by shoveling it in from inside the garden. Using care not to shift the wall, use the back of the shovel to pat down and settle the dirt in. If you use the gravel and rocks appropriately, it shouldn’t be shifting at all.
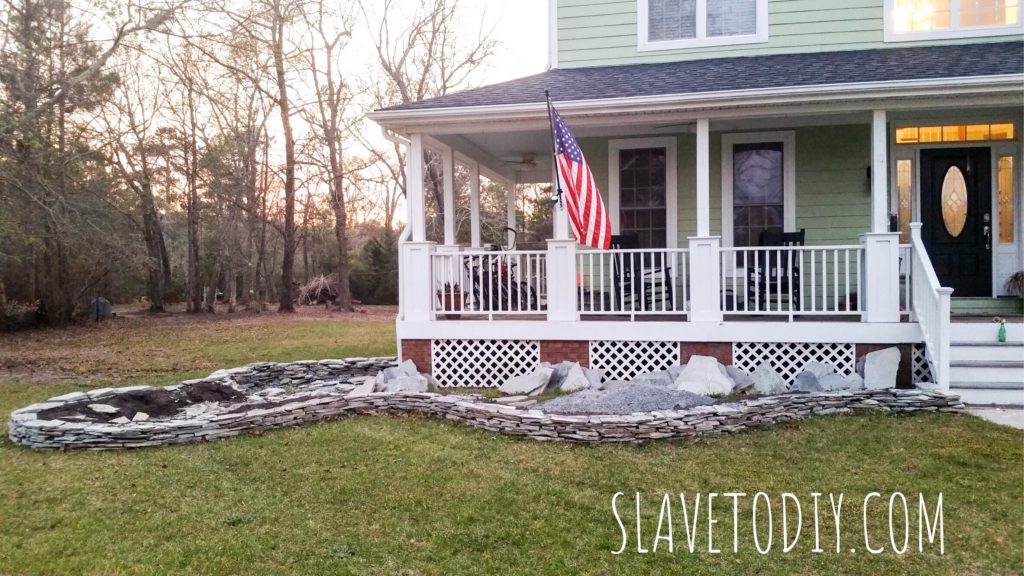
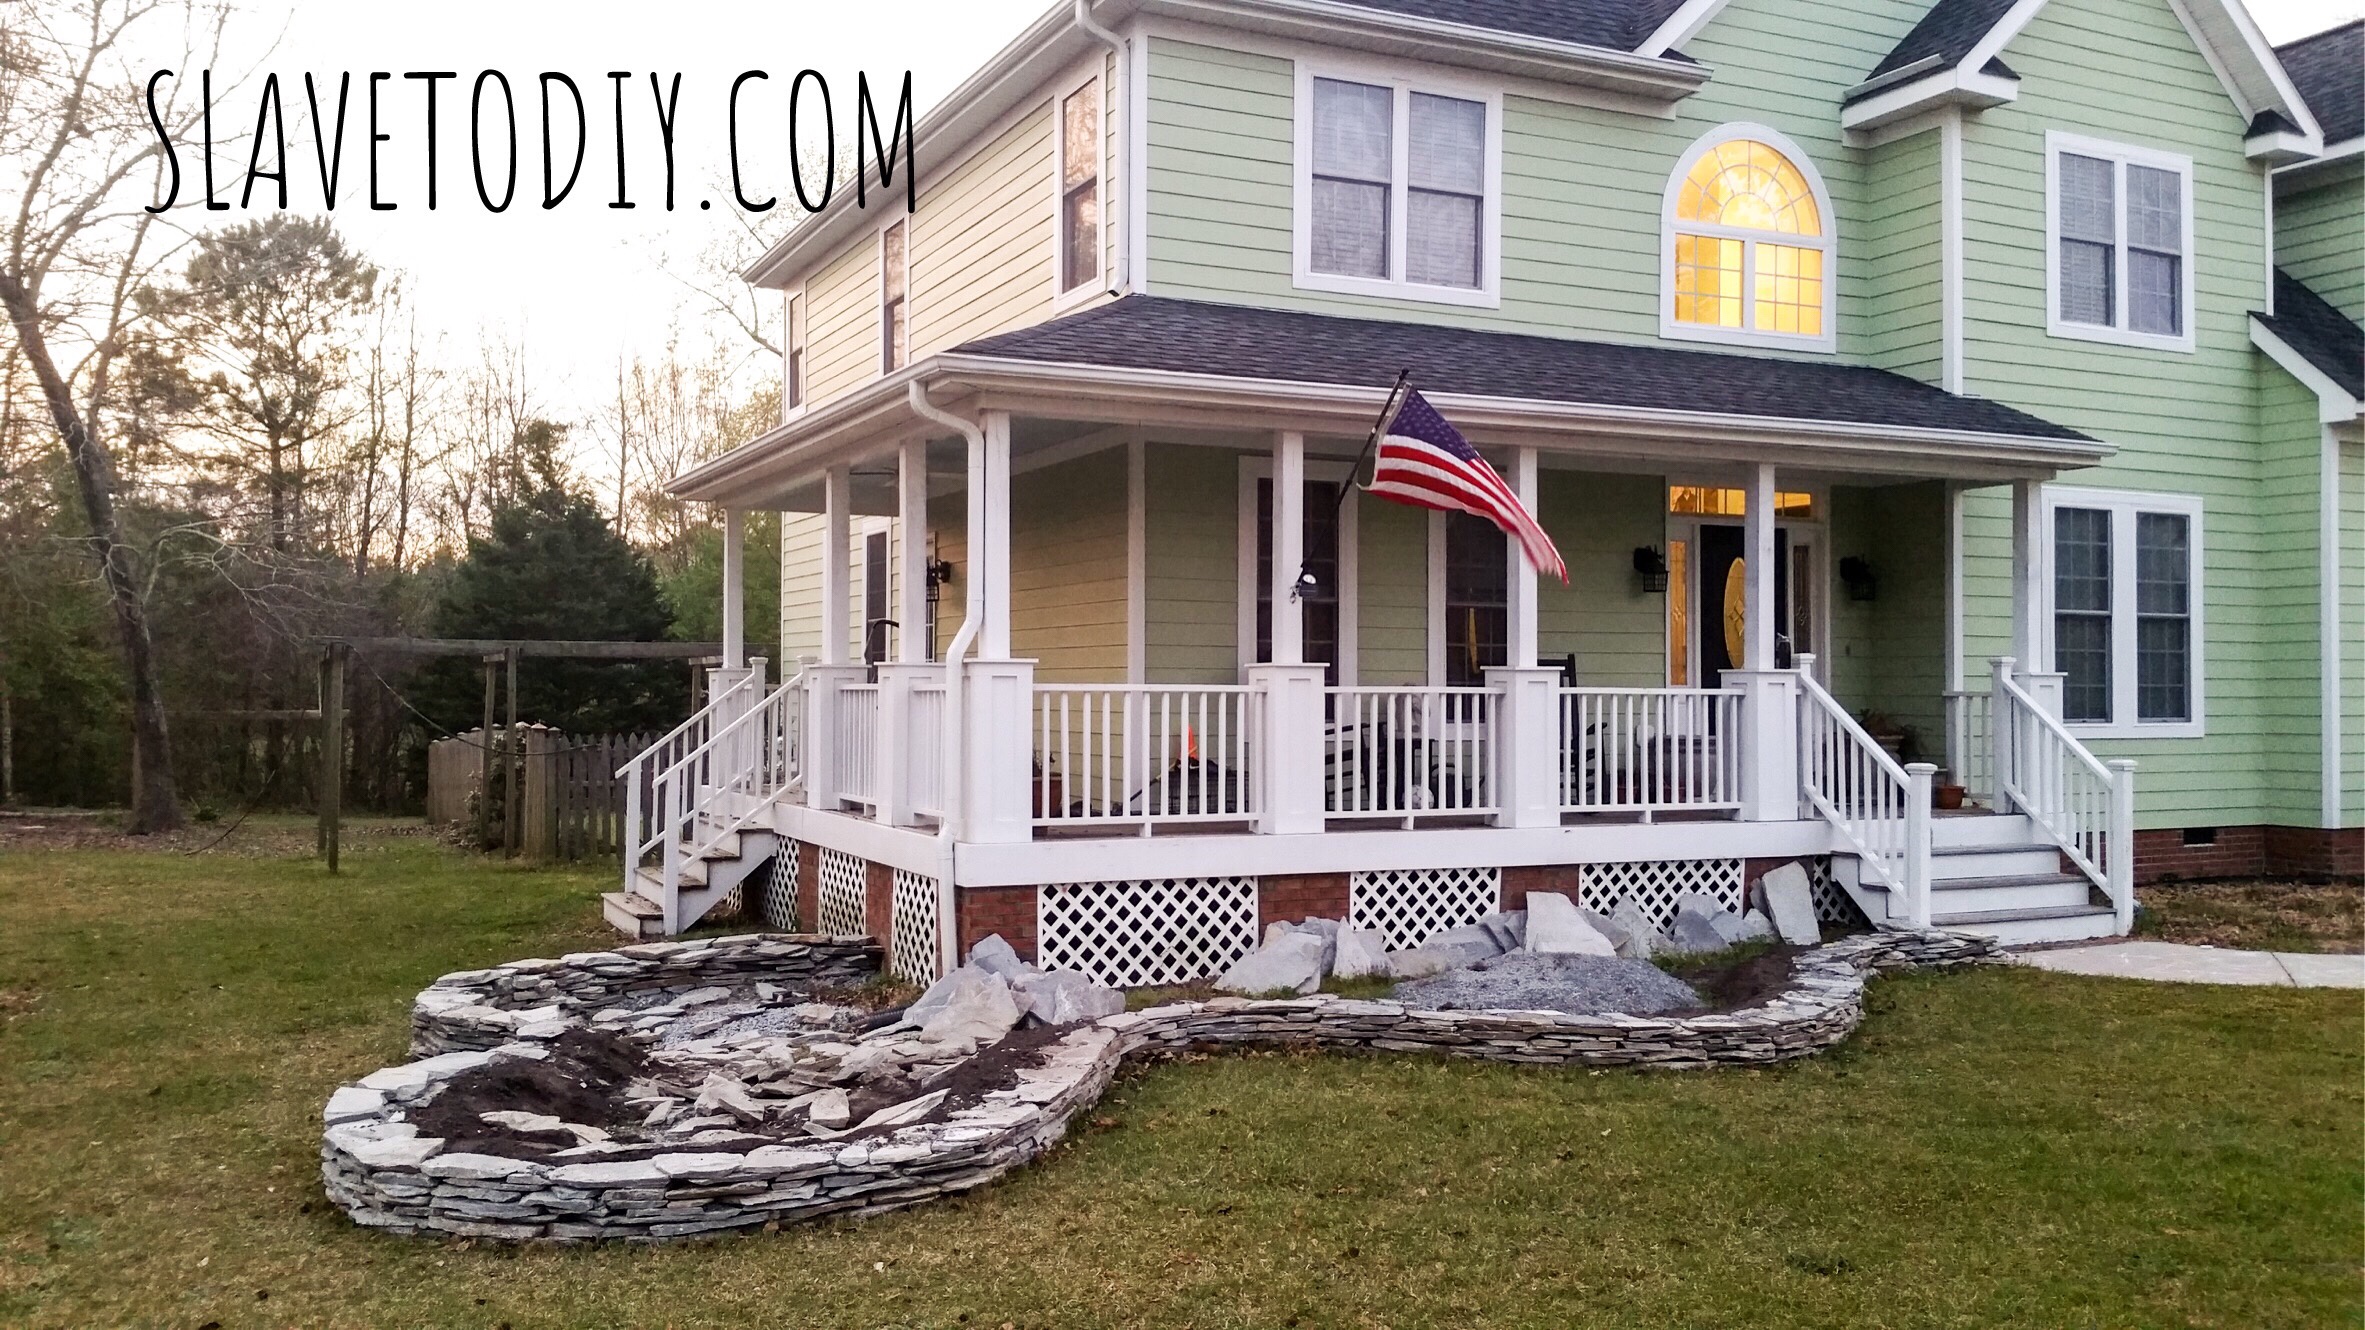
At the end of this part of the project, the capstones were set aside and the wall was “close” to level. When Rainman got home from his trip he helped me get the wall much closer to level and ready for dirt. This was accomplished by putting stakes in at the ends and the tips of each curve then attaching a white string. Then enter the level. The Rainman. The corrections. The tempers. Then, a really nice product.
That was phase one of the stone bed. Phase two involves more stone, lots of dirt, and power tools. The lattice work needs to be ripped out and the openings closed in to support the garden dirt so we can keep going with the building-the-garden process.
Rainman, don’t read this part:
Supplies so far:
-
4 pallets of flat stone, delivered $1400
-
Medium stone, pea gravel, and topsoil $200
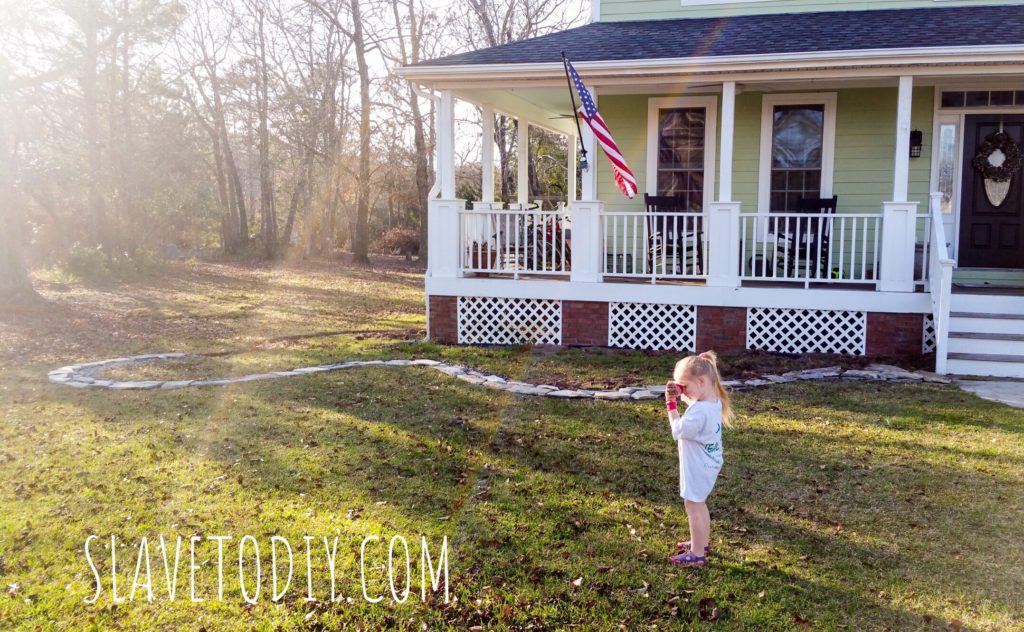
Don’t be fooled or disheartened by the brevity of this post. This was weeks of work. Every afternoon. It was winter when we began and as you can see the grass is turning green. It’s going to take a long time and it’s a labor of love. It’s worth it though.
Phase two of the project is here. Stay with us!
*Legal stuff:
I am honest about my experiences with different products and write because I enjoy it. I do however, have the opportunity to earn money for my writing, also.
Slavetodiy.com is a participant in the Amazon Services LLC Associates Program, an affiliate advertising program designed to provide a means for sites to earn advertising fees by advertising and linking to amazon.com. Amazon offers a small commission on products sold through their affiliate links. Each of your purchases via our Amazon affiliation links supports our cause at no additional cost to you.
If a blogger links to an Amazon product (with a special code for affiliates embedded in the link), and a reader places an item in their “shopping cart” through that link within 24 hours of clicking the link, the blogger gets a small percentage of the sale. Amazon links are not “pay per click.” If you click on the product link and stay around Amazon and purchase something else, however, I will get a commission on that sale.
Slavetodiy.com is also a VigLink affiliate advertiser which works similarly.