
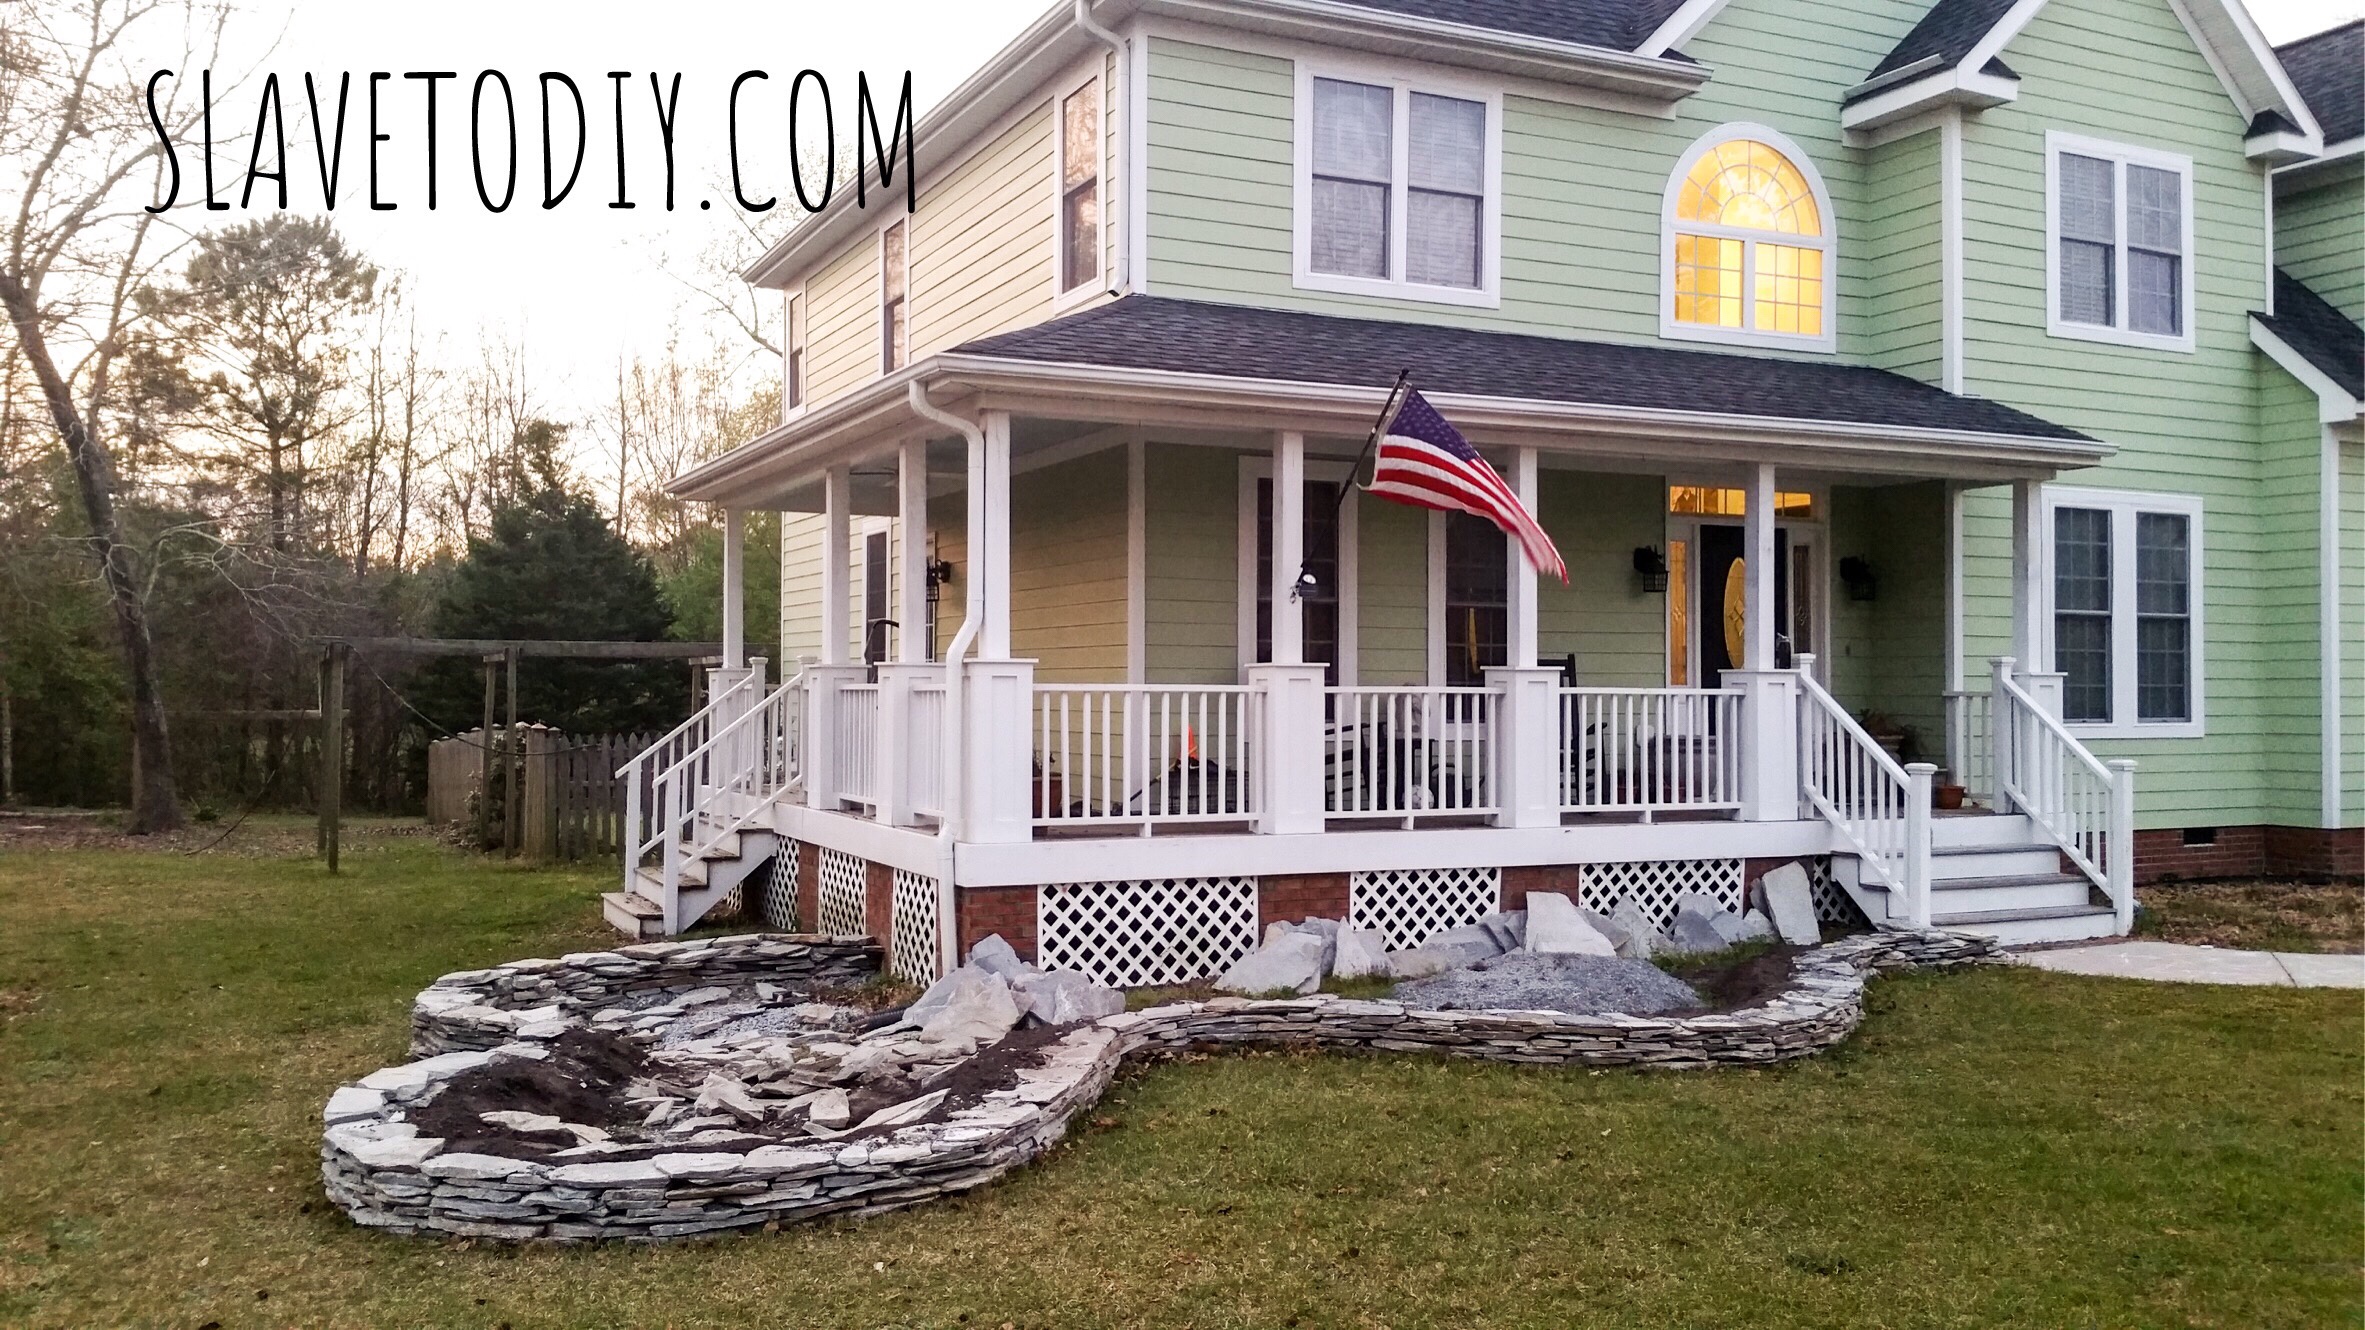
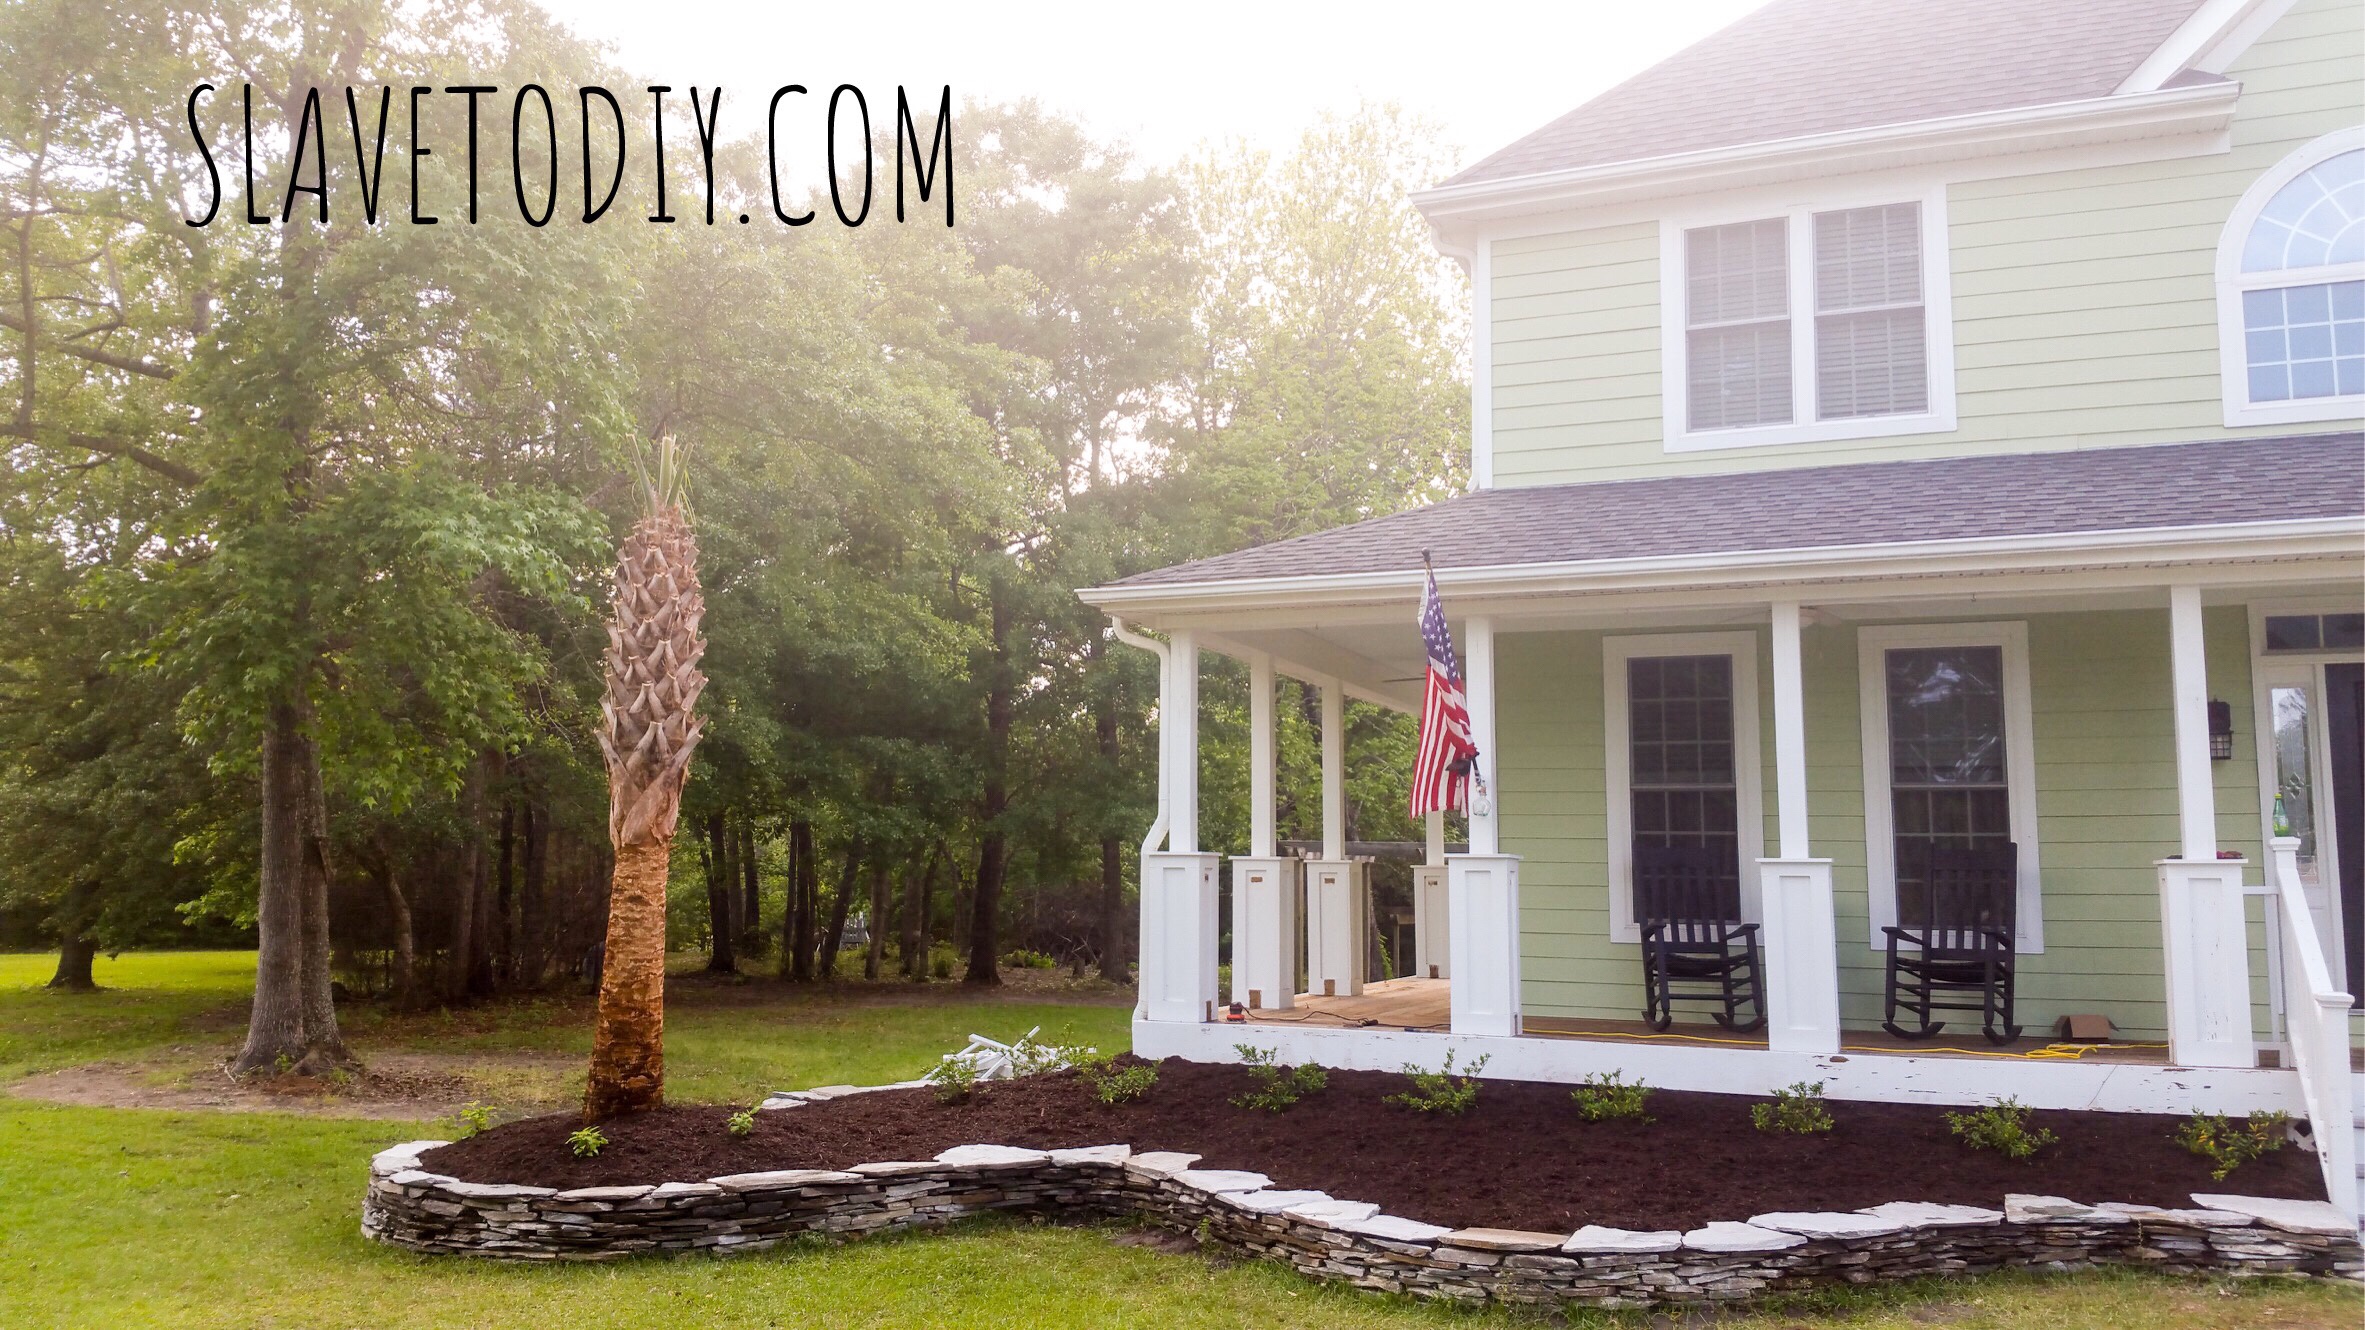
Dry stacked stone gardens are so beautiful. We’ve done this style several times and this is phase two of this particular project. If you missed it, you can read the directions for the how-to for phase one here. This is a HUGE project labor wise, so if you’re doing it yourself, pace yourself. Where we left off from the last post, this is what the garden looked like after Rainman helped me level it.
This post may contain affiliate links. Please see our disclosure at the end of the post.
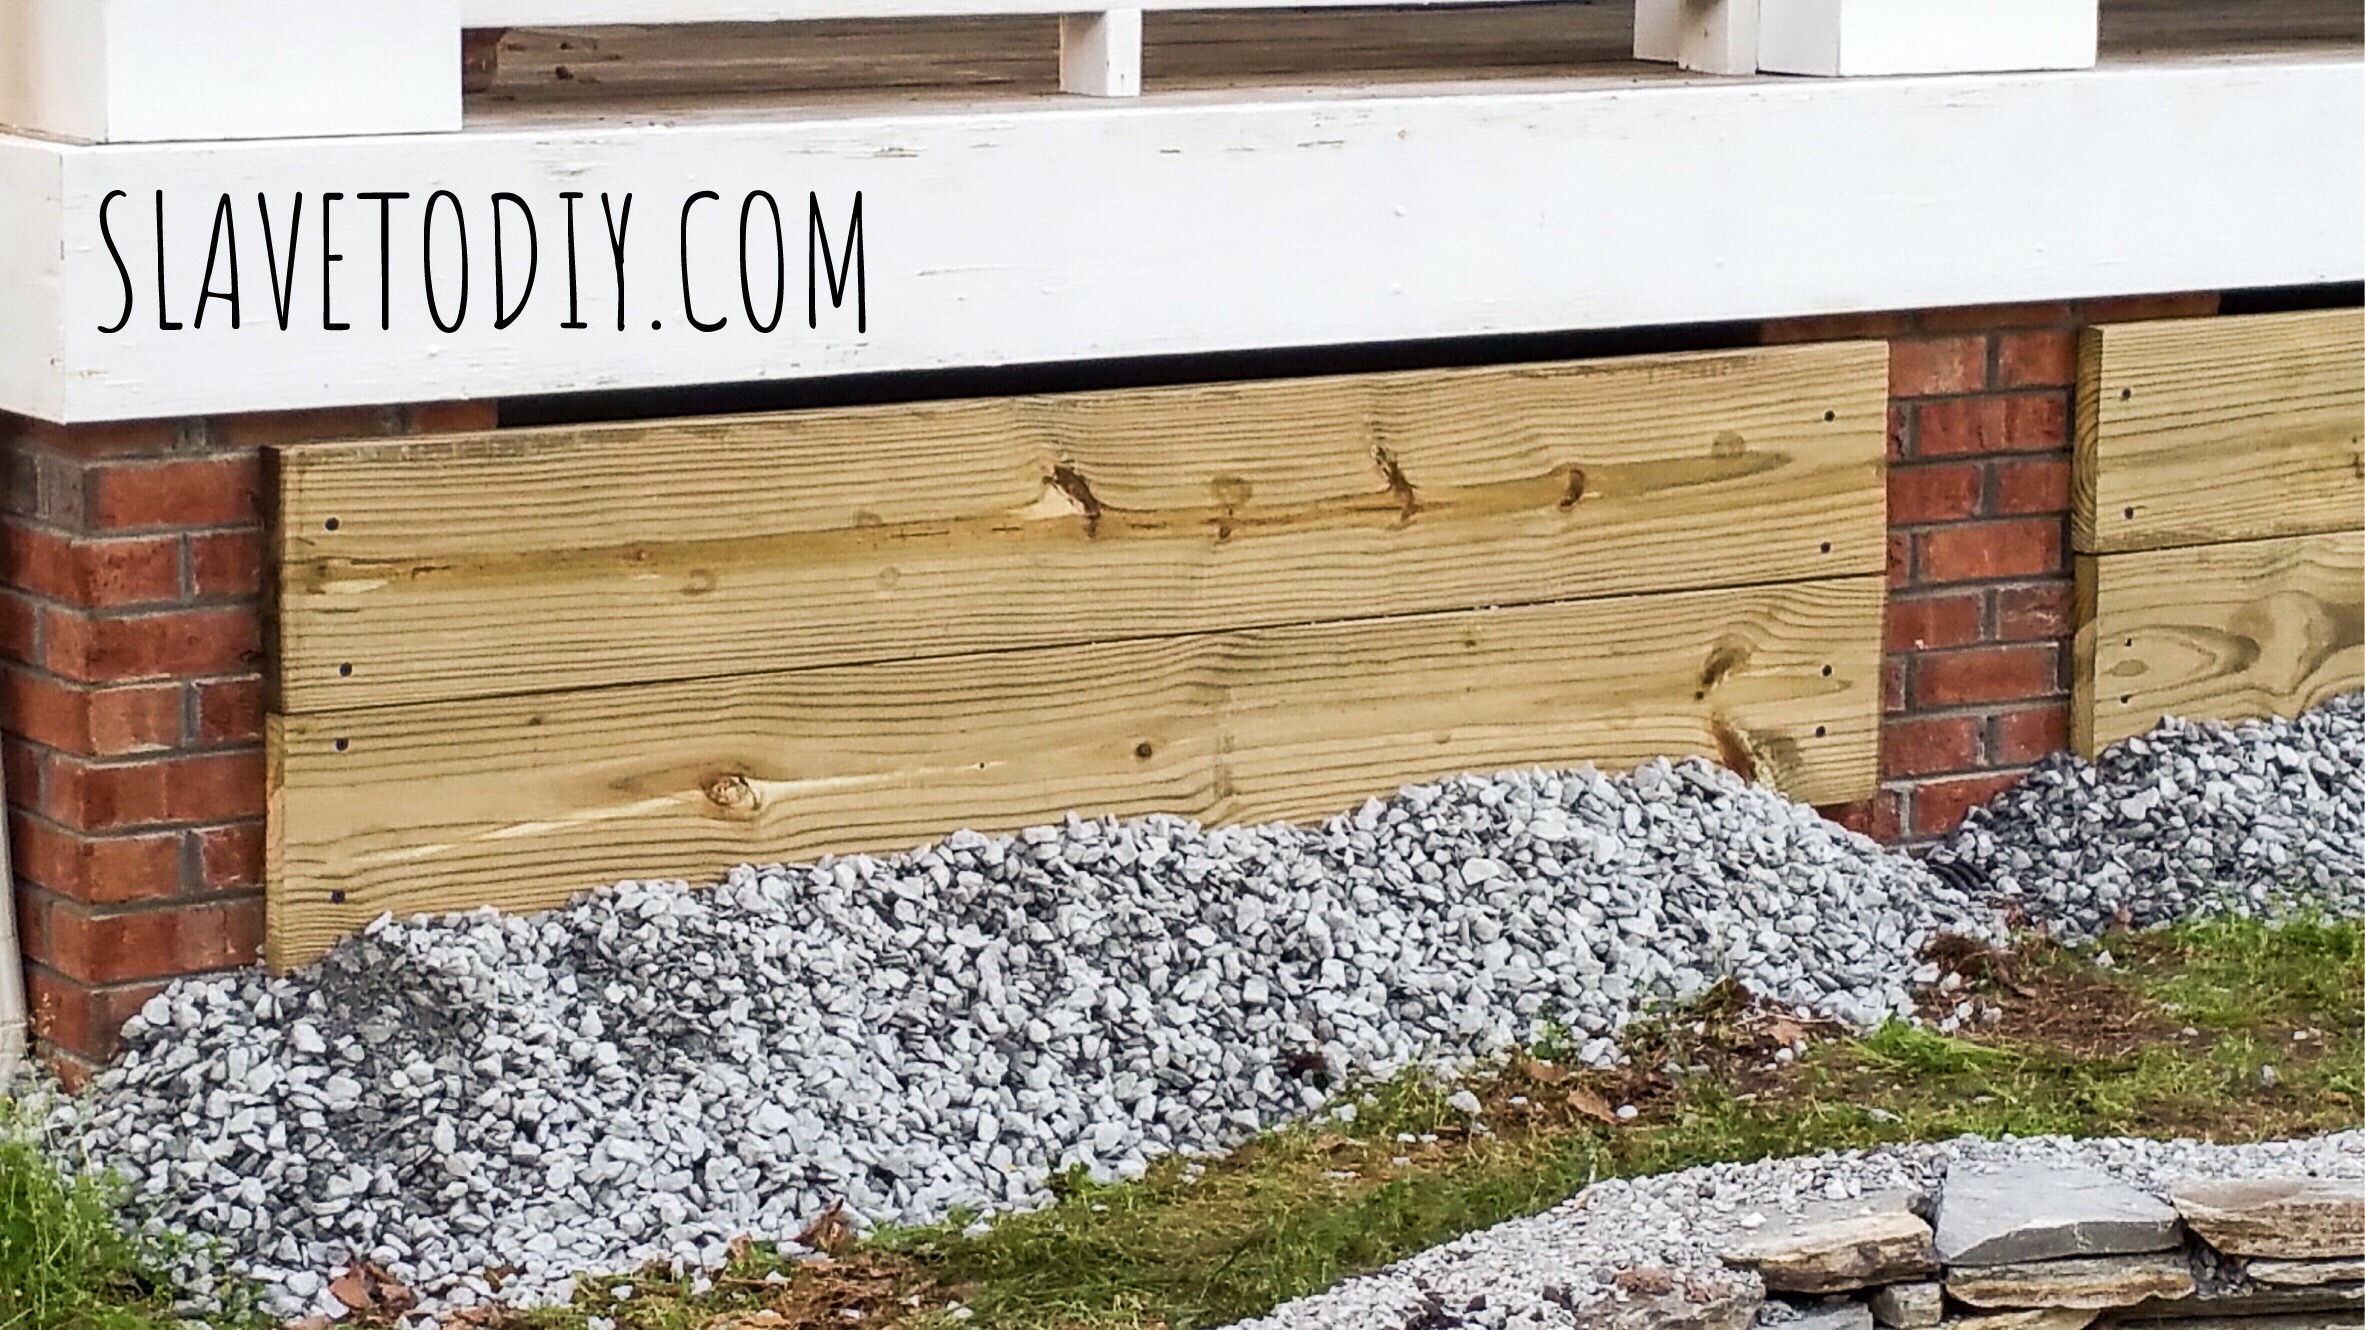
The next step now that the wall was all beautifully level was to block off under the front porch so the topsoil doesn’t go underneath. This is fairly simple, but requires some strength. First, I had to remove the white vinyl lattice that enclosed the crawl space under the porch. It was a matter of grabbing and pulling. With a little wiggling and yanking it came right out. I’m sure my aggression (I sort of despise the white vinyl lattice) helped the process go more smoothly.
By the time I got to installing the boards, I was huffing and puffing trying to get the anchors in. You’ll need treated lumber and masonry screws. I like the beefy two inch boards. Measure the depth on your boards and get your screws 3/4 inch longer than that. It’s not terribly important for the boards to be the same length or exactly the same as you’ll only see the top line. It’s really only important that they be level or match the board above them, because they’ll look awful if they’re crooked. Here it was most important visually for them to match the white trim board above them, so that’s where I leveled off of.
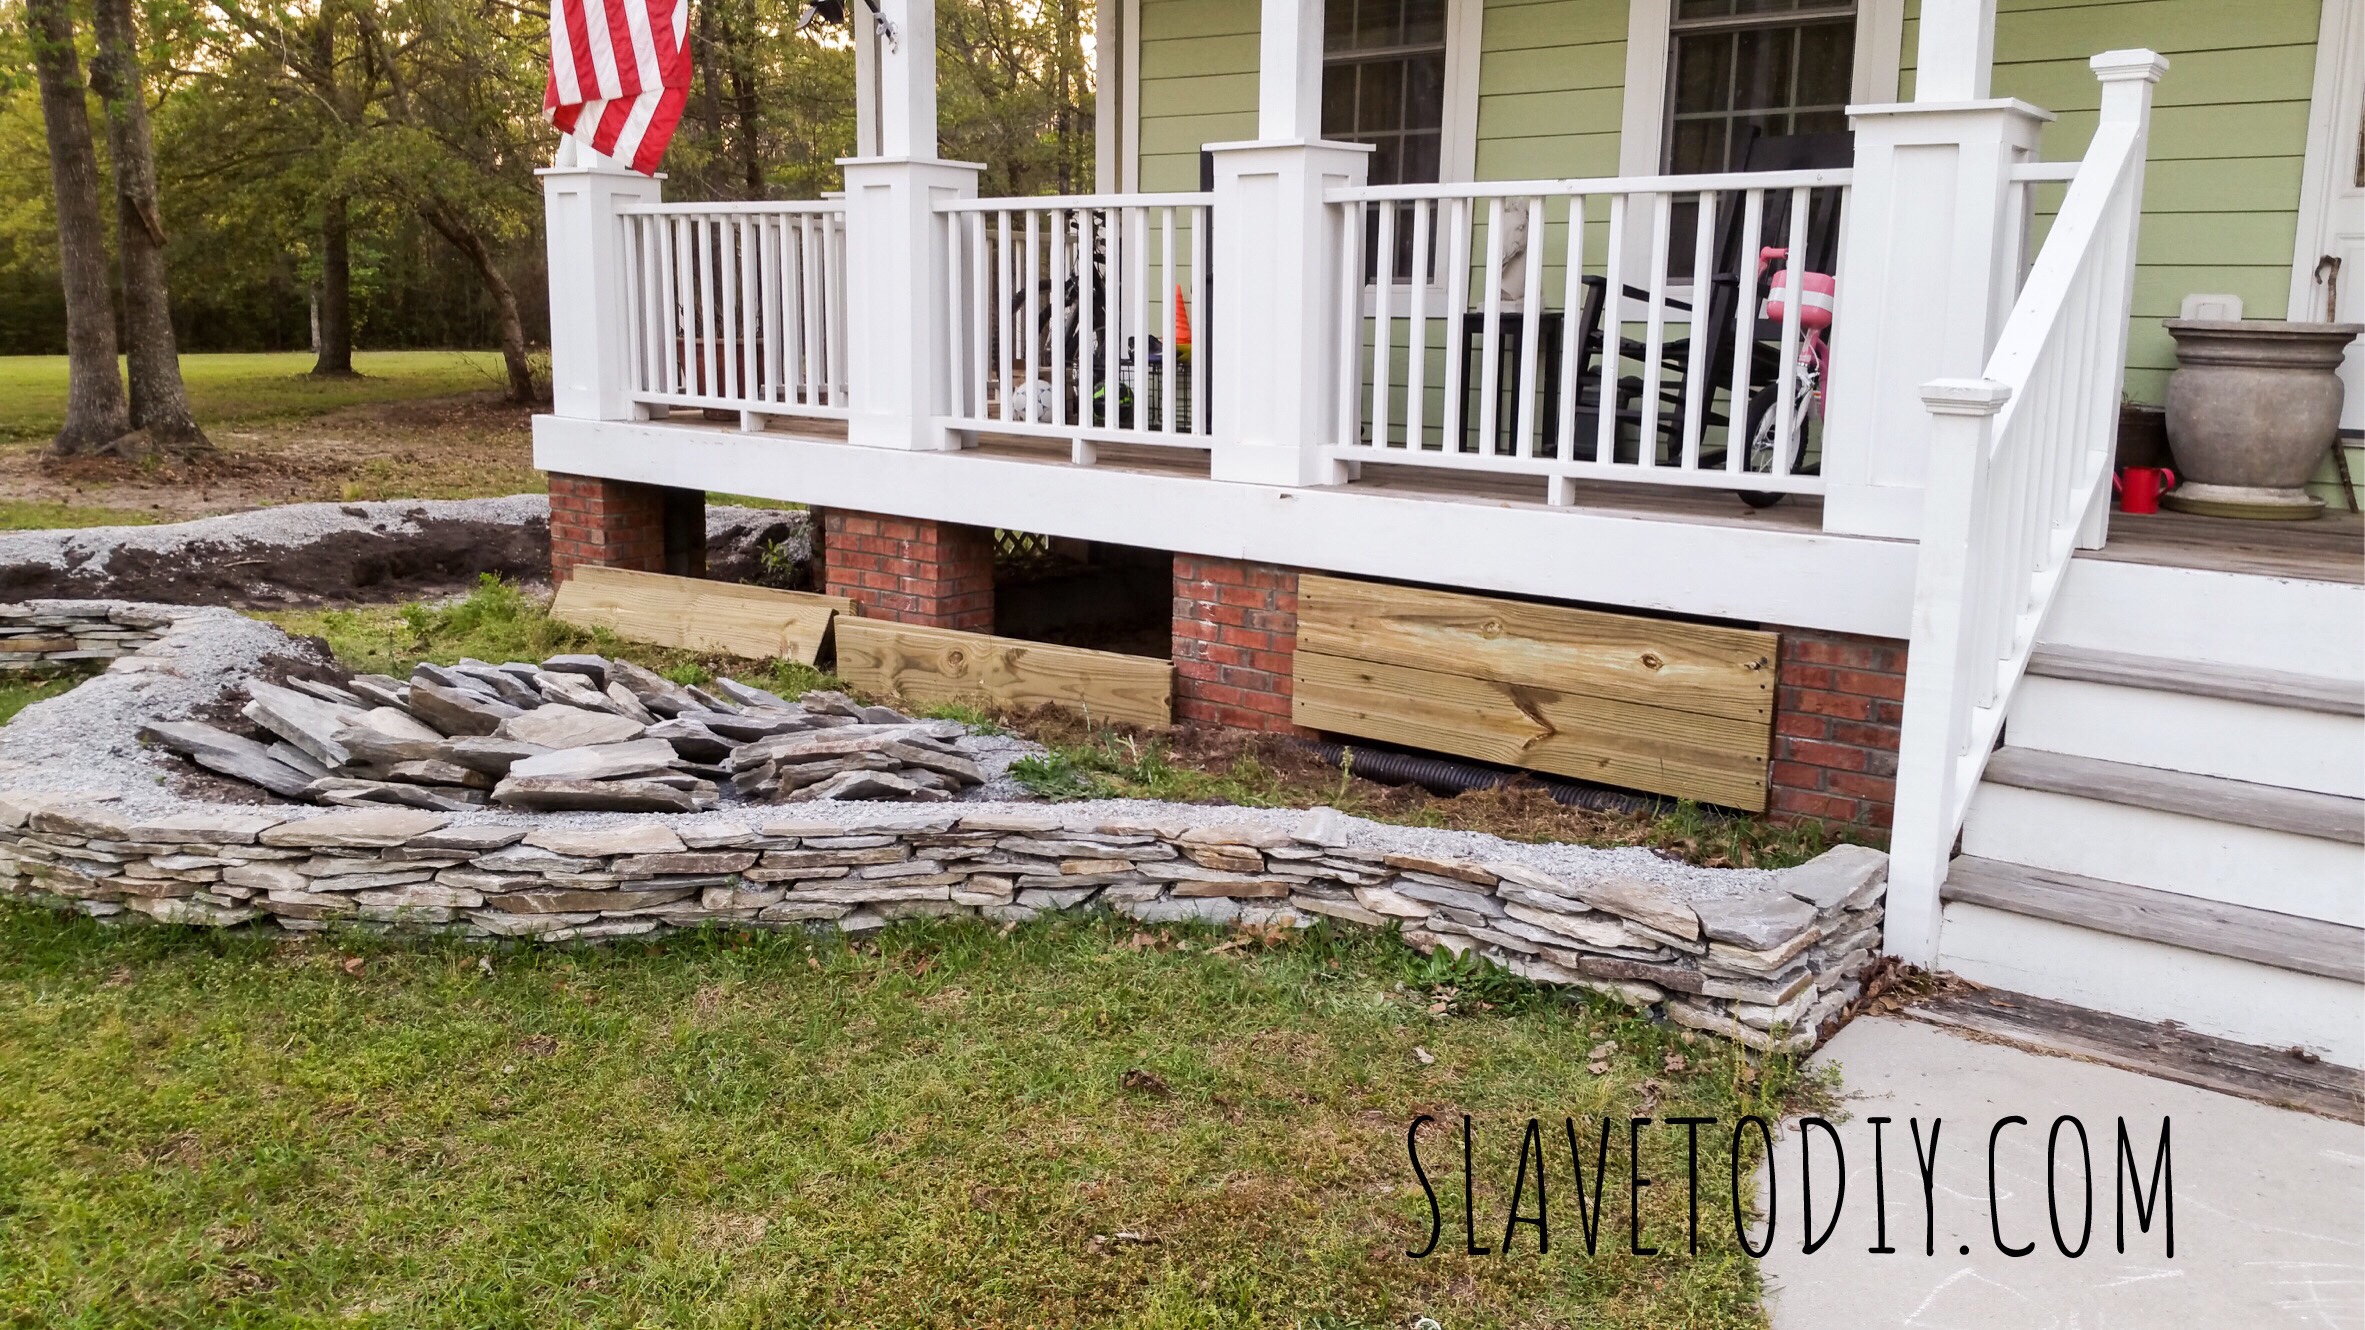
Most of these masonry packets come with a drill bit, which you’ll need. I had my helper hold the boards up once they were cut (I allowed about four inches per side to anchor the brick bases). Then I lined up the drill bit on the wood where it will go through to the GROUT line. Don’t drill into the brick, just into the grout. After drilling each hole, I managed to get two screws per side into the bases and that held them. Once the dirt is in place these things won’t move anyway, but I like everything being really solid.
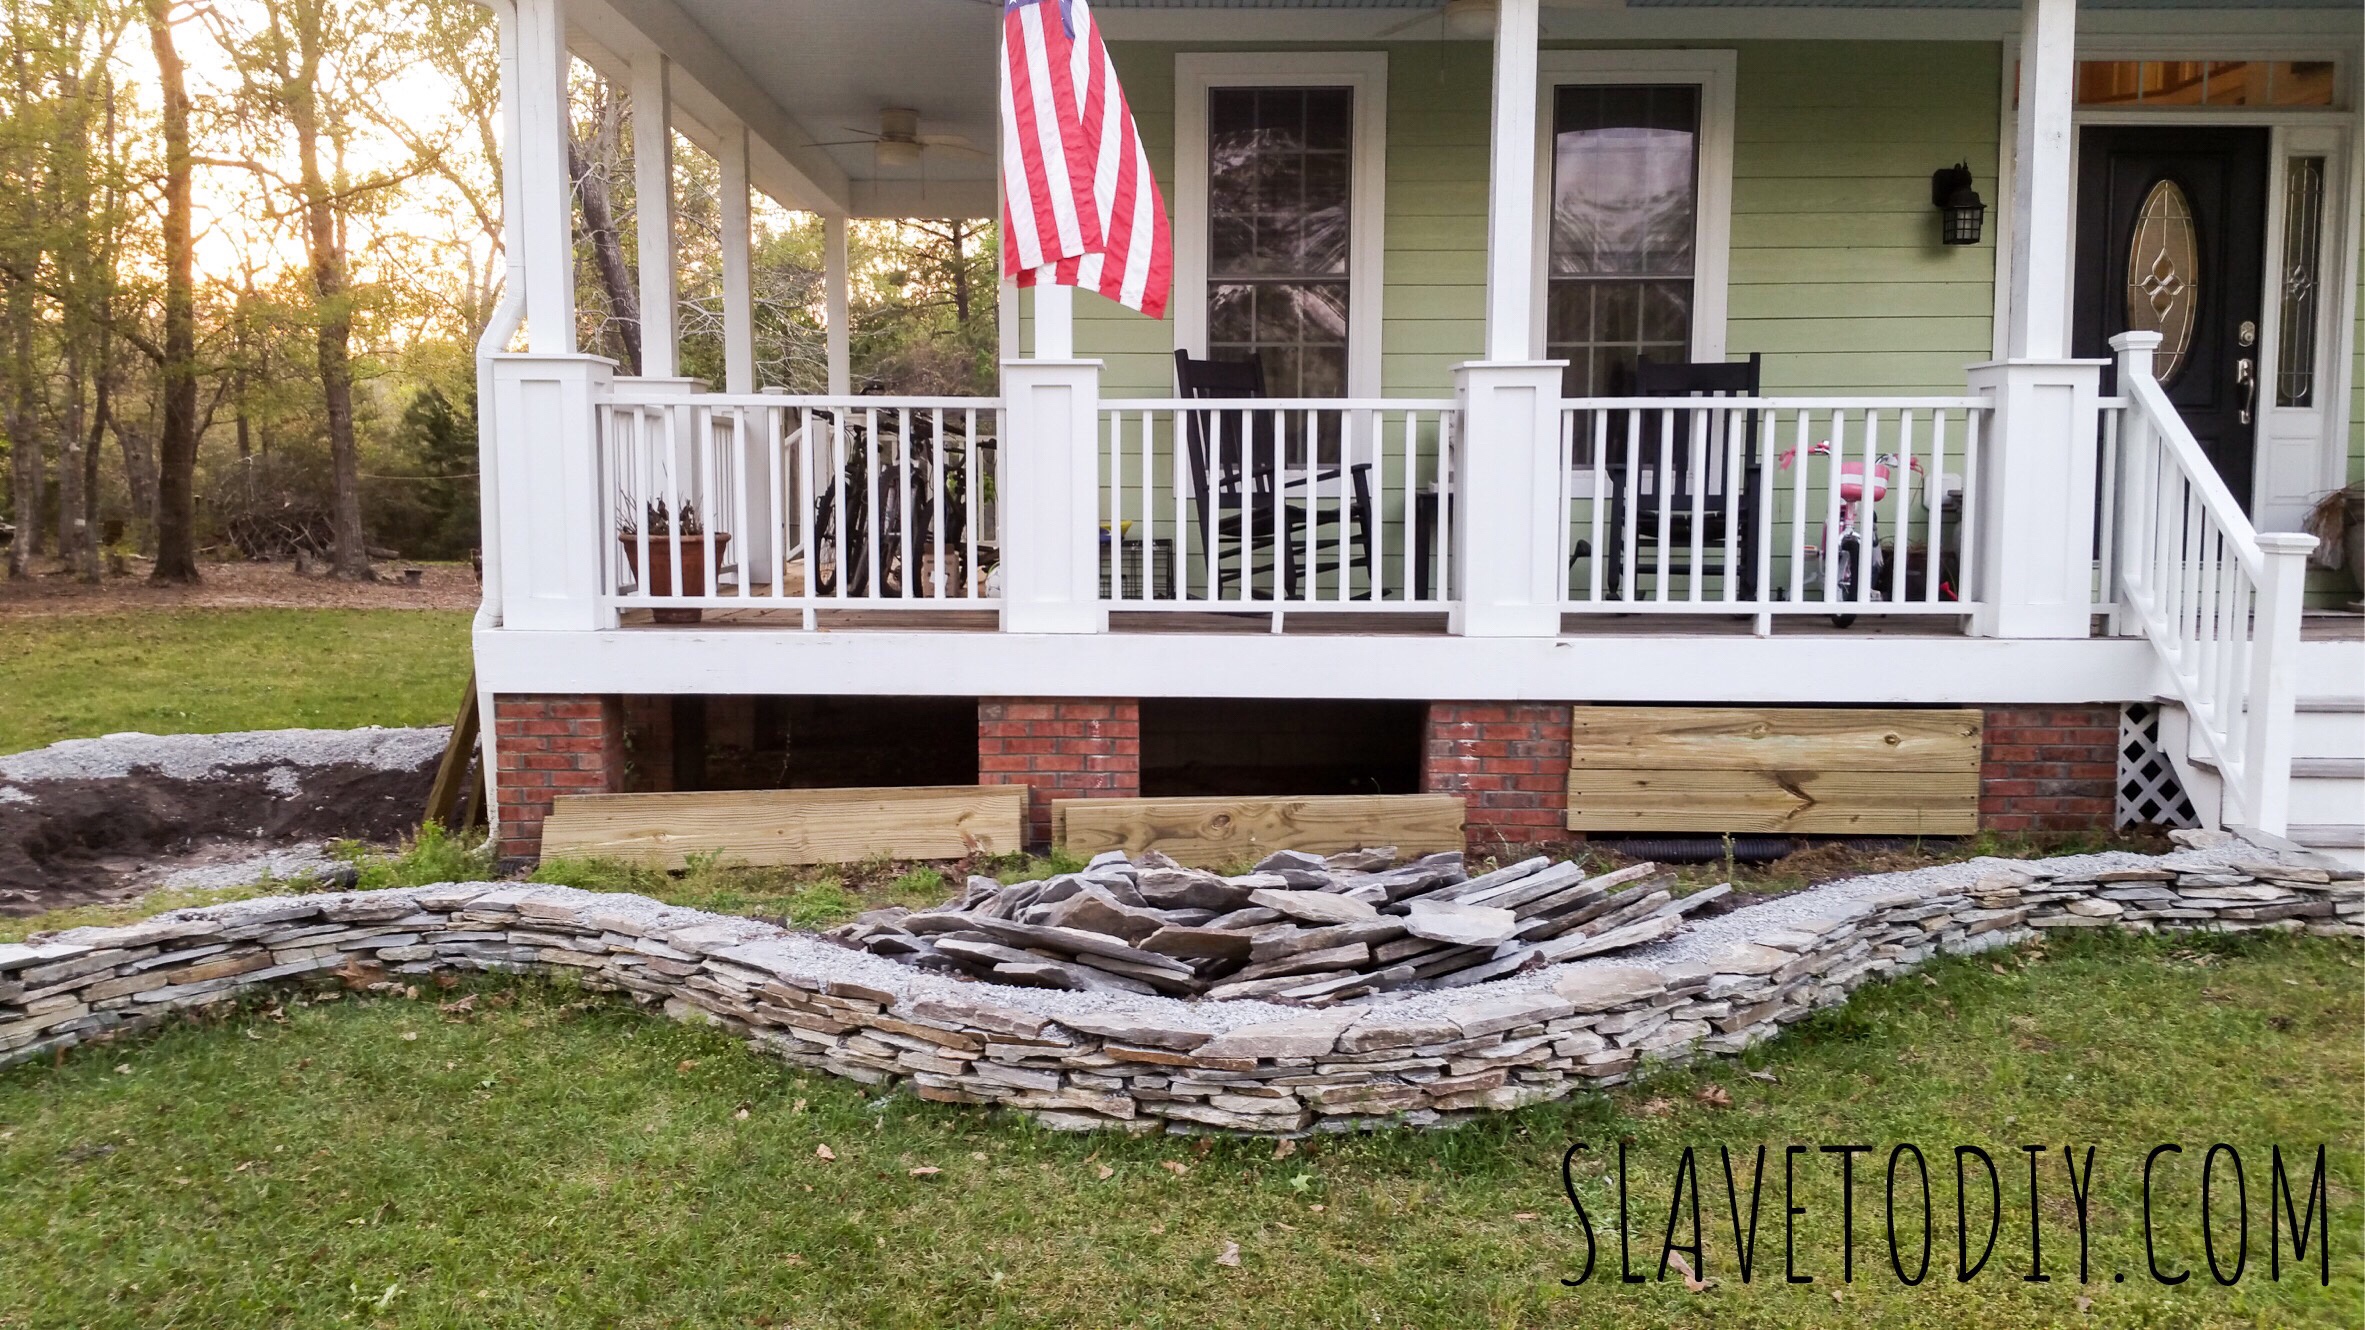
Once the boards were up, we piled the medium gravel (from phase one) under each opening to prevent the dirt from making it’s way under the porch.
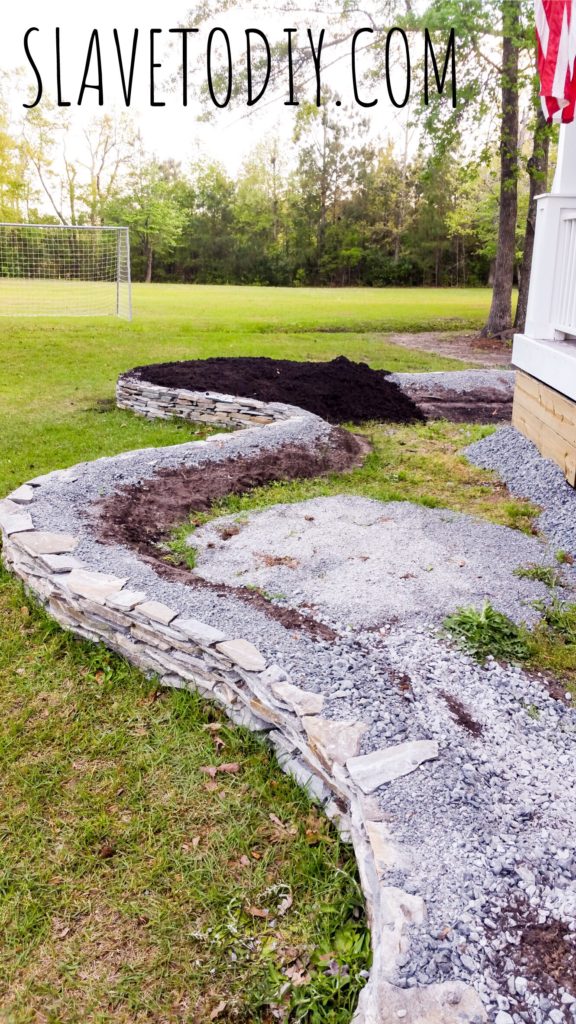
So, we moved the base caps off to the side and began the process of bringing in topsoil. I had 8 yards of topsoil delivered and had to wheelbarrow it in because the truck dumping it would have collapsed the walls. I think on top of the dump truck we probably had another ten scoops we added to top it off.
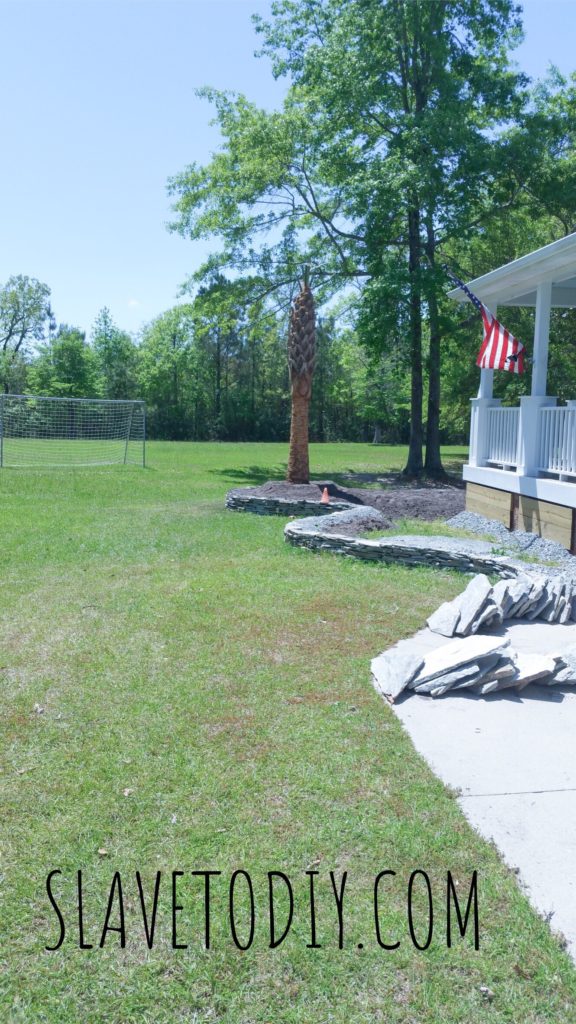
Meanwhile, I had ordered the palm tree that was going in, but wasn’t quite ready to receive it. You know, like we weren’t done putting in the dirt. It arrived two weeks early so I had to scramble to get the dirt at least in that part of the garden. By the way, these are my garden gloves and really helped save my hands moving rocks, dirt, and using shovels, etc.

The installers showed up a day late and I ended up having to leave a soccer cone in place (PUT IT HERE, PLEASE) and leave for a soccer game. That’s a lot of trust to make sure it’s level and plumb without being there. Trusting other people to do something correctly is not really my strong suit. But, they did a good job and it’s mostly straight.
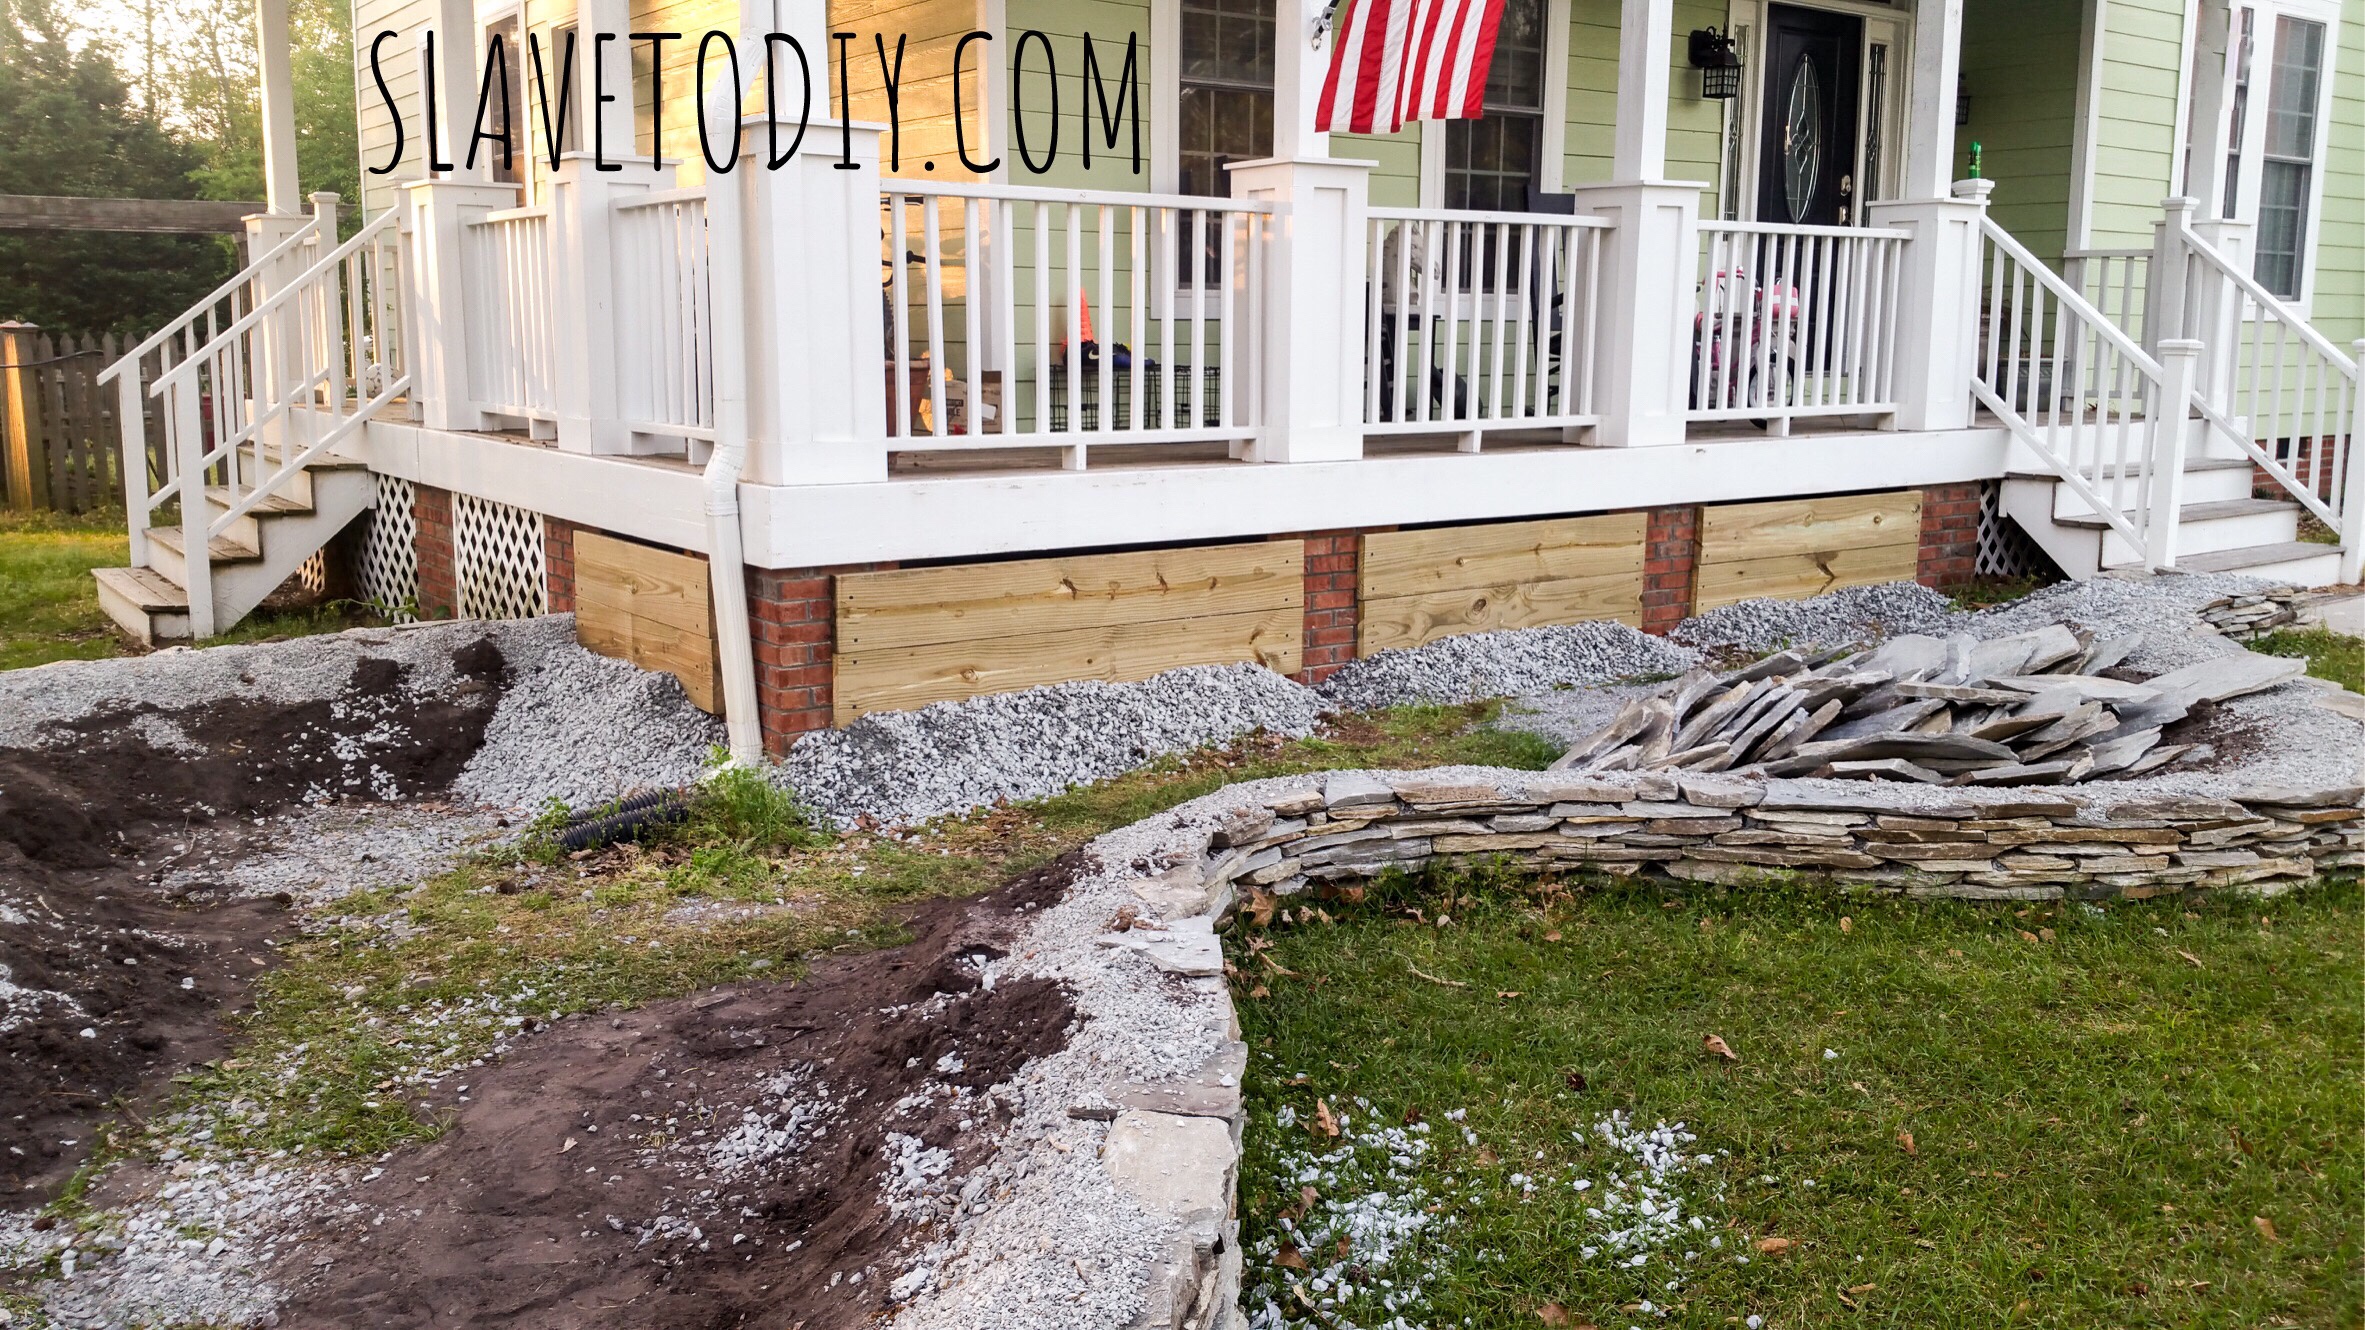
So, we continued lugging dirt and I started putting landscaping fabric on the “finished” areas.
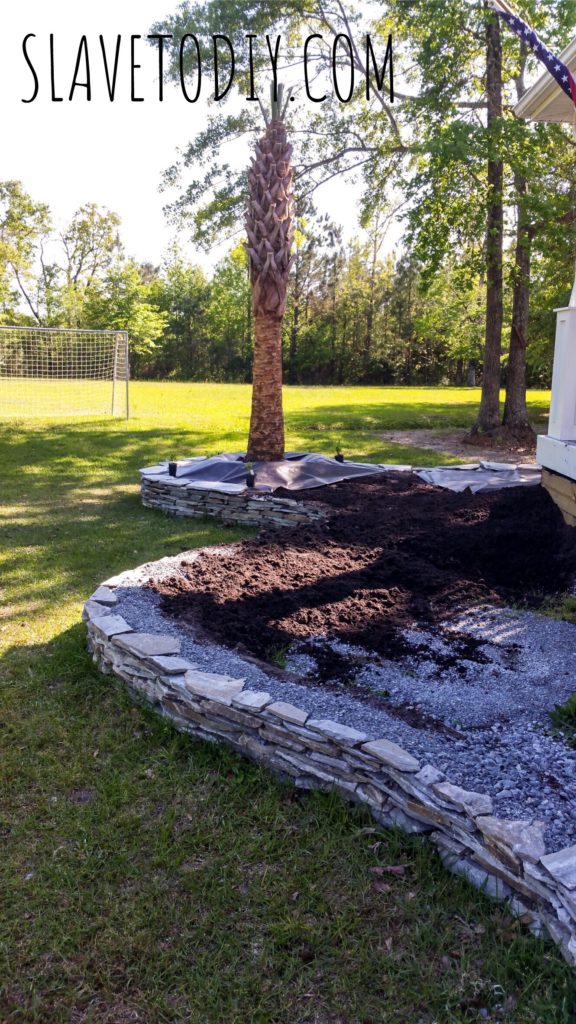
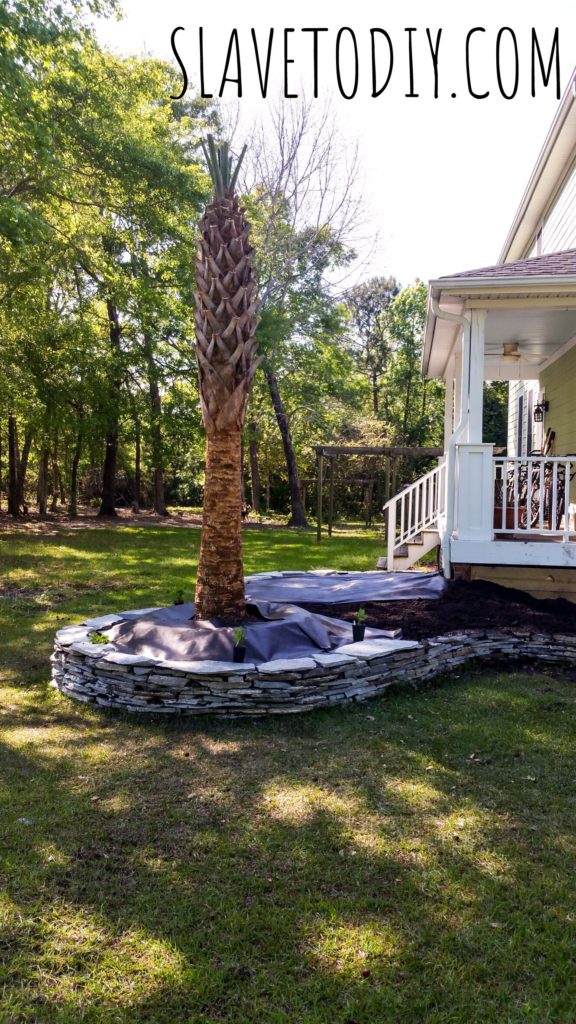
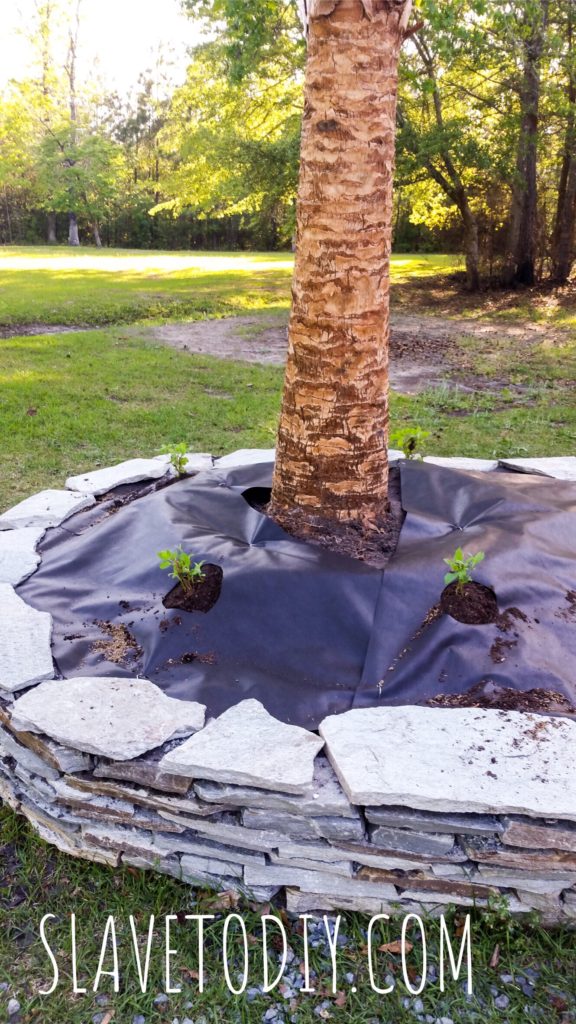
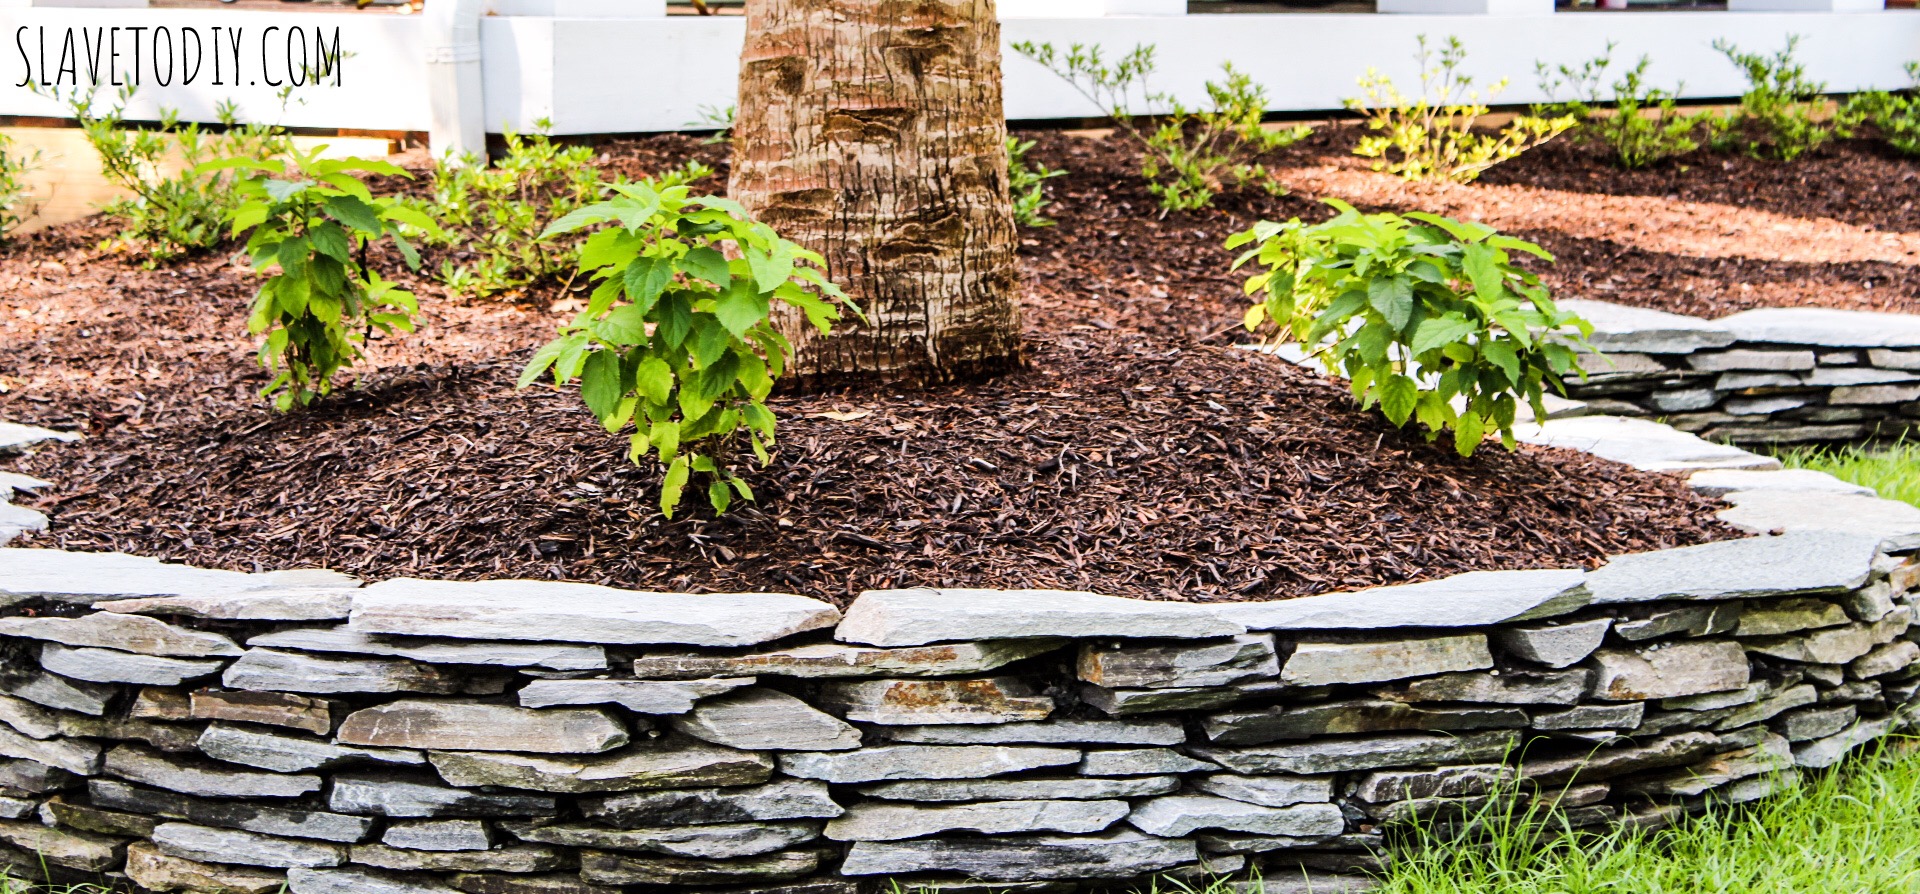
 The hydrangea I ordered also arrived ahead of schedule so I needed a place to put them so they would be happy. I was unable to find the Annabelle hydrangea I wanted at our local nursery or lowes but I found them at Brighterblooms.com. They came super fast so, I cut out little homes for them around the palm. I generally use Miracle Grow Garden Soil in the holes when I plant them so they get a little head start.
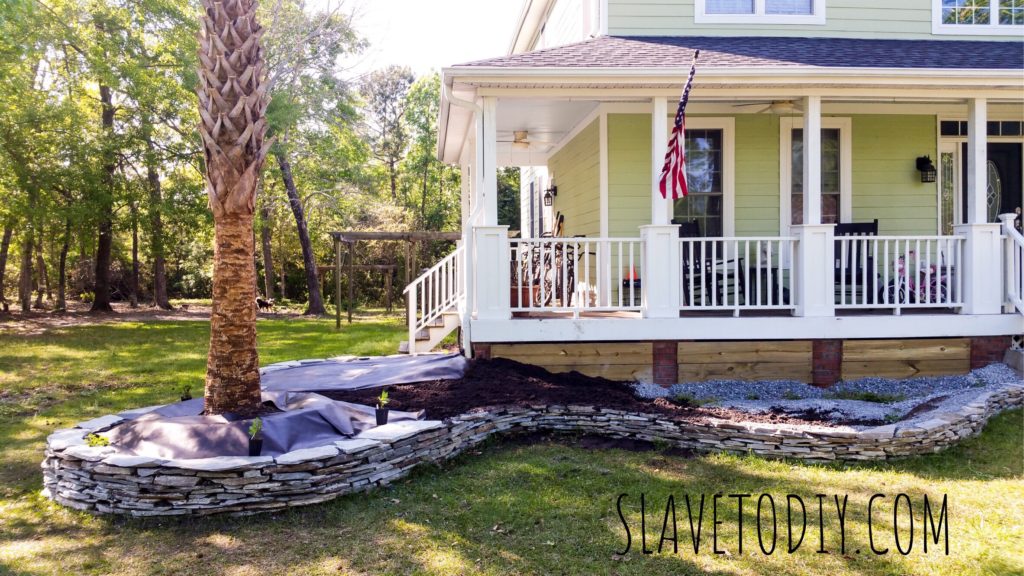
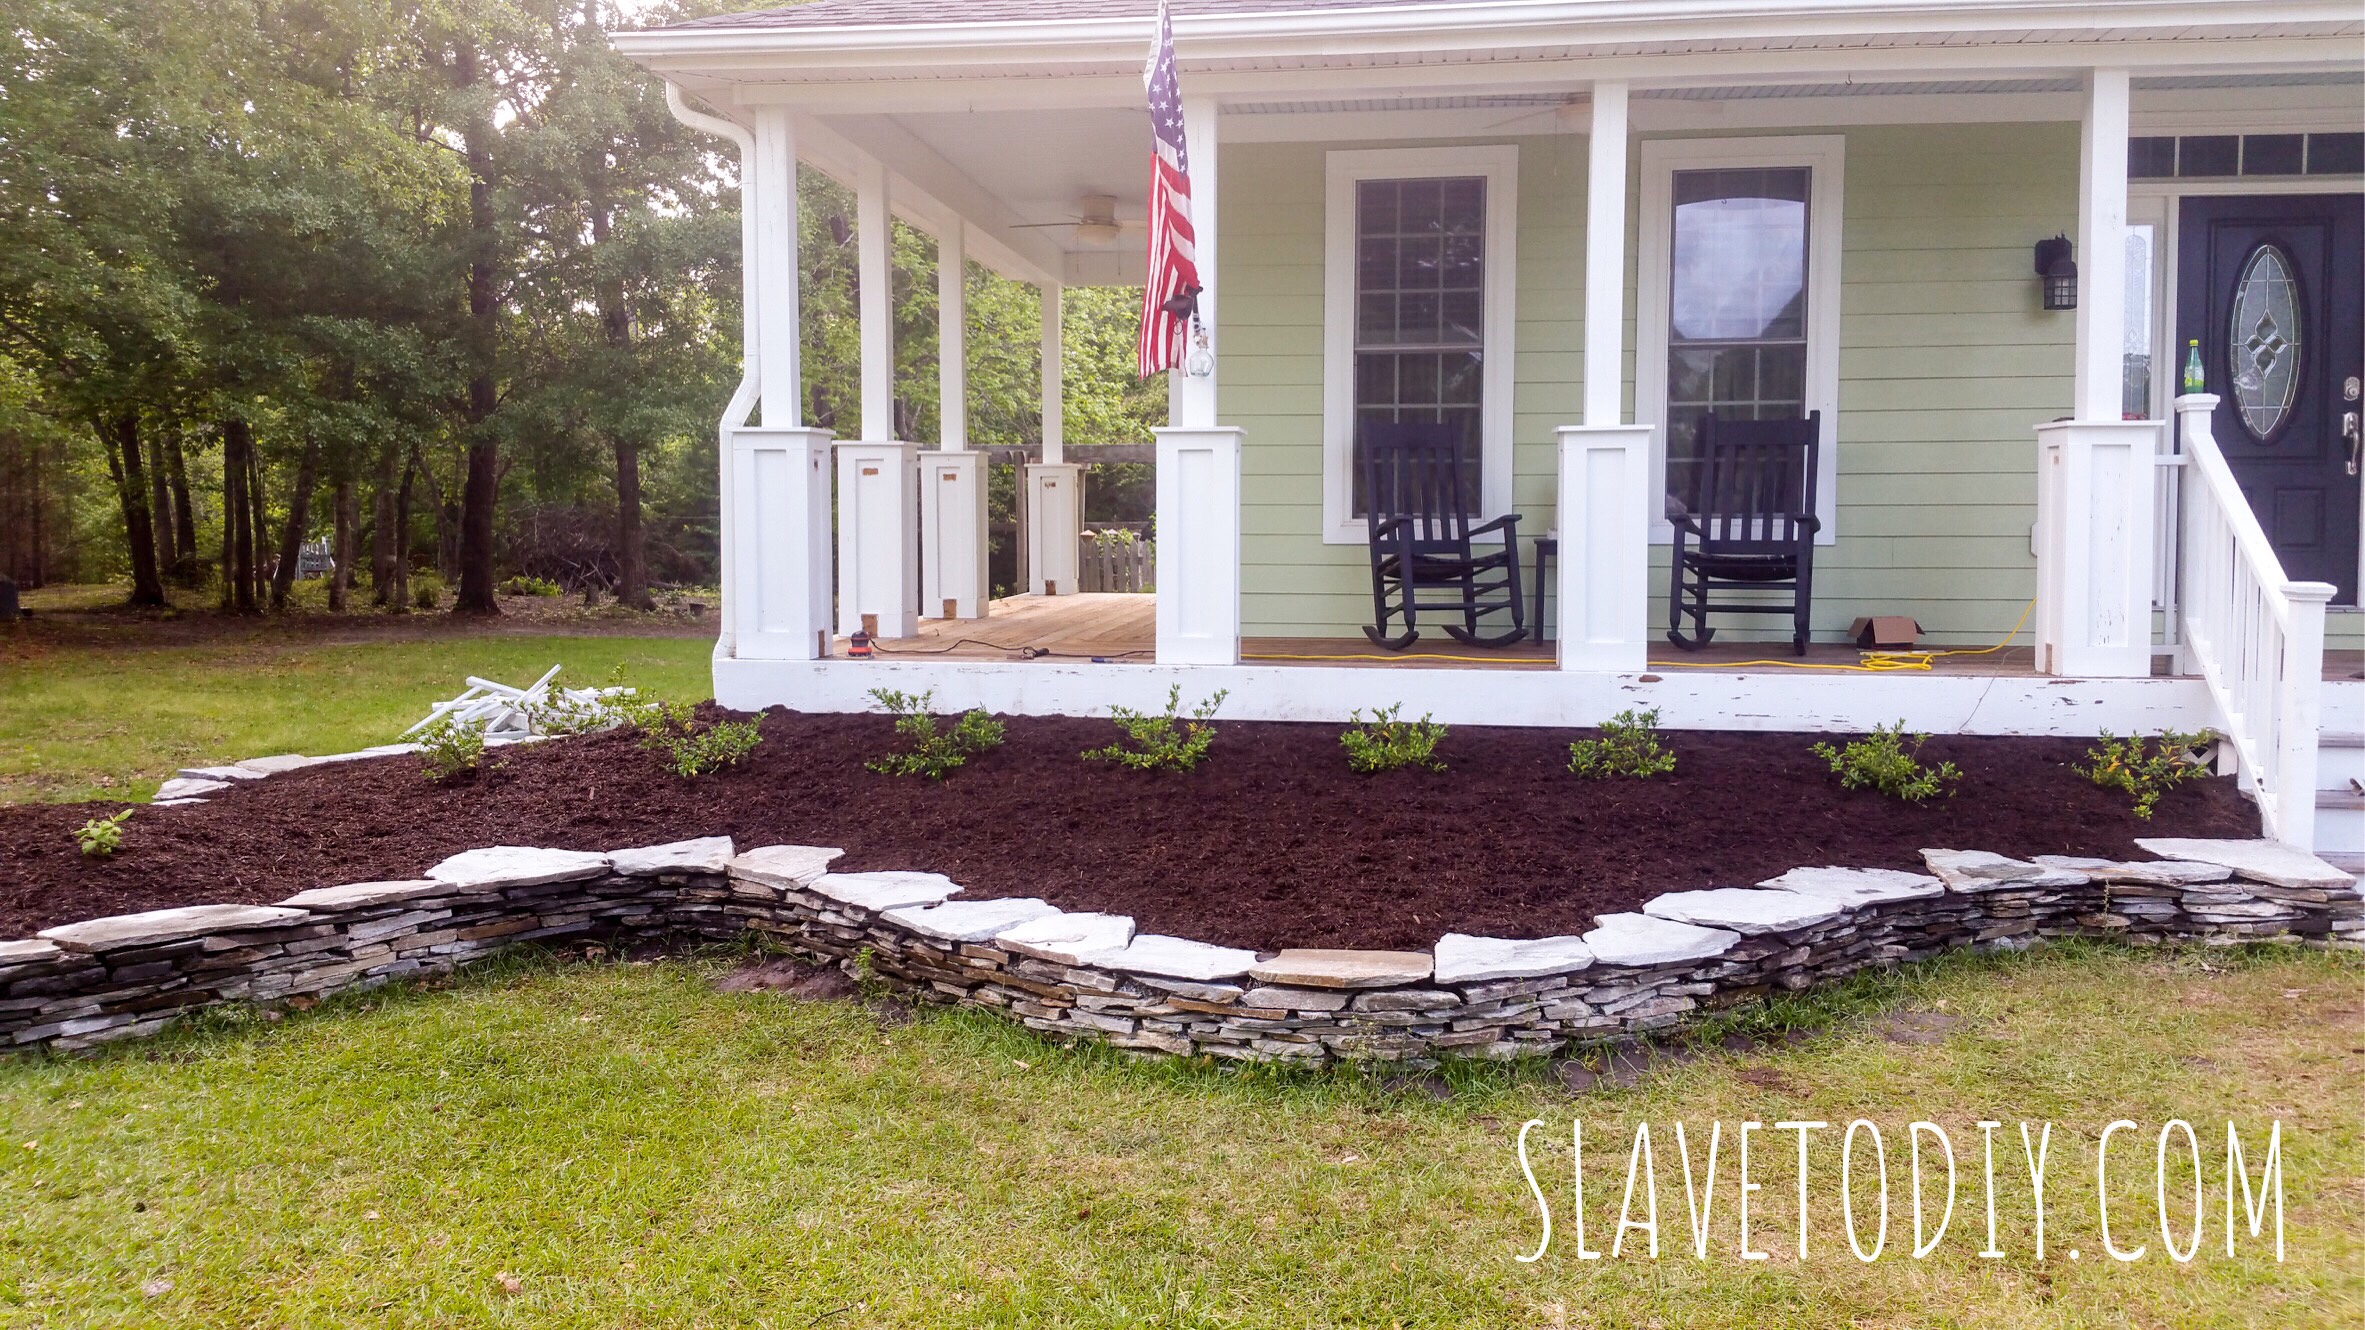
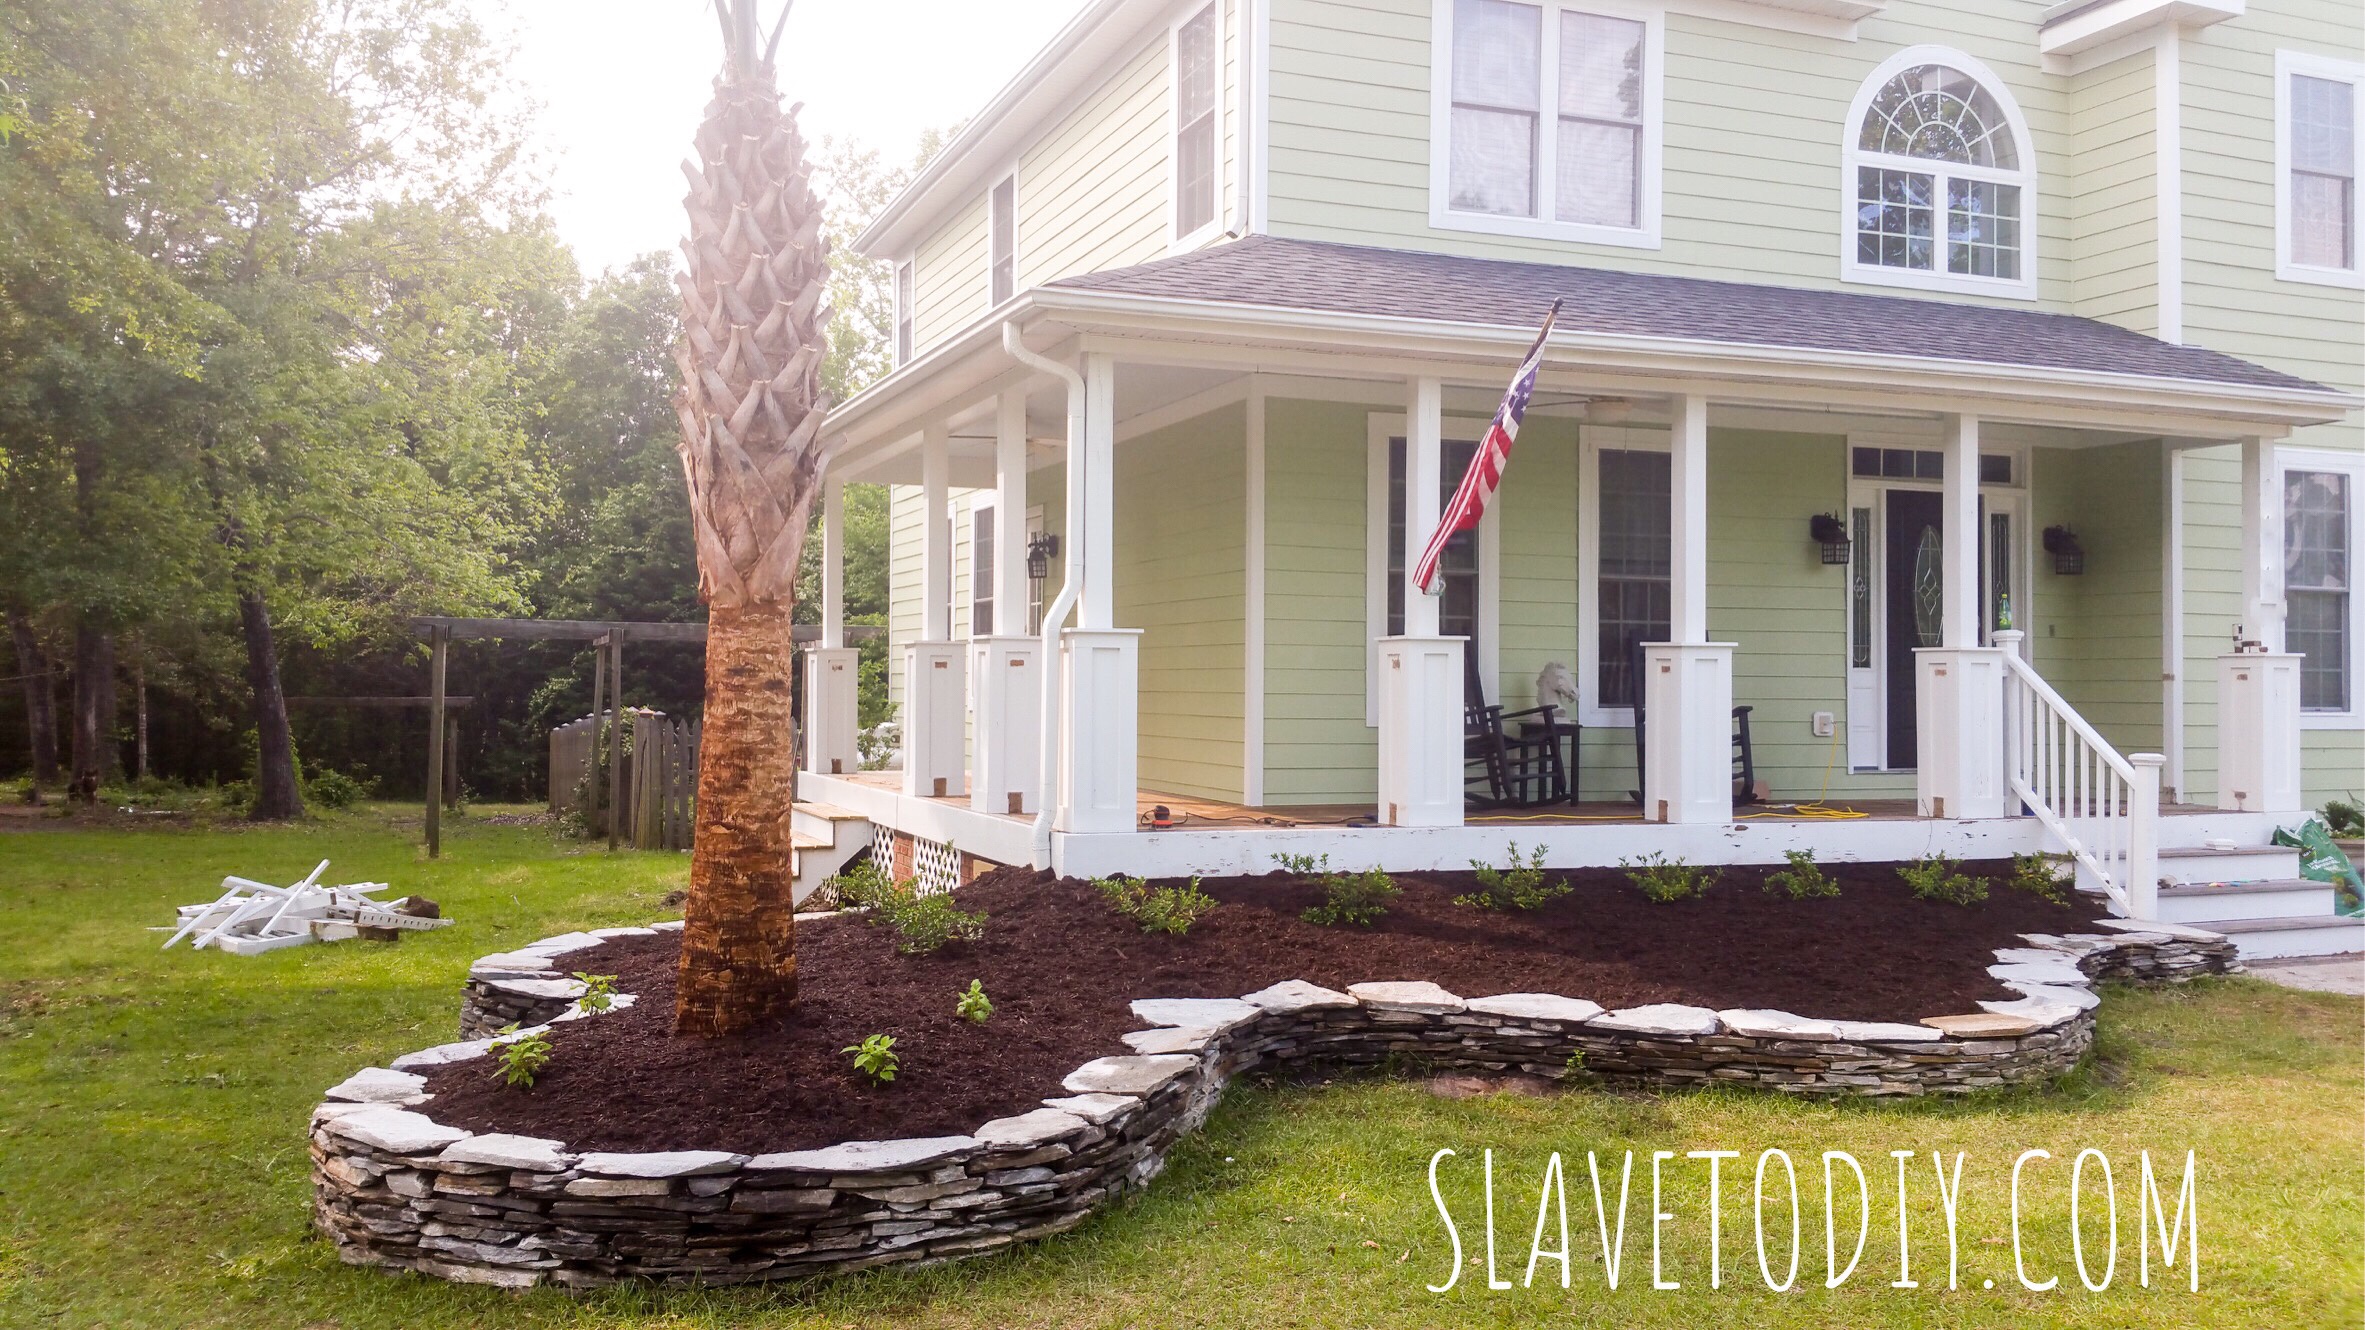
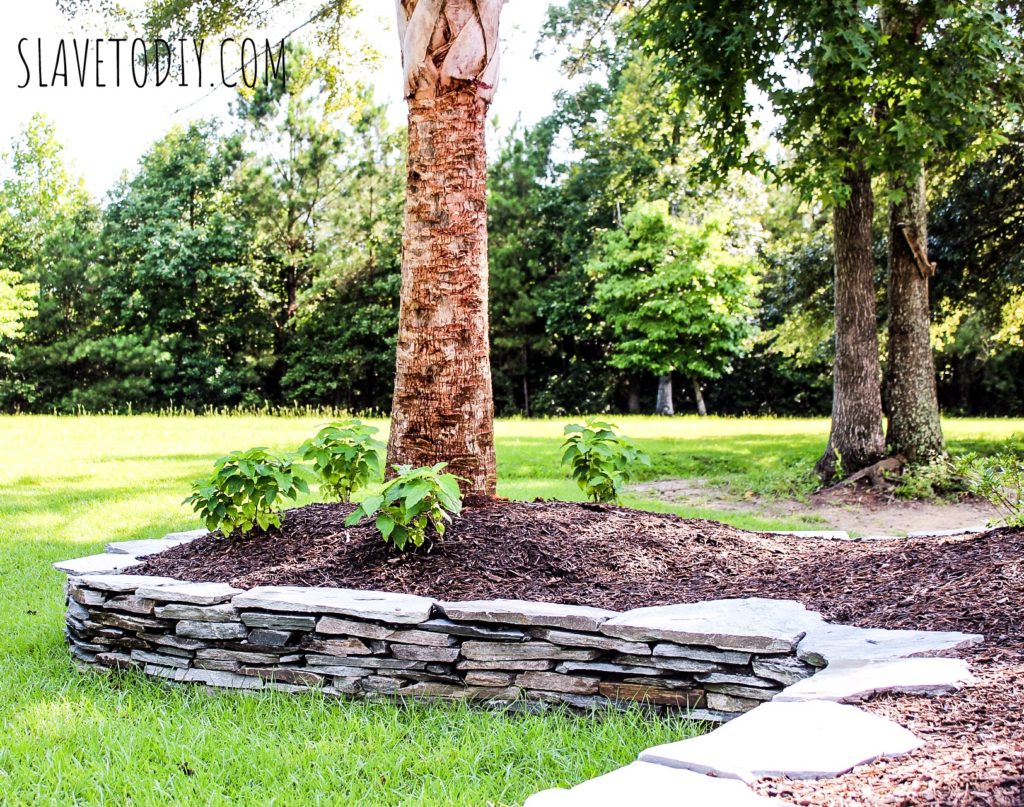
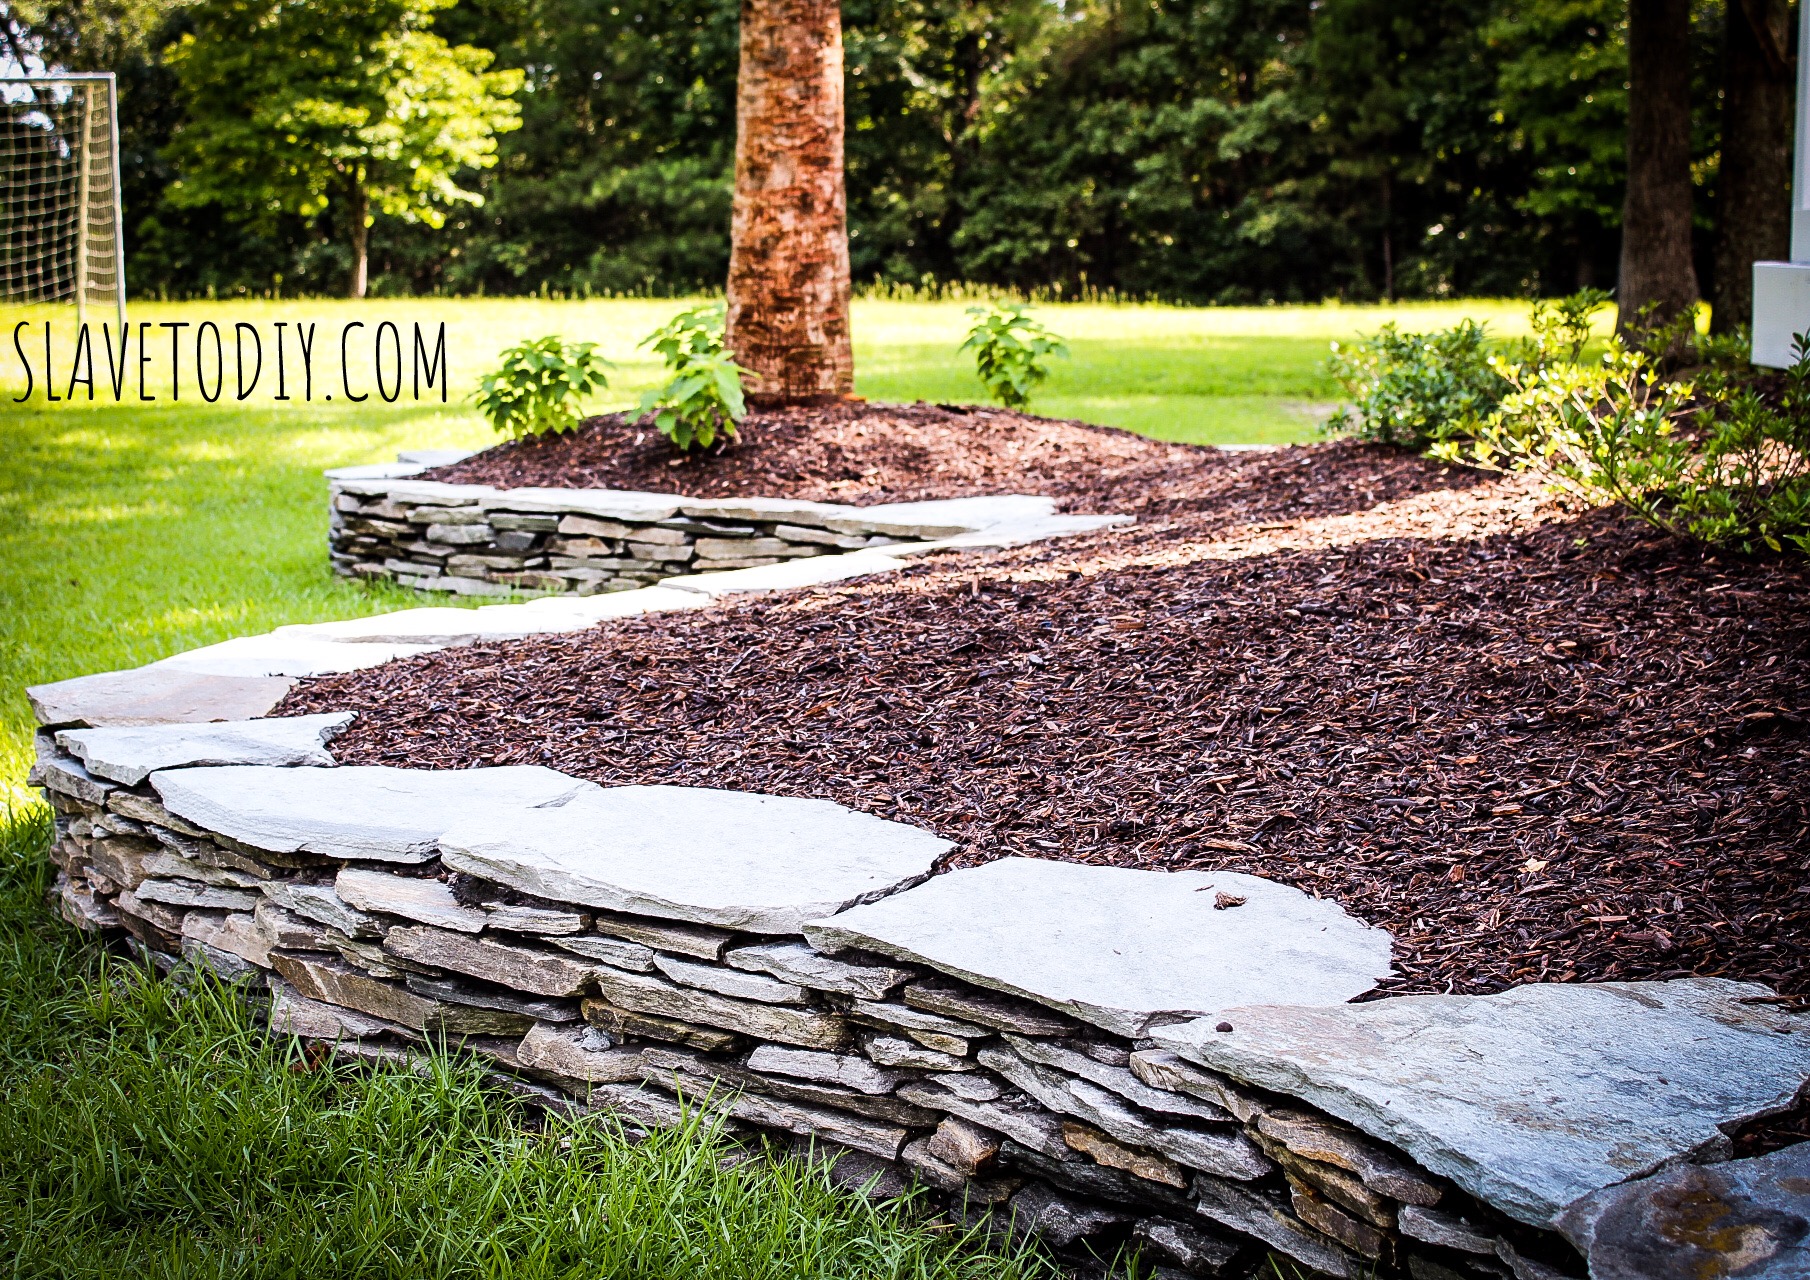
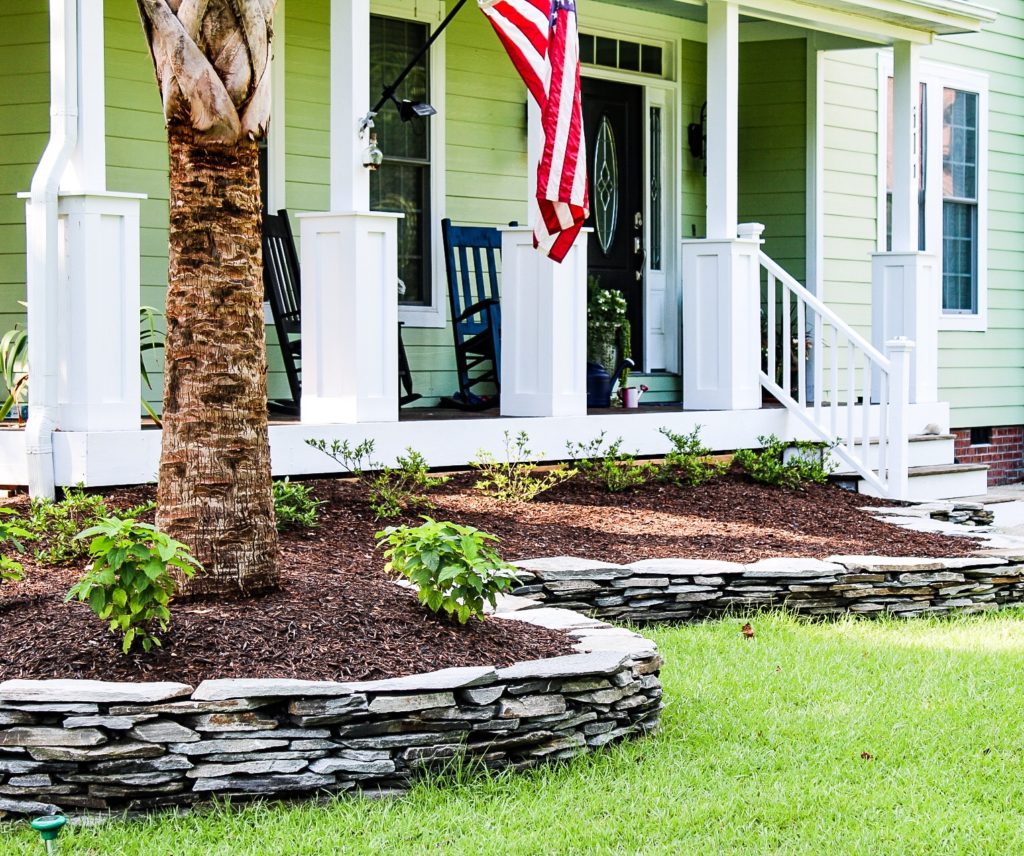
Once the topsoil was in (FINALLY) the rest of the project went really fast. I completed the landscaping fabric install and went back to my big capstones. They were super easy to put in because the walls were already level and there is an upslope in the garden up to the porch. Once the capstones were in we got about three loads of mulch from the local mulch place and put in a row of Dwarf Radicans Gardenia, also from Brighter Blooms. I’ve had great luck with them over the years, long before I started blogging.
Did you happen to notice that we ripped out the porch railings? Yeah, that wasn’t planned. I was sitting back and looking at the garden and thought, “wow, those have got to go.” A half hour and a swinging hammer later the railings were down (read all about our fabulous front porch update here).
The install has been complete for three months and I’ve only pulled out three weeds, superficially clinging to the surface of the mulch. The plants are doing well and the palm is opening.
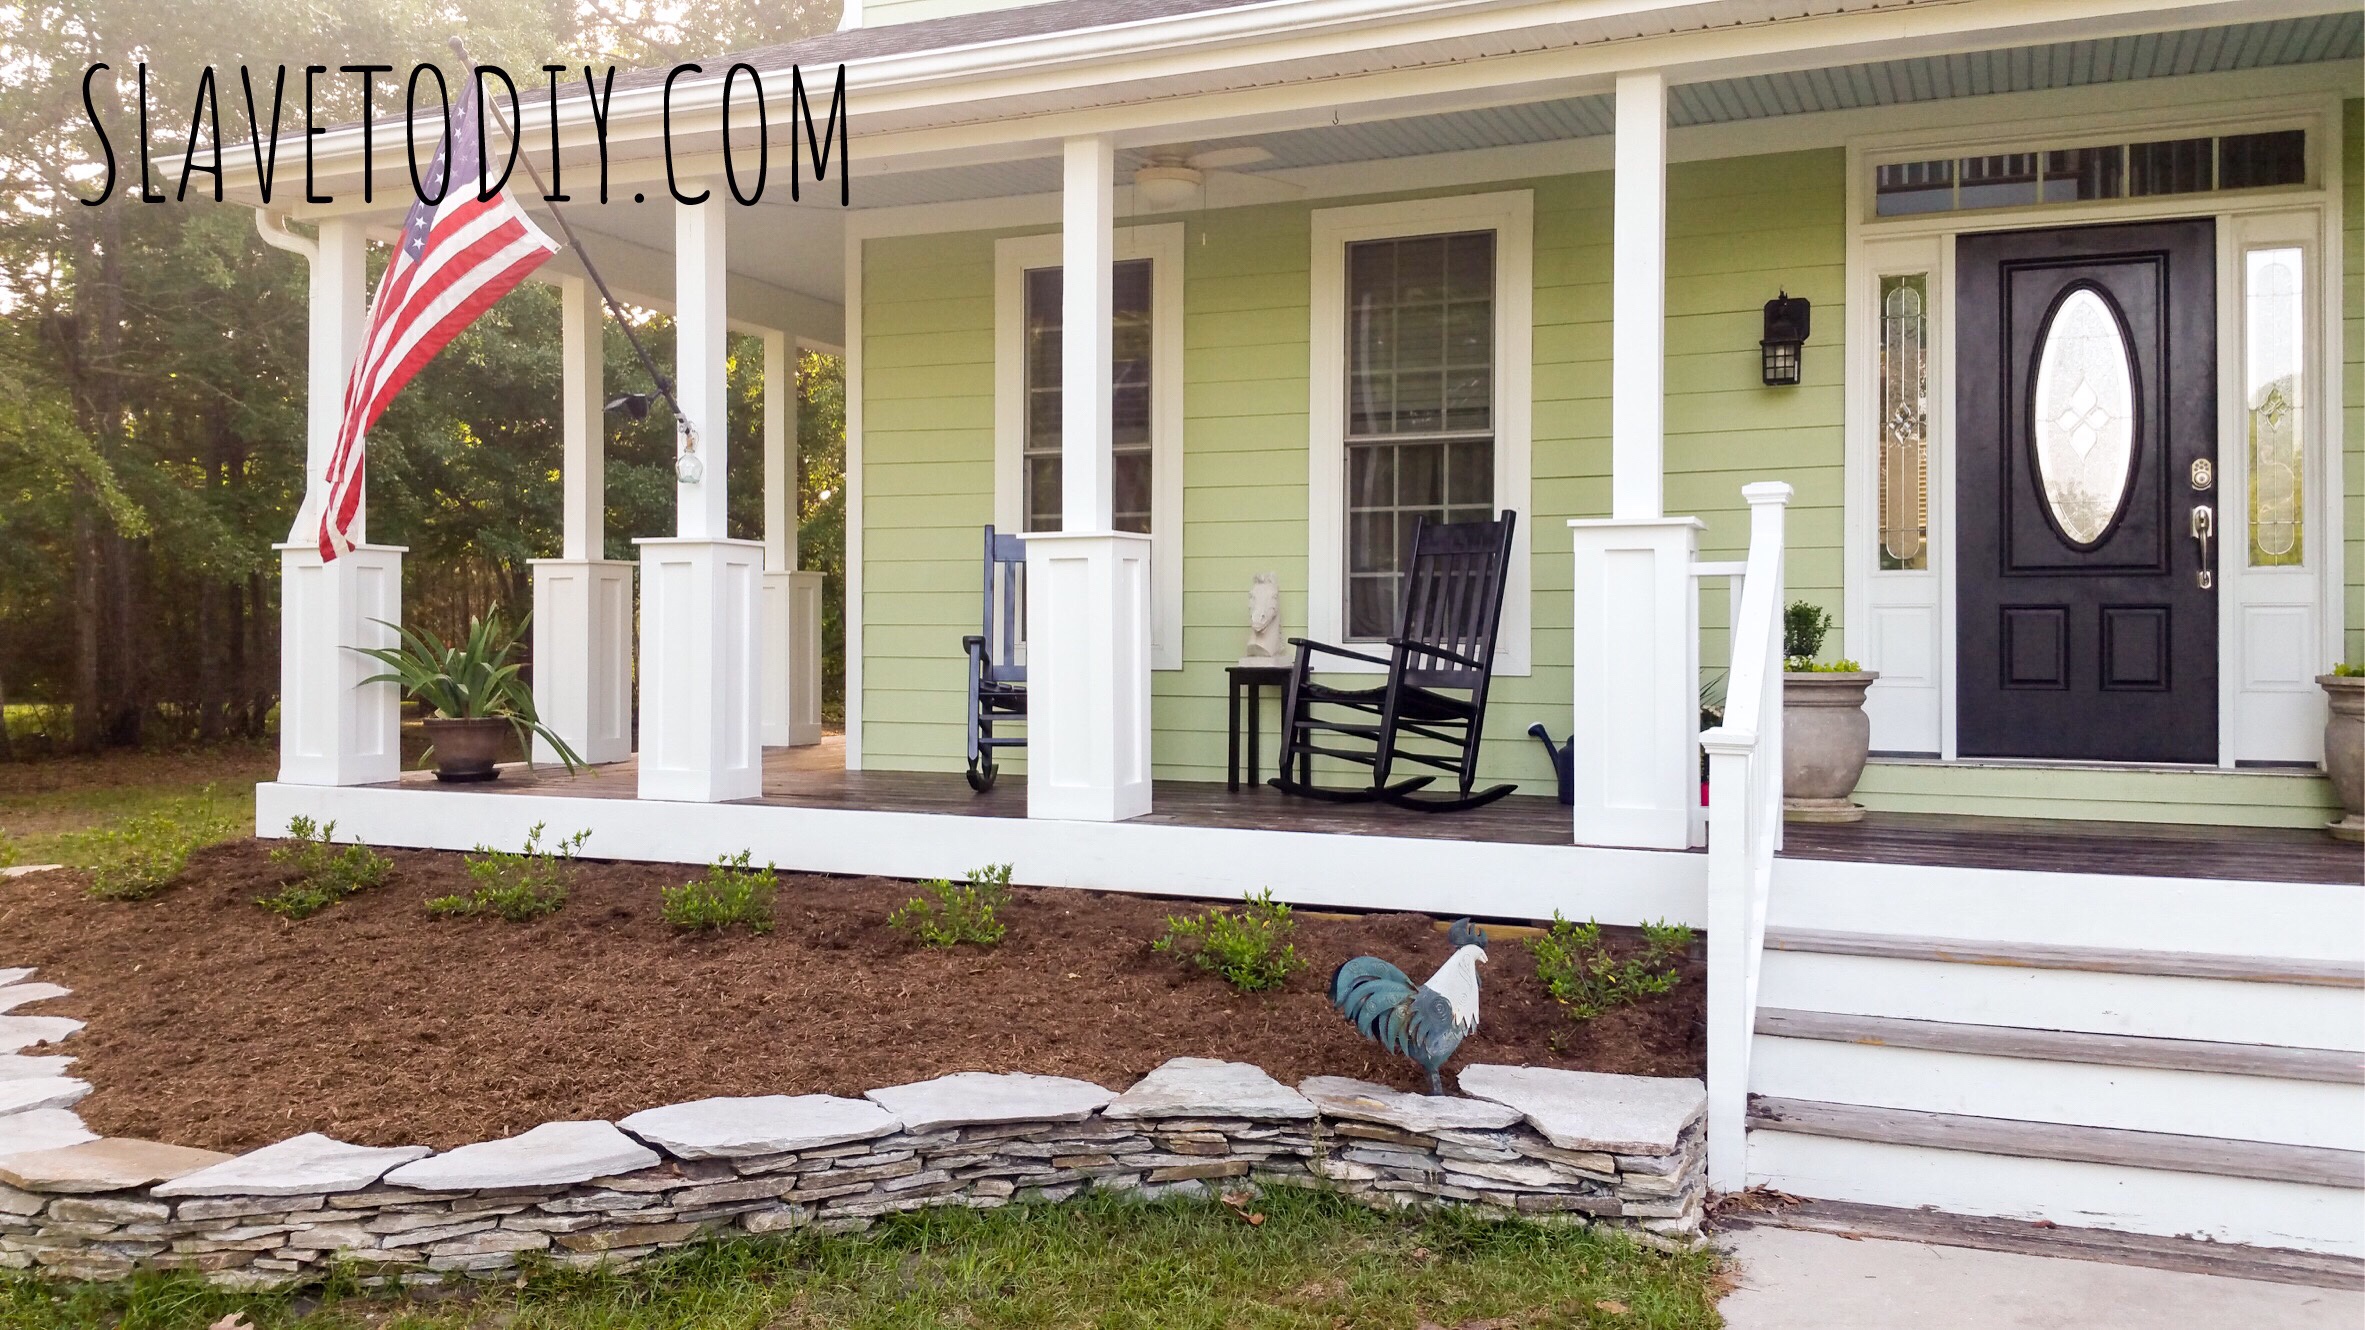
This is what it looks like at the end of the summer.
Cost for this phase:
- 8 Yards topsoil, delivered $347
- Sabal Palm, installed $365
- Base garden plants $299
- Wood and masonry screws $211
So, the cost of the entire project from beginning to end totalled $2822. Certainly not cheap, but REALLY beautiful and absolutely worth every hour of labor.
A note on plants… In my last several gardens I chose plants that quickly got completely out of hand and required a lot of pruning and maintenance. I do NOT have time for all of that nor do I want to create full gardens where snakes can hide. By installing the garden correctly (i.e. using landscaping fabric) the only maintenance this garden should need is occasional dry season watering, fall hydrangea pruning, and annual mulching refresh. I intentionally chose dwarf species for both the hydrangea and gardenia to minimize the chances of creating an overgrown, high maintenance garden.
Thanks for sharing our adventure! Check out more of our projects Here.
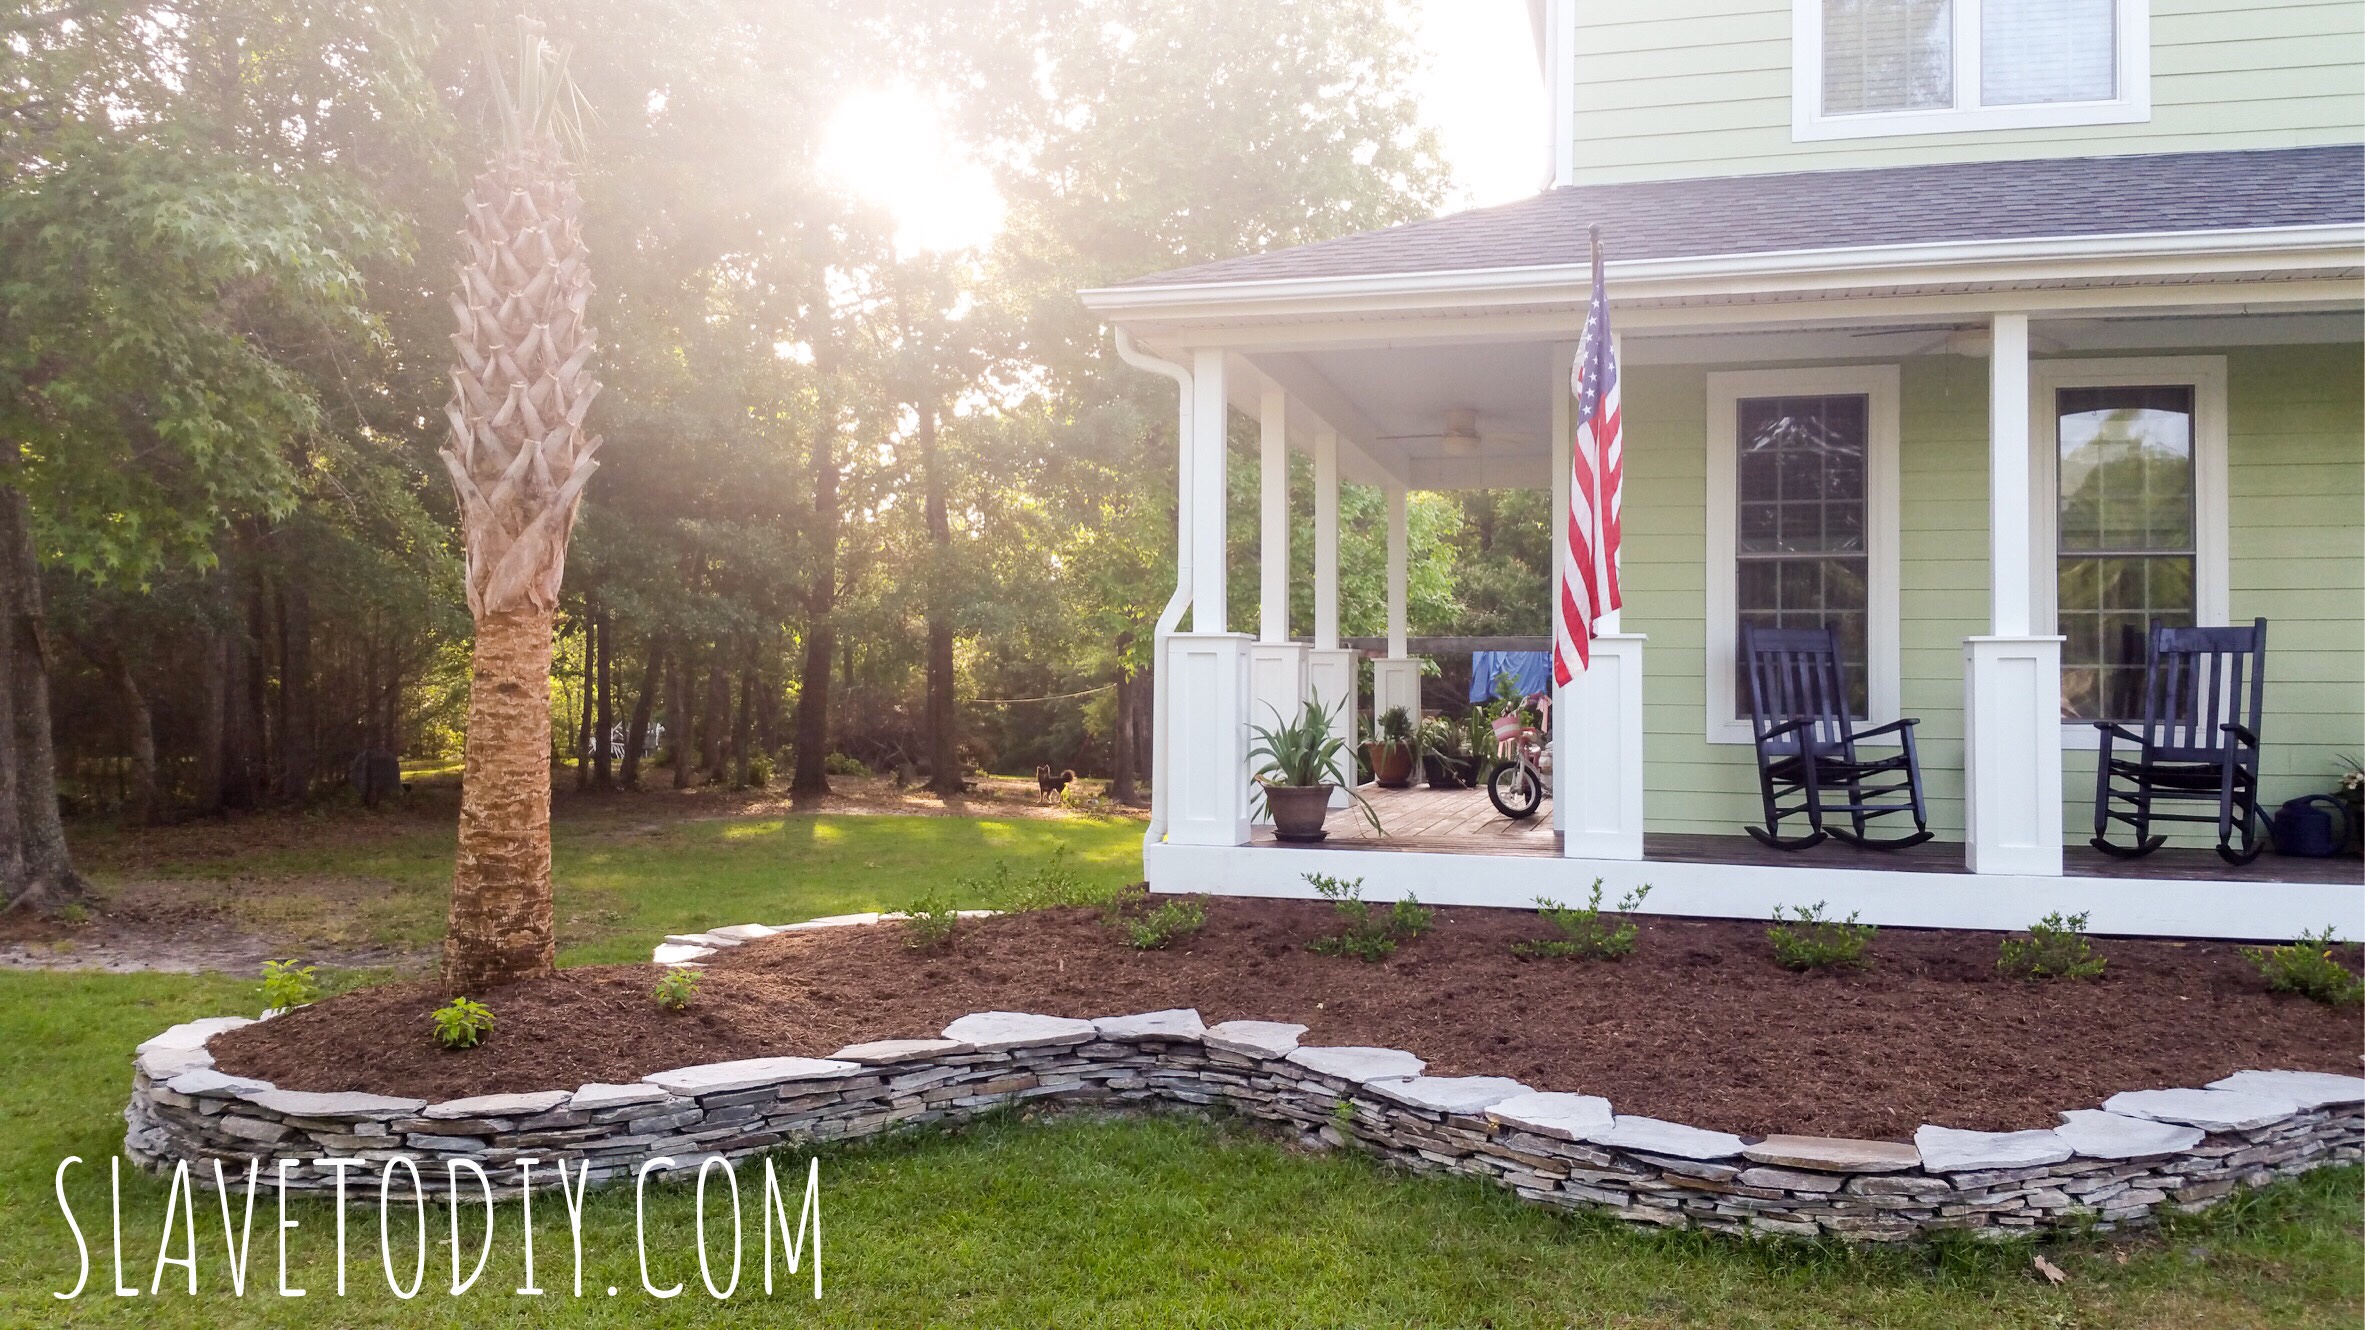
*Update: it’s now October and we’ve been through a major hurricane and a tropical storm. My garden wall survived without so much as a shift. Some of the plants took a beating, but my palms are still standing. I’ll update with pictures in the spring!
*Legal stuff:
I am honest about my experiences with different products and write because I enjoy it. I do however, have the opportunity to earn money for my writing, also.
Slavetodiy.com is a participant in the Amazon Services LLC Associates Program, an affiliate advertising program designed to provide a means for sites to earn advertising fees by advertising and linking to amazon.com. Amazon offers a small commission on products sold through their affiliate links. Each of your purchases via our Amazon affiliation links supports our cause at no additional cost to you.
If a blogger links to an Amazon product (with a special code for affiliates embedded in the link), and a reader places an item in their “shopping cart” through that link within 24 hours of clicking the link, the blogger gets a small percentage of the sale. Amazon links are not “pay per click.” If you click on the product link and stay around Amazon and purchase something else, however, I will get a commission on that sale.
Slavetodiy.com is also a VigLink affiliate advertiser which works similarly.