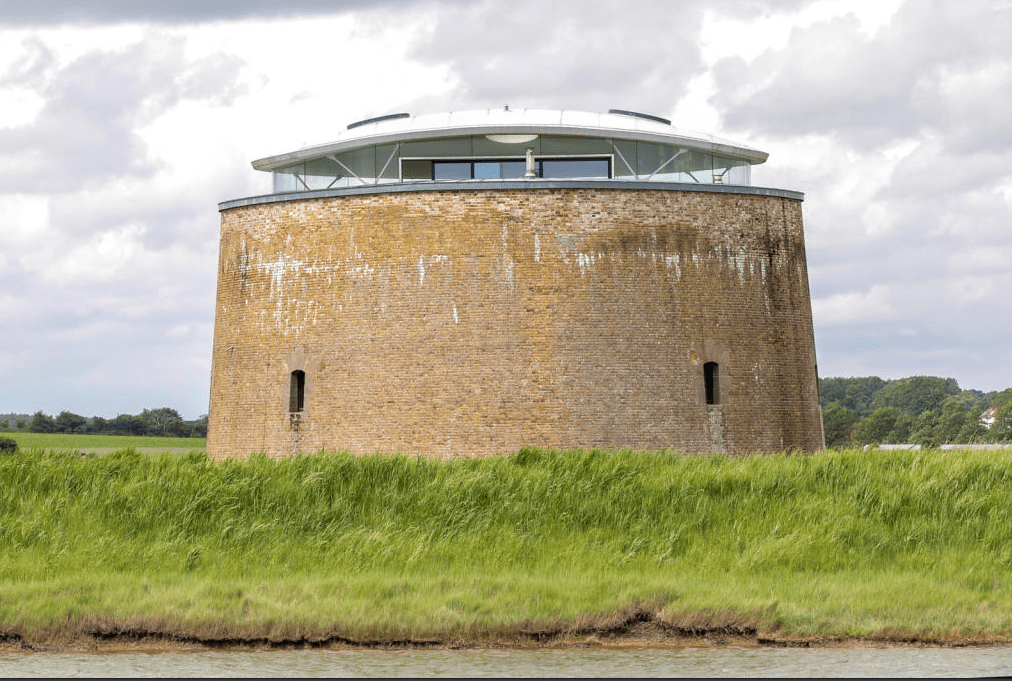
It’s not everyday that you find a home that appeals to your zombie-apocalypse-prepper side and your interior designer side. If you’re fortunate enough to live in the UK you can see this place, the Martello Tower Y, in Bawdsey, Suffolk.
For 1,250,000 Euros, or about 1.4m dollars, you can own this award winning “Martello Tower,” originally styled after similar structures built to protect against a hypothetical Napoleonic invasion in the 16th century. Built in the early 19th century, and redesigned in 2010 by architect Stuart Piercy and designer Duncan Jackson, it is a masterpiece and is a designated future historical site. With a breathtaking ocean and marsh view, it doesn’t get much better than this.
*This post may contain affiliate links. Please see full disclosure at the end of the post.
This place is currently a holiday rental, so even if you can’t afford the whopping price tag, it’s a two hour ride by train from London, and I’m betting, a wonderful get away.
It is listed by The Modern House, London: 020-3795-5920, and all photo credits go to the listing agency.
The exterior is intriguing in an unbelievable ocean setting:
House Porn: The Coolest Luxury Bunker For The Zombie Apocalypse. View of the bunker across the marshHouse Porn: The Coolest Luxury Bunker For The Zombie Apocalypse. Another exterior view along the marsh.House Porn: The Coolest Luxury Bunker For The Zombie Apocalypse, A Close Up View of The ExteriorHouse Porn: The Coolest Luxury Bunker For The Zombie Apocalypse, Exterior With Stormy SkiesHouse Porn: The Coolest Luxury Bunker For The Zombie Apocalypse, Stormy Skies behind The Structure
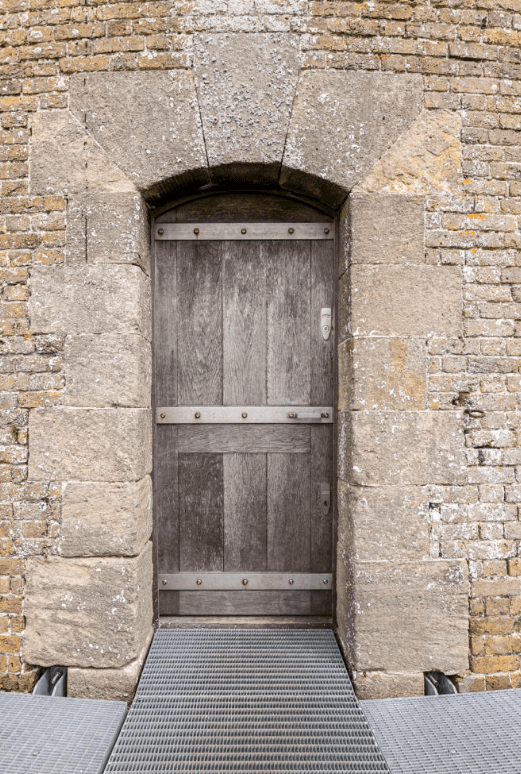
If you didn’t know what you were approaching, the first clue that something magical is on its way is the entrance stairway to the incredible, weathered door.
House Porn: The Coolest Luxury Bunker For The Zombie Apocalypse, EntranceHouse Porn: The Coolest Luxury Bunker For The Zombie Apocalypse, Front Door with Metal Banding
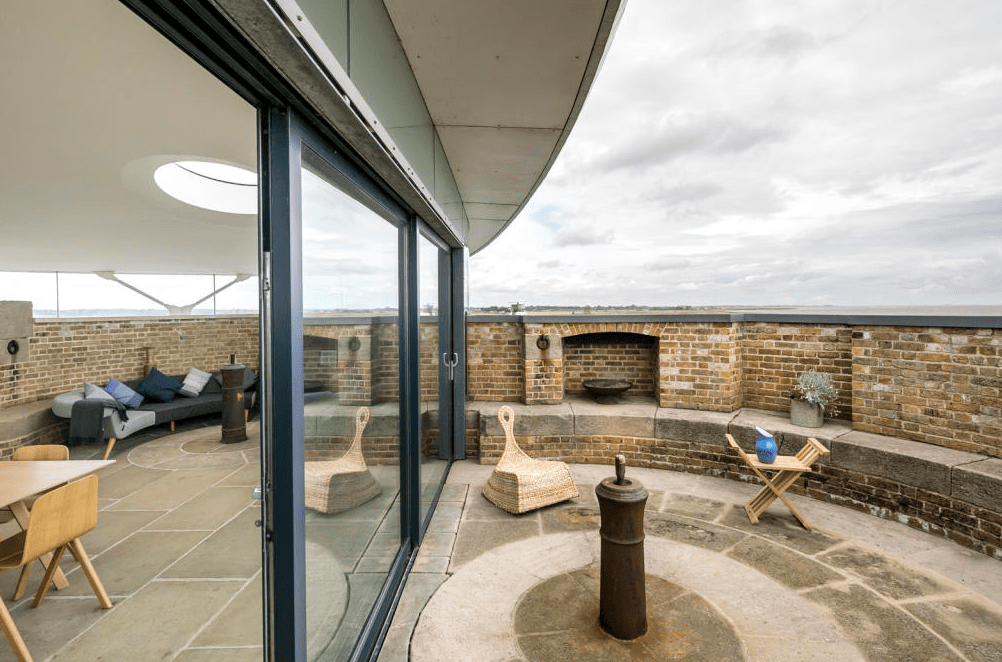
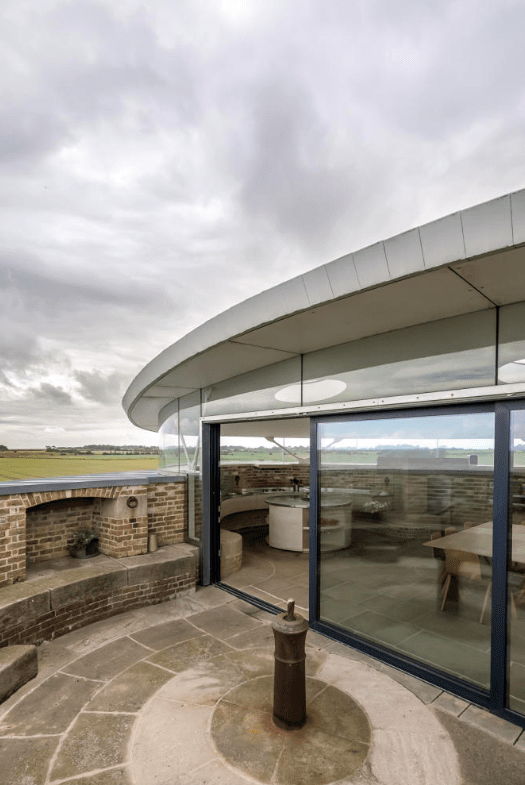
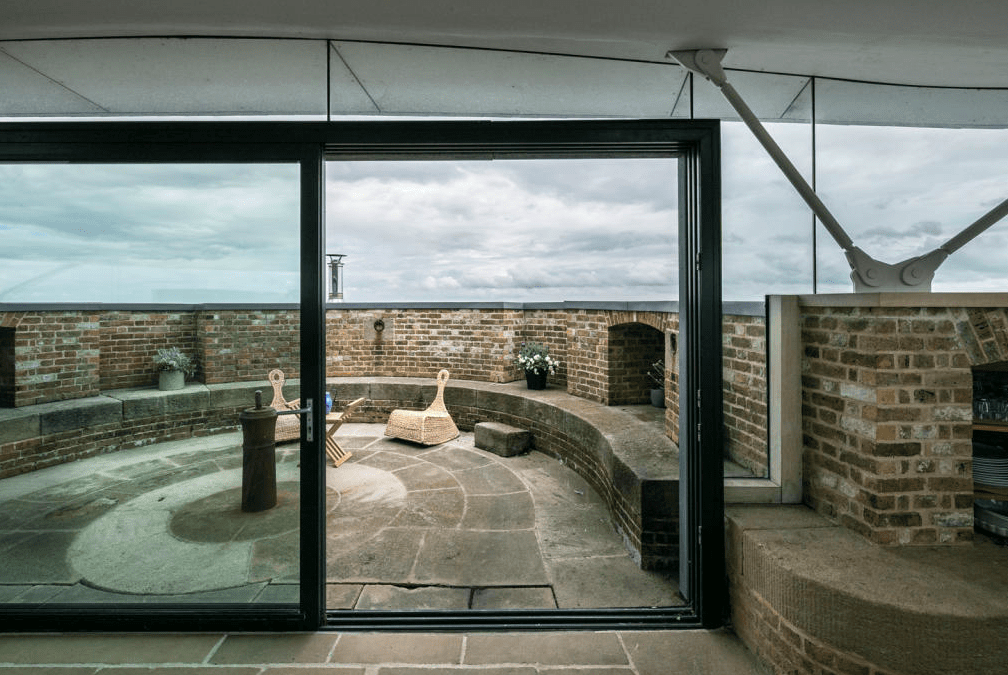
The exterior patios offer ocean views and fresh, sea air.
House Porn: The Coolest Luxury Bunker For The Zombie Apocalypse, PatioHouse Porn: The Coolest Luxury Bunker For The Zombie Apocalypse, More Patio Views
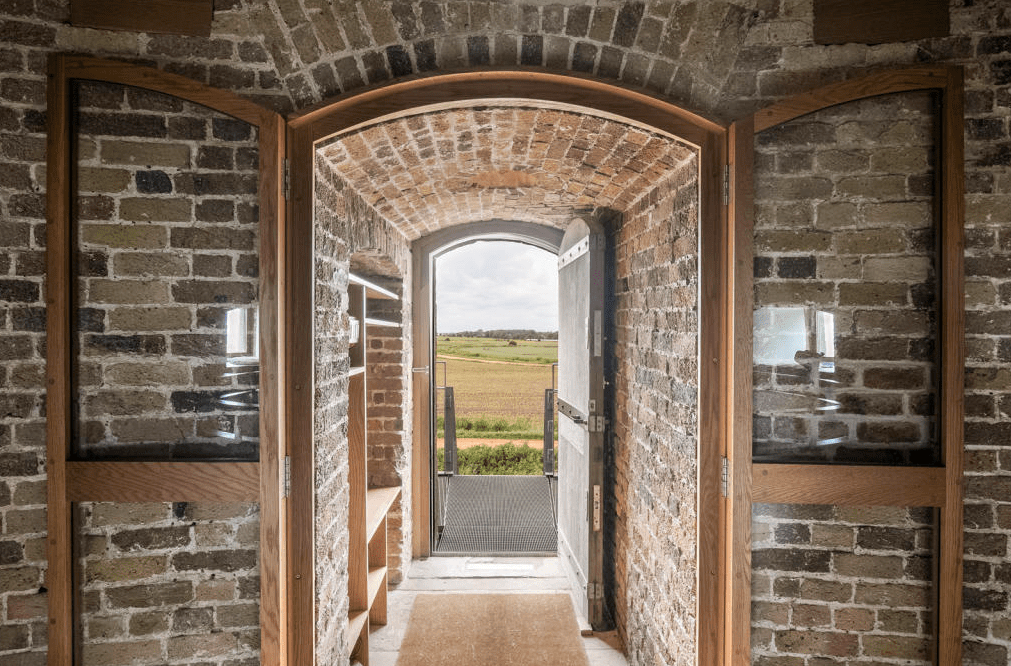
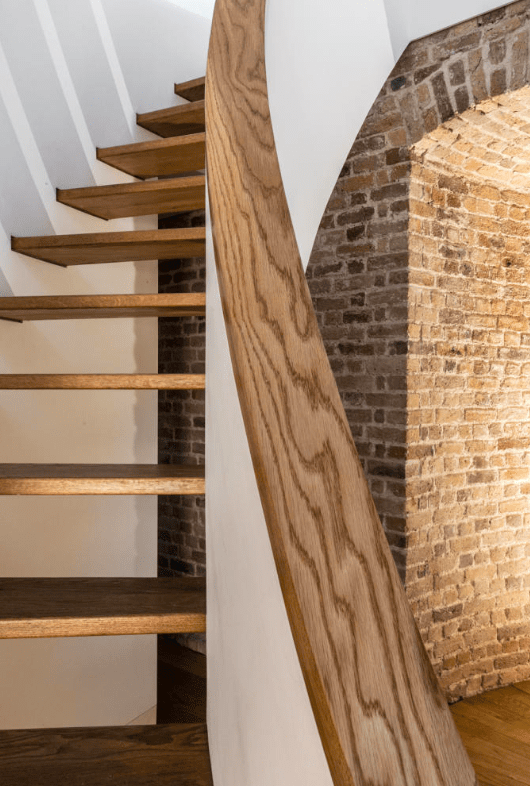
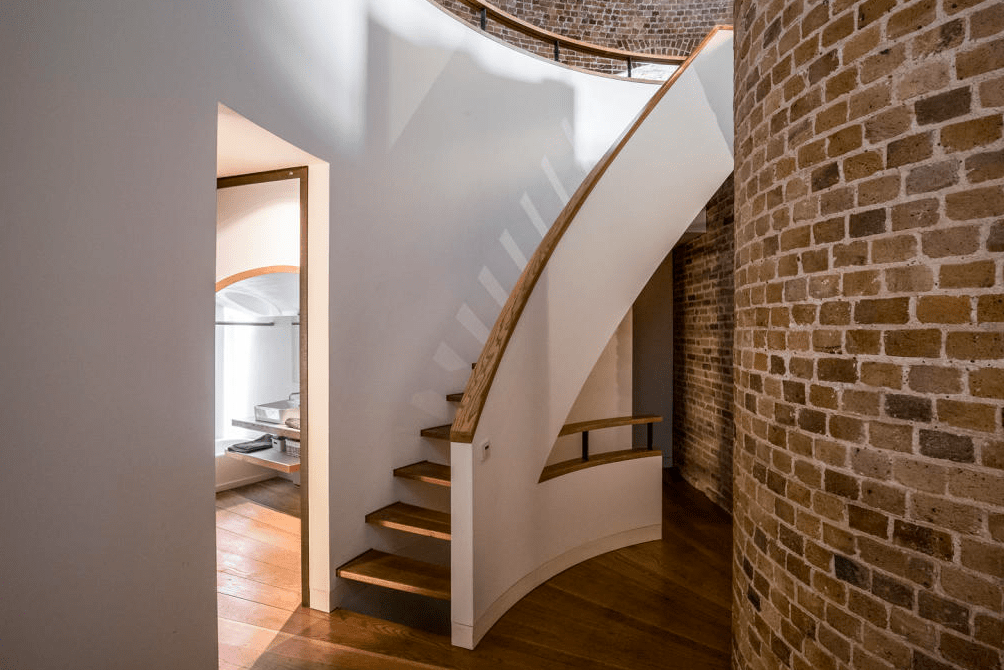
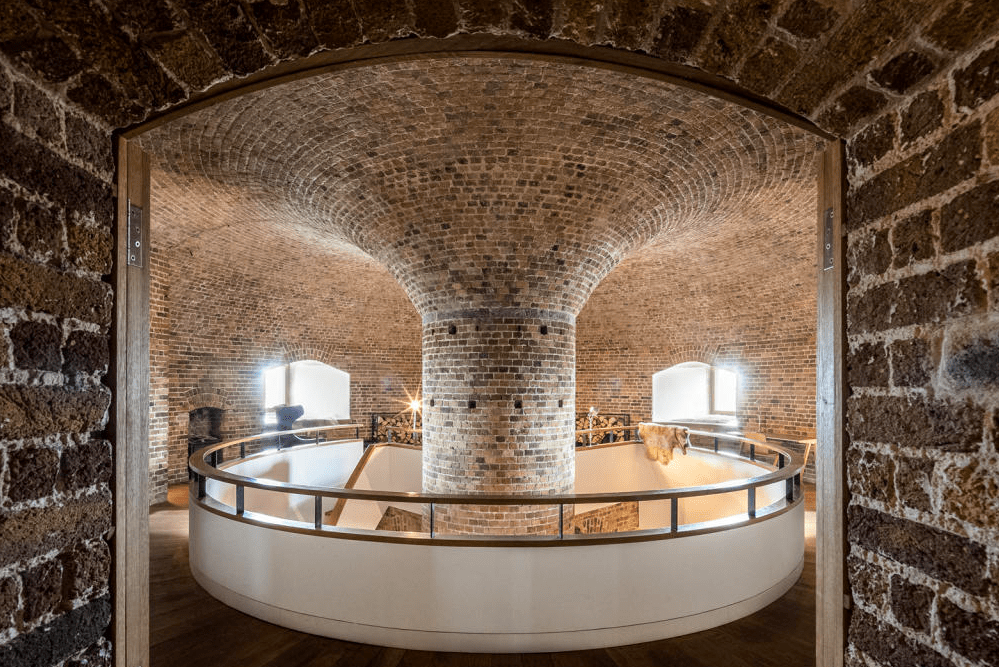
The rustic brick entrance with smooth finish wood and glass doors is your first clue inside that the home will offer an array of architecturally stunning staircases, passageways, and rooms, cleverly tucked away.
House Porn: The Coolest Luxury Bunker For The Zombie Apocalypse, Interior EntrancewayHouse Porn: The Coolest Luxury Bunker For The Zombie Apocalypse, Interior Open StaircaseHouse Porn: The Coolest Luxury Bunker For The Zombie Apocalypse, Incredible Curved Brick HallwayHouse Porn: The Coolest Luxury Bunker For The Zombie Apocalypse, Curved Walkway and Stairs Lined in BrickHouse Porn: The Coolest Luxury Bunker For The Zombie Apocalypse, Interior Hallway and Staircases in BrickHouse Porn: The Coolest Luxury Bunker For The Zombie Apocalypse, Central Staircase View
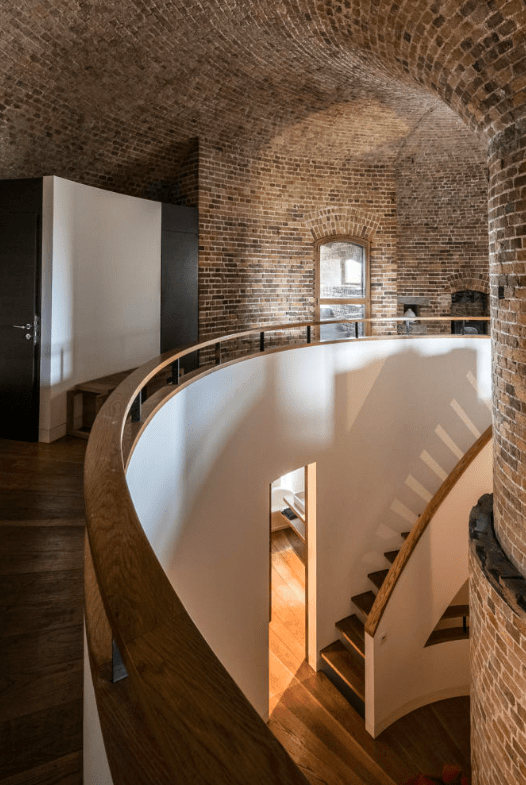
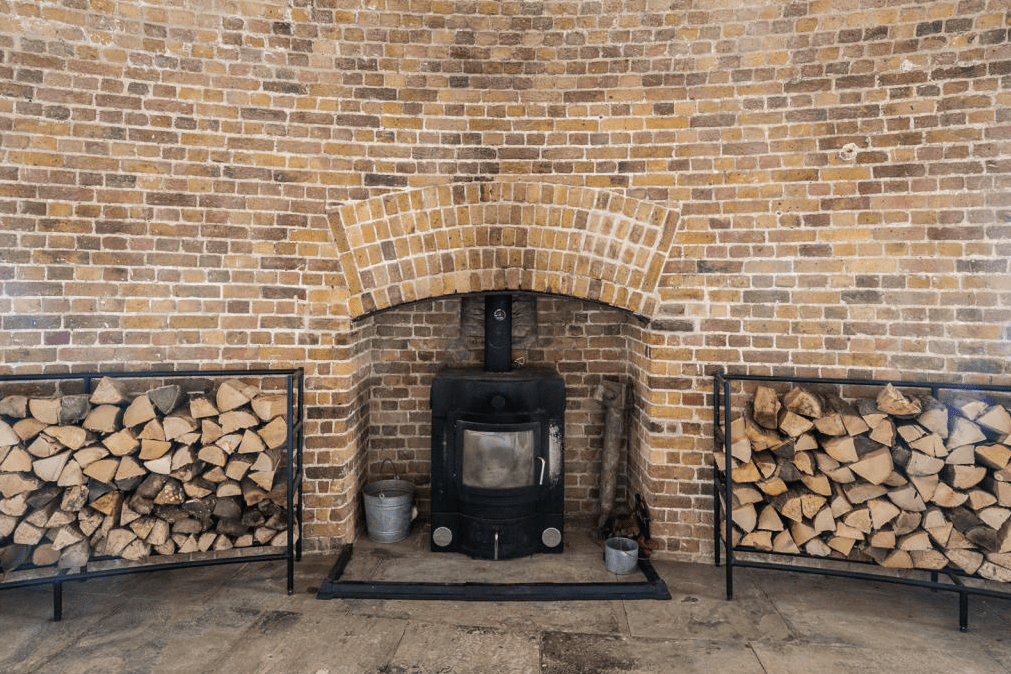
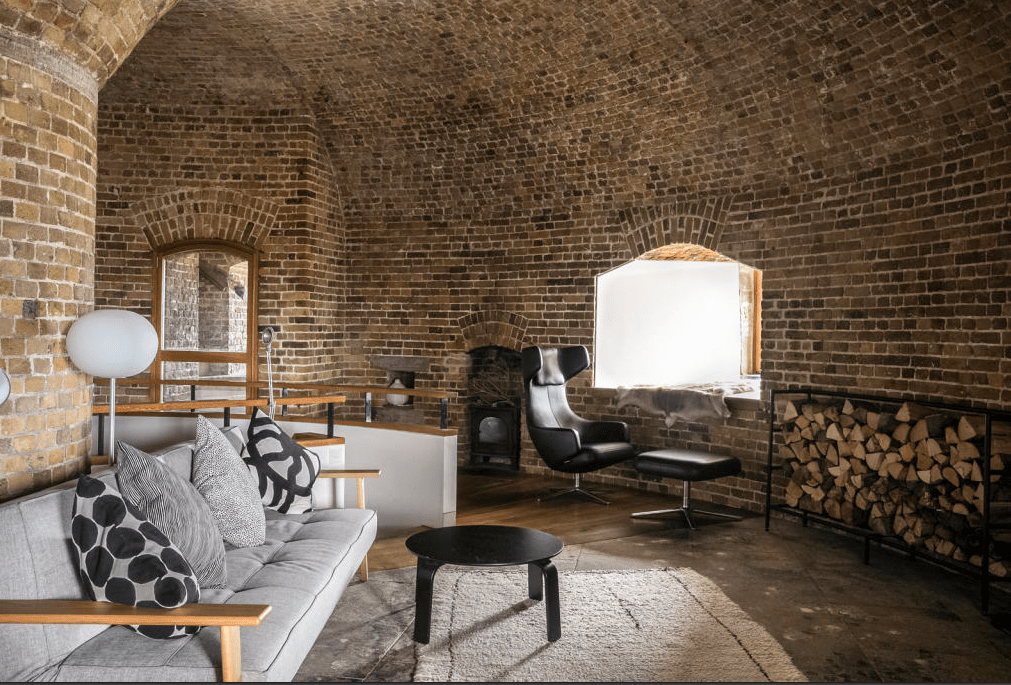
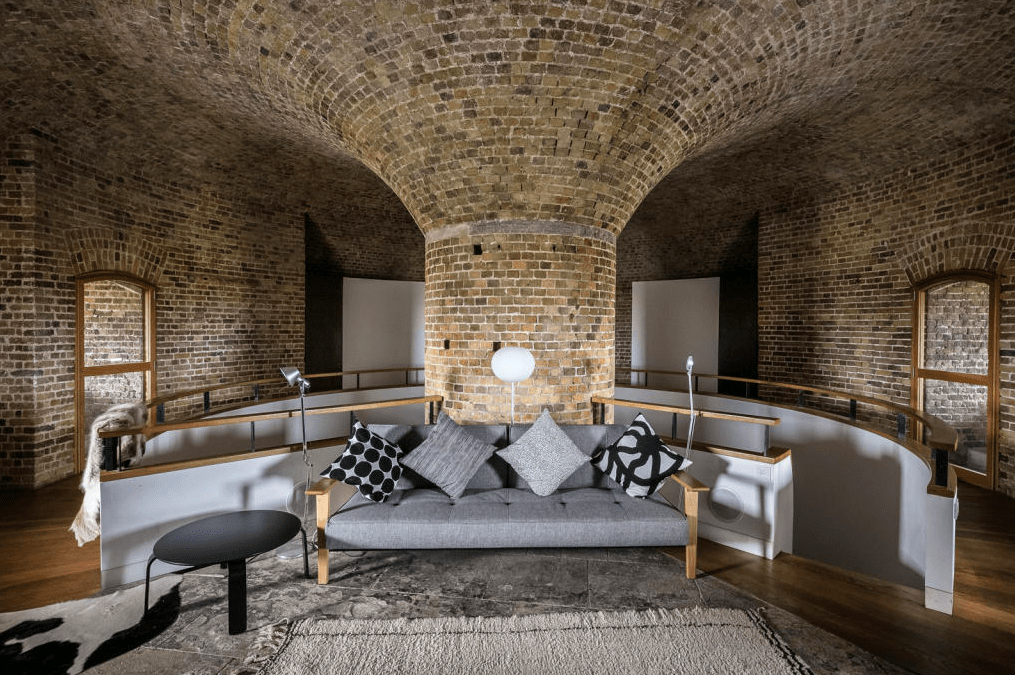
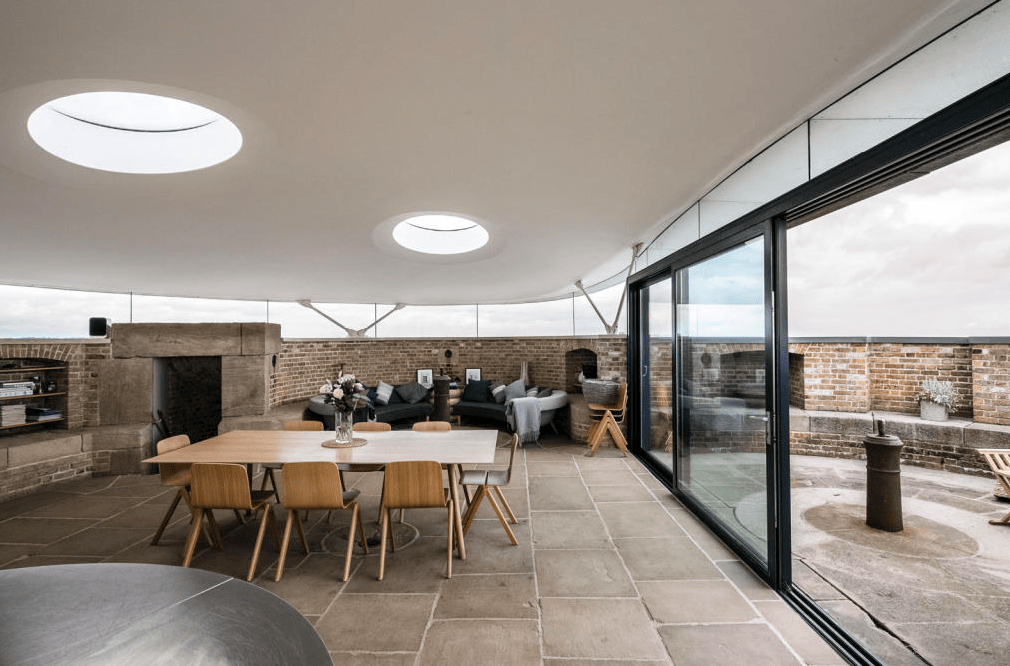
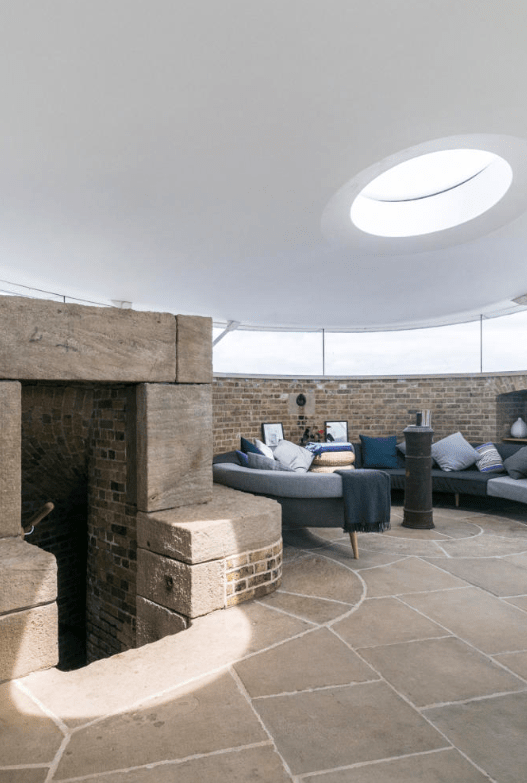
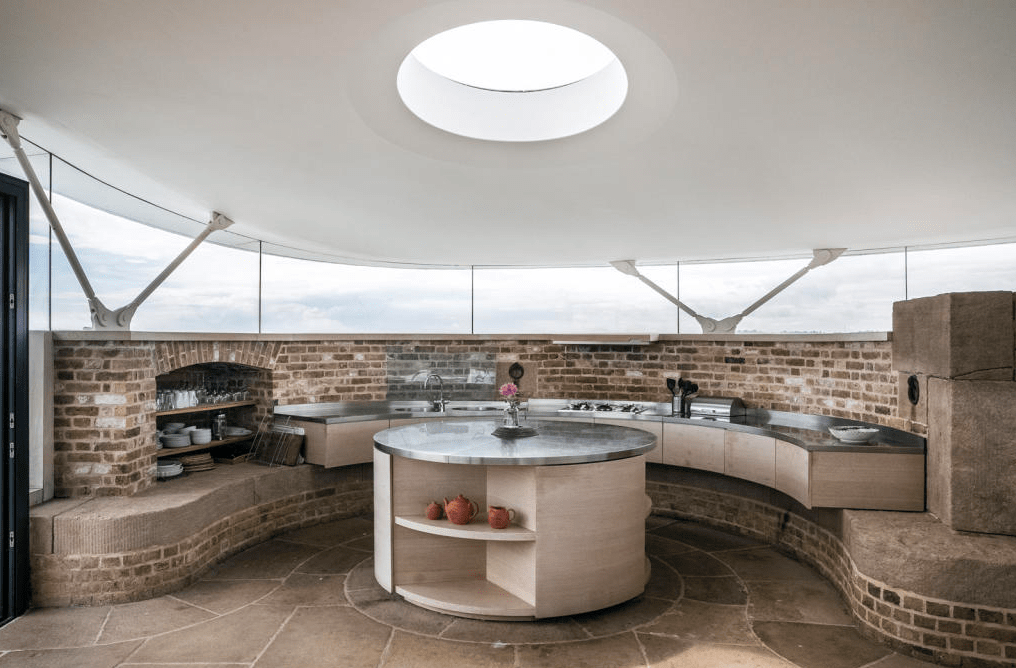
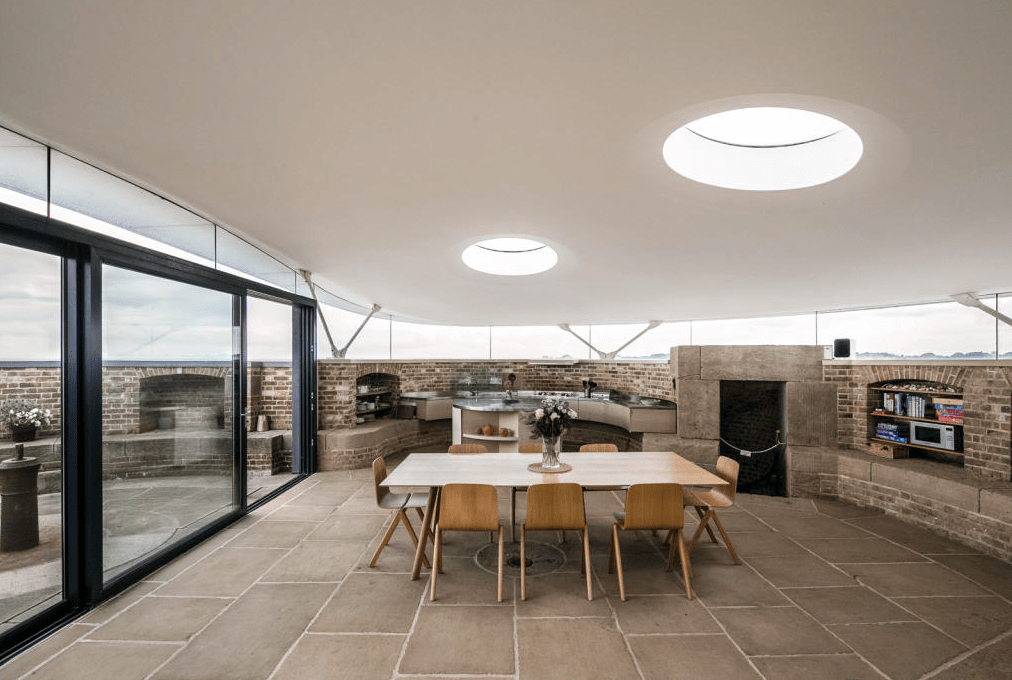
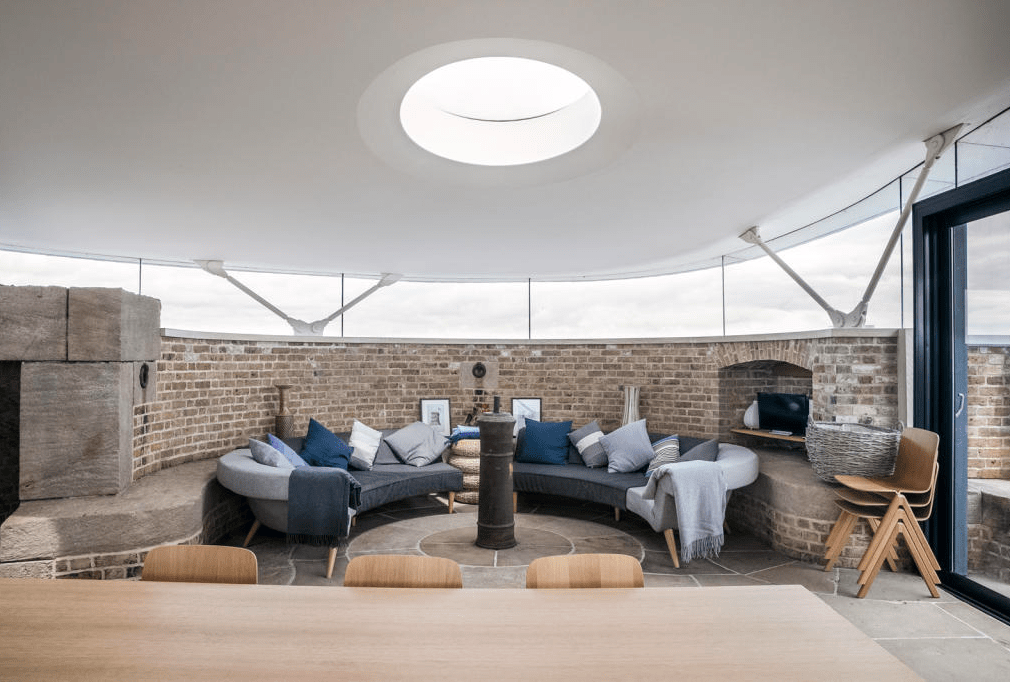
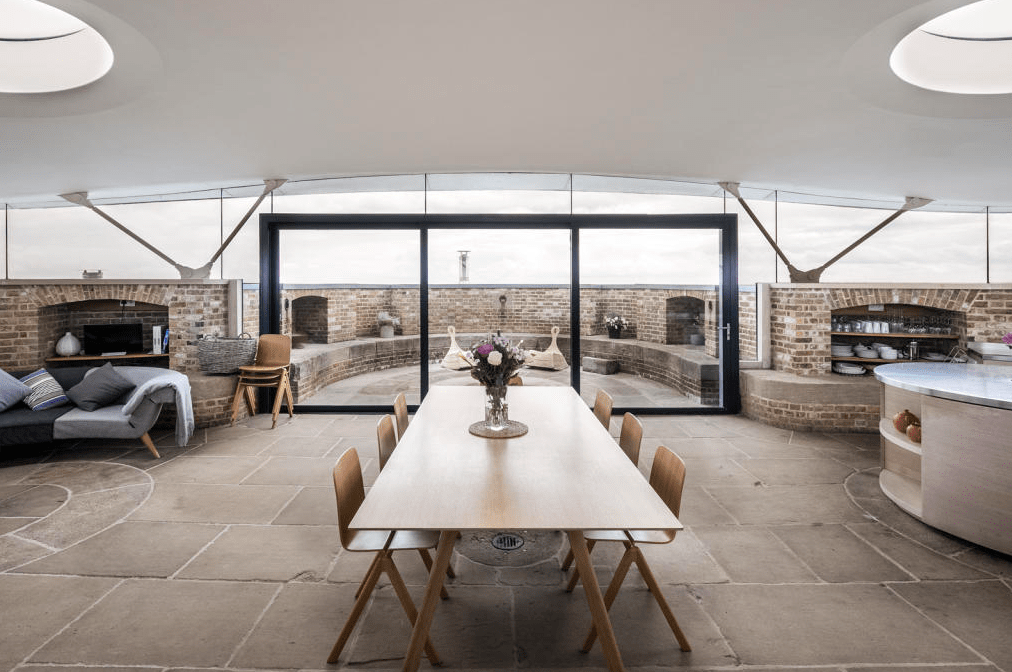
Multi-level living spaces offer the opportunity for both warm, family spaces and bright, open living spaces with a tremendous view.
House Porn: The Coolest Luxury Bunker For The Zombie Apocalypse, Wood Burning Fireplace in Family RoomHouse Porn: The Coolest Luxury Bunker For The Zombie Apocalypse, All-Brick Walls in the Family Room with Natural=Light Hatches to the OutsideHouse Porn: The Coolest Luxury Bunker For The Zombie Apocalypse, View to the Other Side of the Family RoomHouse Porn: The Coolest Luxury Bunker For The Zombie Apocalypse, More Mid-Level Family Room with Central StaircaseHouse Porn: The Coolest Luxury Bunker For The Zombie Apocalypse, Upstairs Living AreaHouse Porn: The Coolest Luxury Bunker For The Zombie Apocalypse, Upstairs Living Area and Staircase EntranceHouse Porn: The Coolest Luxury Bunker For The Zombie Apocalypse, Looking Out to the Patio From the Living SpaceHouse Porn: The Coolest Luxury Bunker For The Zombie Apocalypse, Incredible, Practical, Rustic-Modern Kitchen with ViewsHouse Porn: The Coolest Luxury Bunker For The Zombie Apocalypse, View Through the Dining Area to KitchenHouse Porn: The Coolest Luxury Bunker For The Zombie Apocalypse, The Living RoomHouse Porn: The Coolest Luxury Bunker For The Zombie Apocalypse, Another View of the Dining Area, Living Space, and Patio
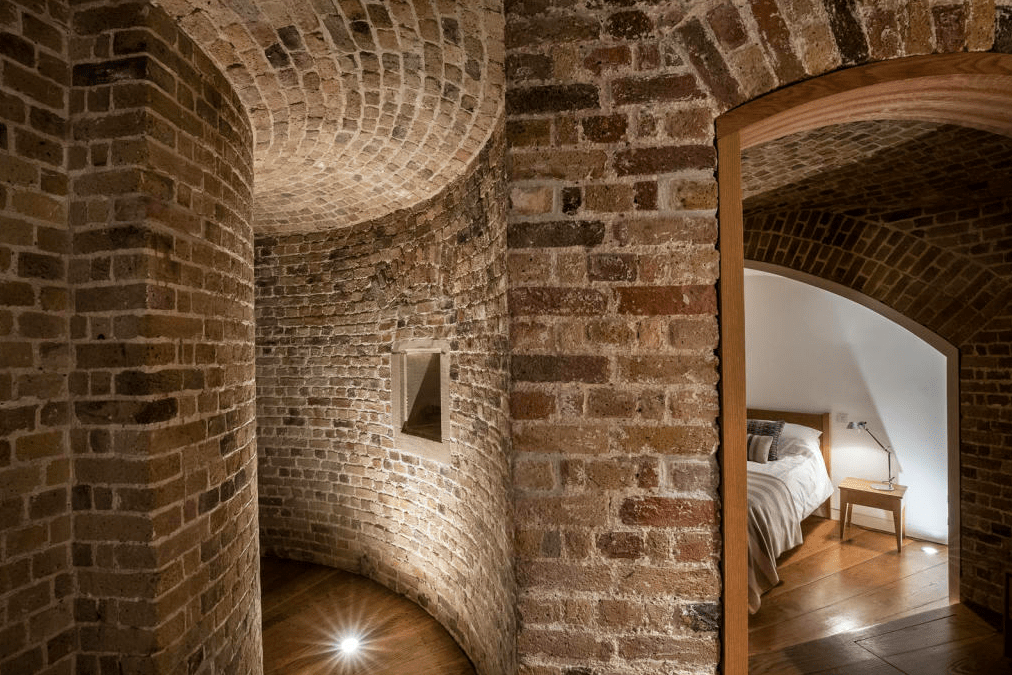
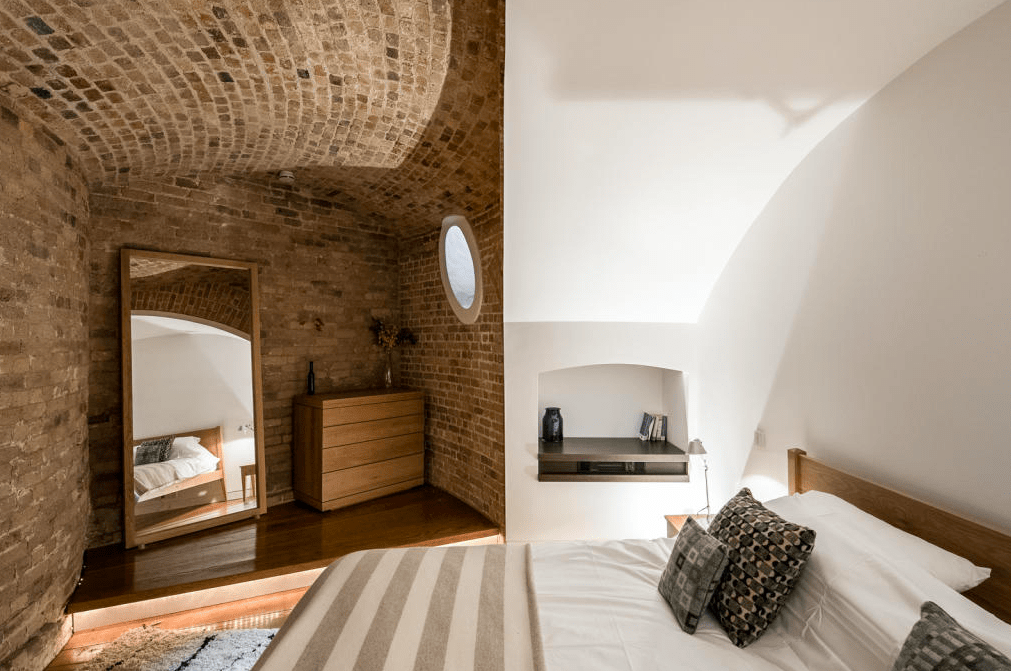
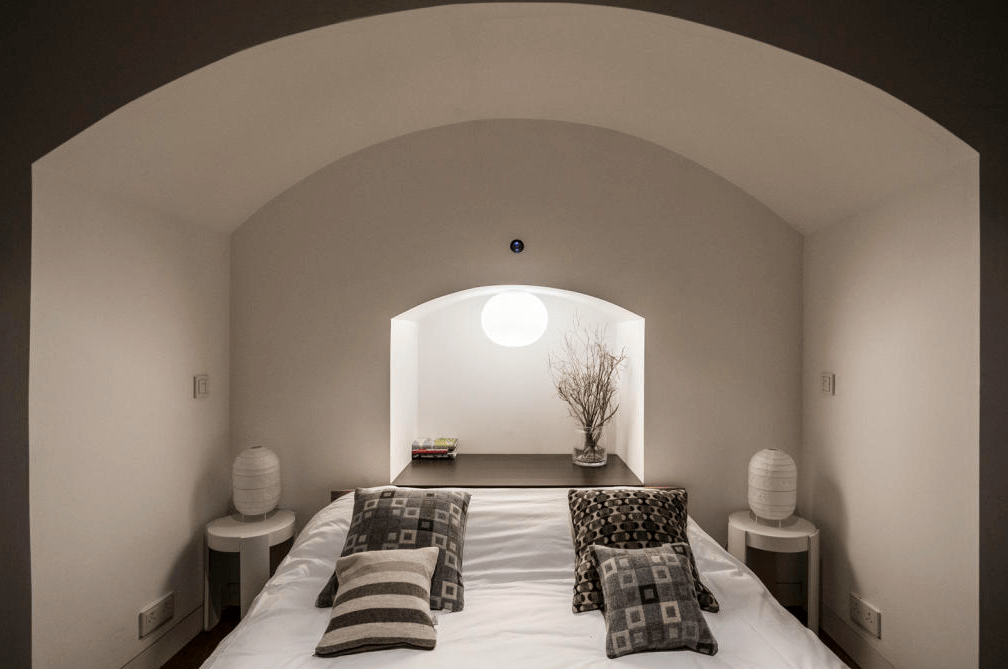
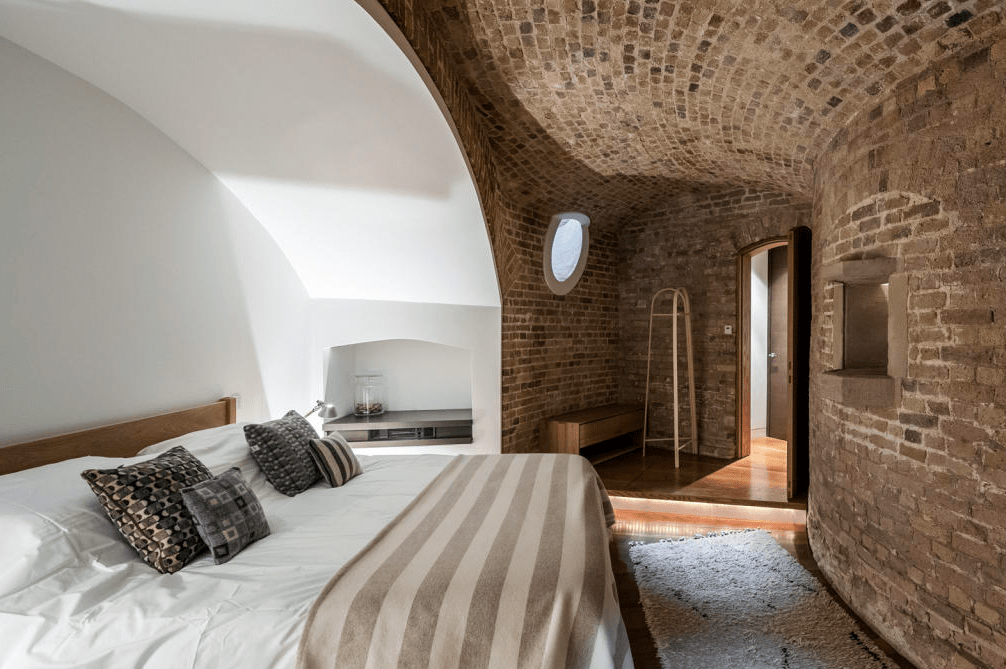
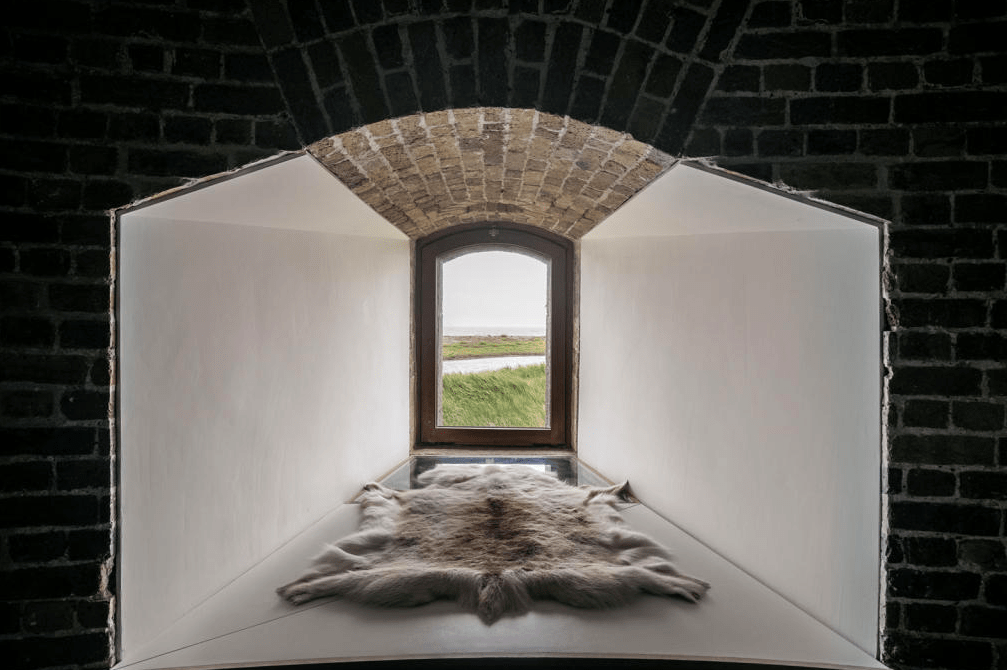
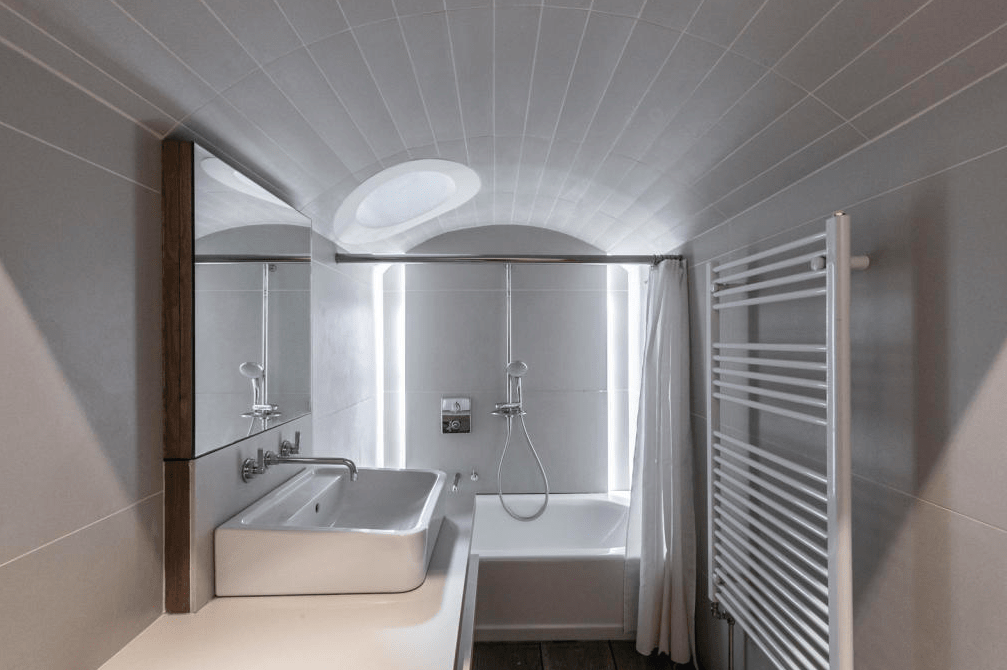
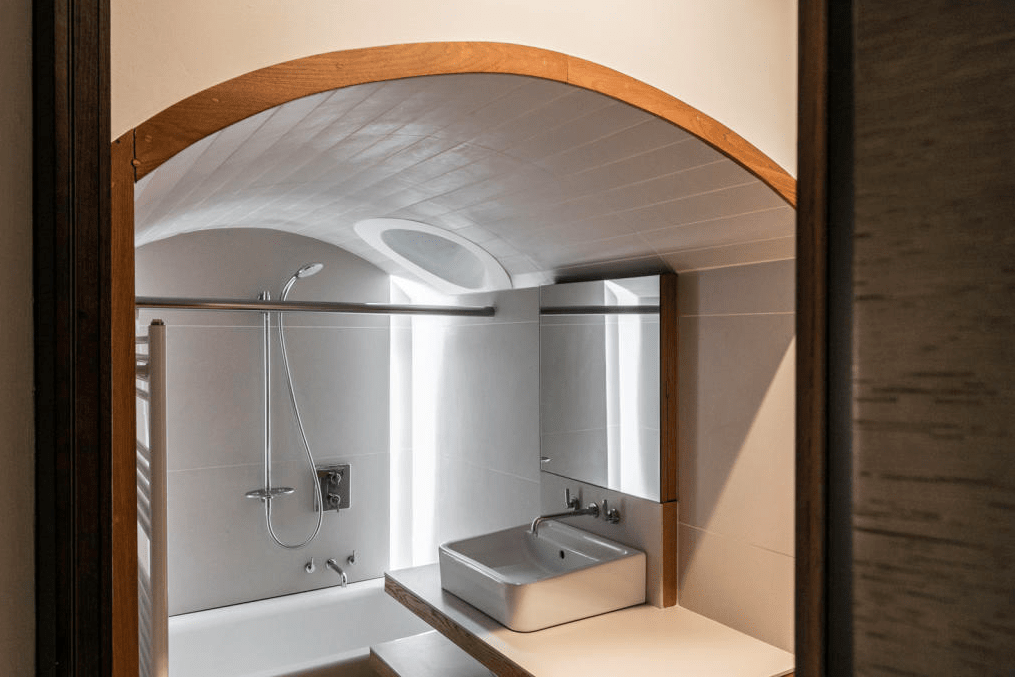
The tricky part in this type of home would be making cozy bedrooms that still get good natural light. The architect and designer decided on light portals in all of the downstairs spaces that prevent them from feeling like caves. The bedrooms and baths are unique, comfortable, and modern.
House Porn: The Coolest Luxury Bunker For The Zombie Apocalypse, Bedroom with Light PortalHouse Porn: The Coolest Luxury Bunker For The Zombie Apocalypse, Bedroom with Natural LightHouse Porn: The Coolest Luxury Bunker For The Zombie Apocalypse, Bedroom With Natural Light and Curved Brick Wall DetailHouse Porn: The Coolest Luxury Bunker For The Zombie Apocalypse, Cozy NookHouse Porn: The Coolest Luxury Bunker For The Zombie Apocalypse, Modern Bath with Natural and Artificial LightHouse Porn: The Coolest Luxury Bunker For The Zombie Apocalypse, Bathroom with Wood Detail
There is something very attractive about the safety of living in a bunker, and of course, the cozy feel of the home juxtaposed with the modern coolness of the architecture. I could definitely see myself living here. Could you? Tell me your favorite part of the house in the comments below!
Check out more of our great content on our blog! Cheers!
*Legal stuff:
I am honest about my experiences with different products and write because I enjoy it. I do however, have the opportunity to earn money for my writing, also.
Slavetodiy.com is a participant in the Amazon Services LLC Associates Program, an affiliate advertising program designed to provide a means for sites to earn advertising fees by advertising and linking to amazon.com. Amazon offers a small commission on products sold through their affiliate links. Each of your purchases via our Amazon affiliation links supports our cause at no additional cost to you.
If a blogger links to an Amazon product (with a special code for affiliates embedded in the link), and a reader places an item in their “shopping cart” through that link within 24 hours of clicking the link, the blogger gets a small percentage of the sale. Amazon links are not “pay per click.” If you click on the product link and stay around Amazon and purchase something else, however, I will get a commission on that sale.
Slavetodiy.com is also a VigLink affiliate advertiser which works similarly.
Chances are you don’t have your Dream Pantry set up yet, and neither do I. But, it’s absolutely the RIGHT time to start planning and collecting the types of containers to use. Then you can design your pantry around the functionality you want to have! There are two basic types of jars I have, upcycled and purchased. I will show you where I find the best of both worlds.
And, yeah, I have a jar for that.
*This post may contain affiliate links. Please see full disclosure at the end of the post.
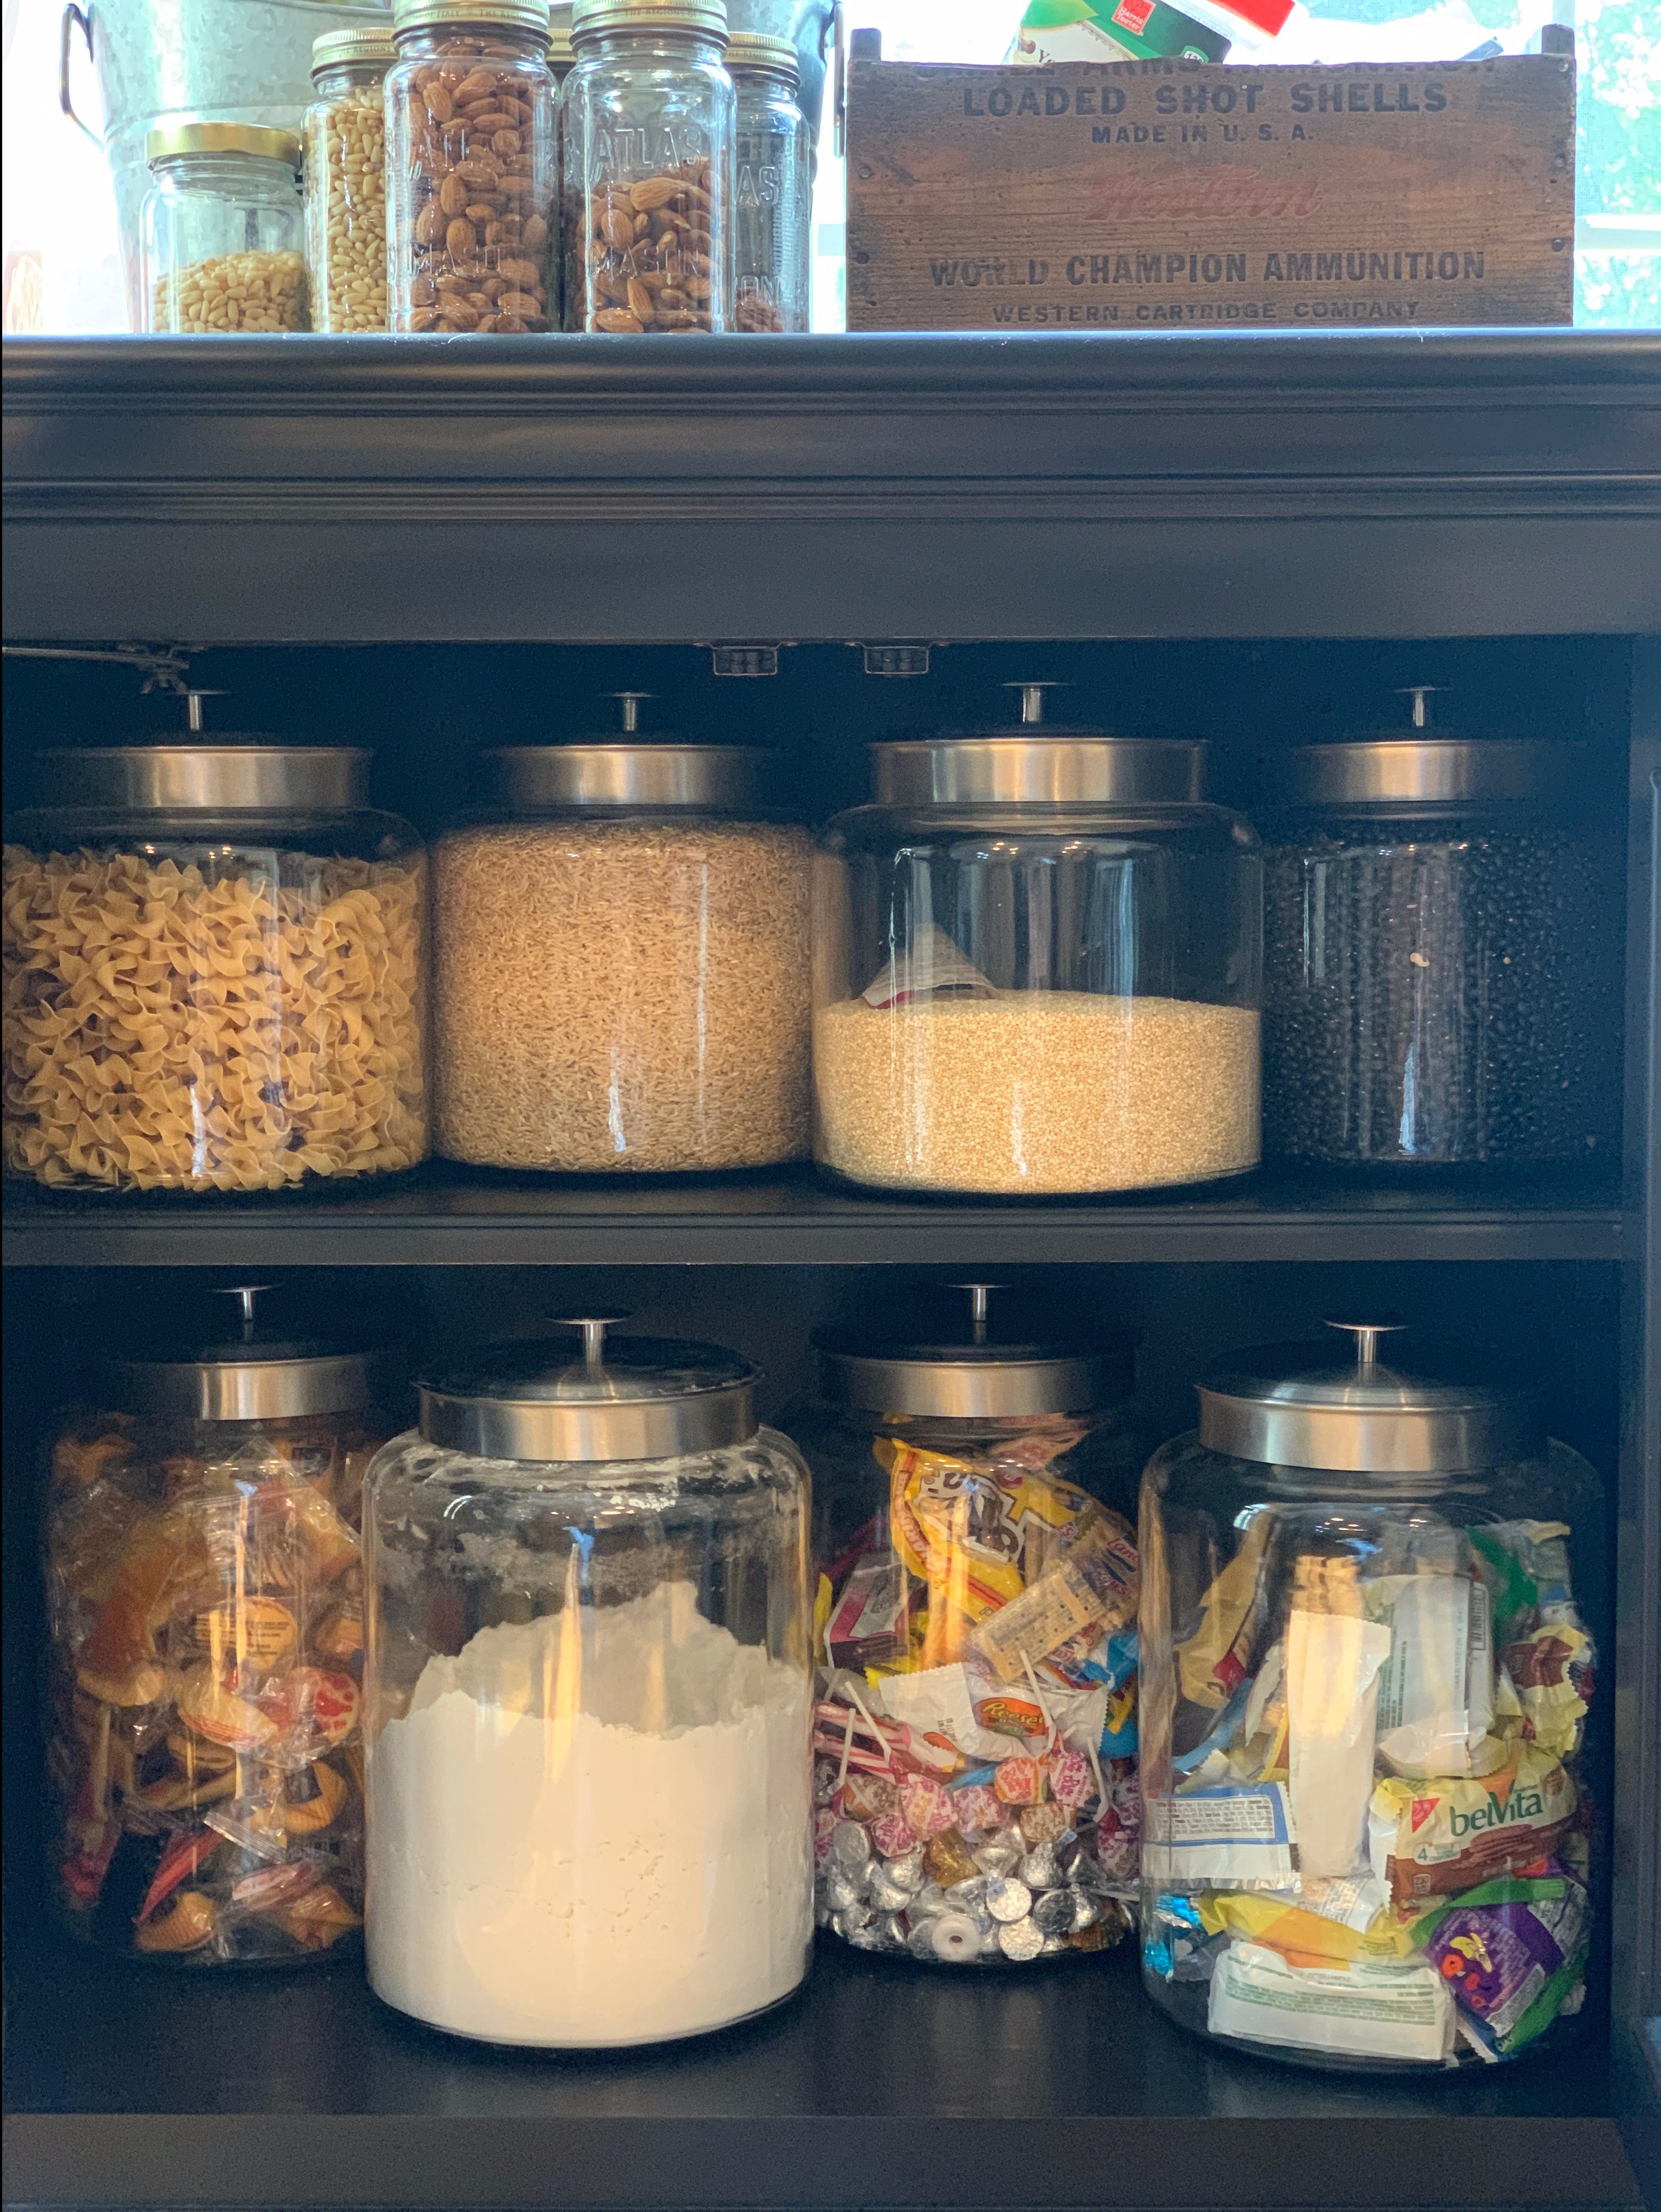
Most of the jars that I am using currently live on top of our sideboard. The big jars inside the sideboard (which will eventually become a baking station) will remain accessible for cooking when the sideboard becomes the base for the island/breakfast table nook. But, the rest of the jars will live in the pantry or in the glass and metal cabinets (that are not yet actually hung on the wall). By the way, I am loving the sideboard, and it is going to work fantastic for what I want.
The Best Upcycled and New Jars For Your Farmhouse Pantry: Shown Inside Restoration Hardware’s 20th C. English Brass Bar Pull Glass 4-Door Sideboard in Waxed Black
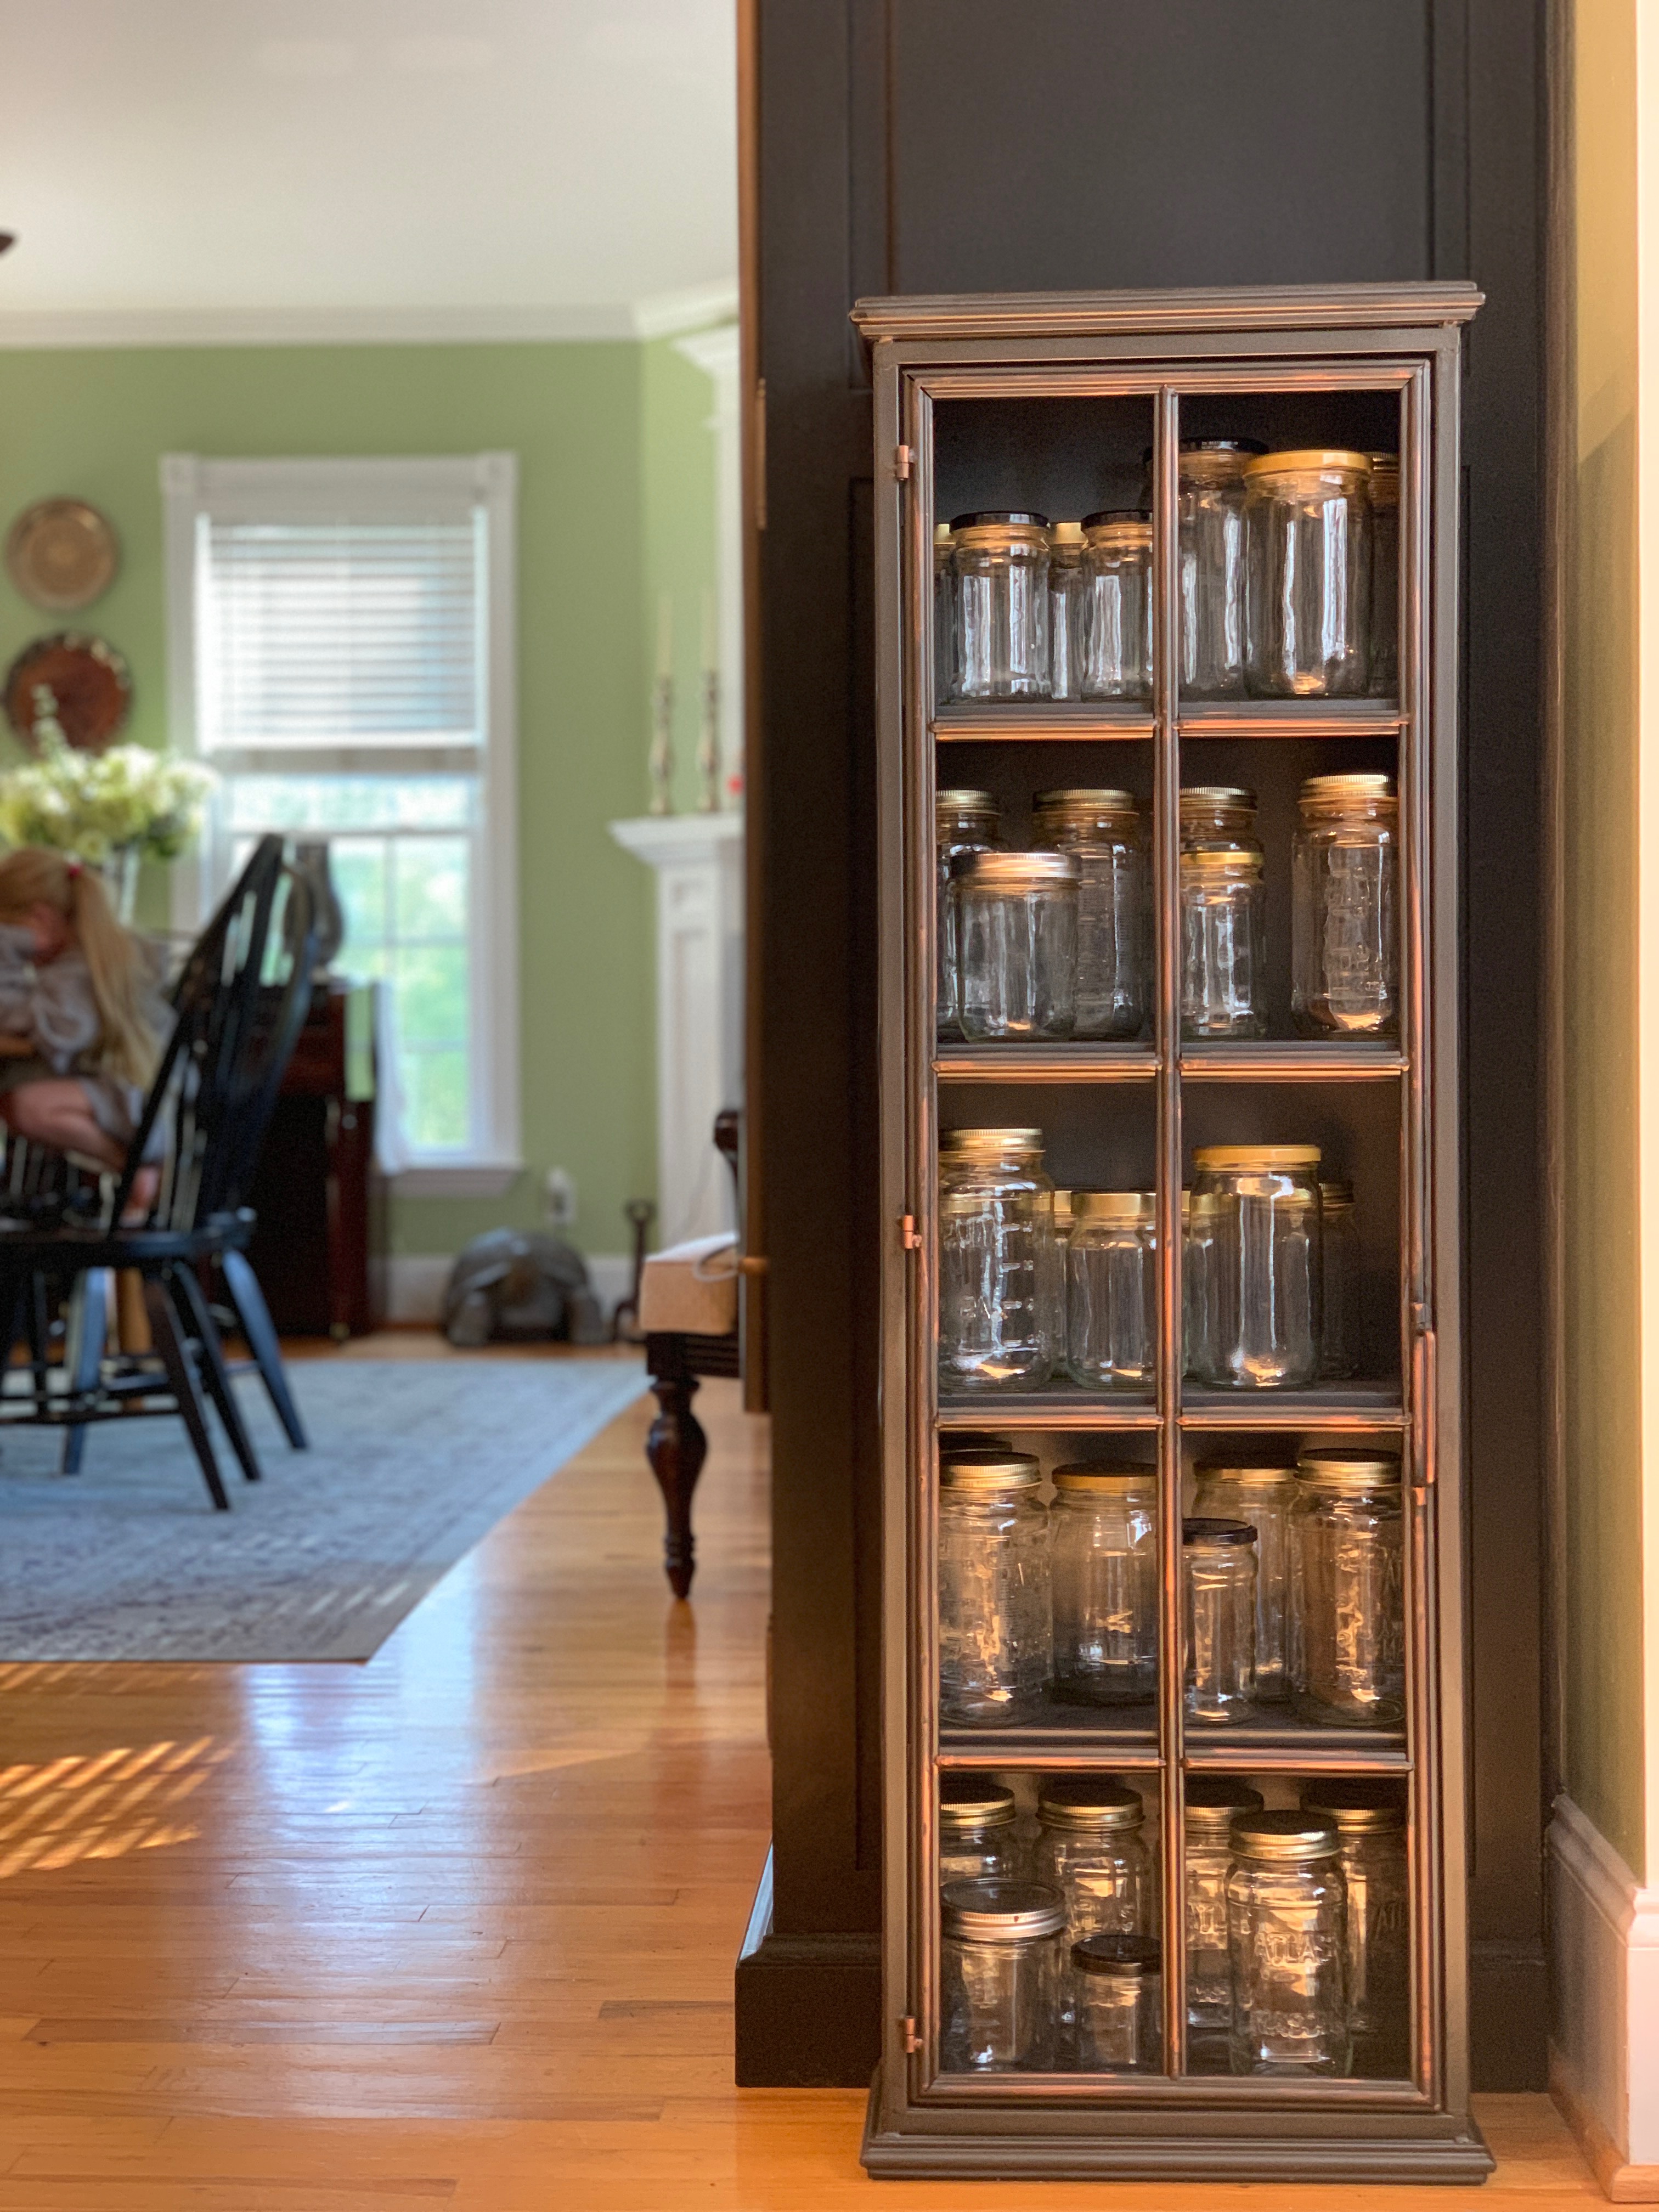
As you can see, my kitchen renovation is started-ish, but I’m betting it will be years before we put in the time and effort to get it finished. In the meantime, we’re collecting pieces for the kitchen, and the metal cabinets I found are a house for my found and upcycled jars. Freebies are my favorite. So, where do I get all these free jars? They’re from things we bought and used, and now I can reuse them for all kinds of stuff.
The Best Upcycled and New Jars For Your Farmhouse Pantry: Upcycled Jars Shown in Aurelle Home Gunmetal Iron Tall Cabinet
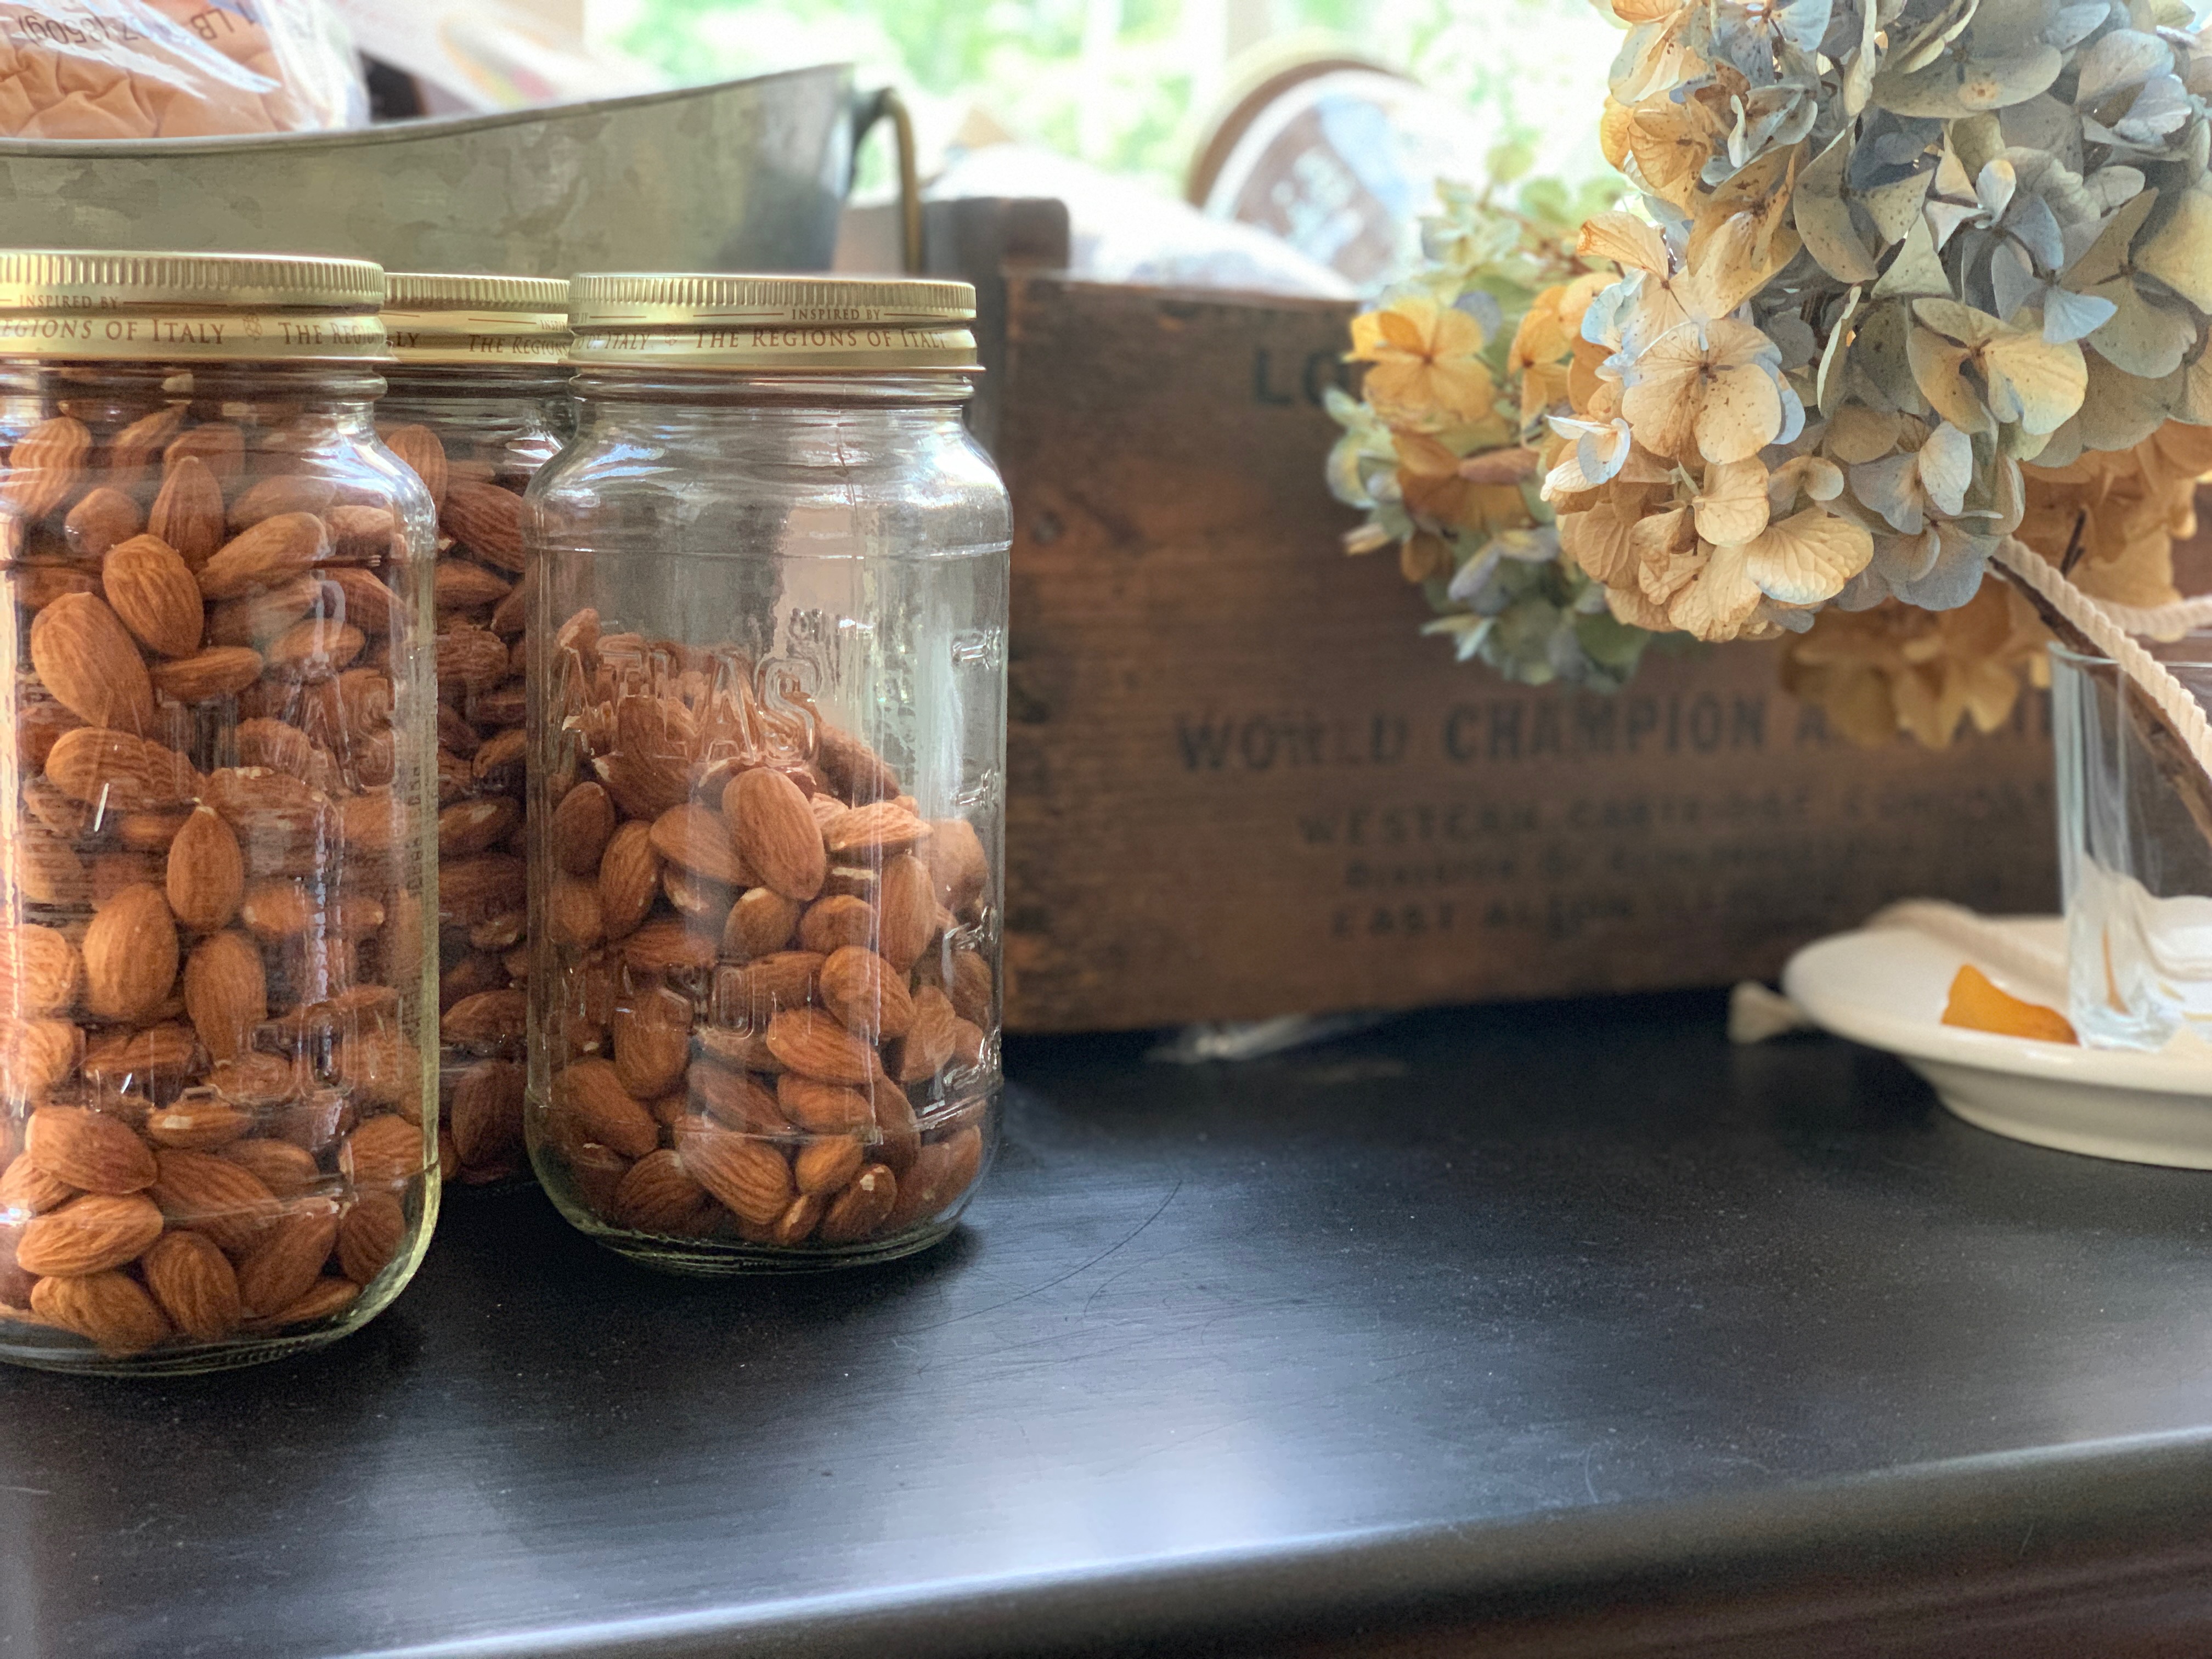
Classico Pasta Sauce is our favorite, and it comes in an intentionally reusable mason jar. We use our sauce, soak jars overnight, pull the label off, and then run them through the dishwasher. We use them for all kinds of stuff, nuts, etc. And honestly, I find having them out and visible makes for healthier snack choices for kids AND adults.
The other jars are from salsas, mushrooms, olives etc, and I LOVE the assorted sizes.
If you’re impatient to start your jar collection, you can get reasonable Mason Jar Sets on Amazon but, I recommend waiting and getting the free ones as you use food jars!
The Best Upcycled and New Jars For Your Farmhouse Pantry, Upcycled Classico Jars As Nut Storage
But, what about those GIANT jars, you ask? They’re my FAVORITE, which is why I have so many. What you can’t see is that they have a rubber seal on the lid that keeps them air tight and perfect for all your dried items in the pantry (dried beans, assorted noodles, quinoa, flour, dog biscuits, etc).
These are Anchor Hocking jars: the smaller one is the 1.5 Gallon Anchor Hocking Montana Jar and the larger ones are 2.5 Gallon Anchor Hocking Montana Glass Jar. I love these, hence the collection. I found them quite a bit cheaper on Amazon than any other sites which is awesome because the jar websites usually charge for shipping (which I don’t like doing because I’m spoiled by my Amazon Prime).
And, guess what, I’ve gotten almost all of them FREE because I use my Amazon card points!
The Best Upcycled and New Jars For Your Farmhouse Pantry, Upcycled Classico and Salsa Jars and Anchor Hocking Montana Jars
Do you have any favorite jars for upcycling?
Thanks for hanging out and check out other DIY and project ideas on our blog. Cheers!
*Legal stuff:
I am honest about my experiences with different products and write because I enjoy it. I do however, have the opportunity to earn money for my writing, also.
Slavetodiy.com is a participant in the Amazon Services LLC Associates Program, an affiliate advertising program designed to provide a means for sites to earn advertising fees by advertising and linking to amazon.com. Amazon offers a small commission on products sold through their affiliate links. Each of your purchases via our Amazon affiliation links supports our cause at no additional cost to you.
If a blogger links to an Amazon product (with a special code for affiliates embedded in the link), and a reader places an item in their “shopping cart” through that link within 24 hours of clicking the link, the blogger gets a small percentage of the sale. Amazon links are not “pay per click.” If you click on the product link and stay around Amazon and purchase something else, however, I will get a commission on that sale.
Slavetodiy.com is also a VigLink affiliate advertiser which works similarly.
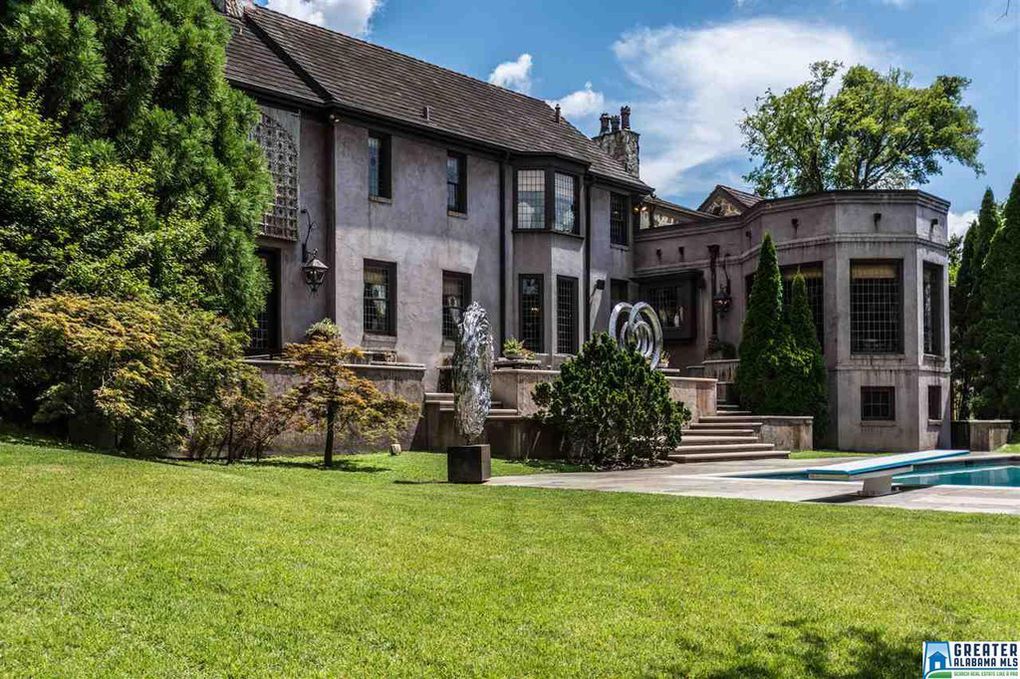
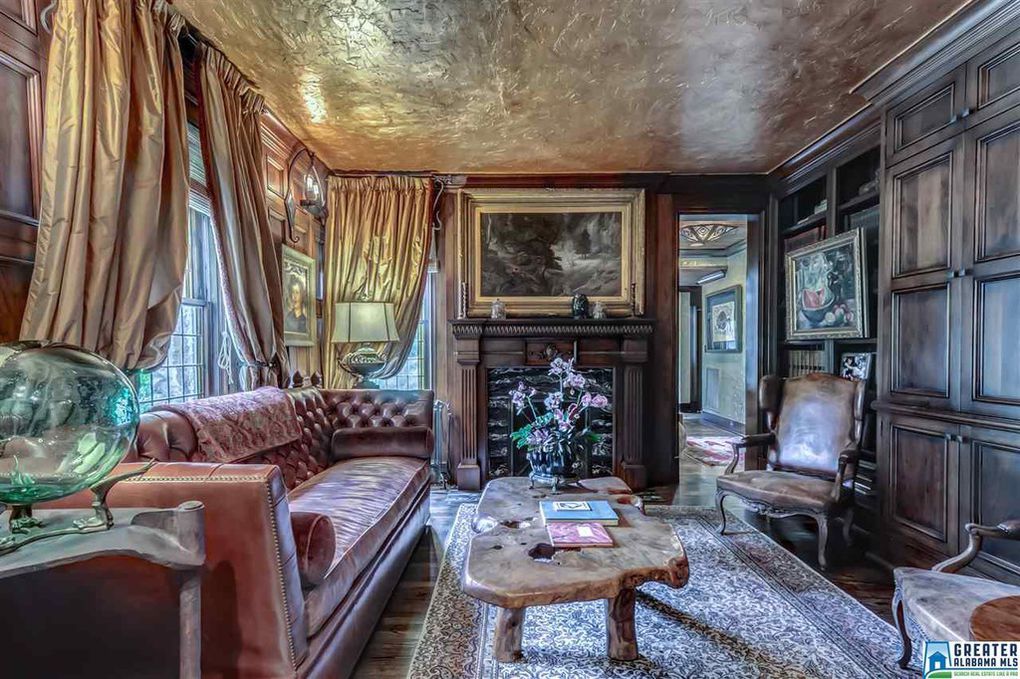
I have a confession to make: I’m bored to tears with white. There was a time when texture and color were okay, and i desperately miss those days. I recently found a place where every surface: every wall, floor, fixture, and cabinet door has interest. Like a breath of fresh air: hand carved details, custom wall finishes, hand hewn floors… I love it all. Check out the home tour in photos below.
The listing, at 2740 Abingdon Rd, Mountain Brook, AL is 4 bedrooms, 5.5 baths, and a sprawling 4337 sq. ft. The listing photos are the property of the Realtor, Brooke Wahl, at ARC realty and can be reached at 855-822-3469 for anyone interested in purchasing.
*This post may contain affiliate links. Please see full disclosure at the end of the post.
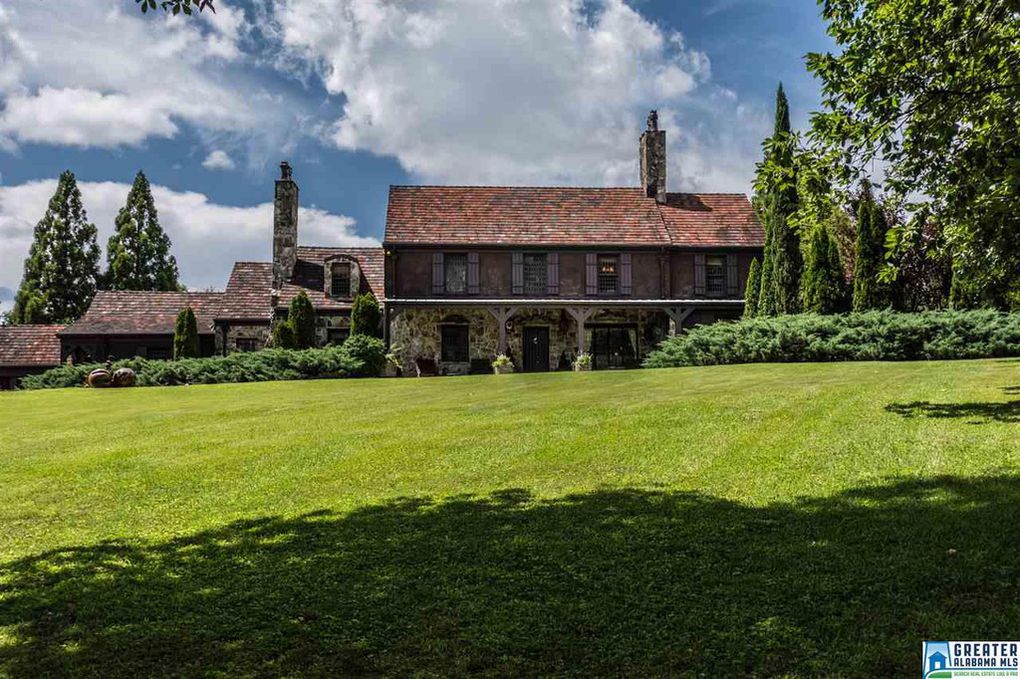
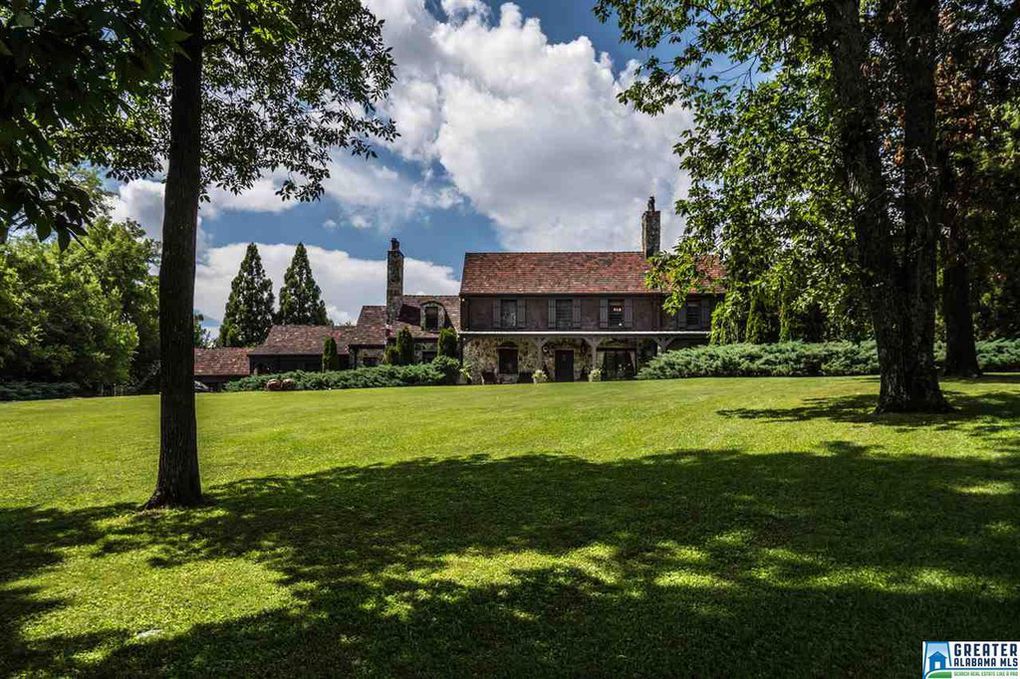
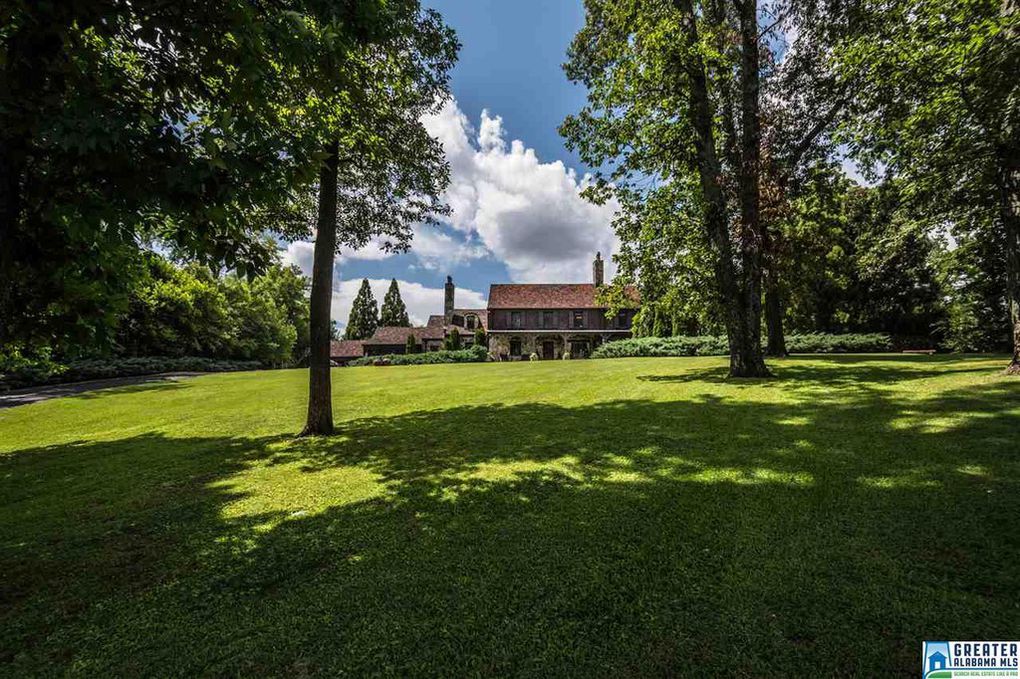
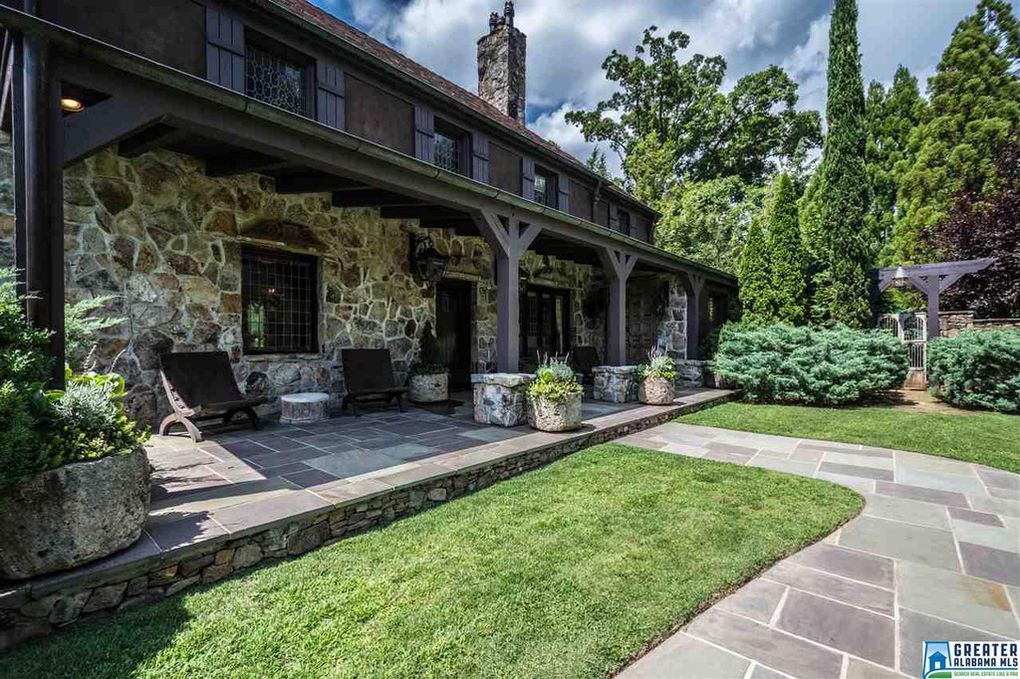
The exterior:
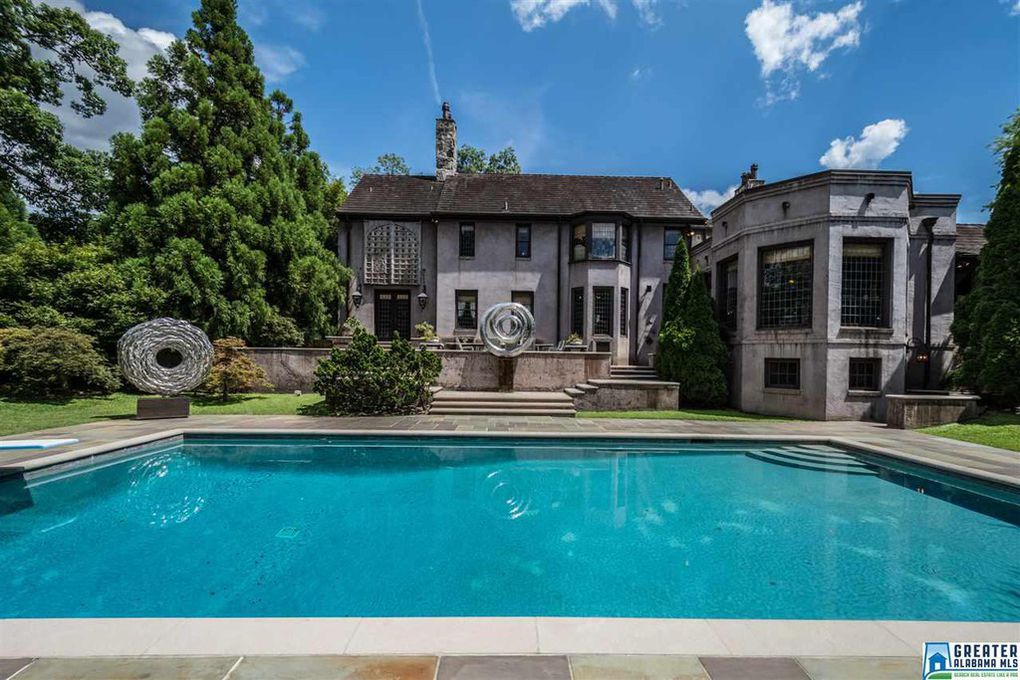
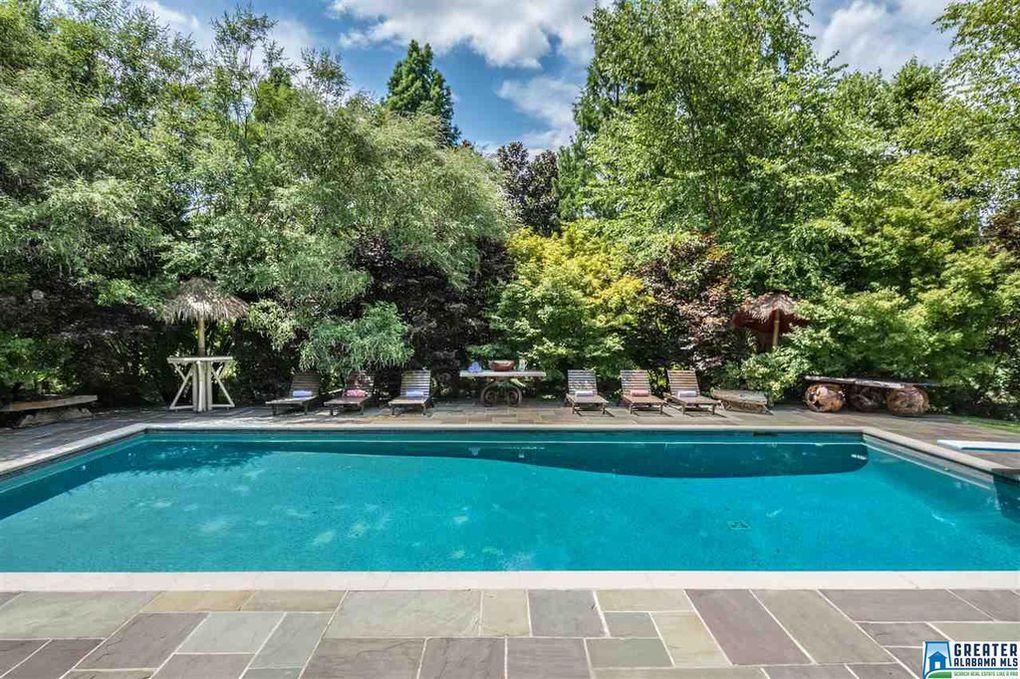
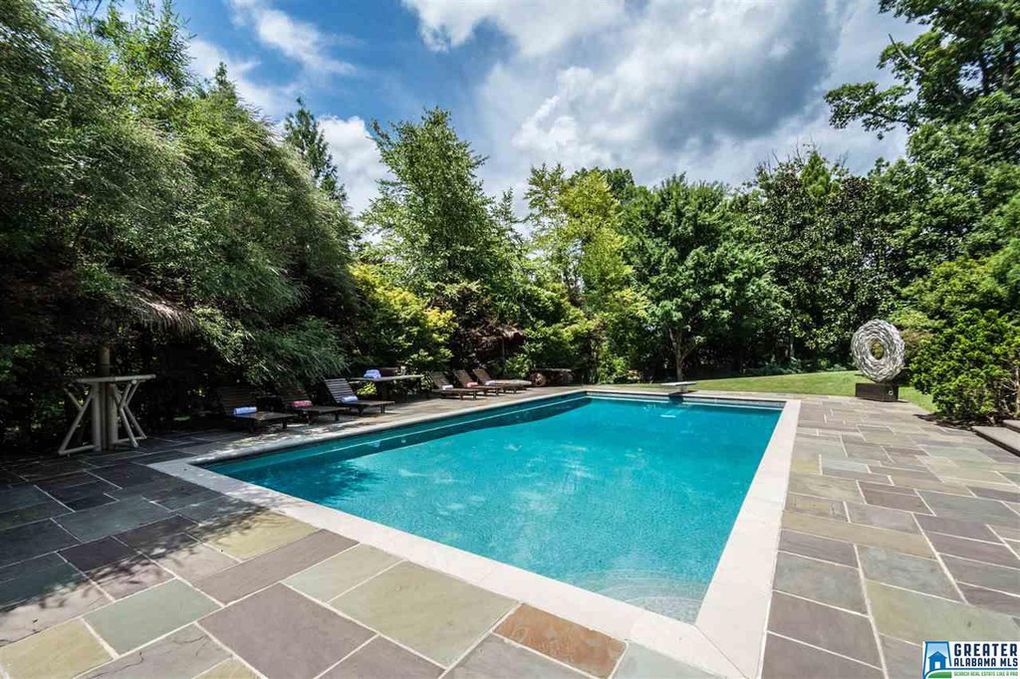
A two acre lot feels big and is beautifully manicured, perfect for outdoor entertaining and family time. Sculptures are placed throughout the landscape, rolling hills, and stone gardens and patios. The pool is a tasteful addition and blends with the rest of the exterior seamlessly.
Exterior stone, chimneys, and descending rooflinesIncredible lush, sloping lawn with mature treesCurb appeal, view of the exteriorLeaded glass windows with stained glass inlays, sculptural detailed window crowns, blue stone patio, stone containers and wrought iron lanterns.Sweeping stone patios with a firepit and custom hewn log furnitureExtensive stacked stone garden wallsView of the outdoor entertaining area with large sculptures flanking the poolLarge sculptures outside Birmingham home flanking poolIncredible stone tiered outside patio terrace leading to incredible pool with bluestone paversPool with sculptures and blue stone paversBeautiful pool with bluestone paversOutdoor volleyball court between stone wallsEntrance walk leading up to the house
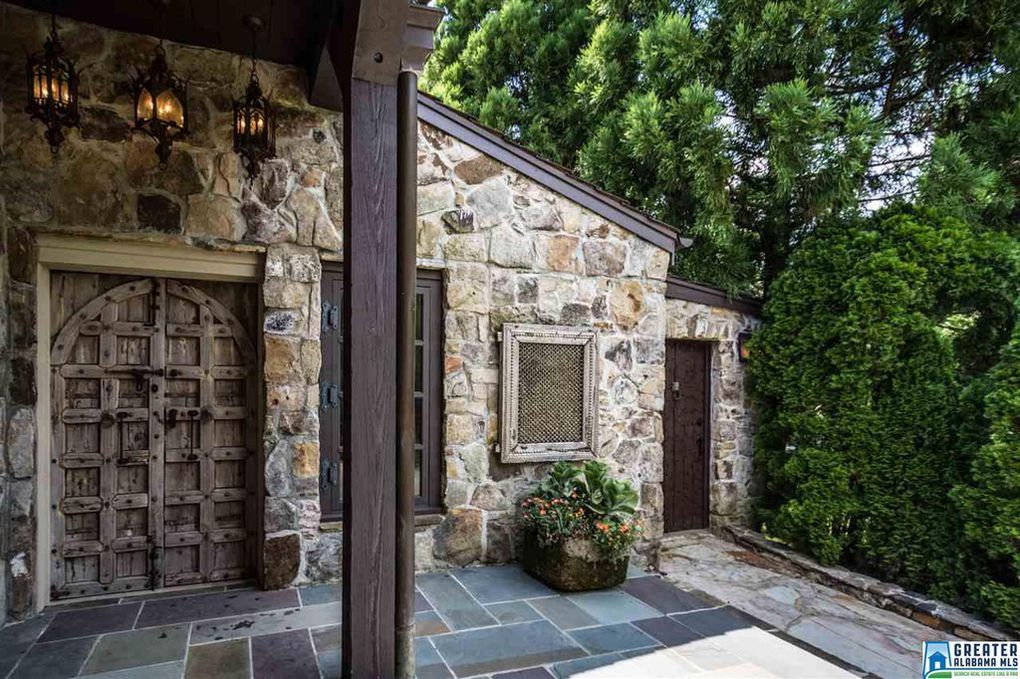
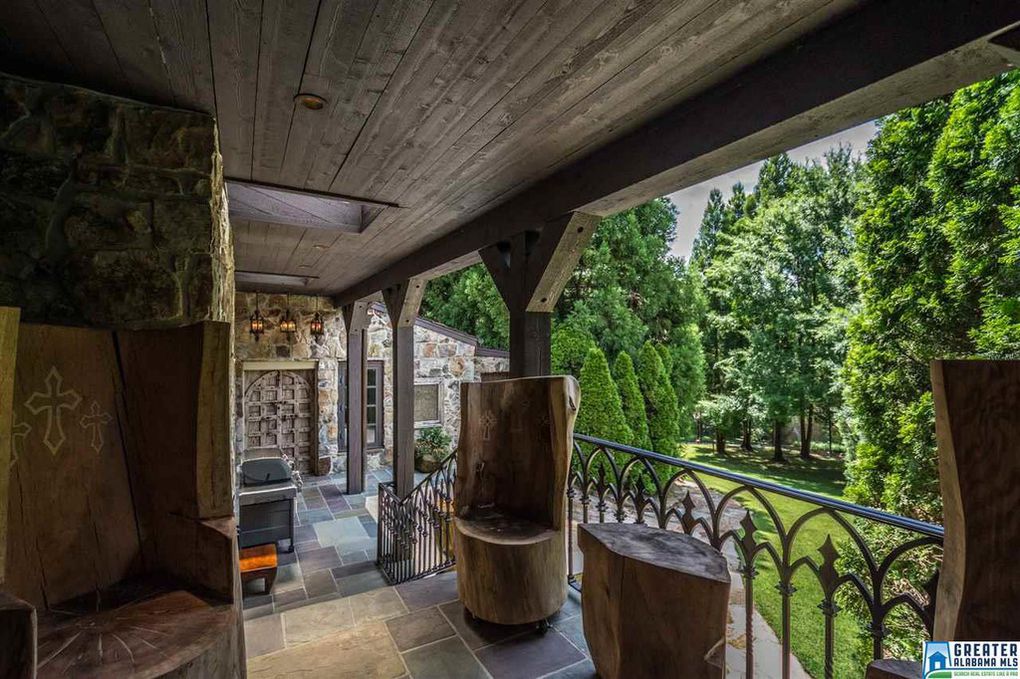
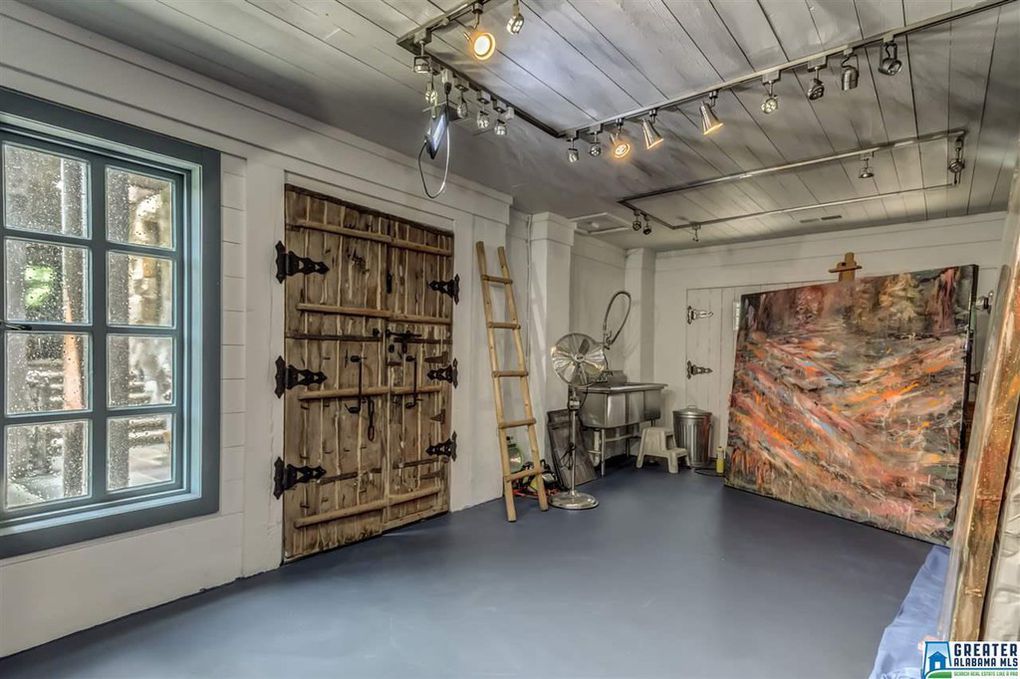
Special spaces:
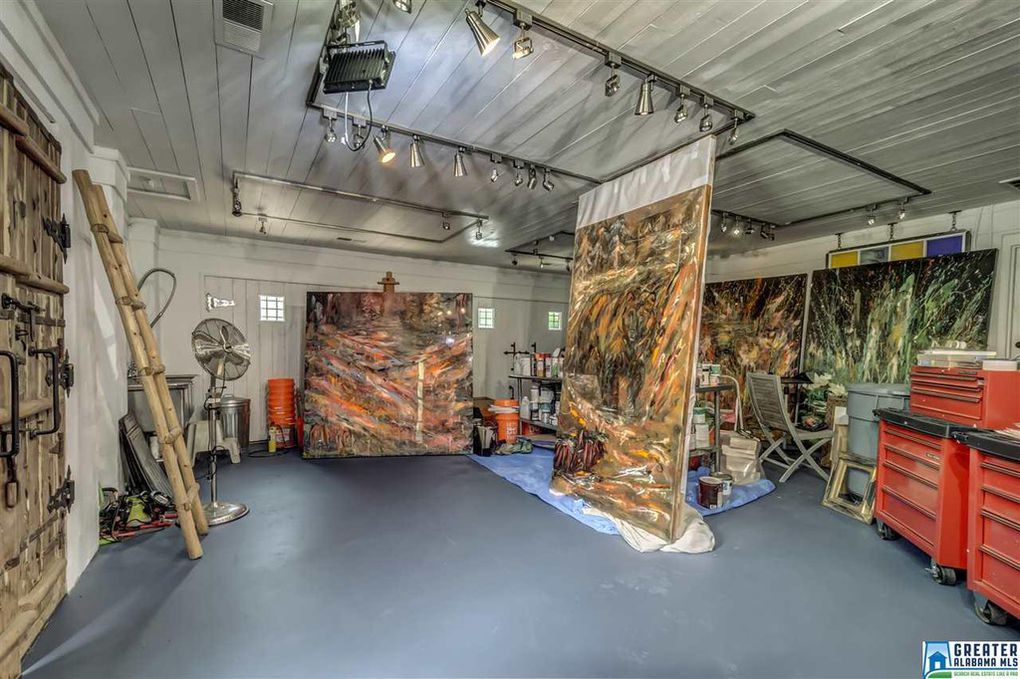
I felt like Alice in Wonderland exploring this place, and the details are incredible. One of my favorite places? The art studio.
The side entrance leading to the art studio.Side patio leading to art studio, with custom iron railings, tiered stone patio, and custom hewn log furnitureInterior art studio, light and bright with tons of space and track lightingInterior shop and art studio
The interior:
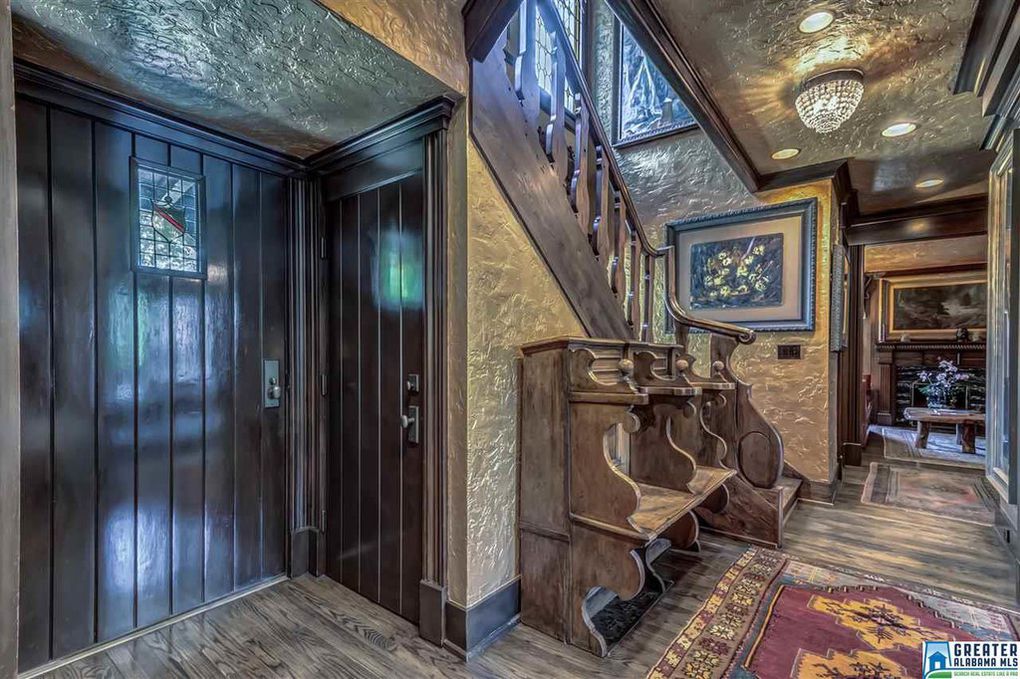
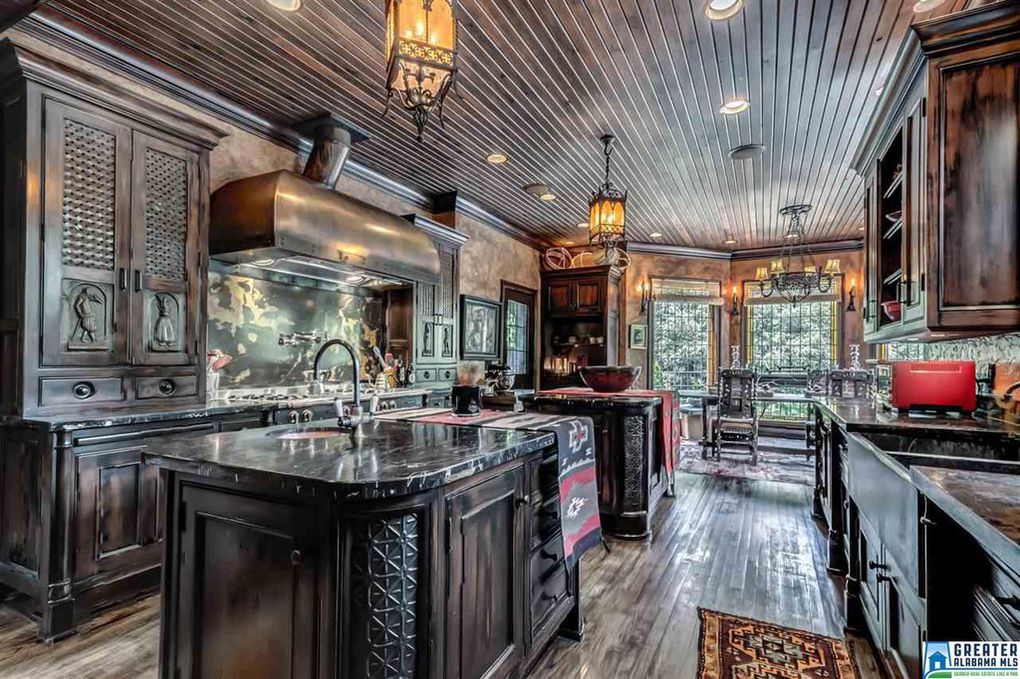
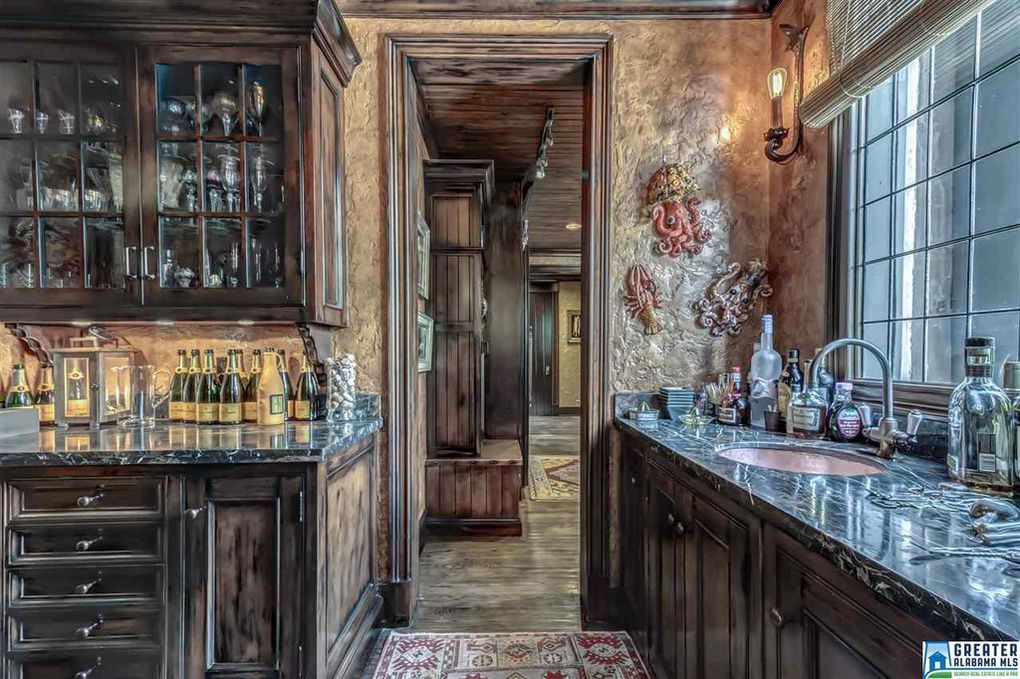
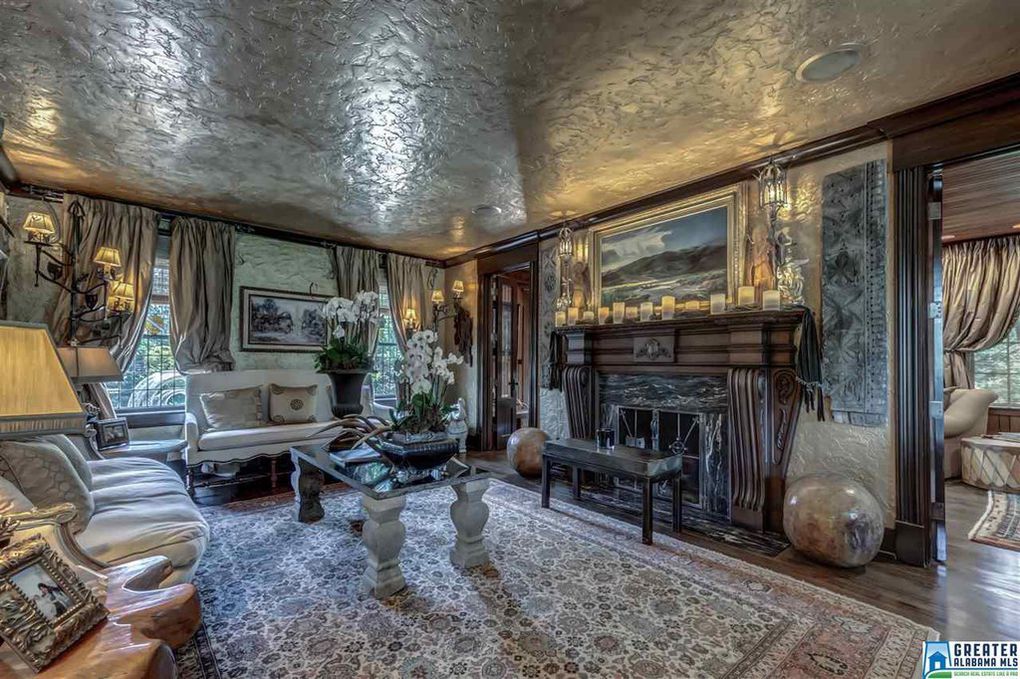
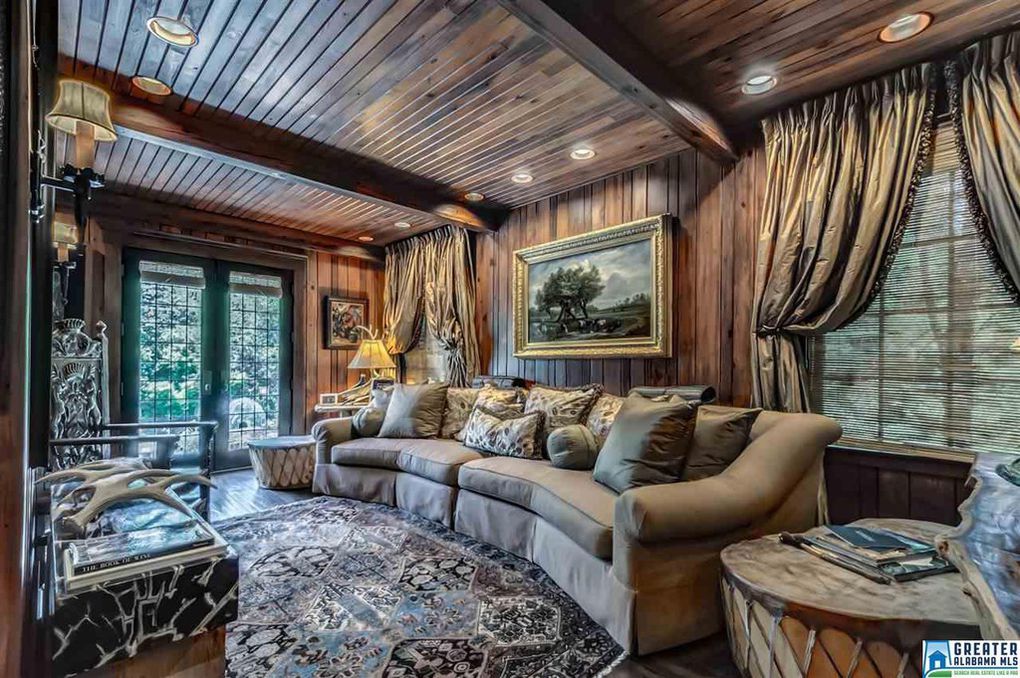
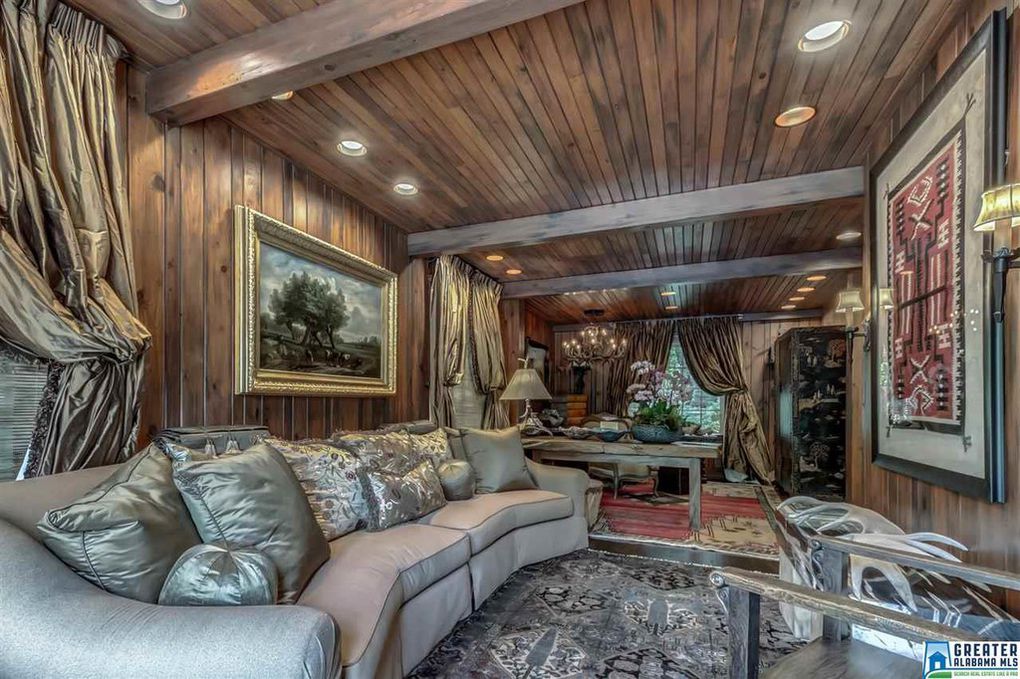
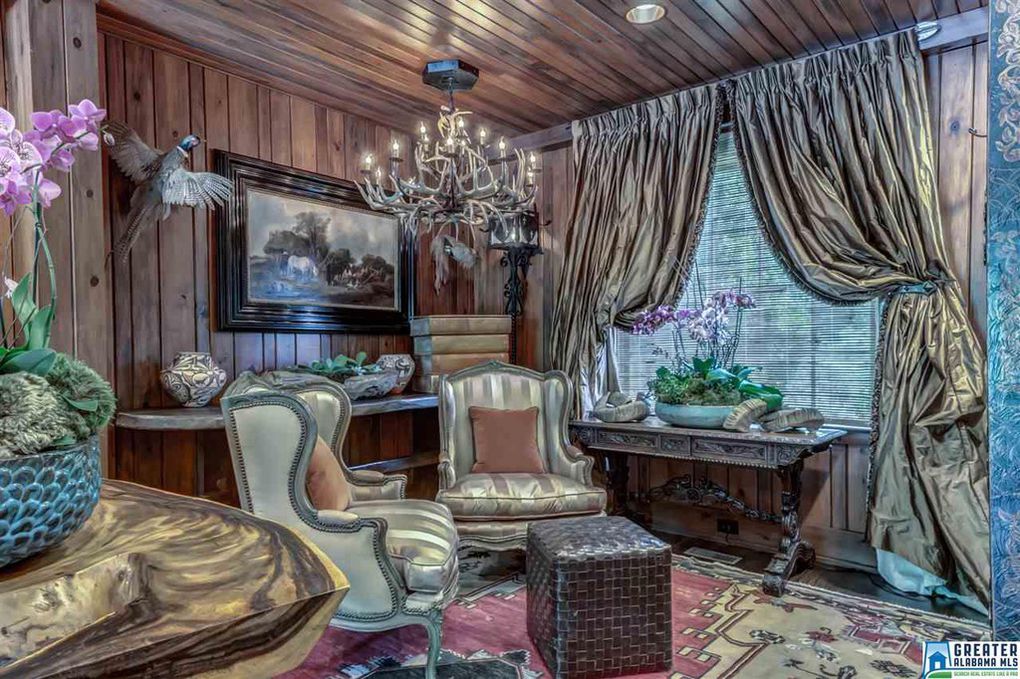
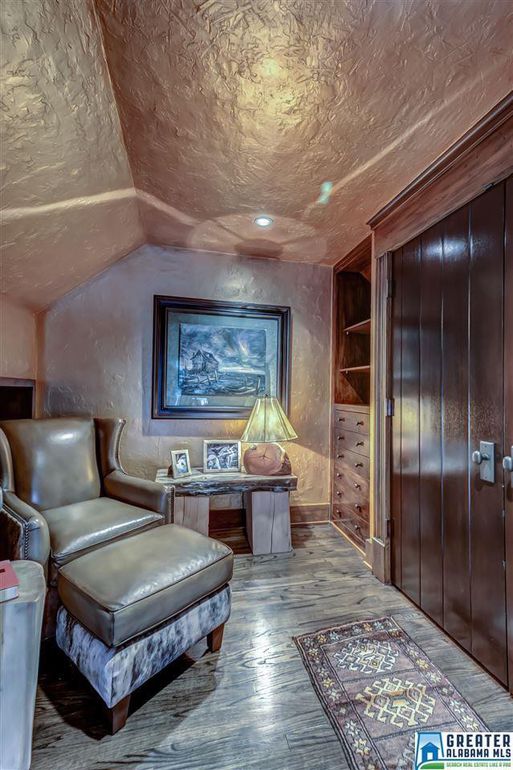
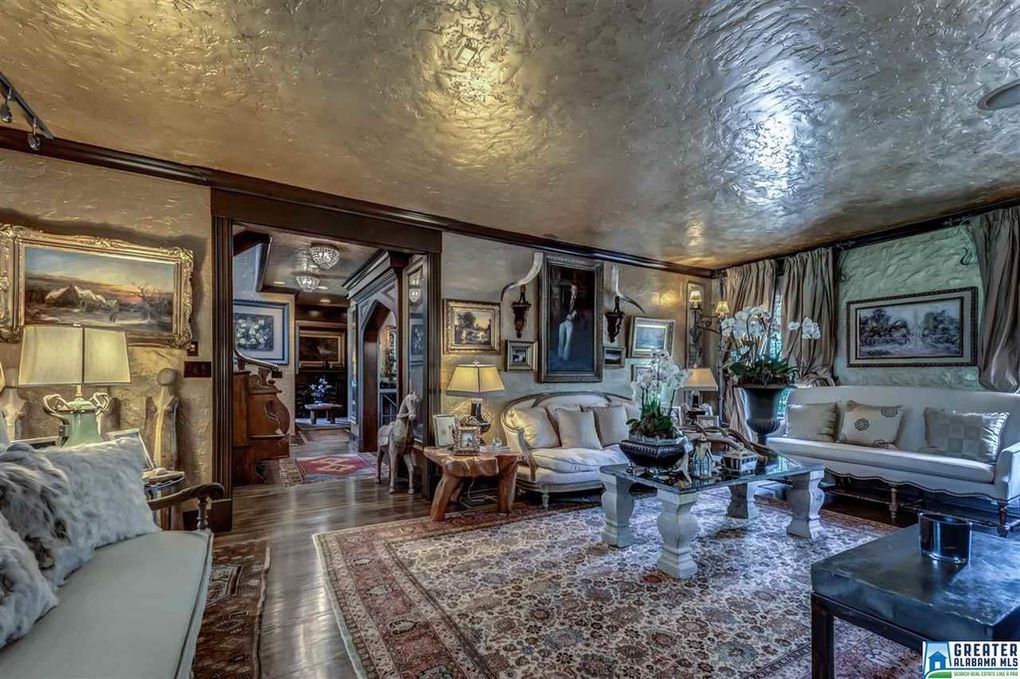
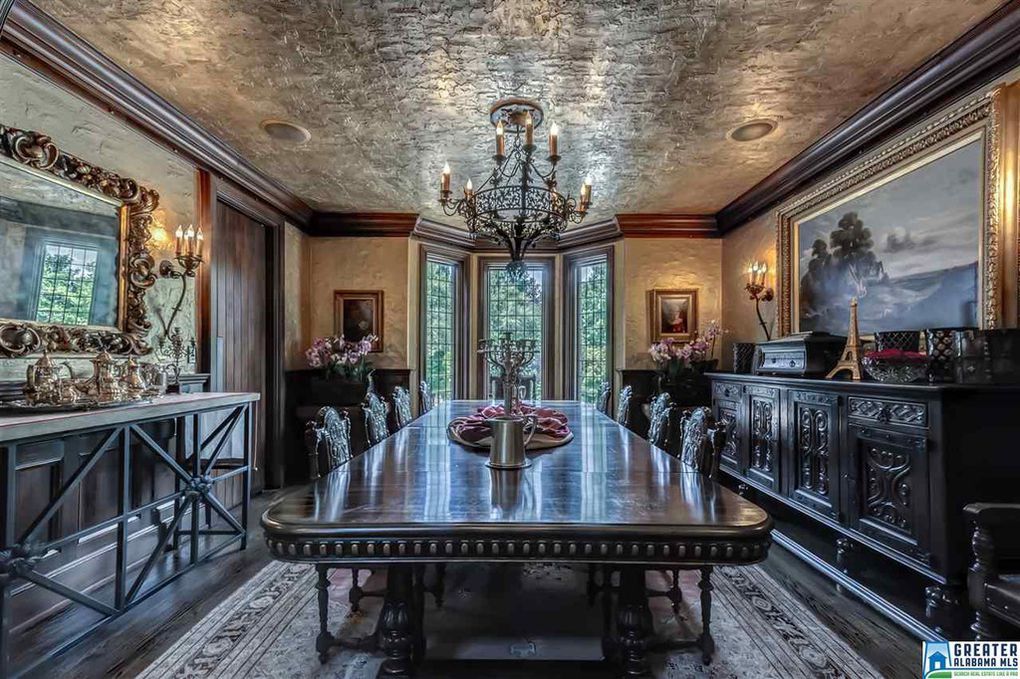
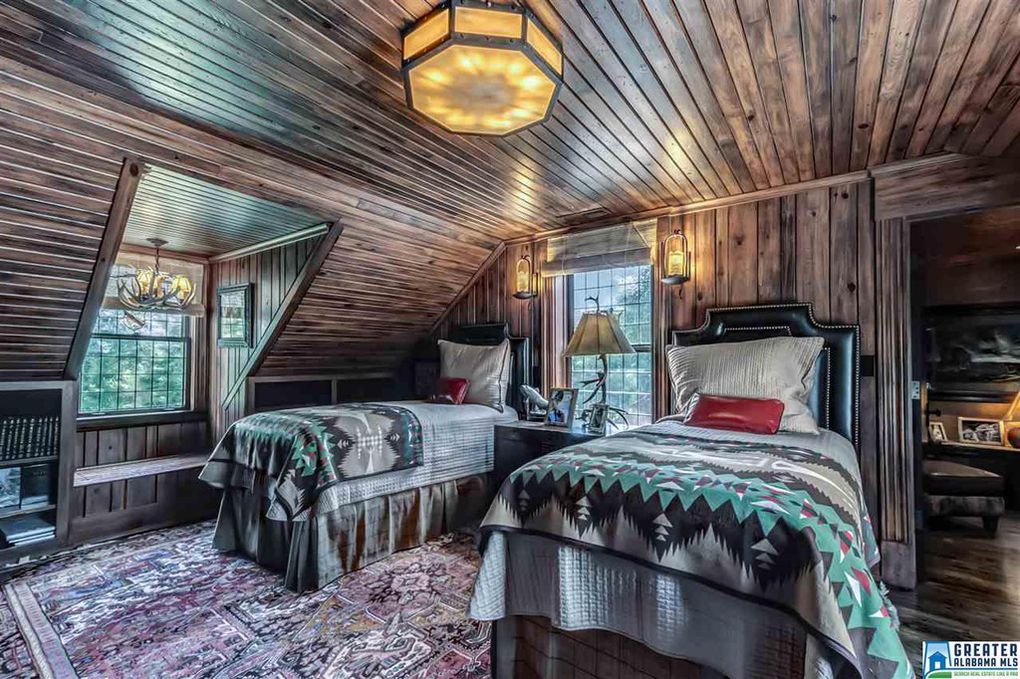
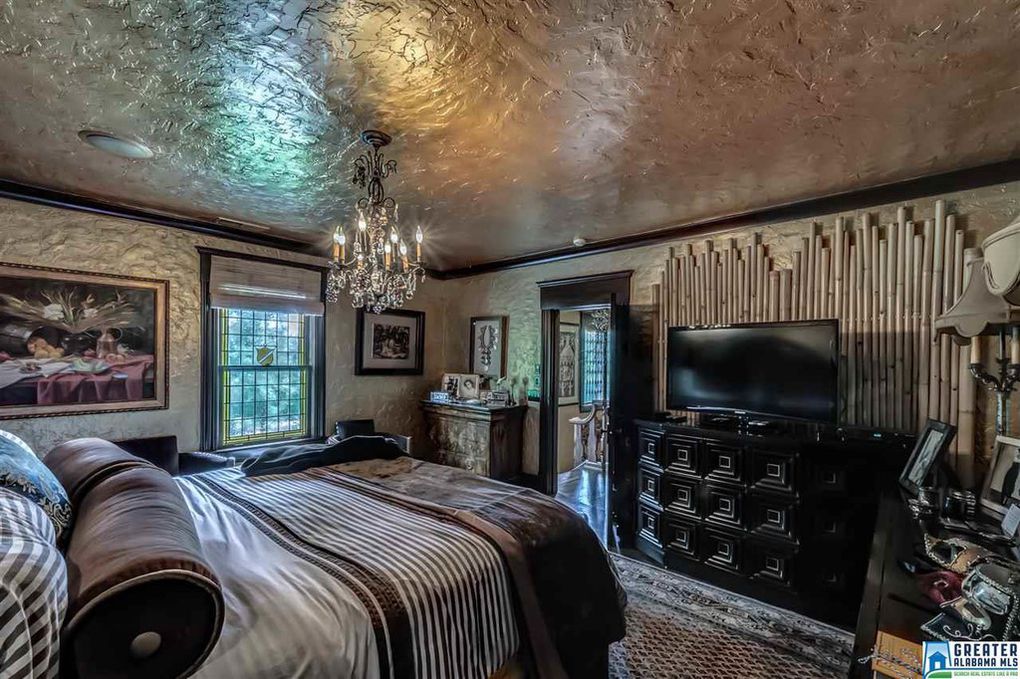
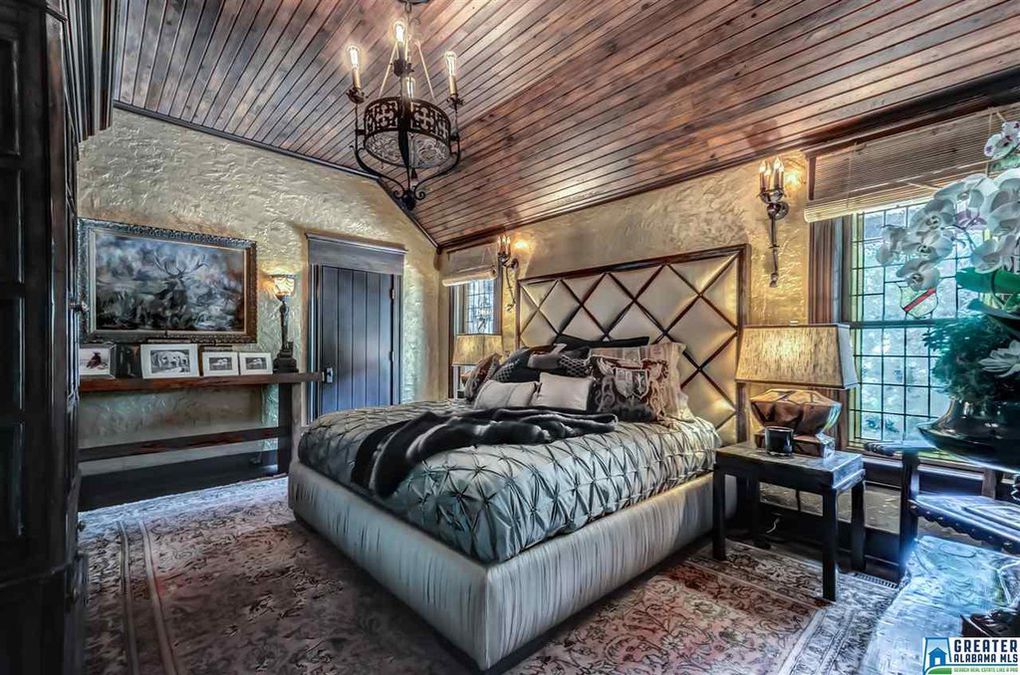
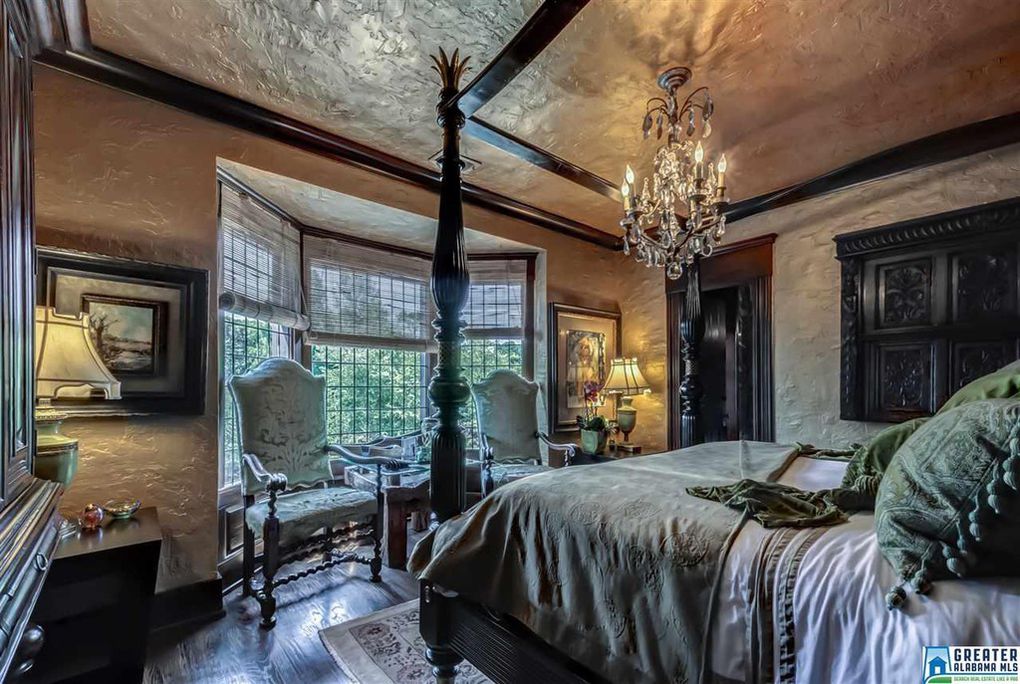
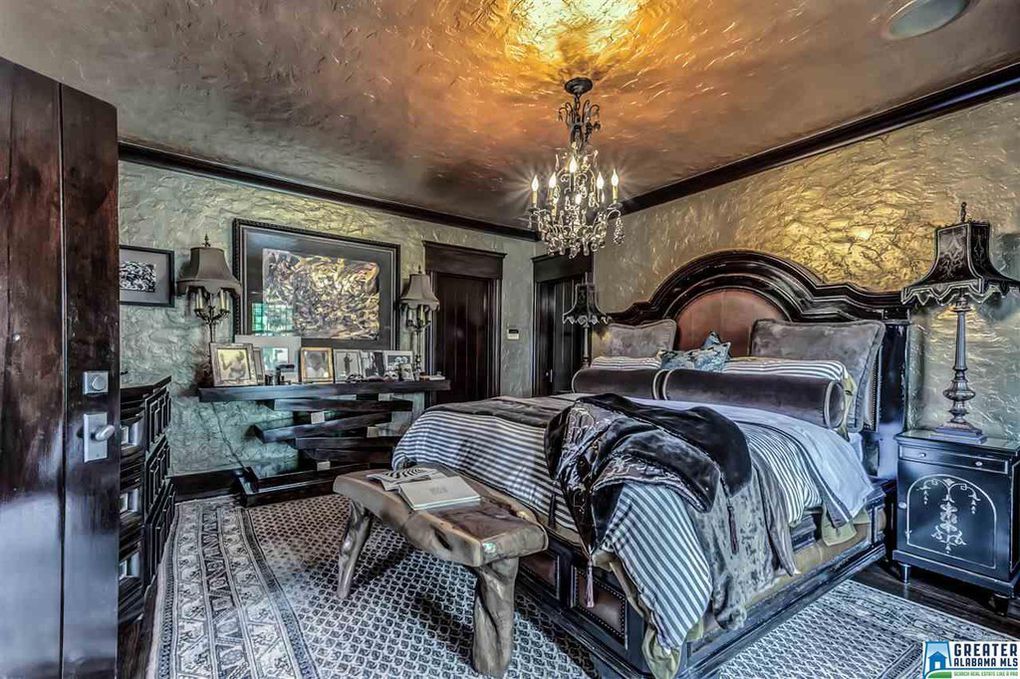
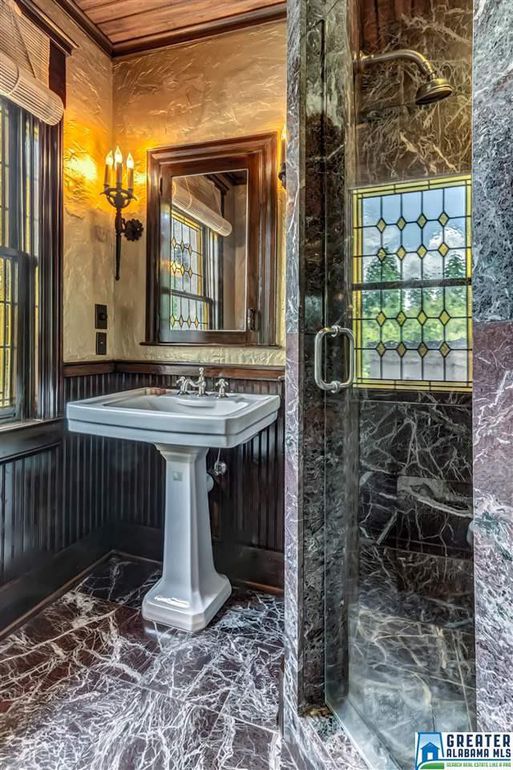
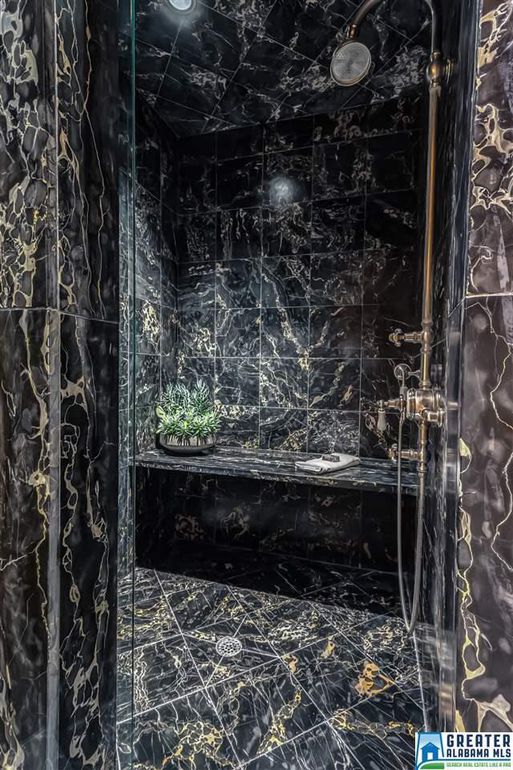
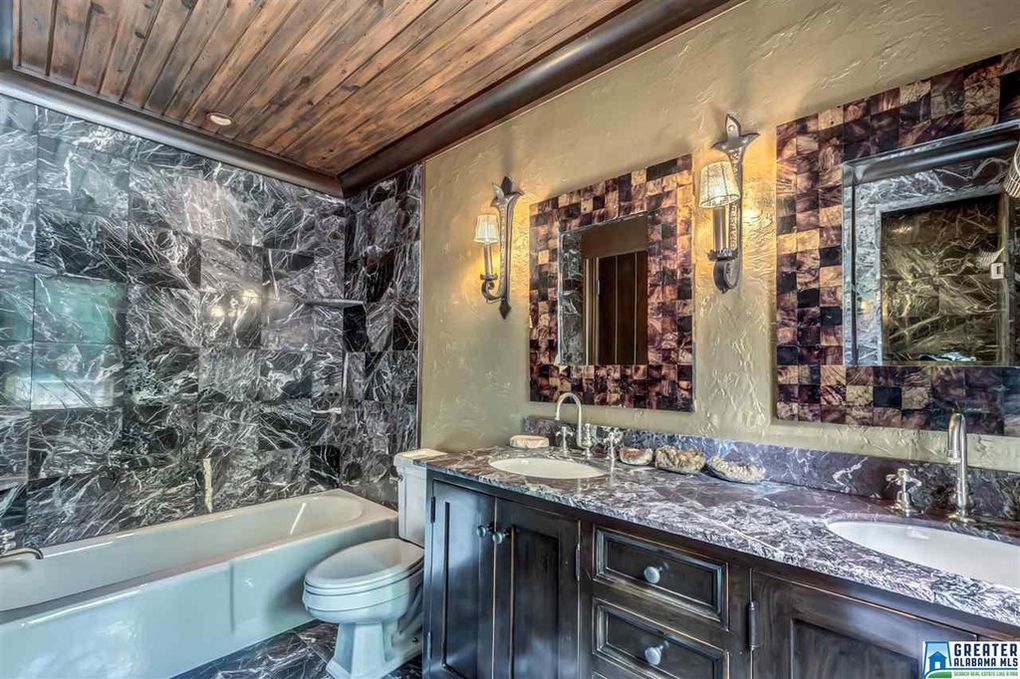
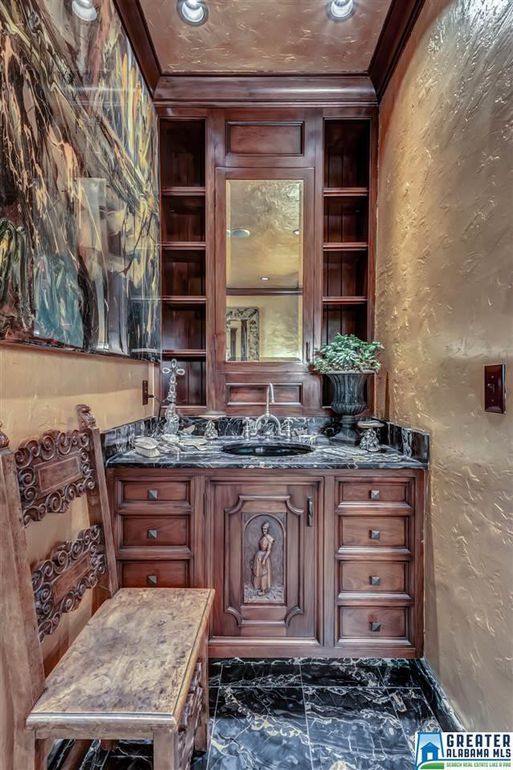
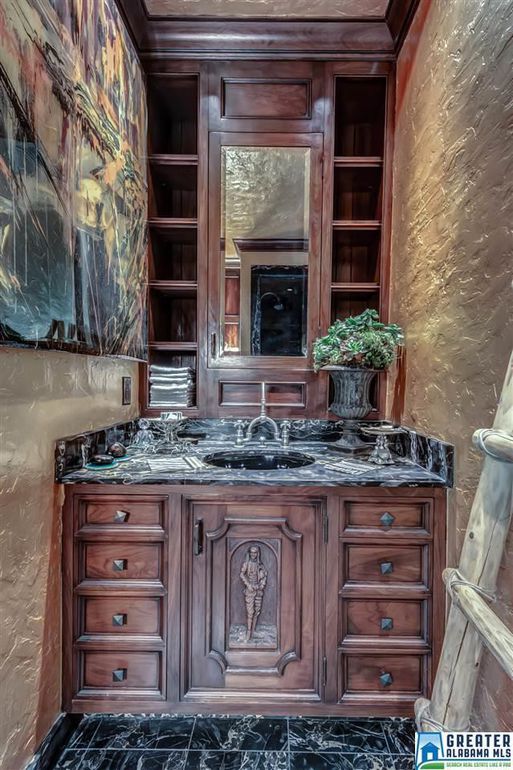
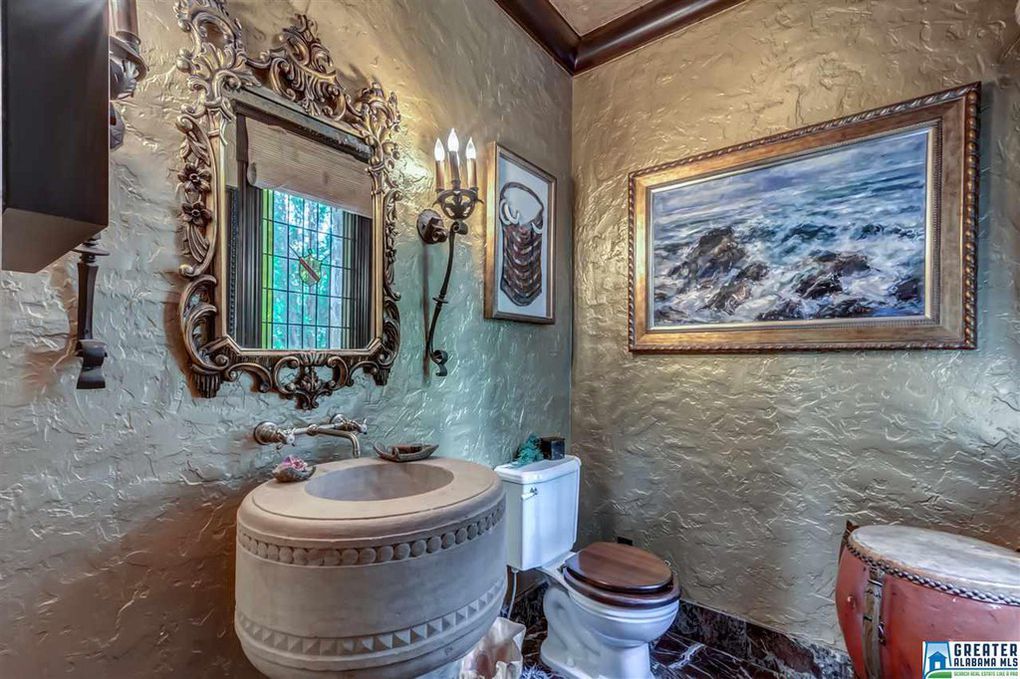
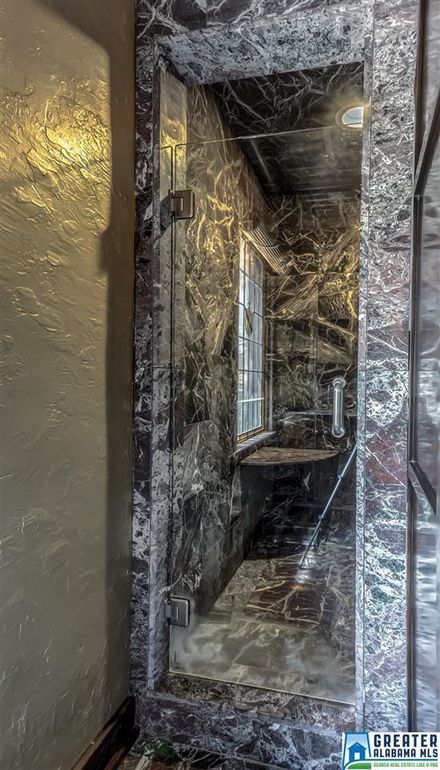
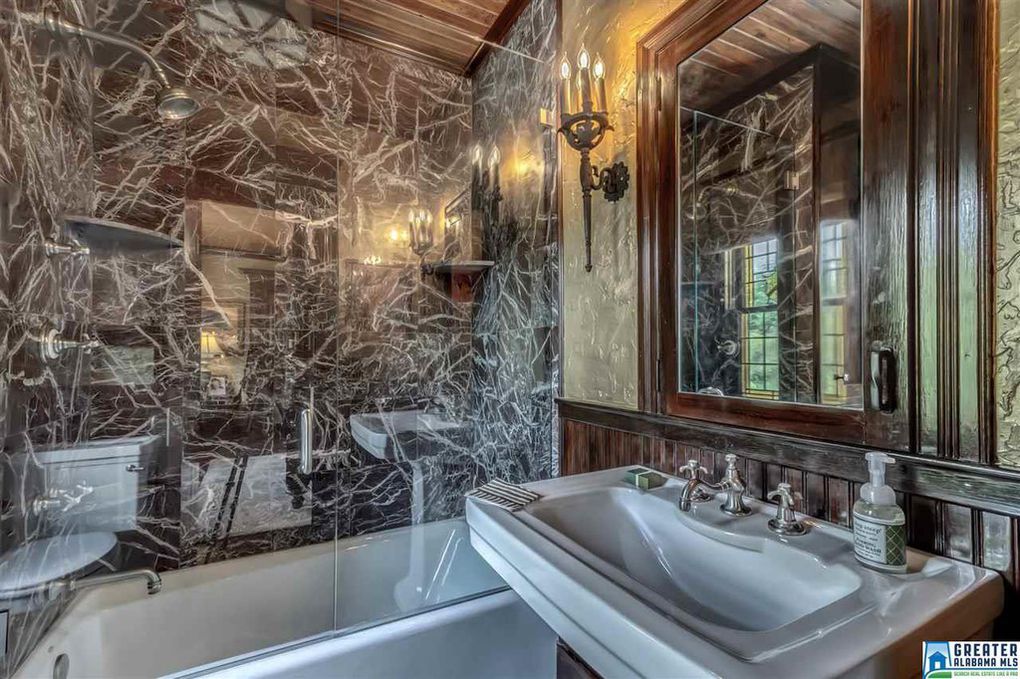
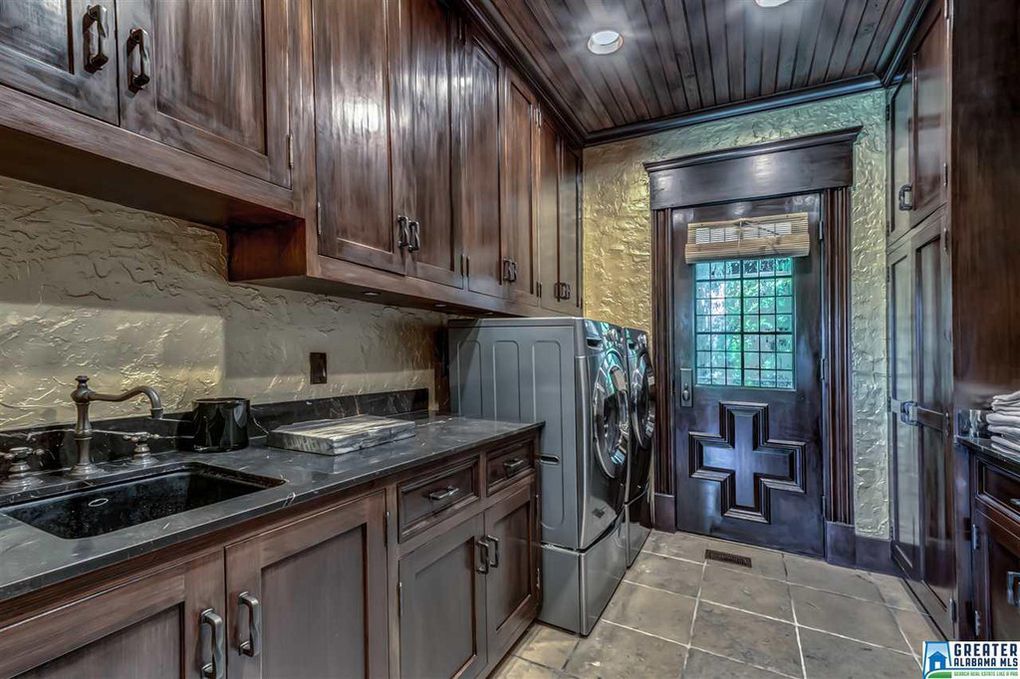
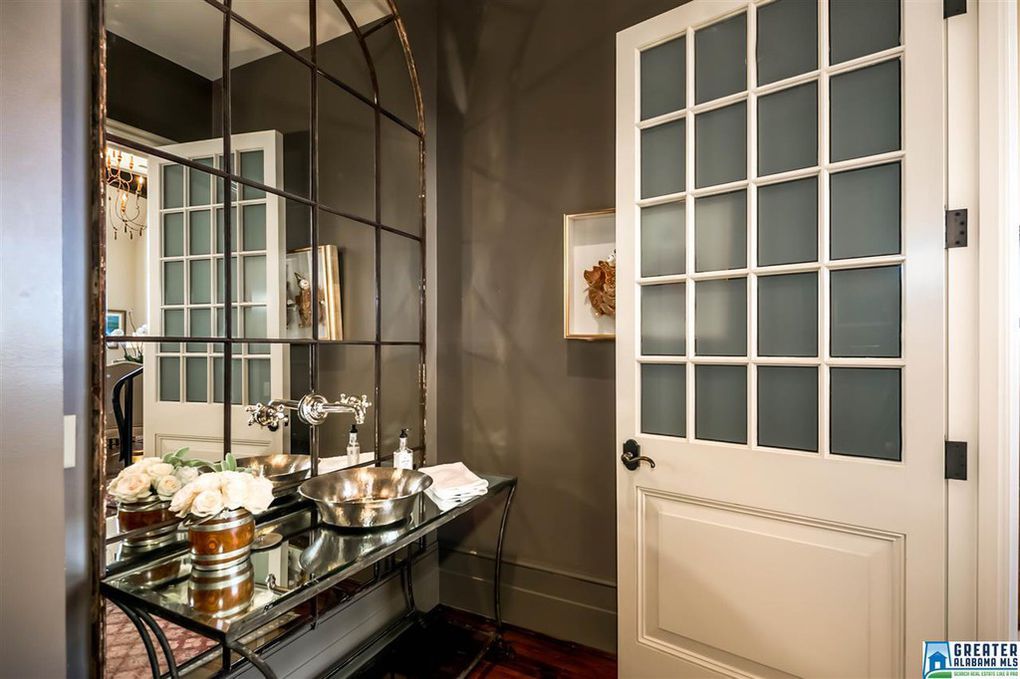
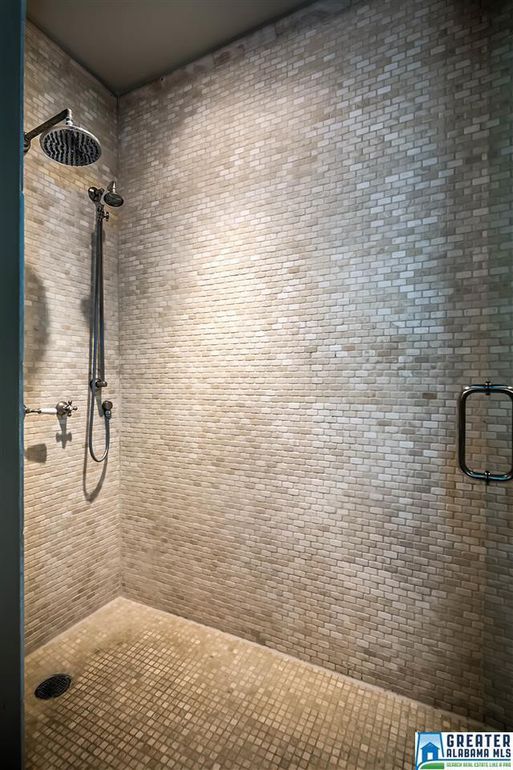
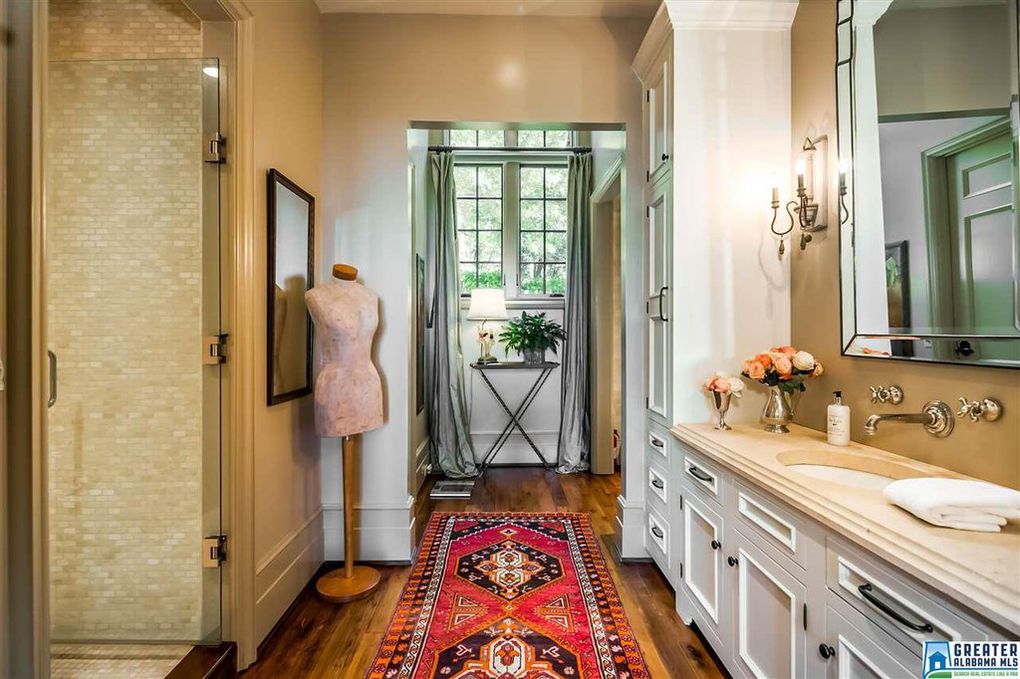
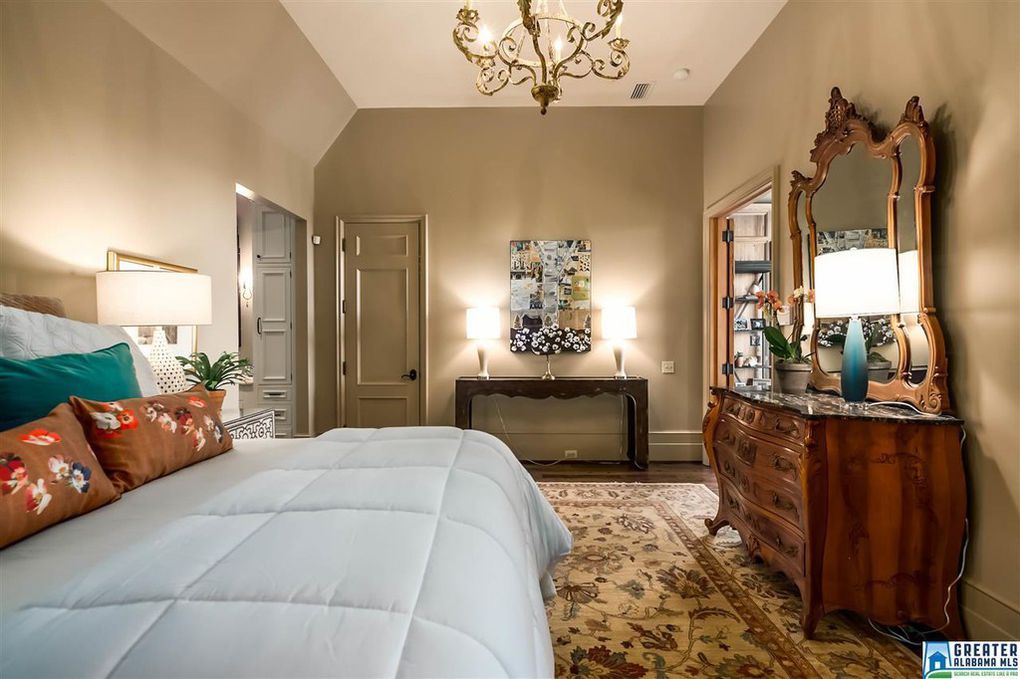
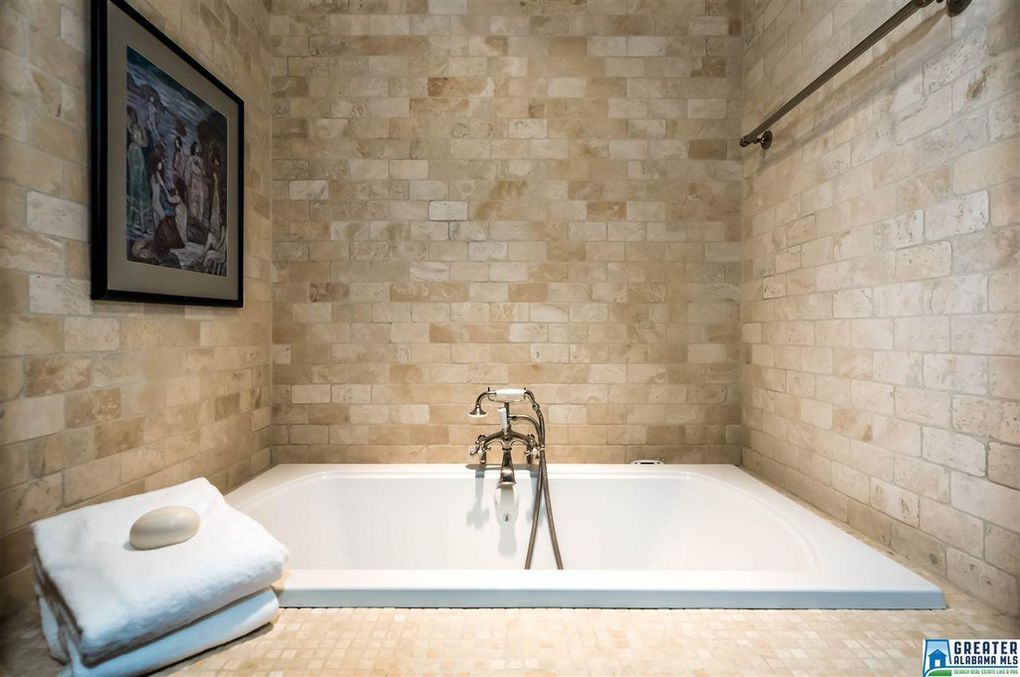
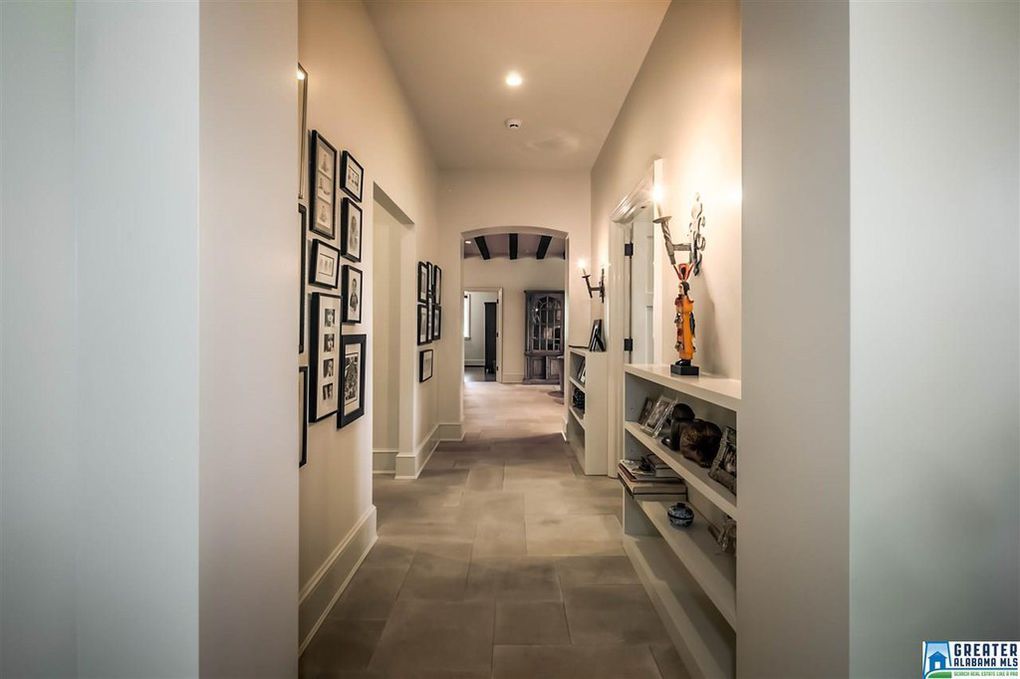
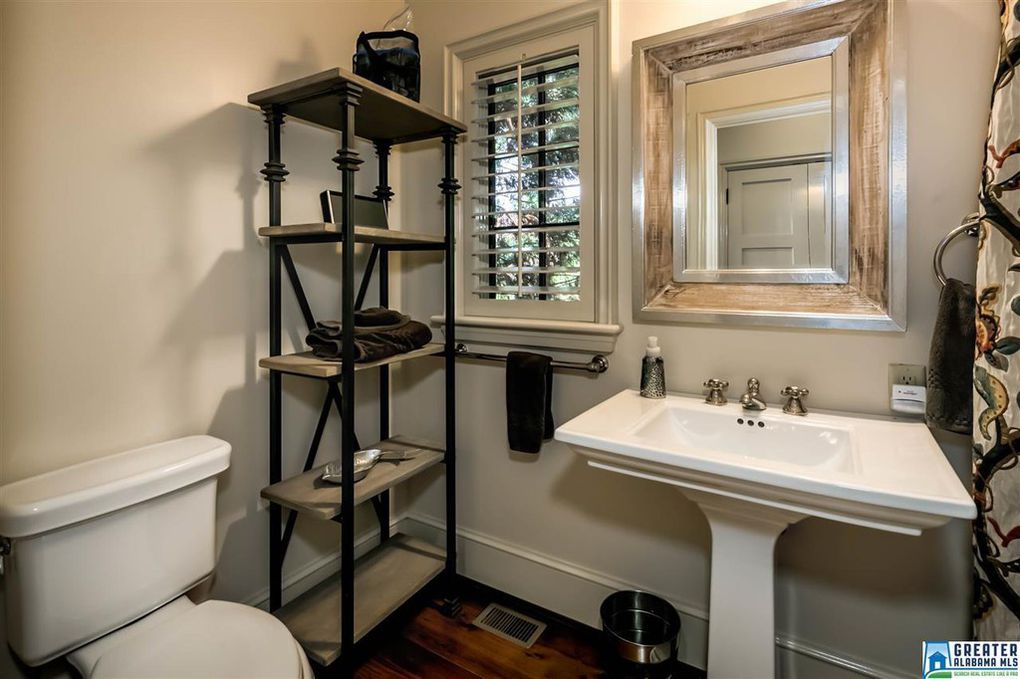
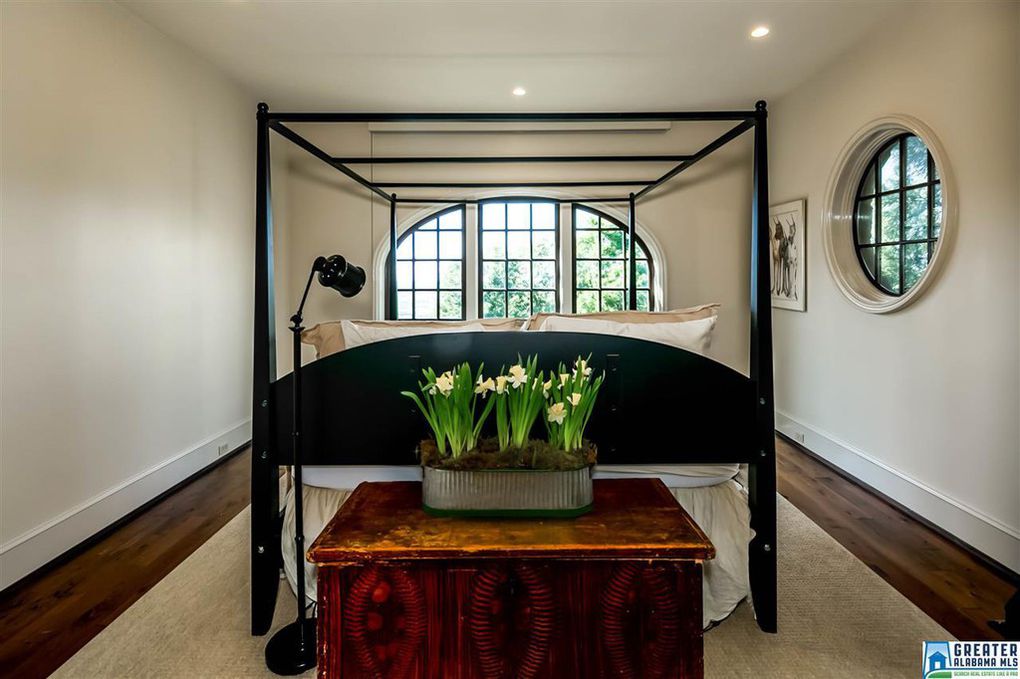
Deep autumn hues wrap the entire interior in a warm, homey hug, yet it’s sophisticated and creative. Extensive recessed lighting, and warm wrought iron fixtures and chandeliers, ensure that it’s still bright even with the maximalist style and textured walls, ceilings, and floors.
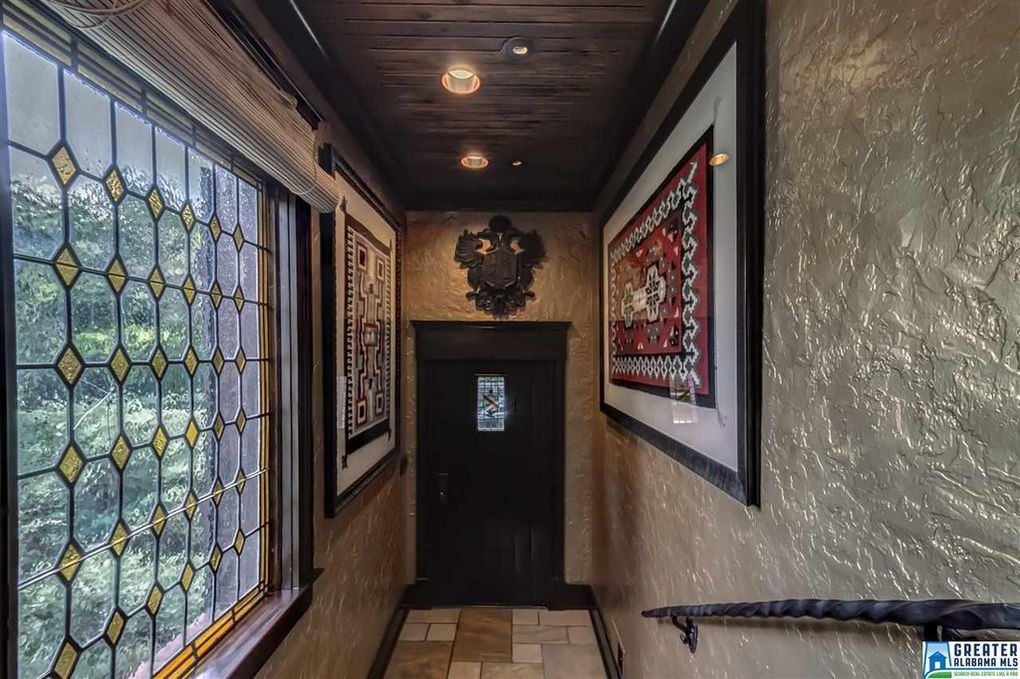
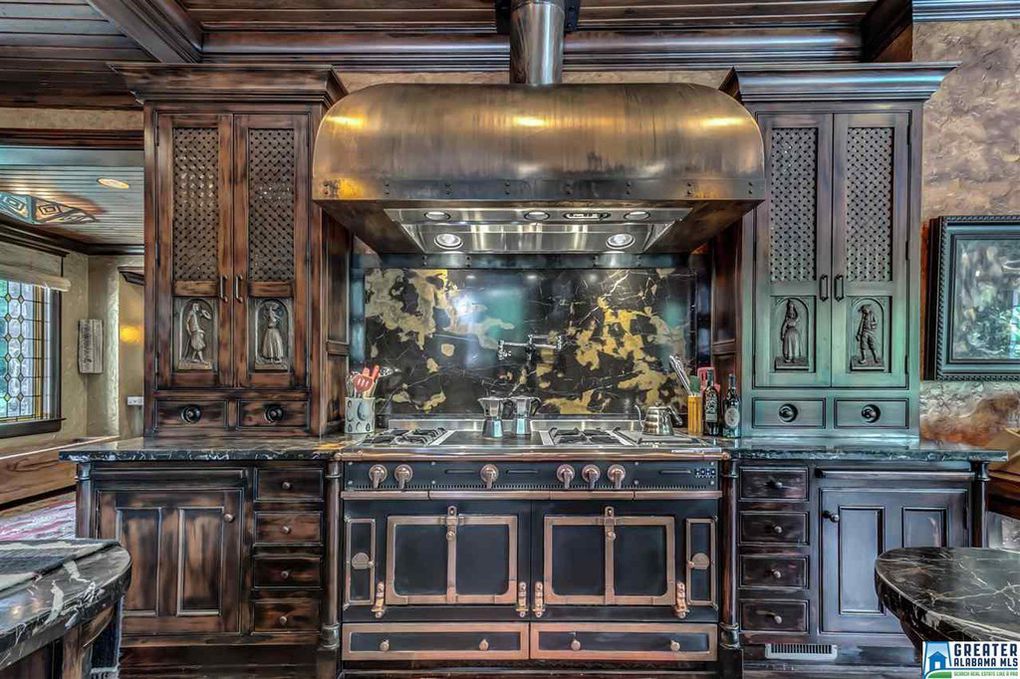
Front entrance with rustic wood doors and inlaid leaded glass, textured walls with a sheen to maintain cleanliness, crystal lighting, walnut floors, custom wooden railings, and stacked pews.Custom leaded/stained glass windows, textured walls, wooden ceilings, stone floors, modern lighting, cast iron railing, and carved wooden crestProperly scaled, massive metal hood with an aged patina over 60 inch gas stove, flanked by wooden cabinetry with hand carved doorsTwo islands in a rich, multi-texture kitchen with modern and period lightingKitchen details: antique glass in cabinet inset with electric sconces and leaded glass grid windows and marbleRich drapes and sculptural details around a one of a kind wooden mantelLiving area with real wood paneling, beams, and modern lightingLiving space with wood walls and detailsIncredible arrangements, unique light fixtures, and professionally done draperiesCozy reading nook with textured walls and wooden builtinsLiving area looking through to the front hallStudy with walnut paneling, custom wood burning fireplace, textured ceilings, and soft golden lightingMajestic dining room with properly scaled art and furnishings and grand, tall leaded windowsLarge leaded grid windows surround an informal dining area, bathed in natural lightTwin beds upstairs in a guest bedroomMaster suite with crystal chandelierRustic wrought iron chandelier and sconces, textured walls, and wooden ceiling paneling in an alternate guest bedroomGuest bedroom with a view, out leaded windowsAnother unique large scale bedroomGuest bathroom with marble and glass shower, iron sconces, textured walls, and wood plank ceilingMarble tub surround with textured walls, built in shelves and windowMarble shower with benchAdditional bath with marble, planked ceiling, recessed lighting, textured walls, and iron sconcesHalf bath with custom carved vanity, textured walls, recessed lighting, and wooden builtinsCustom, carved vanityHalf bath with stone pedestal sink, textured walls, gilded mirror, and iron sconcesMarble shower with glass door and textured wallsGuest bath with marble, glass, wood molding, textured walls, plank wood ceiling, and iron sconcesLaundry room with beautiful wood cabinetry, custom door, and marble countersOffice nook with textured ceilings, hand carved light fixture, and leaded glass window with crest inlayHallway with textured walls, wooden floors, wooden hand railings, leaded and stained glass windows
What do you think? Are you ready to ditch those boring white walls for texture and layers of color?
Thanks for checking out our post! Get more awesomeness on our blog. Cheers!
*Legal stuff:
I am honest about my experiences with different products and write because I enjoy it. I do however, have the opportunity to earn money for my writing, also.
Slavetodiy.com is a participant in the Amazon Services LLC Associates Program, an affiliate advertising program designed to provide a means for sites to earn advertising fees by advertising and linking to amazon.com. Amazon offers a small commission on products sold through their affiliate links. Each of your purchases via our Amazon affiliation links supports our cause at no additional cost to you.
If a blogger links to an Amazon product (with a special code for affiliates embedded in the link), and a reader places an item in their “shopping cart” through that link within 24 hours of clicking the link, the blogger gets a small percentage of the sale. Amazon links are not “pay per click.” If you click on the product link and stay around Amazon and purchase something else, however, I will get a commission on that sale.
Slavetodiy.com is also a VigLink affiliate advertiser which works similarly.
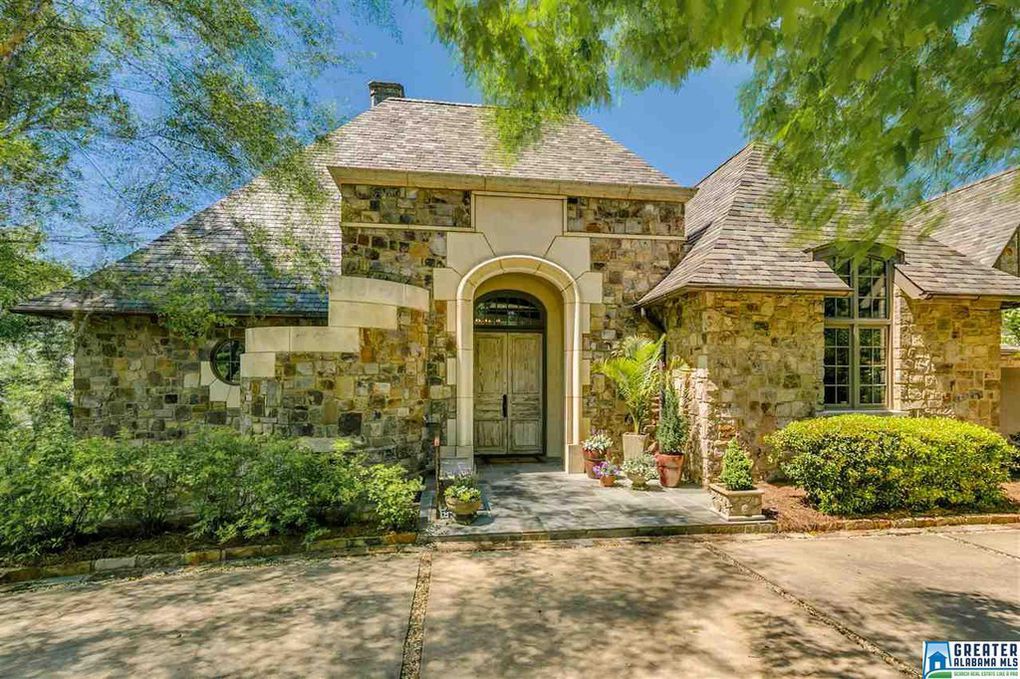
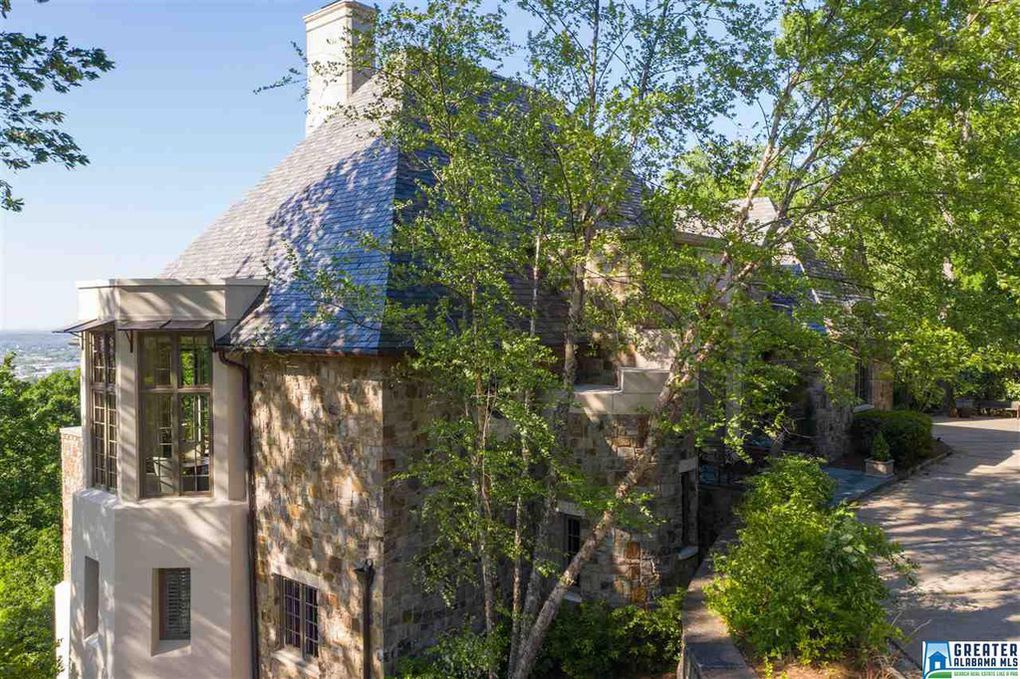
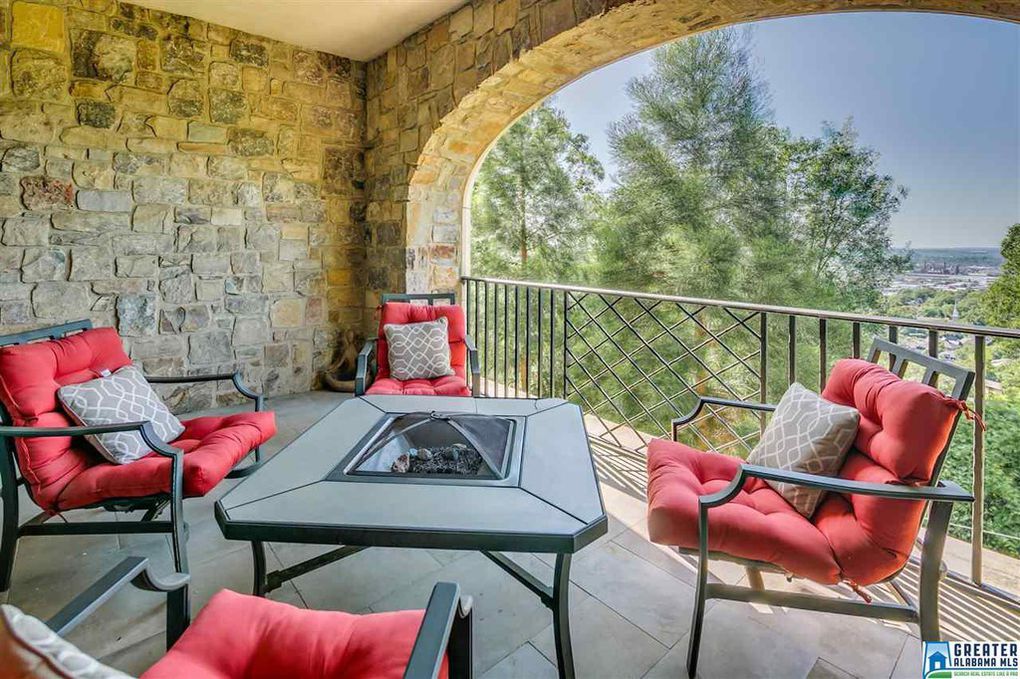
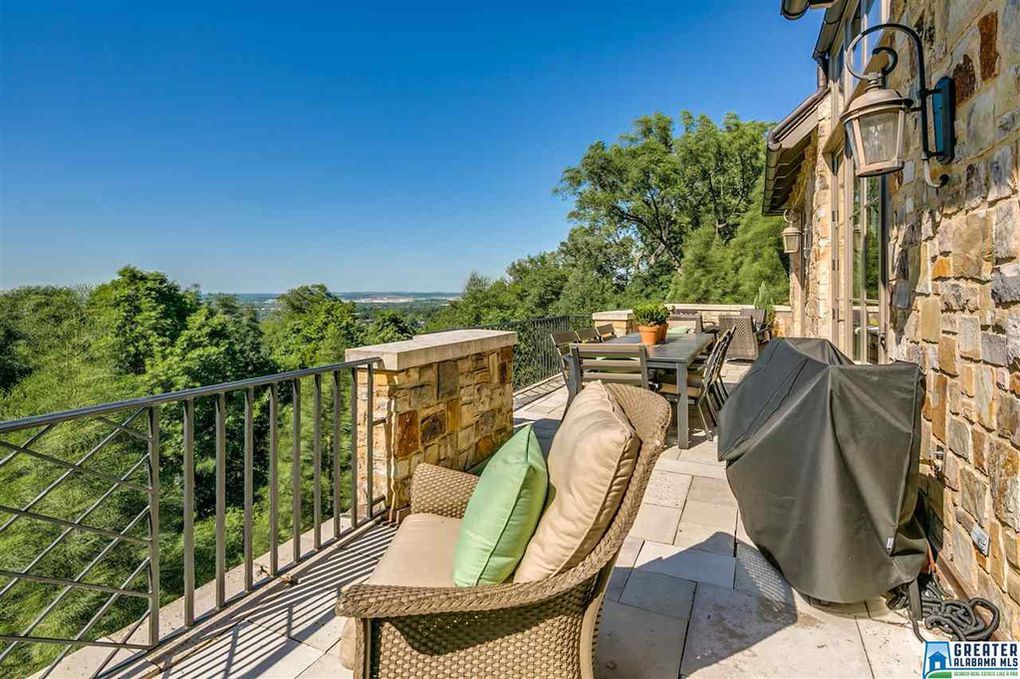
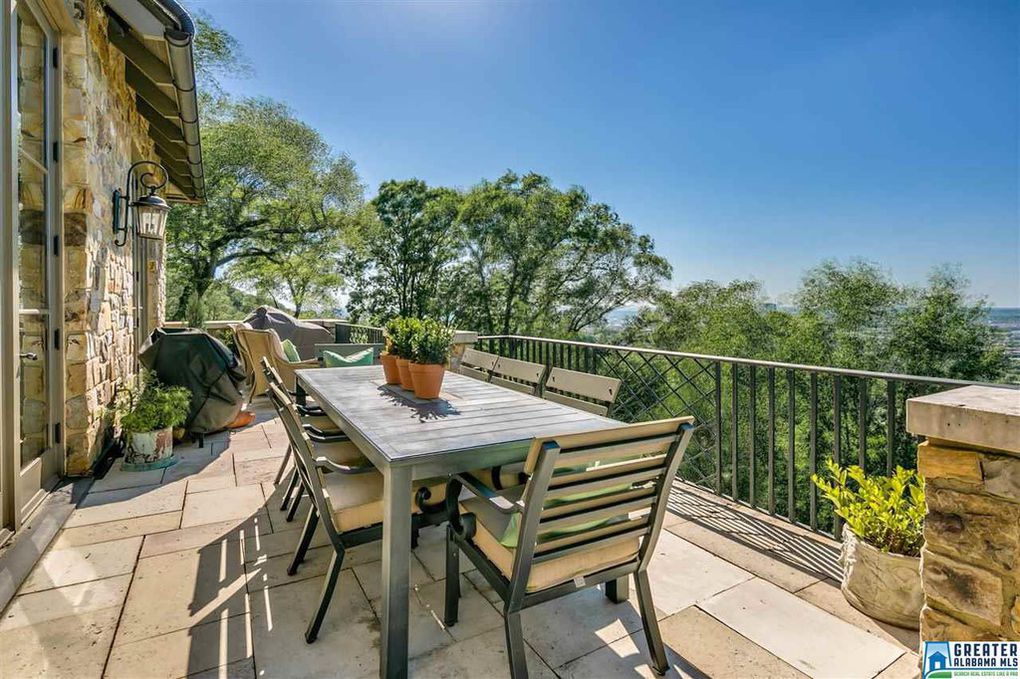
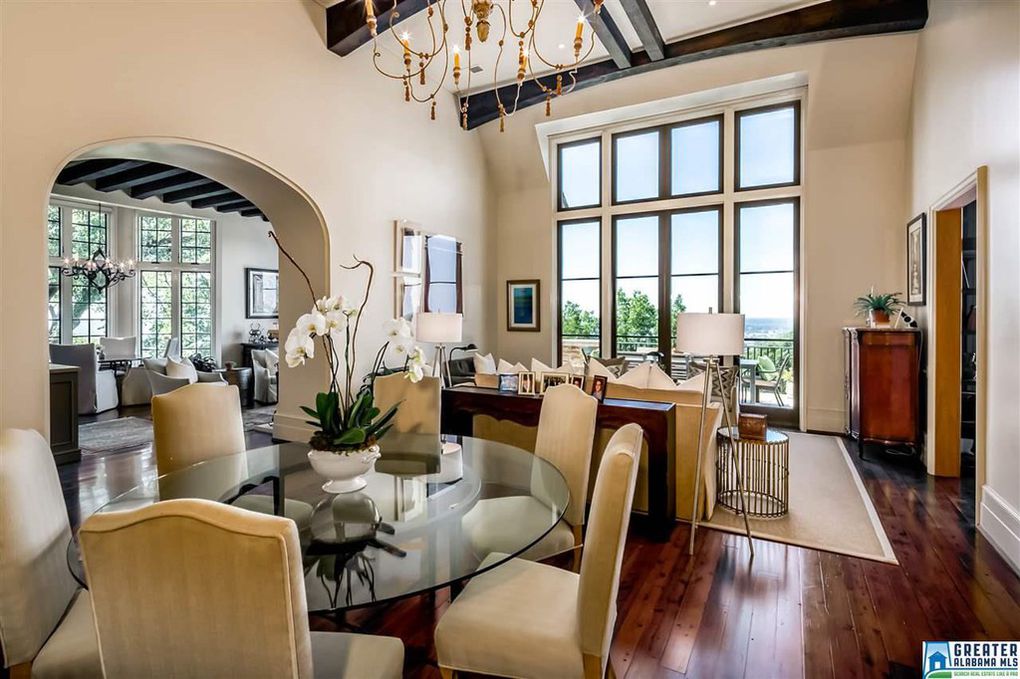
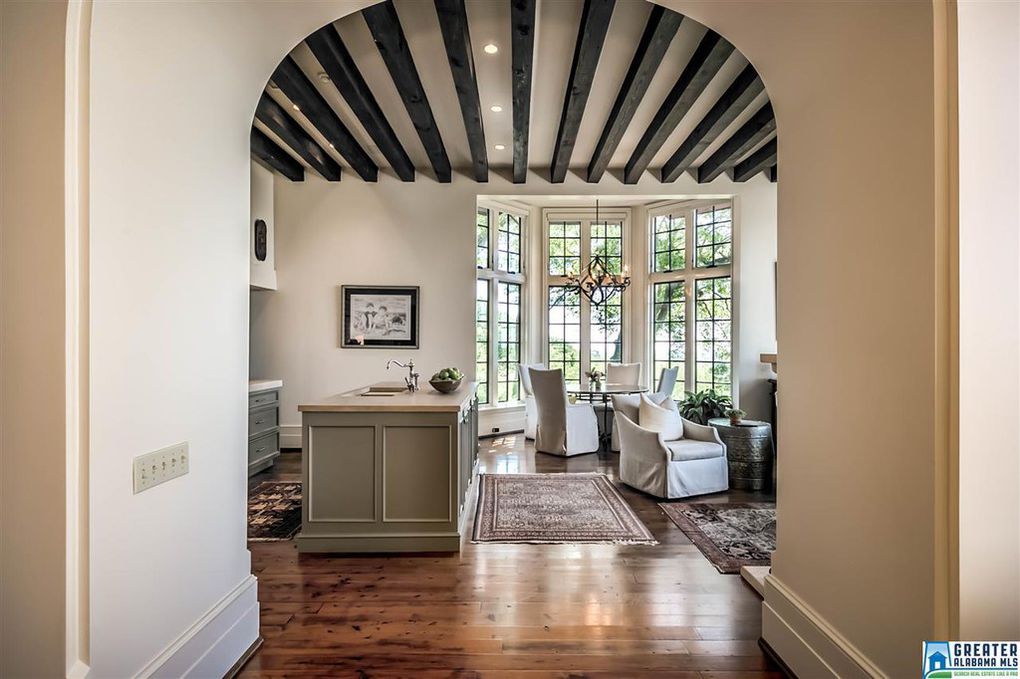
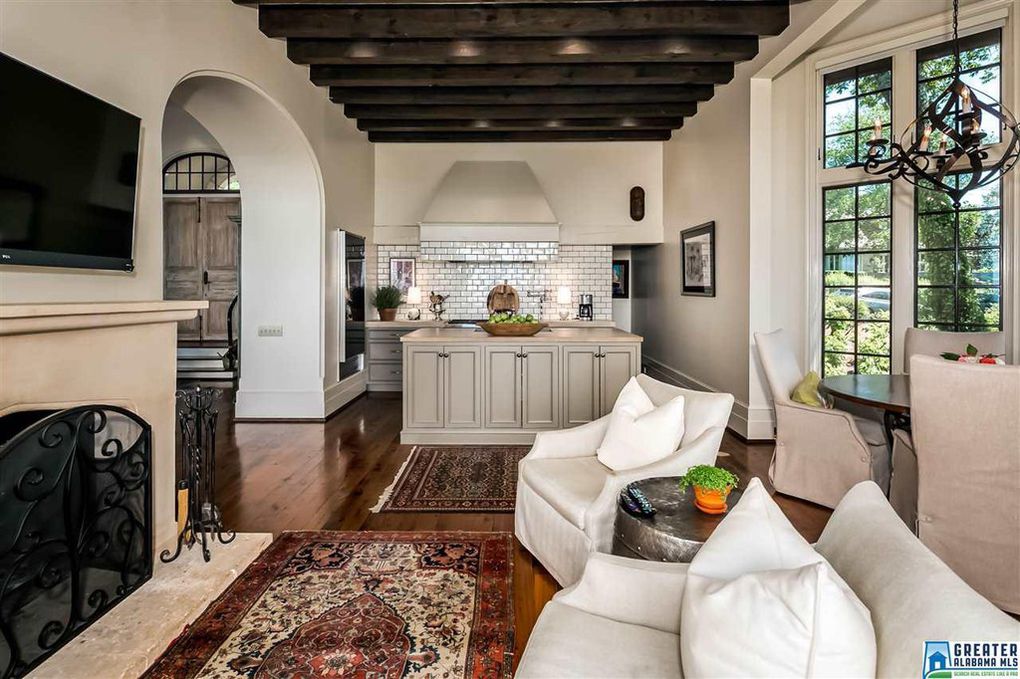
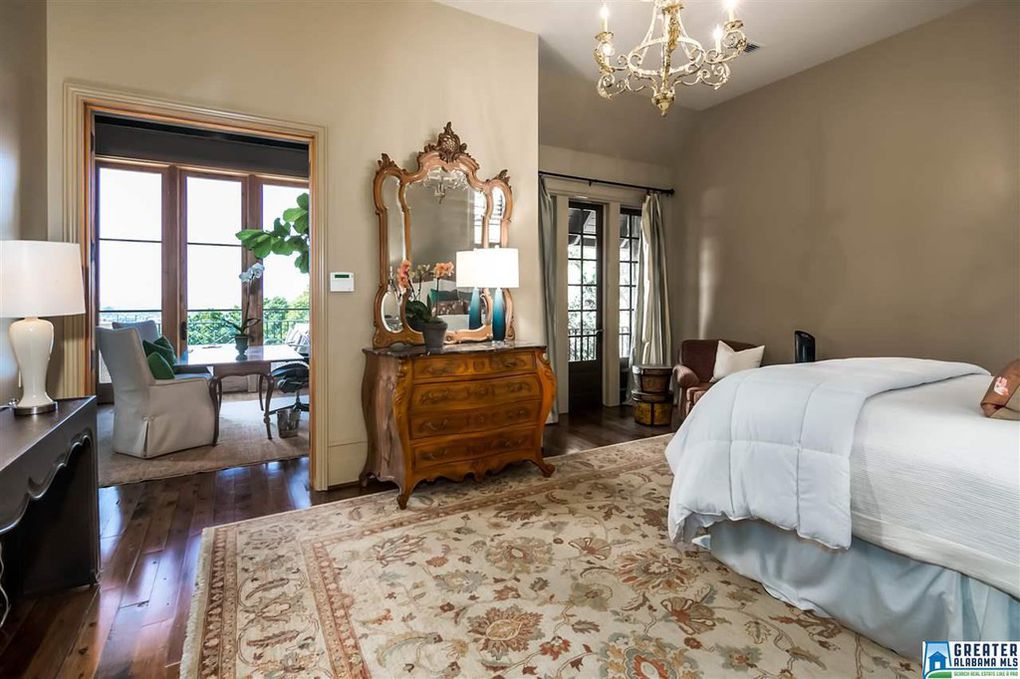
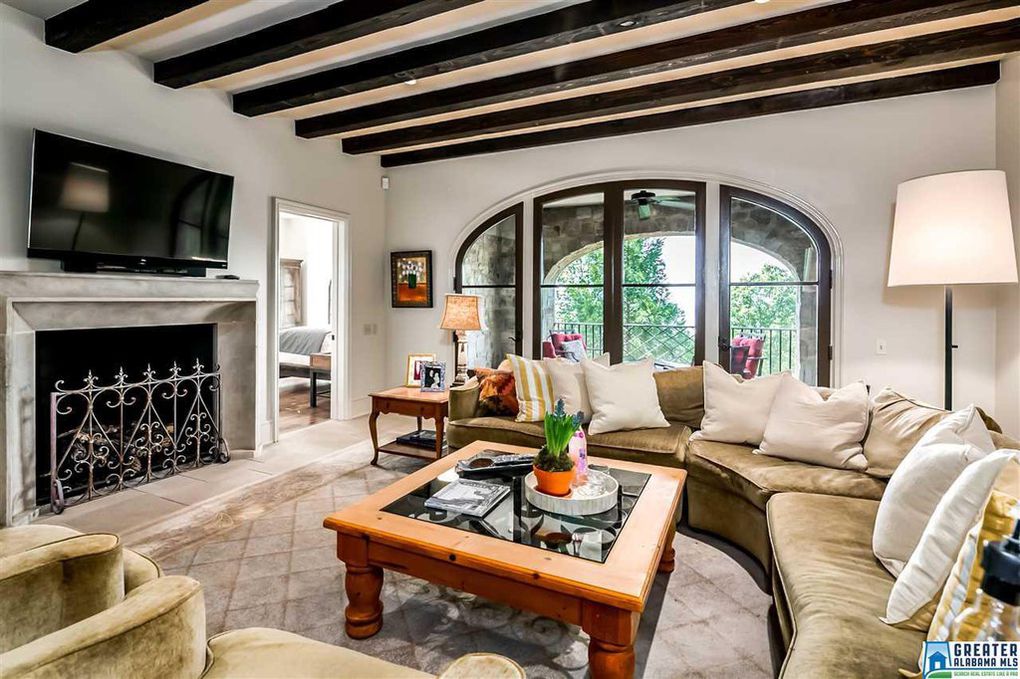
Every once in a while you stumble across a home that absolutely takes your breath away. I had no idea, until we attended an event there last year, that Birmingham, Alabama has some unbelievable real estate. This particular place is downright sexy. It has everything: adult entertaining spaces, a gorgeous stone exterior, and stunning panoramic views. For a cool $2.4m you can own this little slice of heaven, perched on the side of a mountain, overlooking the city.
*This post may contain affiliate links. Please see full disclosure at the end of the post.
All photos are the property of the listing agent Stephanie Robinson, with Realtysouth at 866-243-8436.
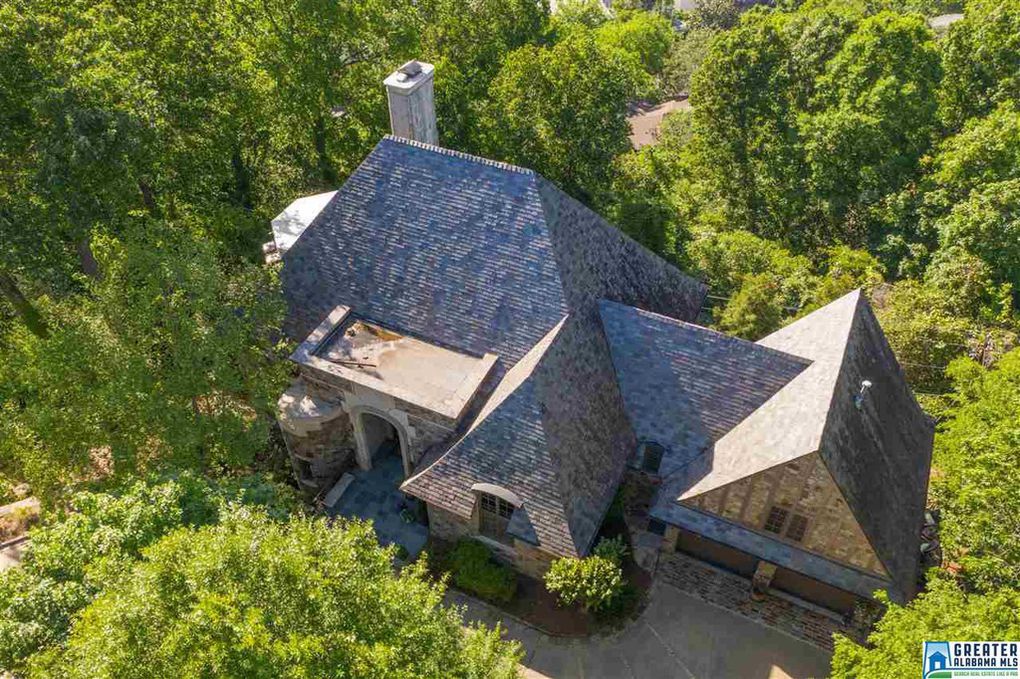
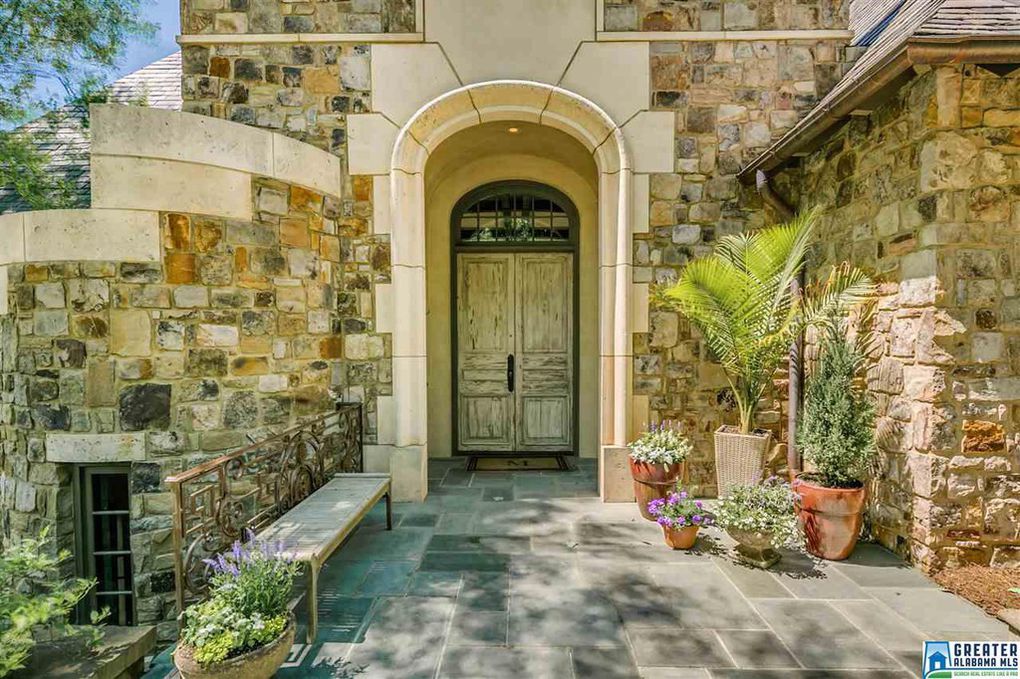
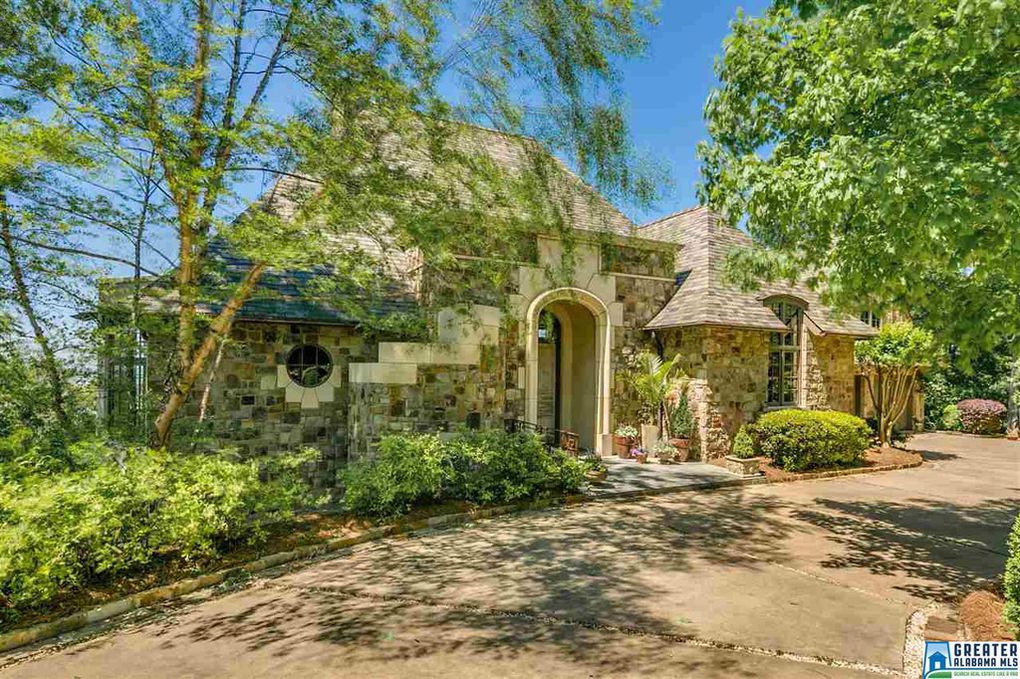
This home tour begins with a stunning stone exterior, custom windows, amazing curved rooflines, and incredible views.
Vampire worthy stone home in BirminghamVampire worthy stone home in BirminghamVampire worthy stone home in BirminghamVampire worthy stone home in BirminghamVampire worthy stone home in BirminghamVampire worthy stone home in BirminghamVampire worthy stone home in BirminghamVampire worthy stone home in BirminghamVampire worthy stone home in BirminghamVampire worthy stone home in Birmingham
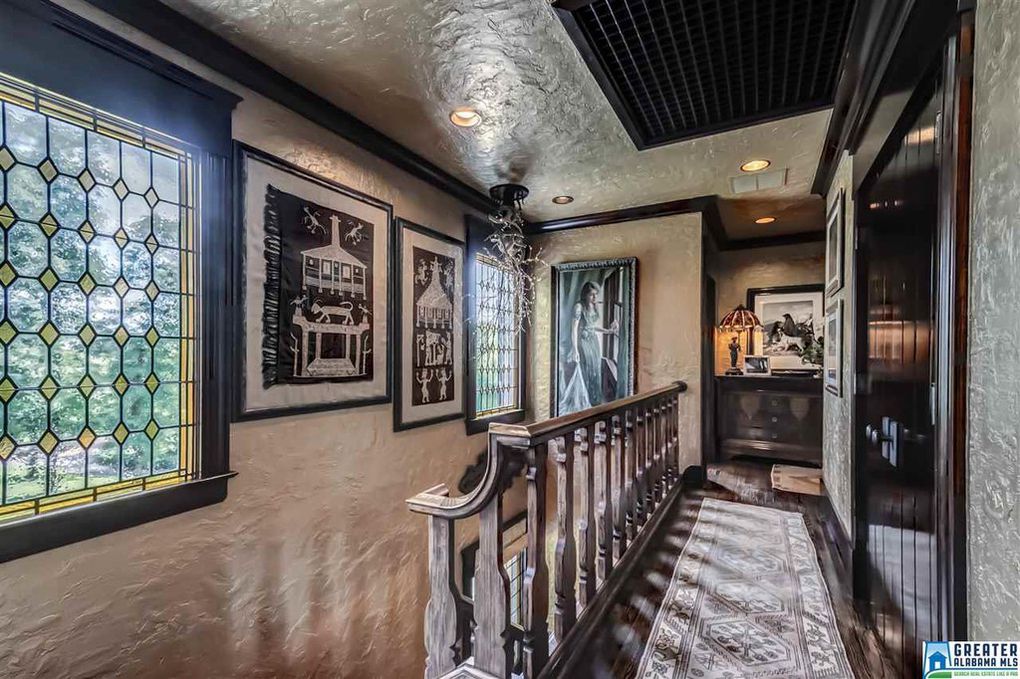
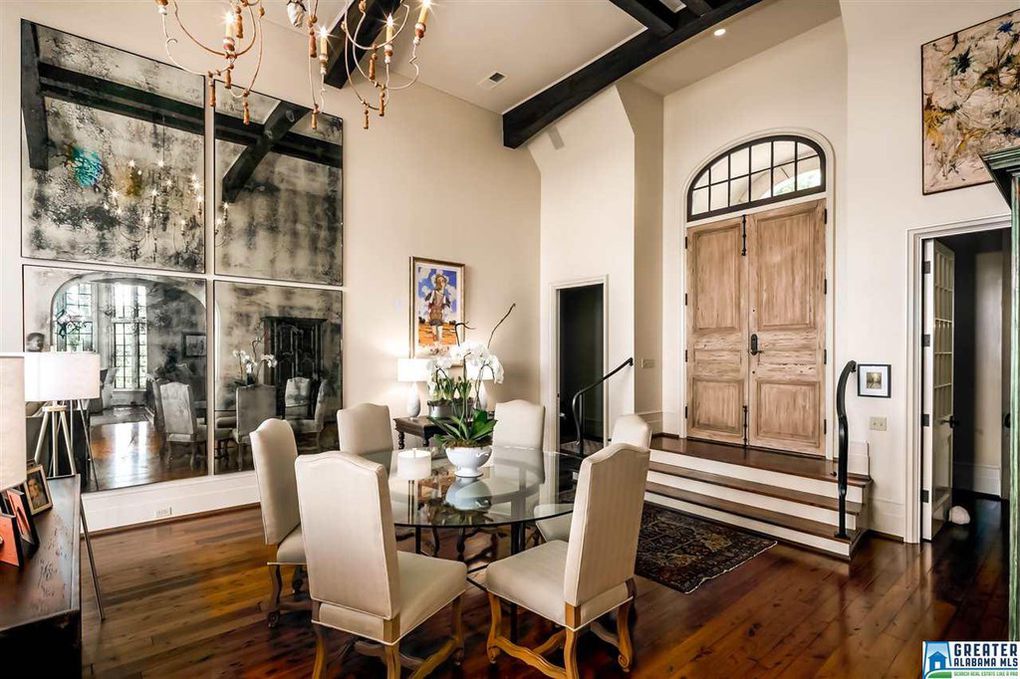
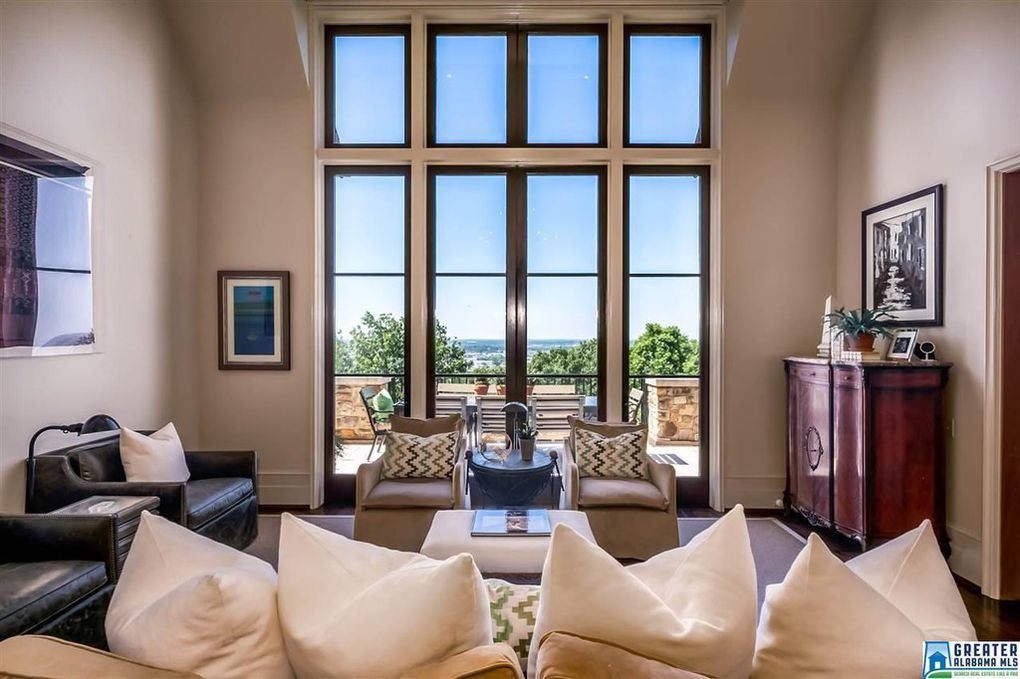
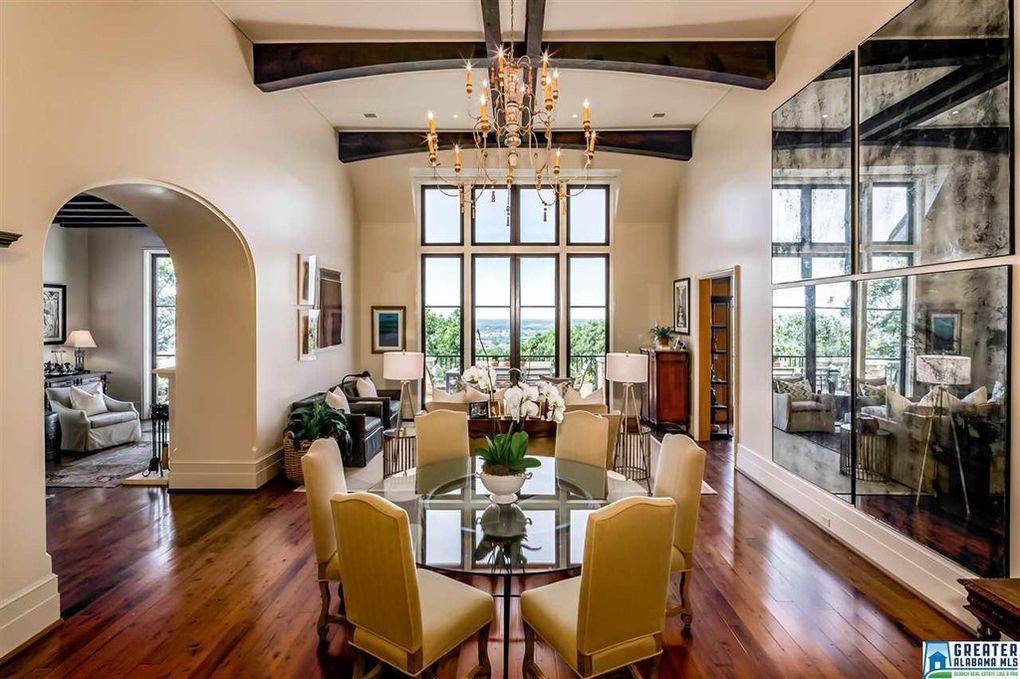
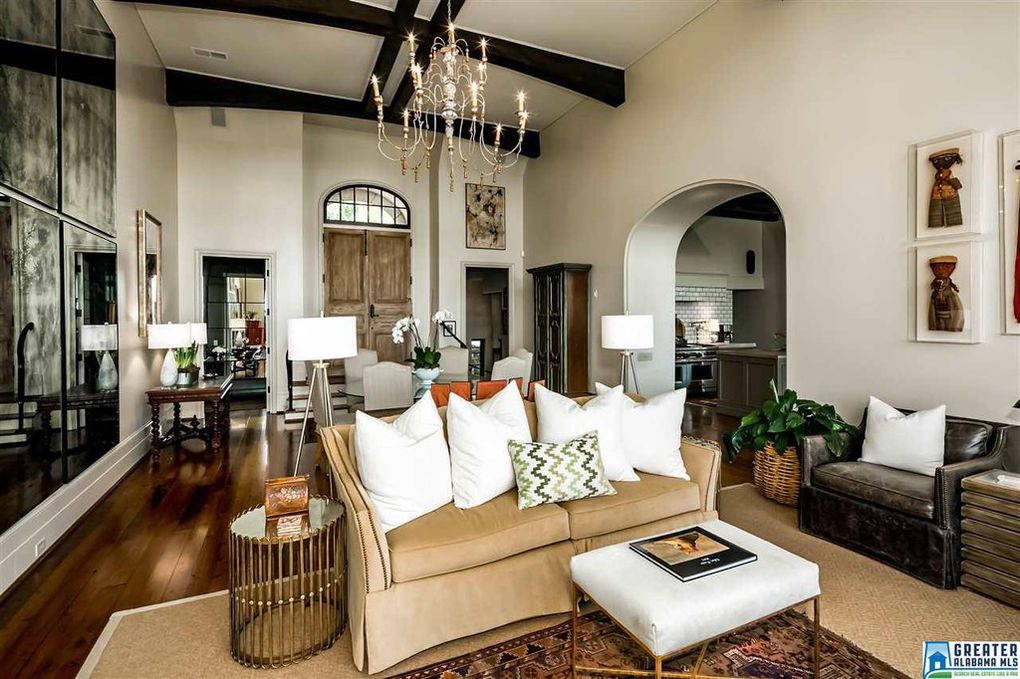
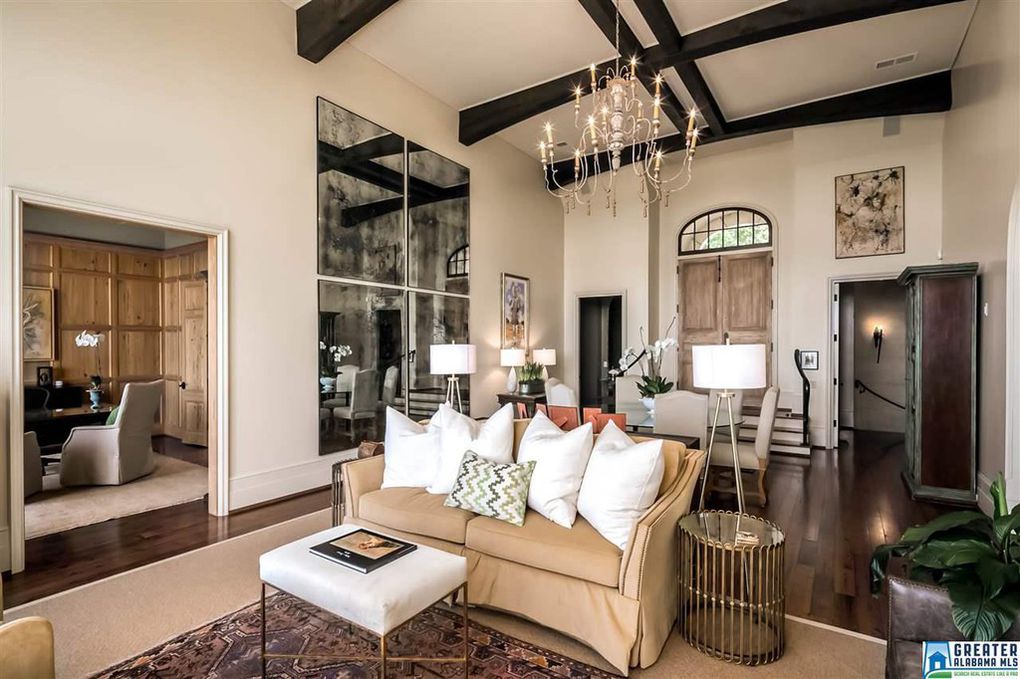
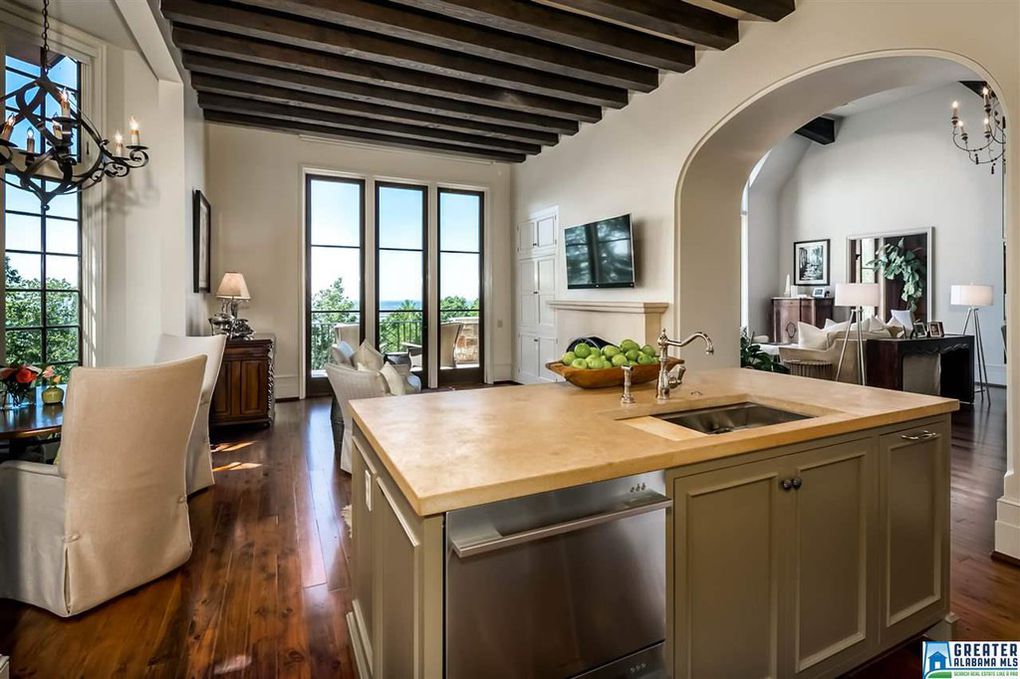
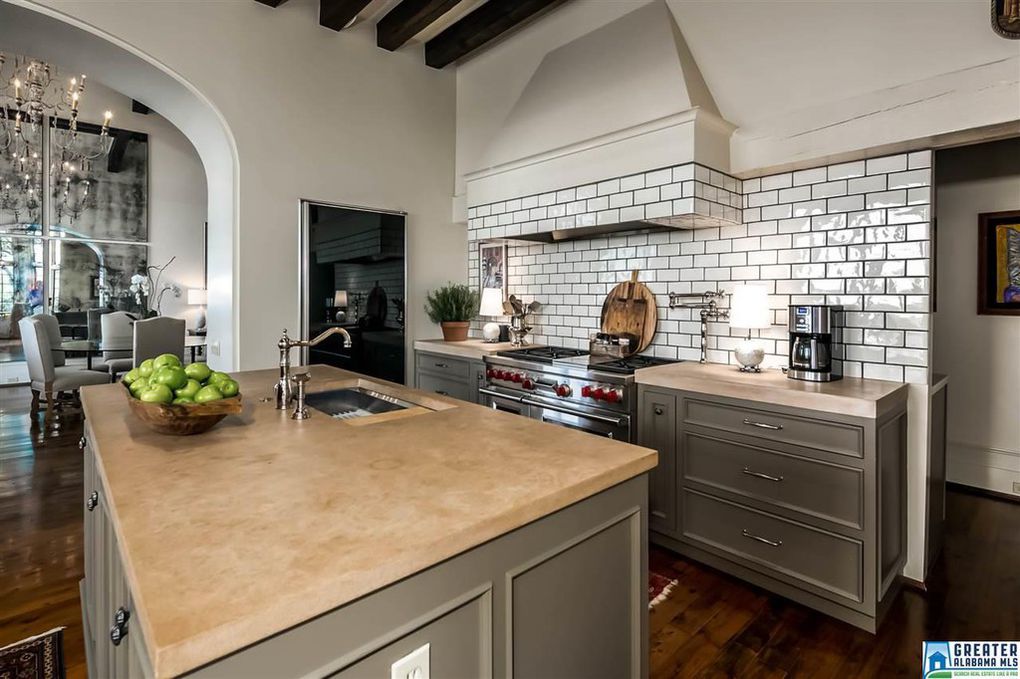
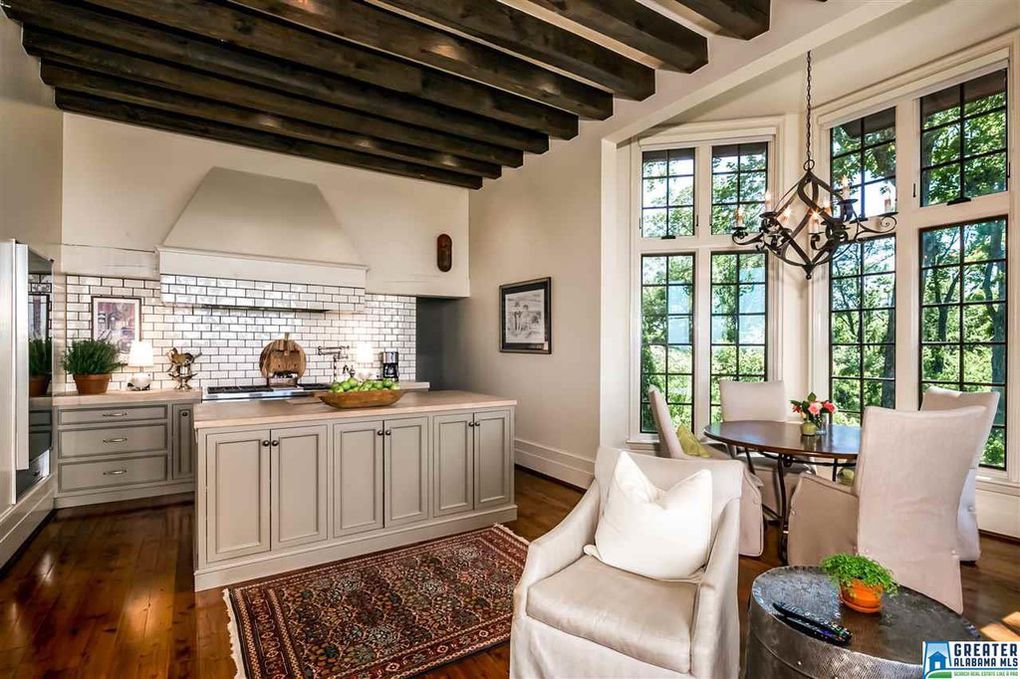
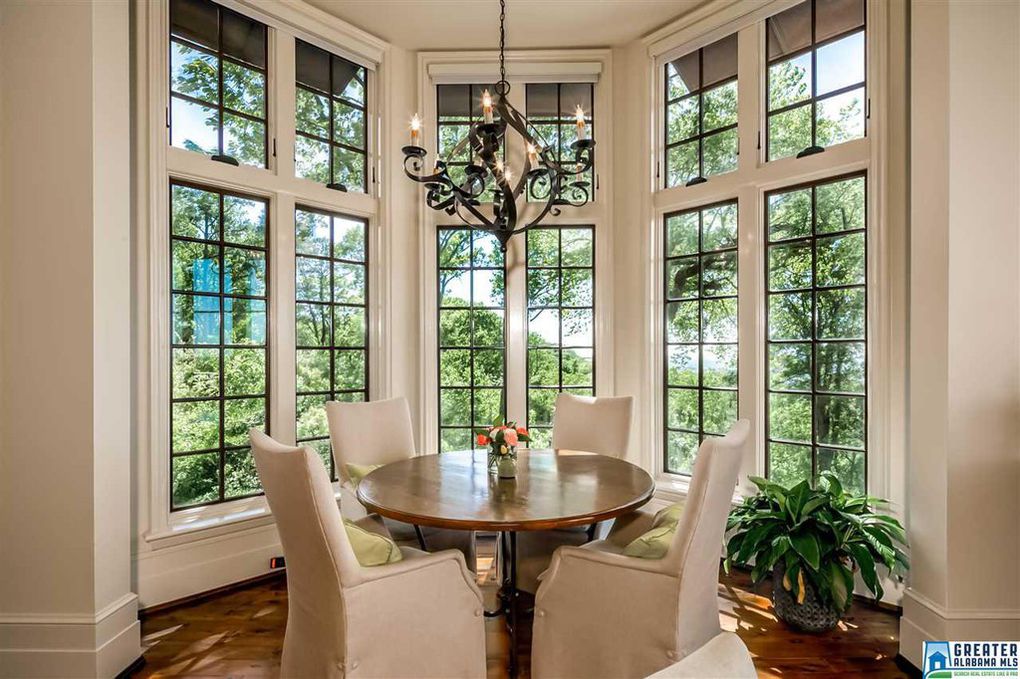
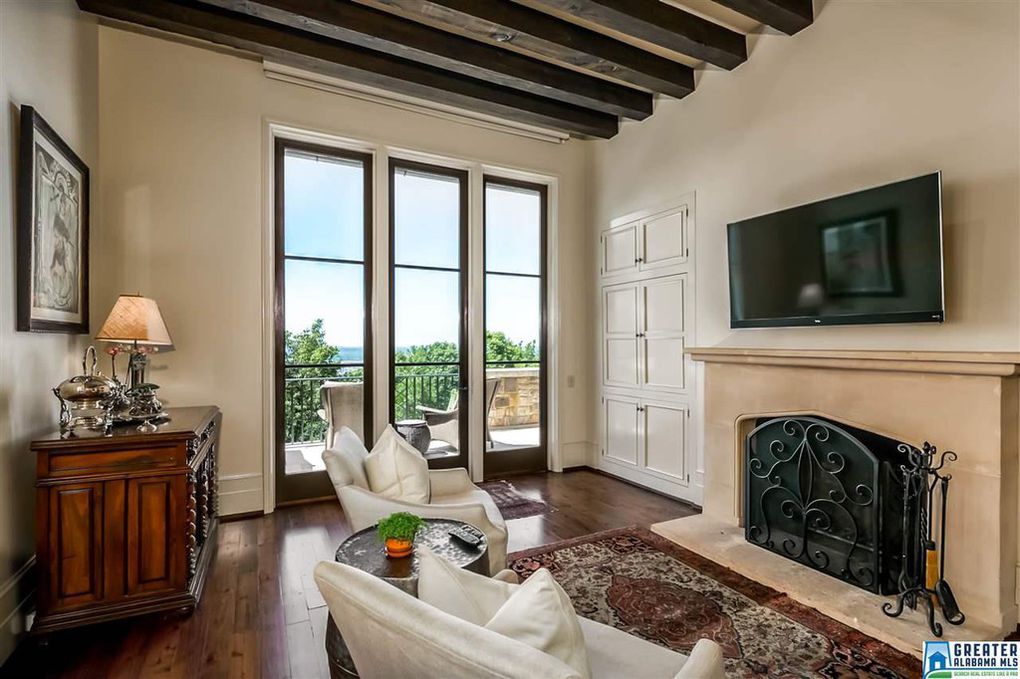
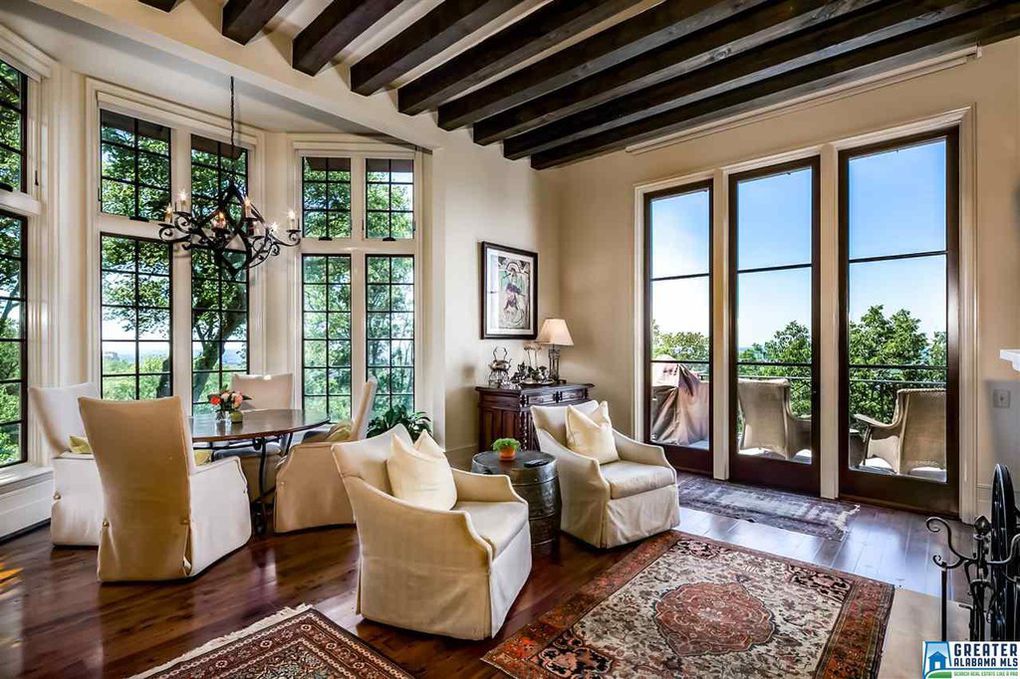
Inside, the common spaces are elegant and thoughtfully designed. Exposed beams, soaring ceilings, exquisite light fixtures, rich hardwood floors, and crisp clean lines define the home.
Vampire worthy stone home in BirminghamVampire worthy stone home in BirminghamVampire worthy stone home in BirminghamVampire worthy stone home in BirminghamVampire worthy stone home in BirminghamVampire worthy stone home in BirminghamVampire worthy stone home in BirminghamVampire worthy stone home in BirminghamVampire worthy stone home in BirminghamVampire worthy stone home in BirminghamVampire worthy stone home in BirminghamVampire worthy stone home in BirminghamVampire worthy stone home in BirminghamVampire worthy stone home in BirminghamVampire worthy stone home in BirminghamVampire worthy stone home in Birmingham
The master suite is generously sized and features a flowing and open floor plan. It’s absolutely stunning.
Vampire worthy stone home in BirminghamVampire worthy stone home in BirminghamVampire worthy stone home in BirminghamVampire worthy stone home in Birmingham
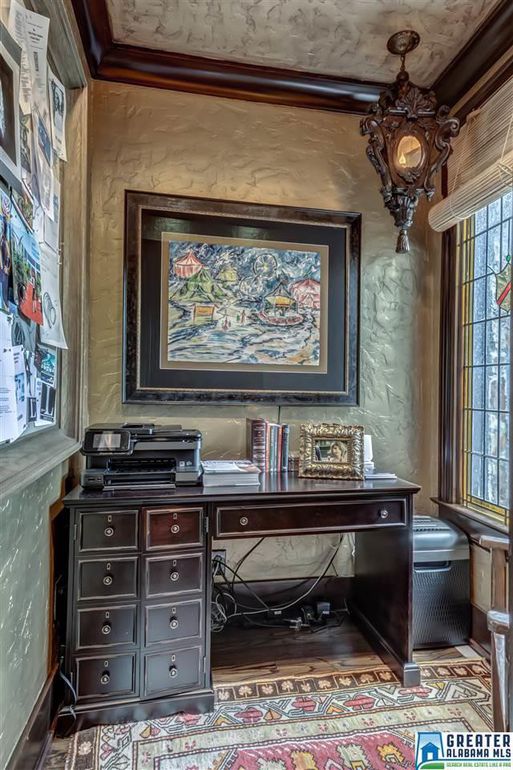
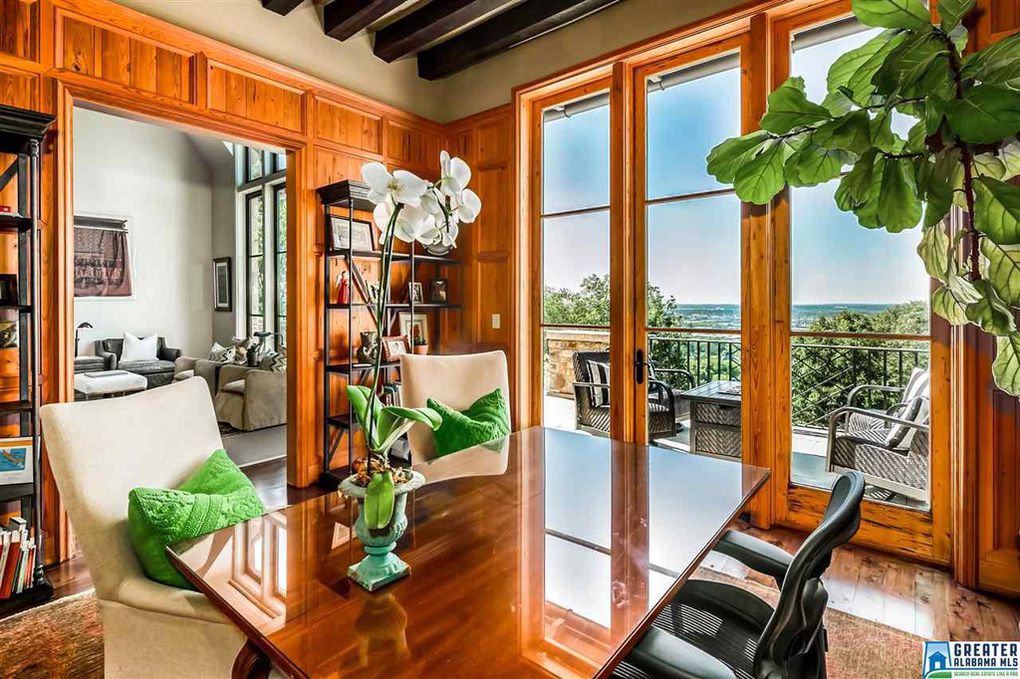
The home office is absolutely dreamy and filled with light.
Vampire worthy stone home in BirminghamVampire worthy stone home in Birmingham
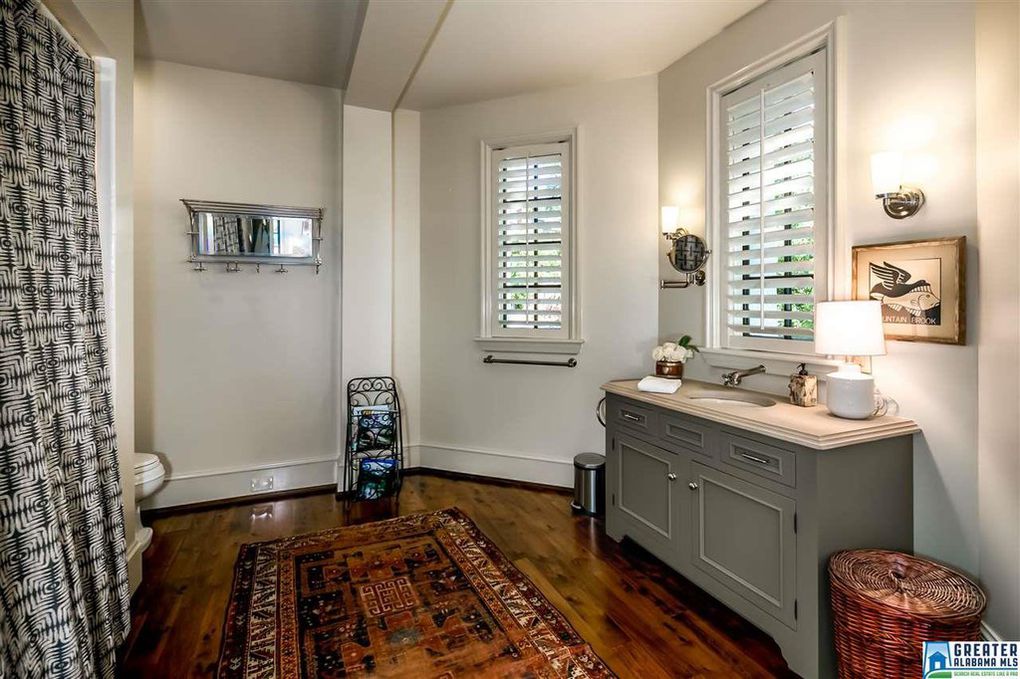
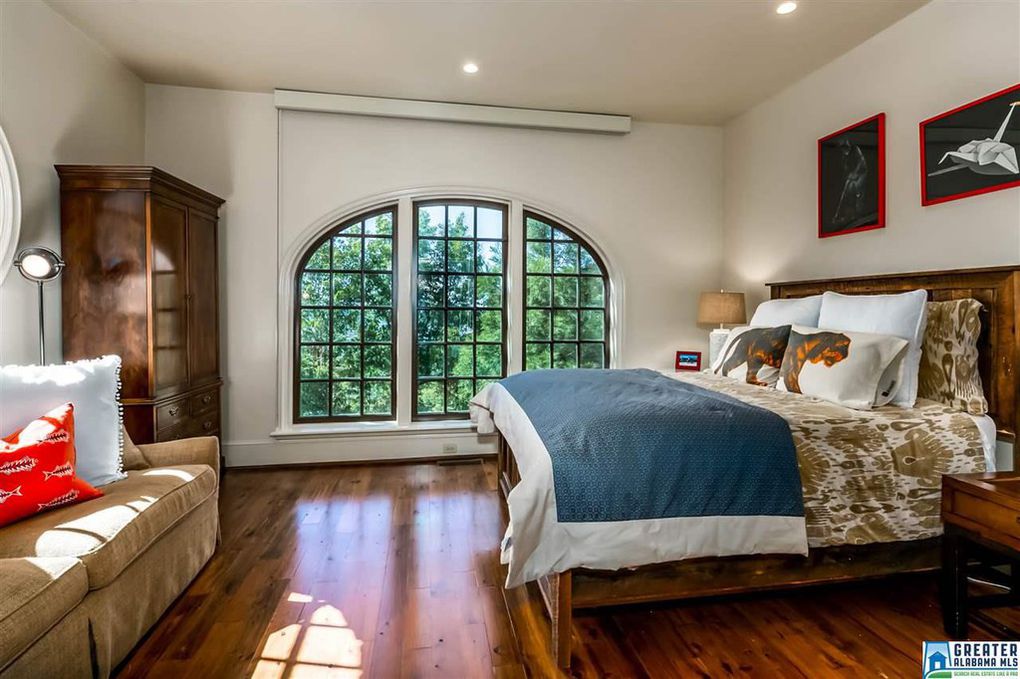
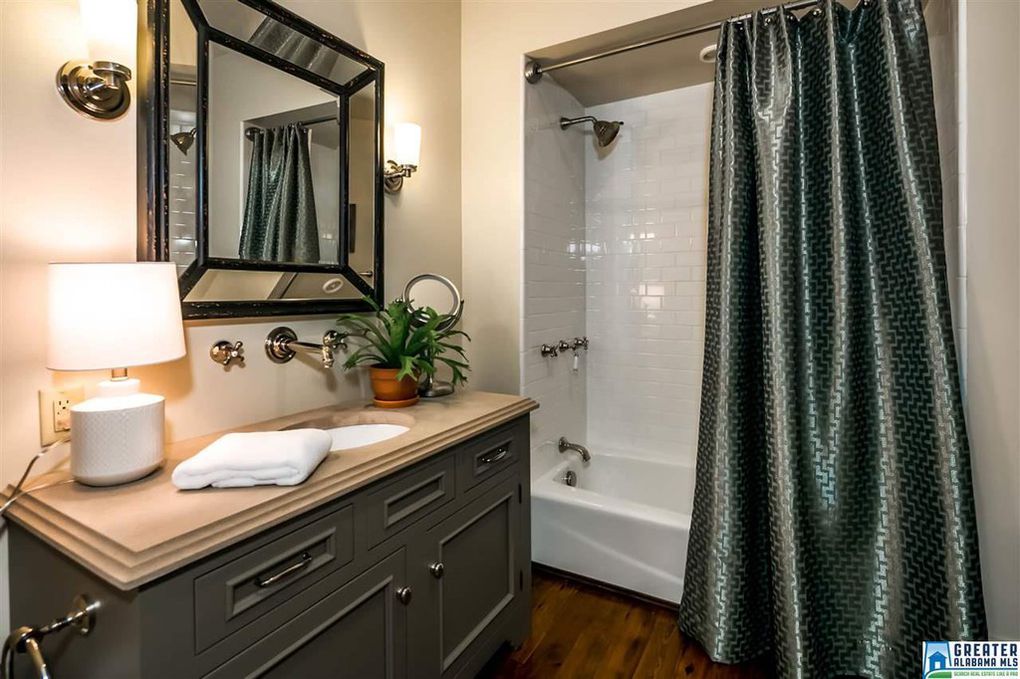
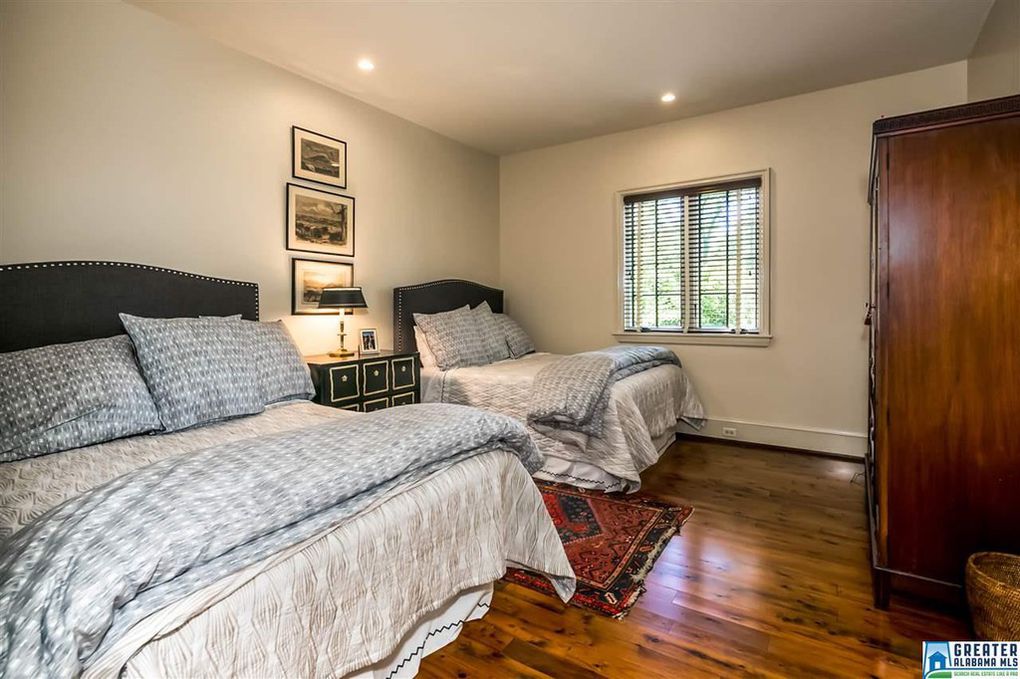
Guest spaces are welcoming and luxurious.
Vampire worthy stone home in BirminghamVampire worthy stone home in Birmingham
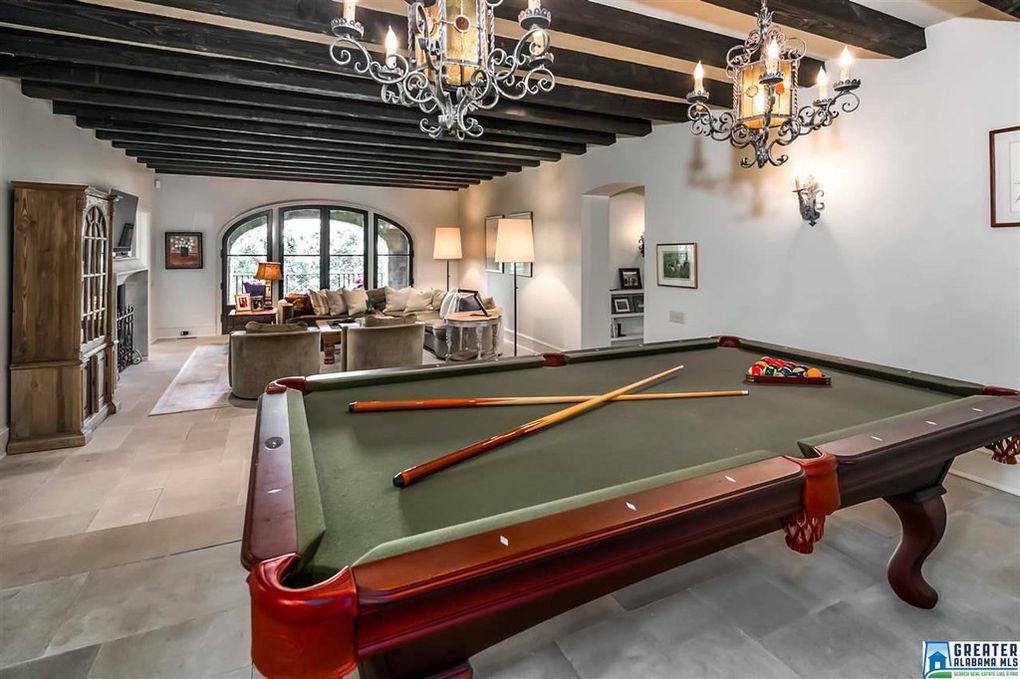
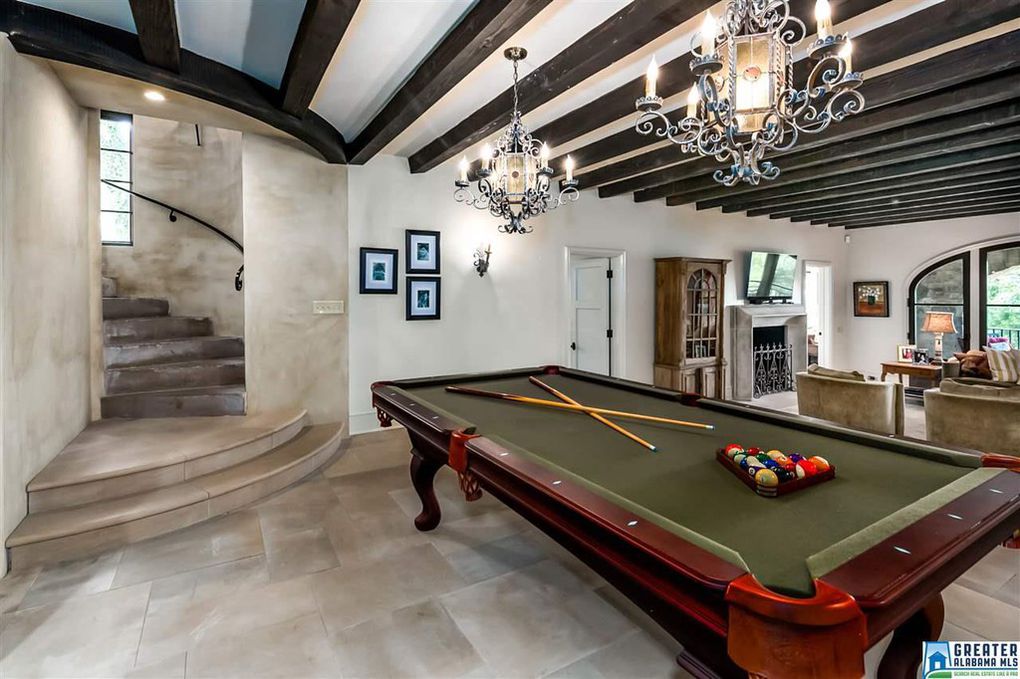
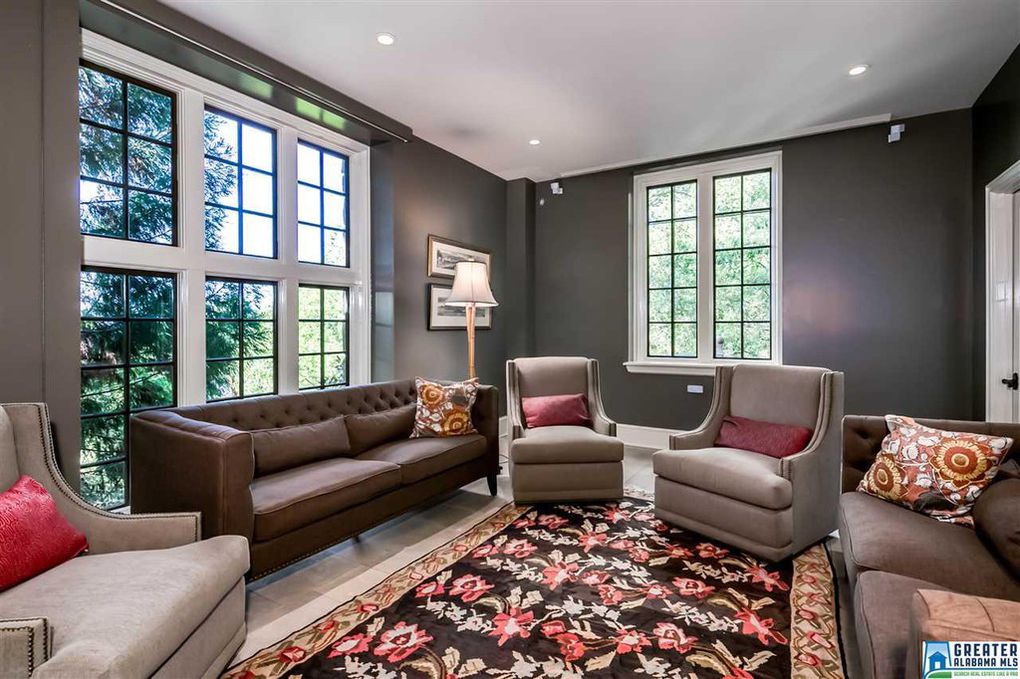
The downstairs entertaining areas are my favorite part of the house and are just as beautiful as the upstairs.
Vampire worthy stone home in BirminghamVampire worthy stone home in BirminghamVampire worthy stone home in BirminghamVampire worthy stone home in Birmingham
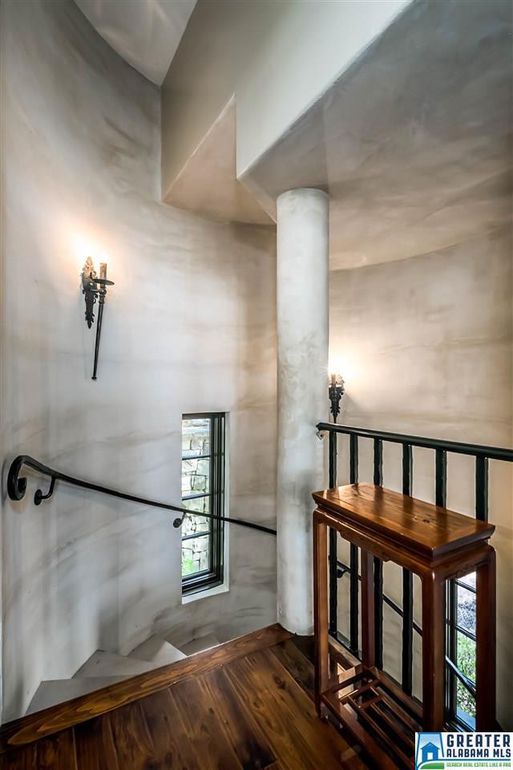
More stunning spaces:
Vampire worthy stone home in BirminghamVampire worthy stone home in BirminghamVampire worthy stone home in BirminghamVampire worthy stone home in BirminghamVampire worthy stone home in BirminghamVampire worthy stone home in Birmingham
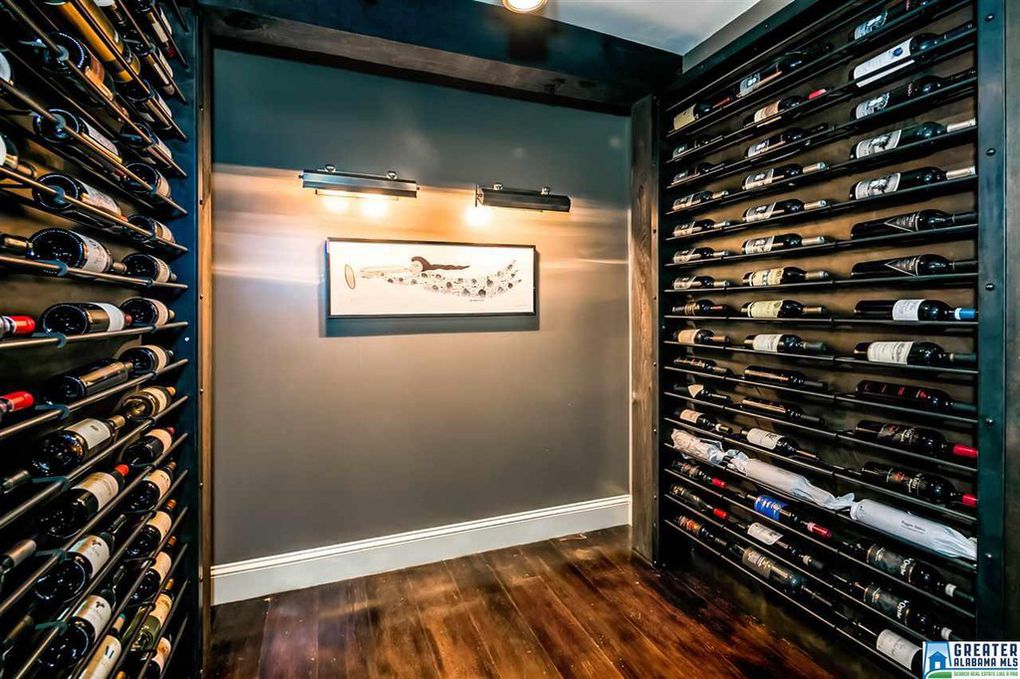
And what entertaining mecca is complete without a fantastic wine cellar?
Vampire worthy stone home in BirminghamVampire worthy stone home in Birmingham
How much would you pay for a place this awesome? Let us know what you think in the comments below!
Thanks for hanging out and check out more of our projects and DIY on our blog. Cheers!
*Legal stuff:
I am honest about my experiences with different products and write because I enjoy it. I do however, have the opportunity to earn money for my writing, also.
Slavetodiy.com is a participant in the Amazon Services LLC Associates Program, an affiliate advertising program designed to provide a means for sites to earn advertising fees by advertising and linking to amazon.com. Amazon offers a small commission on products sold through their affiliate links. Each of your purchases via our Amazon affiliation links supports our cause at no additional cost to you.
If a blogger links to an Amazon product (with a special code for affiliates embedded in the link), and a reader places an item in their “shopping cart” through that link within 24 hours of clicking the link, the blogger gets a small percentage of the sale. Amazon links are not “pay per click.” If you click on the product link and stay around Amazon and purchase something else, however, I will get a commission on that sale.
Slavetodiy.com is also a VigLink affiliate advertiser which works similarly.
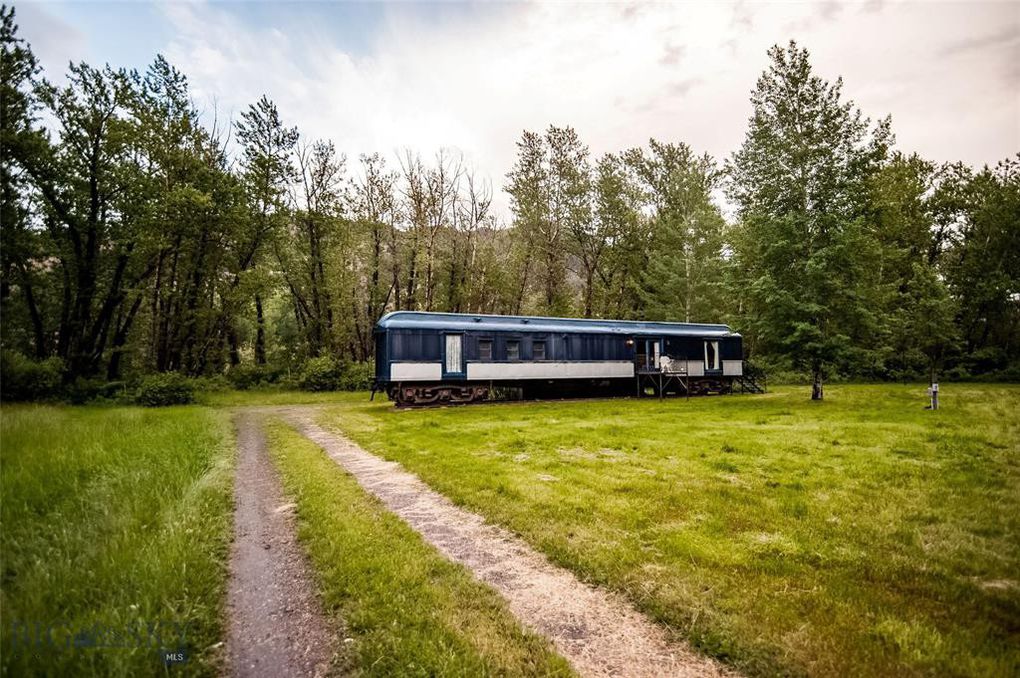
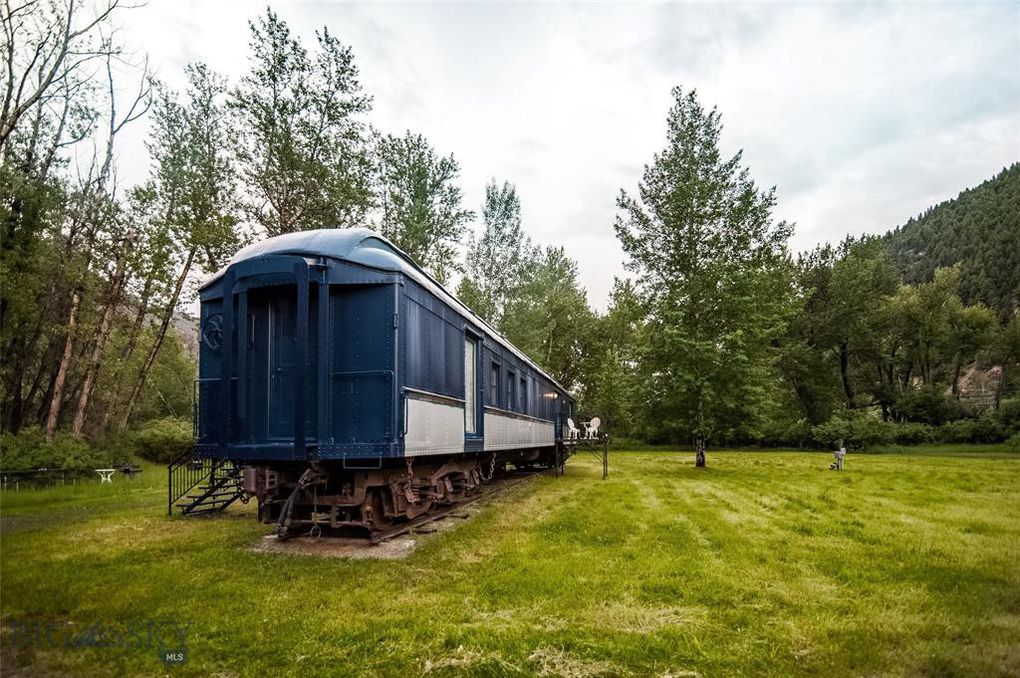
What if there was a place, a magical place, where you could go to be alone? A Victorian era train car, beautifully restored and sitting on 13 acres on the Yellowstone River, just outside of Yellowstone National Park is on the market for just under $800k. It is currently used as a vacation rental, so either way, wouldn’t it be cool to stay there?
*This post may contain affiliate links. Please see full disclosure at the end of the post.
This is listed through Greg Smith at PureWest Real Estate (406-586-9418) and photo credits go to the listing agent.
Check it out, it’s awesome:
House Porn: Restored Train Car Near Yellowstone National Park
It’s just so NEAT. And private, I might add. What a great weekend getaway.
House Porn: Restored Train Car Near Yellowstone National Park
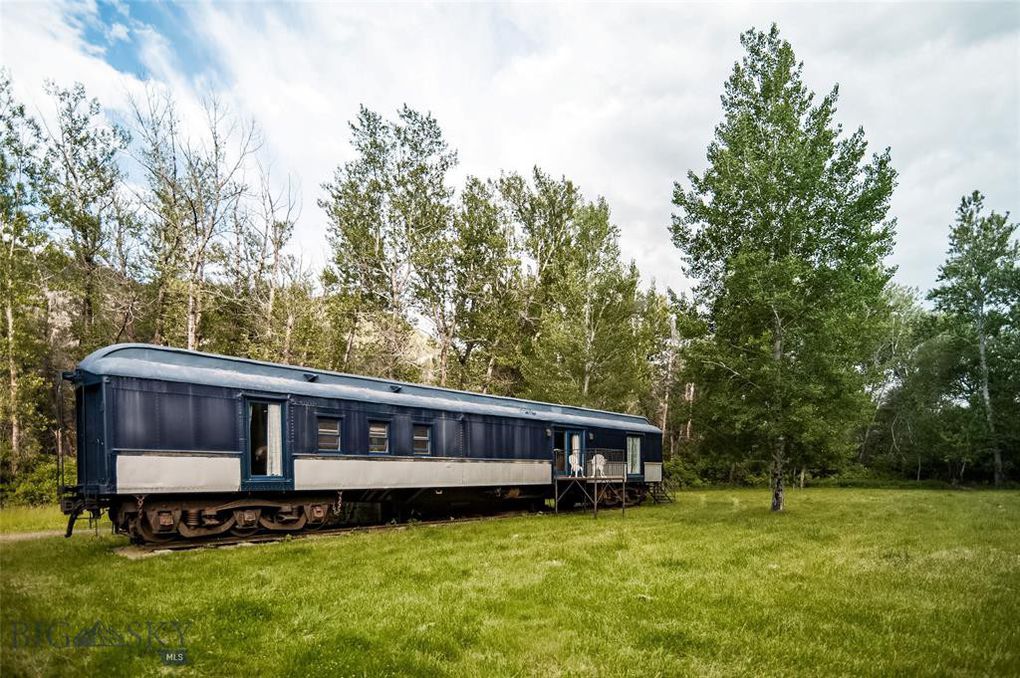
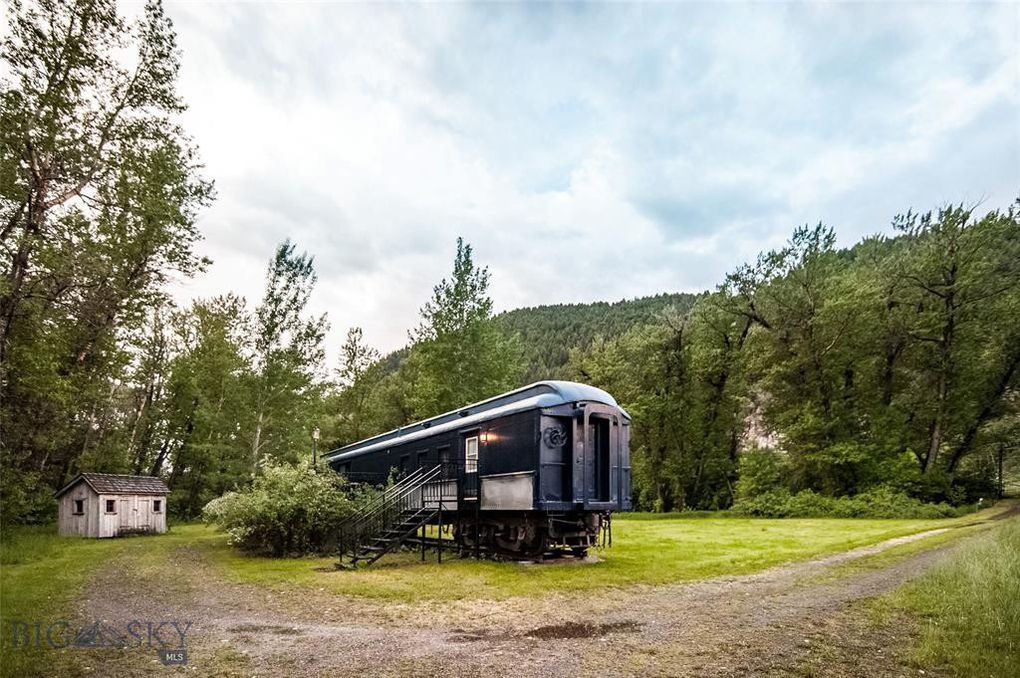
I love that the exterior has been maintained to still look like a working train car.
House Porn: Restored Train Car Near Yellowstone National Park
I would absolutely have to have pictures hanging off the back like I’m about to jump from a moving train.
House Porn: Restored Train Car Near Yellowstone National Park
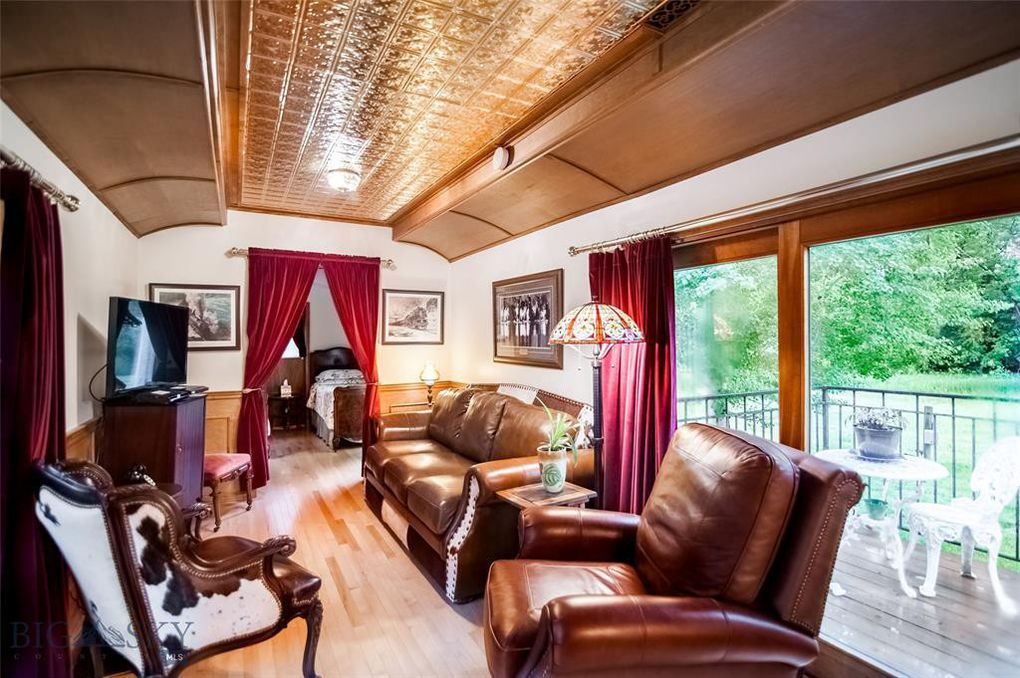
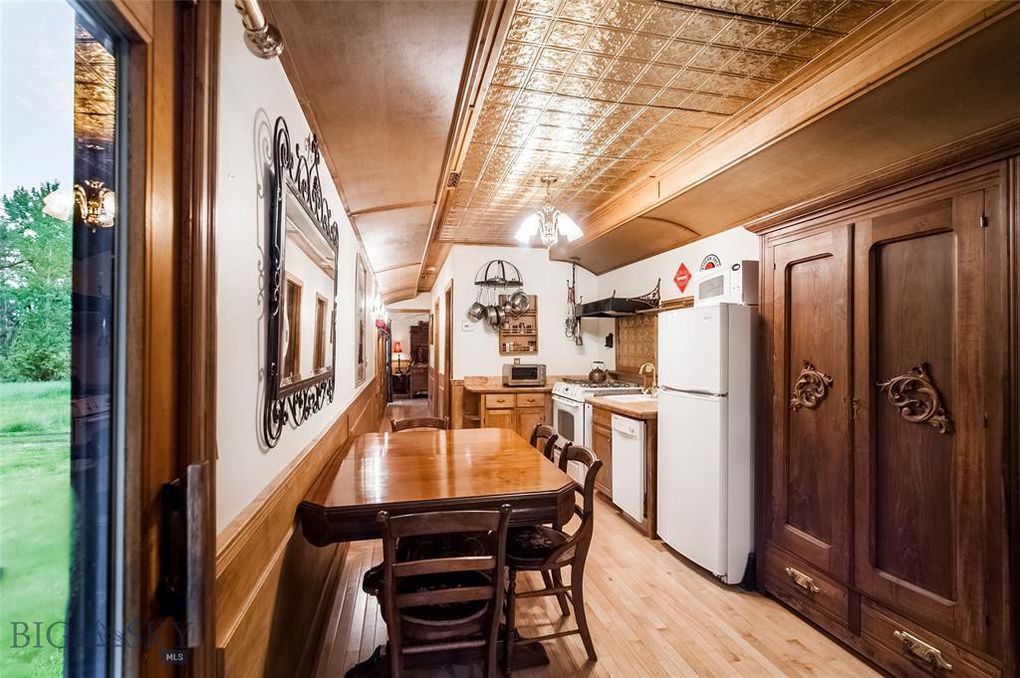
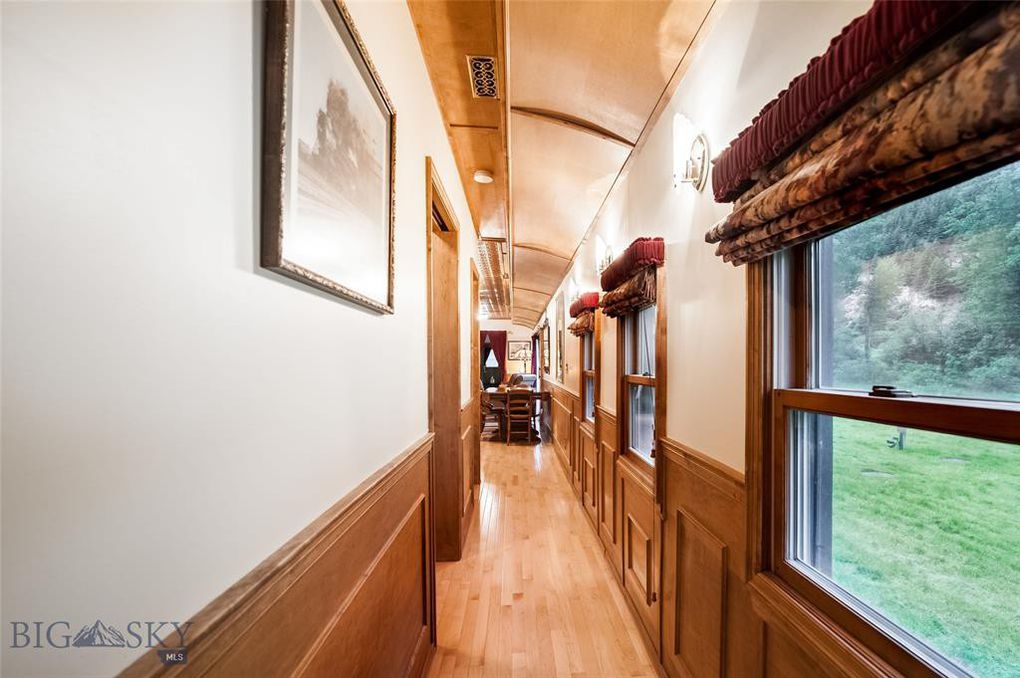
Every space inside is thoughtfully and luxuriously appointed. Supple leather and Victorian era (I love the cowhide!) pressed tin ceilings, period real wood wainscoting, and rich velvet curtains. The black and white train photos are a perfect addition.
House Porn: Restored Train Car Near Yellowstone National Park
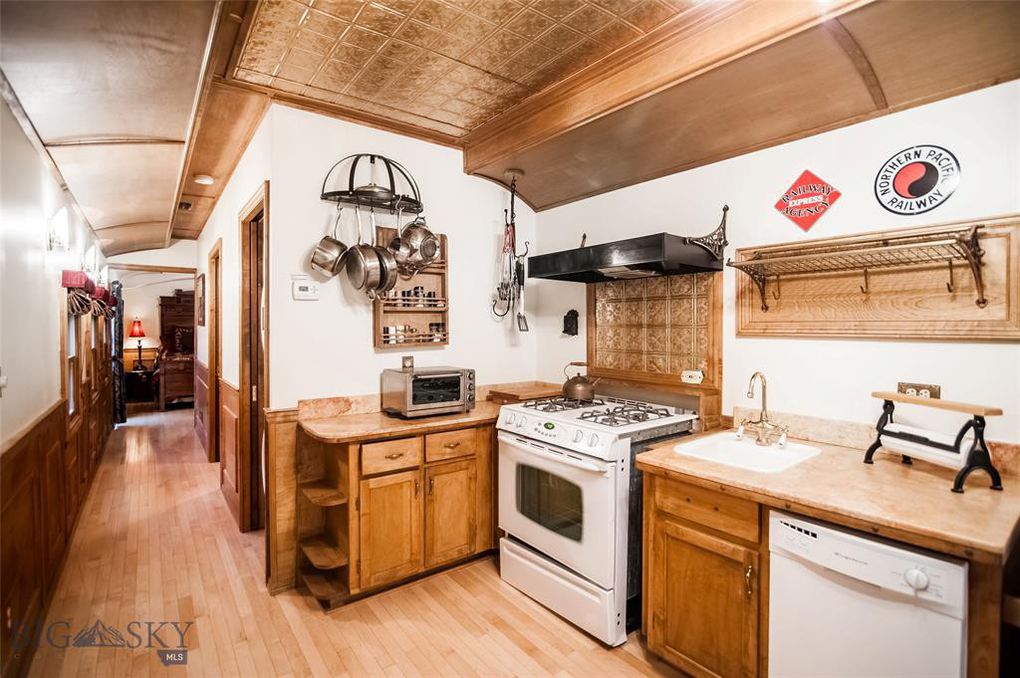
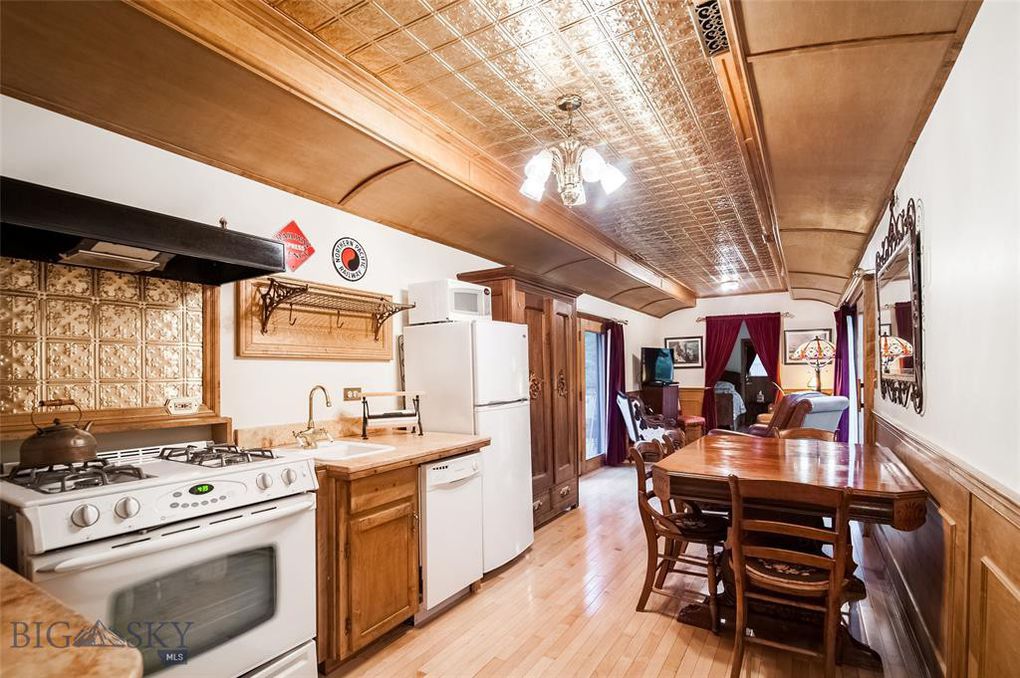
Add a right-sized kitchenette with a full size stove and a gorgeous hand carved pantry cabinet.
House Porn: Restored Train Car Near Yellowstone National Park
Yes, this kitchen is adorable.
House Porn: Restored Train Car Near Yellowstone National Park
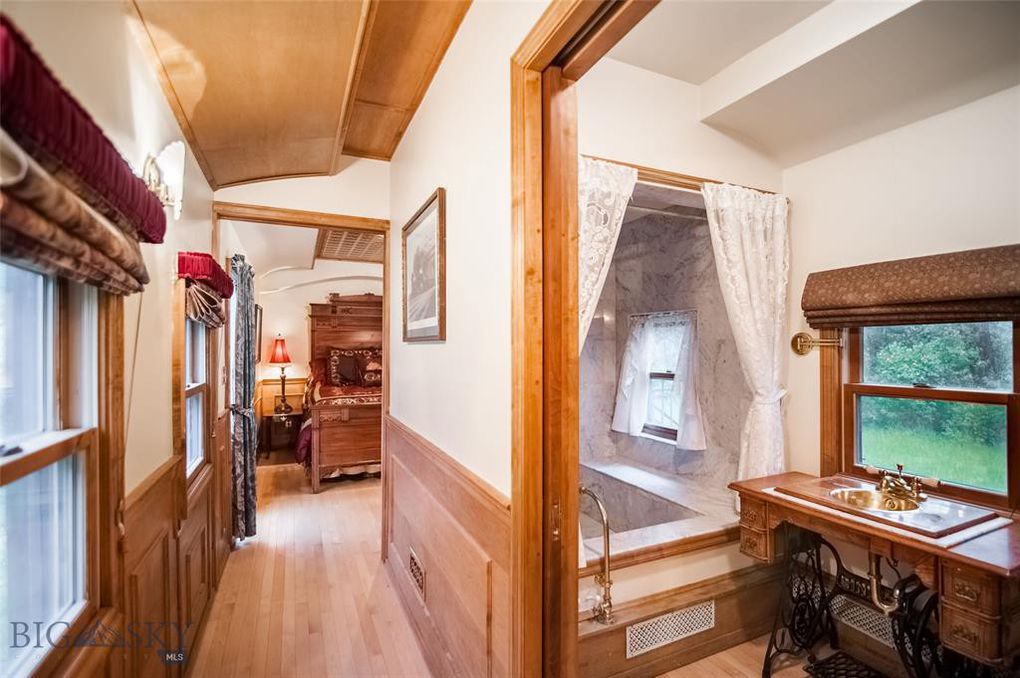
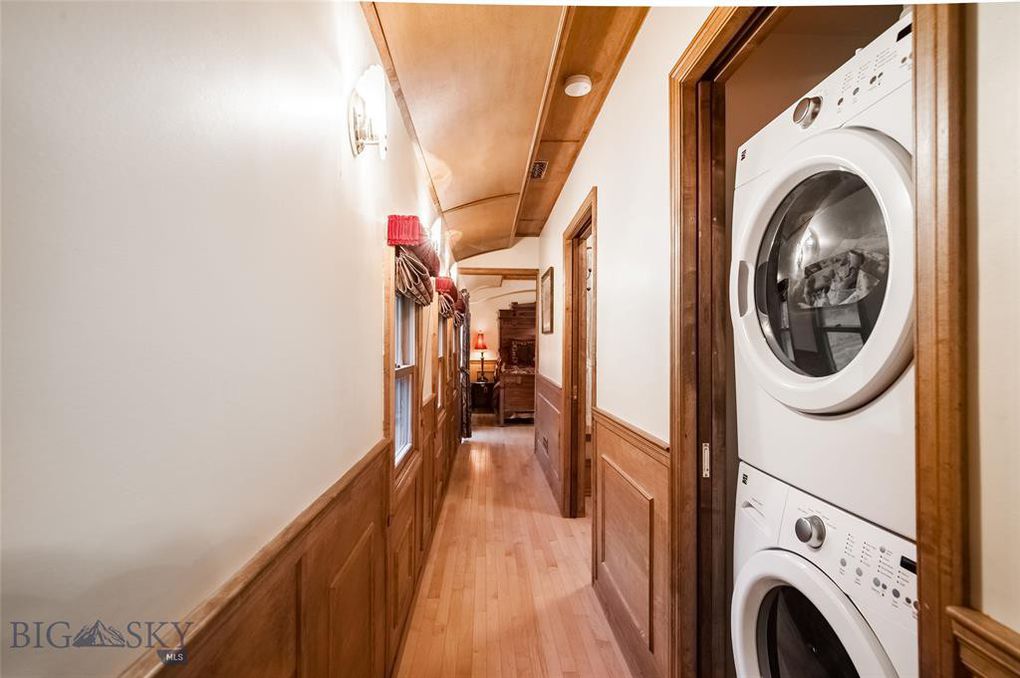
I love the layout with the spaces nice and open to keep it from feeling too tight.
House Porn: Restored Train Car Near Yellowstone National Park
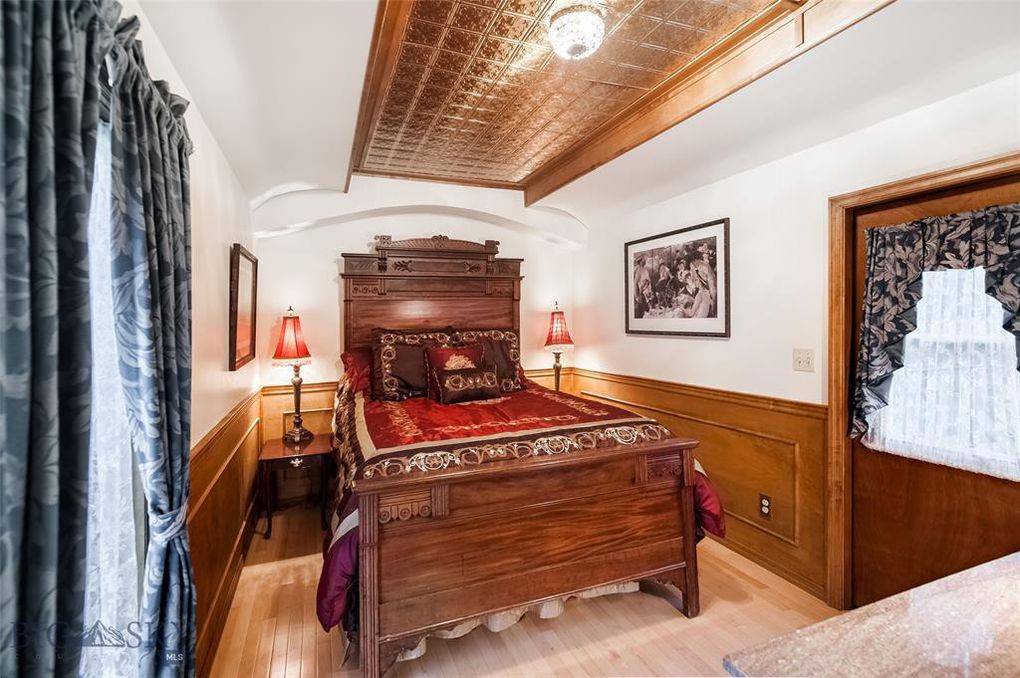
The master is perfect, with the details continued throughout the whole space. An antique bed and lamps are exquisite.
House Porn: Restored Train Car Near Yellowstone National Park
House Porn: Restored Train Car Near Yellowstone National Park
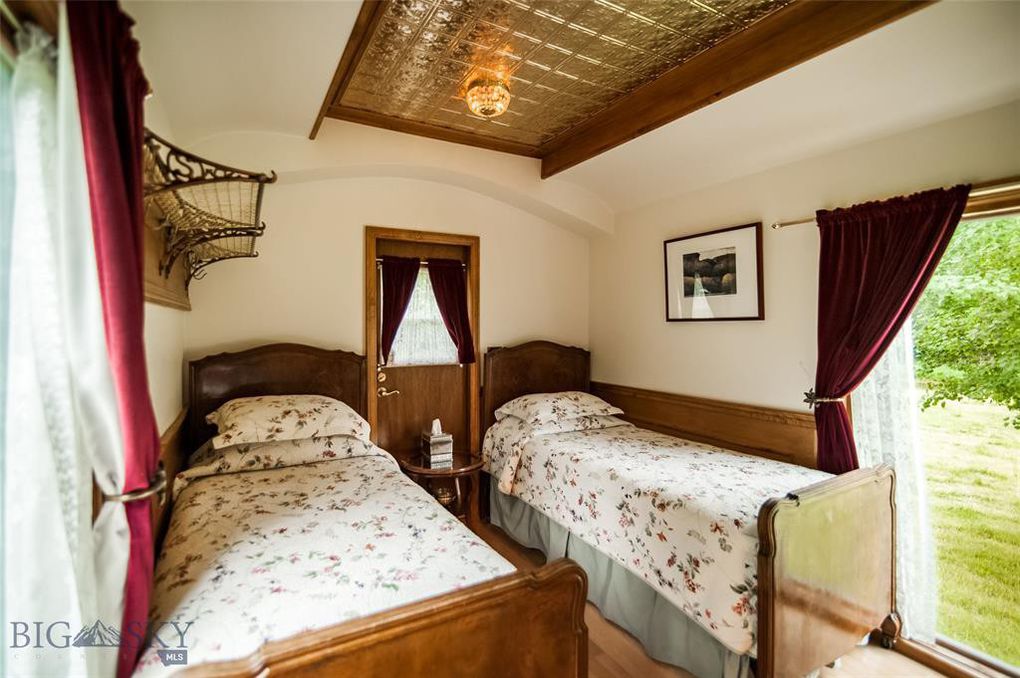
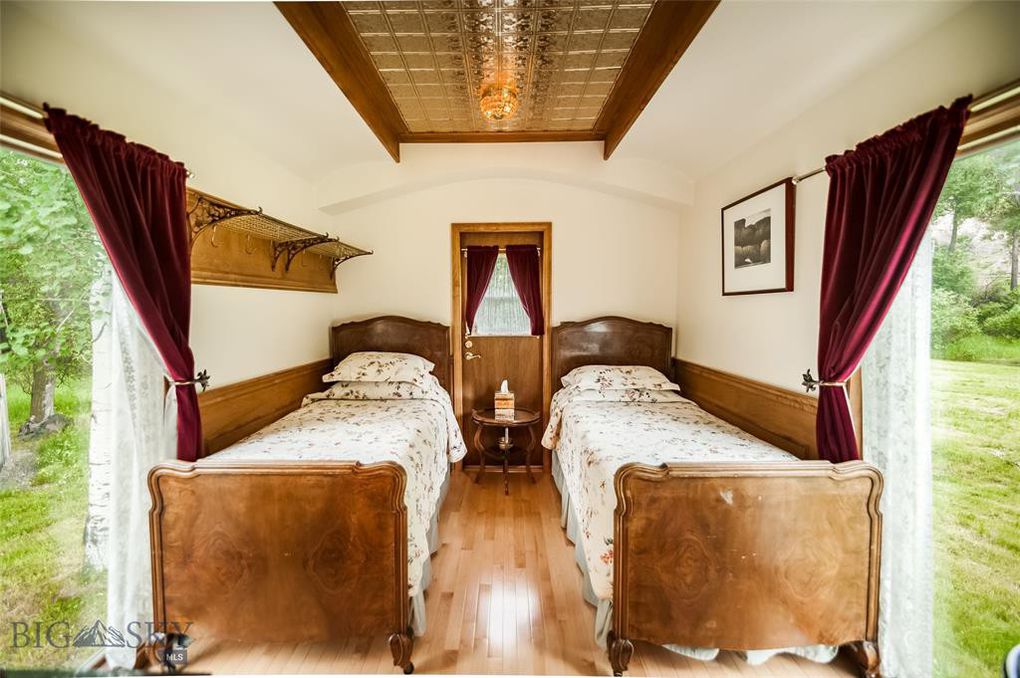
The second bedroom is separated from the living room by velvet drapes and sits at the opposite end from the Master suite for maximum privacy.
House Porn: Restored Train Car Near Yellowstone National Park
House Porn: Restored Train Car Near Yellowstone National Park
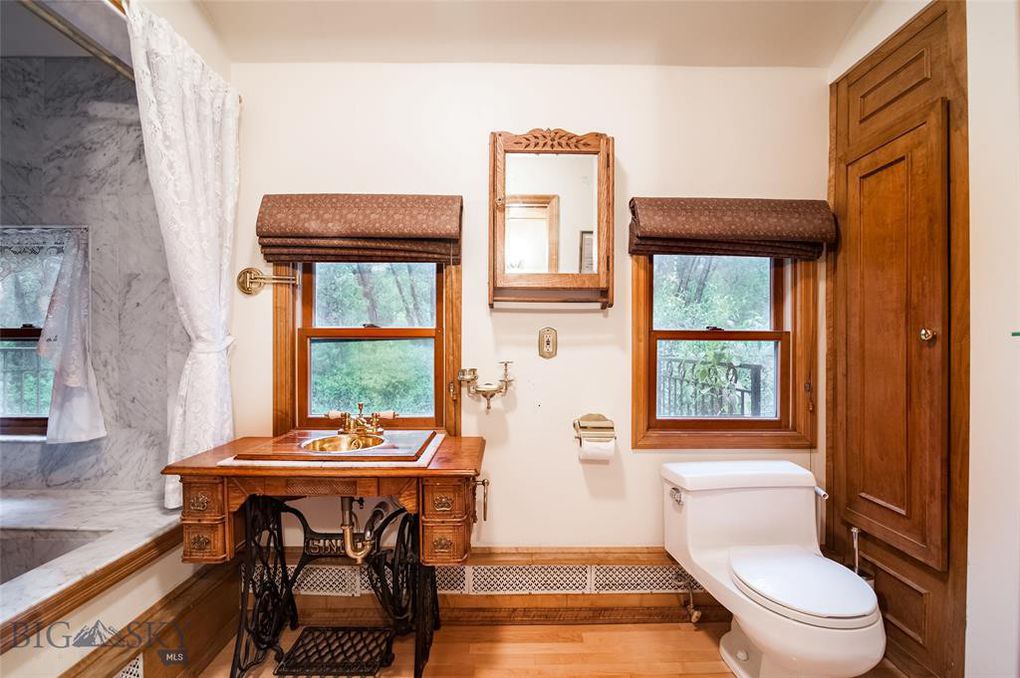
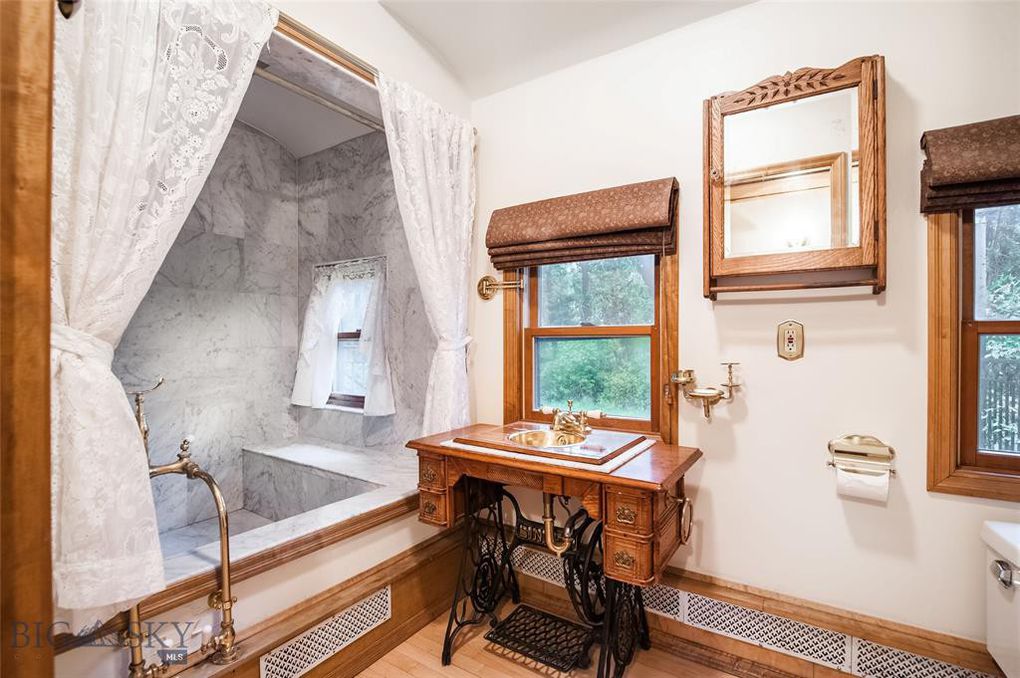
The bathroom is my favorite part of the house. Carrera marble and an antique sewing machine turned sink make for a fabulous bathroom suite.
House Porn: Restored Train Car Near Yellowstone National Park
House Porn: Restored Train Car Near Yellowstone National Park
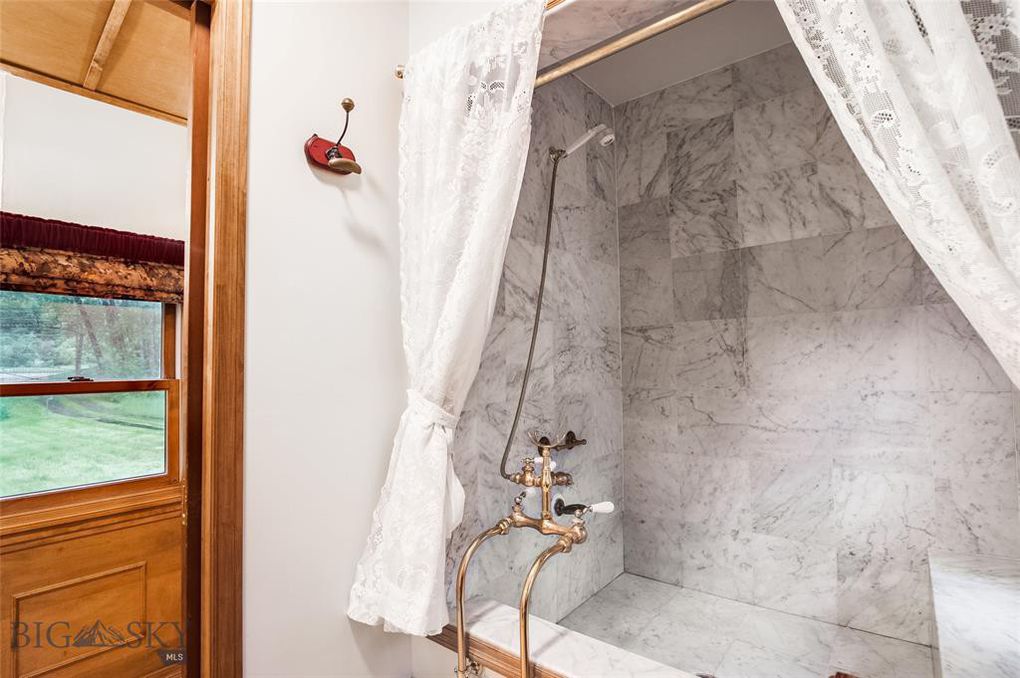
I love the historic repro fixtures in the shower/tub.
House Porn: Restored Train Car Near Yellowstone National Park
House Porn: Restored Train Car Near Yellowstone National Park
House Porn: Restored Train Car Near Yellowstone National Park
Almost as neat as the car itself is the location. Check out these gorgeous photos of the Yellowstone River and views of Yellowstone National Park:
House Porn: Restored Train Car Near Yellowstone National Park
House Porn: Restored Train Car Near Yellowstone National Park
House Porn: Restored Train Car Near Yellowstone National Park
House Porn: Restored Train Car Near Yellowstone National Park
House Porn: Restored Train Car Near Yellowstone National Park
House Porn: Restored Train Car Near Yellowstone National Park
House Porn: Restored Train Car Near Yellowstone National Park
House Porn: Restored Train Car Near Yellowstone National Park
House Porn: Restored Train Car Near Yellowstone National Park
House Porn: Restored Train Car Near Yellowstone National Park
House Porn: Restored Train Car Near Yellowstone National Park
House Porn: Restored Train Car Near Yellowstone National Park
House Porn: Restored Train Car Near Yellowstone National Park
House Porn: Restored Train Car Near Yellowstone National Park
House Porn: Restored Train Car Near Yellowstone National Park
Life doesn’t get much better than a one-of-a-kind hideaway near some of our country’s most beautiful scenery. I’m dreaming of a snowy weekend curled up with a cup of cocoa.
Thanks for hanging out! Check out more fun content on our blog! Cheers!
*Legal stuff:
I am honest about my experiences with different products and write because I enjoy it. I do however, have the opportunity to earn money for my writing, also.
Slavetodiy.com is a participant in the Amazon Services LLC Associates Program, an affiliate advertising program designed to provide a means for sites to earn advertising fees by advertising and linking to amazon.com. Amazon offers a small commission on products sold through their affiliate links. Each of your purchases via our Amazon affiliation links supports our cause at no additional cost to you.
If a blogger links to an Amazon product (with a special code for affiliates embedded in the link), and a reader places an item in their “shopping cart” through that link within 24 hours of clicking the link, the blogger gets a small percentage of the sale. Amazon links are not “pay per click.” If you click on the product link and stay around Amazon and purchase something else, however, I will get a commission on that sale.
Slavetodiy.com is also a VigLink affiliate advertiser which works similarly.
I am super excited to be sharing our completed living room with you!!! It’s hard to believe that it’s come this far from where we started, but one of the reasons we bought this place was its overall improvability. I like everything customized MY way, and it’s nice not have to make any structural changes to achieve results, or to pay a higher price for a home that’s finished, but not necessarily what you would have chosen. So, now we have EXACTLY what I wanted and it turned out even better than I dreamed. See the complete source list below each photo!
*This post may contain affiliate links. Please see full disclosure at the end of the post.
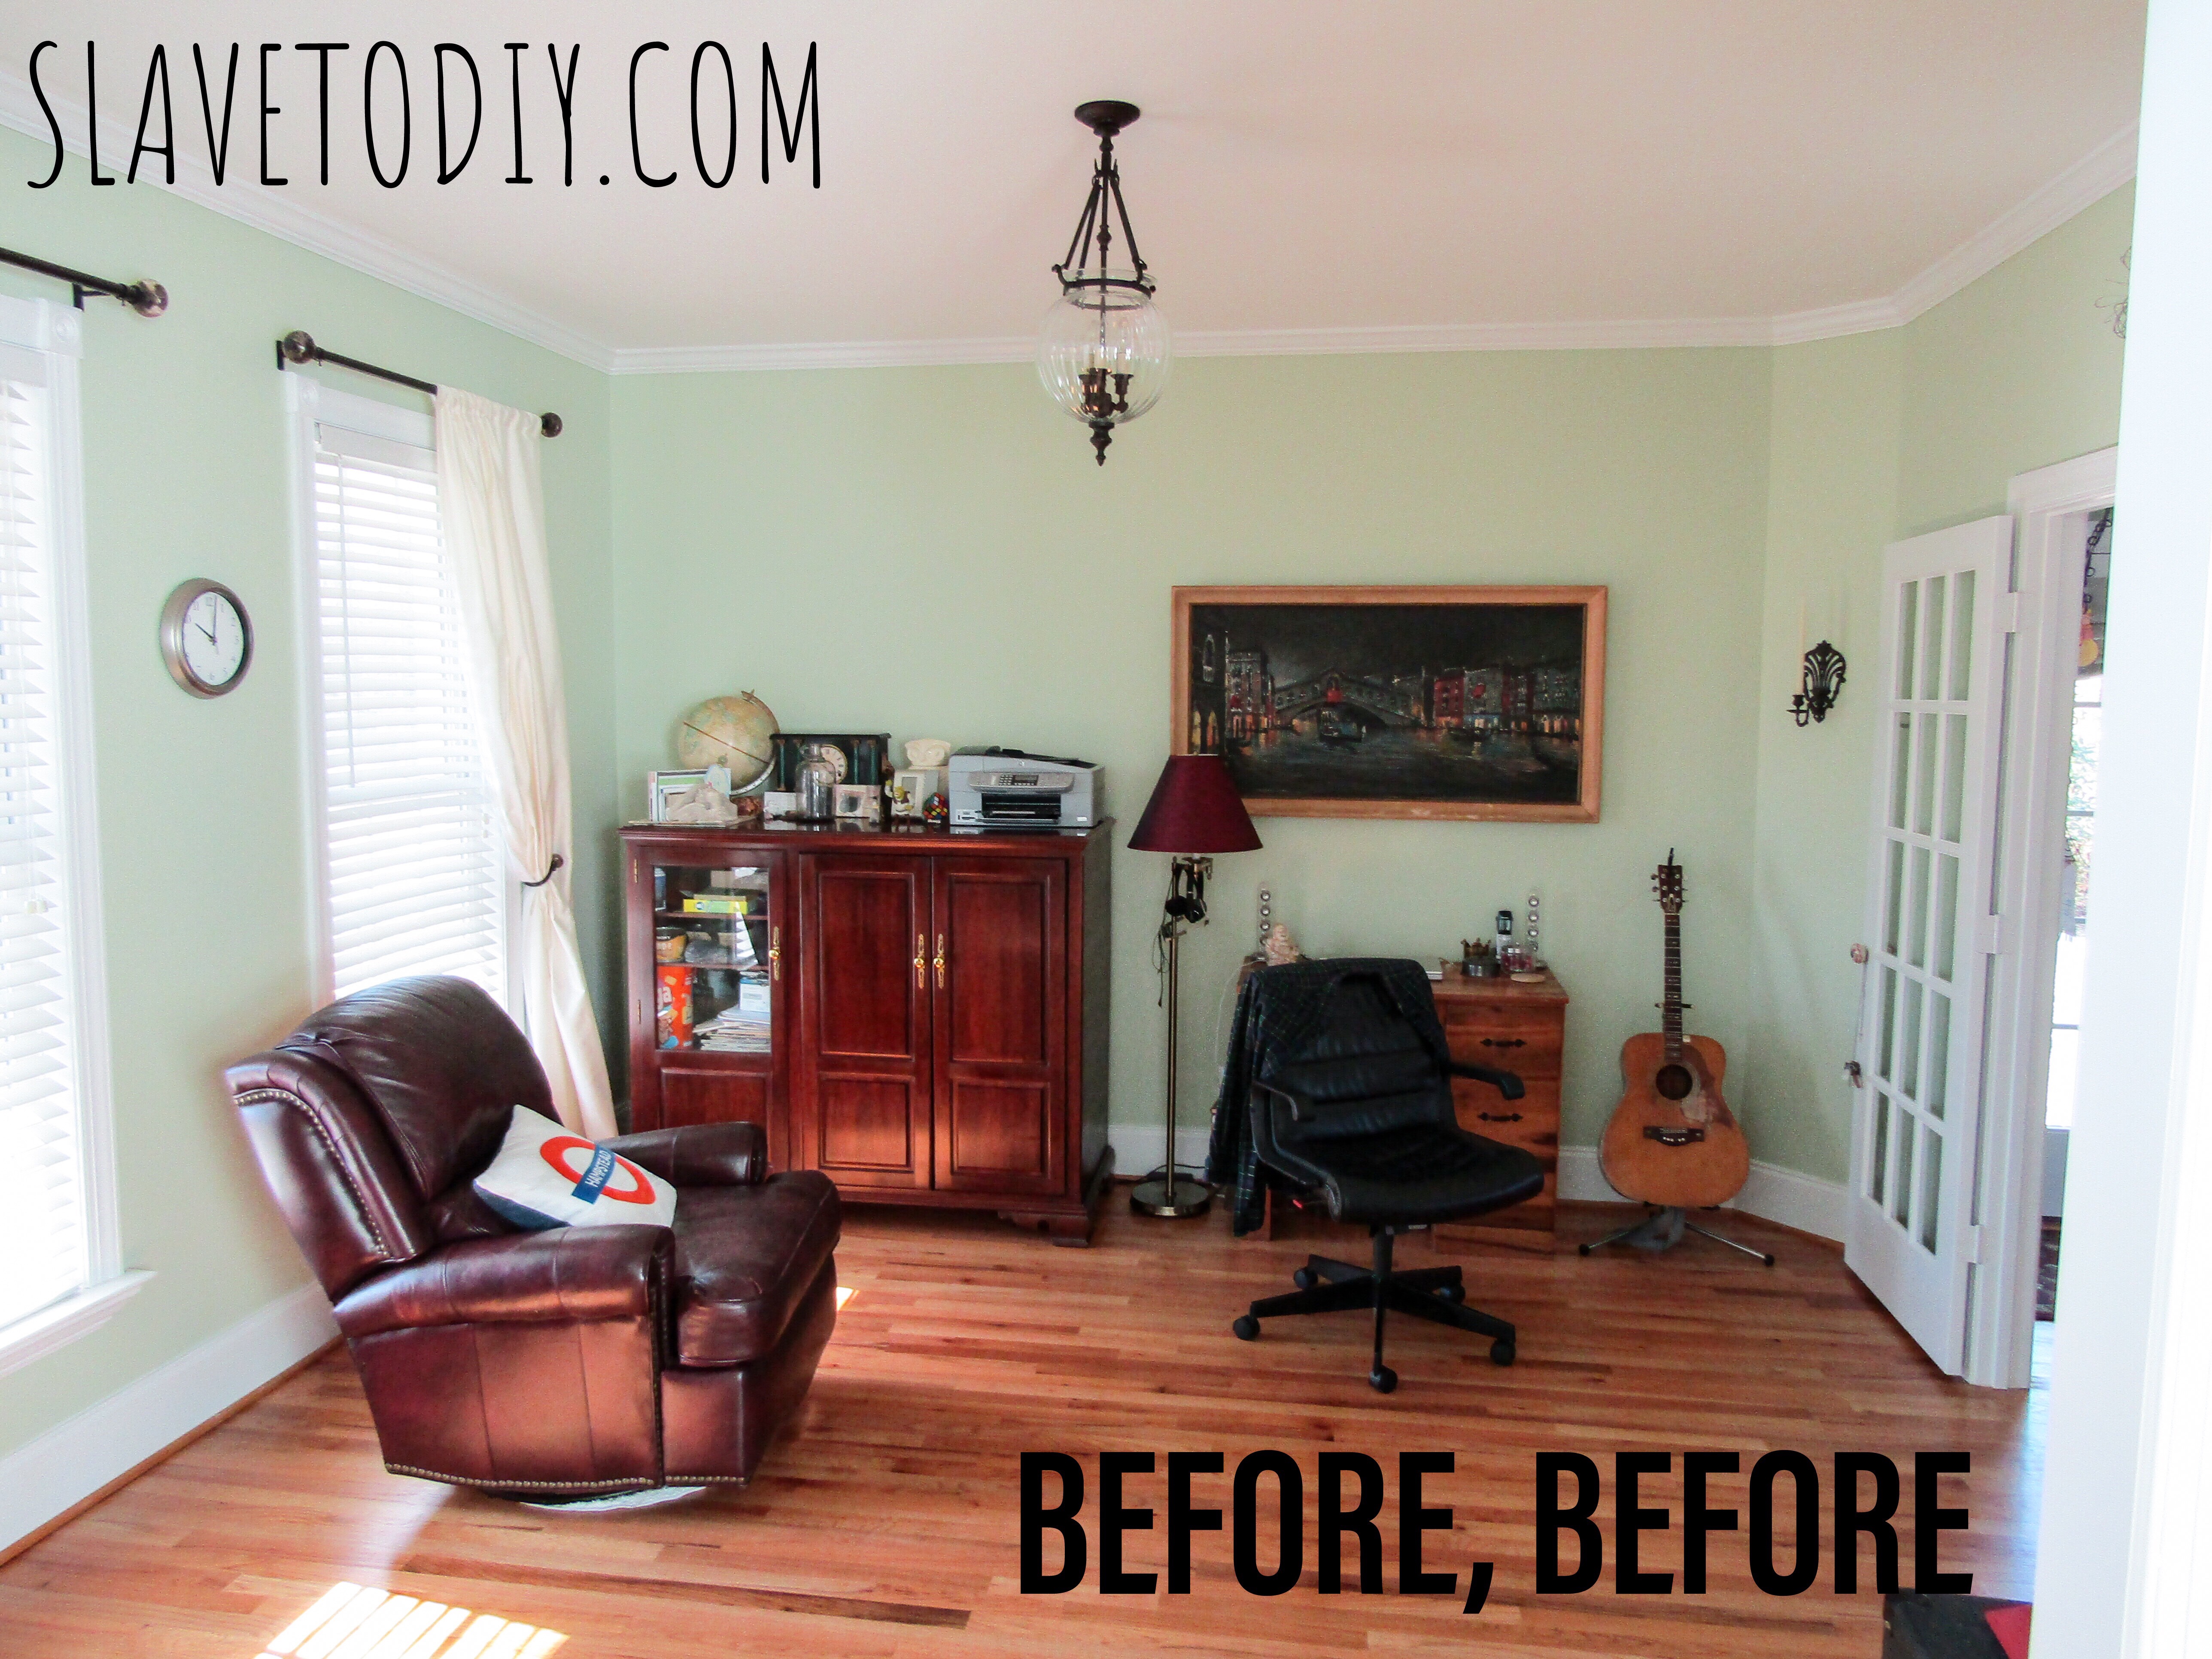
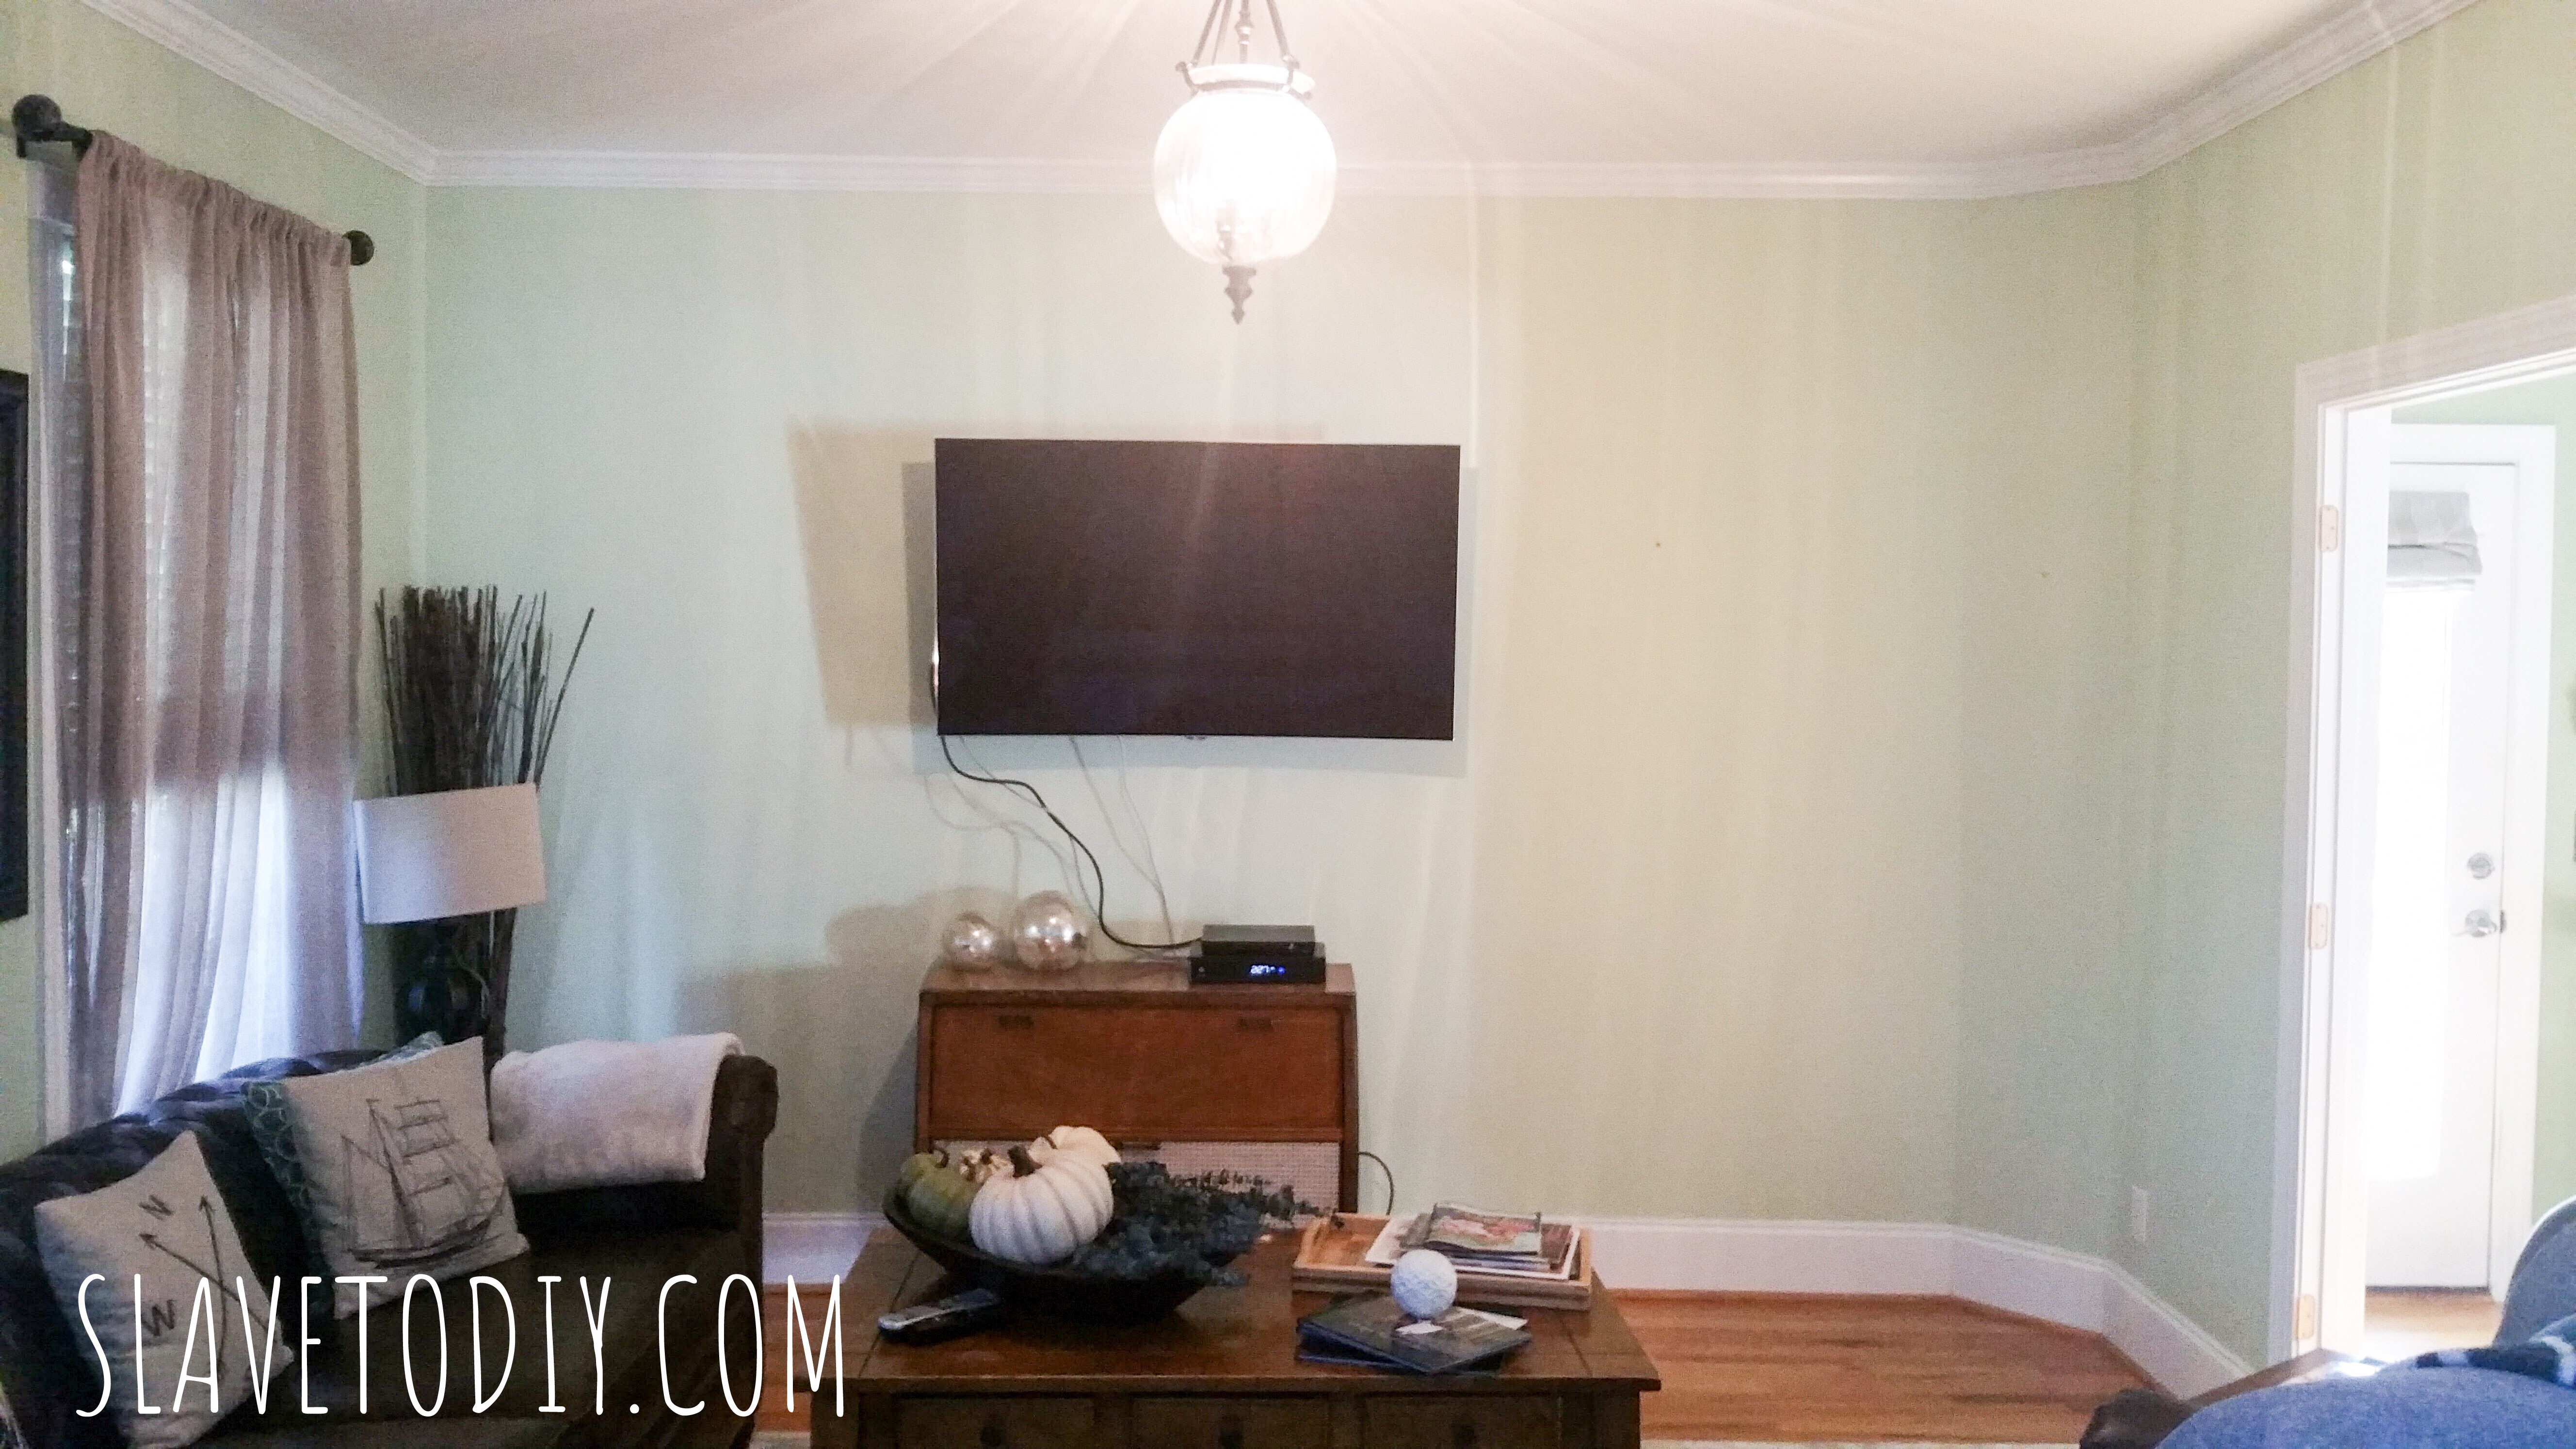
So, here’s a flashback to what this place looked like before we moved in (eeeeek!). But, with the high ceilings and great windows, it was ripe for an elegant update. The house was super clean and ready for a facelift.
It is difficult to believe that this is the same room, but I am completely in love. Check out the incredible results:
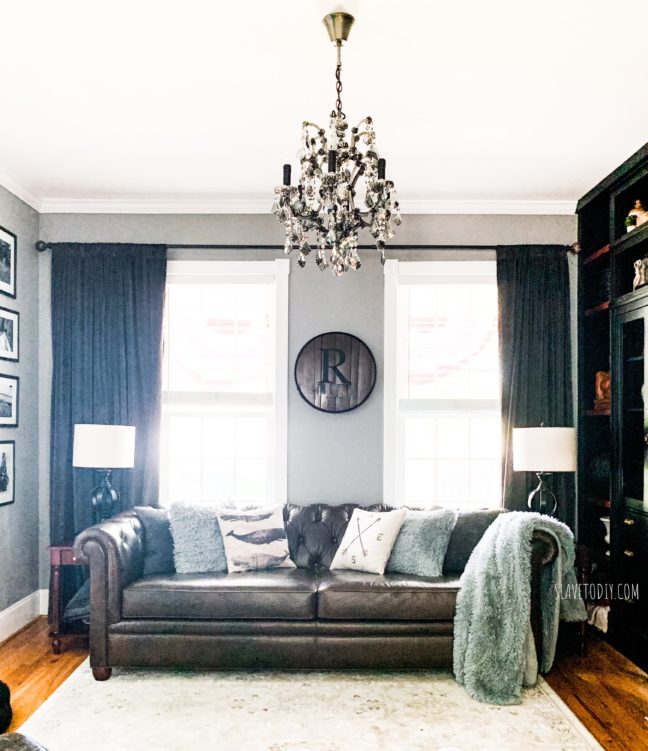
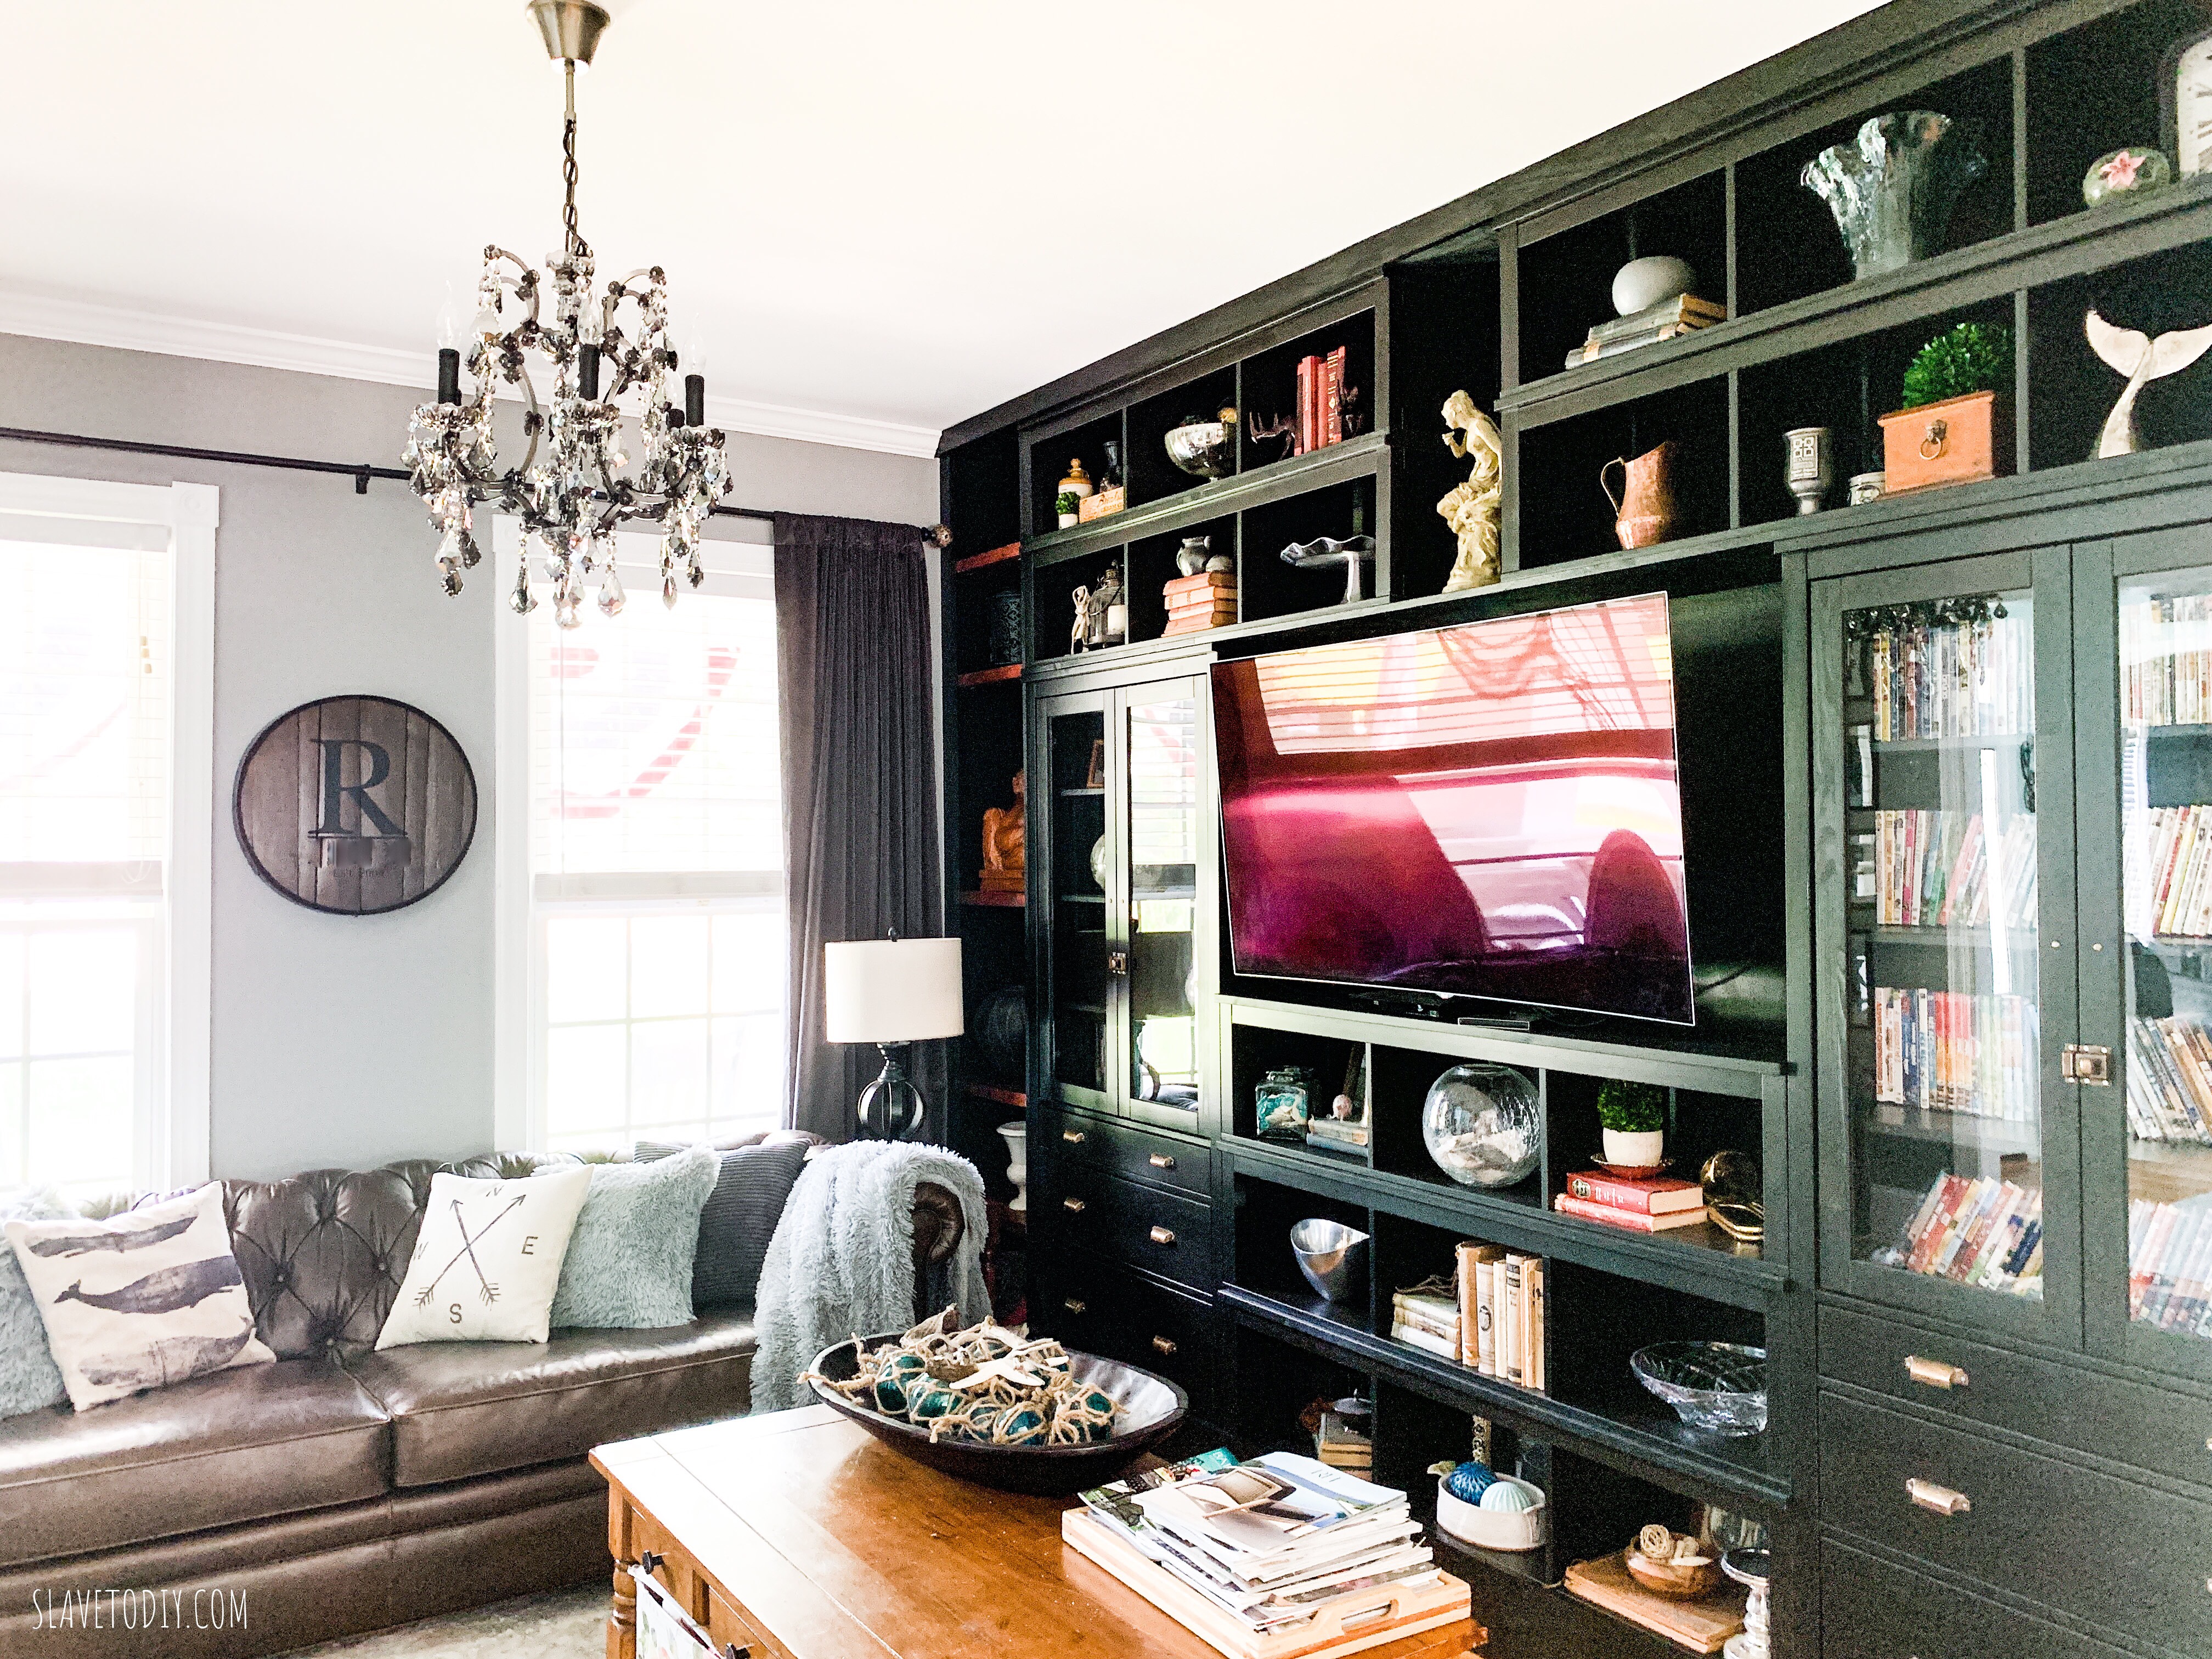
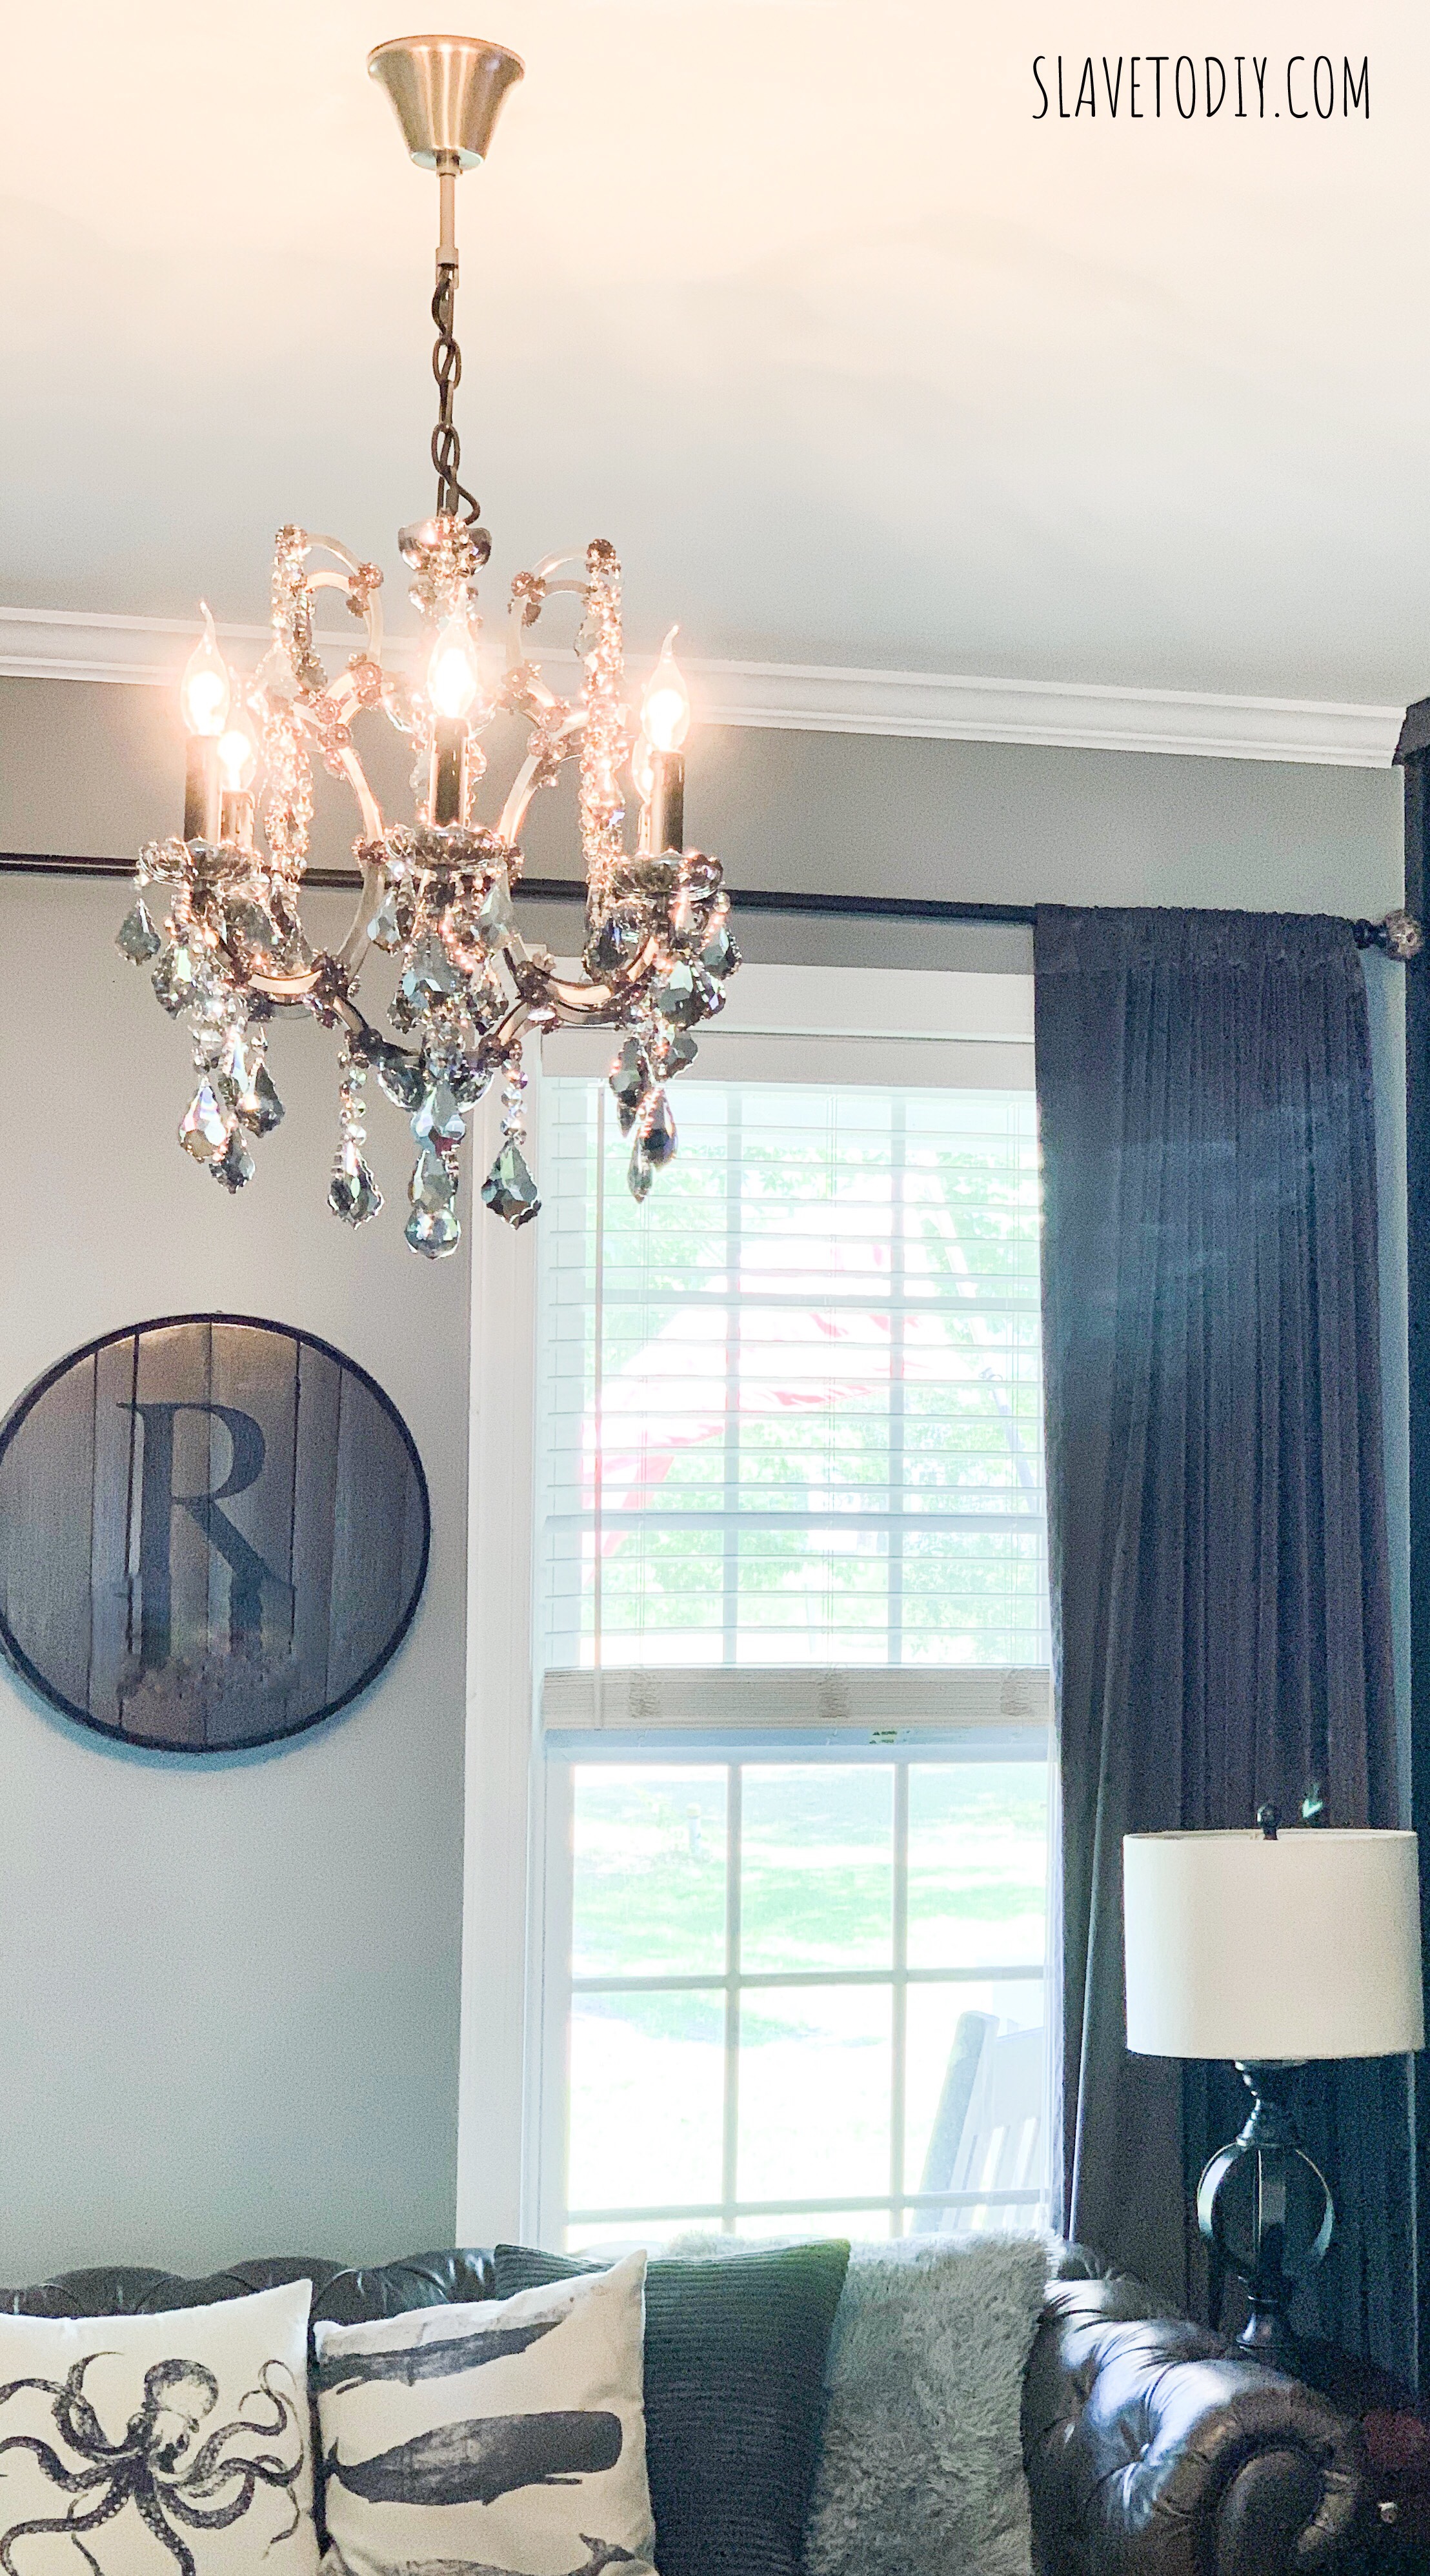
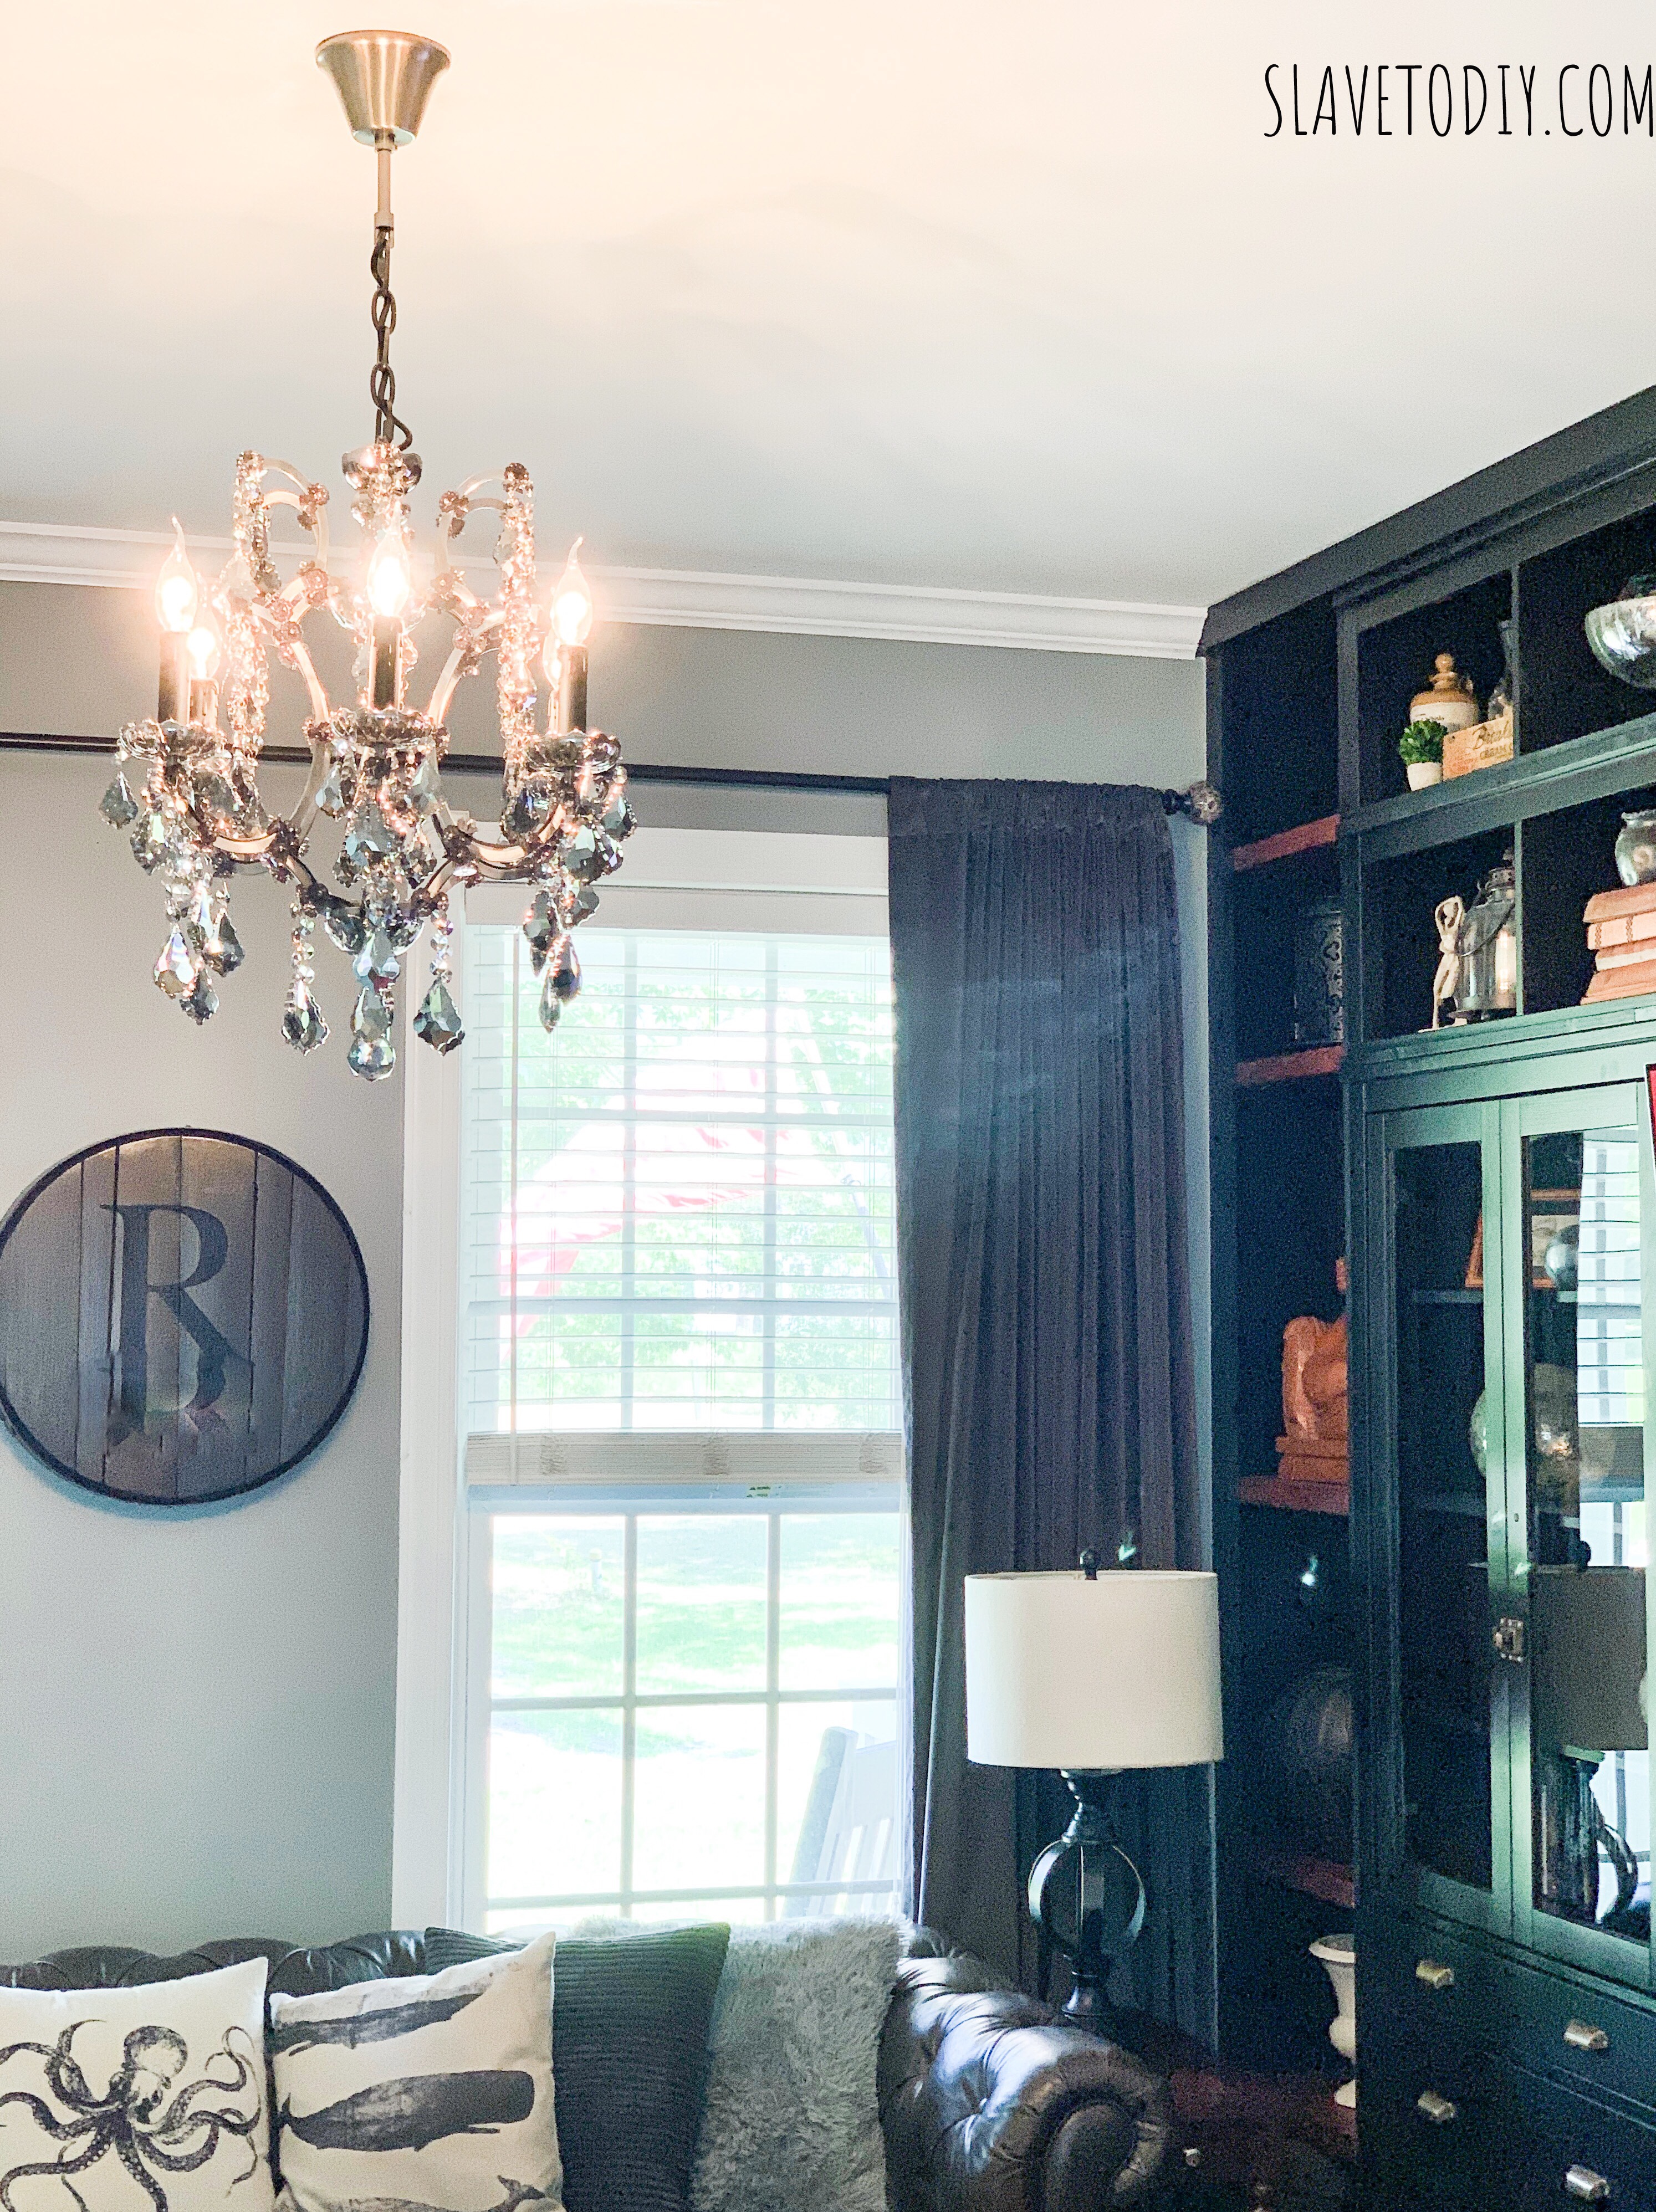
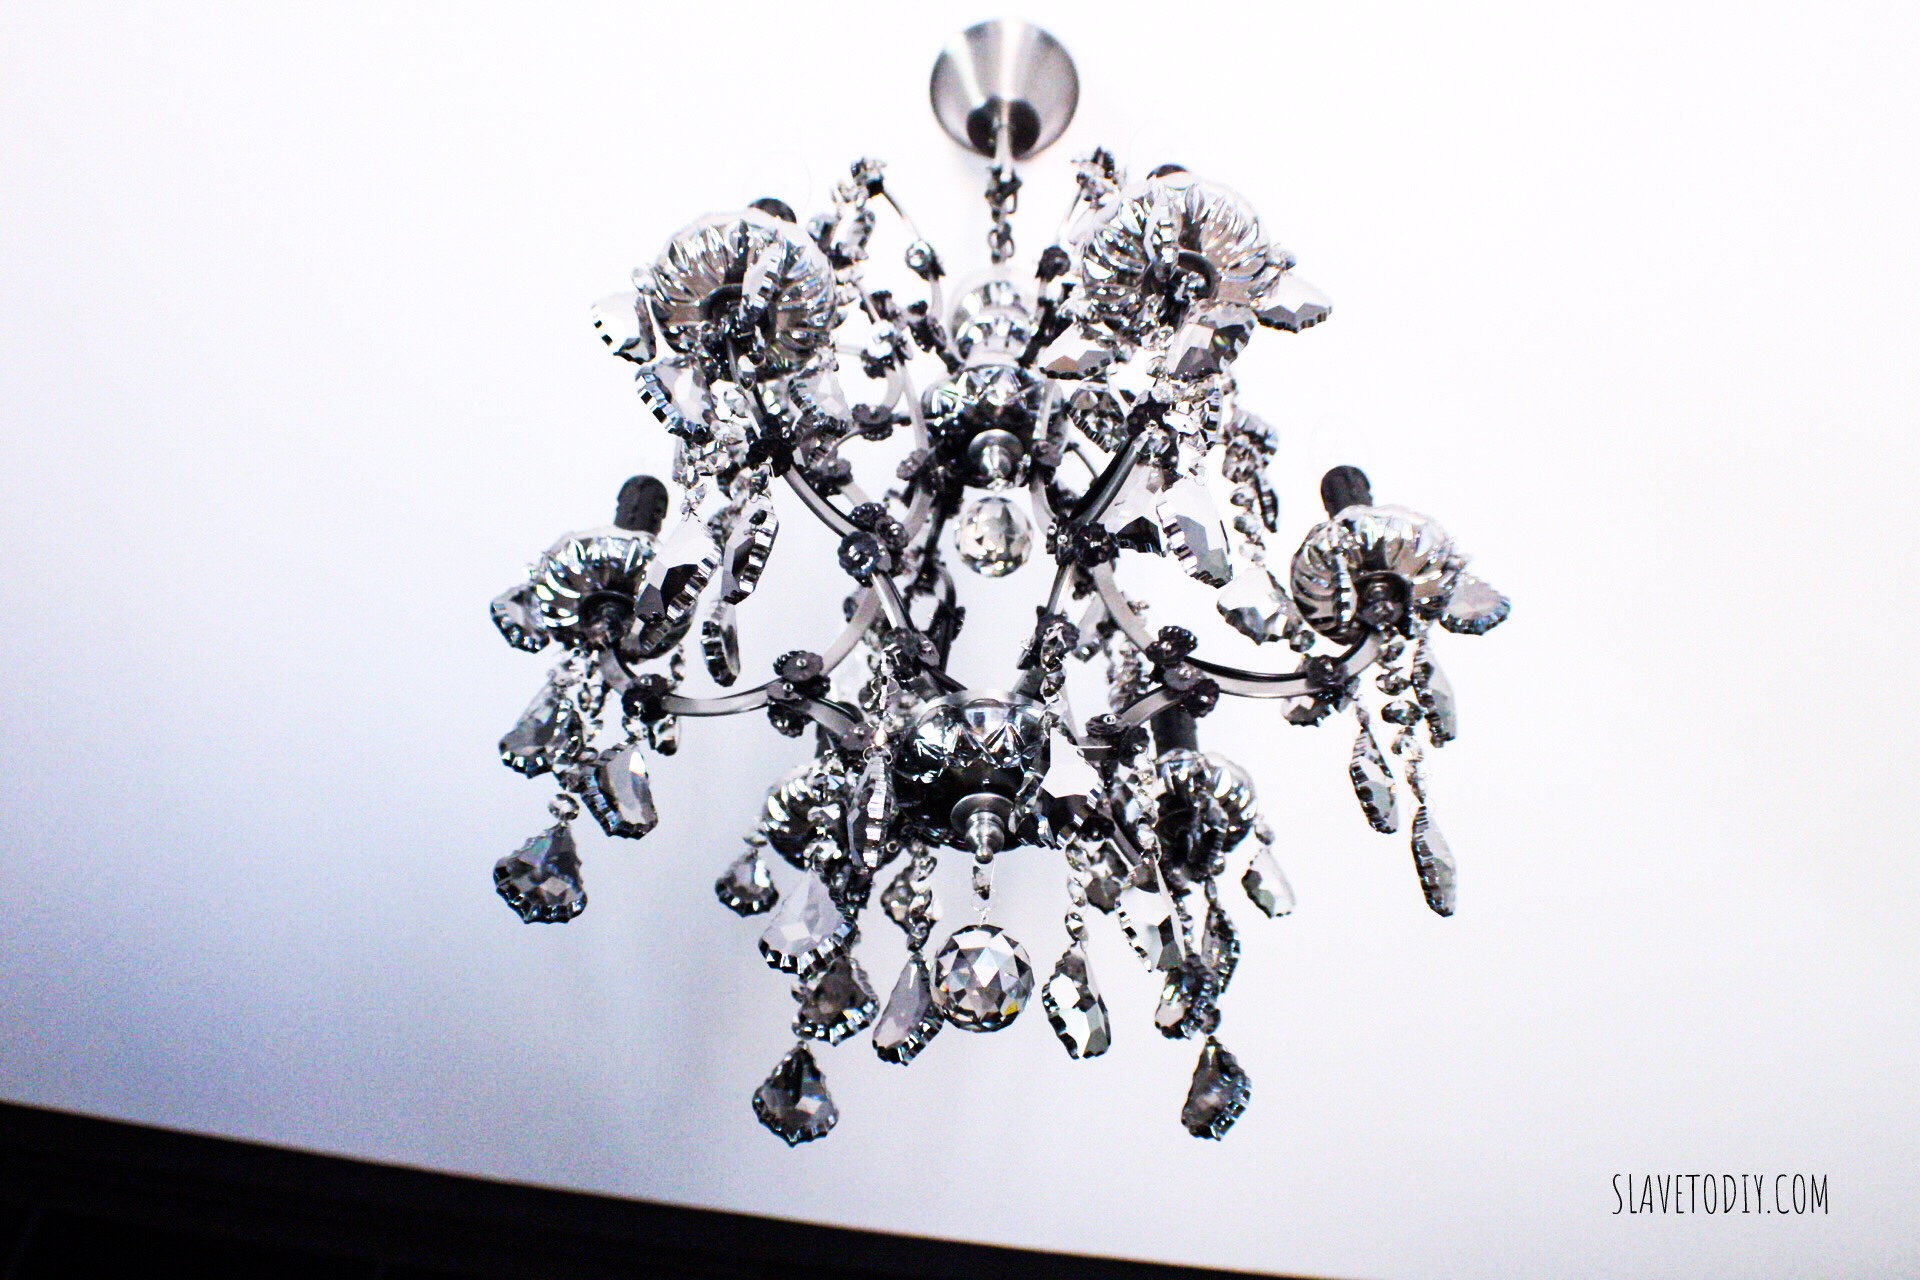
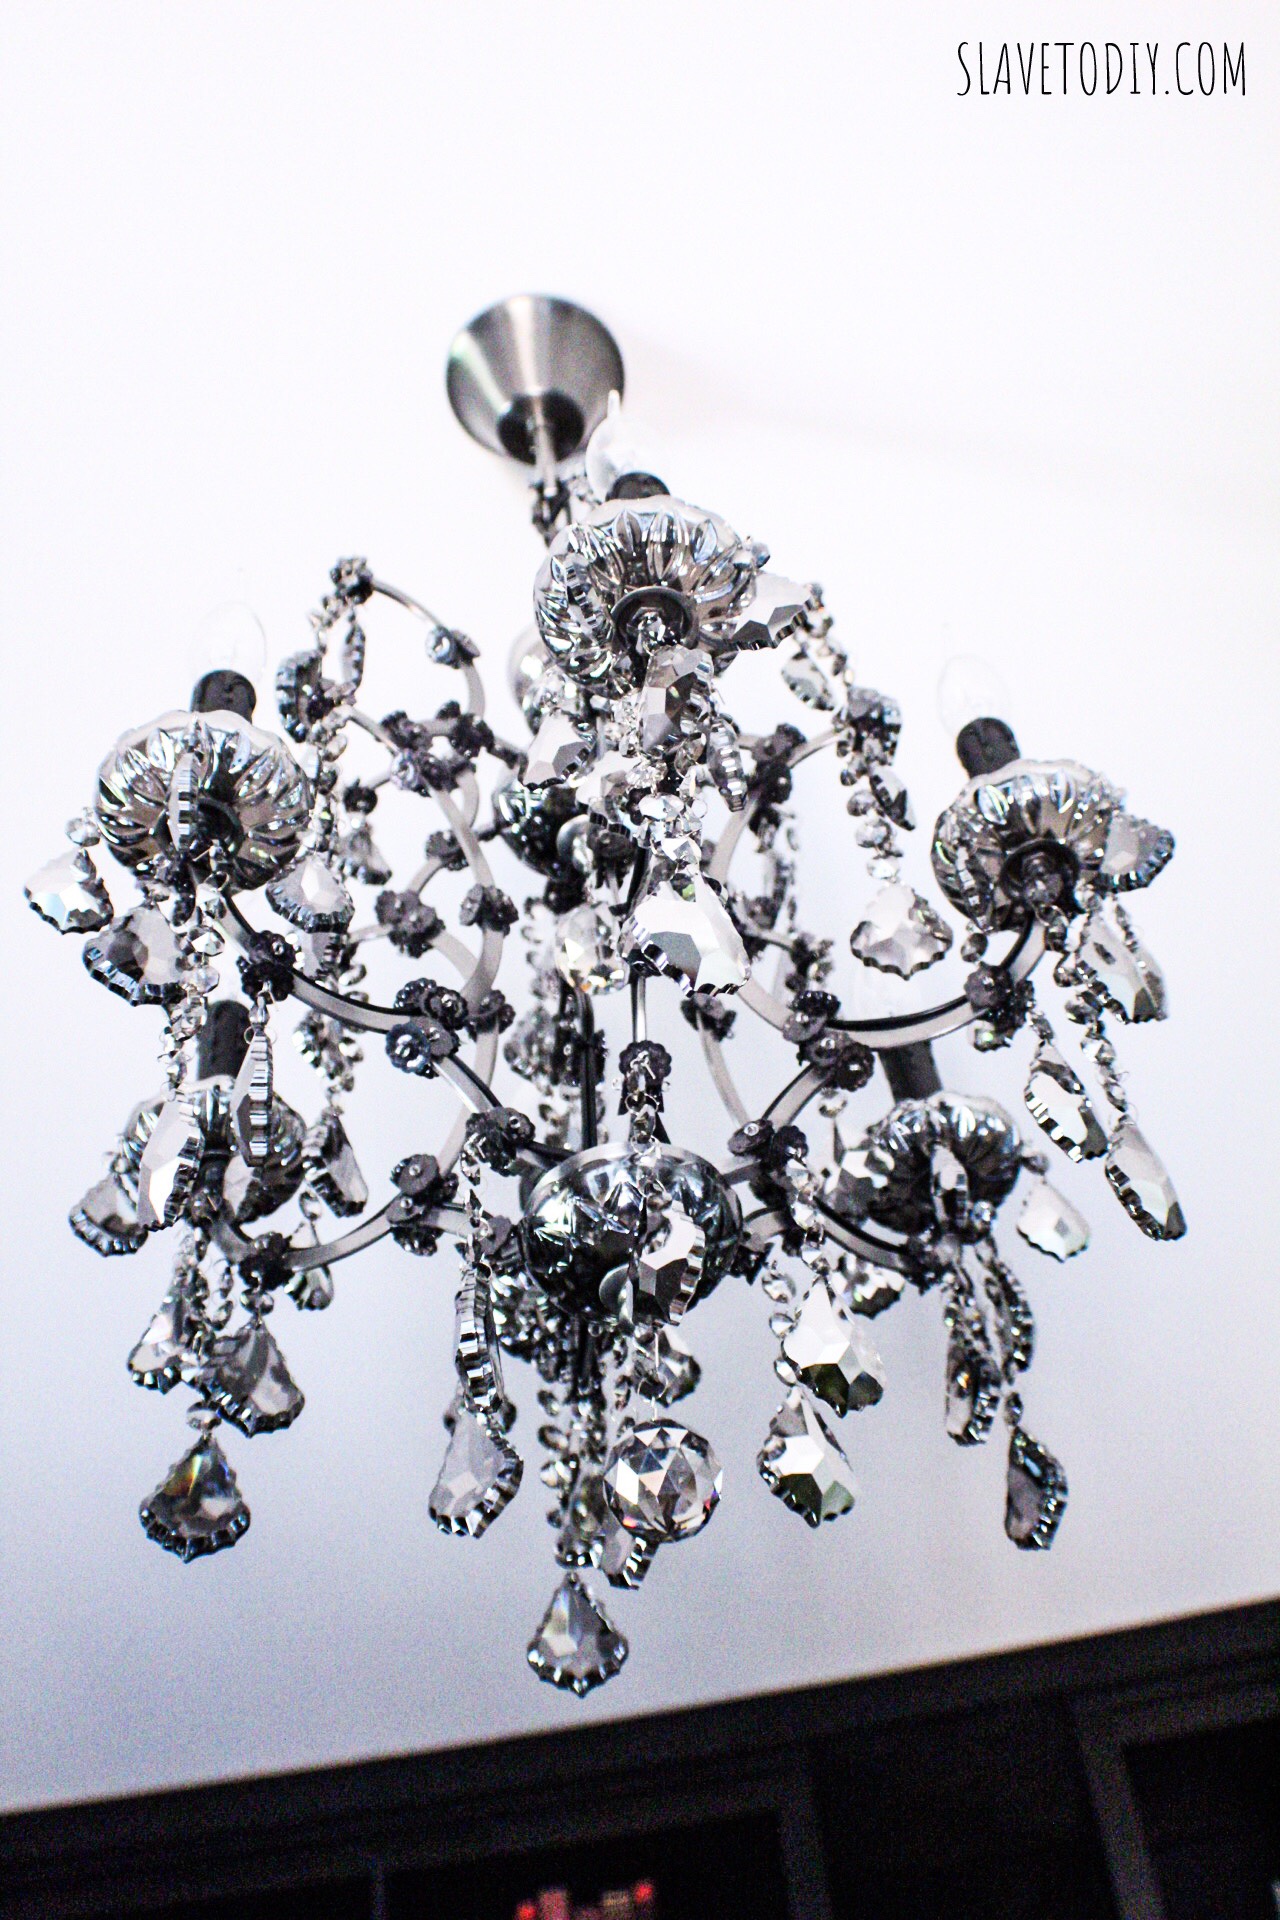
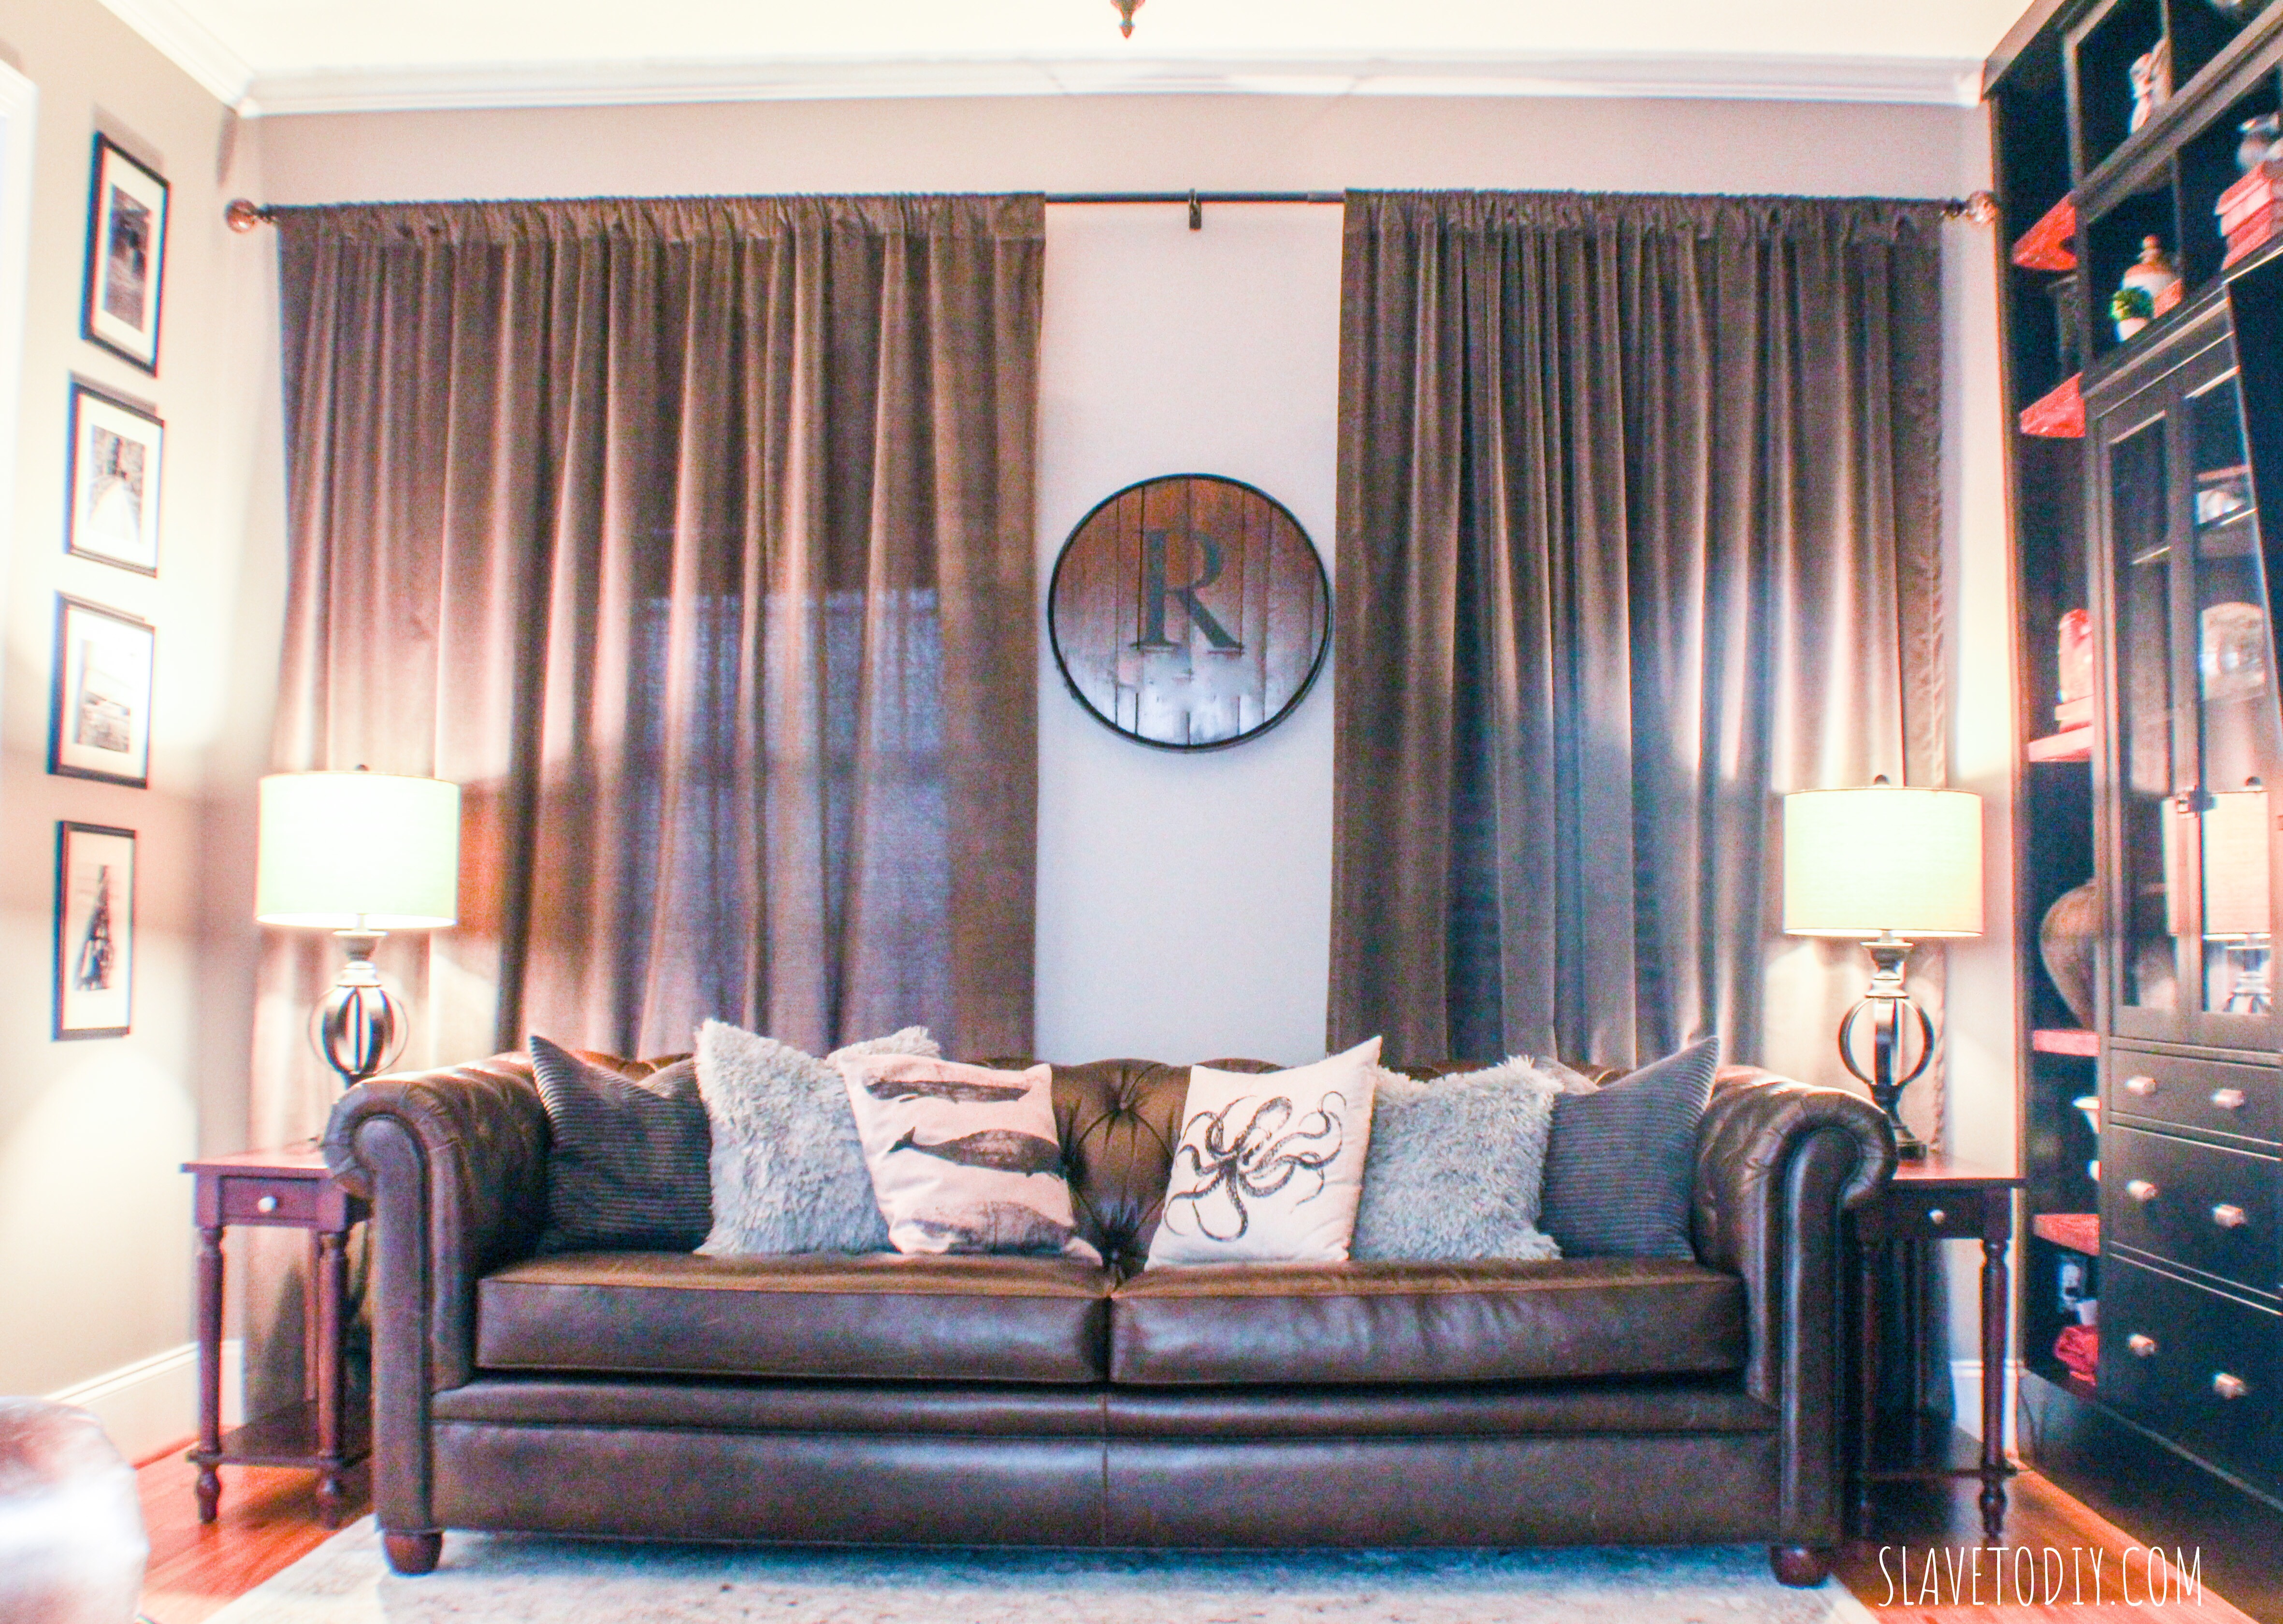
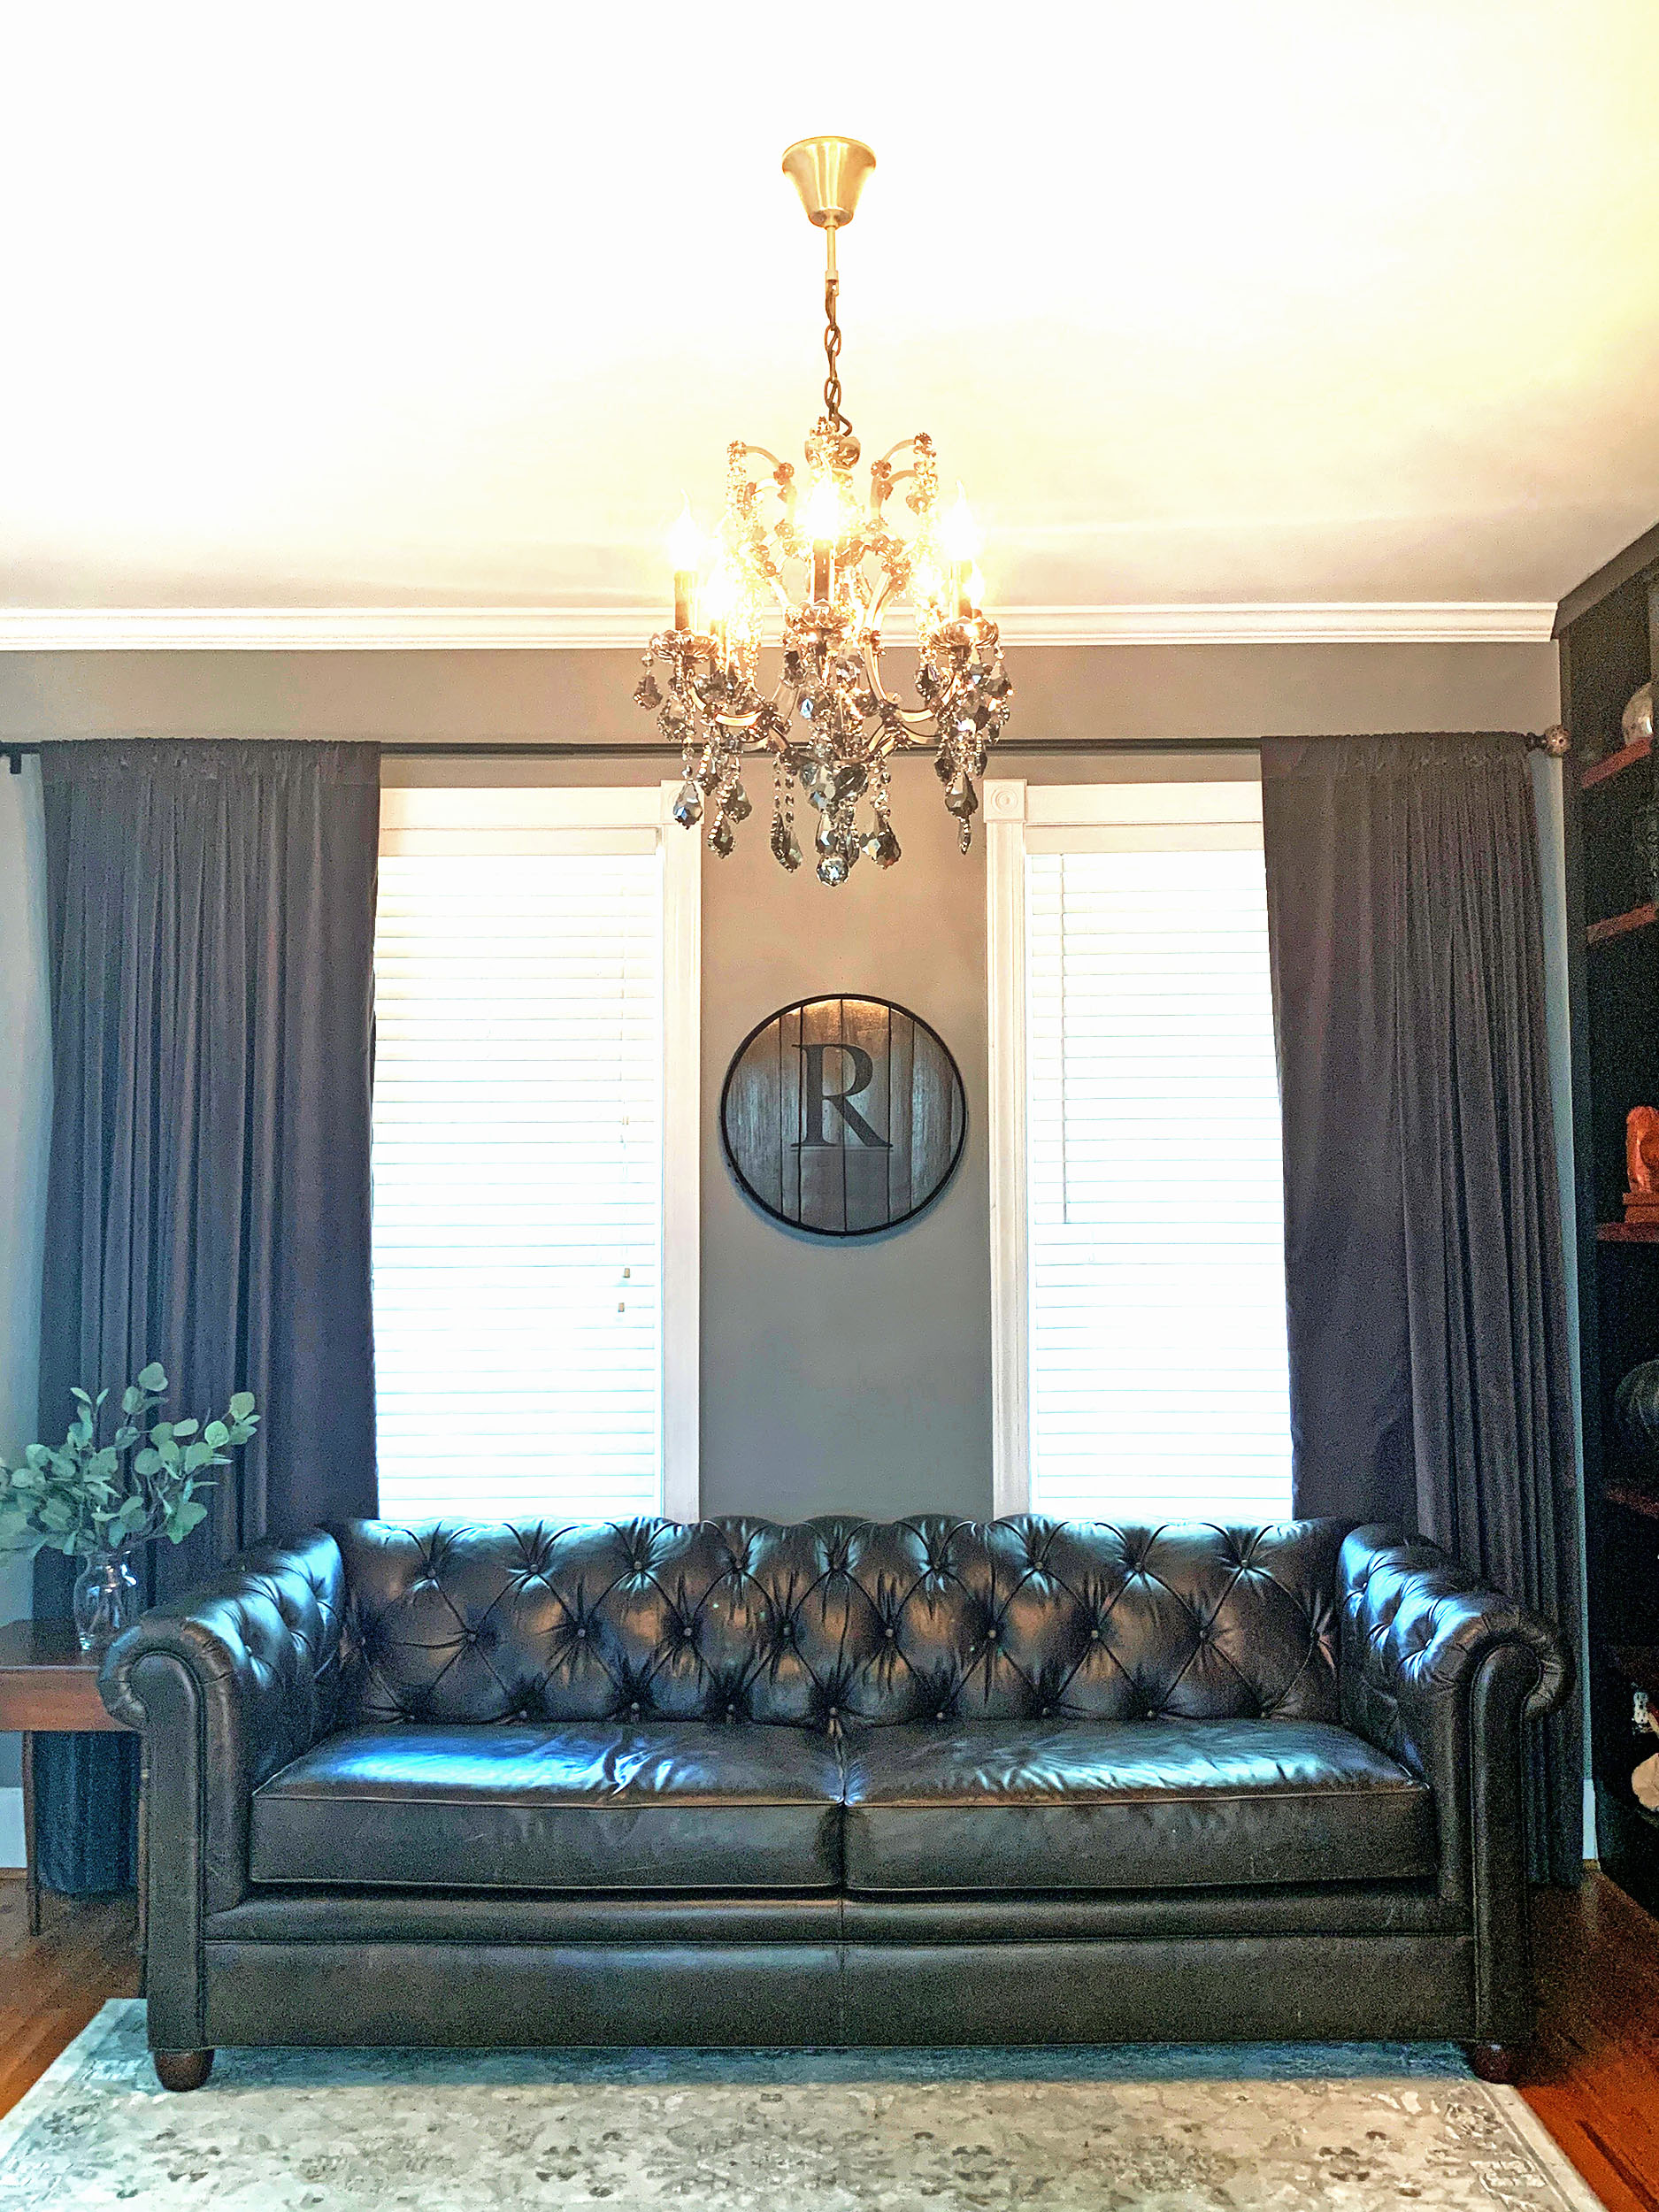
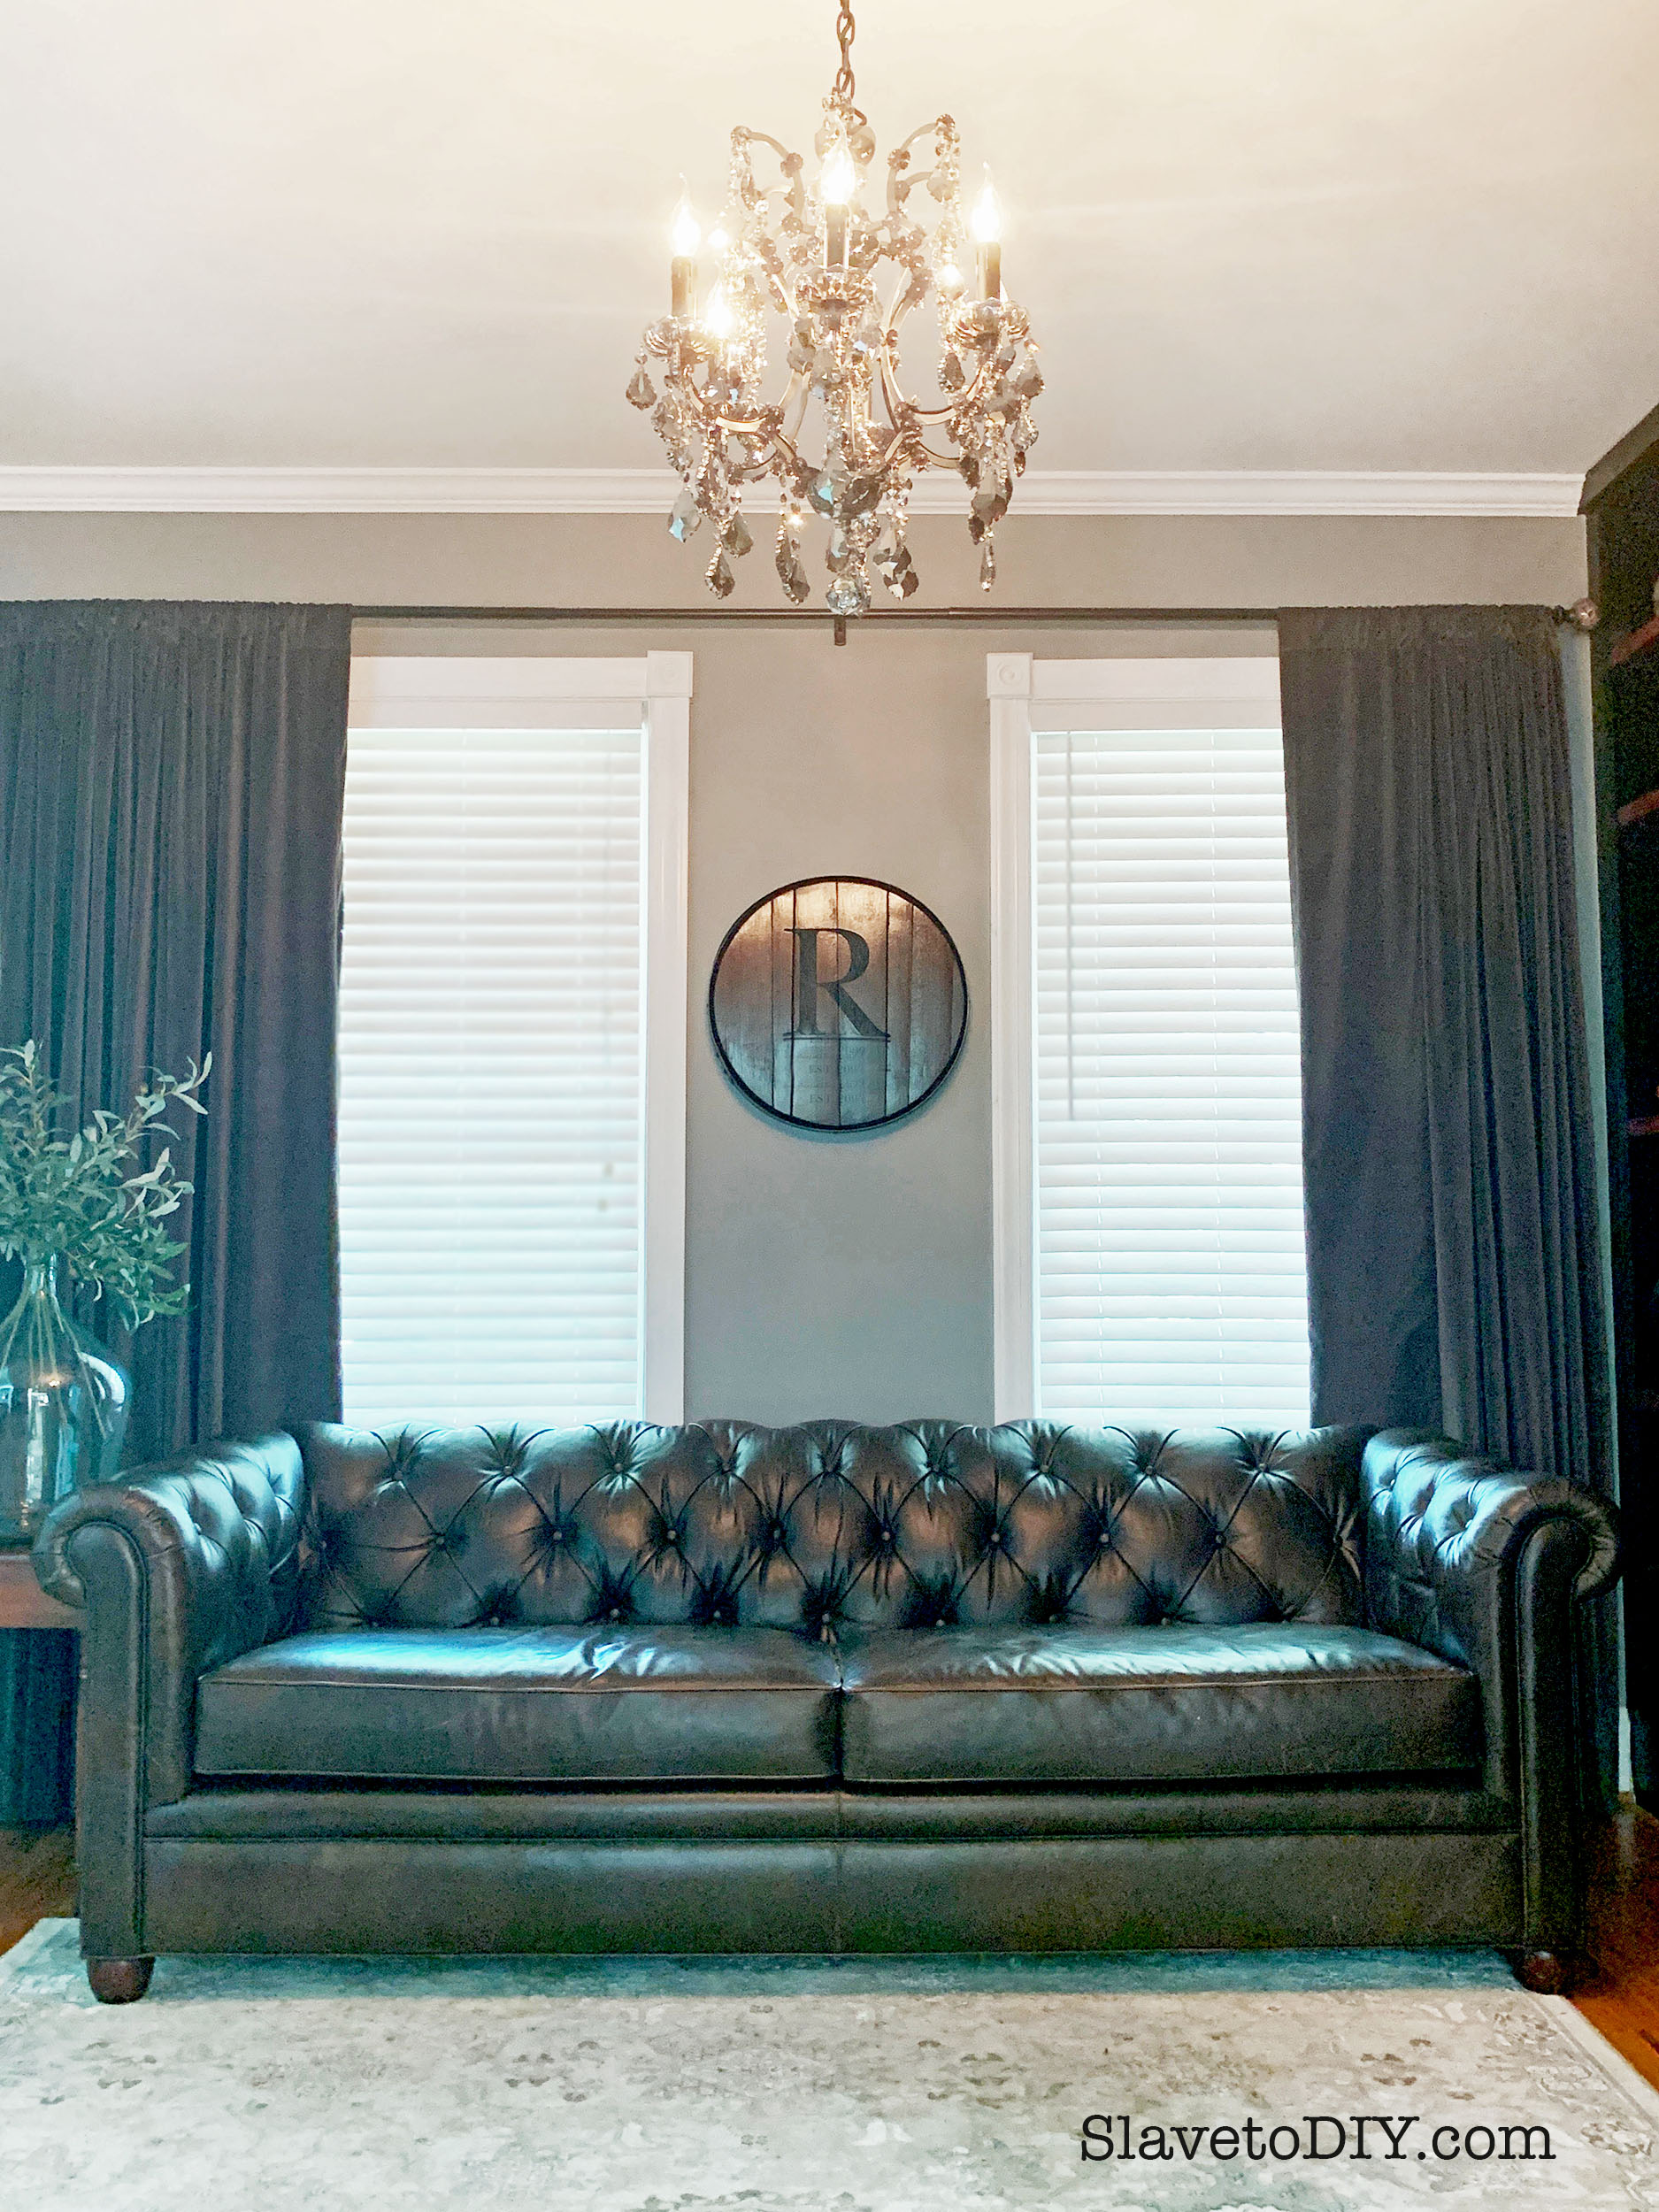
Classic living room with Pottery Barn Chesterfield sofa, RH 19th Century Rococo Iron & Crystal Round Chandelier, and RH knock off (DIY) velvet curtains
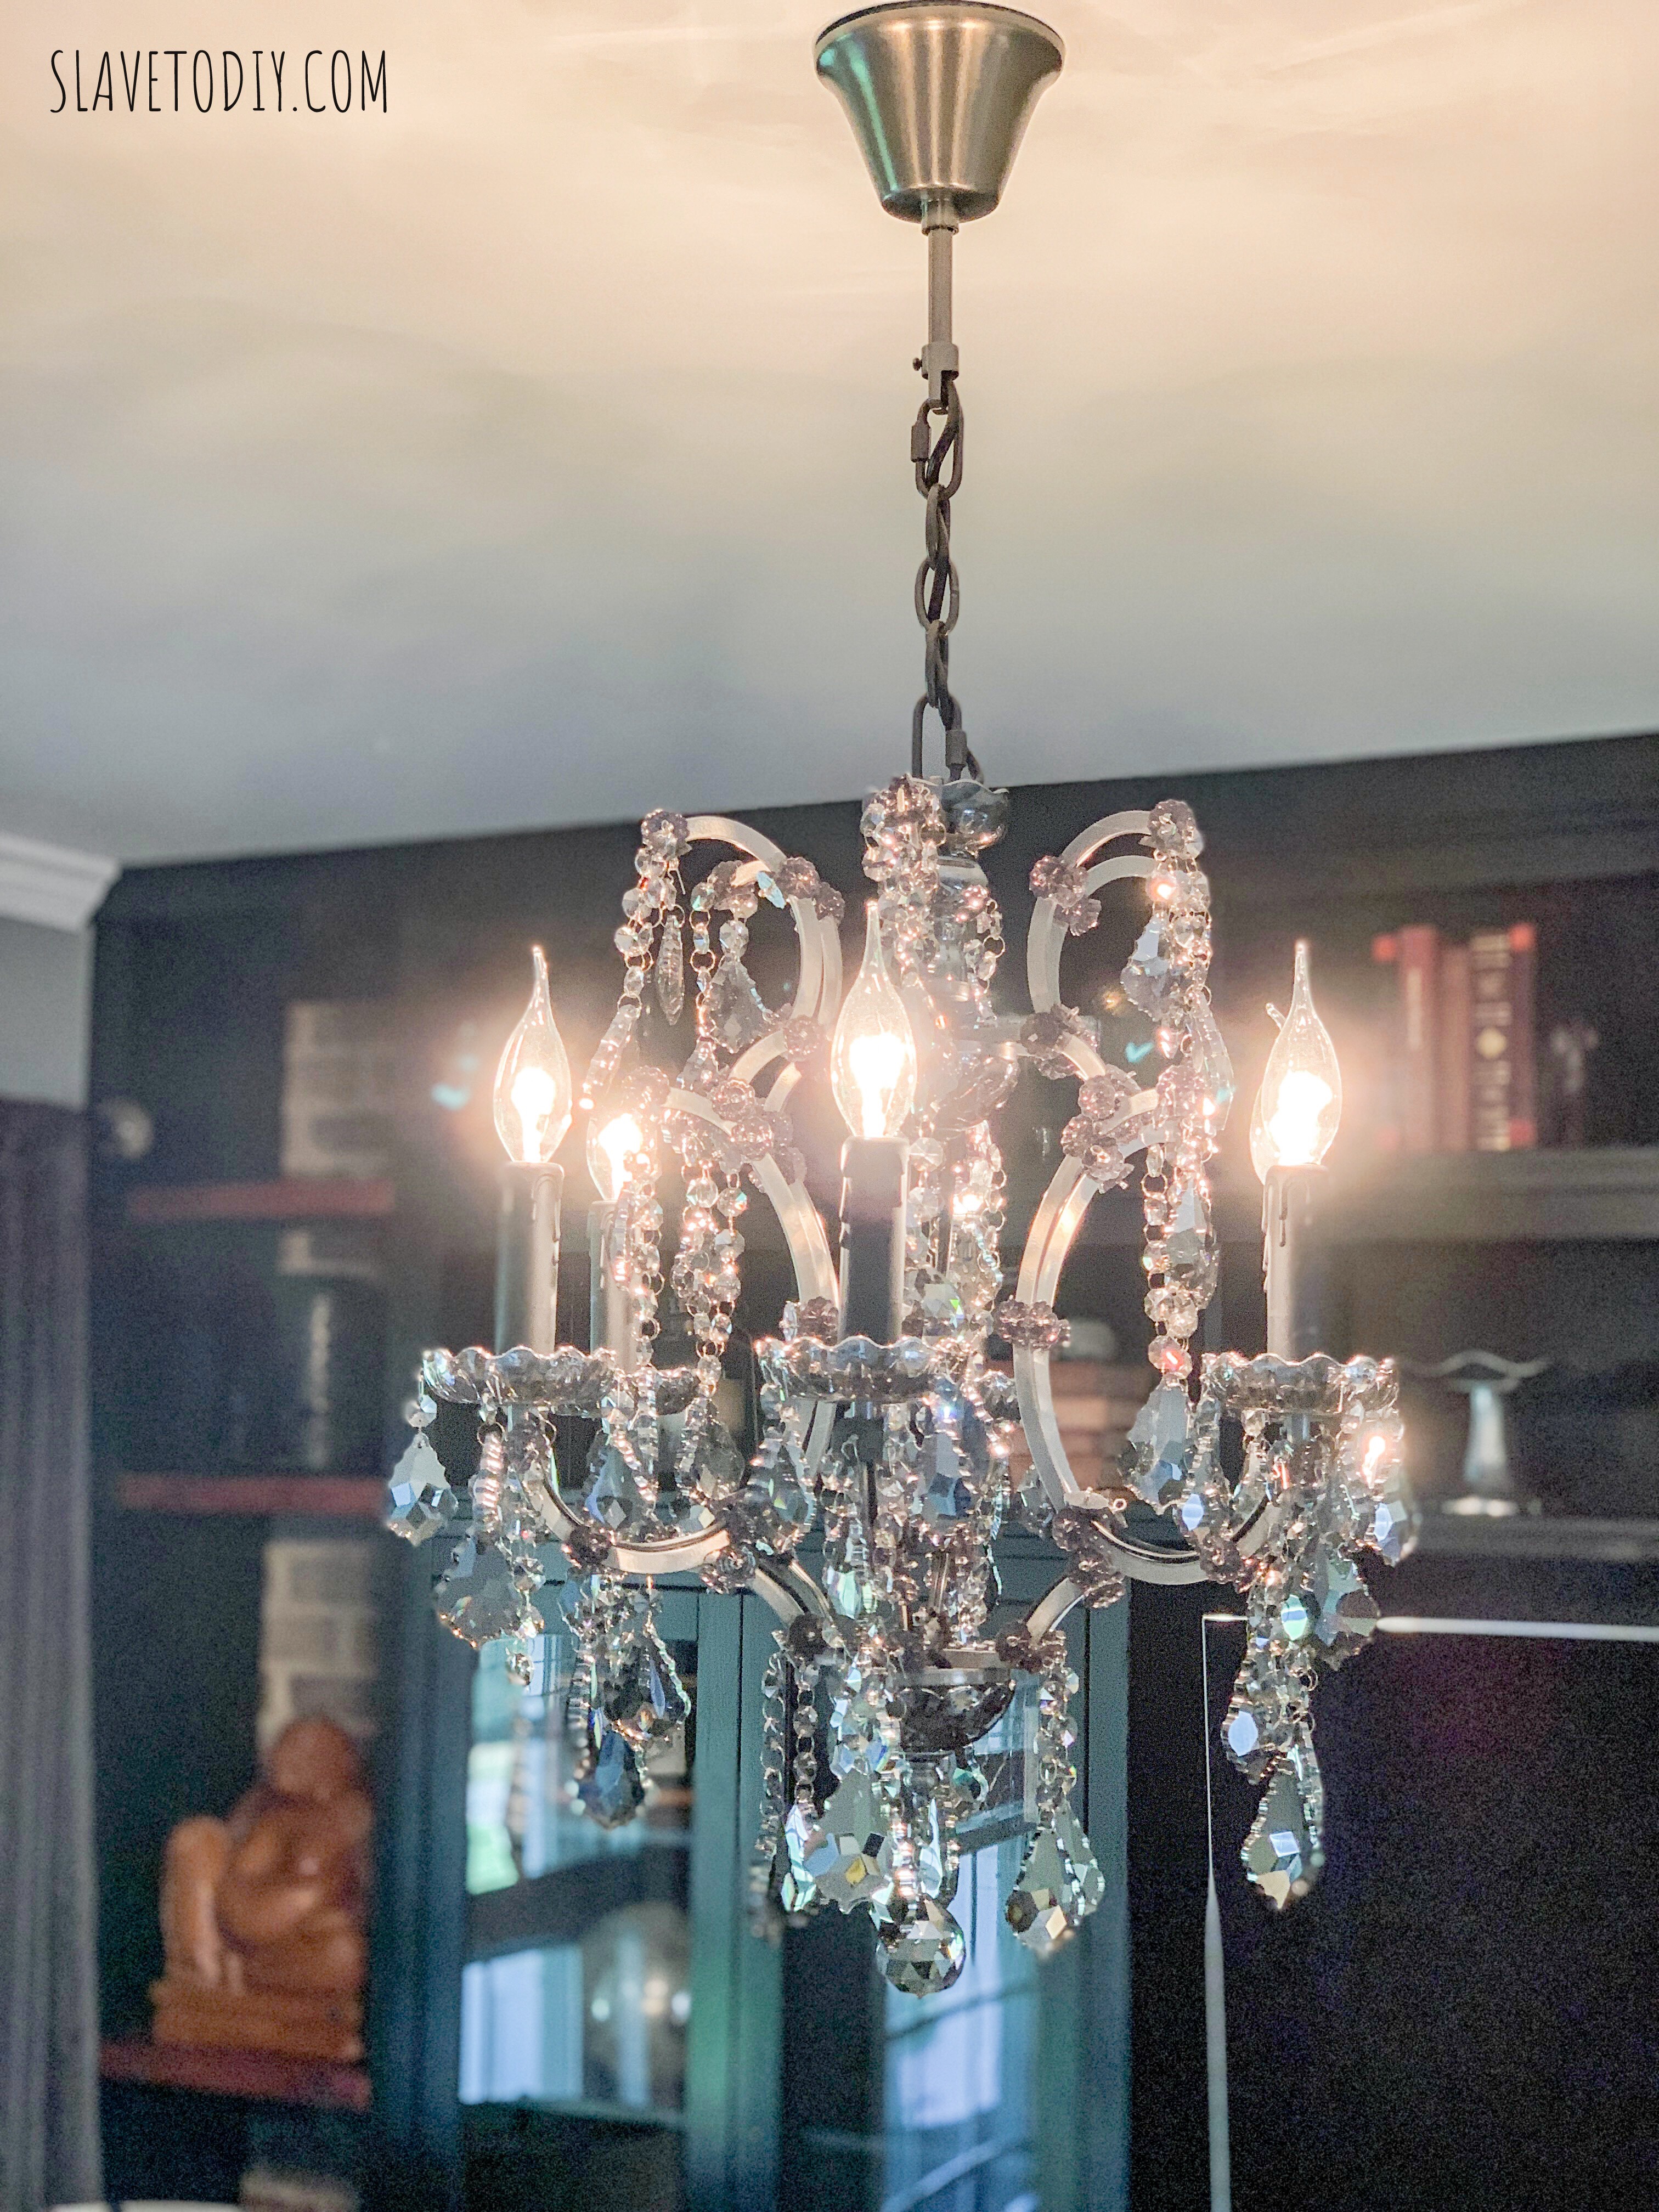
The fantastic light fixture from RH is the crown jewel of the space and really takes it to another level. It is the 19th Century Rococo Iron & Crystal Round Chandelier in Matte Natural Iron/Smoke Crystal and it is breathtaking.
I started out with a great foundation piece from Pottery Barn, this Grand Chesterfield Sofa in Vintage Cocoa Leather that has held up great to kids, two cats, and a dog that occasional jumps up when we’re not looking.
The side tables are from wally-world and are decent (they’re not show-stoppers because they are playing a support role here).
The customized Bourbon Barrel top is from Etsy and the shop name is KYBourbonBarrel. This was a gift for my husband for Christmas and we just love it.
The velvet curtains were sewn by my mother and you can find the source links and project tutorial here.
The rug is from Home Depot and it’s one of my favorite finds. It doesn’t feel cheapy and it wasn’t a small fortune like similar ones I like from Pottery Barn. I wish I had a sourced a few others from there that I got online and didn’t totally love.
The beautiful, solid (and did I mention heavy) dough bowl is from Pottery Barn, although I’m not totally sure they have this dark wood one anymore. In it are found driftwood, a starfish, and Japanese Fishing Floats.
The room was designed around the curved television so that it can be viewed well from almost any angle. Rainman researched and decided on the LG 4H in a curved model. It’s pretty awesome.
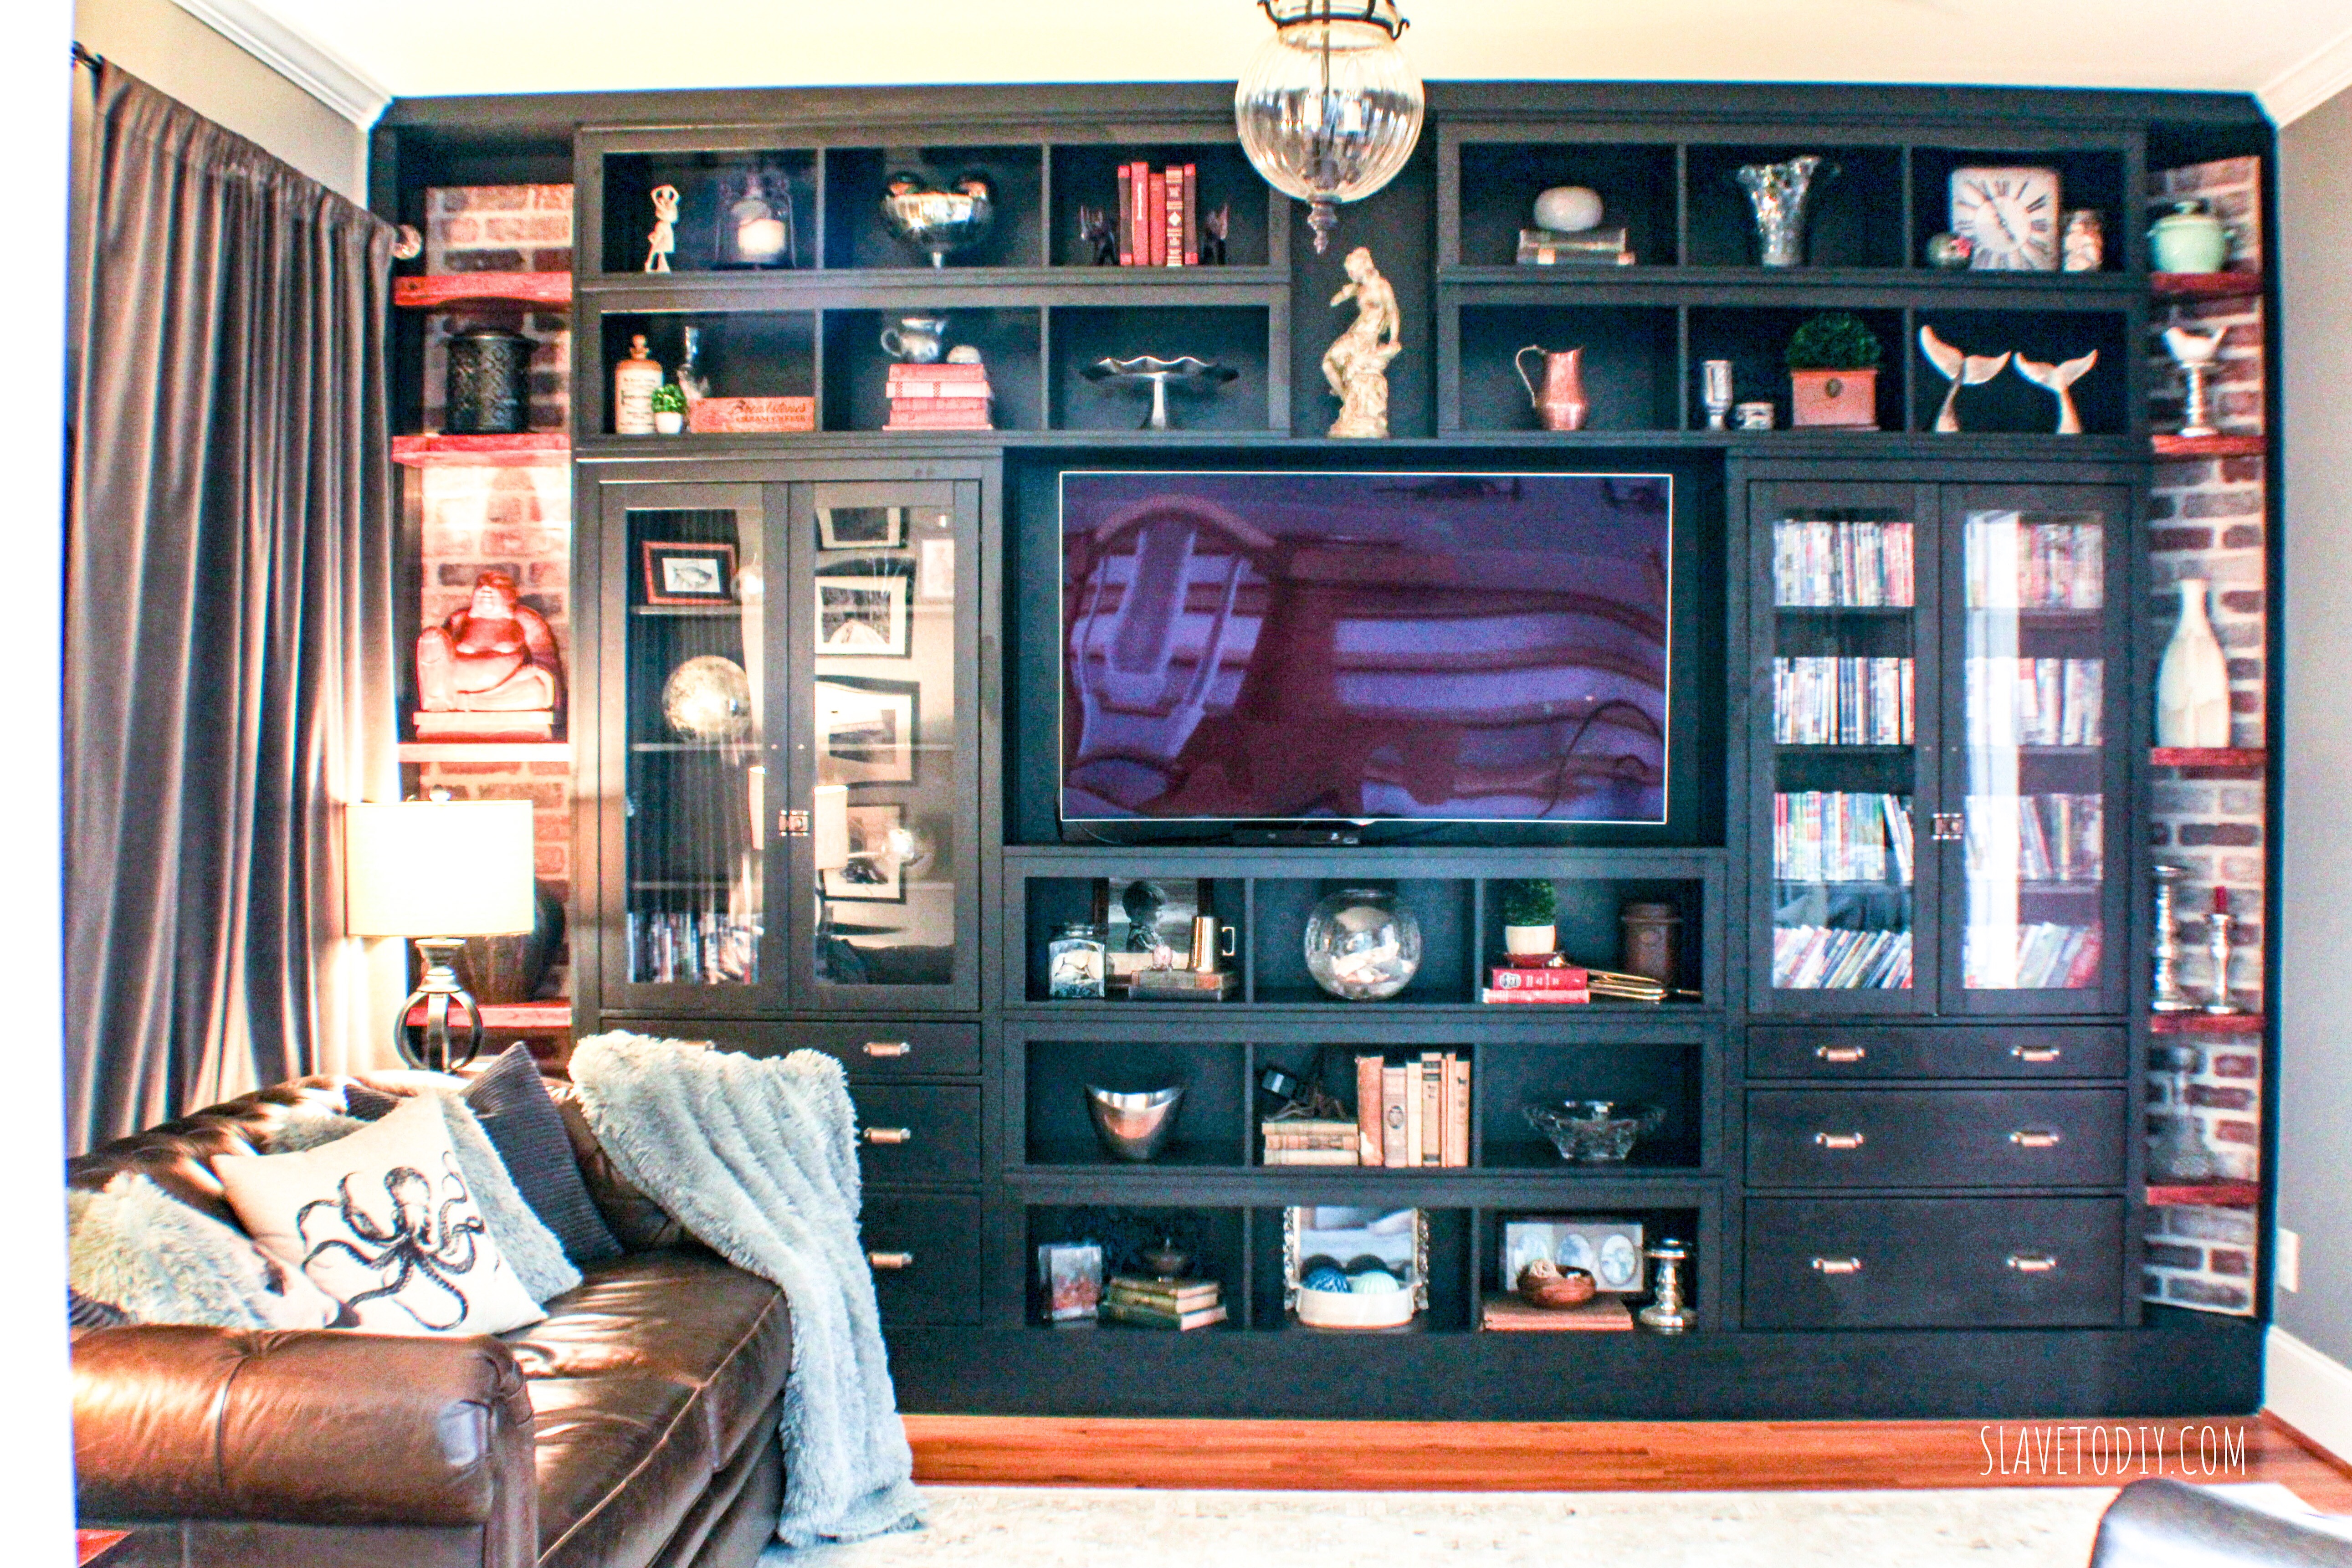
Classic Living Room with black builtins, leather chesterfield sofa from Pottery Barn, and Chandelier from Restoration Hardware
Most of the items in the builtins are things that I’ve collected over the years but there are a few that I’ve purchased recently to fill in just a few areas. I believe in builtins because you need them, not to arbitrarily spend money for storage and display space that you don’t need.
IKEA black builtins, brick veneer, custom wood shelves flanking the builtins, RH Chandelier
The little punches of green are super important on the builtins and I love getting REAL preserved boxwood. My artisan of choice is on Amazon and Etsy, Door and Decor. The wreath below is from her, also, and her work is stunning. The prices are slightly less than West Elm or other online vendors and her creations are far superior.
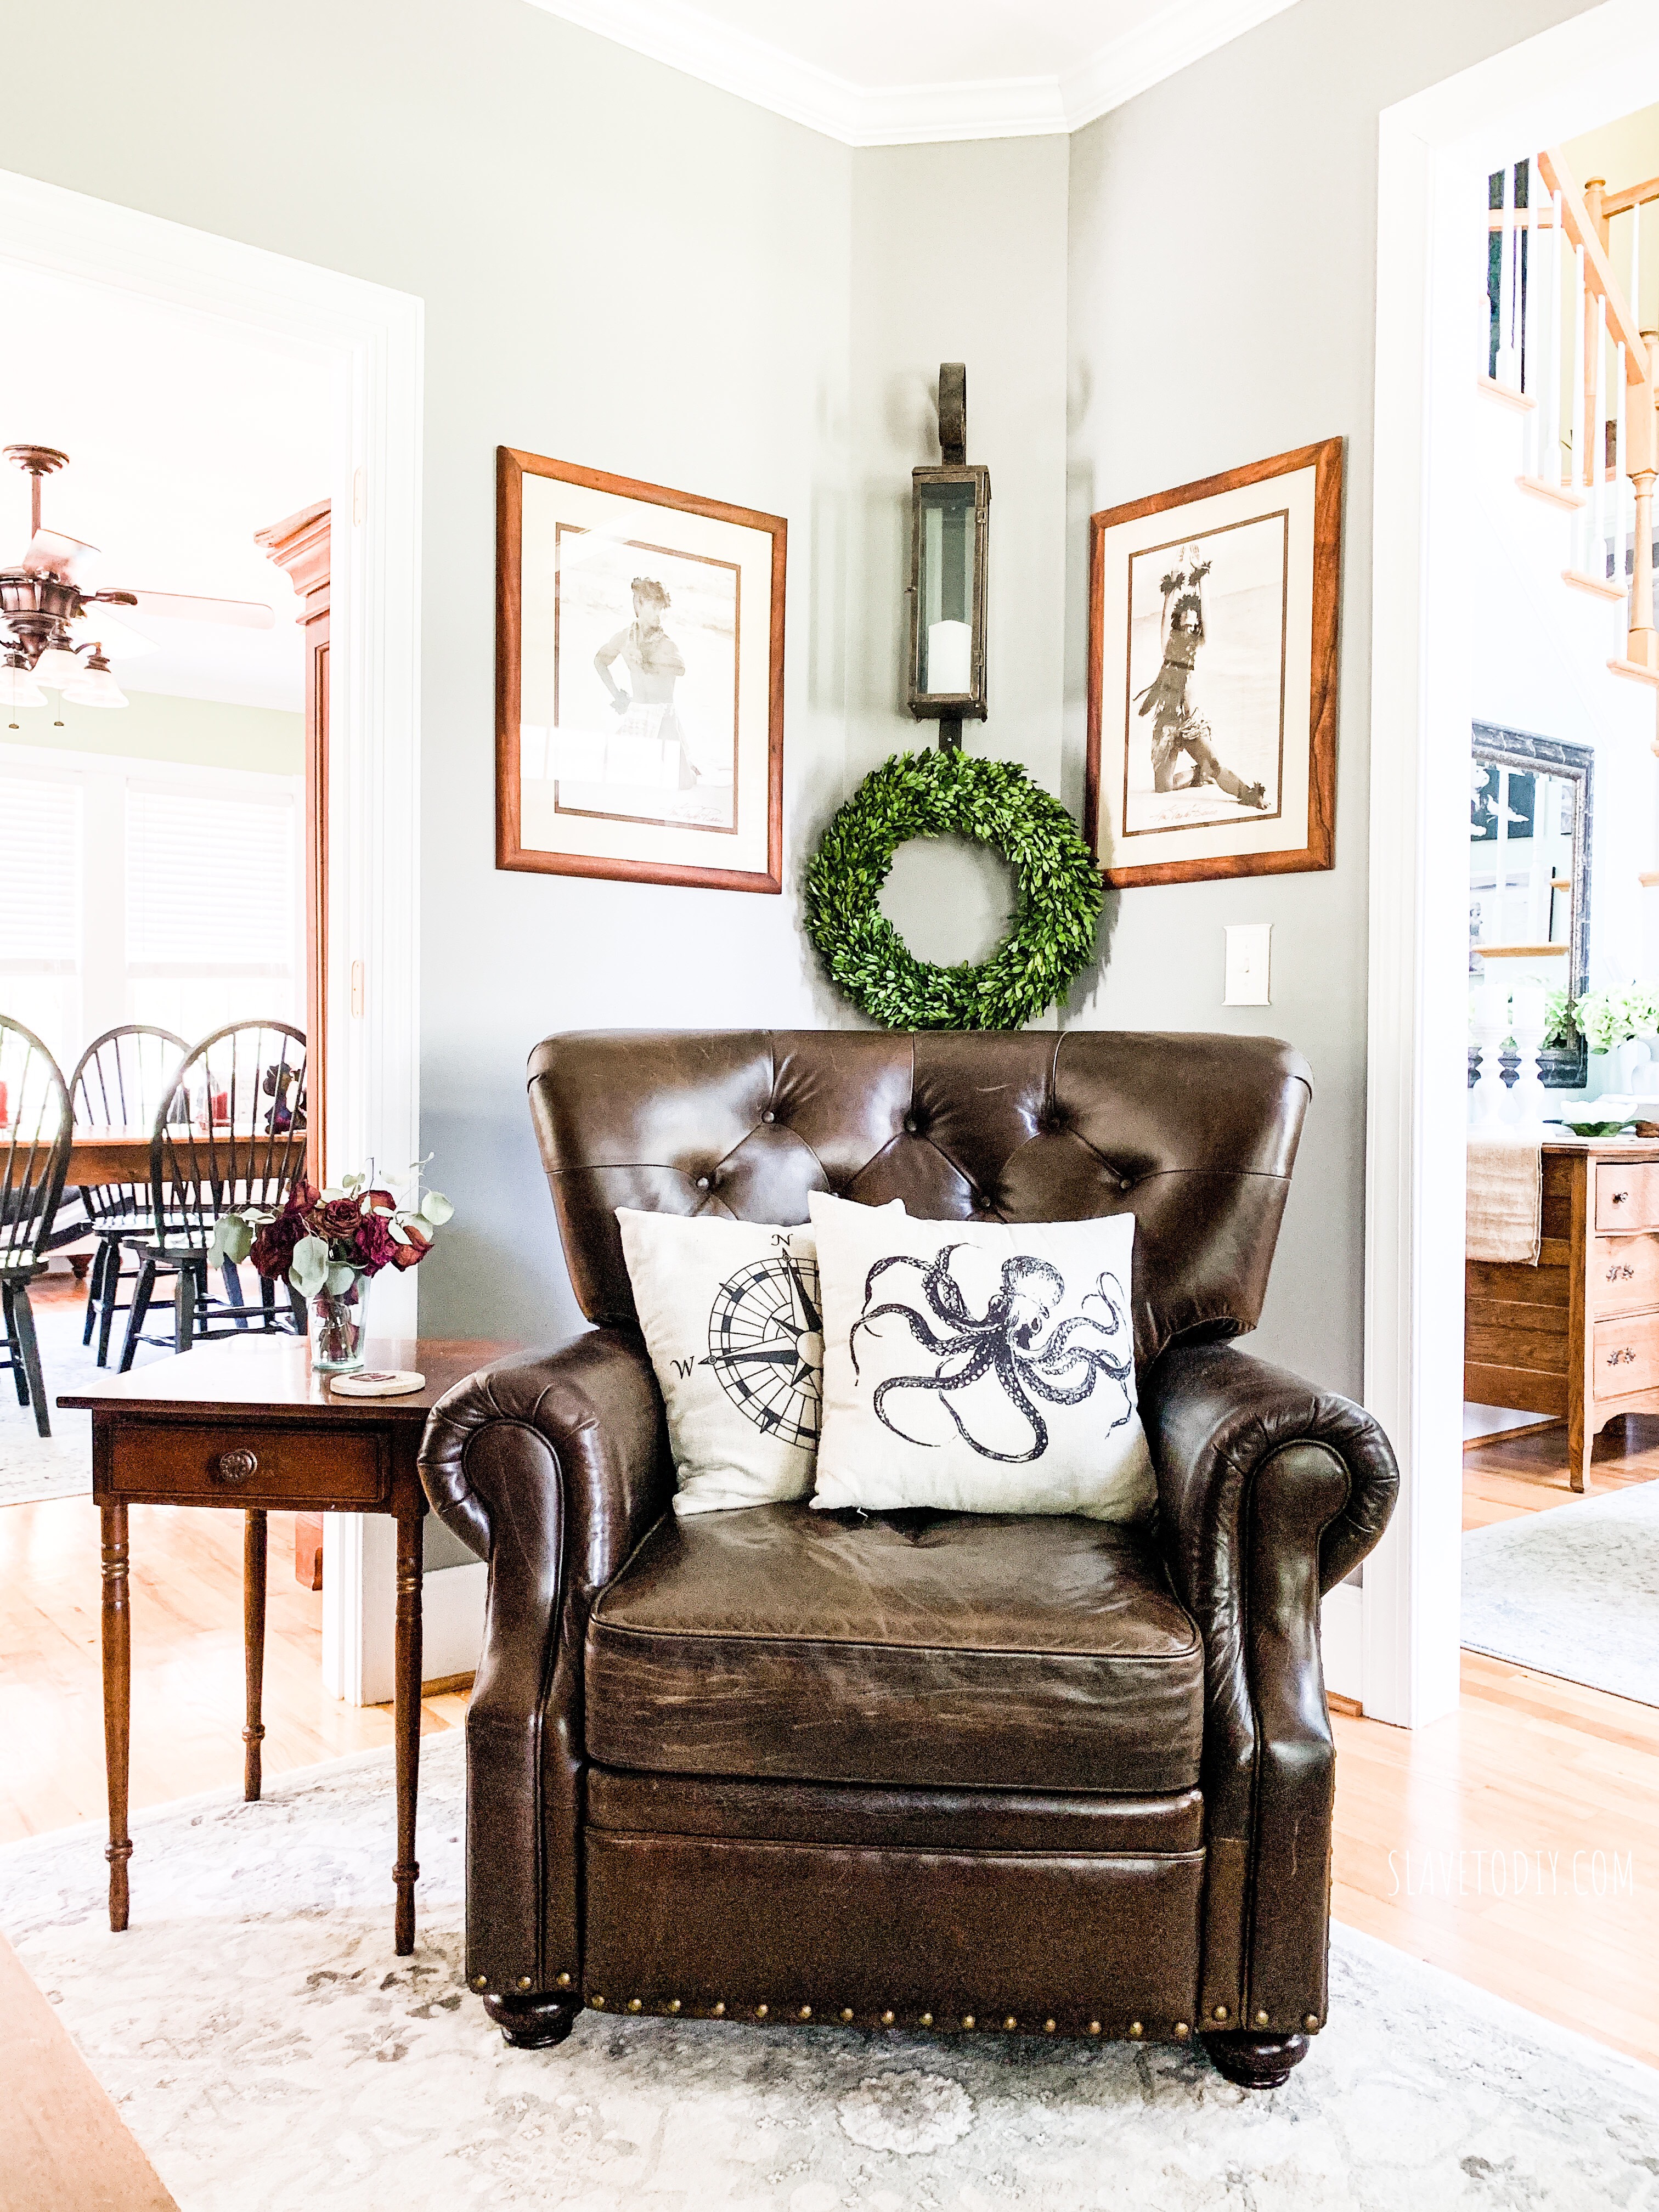
Rainman’s chair, with Kim Taylor Reece photography in Koa wood frames, Preserved Boxwood Wreath from DoorandDecor (Etsy)
To match the chesterfield sofa, we purchased the Lansing Leather Recliner in Vintage Cocoa from Pottery Barn.
The tutorial for the dried rose arrangement is here and the table is an antique hand me down from my mom.
The Octopus Pillow Cover and Compass Rose Pillow cover are both from Amazon. The lantern looks very nice but I wasn’t super excited about the construction, so I won’t recommend it.
So glad you came to check out our finished adult living room! Thanks for stopping by and check out our other updates, projects, and design inspiration on our Blog. Cheers!
*Legal stuff:
I am honest about my experiences with different products and write because I enjoy it. I do however, have the opportunity to earn money for my writing, also.
Slavetodiy.com is a participant in the Amazon Services LLC Associates Program, an affiliate advertising program designed to provide a means for sites to earn advertising fees by advertising and linking to amazon.com. Amazon offers a small commission on products sold through their affiliate links. Each of your purchases via our Amazon affiliation links supports our cause at no additional cost to you.
If a blogger links to an Amazon product (with a special code for affiliates embedded in the link), and a reader places an item in their “shopping cart” through that link within 24 hours of clicking the link, the blogger gets a small percentage of the sale. Amazon links are not “pay per click.” If you click on the product link and stay around Amazon and purchase something else, however, I will get a commission on that sale.
Slavetodiy.com is also a VigLink affiliate advertiser which works similarly.
For those of you have been following our progress, you know I was mortified that we hadn’t completed the front garden project. We did a massive, beautiful stacked stone garden around the front porch but the garden along the walk leading from the driveway to the front door was still sad, neglected, and downright awful.
*This post may contain affiliate links. Please see full disclosure at the end of the post.
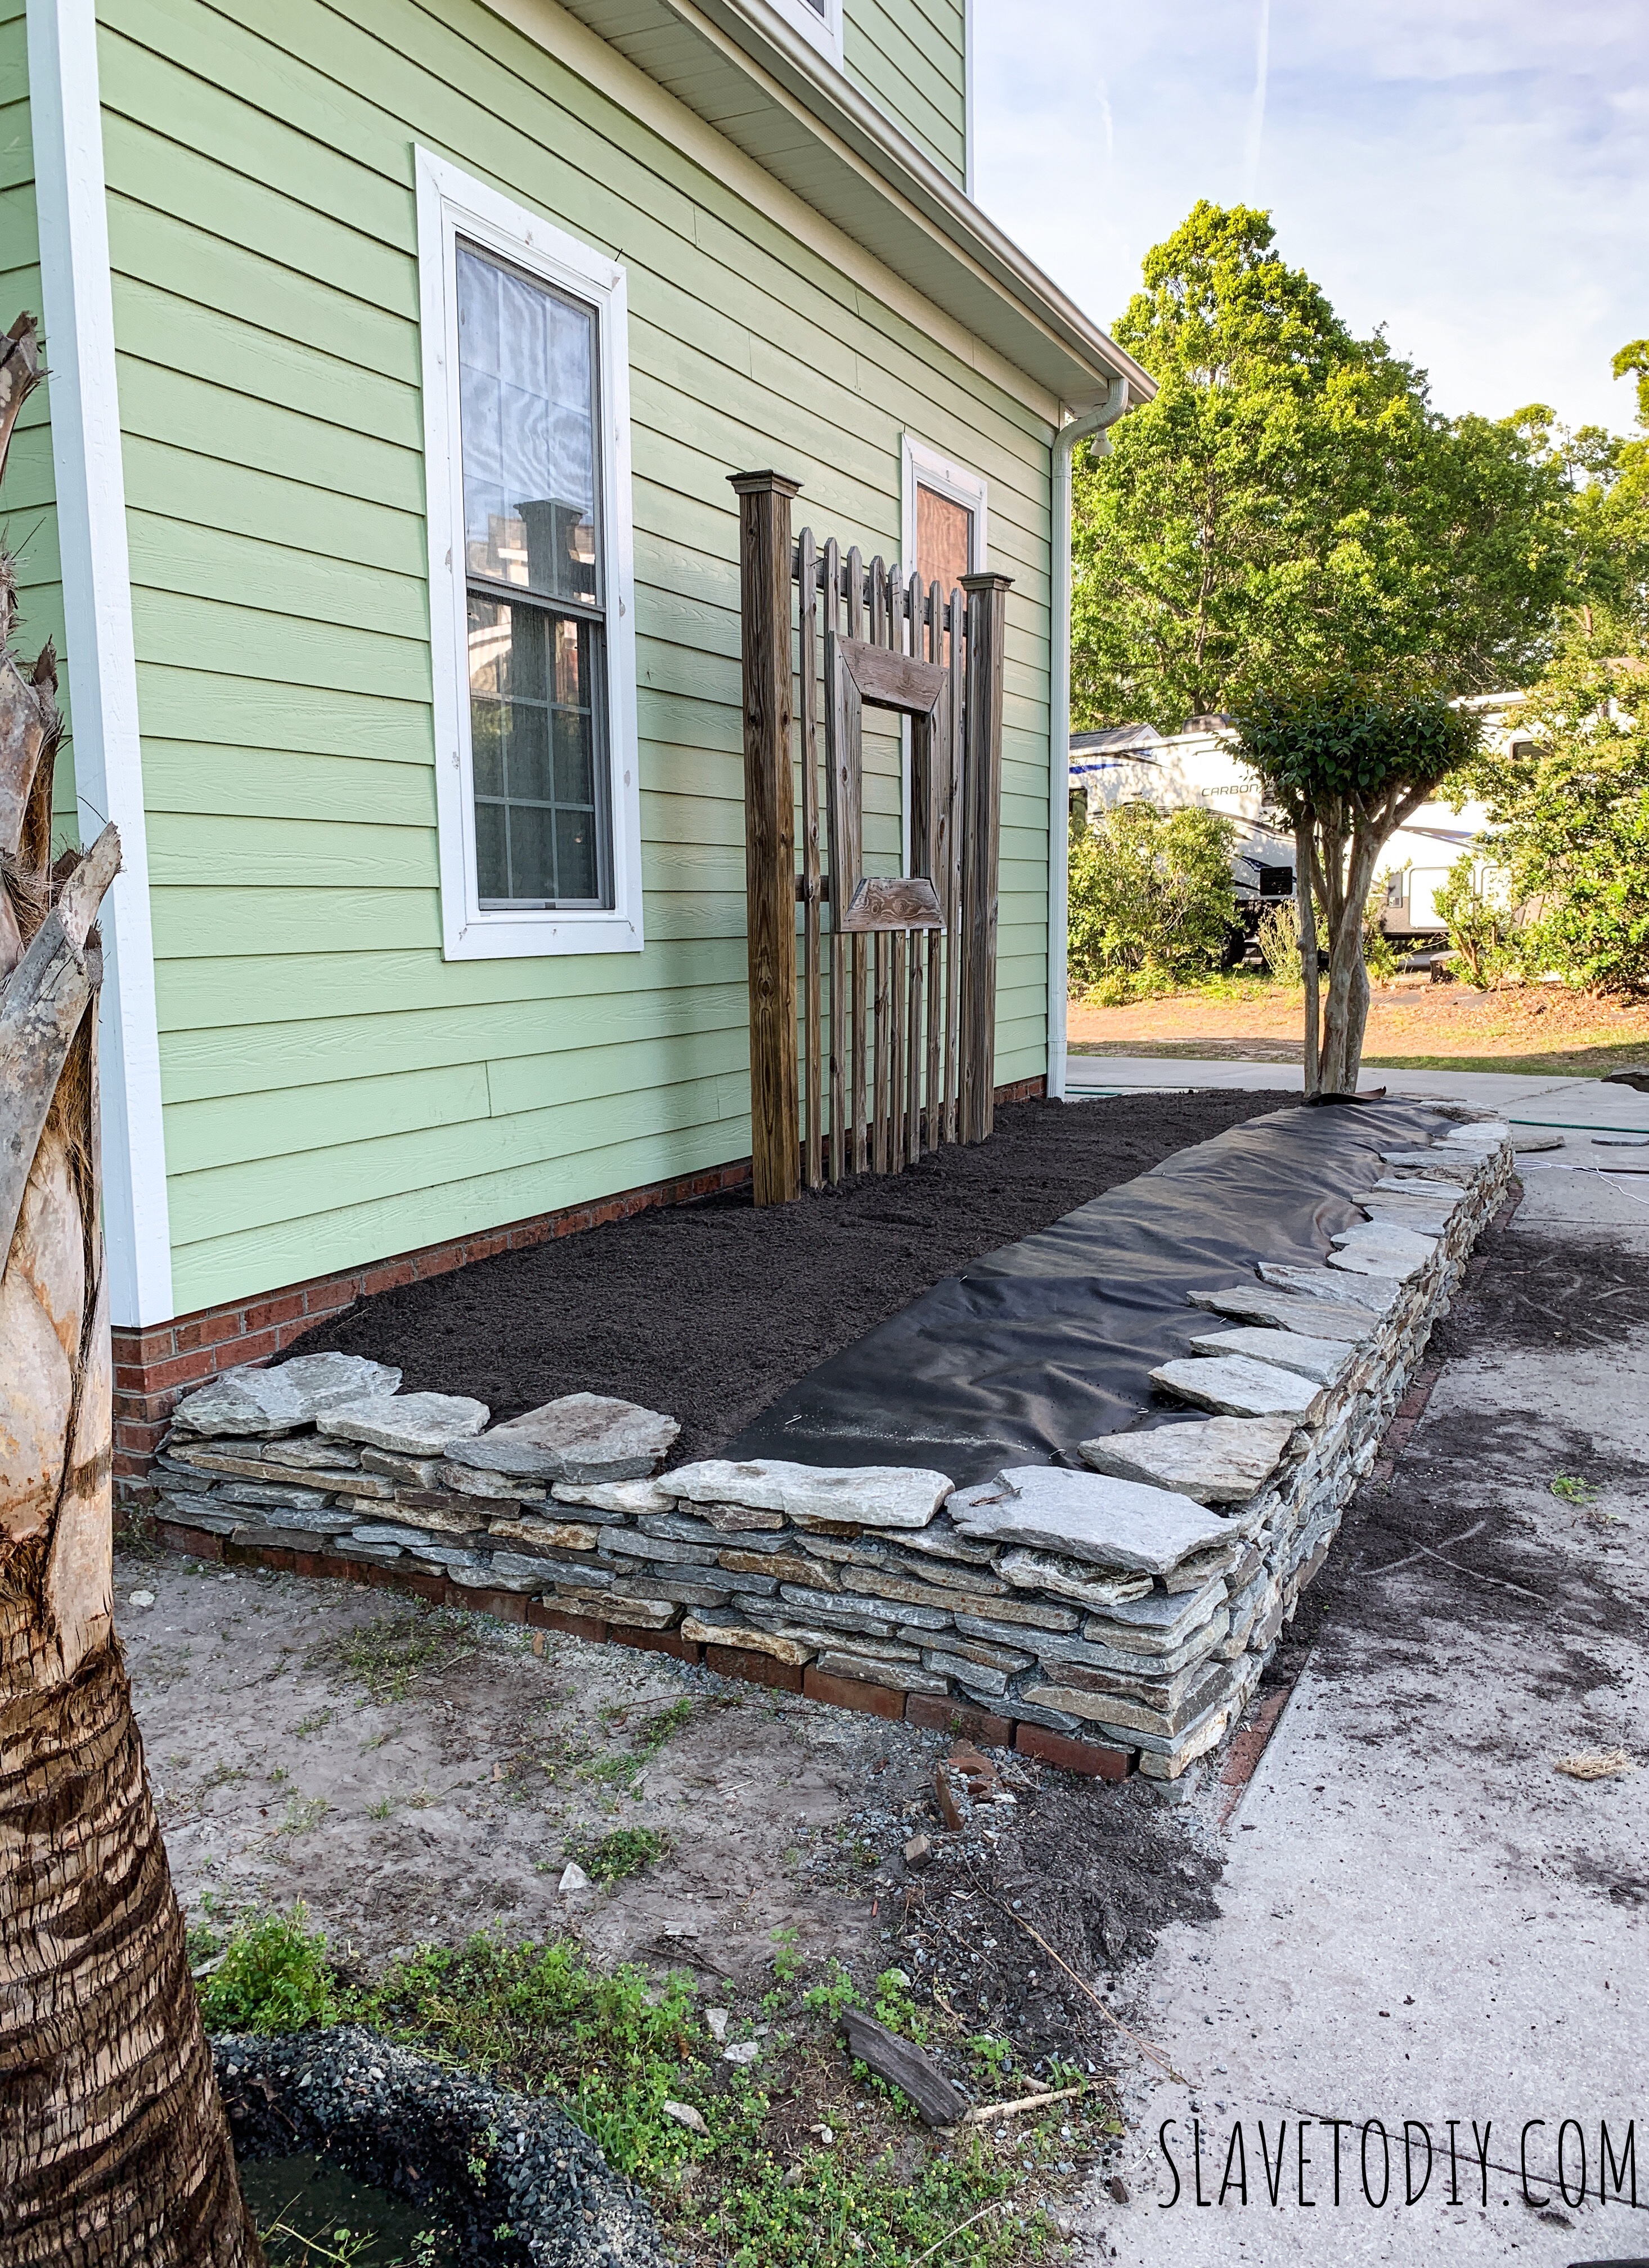
This is the “after,” but it took a few weeks to get there, working a little bit each day:
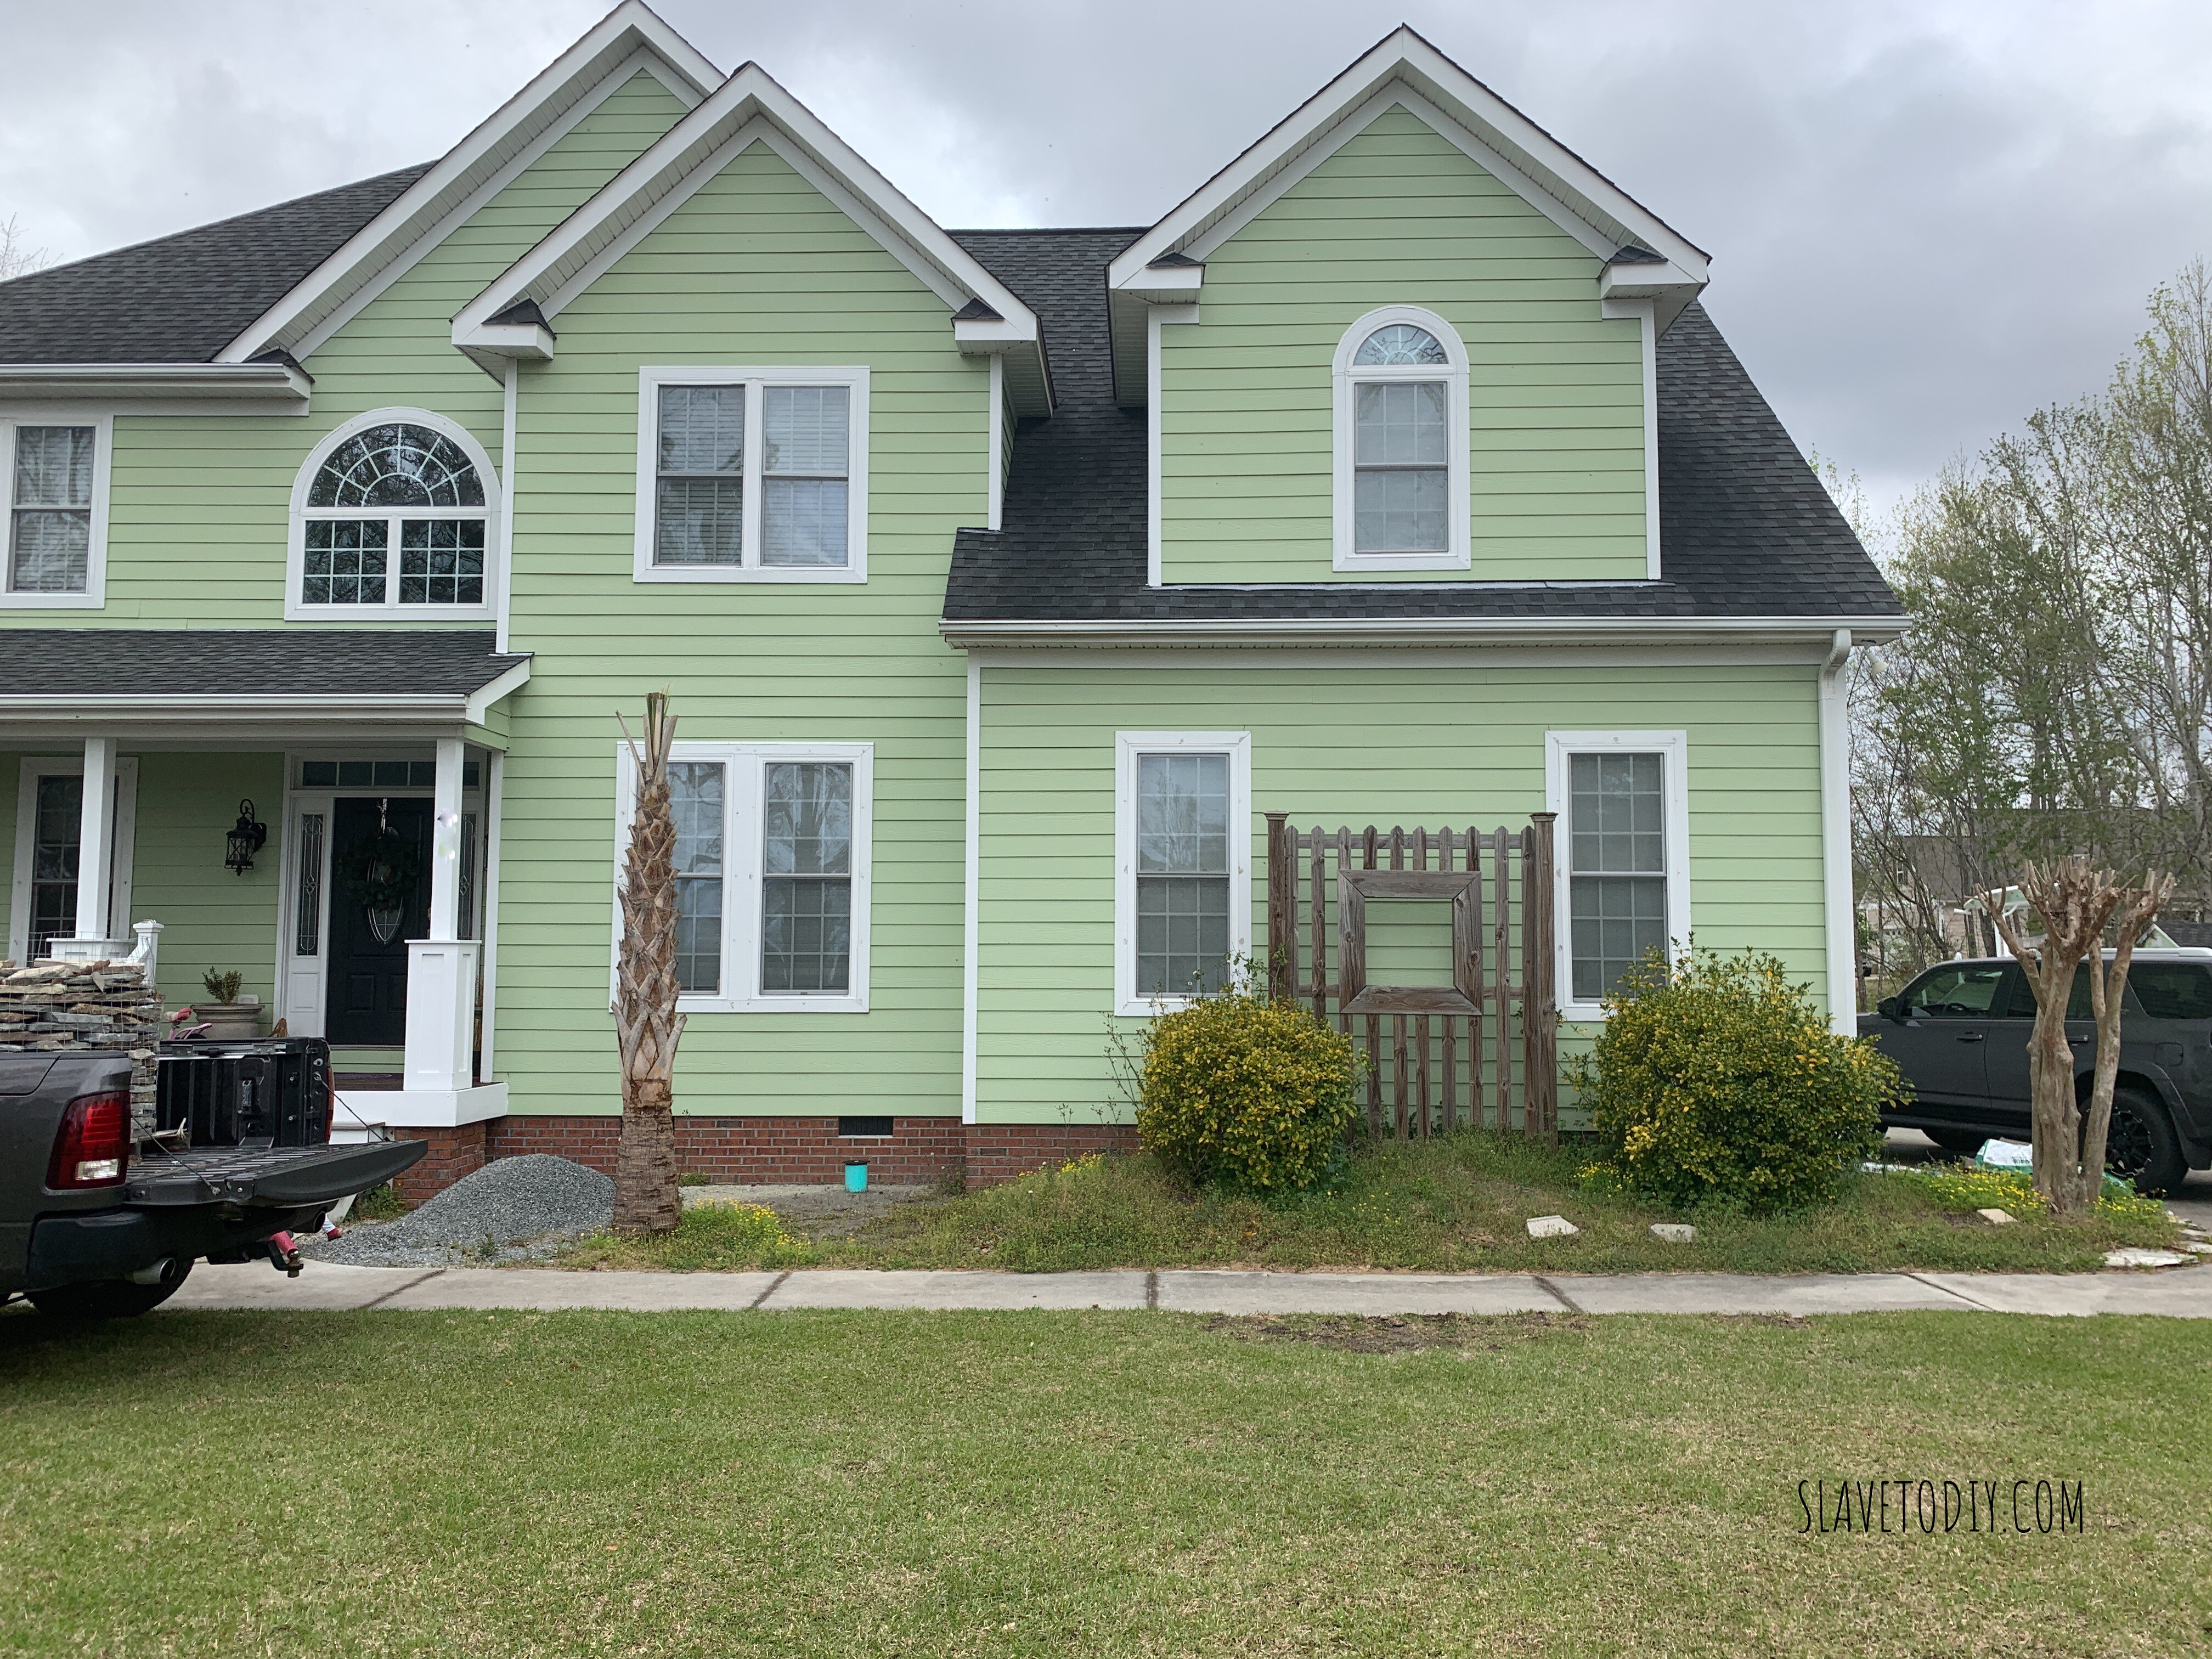
So, this is what that “garden” looked like before I finally insisted Rainman go buy me some rocks (like we didn’t already have enough on our plates). We had already cleared for the future patio and had deposited excess dirt into it, piled up around the bushes, with the bonus of random pavers that braced Christmas lights. Just beautiful. Sigh.
Before. Awful, unfinished landscaping project.
Ugh. It’s really bad. Please look away.
View from the porch of the bad garden.
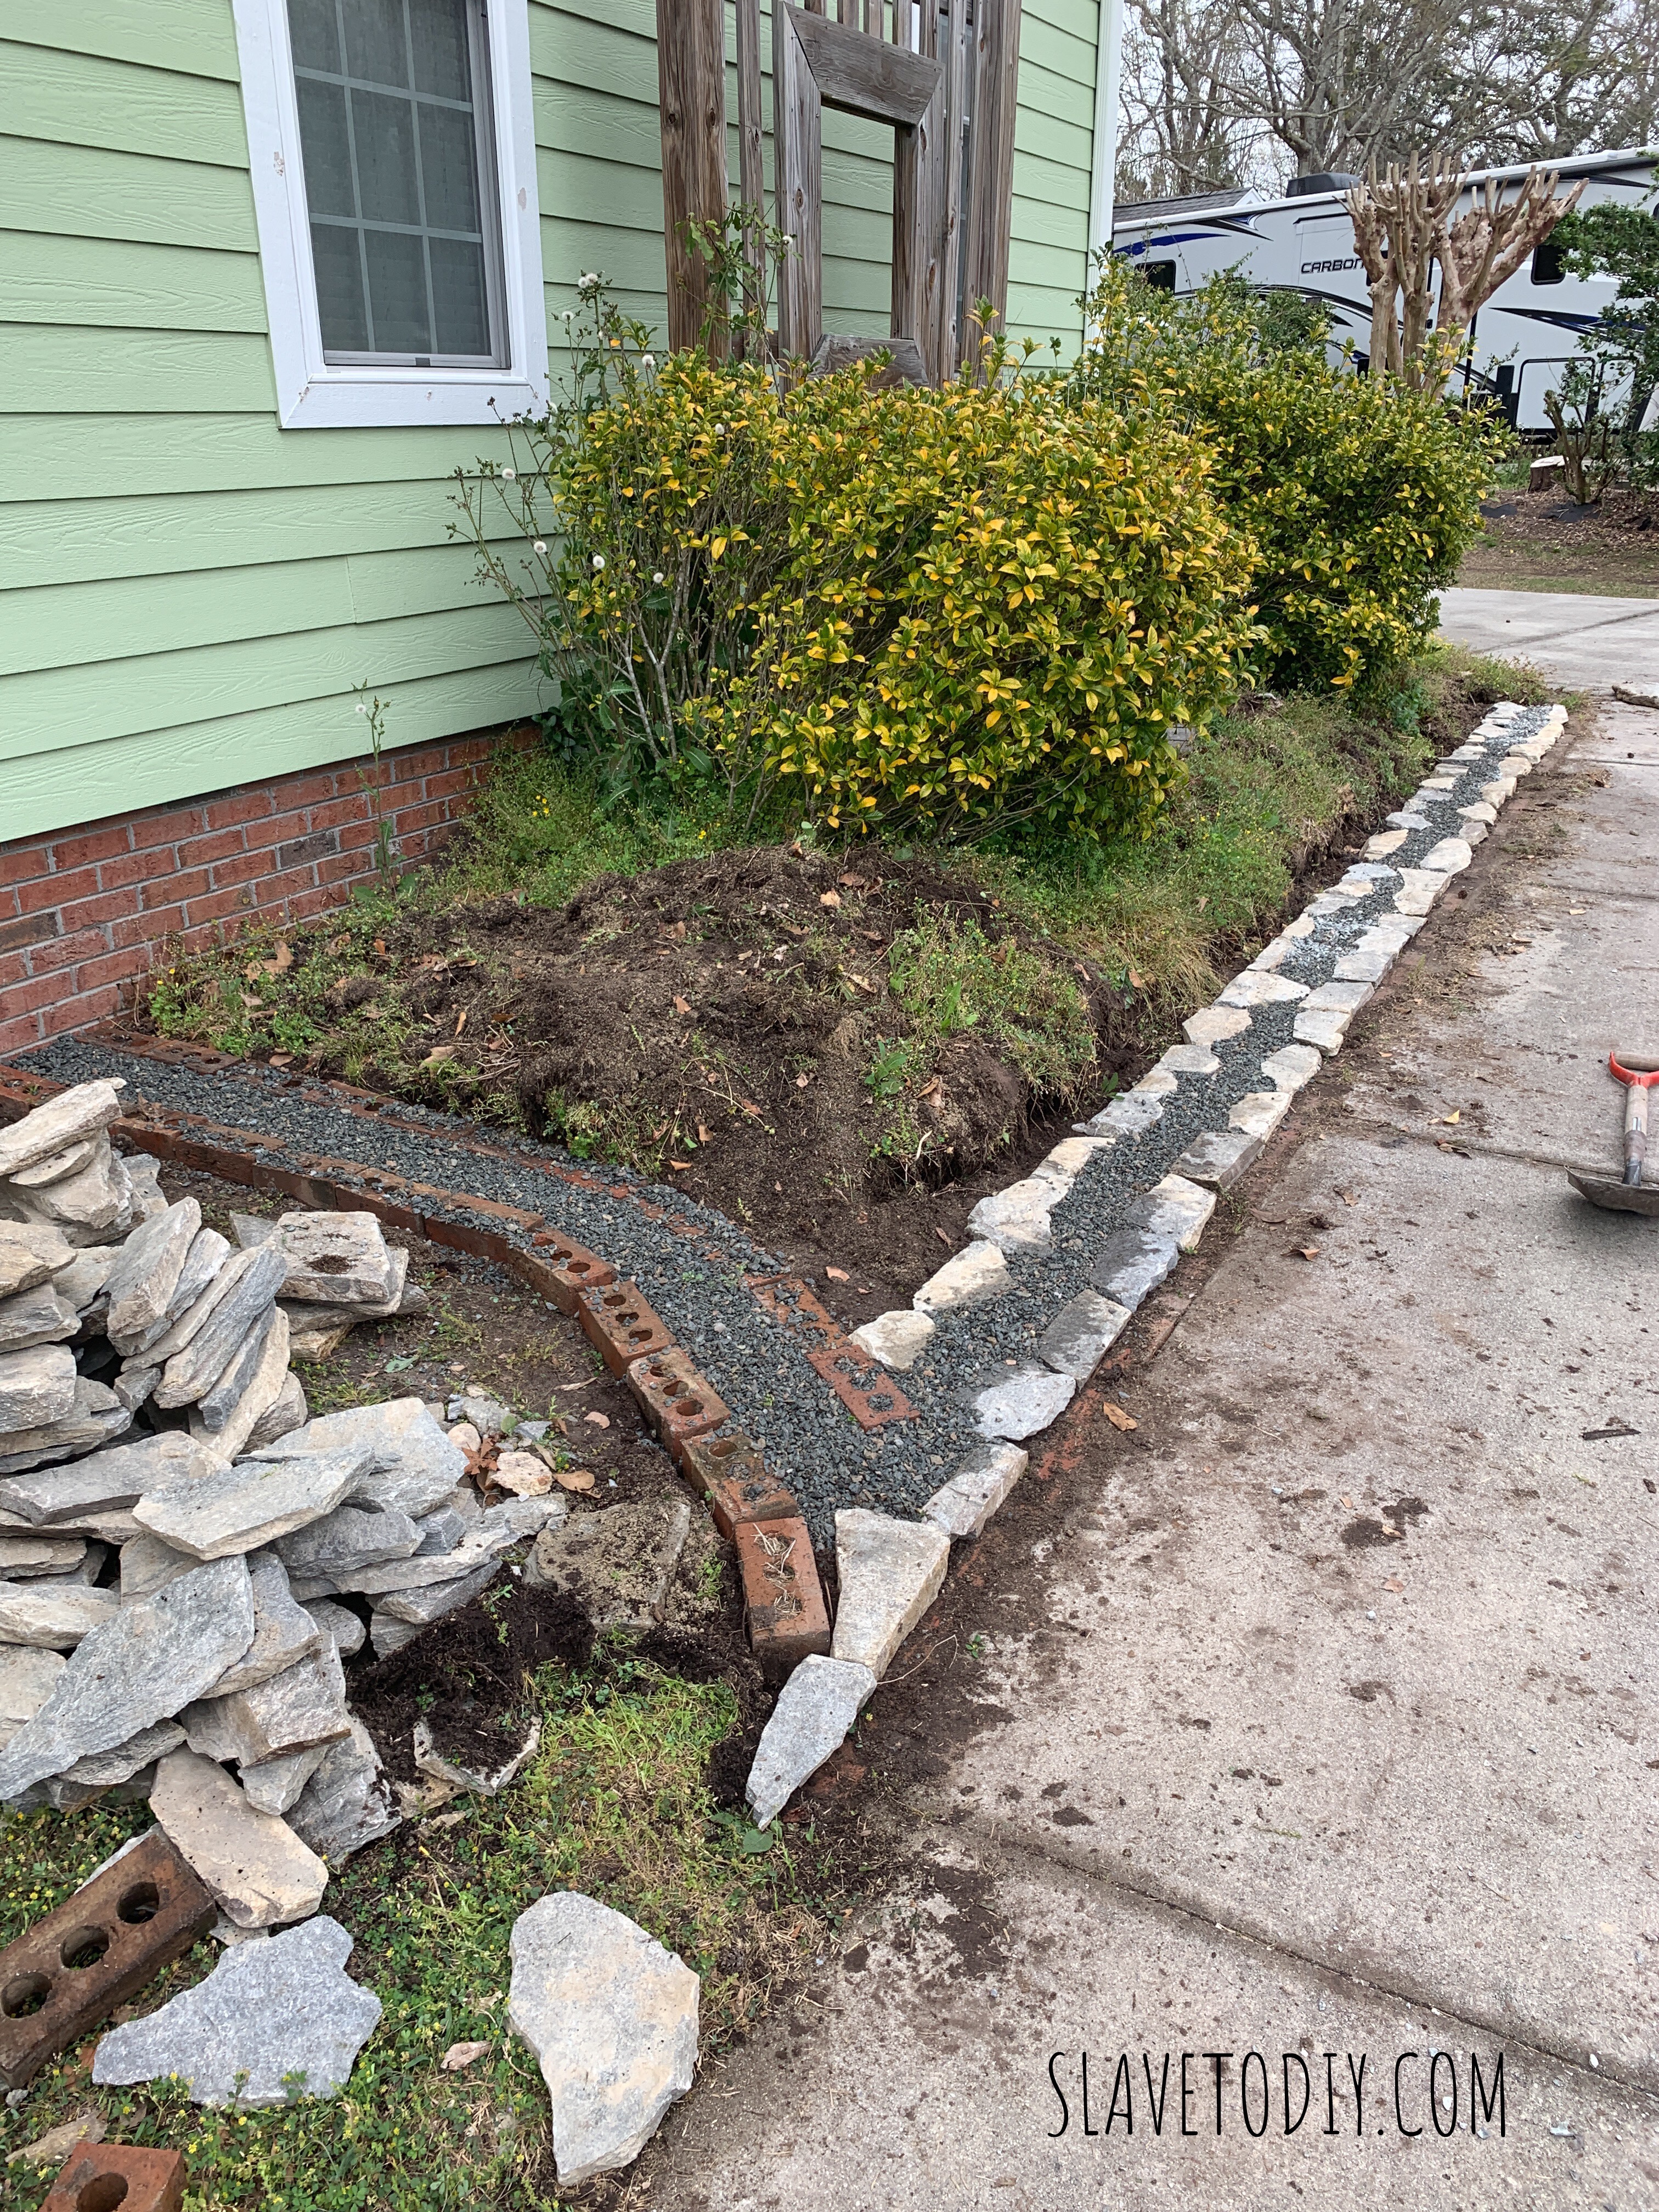
The sand-base is the home of the future brick patio. This is another “before” photo. So, I’m not going to go into the project as exhaustively as I did on the last one, this is sort of an abbreviated photo tutorial. For detailed instructions (totally the same process!) check out A Classic Stacked Stone Garden Wall, Phase One and Classic Stacked Stone Garden, Phase Two. As for this guy, here goes.
Base layer for dry stacked stone garden with gravel and stone.
First we did the base to make sure we had a stable foundation. We mimicked the curve coming off the steps so the future patio will be the right shape. We used the bricks since that side will be higher (a step up to the brick patio) and that way we didn’t waste any stone.
Another shot of the base layer in on the dry stacked stone garden.
It didn’t occur to me at this point what was really bothering me. But, I’ll get to that.
The curve around the Crepe Myrtle with stacked stone garden base
I really love this gentle curve around the end of the garden. It’s a great shape.
Another shot of the rock base for the dry stack stone garden wall.
This shows how the base took shape.
Dry Stacked Stone Garden wall going in.
So, I was standing there looking at it: this future garden and Rainman asks me a simple question. “You don’t like those bushes do you?” And, of course, that was exactly what was bothering me. It would’ve been WAY more simple if I had asked him to remove them BEFORE I began the wall installation, but he didn’t even fuss at me.
Dry Stacked Stone Garden wall taking shape.
So, the deal with the garden wall installations is that Rainman can’t help. It’s sort of like playing tetris, except that the pieces aren’t the same and you have to be a little creative. It’s an art, really. So, he did what he could: he broke up the weeds and filled in gravel where I needed it. He also lugged rocks of various sizes over to where I was working so that I could build faster. He’s really very awesome, this Rainman of mine.
Leveling the dry stacked stone garden
When we get to this stage of the game, where final leveling is happening, his help, and his eye are essential. I still don’t let him touch any rocks, but he gets me a line so we can get the wall ready for capstones.
Topsoil going in on the dry stacked stone garden
In order to get the garden ready for capstones and landscaping fabric I needed the rest of the topsoil in so I put the teenagers on duty, running back and forth to the topsoil and mulch place.
Getting dry stacked stone garden levelled and ready for landscaping fabric and mulch.
So, we finally got it mounded where I wanted it, and let it rest overnight with a good soaking rain so we were sure it was good and settled and the levels were where I wanted them.
Dry stacked stone garden with landscaping fabric and capstones going in.
Once the soil was in and mounded the way I wanted, we added landscaping fabric and capstones. Don’t EVER skip the landscaping fabric. You’ll be sorry you did.
Dry stacked stone garden complete with mulch and ready to plant!
Once we had the landscaping fabric and capstones in, it only took two scoops of mulch to get a nice thick layer. Now I could really look at my blank palette and make plant decisions.
Enter a caption
This little tree frog took up residence on one of the porch columns and kept us company almost the whole project.
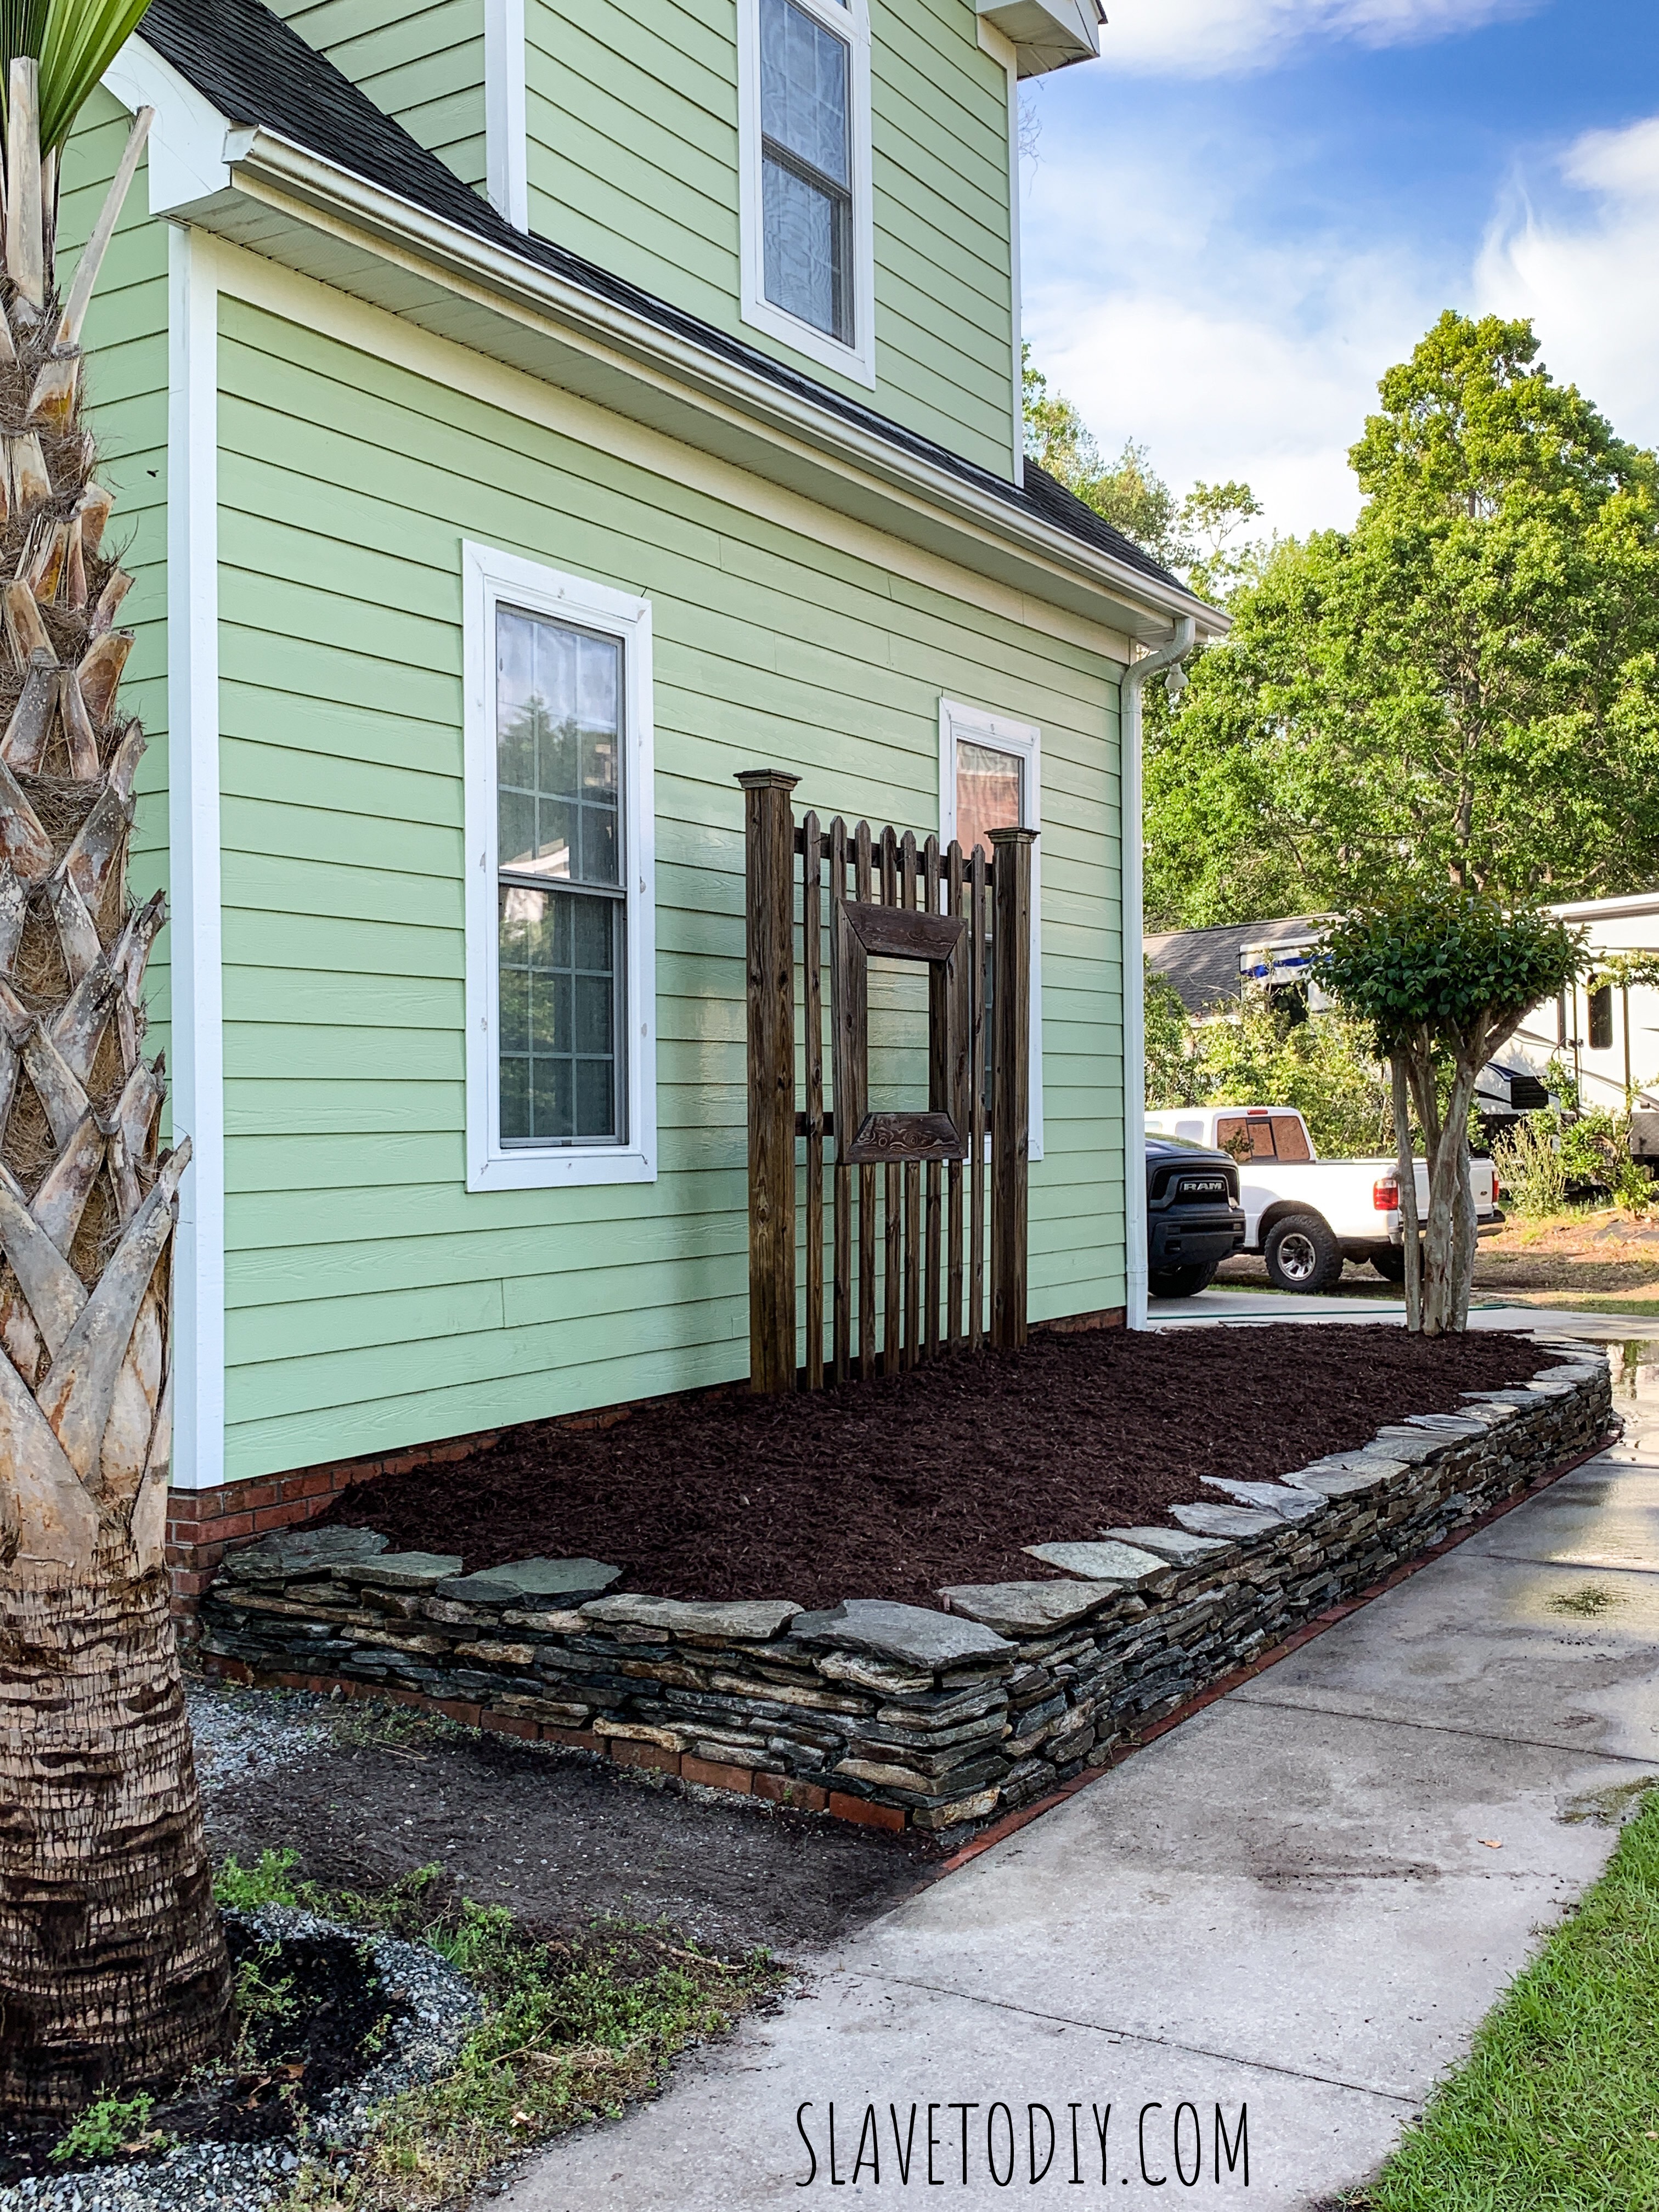
Dry stacked stone garden from the driveway.
This is a shot of the garden from the driveway.
Both dry stacked field stone gardens together and finished!
For the tutorial on step-by-step stacked stone garden wall installation see our blog post here.
Landscaping Fabric Pins (leftover from another project)
Two Scoops Mulch: $74.72
Four Incrediball Hydrangea and a Rose Bush from Spring Hill Nurseries: $147.55
Seven Scoops Topsoil: $134.54
Total: $1074.17
Can you imagine how much it would’ve cost to hire someone to do this? I’m not saying it’s easy, but it IS a project you can do one afternoon at a time. And it’s VERY, VERY satisfying and rewarding to see what a beautiful thing you created.
Thanks for reading along and check out more of our projects on our blog. Cheers!
*Legal stuff:
I am honest about my experiences with different products and write because I enjoy it. I do however, have the opportunity to earn money for my writing, also.
Slavetodiy.com is a participant in the Amazon Services LLC Associates Program, an affiliate advertising program designed to provide a means for sites to earn advertising fees by advertising and linking to amazon.com. Amazon offers a small commission on products sold through their affiliate links. Each of your purchases via our Amazon affiliation links supports our cause at no additional cost to you.
If a blogger links to an Amazon product (with a special code for affiliates embedded in the link), and a reader places an item in their “shopping cart” through that link within 24 hours of clicking the link, the blogger gets a small percentage of the sale. Amazon links are not “pay per click.” If you click on the product link and stay around Amazon and purchase something else, however, I will get a commission on that sale.
Slavetodiy.com is also a VigLink affiliate advertiser which works similarly.
Did you notice that it’s super hard to find reviews on RH light fixtures (or anything else Restoration Hardware sells)? I have to tell you, I was a little afraid… the shroud of secrecy surrounding the quality of the items, and lack of happy customer (or any) reviews, left me feeling a bit wary. So, I hope I can shed a little light on my RH “experience” and provide an honest review (I still have fear about a hypothetical RH strong arm guy coming to bust my knee caps, but here goes…): oh, by the way. I’m not an affiliate. I think their snobbery prevents affiliatery (dude, that’s not a word, I just made it up), so you can be sure of my unadulterated, completely honest opinion.
*This post may contain affiliate links. Please see full disclosure at the end of the post.
First, let’s be totally up front. Restoration Hardware’s marketing team and strategy are second to none. They are selling class. Period. It’s unbelievably brilliant and diabolically well executed. Every purchase says: welcome to the champagne life. But, is it true? Are their products that much better?
I’ve had my eye on a light fixture at RH for a while. I visited it at night on their website, shielding my iPad just in case Rainman was just pretending to be asleep and really wanted to know what I was cyber stalking. Several times I almost caved and bought a knock off (everything that was similar had a lot of chrome, which was too glammy), but I stayed strong and finally bit the bullet. Enter the 19th century rococo chandelier in smoke into my life. It was the perfect piece to complete a recent adult living renovation and I just couldn’t say no.
RH Restoration Hardware 19th C. Rococo Iron & Crystal Round Chandelier Product Review
As we have been busy on a MAJOR DIY deck addition, the box sat unattended for several weeks before my Rainman discovered me looking sad one night and rolled up his sleeves. What we thought would be a simple installation was not quite, but I’ll tell you all about it.
RH Restoration Hardware 19th C. Rococo Iron & Crystal Round Chandelier Product Review
But, first, back to that deck renovation. So, the deck needed to go in before child-next graduated from high school so there was an appropriately awesome place for his friends to hang out, not inside with all of the boring adults (and no one sued us when they fell through the old, rotting deck). Surprise, surprise, as we were peeling back siding to install the ledger board, Rainman and my father in law discovered rot. It went halfway up the back wall and surrounded the door.
RH Restoration Hardware 19th C. Rococo Iron & Crystal Round Chandelier Product Review
This was the same door that eventually I wanted to close in anyway, and was going to have a kitchen cabinet behind it, because we would also rip out windows and install custom steel doors instead. Nevermind that this other renovation was nowhere near ready to start, financially or otherwise, I was like, “fill it in.” We’re already doing this, and I’d rather not install a new door that we’re going to take out and close in later. And, as anyone knows who has DIYed a kitchen reno, there’s no time like the present to start it, and no time like right before you sell the house to finish it! Needless to say, I was a bully, and Rainman was not happy.
RH Restoration Hardware 19th C. Rococo Iron & Crystal Round Chandelier Product Review
Well, I couldn’t leave the blank wall without a cabinet. And if you’re going to get the cabinet you might as well get the matching one for the base of the banquette island you planned. And if you’re already paying the unlimited furniture delivery fee (which is unfortunately $399 in my area because I live out in the sticks), you might as well buy that fixture you’ve had your eye on. It’s like I was saving us money already. (I feel like I’ve maybe been reading those “If You Give A Mouse A Cookie” books to the little one too much lately).
RH Restoration Hardware 19th C. Rococo Iron & Crystal Round Chandelier Product Review
So, I had my fixture.
RH Restoration Hardware 19th C. Rococo Iron & Crystal Round Chandelier Product Review
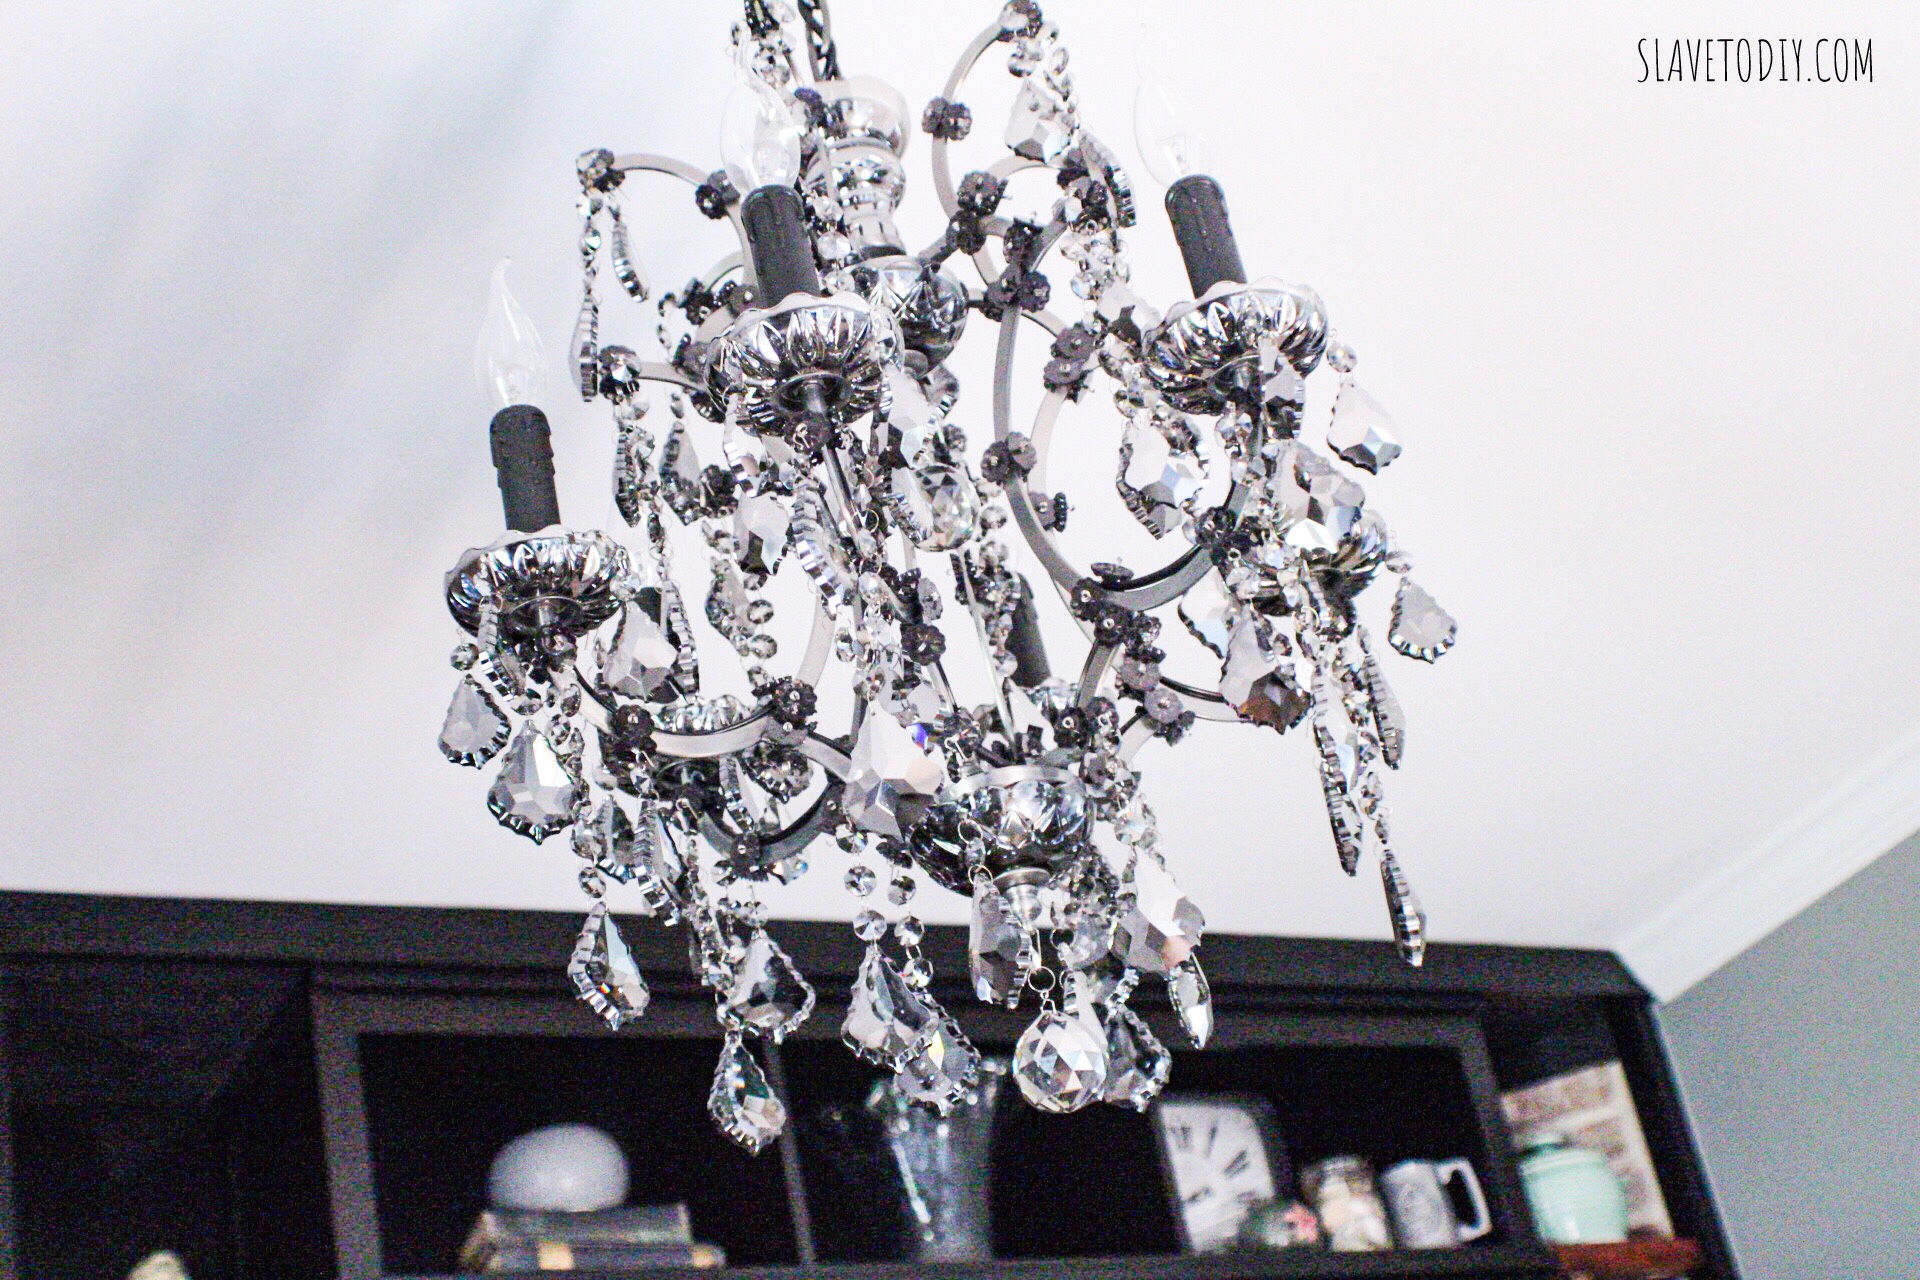
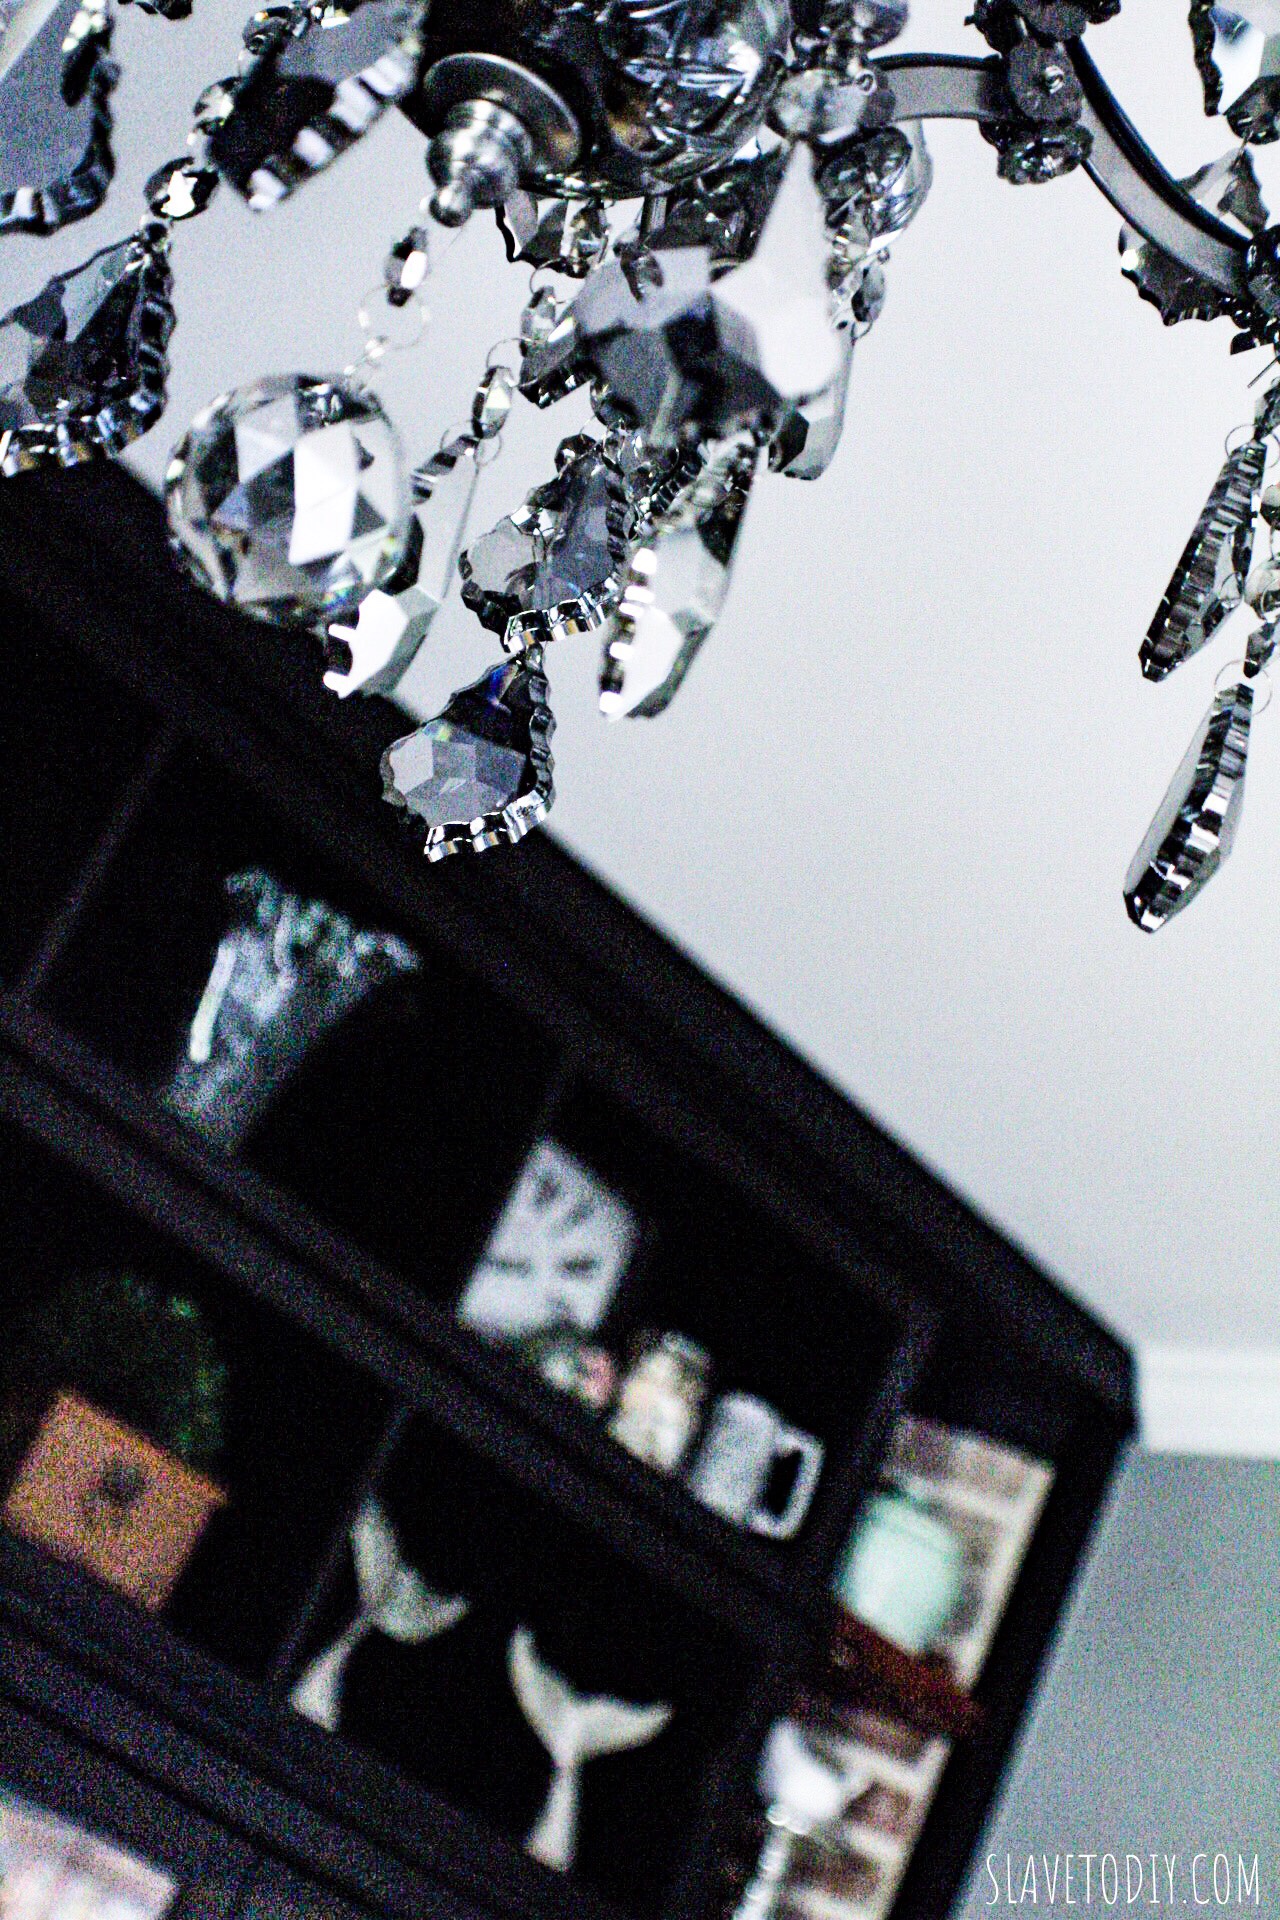
Rainman just wanted to make me happy, and generally, fixture hanging is a weekday evening type of deal. Straightforward and satisfying. Unless there are like 200 crystals that have to be individually attached. But, it’s fine… it would be better if there were gloves but they’re not included (I still need to go back and get all of the fingerprints off the crystals). I ordered white cotton gloves from Amazon and they’re ready for me whenever I get to it (there was no way I was stopping progress to wait on gloves).
RH Restoration Hardware 19th C. Rococo Iron & Crystal Round Chandelier Product Review
So, the actual fixture installation was pretty straightforward (although the directions are a bit lacking). I believe the prevailing assumption is that anyone buying this is going to have a pro install it and not their own personal slave Rainman after work one evening, so I guess I get that the wiring diagrams weren’t totally great. The real kicker was that the number of crystals doesn’t actually match the installation guide and you basically can’t get there from here. But, it may be that it’s a matter of personal preference how you’d like the crystals to hang, I’m not totally sure.
RH Restoration Hardware 19th C. Rococo Iron & Crystal Round Chandelier Product Review
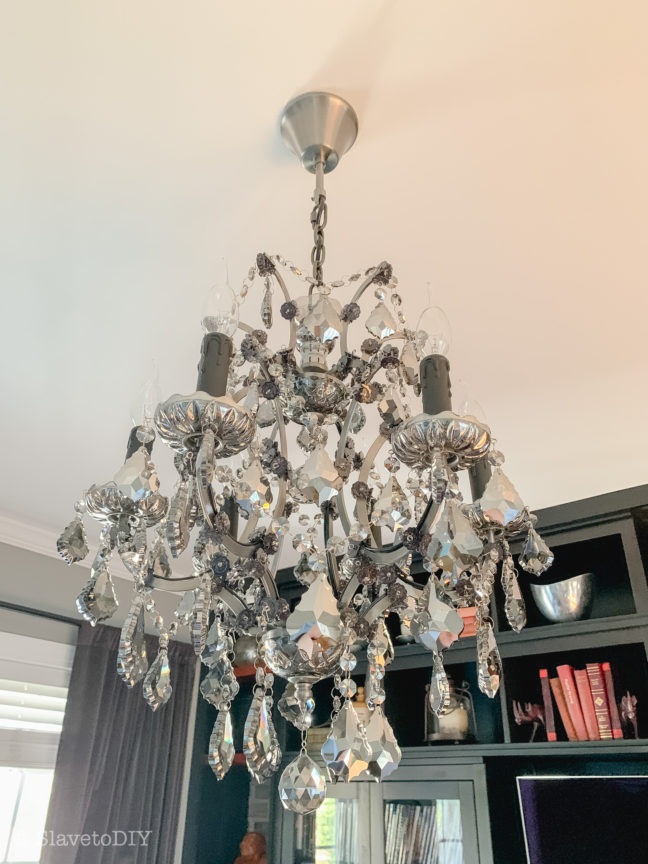
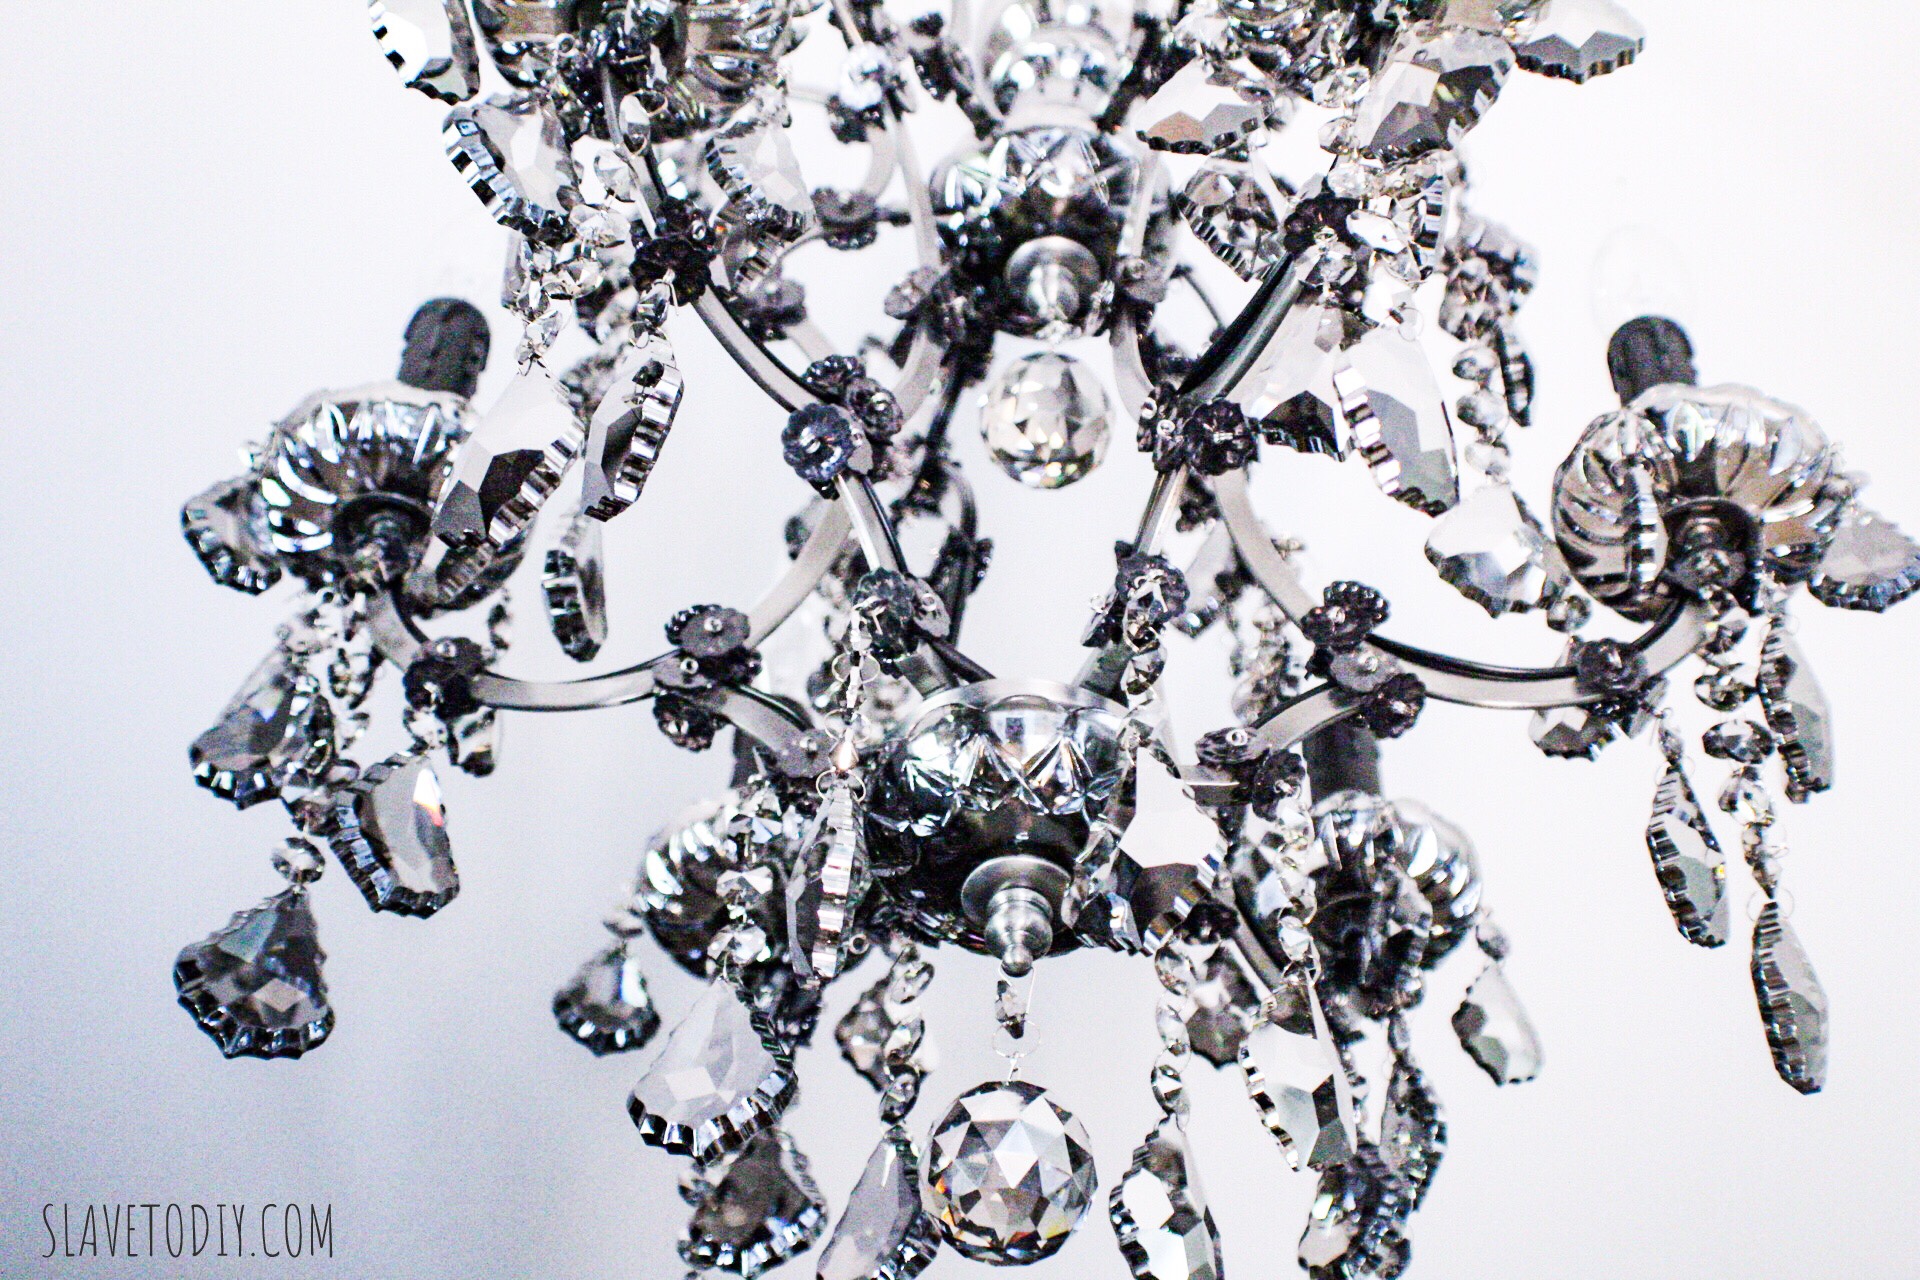
What I didn’t get from the product info before I received it (and you can’t see in their pictures) is that the body of the fixture is in matte iron – which sort of reminds me of industrial steel beams before they start rusting. It’s beautiful, just not what I expected. The black wrought iron seen in some of the pictures is only on the clear crystal option. I love it just as much, I just figured it was worth noting since it wasn’t entirely apparent to me upfront.
RH Restoration Hardware 19th C. Rococo Iron & Crystal Round Chandelier Product Review
The verdict: (drumroll please) I would ABSOLUTELY recommend the fixture. It’s gorgeous and dazzling (like, going to need a dimmer), it is the crown jewel in the living room that took it from nice to, OMG-where’d-you-get-that? I love watching the light dance off of the beautiful smoke crystals in different patterns as the sun moves around the house during the day and the shadows it creates when the sun goes down. It’s breathtaking.
Although we didn’t have any issues with this particular fixture, there were some blemishes on one of the cabinets. I offered to have them send me replacement hardware, but as that was out of stock, they send a team to pick up the cabinet and bring me a whole new one. No trouble, no fuss, no problem. The customer service is fantastic, and their dedicated delivery teams are super professional and friendly.
Apparently they have some ludicrously good warranty on all of their stuff (which I honestly didn’t know when I hit “play” on the purchase), so even though the products are a bit *cough *cough on the pricey side, we’ll be buying from them again. It’s well worth the extra money to have heirloom quality pieces.
Thanks for hanging out with us today and check out more of our DIY, projects, and decor on our blog.
Cheers!
*Legal stuff:
I am honest about my experiences with different products and write because I enjoy it. I do however, have the opportunity to earn money for my writing, also.
Slavetodiy.com is a participant in the Amazon Services LLC Associates Program, an affiliate advertising program designed to provide a means for sites to earn advertising fees by advertising and linking to amazon.com. Amazon offers a small commission on products sold through their affiliate links. Each of your purchases via our Amazon affiliation links supports our cause at no additional cost to you.
If a blogger links to an Amazon product (with a special code for affiliates embedded in the link), and a reader places an item in their “shopping cart” through that link within 24 hours of clicking the link, the blogger gets a small percentage of the sale. Amazon links are not “pay per click.” If you click on the product link and stay around Amazon and purchase something else, however, I will get a commission on that sale.
Slavetodiy.com is also a VigLink affiliate advertiser which works similarly.
I’m so excited the Hemnes IKEA builtins are finally finished!!! This has literally been a two-year process (of building custom-ish bookshelves) and life has been truly uncooperative. But, they are done and I am super psyched to be sharing our process and pictures with you!
Before I get started, I feel like a short discussion is warranted… a note on this new culture in which I find myself.
You know, when I was growing up, the word “hack” was a bad thing. Like, if someone called you a “no talent hack” or you were watching a movie about murderous chainsaw wielding “hacks”… or am I using that wrong? Anyway, so I’m old now, and apparently hacking is a positive thing. Unless, it’s computer related and you’re trying to pass high school by updating your math grade in the school by flashlight. But, suddenly life hacks are awesome, furniture hacks are even better, and IKEA hacks are the holy grail. So, now I’m hacking away, trying to fit in.
I’ve performed my very first IKEA hack (in my head I’m trying desperately to suppress the sound of a hair ball being coughed up every time I write the word “hack”).
This post may contain affiliate links. Please see the full disclosure at the bottom of the post.
After much pinteresting and pinning and planning I finally bit the bullet and ordered the components for my long-awaited living room builtins (I challenge you to find hemnes hacks in black on Pinterest- they’re few and far between). The boxes of homeless decor were staring at me every time I walked by and rendering the media room, which was temporarily storing the wayward decor, unusable. Enough was enough. And this HAD to be easier than building from scratch with MDF and poplar/pine as we’ve done in the past. And, of course, that dreamy factory finish is just impossible to accomplish without, you know, buying it from the factory.
So, we’ve previously done four sets of built ins of slightly varying design, each time getting better and learning tricks along the way. However, when you’re working with afternoons and weekends, and your own personal OCD- Rainman husband, they take FOREVER. It was worth seeing whether these would look as nice (or better) and if the process would go any more quickly. Fingers crossed. This is in my living room. So, no pressure if I hate it, right?
Listing photo from before we purchased the house.
Before.
Our New House, getting unpacked!
Here’s how this went down. In case the cops ask.
So, I ordered the hemnes components after measuring, remeasuring and adding their weirdly sized measurements together (these are designed with metric measurements, so the conversion is generally some oddball number and 5/8s). So, I got my 6th grade math hat on, did my measurements, made a pretty drawing on graph paper, left PLENTY of wiggle room in the design, and ordered online. This is literally drawn on graph paper. And yes it’s still okay to use a paper and pencil. This is a big wall, and those of you that follow our journey, know I like to use the WHOLE wall when we do builtins. Go big or go home, right?
And now I can’t find my sketch, so I have no proof that ever happened.
A design note: I fell in love with white cabinets and built ins for years. We did white builtins in the last place and I adored them (so did the buyers apparently). But, is that dreamy white kitchen on Pinterest really timeless? Are the built ins? Or will they be the next victim of HGTV inspired design trend that date the home? I’m so glad I waited, because we went with black, and I feel like it’s way more US, and timeless. Dare I say classic? I would hate to be here in 15 years and think, “nice going, 15 years ago self. That looks like garbage.” So, time will tell. But, I feel like black is like that little black dress that will stand the test of time. (I’m not hating on your white builtins, they’re just boring me to tears lately and I’m way to moody for all that cheerfulness).
Total cost on the bookshelves and bridging shelves from IKEA (not final cost with support lumber and trim) was $1591.64. This was the general plan:
IKEA Hemnes Builtins Hack, in black, bridging shelves and bookshelves
Buying from IKEA, a few things to note:
I purchased when I did because they were offering 20% off. Once you add the shipping, it comes out to about what it would’ve otherwise cost. Shipping on furniture is almost never free at IKEA, so if you’re waiting on that it will be a long time. Furniture delivery took about two weeks and was delivered by a different delivery service (as in scheduled with an appointment time, not FedEx or UPS). There was one damaged box with a nicked shelf and one of the seven bridge shelves was missing completely (I did the math on weight and figured out that it never shipped from IKEA, not that it disappeared en route).
So, I immediately emailed with the discrepancy and, after not getting a reply, called IKEA. After 59 minutes on hold listening to the elevator version of “I love you, always forever” by Donna Lewis mixed in with Ikea advertisements, I was approaching homicidal, but got a human being in time that my phone didn’t become just another statistic. Well, it turns out they didn’t ship it on purpose because it wasn’t in stock (could I get a heads up???). Also, helpful-insider-info-Ikea-customer-service-guy shared with me that they never get to the emails, so just call next time… good to know. Back on hold with electronica Donna Lewis…. Yay! They shipped it via FedEx so I don’t even have to be there for delivery. But, wait! The shelf! Back on hold… sigh.
The missing bridging shelf arrived a few days later, not so much the other shelf. Let’s see if I ever get around to calling them on that.
Assembly:
Assemble components. Follow the directions. Leave the el-cheapo back covers off (this is the cardboard-ish thin backer board).
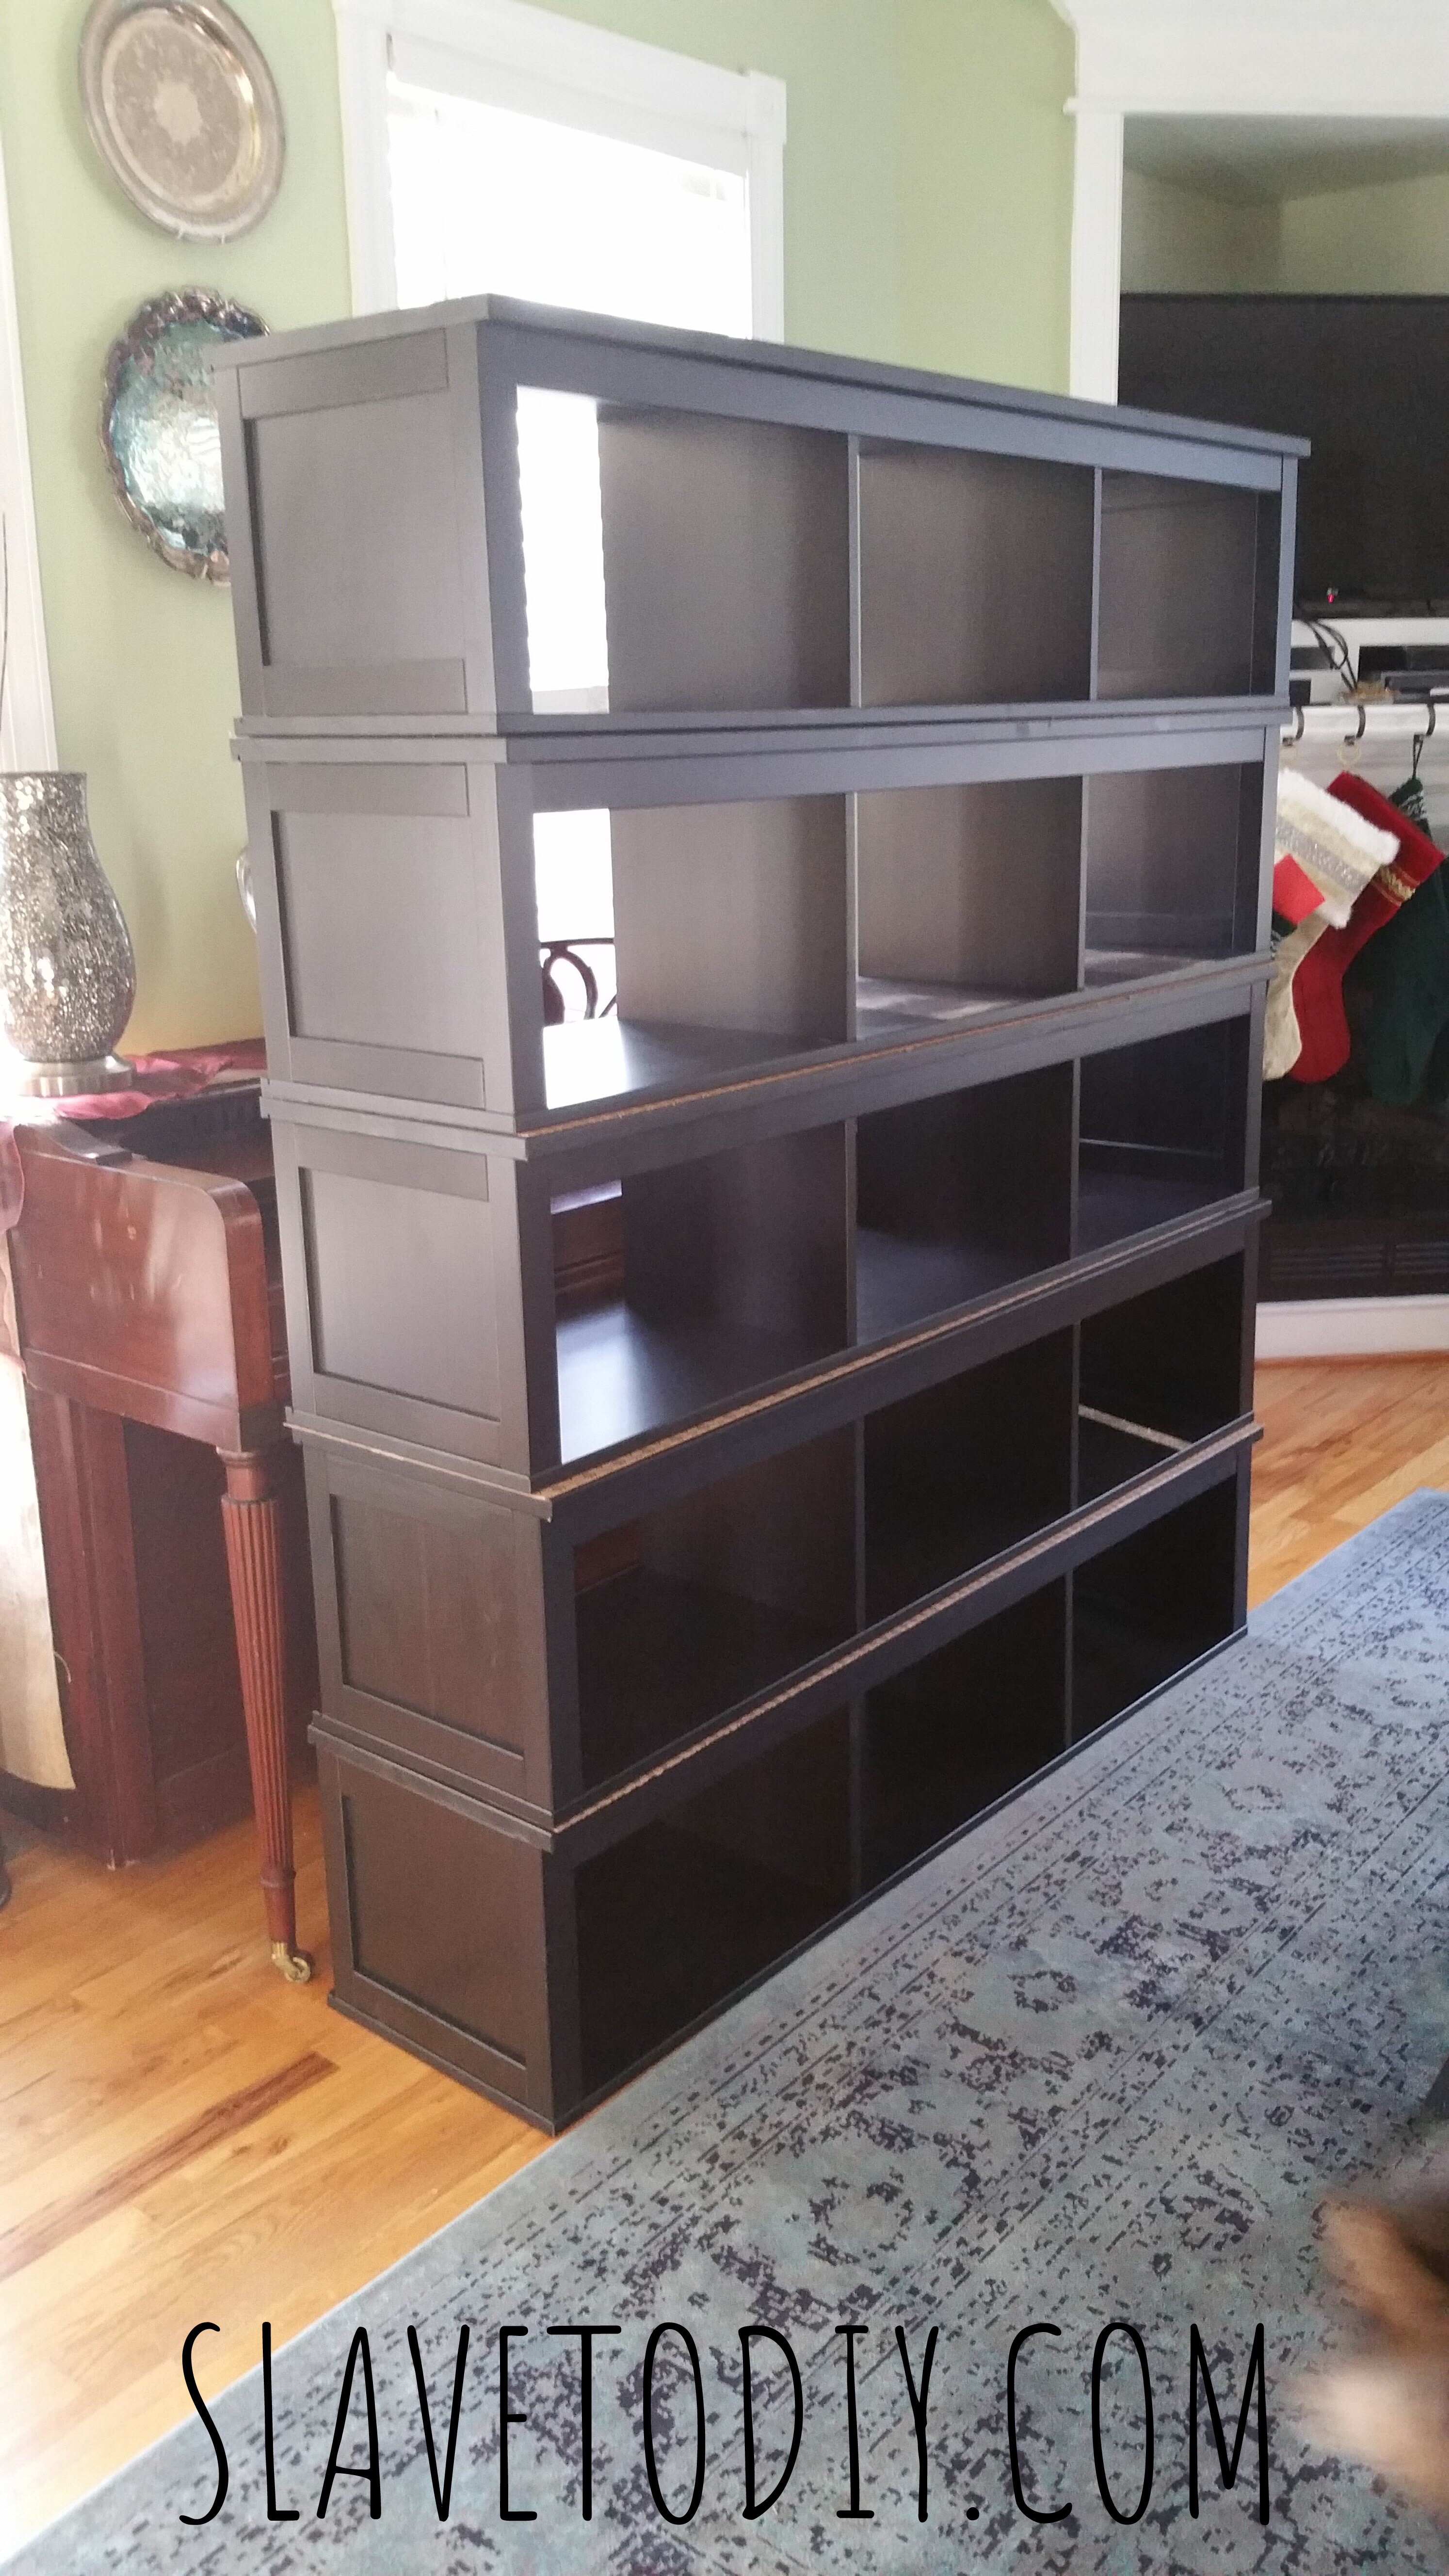
Bridging shelves. Well. Most of them. Stacked. Tempting cats to cause a mishap.
IKEA hemnes bookcase with drawers and cabinets. Partially assembled.
IKEA Hemnes Bookshelf in Black
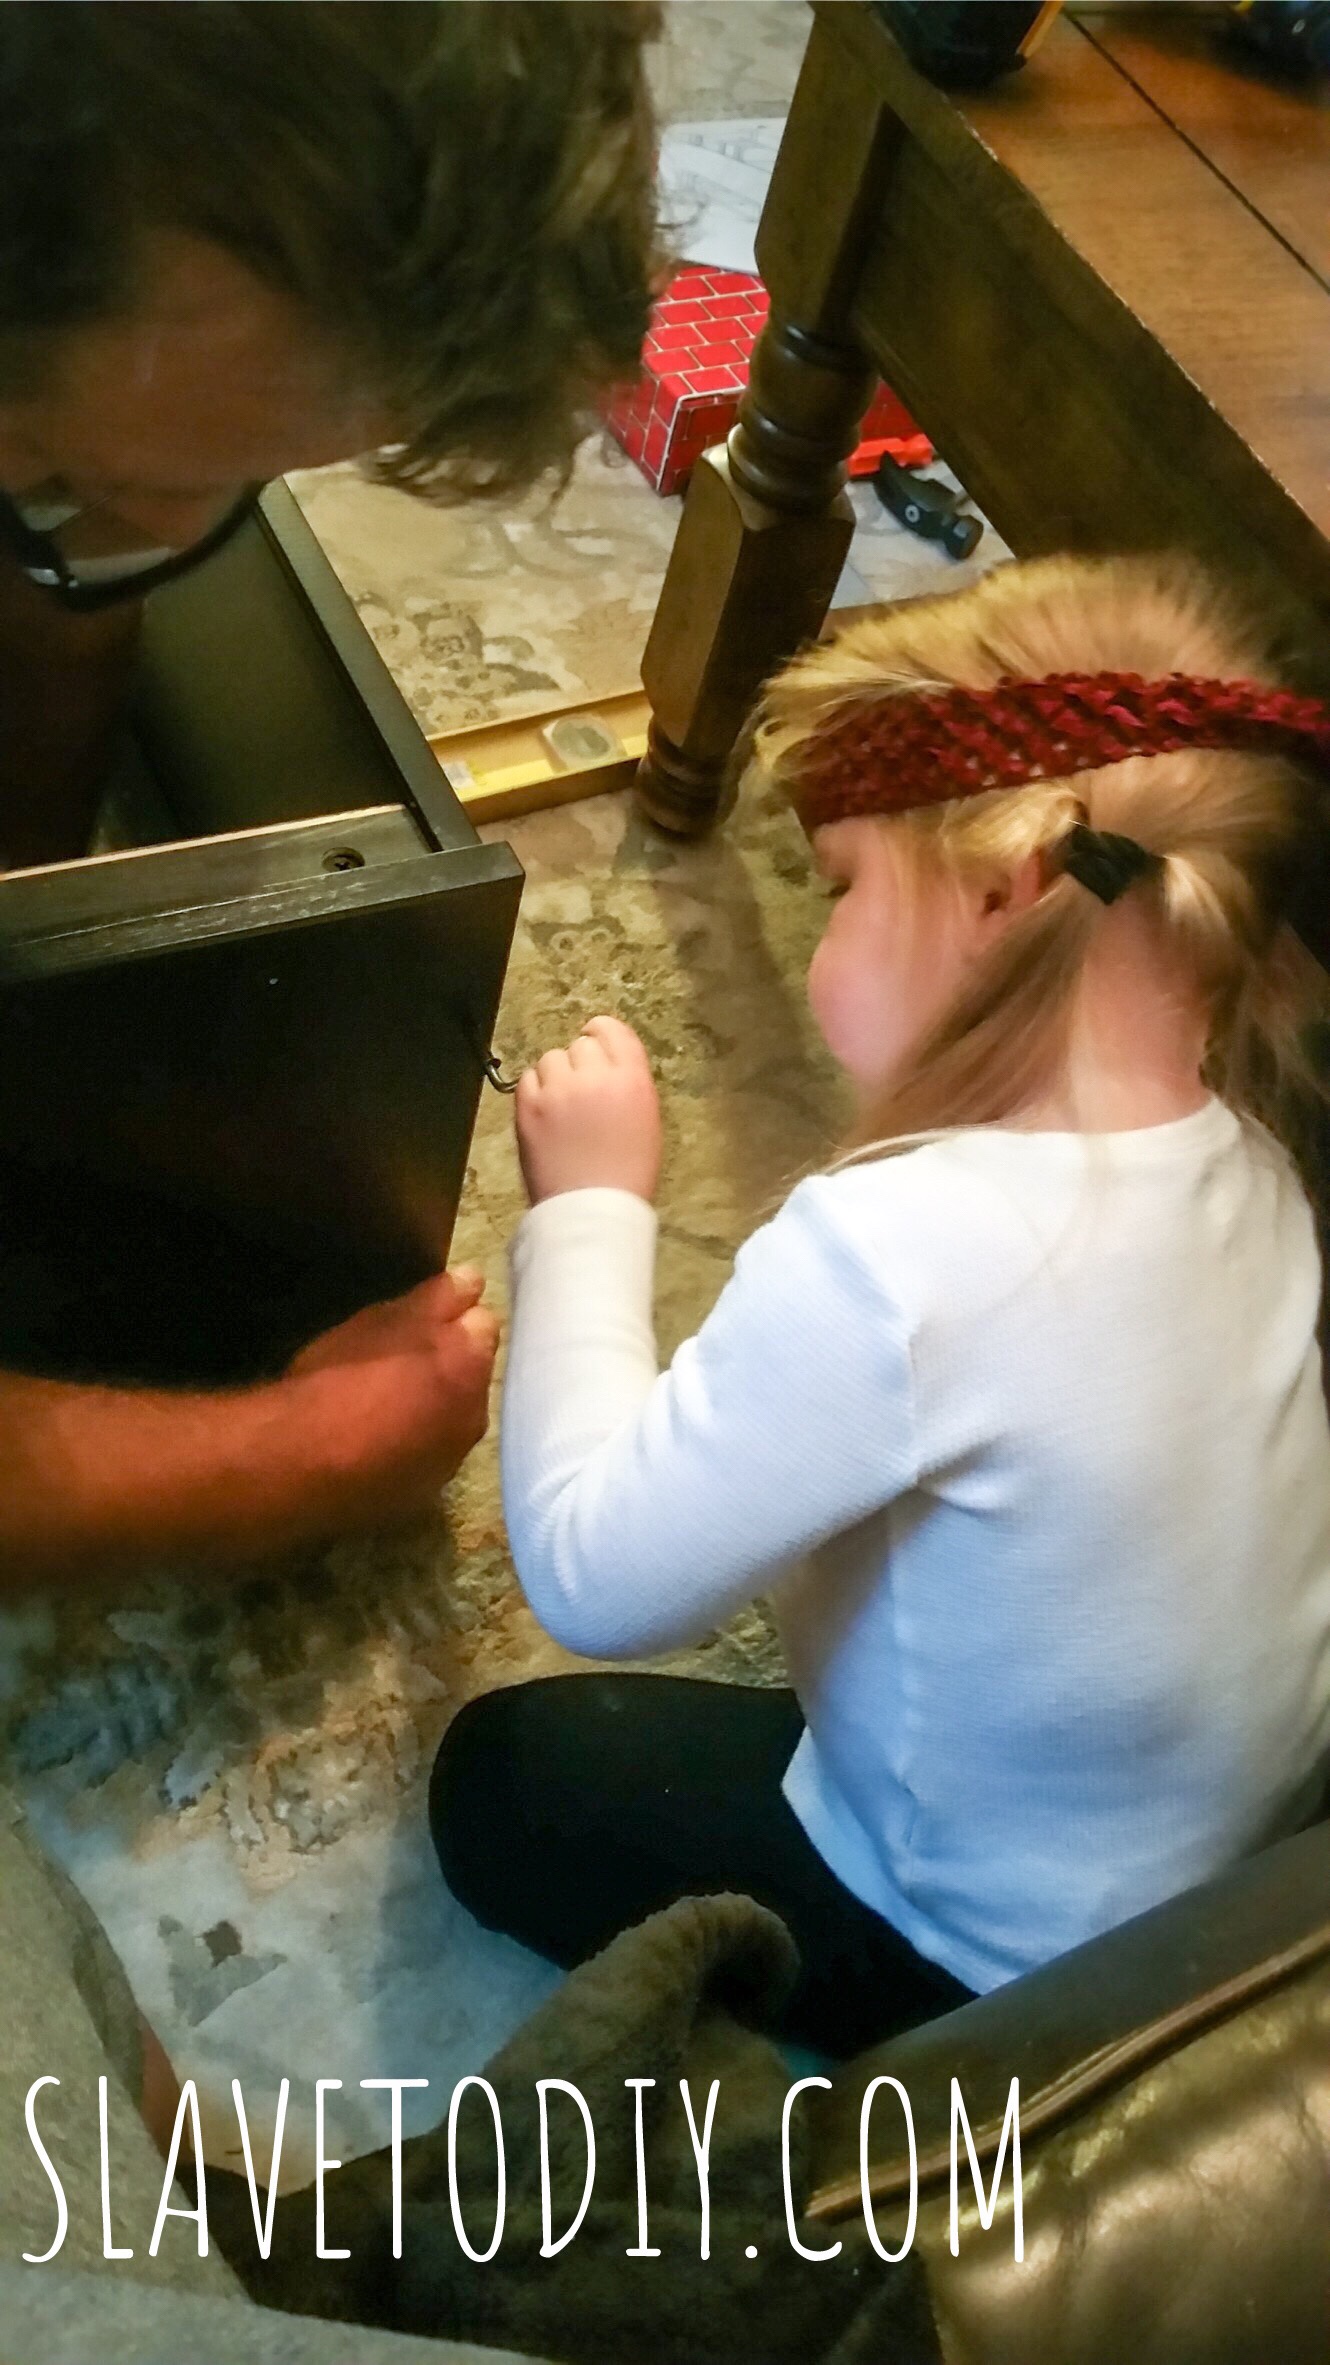
Helpers assembling Hemnes IKEA with Rainman
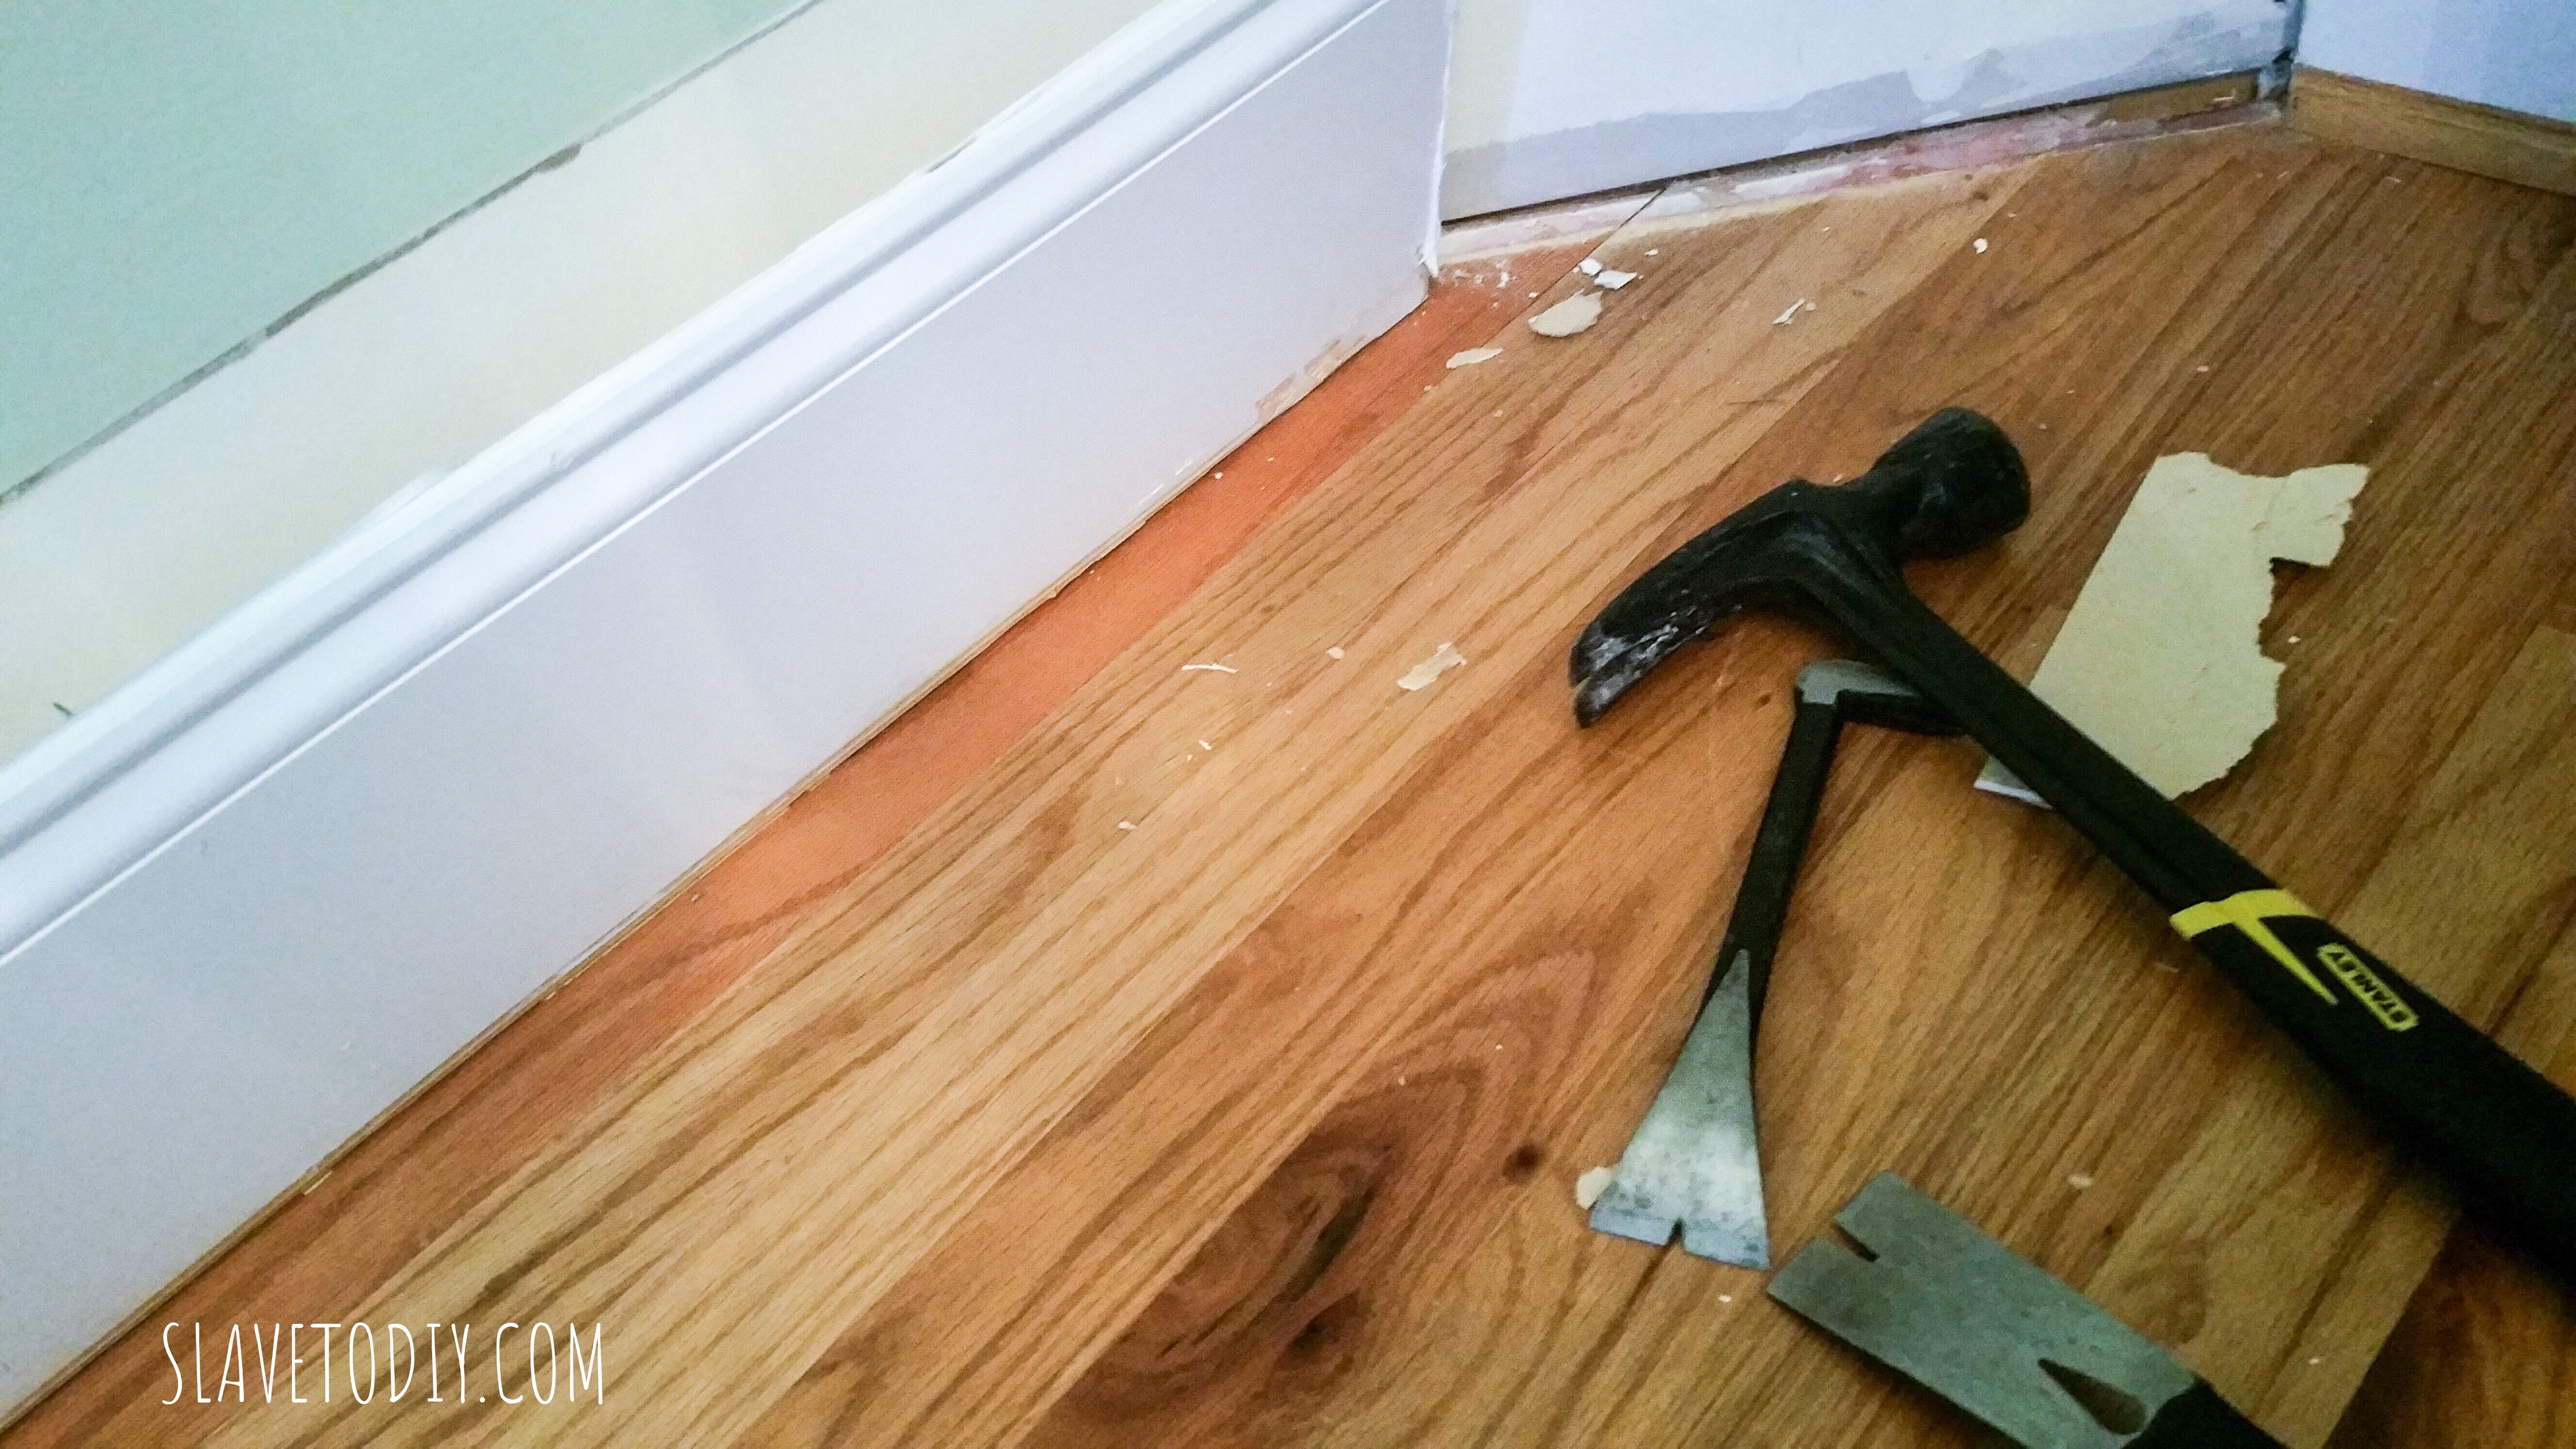
Wall prep.
So, for installation the baseboard had to be removed, and not being totally sure where the shelves would cover to (due to the *cough *cough extreme precision of my design plan) I decided to spackle and sand the uneven spots. I hate mud. I hate sheetrock. I hate sanding. Shoot me.
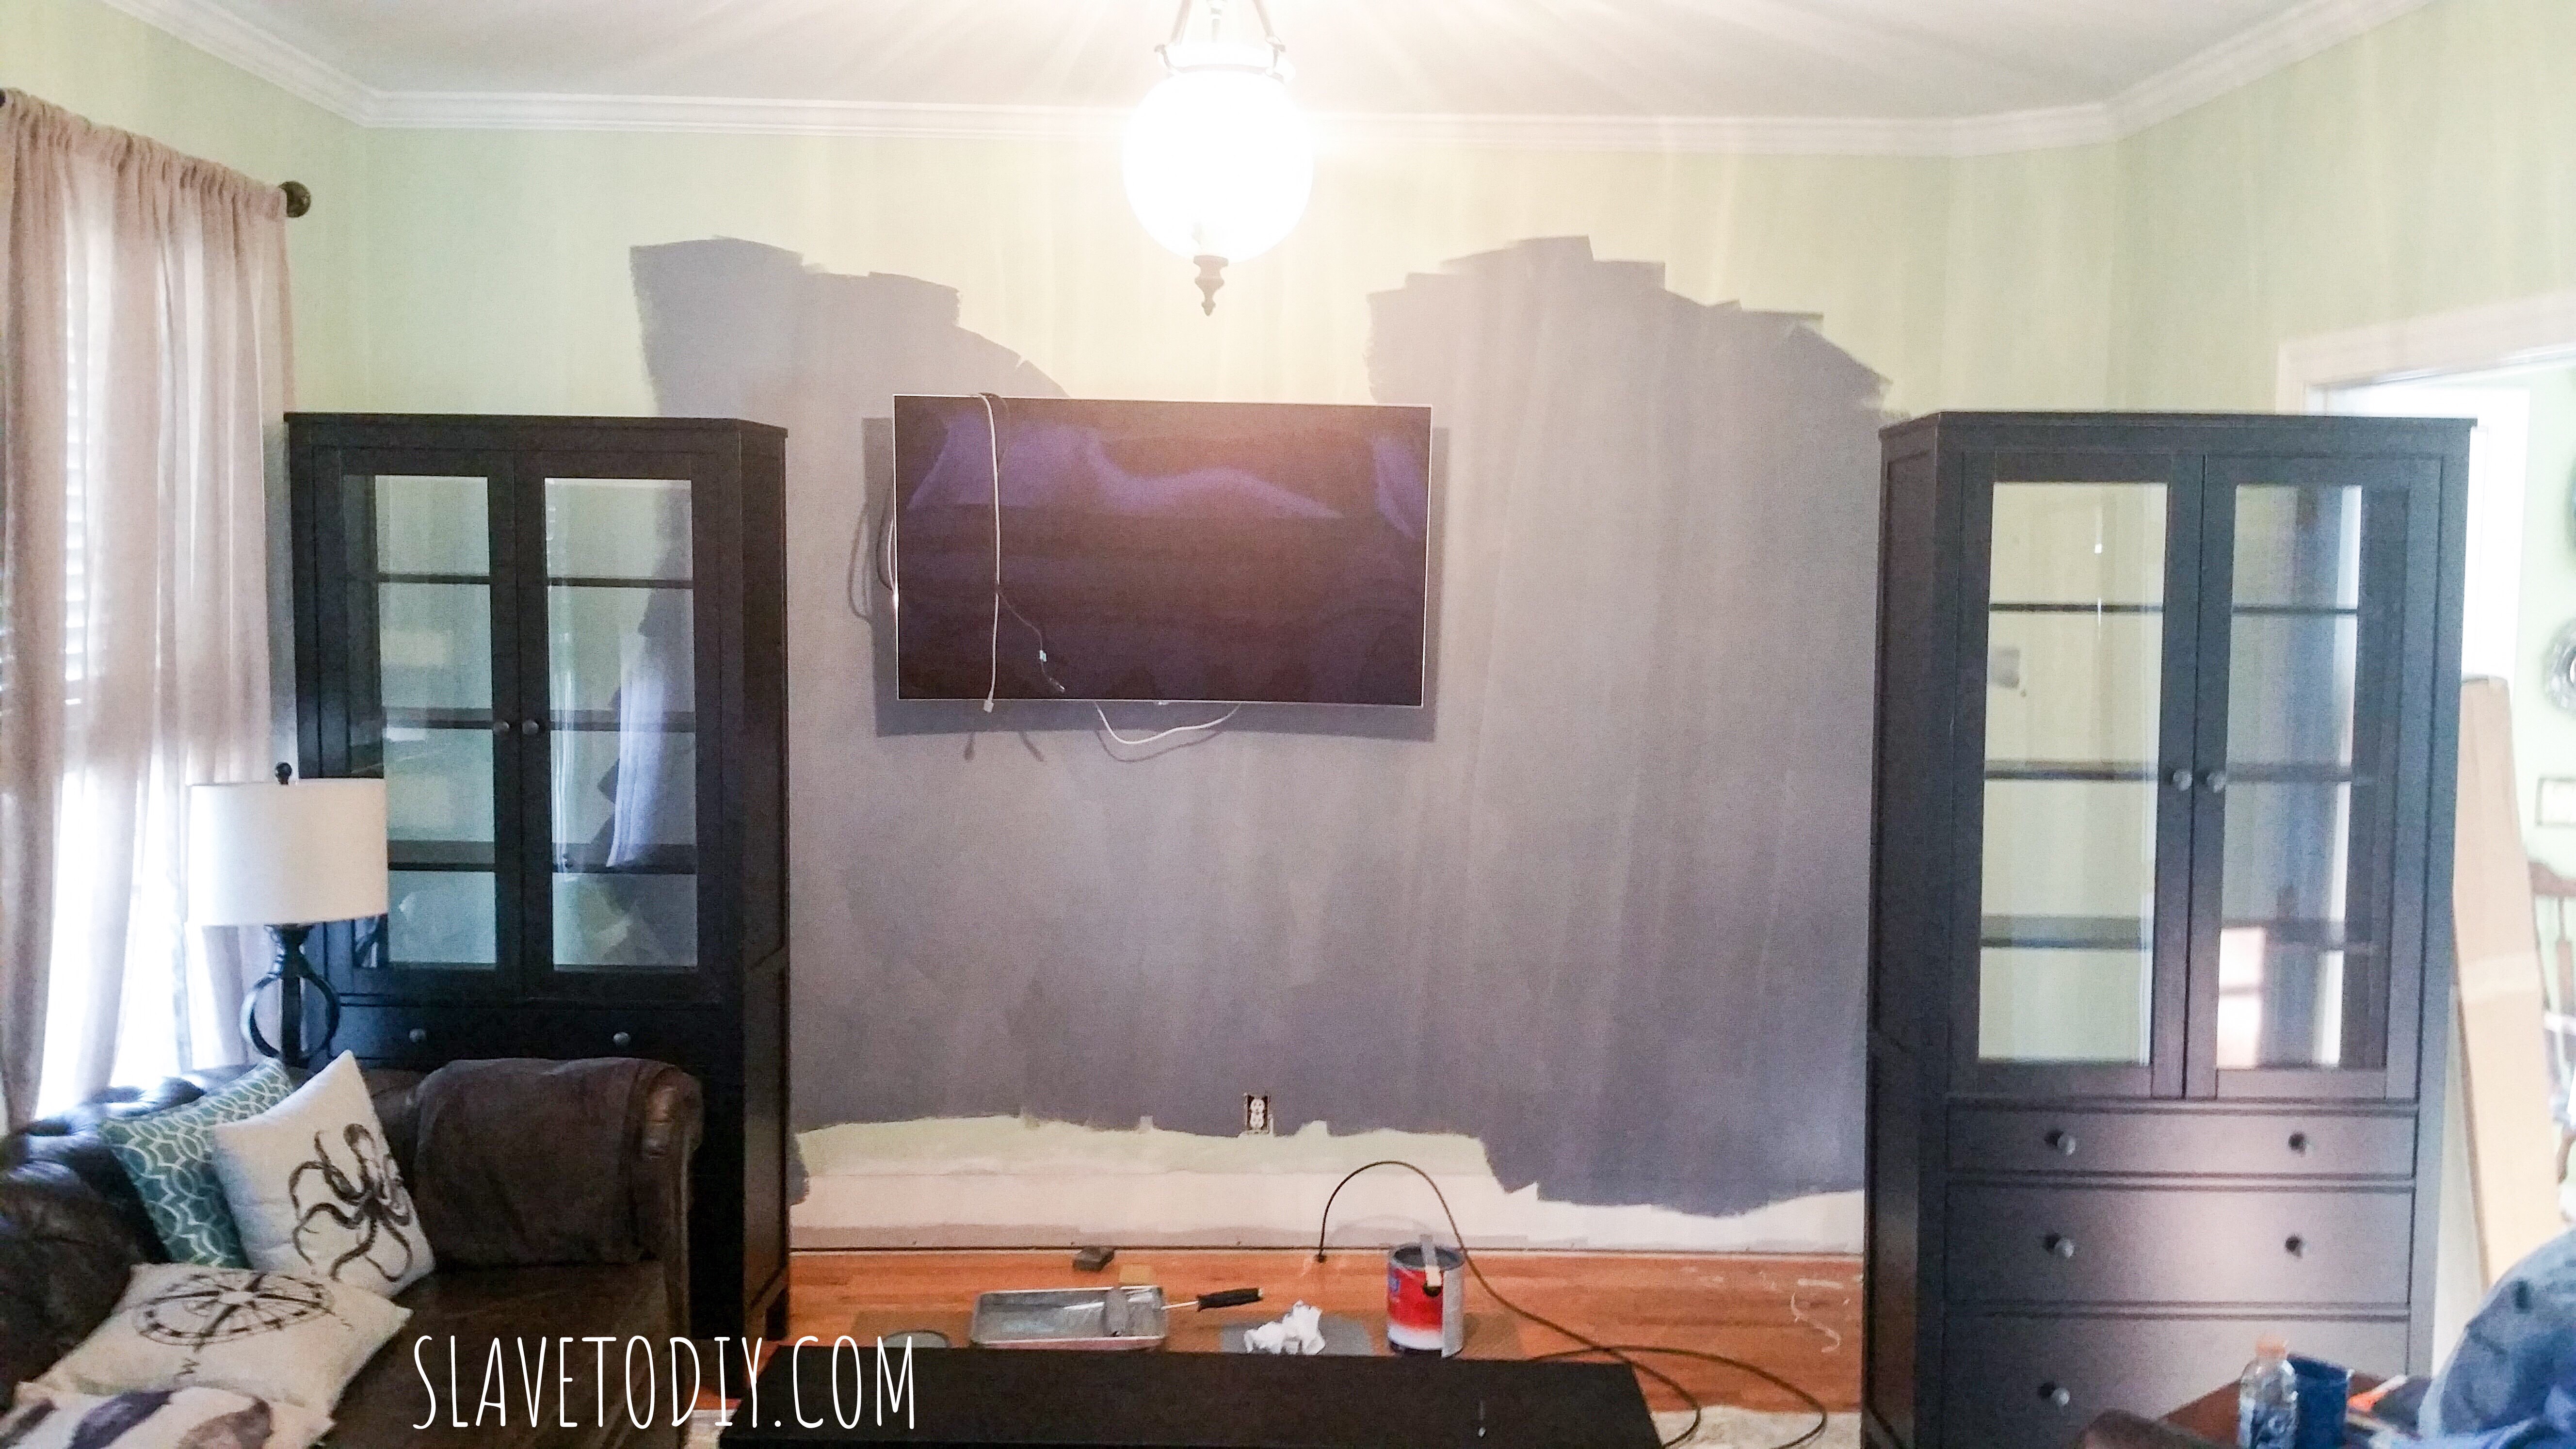
Paint:
I kept seeing all of these great shelves with an accent color on the back wall. So, I chose a color at the paint store, and hated it. My pretty gray turned out purple and I waited a couple of months before admitting that I hated it, and got the wall painted black before the installation began. Yeah, I said months. This is why we don’t six-week challenges. Six MONTH challenges would be record-breaking for us.
Purple. Blech. It was supposed to be gray.
So, we survived the holidays and I dropped not so subtle hints about beginning the installation on our anniversary weekend when we were both coming down with colds. I mean, I painted (again) so now we were waiting on HIM. Not my best moment as me and grumple-stilt-skin headed to Lowe’s with Chatty-Cathy in tow. Thank the Good Lord the Lowe’s car shopping cart was available. About a hundred bucks later, with black cabinet screws and framing lumber, we escaped back to our nest where I decided we collectively needed a break and SEC football was more important than my built ins. Oddly, I didn’t get any protests.
The black looks good, though, right?
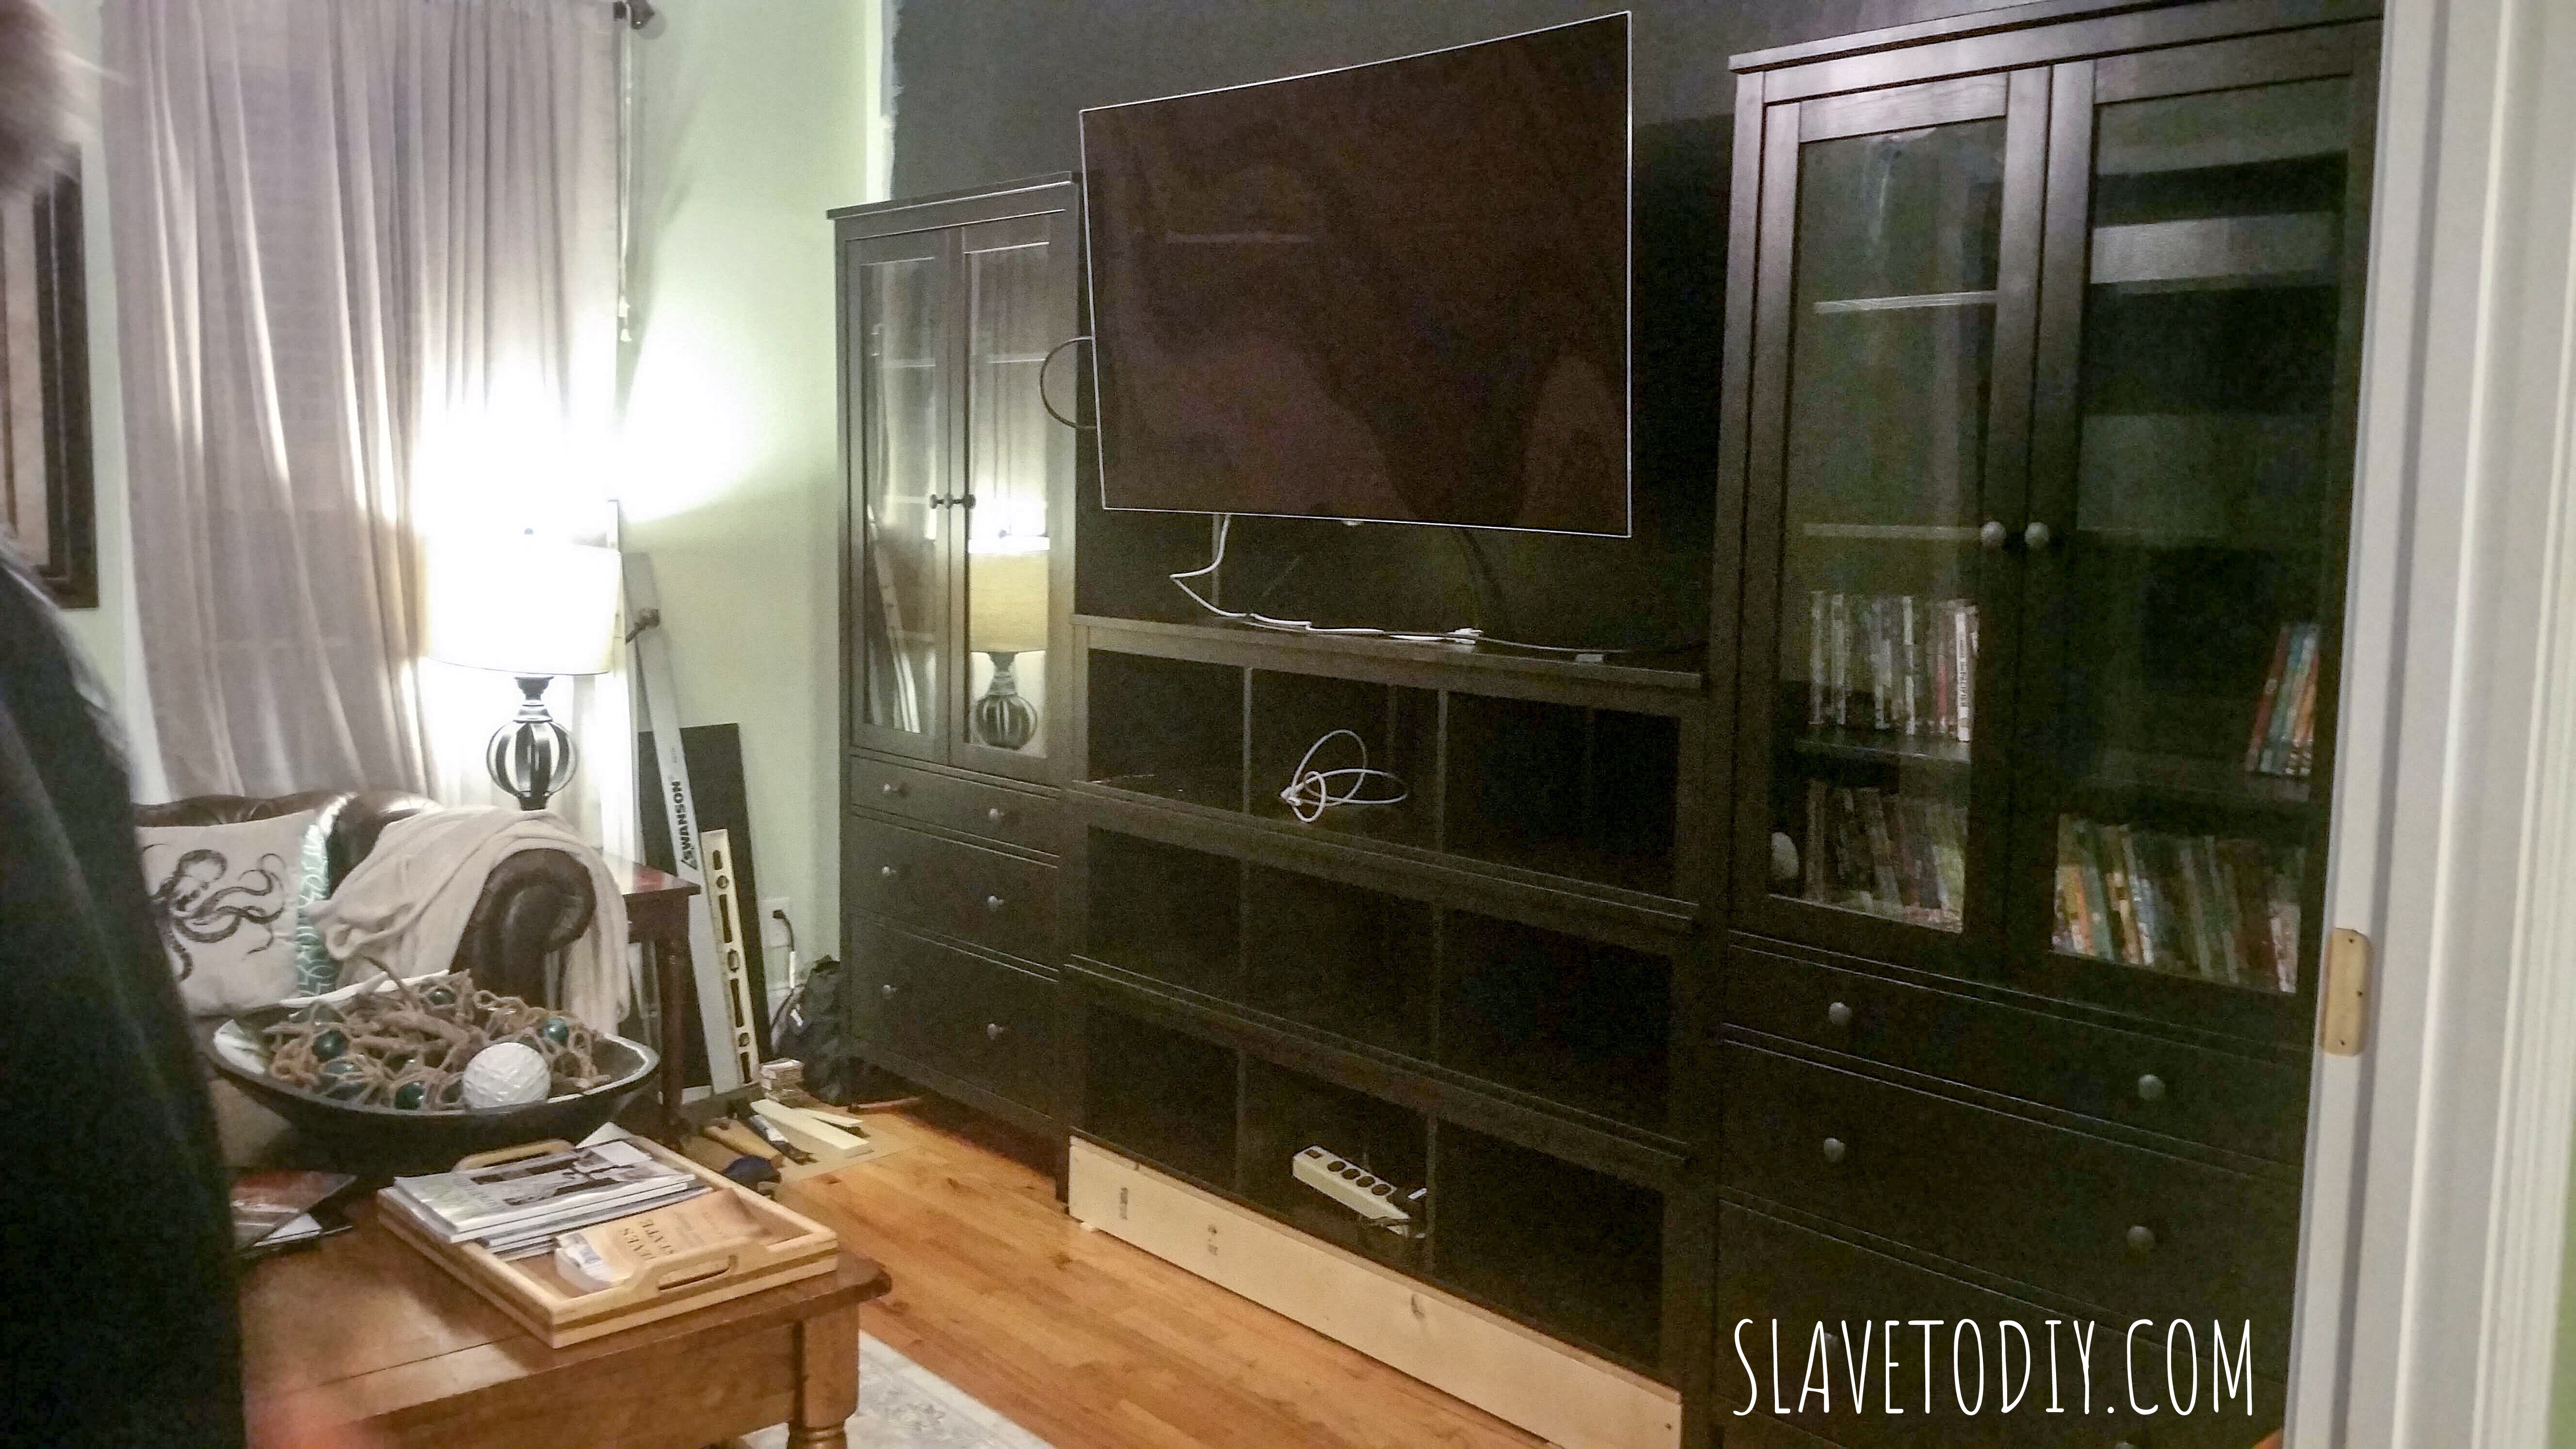
Two days later he built the base for the bridging shelves to sit on and we were back to waiting on…. ourselves. Because we were not sure what we wanted to do for a conduit to hide all the crap that goes behind the TV. Well. I’ll let you know.
It’s going to be a few days because it snowed in North Carolina and the state is shut down. My husband was doing donuts in the cul-de-sac in his truck with the kids, so that’s a better day, ANY day, than installing built ins. Snow man 1. Built-ins 0.Send help.
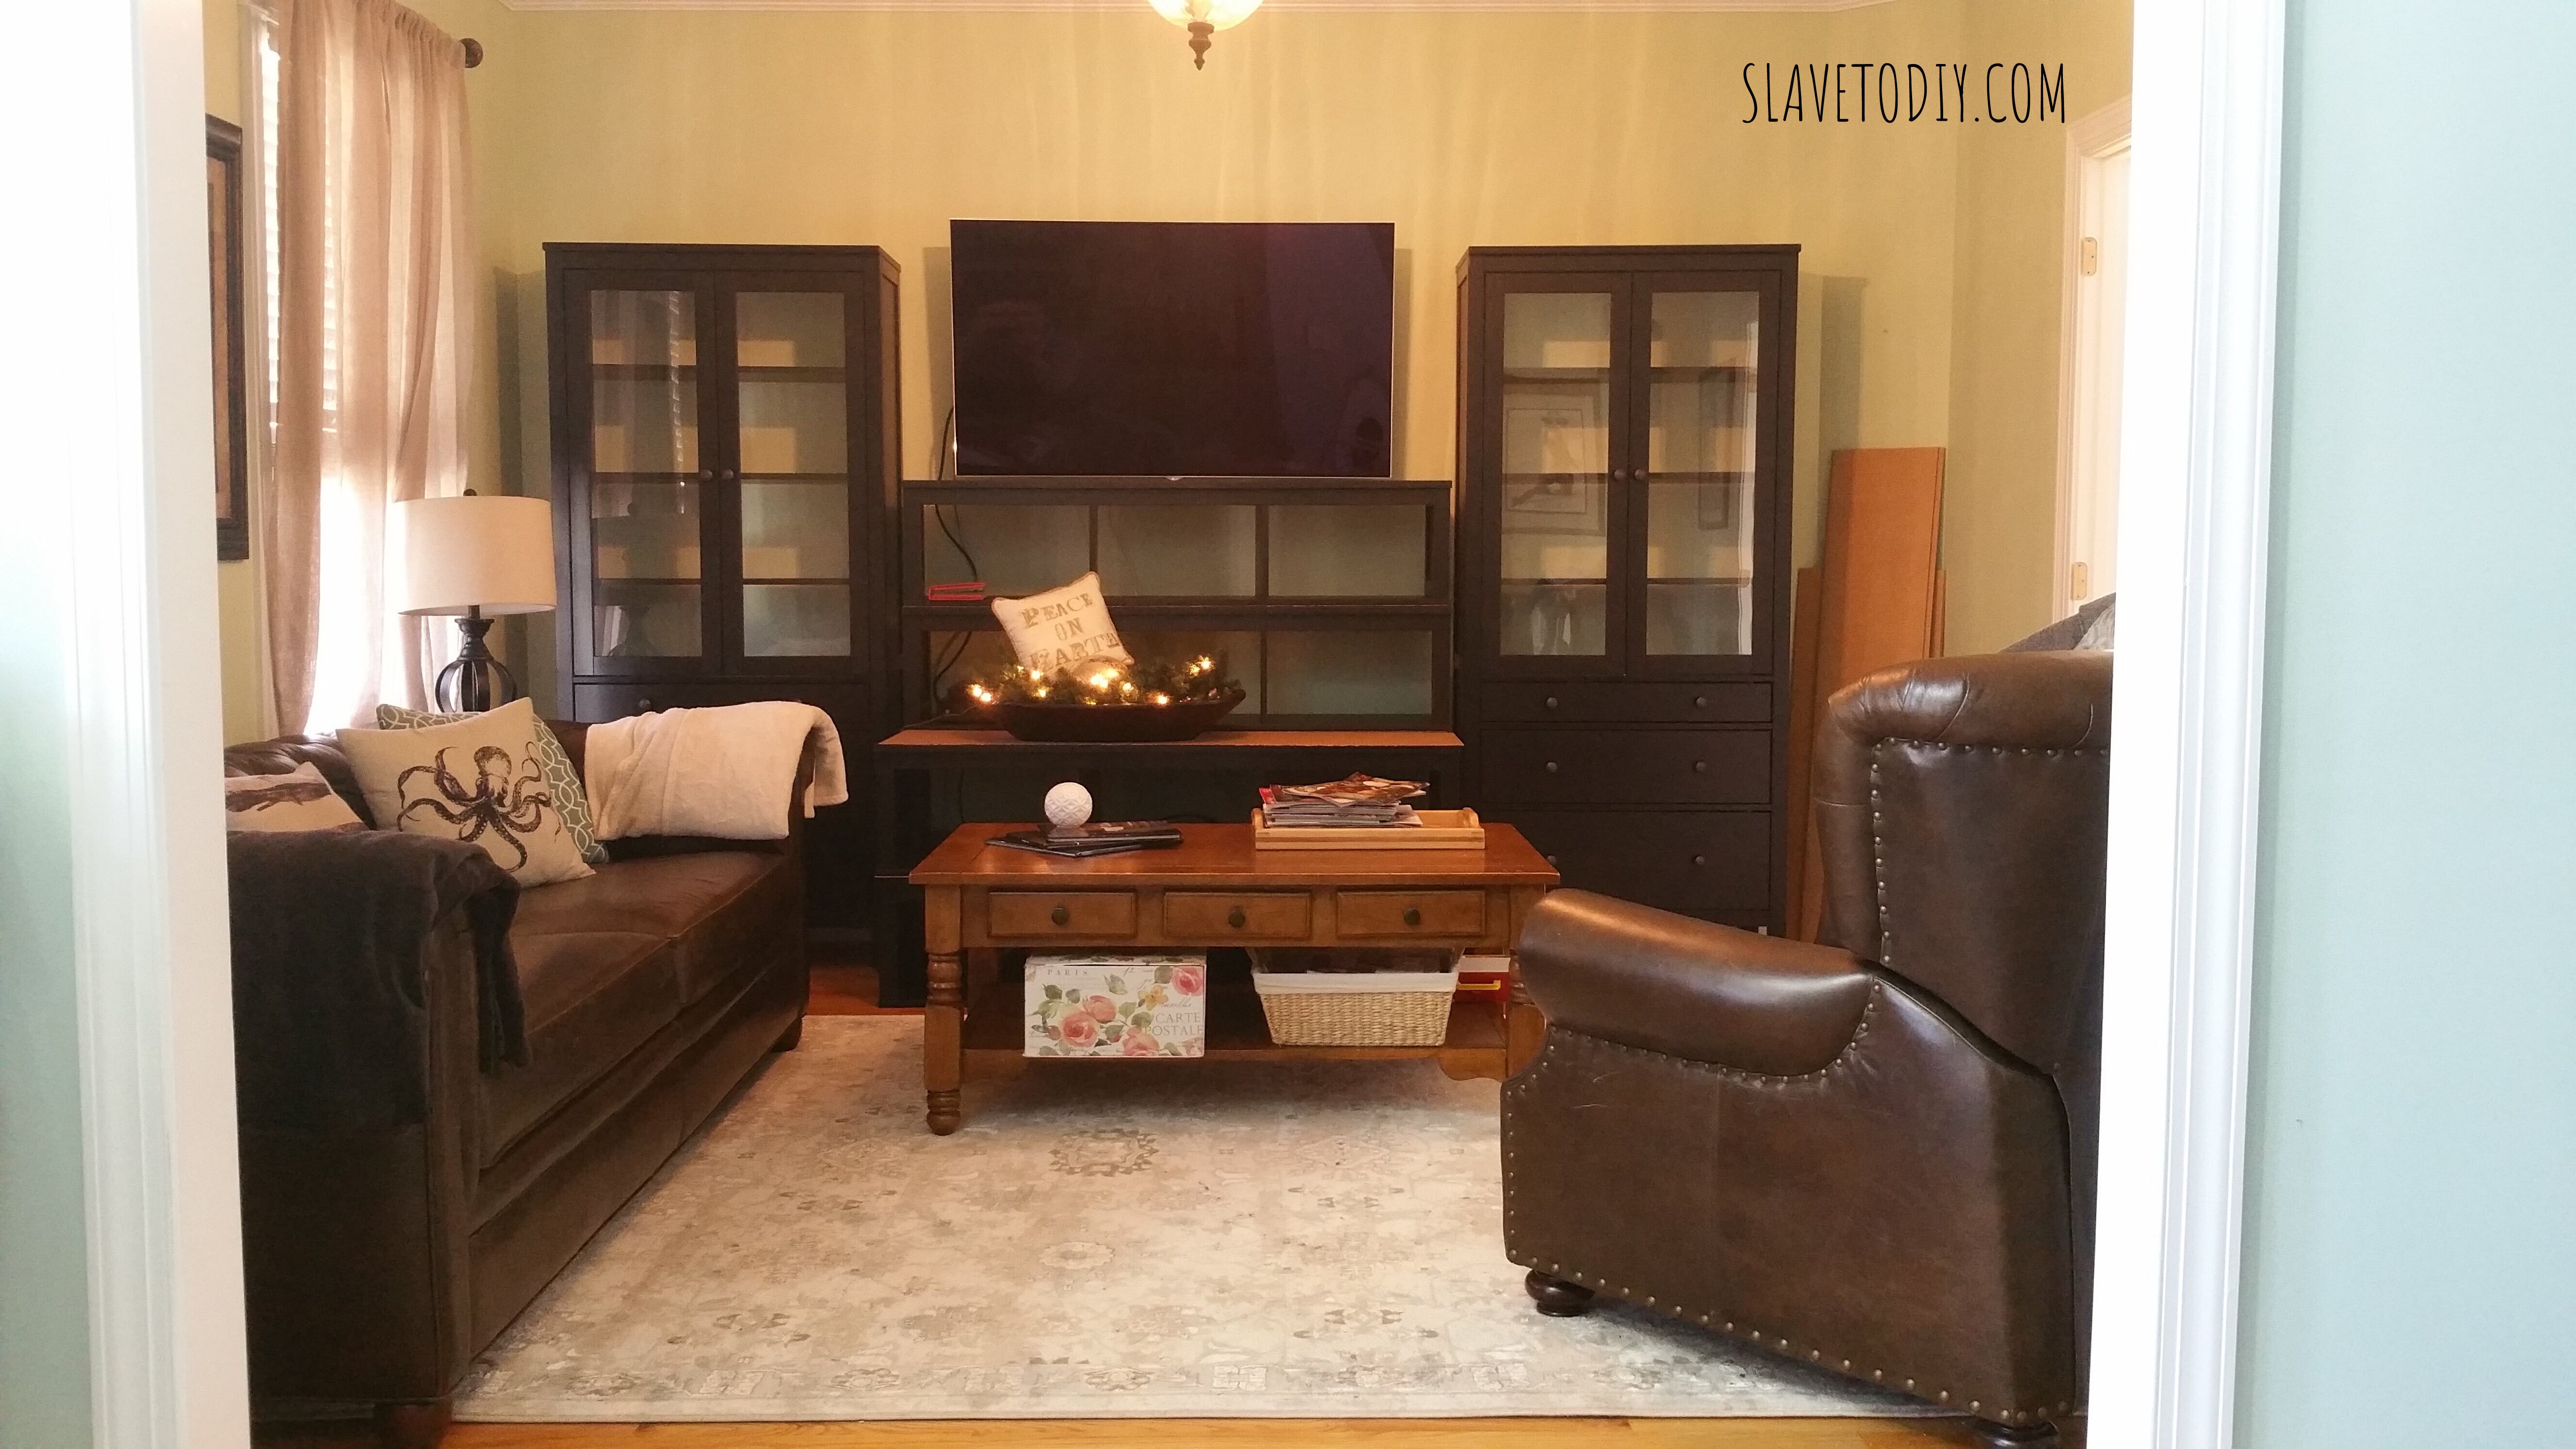
And the kids were out of school for a WEEK. No snowplows. (Did you happen to notice that we’re nowhere near done and these aren’t so much as attached to the wall, but I already started putting stuff in them?)
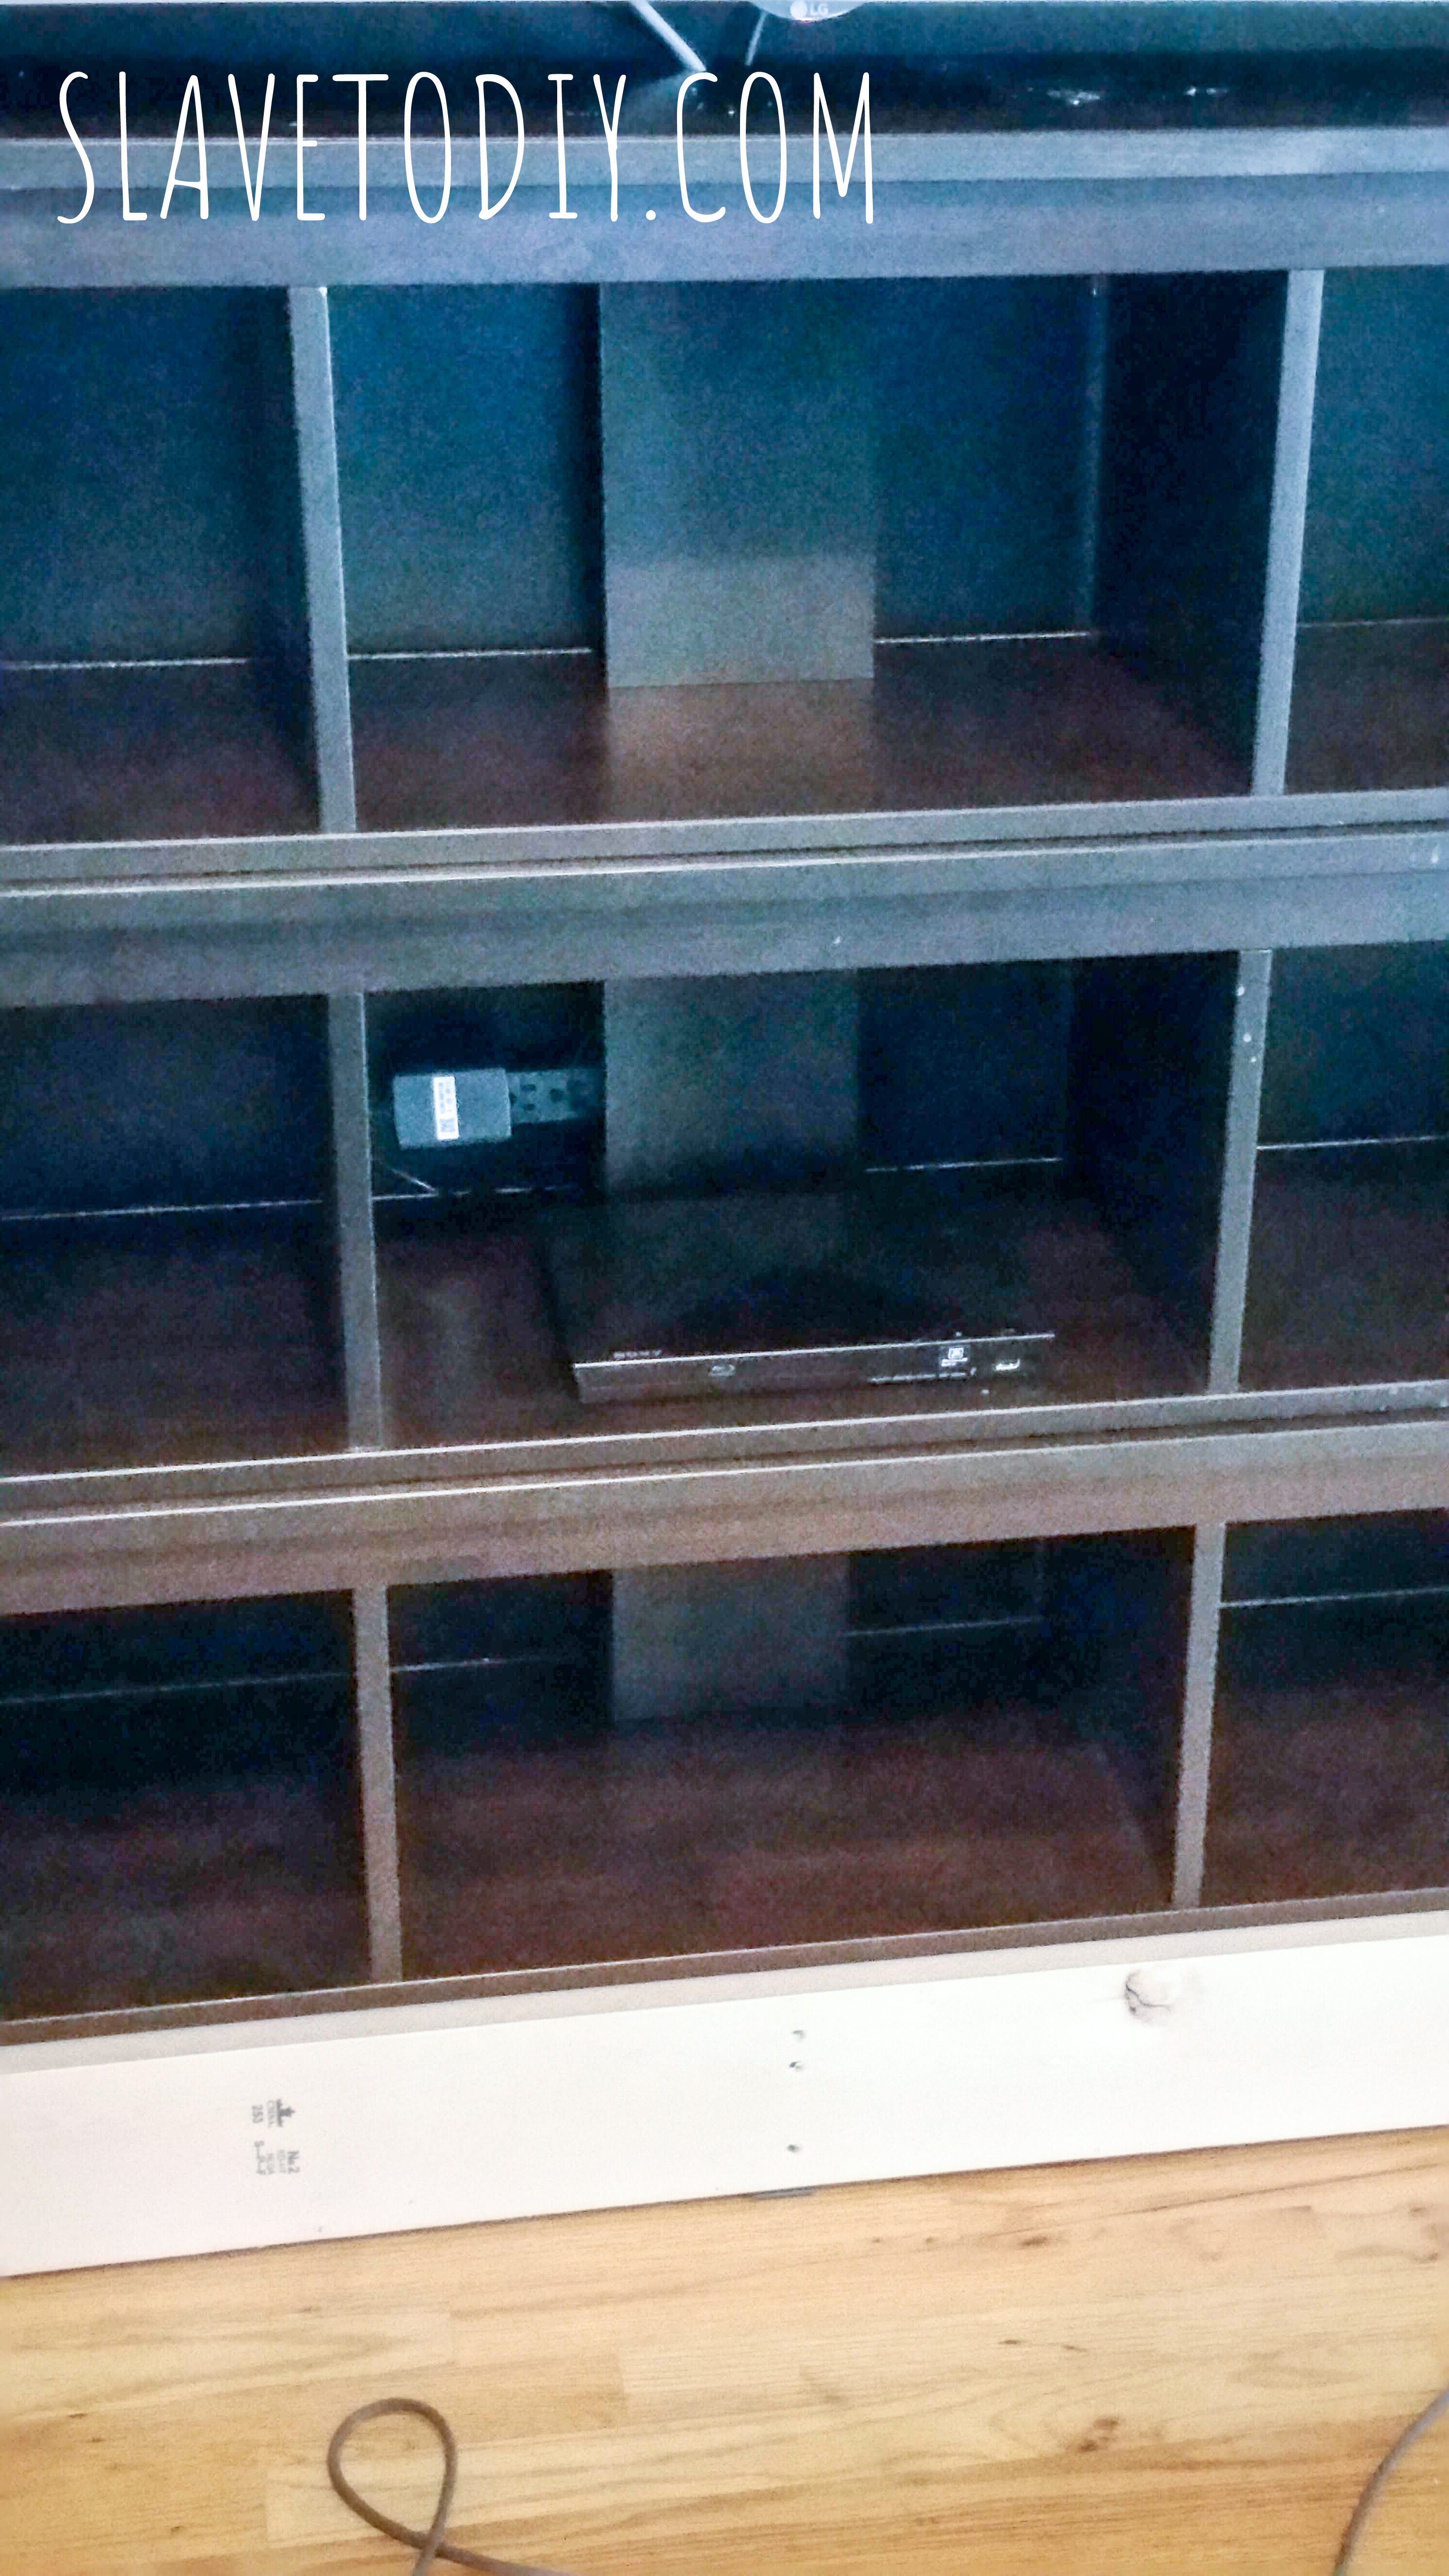
Cord hiding solution win. I pulled the surge protector out so you could see where it was all hiding.
Several installation sessions happened in the spring. I finally decided on a cord hiding solution (which is totally genius and I should definitely receive a prize for) so my tired Rainman got to work. The cord hiding solution ended up being three rectangles, one in each center shelf, hiding from view the two-inch diameter access holes through the horizontal panels. The cords thread through behind with super easy access.
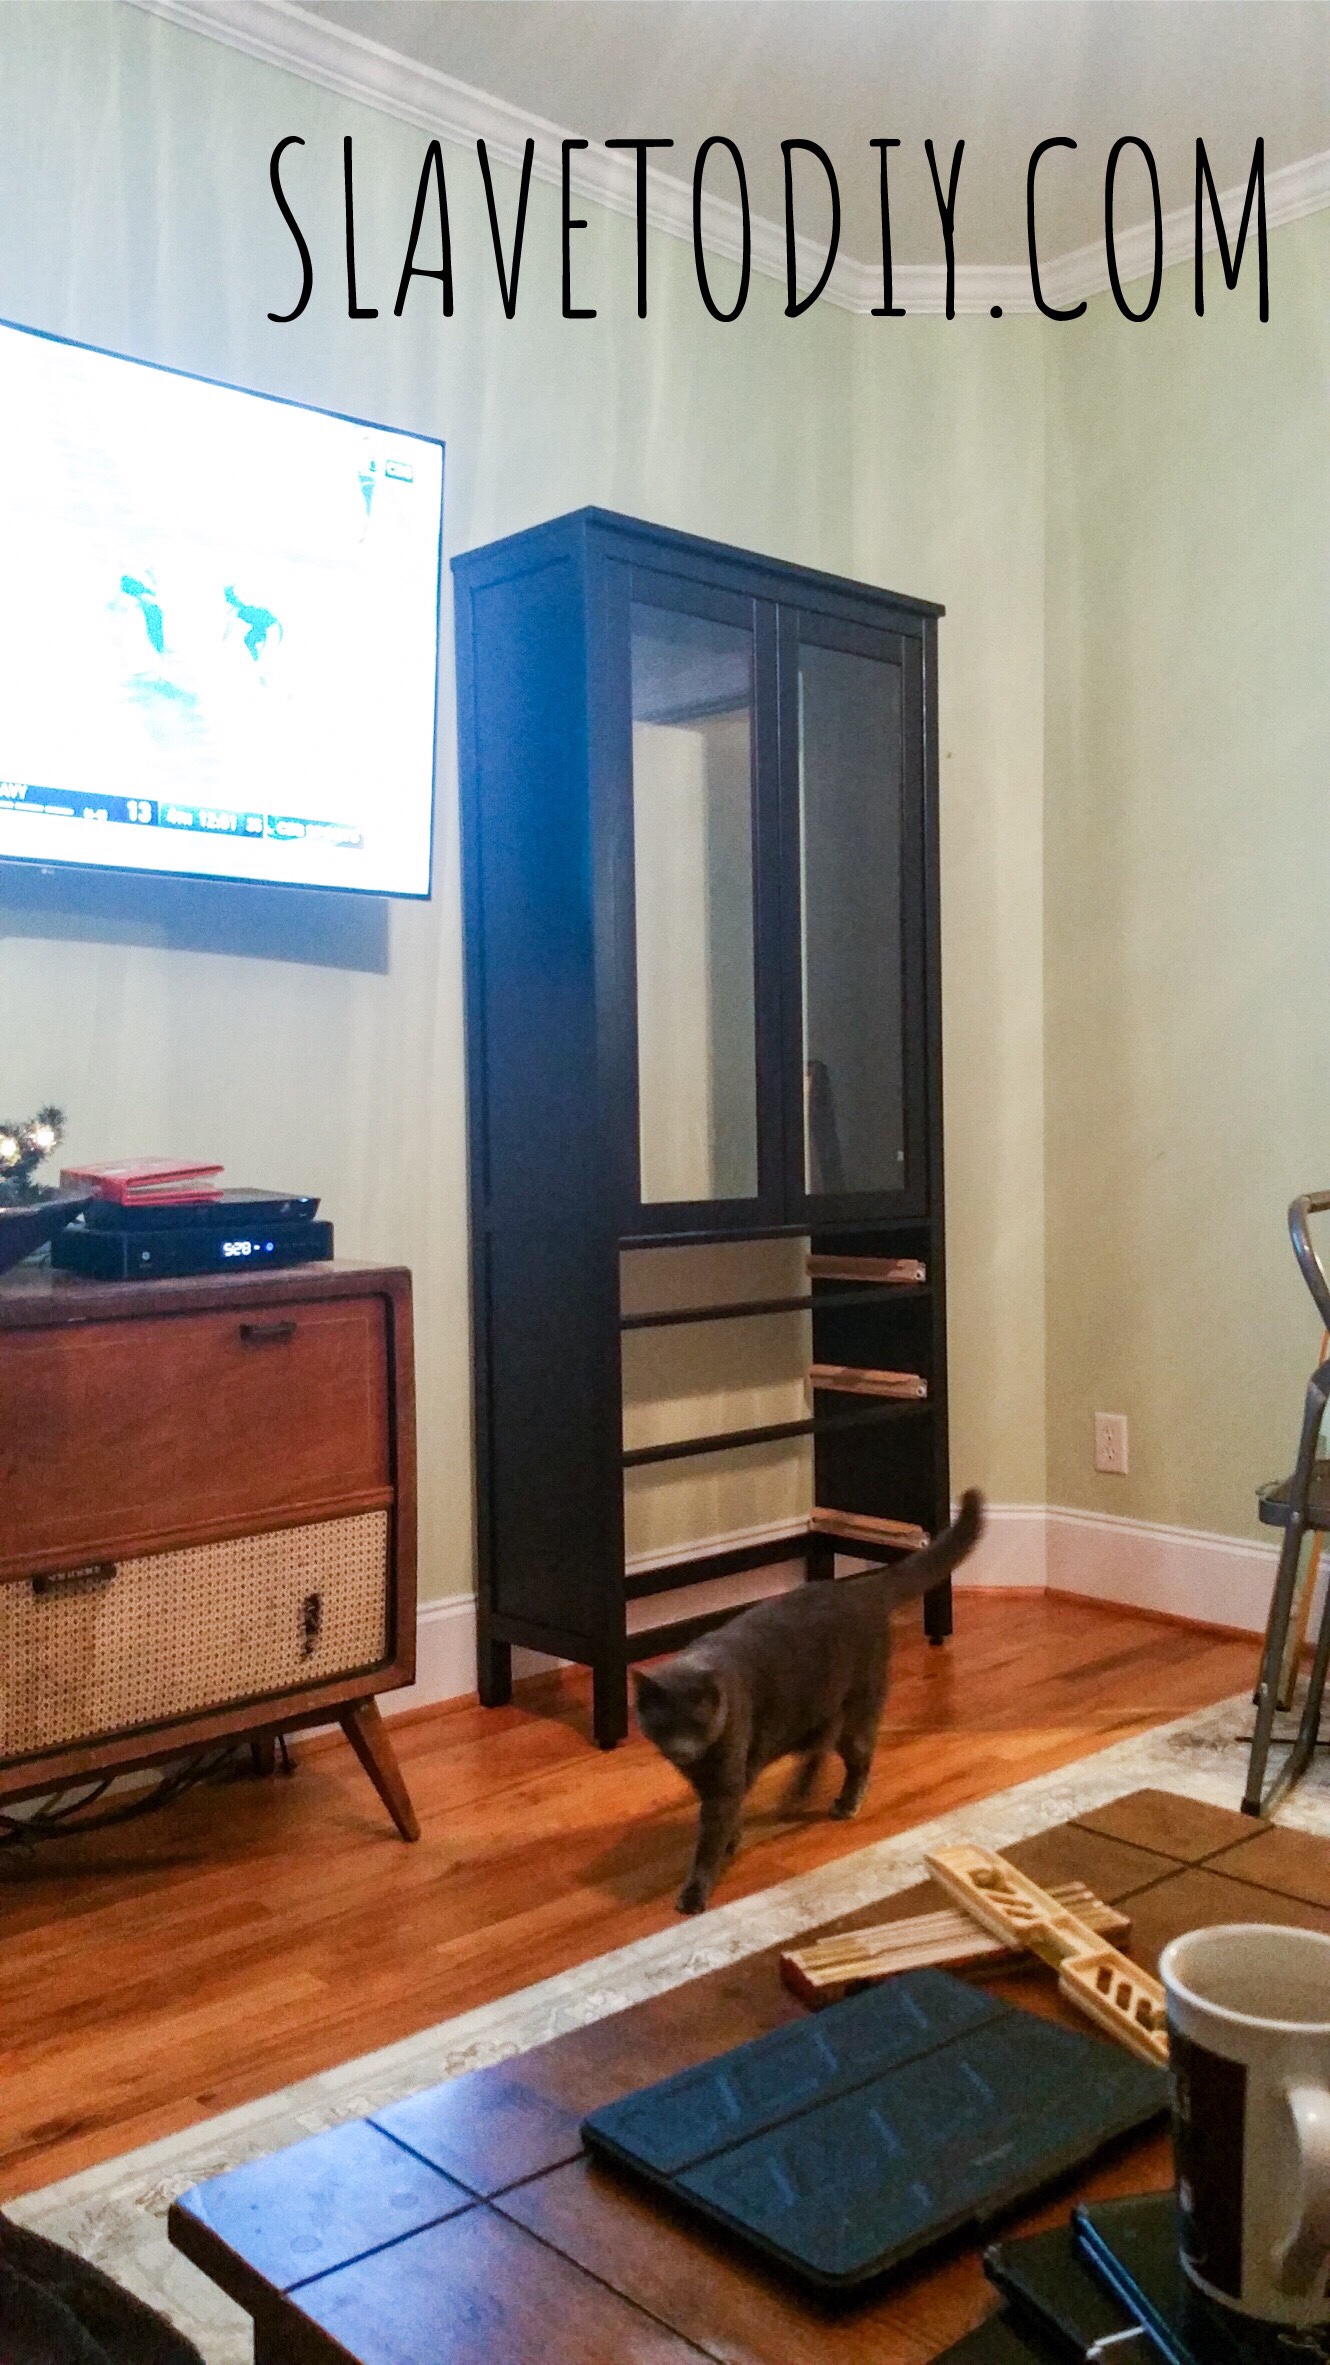
To be fair… Looking back, I realize that the hesitation for Rainman on this project actually had to do with the odd shape of the hemnes components. And this is something to keep in mind during the design phase.
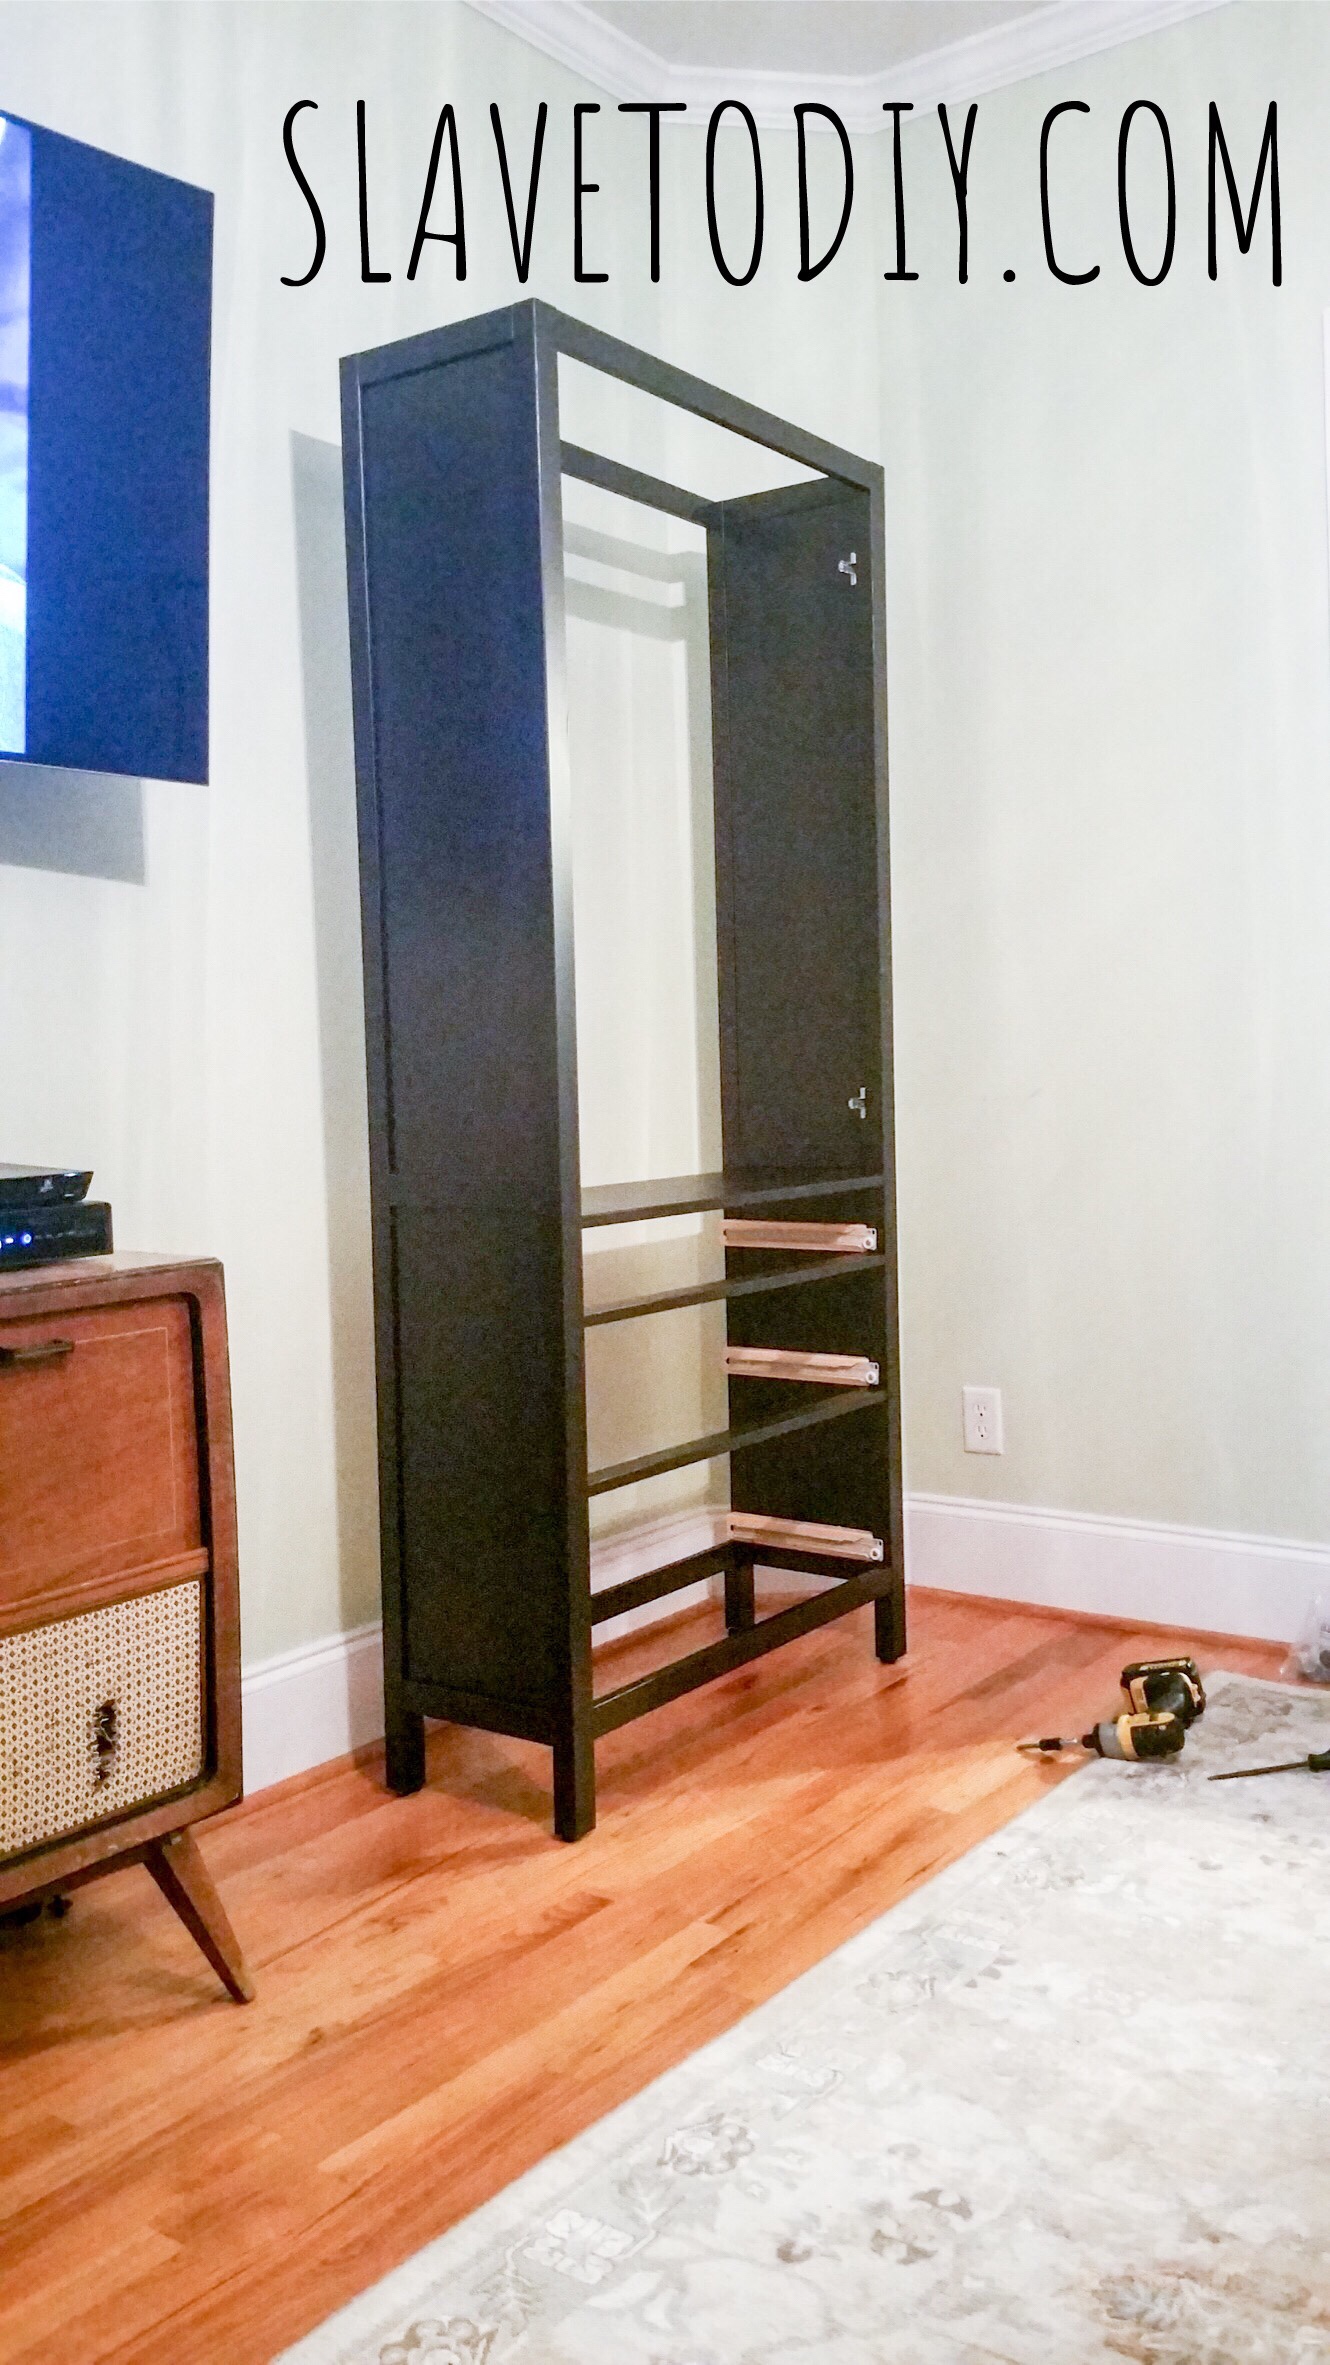
Front and Side View of Hemnes Bookshelves from IKEA, Dimensions
Basically, the back is not flush on any of them. Presumably this is to allow for the whole unit to sit flat against a wall with base molding, (with the top of the back sticking out further than the bottom) but makes installation as built ins maddening. Several times we had to pull pieces of trim out and reseat them because we lost track of which edges On the face were supposed to line up flush.
In hindsight, it would’ve been easier if we had trimmed the tops on each component so that the back sat completely flat against the wall and we didn’t have to shim each component to line them up. He suggested that after the initial component assembly and I shot it down because all I saw was an afternoon of wasted time disassembling, trimming, and reassembling components. I like the way it ended up because now I can install a light kit with existing gaps, but in hindsight this project would have been WAY faster without the bumped out tops. He was right. I was wrong. Don’t tell him I said that.
This is how ridiculous my life is. It was December when we ordered the IKEA components. It is now July, and wouldn’t ya know, that s&@# is still. Not. Finished. We’re agonizingly close. But, life and work just won’t step aside to allow us to finish the built ins.
Side note, I can blame an entire lost work day, last Sunday, on a collapsed shelf in the garage. Little shelf? No, huge shelf. Like shelf that runs along the entire back of the garage shelf. I went out to get a water out of the beverage fridge and the door was WIDE open. “Which one of you little $#&% left the damn door open and how long has it been that way?” I thought to myself. I pushed on it. Harder. Nothing. I looked up. Why was the beverage igloo pushed forward against it?
Then I saw it, the giant shelf collapsed on top of the fridge, on top of the filing cabinets and router table, BARELY missed the bottle on top of the hot water heater. I distinctly remember warning a certain someone that those were crappy shelves were going to collapse. We installed really strong, nice shelves, that are bolted into ceiling joists. UGH. I managed to only say I told you so once, and everything on the shelf fit up on the new shelves. I still want to find the jackass who built that shelf and have a short conversation with him.
So, here we are again, NOT finished. However, we’ve made some progress. I almost, in a moment of desperation, changed the design plan in favor of the version that would get us to the finish line faster, but I’m just not willing to throw in the towel, yet.
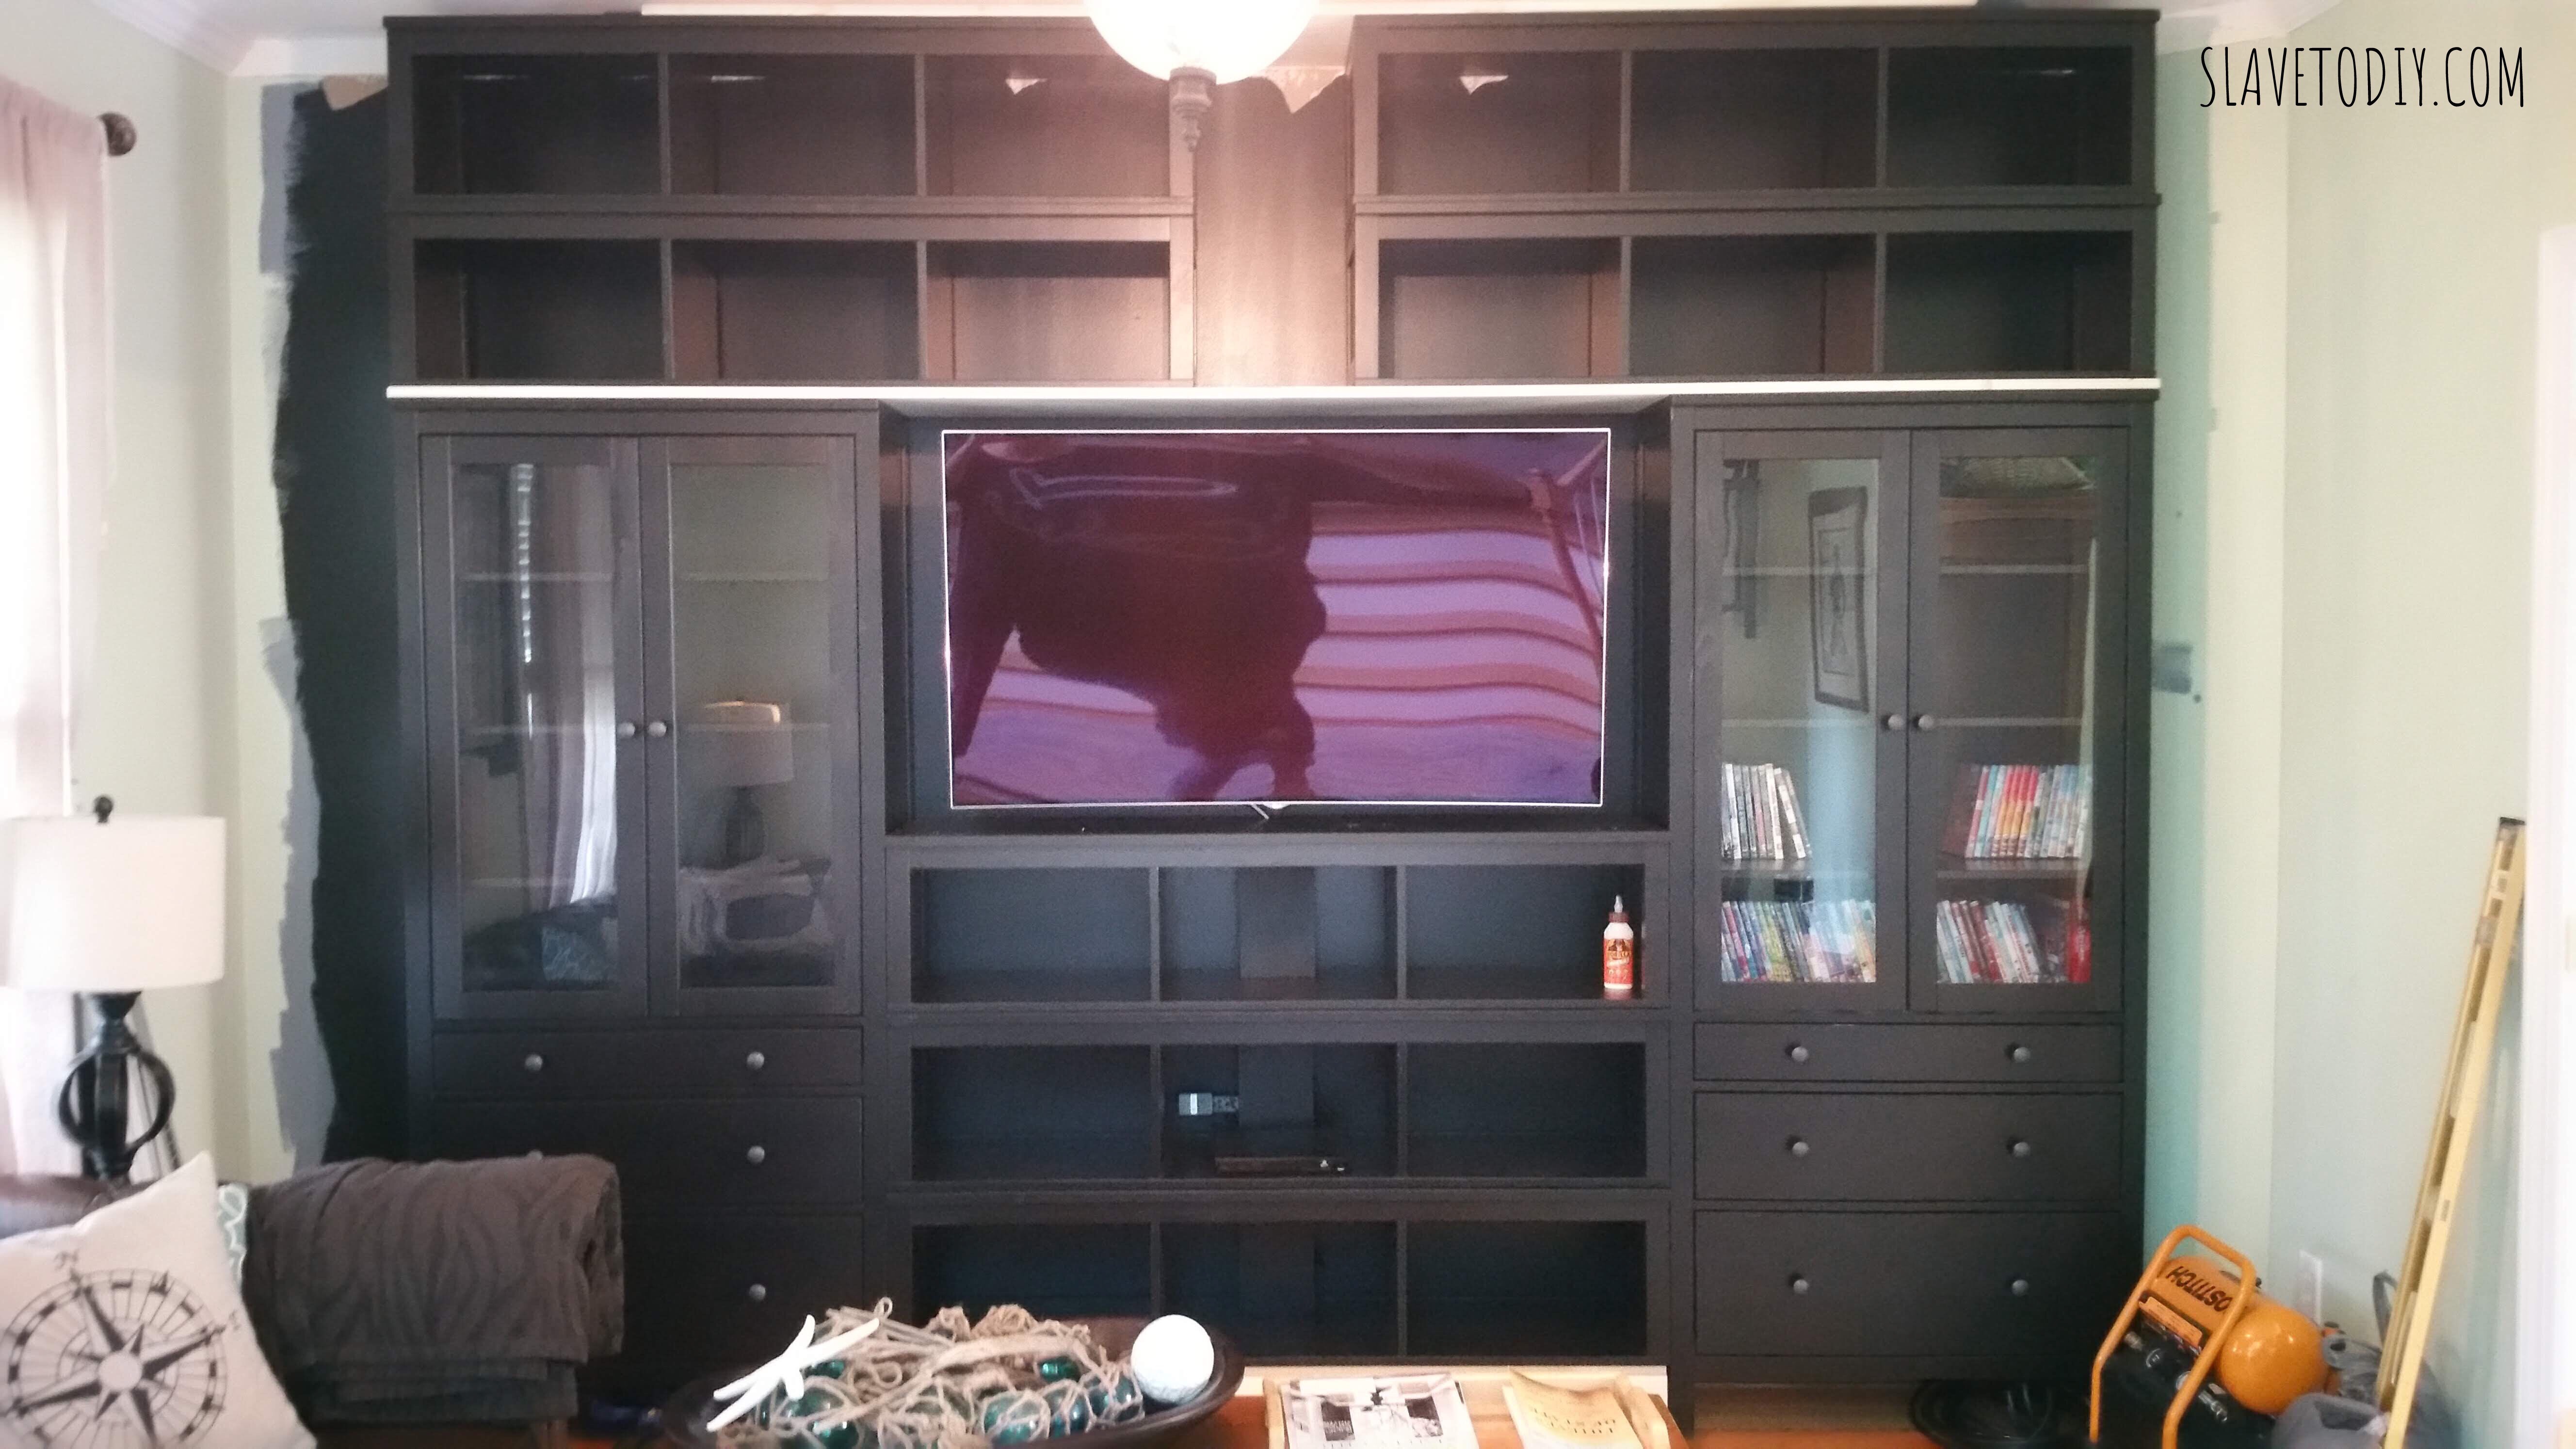
We began installing the components and securing them to the wall and to each other, which proved challenging. This is because of the aforementioned bumpouts which leaves only one section of each component actually touching the wall. We secured them to the studs with black cabinet screws. We used pine boards for the transition areas since they were going to be painted black.
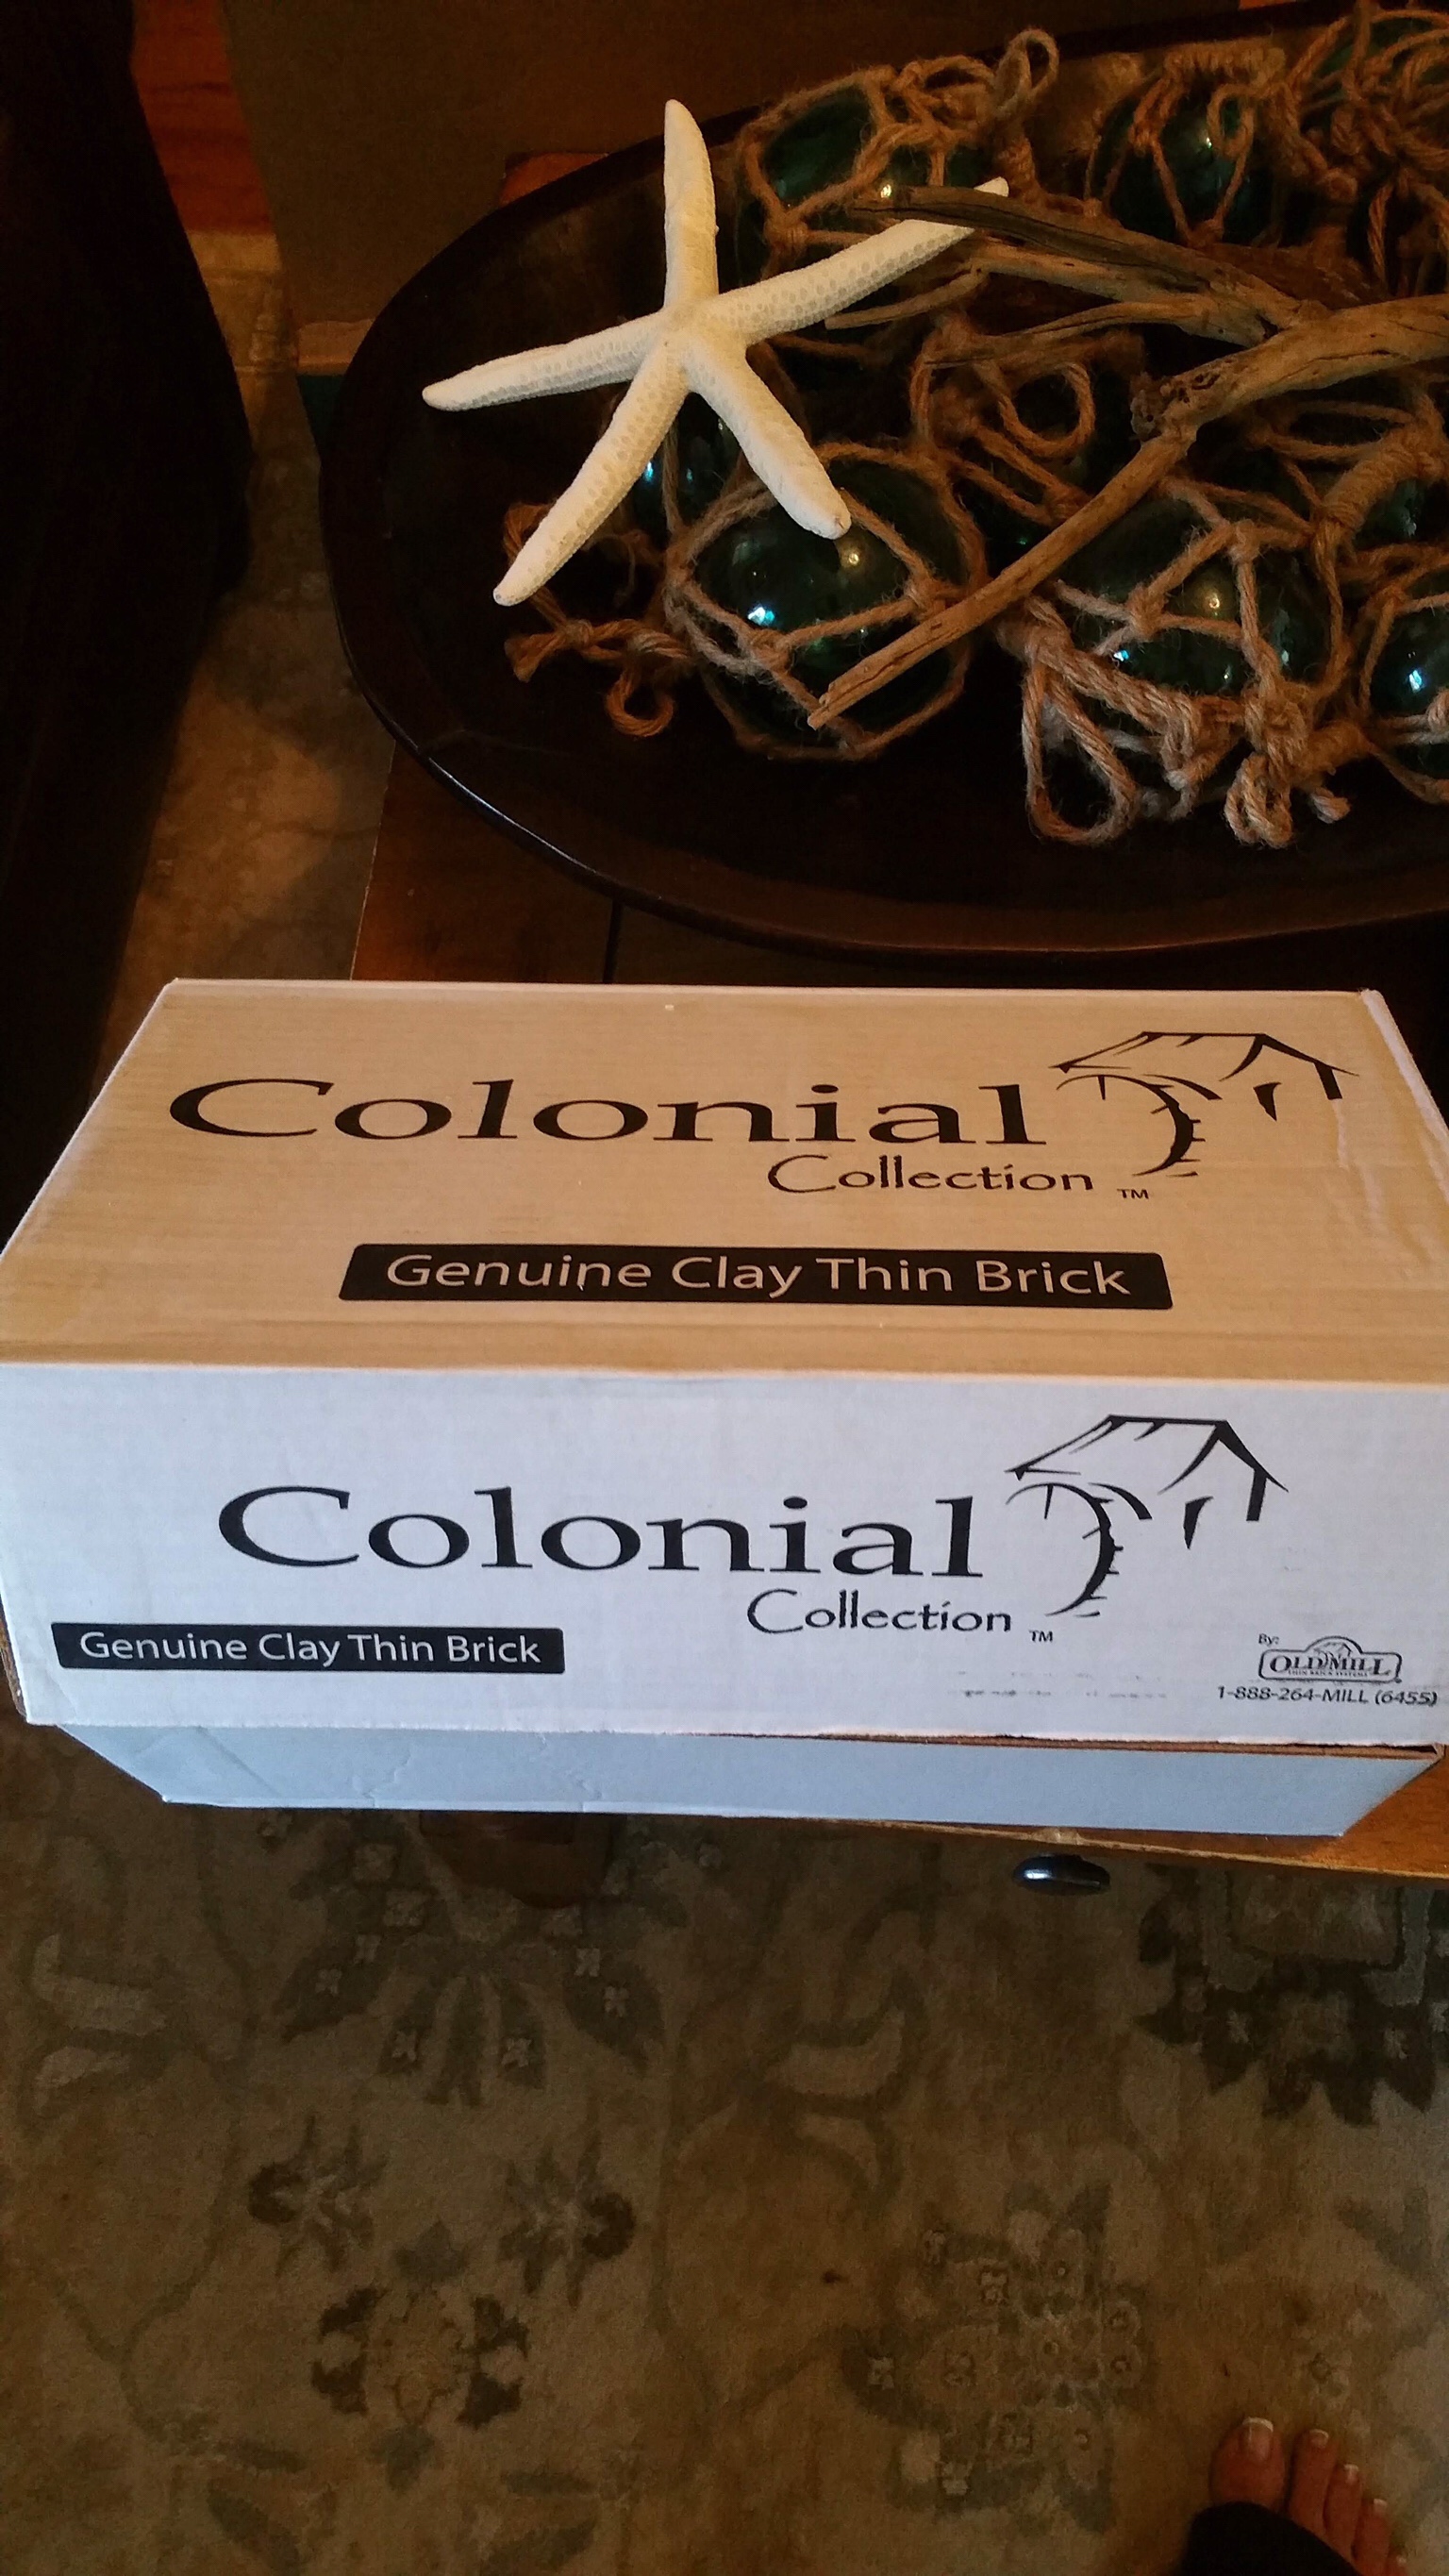
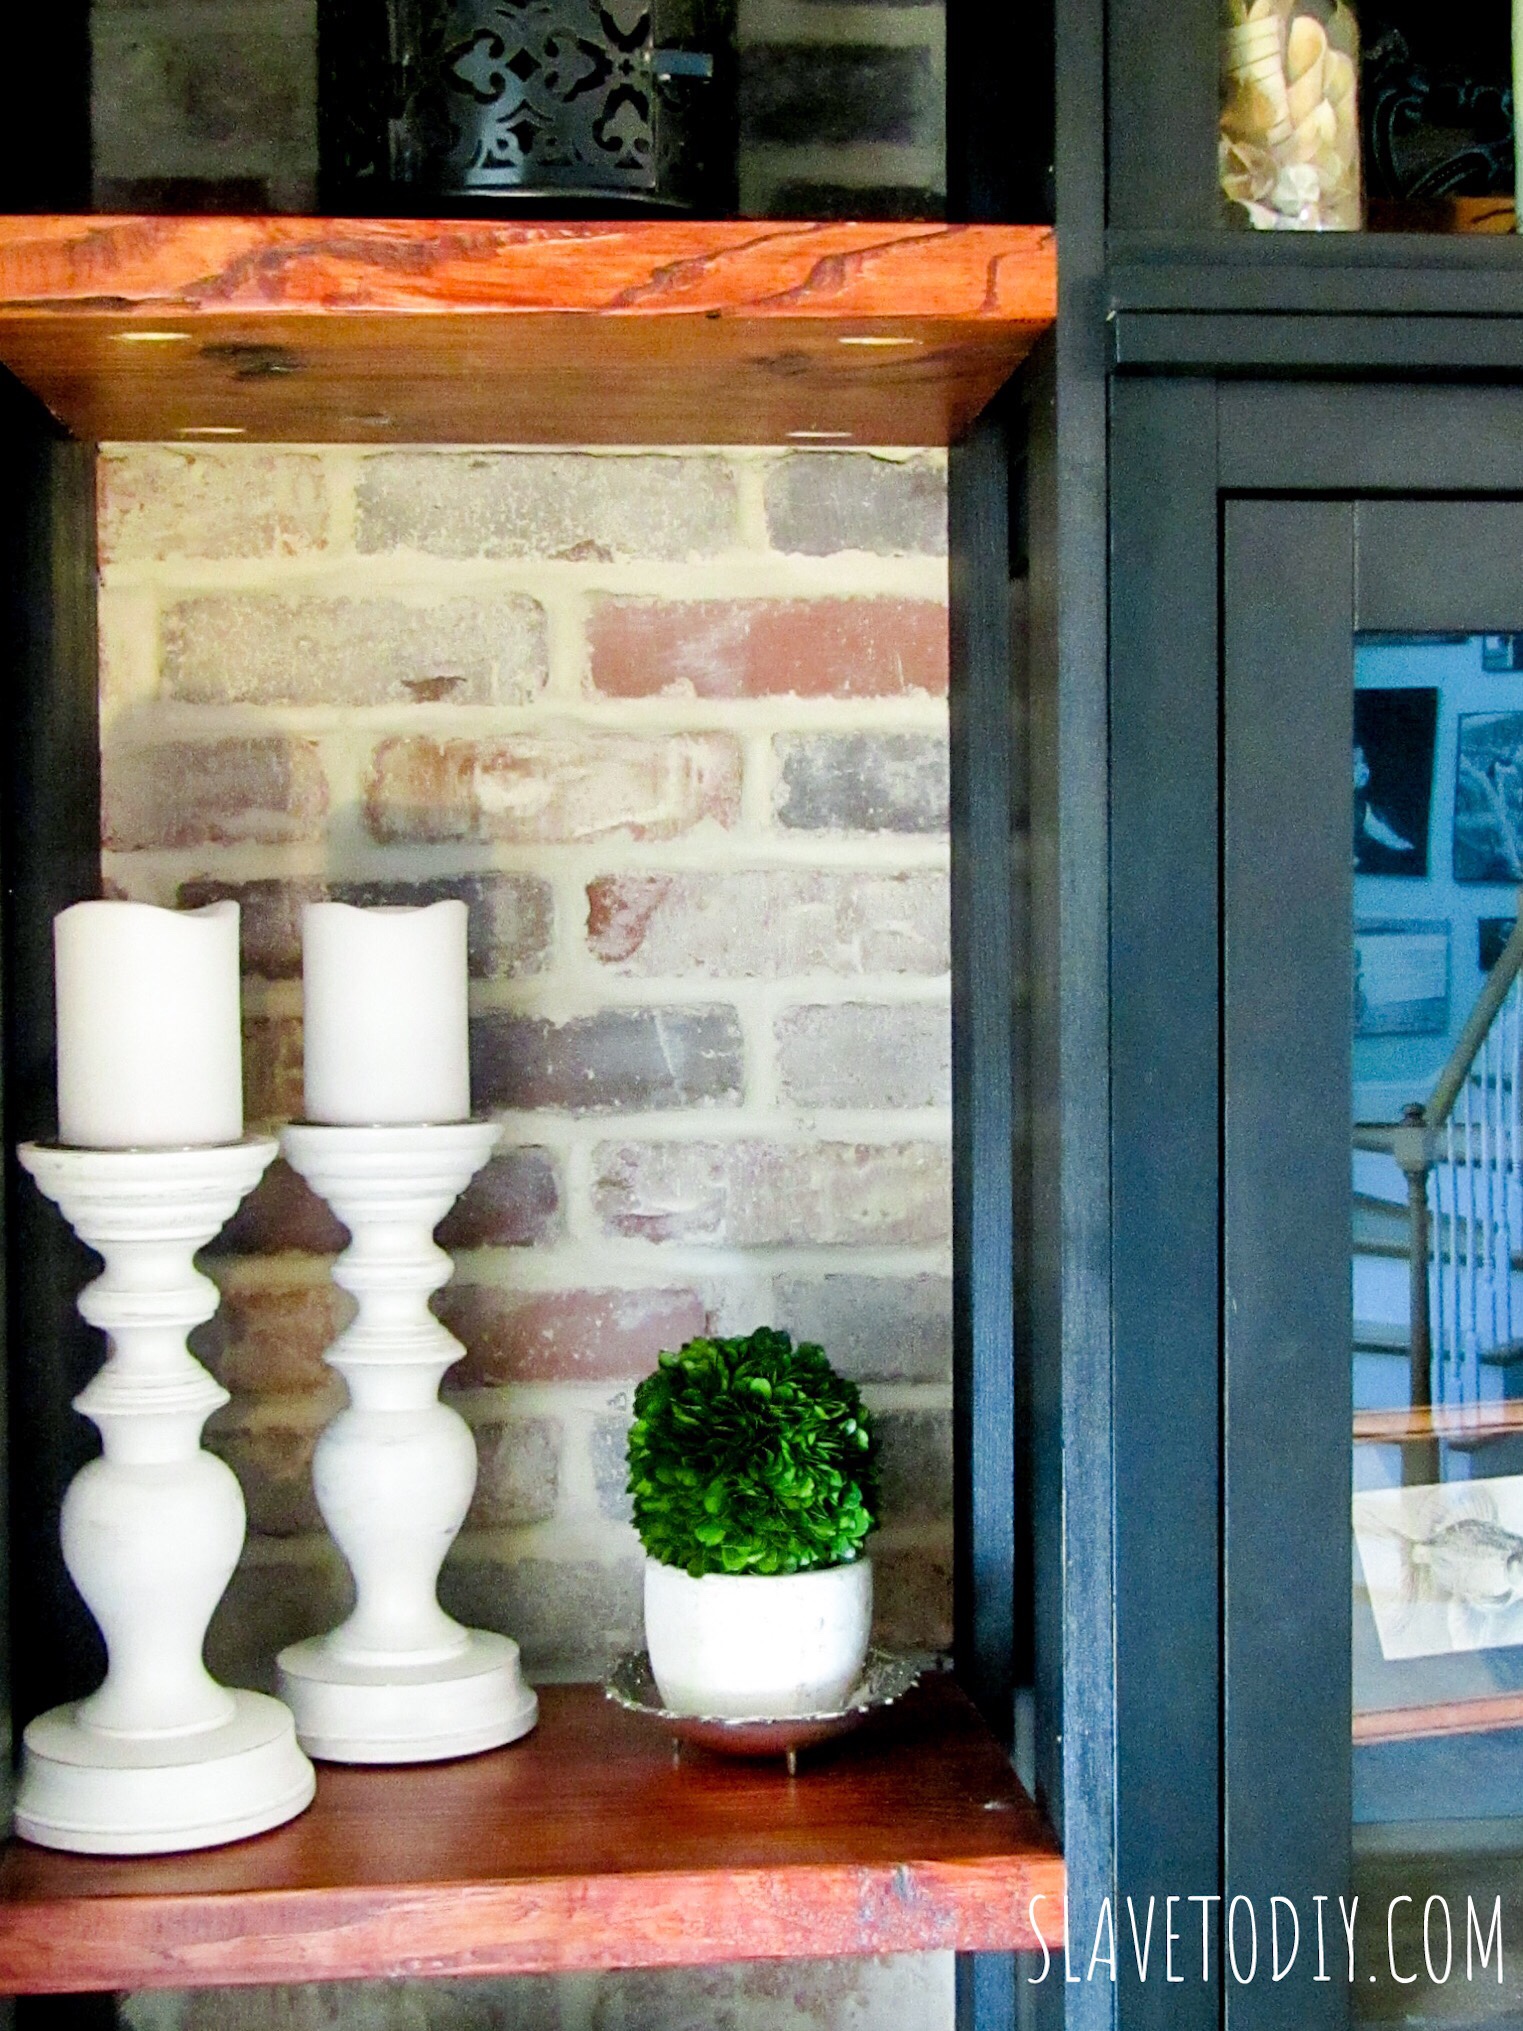
And I have to say, the details are turning out BAD ASS. We ordered some brick veneer from Home Depot (after I price compared with a local brick distributor that needed six weeks lead time to create the veneer and only sold big pallets). It’s called Old Mill Brick, comes in neatly stacked cardboard boxes and is really nice. I looked at all the types first on their website and ended up choosing an antique style, “Colonial Collection Castle Gate”, 59.97 for a box of 50 bricks. Not cheap, but reasonable. Here’s the thing, the cost of the brick detail just on the outside shelves, cost about $120. The mortar and grout ran around $70. But, it’s the thing that makes them awesome. Don’t let the “veneer” part fool you.. It’s real brick. Just thinner.
Castlegate, Old Mill BrickCastlegate, Old Mill Brick, Veneer
Tip: When measuring for your brick, include your anticipated grout lines in the height and width of your bricks and you won’t ordered $120 worth of extra brick. Yes, we literally ordered twice what we needed. We used half-inch grout lines so our measurements should have been 8.225 x 2.75 instead of 7.625 x 2.25. Luckily, we’re planning to use this same brick as an accent in the kitchen so no biggy.
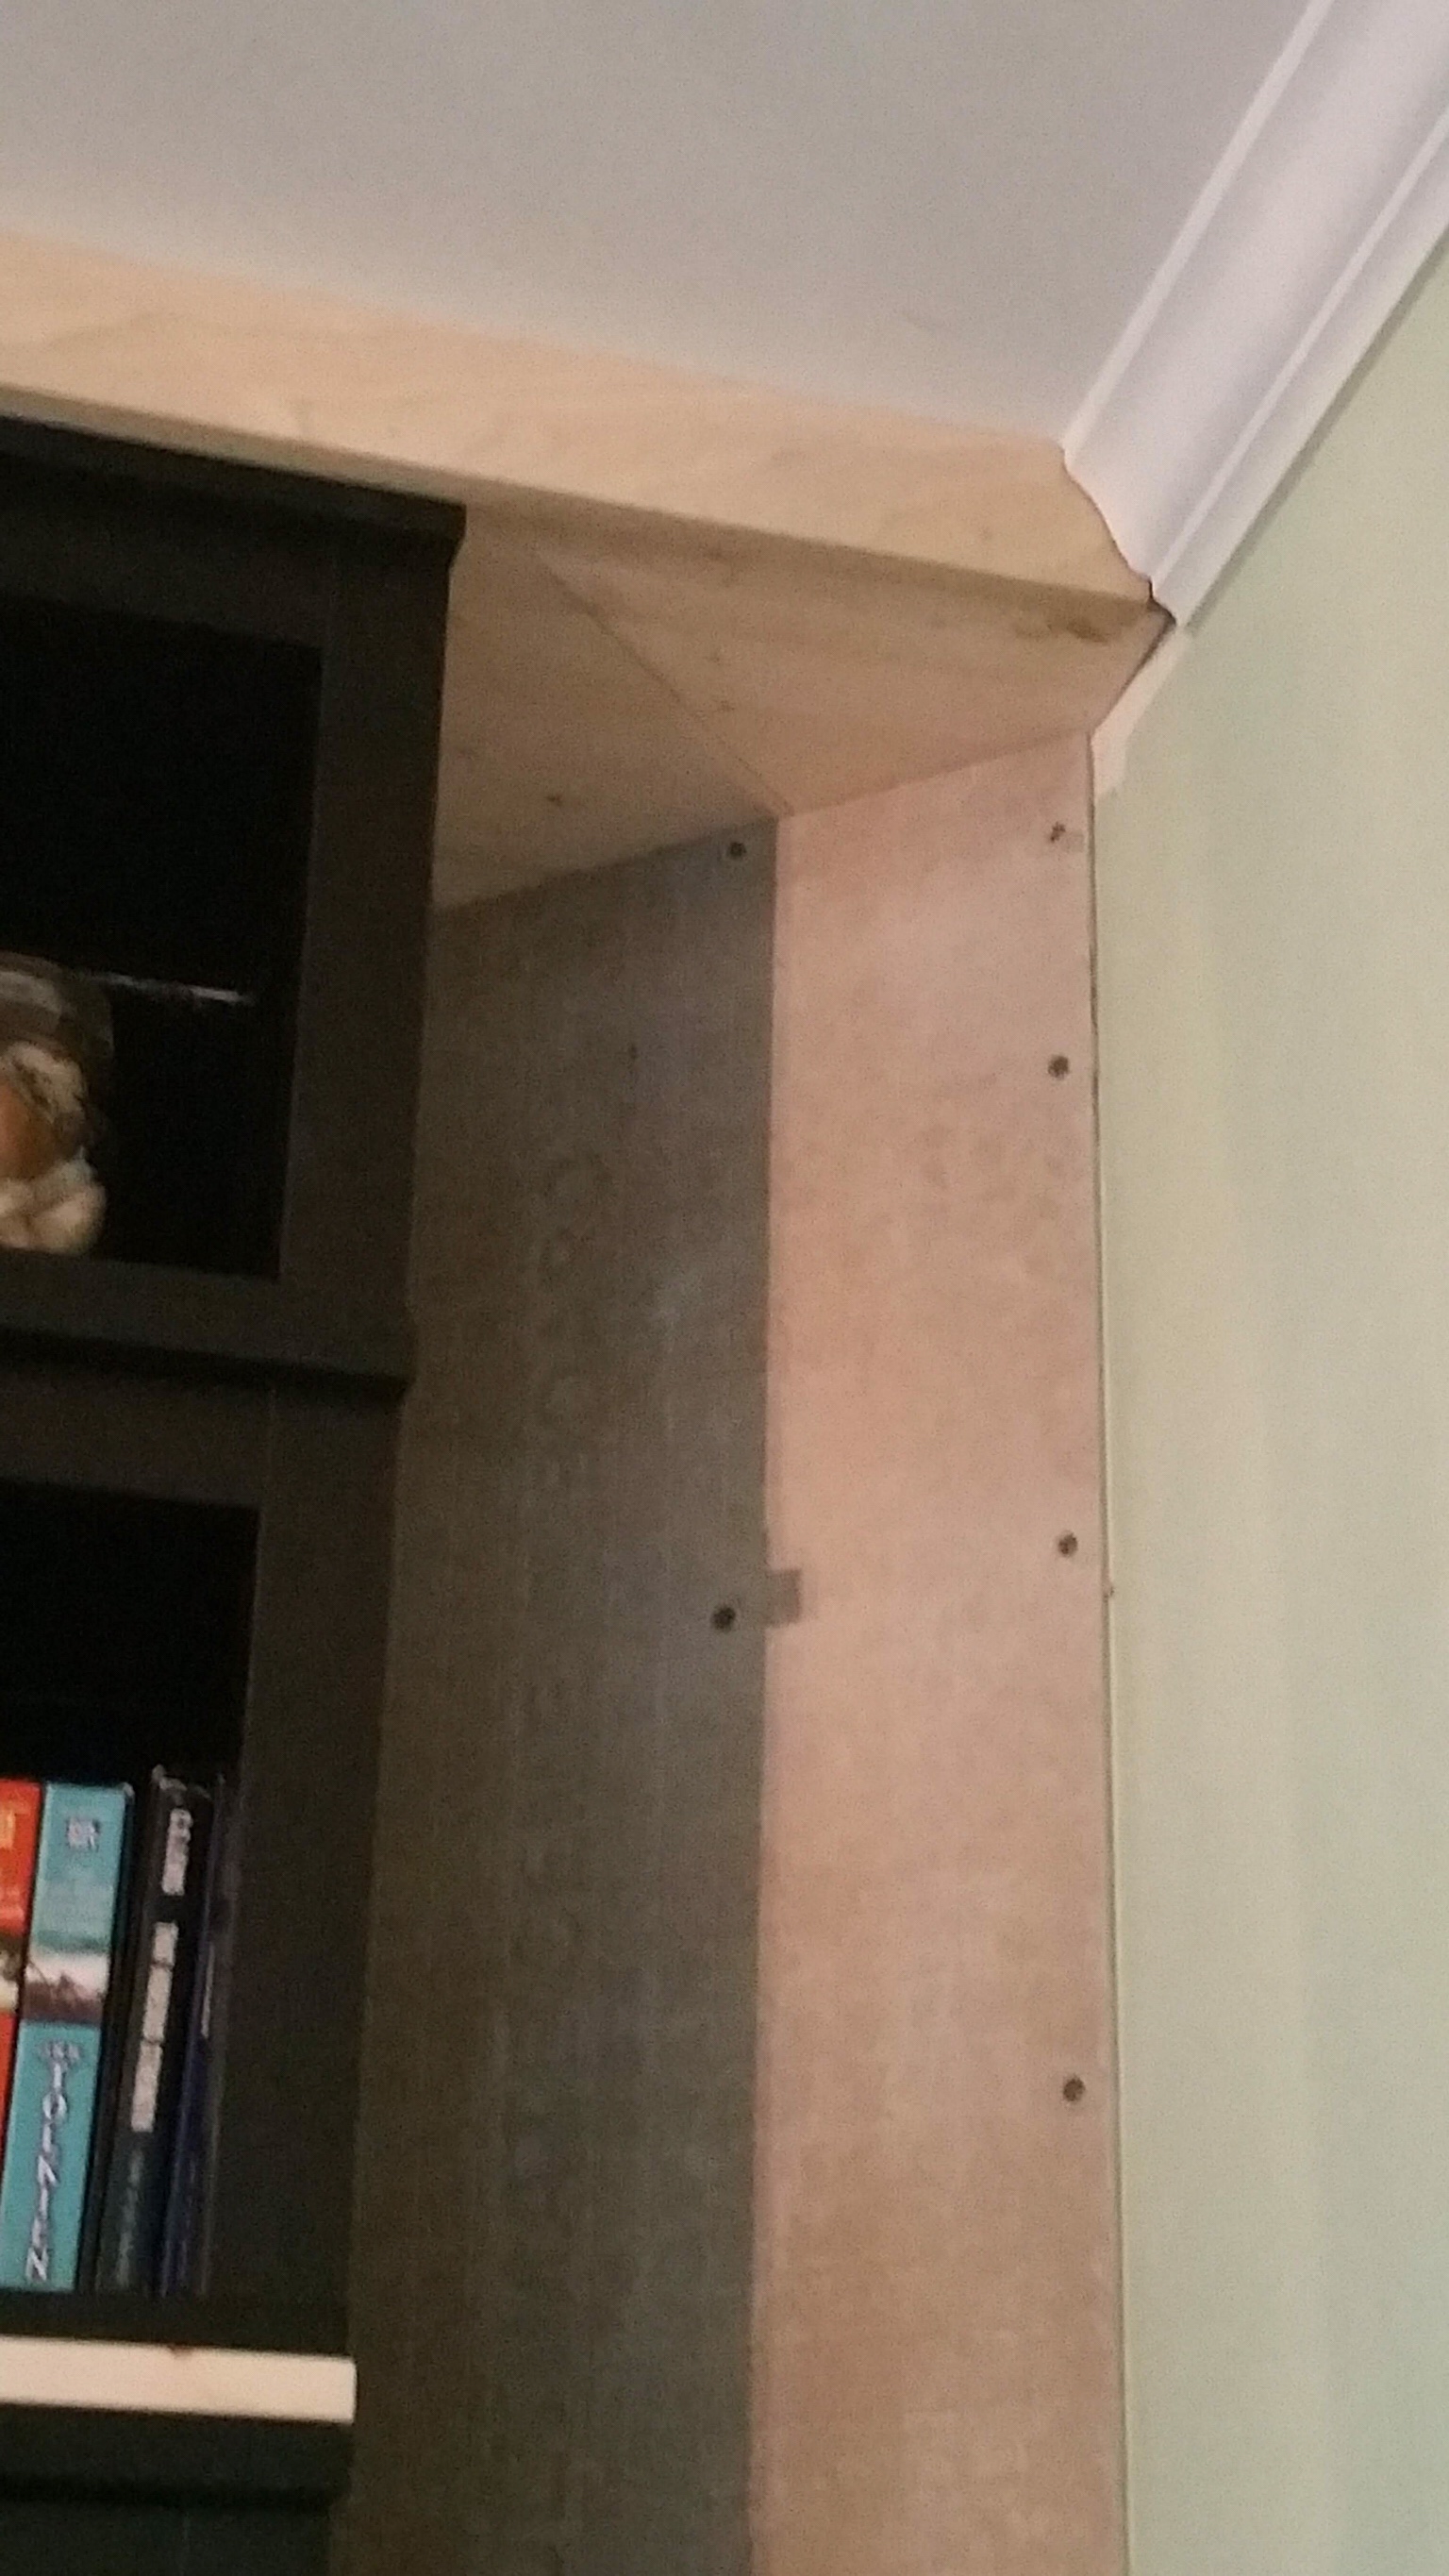
Concrete Backer Board
We installed concrete backer board on the walls where the brick was going, but looking back, we probably didn’t really need it.
Old Mill Brick, Castlegate, on the accent walls flanking the buitins
We got the brick installed… (that is a much longer story). And I’m not going into it. Because it was misery. Working in the tiny space was awful. I look forward to doing this on an open wall.
Anyway, it looks awesome. Took three different tries and one of the biggest, messiest, most tedious installation processes ever. The brick installation process is coming soon. Maybe. If I have the strength.
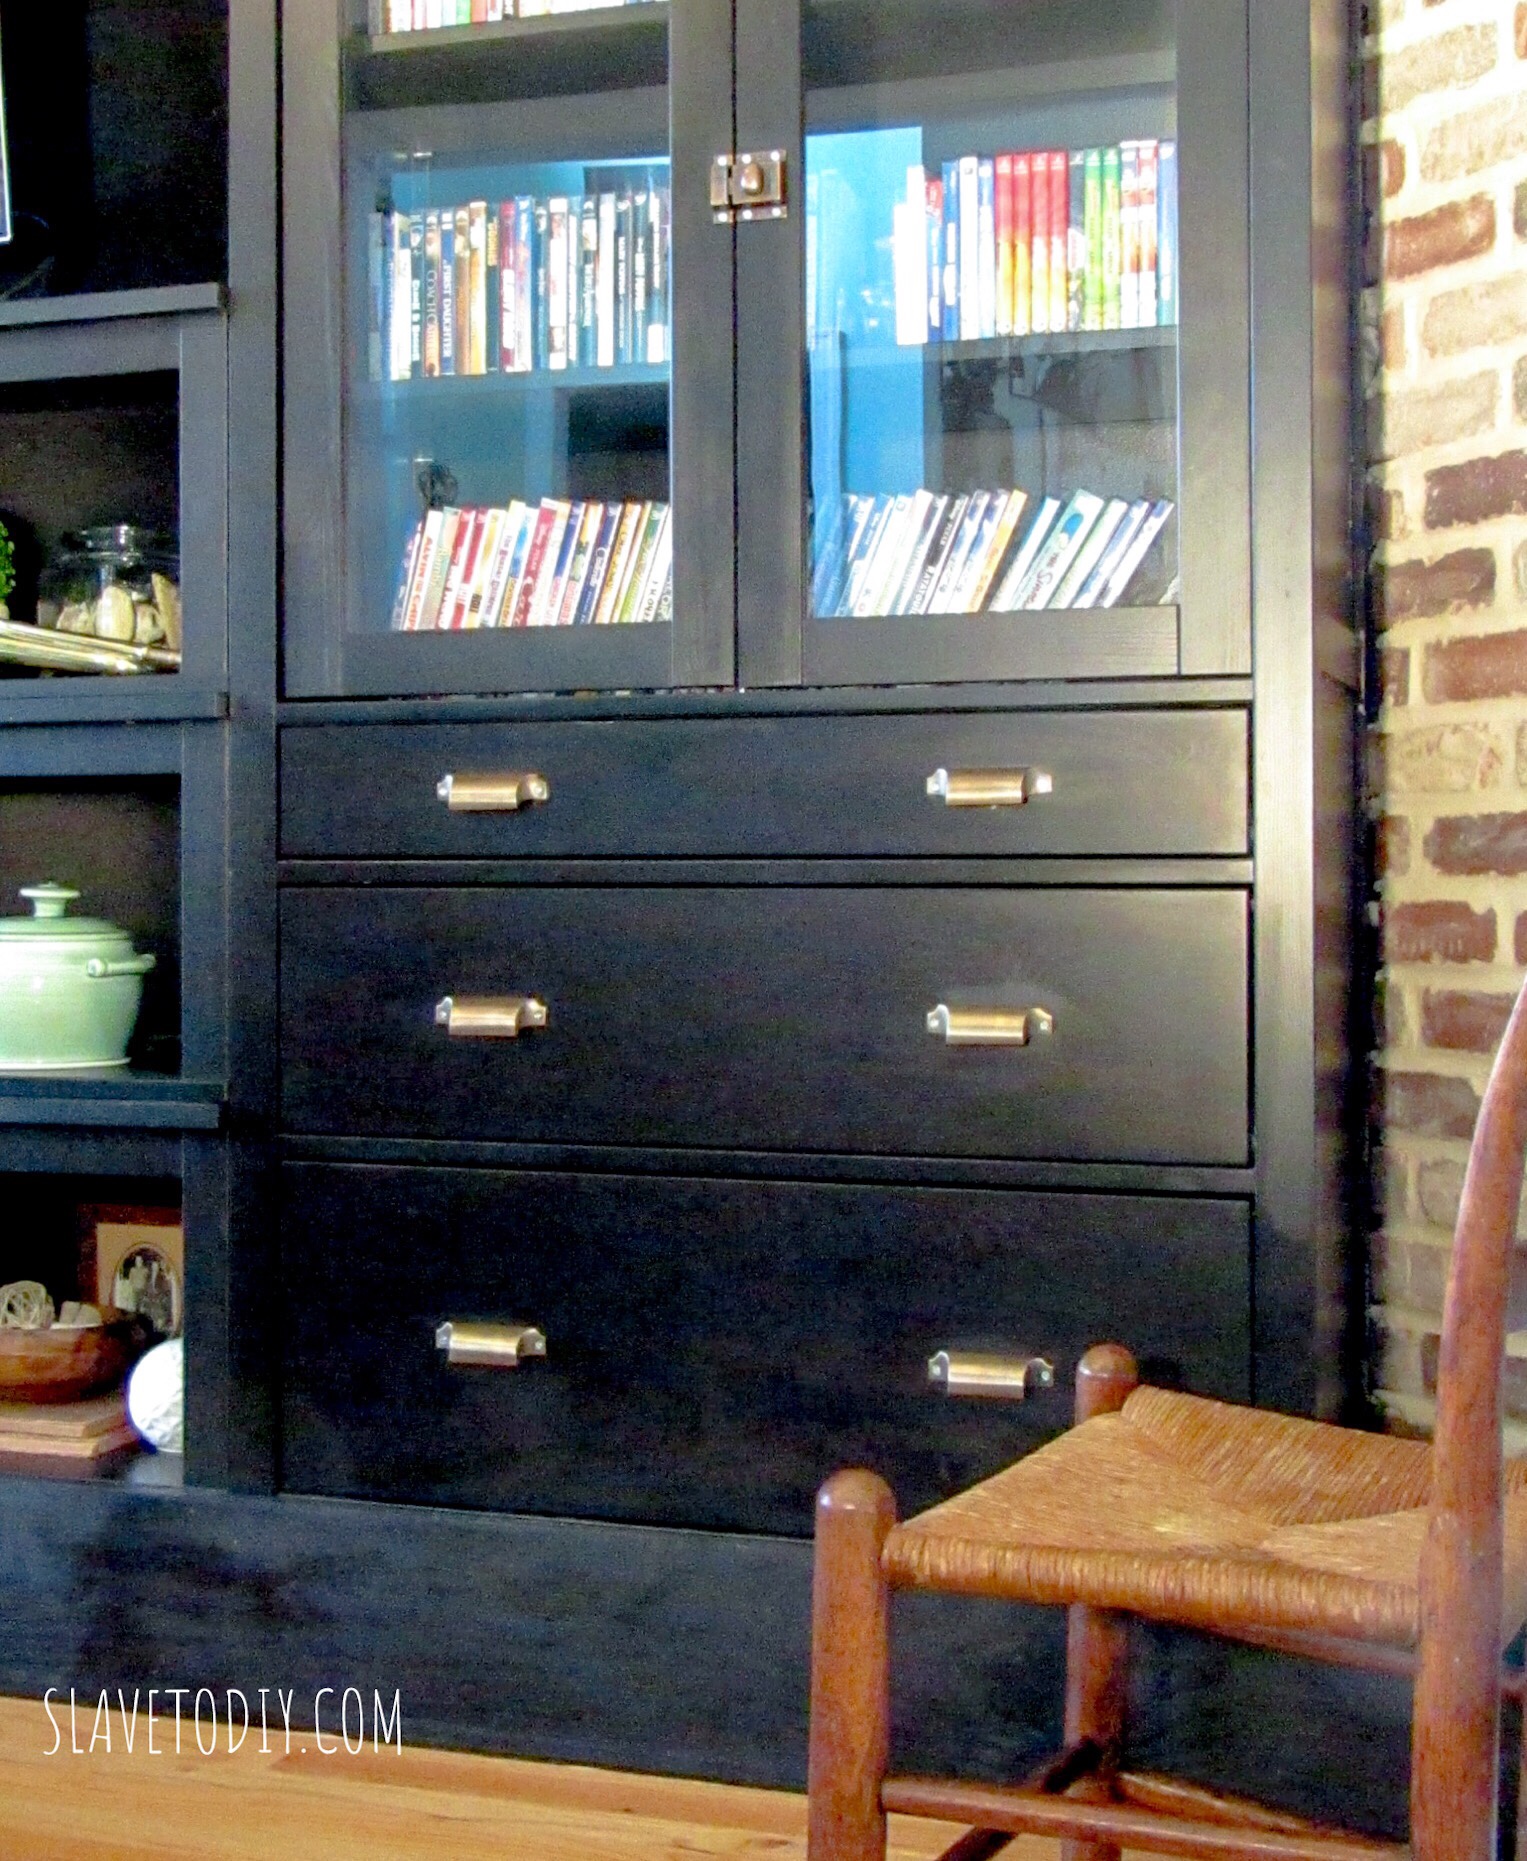
But, this is what it looks like when we finished the outside edges:
And as you can see we installed the awesome floating shelves on the outer edge. This, combined with the brick really makes this installation special. These little customizations are what make the IKEA hacks look super awesome and non-generic.
Oh, and I’m sure you noticed the pure awesomeness of that pretty hardware (hint: NOT IKEA). See the tutorial on updating the hardware.
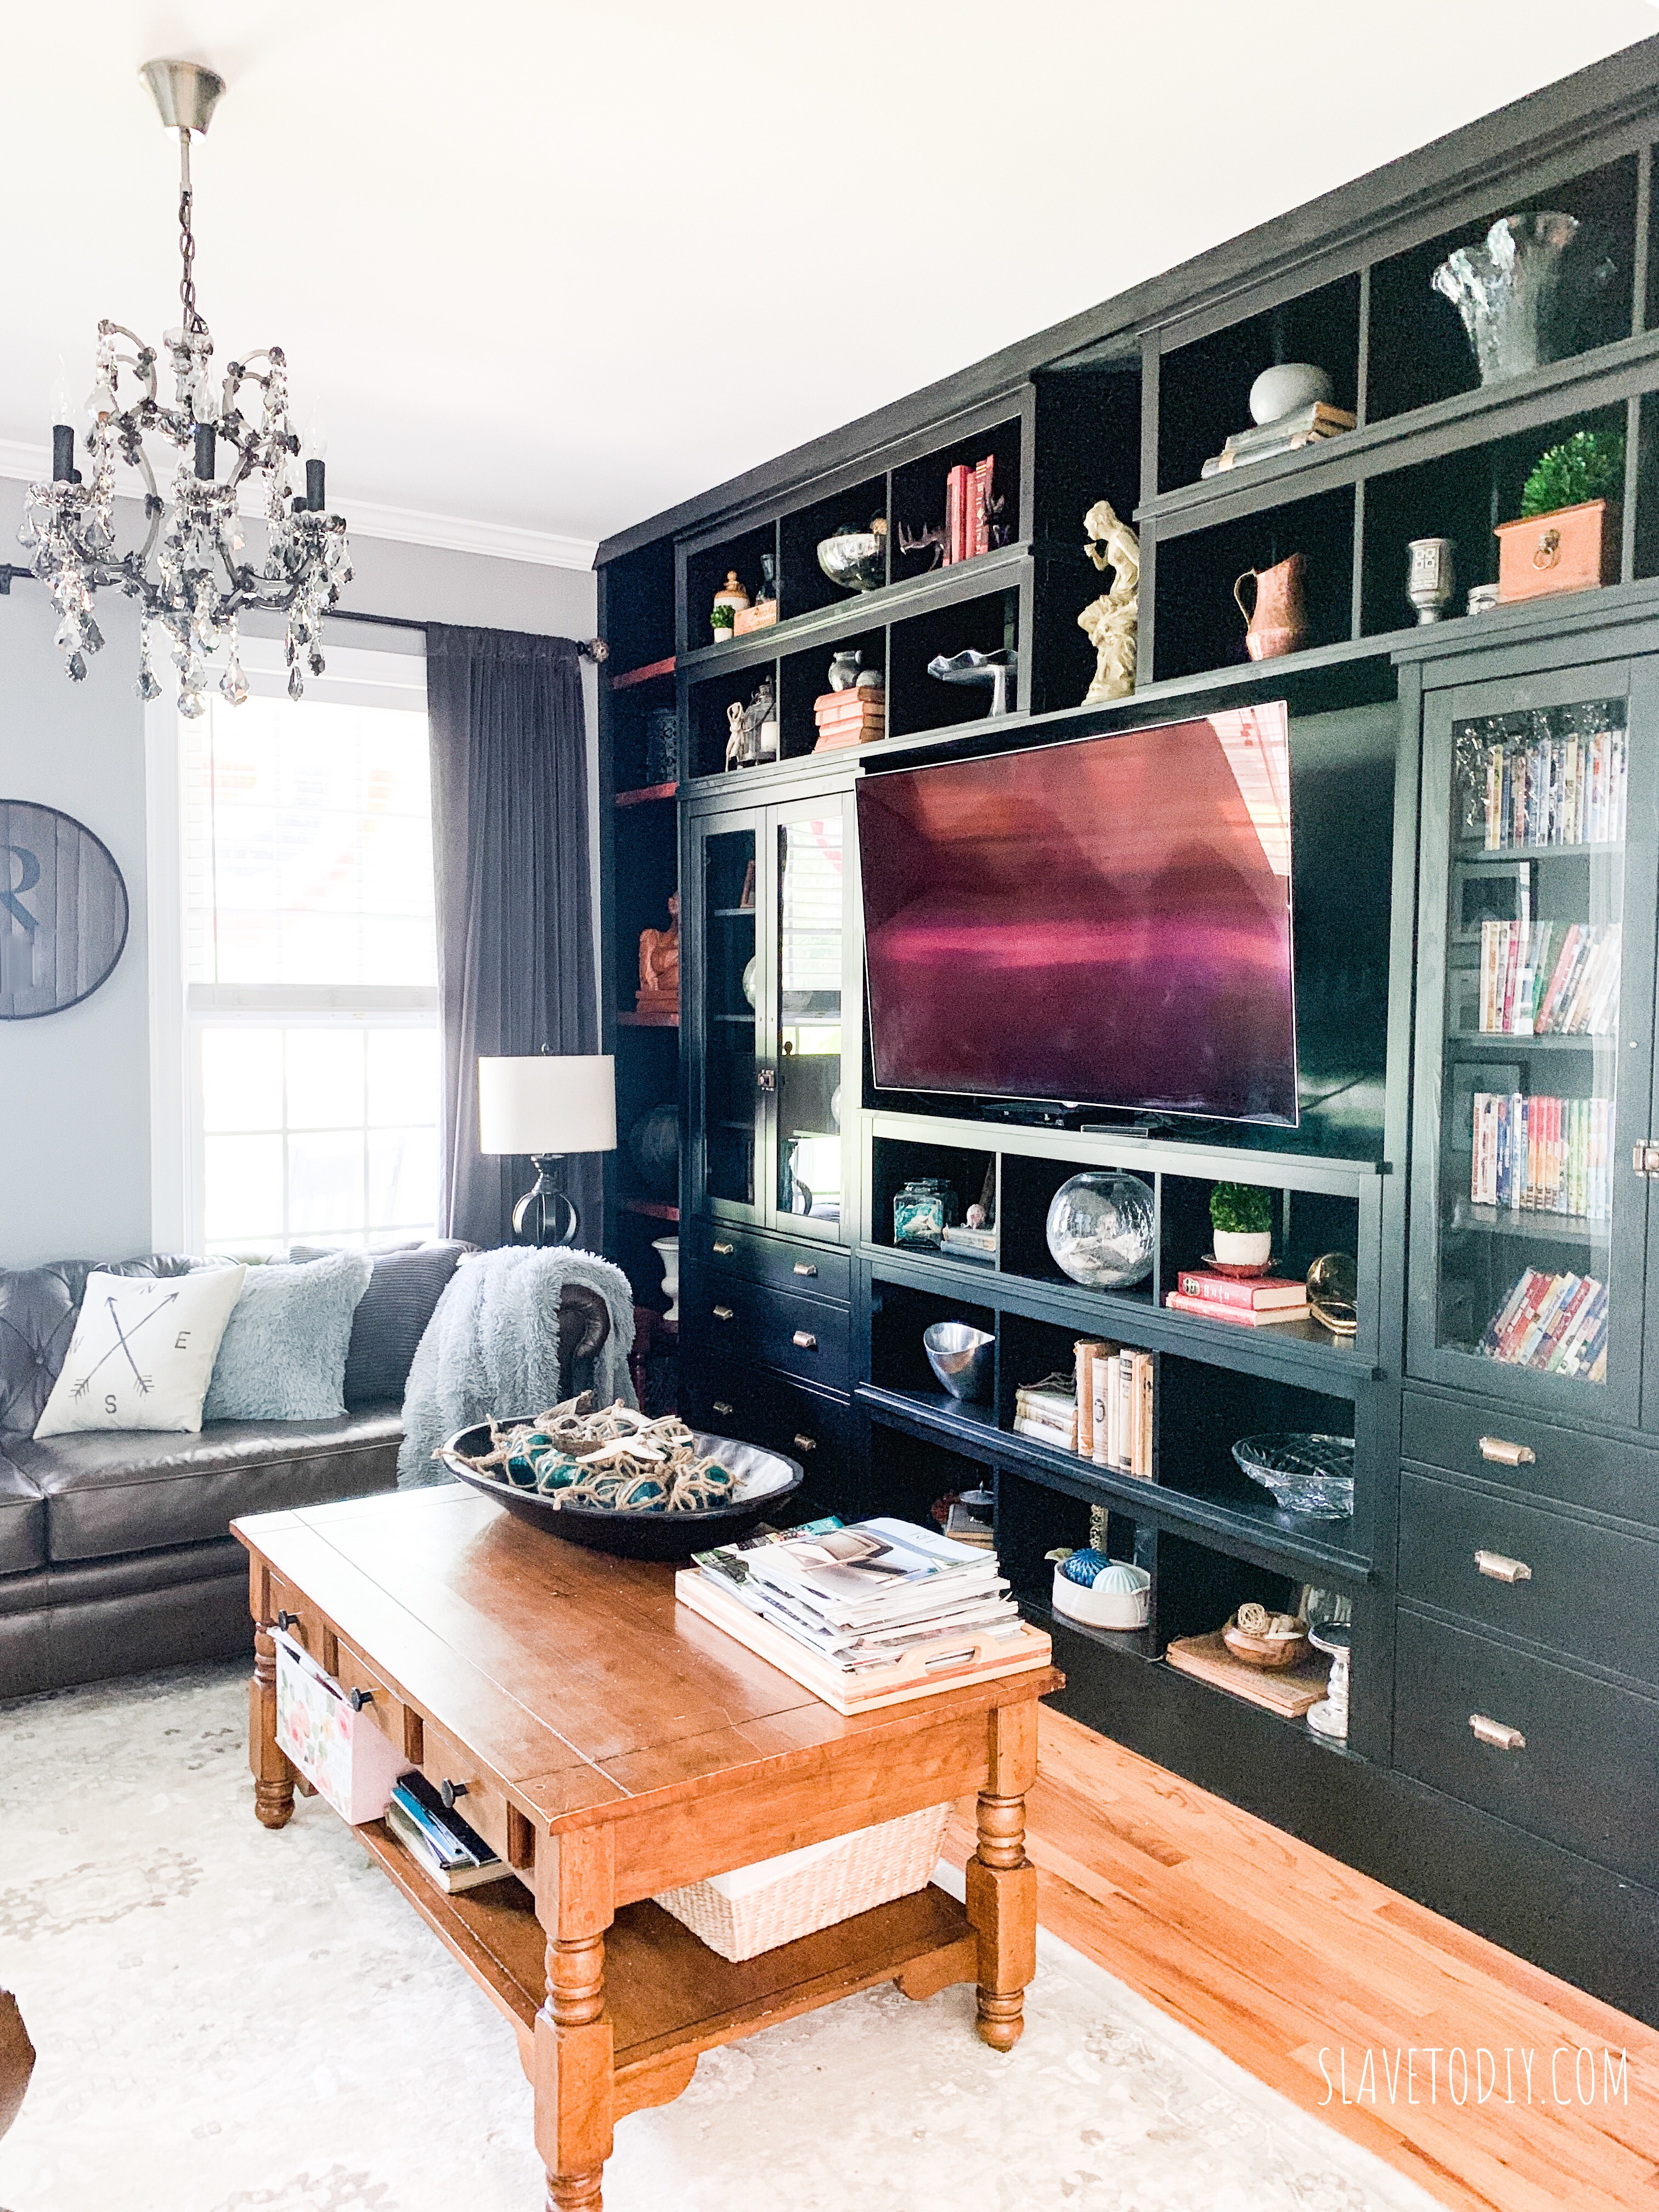
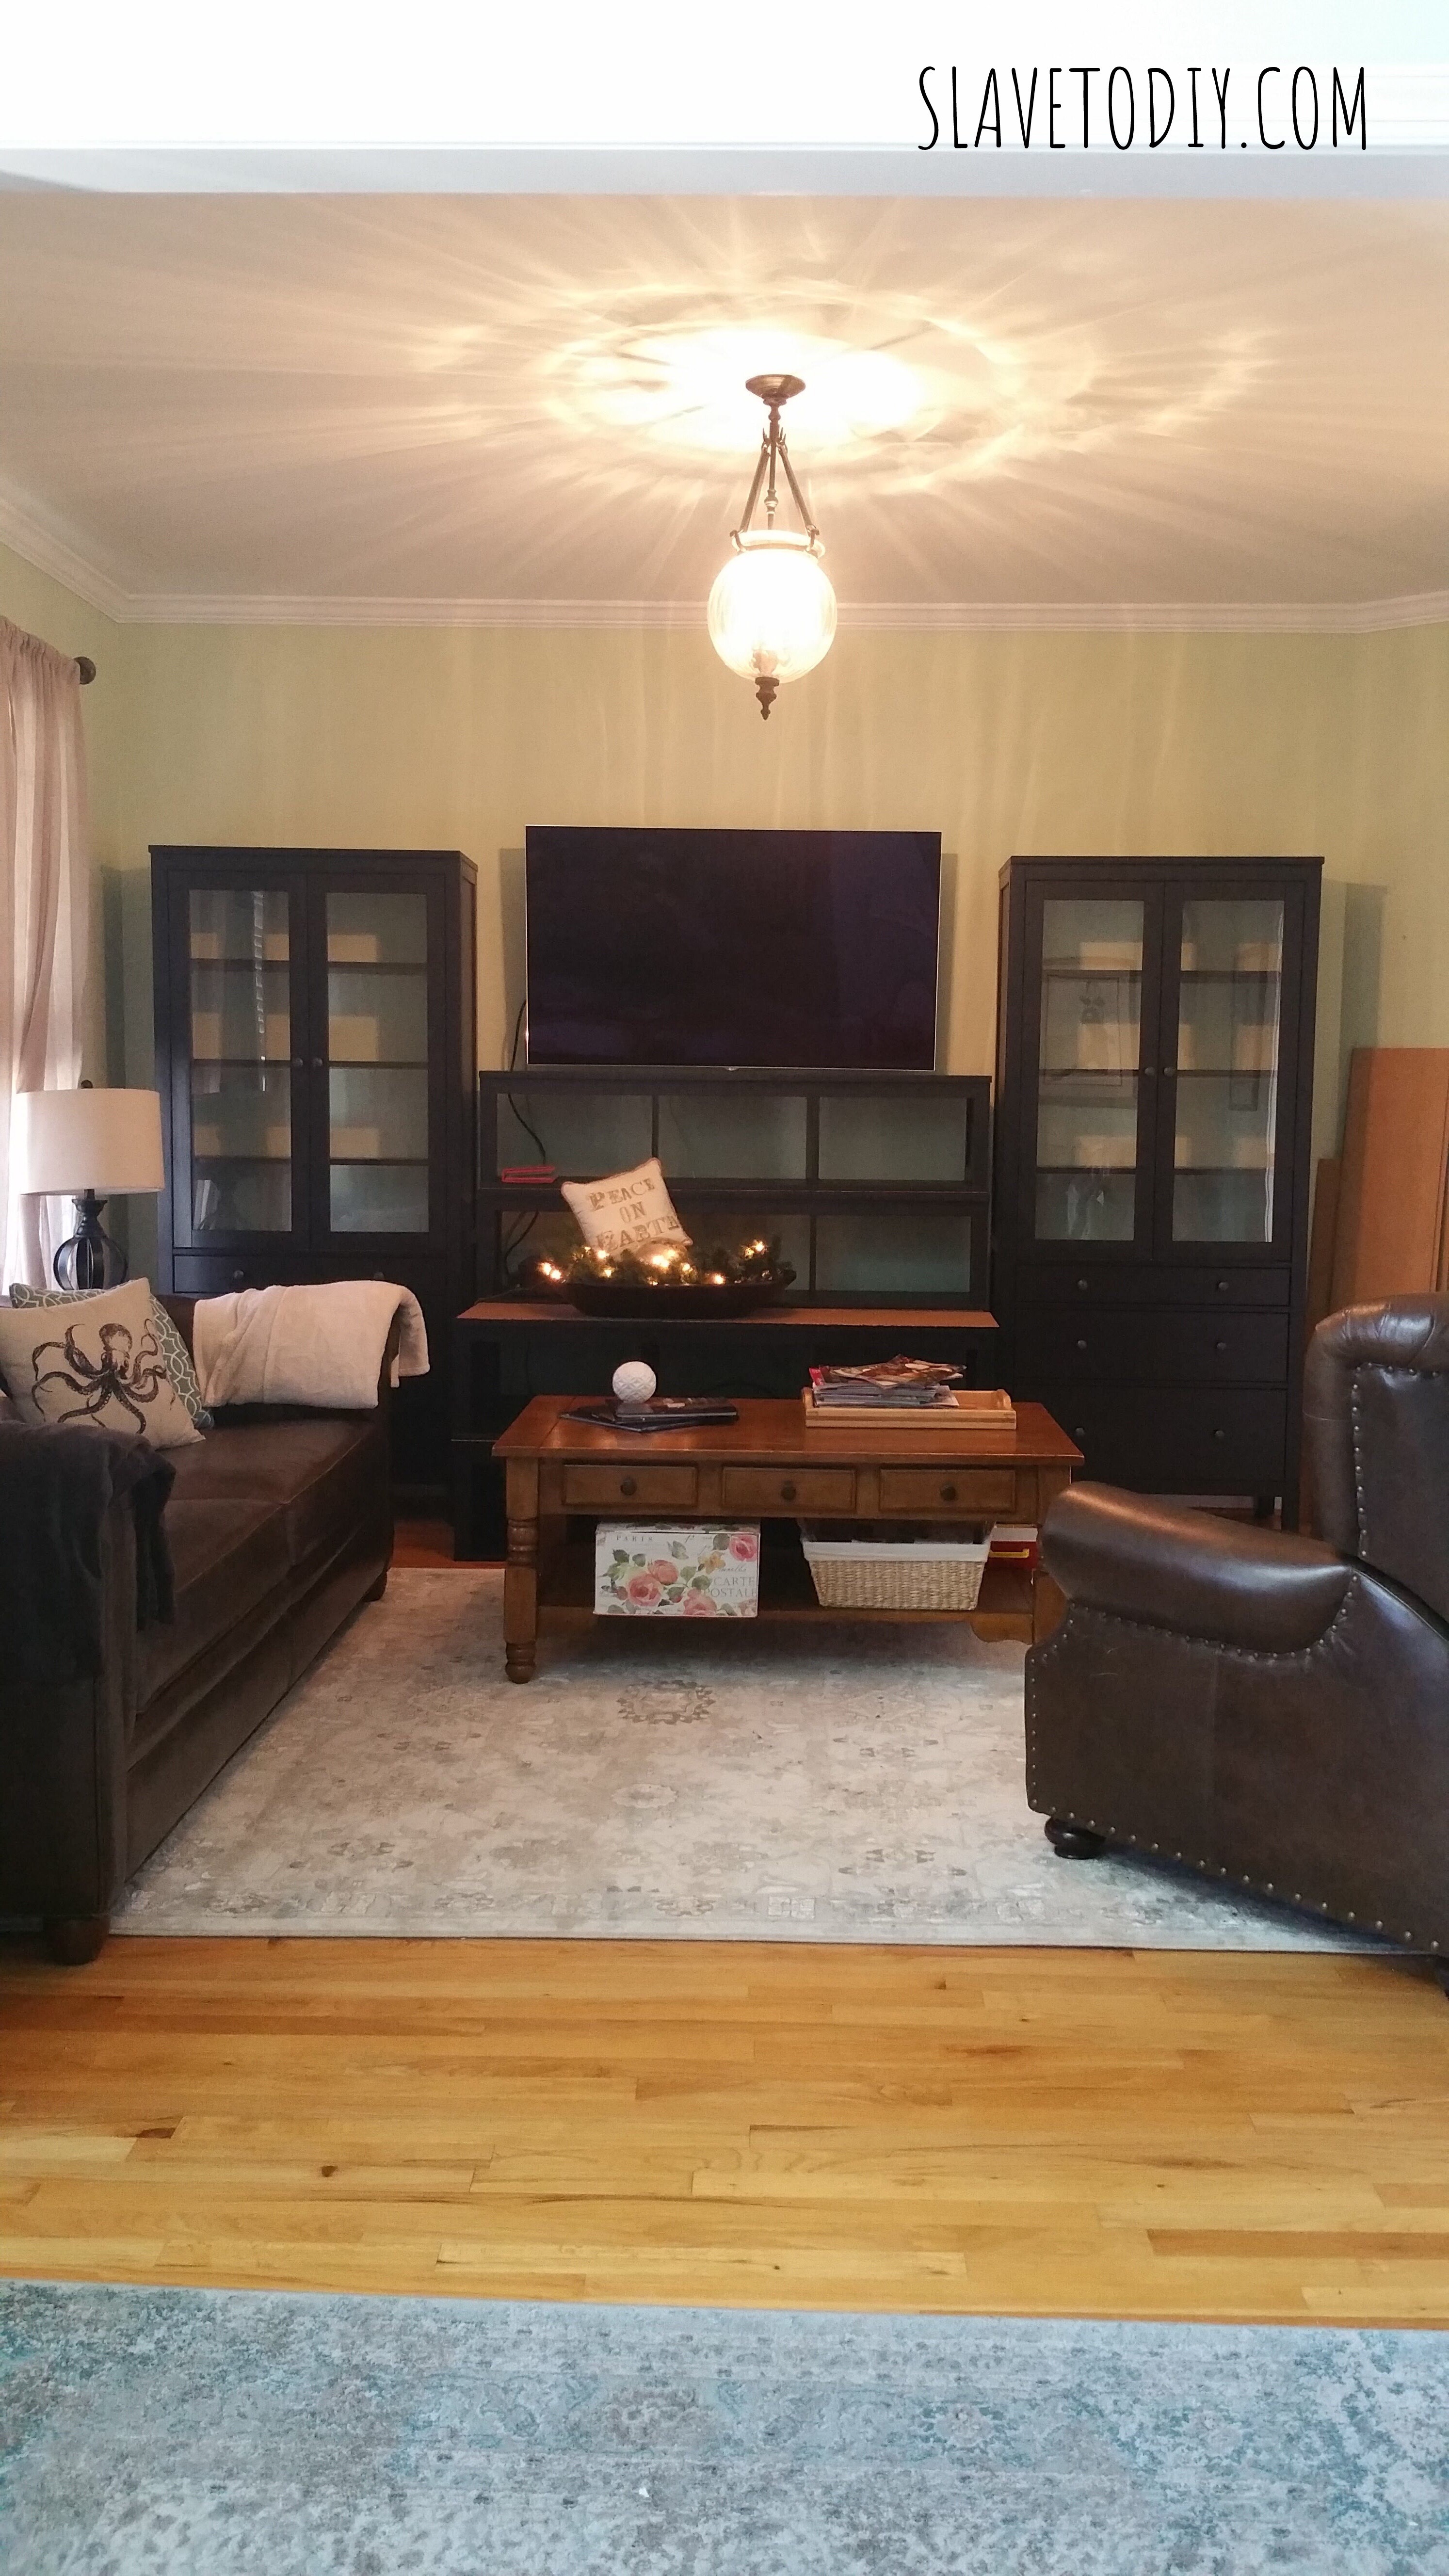
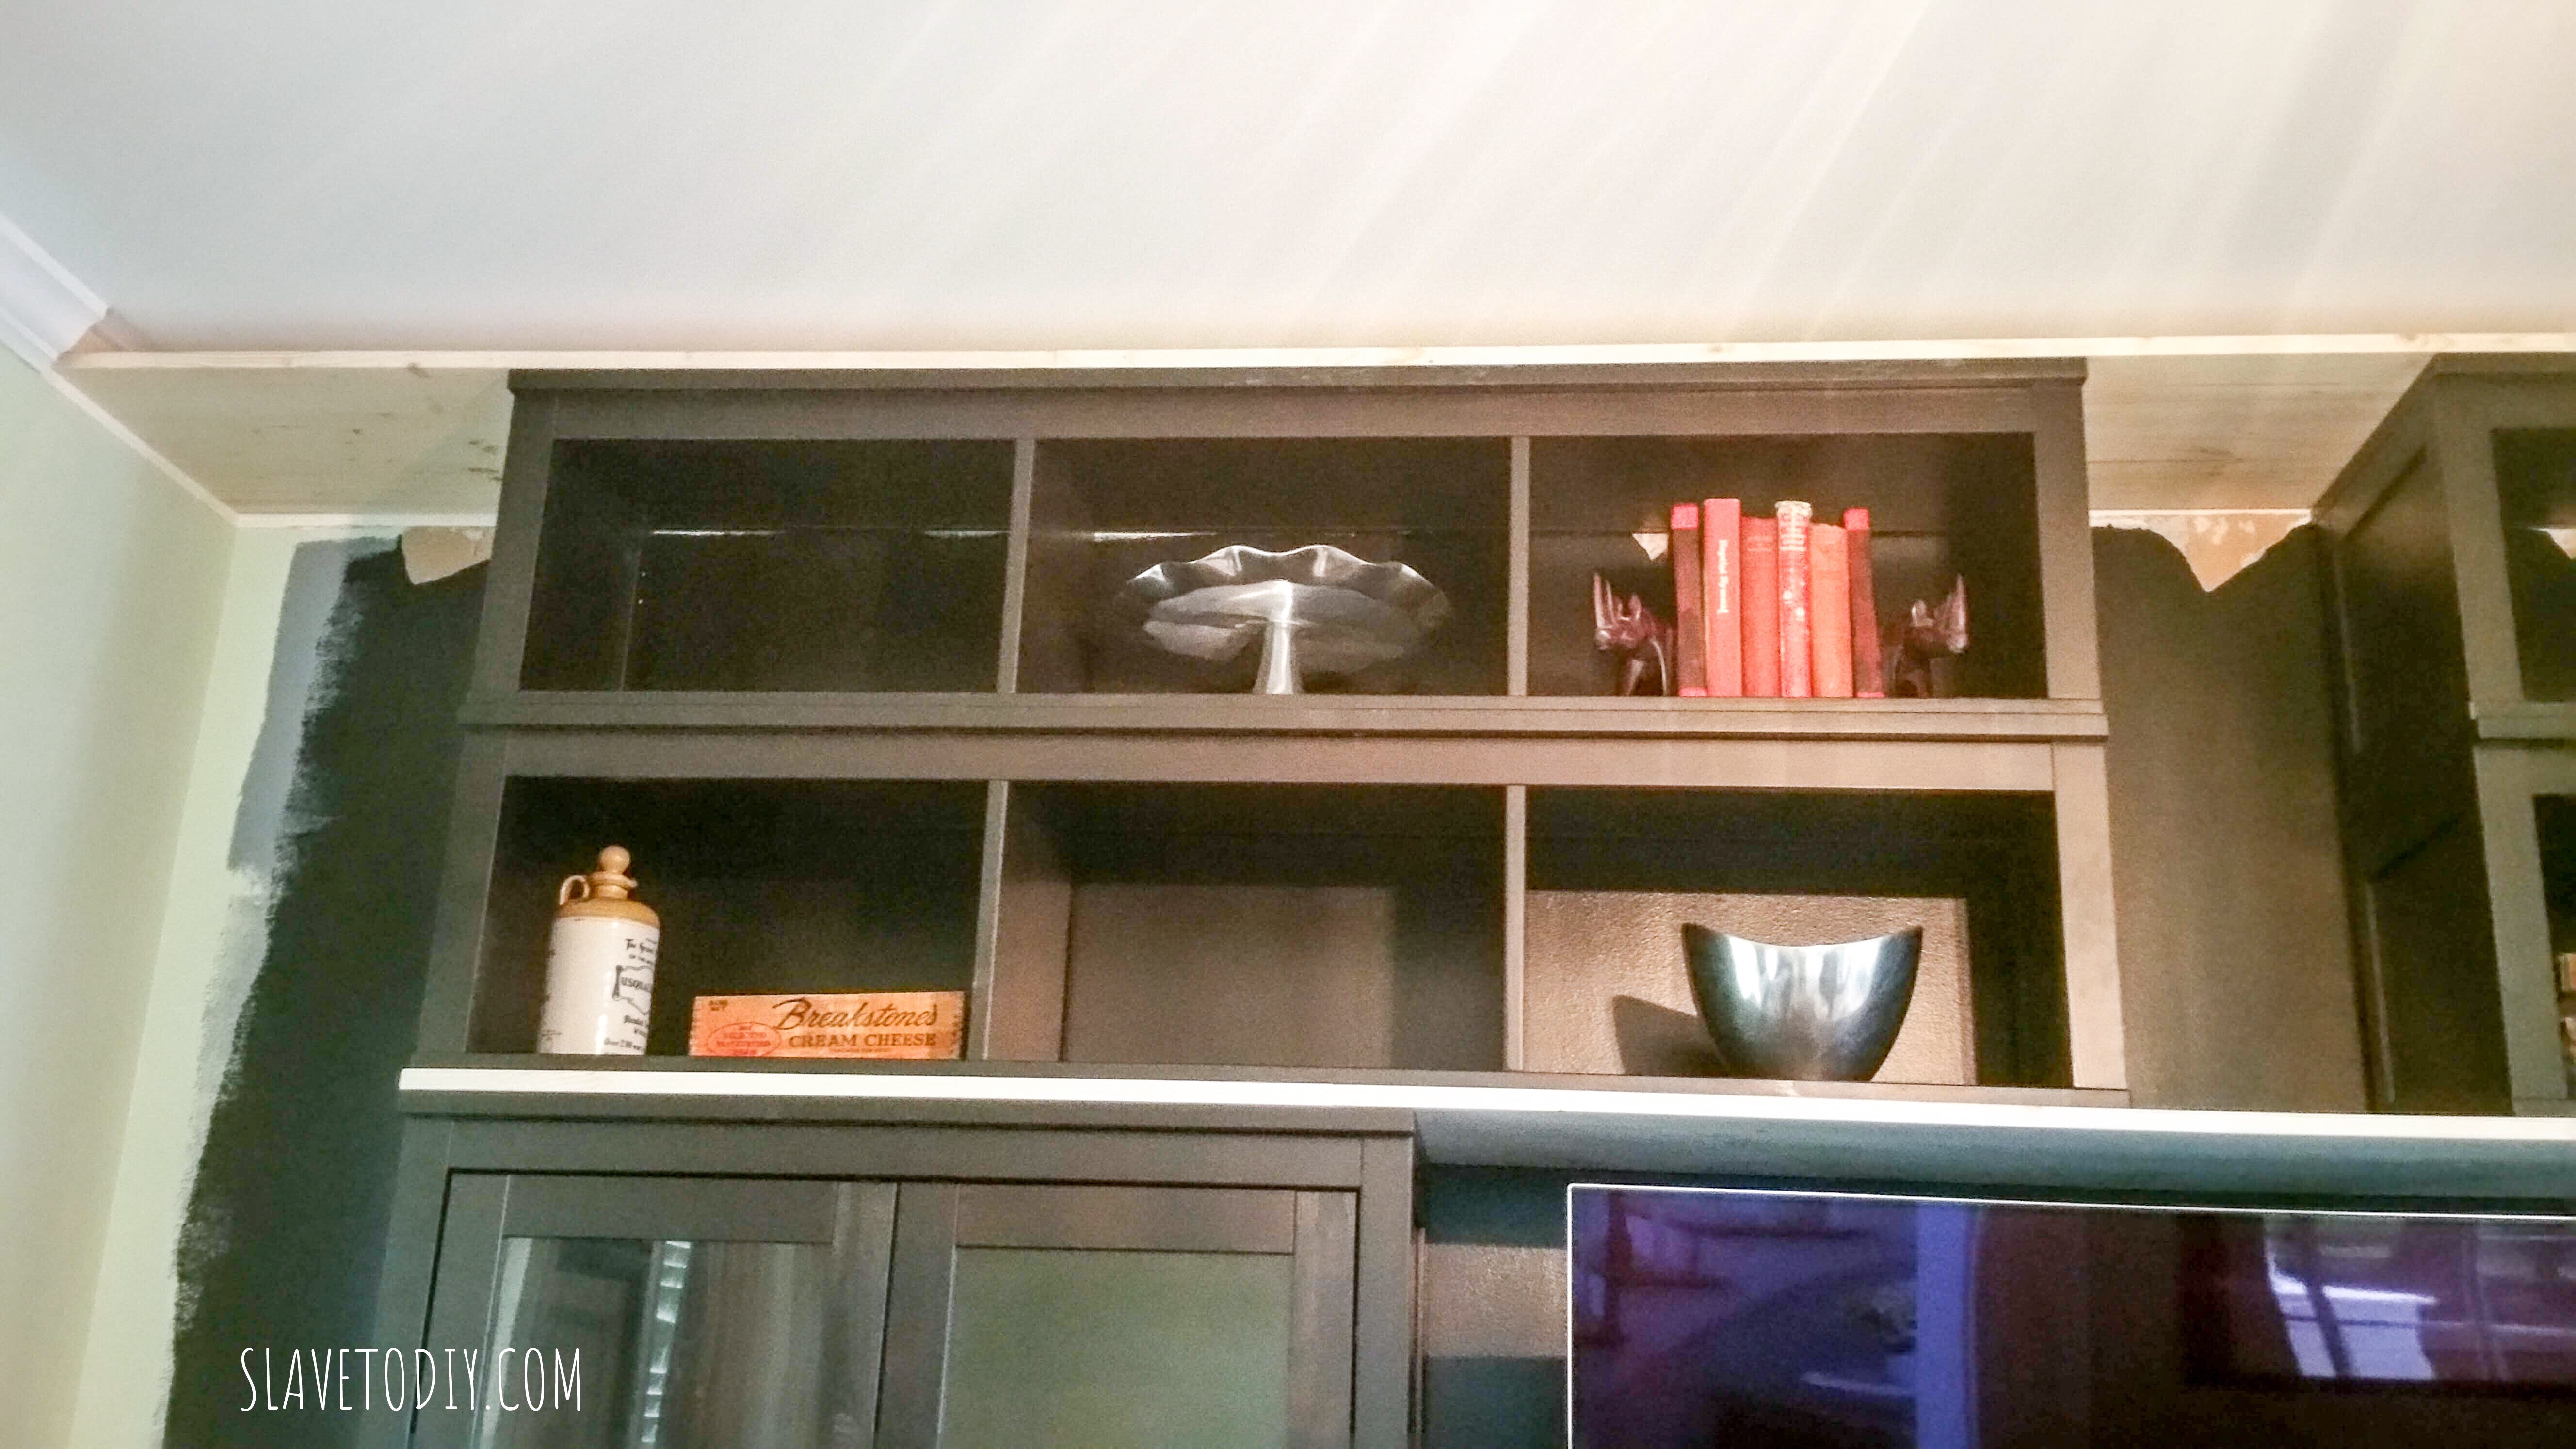
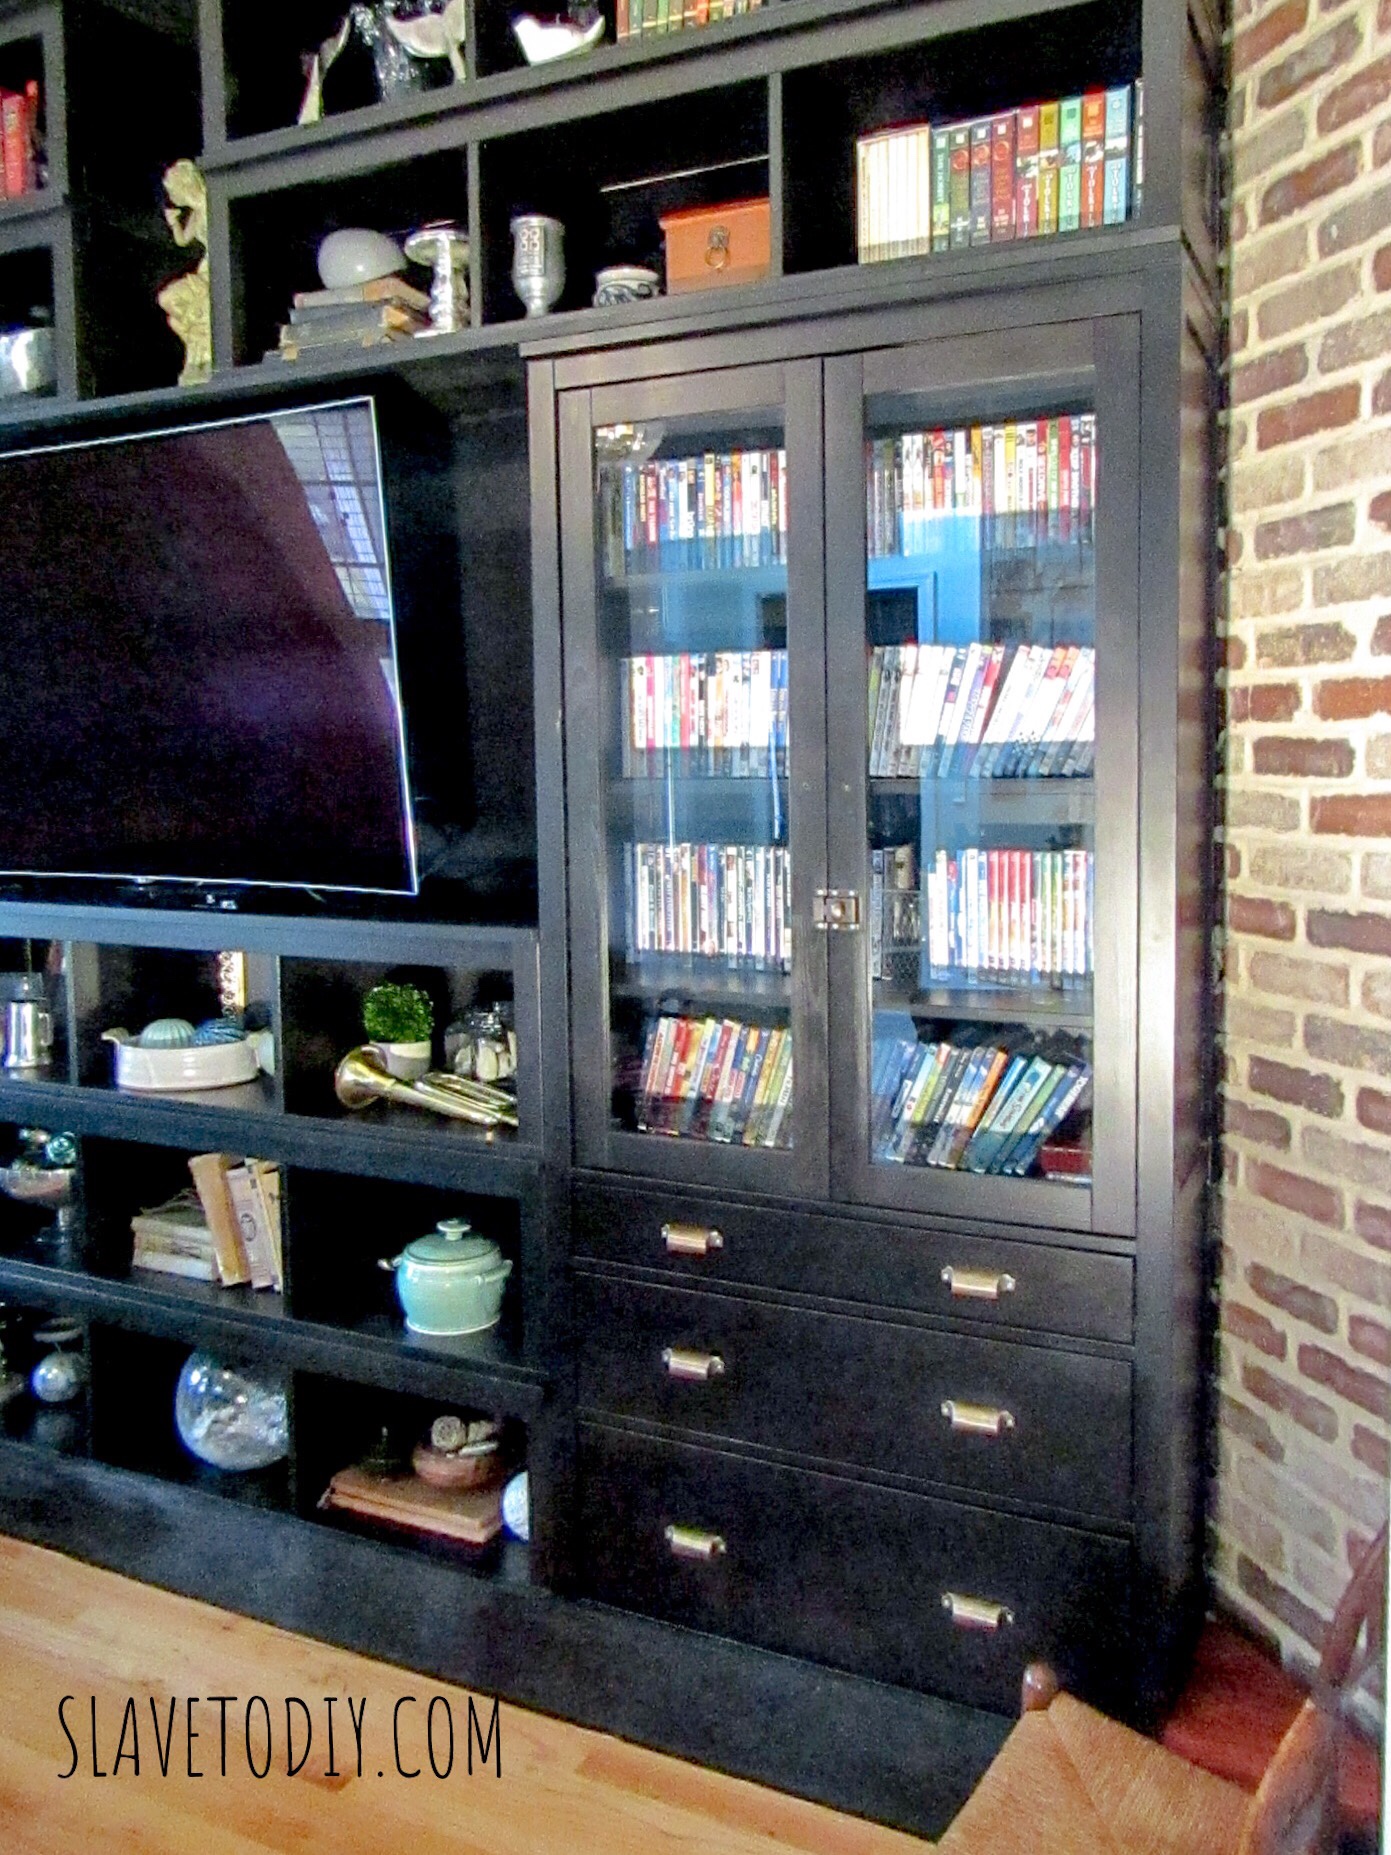
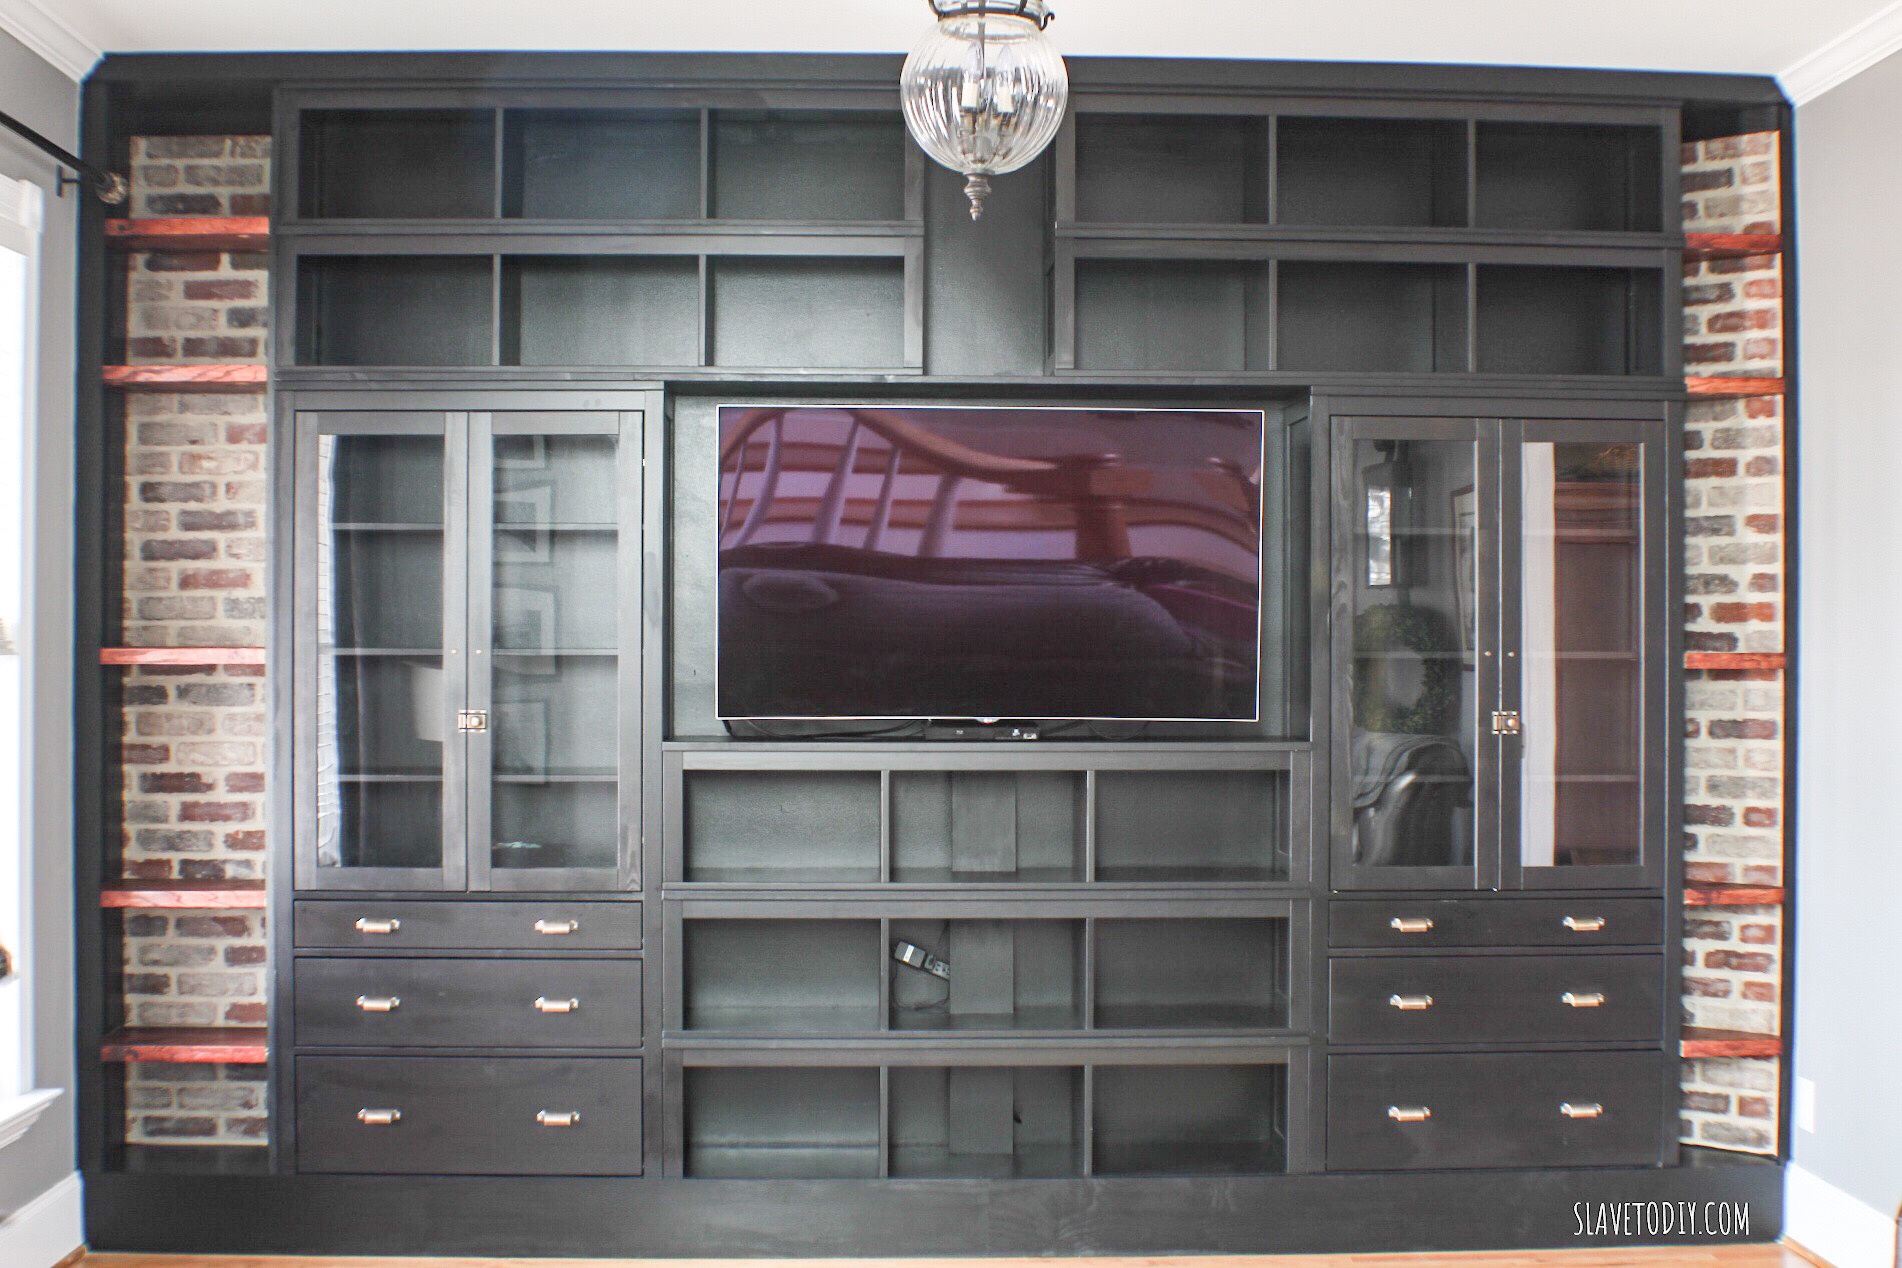
So, here’s what they look like empty. Awesome. And most importantly, finished.
IKEA Hemnes Builtins in black
For those of you looking for stuff to buy to “dress your shelves”, I hate you. Built ins are for unpacking 10 boxes of stuff you already had, not arbitrarily purchasing junk so your built ins look good. That’s insane. Find stuff around the house. Arrange it. Never, never buy stuff to fill shelves. Also, never buy anything you don’t ABSOLUTELY have to have. I learned this from my mother who had to smuggle outdated decor out of the house when my dad was out-of-town.
Anyway, how cool is it that we went from THIS:
To THIS:
IKEA Hemnes Hack-in-black Builtins, dressed and finished.
I’m SO super excited we’re finished. My SUPER EXACT recollection of how much this project cost was around $2500, including the hardware update. Using the brick veneer definitely added some cost but I think the effect is spectacular, and lends itself to the CUSTOM look we were going for.
Thanks for checking out our FINISHED project and we’d love for you to check out more on our Blog. Cheers!
*Legal stuff:
I am honest about my experiences with different products and write because I enjoy it. I do however, have the opportunity to earn money for my writing, also.
Slavetodiy.com is a participant in the Amazon Services LLC Associates Program, an affiliate advertising program designed to provide a means for sites to earn advertising fees by advertising and linking to amazon.com. Amazon offers a small commission on products sold through their affiliate links. Each of your purchases via our Amazon affiliation links supports our cause at no additional cost to you.
If a blogger links to an Amazon product (with a special code for affiliates embedded in the link), and a reader places an item in their “shopping cart” through that link within 24 hours of clicking the link, the blogger gets a small percentage of the sale. Amazon links are not “pay-per-click.” If you click on the product link and stay around Amazon and purchase something else, however, I will get a commission on that sale.
Slavetodiy.com is also a VigLink affiliate advertiser which works similarly.
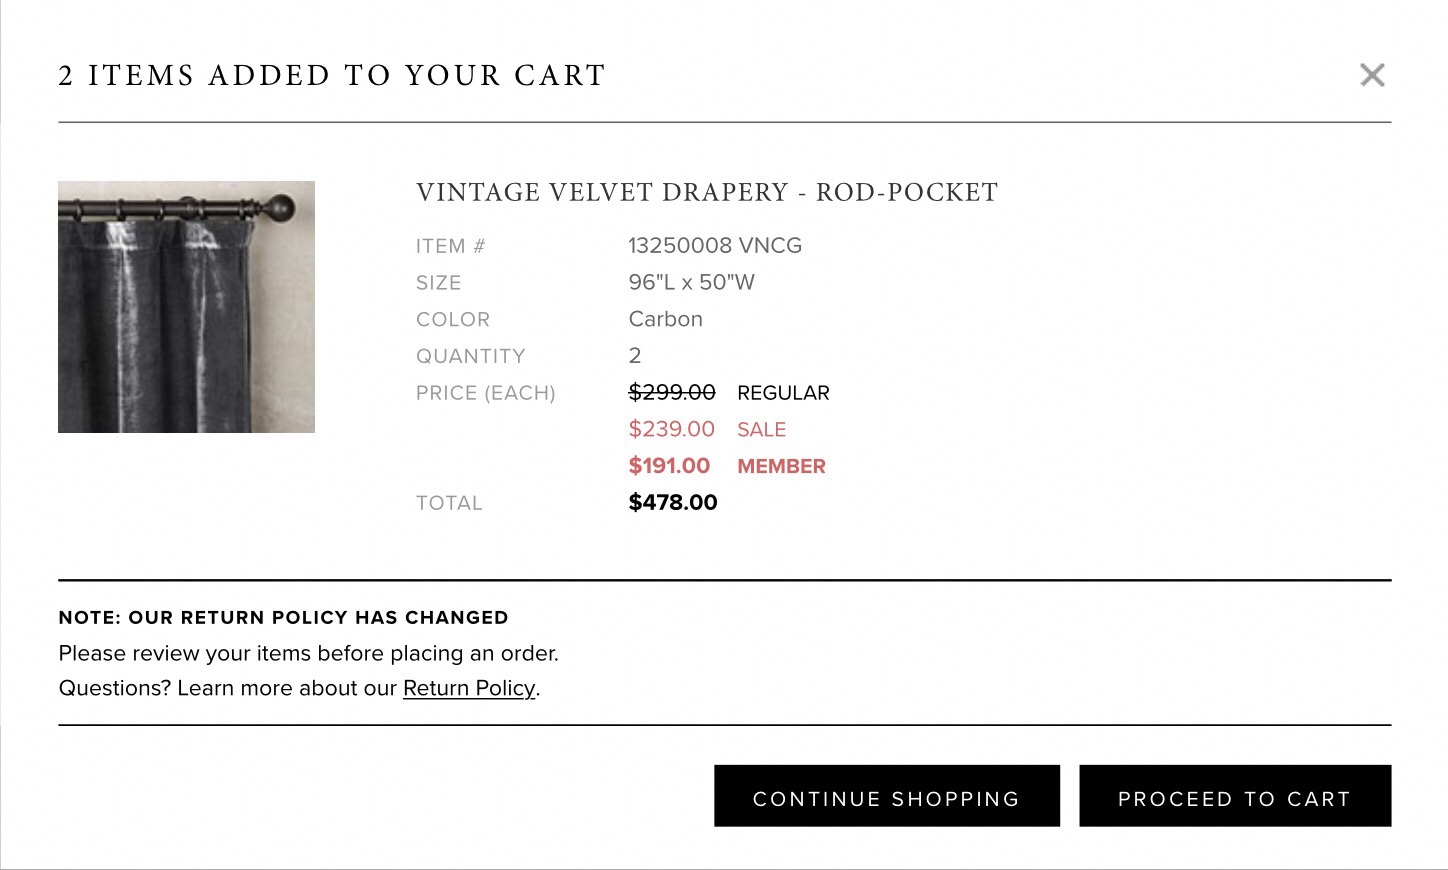
Can you hear me laughing maniacally from there? I believe once I added in the shipping it was five hundred dollars from Restoration Hardware! For TWO luxuriously wonderful curtain panels. Yes, TWO. Not two sets. Two panels. ON SALE. I swallowed my insanity, put down my wine glass, closed the tab, and let reality sink in. Allow me a moment to get my blood pressure back down. Look, I admire Restoration Hardware’s whole seductive look they have going on, but I’m apparently in the wrong tax bracket to be shopping there. They’re CURTAINS. As in, fabric that adds privacy and style to windows. Not exactly life or death. So, I did what I do best: I found a way around their ridonculous pricing. But, first let’s bask in the sexy glory of Vintage Velvet Drapery for just a moment.
*This post may contain affiliate links. Please see full disclosure at the end of the post.
Luckily for us, Restoration Hardware likes to brag about their designers and suppliers. Woot! It ALSO turns out their velvet supplier, J.B. Martin, is available on Fabric.com and Amazon (let’s hear it for non-exclusive suppliers). And (even better) I have a mother that is awesome with a sewing machine. WIN.
I almost purchased the J.B. Martin Banker’s Gray Velvet on Amazon, but decided I wanted a darker gray. So, I found 54″ wide fabric instead J.B. Martin’s Velvet in Graphite, to EXACTLY match the curtains I couldn’t afford from RH, shipped them directly to her… And here they are… (DRUM ROLL, PLEASE)…
RH knock off, DIY Velvet Curtains with Pottery Barn Chesterfield Grand Sofa
So, we made two 96″X50″ exact duplicate panels for the jaw dropping low price of:
$169.05
We saved $330.95 off of retail RHs SALE price.
So, not cheap, but CHEAPER. And gorgeous. And happy me.
Here are some shots with fewer distractions:
RH knock off, DIY Velvet Curtains with Pottery Barn Chesterfield Grand SofaRH knock off, DIY Velvet Curtains with Pottery Barn Chesterfield Grand Sofa
Yaaaas! I just love them!
Check out more of our awesomeness on our blog! Cheers!
*Legal stuff:
I am honest about my experiences with different products and write because I enjoy it. I do however, have the opportunity to earn money for my writing, also.
Slavetodiy.com is a participant in the Amazon Services LLC Associates Program, an affiliate advertising program designed to provide a means for sites to earn advertising fees by advertising and linking to amazon.com. Amazon offers a small commission on products sold through their affiliate links. Each of your purchases via our Amazon affiliation links supports our cause at no additional cost to you.
If a blogger links to an Amazon product (with a special code for affiliates embedded in the link), and a reader places an item in their “shopping cart” through that link within 24 hours of clicking the link, the blogger gets a small percentage of the sale. Amazon links are not “pay per click.” If you click on the product link and stay around Amazon and purchase something else, however, I will get a commission on that sale.
Slavetodiy.com is also a VigLink affiliate advertiser which works similarly.