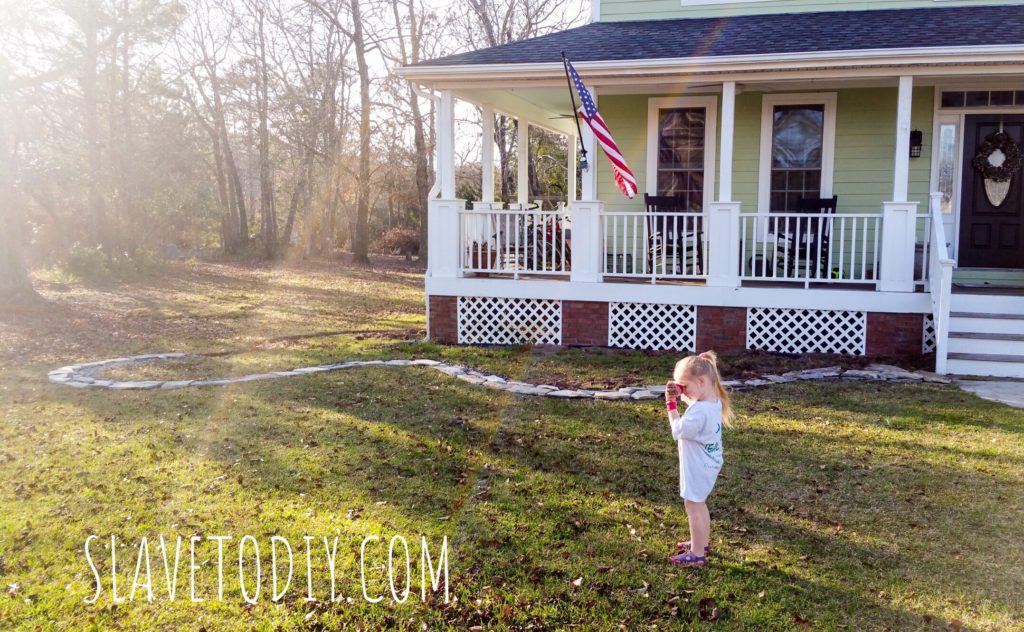
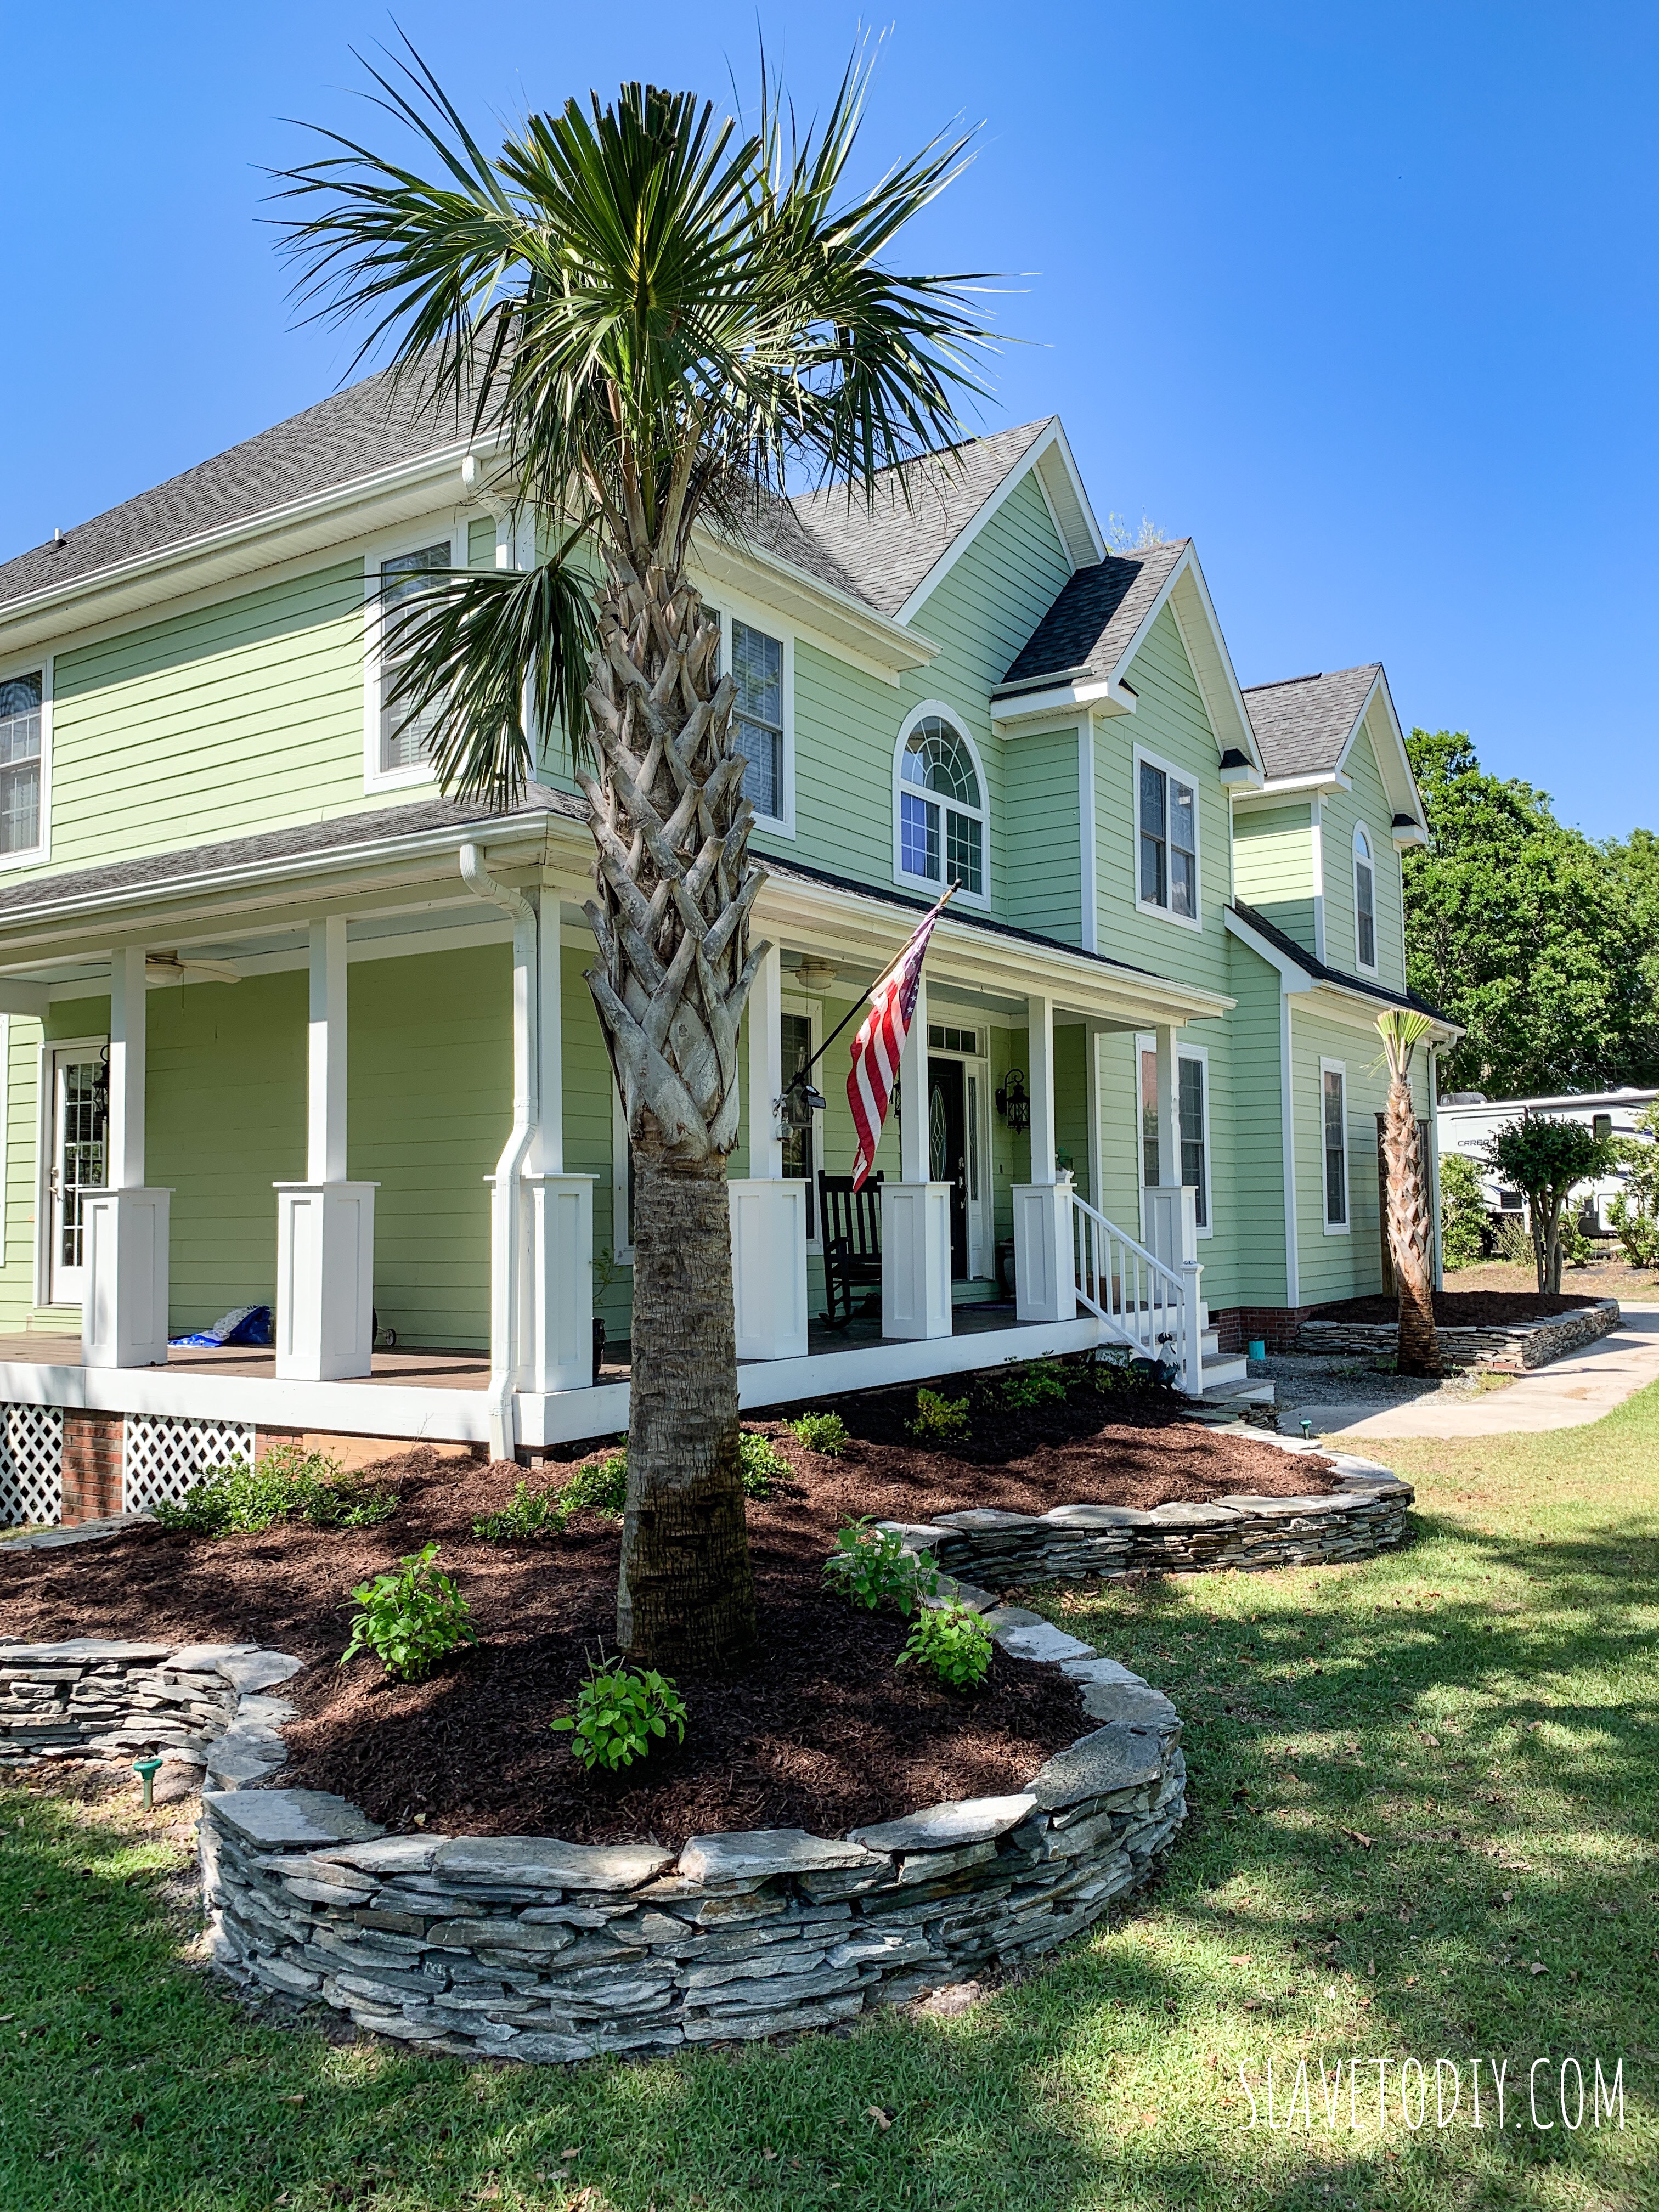
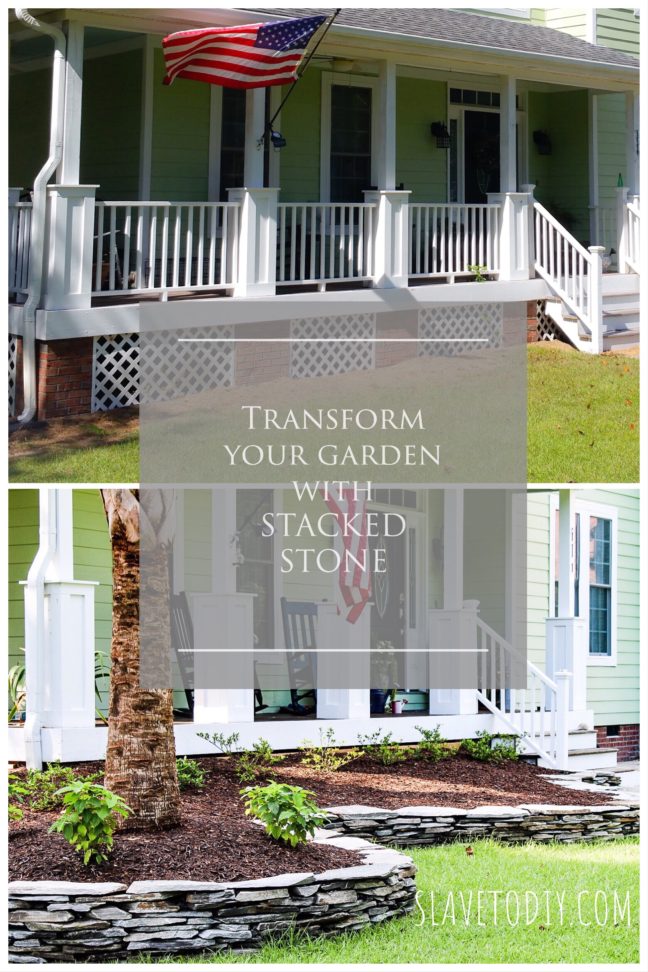
For those of you have been following our progress, you know I was mortified that we hadn’t completed the front garden project. We did a massive, beautiful stacked stone garden around the front porch but the garden along the walk leading from the driveway to the front door was still sad, neglected, and downright awful.
*This post may contain affiliate links. Please see full disclosure at the end of the post.
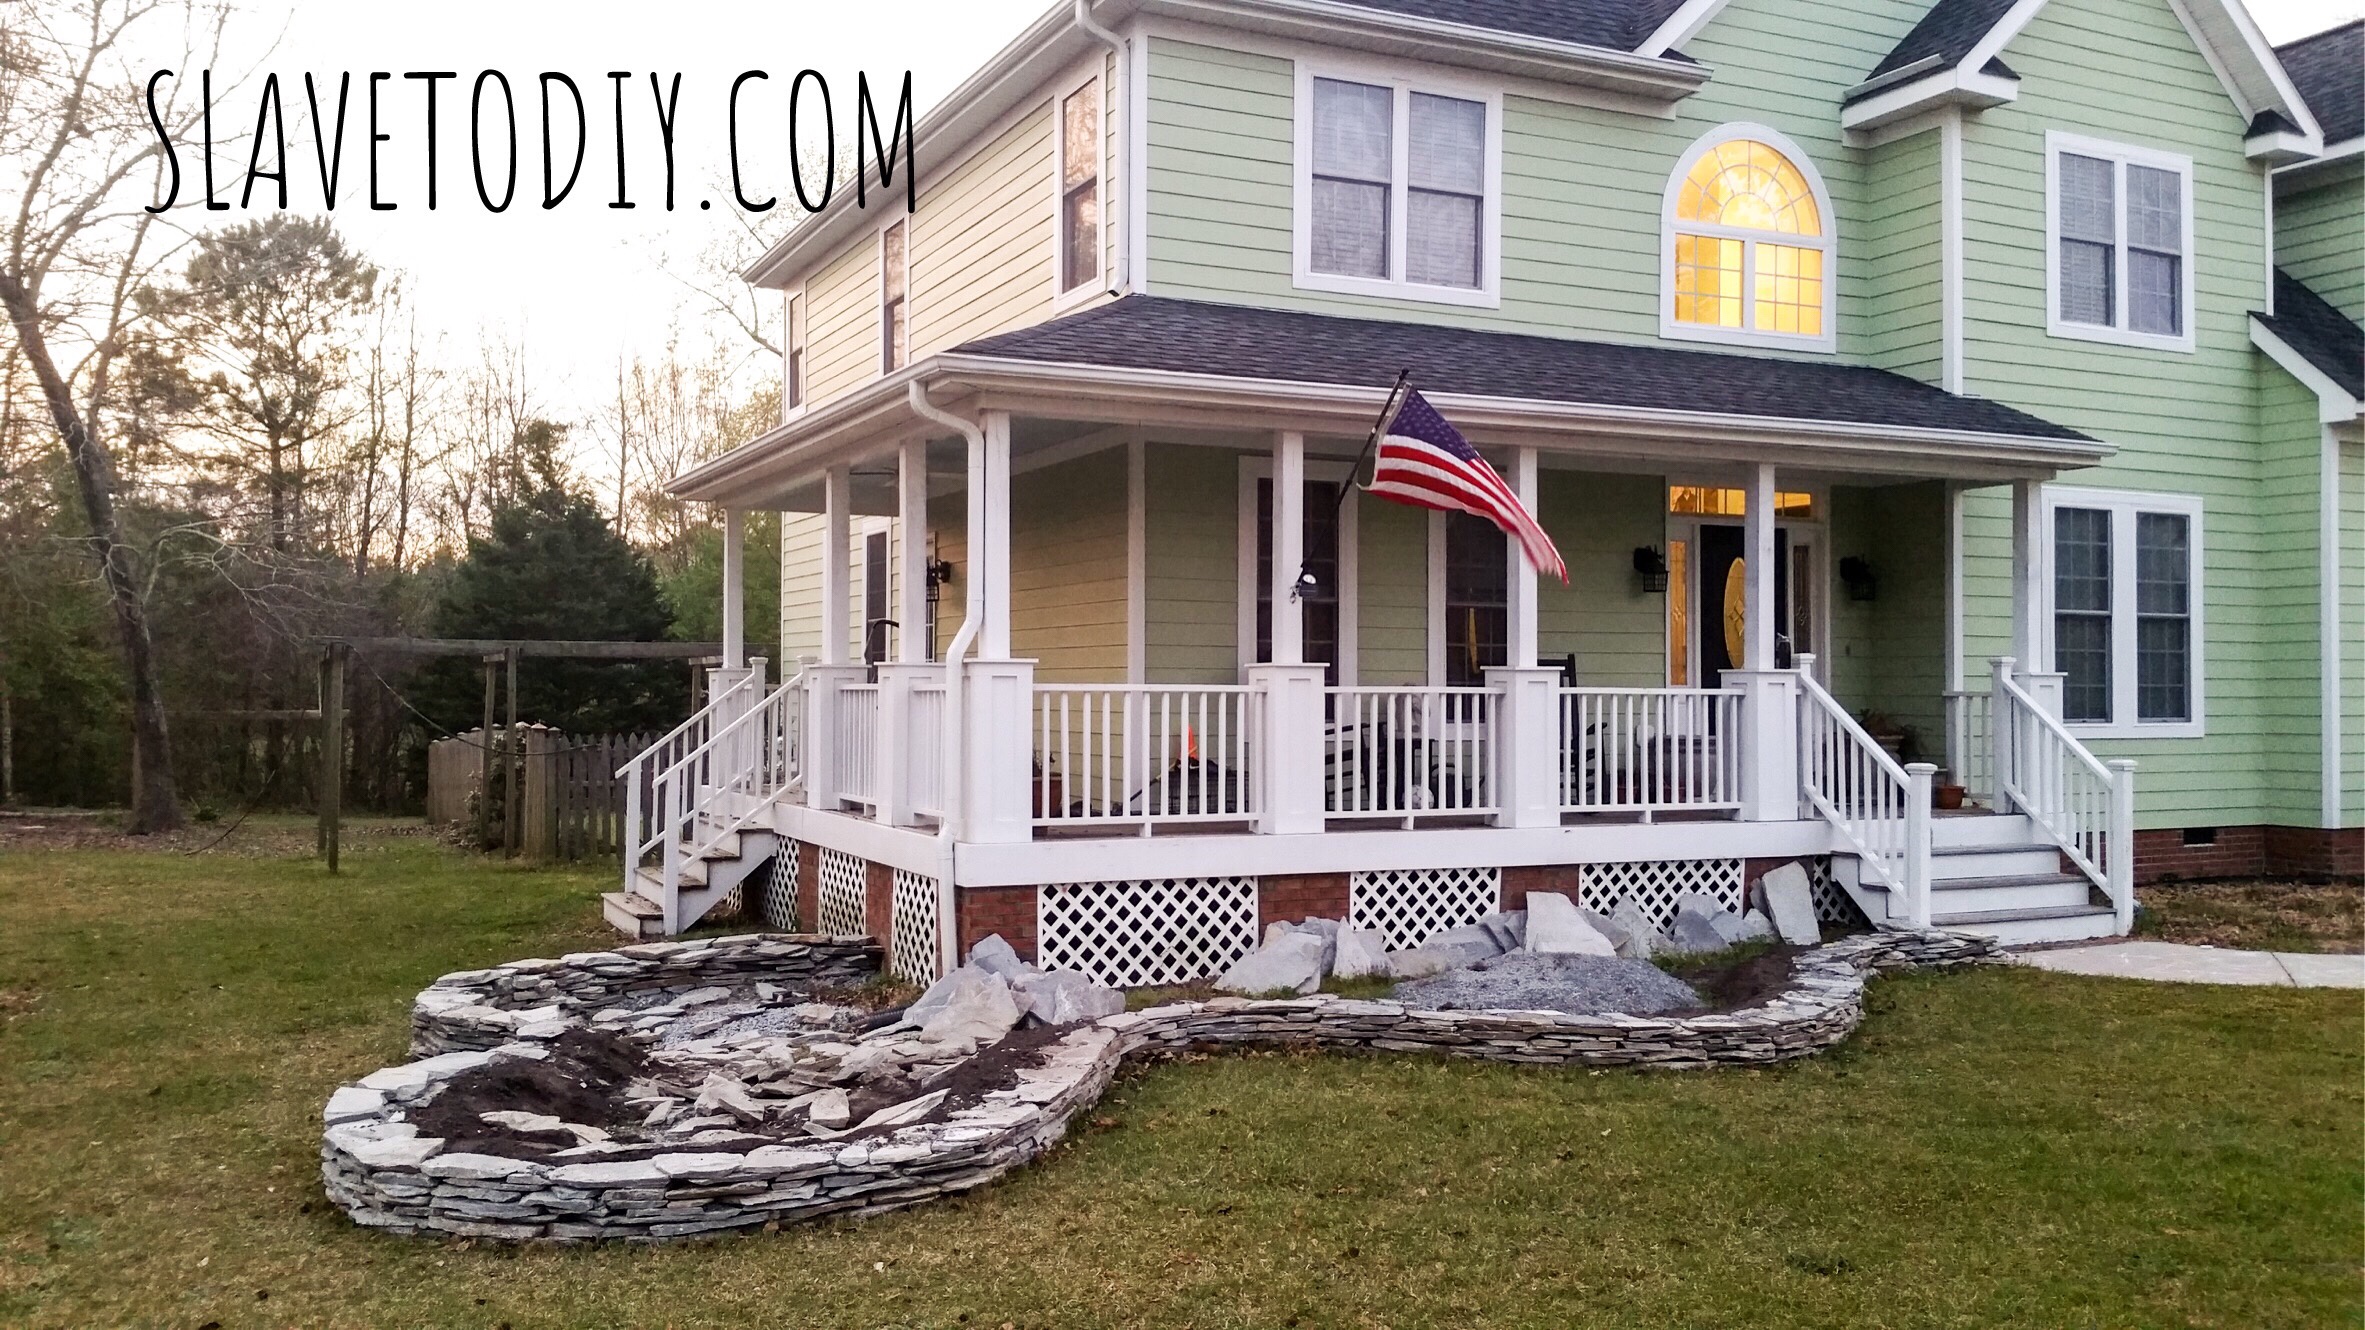
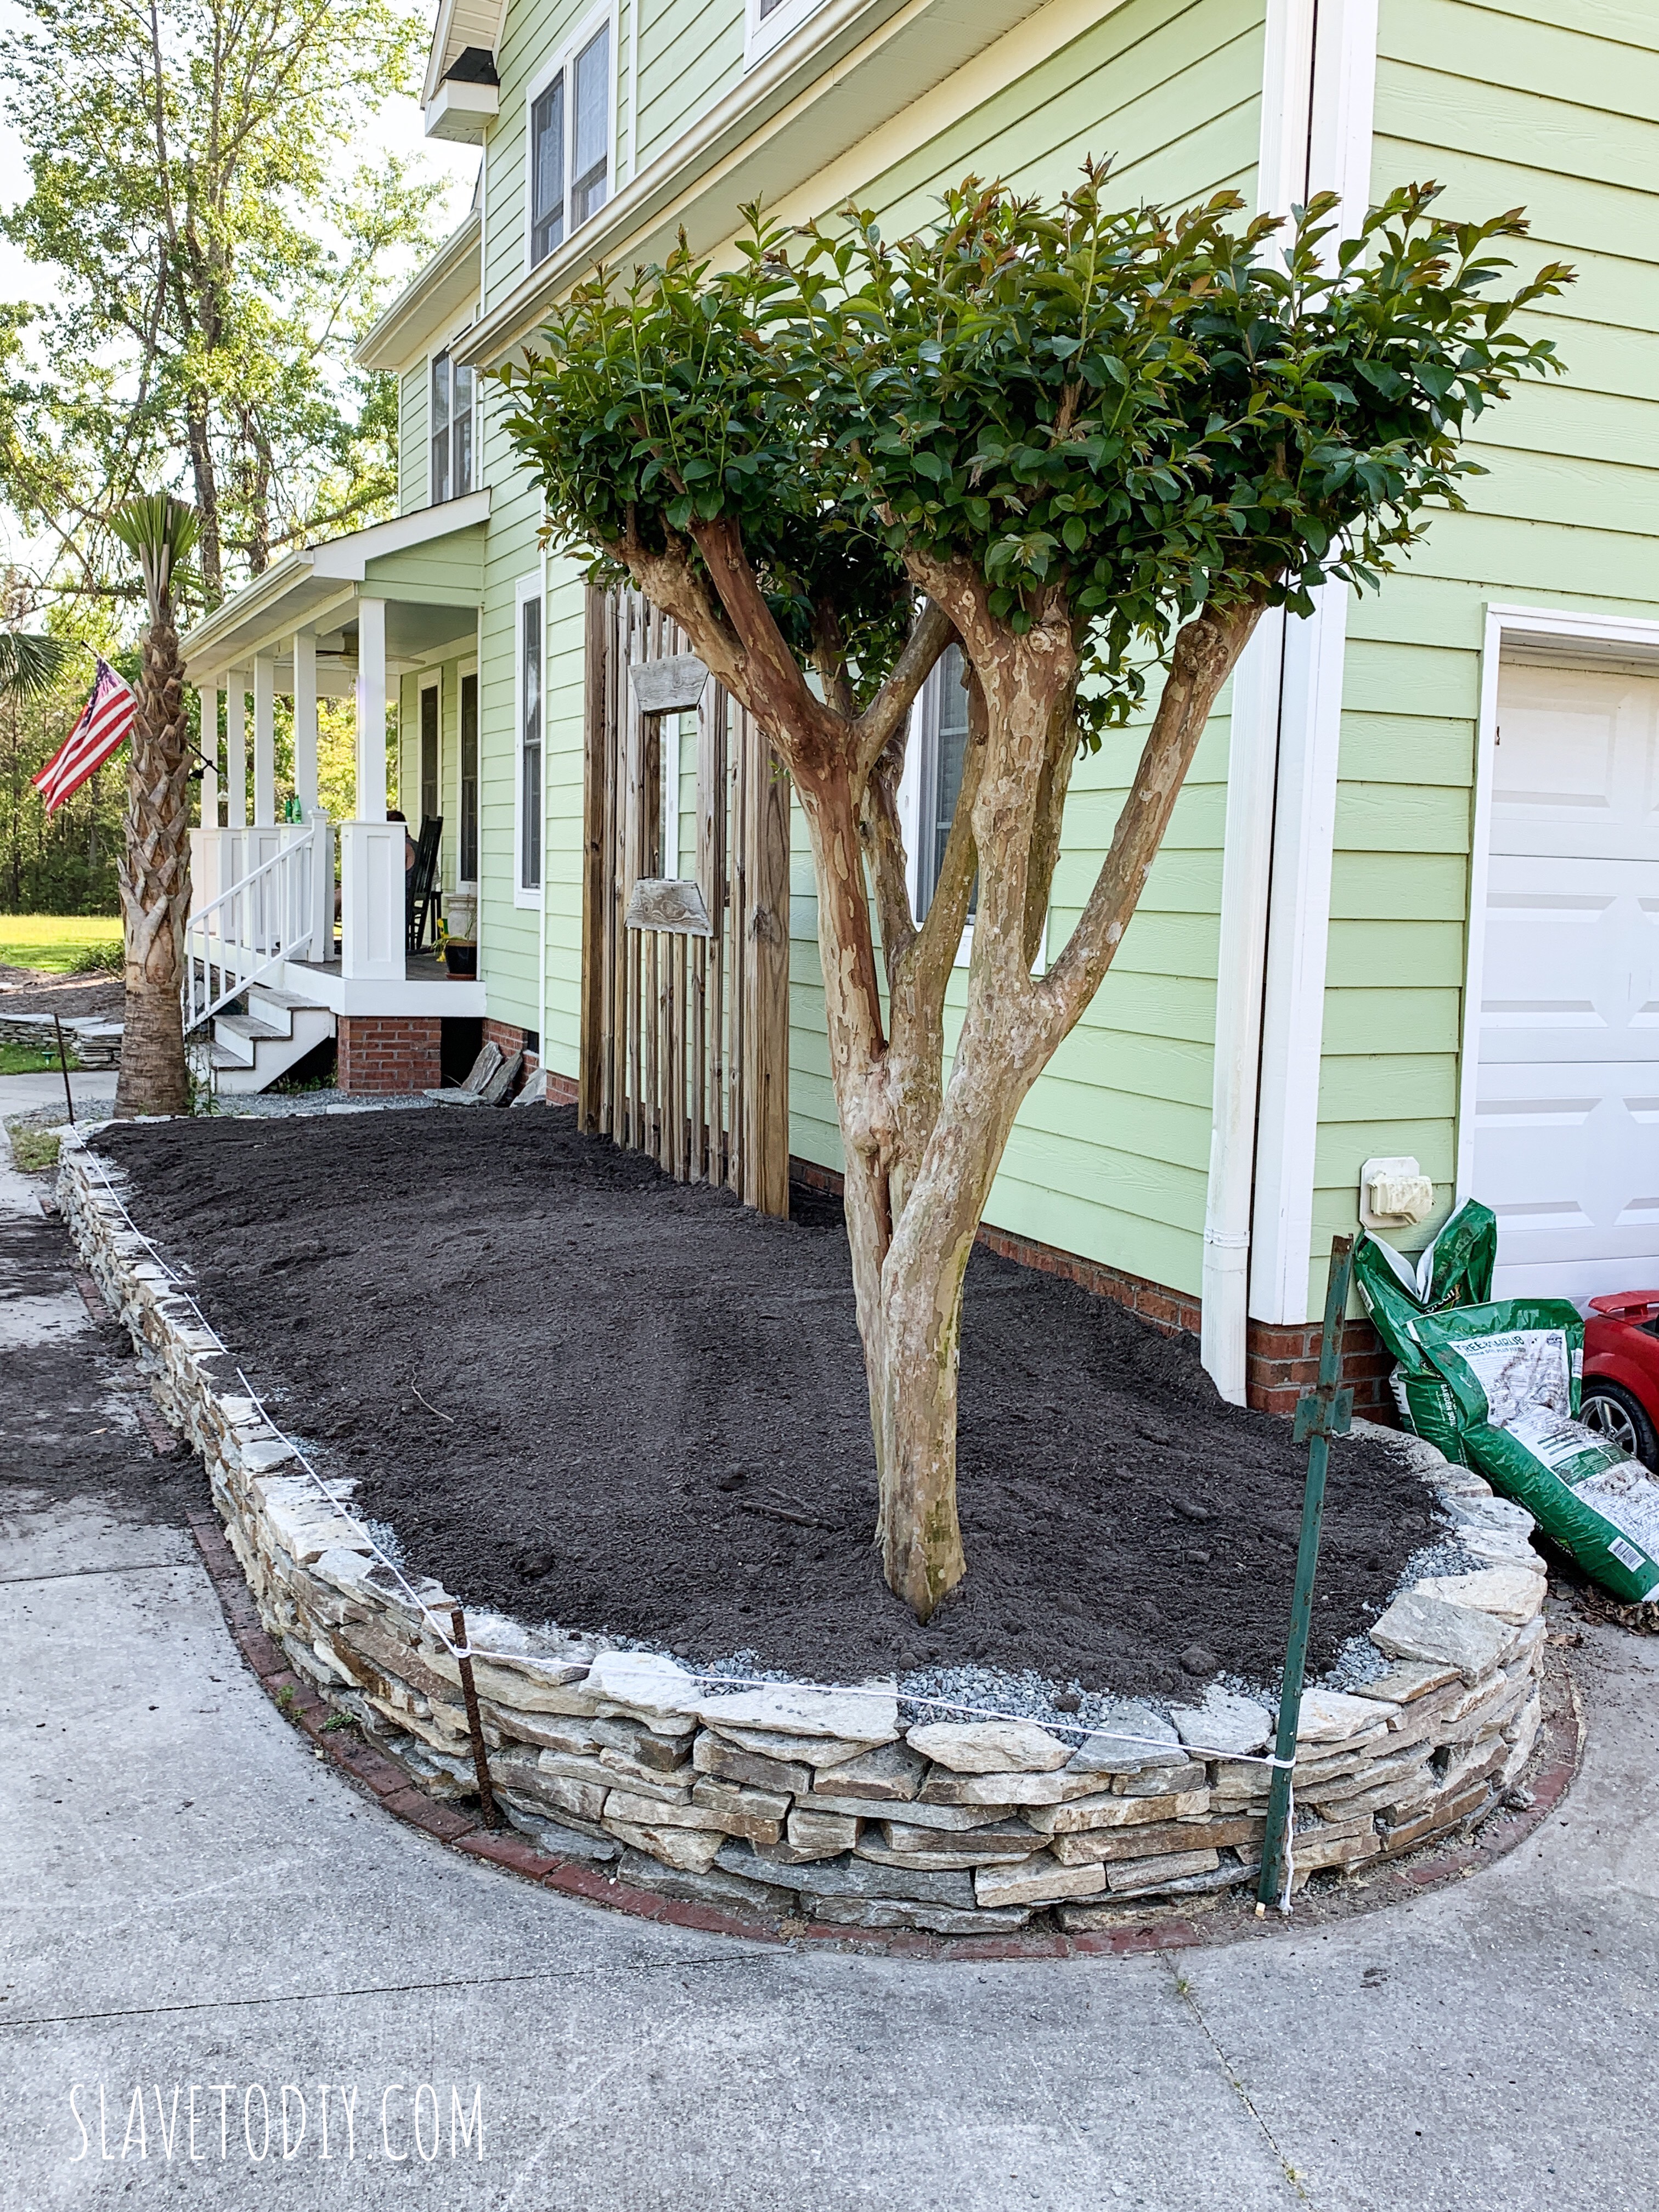
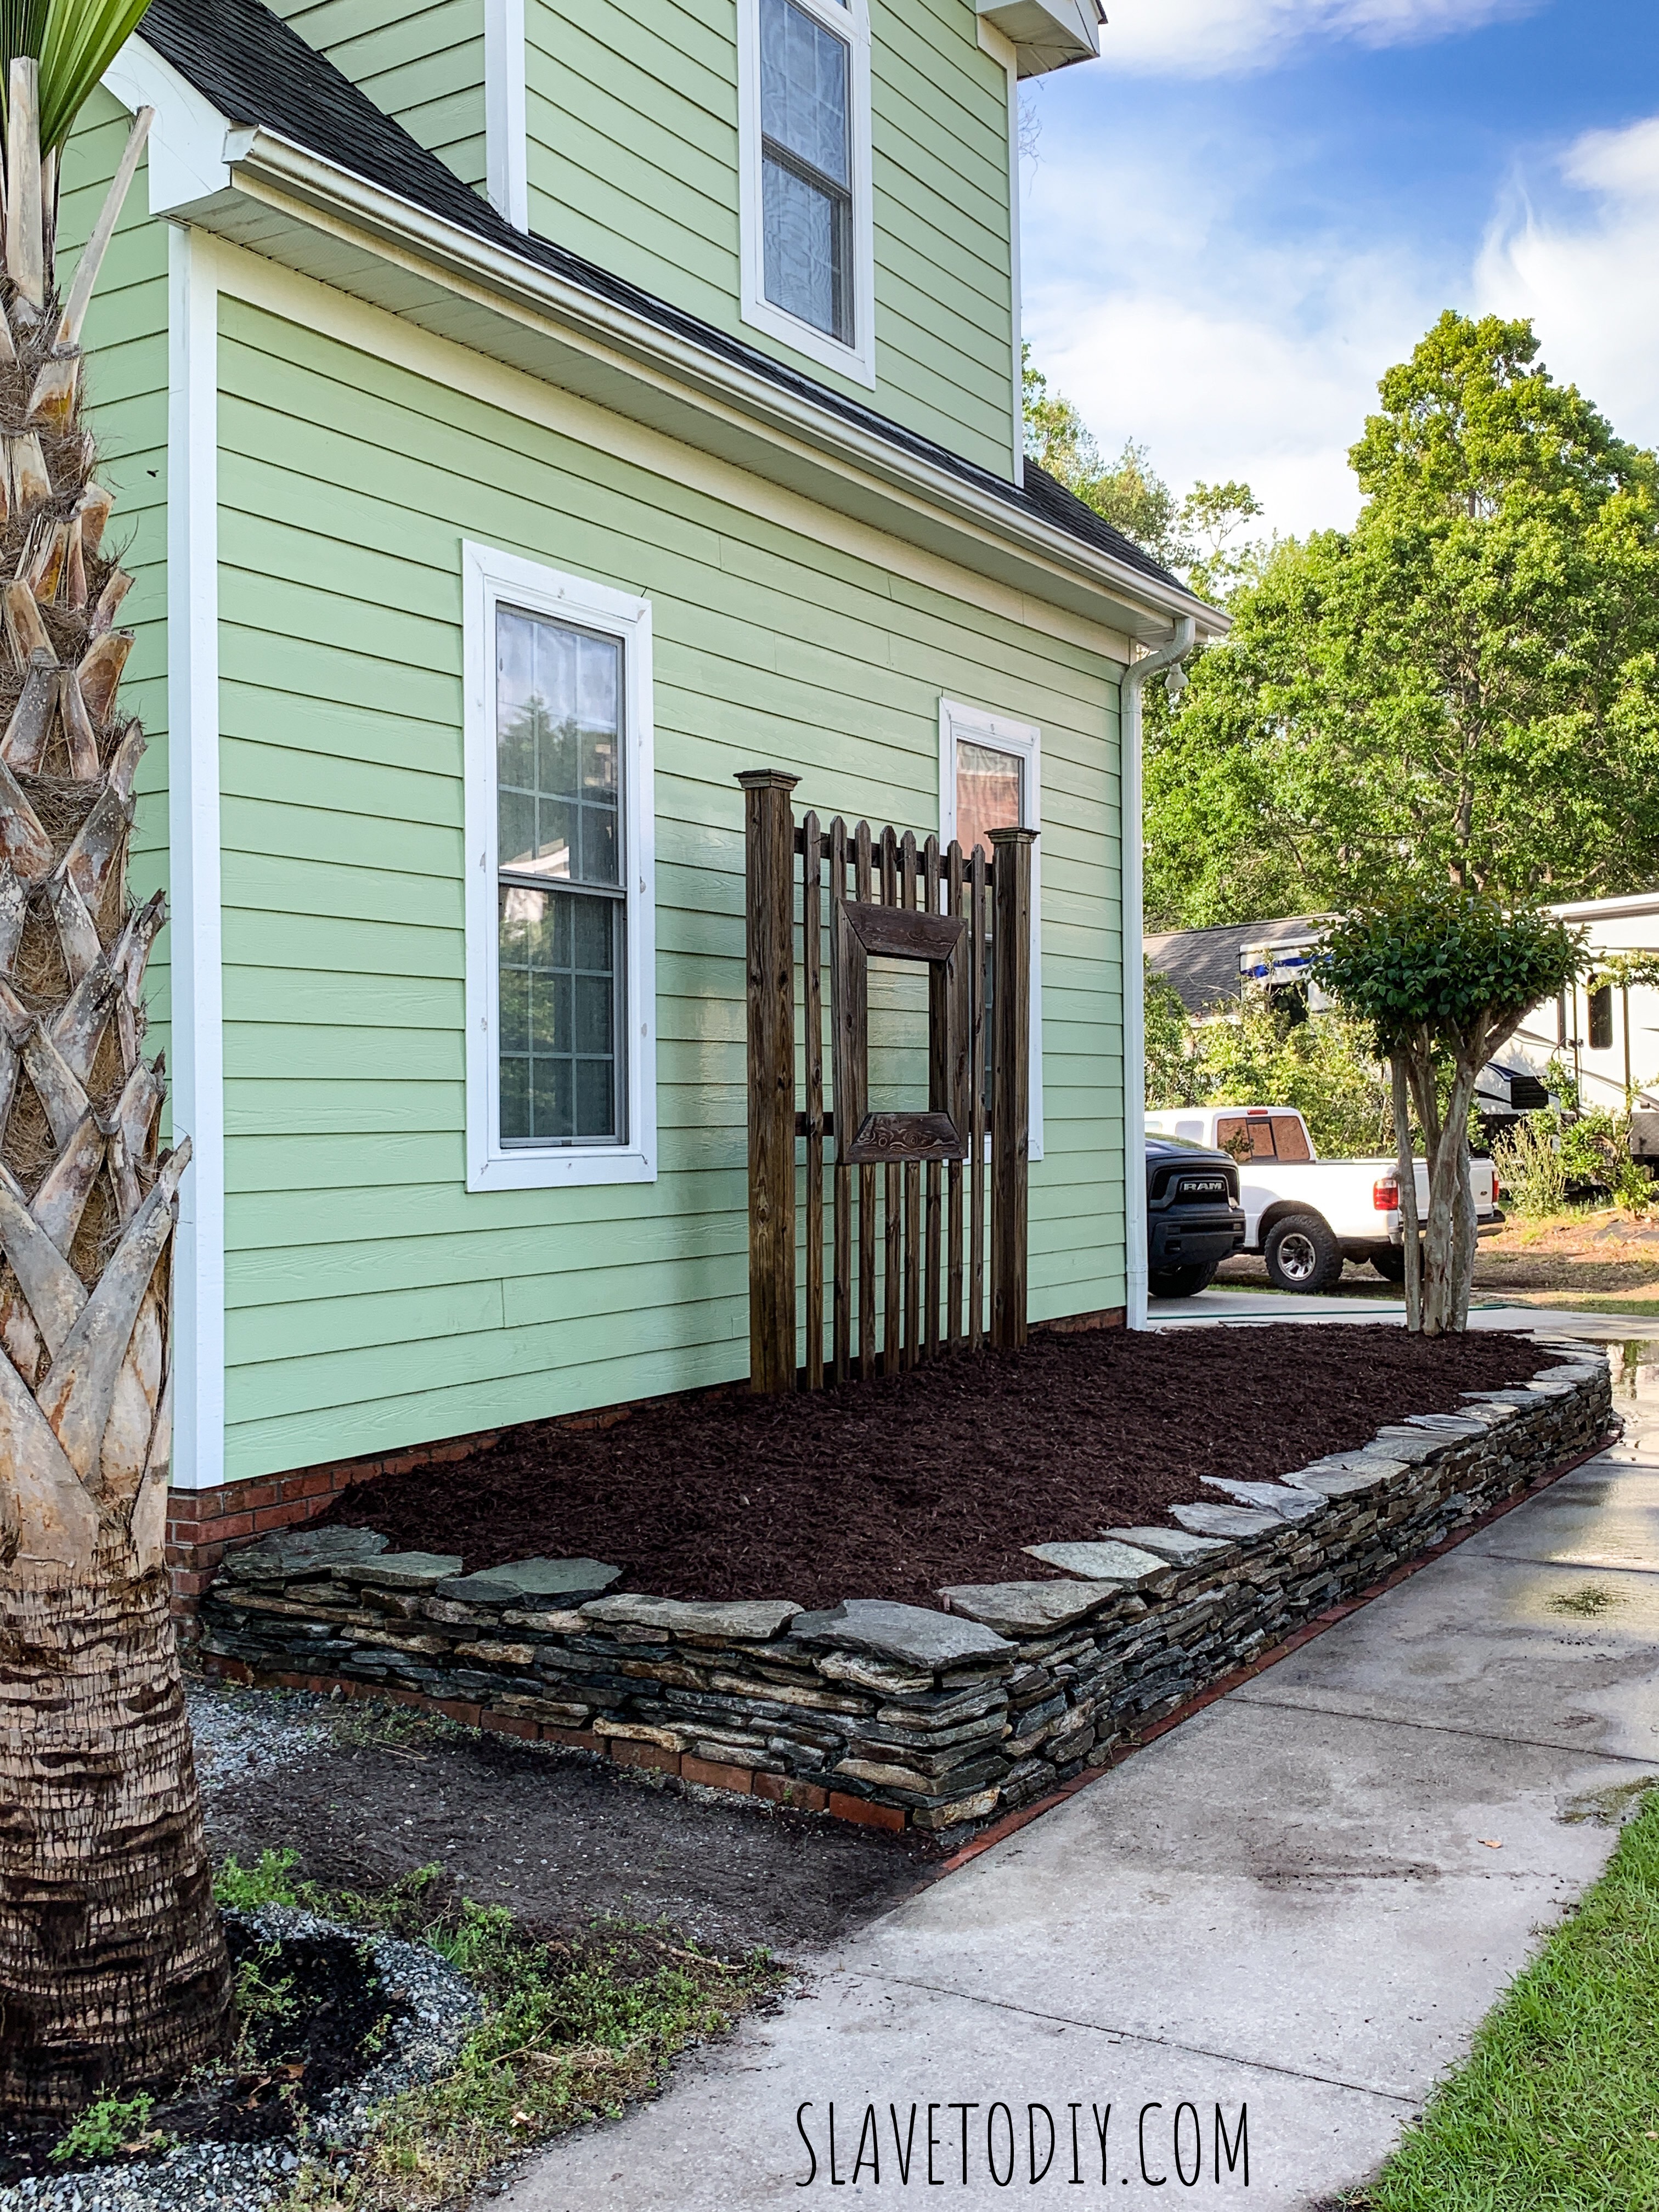
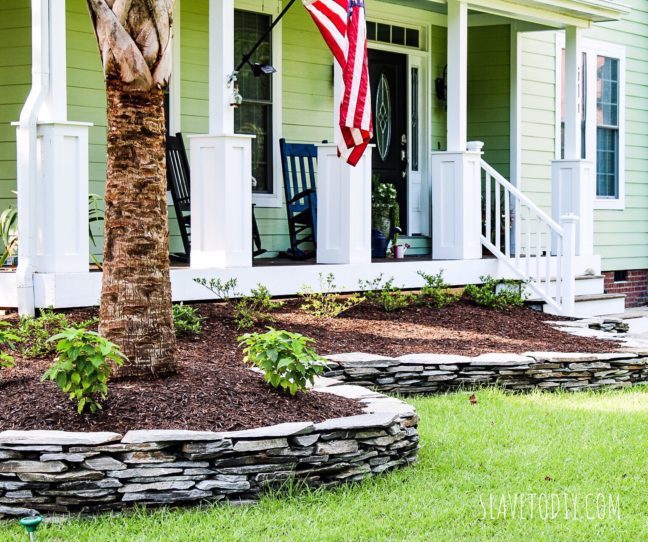
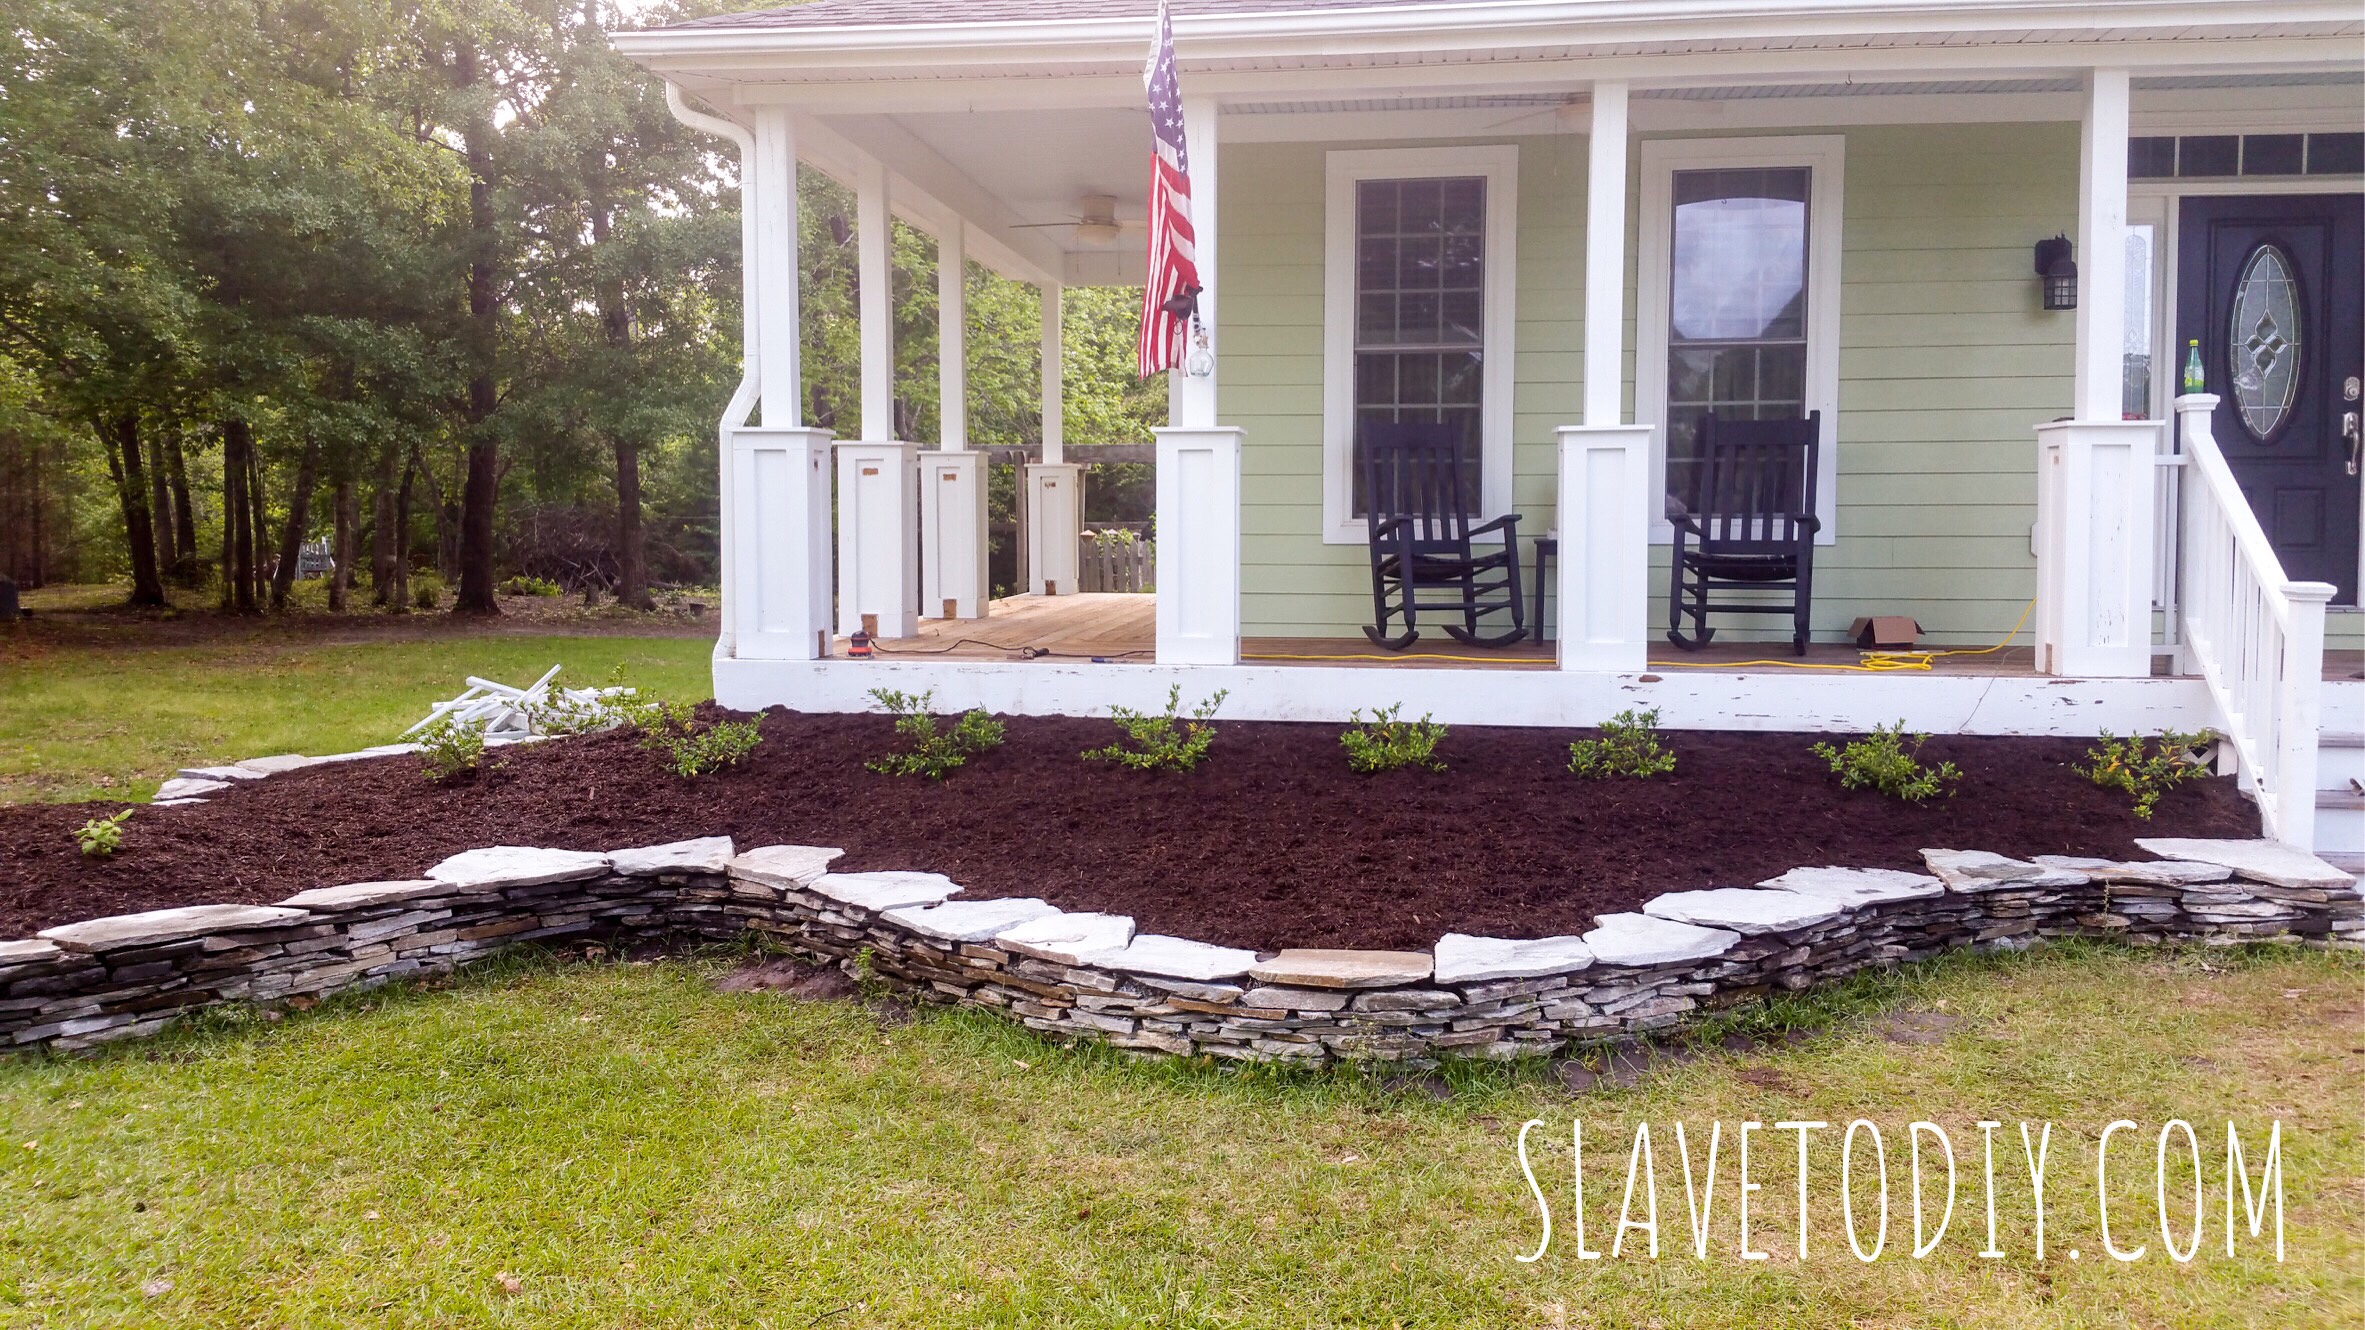
This is the “after,” but it took a few weeks to get there, working a little bit each day:
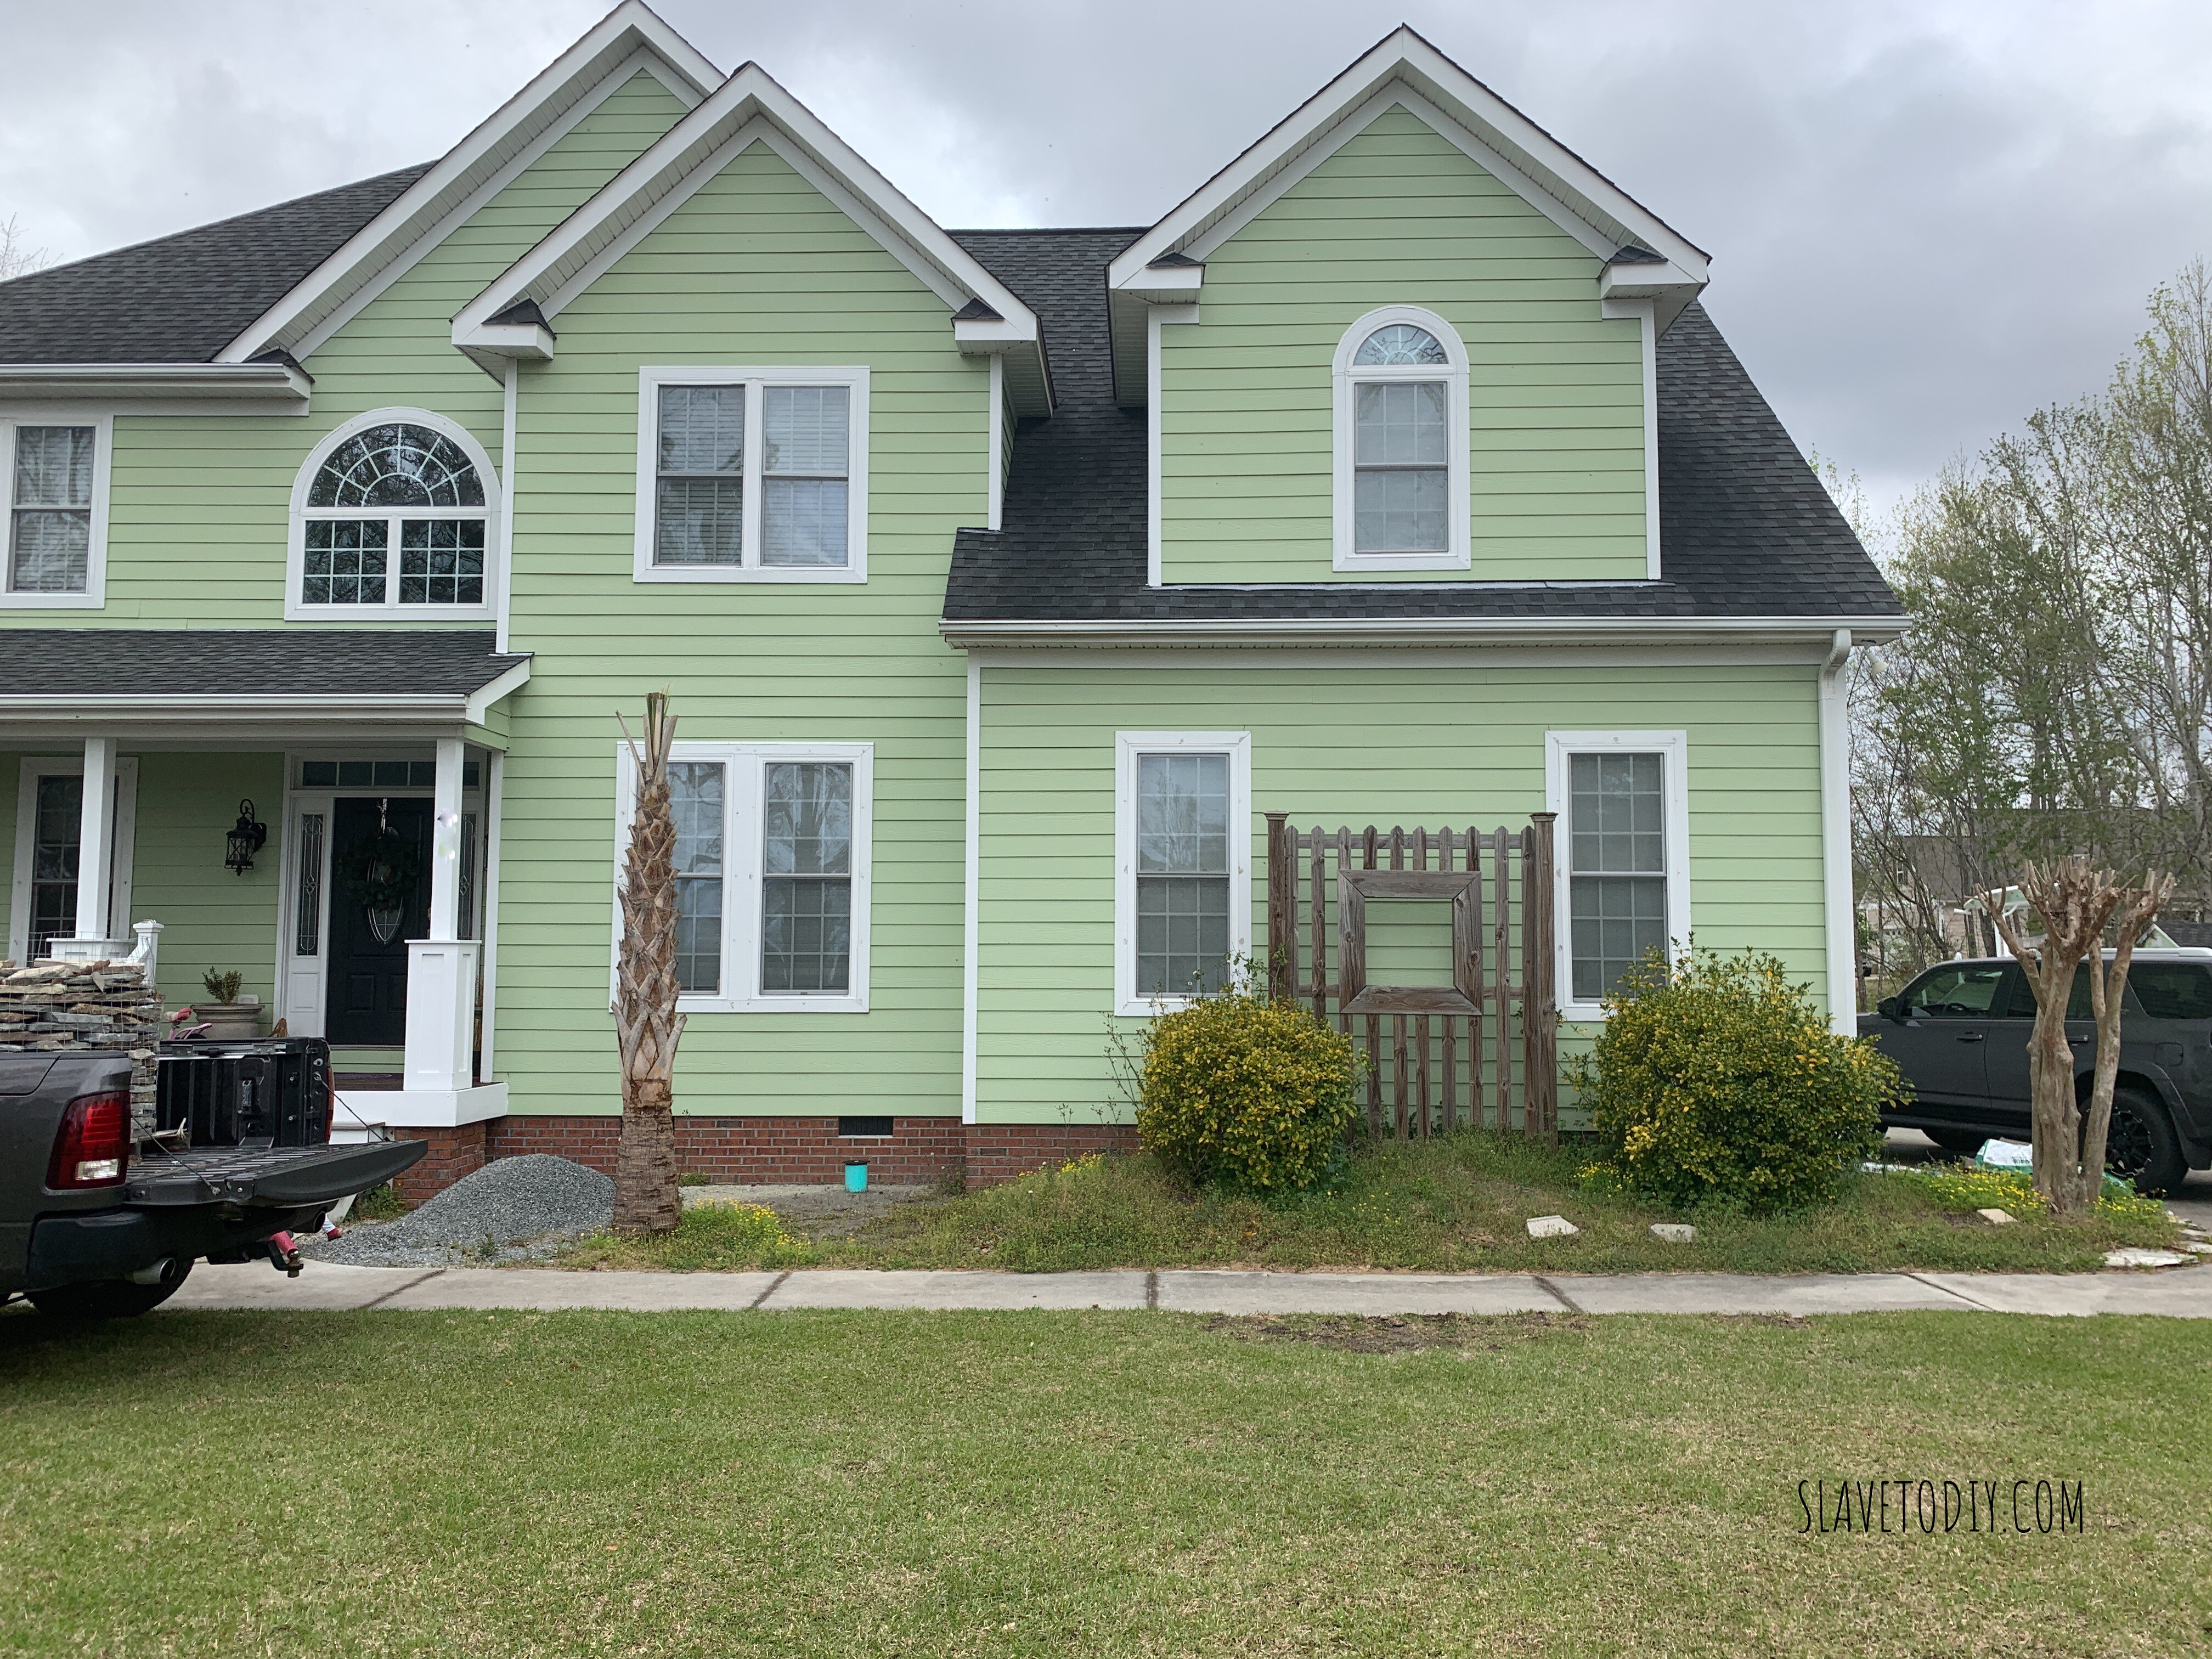
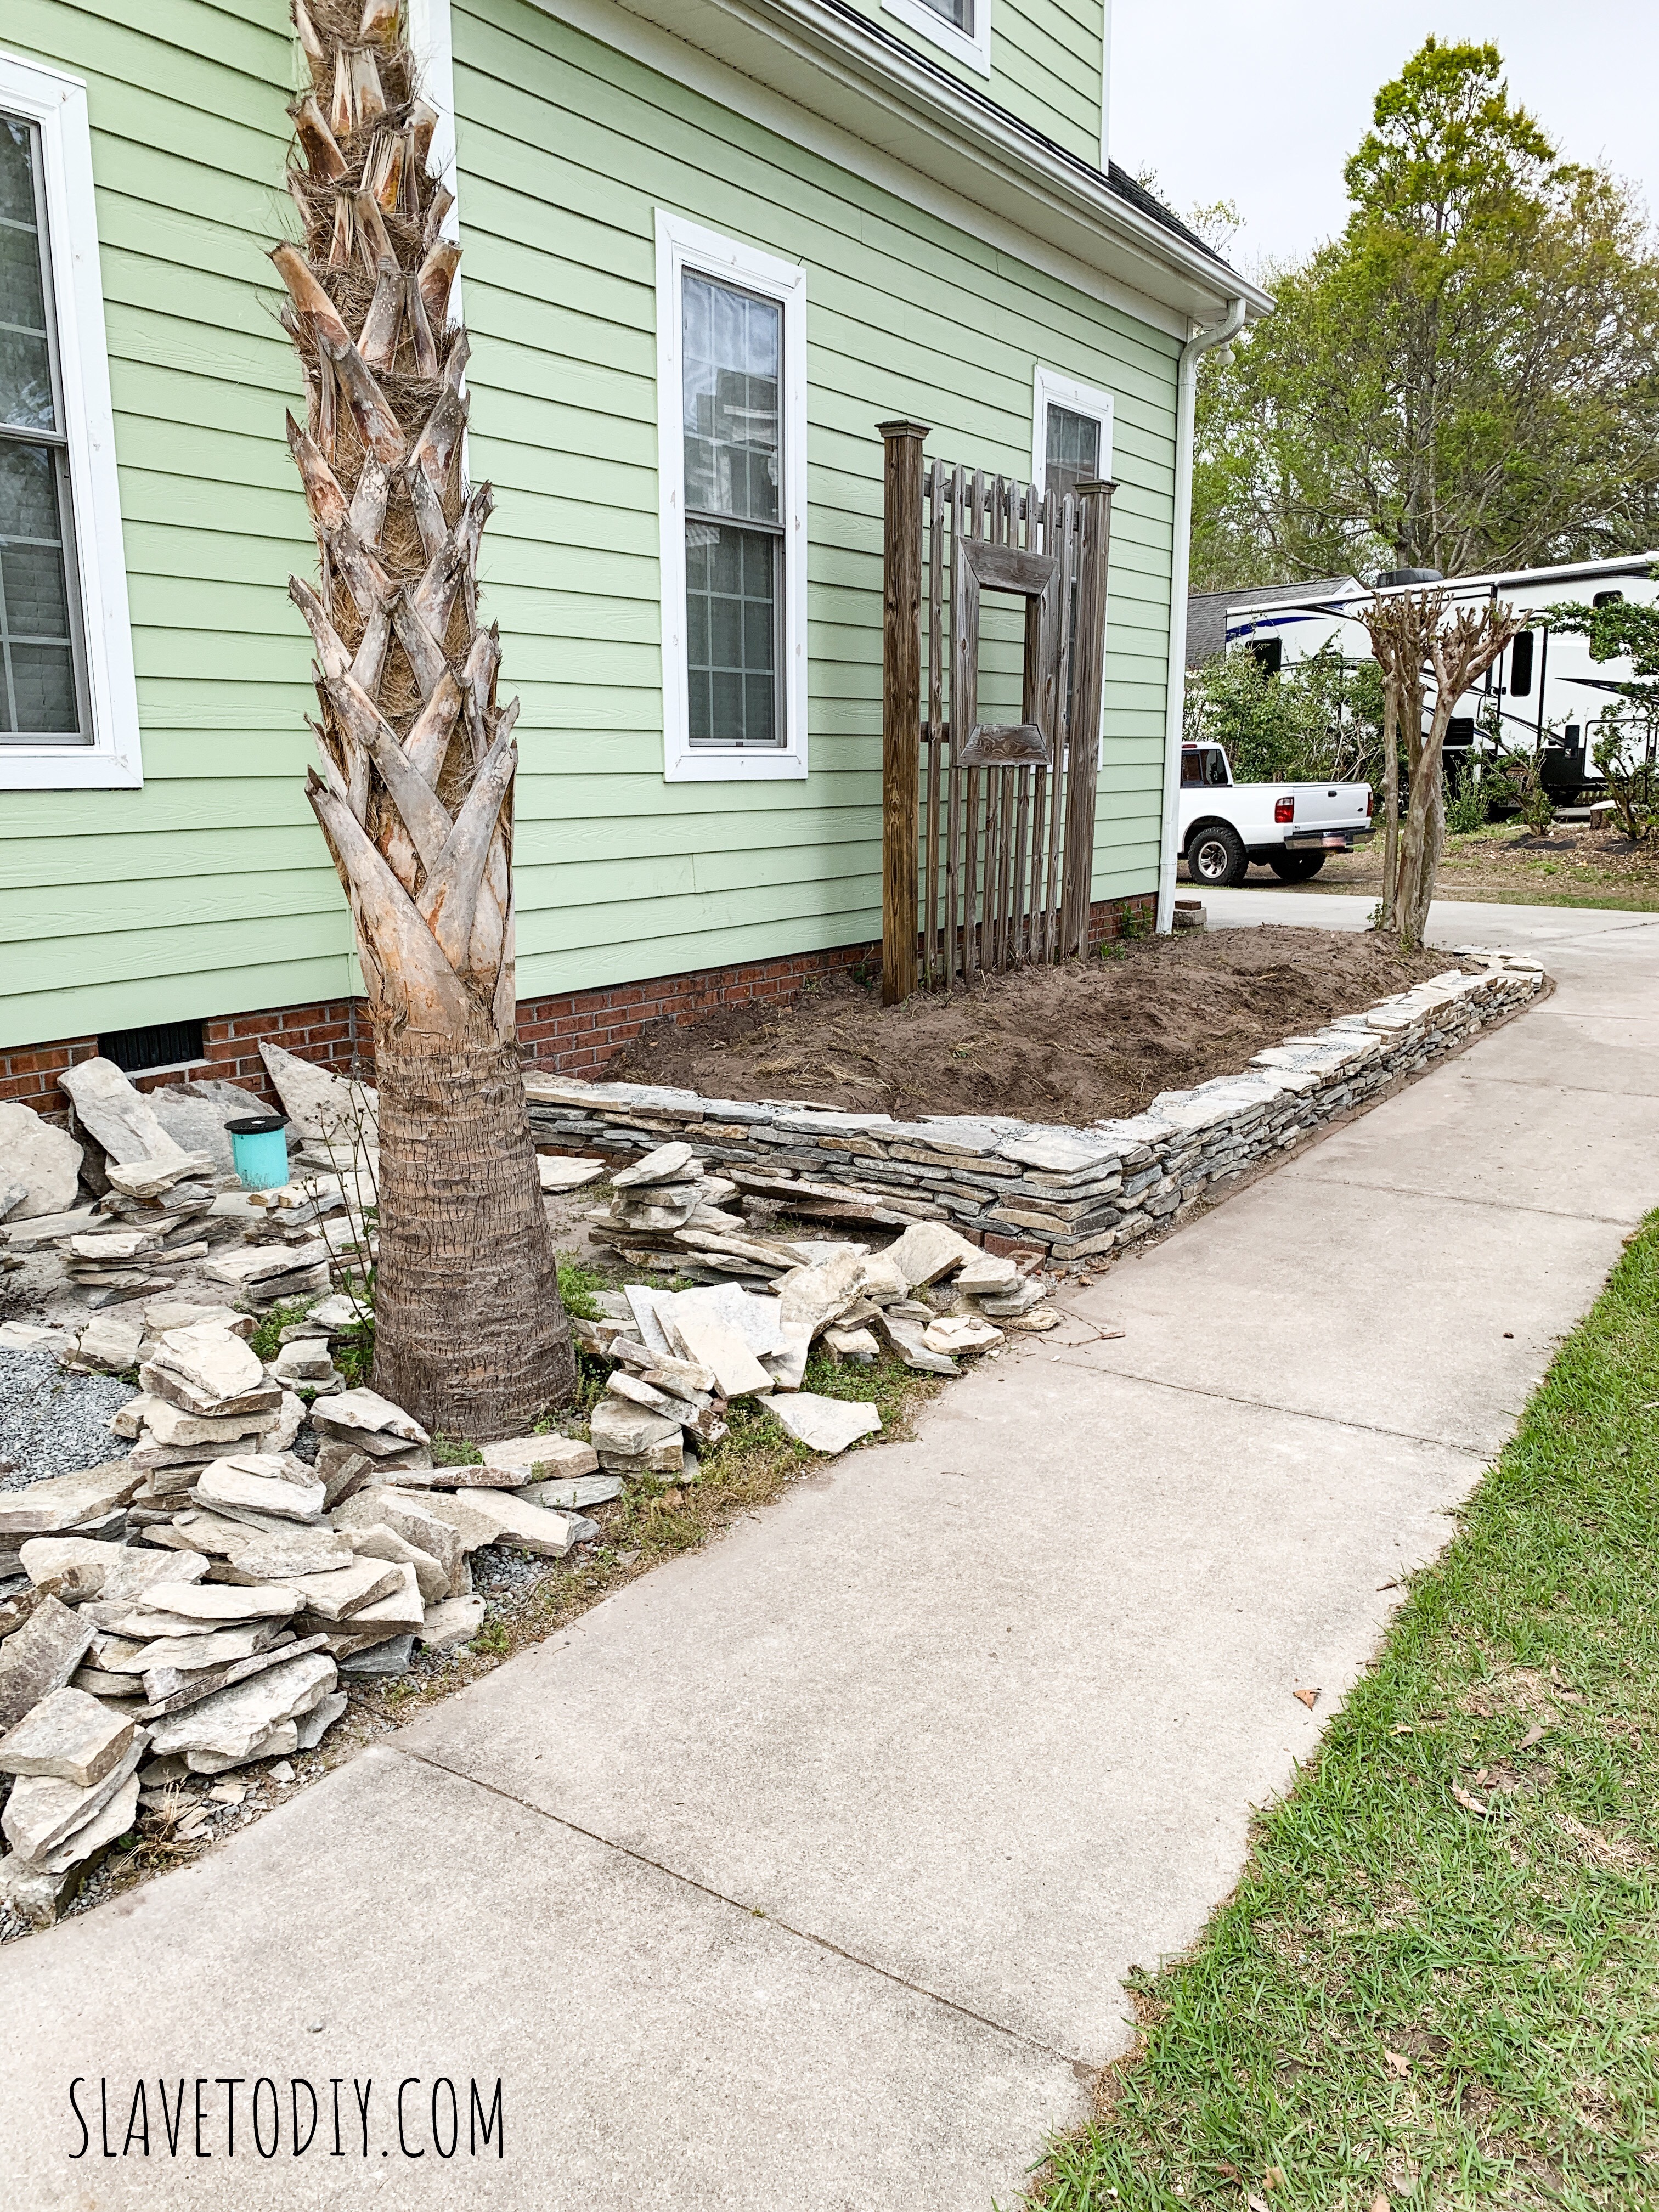
So, this is what that “garden” looked like before I finally insisted Rainman go buy me some rocks (like we didn’t already have enough on our plates). We had already cleared for the future patio and had deposited excess dirt into it, piled up around the bushes, with the bonus of random pavers that braced Christmas lights. Just beautiful. Sigh.
Before. Awful, unfinished landscaping project.
Ugh. It’s really bad. Please look away.
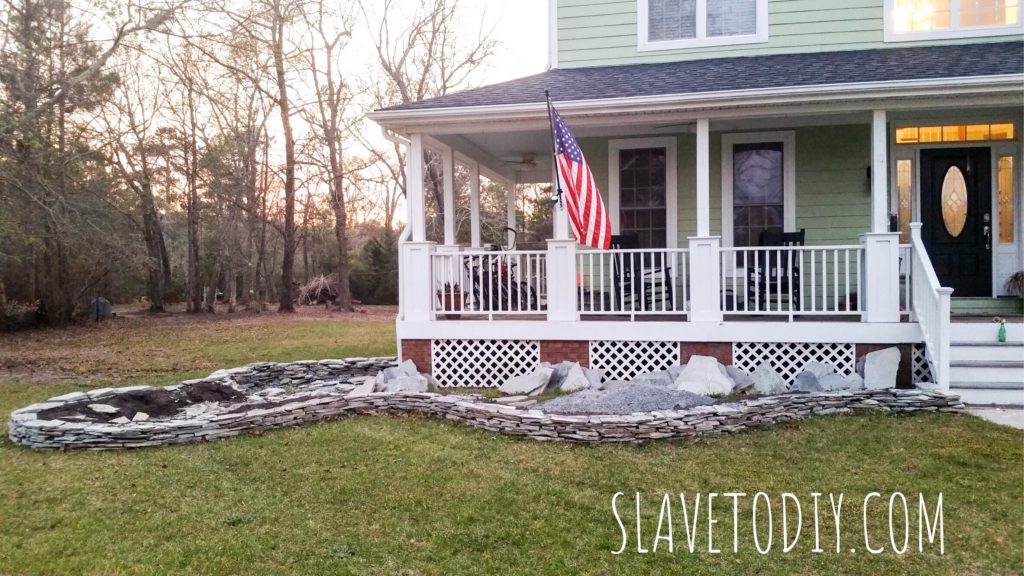
View from the porch of the bad garden.
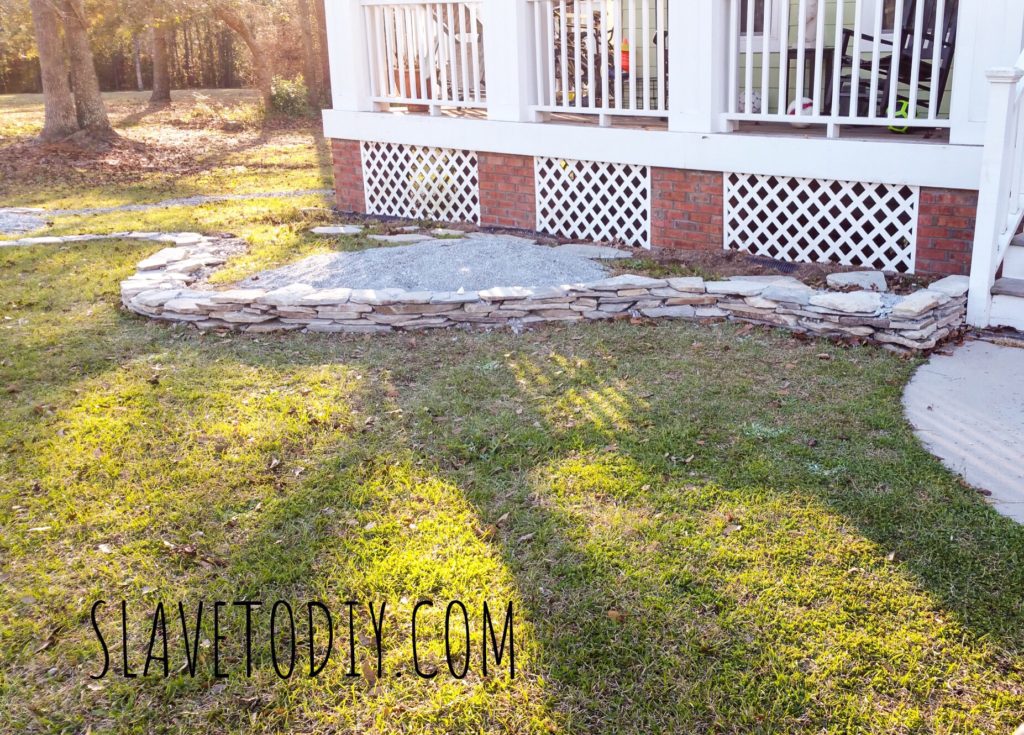
The sand-base is the home of the future brick patio. This is another “before” photo. So, I’m not going to go into the project as exhaustively as I did on the last one, this is sort of an abbreviated photo tutorial. For detailed instructions (totally the same process!) check out A Classic Stacked Stone Garden Wall, Phase One and Classic Stacked Stone Garden, Phase Two. As for this guy, here goes.
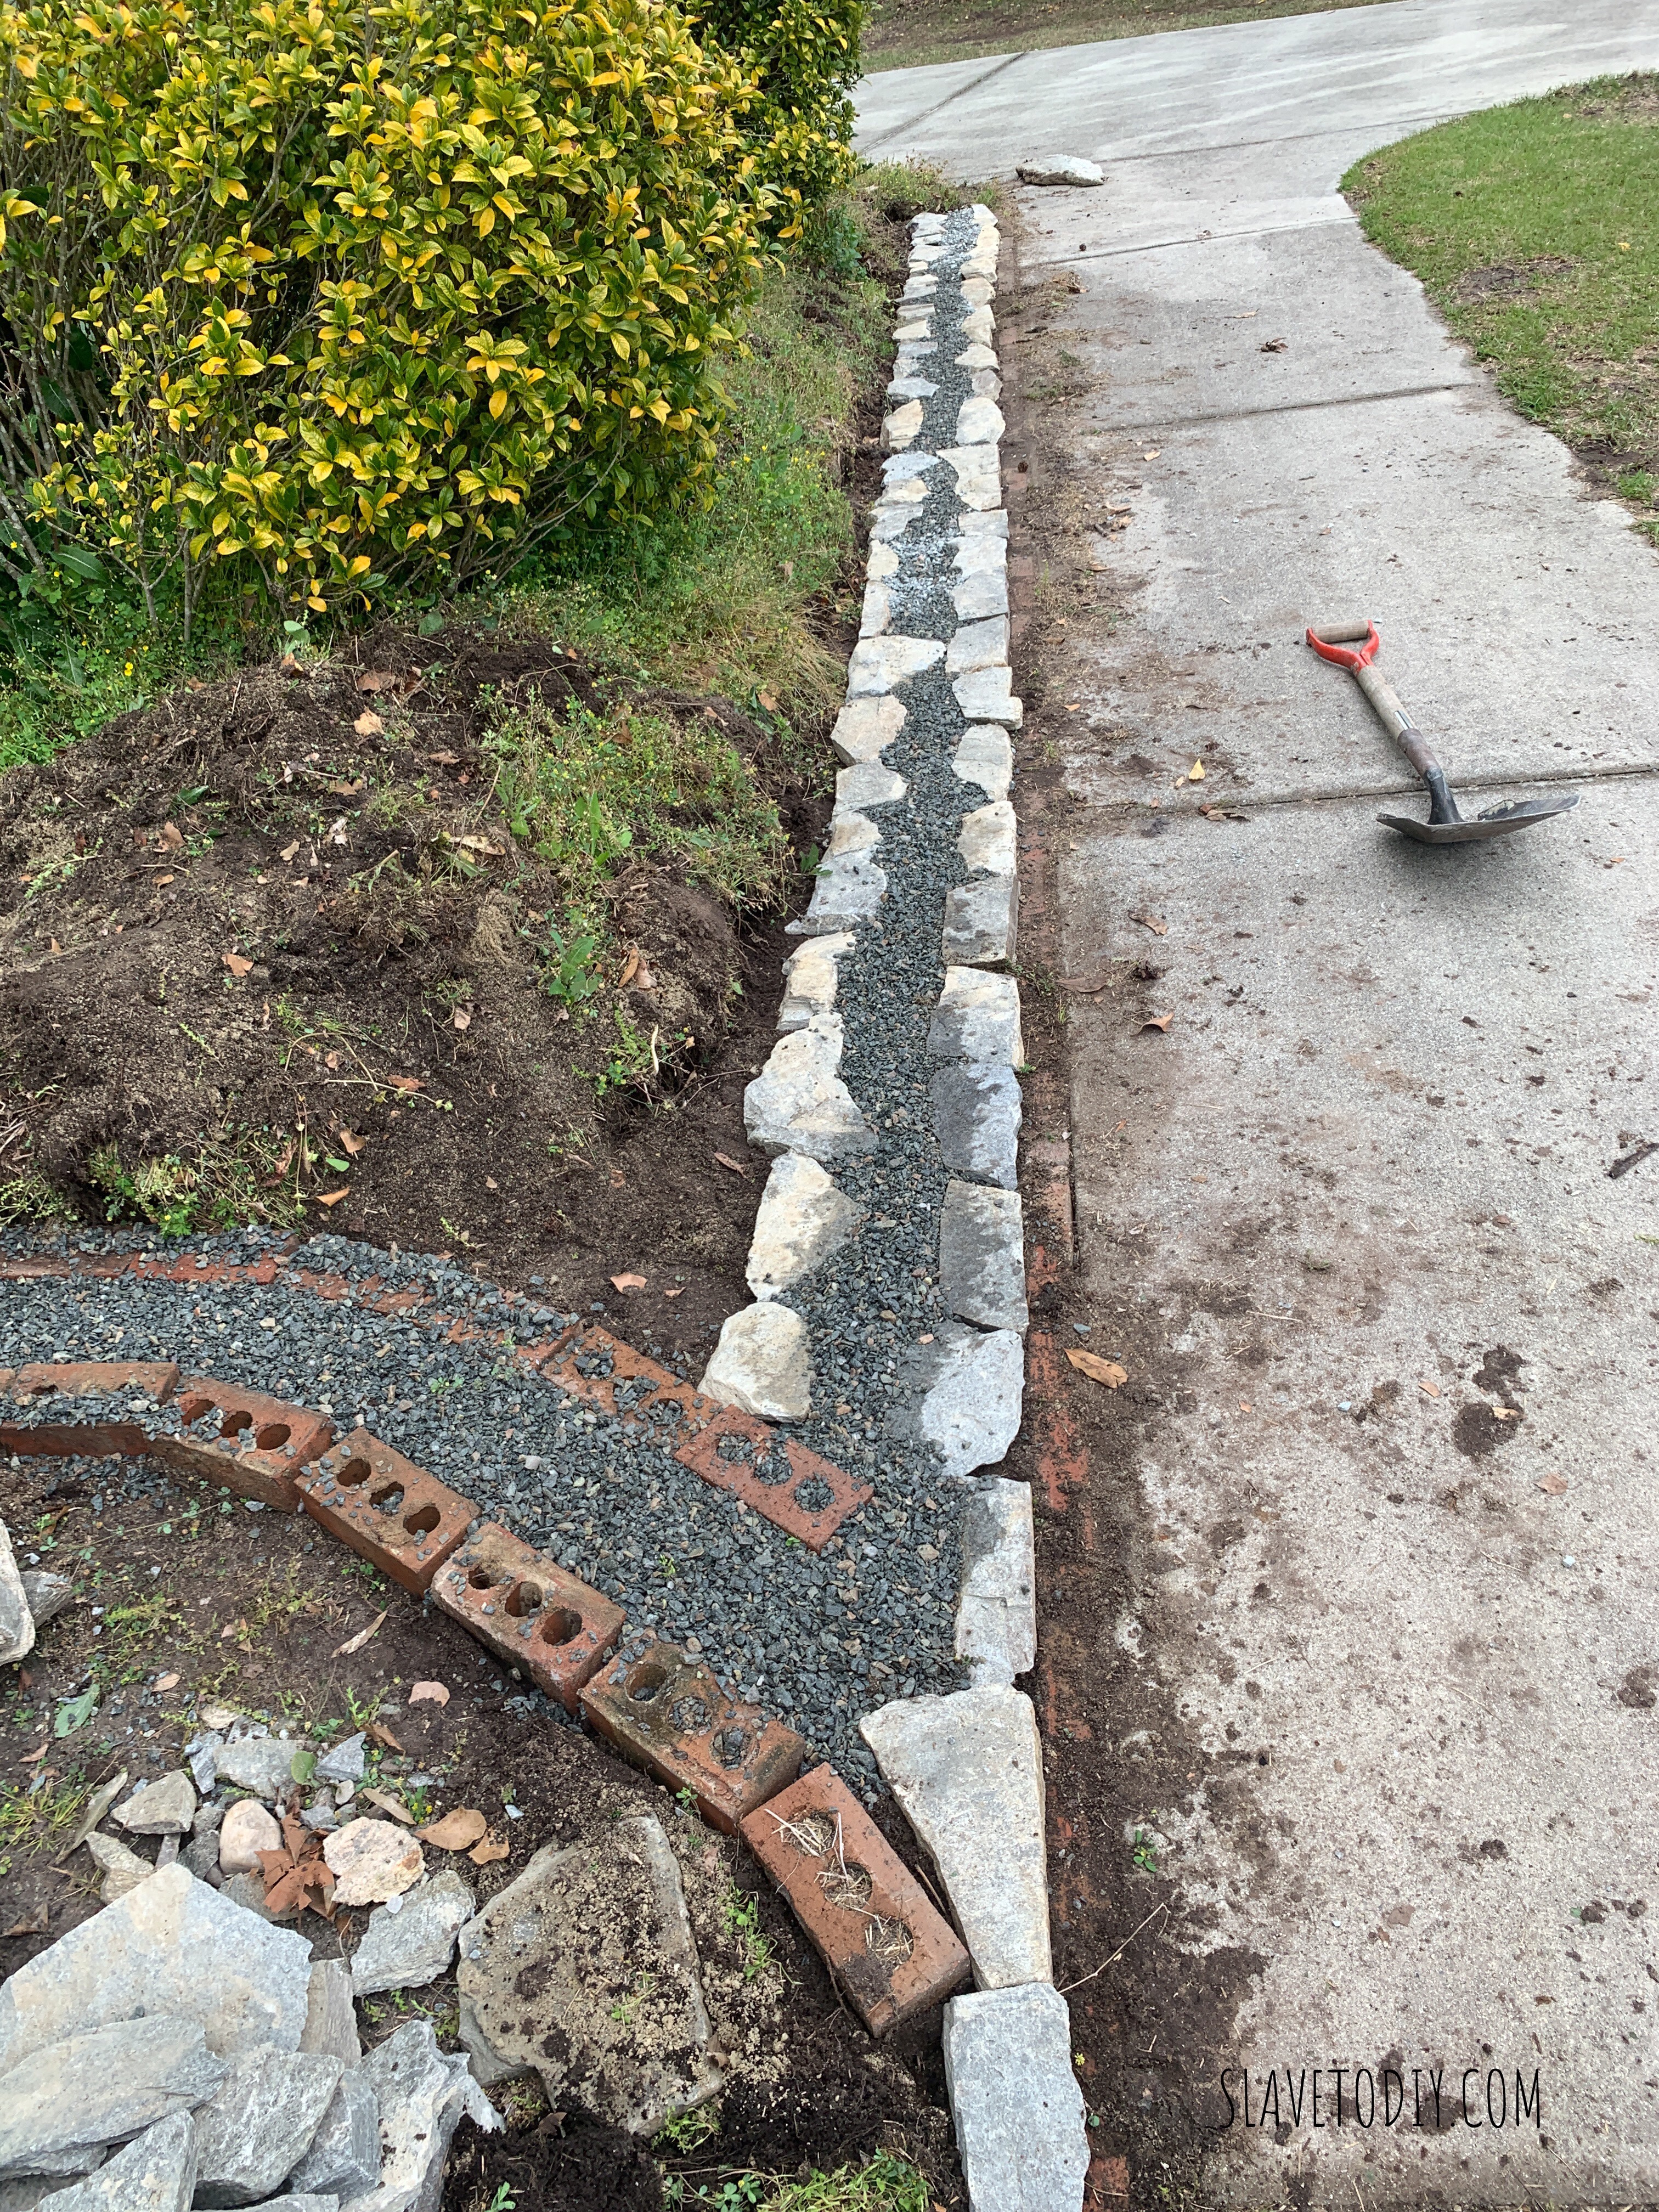
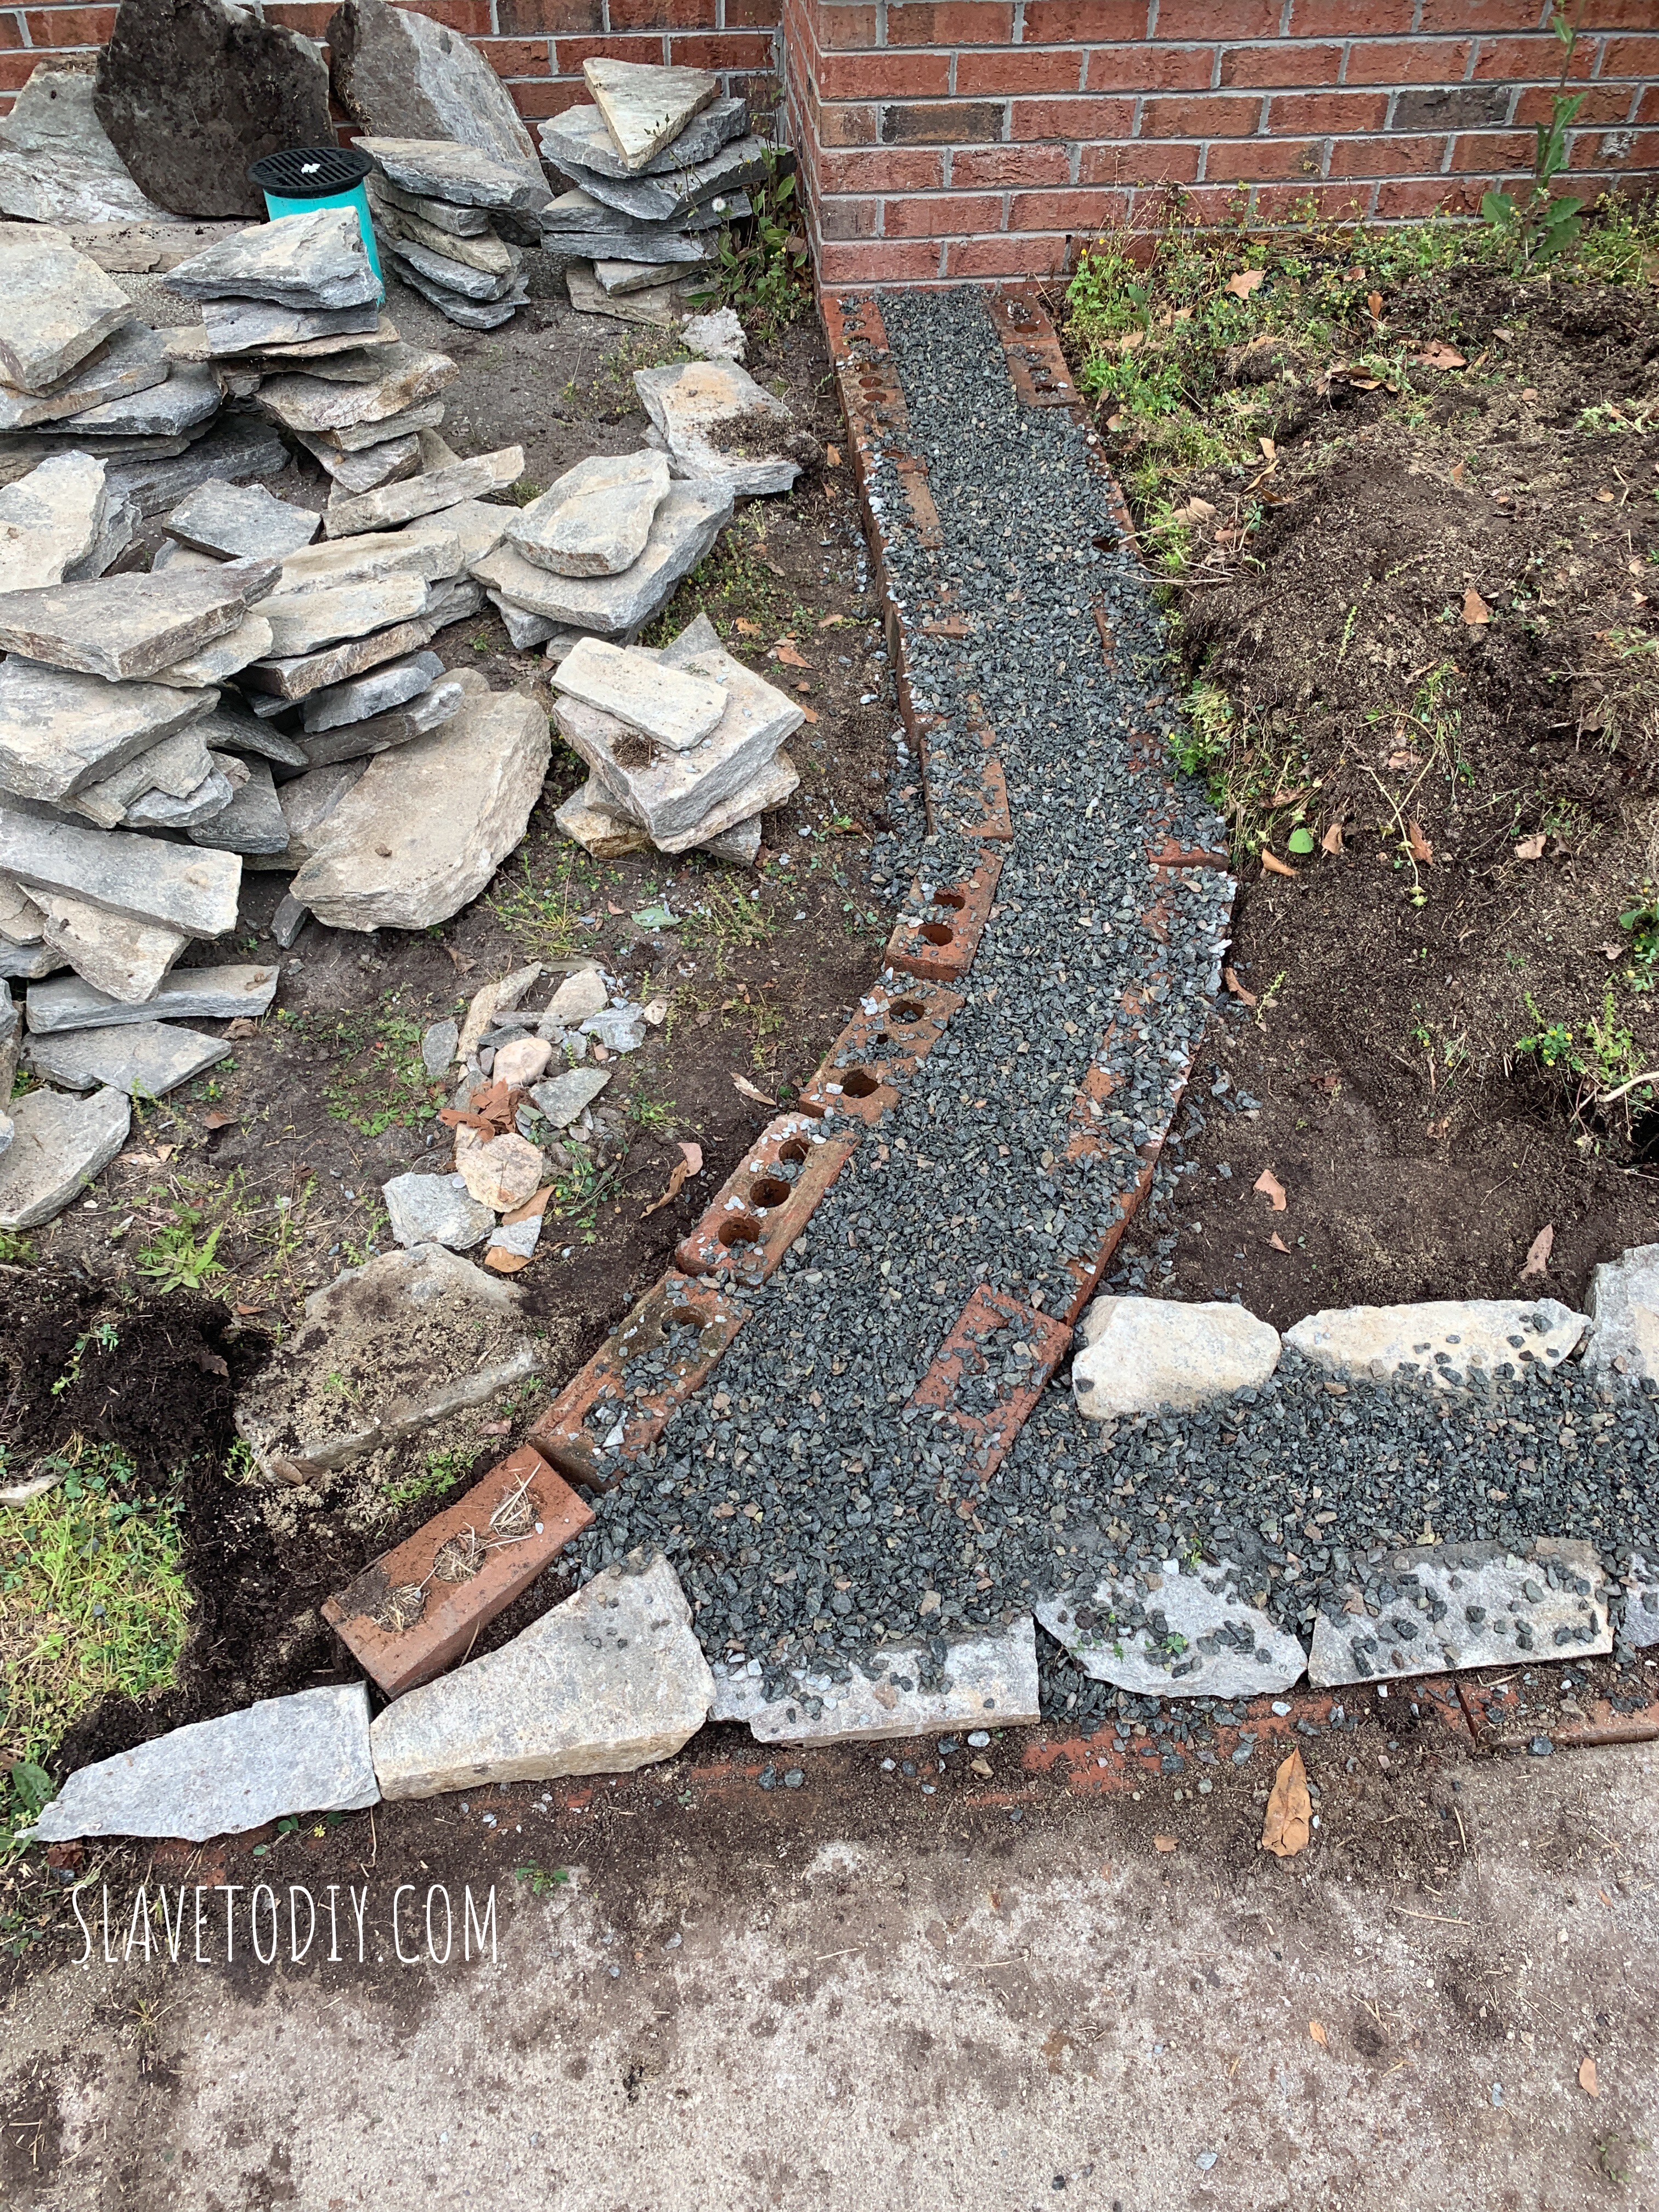
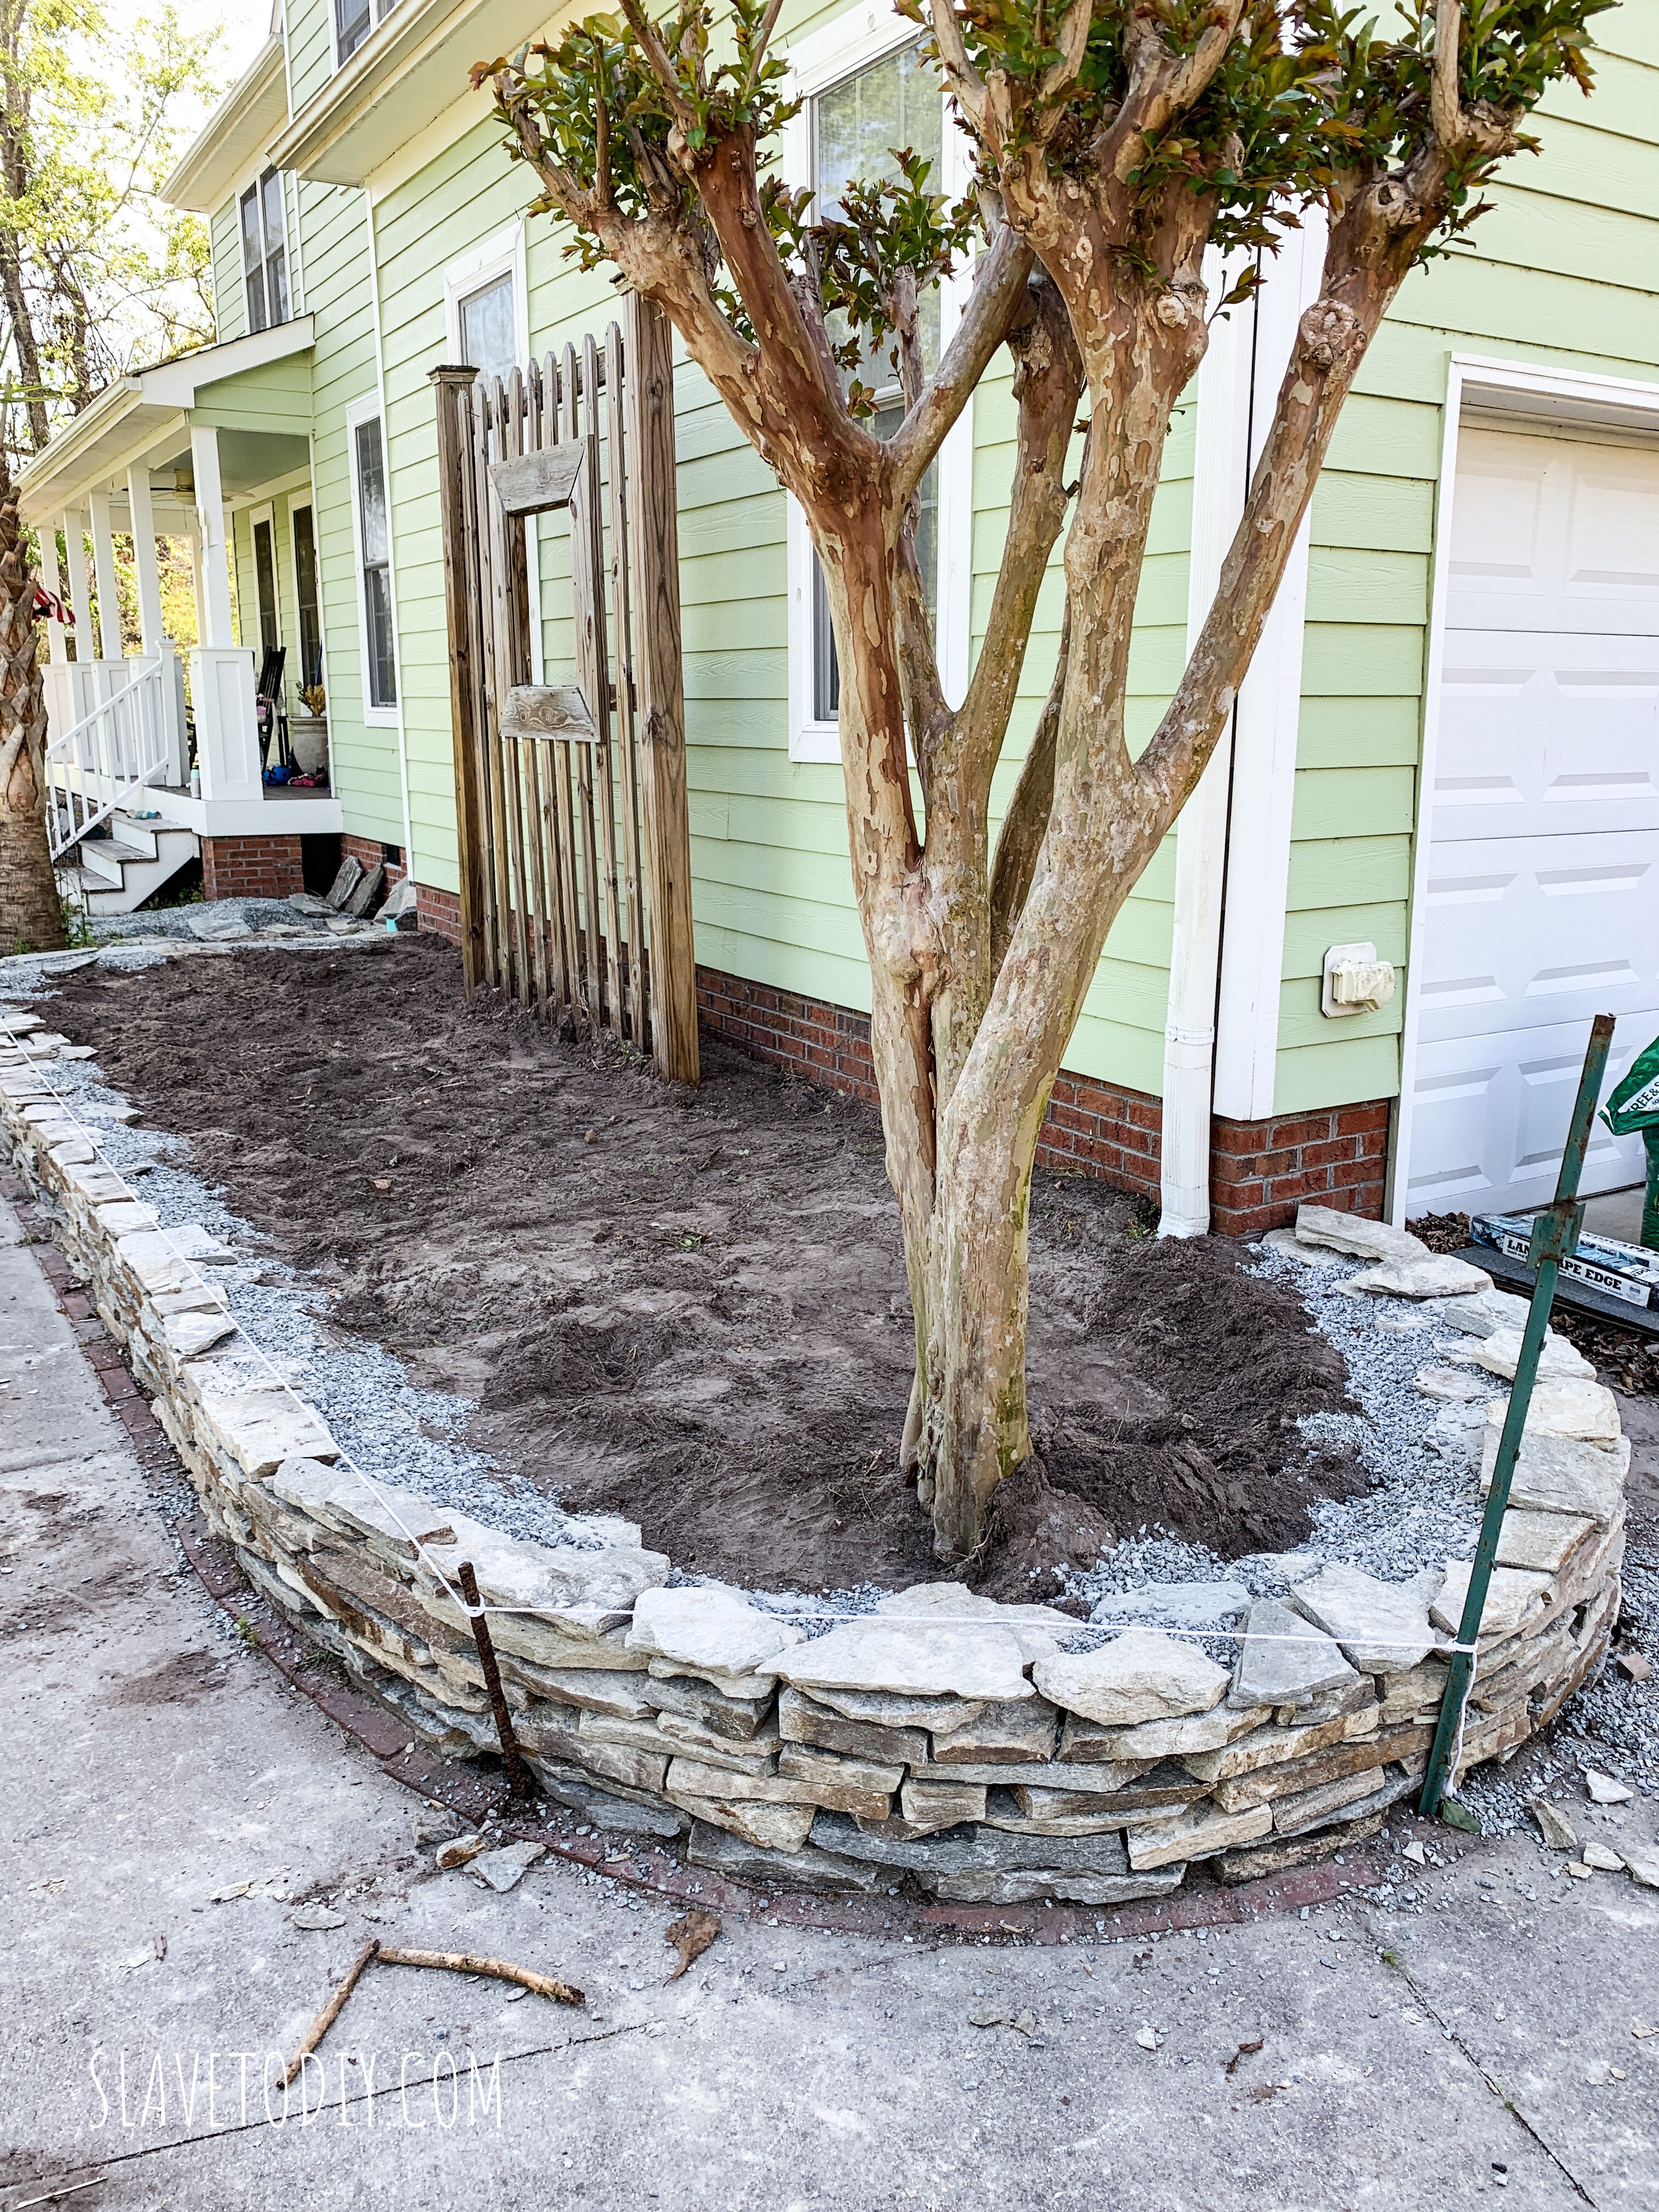
Base layer for dry stacked stone garden with gravel and stone.
First we did the base to make sure we had a stable foundation. We mimicked the curve coming off the steps so the future patio will be the right shape. We used the bricks since that side will be higher (a step up to the brick patio) and that way we didn’t waste any stone.
Another shot of the base layer in on the dry stacked stone garden.
It didn’t occur to me at this point what was really bothering me. But, I’ll get to that.
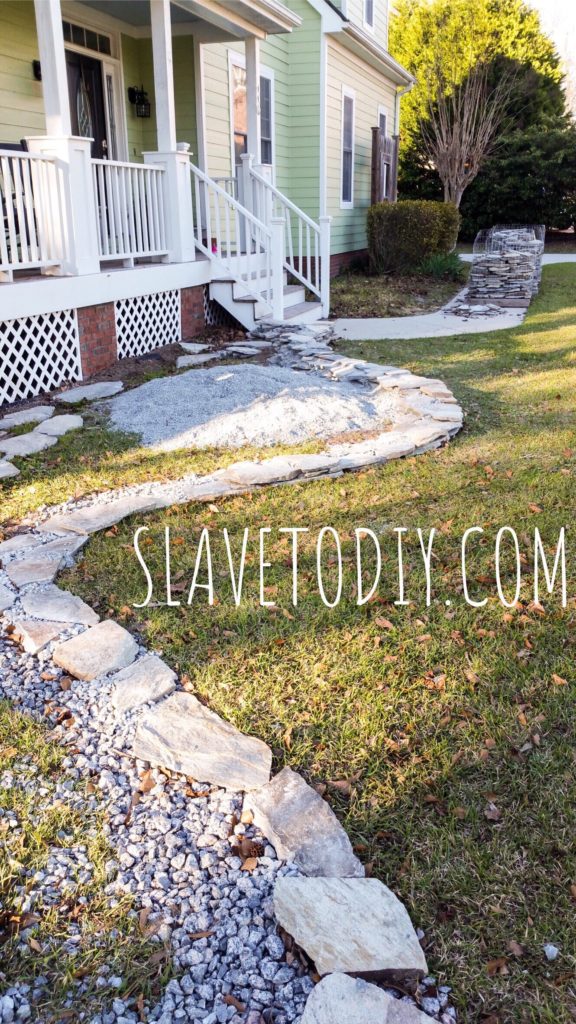
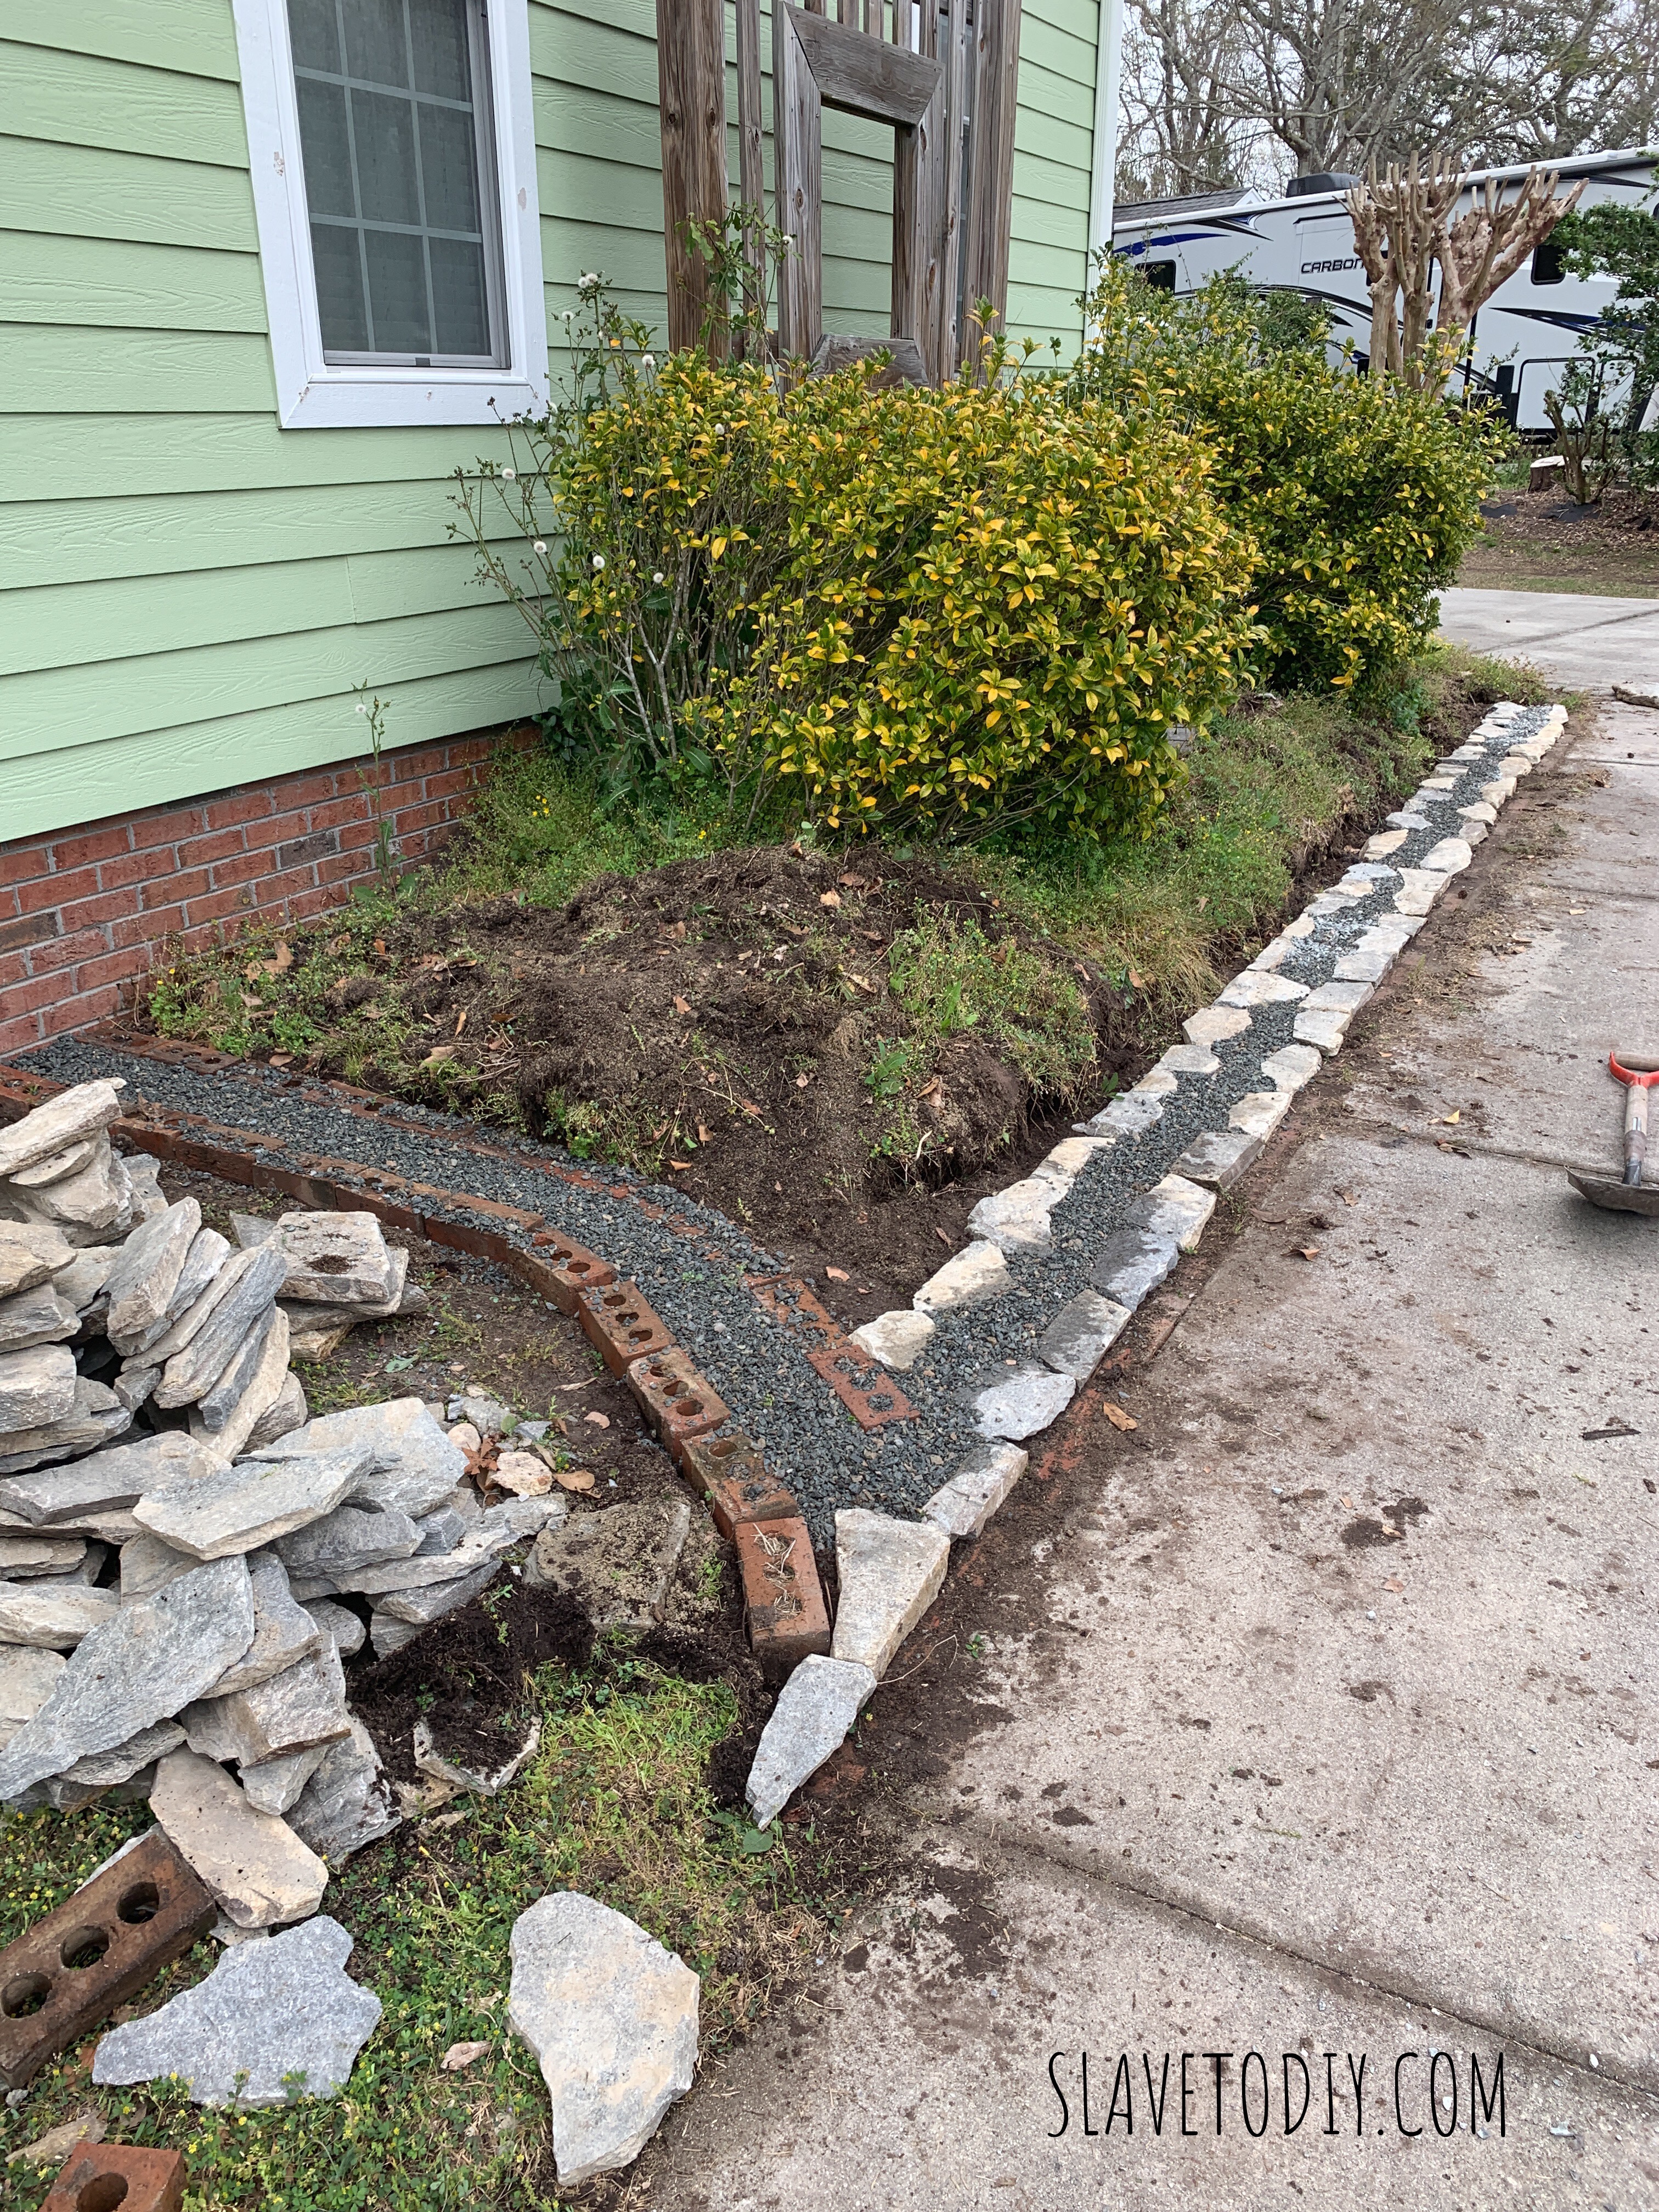
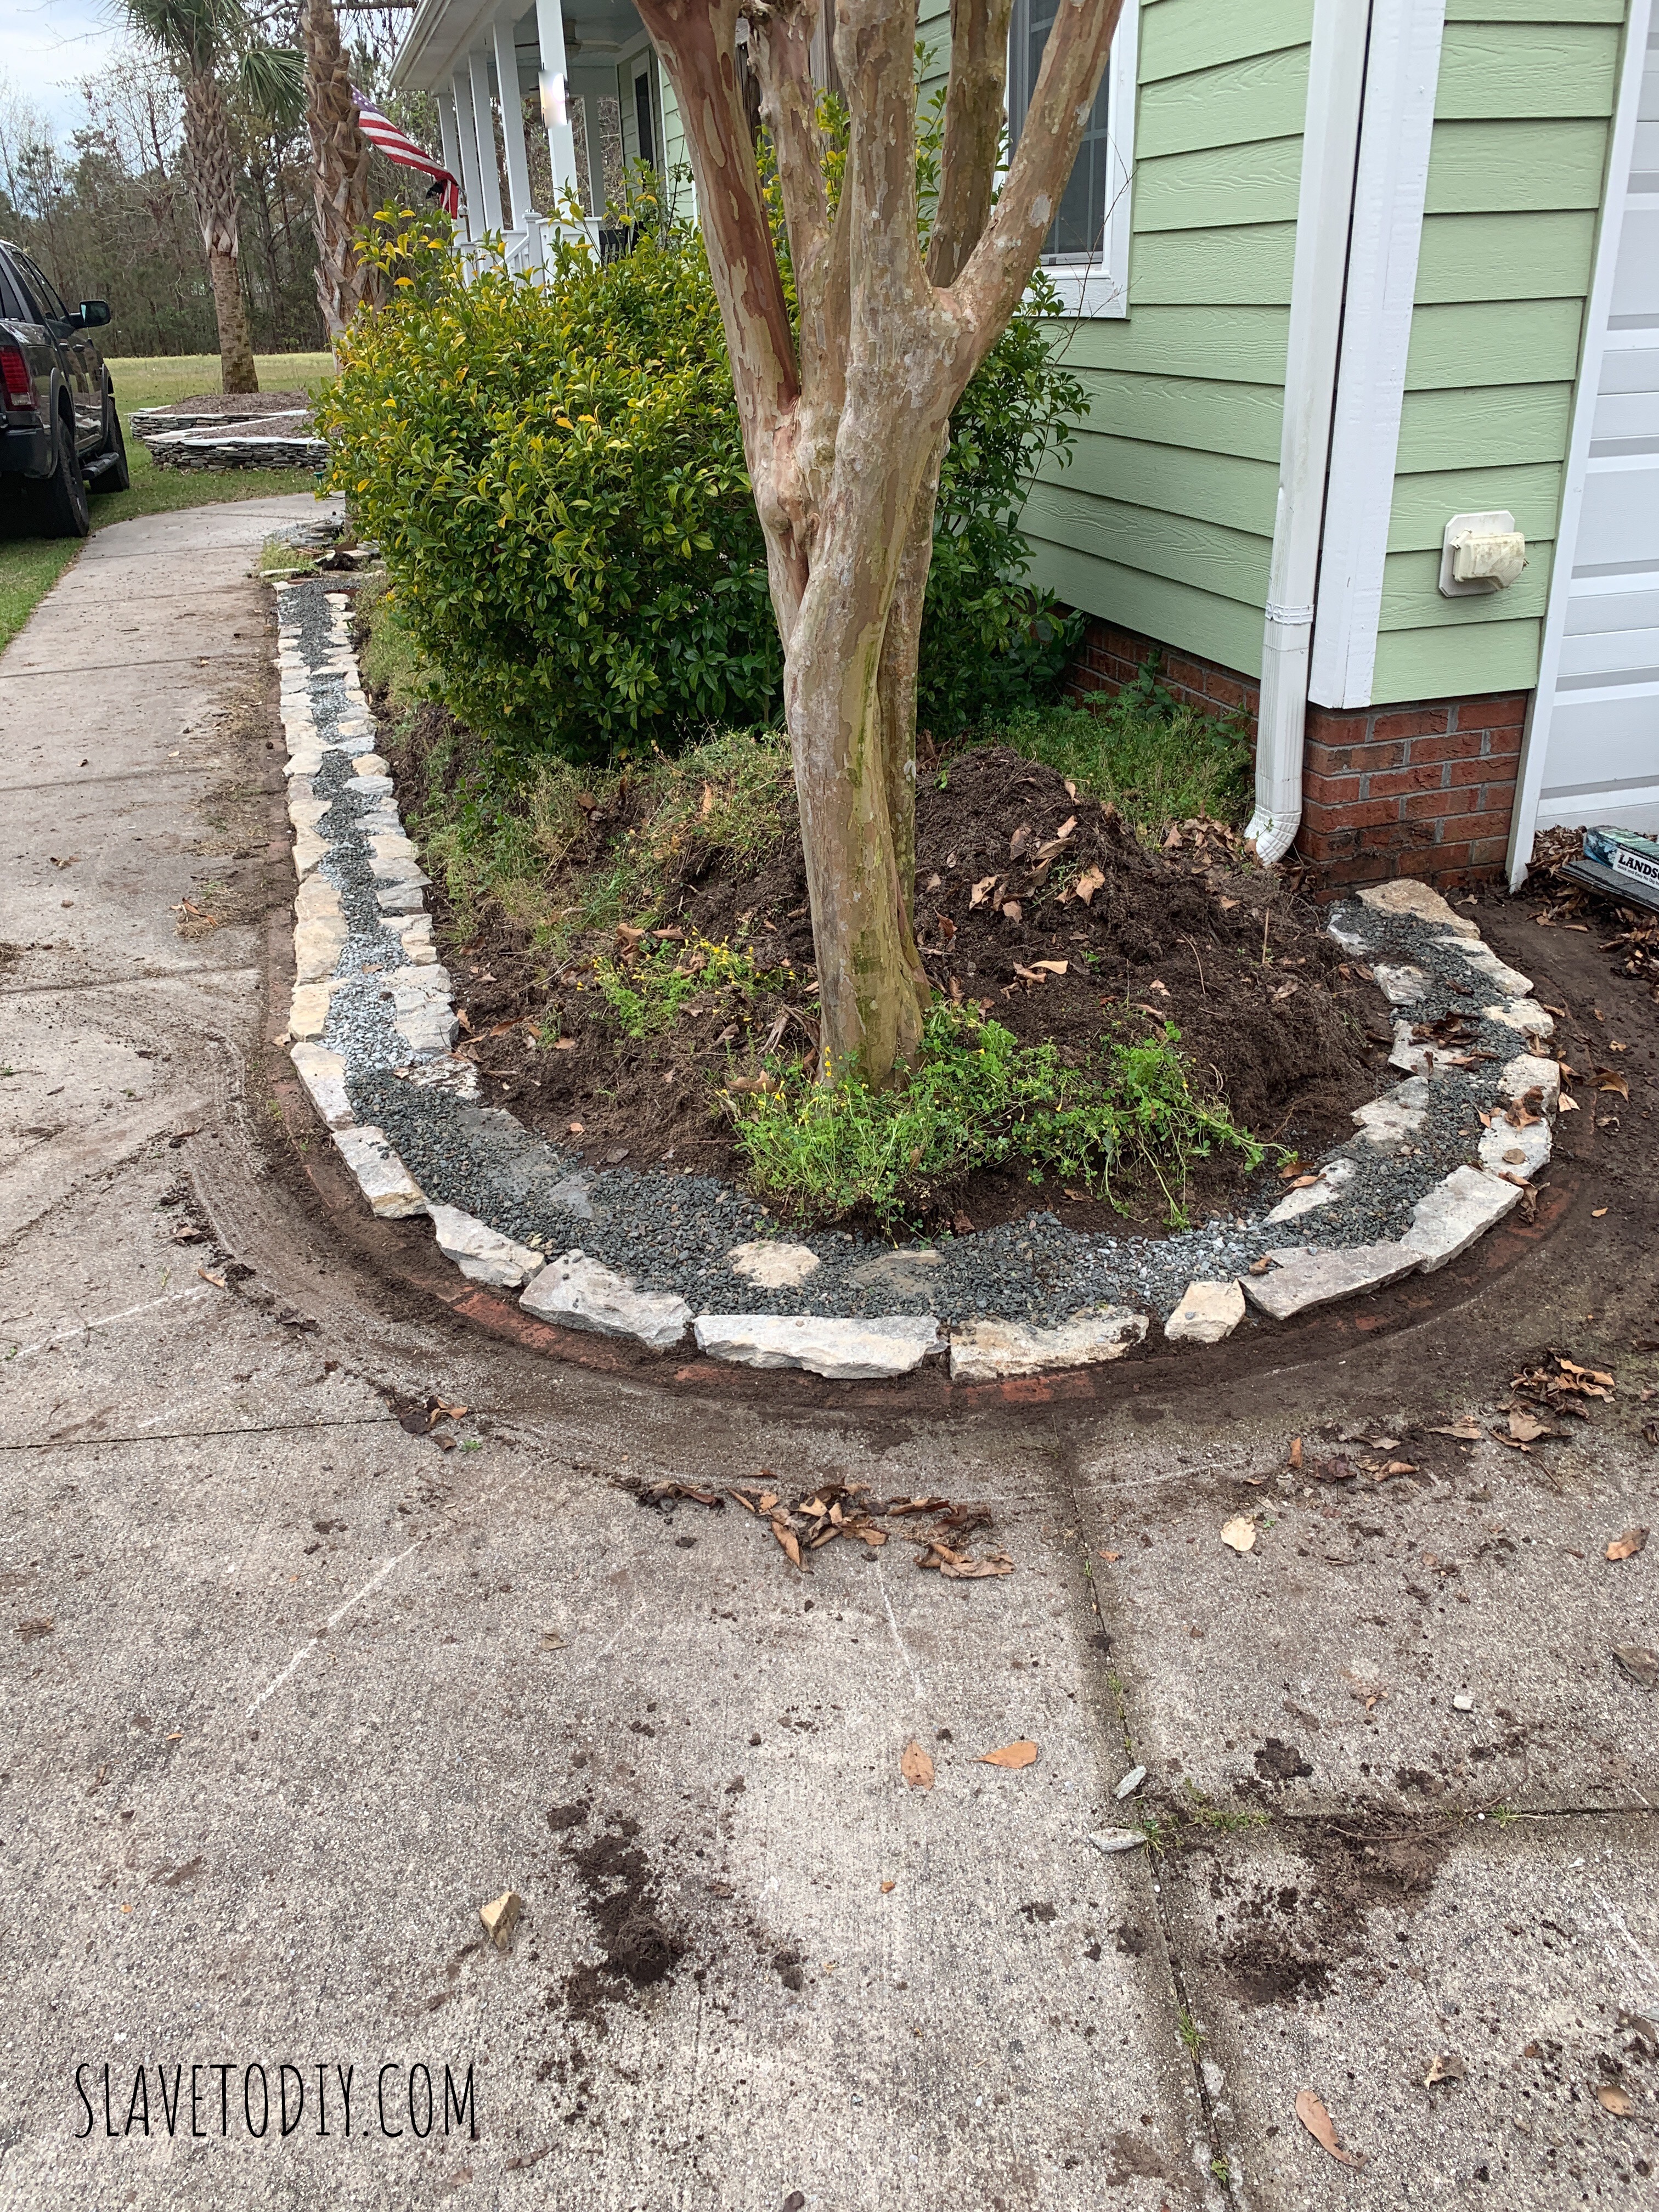
The curve around the Crepe Myrtle with stacked stone garden base
I really love this gentle curve around the end of the garden. It’s a great shape.
Another shot of the rock base for the dry stack stone garden wall.
This shows how the base took shape.
Dry Stacked Stone Garden wall going in.
So, I was standing there looking at it: this future garden and Rainman asks me a simple question. “You don’t like those bushes do you?” And, of course, that was exactly what was bothering me. It would’ve been WAY more simple if I had asked him to remove them BEFORE I began the wall installation, but he didn’t even fuss at me.
Dry Stacked Stone Garden wall taking shape.
So, the deal with the garden wall installations is that Rainman can’t help. It’s sort of like playing tetris, except that the pieces aren’t the same and you have to be a little creative. It’s an art, really. So, he did what he could: he broke up the weeds and filled in gravel where I needed it. He also lugged rocks of various sizes over to where I was working so that I could build faster. He’s really very awesome, this Rainman of mine.
Leveling the dry stacked stone garden
When we get to this stage of the game, where final leveling is happening, his help, and his eye are essential. I still don’t let him touch any rocks, but he gets me a line so we can get the wall ready for capstones.
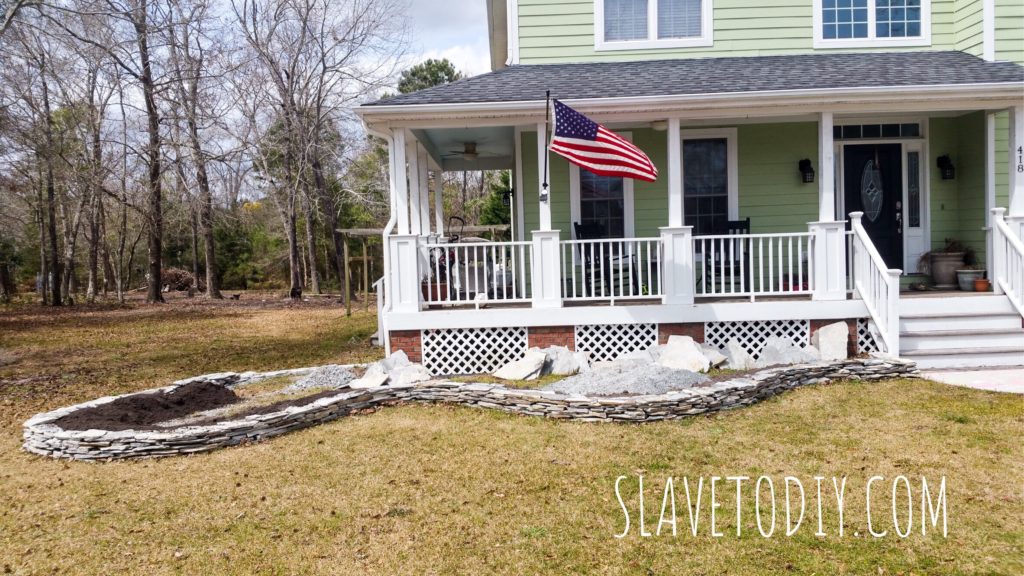
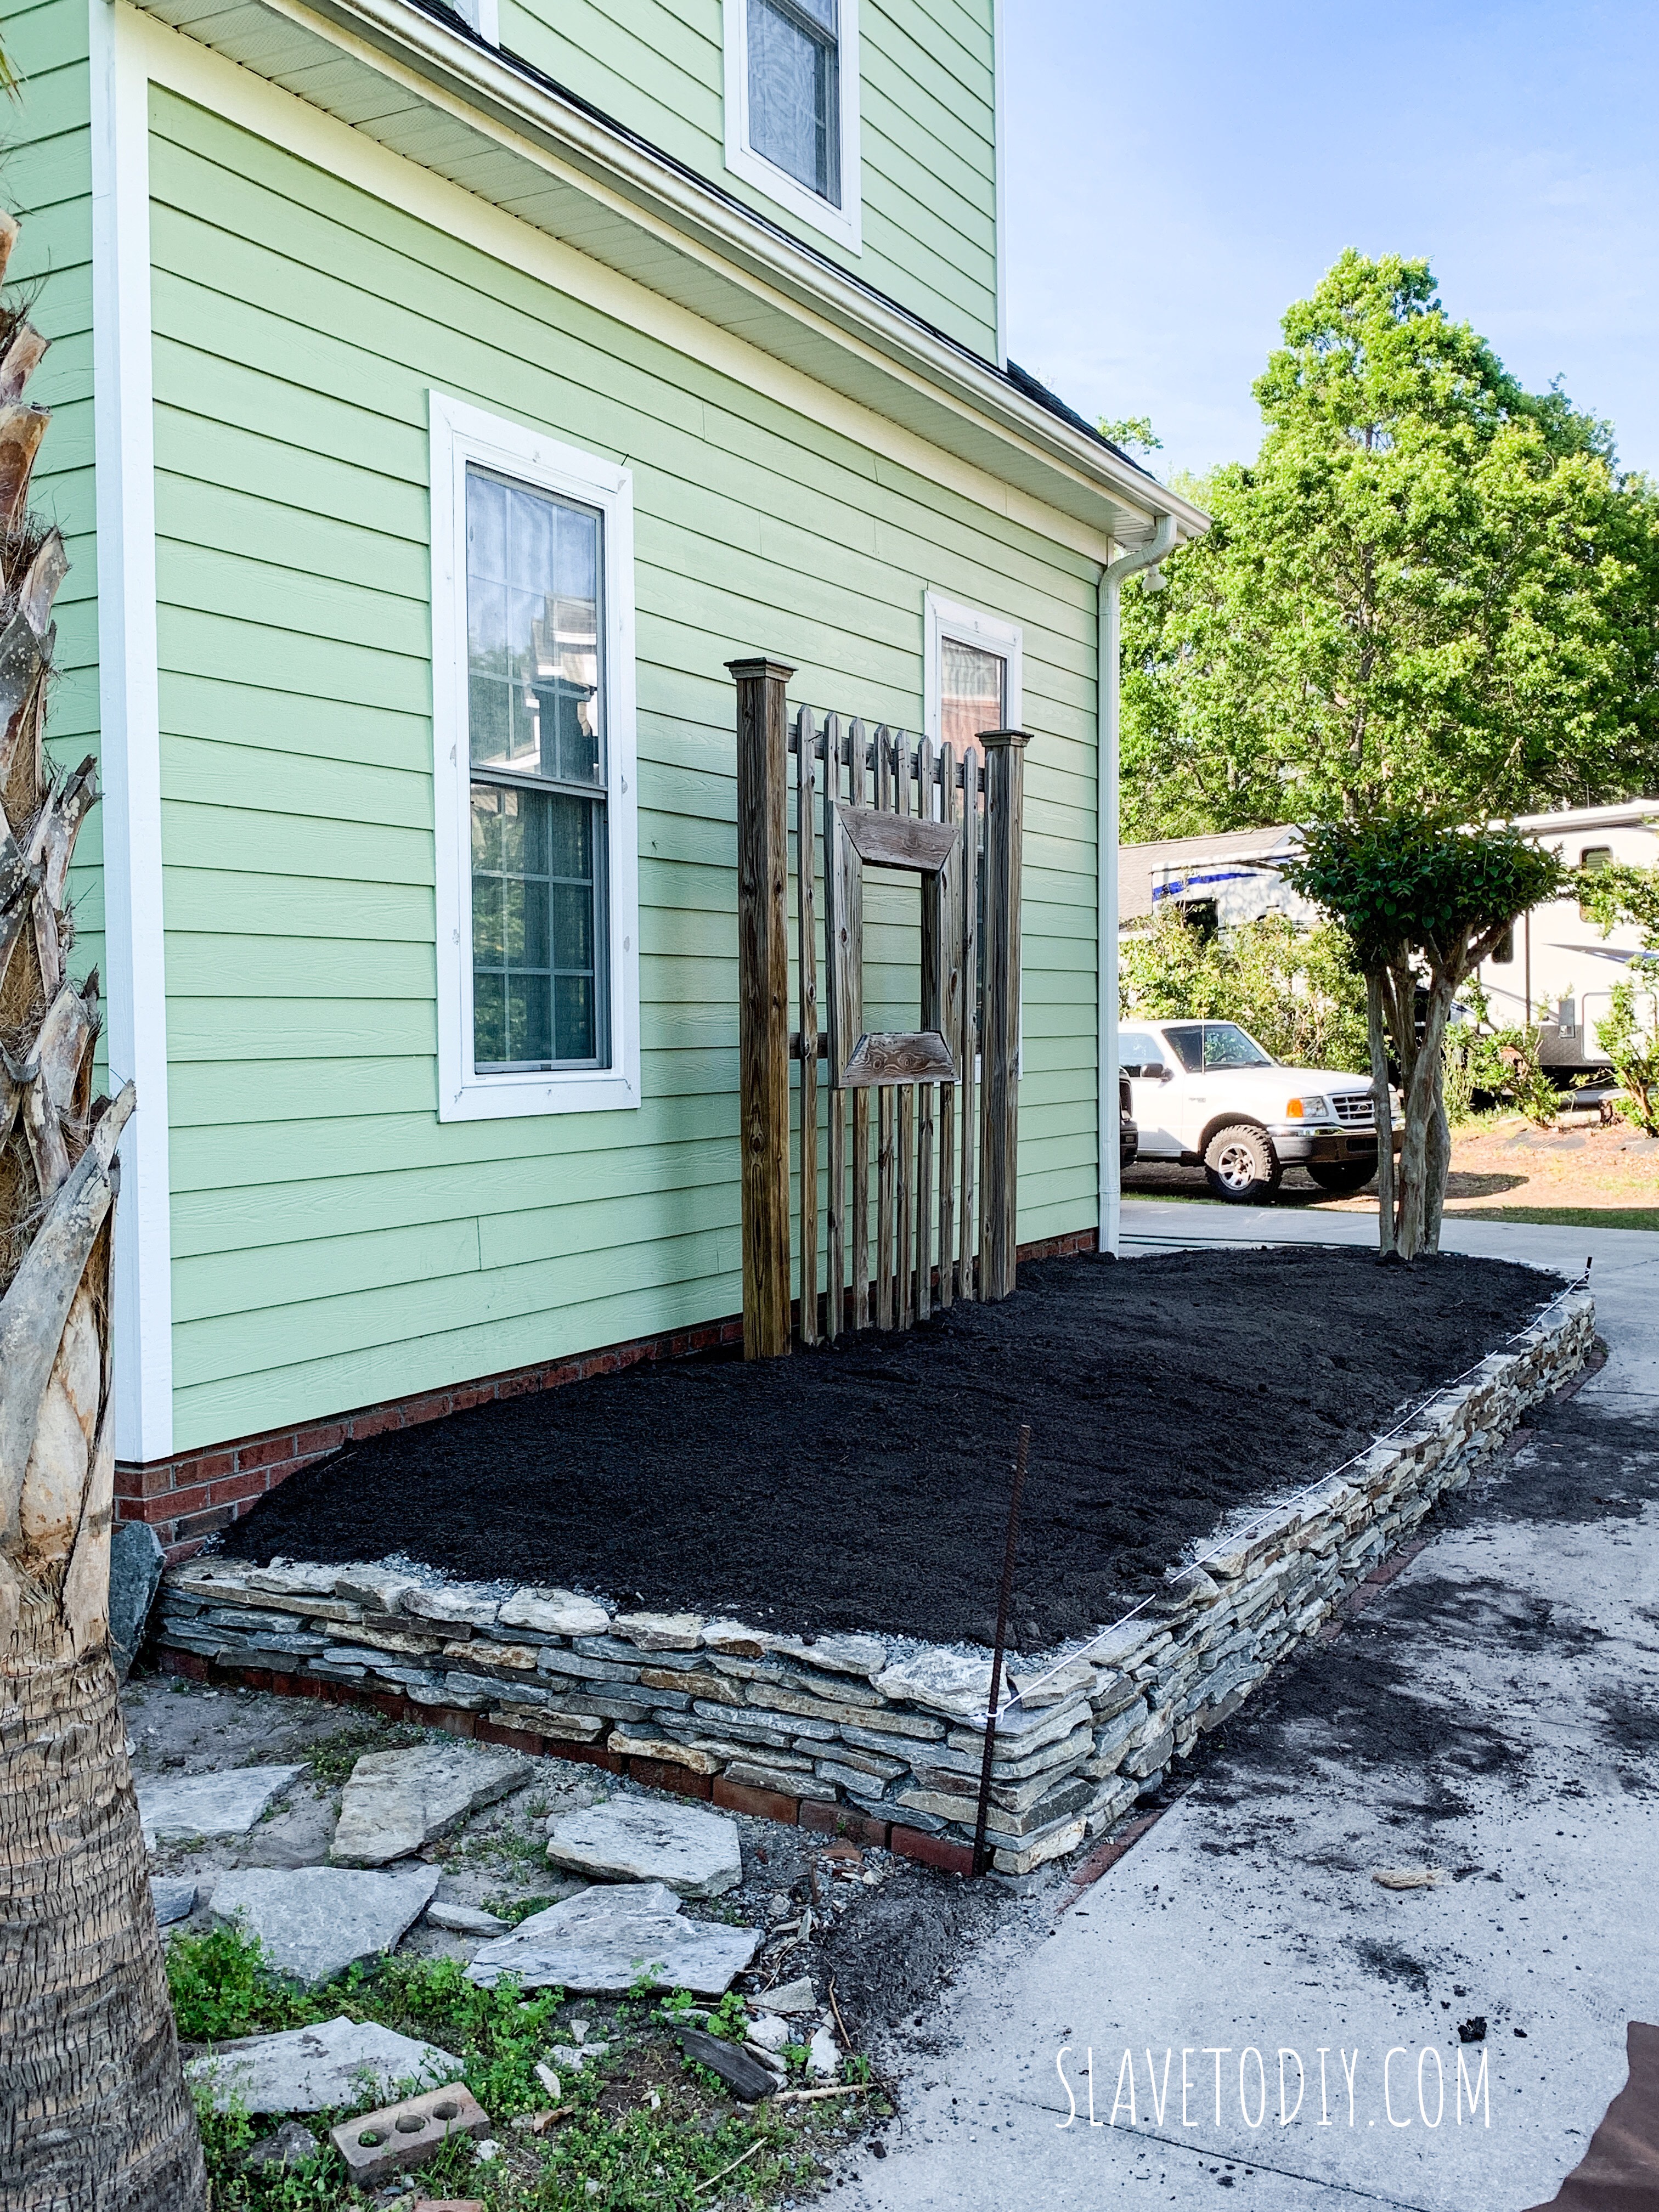
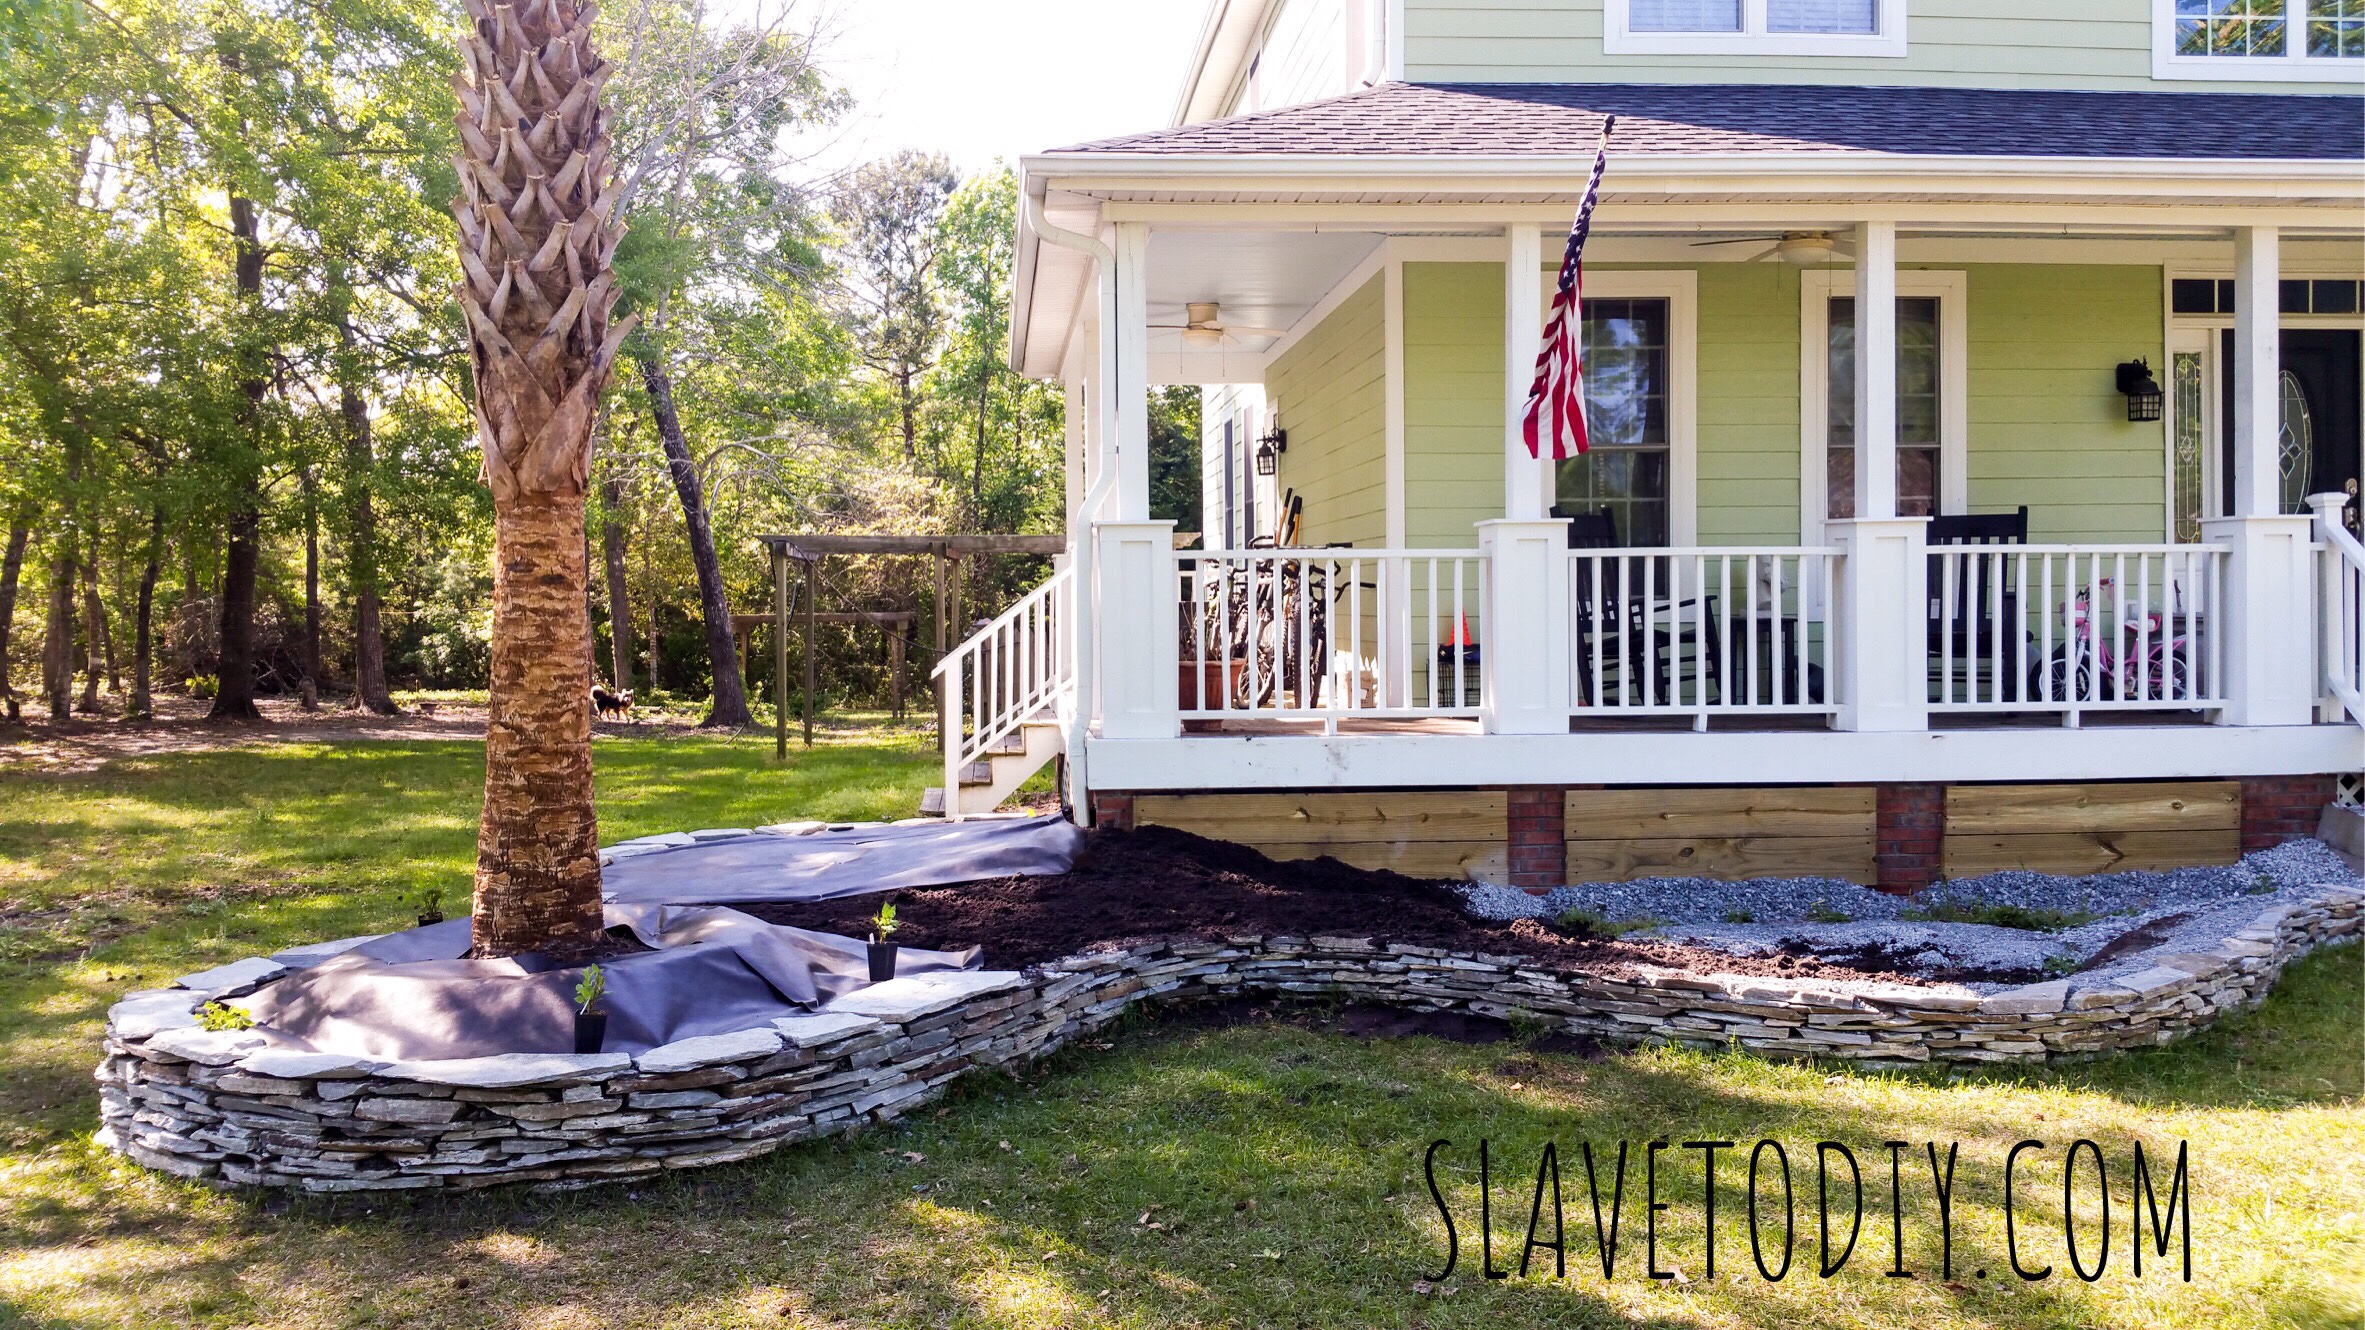
Topsoil going in on the dry stacked stone garden
In order to get the garden ready for capstones and landscaping fabric I needed the rest of the topsoil in so I put the teenagers on duty, running back and forth to the topsoil and mulch place.
Getting dry stacked stone garden levelled and ready for landscaping fabric and mulch.
So, we finally got it mounded where I wanted it, and let it rest overnight with a good soaking rain so we were sure it was good and settled and the levels were where I wanted them.
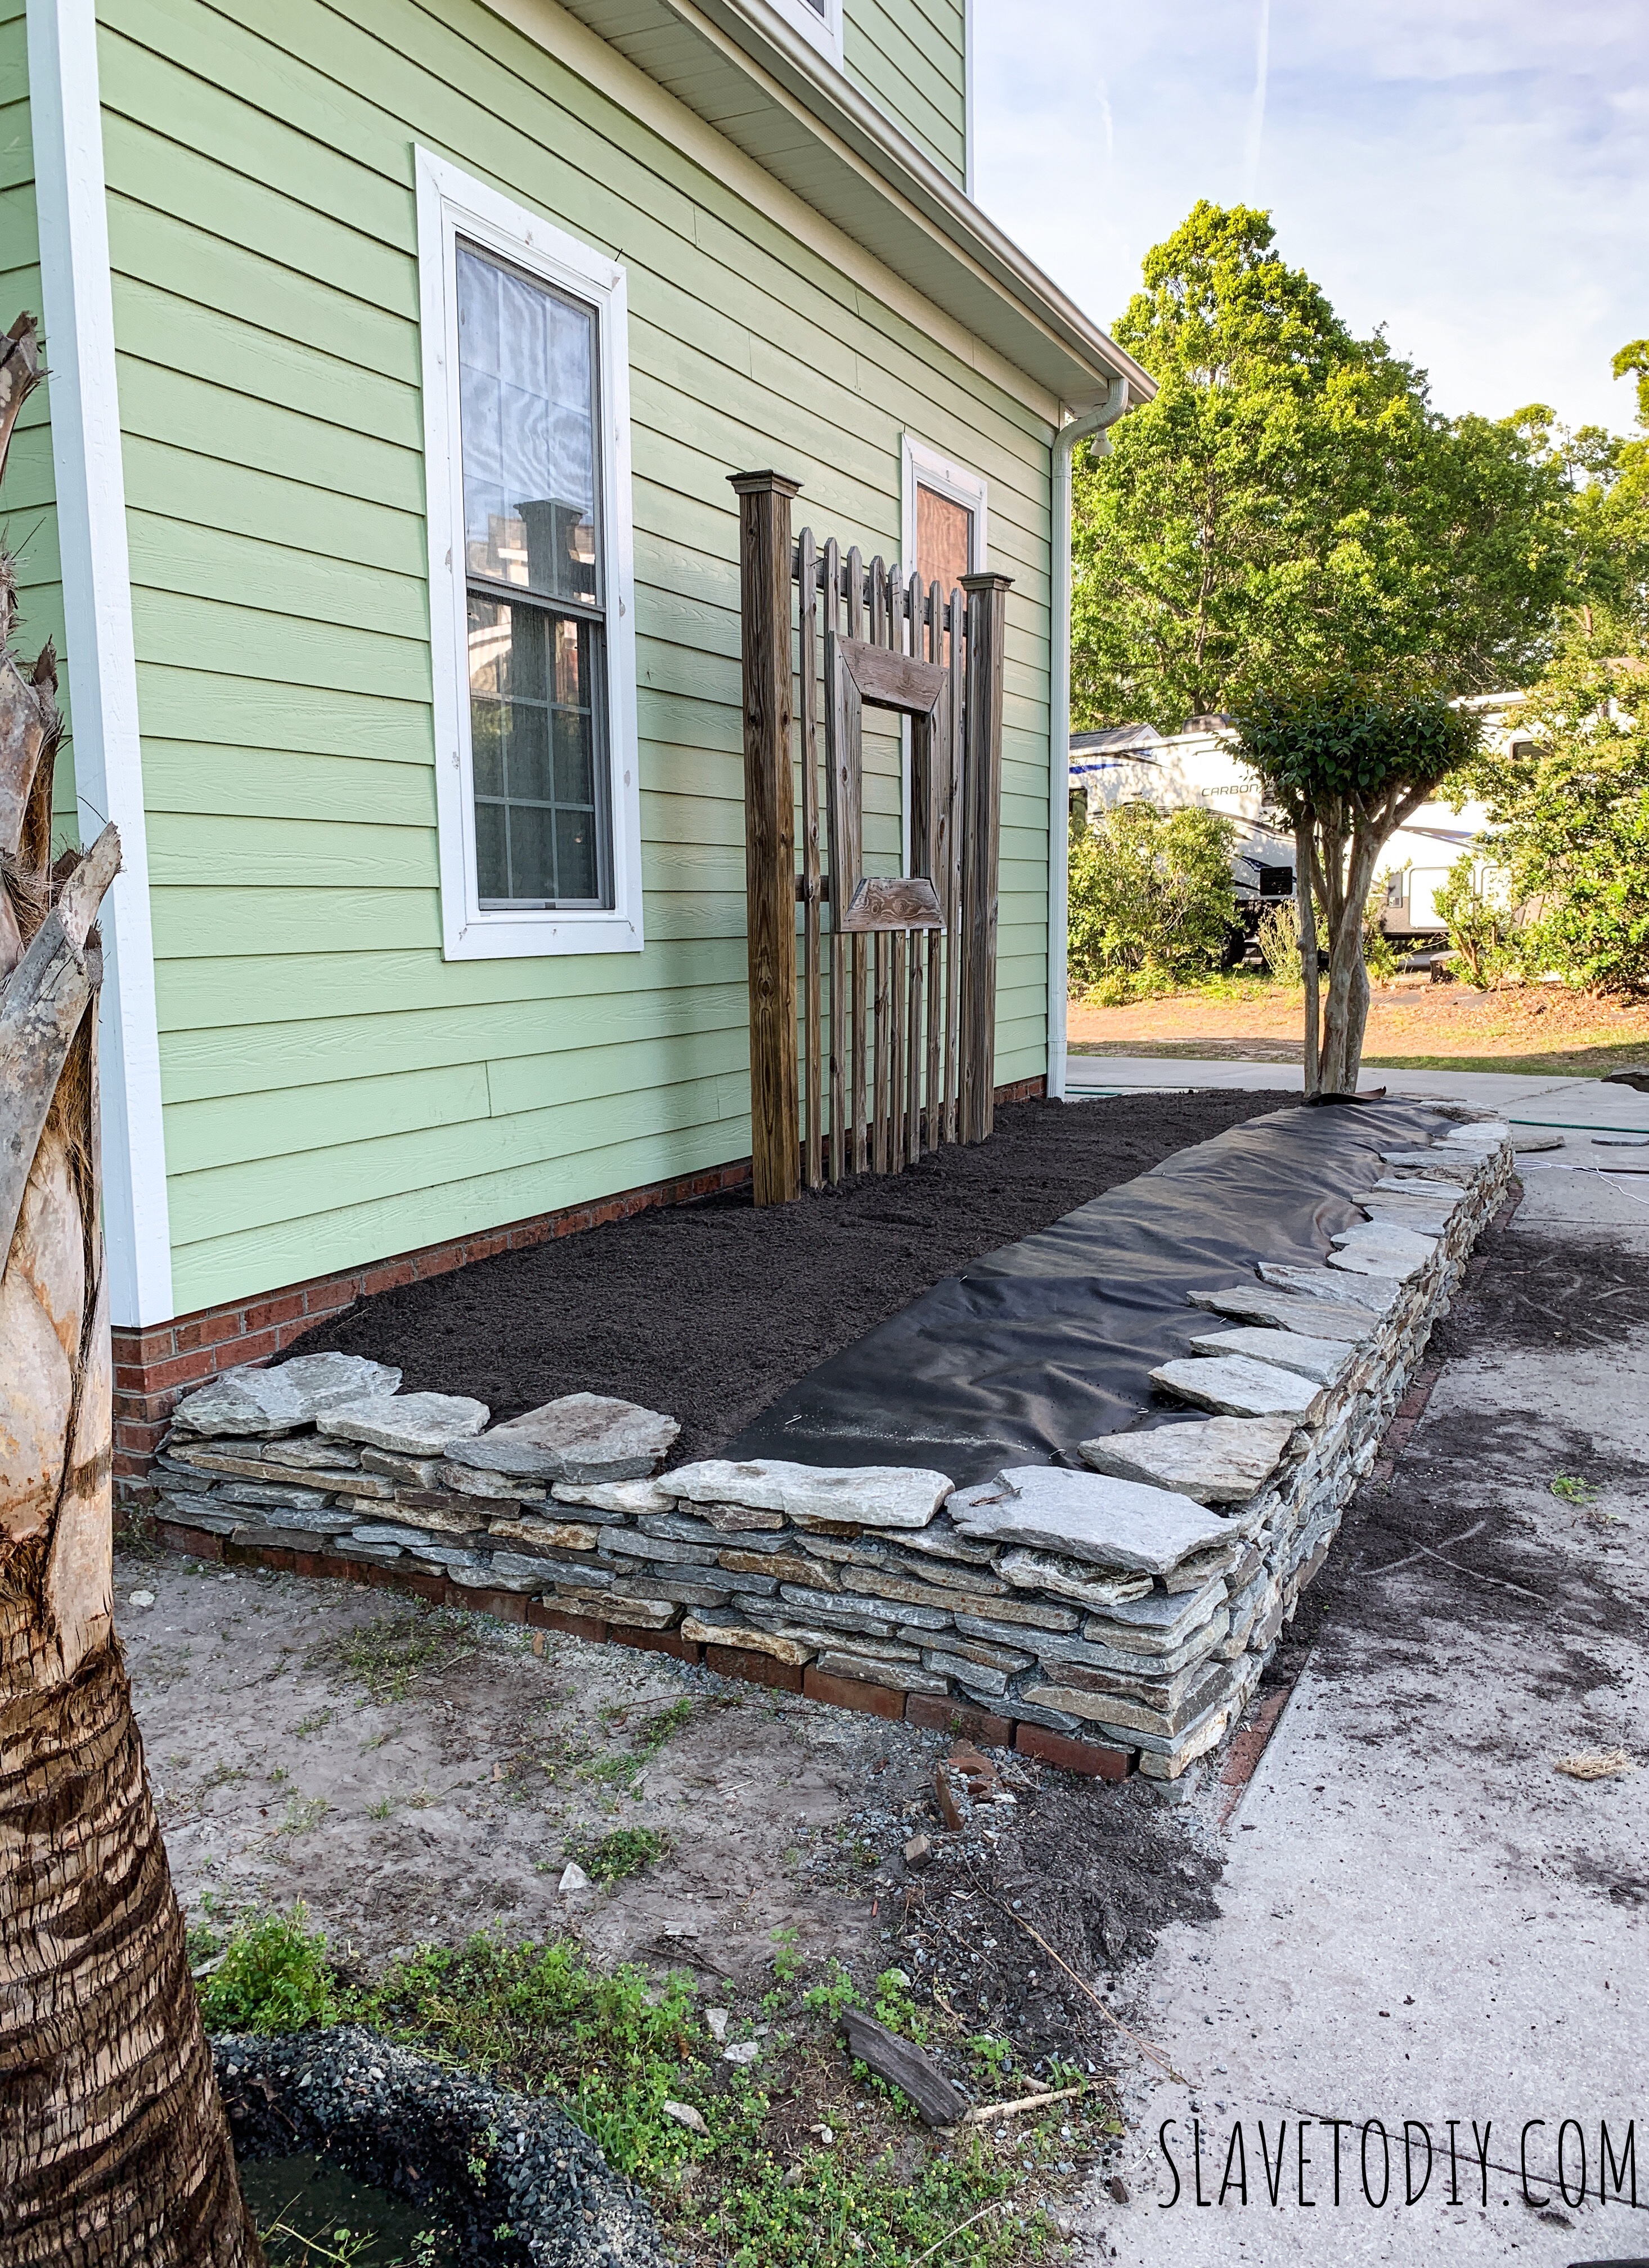
Dry stacked stone garden with landscaping fabric and capstones going in.
Once the soil was in and mounded the way I wanted, we added landscaping fabric and capstones. Don’t EVER skip the landscaping fabric. You’ll be sorry you did.
Dry stacked stone garden complete with mulch and ready to plant!
Once we had the landscaping fabric and capstones in, it only took two scoops of mulch to get a nice thick layer. Now I could really look at my blank palette and make plant decisions.
Enter a caption
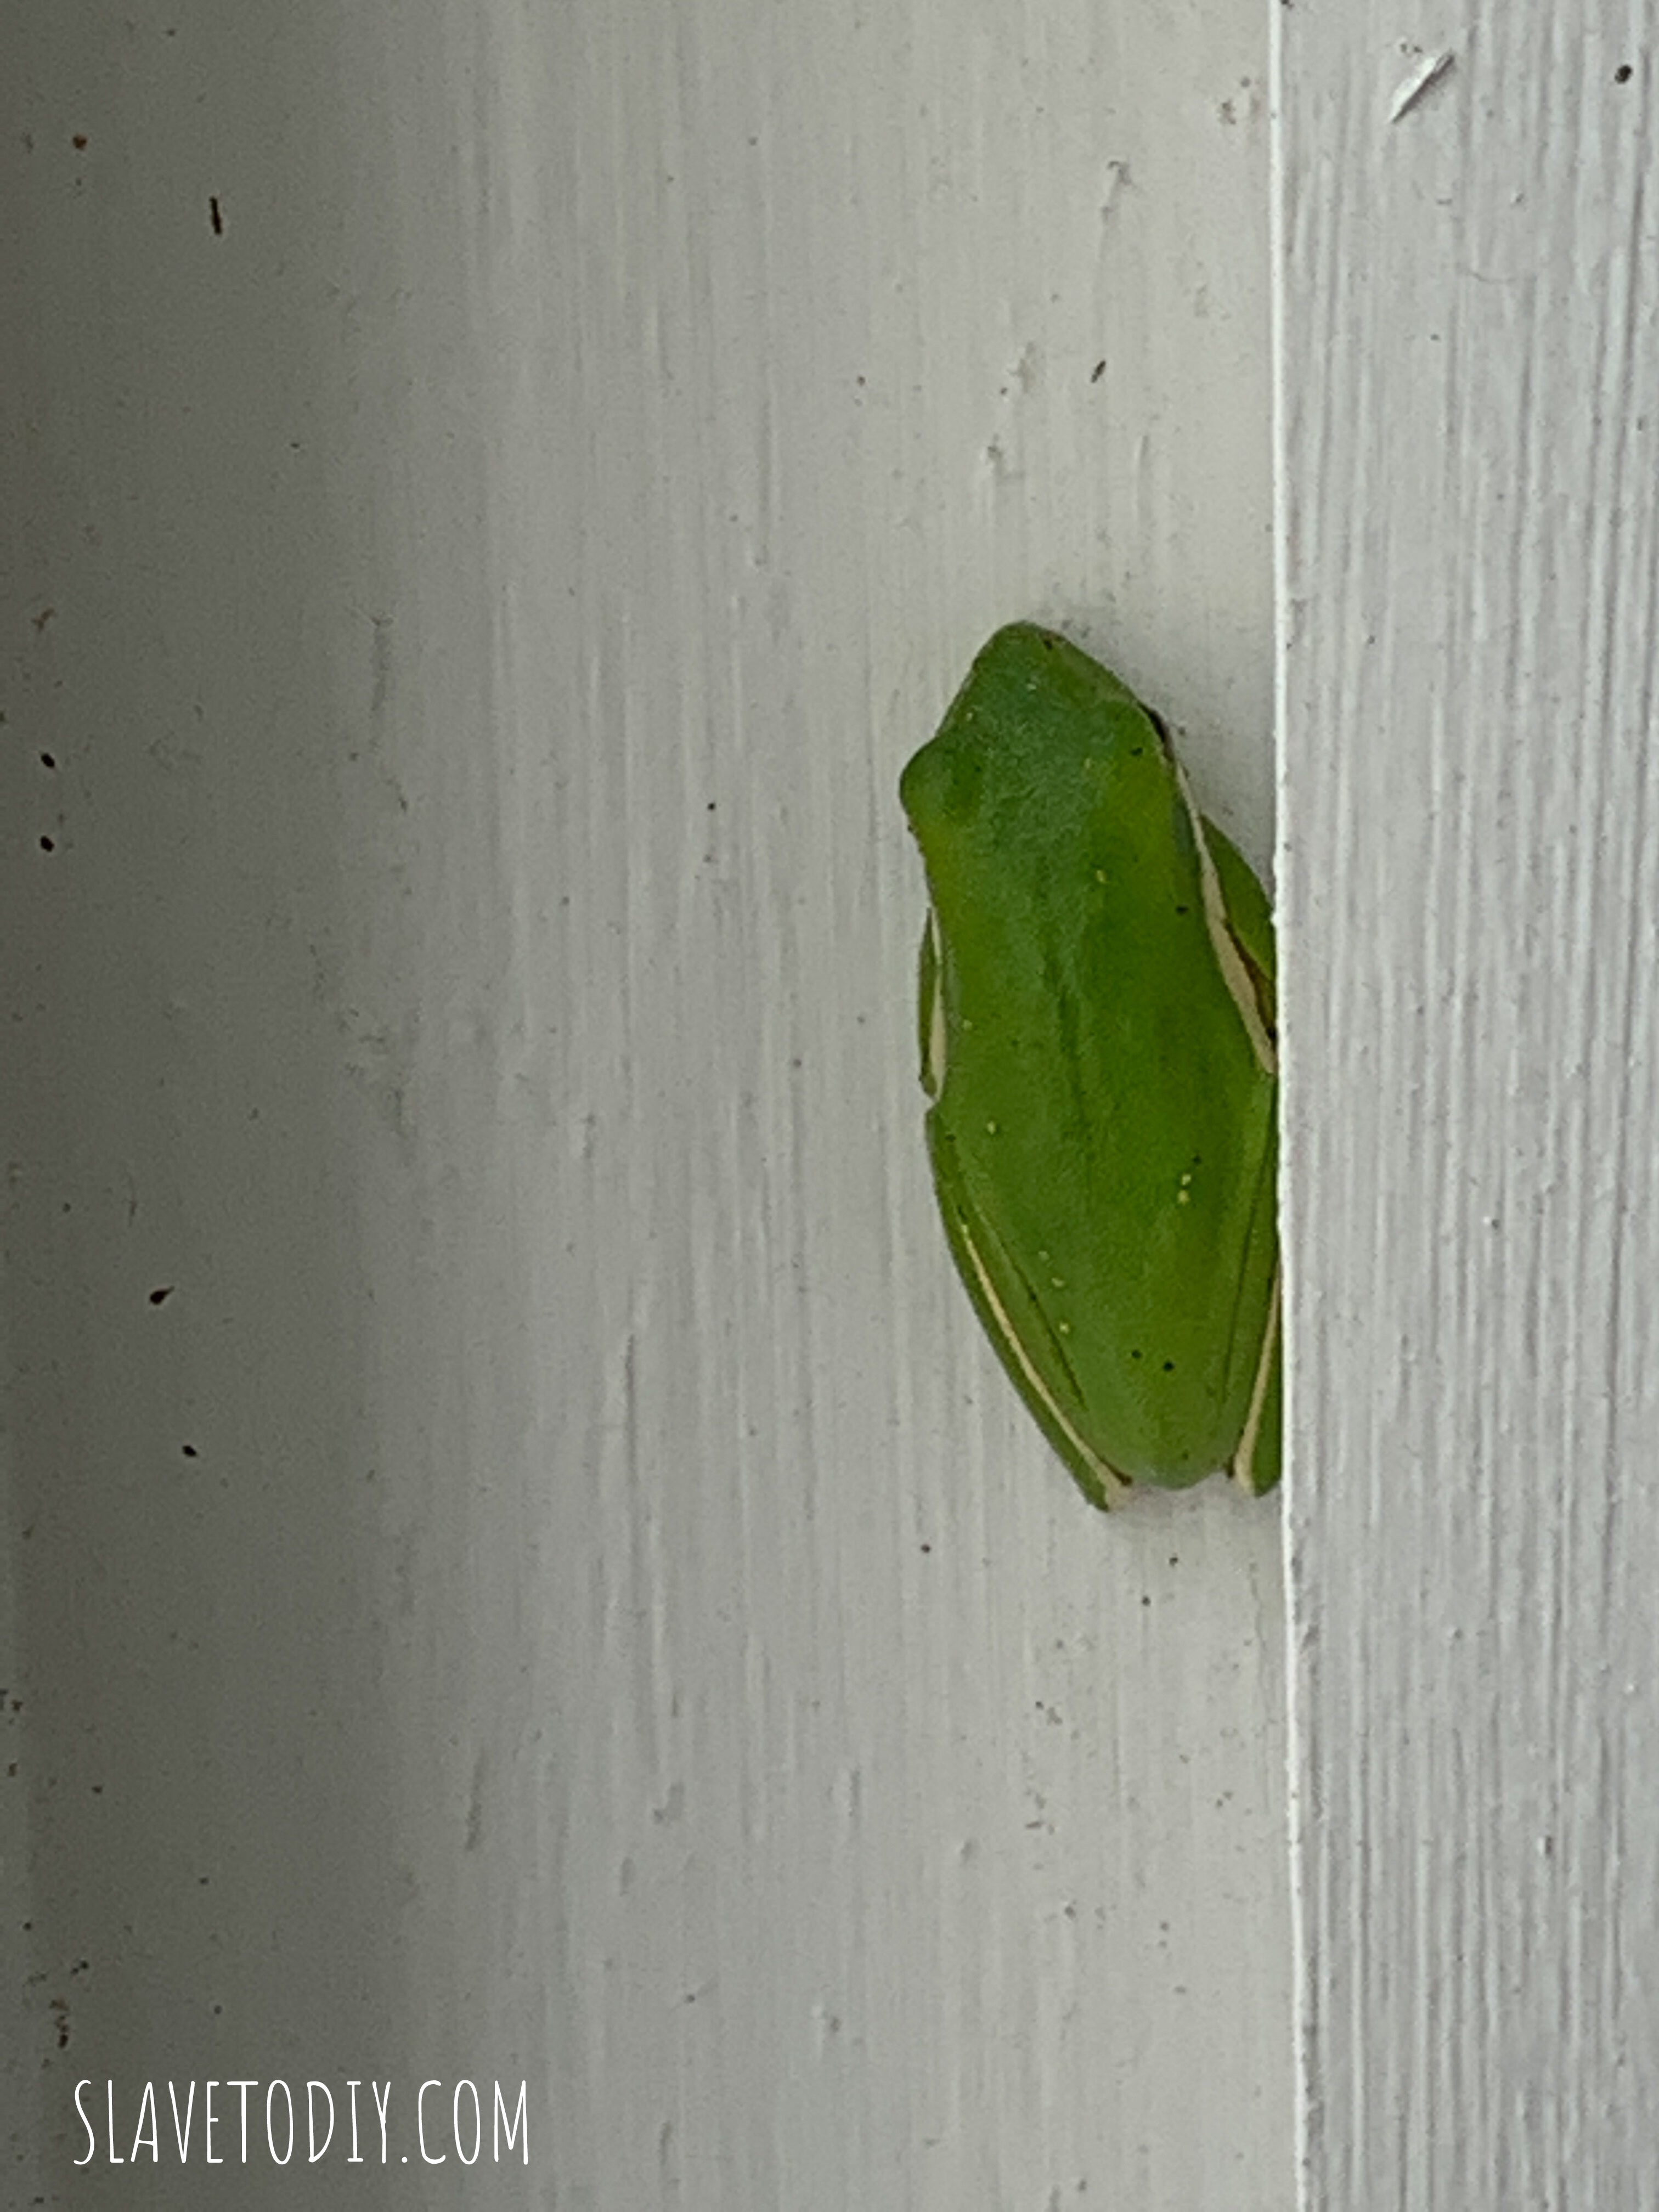
This little tree frog took up residence on one of the porch columns and kept us company almost the whole project.
Dry stacked stone garden from the driveway.
This is a shot of the garden from the driveway.
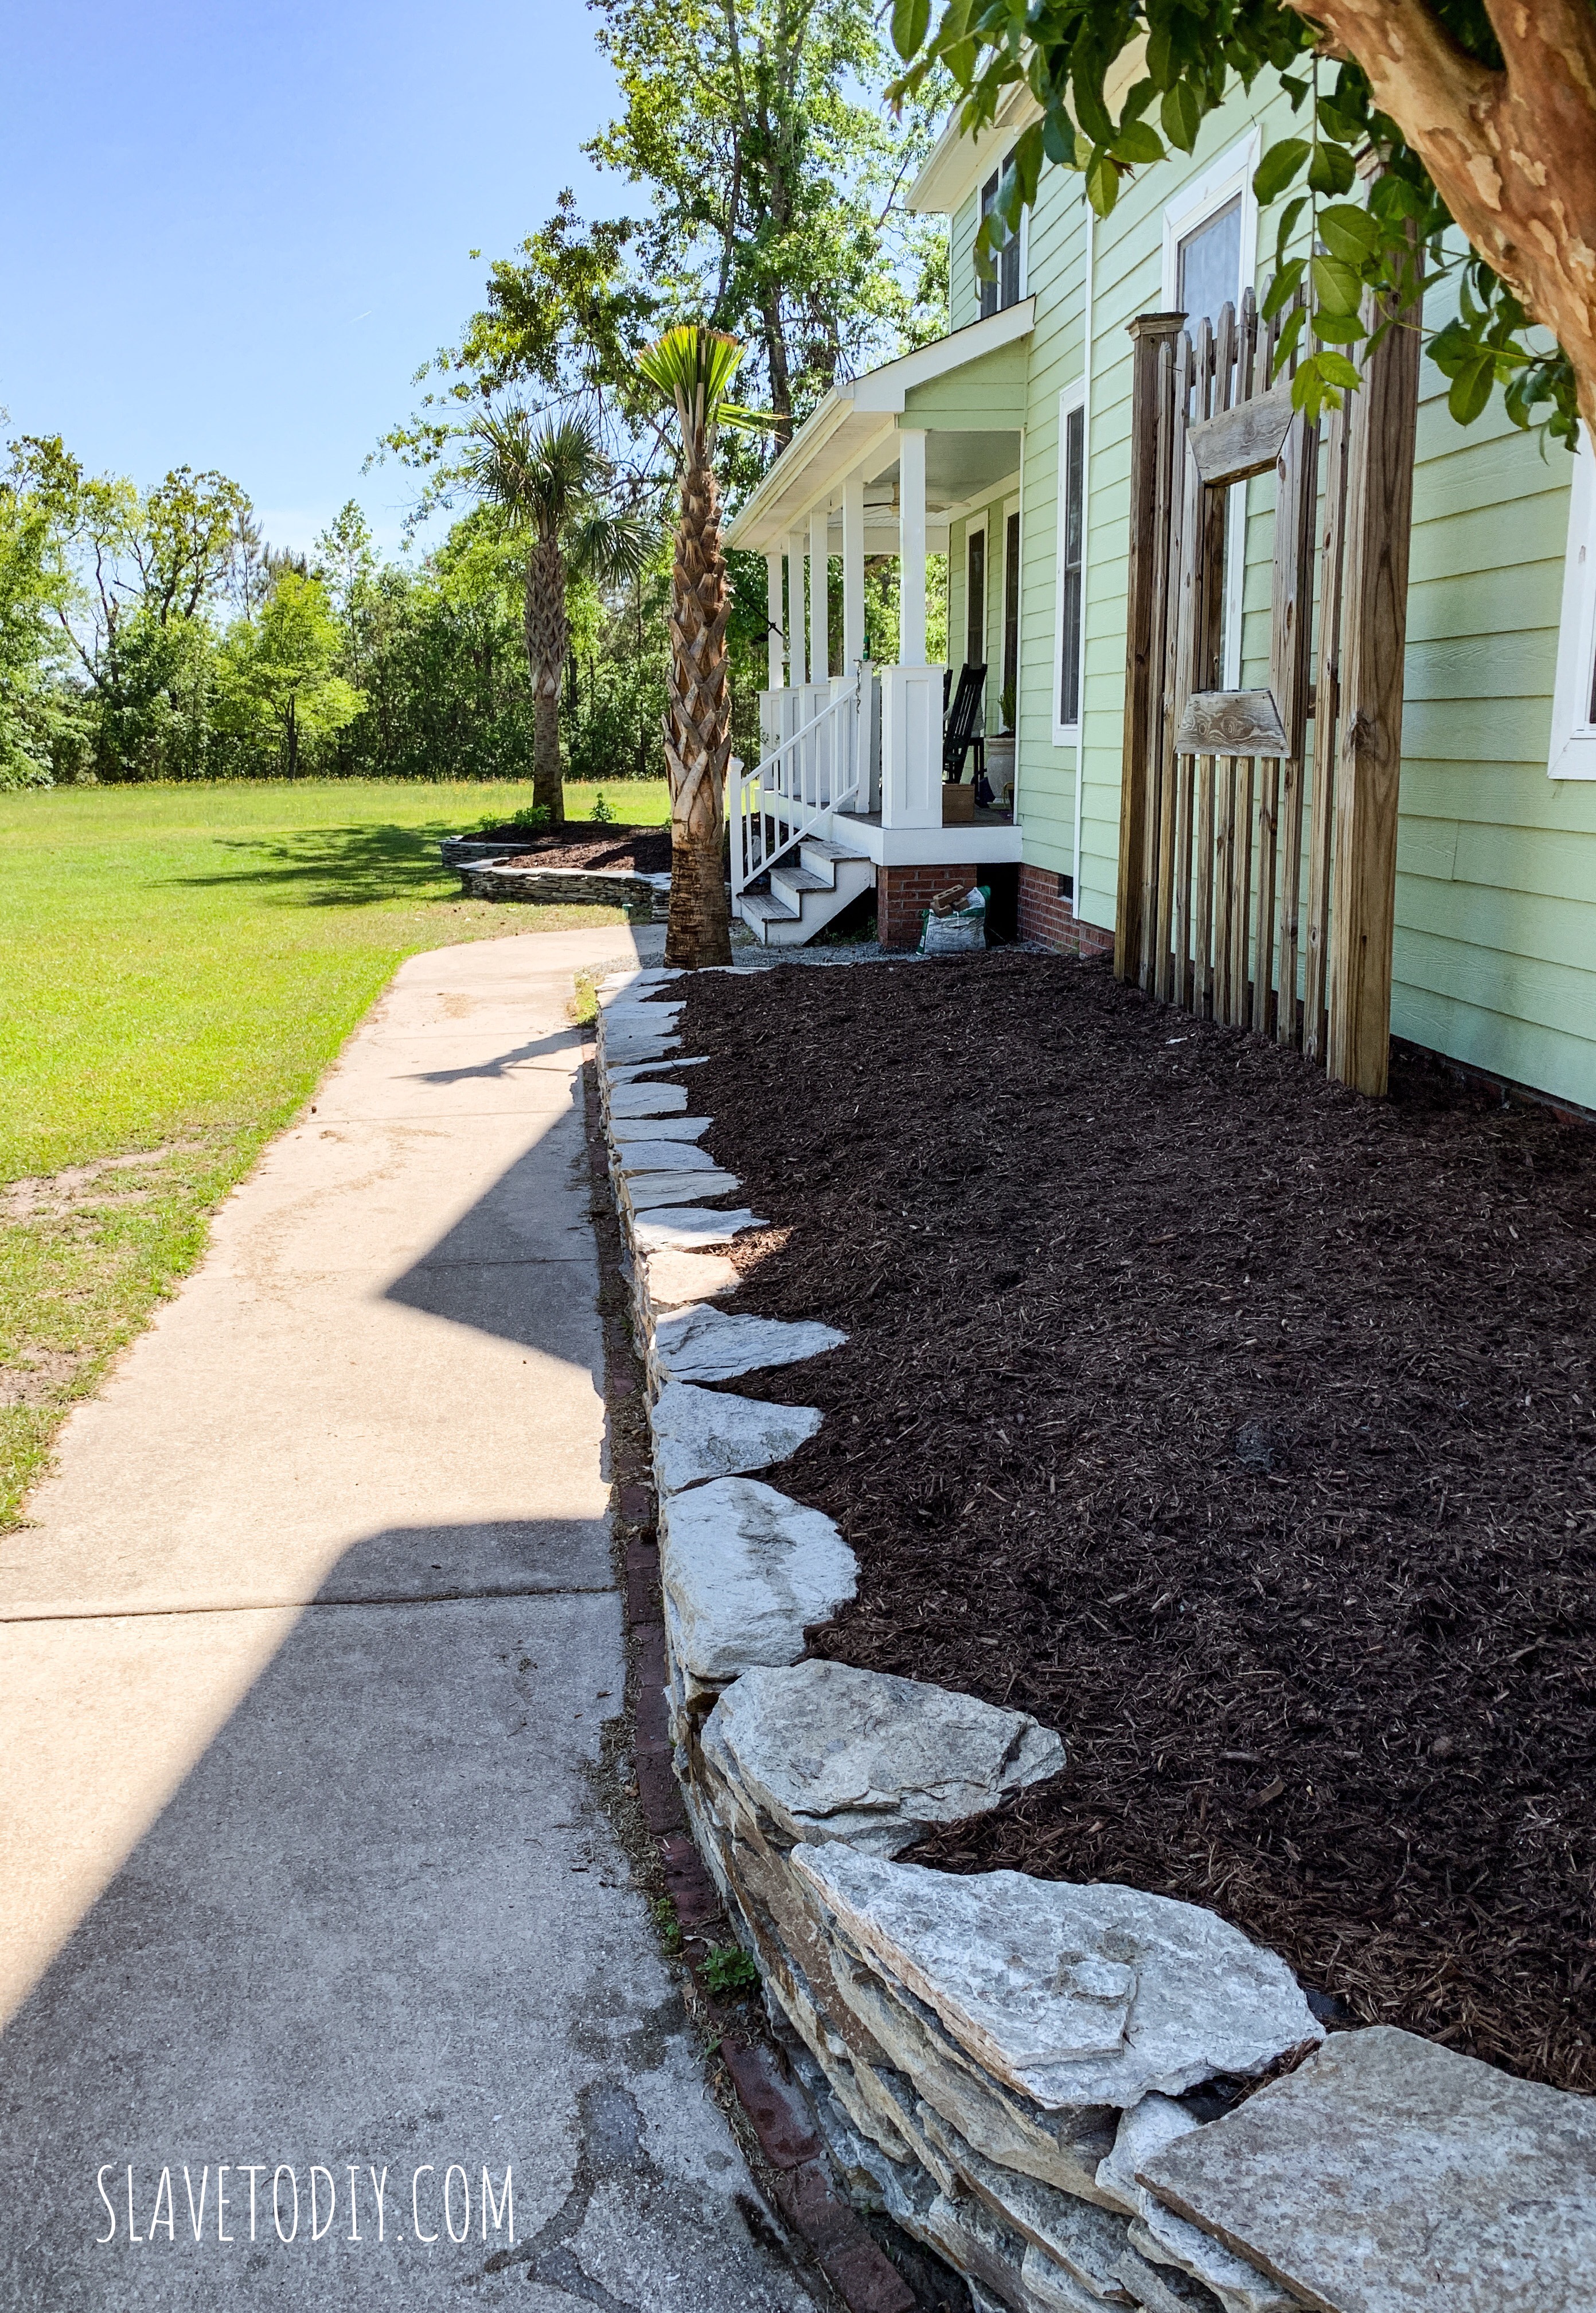
Both dry stacked field stone gardens together and finished!
For the tutorial on step-by-step stacked stone garden wall installation see our blog post here.
Landscaping Fabric Pins (leftover from another project)
Two Scoops Mulch: $74.72
Four Incrediball Hydrangea and a Rose Bush from Spring Hill Nurseries: $147.55
Seven Scoops Topsoil: $134.54
Total: $1074.17
Can you imagine how much it would’ve cost to hire someone to do this? I’m not saying it’s easy, but it IS a project you can do one afternoon at a time. And it’s VERY, VERY satisfying and rewarding to see what a beautiful thing you created.
Thanks for reading along and check out more of our projects on our blog. Cheers!
*Legal stuff:
I am honest about my experiences with different products and write because I enjoy it. I do however, have the opportunity to earn money for my writing, also.
Slavetodiy.com is a participant in the Amazon Services LLC Associates Program, an affiliate advertising program designed to provide a means for sites to earn advertising fees by advertising and linking to amazon.com. Amazon offers a small commission on products sold through their affiliate links. Each of your purchases via our Amazon affiliation links supports our cause at no additional cost to you.
If a blogger links to an Amazon product (with a special code for affiliates embedded in the link), and a reader places an item in their “shopping cart” through that link within 24 hours of clicking the link, the blogger gets a small percentage of the sale. Amazon links are not “pay per click.” If you click on the product link and stay around Amazon and purchase something else, however, I will get a commission on that sale.
Slavetodiy.com is also a VigLink affiliate advertiser which works similarly.
Two years ago, when we moved into our new place in Eastern North Carolina, we found one area of our yard that wasn’t hiding the neighbors quite well enough. Friends of ours are landscapers, so I asked them to come take a look and give us their honest opinion. The two most popular for our zone were the Arborvitae and Leyland Cyprus, so we had to choose between the two.
*This post may contain affiliate links. Please see full disclosure at the end of the post.
I’m sure you’ve seen the Thuja Green Giant (Arborvitae) or Emerald Green (Arborvitae) in the nursery magazines you receive in the mail, as well as the Leyland Cypress. They’re all listed as “fast growing” trees and they’re fantastic as mature privacy hedges. They’re both relatively disease and drought tolerant and grow well in a variety of soils.
There were several mature Leyland Cypresses already, and they’re wider than the mature arborvitae, but I didn’t love the way they grow if they have neighboring trees encroaching. There were Leyland Cypresses EVERYWHERE in our neighborhood (sometimes, you can just look around and figure the neighbors might know what they’re doing, or at least the local landscapers). The Arborvitaes seemed to be more of what I had in mind. Tall, slender, fast growing, and I liked the lighter green. But, the Cypresses seemed to be the PROVEN winner in the neighborhood.
So, which do you choose?
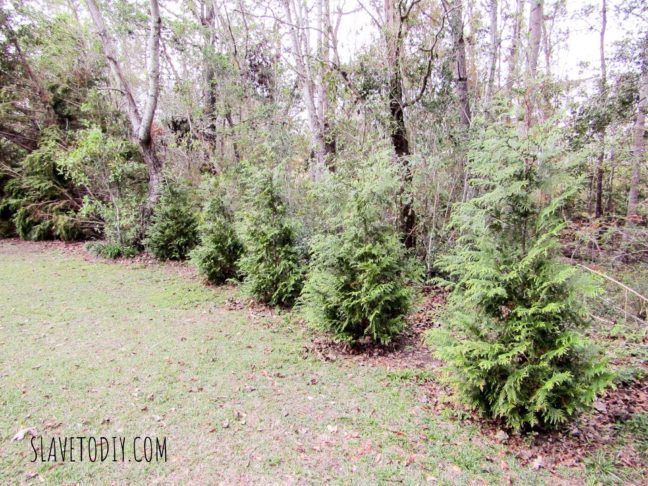
Arborvitae Hedge, Emerald Green
We chose the Arborvitae, and I’m about to show you why you should, too.
I have one word for you: HURRICANES.
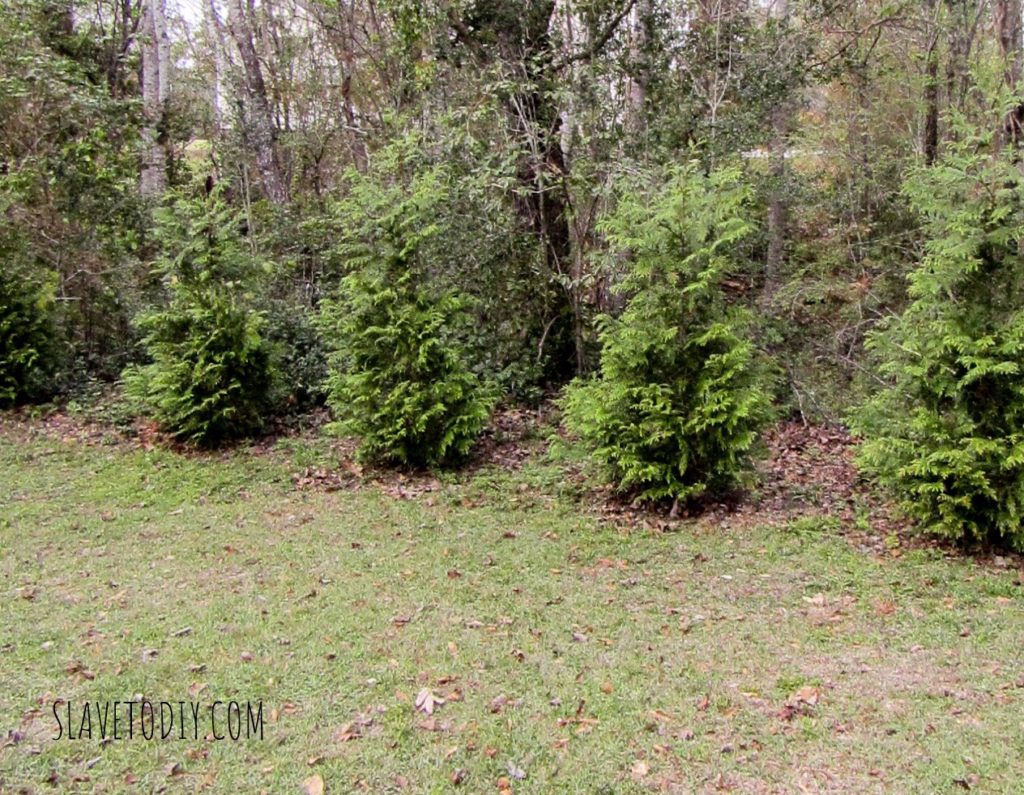
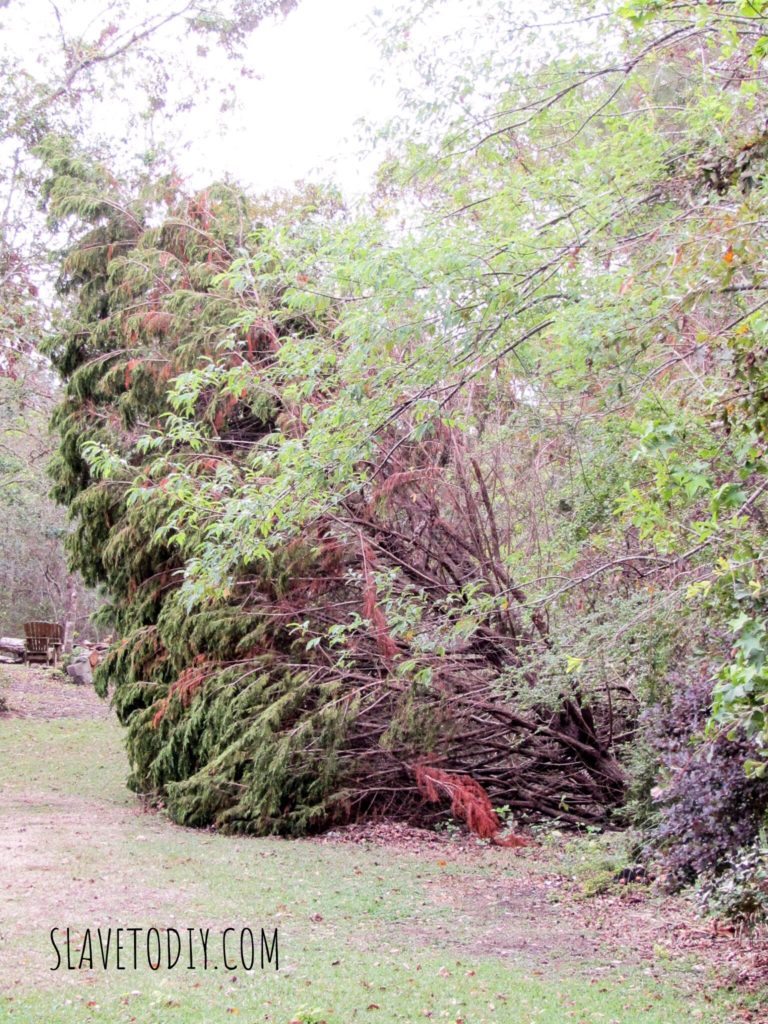
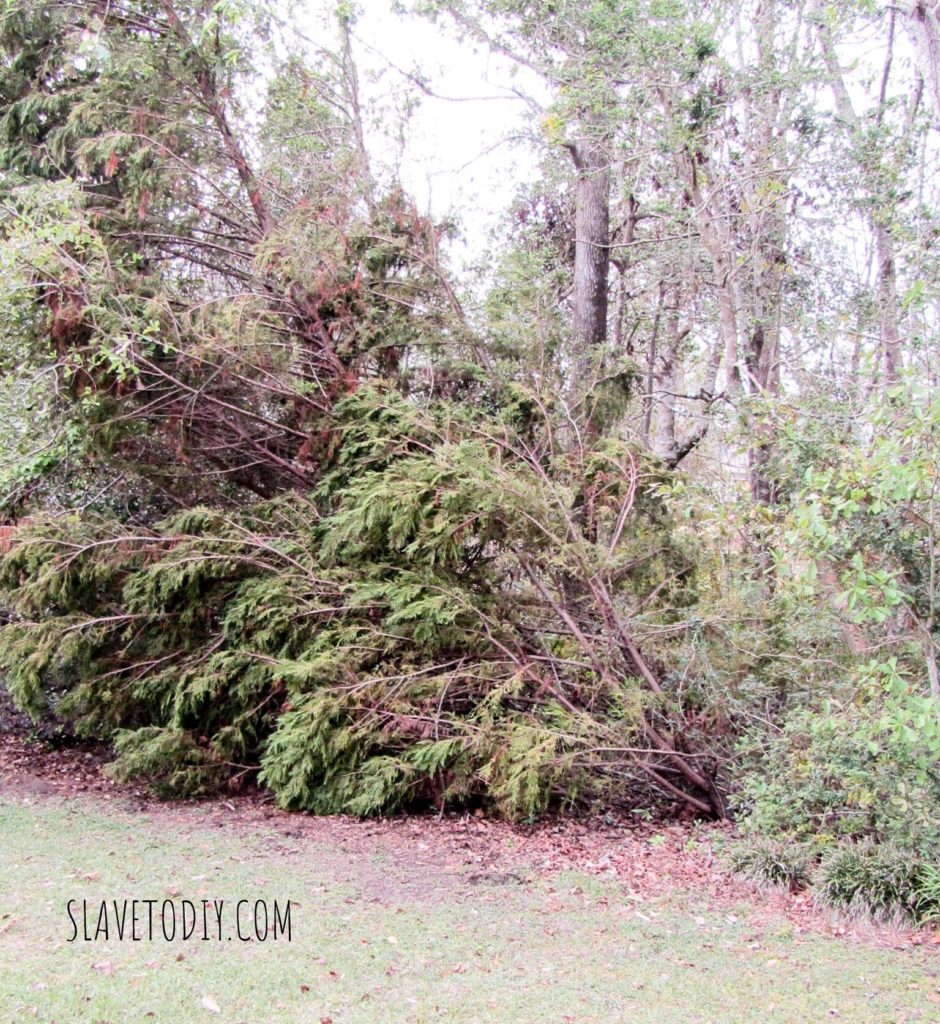
Not long ago, a strong Category One hurricane came through our area and wreaked havoc on everything including the trees. We went from being able to see one neighbor vaguely in the winter, to being able to see at least five. EVERY LELAND CYPRESS HEDGE in the neighborhood was destroyed by the hurricane. We took down the hedge between us and the neighbors (the trees were essentially laying on our driveway). This is what the trees look like that we haven’t taken down yet in the backyard:
Leyland Cyprus after the hurricane
Now, you might argue that the Leyland Cypresses were bigger and creating more drag (they are ABSOLUTELY wider and create more drag) but, neighbors with a mature Arborvitae hedge have the only hedge that survived the storm. I don’t know the mechanics, I just know that our young trees made it and so did the neighbors mature trees that were Arborvitaes.
Arborvitae Hedge
I know that I haven’t yet seen an undamaged Leyland Cypress in our entire area.
Damaged Leyland Cyprus after hurricane
Basically, if you live in a hurricane prone area, our experience has been that the Arborvitaes are more likely to survive than the Leyland Cypresses. We purchased some of them from the local landscaper and some from Brighter Blooms. The ones ordered in the mail always surprise me, because I’m initially disappointed, and then once they are planted they catch right back up.
Happy planting and thanks for joining us! Check out more of our adventures on our Blog!
*Legal stuff:
I am honest about my experiences with different products and write because I enjoy it. I do however, have the opportunity to earn money for my writing, also.
Slavetodiy.com is a participant in the Amazon Services LLC Associates Program, an affiliate advertising program designed to provide a means for sites to earn advertising fees by advertising and linking to amazon.com. Amazon offers a small commission on products sold through their affiliate links. Each of your purchases via our Amazon affiliation links supports our cause at no additional cost to you.
If a blogger links to an Amazon product (with a special code for affiliates embedded in the link), and a reader places an item in their “shopping cart” through that link within 24 hours of clicking the link, the blogger gets a small percentage of the sale. Amazon links are not “pay per click.” If you click on the product link and stay around Amazon and purchase something else, however, I will get a commission on that sale.
Slavetodiy.com is also a VigLink affiliate advertiser which works similarly.
So, here’s the deal. Sometimes it’s super expensive to create a breathtaking transformation to your house, and sometimes it’s FREE. Sometimes all you need is a little elbow grease (and maybe some basic supplies you already had on hand) to make a huge impact.
*This post may contain affiliate links. Please see the full disclosure at the bottom of the post.
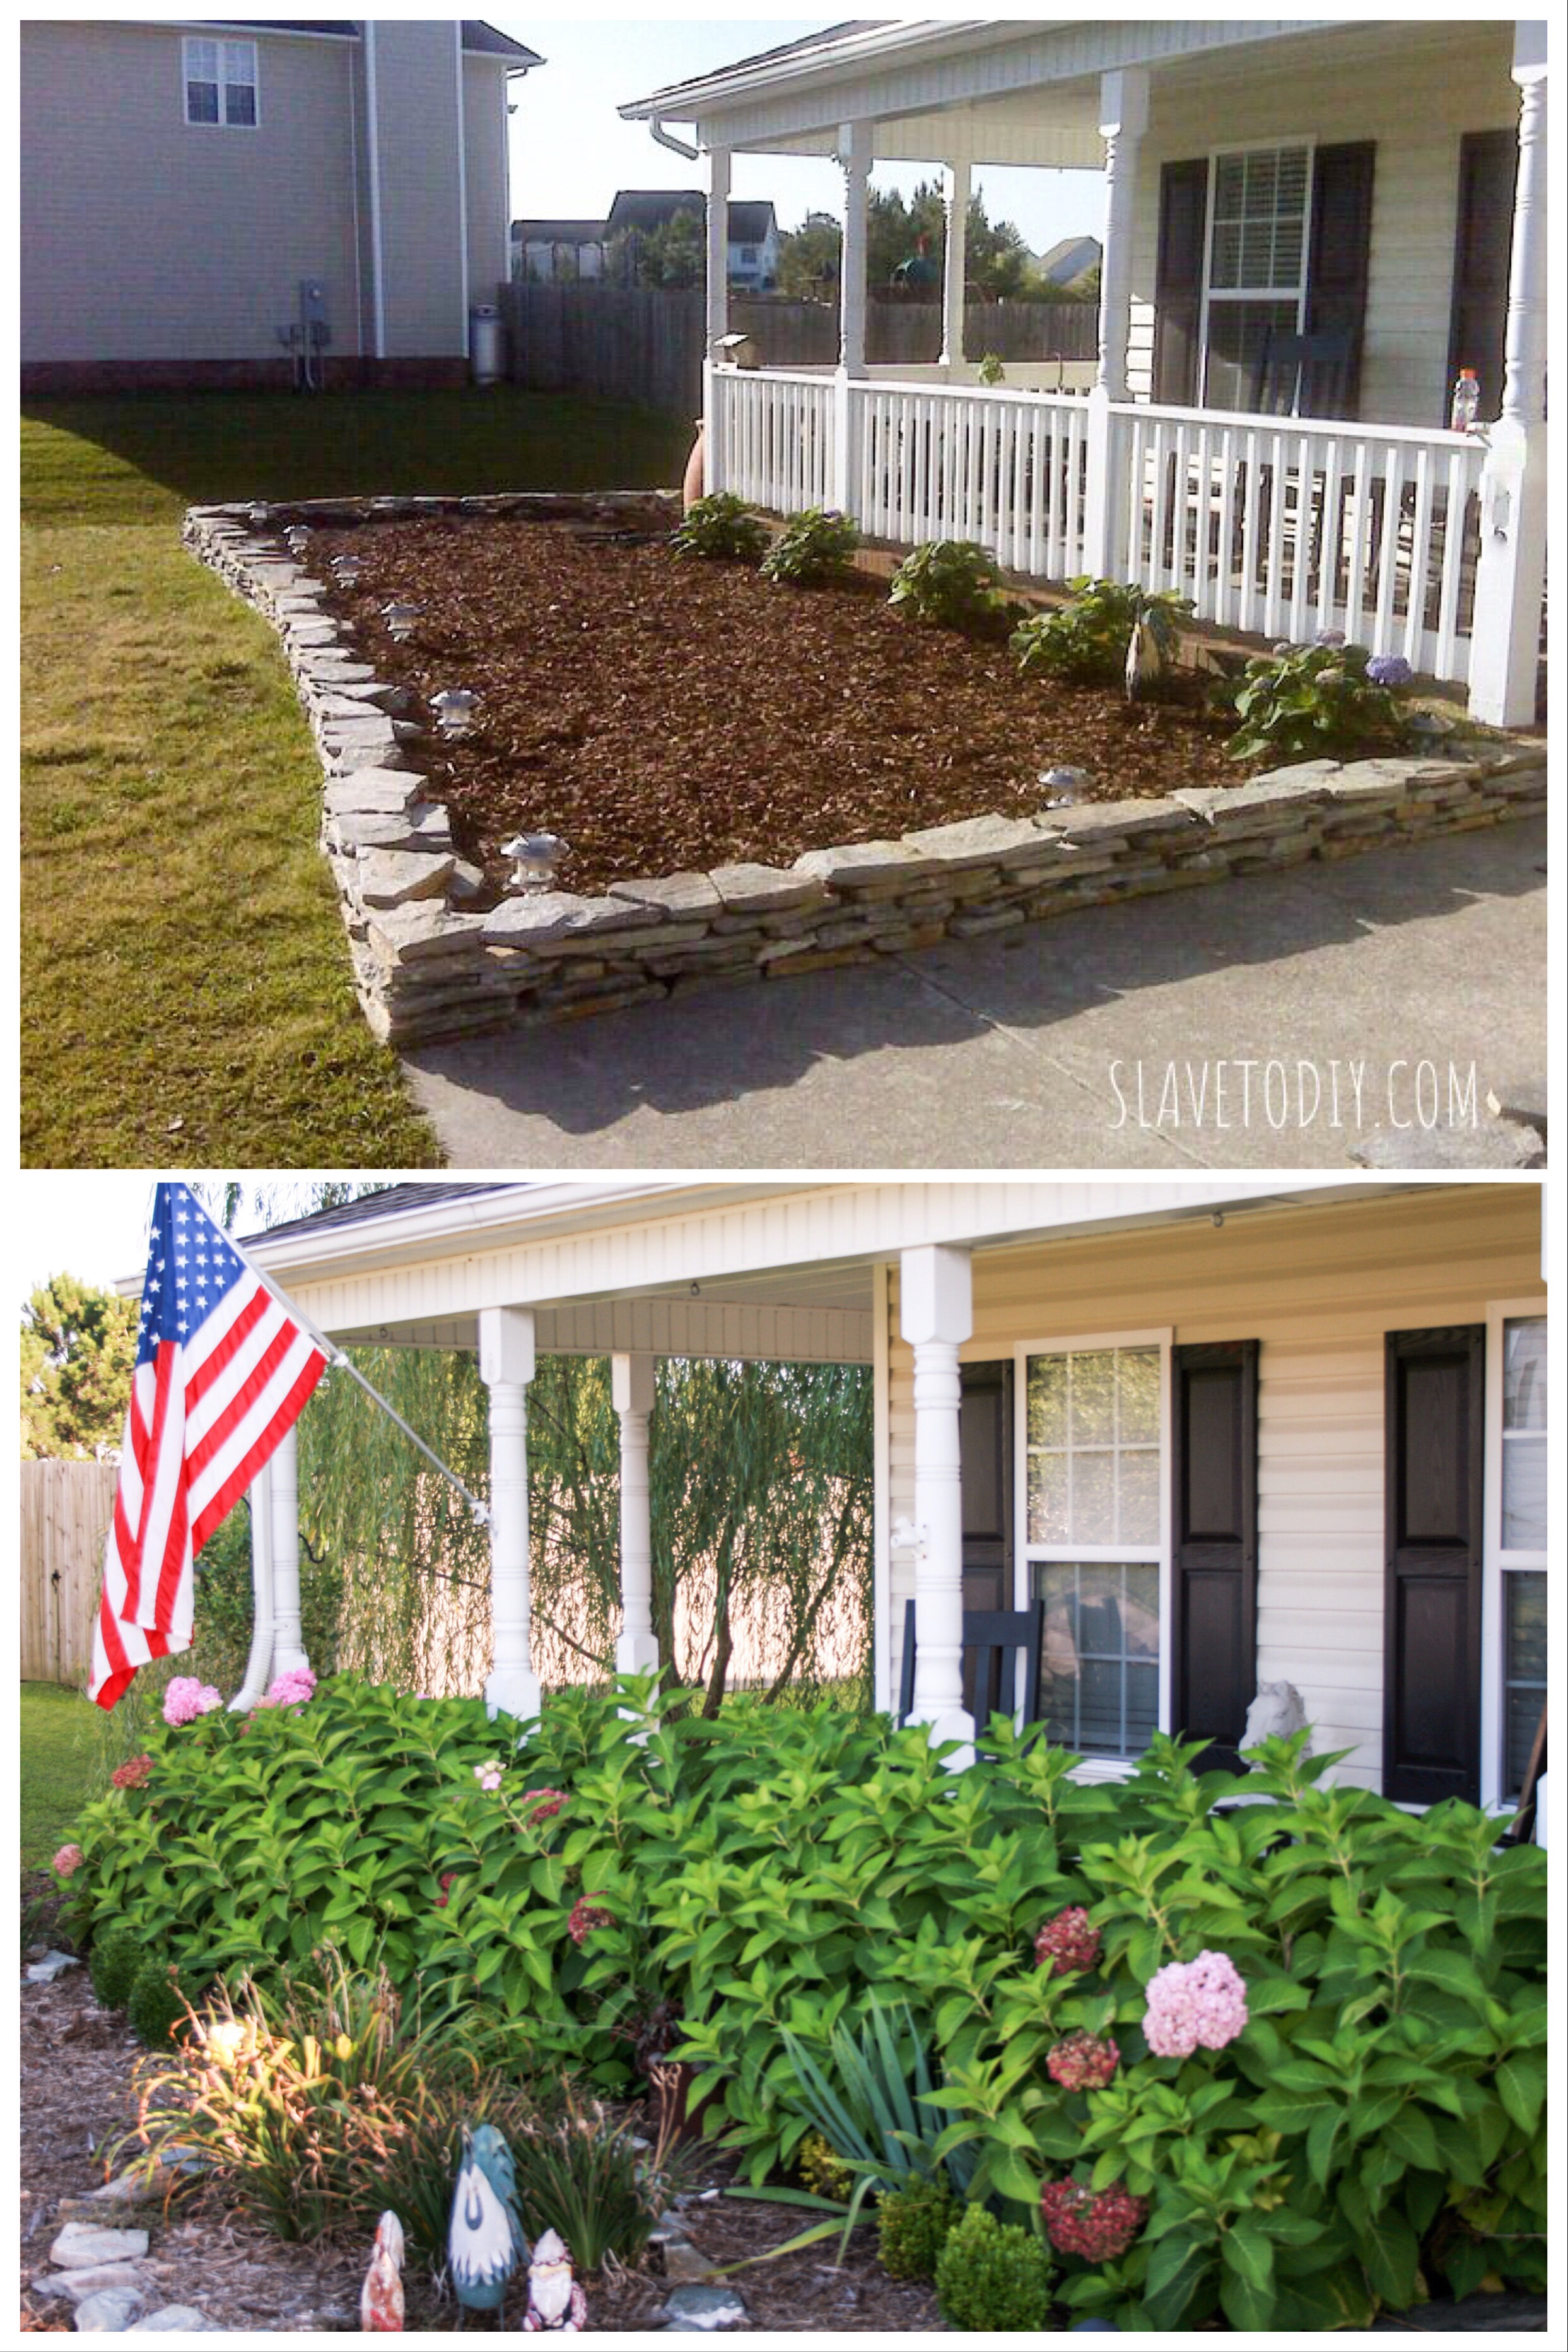
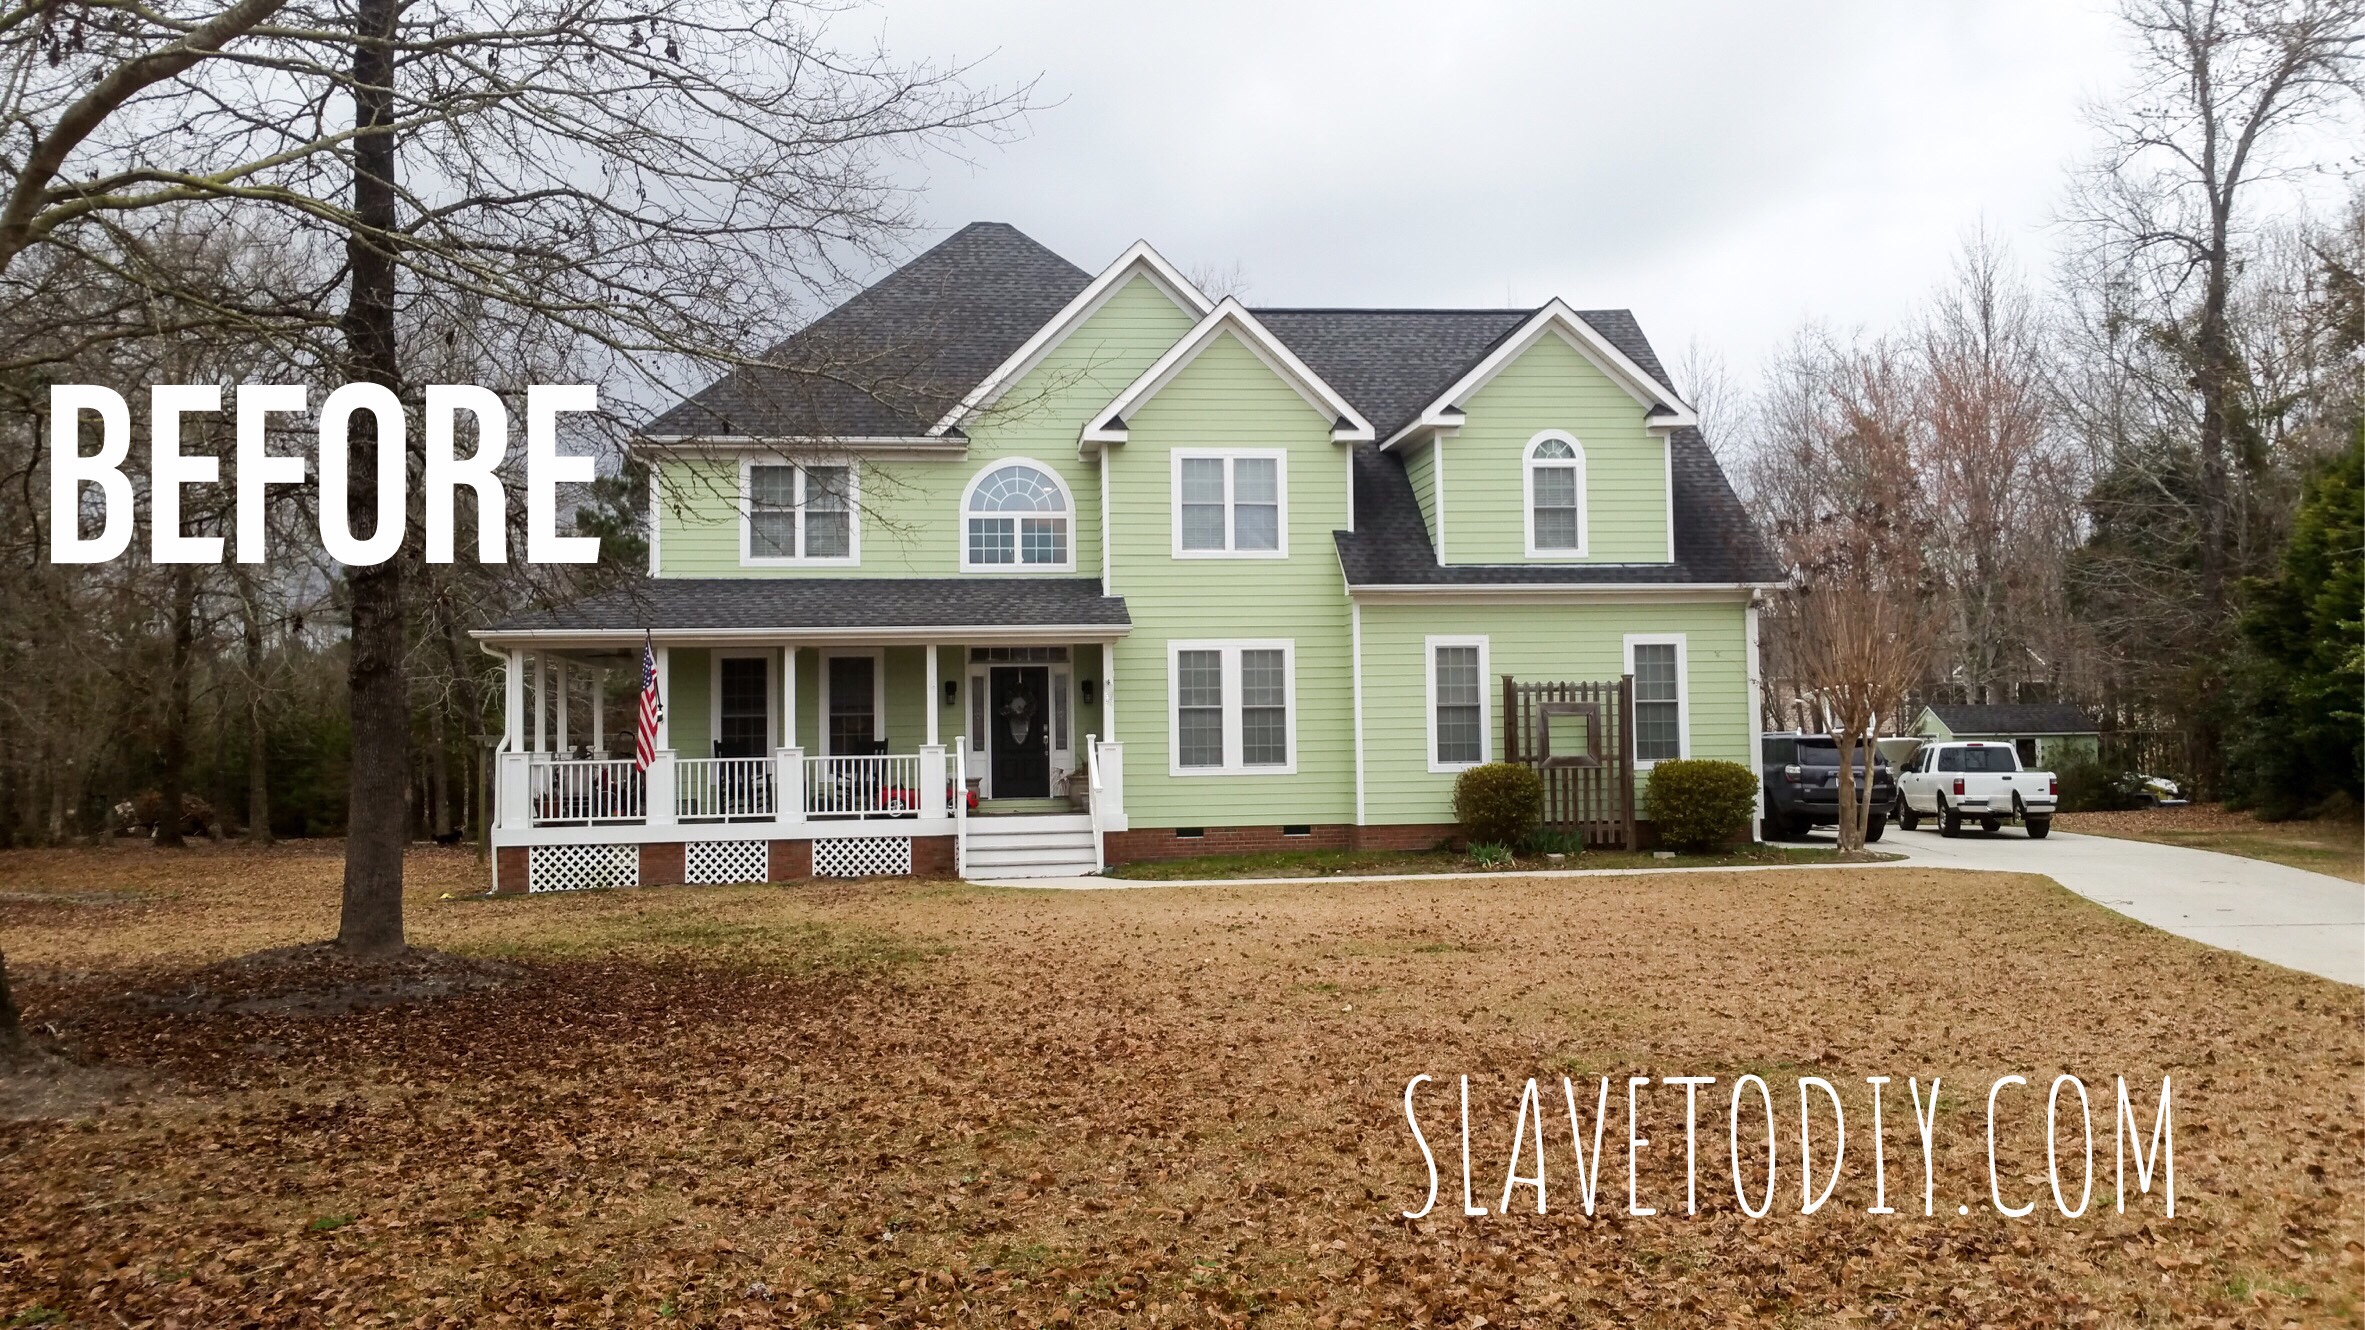
This is the second time I have taken down the railings at a home that we own. The first time the porch was basically at ground level and it was a no-brainer. The impact was immediate- INSTANT curb appeal. I loved it. See the complete “after” transformation on the old house we sold in 2016 here.
Okay, it’s a little hard to see the LACK of railing there because of the out of control hydrangea. Trust me. The railings were removed. Details on that crazy garden you can see here.
When we moved in to our current home it had those same railings, but they were serving an entirely different purpose- safety. The porch is a few feet off the ground. In the middle of our epic and back-breaking front garden project (which you can check out here) I decided to rip them out. I knew that the dirt would end about a foot below the front porch/deck so it would be safe to take them down. I feel the need to say, “I’m not telling you to take your front railings down. I haven’t seen your house. It could pose a safety hazard.” Please consider safety: toddlers, old people, clumsy people, etc. as you make the decision to keep your railings or not. We may eventually put in black, wrought iron railings, but for now I like it just like it is.
Here’s a picture before my project A.D.D. took hold:
So, I seriously stopped mid project, stole one of Rainman’s hammers, and started swinging away. As I suspected, the sellers had covered up rot with white paint (pretty typical) and the railings came down in about 30 minutes. Of course, this made me realize the bicycles and miscellaneous crap all over the front porch would need to find a new home (not exactly HGTV ready).
Tip: Painting and caulking front porch columns and railings is an ANNUAL MAINTENANCE ITEM. It should be on your list. Otherwise they rot. Case in point.
And here’s the front porch immediately after taking the railings down: Sigh. I’m in love.
Above you can see the pile of railings (dry/rotted wood is excellent for starting bonfires) to the left there and the bare wood on the columns where the railings used to be.
While I was having A.D.D. and happened to have a nephew visiting (can I get an AMEN for cheap, available labor???) I decided to get some painting and staining done.
I had him sand the front deck and get any loose deck screws back in. If you don’t have a good sander, I have several of these. I have one I keep for just drywall finishing, then others for miscellaneous sanding projects. They’re cheap enough it doesn’t break my heart to burn them up or buy a new one, but they’re surprisingly hardy.
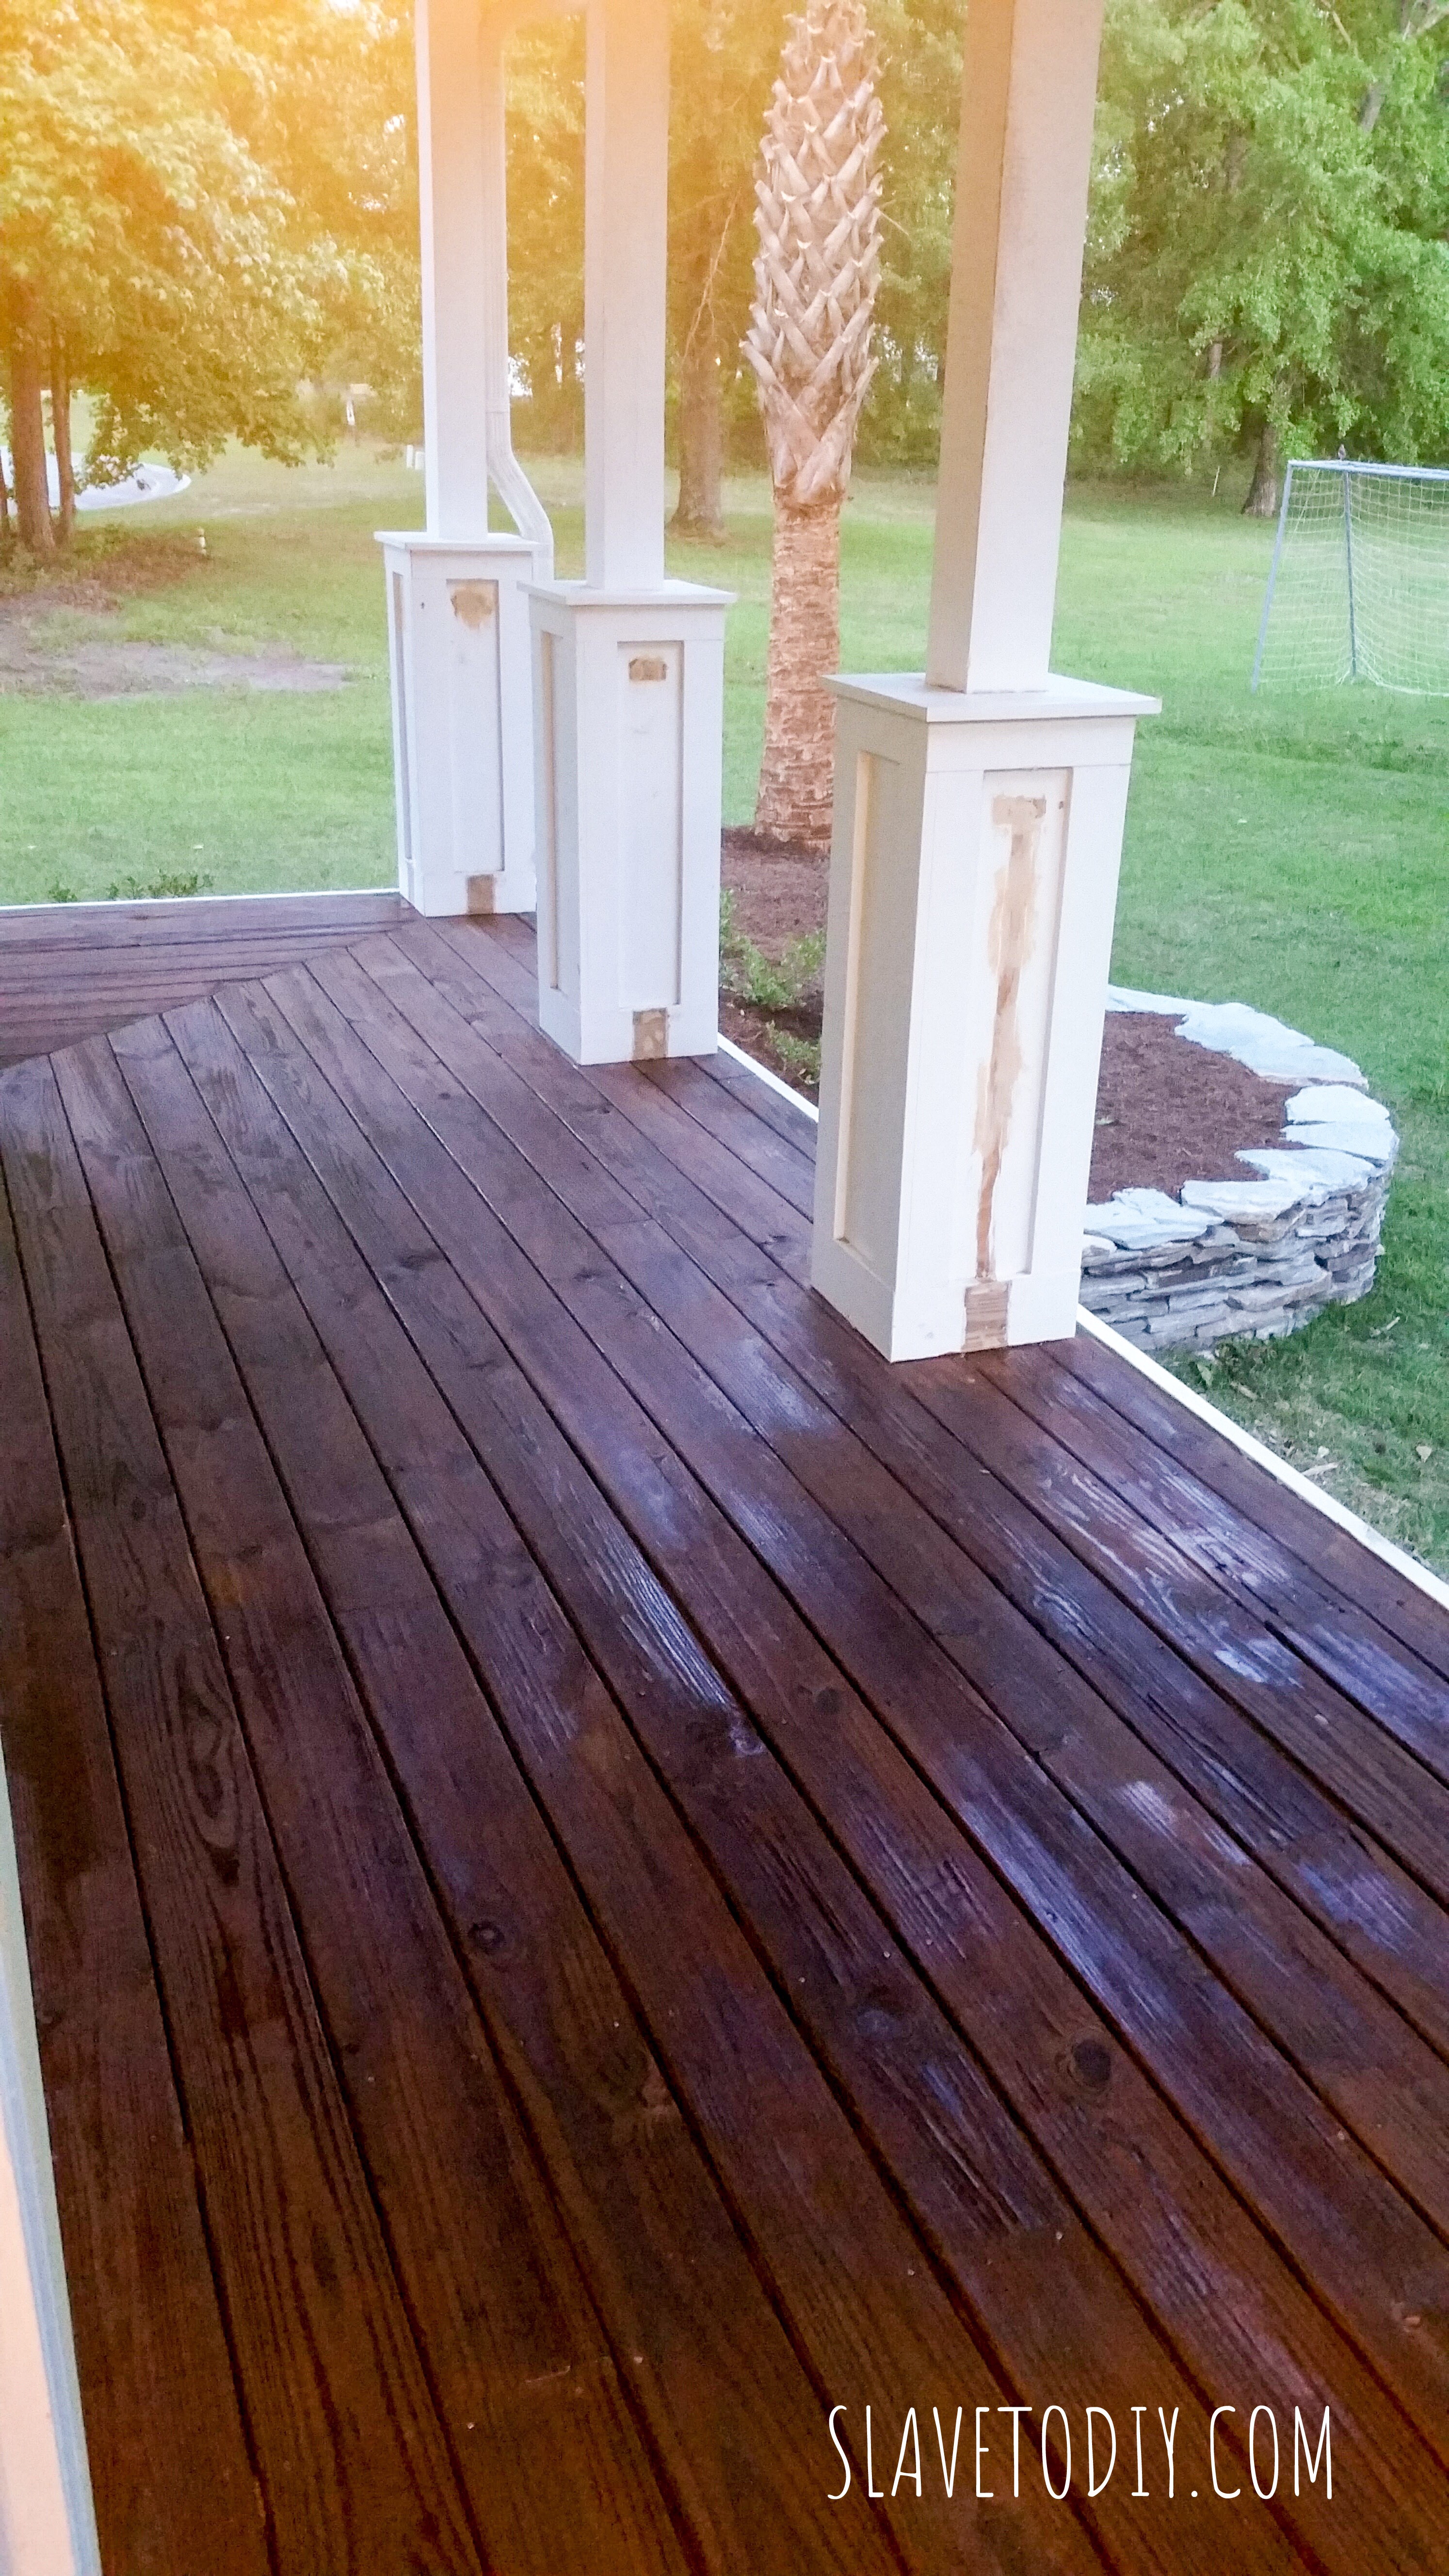
I also had him sand around where the railings had been on the posts so we could get a fresh FLAT coat of white and the seam would be invisible.
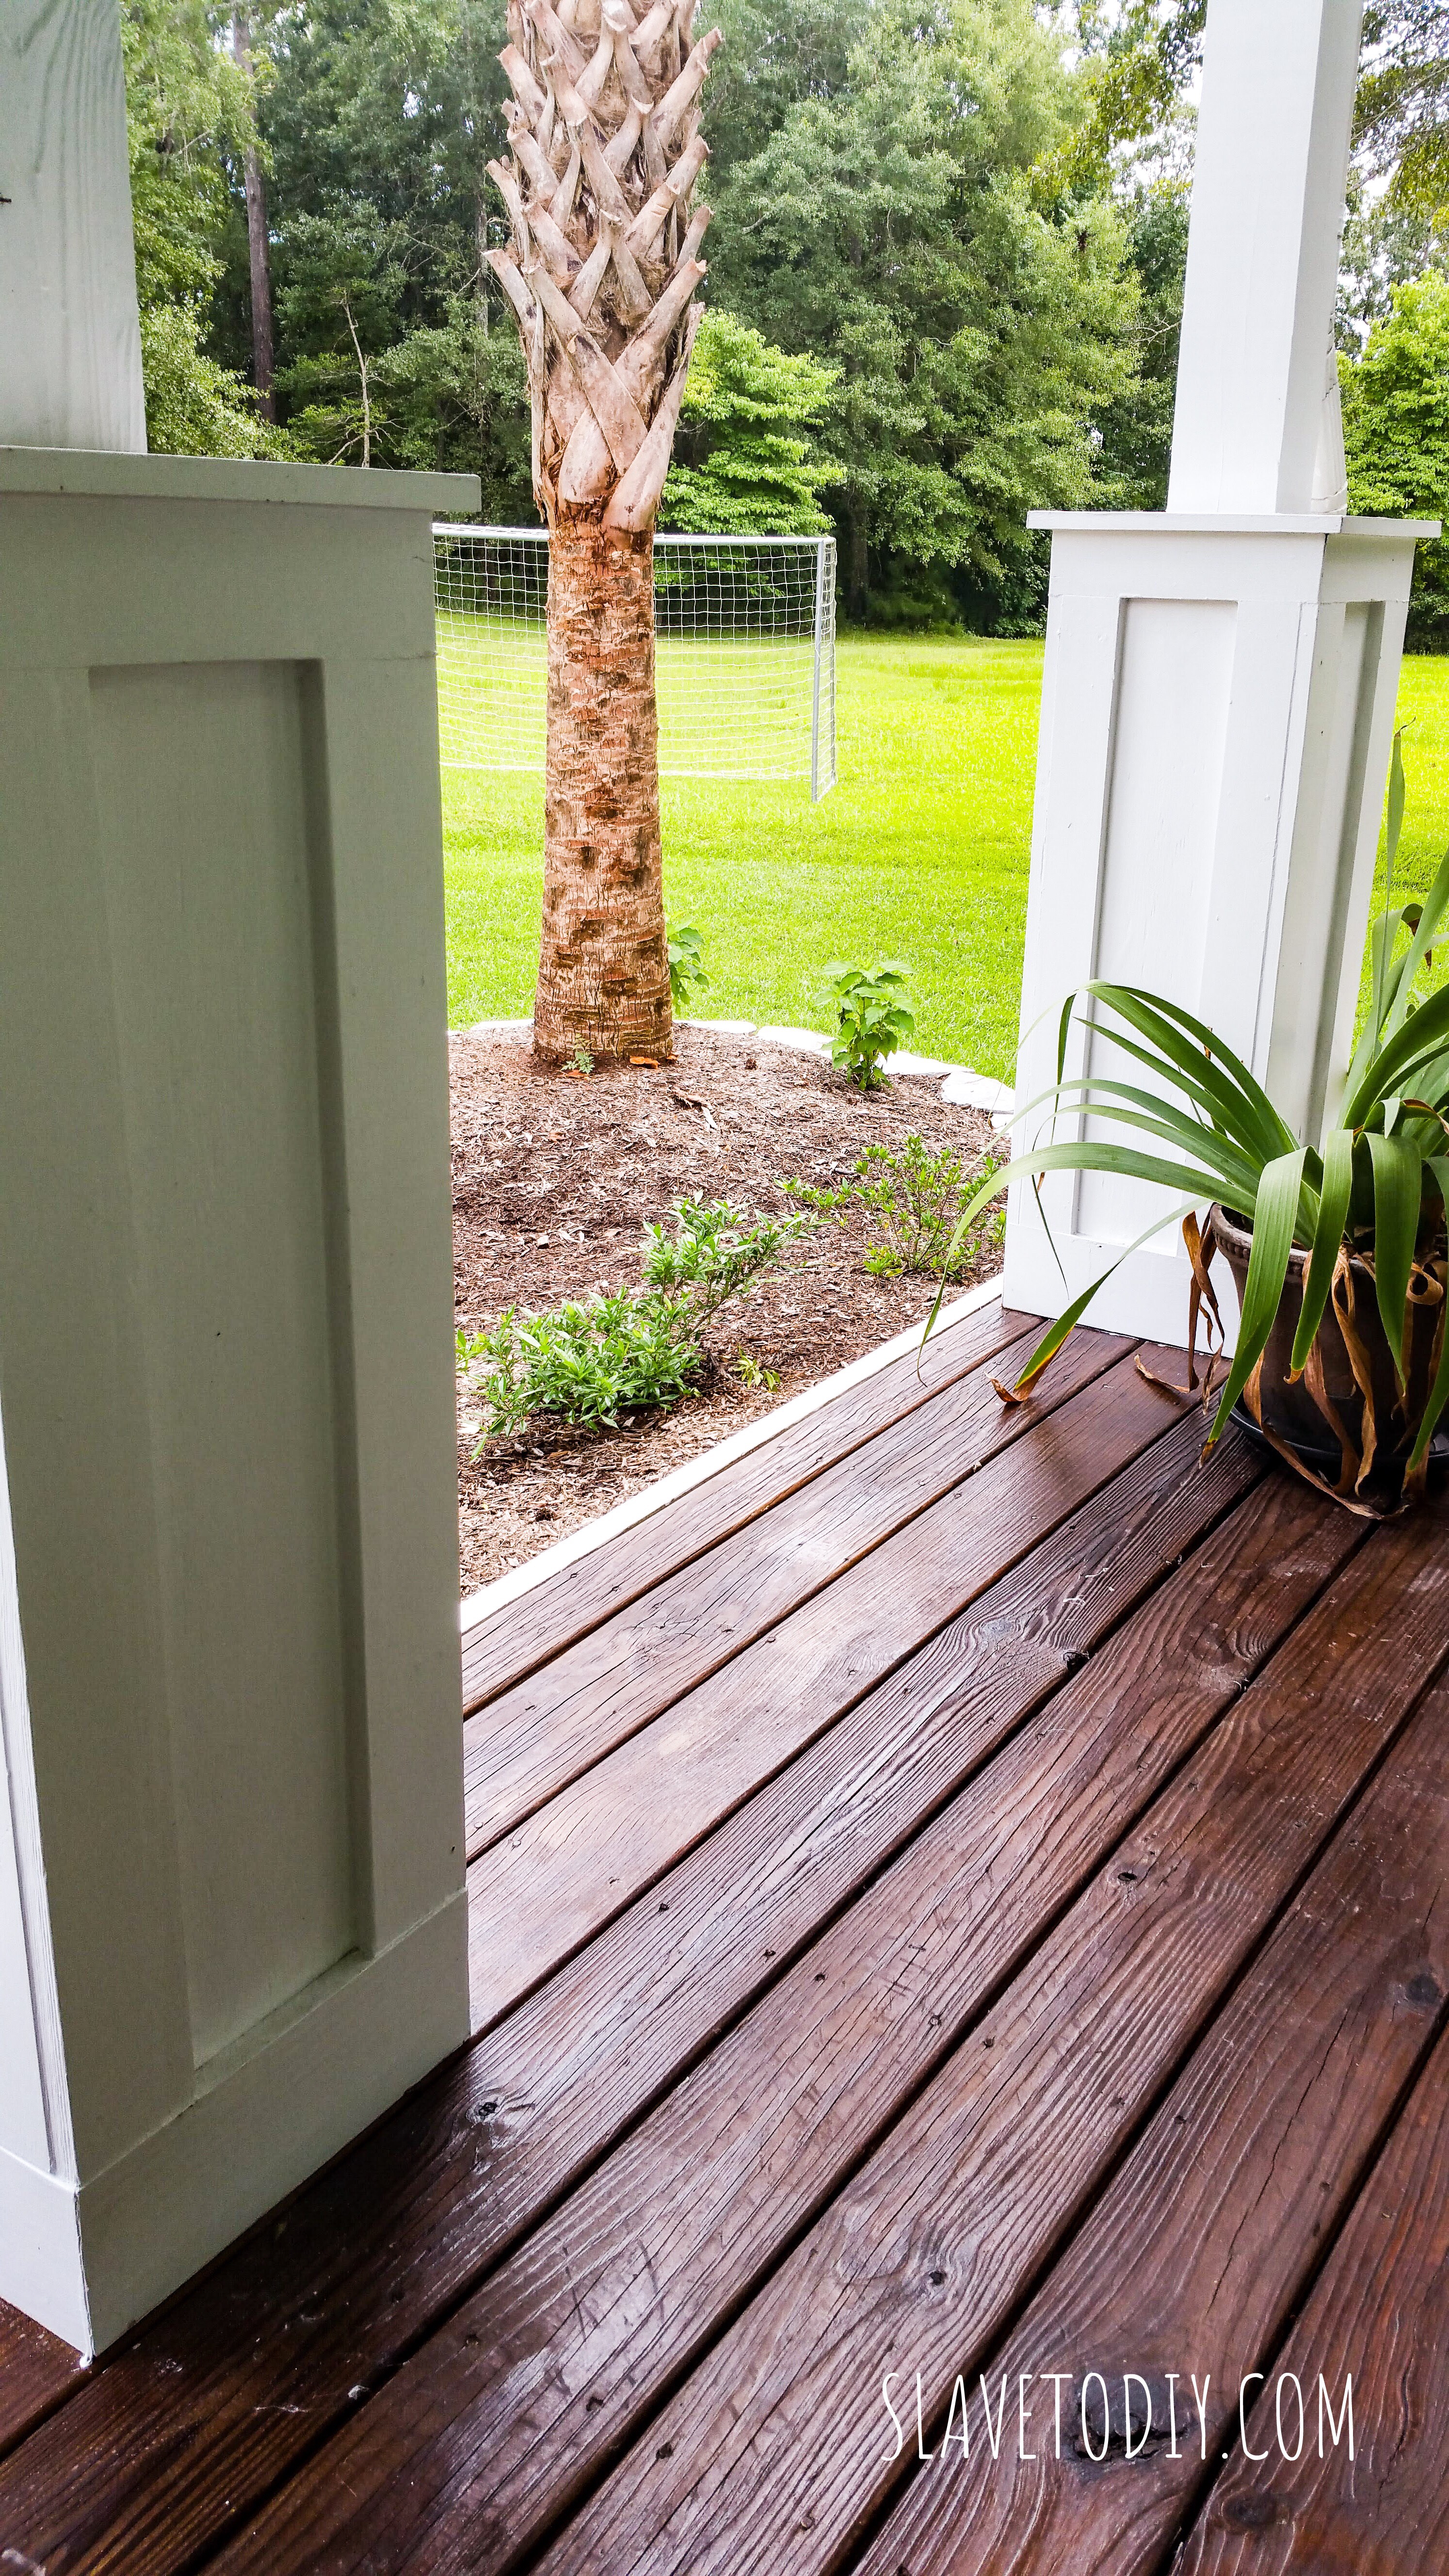
I splurged on some good deck stain and sealant and we did two coats. For stain, I recommend throw away brushes, which you can get pretty cheap at Lowe’s. True story: in seventh grade my son did a science project on which of three deck stains offered the best moisture protection (based upon water absorption and weight). I used that brand. I love the color and it’s amazing the difference it makes. It ended up being a smaller splurge than I expected because that huge front deck took less than a gallon for two coats.
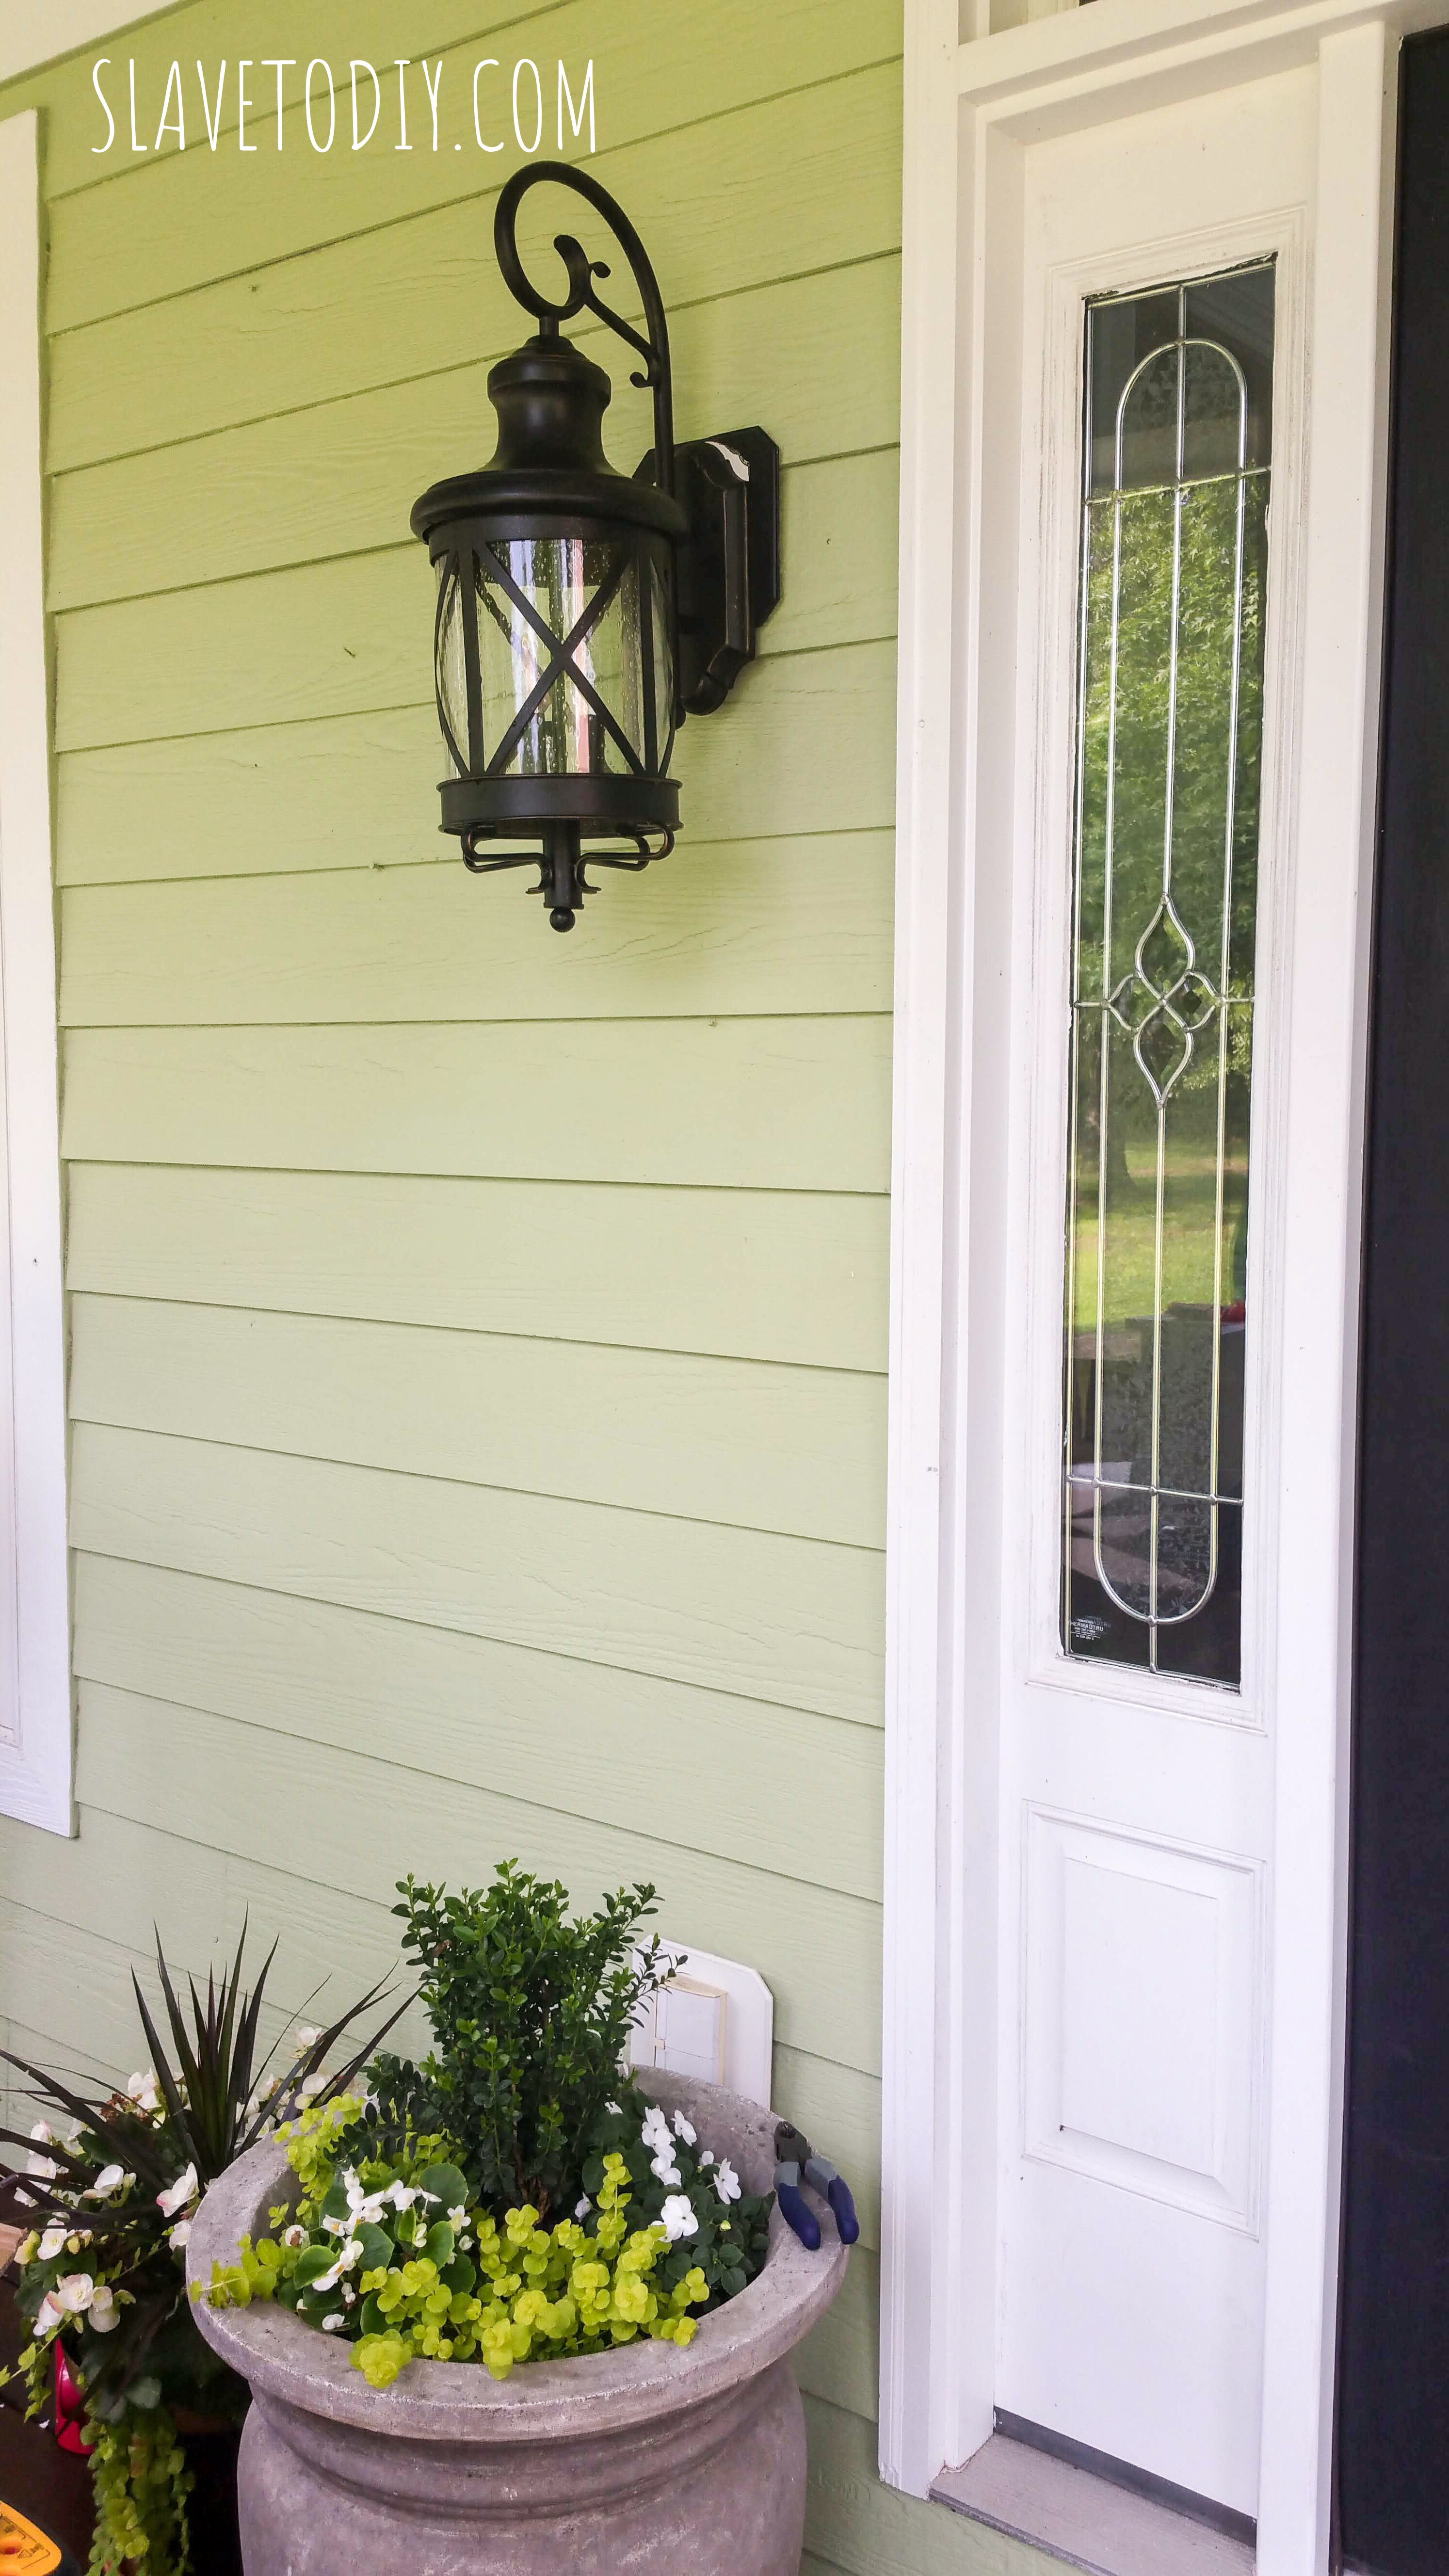
So here we were, working along and I noticed those damn builder grade lights. Project A.D.D. strikes again. Yeah, those definitely had to go. I hadn’t even noticed them delaminating until I fixed all the other stuff.
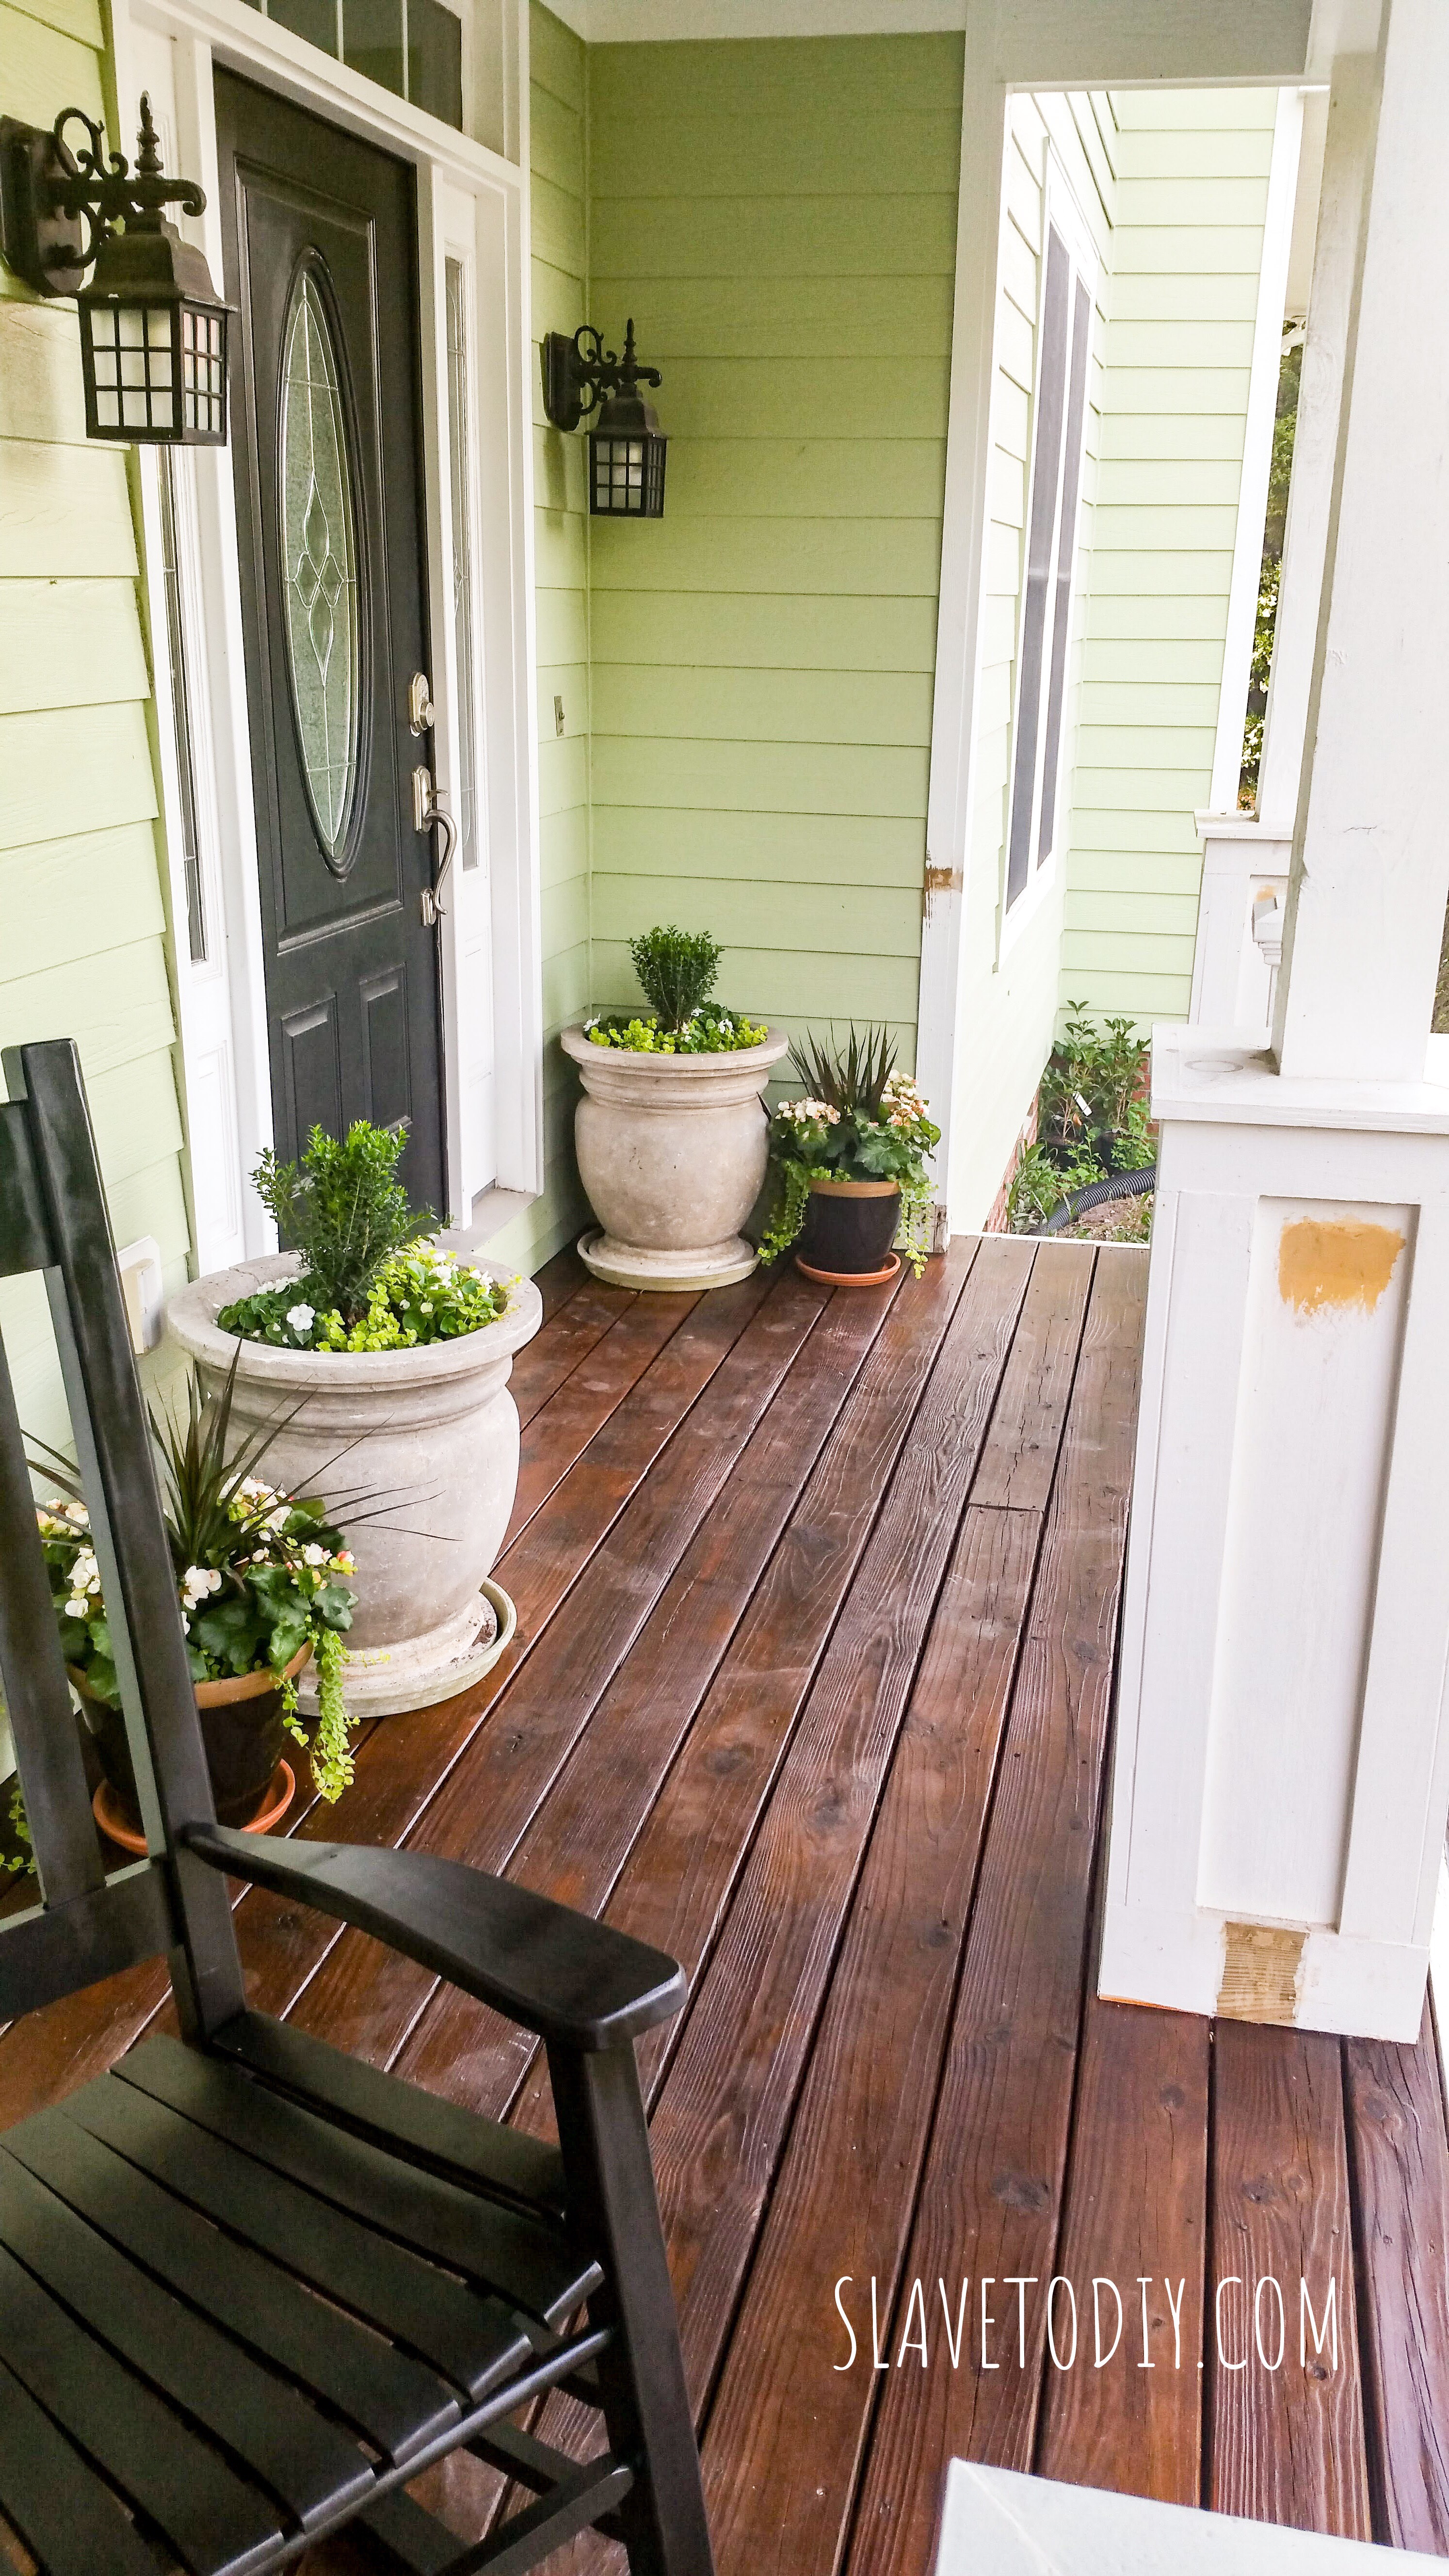
So, we took the opportunity to change out the porch lights and found a great deal on really nice looking lights.
While we were out there I handed Rainman black spray paint to put a fresh coat on our 10 year old rocking chairs and little black table. He hit the rough spots with sand paper, cleaned and dried them, tightened the hardware, then spray painted. TADA! Good as new.
We will be doing another update soon (cough* cough*) on working shutters for the windows. We are currently doing price comparisons on shutters and hardware. After the hurricane we realized we can’t spend two days putting up plywood every time we evacuate. Also coming soon, the tutorial on how to put up plywood over your windows before you evacuate for a hurricane.
Anyway, drum roll please…
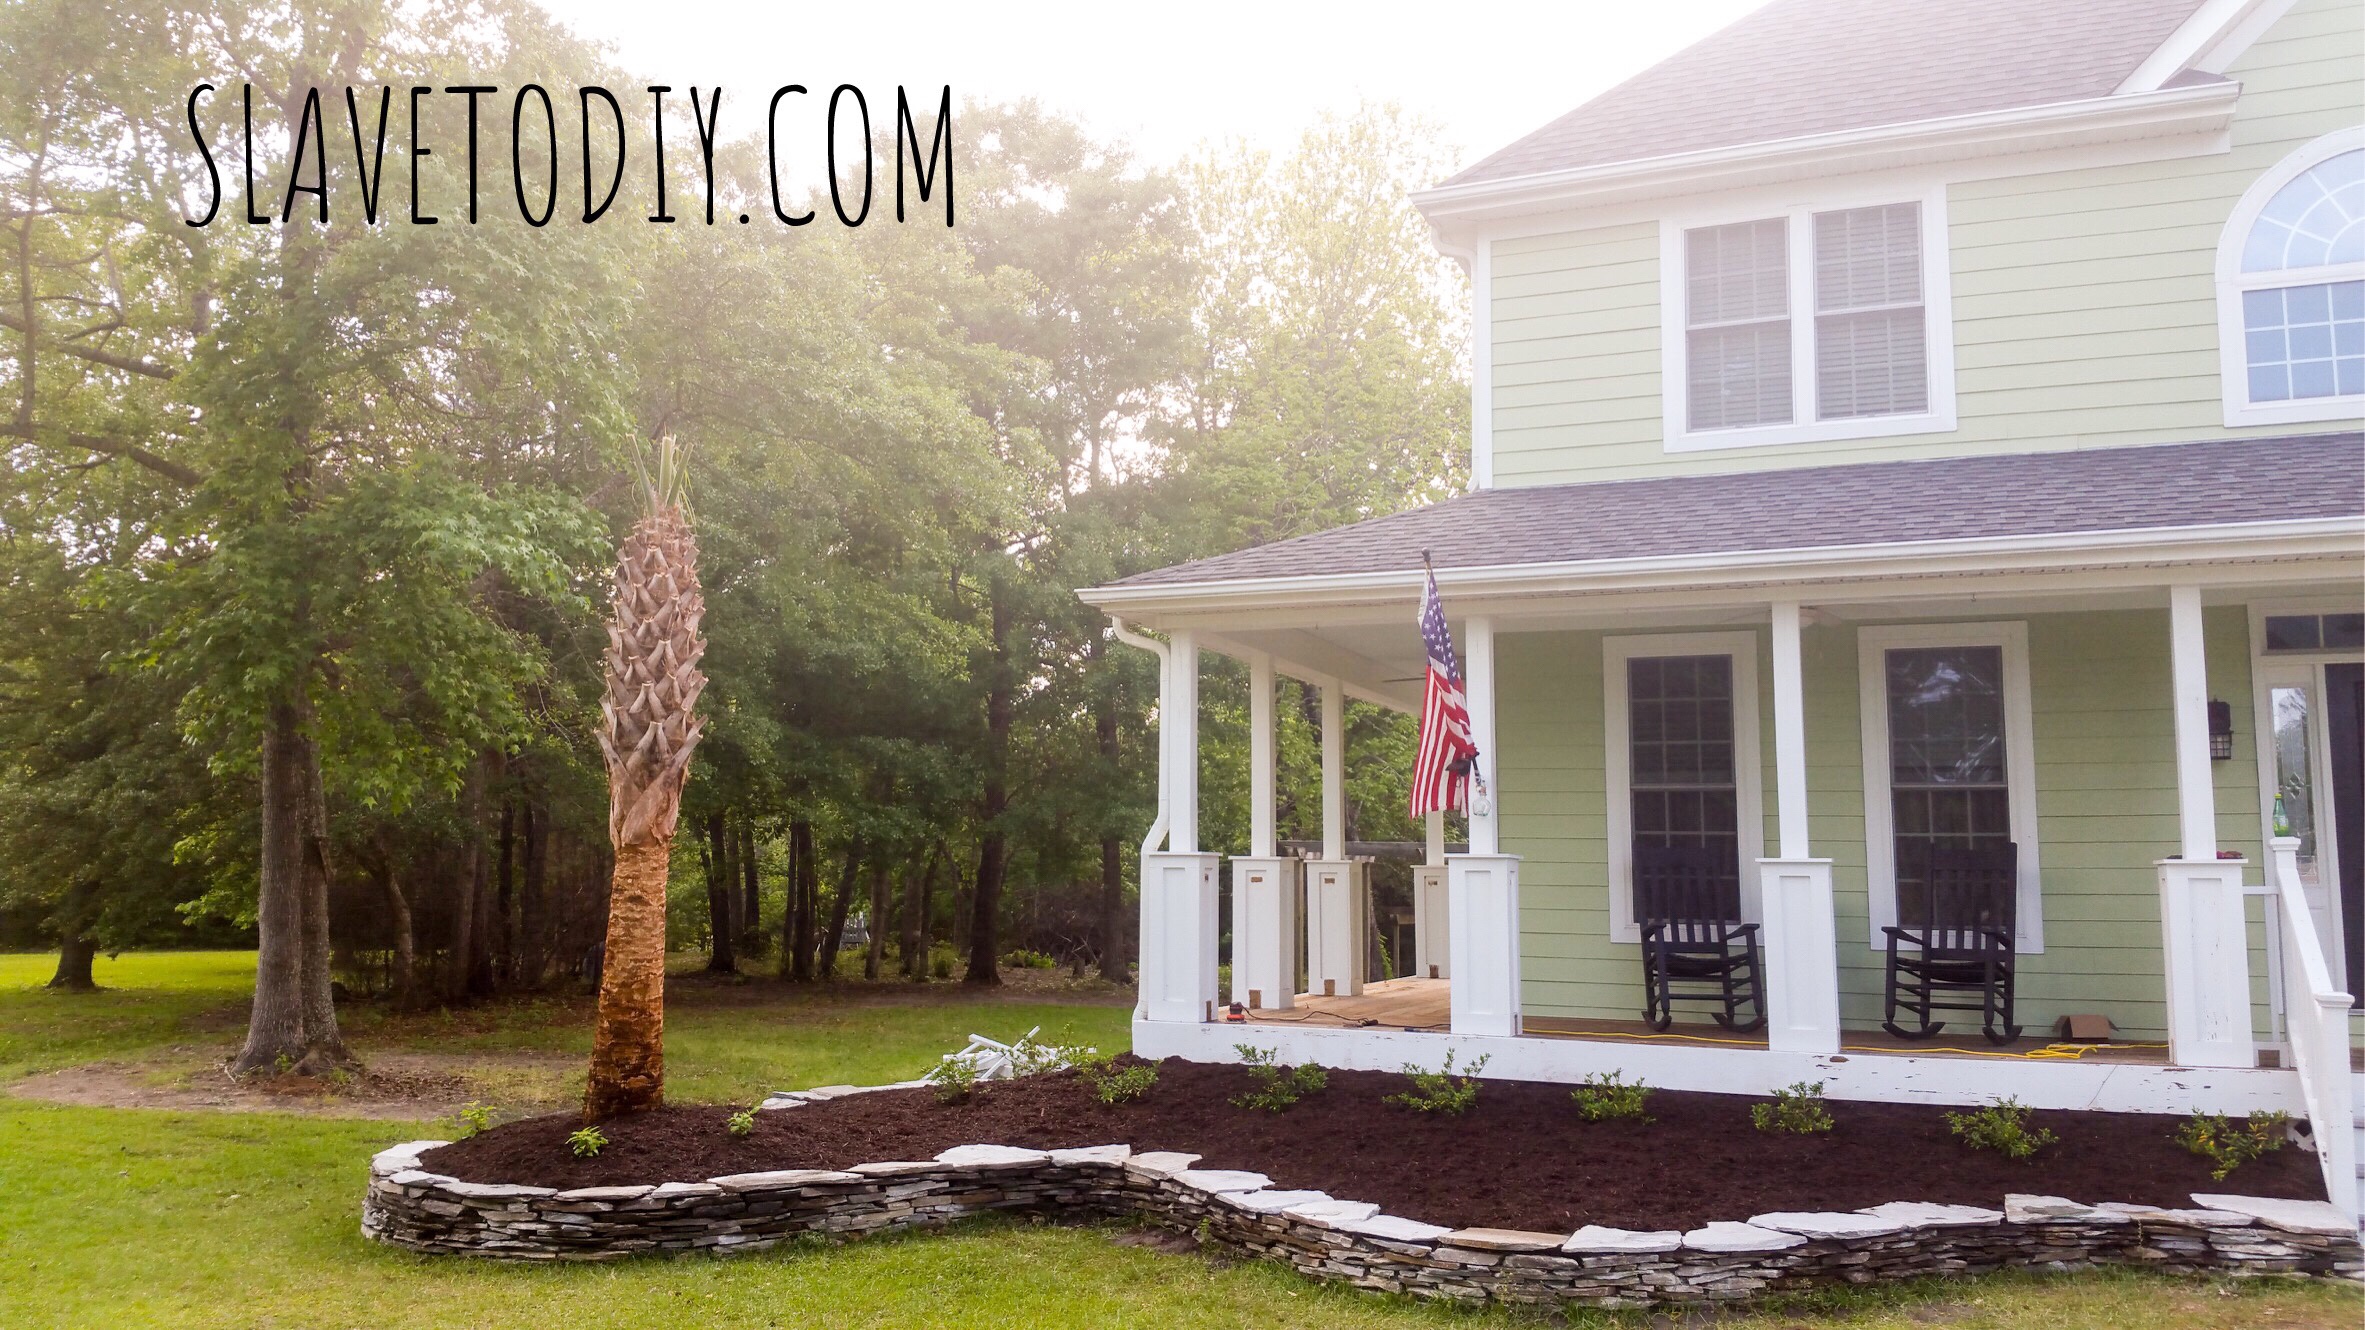
Doesn’t it look AWESOME??? Bear with me. The right side over by the staircase is still in need of rework. Here’s another view from the rocker:
Everything’s all nice and painted, stained, and ready to move on to the next thing! I just love how our mini-flip on the front porch turned out. Big impact for minimal cost!
Check out our other projects and wins and fails here. Thanks for stopping by!
*Legal stuff:
I am honest about my experiences with different products and write because I enjoy it. I do however, have the opportunity to earn money for my writing, also.
Slavetodiy.com is a participant in the Amazon Services LLC Associates Program, an affiliate advertising program designed to provide a means for sites to earn advertising fees by advertising and linking to amazon.com. Amazon offers a small commission on products sold through their affiliate links. Each of your purchases via our Amazon affiliation links supports our cause at no additional cost to you.
If a blogger links to an Amazon product (with a special code for affiliates embedded in the link), and a reader places an item in their “shopping cart” through that link within 24 hours of clicking the link, the blogger gets a small percentage of the sale. Amazon links are not “pay per click.” If you click on the product link and stay around Amazon and purchase something else, however, I will get a commission on that sale.
Slavetodiy.com is also a VigLink affiliate advertiser which works similarly.
This is not a staging checklist. It’s a showing checklist. So if your house isn’t staged yet, this article isn’t for you. There are a bazillion staging tutorials out there, but once you’re staged you’re ready for your first showing, and that’s where I come in.
This post may contain affiliate links. Please see the full disclosure at the bottom of the post.
So you get the call from your realtor. Hooray! Showing in the morning! So what now? Panic? No. Pop a bottle of wine? Maybe. Later. But, first…
So, how would I know how to do a fantastic showing anyway? When we sold our house two years ago we got top dollar and had multiple offers. Both times we were under contract in less than a week from the time the house was listed (our original buyers backed out when their co-signer changed their mind). I think that makes me an expert. Or a rockstar. Or possibly just experienced.
The Ultimate Pre-showing Checklist for Selling Your Home Fast!
I did a bunch of research and compiled a checklist to use so I wouldn’t stress out on showing days. The second time around we had multiple showings per day. Was I under pressure? Yes. But, cool as a cucumber. I had my list. And I really, actually used it.
Our feedback from the showing agents was overwhelmingly positive. It got a little ridiculous to be perfectly honest. Realtors started showing up with buyers that couldn’t afford it but just wanted to see it. Cause it was really cool inside. So, we became a temporary tourist attraction. Sigh. It’s hard to be so popular sometimes.
The point is, my list worked. And lucky for you, I’m willing to share with you so you can be a calm, popular seller, too. Sit back and wait for the offers to start pouring in.
So here’s the bottom line: You’re selling a lifestyle, not just a house. The buyers are looking at a house, but they’re really taking a peek at your lives. If they want your life, they’ll want your house. Your job is to seduce them into picturing themselves living there, and living your groovy life. You can do it.
The Ultimate Pre-showing Checklist for Selling Your Home Fast!
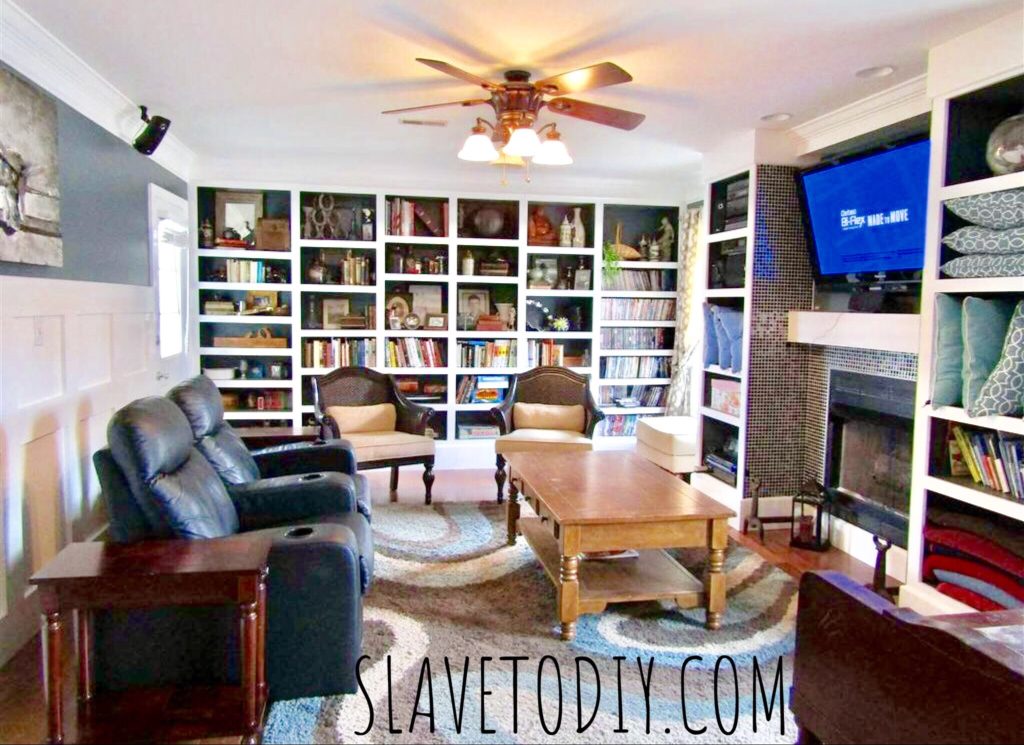
Decide what the coolest parts of your house are and tell a story about them. Control the flow of the house by luring buyers from space to space. If you have great entertaining spaces, set up a party scene. If you have an art studio, make it immaculate and inviting with a blank canvas set up. If you have an awesome movie/media room cue up a Nat Geo HD film that show off the awesomeness of the room and equipment. Here are the basics:
So some of the items on my list are not original. They’re common sense. I’m assuming things are basically clean (I hired maids to come weekly while we were on the market, and I whole-heartedly recommend it). Clean:
Make beds. I took the opportunity to get new sets during staging. Overstock usually has some nice, reasonable ones. It’s a lot of bang for the buck. If you really want to outdo yourself, shop (or just look at) the Pottery Barn bedding to get ideas for a well staged bed. Especially in the master bedroom, the retreat feel is important. (I am astounded by the number of beds I see in real estate photos with straightened-ish blankets and not so much as a bed skirt to cover the metal legs. Apparently these people are in no rush to sell the place.) The cool thing is… you can take new bedding with you, so go for it.
The Ultimate Pre-showing Checklist for Selling Your Home Fast!
Pick up. Nothing screams stress to most people more than an untidy house that looks like there isn’t enough organization/storage space. And remember, you’re selling a relaxing, organized, and clean house.
Do the dishes. It’s okay if they’re sitting in the dishwasher.
Sweep & vacuum. Seriously, leave the lines in the carpet. It screams, “we keep this place clean and well cared for.”
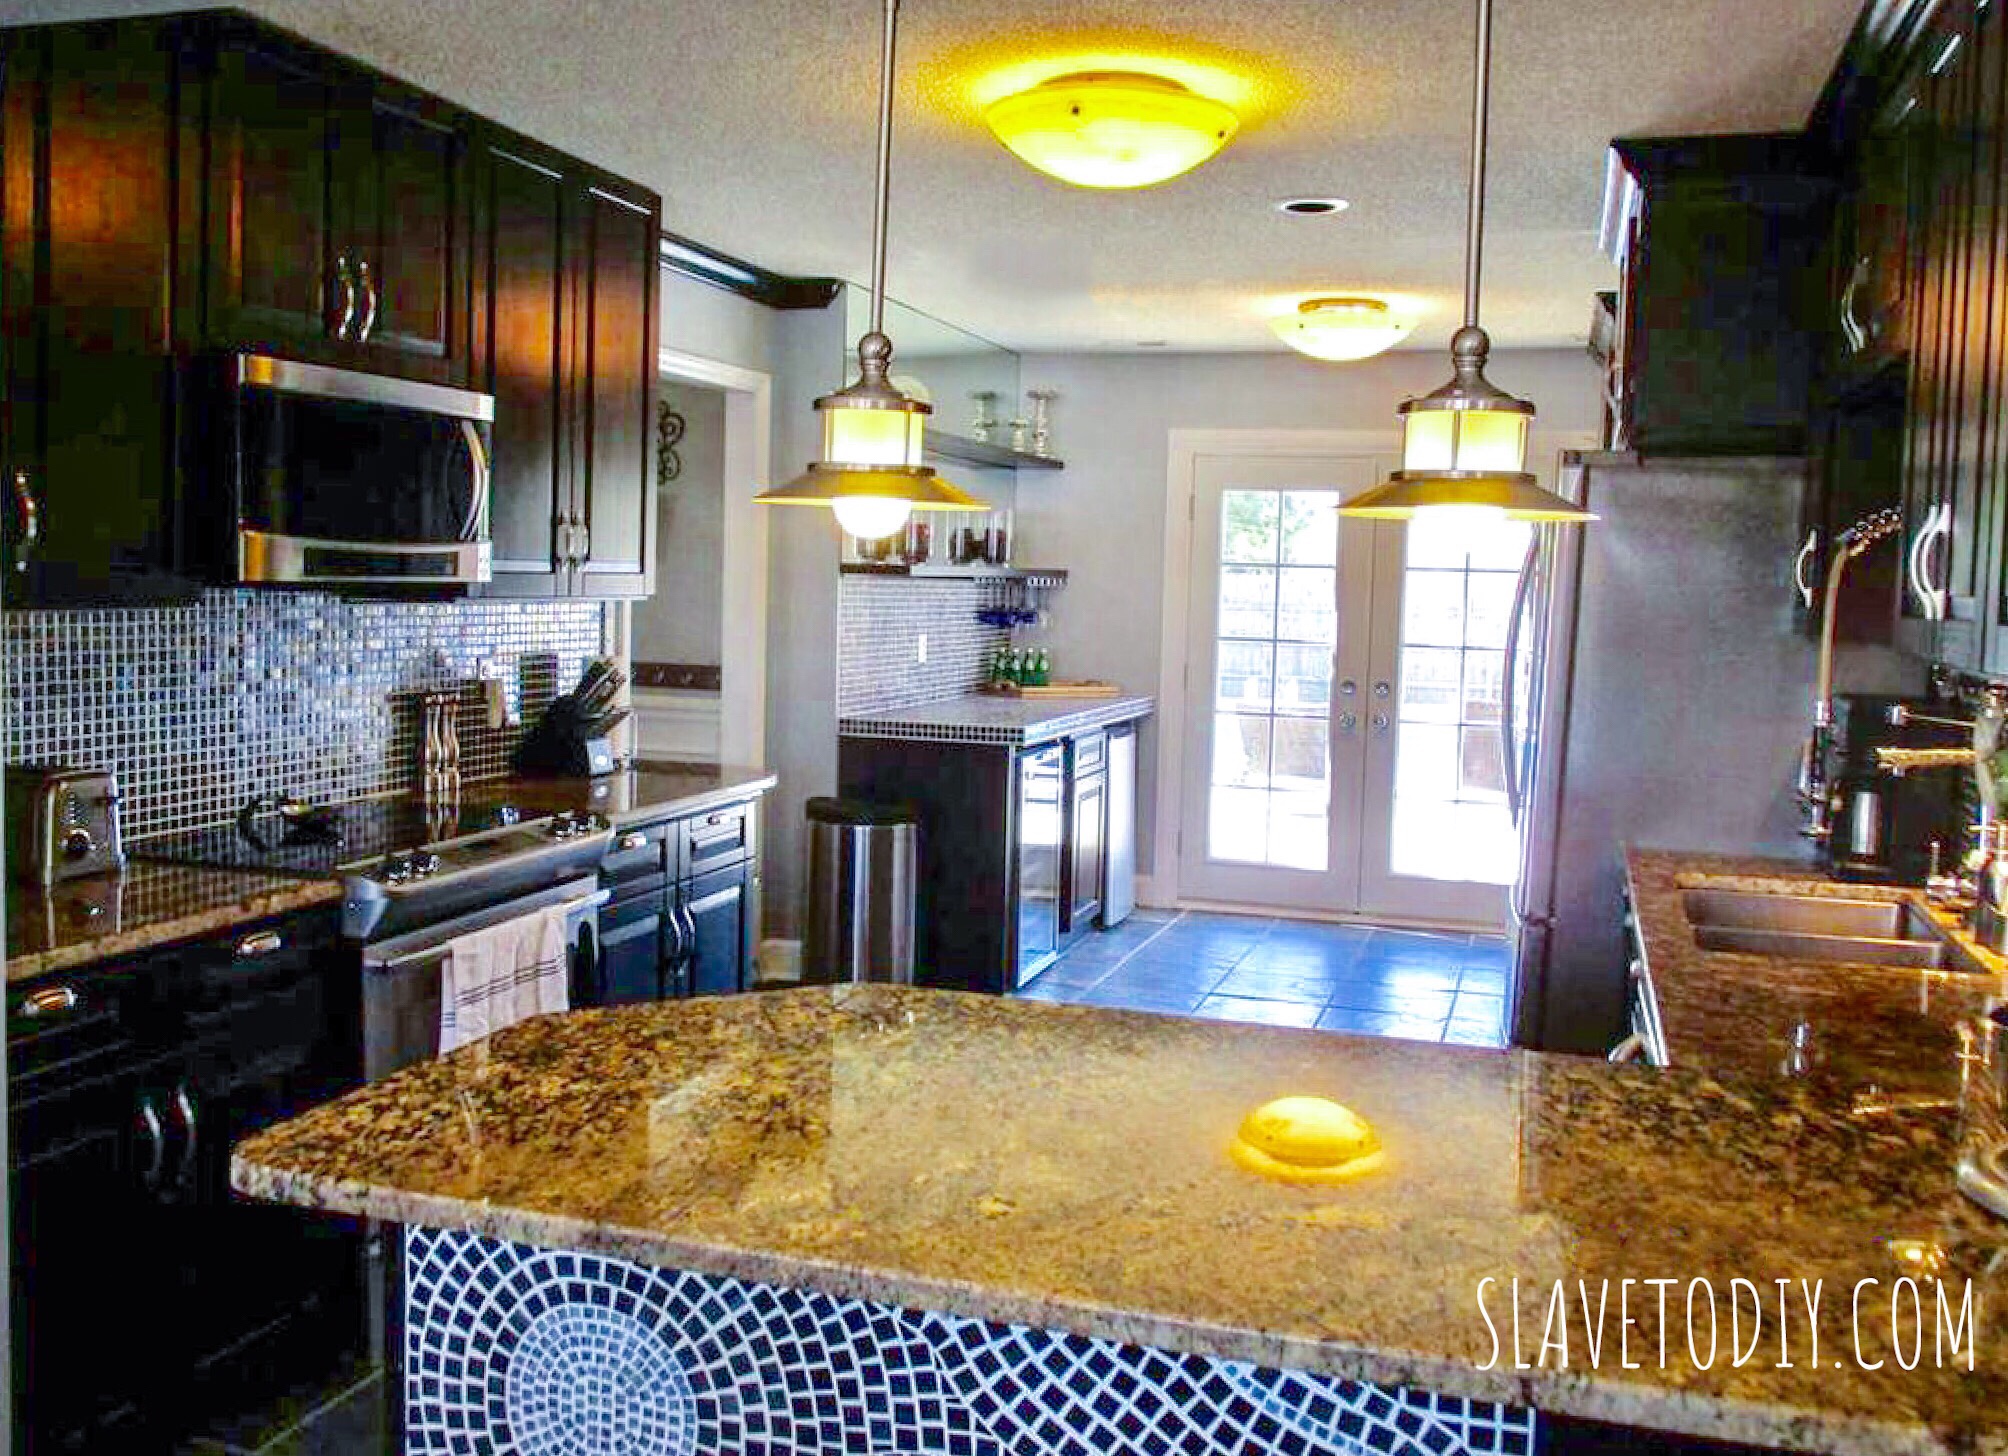
Wipe and clear the kitchen counters. Make them shine.
Check bathrooms. The smell of cleaner is okay.
Mow lawn. Pull weeds. (Never leave anything that says, “I’m work waiting for you to do when you move in here.”)
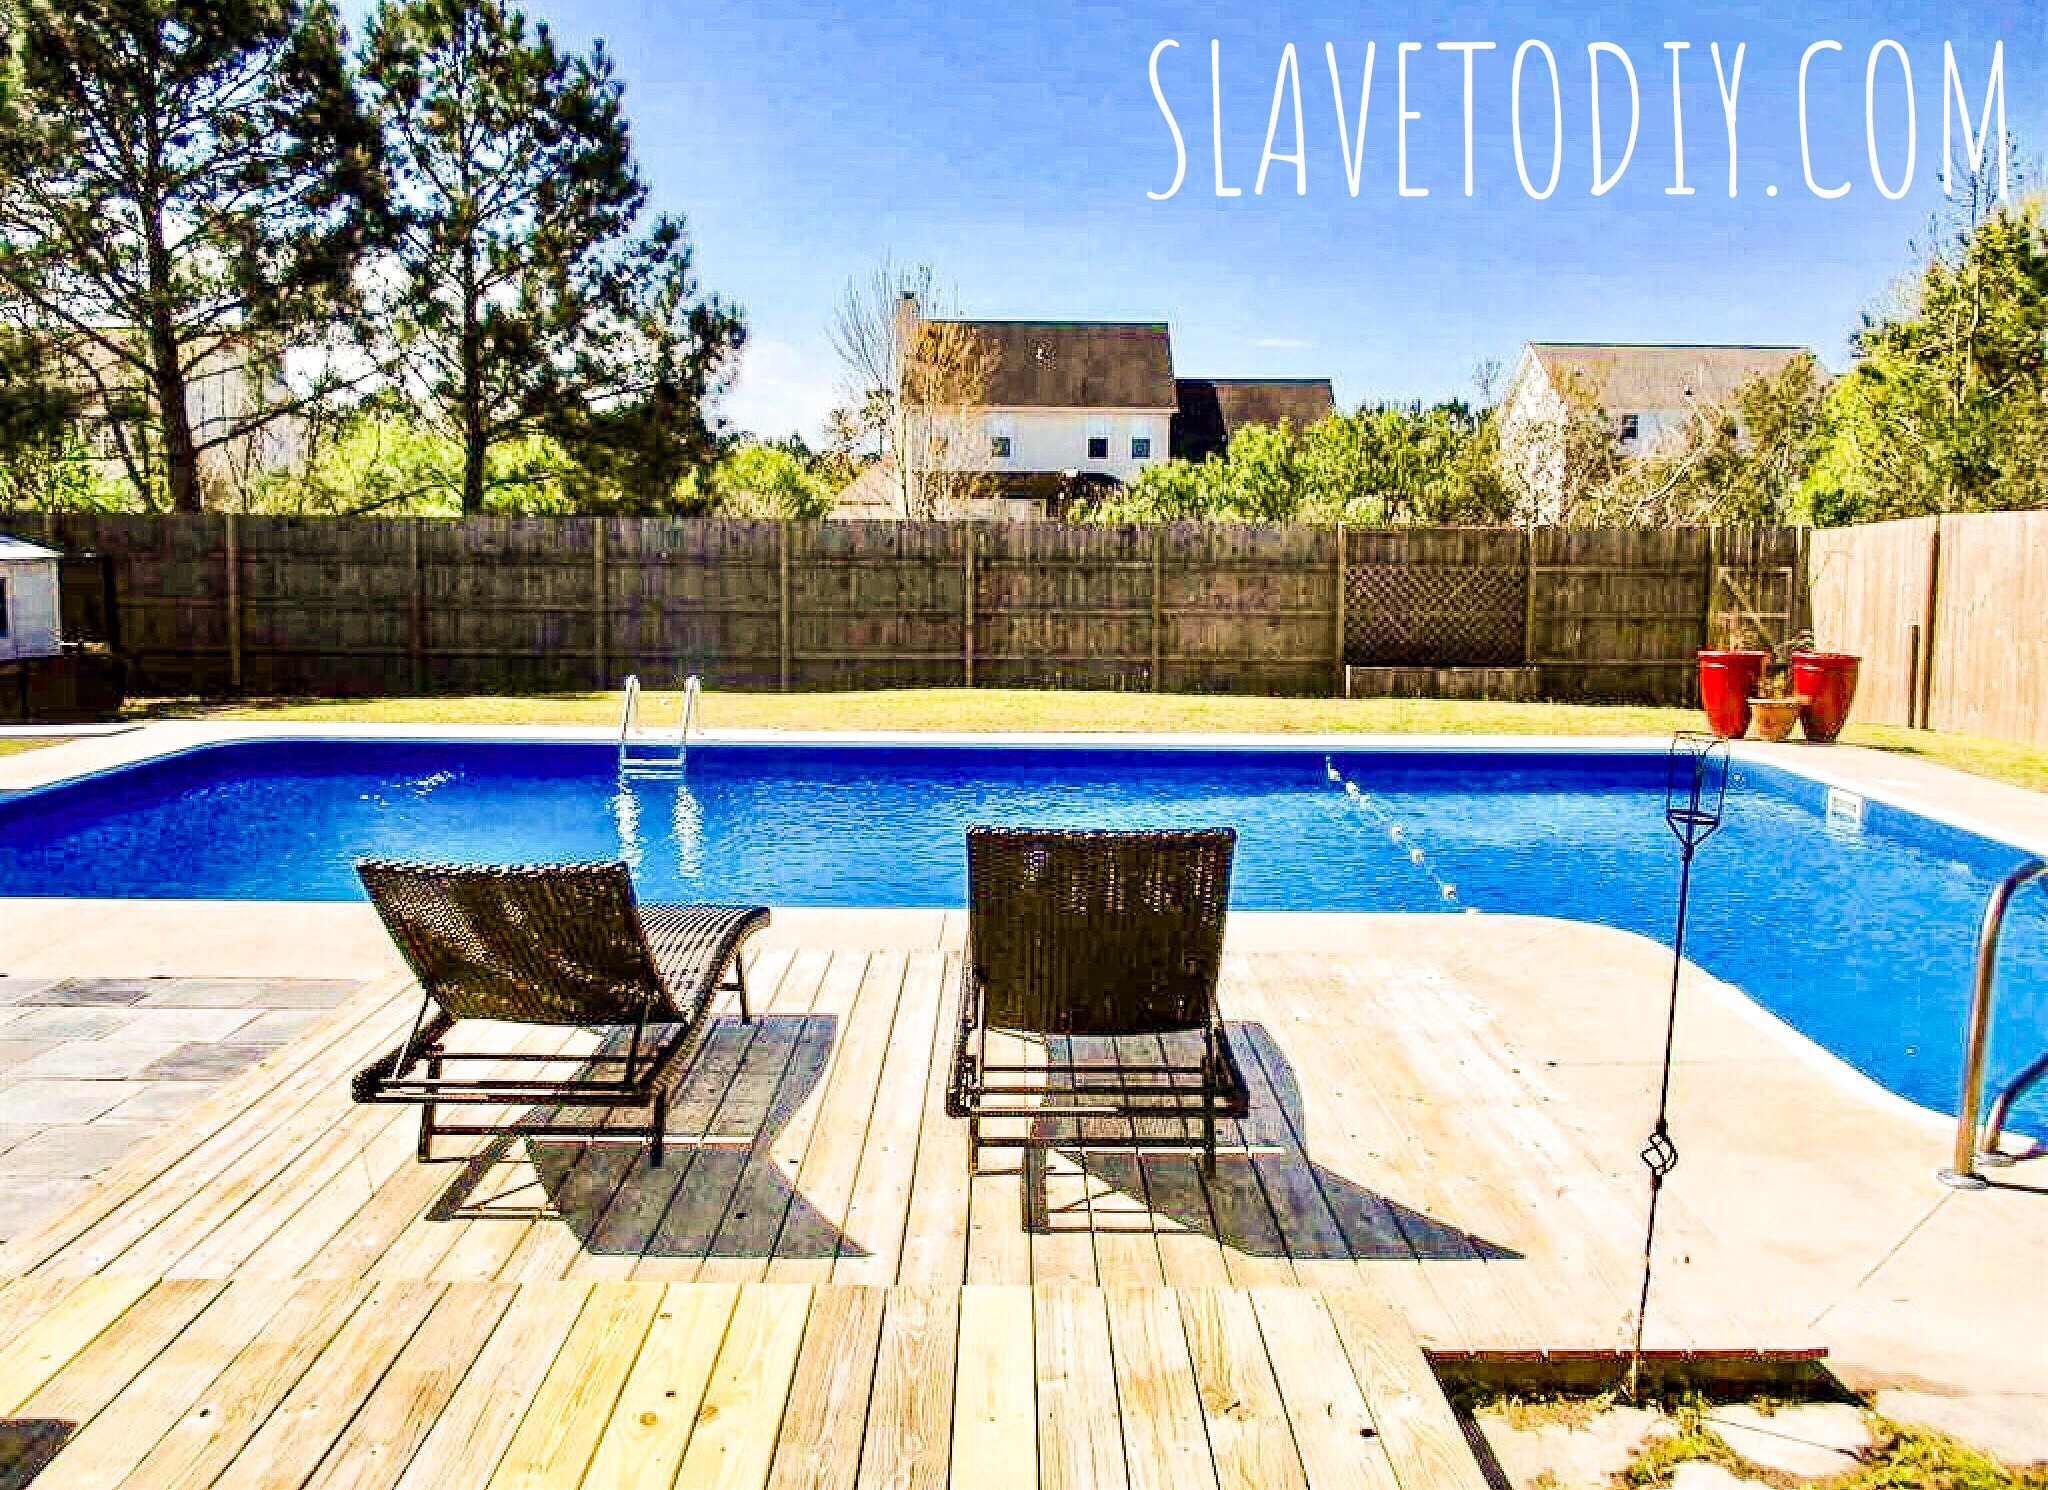
The Ultimate Pre-showing Checklist for Selling Your Home Fast! Pool is clean, ready for beach towels rolled on the chairs.
Specialty items:
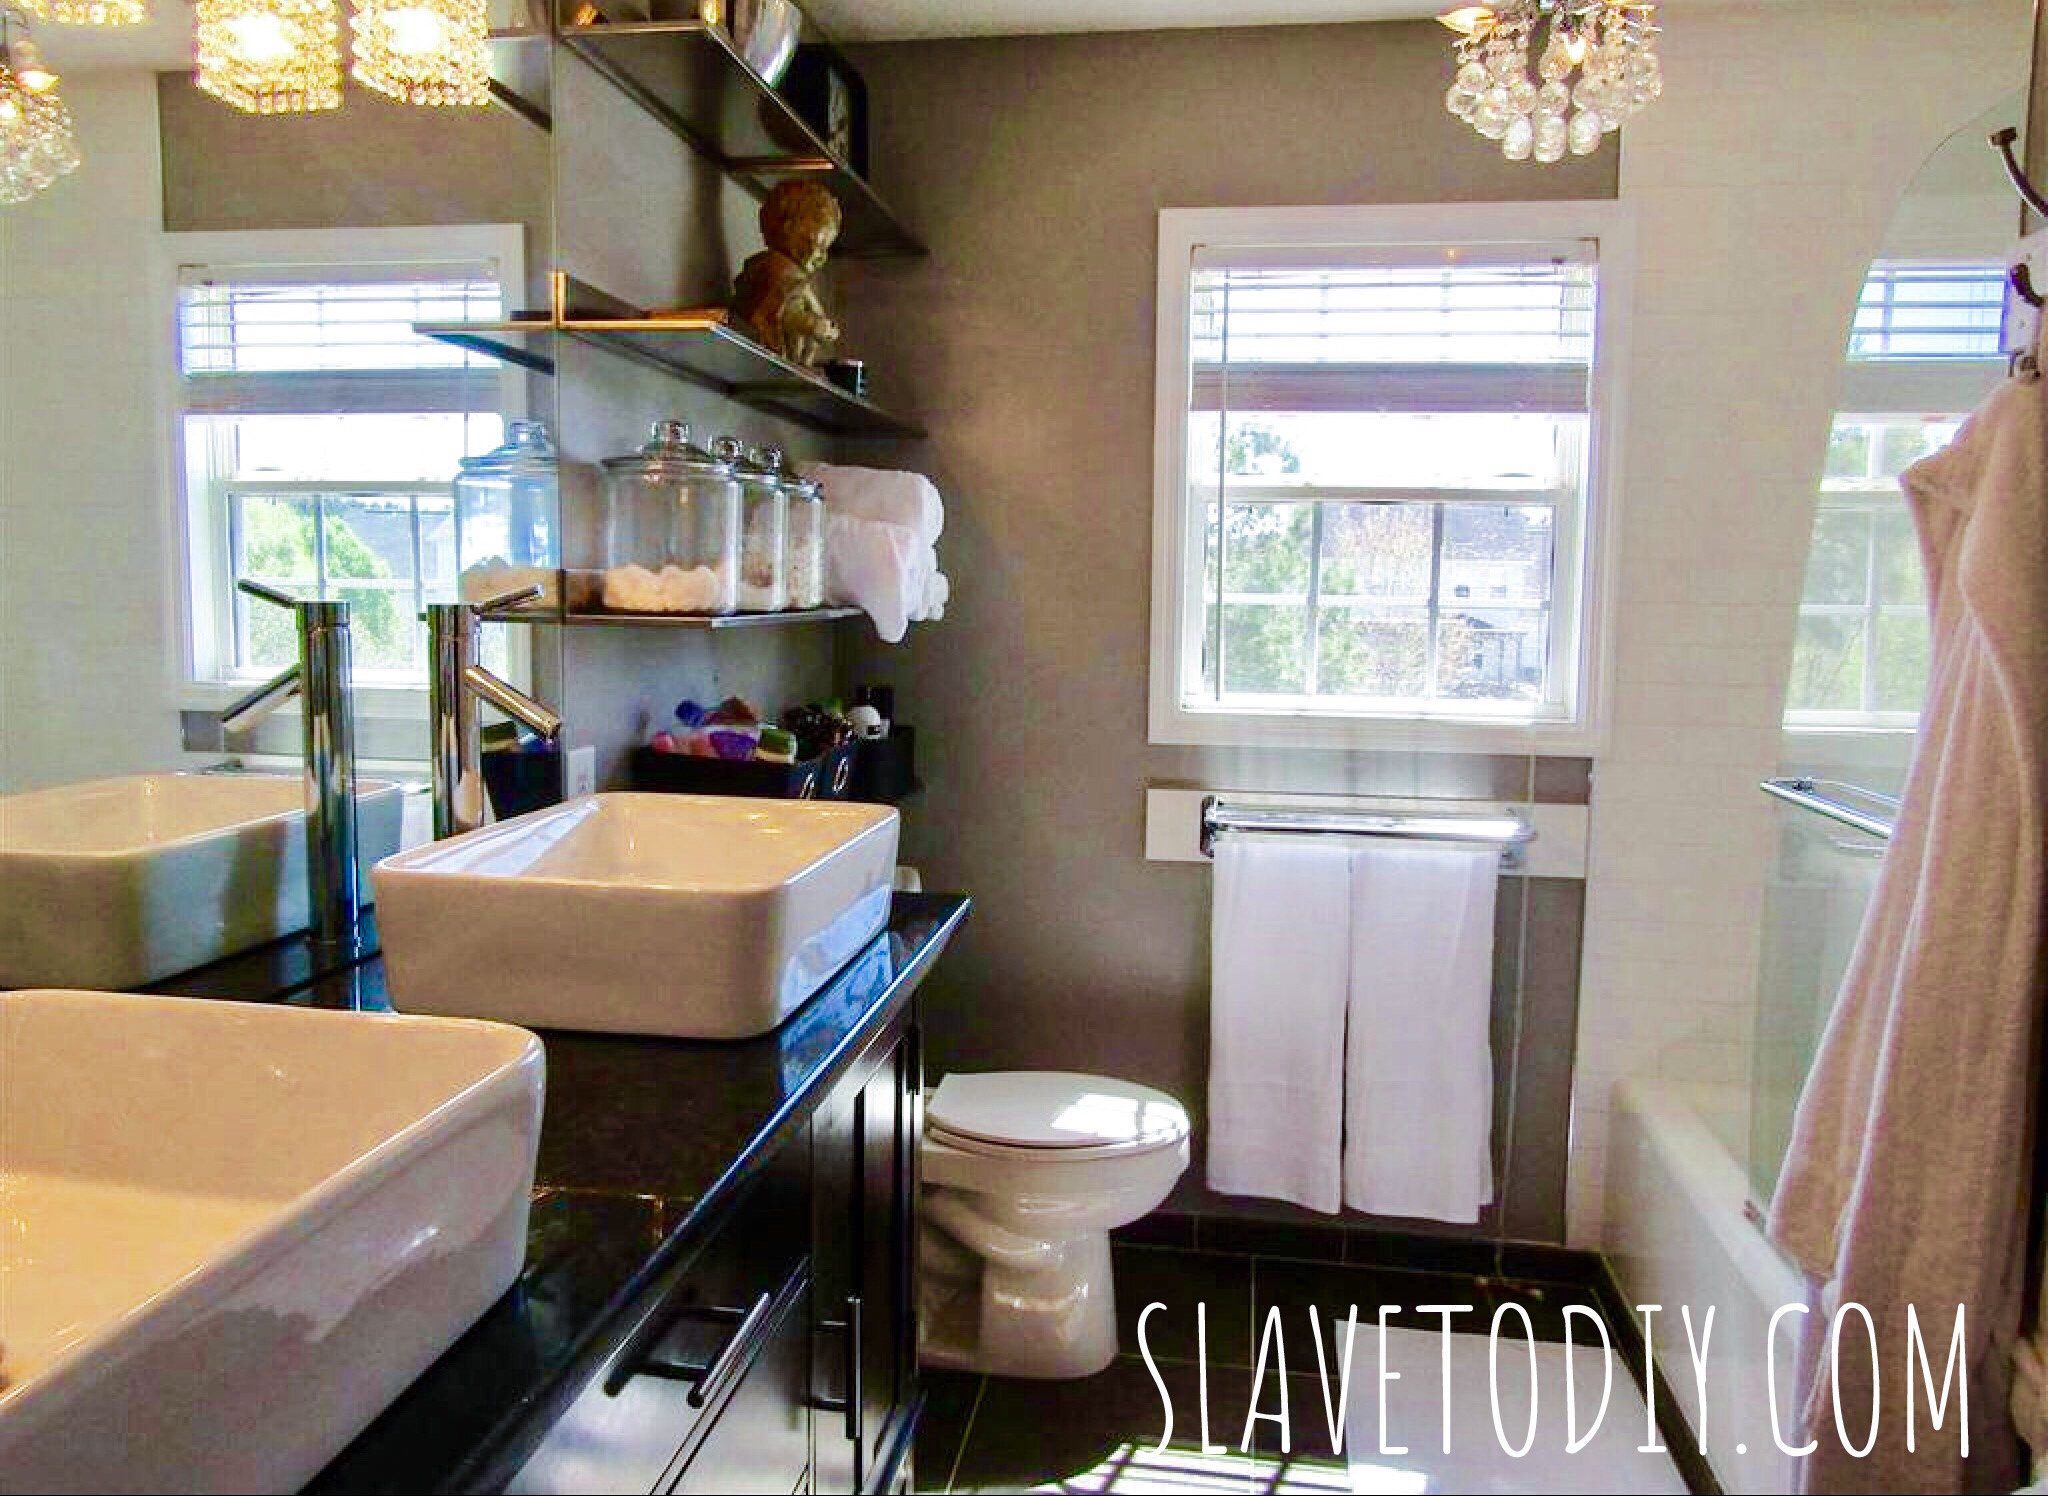
Hang fresh towels in the bathrooms. Get bright white, new towels. White towels make your baths feel like a Spa. I got new towels for staging/showings and threatened everyone in the family about not using them until after the house was sold. They don’t have to be soft, just new and white. I bought some reasonable ones here.
The Ultimate Pre-showing Checklist for Selling Your Home Fast! Rolled towels on shelves add to that luxury feel (see up to the left there?) and fresh, clean (unused!) white towels make it feel like a spa-retreat.
Temperature: 70. Crank that AC in the summer. Make it toasty in the winter. It should feel refreshing. It gives buyers a sense that the heat/cooling systems are in good working order. This is a great time to check your air filters to make sure it doesn’t sound like the system is struggling when it cycles. I use 3m filtrete filters that last three months. Yes, you can buy them on Amazon, but they’re cheaper from Lowe’s.
Fireplace. Turn it on low. Even in the summer. It creates a nice ambiance and it shows the buyers the fireplace works.
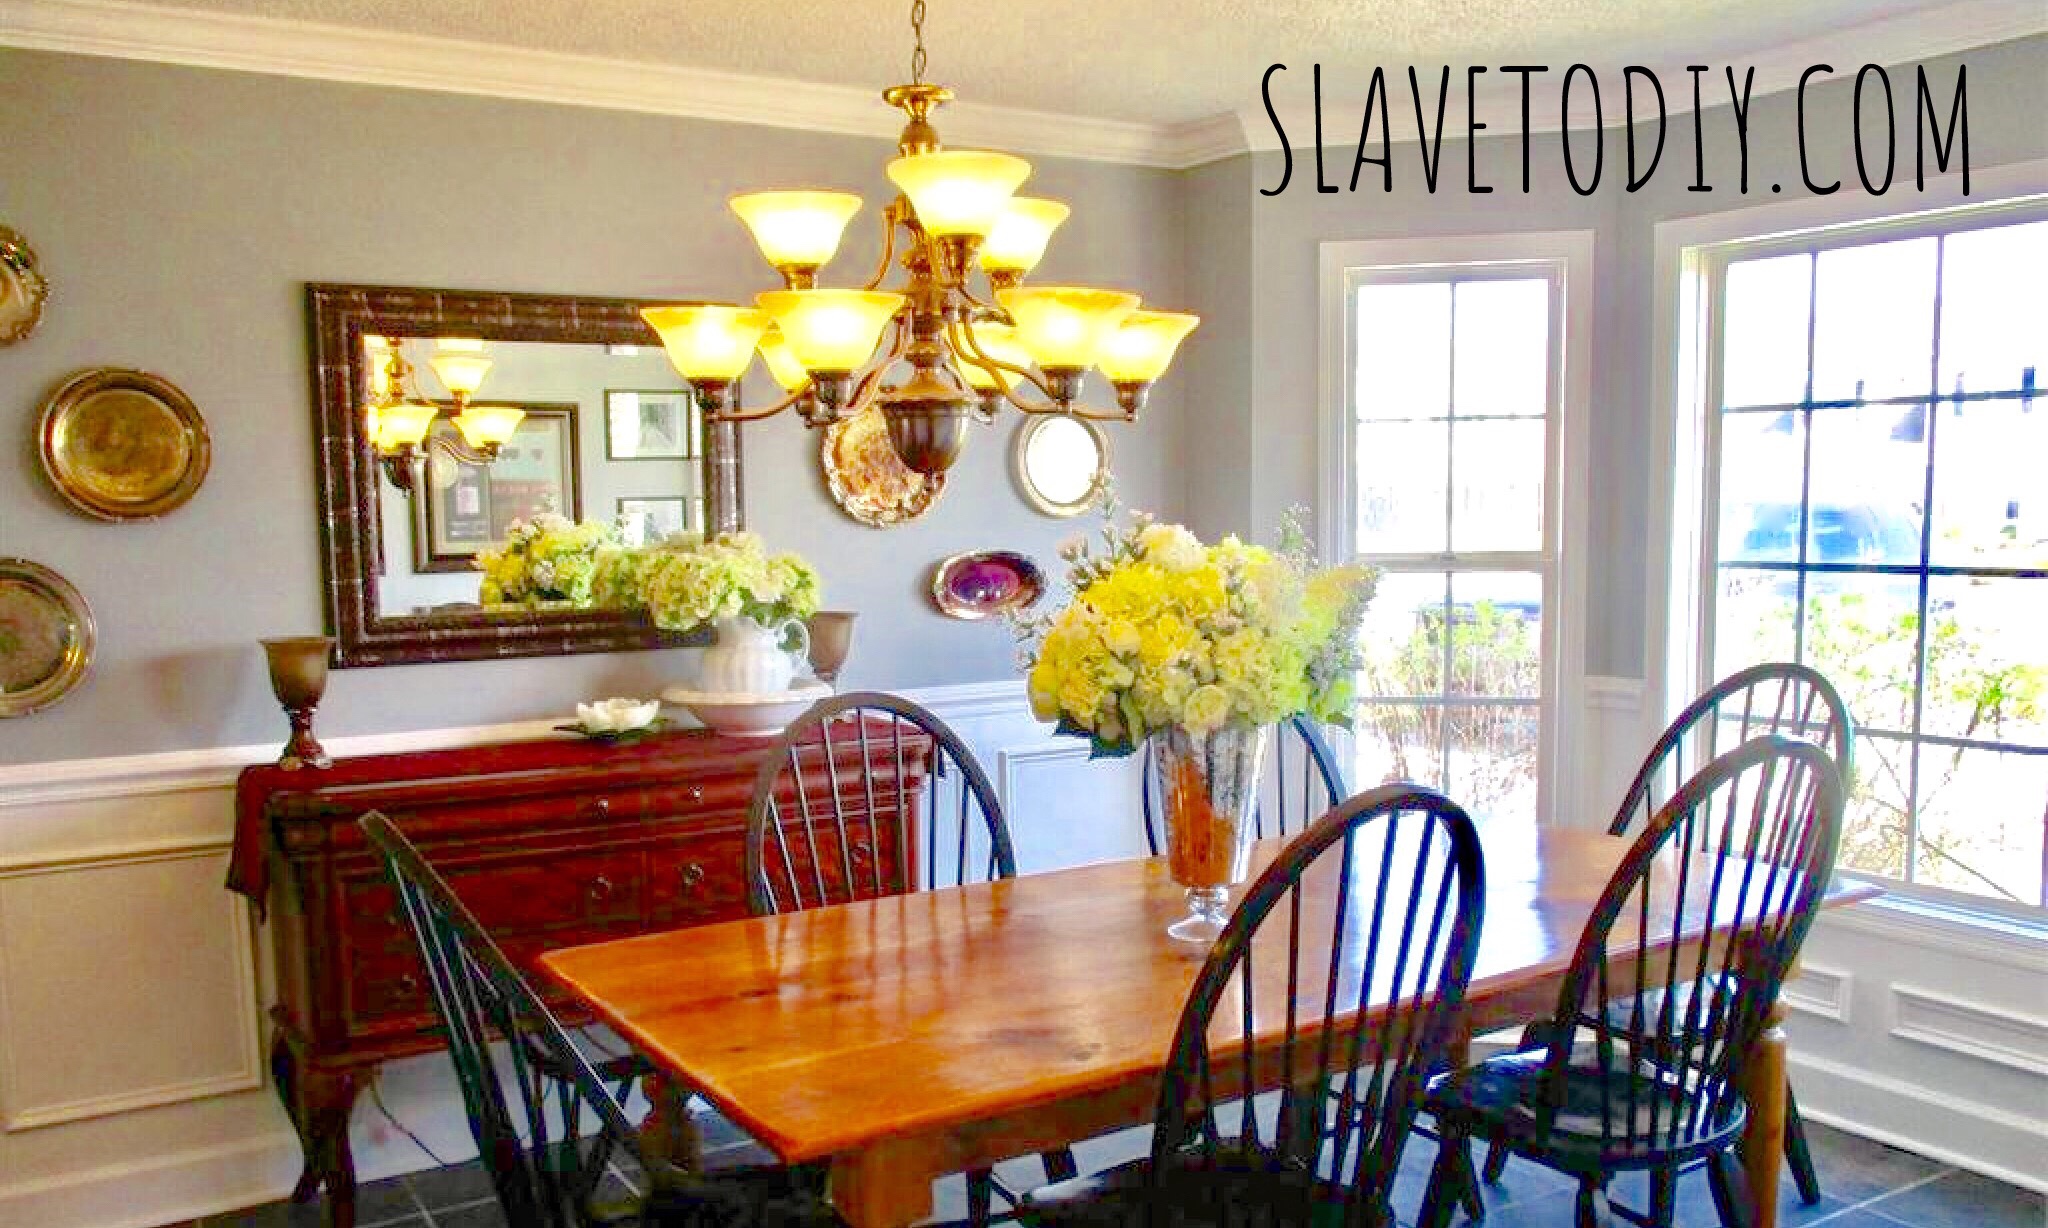
Set the table (Pinterest some cool table scapes and copy them). Even if the dining room isn’t great, people remember it being “inviting” because the table is set. It looks like the house is ready to do some entertaining. Once again, you can take this stuff with you. World Market always carries some reasonable, stylish sets.
The Ultimate Pre-showing Checklist for Selling Your Home Fast! Photo by Pixabay on Pexels.com
Open the drapes. All the way. Open the blinds flat and pull them halfway up the window. Make sure they’re straight and not lopsided.
Lights. Blazing. Turn them all on and open all of the interior doors. Don’t let potential buyers fumble for light switches or door handles. They should be able to walk through and simply enjoy. (I left a note for the realtors telling them we’d turn the lights off when we got home). This is not the time to be stingy about the light bill.
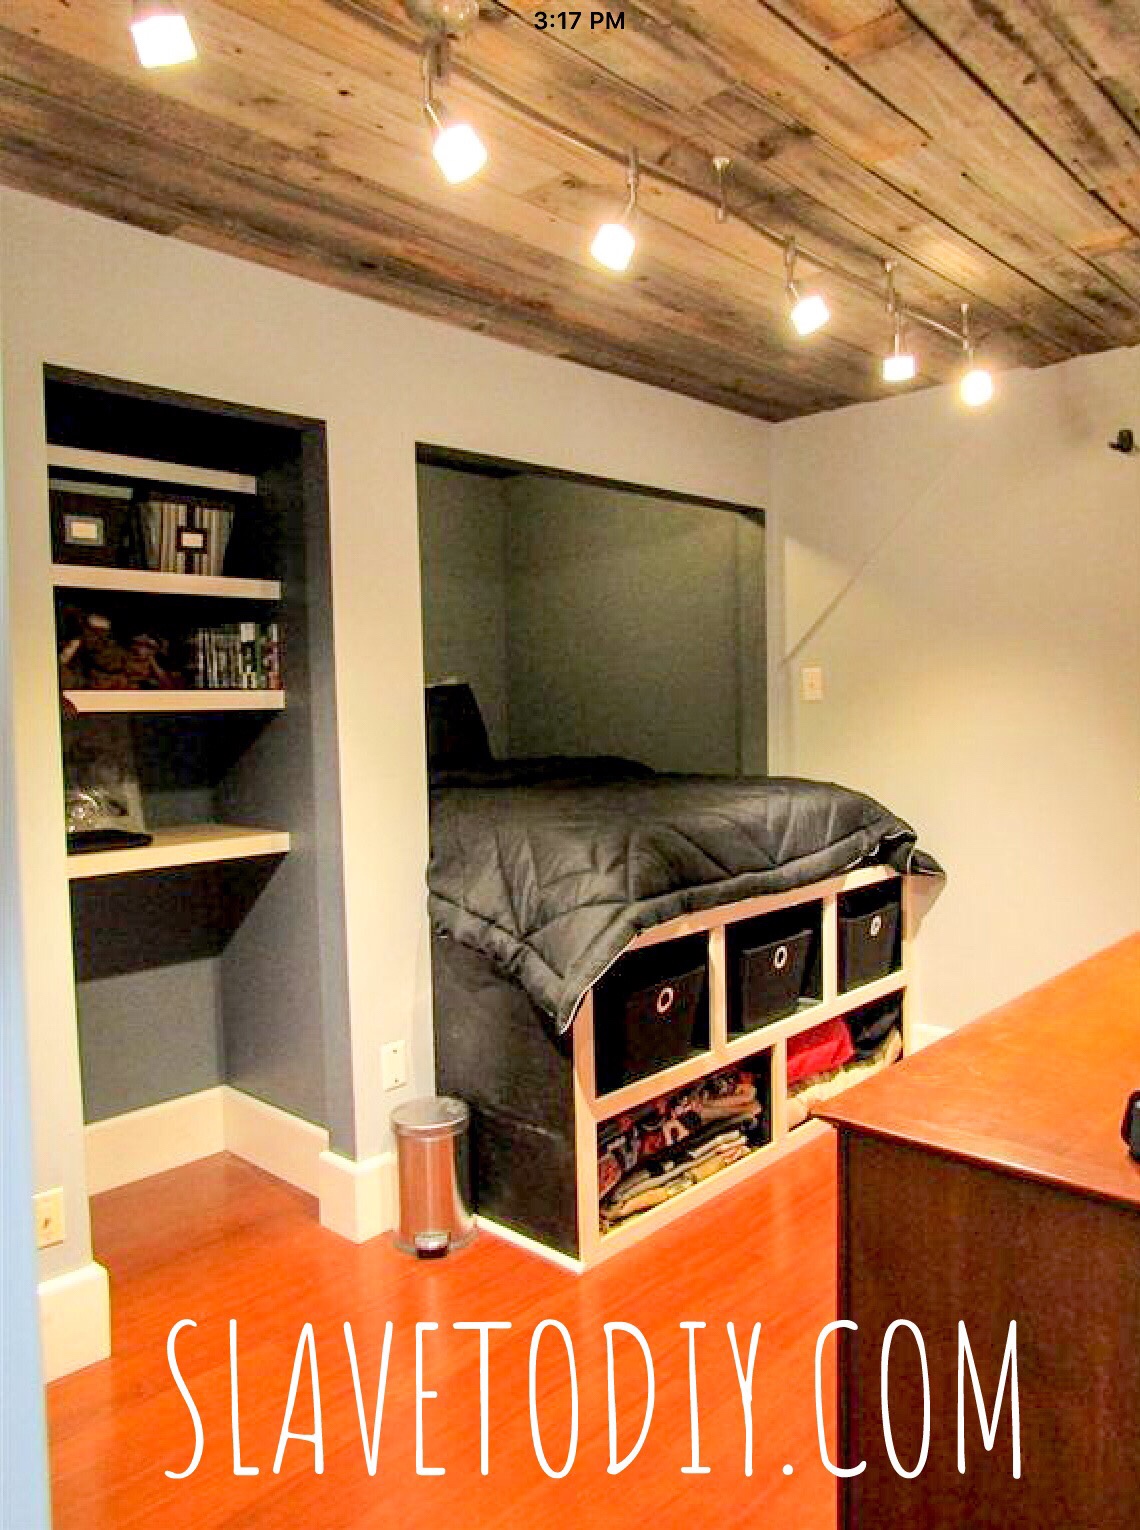
The Ultimate Pre-showing Checklist for Selling Your Home Fast! Turn All Of The Lights On Before The Showing.
Case in point, there are three different lights in this room and no windows. It is a cave with no lights on- pitch black. There is a lightswitch for the built in bed over by the bed. There is a lamp on the dresser. With the door open and all the lights on this is a showcase. Every kid in the world wants this room. Fumbling for the lights and trying to see it in the dark would leave the proper “showing” of this room to chance. Turning the lights on in advance let’s you control the showing.
The Ultimate Pre-showing Checklist for Selling Your Home Fast!
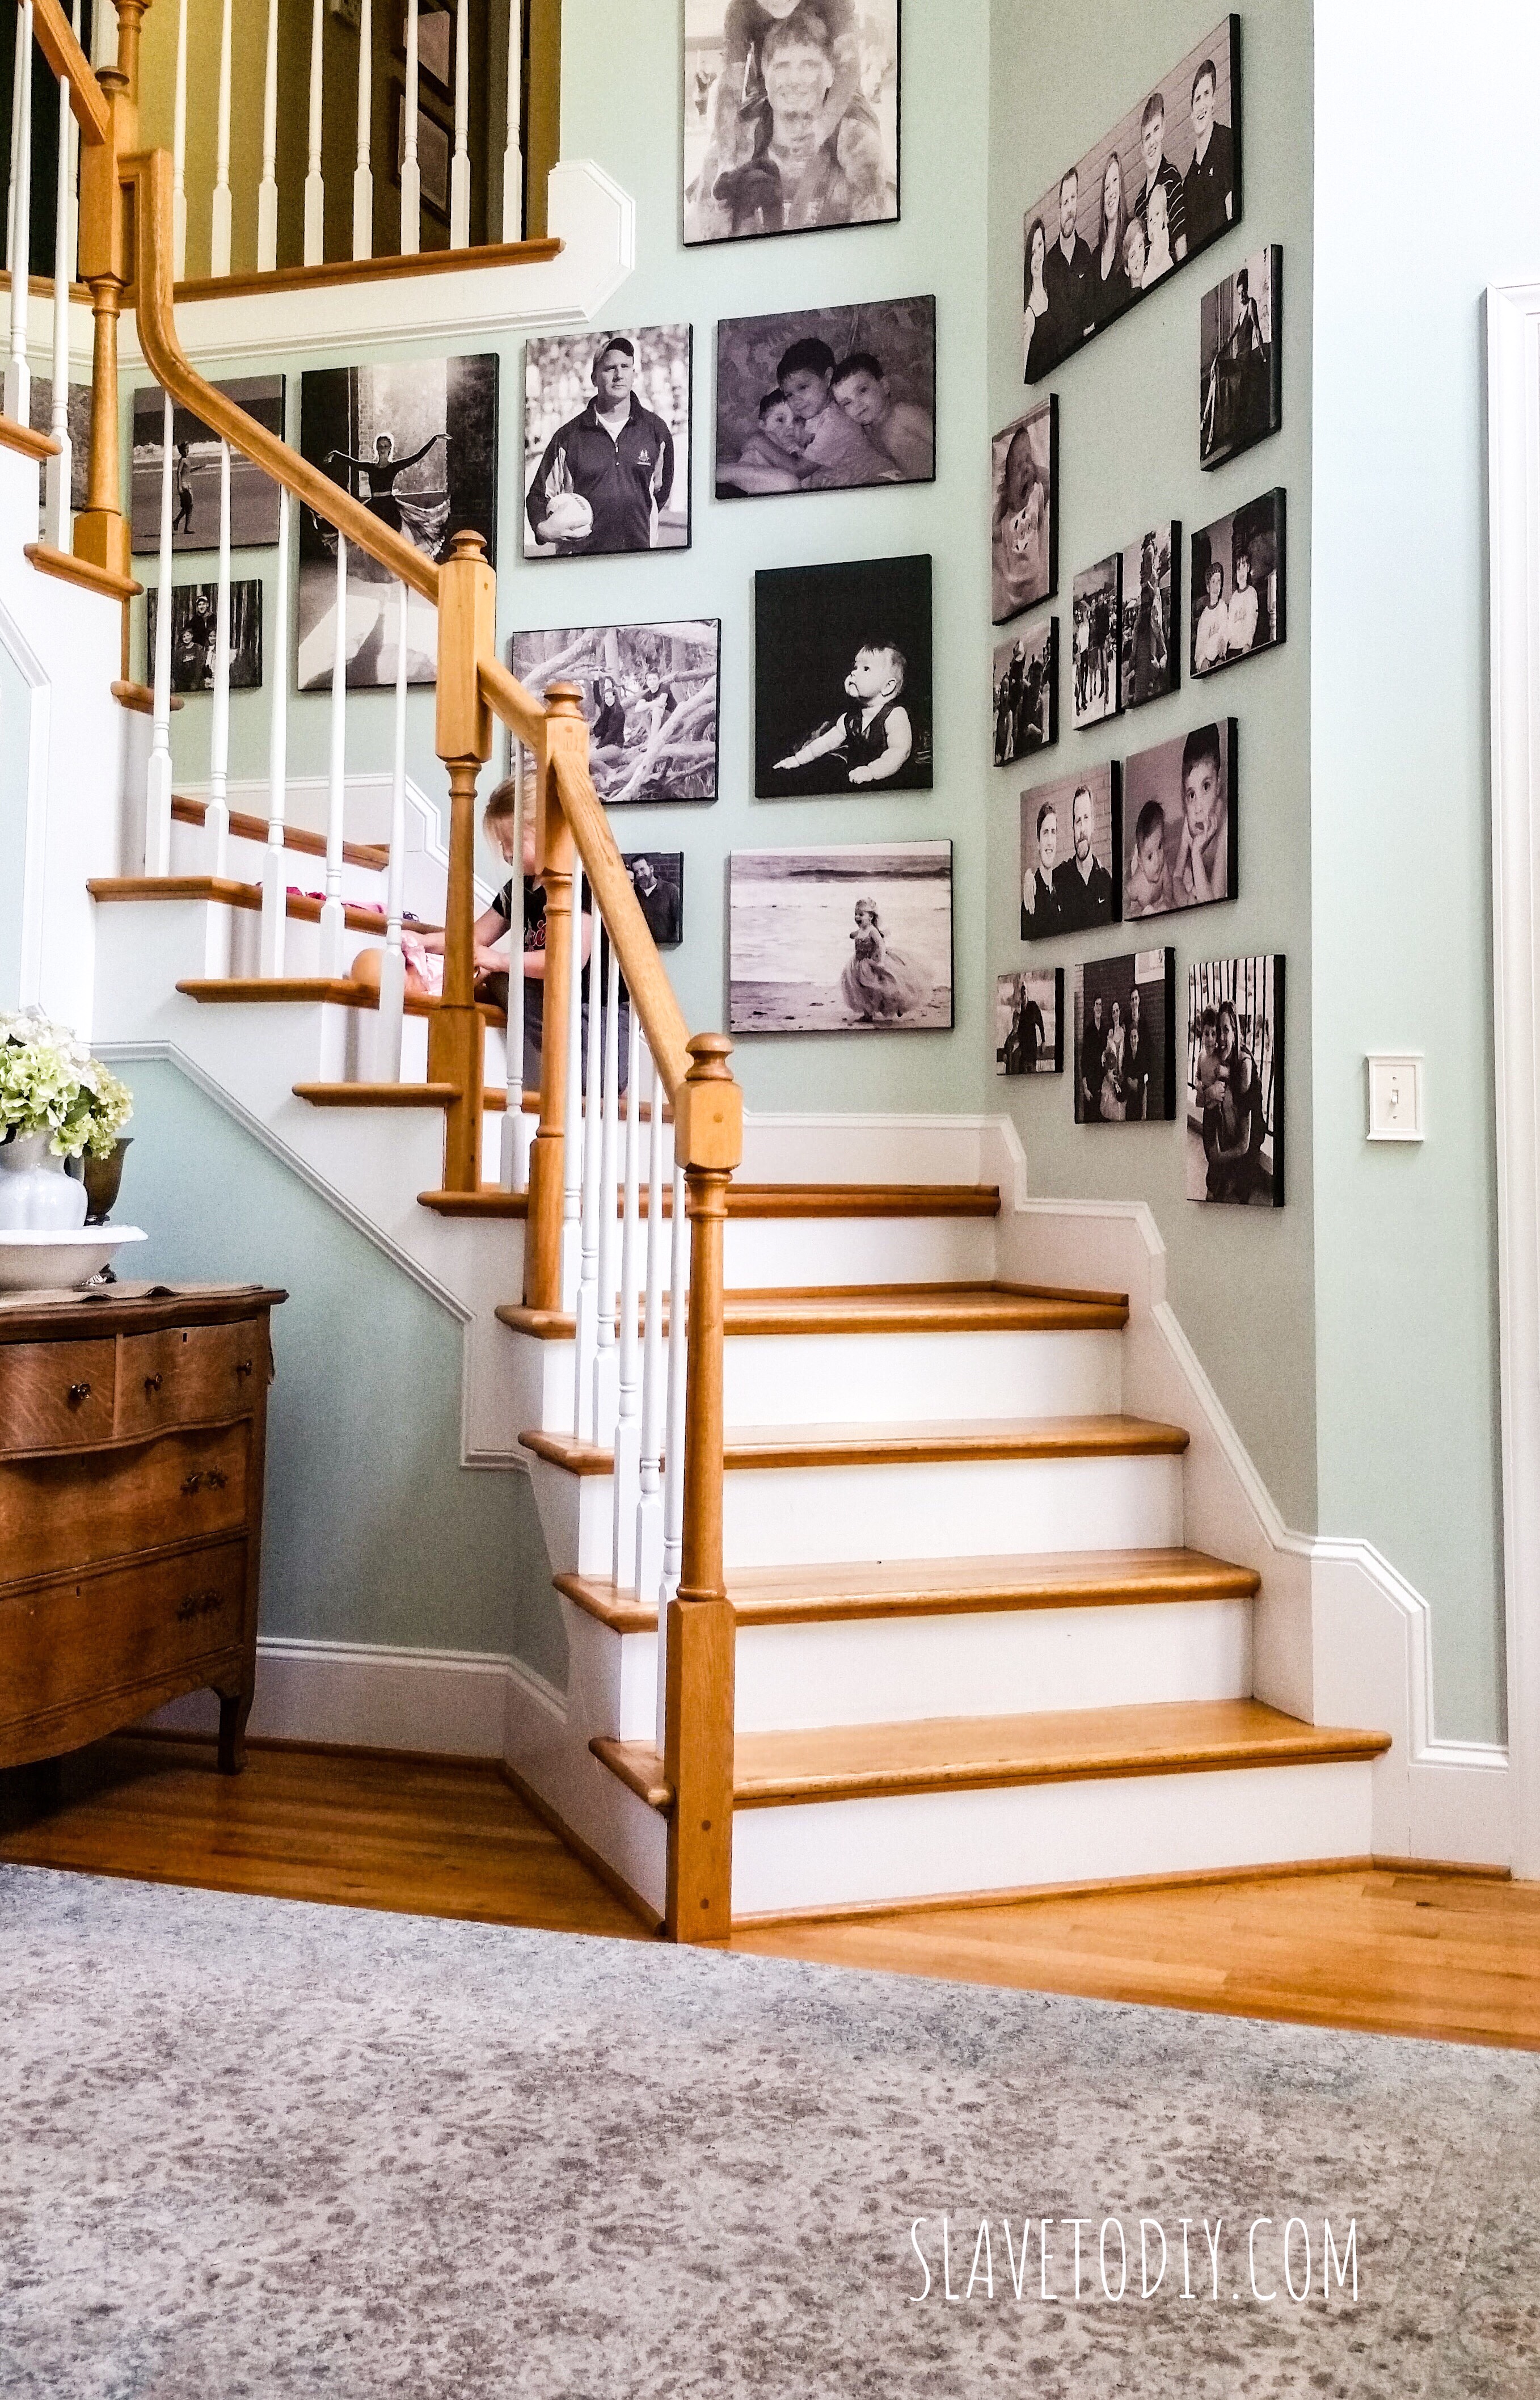
Pictures (okay, this is a staging item, but I feel strongly about it. I also apparently disagree with every HGTV host, ever). Only take your family pictures down if they’re in lousy frames and/or you have ugly kids. Be honest with yourself here. People realize that someone lives in the house… isn’t that why companies use models to sell clothing? Think of your family photos as “happy family home” models. I had a cool wall with black and white canvasses full of family pictures. We left those pictures up. They just screamed “we’re one big happy family in our happy family home.” It’s also a wall-staging item. Without those our staircase would be empty.
Music. Low volume smooth jazz. If you have cable there are usually music channels included in your package so we had several TVs on with smooth jazz going. That is professional level ambiance.
Garbage disposal. Run a lemon or orange through it right before the showing. The citrus hides any lingering smells you might have missed. If you don’t keep citrus on-hand, you can get a bag of forty garbage disposal bombs from Bed, Bath & Beyond for about ten bucks.
Cinnamon apple glade. A can per showing in a 2000sf house. No kidding. I did a ton of research and apple pie or cinnamon apple apparently puts people in a “this is the one” mindset. I don’t question it. It worked. Buy it here.
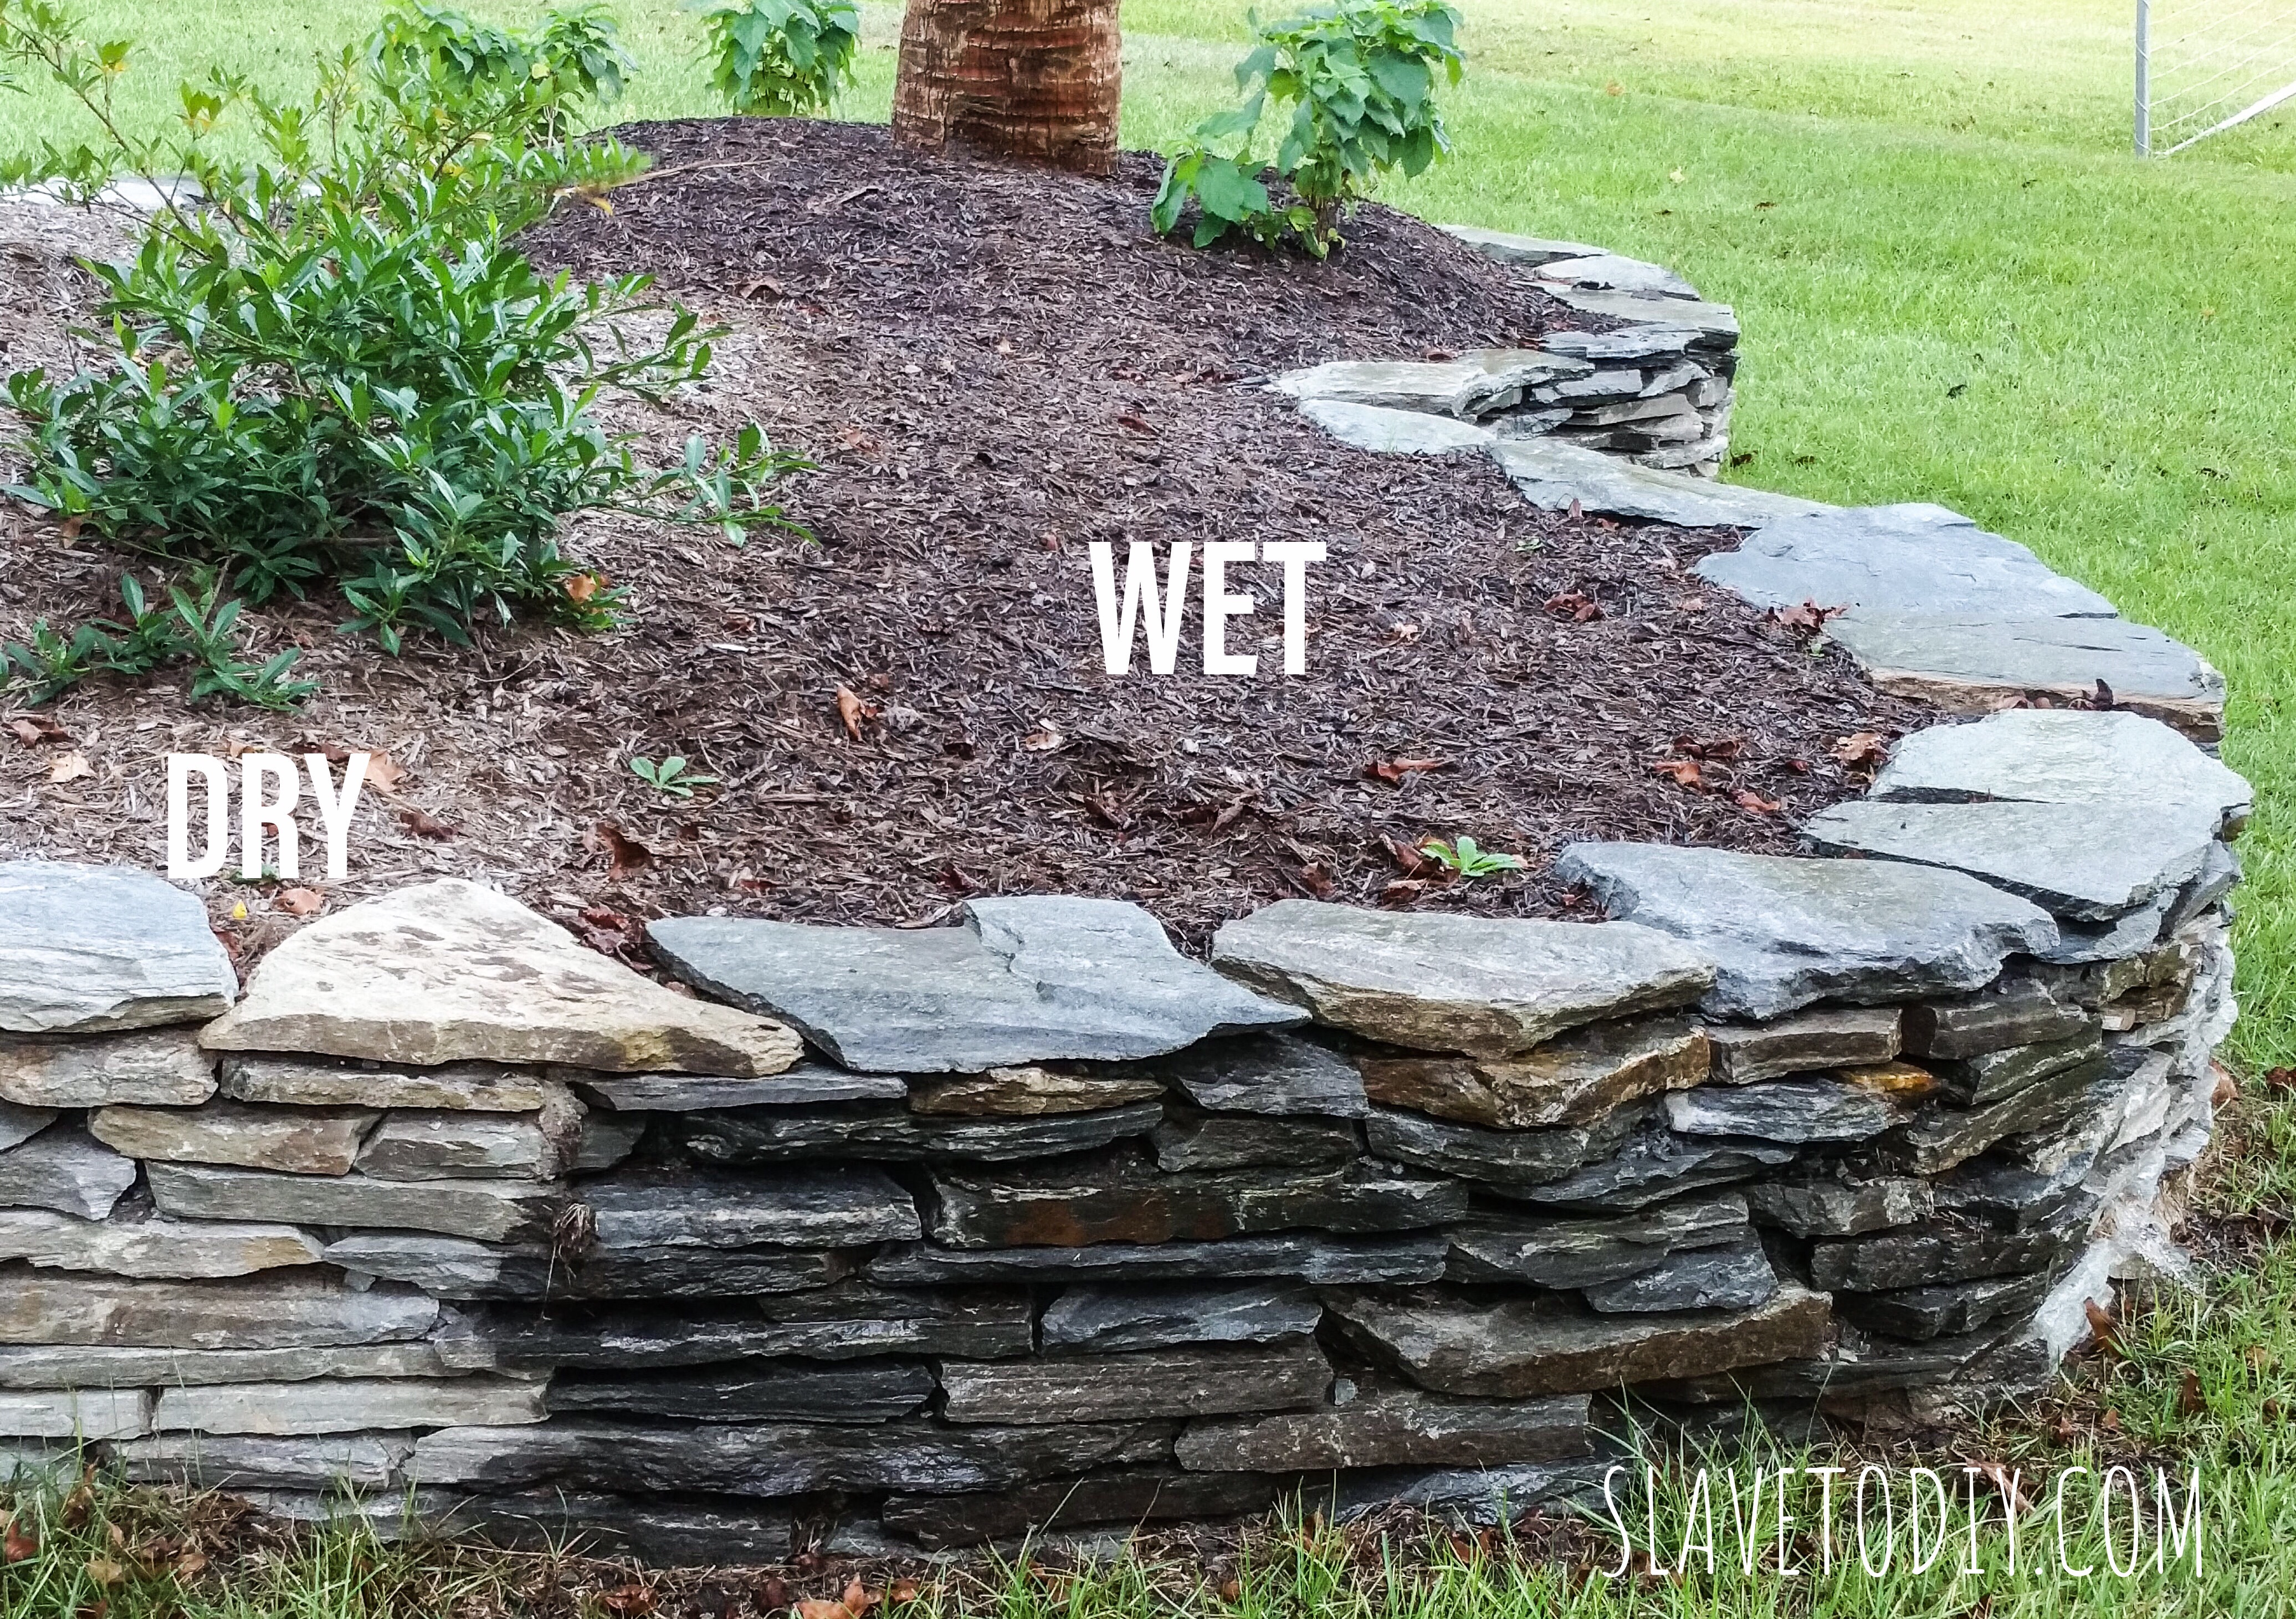
Pool, gardens, and specialty areas should be freshly staged. Wet your decks, exterior pavers, and mulch with a garden hose. They look nicer darker and like you’ve given them fresh attention. If you ever watch hgtv outdoor transformations shows, pay attention next time. Everything is soaked when they do “the reveal”. Get new pool towels and roll them up on your deck chairs/chaise lounges. Open your pool umbrella if you have one and put out the cushions. It needs to feel inviting.
The Ultimate Pre-showing Checklist for Selling Your Home Fast!
Take your animals with you. Hide evidence of them existing. Seriously. Cat litter boxes, beds… etc. Put them in your car when you leave. Nothing deters a buyer with cat allergies more than telltale signs of pets. I was bitten by a jack Russell once during a showing. You have no idea what your pets will do when you’re not there. Nothing like getting sued by someone you were hoping would buy your house because Snooki bit them trying to get into the master bedroom (and no, I didnt’ sue. I just gave them a heads up they might want to take the dog with them next time). Potential buyers may also let your indoor cats outside or your circus dog out.
Make sure evidence of animals is gone. Hit areas with telltale hair with tape or a lint roller.
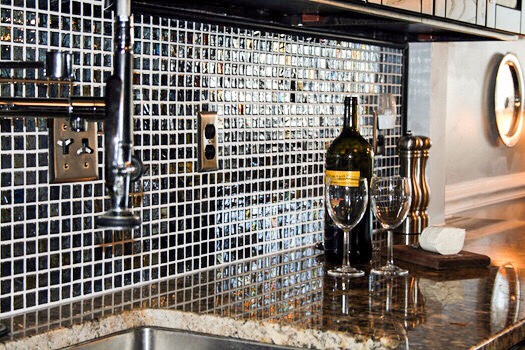
Kitchen. Clear counters except your nice knife block. A bottle of wine with a few glasses for later is a nice touch. (Who’s in the mood to celebrate buying a house???)
The Ultimate Pre-showing Checklist for Selling Your Home Fast!
Remember, you ultimately only need ONE buyer. It’s going to be the one that falls in love with your life. Prepare accordingly.
Do you have any niche showing tips that you recommend? I would love to see your tips and questions in the comments section! Thanks for reading and you can find more great DIY articles here.
Cheers and happy selling!
*Legal stuff:
I am honest about my experiences with different products and write because I enjoy it. I do however, have the opportunity to earn money for my writing, also.
Slavetodiy.com is a participant in the Amazon Services LLC Associates Program, an affiliate advertising program designed to provide a means for sites to earn advertising fees by advertising and linking to amazon.com. Amazon offers a small commission on products sold through their affiliate links. Each of your purchases via our Amazon affiliation links supports our cause at no additional cost to you.
If a blogger links to an Amazon product (with a special code for affiliates embedded in the link), and a reader places an item in their “shopping cart” through that link within 24 hours of clicking the link, the blogger gets a small percentage of the sale. Amazon links are not “pay per click.” If you click on the product link and stay around Amazon and purchase something else, however, I will get a commission on that sale.
Slavetodiy.com is also a VigLink affiliate advertiser which works similarly.
This is a multi-phase project… and turned out being one of the many I decided to “surprise” Rainman with when he got back from a trip.
This post may contain affiliate links. Please see our disclosure at the end of the post.
Here’s the deal, I love this house. However, one of the reasons we chose this place is because it has beautiful bones and is ripe for updating. The front yard was no exception. The exterior of the house has the potential to be spectacular, the landscaping on the other hand is at best generic. Someone planted a whole bunch of stuff when this place was built. The next person let it go. Like the amazon, it took over. There may be undiscovered species living by the pool.
We ripped it out. And are still in the process of ripping out more. Baby steps. Here’s what this project started with (after a lot of wild bush removal had already happened). This was my blank pallet:
From overgrown to a big, stark, boring looking thing. Now that I’m looking at it, it almost looks like new construction. We just can’t have that, now can we?
Here’s my vision: I love stacked stone walls. I love the look of them in my native New England, like they’ve been there forever, meandering along the hillside, fallen autumn leaves contrasting their mossy patina. Sigh.
I’ve built them at two previous homes and helped friends with them, so I’m getting pretty damn good at them. I STILL love them and haven’t outgrown them, so they must be CLASSIC. The first time I did this, I did it without google. I did it without *GASP* Pinterest. I did it without the internet. I was trying to dig rocks out of my new construction home in the PA Poconos to create space for a lawn. My idea was to bring in soil and grow grass myself. A great place for my two little boys to play. I KEPT HITTING ROCKS. As the pile grew, my new plan began to take shape. I had more than enough for a garden and by maybe cutting into the empty lot next door just a smidge I uncovered enough for a gorgeous garden that ran the length of the whole house. I had no idea at the time how many thousands of dollars I had saved, but I had uncovered the beginnings of my lust for constant improvement.
This newest project, I didn’t realize initially, was going to be varsity level and my estimate on materials (as usual) was waaaay low.
Tip: Whatever your guesstimate is on materials, double it.
What you’ll need:
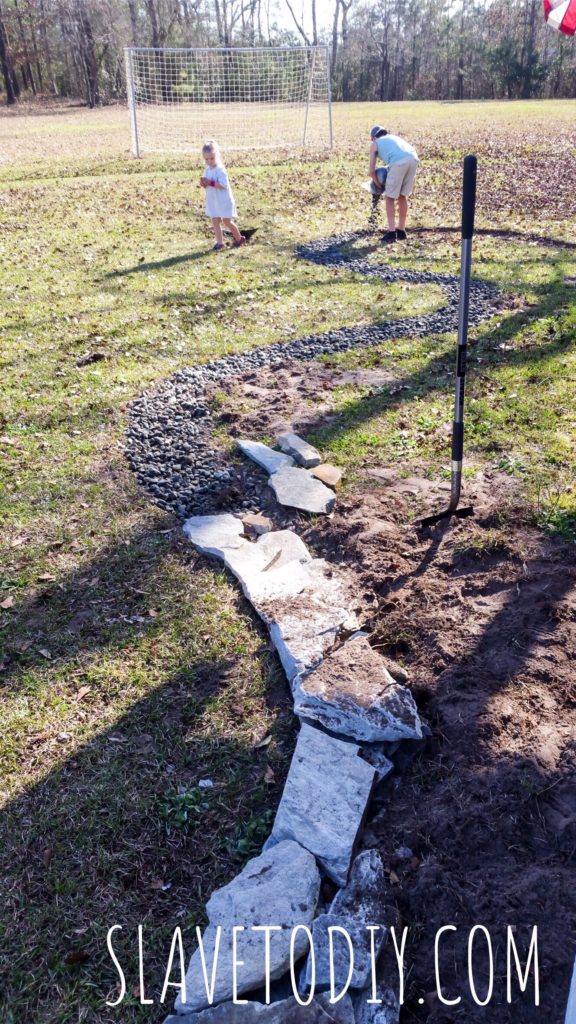
Long hose or stiff rope for laying out the garden line
I really wanted to get started before the SNAKES woke up (shudder), so I think we started in February. We started by laying out a long hose and moving it around to try to visualize where I wanted the wall. Now, this takes some imagination and time. It’s very difficult to try to imagine the wall at its full height.
Tip: Get the line where you think you love it. Walk away. Come back. Adjust it. Leave it overnight. Have coffee with your pretend wall in the morning. Adjust it again. Have wine with it in the evening. Adjust it again. Ask a friend for her opinion of the line. Ignore her opinion. Adjust it again. You get the idea.
Once I was in love with my curvy line I used white spray paint along the line to mark my garden edge. I also spray painted the black hose. Whoops. If Rainman noticed, he didn’t fuss about it.
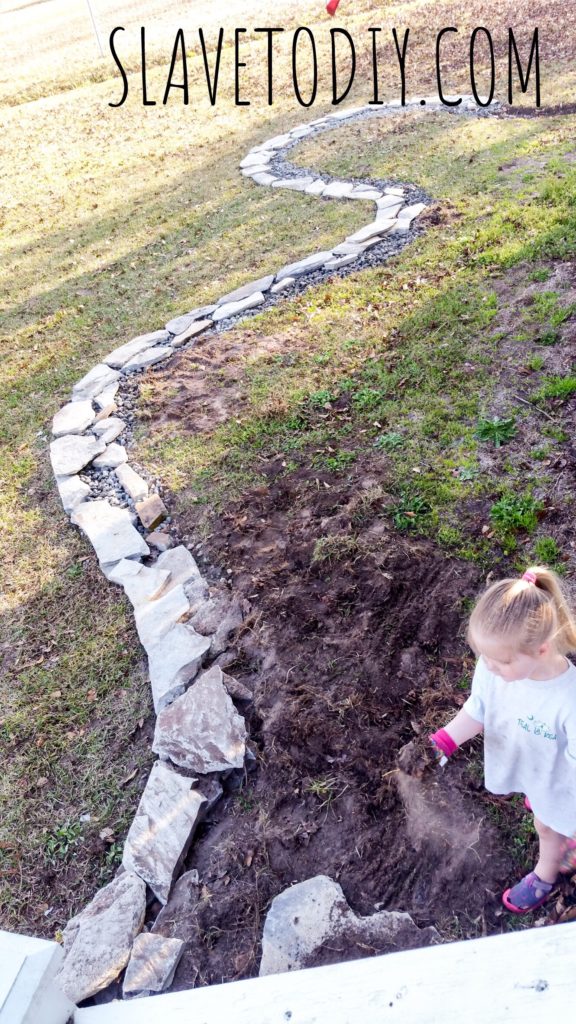
My son helped me dig out a trench from the line toward the house a few inches deep and about a foot and a half wide. We essentially removed a layer of sod and replanted it in a bare spot the idiot dog dug up. This is a process. If you want to rent a sod cutter (for larger sized walls) they are available from rental companies and home depot pretty reasonably. For me, I have free teenager labor, so I skipped it.
I noticed in previous projects that a solid base for the wall, especially a heavy one, is pretty important for its stability. I’ve seen walls sink, slide, and tip when done improperly. Depending on your soil, you may want to do a true paver base (4-6 inches of tamped sand over a layer of medium rocks). Our soil is very stable. We put a layer of drainage rock down to put the first layer of stones on, supplemented by pea gravel to balance the rocks.
Design tip: Go bigger. Extend the line of your garden past where the traditional “base plantings” go. Use curves. Curves are sexy. We like sexy.
Once that good layer of drainage rock is down, it’s much easier to settle and balance the first layer of flat stones. It’s really difficult to explain the balancing and the building… but a lot of it is common sense. The other part is pure finesse and artistic ability. You’ve either got it, or you don’t. Rainman doesn’t participate in this process until we get to final leveling. He would lose his mind.
Tip: If you have a Rainman helping, employ him by having him unload pallets and separate the stones into similarly sized piles. Set aside unusually large and straight edged stones to be used later as capstones. It’s helpful to you, and prevents any freak-outs because of the un-squareness of the building materials.
Keep the seams away from each other, use drainage rocks or splintered stones from your pallet to shim, backfill with topsoil and smaller drainage rocks or gravel.
Here’s the deal, these are dry stacked, but they’re not going anywhere. There are two different stone sizes used to balance and I kept them packed from behind with topsoil. Plus the very subtle lean toward the garden itself keeps it naturally balanced.
And thus began the game of Tetris.
You’ll notice that in some areas there is a double layer of skinny rocks and some areas of the trench are covered by larger rocks. It doesn’t matter as long as you keep them balanced. Start wide at the base and keep irregular stones to build up/balance the back. You won’t see this part as it will be buried, so the balance is the only part that matters on the back of the wall. The front on the other hand is important. I tried really hard to keep the front edge relatively flush so nobody slices a leg open walking by. Obviously, the front is the side that will be visible and the aesthetic matters.
Once that first layer is down, fill the middle with medium rocks. Use the gravel to help balance the next level of rocks.
It helps to work from one side and work around the garden to the other side. Some people work one layer at a time but that doesn’t work for me. I end up laying out half a pallet of stones and looking for specific shapes as I go. Think: giant jigsaw puzzle.
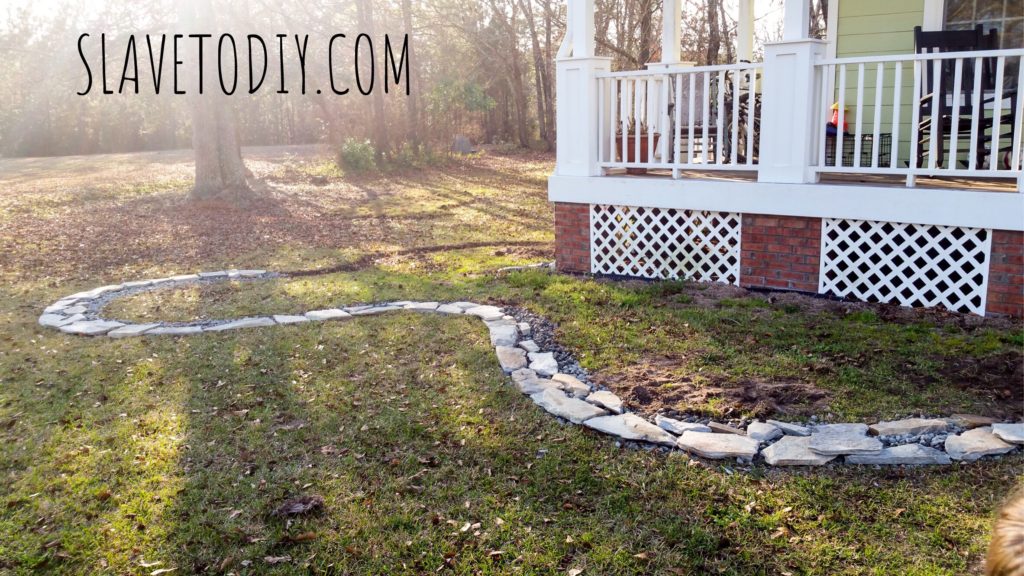
You can see in the next picture, the wall is much higher by the steps then tapers off because I was working in that direction.
Notice the two piles of rock, one medium rock, one pea gravel. I worked from these piles during the whole, very long process. Also notice the large rocks back by the lattice work. As I found large, flat stones in the pallets, I set them aside for the end to be used as capstones. It gives the finished product a very polished look.
Tip: If you have a truck, it is MUCH, MUCH cheaper to get scoops of topsoil and different fill rock from the local mulch store than getting bags from Lowe’s or Home Depot. It’s also MUCH, MUCH easier to back the truck up and unload it with a shovel than to drag individual bags out of your car.
Once the wall started getting high enough to be concerned about it slipping, I began adding topsoil. My son was not happy about the daily order of dirt from the mulch place on his way home from school, but I have to abuse him as much as possible before he leaves to go to college, right?
Each load was two scoops of topsoil in his little truck. Pack the soil in on the backside of the wall by shoveling it in from inside the garden. Using care not to shift the wall, use the back of the shovel to pat down and settle the dirt in. If you use the gravel and rocks appropriately, it shouldn’t be shifting at all.
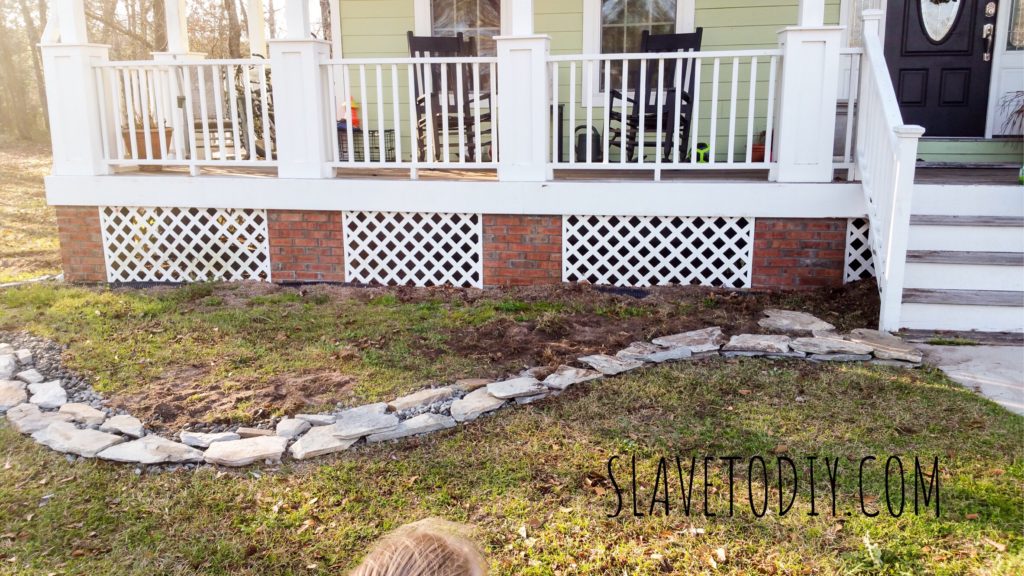
At the end of this part of the project, the capstones were set aside and the wall was “close” to level. When Rainman got home from his trip he helped me get the wall much closer to level and ready for dirt. This was accomplished by putting stakes in at the ends and the tips of each curve then attaching a white string. Then enter the level. The Rainman. The corrections. The tempers. Then, a really nice product.
That was phase one of the stone bed. Phase two involves more stone, lots of dirt, and power tools. The lattice work needs to be ripped out and the openings closed in to support the garden dirt so we can keep going with the building-the-garden process.
Rainman, don’t read this part:
Supplies so far:
4 pallets of flat stone, delivered $1400
Medium stone, pea gravel, and topsoil $200
Don’t be fooled or disheartened by the brevity of this post. This was weeks of work. Every afternoon. It was winter when we began and as you can see the grass is turning green. It’s going to take a long time and it’s a labor of love. It’s worth it though.
I am honest about my experiences with different products and write because I enjoy it. I do however, have the opportunity to earn money for my writing, also.
Slavetodiy.com is a participant in the Amazon Services LLC Associates Program, an affiliate advertising program designed to provide a means for sites to earn advertising fees by advertising and linking to amazon.com. Amazon offers a small commission on products sold through their affiliate links. Each of your purchases via our Amazon affiliation links supports our cause at no additional cost to you.
If a blogger links to an Amazon product (with a special code for affiliates embedded in the link), and a reader places an item in their “shopping cart” through that link within 24 hours of clicking the link, the blogger gets a small percentage of the sale. Amazon links are not “pay per click.” If you click on the product link and stay around Amazon and purchase something else, however, I will get a commission on that sale.
Slavetodiy.com is also a VigLink affiliate advertiser which works similarly.


 From overgrown to a big, stark, boring looking thing. Now that I’m looking at it, it almost looks like new construction. We just can’t have that, now can we?