Kitchen Crush: The Best Ways To Transform An Outdated Kitchen On A Tiny Budget

What I remember most about my first condo was how much I hated the kitchen. Actually, hate might not be a strong enough word. It was dark and depressing, with a weird window and aged-orange vertical shades, all illuminated by a florescent fixture with brown burn marks on the plexiglass cover. The condo itself had space and was the right price, but the kitchen was awful. It was tragic. However, my total budget for transforming the space was right around ZERO dollars. Even the grocery budget was tight, at the time, so much that I sometimes worried about being able to buy diapers for my one year old. So, how the kitchen looked wasn’t a priority, regardless of how depressing it was to cook in it.

*This post may contain affiliate links. Please see full disclosure at the end of the post.

I’m betting many of you can relate. Stuck with dated, 80s arched doors or a too-dark 70s finish, or even worse, the orangish-tannish builder grade oak cabinets of the late 80s and 90s… the scalloped arches over the kitchen sink, the brown and orange vinyl flooring. All of this made MUCH worse by the endless taunting from Pinterest and Instagram: the gorgeous, highly edited kitchen photos of IG starlets showing off the latest dishes and gadgets they’re creating and using in their maddeningly perfect kitchens.

I understand. I’ve BEEN THERE. But, I’m going to tell you a secret: You CAN transform a kitchen you hate on a tiny budget. I’ve done it, multiple times.

Now, I’m not going to tell you that I’m still in that place, because I’m not. That was twenty years ago and I’ve been Blessed financially since then, so I’m working on planning my FOREVER kitchen in a MUCH larger home and loving every second (keep the FAITH, you’ll get there!). However, I want to share my secrets with you… I want to share how you can make your kitchen a place you like to cook, even take pictures of, especially if you’ve got a little bit of cash for supplies and energy to do the heavy lifting, I’ll tell you how to make BIG impact transformations for just a little bit of money.

So, here’s the big impact list: add moldingcabinet color, hardware, counter kits, counter stools & kitchen furniture, light fixtures, repurposed furniture island, and, yes, backsplashes.

Add Molding:

You may not realize when you look at those horrid 70s, 80s, and 90s kitchens what in particular makes them so hideous, but I can tell you for sure that one main thing is the soffits! Some of them are for no reason at all other than to close the space in above the cabinets, and others house vents, etc. However, this is fixable! You can add molding over soffits or close in spaces above cabinets to completely update cabinets and bring them into this century! There are some really neat molding stackups I’ve seen done and it can totally change the look of a kitchen for not very much money!

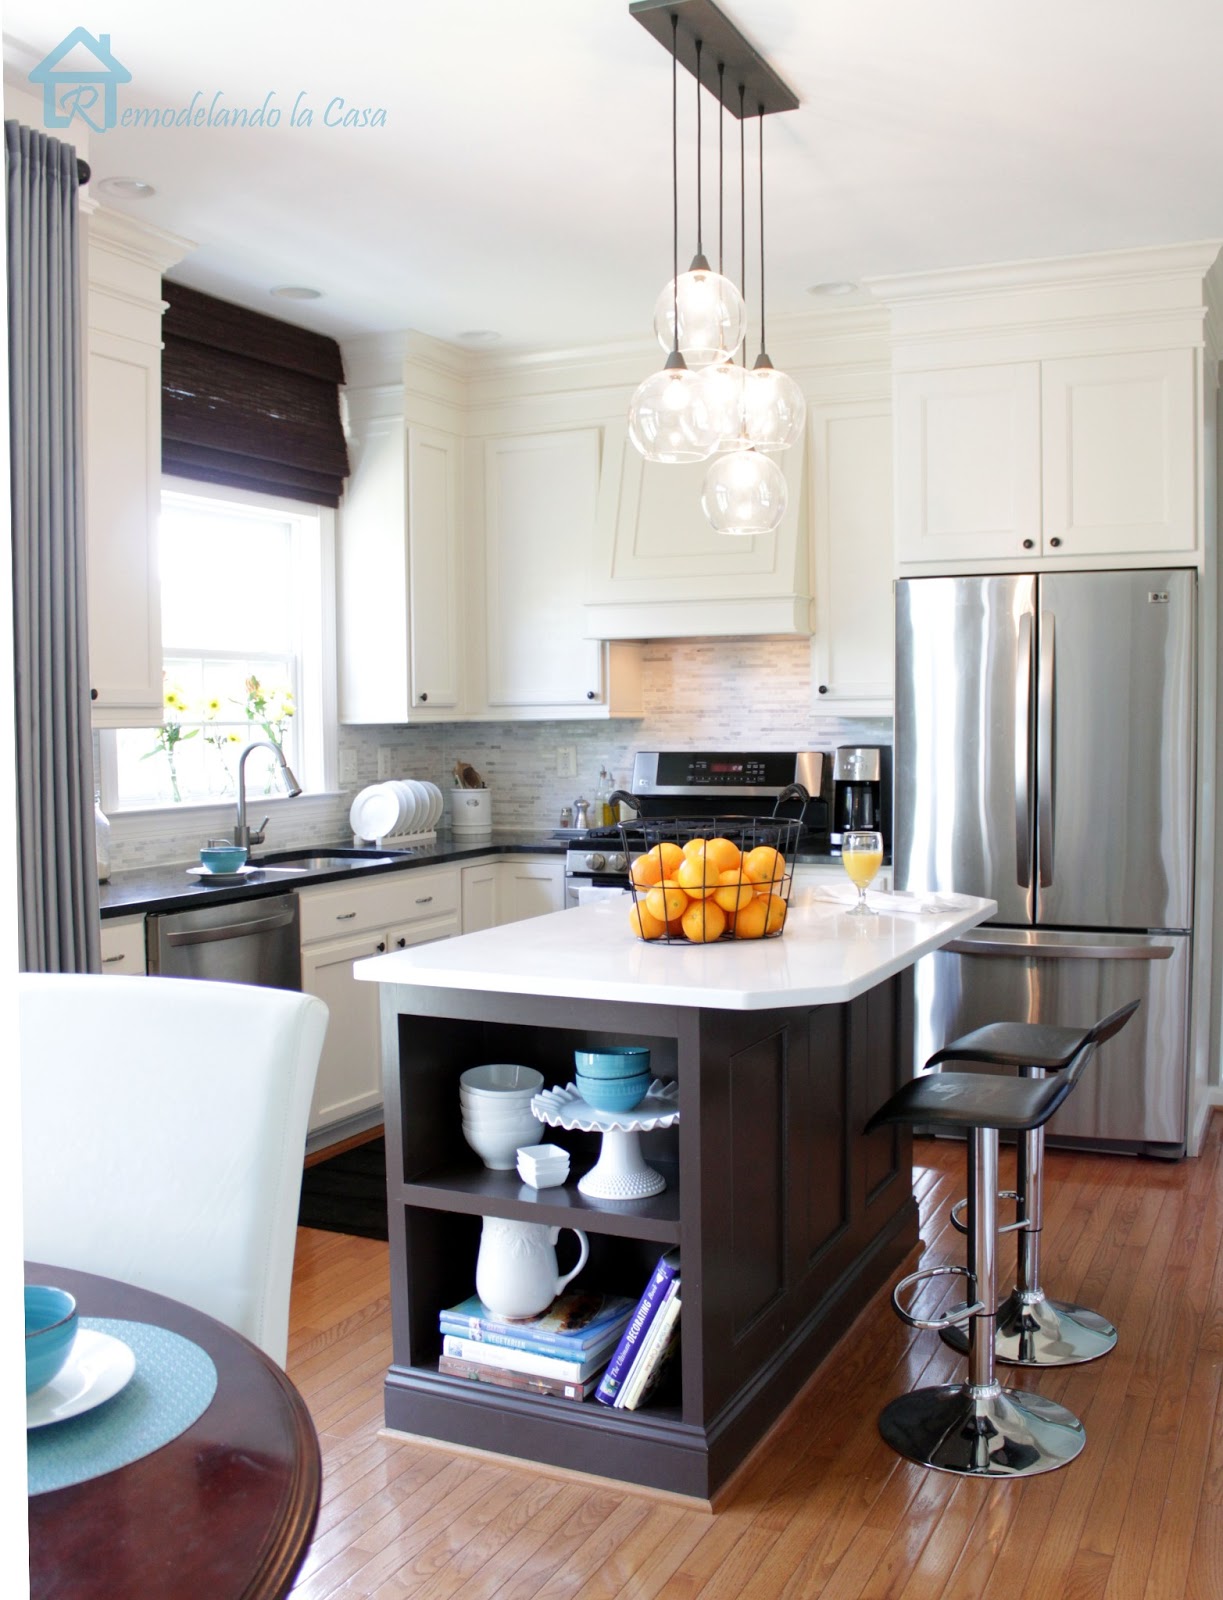
Check out this incredible makeover from Remodelandolacasa.com. A combination of paint and some smaller build projects, including adding molding to the ceiling, created a dramatic transformation in this great kitchen before and after:

remodelandolacase.com

remodelandolacasa.com
Isn’t that amazing the difference? Adding molding completely changed the look and feel of the cabinets. To see this whole transformation, go to https://www.remodelandolacasa.com/2012/01/kitchen-remodeling.html


Cabinet Color:

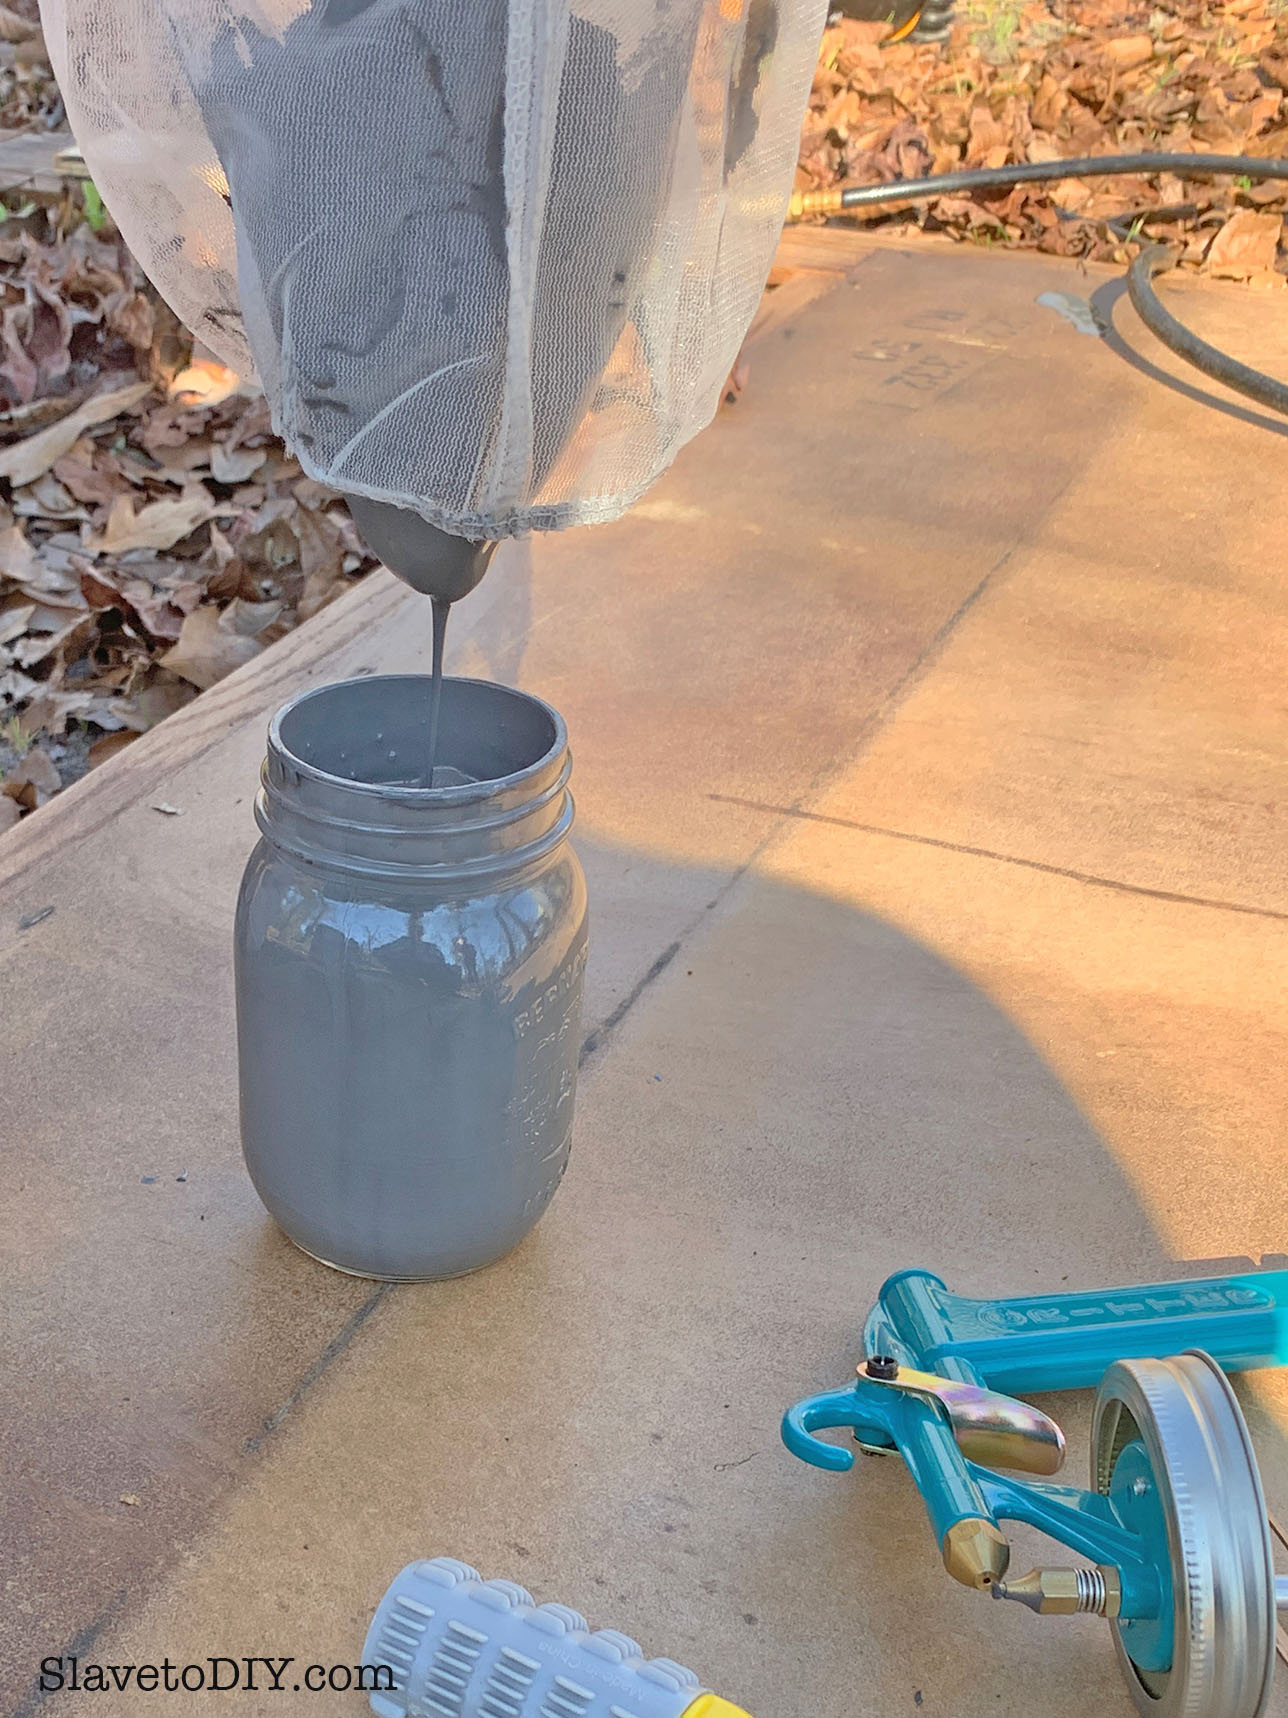
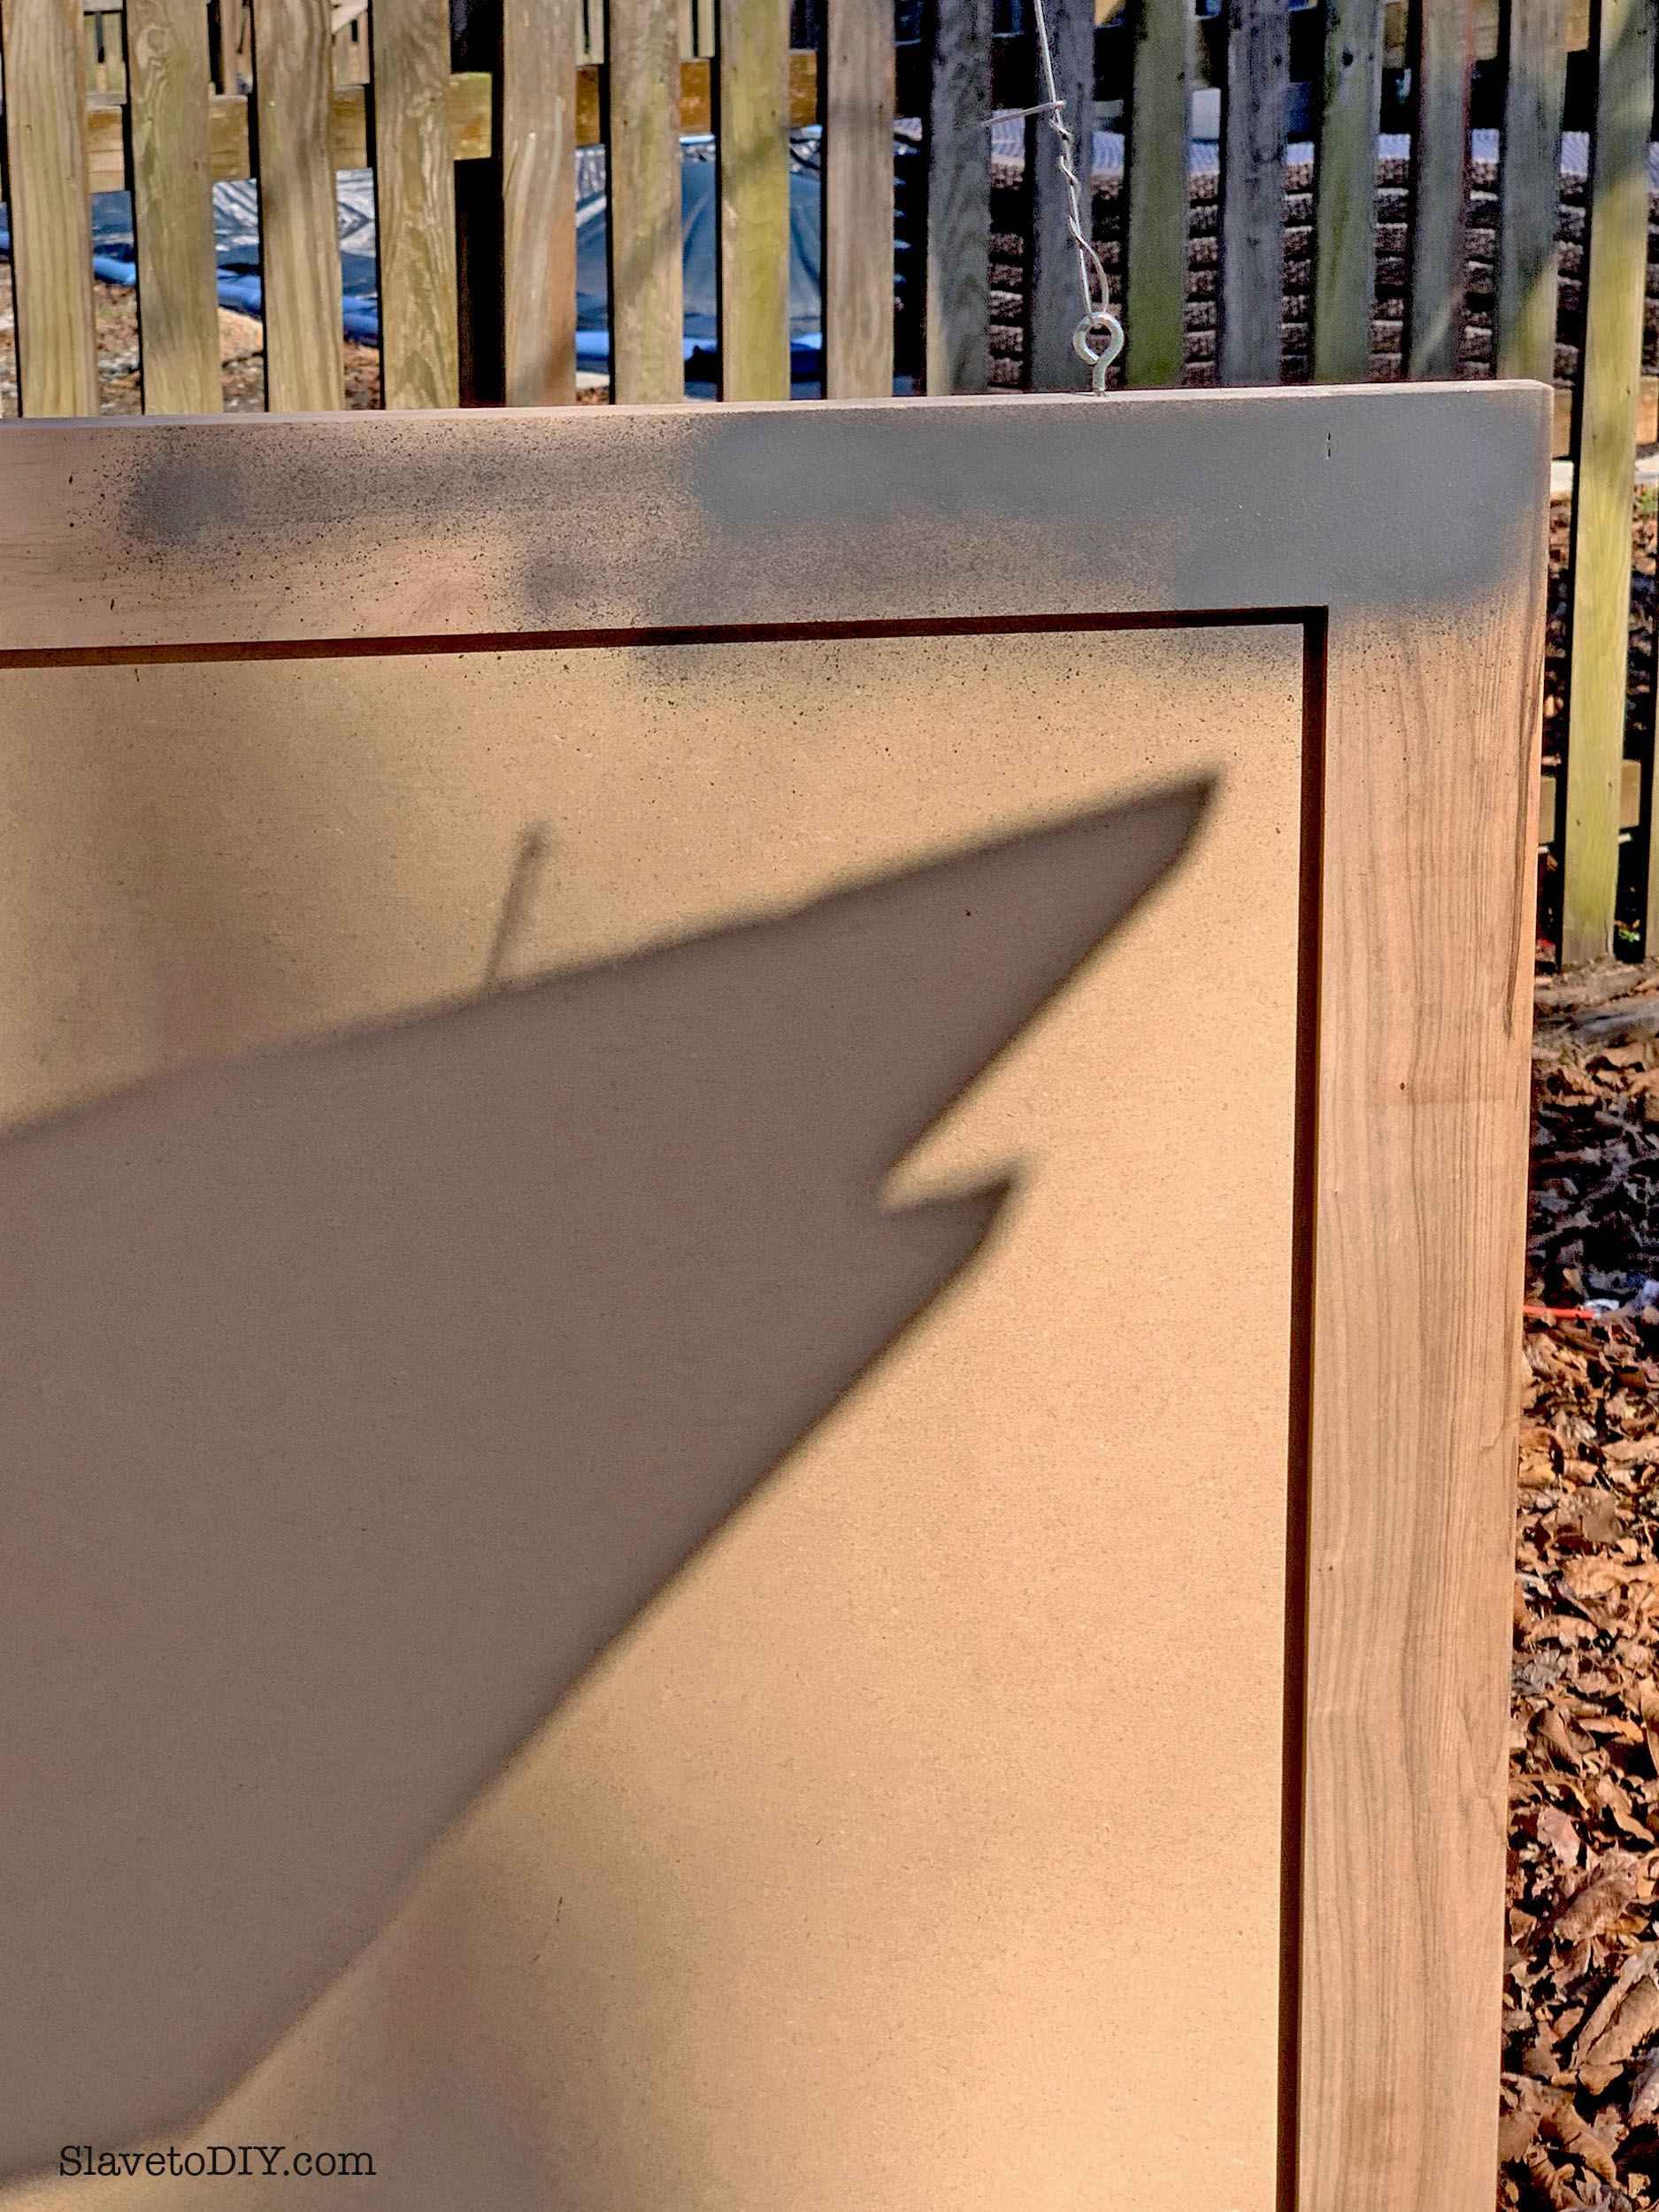
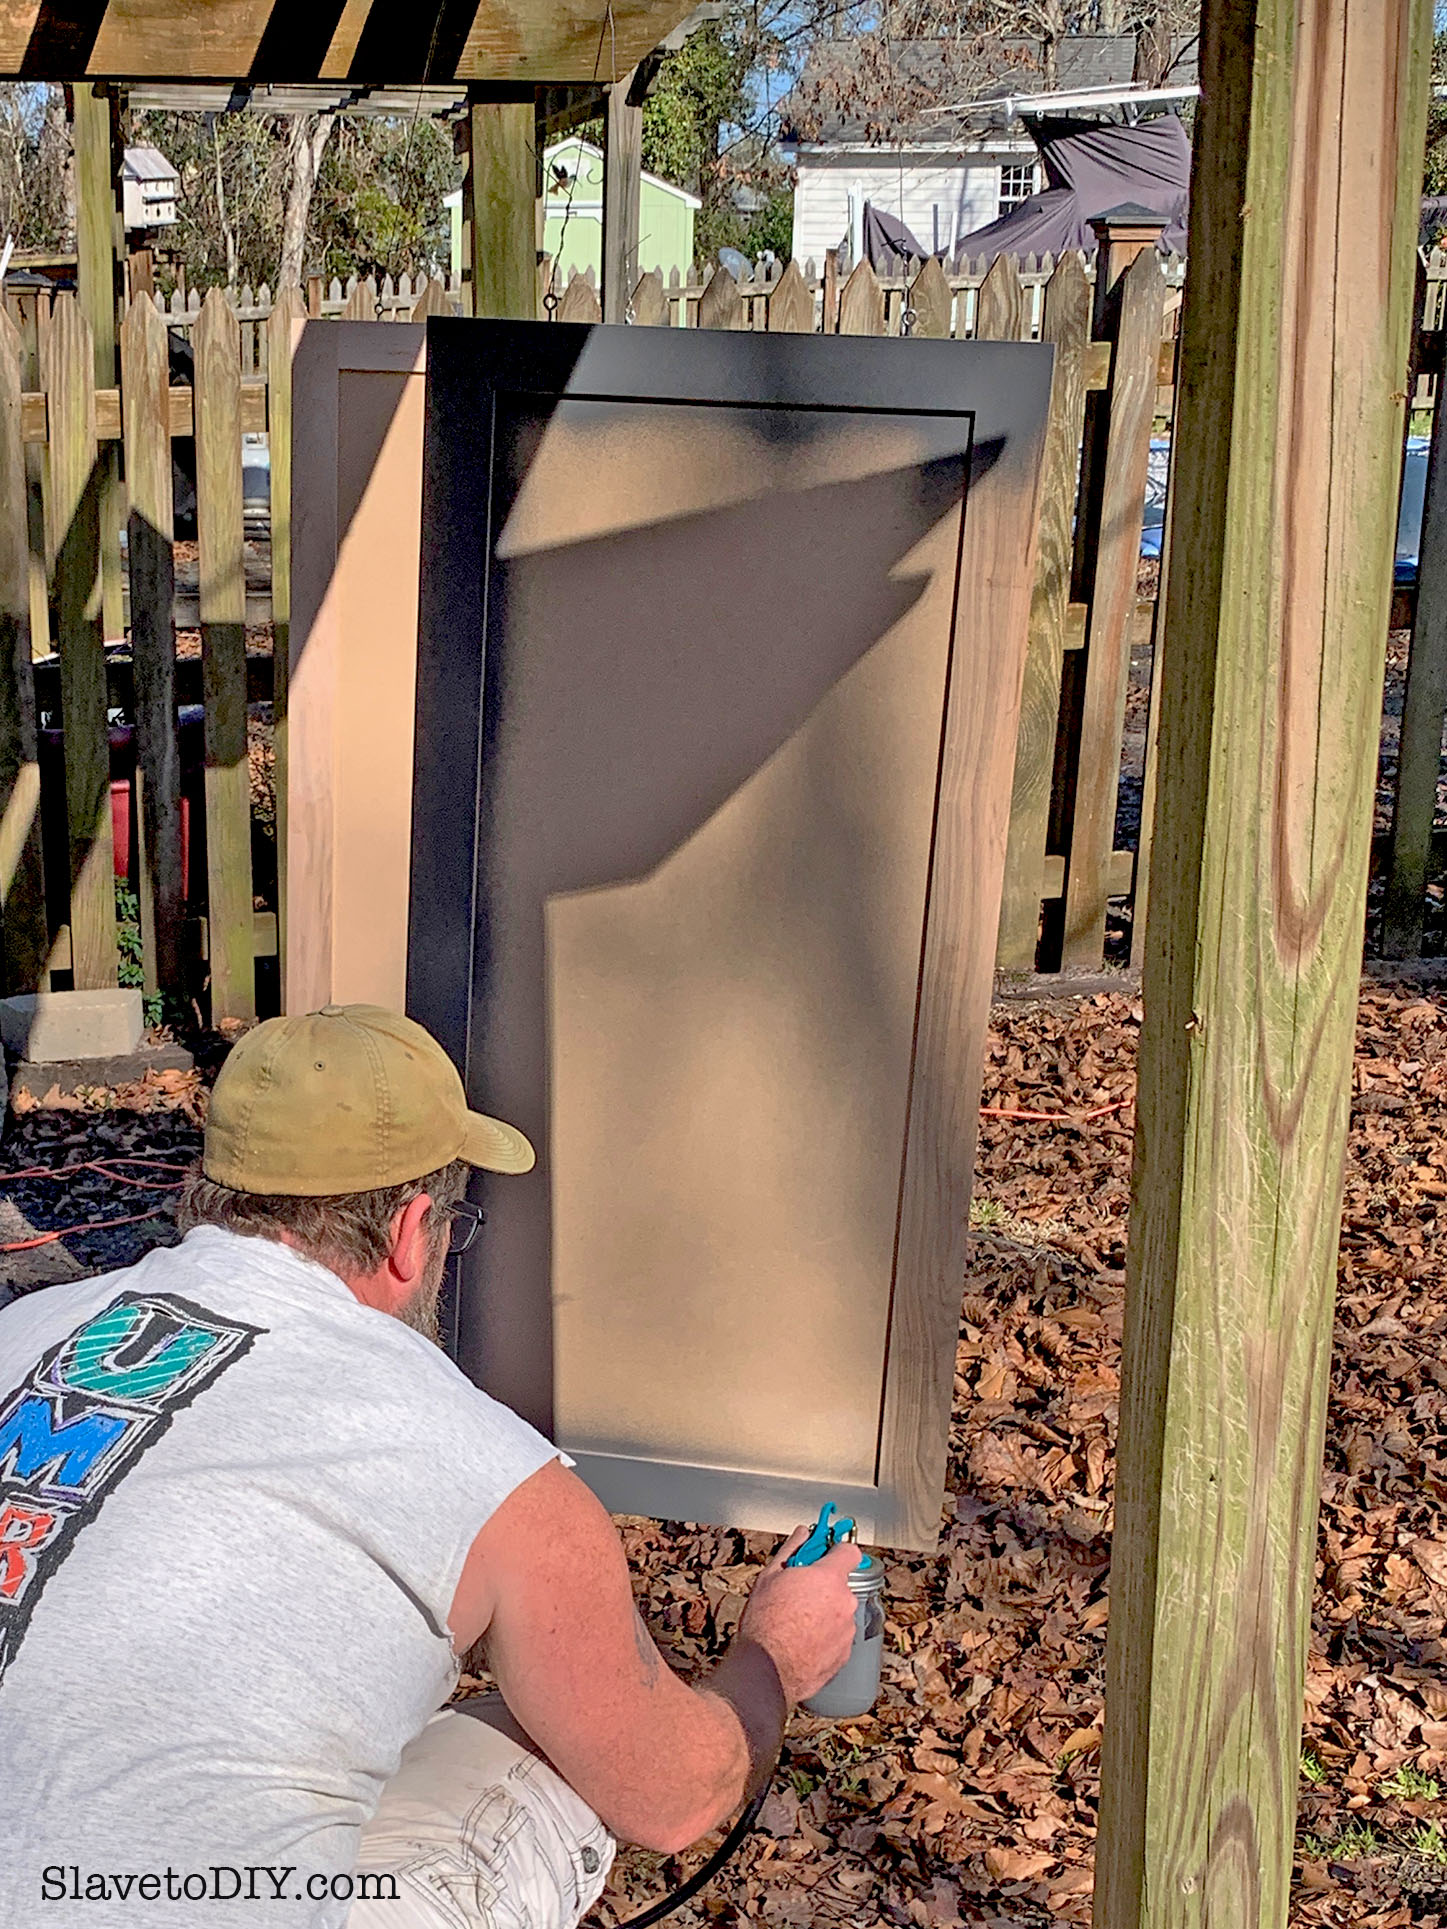
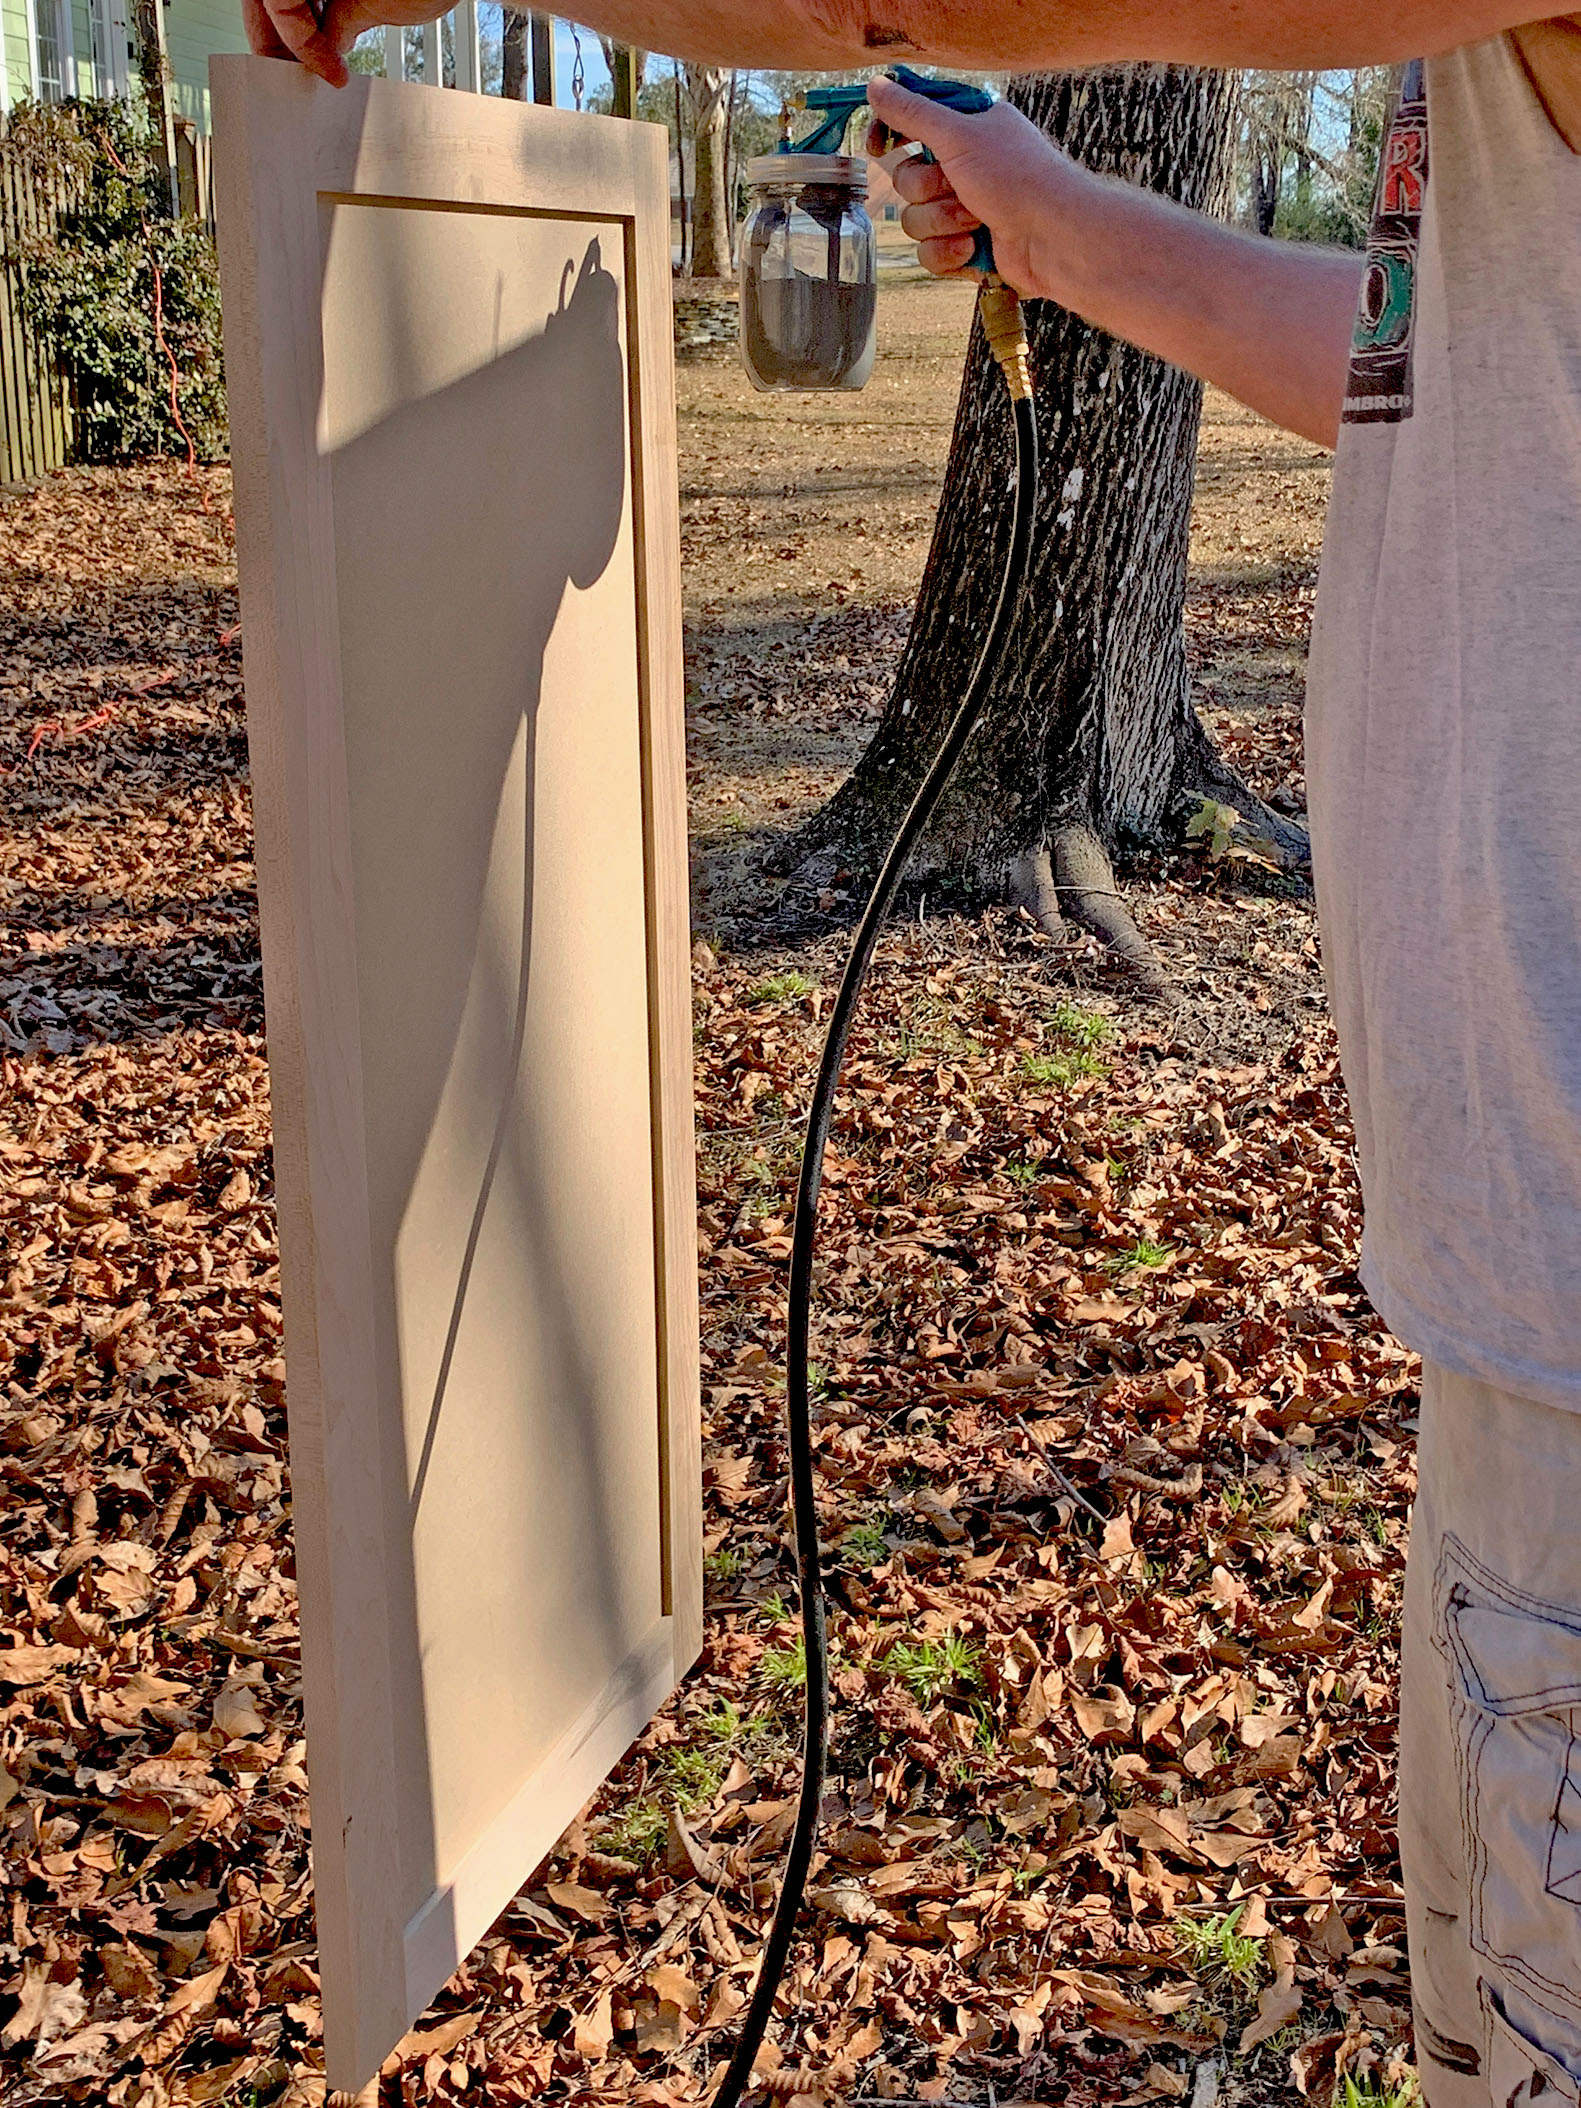
Cabinet Painting is ALL the rage these days, and with good reason. A new color can totally transform the space. On the positive side, if you have a 70s or 80s kitchen, chances are the cabinets are solid wood and will hold up really well to sanding and painting.

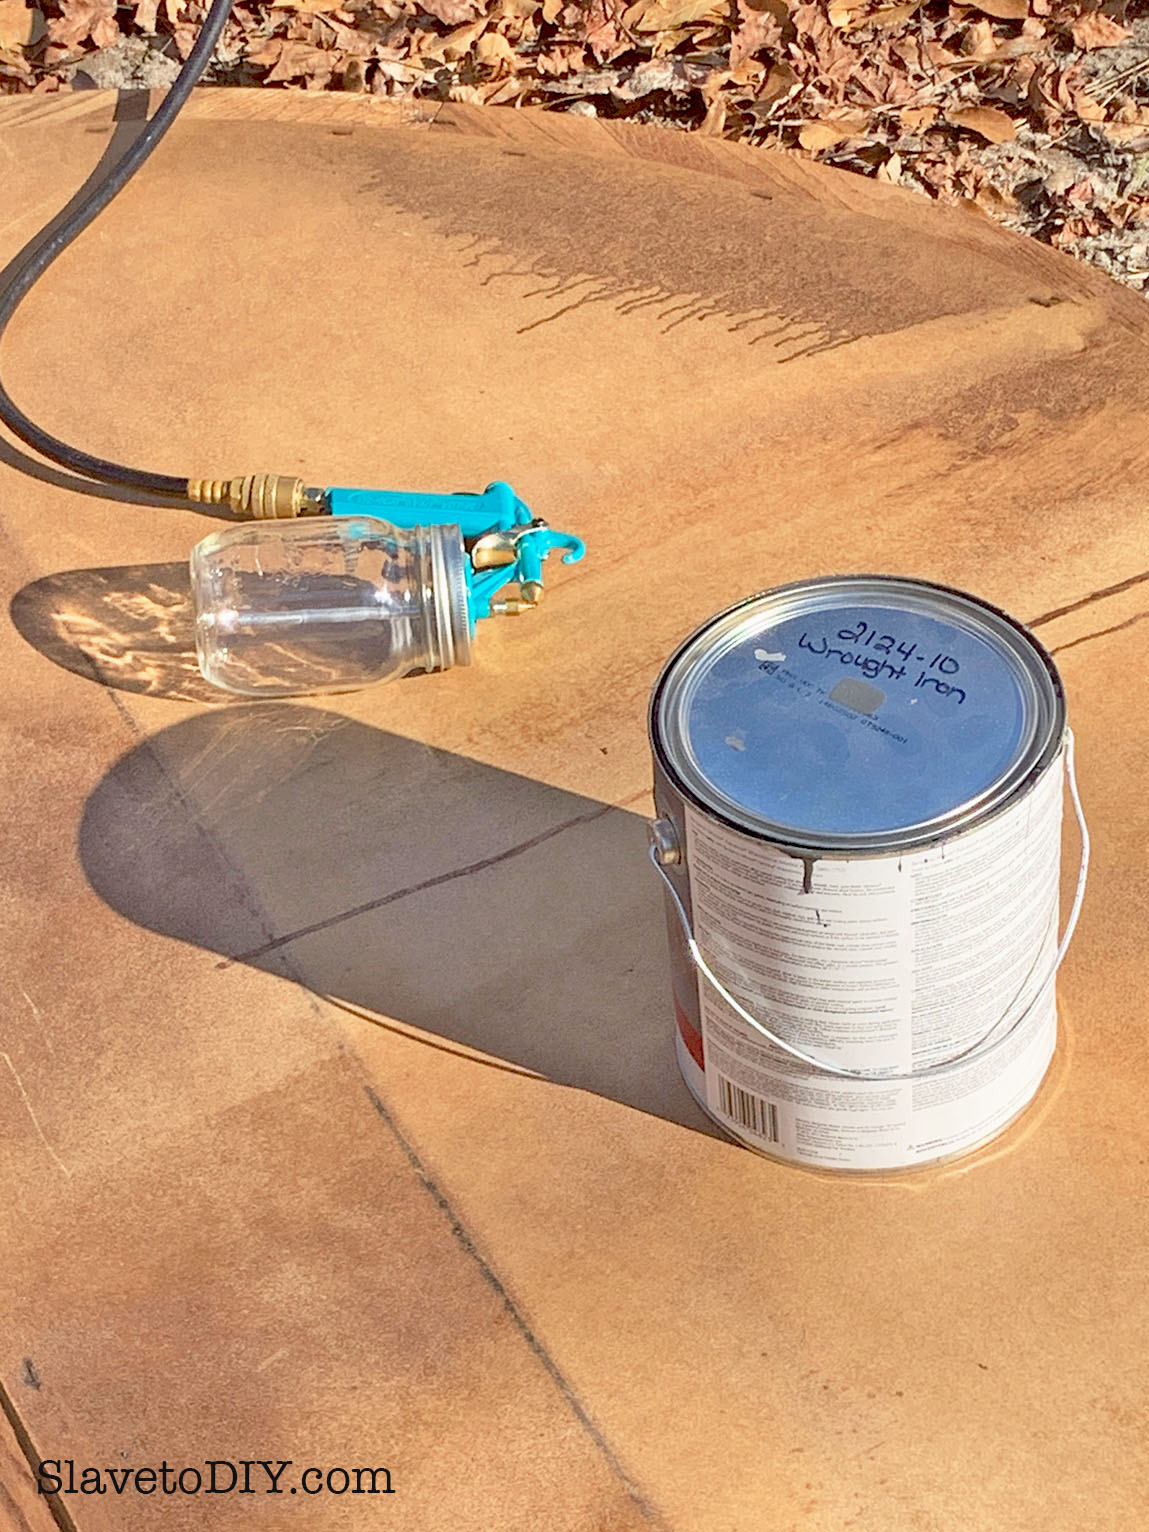
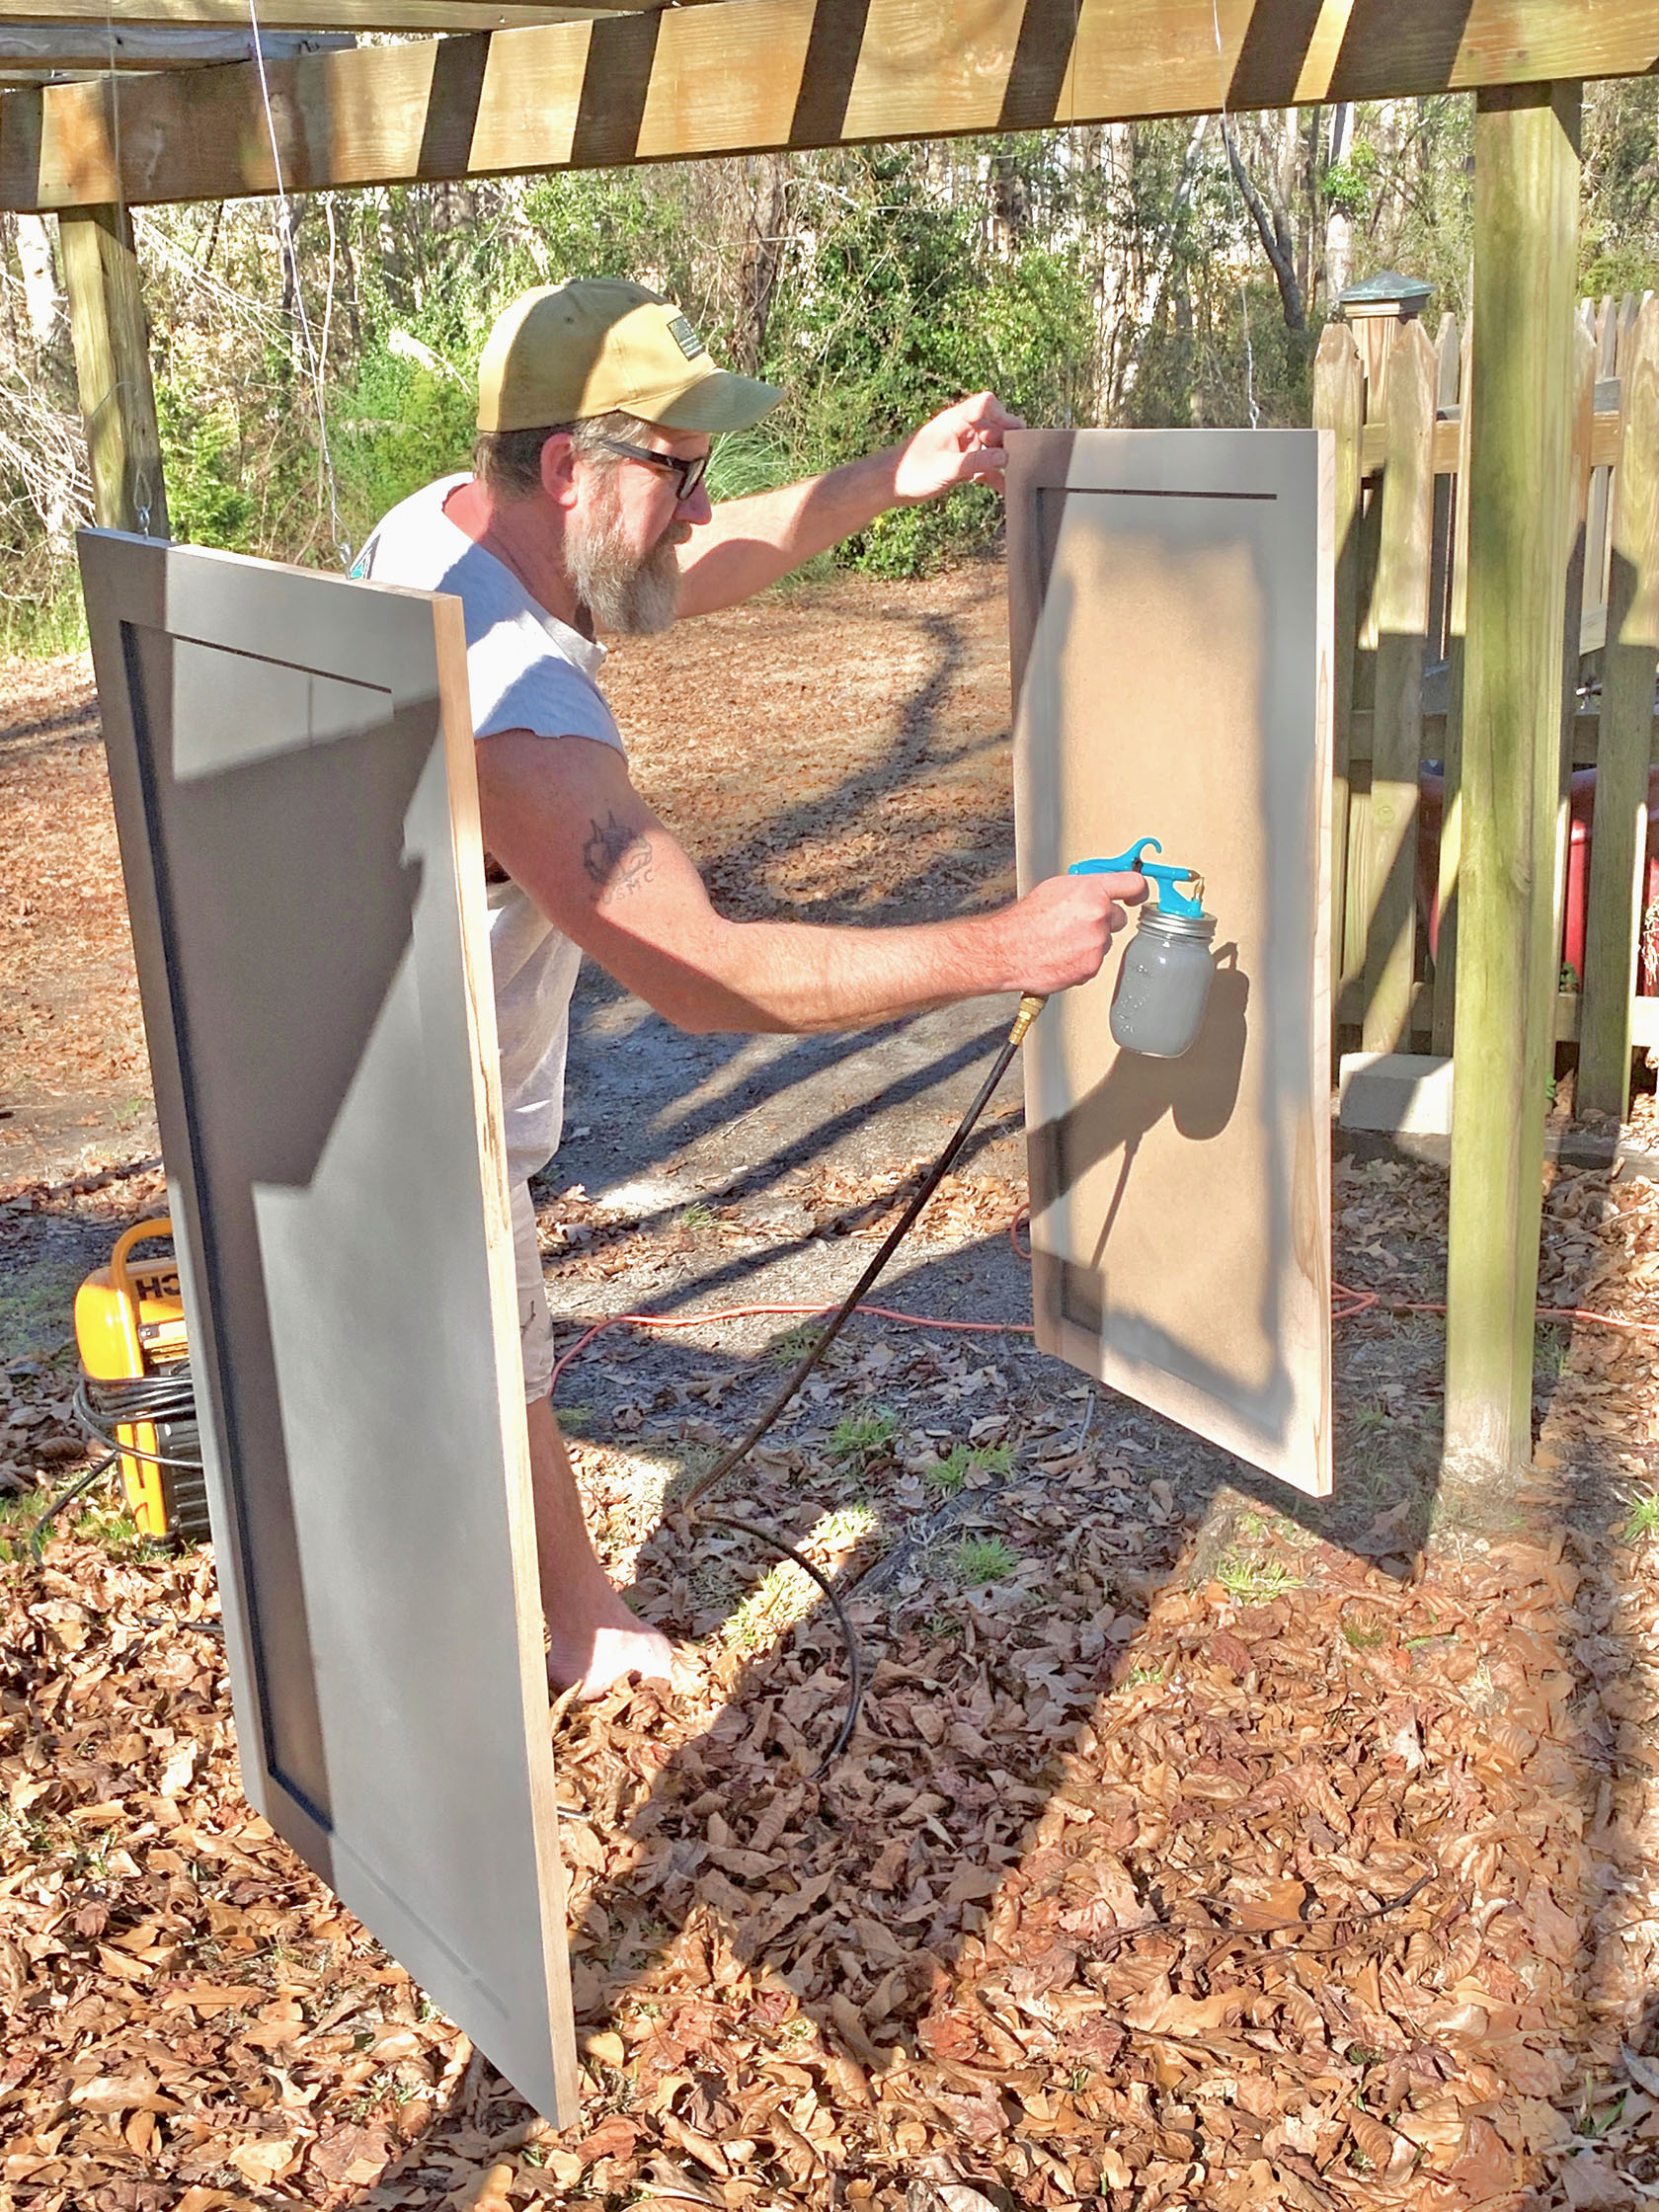
Pro tip: beware of the tutorials that tell you to slop on some paint with a brush. It’s going to turn out like poo and you’ll regret it. There’s a cheaper way to do this that has GREAT results. There’s a cute little basic paint spray gun that you can get for about $35 bucks that will take your cabinet paint job from “Yikes, she painted her cabinets” to “wow, how did you afford new cabinets?”

I recommend the paint from Benjamin Moore that makes it look and feel like a hard factory finish. If you’re one of those farmhouse gals that’s dreaming of a white kitchen, Benjamin Moore’s White Dove in CO-INSL-X Cabinet Coat is the BEST option. This is an enamel and will dry to a hard finish. It’s AWESOME. But, that paint is NOT cheap. If you can’t afford it, run down to the local hardware store and the paint guy should be able to tell you which paint to buy.

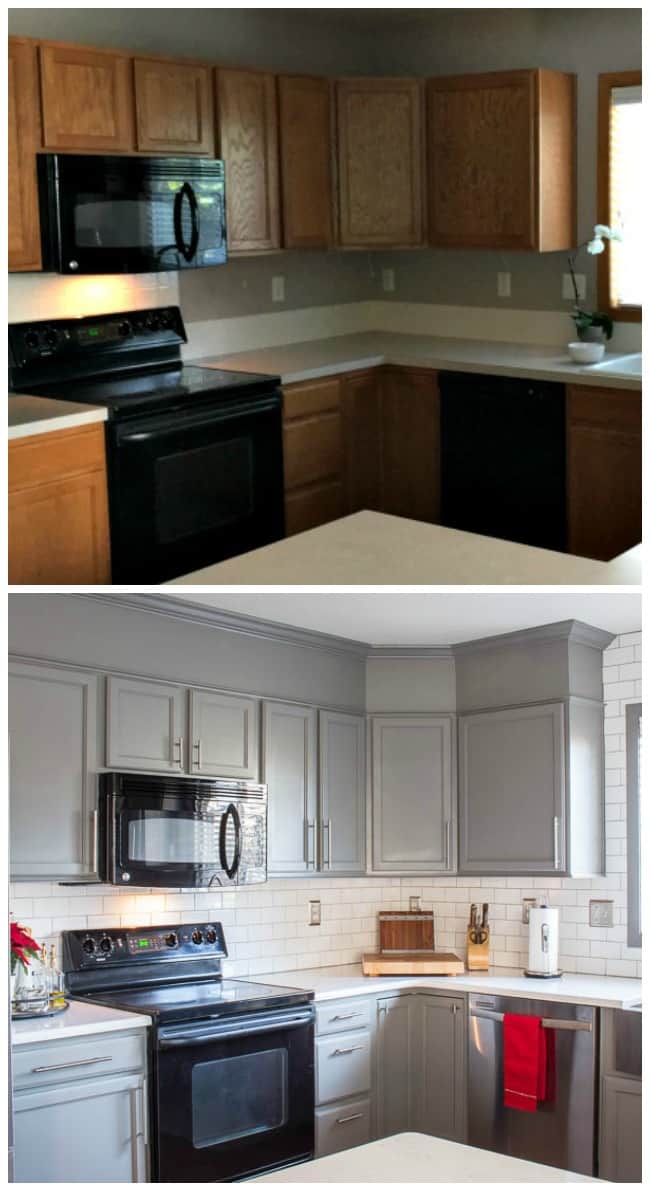
One of my favorite transformations is from Laura at inspirationformoms.porch.com. She did a heavenly flip on her kitchen:
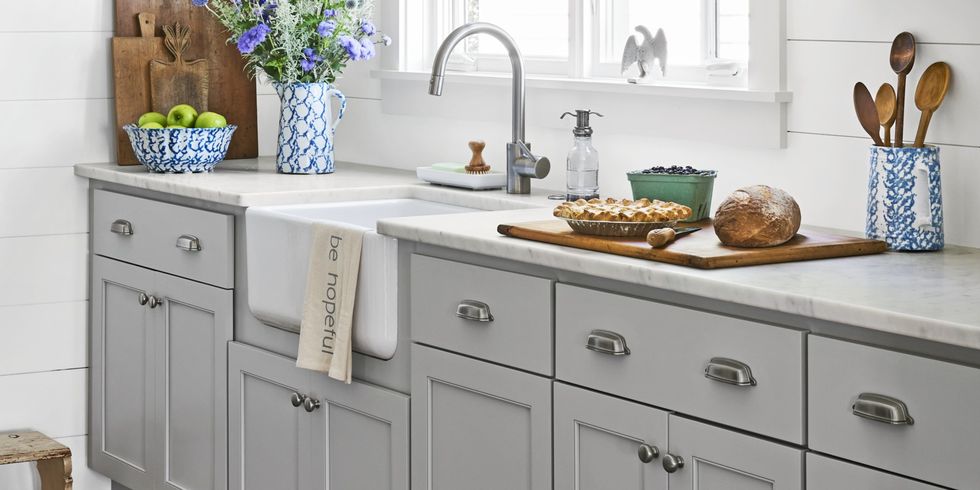
Collage-before-and-after1
How’s that for a fantastic before and after on kitchen cabinet paint (and did you notice the molding at the top of the cabinets???). To see this whole transformation go to https://inspirationformoms.porch.com/kitchen-before-and-after-reveal/


Hardware:

New hardware, and swapping out dated hardware, can completely transform a kitchen all by itself. It’s like remembering accessories when you get dressed up: the perfect necklace and jewelry to accent and improve your cute outfit. Think it’s expensive? Think again.

One of the coolest things that has happened because of Amazon in the last few years is that competition has SIGNIFICANTLY reduced the cost of cabinet hardware. The 3″ Stainless Steel Bar Kitchen Cabinet Pulls I purchased for a renovation in 2011/2012 at $25 each you can buy on Amazon today for a quantity of 25 for the same price (try to visualize the steam coming out of my ears). Yes, THEY’RE LITERALLY A DOLLAR APIECE. This is a project you can afford, and you don’t need any specialty tools to install them. If you purchase hardware with the same hole spacing as the old ones, you won’t even need to drill.

Country Living Magazine has a great blog post on easy DIY and inexpensive hardware updates. It’s amazing to me what a difference hardware makes, and how it can COMPLETELY change the style of a kitchen.

diy-kitchen-cabinet-hardware-ideas-1558648318
From Country Living Magazine https://www.countryliving.com/home-design/decorating-ideas/g27572367/kitchen-cabinet-hardware-ideas/


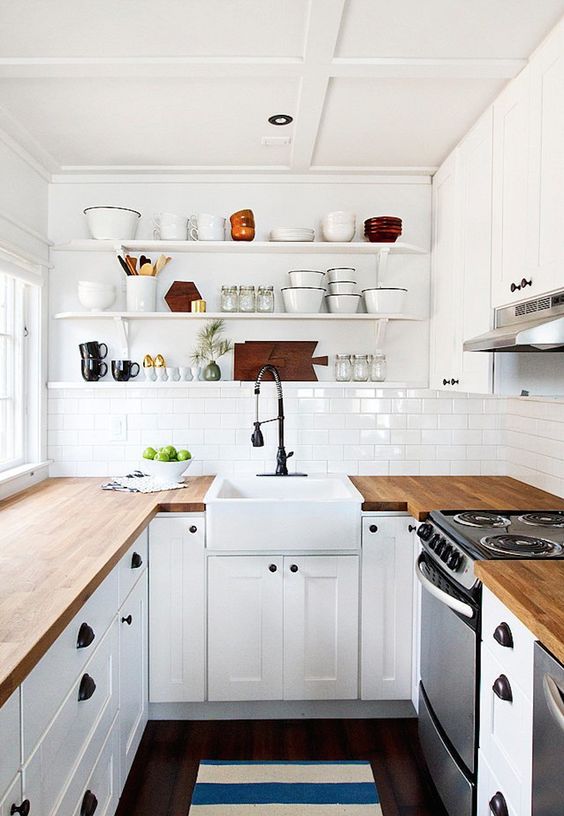
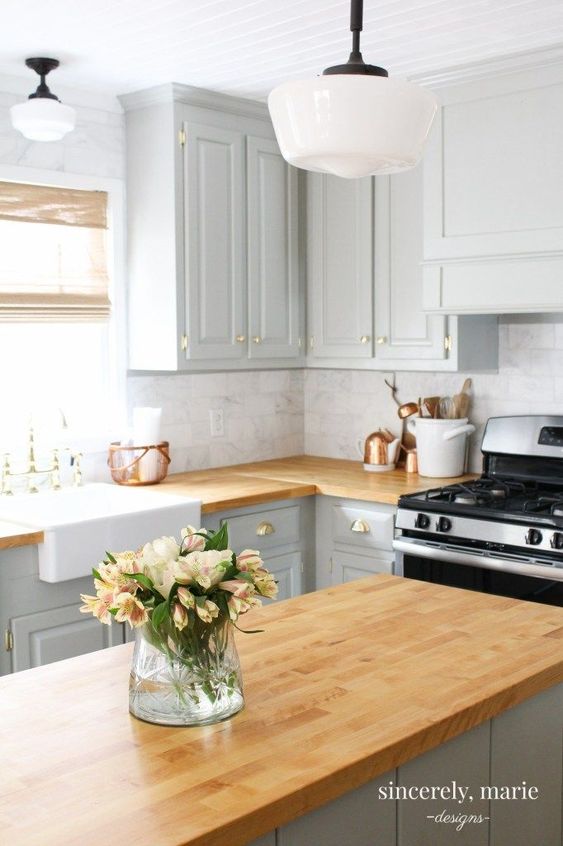
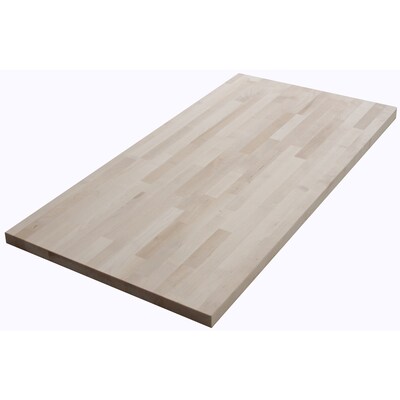
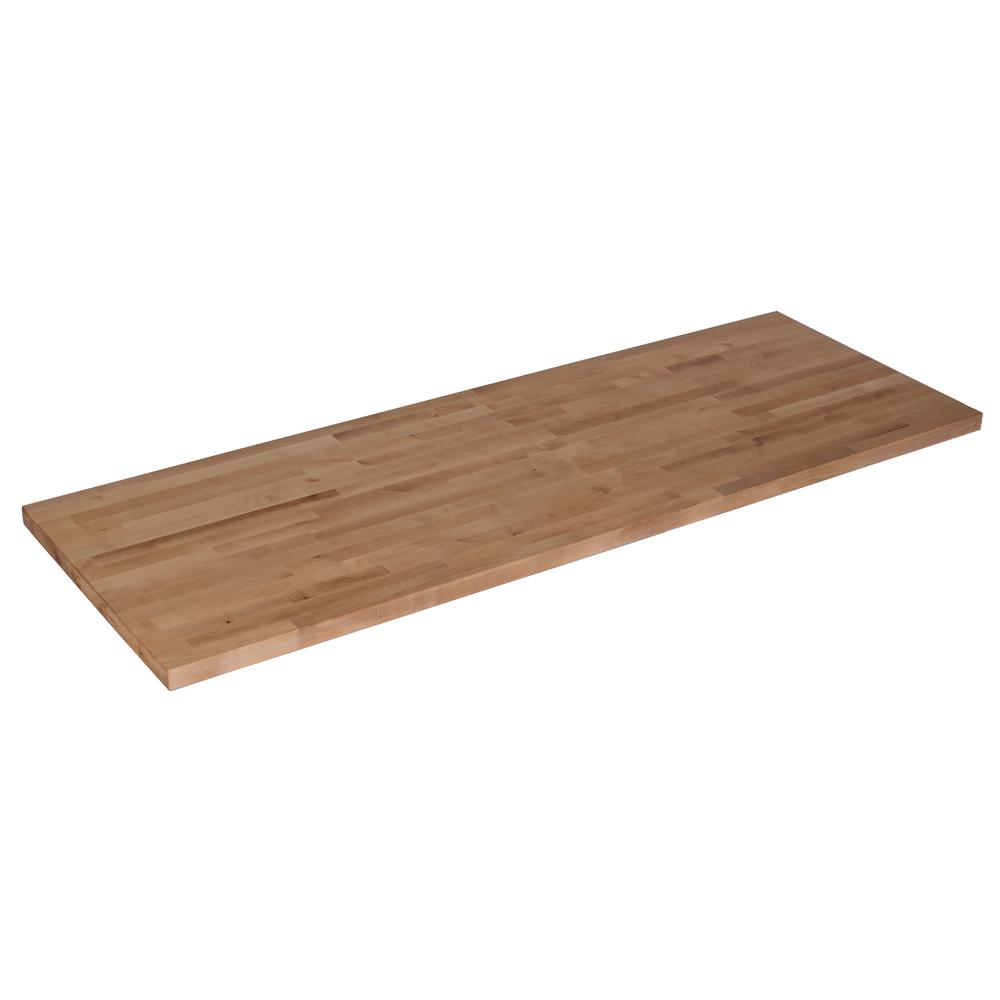
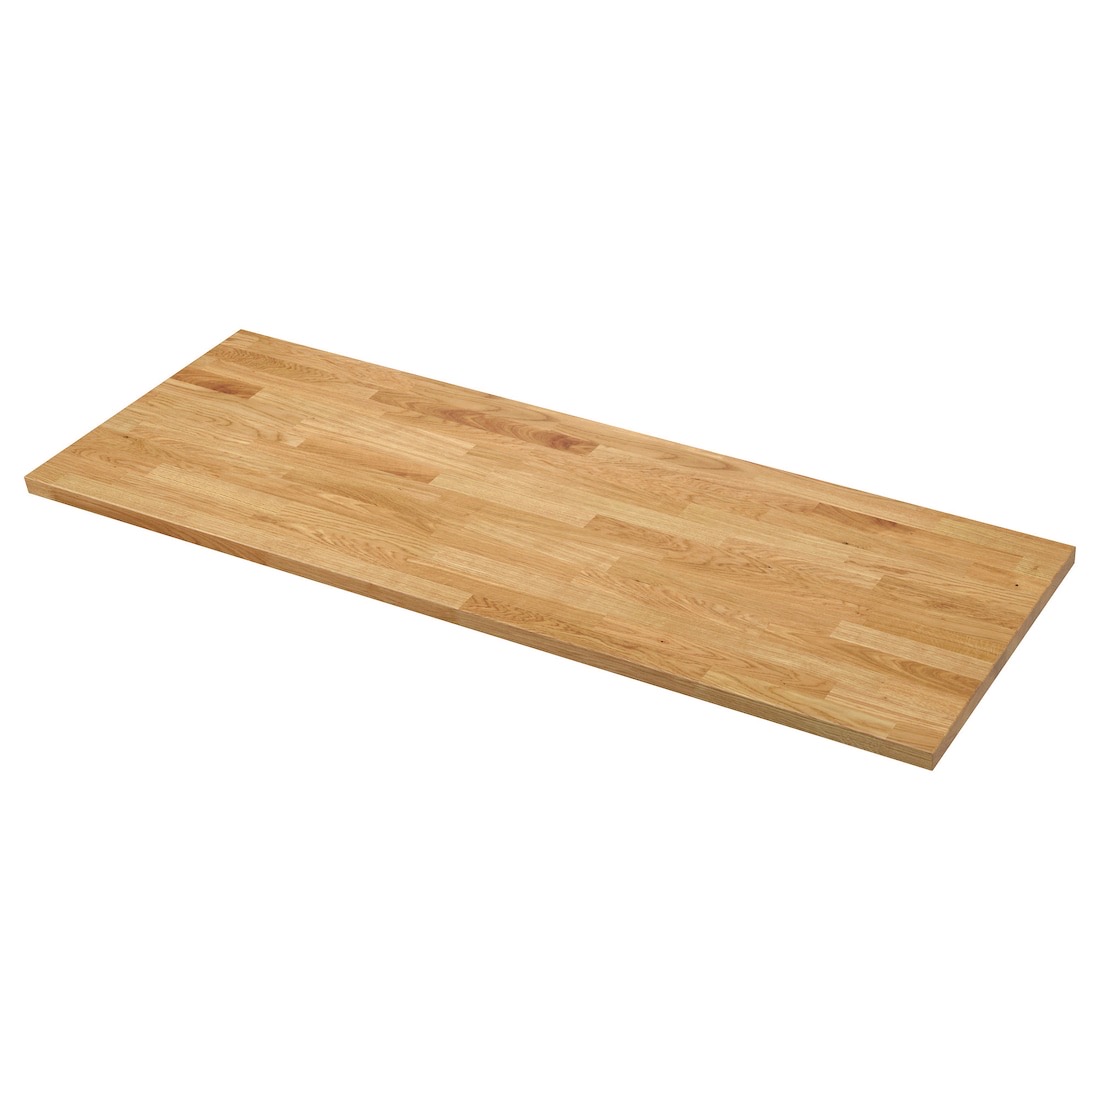
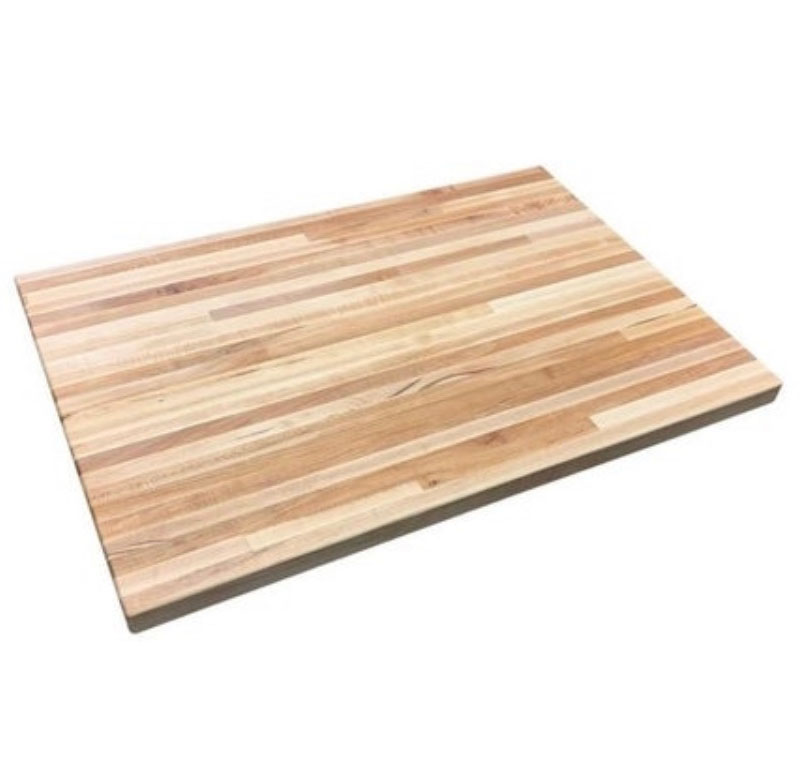
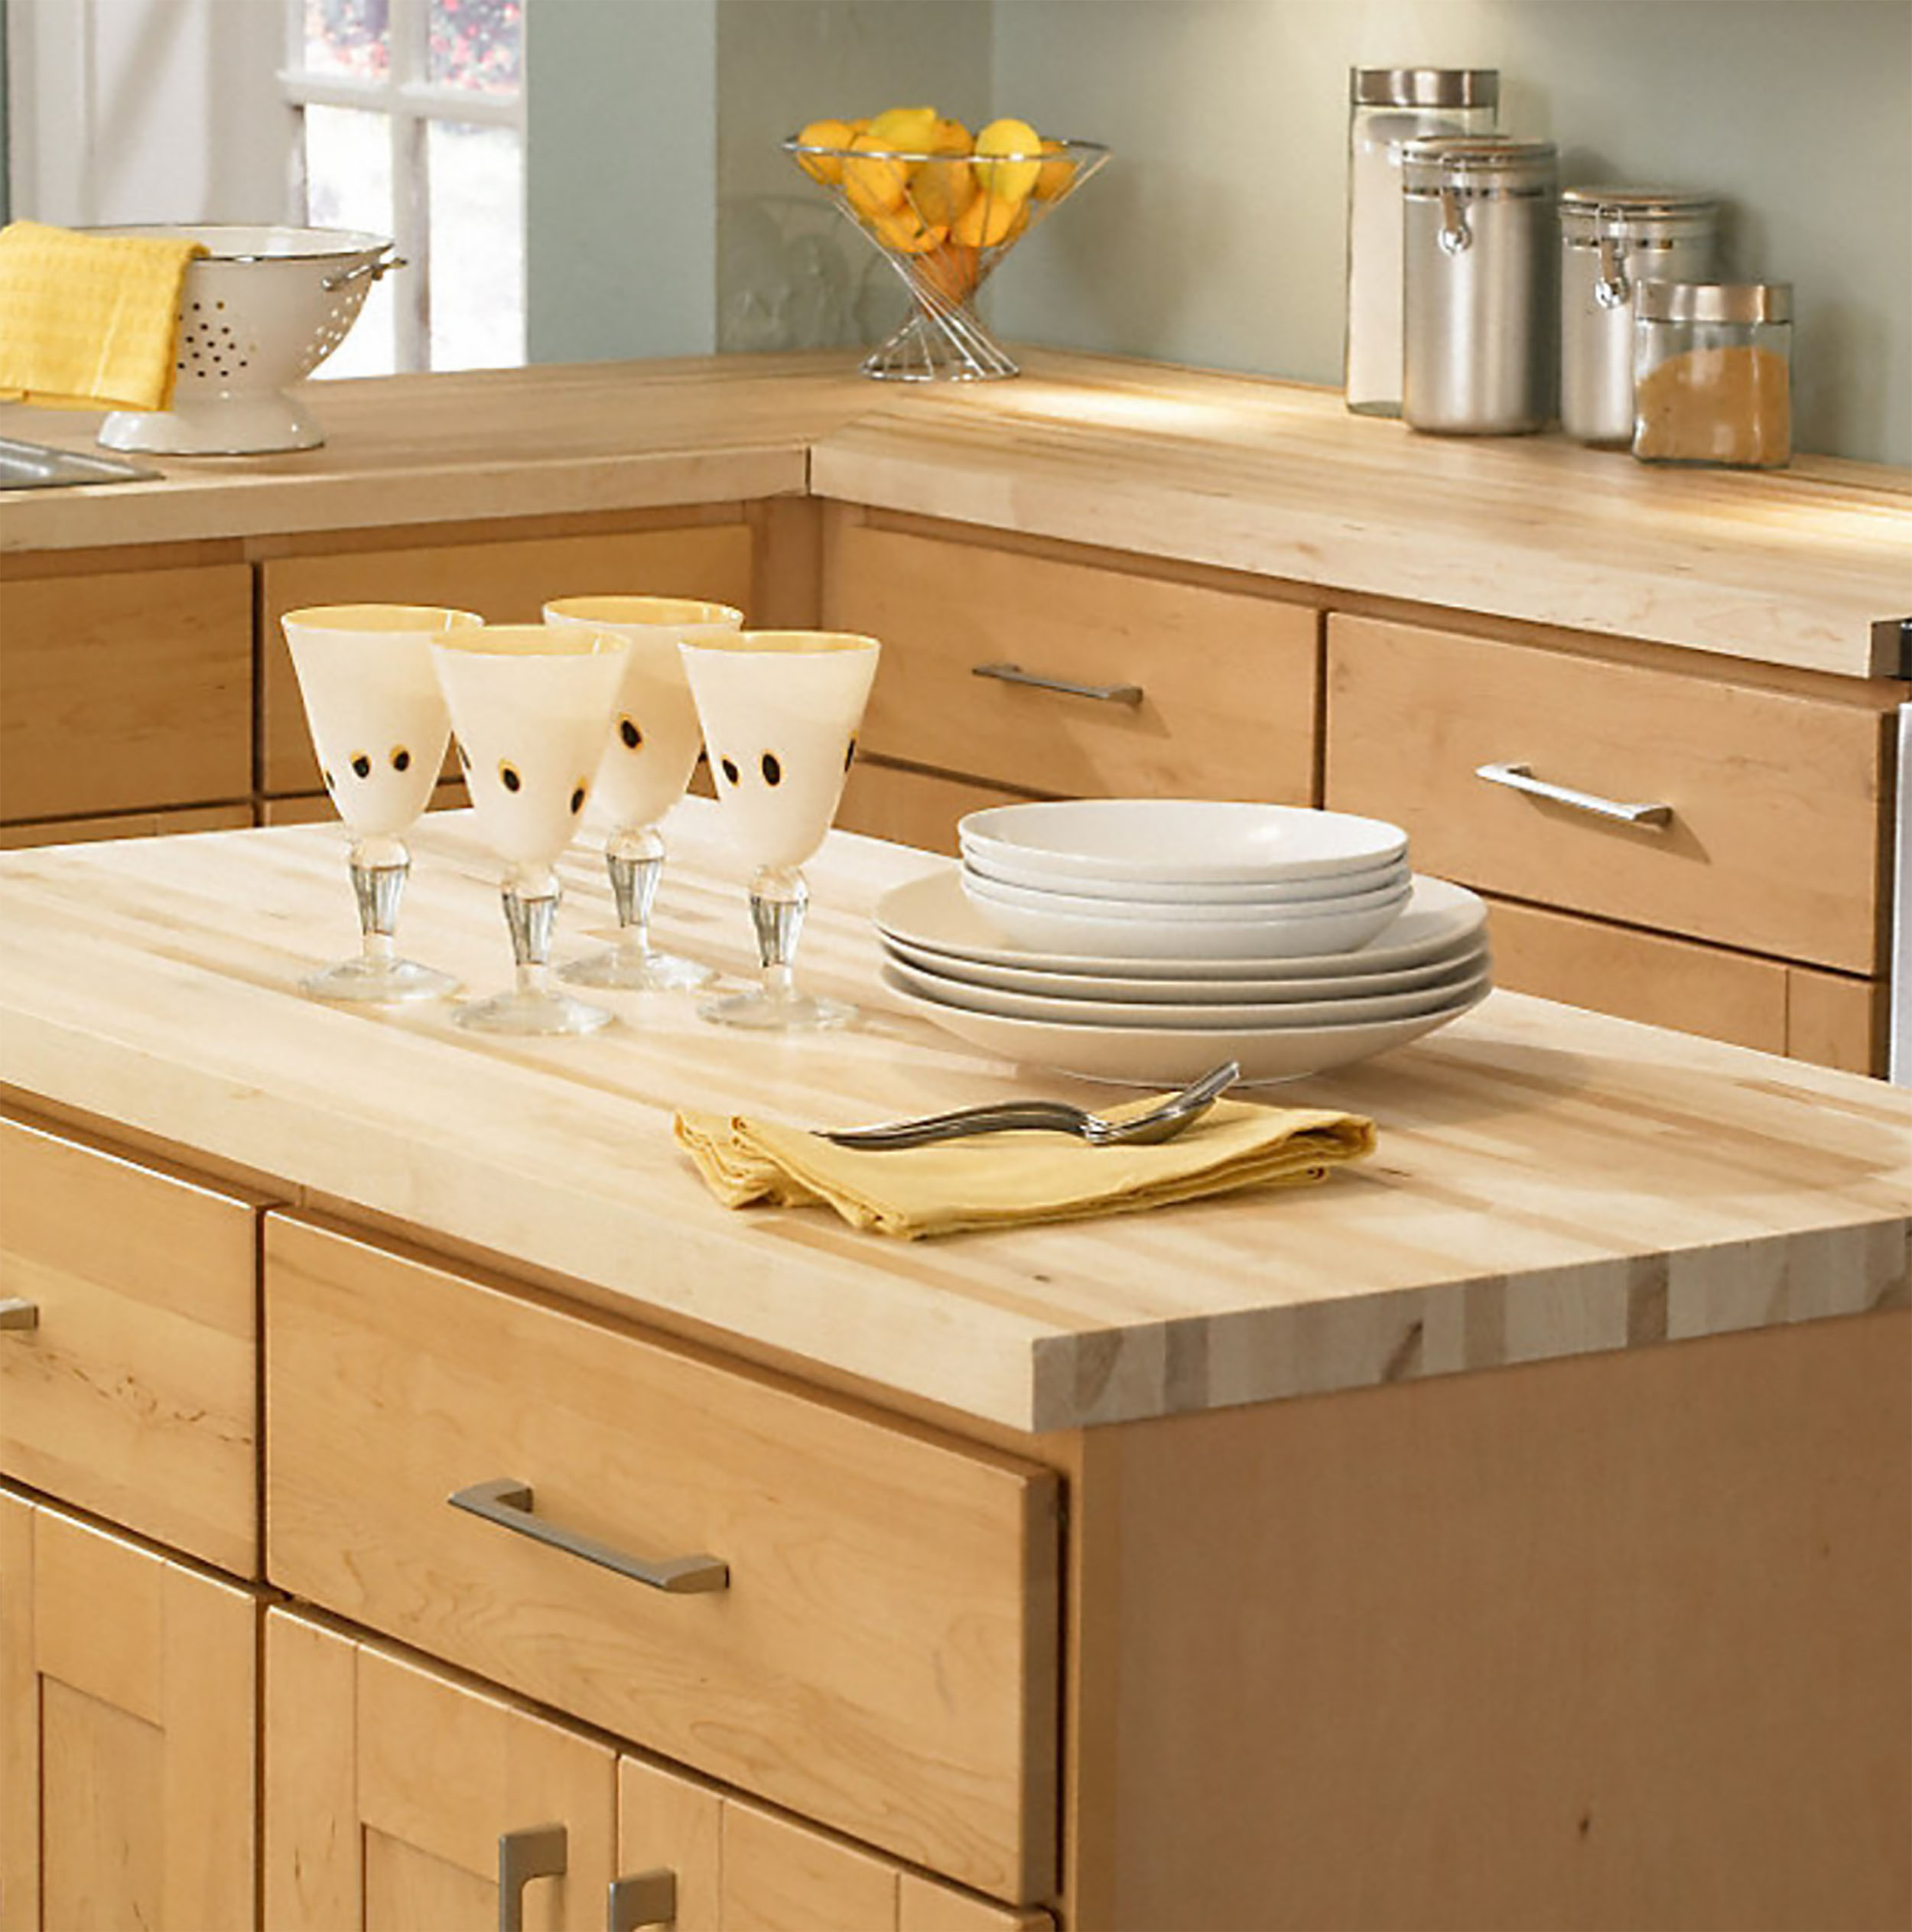
Countertop Update Kits and Butcher Block: 

I know you want solid surface countertops. I get it. I love them, too. But, guess what, you can’t afford them right now. So, you’ve got two GREAT options:

Tiny budget: Vinyl contact paper. There are very convincing vinyl self-adhesive countertop paper kits that can make your laminate countertops look like Carrera Marble. They have great reviews and cost about $29 bucks. But, be careful with these: they won’t stand up to abuse or hot pans.

Small budget: Butcher block! It’s super popular right now and I have a great post on Where To Find The Best Deals On Butcher Block Countertops if you decide that’s the right option for you! To give you a ballpark idea, when I wrote the article, you could purchase 50 inches of butcher block countertop from the Home Depot for $105 plus tax. You’ll need some special oil to treat it and some screws to install it. How awesome is that?

Pro tip: You can find left over granite slabs on Craigslist and letgo for around $50 if you scour the internet and be patient. It’s not an easy project, but if you have any experienced craftsmen in the family, they can help you, so be on the lookout!

One of my favorite countertop updates is from my friend Krystle at Spruceandabide.com. She and her husband did a kitchen flip and I just love how it turned out (and definitely give them a follow on Pinterest and IG, they are the cutest couple ever):
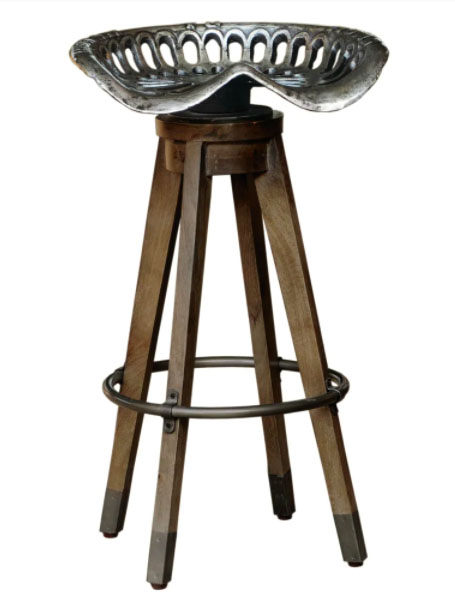
Spruceandabide.com
Krystle from Spruceandabide.com did a gorgeous butcher block countertop update. You can read all about it at https://spruceandbide.com/our-rustic-kitchen-makeover-a-mini-tour/


Counter Stools: 

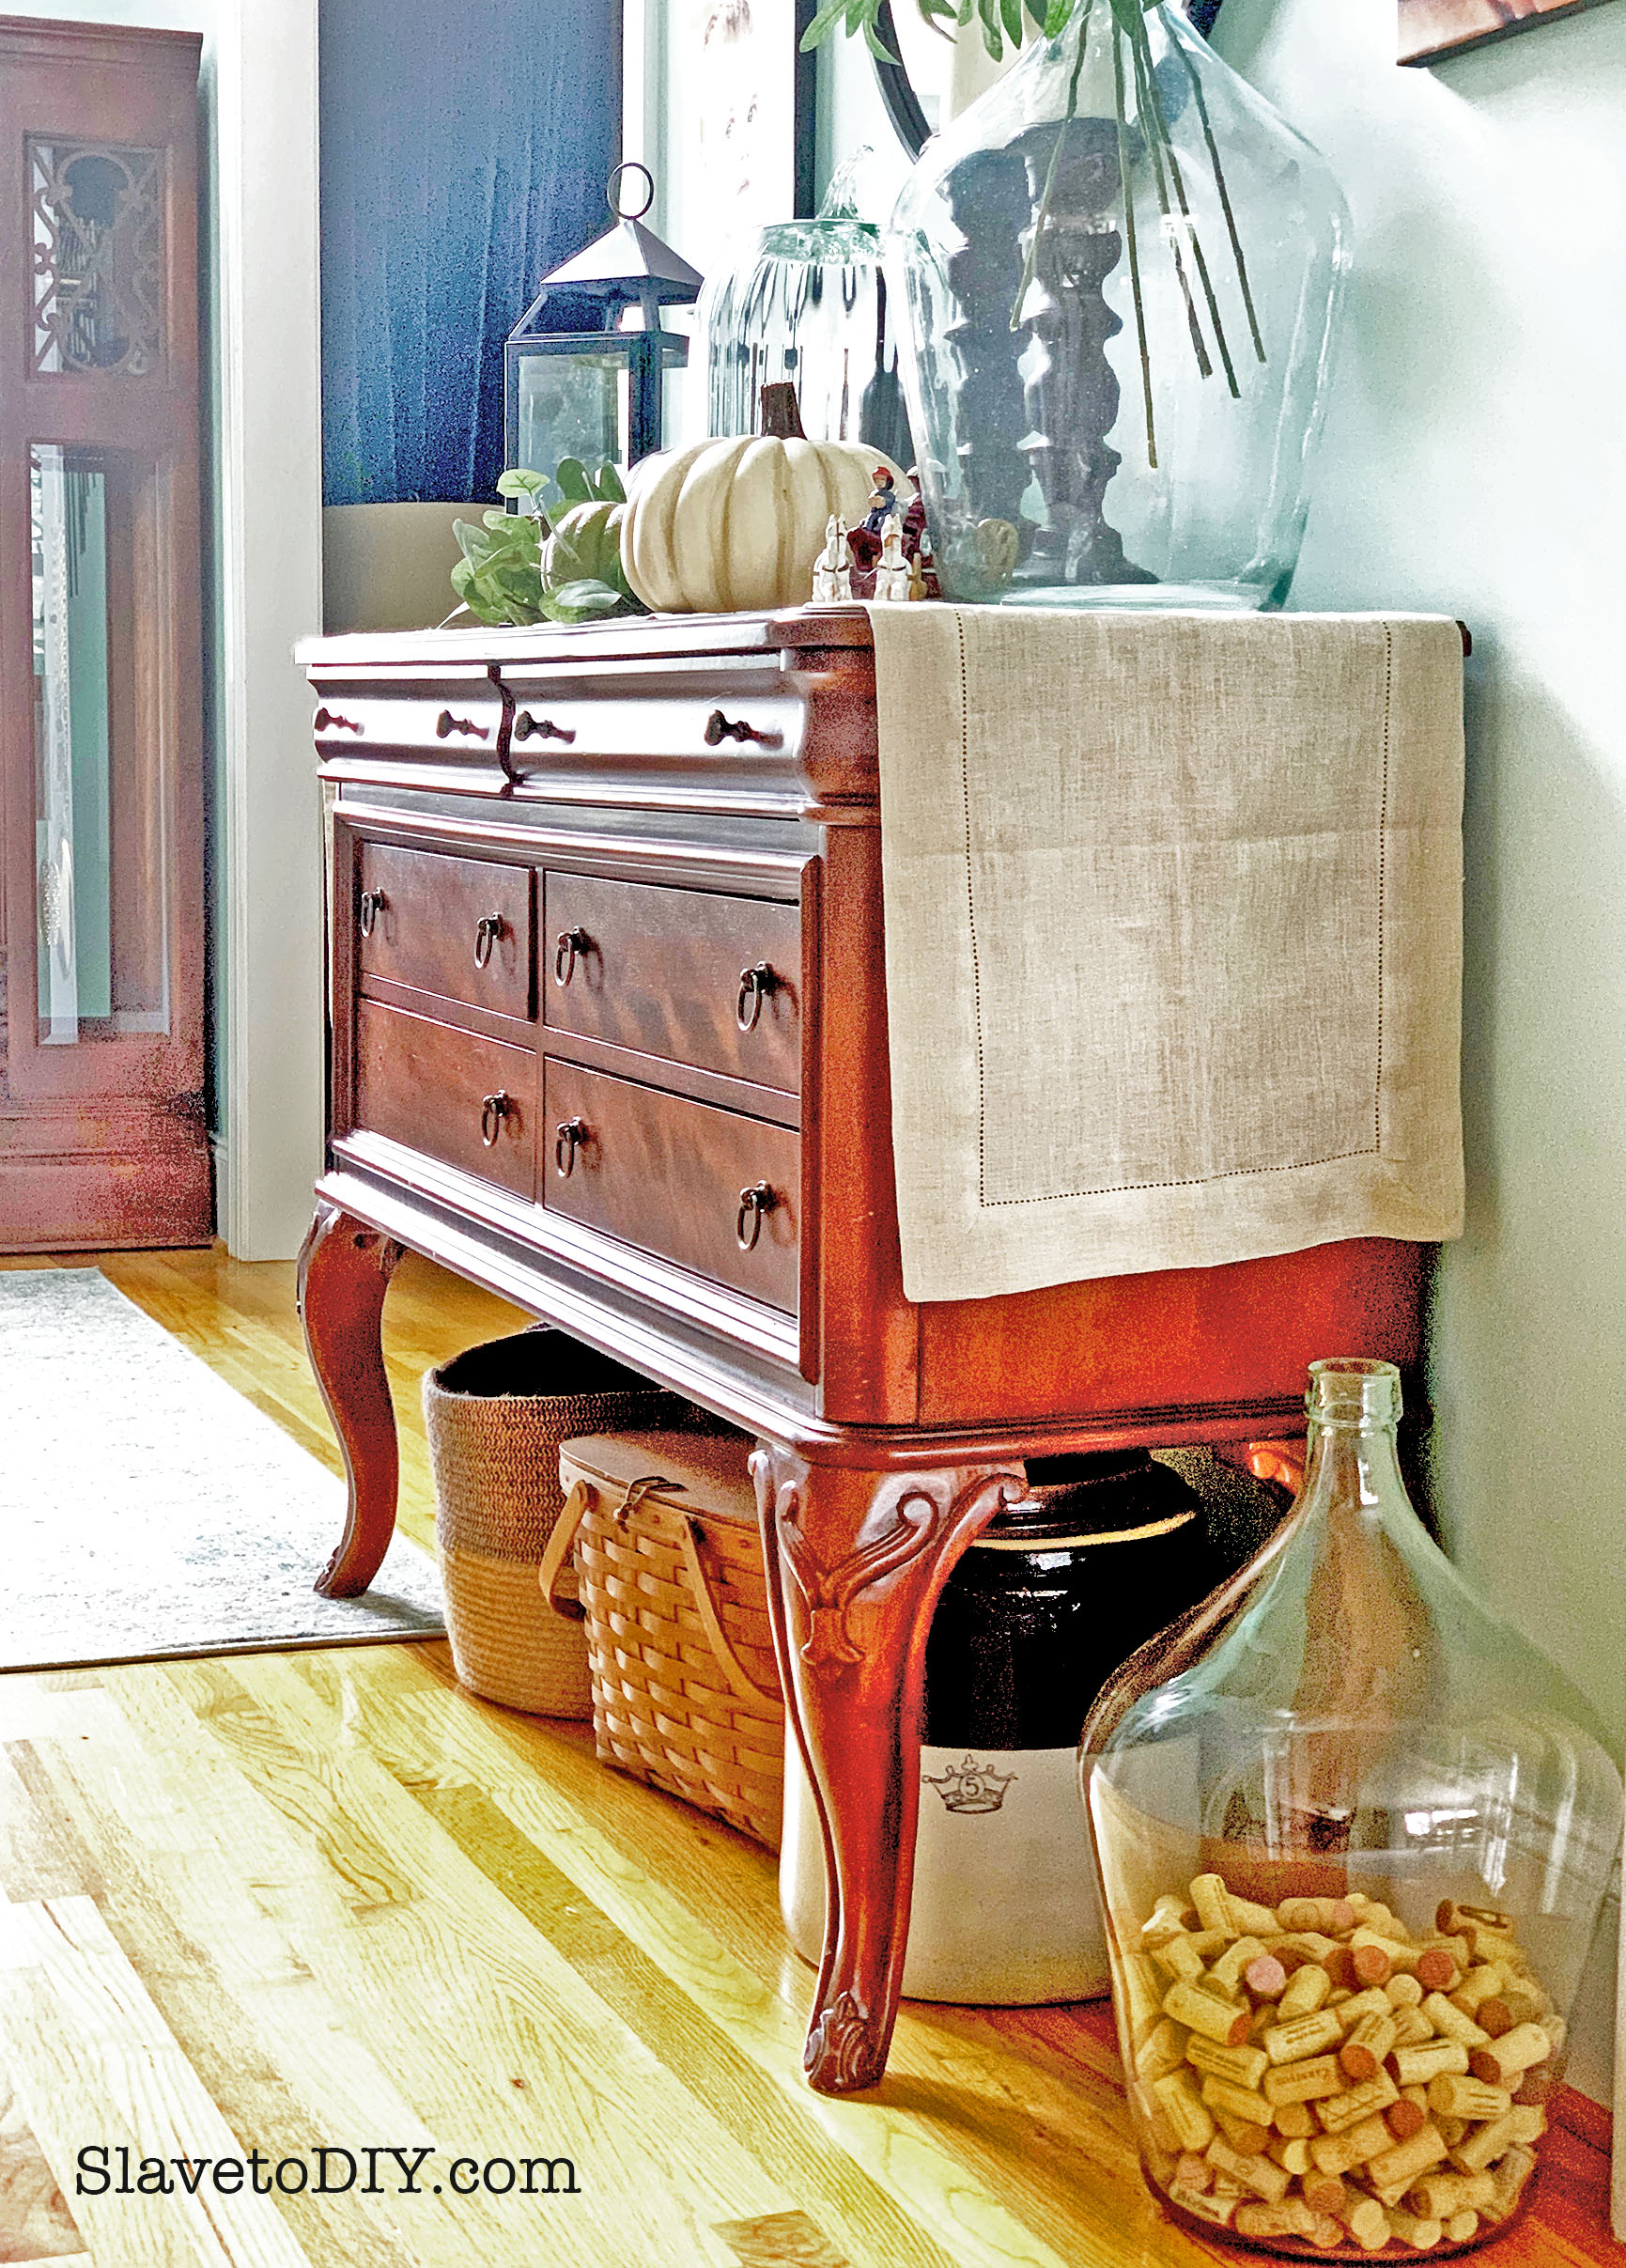
Maybe your parents and friends donated some furniture to you when you moved in, and you know what? They were so generous because they didn’t want it anymore. Because it’s ugly. How are your barstools? Kitchen furniture can make your space look dated really fast. You can buy some VERY reasonable new bar stools both on Amazon and, my personal favorite place to find deals, Overstock.

One of my favorite types of stools are tractor seat stools, they’ve been a thing in my native Vermont for several decades but have picked up steam more recently (thanks, Joanna). If you watch for antique tractor seats on Craigslist, you can add them to the top of a basic wooden stool, for about $25 each (plus the cost of the tractor seats and a little spray paint)!
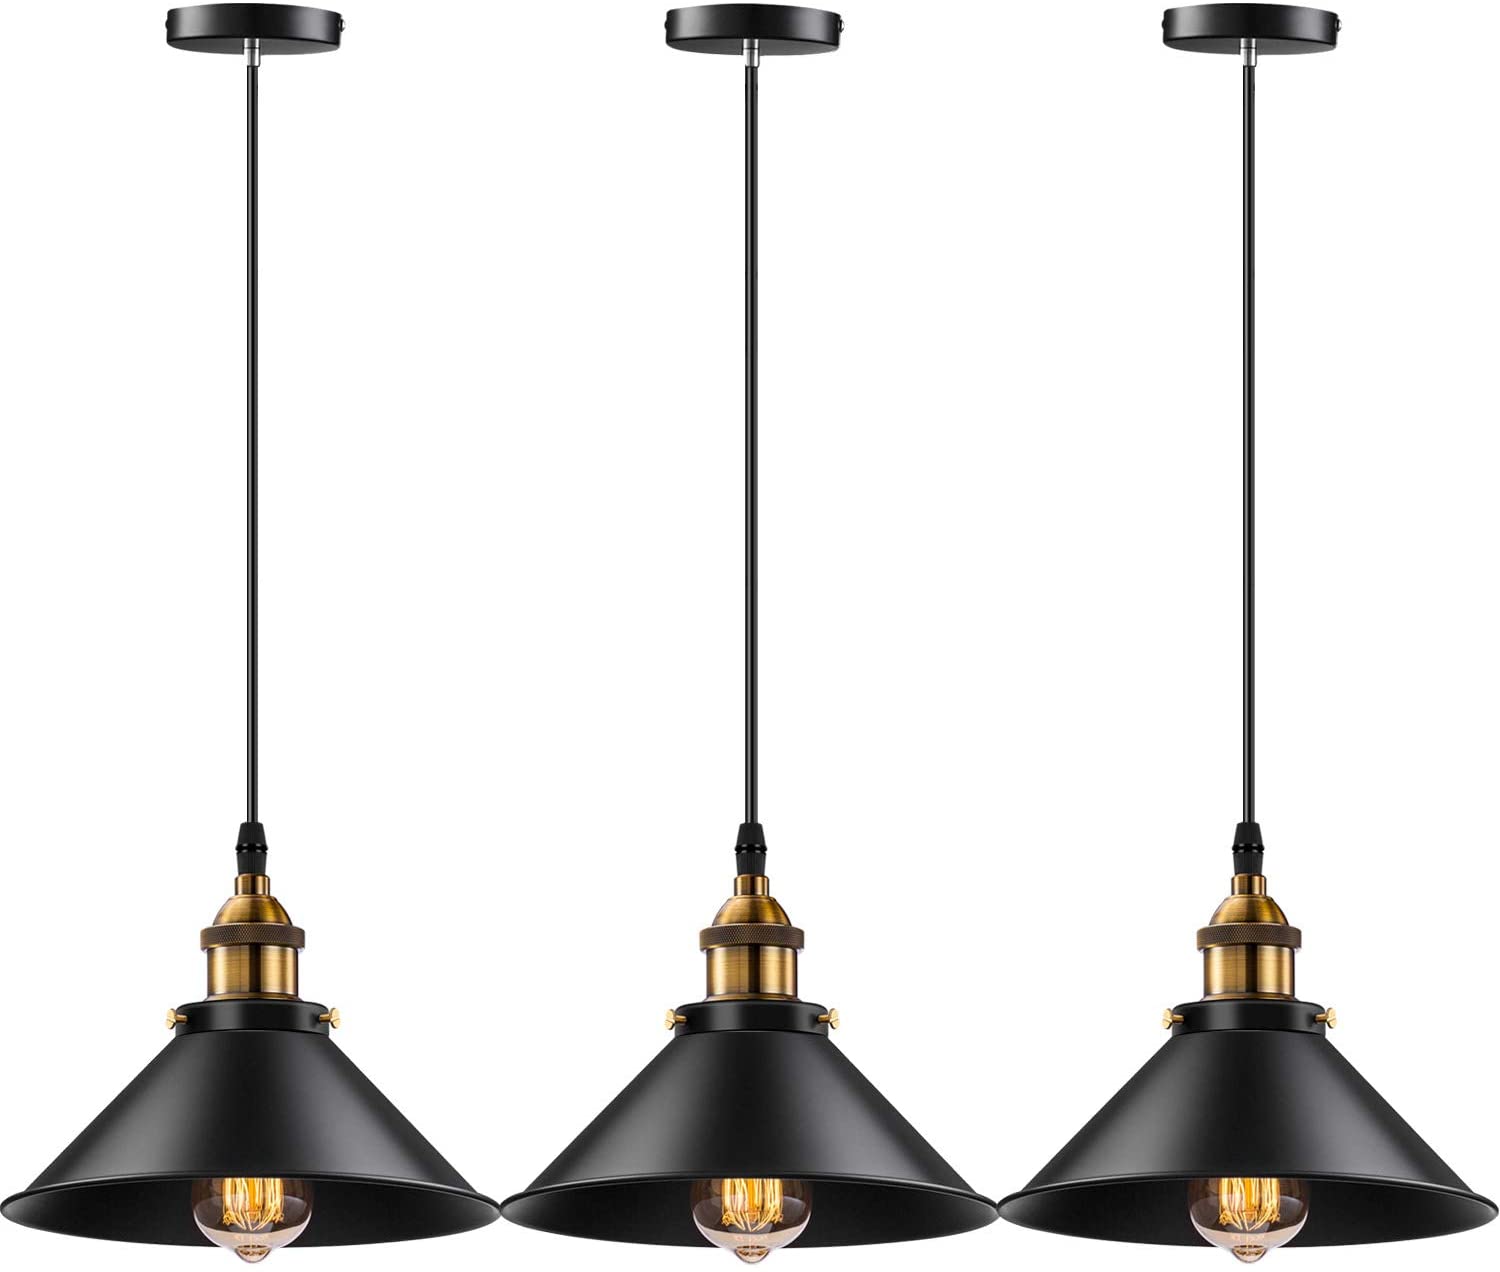
Tractorseatstool
Tractor Seat Stool From Overstock https://bit.ly/2X53QN8


Light Fixtures:

I’m not suggesting that you can get REALLY NICE light fixtures at this point in your life. But, what if they looked just like really nice light fixtures but were a lot cheaper (come to think of it, why are there more expensive fixtures when you can buy cheaper ones)? Once again, thanks to global competition, you can get some really nice looking light fixtures for a lot less than you’d imagine!

But, which ones should you swap out? Well, the giant florescent light fixture I would leave alone. I know it’s a bummer, but changing those out is not a straightforward process and I don’t want you to get mad at me for suggesting it (the replacement fixture isn’t that much, but it leaves an area of the ceiling needing repair and it’s a big mess). If you REALLY hate it, go get a new piece of plexiglass (they have seeded glass and rain pattern plexi panels cheap) for it and paint the wood on the outside to match your cabinets.

However, some light fixtures are very straightforward to swap out: if you have an outdated dome light over your kitchen sink, that’s a great opportunity to swap it for a pretty pendant for about $25 bucks. You can get a Three Pack of Industrial Edison Bulb Pendants to replace island lighting for $35 bucks! These might not be Pottery Barn fixtures, but I’m betting that your friends can’t tell the difference and YOU are going to love them.


Edisonbulbpendant
Edison Bulb Pendants (Pack of 3)Find on Amazon at https://bit.ly/2X53QN8


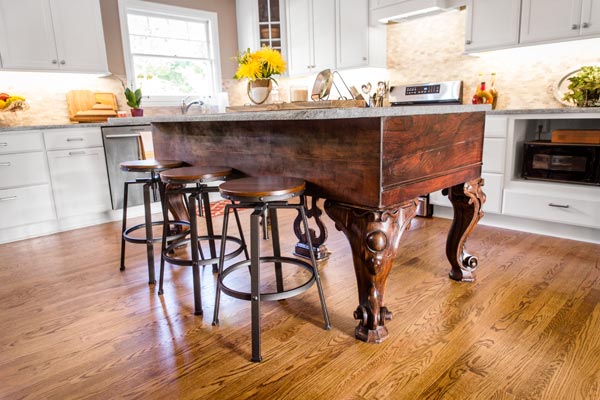
Repurposed Furniture Island:

One of my favorite kitchen updates is seeing furniture transformed into functional kitchen islands (for a LOT cheaper than a custom build or using store bought cabinets)! If you want to see lots of ideas on this, check out our design inspiration post on Kitchen Islands Out of Repurposed Furniture and Materials! Craigslist finds are my favorite source for these, or dressers you couldn’t find a purpose for, etc. The point is, the island adds counter and storage space for next to nothing in cost if you’re creative!

My favorite idea is fancy antique pianos that are no longer working… how cool is this?

Mashup Monday: Kitchen Islands Out of Repurposed Furniture and Materials
Mashup Monday: Kitchen Islands Out of Repurposed Furniture and Materials: From This Old House “Salvage Projects You’ve Got To See”


Backsplashes:

What’s popular right now? At the Home Depot you can get 3X6 Bright White Subway Tile for 15 cents each (and they generally ship free to your house)!  That means that for the entire run, let’s say you have 10 linear feet of counters (and an 18 inch tall backsplash), the tile would cost you $19 plus tax. Now, once you add in the mortar, grout, and basic tools, the total will probably be closer to $100 bucks. But, what a HUGE impact! One of my favorite subway tile transformations is from my friend Krystle @spruceandbide on Instagram. Isn’t it cool???

kitchenremodel-spruceandbide-5
Kitchen backsplash update from Krystle @spruceandabide on Instagram. Check out the whole kitchen update athttps://spruceandbide.com/our-rustic-kitchen-makeover-a-mini-tour/


The point is, just because you’re broke doesn’t mean you have to live and cook in your depressingly outdated kitchen. There are absolutely ways to update your kitchen without spending a bunch of money!

How have you updated your spaces on a small budget?  I’d love to hear about it!

Thanks for stopping by and check out more design inspiration and DIY on our blog. Cheers!

*Legal stuff:

I am honest about my experiences with different products and write because I enjoy it.  I do however, have the opportunity to earn money for my writing, also.

Slavetodiy.com is a participant in the Amazon Services LLC Associates Program, an affiliate advertising program designed to provide a means for sites to earn advertising fees by advertising and linking to amazon.com.  Amazon offers a small commission on products sold through their affiliate links.  Each of your purchases via our Amazon affiliation links supports our cause at no additional cost to you.

If a blogger links to an Amazon product (with a special code for affiliates embedded in the link), and a reader places an item in their “shopping cart” through that link within 24 hours of clicking the link, the blogger gets a small percentage of the sale.  Amazon links are not “pay per click.”  If you click on the product link and stay around Amazon and purchase something else, however, I will get a commission on that sale.

Slavetodiy.com is also a Sovrn affiliate advertiser which works similarly.

Mastering The Scene: An Elegant Faux Eucalyptus and Moss Balls Arrangement

I put together a super easy and elegant arrangment the other day with three very simple components. I’ve sourced them for you here, all from Amazon, and all very convincing “faux” materials, as you can see. I love how this is warming up my mantel, right now. The cool thing is, eucalyptus works for every season, and the simple addition of a bouquet of flowers will take my mantel right into the spring season with very little effort.

Mastering The Scene: An Elegant Faux Eucalyptus and Moss Balls Arrangement

*This post may contain affiliate links. Please see full disclosure at the end of the post.

Here is this beauty, with Amazon links below:

Mastering The Scene: An Elegant Faux Eucalyptus and Moss Balls Arrangement

These are the eucalyptus sprays I use:

These are the moss balls I used (they carry a smaller size also that I use to fill in):

Amazon no longer carries my Hurricane Lantern, but this one is very similar and cheaper:

Glad you came to hang out with us today! For more inspiration and DIY check out our blog.  And, of course, if you see other items in my home you’d like sources for, leave a comment and I will get back to you!

Cheers!

*Legal stuff:

I am honest about my experiences with different products and write because I enjoy it.  I do however, have the opportunity to earn money for my writing, also.

Slavetodiy.com is a participant in the Amazon Services LLC Associates Program, an affiliate advertising program designed to provide a means for sites to earn advertising fees by advertising and linking to amazon.com.  Amazon offers a small commission on products sold through their affiliate links.  Each of your purchases via our Amazon affiliation links supports our cause at no additional cost to you.

If a blogger links to an Amazon product (with a special code for affiliates embedded in the link), and a reader places an item in their “shopping cart” through that link within 24 hours of clicking the link, the blogger gets a small percentage of the sale.  Amazon links are not “pay per click.”  If you click on the product link and stay around Amazon and purchase something else, however, I will get a commission on that sale.

Slavetodiy.com is also a VigLink affiliate advertiser which works similarly.

Mashup Monday 12: Where To Find The Best Deals On Butcher Block Countertops

We are in the middle of a super exciting project! My sister purchased a fixer upper for our mother’s forever home and I get to design her kitchen! The thing is, my mom watches way too much HGTV and is a perpetual renovator (I come by it honestly), so I know she will be bummed if it doesn’t look like a designer kitchen. So, no pressure, right?

*This post may contain affiliate links. Please see full disclosure at the end of the post.

One of the reasons I’m designing it is that I’ve done kitchens before and have done a lot of research on it (read: obsessively planning our current kitchen reno)… plus, I’m generally good at bargain hunting and finding cost efficient ways to do things.

Any kind of high end countertops are a MAJOR expense in the kitchen planning process and I need to find ways to make it cost less. So, the first thing I’m looking at is alternatives to solid surface. Guess what I super, duper love? Butcher block.

Here’s a quick look at some of my favorite blogger kitchens and their awesome butcher block:

Butcher Block Countertops, via Remodelista
Remodelista.com, From: Remodeling 101- All About Butcher Block Countertops


Via sincerelymariedesigns.com our butcher block counter top review - one year later
Sincerelymariedesigns.com: Our Butcher Block Counter Top Review – One Year Later


Via beckiowens.com Best of Pinterest BECKI OWENS
Beckiowens.com, Best of Pinterest : Becki Owens


domesticimperfection.com My Butcher Block Countertops, Two Years Later
Domesticimperfection.com


The first place to ALWAYS look is for places that carry off-the-shelf sizes. Producers offer standard sizes to consumers much more cheaply than semi custom or custom sizes. The best way to save yourself money is to find inexpensive products and sizes that will work and plan the design around that.  I found a few places that have reasonable offerings. I looked for four foot lengths for purposes of comparison, but several stores only had longer lengths.

*Please note that prices are current in February 2020 and are subject to change.

Lowes Home Improvement

The Baltic Butcher Block, Natural Straight Butcher Block Birch Kitchen Countertop:  4 feet long (48 inches), About 25 inches deep, and 1.75 inches thick. Baltic burch. Unfinished. $119.98.

Lowe's Butcher Block
Lowe’s Home Improvement Warehouse: Butcher Block


The Home Depot

Hardwood Reflections Butcher Block Countertop in Unfinished Birch:  4 feet 2 inches long (50 inches), 25 inches deep, 1.5 inches thick. Birch. Unfinished. $109.00.

Home Depot Butcher Block


IKEA 

Karlby Countertop, Oak, Veneer:  Veneer thickness : 1/8 inch, 6 feet 2 inches long (74 inches), 25 5/8 inches deep, 1.5 inches thick. Oak veneer, foil, and particleboard. $149.

IKEA Karlby Butcher Block
IKEA Karlsby Butcher Block


Overstock

Forever Joint Hard Maple Butcher Block Top:  4 feet 2 inches long (50 inches), 26 inches deep, 1.5 inches thick. Maple. $252.89.

Forever Joint Hard Maple 26 x 50 Butcher Block Top 2
Overstock, Maple Butcher Block


Lumber Liquidators

Williamsburg Butcher Block Company, Maple Butcher Block Countertop:  12 feet long (144 inches), 25 inches deep, 1.5 inches thick. Maple. Unfinished. $399.99.

lumberliquidators
Lumber Liquidators Maple Butcher Block


Obviously, what size the sections are that you are working with are important. I will let you know what we decide and definitely show you the finished product!

Have you used butcher block from any of these stores? Have you found them in precut sizes elsewhere? We’d love to hear about it in the comments!

Thanks for hanging out with us in DIY land and check out more great DIY and design inspiration over on our blog.

Cheers!

*Legal stuff:

I am honest about my experiences with different products and write because I enjoy it.  I do however, have the opportunity to earn money for my writing, also.

Slavetodiy.com is a participant in the Amazon Services LLC Associates Program, an affiliate advertising program designed to provide a means for sites to earn advertising fees by advertising and linking to amazon.com.  Amazon offers a small commission on products sold through their affiliate links.  Each of your purchases via our Amazon affiliation links supports our cause at no additional cost to you.

If a blogger links to an Amazon product (with a special code for affiliates embedded in the link), and a reader places an item in their “shopping cart” through that link within 24 hours of clicking the link, the blogger gets a small percentage of the sale.  Amazon links are not “pay per click.”  If you click on the product link and stay around Amazon and purchase something else, however, I will get a commission on that sale.

Slavetodiy.com is also a VigLink affiliate advertiser which works similarly.

How To Use An Inexpensive Paint Sprayer For Painting Cabinets or Furniture

I have been wondering about using a paint sprayer for years now, because of course I see all these gorgeous finishes on people’s cabinets, furniture, and small paint projects. So, I did a little research, and finally settled on a small project paint gun that is inexpensive, works really well, and is very simple to set up and clean up. Here is the process and what we used to get outstanding results!

*This post may contain affiliate links. Please see full disclosure at the end of the post.

The first step is having a place to paint. Now these doors were unattached and I REALLY didn’t want to do prepwork inside to paint (especially because of the cats). So, we waited for a day when the wind was relatively still, and set up a clean work surface on the ground and screwed in eyelet screws into the top of the cabinet doors. Then we wired them to an outdoor arbor so they were suspended and accessible.

What you’ll need:

A paint gun: we used the Critter Paint Gun, (great design, very simple, and the best news: CHEAP!).

Paint straining bags: you can get these for a buck and change at hardware stores or buy them online: Paint Strainer Bags.

A compressor, hose, and basic attachments. We have a large Dewalt Compressor (which I bought apparently thinking we’d be framing walls and working in a commercial building environment) but we used the smaller and much more easy to wield Bostich Air Compressor for this project).

First we dry fitted everything on the gun to make sure it worked with the compressor hoses.

How To Use An Inexpensive Paint Sprayer and Get Outstanding Results


Then we used one of the paint strainers to strain the paint into the jar.

TIP FROM RAINMAN: THIS IS AN IMPORTANT STEP. If you don’t strain the paint, little chunks will clog up the tiny tube that feeds the sprayer.

How To Use An Inexpensive Paint Sprayer and Get Outstanding Results


We realized after the first few minutes that the best method is to put the strainer all the way in and then pour the paint in. It lends some weight to the process and makes it strain MUCH faster.

How To Use An Inexpensive Paint Sprayer and Get Outstanding Results


Once the paint is in, lift the strainer out until it has all drained into the mason jar. We layed the bag down on our clean surface, knowing we would use it again, but if you’re taking a long time, you might want to rinse it with a hose between uses (we have not found a non-messy way to do this).

How To Use An Inexpensive Paint Sprayer and Get Outstanding Results


Attach the mason jar back to the gun, and make sure your air compressor is set at 30 PSI.

TIP FROM RAINMAN: USE SCRAP WOOD TO GET PSI, LIQUID NOZZLE, AND DISTANCE SET (35 PSI WITH LIQUID NOZZLE CENTERED WORKED WELL WITH THIS PAINT AT AROUND 4 INCHES FROM SURFACE).

Rainman sprayed around the edges, then into the corners, then did a good layer, spraying back and forth across it.

How To Use An Inexpensive Paint Sprayer and Get Outstanding Results


Spraying around the outside:

How To Use An Inexpensive Paint Sprayer and Get Outstanding Results


Door two: holding it steady to start spraying (this is where those eyelets and wire are handy).

How To Use An Inexpensive Paint Sprayer and Get Outstanding Results


Spray the front sides, then the back sides, and give it a little time to dry. Make sure you get any outside edges you will see.

The Dark and Moody Fireplace Update
The Dark and Moody Fireplace Update; Painting the doors with the Critter


Depending on the paint and color, you will need at least two coats. We did three for good measure and for even coverage.

TIP FROM RAINMAN: LIQUID NOZZLE MAY NEED TO BE CLEANED (PICK OFF ANY DRIED/DRYING PAINT), ESPECIALLY IF YOU LET THE GUN SIT BETWEEN APPLICATIONS.

Pose for a “finished painting” photo:

The Dark and Moody Fireplace Update
The Dark and Moody Fireplace Update; Finished Painted Doors


We took the doors into the downstairs shower (where there are no cats if we close the door) and where we had a rod across the middle and resecured them to the rod for three days to make sure they were really good and dry before we mounted them.

TIP FROM RAINMAN: CLEAN GUN WITH PAINT THINNER BEFORE PAINT DRIES ON GUN SURFACES.

Clean-up: Rainman rinsed out all of the paint from the mason jar, rinsed all of the tubing and the outside of the paint gun off, and then added mineral spirits to the jar. He sprayed that all out to clean the inside of the tubing and the inside of the gun. Then he dumped that out, added water, and did it again. Take the components apart and let them dry completely before you put it back together. We stored it back in the box and will definitely use it again!

TIP FROM RAINMAN: NOT SURE HOW LONG JAR GASKET WILL LAST; PROBABLY NEED TO ORDER SPARES.

Here are the doors mounted on the fireplace:

How To Use An Inexpensive Paint Sprayer and Get Outstanding Results


Here they are mounted and COVERING THAT AWFUL GAPING HOLE!

How To Use An Inexpensive Paint Sprayer and Get Outstanding Results

We had already painted the rest of the fireplace with brushes and rollers. If I had realized how easy it was to use the sprayer and how little overspray there was, I would’ve used The Critter to paint that, as well. The finish looks VERY professional, and I’ll definitely be using it to do our cabinets once we get to that point.

I’d love to see your paint projects and hear about how this little paint gun worked for you!  Please share in the comments below and check out more great project tutorials and inspiration over on our blog.

Cheers!


*Legal stuff:

I am honest about my experiences with different products and write because I enjoy it.  I do however, have the opportunity to earn money for my writing, also.

Slavetodiy.com is a participant in the Amazon Services LLC Associates Program, an affiliate advertising program designed to provide a means for sites to earn advertising fees by advertising and linking to amazon.com.  Amazon offers a small commission on products sold through their affiliate links.  Each of your purchases via our Amazon affiliation links supports our cause at no additional cost to you.

If a blogger links to an Amazon product (with a special code for affiliates embedded in the link), and a reader places an item in their “shopping cart” through that link within 24 hours of clicking the link, the blogger gets a small percentage of the sale.  Amazon links are not “pay per click.”  If you click on the product link and stay around Amazon and purchase something else, however, I will get a commission on that sale.

Slavetodiy.com is also a VigLink affiliate advertiser which works similarly.

The Dark and Moody Fireplace Update

If you follow us, about a year ago I started thinking about the fireplace (and how NOT enamored with it I was). I dug up some fireplace inspiration in the hopes that I would find something awesome and reasonably cost friendly.  The thing is, we have some really pretty millwork around the fireplace, but over the fireplace is an awful TV space, meant for one of those gigantic tube TVs. Aside from the part where it a terrible waste of space, it is a complete eyesore, as well.

*This post may contain affiliate links. Please see full disclosure at the end of the post.

The more I looked, however, the more I realized that I have REALLY expensive taste. The fireplaces I love would require a complete gut, a big mess, and a LOT of money (like upwards of $3000 just for the fireplace surround). So, the alternative is to keep what I have and build upon it. I came up with a design that I think I’m really going to love, that’s very US, and added to it a bit. Rainman is going to kill me when he sees what I added to the project (but ultimately he’ll love how it looks).

This is what we’re starting with (the before):

The Dark and Moody Fireplace Update
The Dark and Moody Fireplace Update, Before We Started


Okay, so it’s not really that bad. I should stop my crying and just stay with what I have, right? (insert evil laughter).  We both know that’s not going to happen. And, is there a reason that I’m showing the whole wall and not just the fireplace? Oh yes, there is. But, we’ll get to that.

Right now, it is a very classic-ish, plain fireplace with some pretty mill-work and a crazy, giant opening up top. This is a shot of it with the cabinet doors that I ordered from Cabinet Door World. So, yeah, you can make cabinet doors (pretty easily), however, with no working wood shop currently, and very little time, I ended up ordering them instead. The quality is very good and the ordering process was easy. I got them exactly the size of the opening, so I’m sure we’ll need to do some sanding once we dry fit the hardware.

The Dark and Moody Fireplace Update
The Dark and Moody Fireplace Update; Doors To Be Mounted Above


For the color we chose Benjamin Moore’s “wrought iron” and I think it will be fantastic. I’m planning on using it for the cabinets we’re moving out of the kitchen into the mudroom area, also, so this will be a good test run. Check out the tutorial on how we used a great, super cheap spray gun to paint the cabinet doors!

The Dark and Moody Fireplace Update
The Dark and Moody Fireplace Update; Our Favorite Paint! Benjamin Moore, Wrought Iron


Project tip: We were painting over a semi-gloss, so we sanded with a sanding block first, then wiped down the whole thing and let it dry before painting (a good three coats because of the color!).

The cabinet hardware, from House Of Antique Hardware is still backordered, so I will update once that comes in and we get the doors up, but for now, I couldn’t WAIT to show you how amazing the fireplace looks with a fresh coat of paint! Drum roll, please.

The Dark and Moody Fireplace Update
The Dark and Moody Fireplace Update; Painted and Updated


It blows my mind sometimes how much a simple color change can transform a space! (And yes, I’m planning on painting the walls… but there are more dining room projects that have to happen first, like the new doors and the stone veneer on the wall to the left of the fireplace… Welcome to my project A.D.D.)

The Dark and Moody Fireplace Update


And one more, just because I’m so in love:

The Dark and Moody Fireplace Update
The Dark and Moody Fireplace Update; With Pretty Lighting


Project Update:

You’ll remember that we weren’t actually done, I just had to show you the paint because I was way too excited. The most difficult part of the project was still to come: actually installing the doors over the fireplace.

A quick word of advice: If you have to work with your spouse, find something that works for you. I find a combination of wine and a mute button work best when he’s doing something for me. I throw in some compliments and thank yous about the awesomeness of his work and shut my mouth. If I have the urge to OPEN my mouth and say something, I open it and insert wine. It has worked out pretty well thus far and has yielded tremendous results.

I ordered the doors so they exactly fit in the opening. That means that in order to account for the fact that the opening is not square and unlevel areas on the mantel, the doors had to be dry-fit, then trimmed down. Now, let me tell you, this is the most Rainman-iest project in Rainman land. It also means that we couldn’t paint them until they were fitted and trimmed.

Full disclosure: I love this man. 

First, was the problem of explaining why we needed to build trim above to act as a stop for the doors and fill in the dead space above when the doors are closed. It’s not that he doesn’t understand my “I don’t want a gap above the doors”, it’s just that explaining something conceptually doesn’t always translate to something concrete in his brain. So, a little while later, he devised a solution.

The Dark and Moody Fireplace Update
The Dark and Moody Fireplace Update, Installing Trim Over Fireplace


“YES, my love, that will fill in the gap. It’s perfect. What’s the next step?” (sips wine)

The Dark and Moody Fireplace Update
The Dark and Moody Fireplace Update, Trim Above Doors


 Back to Rainman Land: 

This installation involves a plumb-bob, multiple levels, obsessive measuring, remeasuring, shimming, shimming again, dry fitting, shimming again.  Measuring again.  Splitting the difference. Rainman muttering about the lack of squareness in the opening. Let’s just say that I may or may not have started drinking before 5 PM that day (but once again, in my hurry to slap it up there and be done with it, I’m quite sure it wouldn’t have been so downright balanced and lovely in the end).

The Dark and Moody Fireplace Update
The Dark and Moody Fireplace Update, Shimming Doors


After it was shimmed (I don’t mean to undersell the length of that process), I held the doors while he aligned the hinges (more wine, more wine, more wine), and eventually, after much careful sanding and trimming, the doors were hung, and had all the clearance they needed to open and close.

The Dark and Moody Fireplace Update
The Dark and Moody Fireplace Update, Doors Dry Fitted


Now, we are waiting on it to be not blustery weather so we can take the doors down and paint them.  And then we will actually be done.

Update: Finally painted!

The Dark and Moody Fireplace Update
The Dark and Moody Fireplace Update; Painting the doors with the Critter


Check out our post on how to use this awesome little paint gun and get that professional, WOW finish! You can find the paint gun we used, the critter spray products siphon gun, on Amazon.

The Dark and Moody Fireplace Update
The Dark and Moody Fireplace Update; Finished Painted Doors


I’m really fond of drum rolls, so let’s do that again.  Here’s a shot with the doors on and DONE!


The Dark and Moody Fireplace Update
The Dark and Moody Fireplace Update: Doors On And Ready To Hide The TV


And one with the doors painted, on, and CLOSED. WOOT! (Can’t see the TV, can ya, Russ?)

The Dark and Moody Fireplace Update
The Dark and Moody Fireplace Update; Doors Painted, On, and CLOSED

 It may seem like a small thing to other people, but this project has been on the list for a long time. It’s just a matter of making it a priority and having the time to do it. But, of course, that makes each little change that much more awesome!

Here is the breakdown:

Project Cost:

  • Benjamin Moore Paint and supplies: $96.66
  • Two Cabinet doors: $149.57 (delivered)
  • House of Antique Hardware 2X Pair of 9″ Smooth Iron Flush Mount Spear Strap Hinges: $43.94

Total: $290.17

And just for fun, let’s see that before and after one more time:

The Dark and Moody Fireplace Update
The Dark and Moody Fireplace Update, Before We Started
The Dark and Moody Fireplace Update
The Dark and Moody Fireplace Update: The After: Doors above the fireplace, fresh paint, and a new light fixture


It sure is amazing what some doors, paint, and a light fixture can do to a room, right??? And, here’s a shot with what it looks like with the dining table and chairs (which will soon be replaced, but that’s a story for another day!).

The Dark and Moody Fireplace Update
The Dark and Moody Fireplace Update, Dining Room With Updated Fireplace and Light Fixture


I would love to see before and afters on your own paint projects! Thanks for playing with us and, of course, cheers to all of your updates in the New Year and check out more project awesomeness on our blog.


*Legal stuff:

I am honest about my experiences with different products and write because I enjoy it.  I do however, have the opportunity to earn money for my writing, also.

Slavetodiy.com is a participant in the Amazon Services LLC Associates Program, an affiliate advertising program designed to provide a means for sites to earn advertising fees by advertising and linking to amazon.com.  Amazon offers a small commission on products sold through their affiliate links.  Each of your purchases via our Amazon affiliation links supports our cause at no additional cost to you.

If a blogger links to an Amazon product (with a special code for affiliates embedded in the link), and a reader places an item in their “shopping cart” through that link within 24 hours of clicking the link, the blogger gets a small percentage of the sale.  Amazon links are not “pay per click.”  If you click on the product link and stay around Amazon and purchase something else, however, I will get a commission on that sale.

Slavetodiy.com is also a VigLink affiliate advertiser which works similarly.

How To Do Classic Christmas Gift Wrap For $1 Per Package

I used to do new gift wrap every year with different ribbons- but since we usually travel for Christmas all of my packages and pretty bows were smushed and the paper was torn by the time we arrived at our destination. So, I had an idea for something MUCH more forgiving and SIGNIFICANTLY cheaper. I’ve used this same set for several years now and I LOVE the effect. It’s simple, classic, and reminds me of years gone by! The great thing is, it is VERY inexpensive for those of us on a budget and comes in a large roll so you can use it for a long time! I’m including Amazon links so you can find everything quickly and easily!

*This post may contain affiliate links. Please see full disclosure at the end of the post.

The cool thing is, with just a few accessories this gift wrap set is classic and also somehow very NOW (for all of you farmhouse fanatics!). And guess what, you can wrap a medium package for $1.10 each (as shown in the photo)! Even very large packages wrap for only pennies more.  I purchased the paper and twine two years ago and still have plenty for this Christmas and have only had to repurchase the decorations.

How To Do Classic Christmas Gift Wrap For $1 Per Package

So, here is the simple supplies list:

Brown Paper Craft Tags with Jute Twine (120)- $.06 each

Brown Craft Paper (200 ft) – $.25 a yard

Silver Jingle Bells (50) – $.18 each

Artificial Pine Needles (30) – $.50 each (This is the most expensive piece, so if you have these in your yard, I’d use those- we just don’t have them where I live and these are VERY convincing)

Jute twine (328 feet) – $.05 a yard

As I write this, the entire kit costs about $50 to wrap ALL of your gifts.  I can’t wait to see all of your beautiful presents!

How To Do Classic Christmas Gift Wrap For $1 Per Package

If you’re looking for a beginner calligraphy pen set to do that cool lettering, I found this one easy to use and inexpensive. This is literally (and obviously) my first attempt at calligraphy lettering and it’s cute even when it’s not great, so give it a shot!

For more great Christmas decor and DIY ideas check out our blog!

Cheers!


*Legal stuff:

I am honest about my experiences with different products and write because I enjoy it.  I do however, have the opportunity to earn money for my writing, also.

Slavetodiy.com is a participant in the Amazon Services LLC Associates Program, an affiliate advertising program designed to provide a means for sites to earn advertising fees by advertising and linking to amazon.com.  Amazon offers a small commission on products sold through their affiliate links.  Each of your purchases via our Amazon affiliation links supports our cause at no additional cost to you.

If a blogger links to an Amazon product (with a special code for affiliates embedded in the link), and a reader places an item in their “shopping cart” through that link within 24 hours of clicking the link, the blogger gets a small percentage of the sale.  Amazon links are not “pay per click.”  If you click on the product link and stay around Amazon and purchase something else, however, I will get a commission on that sale.

Slavetodiy.com is also a VigLink affiliate advertiser which works similarly.

Charcuterie Boards: Easy Appetizers For Holiday Entertaining To Wow Your Guests

I know you’ve been stalking those beautiful Charcuterie Boards on Pinterest and Instagram, don’t lie. I too am LOVING the whole concept, and we recently hosted a Black Friday Party and just SLAYED the appetizers, presentation and all. I’m going to show you what we did, where we got our supplies and show you how they all came out- you can totally do this!

*This post may contain affiliate links. Please see full disclosure at the end of the post.

So, one of the things I was wondering when I gathered all of the goodies to make the boards (which we MOSTLY did with platters, but it’s the same concept) is if they would actually get eaten. To my surprise, people REALLY did dig in and eat just about everything but the garnish!

And, you know what’s so COOL? I got almost everything for the boards from Costco (and since Sams carries many of the same things, I’m betting you could shop this same list there).

The other coolest thing: I gave her all of the stuff and my daughter made all of the boards so I could finish cleaning and setting up the rest of the party. It’s so awesome having artistic kids!

Charcuterie Boards: Easy Appetizers For Holiday Entertaining To Wow Your Guests


Step One: You don’t actually need those $200 boards. Use different cutting boards and platters you already have. Have some antique silver or pewter platters? Those work, too! I have a ton of little ramekins that I use for sauces etc every day and these work PERFECTLY in this instance to hold sauces or juicy things that you don’t want soaking the surrounding foods (nobody likes soggy crackers).

Charcuterie Boards: Easy Appetizers For Holiday Entertaining To Wow Your Guests


Step Two: Shop your list!

Get something to put all those dips and goodies on: We shopped Costco for crackers (we like Carr’s Water Table Crackers), Hawaiian Rolls, Artisan Breads, mini Naan bread, Stacy’s Pita Chips etc. These are to make little sandwiches and sample sauces, cheeses, and meats.

Salty foods: Black, green, and kalamata olives. Cocktail dill pickles, marinated artichoke hearts, stuffed tomatoes/peppers (Costco has a Charcuterie platter with these already made!), marinated mushrooms, and heart of palm.

Fresh, colorful foods: Cherry or grape tomatoes, cranberries, grapes, kiwis, strawberries, blueberries and pomegranates. Try to find good ones that are in season!

Cheeses: Costco has an artisan cheese section by the wine. Get an assortment of stinky cheeses, soft cheeses, marinated mozzarella balls, etc. Try some new ones!

Meats: In the same section as the cheese there are artisan and fancy meats: pepperoni, prosciutto, and smoked salmon. I went WAY overboard on meat. Keep in mind how big your platters are!

Garnish: Herbs are great for garnish to add a little green in places that need it.

Sauces and Dips: We used tzatziki, hummus, spinach dip (Knorr vegetable dip with fresh chopped spinach instead of cooked), cream cheese and red chili pepper spread (for the salmon).

Crunchy foods: We used pine nuts, but you can do little bowls of walnuts, pistachios, etc, also.

Charcuterie Boards: Easy Appetizers For Holiday Entertaining To Wow Your Guests


Preparing: It’s really tough to time this right, but with a little common sense, you can get these out just as your guests are arriving.

Tip: Not feeling creative? Use a picture from Pinterest and copy the board (the greatest form of flattery!).

Charcuterie Boards: Easy Appetizers For Holiday Entertaining To Wow Your Guests


Start with your crackers and room temperature items (black olives, nuts, etc). Then move to cutting the cheeses and meats (when you’re done, stick them back in the fridge to keep them cool until you’re ready to add them to the platters). Next add the cold fruits, the cheeses and meats, and finally the cold sauces and dips in ramekins.

The last thing you should be doing is toasting your bread just before the guests arrive!

Tip: Use clean, white flour sack towels to wrap over your warm rolls to keep them warm and moist until people start digging in!

Charcuterie Boards: Easy Appetizers For Holiday Entertaining To Wow Your Guests


Arranging: The idea is to keep sets of complementary foods next to each other. On the smoked salmon platter we had the chili jelly and cream cheese and water crackers nearby to build a little sandwich on.

If you have something especially unusual or you just like labelling things, you can make little Alice in Wonderland signs “Try me on a cracker with red jelly and cream cheese!” These cardholders on Amazon are super cute and reusable!

Charcuterie Boards: Easy Appetizers For Holiday Entertaining To Wow Your Guests


Displaying: I like using all of my serveware! If you have cake stands, etc, get those out and put your desserts on them. It gives the table different heights and depths.

Charcuterie Boards: Easy Appetizers For Holiday Entertaining To Wow Your Guests


For fun centerpieces (that don’t take up a ton of room) check out these wine bottle cork fairy lights to put in your saved wine bottles- at about fifty cents apiece you really can’t go wrong! It gives the table some additional interest, height, and color!

Charcuterie Boards: Easy Appetizers For Holiday Entertaining To Wow Your Guests


These little porcelain ramekins are awesome and we use them for individual dipping sauces all the time. They have been super hardy and durable!

Charcuterie Boards: Easy Appetizers For Holiday Entertaining To Wow Your Guests


As you can see, I use the platters as a centerpiece and layer around them. We almost always have deviled eggs (because they’re MY favorite) and adding pies makes for a fun evening paired with your favorite wines and spirits. That beautiful wooden cake stand comes with a pretty glass dome and I use it all the time! The egg plate and four bowl server are both from Pottery Barn, but unfortunately I don’t think they’re available anymore.

Charcuterie Boards: Easy Appetizers For Holiday Entertaining To Wow Your Guests


For more ways to use your saved wine bottles, we have a Great Wine Bottle Post on upcycling! And those low white porcelain serving bowls with the bread and crackers are one of my new favorite brands: Dowan on Amazon, their stuff is sturdy, well made, sourced responsibly, and sturdy!

Charcuterie Boards: Easy Appetizers For Holiday Entertaining To Wow Your Guests


Do you have favorite goodies that you serve around the holidays? If you have combos you love on charcuterie boards, I’d love to hear about them in the comments section below!

Check out more great content on our blog!

Cheers and Happy Holidays!


*Legal stuff:

I am honest about my experiences with different products and write because I enjoy it.  I do however, have the opportunity to earn money for my writing, also.

Slavetodiy.com is a participant in the Amazon Services LLC Associates Program, an affiliate advertising program designed to provide a means for sites to earn advertising fees by advertising and linking to amazon.com.  Amazon offers a small commission on products sold through their affiliate links.  Each of your purchases via our Amazon affiliation links supports our cause at no additional cost to you.

If a blogger links to an Amazon product (with a special code for affiliates embedded in the link), and a reader places an item in their “shopping cart” through that link within 24 hours of clicking the link, the blogger gets a small percentage of the sale.  Amazon links are not “pay per click.”  If you click on the product link and stay around Amazon and purchase something else, however, I will get a commission on that sale.

Slavetodiy.com is also a VigLink affiliate advertiser which works similarly.

How To Use All of Those Wine Bottles You Saved

I don’t know about you, but sometimes I collect things with some vague notion of re-purposing them in the future. Well, I’ll have to admit, I may have let the wine bottle collection get a little out of hand. So, I came up with a few ways to use them and even smuggle some of them out of the house, legitimately.  Check out this inspiration and maybe you too can get your collection under control.

*This post may contain affiliate links. Please see full disclosure at the end of the post.

The first step was gathering all of my collected bottles in one place and doing a mini-inventory. With the few ideas I had, I needed to sort them by shape, size, and color… and of course figure out what I was gifting and what I was keeping for me.


How To Use All of Those Wine Bottles You Saved


Having a usable workspace in the guest bedroom gave me a little time to be in work on this and not have to put everything away again.


How To Use All of Those Wine Bottles You Saved


1: Holiday Decorating

The first thing I did was weed out the bottles that I want to keep. I like interesting shapes and, of course, different heights, etc. I like a varied collection that adds interest in the display. I did a test order of some SUPER inexpensive fairy lights and used a few of the bottles in my fall decor.

Saved Wine Bottles: How To Use Them This Holiday Season
Saved Wine Bottles: How To Use Them This Holiday Season: As you can see by our cork collection, we’re committed to the process

They are really pretty! But, the real thing I’m looking forward to is seeing them in the Christmas decor. I think these will look spectacular on the stairs, especially once I get all of the greenery up! I used to sometimes think big foyers were a waste of space, but the look during the holidays makes it all worth it!

How To Use All of Those Wine Bottles You Saved


Now, we’ll see if the cats leave them alone. My guess is I’ll have some smashed glass to contend with, but we’ll see.

How To Use All of Those Wine Bottles You Saved

Here they are with some eucalyptus/fir garland! What do you think?

2: Holiday gifting

I’m always in search of Christmas gift basket ideas throughout the year, and I found a brilliant way to make my problem someone else’s. For my “extras”, *cough *cough, I’m going to do gift sets with tabletop wine bottle lanterns. There are very reasonable wick kits on Amazon to make these, and with bottles of lantern fluid, and a cute wrap job, what’s not to like? If you want to go SUPER thrifty, skip the lantern fluid and basket… a bottle with wick kit, a pretty ribbon, and a handwritten note works just as well!

How To Use All of Those Wine Bottles You Saved
How To Use All of Those Wine Bottles You Saved, Homemade Wine Bottle Lanterns in a Simple Gift Bag


How To Use All of Those Wine Bottles You Saved
How To Use All of Those Wine Bottles You Saved, Classic Gift Wrap in a Canvas Bag


3: Backyard lanterns

I’ve seen these lanterns mounted with brackets on backyard fences and I dig that too (especially with our evening mosquito problem)! I found some brackets that I am going to try with the smaller bottles around the interior of the pool enclosure and see how it looks, and more importantly, if it works. Of course, you can bring your bottle down to the hardware store and just fit the pieces together there. I had to laugh, finding these for sale without bottles was challenging. Me: Um, we’re good on bottles.

They also work brilliantly as tabletop outdoor lanterns.

How To Use All of Those Wine Bottles You Saved


4) Watering your plants!

With a wine bottle, and a terracotta watering spike, you can forget about your plants for weeks and they’ll still be going strong! These are essential for people like me, who have trouble not killing plants inside.

Winebottlewaterer

I know if I don’t get this wine bottle habit under control I will never hear the end of it. So, here goes!

Do you have any great uses for wine bottles? Please share in the comments below! And, of course, check out more great content on our blog!

Cheers!


*Legal stuff:

I am honest about my experiences with different products and write because I enjoy it.  I do however, have the opportunity to earn money for my writing, also.

Slavetodiy.com is a participant in the Amazon Services LLC Associates Program, an affiliate advertising program designed to provide a means for sites to earn advertising fees by advertising and linking to amazon.com.  Amazon offers a small commission on products sold through their affiliate links.  Each of your purchases via our Amazon affiliation links supports our cause at no additional cost to you.

If a blogger links to an Amazon product (with a special code for affiliates embedded in the link), and a reader places an item in their “shopping cart” through that link within 24 hours of clicking the link, the blogger gets a small percentage of the sale.  Amazon links are not “pay per click.”  If you click on the product link and stay around Amazon and purchase something else, however, I will get a commission on that sale.

Slavetodiy.com is also a VigLink affiliate advertiser which works similarly.

Classic, Elegant Christmas Decor Inspiration and Ideas on a Budget

I’ve been sneaking Christmas decor out of the closet, but I guess I’m not super stealthy. The thing is, I don’t have a lot a lot of energy, and I really have to pace myself. So, if everything but the tree is up before Thanksgiving, so be it. This is my favorite time of the year, and the little white twinkling lights just give me the Christmas feels! So, here is what I have done so far:

*This post may contain affiliate links. Please see full disclosure at the end of the post.

The exterior: If it was up to me, we’d be done. I have wreaths with red ribbons and window candles with automatic light sensors and flickering flames (for about $5 each, I thought these were a steal). Okay, maybe some lighted garland around the porch would be cool, but, we’ll see. Clark Griswold is already harassing me about adding more lights, but I’m standing my ground.

Classic Christmas Decor
Classic Christmas Decor: Wreaths with red ribbons in the windows and window candles


This is a great example of the unpredictable weather in Coastal NC: My roses are still blooming, my hydrangea leaves haven’t wilted yet, my Christmas stuff is out, and there are still tons of leaves falling.

Classic Christmas Decor
Classic Christmas Decor: Individual window wreaths with red velvet ribbon, pink roses, and a stacked stone garden.


This is a close up of the basic wreaths: Very basic but should hold up well outdoors, and they were cheap enough that it won’t break my heart if they’re ruined. They’re perfectly matched with the window candles!

Classic Christmas Decor
Classic Christmas Decor: Window Wreaths and Flickering Window Candles


This is a great example of “be where you are.” I am not in love with my fireplace set up currently, but it’s where we are, so I just decorated the crap out of it. I am REALLY proud of my garland I put together, with a willow/eucalyptus garland combined with a basic fir garland (if you don’t have any of these, go to Michael’s after Christmas when they’re pretty much giving them away. They’re on racks on the wall and I got the basic lighted garlands for about $5 each. The faux silver dollar eucalyptus and preserved roses arrangement I added as an afterthought and I love the combo. (Check out our great post on how to preserve roses!)

Classic Christmas Decor
Classic Christmas Decor: Eucalyptus/Willow Lighted Garland, Christmas Eucalyptus and Preserved Roses Arrangement, Classic Candlesticks and Candlebra, and Classic Oversized Ethan Allen Vase with Faux Cranberries


This awesome Ethan Allen Vase I use for every season with different stems because I ADORE it! The faux cranberries make a gorgeous, simple seasonal arrangement (tip: open them outside and let them air out a little… they have a heavy chemical scent but are beautiful once they’ve breathed a little they’re great!).

For the story of why our turtle inspires us, check out the story on Our Instagram!

Classic Christmas Decor
Classic Christmas Decor: Our Ethan Allen Vase with a faux cranberry arrangement and our trusty Mr. Turtle the tortoise feeling festive!


And finally, I’m still in work on these faux eucalyptus mixed garlands, and there is a great garland tutorial on our blog so you can make your own much more cheaply than buying them! And I’m just loving the cool led cork-bottle fairy lights, if you’re looking for what to do with all those bottles you saved.

How To Make Your Own Eucalyptus-Fir Mixed Christmas Garland For A Fraction Of The Price


I would love to hear what you think about our Christmas style in the comments below! Do you have any Christmas decor traditions at your house?

Check out more of our decor and project inspiration over on our blog.  Cheers!

*Legal stuff:

I am honest about my experiences with different products and write because I enjoy it.  I do however, have the opportunity to earn money for my writing, also.

Slavetodiy.com is a participant in the Amazon Services LLC Associates Program, an affiliate advertising program designed to provide a means for sites to earn advertising fees by advertising and linking to amazon.com.  Amazon offers a small commission on products sold through their affiliate links.  Each of your purchases via our Amazon affiliation links supports our cause at no additional cost to you.

If a blogger links to an Amazon product (with a special code for affiliates embedded in the link), and a reader places an item in their “shopping cart” through that link within 24 hours of clicking the link, the blogger gets a small percentage of the sale.  Amazon links are not “pay per click.”  If you click on the product link and stay around Amazon and purchase something else, however, I will get a commission on that sale.

Slavetodiy.com is also a VigLink affiliate advertiser which works similarly.

Mashup Monday 10: 10 Inspired Christmas Mantels You’ll Want To Copy

As I was starting my Christmas Mantel this year, I started looking for Pinspiration (and Insta-inspiration) even though I sort of knew which direction I was heading. I am totally crushing on Silvery Dollar Eucalyptus and did all of my staircase railing garlands in a Eucalyptus-Fir combo (Garland Tutorial Here), but I felt like I wanted to kick up the mantel garland a little bit.

*This post may contain affiliate links. Please see full disclosure at the end of the post.

Here’s a slice of my mantel with a lighted Fir-Willow-Dollar Eucalyptus Garland.

Mashup Monday 10: 10 Inspired Christmas Mantels You'll Want To Copy
Mashup Monday 10: 10 Inspired Christmas Mantels You’ll Want To Copy: Slave To DIY 2019 Mantel


If you’ve been here before you know I’m sort of a traditional girl and I’m not a farmhouse lady at all. In any case, here are ten of my favorites if you’re looking for inspiration!

This first mantel has something I will never achieve: a well arranged greenery adorning a fantastic black fireplace. I do NOT have the arranging gift, but this one from Kristine Hall on Instagram (@restoringlansdowne) is absolutely incredible. And the best little owl!!! I just love it.

Mashup Monday 10: 10 Inspired Christmas Mantels You'll Want To Copy
Mashup Monday 10: 10 Inspired Christmas Mantels You’ll Want To Copy: Photo From @restoringlansdowne on Instagram


The next one from B. Michelle on Instagram (@deckthehalls365) is balanced, classic, and has roses (you know I’m a sucker for red roses). Simple greenery, lanterns, and metallic patina pinecones. A+. I may have to bring the roses out!

Mashup Monday 10: 10 Inspired Christmas Mantels You'll Want To Copy
Mashup Monday 10: 10 Inspired Christmas Mantels You’ll Want To Copy: Photo From @deckthehalls365 on Instagram


Mastering the art of the swag is an absolute gift and Jodi Bond (@houseonasugarhill) nailed it. A simple, round gold mirror and fantastic alternating-height candlesticks make for a simple and elegant mantel. I just want to curl up!

Mashup Monday 10: 10 Inspired Christmas Mantels You'll Want To Copy
Mashup Monday 10: 10 Inspired Christmas Mantels You’ll Want To Copy: Photo From @houseonasugarhill on Instagram


What I love about this next one is how warm and homey it is. It’s rustic, and simple. The authentic greenery and old-fashioned stockings sort of taking me back to being a kid. Well done from @ChristmasHeartandHome on Instagram.

Mashup Monday 10: 10 Inspired Christmas Mantels You'll Want To Copy
Mashup Monday 10: 10 Inspired Christmas Mantels You’ll Want To Copy: From @ChristmasHeartandHome on Instagram


You know why I dig this next one? Tammy (@VintageWhiteFarmhouse on Instagram) has made a very plain room INCREDIBLE. Take away her decorating style and that fireplace surround might even look dated. But, NO, it’s charming, tasteful, and cozy! Her curtains look just like my DIY Restoration Hardware Knock Off Velvet Curtains and that table is to die for… oops I got sidetracked. The Christmas mantel is perfection, and flanked by two oversize arrangements, it’s JUST RIGHT. The punky brewster greenery mantel is so well done (I have mad jealousy). Classic candlesticks… just awesome!

Mashup Monday 10: 10 Inspired Christmas Mantels You'll Want To Copy
Mashup Monday 10: 10 Inspired Christmas Mantels You’ll Want To Copy: Photo From @VintageWhiteFarmhouse on Instagram


I gotta tell you, I am a sucker for white lights and greenery. This is monochrome white at it’s absolute best, balanced with 50 different white textures (and a fantastic light fixture, builtins, and enviable coffee table). Love from Erin (@MyTexasHouse on Instagram).

Mashup Monday 10: 10 Inspired Christmas Mantels You'll Want To Copy
Mashup Monday 10: 10 Inspired Christmas Mantels You’ll Want To Copy: Photo From @mytexashouse on Instagram


The problem is, even when gold is OUT of style (which it’s not) I love it, and having an amazing gold mirror to cap it all off certainly helps. I love the simple gold infused garland and white/gold combination. Cheers to Jasmin @thedecordiet on Instagram. Why is it all these Texas chicks have a strong decor game? Must be something in the water!

Mashup Monday 10: 10 Inspired Christmas Mantels You'll Want To Copy
Mashup Monday 10: 10 Inspired Christmas Mantels You’ll Want To Copy: Photo from @thedecordiet on Instagram


Another incredible gold gilded mirror to cap the mantel and a magnolia leaf, fruit, and fir drapey garland that’s just to die for from Suzanne Zingg (@suzanne_zingg on Instagram). The mixed height/texture/finish/size candlesticks are so well done against crisp white millwork. Classic and eclectic!

Mashup Monday 10: 10 Inspired Christmas Mantels You'll Want To Copy
Mashup Monday 10: 10 Inspired Christmas Mantels You’ll Want To Copy: Photo From @suzanne_zing on Instagram


My favorite color combo is green and white (it’s sort of where most of my decor lives) and I just adore this mantel from @tuftandtrim on Instagram. White hydrangea mixed with greenery and dollar eucalyptus (totally crushing on this combo!!). Even with the farmhouse hints it’s classicly done, with warmth for the whole family.

Mashup Monday 10: 10 Inspired Christmas Mantels You'll Want To Copy
Mashup Monday 10: 10 Inspired Christmas Mantels You’ll Want To Copy: Photo from @tuftandtrim on Instagram


This mantel I saved for last because I adore the way she did the greenery and how balanced the whole look is (oh, and little white lights). Lori (@thehumblehaven on Instagram) did an exquisite job on her mantel!

Mashup Monday 10: 10 Inspired Christmas Mantels You'll Want To Copy
Mashup Monday 10: 10 Inspired Christmas Mantels You’ll Want To Copy: Photo from @thehumblehaven on Instagram


Do you have a favorite mantel style (or pet peeve)? Share in the comments section below!

Check out more great content on our blog!

Cheers!


*Legal stuff:

I am honest about my experiences with different products and write because I enjoy it.  I do however, have the opportunity to earn money for my writing, also.

Slavetodiy.com is a participant in the Amazon Services LLC Associates Program, an affiliate advertising program designed to provide a means for sites to earn advertising fees by advertising and linking to amazon.com.  Amazon offers a small commission on products sold through their affiliate links.  Each of your purchases via our Amazon affiliation links supports our cause at no additional cost to you.

If a blogger links to an Amazon product (with a special code for affiliates embedded in the link), and a reader places an item in their “shopping cart” through that link within 24 hours of clicking the link, the blogger gets a small percentage of the sale.  Amazon links are not “pay per click.”  If you click on the product link and stay around Amazon and purchase something else, however, I will get a commission on that sale.

Slavetodiy.com is also a VigLink affiliate advertiser which works similarly.